A delightful flatbread topped with creamy brie, tart cranberries, crunchy toasted walnuts, and a spicy hot honey drizzle for a perfect appetizer or snack.
Ingredients
Scale
1 package pre-made flatbread dough
8 ounces brie cheese, sliced
1 cup fresh cranberries
1/2 cup walnuts, toasted and chopped
1/4 cup hot honey
2 tablespoons olive oil
Salt and pepper to taste
Instructions
Preheat oven to 400°F (200°C).
Roll out the flatbread dough on a floured surface until thin.
Brush the dough with olive oil and season with salt and pepper.
Arrange brie slices, cranberries, and toasted walnuts evenly on the dough.
Bake in the preheated oven for 10-12 minutes until crispy and golden.
Drizzle with hot honey immediately after removing from the oven.
Slice and serve warm.
Notes
For a spicier version, add more hot honey or include chili flakes.
Avocado Toast with Feta, Cherry Tomatoes, Cranberries, and Walnuts: The Ultimate Flavor Bomb
Tired of bland breakfasts and boring snacks? Welcome to your new obsession: Avocado Toast with Feta, Cherry Tomatoes, Cranberries, and Walnuts. This isn’t just any avocado toast recipe; it’s a symphony of textures and tastes designed to awaken your senses. We’re talking vibrant flavors, satisfying crunch, and creamy indulgence, all piled high on perfectly toasted whole grain bread. If you’re looking for quick breakfast ideas that are both healthy and incredibly delicious, this recipe is your answer. Forget sad, uninspired toast – this is an experience.
Imagine this: the luxuriously smooth, almost buttery texture of ripe avocado, perfectly seasoned and spread generously over warm, crisp whole-grain toast. Each bite is then elevated by the burst of sweetness from juicy cherry tomatoes, the salty tang of crumbled feta cheese, the chewy sweetness of dried cranberries, and the satisfying crunch of toasted walnuts. This culinary masterpiece is a delightful dance of sweet and savory, soft and crunchy, creating a breakfast that’s as visually appealing as it is delicious. It’s a healthy toast recipe that doesn’t compromise on flavor one bit.
At cookingwithemy.com, we believe that even the simplest dishes can be extraordinary. That’s why this recipe for avocado toast with feta, cherry tomatoes, cranberries, and walnuts has been meticulously crafted and tested to bring you the absolute best. We’ve infused it with a special touch – a secret ingredient that transforms everyday avocado toast into a gourmet delight. Get ready to discover how to achieve unparalleled flavor and texture, ensuring this becomes your go-to healthy toast recipe for any occasion. Let’s dive into creating this marvel together!
Prep Time: 10 minutes
Cook Time: 5 minutes
Total Time: 15 minutes
Servings: 2
Why This Avocado Toast with Feta, Cherry Tomatoes, Cranberries, and Walnuts Recipe is a Game-Changer
The Chef’s Secret: A Sprinkle of Magic for Creamy Perfection
The “secret” to this incredibly satisfying avocado toast lies in the preparation of the avocado itself. Instead of just mashing, we lightly whip the avocado with a touch of salt and pepper. This simple technique introduces tiny air bubbles, creating an impossibly creamy, almost mousse-like consistency that clings perfectly to the toast. It prevents that slightly dense, sometimes heavy feel, making each bite lighter and more enjoyable. This subtle step elevates the entire avocado toast experience, ensuring maximum creaminess without added fat.
Unbeatable Texture: The Harmony of Crunch and Cream
The magic of this avocado toast with feta, cherry tomatoes, cranberries, and walnuts lies in its incredible textural contrast. The creamy, whipped avocado base provides a luscious foundation. This is beautifully countered by the slight chew of the whole-grain toast, the juicy pop of the cherry tomatoes, the firm crumble of the feta, the soft chew of the cranberries, and the distinct, satisfying crunch of the toasted walnuts. Each element plays a vital role in creating a satisfying mouthfeel that keeps you coming back for more.
Foolproof for a Reason: Tested and Trusted
We understand that home cooks need reliable recipes. This avocado toast recipe has been tested numerous times to ensure perfect results every time. From nailing the avocado’s creaminess to balancing the sweet and savory elements, every instruction is designed for success. Whether you’re a seasoned chef or a kitchen novice, you can trust this recipe to deliver a stunningly delicious and beautiful dish. It’s a testament to simplicity executed with perfection.
Ingredient Spotlight: Quality Makes the Difference
Whole Grain Bread: The foundation of our avocado toast recipe! Opt for a sturdy, hearty whole-grain bread. Sourdough or a multi-grain loaf with visible seeds and grains works beautifully. The whole grains provide essential fiber and a robust flavor that pairs perfectly with the toppings. Avoid overly soft or thin bread, as it may become soggy. If you have celiac disease, a high-quality gluten-free whole-grain bread will work.
Ripe Avocado: The star of the show! For that signature creamy texture, choose an avocado that yields gently to pressure. If your avocados are too firm, you can speed up ripening by placing them in a brown paper bag with a banana or apple for a day or two. If they are overripe and mushy, they might be too brown to use effectively for this recipe.
Cherry Tomatoes: These add a burst of freshness and a touch of sweetness. Use ripe, firm cherry tomatoes and halve them for easy topping. Grape tomatoes are a good substitute if cherry tomatoes are unavailable. The vibrant red adds stunning visual appeal to the finished avocado toast.
Feta Cheese: For that essential tangy, salty kick. Crumbled feta offers a delightful contrast to the creamy avocado and sweet cranberries. Look for a block of feta packed in brine and crumble it yourself for the best flavor and texture; pre-crumbled feta can sometimes be drier. For a vegan option, a high-quality plant-based feta alternative can be used.
Dried Cranberries: These little jewels add a chewy texture and a delightful, tart sweetness that balances the savory elements. Opt for unsweetened or lightly sweetened dried cranberries if possible. If you can only find sweetened varieties, that’s perfectly fine too – adjust seasoning slightly if needed. Fresh cranberries are not a good substitute here as they are very tart and hard.
Walnuts: For a satisfying crunch and a rich, nutty flavor. Toasting your walnuts enhances their flavor significantly. Simply toast them in a dry skillet over medium heat for 3-5 minutes until fragrant, or roast them in a 350°F (175°C) oven for about 8-10 minutes. Chopped pecans or almonds can be used as a substitute if you have a walnut allergy.
Step-by-Step Instructions
Step 1: Toasting the Bread
Toast your two slices of whole-grain bread in a toaster until they are golden brown and delightfully crisp. This step is crucial for providing a sturdy base that can hold all the delicious toppings without becoming soggy. Aim for a toast that has a satisfying crunch when you bite into it.
Pro Tip: For an extra layer of flavor, you can lightly brush your toast with a tiny bit of olive oil immediately after toasting while it’s still warm.
Step 2: Preparing the Avocado Cream
While the toast is toasting, take your ripe avocado. Halve it, remove the pit, and scoop the flesh into a small bowl. Using a fork, gently mash the avocado. Don’t over-mash it into a paste; you want to leave some small, delightful chunks for texture. Season generously with salt and freshly ground black pepper.
Common Mistake to Avoid: Over-mashing the avocado. This can result in a gummy texture. A little texture is good!
Step 3: Assembling Your Gourmet Toast
Generously spread the mashed avocado evenly over the surface of each toasted bread slice, ensuring good coverage from edge to edge.
Pro Tip: Use the back of your fork to create little swirls or peaks in the avocado spread; it makes for a beautiful visual presentation.
Step 4: Layering the Flavor Bombs
Now for the fun part! Artfully arrange the halved cherry tomatoes over the avocado. Sprinkle the crumbled feta cheese generously on top. Next, scatter the dried cranberries, adding pops of color and sweetness. Finally, finish with a good sprinkle of chopped walnuts for that irresistible crunch.
Common Mistake to Avoid: Overcrowding the toast. While tempting to pile everything on, give each topping a little space to shine and to prevent toppings from sliding off.
Step 5: Serve and Savor
Your masterpiece is ready! Serve immediately to enjoy the perfect balance of warm toast, creamy avocado, and fresh, vibrant toppings. This avocado toast with feta, cherry tomatoes, cranberries, and walnuts is best enjoyed right away.
Pro Tip: A quick drizzle of good quality extra virgin olive oil or a balsamic glaze can add an extra dimension of flavor if desired.
Serving & Presentation
This stunning avocado toast with feta, cherry tomatoes, cranberries, and walnuts is a showstopper on its own, a perfect centerpiece for any breakfast or brunch table. For an extra touch of elegance, consider a light drizzle of balsamic glaze over the top, which adds a beautiful visual contrast and a sweet-tart dimension. A tiny sprinkle of red pepper flakes can add a hint of heat for those who enjoy a little spice.
To make this a complete meal, pair it with a simple side salad of mixed greens. The freshness of the salad complements the richness of the toast beautifully. For a heartier brunch, serve alongside a perfectly poached or fried egg, some crispy bacon or prosciutto, or a small serving of Greek yogurt with fruit. This recipe also makes a fantastic light lunch or a sophisticated appetizer for guests – just cut the toast into smaller portions.
Make-Ahead & Storage Solutions
While this avocado toast is truly best enjoyed fresh, you can certainly prep components in advance to make assembly even quicker. The key is to keep moisture away from the bread and prevent the avocado from browning.
Make-Ahead Strategy:
Avocado: Mash and season the avocado just before assembling. If you absolutely must prep it an hour or two ahead, press plastic wrap directly onto the surface of the mashed avocado to minimize air exposure and prevent browning. Keep it in the refrigerator. Another trick is to add a squeeze of lemon or lime juice, though this can alter the flavor slightly.
Toppings: Halve your cherry tomatoes, crumble your feta, and chop your walnuts up to 2-3 days in advance. Store them in separate airtight containers in the refrigerator. The dried cranberries are already shelf-stable and can be stored at room temperature.
Bread: Toast the bread just before serving for the best crispness.
Storing Leftovers:
This recipe is designed for immediate enjoyment. Leftover assembled avocado toast is not ideal for storage as the bread will become soggy and the avocado may brown. It’s best to make only what you plan to eat. If you have a small amount of excess mashed avocado, store it as described above.
The Best Way to Reheat:
There is no effective way to reheat assembled avocado toast. The toasted bread will lose its crispness, and the toppings may become watery or unappealing. For the best experience, always prepare this dish fresh.
Frequently Asked Questions (FAQ)
What kind of bread is best for avocado toast with feta and tomatoes?
A sturdy, whole-grain bread is ideal. Think sourdough, a hearty multi-grain loaf, or a dense rye bread. These varieties have the structure to hold up to the juicy toppings without becoming soggy too quickly. Avoid soft, thin white breads. The texture and flavor of whole grains also complement the toppings beautifully.
How do you prevent avocado toast from getting soggy with toppings?
The primary defense against soggy avocado toast is a well-toasted base. Toast your bread until it’s golden brown and visibly crisp. Additionally, assemble the toast just before serving. If you need to prep ahead, keep the mashed avocado separate from the toast and add it at the last minute, followed immediately by the toppings. Ensure your toppings, especially tomatoes, are not overly wet.
Can I make avocado toast with feta, tomatoes, and cranberries ahead of time?
It’s best to assemble this avocado toast recipe right before serving for optimal texture and flavor. However, you can prep the individual components in advance: mash the avocado (taking precautions against browning), halve the tomatoes, crumble the feta, and chop the walnuts. Store these separately in airtight containers in the refrigerator. Toast the bread and assemble just before you’re ready to eat.
What are good serving suggestions for avocado toast with feta, tomatoes, cranberries, and walnuts?
This avocado toast recipe is a complete meal on its own for breakfast or lunch. For a more substantial meal, it pairs wonderfully with a side of scrambled or poached eggs, a simple green salad with a light vinaigrette, or a small bowl of fruit. It also makes an excellent appetizer if cut into smaller pieces.
Can I add other fruits or vegetables to this avocado toast?
Absolutely! This recipe is very versatile. Consider adding thinly sliced red onion for a sharp bite, sliced cucumber for extra freshness, or a sprinkle of pomegranate seeds for a festive pop of color and flavor. A few thinly sliced radishes can also add a peppery crunch.
What are the health benefits of this avocado toast recipe?
This avocado toast is packed with nutrients! Avocados are a great source of healthy monounsaturated fats, fiber, and potassium. Whole-grain bread provides complex carbohydrates and fiber. Feta cheese offers protein and calcium. Walnuts contribute omega-3 fatty acids and antioxidants, while cranberries provide vitamins and antioxidants. It’s a satisfying meal that’s rich in beneficial fats, fiber, and essential nutrients.
Can I make this recipe vegan/gluten-free?
Yes, this recipe can easily be made vegan and gluten-free! For a vegan version, simply substitute the feta cheese with a high-quality plant-based feta alternative. Ensure your dried cranberries do not contain any non-vegan ingredients (most are naturally vegan). For a gluten-free option, use your favorite gluten-free whole-grain bread. The rest of the ingredients are naturally gluten-free and vegan.
Tried This Recipe? Leave a Comment!
Did you make this recipe? I’d love to hear how it turned out! Please leave a comment and a rating below. Your feedback helps other home cooks and supports cookingwithemy!
For more delicious inspiration, follow me on Pinterest!
Steak, Avocado, and Roasted Corn Bowl with Cilantro Cream Sauce: The Ultimate Speedy Steak Dinner
Are you searching for a healthy, flavor-packed meal that doesn’t take hours to prepare? Look no further! This Steak, Avocado, and Roasted Corn Bowl with Cilantro Cream Sauce is your answer. It’s the perfect weeknight dinner solution for busy families and anyone craving a vibrant, satisfying meal. We’ve perfected this steak bowl recipe to be incredibly easy to follow, ensuring a restaurant-quality dish right in your own kitchen. Forget takeout – this avocado corn salad medley, elevated by a zesty sauce, is what your taste buds have been dreaming of.
Imagine this: tender, perfectly grilled steak, creamy slices of ripe avocado, sweet kernels of roasted corn with just the right amount of char, all brought together by a bright, herbaceous cilantro cream sauce. This cilantro lime steak bowl is a symphony of textures and tastes – the richness of the steak, the buttery softness of the avocado, the slight pop of the corn, and the refreshing tang of the sauce. It’s a meal that’s as beautiful to look at as it is to eat, bursting with fresh ingredients and vibrant colors that will brighten any table.
At cookingwithemy.com, we believe that delicious and healthy eating should be accessible to everyone. That’s why we’ve fine-tuned this Steak, Avocado, and Roasted Corn Bowl recipe with clear instructions and our special “Chef’s Secret” to ensure your success. We’ll guide you through each step, from perfectly roasting the corn to whipping up the luscious cilantro cream sauce, making it a stress-free culinary adventure. Get ready to impress yourself and your loved ones with a truly exceptional meal.
Prep Time: 15 minutes
Cook Time: 25 minutes
Total Time: 40 minutes
Servings: 4
Why This Steak, Avocado, and Roasted Corn Bowl with Cilantro Cream Sauce Recipe is a Game-Changer
The Chef’s Secret: Our unique edge in this steak bowl recipe lies in the perfect marriage of flavors and textures achieved through a simple yet impactful technique: roasting the corn until slightly charred
This isn’t just about cooking the corn; it’s about developing its natural sweetness and introducing a subtle smoky depth that complements the rich steak and creamy avocado beautifully. The slight charring concentrates the sugars, creating caramelization that punches up the flavor profile beyond what boiled or steamed corn could ever achieve. This step is crucial for that vibrant, robust taste that makes our Steak, Avocado, and Roasted Corn Bowl truly sing.
Unbeatable Texture
The magic of this steak avocado corn bowl lies in its harmonious blend of textures. The flank steak, grilled to a perfect medium-rare, offers a satisfying chew and rich, beefy flavor. The avocado provides luxurious creaminess, melting in your mouth with every bite. The roasted corn, with its slight char and juicy pop, adds a delightful contrast, preventing the dish from becoming too uniformly soft. Finally, the cilantro cream sauce, blended until silky smooth, coats everything with a cool, zesty richness that ties all these elements together.
Foolproof for a Reason
We’ve tested this steak bowl recipe multiple times to ensure it’s straightforward and yields consistently delicious results. From selecting ripe avocados to grilling the steak perfectly and achieving that irresistible char on the corn, every step is designed for home cooks of all skill levels. You’ll find detailed instructions, common mistakes to avoid, and pro tips to help you create this stunning meal with confidence, every single time.
Ingredient Spotlight: Quality Makes the Difference
1 lb Flank Steak: For this cilantro lime steak bowl, flank steak is an excellent choice because it grills quickly and absorbs marinades well. Its slightly leaner profile makes it a healthier option for a dinner bowl. When searing, look for good marbling. If flank steak isn’t available, skirt steak or even a well-marbled sirloin can be substituted, though grilling times might vary slightly.
2 Ripe Avocados, Sliced: The star of the creamy component! For the perfect creamy texture in your steak avocado corn bowl, choose avocados that yield to gentle pressure but aren’t mushy. Hass avocados are generally the best for their rich flavor and texture. If your avocados aren’t quite ripe, you can speed up the process by placing them in a paper bag with a banana or apple for a day. If they are too ripe, they can become grainy.
4 Ears of Corn, Roasted: Roasting fresh corn is key to unlocking its sweet, smoky flavor for your avocado corn salad component. Use fresh, in-season corn for the best taste. You can roast corn grilled, boiled, or grilled on the cob. Alternatively, frozen corn can be used; thaw it completely, toss with a little olive oil, and then roast on a hot baking sheet until lightly charred.
1 cup Fresh Cilantro: The foundation of our vibrant cilantro cream sauce. Fresh cilantro brings a bright, herbaceous, and slightly peppery note that perfectly cuts through the richness of the steak and avocado. Ensure you’re using fresh, vibrant leaves. If cilantro isn’t your favorite, flat-leaf parsley is a decent substitute, though it will offer a milder, less distinctive flavor profile.
1/2 cup Sour Cream: This forms the creamy base of our sauce, providing a tangy richness. Full-fat sour cream will yield the creamiest sauce. For a lighter option, you can use plain Greek yogurt, which will add a more pronounced tang. Ensure it’s full-fat plain yogurt for the best texture.
2 Cloves Garlic, Minced: Fresh garlic is essential for a potent punch of flavor in both the steak and the sauce. Mince it finely to ensure it distributes evenly. Pre-minced garlic from a jar can be used in a pinch but may have a slightly different, less sharp flavor.
1 Tablespoon Lime Juice: Freshly squeezed lime juice is non-negotiable for brightness and zest in both the sauce and to complement the steak and avocado. Bottled lime juice can work, but it lacks the fresh, vibrant citrusy kick that makes this cilantro lime steak bowl so irresistible.
Salt and Pepper to Taste: Essential for seasoning and enhancing all the natural flavors in this steak bowl recipe. Use kosher salt or sea salt for better flavor and texture. Freshly ground black pepper will provide a more aromatic and pungent spice than pre-ground pepper.
Olive Oil for Roasting: A good quality olive oil helps the corn char nicely and prevents sticking. Extra virgin olive oil is great for flavor, but a regular olive oil will also work well for roasting.
Step-by-Step Instructions
Step 1: Perfectly Roasting the Corn
Preheat your oven to 400°F (200°C). Husk the corn, then brush each ear lightly with olive oil. Season with salt and pepper. Place the corn directly on the oven rack or on a baking sheet. Roast for 15-20 minutes, turning occasionally, until the kernels are tender and have developed some nicely charred spots. Once roasted, let them cool slightly, then carefully slice the kernels off the cobs. This charring step is vital for flavor.
Pro Tip: For an extra layer of smoky flavor, you can grill the corn instead of roasting it in the oven. Grill over medium-high heat, turning frequently, until nicely charred all around.
Step 2: Grilling the Flavorful Steak
While the corn roasts, prepare your flank steak. Pat it completely dry with paper towels – this ensures a better sear. Season generously on both sides with salt and freshly ground black pepper. Drizzle with a little olive oil and rub it in. Heat a grill pan or outdoor grill to medium-high heat. Sear the steak for 4-5 minutes per side for medium-rare, or adjust to your desired doneness. Let the steak rest on a cutting board for at least 5-10 minutes before thinly slicing it against the grain. Resting is crucial for juicy steak.
Common Mistake to Avoid: Slicing the steak immediately after grilling without resting. This will cause all the delicious juices to run out, leaving you with dry, tough meat.
Step 3: Crafting the Zesty Cilantro Cream Sauce
In a blender, combine the fresh cilantro (leaves and tender stems), sour cream, minced garlic, and fresh lime juice. Season with salt and pepper to taste. Blend until the sauce is completely smooth and creamy. If the sauce is too thick, you can add a tablespoon of water or a little more lime juice to reach your desired consistency. Taste and adjust seasoning as needed. This sauce is the vibrant dressing that ties our steak avocado corn bowl together.
Pro Tip: For a spicier kick, add a small piece of jalapeño (seeds removed for milder heat) to the blender along with the other sauce ingredients.
Step 4: Assembling Your Delicious Bowls
Now for the best part – assembling your Steak, Avocado, and Roasted Corn Bowl! Start by dividing the roasted corn kernels into serving bowls. Arrange the sliced grilled steak alongside the corn. Add generous slices of ripe avocado. Drizzle liberally with the fresh cilantro cream sauce.
Pro Tip: Feel free to add other complementary ingredients like black beans, red onion, or a sprinkle of cotija cheese for extra flavor and texture in your healthy steak dinner.
Serving & Presentation
To make your Steak, Avocado, and Roasted Corn Bowl truly shine, presentation matters! Serve the bowls immediately after assembly for the freshest flavors and textures. For an elegant touch, neatly arrange the steak slices fanned out over the corn, with the avocado slices curving alongside. A final drizzle of the cilantro cream sauce over everything creates a beautiful visual appeal. Garnish with a few extra cilantro sprigs, a lime wedge on the side, or even a sprinkle of chili flakes for a pop of color and extra zest. This dish pairs wonderfully with a simple side of black beans or a light, crisp salad.
Make-Ahead & Storage Solutions
Make-Ahead Strategy: To save time, you can prepare components in advance. The corn can be roasted up to 2 days ahead and stored in an airtight container in the refrigerator; gently reheat before assembling. The cilantro cream sauce can also be made up to 2 days ahead and stored in an airtight container in the fridge; it may thicken, so stir in a little water or lime juice before serving. The steak can be grilled and sliced a few hours ahead, then brought to room temperature before serving, or reheated gently.
Storing Leftovers: Leftovers can be stored in an airtight container in the refrigerator for up to 1-2 days. It’s best to store the components separately if possible to maintain optimal texture, especially for the avocado and steak. If storing combined, the avocado may brown slightly.
The Best Way to Reheat: For the best results, reheat the corn and steak gently. You can warm them in a skillet over low heat for a few minutes, or microwave them in short intervals until just warmed through. Add fresh avocado slices just before serving, as avocado doesn’t reheat well and is best served fresh. Re-drizzle with cilantro cream sauce.
Frequently Asked Questions (FAQ)
How do you get perfectly ripe avocados for the bowl?
To find perfectly ripe avocados, gently press the avocado in the palm of your hand. It should yield slightly to gentle pressure. Avoid avocados that feel too soft or have large bruises. If an avocado feels very hard, it needs a few more days at room temperature to ripen. You can speed up ripening by placing unripe avocados in a paper bag with a banana or apple.
What’s the best way to roast corn for this steak and avocado bowl?
The best way to roast corn for this steak bowl is in a hot oven (400°F / 200°C) for about 15-20 minutes, turning occasionally. Brushing the corn with olive oil and seasoning it beforehand helps it to caramelize and develop those delicious charred spots, which add a smoky sweetness that is crucial for this dish. Alternatively, grilling the corn on the cob provides an even deeper smoky flavor.
Can I use a different herb instead of cilantro for the cream sauce?
Yes, you absolutely can! If cilantro isn’t your favorite, flat-leaf parsley is an excellent substitute. It will provide a fresh, herbaceous flavor, though it’s milder than cilantro. Mint or a combination of parsley and mint can also work for a different flavor profile. Dill could also be an interesting addition for a lighter, fresher taste. Just remember that the flavor will change depending on the herb you choose.
How long does it take to assemble this Steak, Avocado, and Roasted Corn Bowl?
The assembly of the Steak, Avocado, and Roasted Corn Bowl itself is very quick, taking only about 5-10 minutes once all the components are prepared. The real time investment is in roasting the corn and grilling the steak, which together take approximately 20-25 minutes of active cooking time, plus resting for the steak. The entire process, from start to finish, is designed to be completed within approximately 40 minutes, making it a perfect weeknight meal.
Can I substitute the steak for chicken or shrimp?
Absolutely! This bowl is incredibly versatile. Grilled chicken breast or thighs, or even quickly sautéed shrimp, would be delicious substitutes for the flank steak. Adjust the cooking times accordingly. For chicken, ensure it’s cooked through. For shrimp, cook until just pink and opaque. The core elements of roasted corn, creamy avocado, and the cilantro cream sauce will still pair beautifully with these protein alternatives.
What makes this recipe “healthy”?
This healthy steak dinner is packed with lean protein from the steak, healthy fats from the avocado, and fiber from the corn and vegetables. The use of fresh ingredients and a cream sauce made with sour cream (which can be lightened with Greek yogurt) keeps it balanced. The entire dish is rich in vitamins, minerals, and antioxidants, offering a satisfying meal without excessive processed ingredients.
Can I make this recipe vegan/gluten-free?
Yes, this recipe can easily be made vegan and is naturally gluten-free. For a vegan steak avocado corn bowl, substitute the flank steak with grilled firm tofu, black beans, or plant-based steak strips. For the cilantro cream sauce, replace the sour cream with vegan sour cream or plain unsweetened coconut yogurt. Ensure all other ingredients like garlic and lime juice are naturally vegan. The dish is already gluten-free as all listed ingredients are gluten-free.
Tried This Recipe? Leave a Comment!
Did you make this recipe? I’d love to hear how it turned out! Please leave a comment and a rating below. Your feedback helps other home cooks and supports cookingwithemy!
For more delicious inspiration, follow me on Pinterest!
Italian Basil Chicken Cutlets with Tomato and Burrata Topping: The Only Recipe You’ll Ever Need
Are you on the hunt for an easy chicken dinner that feels incredibly elegant and tastes like it came straight from a Tuscan trattoria? Look no further! This ultimate Italian basil chicken cutlets recipe elevates simple ingredients into a show-stopping dish. Imagine perfectly tender chicken cutlets, infused with the vibrant perfume of fresh basil, then crowned with a generous dollop of creamy burrata and bright, juicy tomatoes. This isn’t just another chicken recipe; it’s a culinary experience designed for busy weeknights and special gatherings alike, proving that gourmet flavors are achievable even when time is short.
The aroma alone will transport you straight to the heart of Italy. As the chicken sears to a golden perfection, the basil and garlic dance in the pan, releasing an irresistible fragrance that promises a flavorful feast. Then comes the magic of the burrata – its cool, luscious interior melting just slightly from the residual warmth, creating an “extra creamy” topping that is simply divine. Each bite is a delightful contrast of textures: the tender chicken, the slightly crisp tomatoes, and the unbelievably smooth, rich burrata, all harmoniously tied together by a hint of balsamic.
At cookingwithemy.com, we’re dedicated to bringing you recipes that are not only delicious but also thoroughly tested for success. This tomato burrata chicken dish is no exception. We’ve refined every step to ensure your chicken cutlet recipe turns out perfectly every time. Get ready to discover the “Chef’s Secret” that makes these Italian basil chicken cutlets stand out, along with practical tips and tricks to make this impressive meal your new go-to.
Prep Time: 15 minutes
Cook Time: 10 minutes
Total Time: 25 minutes
Servings: 4
Why This Italian Basil Chicken Cutlets with Tomato and Burrata Topping Recipe is a Game-Changer
The Chef’s Secret: The “Chef’s Secret” to achieving an incredibly flavorful and juicy chicken cutlet lies in the technique of pounding the chicken to an even thickness. This ensures that each cutlet cooks uniformly, preventing dry, overcooked edges and ensuring a tender, succulent bite throughout. Additionally, infusing the chicken with half of the fresh basil during seasoning allows the herbaceous notes to penetrate deeply, creating a more complex flavor profile that’s truly unmatched. This simple yet crucial step is what truly elevates this dish beyond the ordinary.
Unbeatable Texture: The brilliance of pounded chicken cutlets is their inherent tenderness. By pounding them to a 1/2-inch thickness, we create a larger surface area that cooks quickly and evenly. This rapid cooking process locks in moisture, resulting in an incredibly tender and juicy texture that is a hallmark of a superior chicken cutlet recipe. When paired with the creamy burrata, the contrast in textures is delightful – the yielding chicken against the soft, luxurious cheese.
Foolproof for a Reason: We understand that confidence in the kitchen is key. That’s why this Italian basil chicken cutlets recipe has been meticulously tested to ensure ease and consistent results. From pounding the chicken to achieving that perfect golden sear and assembling the topping, each step is designed for clarity. You don’t need to be a seasoned chef to create this stunning burrata chicken dish; it’s a testament to simple techniques done well, guaranteeing a delicious outcome for any home cook.
Ingredient Spotlight: Quality Makes the Difference
Chicken Breasts: The star of our dish, chicken breasts provide a lean and versatile base. For the best results, always opt for fresh, high-quality chicken. Pounding them to 1/2 inch thickness is crucial for even cooking, ensuring tenderness. If you can’t find boneless, skinless breasts, you can trim them yourself into uniform cutlets.
Fresh Basil Leaves: This isn’t just for flavor; it’s for aroma and freshness! Use the most vibrant, fragrant basil you can find. Roughly chopped, it adds herbaceous notes that cut through the richness of the burrata. While dried basil can be used in a pinch, it lacks the bright, fresh essence of its raw counterpart. A good substitute might be a mix of fresh parsley and a tiny pinch of dried basil for color.
Tomatoes: For this topping, ripe, juicy tomatoes are essential. Romas or plum tomatoes work beautifully as they are less watery and hold their shape well, offering a concentrated sweetness. Heirloom tomatoes are also excellent when in season for their vibrant colors and robust flavor. Avoid mealy, underripe tomatoes, as they will detract from the overall appeal of your tomato burrata chicken.
Burrata Cheese: The crown jewel! Burrata is a fresh Italian cheese made from mozzarella and cream. It’s incredibly delicate and luxurious. When you cut into it, the creamy stracciatella filling spills out, making your burrata chicken outrageously decadent. For the best experience, use high-quality, fresh burrata. Mozzarella can be substituted, but it won’t offer the signature creamy indulgence this recipe is known for.
Garlic: Freshly minced garlic provides a pungent warmth that complements both the chicken and the basil. Its intense flavor is crucial for building the aromatic base of the topping. Be sure to mince it finely to avoid overpowering bites.
Olive Oil: A good quality extra virgin olive oil is essential for pan-searing the chicken and sautéing the garlic and basil. It adds a subtle fruity note and helps achieve that beautiful golden-brown crust.
Balsamic Vinegar: A drizzle of balsamic vinegar at the end adds a touch of acidity and sweetness, cutting through the richness of the dish and tying all the flavors together. Use a good quality balsamic for the best flavor.
Step-by-Step Instructions
Step 1: Preparing the Chicken Cutlets
Begin by placing the chicken breasts between two sheets of plastic wrap or inside a sturdy plastic bag. Using a meat mallet, rolling pin, or even the bottom of a heavy pan, gently but firmly pound each chicken breast to an even 1/2-inch thickness. This not only tenderizes the chicken but also ensures it cooks uniformly. Once pounded, season both sides generously with salt and pepper. Then, sprinkle half of the chopped fresh basil evenly over one side of each cutlet.
Pro Tip: Pounding chicken between parchment paper can prevent sticking and makes for easier cleanup.
Step 2: Searing the Chicken
Heat 2 tablespoons of olive oil in a large skillet over medium heat until shimmering. Carefully add the seasoned chicken cutlets to the hot skillet, ensuring not to overcrowd the pan (cook in batches if necessary). Cook for 4-5 minutes per side, until the chicken is golden brown and cooked through. The internal temperature should reach 165°F (74°C).
Common Mistake to Avoid: Overcrowding the pan. This lowers the skillet’s temperature, causing the chicken to steam instead of sear, resulting in a pale, less flavorful crust.
Step 3: Resting and Building the Topping Base
Once cooked, remove the chicken cutlets from the skillet and place them on a clean plate or cutting board. Tent loosely with foil to keep warm while you prepare the topping. Do not discard the flavorful bits left in the pan!
Pro Tip: Resting the chicken is crucial for juicy results. It allows the juices to redistribute throughout the meat.
Step 4: Sautéing Garlic and Basil
In the same skillet (no need to wipe it out!), add the minced garlic and the remaining chopped fresh basil. Sauté over medium heat for about 1 minute, stirring constantly, until fragrant. Be careful not to burn the garlic. This quick sauté releases the essential oils from the garlic and basil, creating a wonderfully aromatic topping.
Common Mistake to Avoid: Burning the garlic. Burnt garlic becomes bitter and will ruin the delicate flavor profile. Keep a close eye and stir constantly.
Step 5: Assembling the Burrata Chicken
Return the rested chicken cutlets to the skillet or arrange them on a serving platter. Top each chicken cutlet generously with slices of fresh tomato. Then, place a whole ball of burrata cheese (or half if they are large) on top of the tomatoes. Spoon the fragrant garlic-basil mixture over the burrata.
Pro Tip: Gently break open the burrata just before serving to allow its creamy interior to start to ooze.
Step 6: Finishing Touches and Serving
Drizzle each burrata chicken cutlet with a good quality balsamic vinegar. Serve immediately while the chicken is warm and the burrata is at its creamiest.
Serving & Presentation
This Italian basil chicken cutlets dish is as beautiful as it is delicious. For an impressive presentation, arrange the topped chicken cutlets on a large, elegant platter, or serve each individual cutlet on a warm plate. Garnish with a few fresh basil leaves and a crack of black pepper. The vibrant red of the tomatoes, the creamy white of the burrata, and the golden chicken create a stunning visual contrast.
To complement this exquisite burrata chicken, consider serving it with a light and airy side of fluffy couscous, a simple bed of lemon-herb infused orzo pasta, or even some crusty Italian bread to soak up any delicious run-off from the burrata. A fresh, crisp green salad with a light vinaigrette is also a perfect accompaniment, balancing the richness of the dish. For a truly authentic Italian meal, a side of roasted asparagus or sautéed spinach with garlic would be divine.
Make-Ahead & Storage Solutions
Make-Ahead Strategy: While this dish is best enjoyed fresh for optimal burrata texture, you can get a head start. The chicken can be pounded, seasoned, and even seared up to a day in advance. Store cooked chicken in an airtight container in the refrigerator. The tomatoes can be sliced and stored separately in an airtight container. Prepare the garlic-basil sauté just before serving. Reheat the chicken gently in a skillet or microwave before topping. Assemble just before serving to ensure the burrata is perfectly creamy.
Storing Leftovers: Leftover tomato burrata chicken can be stored in an airtight container in the refrigerator for up to 2 days. The burrata may firm up slightly upon refrigeration.
The Best Way to Reheat: Gently reheat the chicken cutlets in a non-stick skillet over low heat, or microwave them briefly until warmed through. Avoid overheating, as this can dry out the chicken. Top with fresh tomato slices and the garlic-basil mixture, and add a fresh dollop of burrata if desired for the creamiest experience.
Frequently Asked Questions (FAQ)
How do you get chicken cutlets to cook evenly?
The key to even cooking for chicken cutlets is to pound them to a uniform thickness, ideally around 1/2 inch. This ensures that all parts of the cutlet will cook at the same rate, preventing thinner edges from drying out before the thicker center is done. Using medium heat and not overcrowding the pan also contributes to consistent cooking.
What are the best ways to serve chicken cutlets with burrata?
This burrata chicken is incredibly versatile! Serve it as is for a light yet satisfying meal. It pairs beautifully with pasta dishes (like linguine or angel hair with a light tomato sauce), sides of roasted vegetables (asparagus, broccoli, or zucchini), a fresh caprese salad, or even a simple bed of peppery arugula dressed with lemon vinaigrette. A side of crusty bread is always a good idea to soak up any creamy burrata goodness.
Can I substitute mozzarella for burrata in this recipe?
Yes, you can substitute fresh mozzarella balls for burrata, but you will miss the signature creamy, melty interior that burrata provides. If using mozzarella, opt for fresh mozzarella packed in water rather than the low-moisture kind. It will offer a pleasant cheesy topping, but it won’t achieve the same luxurious, “extra creamy” mouthfeel as burrata.
What type of tomatoes are best for the burrata topping?
For the topping, ripe, flavorful tomatoes are essential. Juicy cherry or grape tomatoes, halved, work wonderfully for a burst of sweetness. Sliced Roma or plum tomatoes are also excellent choices as they are less watery and have a good tomato flavor. If heirloom tomatoes are in season, they will add beautiful color and robust taste to your tomato burrata chicken.
Can I make this recipe vegan/gluten-free?
This recipe, as written, is neither vegan nor gluten-free. For a vegan version, you would need to substitute the chicken with a plant-based protein like pan-fried tofu cutlets or large portobello mushrooms prepared similarly. For the burrata, a high-quality vegan mozzarella alternative that melts well would be necessary. For a gluten-free adaptation, this recipe is naturally gluten-free as there are no flour-based coatings or ingredients.
Tried This Recipe? Leave a Comment!
Did you make this recipe? I’d love to hear how it turned out! Please leave a comment and a rating below. Your feedback helps other home cooks and supports cookingwithemy!
For more delicious inspiration, follow me on Pinterest!
The Ultimate Root Vegetable Gratin with Sweet Potatoes, Parsnips, and Beets: Your New Go-To Comfort Food
When the autumn air chills and the desire for comforting, soul-warming dishes sets in, there’s nothing quite like a rustic, bubbling gratin. But forget the heavy, one-note potato versions of the past! Today, we’re elevating the humble root vegetable to gourmet status with this spectacular root vegetable gratin with sweet potatoes, parsnips, and beets. This recipe transforms simple, earthy ingredients into an elegantly layered masterpiece, boasting an extra creamy, luxurious texture that will have your dinner guests begging for the recipe. Get ready to discover your new favorite side dish that’s as beautiful as it is delicious.
Imagine tender, jewel-toned layers of crimson beets, sunset-orange sweet potatoes, and creamy parsnips, all lovingly cradled in a rich, aromatic cream sauce infused with garlic and thyme. As it bakes, the edges caramelize to a delightful crisp, while the center remains impossibly tender and creamy. The sweet, slightly nutty parsnips meld perfectly with the natural sweetness of the sweet potatoes and the earthy depth of the beets, creating a symphony of flavors that dances on your palate. The golden Gruyere cheese topping cascades down the sides, offering a satisfyingly sharp and nutty counterpoint to the vegetables’ sweetness. This isn’t just a side dish; it’s a culinary experience.
At cookingwithemy.com, we believe in empowering home cooks with recipes that are not only delicious but also foolproof. This sweet potato parsnip beet gratin is a testament to that philosophy. We’ve fine-tuned every detail to ensure that even novice cooks can achieve professional-level results. The key to its exceptional creaminess lies in a simple yet brilliant technique that we’ll reveal shortly – the “Chef’s Secret” that ensures a velvety sauce and perfectly cooked vegetables every single time. Prepare to impress yourself and your loved ones with this stunning and satisfying vegetable bake recipe.
Prep Time: 20 minutes
Cook Time: 1 hour
Total Time: 1 hour 20 minutes
Servings: 6
Why This Root Vegetable Gratin with Sweet Potatoes, Parsnips, and Beets Recipe is a Game-Changer
The Chef’s Secret: Extra Creamy Perfection The magic behind this roasted root vegetable gratin lies in our technique for infusing the cream. Instead of simply pouring cold cream over the vegetables, we gently heat the heavy cream with minced garlic and fresh thyme leaves, allowing these aromatics to bloom and infuse their flavors deeply into the cream *before* it touches the vegetables. This simple pre-heating step not only amplifies the herbaceous notes but also slightly thickens the cream, leading to an extra creamy and richer final sauce. It’s a small step that makes a monumental difference in the depth of flavor and luxurious texture of your gratin.
Unbeatable Texture: The Art of the Thin Slice Achieving that signature tender, melt-in-your-mouth texture in a gratin is all about the vegetable cut. For this recipe, the vegetables need to be sliced uniformly thin – about 1/8-inch thick. This ensures that each slice cooks through evenly and absorbs the creamy sauce beautifully. When layered properly, these thin slices create a cohesive, tender “cake” of vegetables. Thinly sliced vegetables also caramelize more readily at the edges during the final uncovered baking stage, adding delightful textural contrast without overcooking the interior.
Foolproof for a Reason: Tested for Success We understand that tackling a new recipe can sometimes feel daunting. That’s why this root vegetable gratin has been rigorously tested to guarantee delicious results. From perfectly thin slicing tips to the ideal baking times, every aspect has been considered to make your cooking experience smooth and enjoyable. Whether you’re a seasoned home chef or just starting out, you can trust this recipe to deliver a show-stopping dish every time. It’s a reliable, repeatable recipe that’s perfect for holiday gatherings, special dinners, or even a comforting weeknight meal.
Ingredient Spotlight: Quality Makes the Difference
Sweet Potatoes
Sweet potatoes provide a beautiful sweetness and vibrant color to our gratin. Their creamy texture when cooked makes them a perfect base for this dish. For the best flavor and texture, choose firm sweet potatoes that feel heavy for their size. While any variety will work, Garnet or Jewel sweet potatoes offer a rich flavor and beautiful orange hue. If these are unavailable, regular yams can be a decent substitute, though their sweetness might vary. Ensure they are fresh and free from soft spots.
Parsnips
Parsnips bring a unique earthy sweetness and a slightly nutty, peppery note that wonderfully complements the other root vegetables. When selecting parsnips, opt for firm, smooth roots that are medium in size. Larger parsnips can sometimes be woody and tough towards the core, so if you must use them, be sure to trim out the tough central core after peeling and slicing. If you absolutely cannot find parsnips, you could experiment with a mix of celery root (celeriac) for its earthy flavor, or add a bit more sweet potato and a touch of a slightly firmer, less sweet starchy vegetable like a Yukon Gold potato.
Beets
The star of the color show, beets, add a deep, earthy sweetness and a striking crimson hue that makes this gratin visually stunning. For this recipe, it’s best to use raw beets, preferably smaller ones, as larger ones can be tougher and more fibrous. Red beets are traditional, but golden beets can also be used for a milder flavor and less vibrant, but still beautiful, color. Crucially, we’re using raw, peeled beets and slicing them thinly just like the other vegetables, allowing them to cook perfectly in the creamy sauce. Pre-cooked or pickled beets will alter the flavor and texture significantly.
Heavy Cream & Garlic
The luxurious cream sauce is the heart of any gratin, and for this recipe, heavy cream is non-negotiable for achieving that truly extra creamy texture. Its high fat content ensures a rich, decadent sauce that coats the vegetables beautifully and browns to perfection. While milk can be used in a pinch, it won’t yield the same velvety result. Fresh garlic is essential for building a flavorful base; its pungent aroma mellows and sweetens when cooked, infusing the cream with a gentle warmth. While garlic powder can be used, fresh garlic offers a brightness and depth that dried versions can’t replicate.
Fresh Thyme & Gruyere Cheese
Fresh thyme adds a sophisticated, herbaceous aroma that cuts through the richness of the cream and complements the earthy root vegetables. Its slightly floral and woody notes are a classic pairing with root vegetables and dairy. While dried thyme can be substituted, use about one-third the amount, as its flavor is more concentrated. Gruyere cheese, with its nutty, slightly sweet, and complex flavor, is our cheese of choice for the topping. It melts beautifully and creates a golden, bubbly crust. Other good melting cheeses with nutty profiles include Emmental, Comté, or even a sharp white cheddar.
Step-by-Step Instructions
Step 1: Prep Your Roots
Preheat your oven to 375°F (190°C). Peel the sweet potatoes, parsnips, and beets. Using a mandoline slicer (highly recommended for even thickness) or a very sharp knife, thinly slice each vegetable into about 1/8-inch thick rounds. Consistency is key for even cooking. Try to keep the slices of each vegetable separate for now.
Pro Tip: To prevent your hands from getting stained by the beets, you can wear disposable gloves while peeling and slicing them. You can also rinse the beet slices under cold water and pat them very dry afterwards to remove excess surface color that might bleed too much.
Step 2: Infuse the Creamy Sauce
In a medium saucepan, combine the heavy cream, minced garlic, fresh thyme leaves, and season generously with salt and pepper. Gently heat over medium-low heat, stirring occasionally, until the mixture just begins to simmer around the edges. Do not boil. Let it gently steep for about 5 minutes off the heat to allow the garlic and thyme flavors to fully infuse into the cream. This simple infusion is the secret to our extra creamy gratin!
Common Mistake to Avoid: Boiling the cream can cause it to curdle or separate, resulting in a less smooth and potentially grainy sauce. Always heat it gently and avoid vigorous bubbling.
Step 3: Layer the Garden’s Bounty
Lightly grease a gratin dish (about 8×8 inches or a similar size oval dish). Begin layering the thinly sliced vegetables, alternating between sweet potatoes, parsnips, and beets. Arrange them in overlapping patterns, creating distinct layers if possible, or mixing them artfully. Start with a layer of sweet potatoes, followed by parsnips, then beets, and repeat until all vegetables are used. Aim for an even distribution of each type of vegetable.
Pro Tip: For a visually stunning presentation, try arranging the vegetable slices in concentric circles or a beautiful mosaic pattern. This makes the gratin a true centerpiece.
Step 4: Bathe in Cream and Cheese
Carefully pour the warm, infused cream mixture evenly over the layered vegetables, ensuring it seeps down through all the layers. Then, sprinkle the grated Gruyere cheese uniformly over the top of the vegetables, covering them completely. The cheese will melt and create a glorious golden crust as it bakes.
Common Mistake to Avoid: Not pouring enough cream can lead to dry, undercooked vegetables. Ensure the vegetables are well-covered; the cream should almost reach the top layer. Don’t skimp on it!
Step 5: Golden Bake – Covered
Cover the gratin dish tightly with aluminum foil. This traps the steam, allowing the vegetables to cook through and become tender without drying out. Place the covered dish in the preheated oven and bake for 45 minutes. The foil ensures the center cooks properly and the cream sauce works its magic.
Pro Tip: Make sure the foil is sealed tightly around the edges of the dish to prevent steam from escaping. This is crucial for even cooking.
Step 6: Golden Bake – Uncovered & Bubbly
After 45 minutes, carefully remove the aluminum foil. Continue to bake for an additional 15-20 minutes, or until the cheese topping is golden brown, bubbly, and the vegetables are fork-tender when pierced through the top layer. The uncovered baking time allows the cheese to melt, caramelize, and develop that irresistible crispy, browned top.
Common Mistake to Avoid: Over-baking after removing the foil can lead to dry edges or burnt cheese. Keep an eye on it during this final stage to achieve perfect golden-brown perfection.
Serving & Presentation
This root vegetable gratin is as beautiful as it is delicious, making it a superb addition to any holiday spread or elegant dinner party. For an impressive presentation, let the gratin rest for about 5-10 minutes after coming out of the oven; this allows the layers to set slightly, making it easier to serve neat portions. Garnish generously with fresh thyme sprigs or a sprinkle of finely chopped chives for a touch of green freshness and visual appeal. The vibrant colors of the beets, sweet potatoes, and parsnips are a feast for the eyes on their own! This dish pairs wonderfully with roasted meats like chicken or pork, seared fish, or as a substantial addition to a vegetarian feast alongside a crisp green salad. It’s hearty enough to stand on its own as a vegetarian main course too, especially with a dollop of sour cream or crème fraîche.
Make-Ahead & Storage Solutions
Make-Ahead Strategy: To save time on the day of serving, you can prepare this gratin up to 24 hours in advance. Assemble the entire dish as per the instructions (steps 1-4), but do not bake it. Cover it tightly with plastic wrap or foil and refrigerate. When ready to bake, remove it from the refrigerator about 30 minutes prior to baking to take the chill off. You may need to add an extra 5-10 minutes to the covered baking time, so check for tenderness. Alternatively, you can prepare the infused cream and slice the vegetables and store them separately (in airtight containers in the fridge) for up to 2 days.
Storing Leftovers: Once baked and cooled, any leftover root vegetable gratin can be stored in an airtight container in the refrigerator for up to 3 days. The flavors often meld and deepen overnight, making leftovers delicious. While freezing is possible, the texture of the cream sauce and vegetables might change slightly upon thawing. If you choose to freeze, wrap portions tightly in plastic wrap and then in foil or place in a freezer-safe container for up to 1 month.
The Best Way to Reheat: To reheat refrigerated leftovers, cover the dish with foil and bake in a preheated 350°F (175°C) oven for 20-25 minutes, or until heated through. For individual portions, the microwave can be used, but the topping might not be as crispy. If reheating from frozen, allow it to thaw in the refrigerator overnight first, then reheat as above. For a crispier top, you can remove the foil for the last 5-10 minutes of reheating.
Frequently Asked Questions (FAQ)
How long should I bake root vegetable gratin with sweet potatoes, parsnips, and beets?
For this specific root vegetable gratin recipe, you should bake it covered with foil for approximately 45 minutes at 375°F (190°C). Following that, remove the foil and bake for an additional 15-20 minutes, or until the vegetables are fork-tender and the topping is golden brown and bubbly. The total cooking time is about 1 hour.
What is the best way to thinly slice root vegetables for a gratin?
The best way to ensure uniformly thin slices for a gratin is to use a mandoline slicer. Set it to about 1/8-inch thickness and slice the vegetables (sweet potatoes, parsnips, beets) carefully. If you don’t have a mandoline, a very sharp knife and a steady hand can work, but it’s much more challenging to achieve consistent thickness, which is crucial for even cooking.
Can I use other root vegetables besides sweet potatoes, parsnips, and beets in this gratin?
Absolutely! This recipe is very adaptable. You can introduce other root vegetables like thinly sliced potatoes (Yukon Gold or Russet work well), carrots, celery root (celeriac), or even rutabagas. Just ensure all vegetables are cut to a similar thinness (around 1/8 inch) for even cooking. Be mindful that some vegetables might cook faster or slower, so you might need to adjust baking times slightly or par-cook very dense vegetables if using significantly different types.
What kind of cheese is best for a root vegetable gratin?
For a truly superior flavor, a nutty, meltable cheese is ideal for a root vegetable gratin. Gruyere is an excellent classic choice, offering a perfect balance of nutty sweetness. Other excellent options include Emmental, Comté, Appenzeller, or even a good quality sharp white cheddar. Avoid pre-shredded cheeses as they often contain anti-caking agents that can hinder smooth melting. Grating your cheese fresh from a block yields the best results for that decadent, gooey topping.
Can I make this recipe vegan/gluten-free?
Yes, this recipe can be adapted for vegan and gluten-free diets. For a vegan version: Replace the heavy cream with full-fat canned coconut milk or a high-quality unsweetened vegan cream alternative (like cashew or oat-based). For the cheese, use your favorite dairy-free shredded cheese blend that melts well. Ensure your chosen vegan cream alternative is unsweetened to avoid an odd flavor profile. Note that the texture might be slightly different but still deliciously creamy and satisfying. This recipe is naturally gluten-free as it contains no gluten-containing ingredients. So, no modifications are needed on that front!
Can I use dried thyme instead of fresh?
Yes, you can substitute dried thyme, but adjust the quantity. Use about 1 teaspoon of dried thyme for every tablespoon of fresh thyme called for. Since dried herbs are more potent, start with a smaller amount and taste the cream mixture before heating to adjust if needed. Add the dried thyme when you add the cream.
What if my vegetables are still firm after baking?
If your vegetables are still firm after the total baking time, especially after the covered portion, it’s likely due to uneven slicing or a vegetable that cooks more slowly. You can cover the dish tightly with foil again and continue baking for another 15-20 minutes, or until tender. Ensure your oven temperature is accurate and that the slices are consistently thin (around 1/8 inch).
Tried This Recipe? Leave a Comment!
Did you make this recipe? I’d love to hear how it turned out! Please leave a comment and a rating below. Your feedback helps other home cooks and supports cookingwithemy!
For more delicious inspiration, follow me on Pinterest!
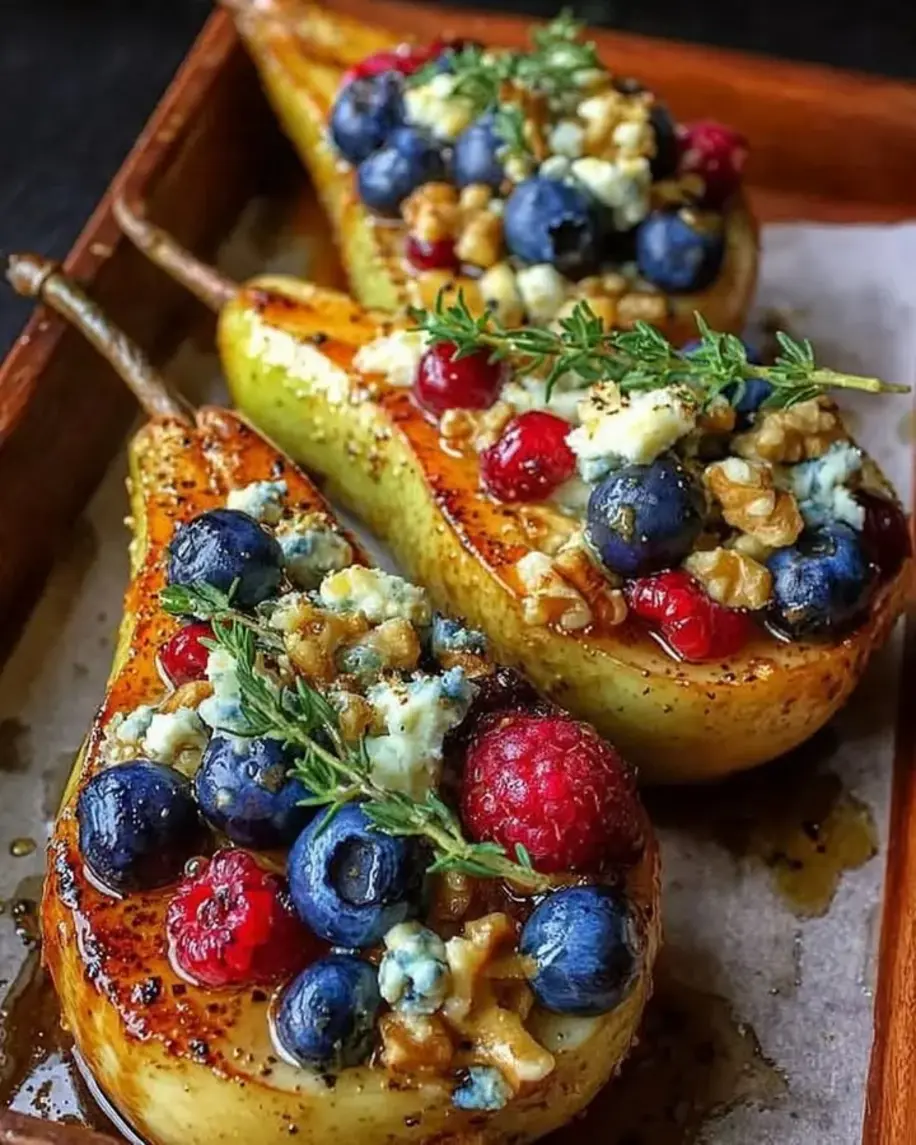
The Easiest & Most Delicious Sweet Potato Rounds with Brie, Cranberry & Pecans
The holidays are a magical time, filled with festive gatherings, twinkling lights, and, of course, irresistible food. But let’s be honest, between the bustling preparations and the endless to-do lists, who has time for complicated appetizers? That’s where these sweet potato rounds with brie, cranberry, and pecan come in. They are the ultimate showstopper that requires minimal effort, making them your secret weapon for stress-free entertaining. Forget spending hours in the kitchen; this recipe is designed for busy home cooks who want to impress without the fuss, proving that elegant appetizers can be incredibly simple to achieve.
Imagine the harmony of flavors and textures: tender, roasted sweet potato rounds forming a slightly sweet, caramelized base. This is perfectly complemented by the luxuriously creamy, melted brie cheese, its mild richness a delightful contrast. Then comes the pop of tart, juicy dried cranberries, cutting through the richness with their bright tang, while the toasted pecans add a satisfying, nutty crunch in every single bite. The subtle herbaceous notes of fresh thyme provide a final flourish, transforming simple ingredients into a sophisticated appetizer that will have your guests raving.
At cookingwithemy.com, we believe in recipes that are not only delicious but also incredibly reliable. This brie cranberry appetizer recipe has been meticulously tested to ensure perfect results every time, regardless of your culinary skill level. We’ve honed the baking times and ingredient ratios to deliver an appetizer that is consistently delightful. Get ready to discover the simple trick that elevates these humble ingredients into a truly unforgettable dish, along with plenty of tips to make your hosting duties a breeze.
Prep Time: 15 minutes
Cook Time: 30 minutes
Total Time: 45 minutes
Servings: 4
Why This Sweet Potato Rounds with Brie, Cranberry & Pecans Recipe is a Game-Changer
The Chef’s Secret: Perfectly Roasted Sweet Potato Rounds
The true magic behind these roasted sweet potato bites lies not in a rare ingredient, but in the preparation of the sweet potato itself. The key is to slice the sweet potatoes into uniform 1/2-inch rounds and ensure they get a good coating of olive oil, salt, and pepper. Then, importantly, you bake them until they are just tender and beginning to caramelize before adding the toppings. This pre-roasting step is crucial because it develops a beautiful sweetness and a slightly firm texture that holds up to the toppings. Over-roasting at this stage will make them too soft, while under-roasting means they won’t have that delicious depth of flavor. This initial roast ensures your sweet potato rounds are the perfect foundation for the gooey brie and tart cranberries!
Unbeatable Texture: The interplay of textures in this appetizer is truly divine. The slight crispness of the sweet potato edges gives way to a tender interior, creating a delightful mouthfeel. This is then contrasted by the molten, creamy brie, the chewy dried cranberries, and the crunchy pecans. This textural symphony ensures that every bite is interesting and satisfying, making these rounds far more than just a pretty appetizer; they are an experience.
Foolproof for a Reason: We know that hosting can be stressful, which is why we’ve designed this recipe to be as straightforward as possible. There are no complicated techniques or hard-to-find ingredients. Each step is clearly explained, and the baking process is forgiving. You can even prep some elements ahead of time, reducing last-minute kitchen chaos. This recipe is your reliable go-to for a guaranteed hit, whether you’re a seasoned chef or a kitchen novice.
Ingredient Spotlight: Quality Makes the Difference
Sweet Potatoes: The Sweet Foundation
Sweet potatoes are the star here, providing a naturally sweet, earthy base. For this recipe, look for large, firm sweet potatoes that are free from blemishes. Their size will allow you to cut generous rounds that are easy to handle and top. When baked, they soften beautifully and develop a delightful caramelized flavor, offering a healthier alternative to traditional crackers or bread bases. If you can’t find large sweet potatoes, you can use two medium ones, just be mindful of the slightly smaller serving size.
Brie Cheese: Creamy Indulgence
Brie is essential for its luxurious, creamy texture and mild, buttery flavor. When melted, it becomes wonderfully gooey, coating the sweet potato rounds in a decadent layer. For best results, use a good quality brie that has a bloomy rind; the rind is edible and adds to the flavor profile. If you prefer a tangier cheese, a mild goat cheese or even a sharp white cheddar could be substituted, though they will change the overall flavor profile significantly. Ensure the brie is at room temperature for easier slicing before baking.
Dried Cranberries: A Burst of Tartness
Dried cranberries bring a welcome tang and chewy texture that cuts through the richness of the brie and the sweetness of the potato. They are readily available in most grocery stores. If you find them too tart, you can opt for sweetened dried cranberries, or even soak regular dried cranberries in warm water for 10 minutes before draining and patting dry. For a more seasonal and complementary flavor, consider using dried cherries or chopped dried apricots as a substitute.
Pecans: Nutty Crunch
Toasted pecans add a fantastic nutty crunch and depth of flavor. Toasting brings out their natural oils and enhances their rich, buttery taste. Make sure to chop them relatively finely so they distribute well over the rounds. You can substitute with walnuts or even slivered almonds if pecans aren’t your favorite, but the distinct flavor of pecans pairs exceptionally well with the other ingredients. Always opt for raw pecans and toast them yourself for the freshest, most vibrant flavor.
Step-by-Step Instructions
Step 1: Preparing the Sweet Potato Rounds
Preheat your oven to 400°F (200°C). Line a large baking sheet with parchment paper for easy cleanup and to prevent sticking. Wash your sweet potatoes thoroughly. Trim off the very ends if they are dry or discolored. Slice the sweet potatoes into uniform 1/2-inch thick rounds. This consistent thickness is key for even cooking.
Pro Tip: If your sweet potatoes are very irregular in shape, you can trim a thin slice off one side to create a flat base, preventing them from rolling around on the baking sheet.
Step 2: Seasoning and Roasting
In a large bowl, toss the sweet potato rounds with 2 tablespoons of olive oil, salt, and freshly ground black pepper. Ensure each round is well-coated. Arrange the seasoned sweet potato rounds in a single layer on the prepared baking sheet, making sure they are not overlapping. This allows them to roast and caramelize properly instead of steaming.
Common Mistake to Avoid: Overcrowding the baking sheet. If the rounds are too close together, they will steam instead of roast, leading to a mushy texture and less caramelization. Use two baking sheets if necessary.
Step 3: First Bake
Bake the sweet potato rounds in the preheated oven for 20-25 minutes. You’re looking for them to be tender when pierced with a fork and showing signs of slight caramelization around the edges. The exact time will depend on the thickness of your slices and your oven. Keep an eye on them after the 20-minute mark.
Pro Tip: If some slices cook faster than others, you can carefully remove the fully roasted ones and let them cool slightly while the others finish.
Step 4: Adding the Delicious Toppings
Once the sweet potato rounds are tender, remove the baking sheet from the oven. Immediately top each warm sweet potato round with a slice of brie cheese. Don’t worry if the slices aren’t perfectly round; they will melt and spread. Scatter a generous pinch of dried cranberries and chopped pecans over the brie on each round.
Common Mistake to Avoid: Adding toppings to completely cooled sweet potato rounds. The residual heat from the roasted sweet potato is essential for helping the brie start to melt before it goes back into the oven.
Step 5: Melting the Brie
Return the baking sheet to the oven for another 5 minutes, or until the brie cheese is melted and bubbly. You want it gooey and luscious, just starting to ooze over the sides. Watch carefully to ensure the pecans don’t burn; they toast up quickly.
Pro Tip: If your brie isn’t melting quickly enough, you can briefly switch your oven to the broiler setting for 30-60 seconds, but watch it very closely to prevent burning.
Step 6: Garnish and Serve
Remove the baking sheet from the oven. Garnish generously with fresh thyme leaves. The fragrant herb adds a beautiful visual appeal and a fresh, slightly peppery note that complements the rich flavors. Serve these cranberry brie pecans appetizers warm immediately for the best texture and melted-cheese experience.
Pro Tip: A drizzle of honey or balsamic glaze over the finished appetizer can add another layer of complex sweetness and tang.
Serving & Presentation
These sweet potato rounds with brie, cranberry, and pecans are designed to be a showstopper on any appetizer spread. For an elegant presentation, arrange them on a rustic wooden board or a festive platter. The vibrant colors of the cranberries, the golden hue of the sweet potato, and the creamy white brie create a visually appealing display. Don’t be afraid to let a little bit of the cheese ooze out; it adds to the rustic charm. Group them closely together or fan them out artistically. For an extra touch, sprinkle a few extra toasted pecans and thyme sprigs around the platter. They pair wonderfully with a crisp white wine like a Sauvignon Blanc or a light-bodied red such as a Pinot Noir. They also make a fantastic accompaniment to a holiday roast or as part of a larger grazing board featuring cheeses, charcuterie, and other festive bites.
Make-Ahead & Storage Solutions
Make-Ahead Strategy: To save time on the day of your event, you can prepare several components in advance. You can slice the sweet potatoes, toss them with olive oil, salt, and pepper, and store them in an airtight container in the refrigerator for up to 24 hours. You can also toast the pecans ahead of time and store them in an airtight container at room temperature. On the day of serving, simply follow the roasting and topping instructions. The brie can also be sliced ahead of time and kept chilled, but add it to the rounds just before baking.
Storing Leftovers: Leftover sweet potato rounds with brie, cranberry, and pecans are best stored in an airtight container in the refrigerator for up to 2 days. While they will still be delicious, the sweet potato might become softer, and the pecans will lose some of their crispness.
The Best Way to Reheat: To enjoy them as close to their original glory as possible, reheat them in a single layer on a baking sheet in a 350°F (175°C) oven for 5-10 minutes, or until the cheese is melts again and the sweet potato is heated through. Avoid microwaving if possible, as it tends to make the sweet potato mushy and the textures less appealing.
Frequently Asked Questions (FAQ)
How long do you bake sweet potato rounds with brie?
You’ll bake the sweet potato rounds first for about 20-25 minutes until tender. Then, after adding the brie, cranberries, and pecans, they go back into the oven for another 5 minutes, or until the cheese is perfectly melted and bubbly.
What can I substitute for cranberries in this recipe?
Excellent substitutes for dried cranberries include dried cherries, chopped dried apricots, or even small pieces of fig. If you choose a sweeter dried fruit, you might want to slightly reduce the amount of sweet potato or brie to balance the flavors.
Should I peel the sweet potatoes for this recipe?
No, you do not need to peel the sweet potatoes for this recipe. The skin adds a lovely texture and is perfectly edible when roasted. Just make sure to wash them thoroughly before slicing.
What kind of pecans are best for sweet potato rounds?
For the best flavor and texture, use raw pecan halves or pieces and toast them lightly yourself. This ensures they are fresh and have a vibrant nutty taste. If you use pre-toasted or seasoned pecans, they can overpower the other delicate flavors or burn quickly when baked.
Can I make this recipe vegan/gluten-free?
Yes, this recipe can be adapted! For a vegan version, substitute the brie with your favorite dairy-free brie alternative or a creamy cashew cheese. Ensure your dried cranberries and pecans are also vegan. For a naturally gluten-free recipe, rest assured that these sweet potato rounds are already gluten-free as long as no gluten-containing ingredients are added during preparation.
Can I use fresh cranberries instead of dried?
Fresh cranberries are much tarter than dried ones and would require some cooking and sweetening before being added to the rounds. If you want to use fresh cranberries, simmer them with a little sugar and water until they soften and burst, then cool before adding to the rounds. However, dried cranberries offer a better chewy texture and concentrated flavor for this recipe.
How can I make sure the sweet potatoes are evenly cooked?
Uniformity in slicing is key. Ensure all your sweet potato rounds are precisely 1/2-inch thick. Also, avoid overcrowding the baking sheet, as this can lead to uneven cooking and steaming rather than roasting. Baking in a single layer allows hot air to circulate around each piece.
Tried This Recipe? Leave a Comment!
Did you make this recipe? I’d love to hear how it turned out! Please leave a comment and a rating below. Your feedback helps other home cooks and supports cookingwithemy!
For more delicious inspiration, follow me on Pinterest!
Mediterranean Ground Beef Stir Fry: The Only Recipe You’ll Ever Need
Imagine a weeknight dinner that transports your taste buds straight to the sun-drenched shores of the Mediterranean, all while being incredibly simple to prepare. That’s exactly what this Mediterranean ground beef stir fry delivers. Forget bland, boring meals; this is a vibrant explosion of fresh herbs, colorful vegetables, and savory ground beef that’s ready in less time than it takes for takeout to arrive. If you’re looking for an easy ground beef stir fry that’s also packed with wholesome goodness, you’ve landed in the right place. This recipe is your new go-to for a quick weeknight dinner that’s both satisfying and healthy.
The aromas that waft from your kitchen as this stir fry cooks are simply intoxicating. Earthy oregano and sweet basil mingle with the subtle sweetness of sautéed onions and bell peppers, all underscored by the rich, savory notes of browned ground beef. Plump cherry tomatoes burst with juicy flavor, while tender zucchini adds a delightful, subtle chew. Each bite is a harmonious blend of textures and tastes – tender meat, crisp-tender vegetables, and a light, herb-infused sauce that coats everything beautifully. It’s a culinary journey that promises pure delight with every forkful.
At cookingwithemy.com, we’re dedicated to bringing you recipes that are not only delicious but also foolproof. This Mediterranean ground beef stir fry has been meticulously tested to ensure you achieve restaurant-quality results in your own home. We’ve honed this recipe to perfection, incorporating a “chef’s secret” that elevates it beyond the ordinary. Get ready for a healthy ground beef recipe that will become a staple in your meal rotation, proving that healthy eating can be incredibly flavorful and exciting.
Prep Time: 10 minutes
Cook Time: 15 minutes
Total Time: 25 minutes
Servings: 4
Why This Mediterranean Ground Beef Stir Fry Recipe is a Game-Changer
The Chef’s Secret
The secret to this easy ground beef stir fry lies in the quality and freshness of your Mediterranean herbs. While dried oregano and basil are essential, the real magic happens when you add a generous pinch of fresh oregano and basil at the very end of cooking, just before serving. This preserves their bright, aromatic oils, infusing the dish with an unmatched vibrancy that dried herbs alone cannot achieve. It’s a simple technique that dramatically lifts the flavor profile and makes this recipe truly special.
Unbeatable Texture
Achieving the perfect texture is key to a satisfying stir fry. This recipe excels because we cook the ground beef first, allowing it to develop a beautiful, slightly caramelized crust. Then, the vegetables are added and cooked just until tender-crisp. This method ensures that your vegetables retain a pleasant bite, preventing them from becoming mushy. The quick cooking time, combined with the right heat, is crucial for this ideal texture, making it feel both robust and fresh.
Foolproof for a Reason
We understand that weeknights can be hectic, which is why this quick weeknight dinner is designed for maximum success with minimal stress. Each step is clearly defined, and the ingredients are readily available. We’ve tested this recipe countless times, adjusting cooking times and ingredient ratios to ensure consistent, delicious results every single time. You can trust this recipe to deliver a stellar meal, even if you’re a beginner cook.
Ingredient Spotlight: Quality Makes the Difference
1 pound ground beef: For the best flavor and texture, opt for an 80/20 ground beef. The fat content is essential for richness and helps keep the beef moist during stir-frying. If you prefer a leaner option, choose 85/15 or 90/10, but be mindful that it may cook a bit drier. For a taste of authentic Mediterranean lamb-like flavor, consider substituting half of the ground beef with ground lamb.
2 tablespoons olive oil: Extra virgin olive oil is paramount here, offering a fruity, peppery note that is quintessentially Mediterranean. It not only provides the necessary fat for sautéing but also contributes significantly to the overall flavor profile. Look for a reputable brand to ensure the best taste. If you don’t have olive oil, a neutral oil like grapeseed or avocado oil can be used, but you’ll miss out on that distinct Mediterranean character.
1 onion, chopped: A yellow or white onion is ideal for its balanced flavor and sweetness when sautéed. It forms the aromatic base of our stir fry, softening and releasing its sweet sugars as it cooks. Avoid red onions here, as they can sometimes overpower the delicate herb flavors.
2 garlic cloves, minced: Fresh garlic is non-negotiable for building depth of flavor. Its pungent aroma and sharp taste are a cornerstone of Mediterranean cuisine and add a crucial savory element. Ensure your garlic is fresh and minced finely to distribute its flavor evenly throughout the dish.
1 red bell pepper, sliced: Red bell peppers bring a beautiful color and a sweet, slightly fruity flavor to this healthy ground beef recipe. They add a delightful crunch when cooked to tender-crisp perfection. Any color bell pepper can be used, but red offers the sweetest flavor and most vibrant visual appeal.
1 zucchini, sliced: Zucchini adds a mild, earthy flavor and a tender texture that complements the other ingredients. It absorbs flavors beautifully and contributes healthy fiber and vitamins. Ensure your zucchini is fresh and firm; overripe zucchini can be watery.
1 cup cherry tomatoes, halved: These little jewels of flavor add bursts of sweetness and a touch of acidity, cutting through the richness of the beef. Halving them ensures they release their delicious juices into the stir fry without becoming overly mushy. Roma tomatoes, diced, can be a substitute if cherry tomatoes are unavailable.
1 teaspoon dried oregano: A classic Mediterranean herb, dried oregano provides that signature savory, slightly bitter, and aromatic flavor. It’s crucial for authentic Mediterranean taste.
1 teaspoon dried basil: Sweet, fragrant basil is another key herb that pairs wonderfully with oregano and tomatoes, adding a fresh, slightly peppery note.
Salt and pepper to taste: Essential for enhancing all the other flavors. Use good quality sea salt and freshly ground black pepper for the best results. Don’t be shy with seasoning; it brings everything together!
Fresh parsley for garnish: This isn’t just for looks! Freshly chopped parsley adds a final burst of bright, herbaceous flavor that elevates the entire dish. Use flat-leaf (Italian) parsley for its superior flavor.
Step-by-Step Instructions
Step 1: Preparing the Aromatics and Beef
Heat the 2 tablespoons of olive oil in a large skillet or wok over medium-high heat. Once shimmering, add the chopped onion and minced garlic. Sauté for 2-3 minutes until the onions are softened and translucent, and the garlic is fragrant. This initial sauté builds the foundational flavors for your stir fry.
Pro Tip: Don’t crowd the pan when sautéing onions and garlic. If your skillet isn’t large enough, sauté them in batches to ensure they soften and become fragrant, rather than steaming.
Step 2: Browning the Ground Beef
Add the 1 pound of ground beef to the skillet. Break it up with a spoon and cook, stirring occasionally, until it’s nicely browned and no pink remains. For optimal flavor, allow the beef to develop a slight crust. Drain off any excess grease, leaving a small amount for flavor and to help sauté the vegetables.
Common Mistake to Avoid: Do not overcook the ground beef to the point of dryness. Your goal is browned, flavorful meat, not hard, crumbly bits. Cook just until browned, then remove from heat if needed while adding other ingredients.
Step 3: Stirring in the Vegetables
Add the sliced red bell pepper and zucchini to the skillet with the browned ground beef and onions. Stir everything together and cook for about 3-4 minutes until the vegetables begin to soften slightly.
Pro Tip: Slicing your vegetables uniformly ensures they cook evenly. Aim for similar thickness for the bell pepper strips and zucchini slices. This is key for that perfect tender-crisp texture.
Step 4: Adding Tomatoes and Seasoning
Stir in the halved cherry tomatoes. Now, season the stir fry generously with 1 teaspoon of dried oregano, 1 teaspoon of dried basil, and salt and pepper to your taste. Stir well to combine all the flavors.
Common Mistake to Avoid: Adding salt too early to vegetables can draw out too much moisture and make them steam rather than stir-fry. Seasoning towards the end, along with the tomatoes, helps balance the flavors without compromising texture.
Step 5: Finishing the Stir Fry
Continue to cook for another 5-7 minutes, stirring frequently, until the bell peppers and zucchini are tender but still have a slight bite. The cherry tomatoes should have softened and started to burst, releasing their juices. Taste and adjust seasoning if necessary.
Pro Tip: For an extra burst of freshness, stir in a tablespoon of fresh chopped oregano and a tablespoon of fresh chopped parsley right at the end. This technique truly elevates the Mediterranean flavors.
Step 6: Garnish and Serve
Remove the skillet from the heat. Garnish generously with fresh parsley. Serve your Mediterranean ground beef stir fry immediately while hot.
Serving & Presentation
This Mediterranean ground beef stir fry is incredibly versatile and can be served in many delightful ways to complement its robust flavors. For a classic and healthy serving, pair it with fluffy quinoa or couscous. The grains soak up the delicious juices from the stir fry beautifully. Another excellent option is serving it over a bed of brown rice or even cauliflower rice for a lower-carb meal. You can also lighten it up by serving it alongside a crisp Greek salad – think cucumbers, Kalamata olives, feta cheese, and a lemon-oregano vinaigrette. For an impressive touch, serve in individual bowls and top with a dollop of plain Greek yogurt or tzatziki sauce for a creamy, cool contrast to the warm stir fry. Don’t forget a final sprinkle of fresh parsley for that pop of green and extra freshness!
Make-Ahead & Storage Solutions
Make-Ahead Strategy: You can prep some components a day or two in advance to make weeknight assembly even faster. Chop all your vegetables (onion, bell pepper, zucchini, tomatoes) and store them in an airtight container in the refrigerator. Mince your garlic and keep it in a small covered dish. Even browning the ground beef ahead of time is possible; just make sure to cool it completely before storing it in the fridge. When ready to cook, you’ll simply need to reheat the beef and sauté everything together.
Storing Leftovers: Once cooled, store any leftover Mediterranean ground beef stir fry in an airtight container in the refrigerator for up to 3-4 days. Ensure the container is properly sealed to maintain freshness and prevent odor transfer.
The Best Way to Reheat: For the best results, reheat the stir fry gently in a skillet over medium-low heat, adding a splash of water or olive oil if it seems dry. Stir frequently until heated through. Microwaving is also an option, though it may alter the texture slightly, making the vegetables a bit softer. Avoid overheating, which can lead to tougher beef and mushy vegetables.
Frequently Asked Questions (FAQ)
What vegetables are best for a Mediterranean stir fry?
The best vegetables for a Mediterranean stir fry are those that cook relatively quickly and hold their shape well, while also embodying Mediterranean flavors. Excellent choices include bell peppers (any color, but red and yellow are sweeter), zucchini, eggplant, cherry tomatoes, spinach, kale, and even artichoke hearts. Onions and garlic form the aromatic base. These vegetables, when cooked to tender-crisp perfection, create a vibrant and healthy dish that’s characteristic of Mediterranean cuisine.
How long does it take to cook ground beef stir fry?
A typical ground beef stir fry, like this Mediterranean version, can be cooked very quickly. With proper preparation (chopping ingredients beforehand), the cooking process itself usually takes about 15-20 minutes. This includes browning the beef, sautéing aromatics, and stir-frying the vegetables until tender-crisp. The total time, including prep, is often around 25-30 minutes, making it an ideal quick weeknight dinner.
Can I use lamb instead of ground beef in a Mediterranean stir fry?
Absolutely! Lamb is a fantastic choice and is deeply rooted in Mediterranean cuisine. Using ground lamb, or even a mix of half ground beef and half ground lamb, will lend a richer, more authentic, and slightly gamey flavor that complements the Mediterranean herbs and vegetables beautifully. Adjust seasoning as needed, as lamb fat can render differently than beef fat.
What are good serving suggestions for ground beef Mediterranean stir fry?
This easy ground beef stir fry is wonderfully versatile. It pairs excellently with grains like quinoa, couscous, or rice (brown or white). For a lighter option, serve it over cauliflower rice or alongside a fresh Greek salad. It’s also delicious served on its own, perhaps topped with a dollop of Greek yogurt or tzatziki. Pita bread or crusty bread for dipping into the flavorful juices is another great idea.
Can I add other herbs and spices?
Yes, you can! While oregano and basil are classic, feel free to experiment. A pinch of dried thyme, rosemary, or even a dash of cumin can add different dimensions. For a hint of warmth, a small amount of red pepper flakes can be added when sautéing the garlic and onions. Remember to taste and adjust as you go to achieve your desired flavor profile.
Is this recipe healthy?
This Mediterranean ground beef stir fry is a very healthy and balanced meal. It’s packed with lean protein from the ground beef, abundant vitamins and fiber from the variety of vegetables, and healthy fats from the olive oil. By focusing on fresh ingredients and moderate portion sizes, it’s an excellent option for a nutritious weeknight dinner that’s low in processed ingredients and high in beneficial nutrients.
How can I make this stir fry spicier?
To add a kick of heat to your Mediterranean flavors, you can introduce some spice. Add a pinch or more of red pepper flakes when you sauté the onions and garlic. You could also stir in a teaspoon of harissa paste along with the vegetables for a smoky, spicy depth of flavor, or serve with a side of your favorite hot sauce.
Tried This Recipe? Leave a Comment!
Did you make this recipe? I’d love to hear how it turned out! Please leave a comment and a rating below. Your feedback helps other home cooks and supports cookingwithemy!
For more delicious inspiration, follow me on Pinterest!
Roasted Carrots with Whipped Ricotta and Hot Honey: The Only Recipe You’ll Ever Need
Are you searching for an easy side dish that’s bursting with flavor and surprisingly elegant? Look no further than these roasted carrots with whipped ricotta and hot honey. Often, side dishes can feel like an afterthought, but this recipe transforms humble carrots into the star of your meal. Within the first 100 words, you’ll discover why this dish, combining tender, caramelized carrots with a cloud-like whipped ricotta and a sweet-spicy drizzle, is destined to become a staple in your repertoire. Say goodbye to bland vegetables and hello to a symphony of taste and texture that will impress even the most discerning palates.
Imagine biting into a perfectly roasted carrot – slightly tender, with edges kissed by caramelization, offering a natural sweetness that is intensified by the heat of the oven. This sweetness is then beautifully tempered by a creamy, luscious whipped ricotta cheese that provides a cool, velvety contrast. The magic truly happens with the final drizzle: a potent yet balanced hot honey that cuts through the richness with its delightful sweet heat. The aroma alone, a tantalizing blend of roasted root vegetables and spiced honey, is enough to make your mouth water.
At cookingwithemy.com, we believe that every recipe should be approachable, reliable, and utterly delicious. This whipped ricotta recipe is no exception. We’ve fine-tuned every step to ensure you achieve restaurant-quality results in your own kitchen. You’ll learn our secret for achieving the silkiest ricotta and the perfectly caramelized carrots, transforming a simple concept into an unforgettable culinary experience. Get ready to elevate your weeknight dinners and special occasion meals with this truly superior side dish.
Prep Time: 15 minutes
Cook Time: 25 minutes
Total Time: 40 minutes
Servings: 4
Why This Roasted Carrots with Whipped Ricotta and Hot Honey Recipe is a Game-Changer
The Chef’s Secret
The “secret” to this elevated dish lies in the preparation of the whipped ricotta. Instead of just spooning plain ricotta, we whip it until it’s incredibly light and airy, almost like a savory mousse. This is achieved by using whole milk ricotta and a touch of cream or milk, whisked vigorously until smooth and fluffy. This technique creates an unbelievably extra creamy texture that is far superior to unwhipped ricotta, providing a luxurious base for the sweet and spicy carrots.
Unbeatable Texture
The magic of texture in this recipe comes from the interplay between the caramelized roasted carrots and the ethereal whipped ricotta. Roasting the carrots at a high temperature (425°F) is key. This high heat caramelizes the natural sugars in the carrots, creating tender interiors and slightly crisp, sweet exteriors. The contrast with the cool, smooth, and extra creamy whipped ricotta is a revelation, offering a delightful sensory experience with every bite.
Foolproof for a Reason
We’ve tested this recipe extensively to ensure it’s simple enough for beginners yet impressive enough for seasoned cooks. The ingredients are readily available, the steps are clear, and the outcome is consistently spectacular. You’ll find that roasting root vegetables this way is incredibly forgiving, and the whipped ricotta, while sounding fancy, is surprisingly straightforward. This recipe proves that easy side dish perfection is within everyone’s reach.
Ingredient Spotlight: Quality Makes the Difference
Carrots: For the best flavor and sweetness, opt for fresh, firm carrots. Look for those that are uniformly sized, as this will help them roast evenly. While any variety of carrot will work, heirloom carrots or multi-colored carrots can add a beautiful visual appeal to your dish. If your carrots are very large, consider cutting them in half lengthwise before chopping into more manageable pieces.
Ricotta Cheese: The star of our creamy base is whole milk ricotta cheese. For the best whipped ricotta recipe, always use whole milk ricotta. Its higher fat content contributes to a richer, smoother, and extra creamy texture when whipped. Avoid part-skim ricotta if possible, as it can result in a less decadent outcome. If you can find fresh, artisanal ricotta from a local cheesemonger, even better!
Honey: For the hot honey drizzle, a good quality honey is essential. A mild, floral honey like clover or wildflower honey works beautifully, as it won’t overpower the other flavors. The hot honey carrots get their kick from red pepper flakes, so choose a honey that complements the spice without competing with it. If you want to elevate the flavor further, consider using a raw, unfiltered honey for added complexity.
Olive Oil: Extra virgin olive oil is our go-to for roasting carrots. Its robust flavor adds a pleasant depth that complements the sweetness of the carrots. Ensure you’re using a good quality EVOO; it makes a noticeable difference in the final taste.
Red Pepper Flakes: These small flakes pack a punch of heat. The amount can be adjusted to your personal preference for spice. For a milder heat, start with less and add more to taste. For truly fiery hot honey carrots, don’t be shy!
Fresh Herbs: While optional when roasting carrots, fresh herbs like parsley, chives, or thyme add a burst of freshness and color as a garnish. They cut through the richness of the ricotta and the sweetness of the honey, providing a welcome herbal note to the dish.
Step 1: Preparing and Roasting the Carrots
Preheat your oven to 425°F (220°C). This high heat is crucial for caramelization. Peel the carrots and trim off the ends. For even cooking, aim to cut them into roughly equal sizes, about 2-3 inches long and ½-inch thick. Toss the prepared carrots on a baking sheet with 2 tablespoons of olive oil, salt, and pepper. Ensure they are in a single layer for optimal roasting and browning.
Pro Tip: Don’t overcrowd the baking sheet! If the carrots are too close together, they will steam instead of roast, resulting in a less caramelized, less flavorful outcome. Use two sheets if necessary.
Step 2: Roasting to Perfection
Place the baking sheet in the preheated oven and roast for 20-25 minutes. You’re looking for them to be tender when pierced with a fork and beautifully caramelized on the edges. The exact time will depend on the thickness of your carrots and your oven.
Common Mistake to Avoid: Under or over-roasting. Under-roasted carrots will be tough and lacking sweetness, while over-roasted carrots can become mushy. Keep an eye on them during the last 5-10 minutes of cooking.
Step 3: Whipping the Ricotta
While the carrots are roasting, prepare the whipped ricotta. In a medium bowl, combine 1 cup of ricotta cheese with 1 tablespoon of honey and a pinch of salt. If you desire a thinner, silkier texture, you can add 1-2 tablespoons of milk or heavy cream. Use an electric mixer (handheld or stand mixer with whisk attachment) or a whisk to beat the ricotta mixture until it becomes light, fluffy, and incredibly smooth. This usually takes 2-4 minutes.
Pro Tip: For an even more decadent and extra creamy texture, ensure your ricotta is at room temperature before whipping. This helps it emulsify better.
Step 4: Making the Hot Honey Drizzle
In a small bowl, stir together the remaining 1 tablespoon of honey with 1/2 teaspoon of red pepper flakes. Taste and adjust the red pepper flakes to achieve your desired level of heat. If you prefer a thinner drizzle, you can warm this mixture gently for about 15-20 seconds in the microwave or on the stovetop, being careful not to overheat it.
Common Mistake to Avoid: Adding too much hot honey at once. It’s easier to add more than to take away. Start with a light drizzle and let guests add more if they wish, especially if serving a crowd with varying spice preferences.
Step 5: Assembling and Serving
Spread the whipped ricotta evenly onto a serving platter or individual plates. Arrange the warm, roasted carrots artfully over the bed of whipped ricotta. Generously drizzle the hot honey mixture over the carrots and ricotta. Garnish with fresh herbs, such as chopped parsley or chives, for a pop of color and freshness. Serve immediately while the carrots are warm.
Pro Tip: A sprinkle of flaky sea salt over the top right before serving can enhance all the flavors and provide a delightful textural crunch.
Serving & Presentation
This visually appealing dish is a showstopper on its own, but here are some tips to make it even more impressive. When plating, create a swoosh of the extra creamy whipped ricotta on your serving platter before arranging the hot honey carrots on top. Don’t be afraid to let some ricotta peek through. The drizzle of hot honey should be applied with an artistic flair, creating elegant lines or pools. For an extra touch, sprinkle some toasted nuts, like slivered almonds or chopped pistachios, over the top for added texture and a gourmet finish.
These roasted root vegetables pair beautifully with a wide range of main courses. Consider serving them alongside grilled chicken or fish, roasted pork loin, or even a hearty lentil shepherd’s pie for a vegetarian option. They also make a fantastic component of a mezze platter or a holiday spread. For a complete meal, pair them with a fresh green salad dressed with a light vinaigrette to balance the richness of the dish.
Make-Ahead & Storage Solutions
Make-Ahead Strategy: You can prepare most components of this dish in advance to save time. The whipped ricotta can be made up to 2 days ahead of time and stored in an airtight container in the refrigerator. It will firm up slightly; simply let it sit at room temperature for about 15-20 minutes before serving or give it a quick whisk to revive its creaminess. The hot honey mixture can also be made 3-4 days ahead and stored at room temperature. The carrots are best roasted just before serving, but if you must roast them ahead, cool them completely and store them in an airtight container in the fridge; reheat gently in the oven or microwave before assembling.
Storing Leftovers: Leftover roasted carrots and whipped ricotta can be stored separately in airtight containers in the refrigerator for up to 2 days. The hot honey drizzle can be stored at room temperature.
The Best Way to Reheat: To reheat the carrots, spread them in a single layer on a baking sheet and warm them in a 350°F (175°C) oven for about 8-10 minutes, or until heated through. Alternatively, microwave them briefly. The whipped ricotta is best served at room temperature or slightly chilled. To assemble leftovers, gently warm the carrots, spread the ricotta on a plate, top with the warm carrots, drizzle with hot honey, and garnish as desired.
Frequently Asked Questions (FAQ)
How long should carrots be roasted for the best flavor?
For the best flavor, carrots should be roasted until they are tender when pierced with a fork and exhibit beautiful caramelization on their edges. This typically takes about 20-25 minutes at 425°F (220°C). The high heat is crucial for developing their natural sweetness through caramelization, which is essential for this dish.
Can I use a different cheese instead of whipped ricotta?
Yes, while whipped ricotta provides a unique lightness and smooth texture, you can experiment with other creamy cheeses. Mascarpone cheese whipped with a touch of cream would be a decadent alternative. For a tangier profile, you could try whipped goat cheese or even a thick, strained Greek yogurt. However, the extra creamy and mild profile of whipped ricotta is ideal for this recipe.
What are some good ways to serve roasted carrots with ricotta and hot honey?
This dish shines as an elegant side dish for almost any meal. It pairs wonderfully with roasted meats like chicken, pork, or lamb. It’s also a fantastic accompaniment to grilled seafood or a vegetarian main like a hearty grain bowl or stuffed portobello mushrooms. For a brunch or appetizer setting, serve it with crusty bread for dipping or as part of a charcuterie board.
How do you make hot honey from scratch for the carrots?
Making hot honey is incredibly simple! For this recipe, you’ll mix 1-2 tablespoons of your favorite honey with 1/2 teaspoon of red pepper flakes. Stir well and let it sit for at least 10-15 minutes to allow the heat from the flakes to infuse into the honey. You can gently warm the mixture for a more immediate infusion, but be careful not to overheat. Taste and adjust the red pepper flakes to your preferred spice level.
Can I make this recipe vegan/gluten-free?
For a vegan version: Use a vegan ricotta alternative (many store-bought options are available, or you can make one from cashews or tofu) and ensure your honey substitute is truly vegan (e.g., agave nectar, maple syrup). The rest of the ingredients are naturally vegan or easily substituted.
This recipe is naturally gluten-free, as all the primary ingredients are gluten-free. Always double-check your labels to ensure no cross-contamination if dealing with severe allergies.
Tried This Recipe? Leave a Comment!
Did you make this recipe? I’d love to hear how it turned out! Please leave a comment and a rating below. Your feedback helps other home cooks and supports cookingwithemy!
For more delicious inspiration, follow me on Pinterest!
Roasted carrots are tossed with olive oil, salt, and pepper, then served over whipped ricotta cheese drizzled with hot honey for a sweet and savory dish.
Ingredients
Scale
1 pound carrots, peeled and trimmed
2 tablespoons olive oil
Salt and pepper to taste
1 cup ricotta cheese
1 tablespoon honey
1/2 teaspoon red pepper flakes
Fresh herbs for garnish
Instructions
Preheat the oven to 425°F.
Toss the carrots with olive oil, salt, and pepper on a baking sheet.
Roast the carrots in the oven for 20-25 minutes, until tender and caramelized.
In a bowl, whip the ricotta cheese until smooth.
Spread the whipped ricotta on a serving platter.
Top with the roasted carrots.
Drizzle with honey mixed with red pepper flakes.
Garnish with fresh herbs and serve immediately.
Notes
For a spicier version, increase the red pepper flakes. Ensure carrots are evenly sized for even roasting.
Spicy Garlic Chicken Bowl with Hummus Cucumber Salad: The Only Recipe You’ll Ever Need
Are you tired of the same old boring lunches that leave you feeling unsatisfied and sluggish? Do you crave a meal that’s both incredibly flavorful and genuinely good for you? Look no further than this vibrant Spicy Garlic Chicken Bowl with Hummus Cucumber Salad. This isn’t just another chicken and hummus salad; it’s a symphony of textures and tastes that will redefine your weeknight dinners and exciting lunches. We’ve perfected this garlic chicken recipe to be the ultimate healthy chicken bowl, packed with protein and refreshing crunch.
Imagine tender, succulent chicken, infused with the fiery kick of chili flakes and the pungent depth of garlic, perfectly complemented by a cool, creamy hummus and cucumber salad. The slight tang of the hummus cuts through the richness of the chicken, while the crisp cucumber offers a delightful textural contrast. Each spoonful of this flavorful bowl is an adventure, promising a satisfying and invigorating culinary experience that awakens your senses and nourishes your body.
At cookingwithemy.com, we’re dedicated to bringing you recipes that are not only delicious but also achievable for every home cook. This spicy garlic chicken bowl is a testament to that commitment. We’ve taken familiar ingredients and elevated them with a simple yet powerful technique that will make you feel like a gourmet chef. Get ready to discover a dish that’s as easy to prepare as it is delightful to eat, becoming your new go-to for quick, healthy, and incredibly tasty meals.
Prep Time: 15 minutes
Cook Time: 20 minutes
Total Time: 35 minutes
Servings: 2
Why This Spicy Garlic Chicken Bowl with Hummus Cucumber Salad Recipe is a Game-Changer
The Chef’s Secret: Infused Garlic & Chili Oil
What truly elevates this garlic chicken recipe from good to extraordinary is the method of infusing the garlic and chili into the cooking oil. Instead of just tossing them into the pan, we’re gently sautéing the minced garlic and chili flakes in olive oil over medium-low heat for a minute or two BEFORE adding the chicken. This process coaxes out the maximum flavor from both the garlic and chili, creating a fragrant, subtly spicy oil that completely coats the chicken as it sears. This infusion technique ensures that every bite of chicken is deeply flavorful, preventing blandness and maximizing the spicy garlic notes without burning the aromatics. It’s a simple step that results in a much more complex and satisfying taste, making this the best spicy garlic chicken bowl you’ll ever make.
Unbeatable Texture & Flavor Balance
The brilliance of this chicken and hummus salad lies in its perfect balance of textures and temperatures. The chicken, cooked to a juicy tenderness, provides a warm, savory anchor to the dish. It’s perfectly offset by the cool, crisp cucumber in the salad, which offers a refreshing crunch. The creamy hummus acts as a luscious dressing, binding the salad components and adding a delightful, earthy richness. When layered over fluffy quinoa, the result is a harmonious bowl where every element plays its part: the warm, spicy chicken, the cool, crunchy salad, and the supporting grains. This thoughtful combination makes it a truly satisfying and complex healthy chicken bowl.
Foolproof for a Reason
We understand that not everyone spends hours in the kitchen. That’s why this garlic chicken recipe is designed for maximum flavor with minimal fuss. The marinade is simple, the cooking process is straightforward, and the salad comes together in minutes. We’ve tested this recipe extensively to ensure that even beginner cooks can achieve restaurant-quality results. From perfectly cooked chicken to a vibrant salad, each step is designed for success, guaranteeing a delicious and impressive meal every single time. You can trust this recipe to deliver a fantastic spicy garlic chicken bowl with hummus cucumber salad, no matter your skill level.
Ingredient Spotlight: Quality Makes the Difference
Boneless, Skinless Chicken Breasts
For this healthy chicken bowl, chicken breasts are ideal as they cook quickly and absorb marinades beautifully. Choose good quality, plump breasts for the most succulent results. If you prefer, you can substitute chicken thighs, though they will take slightly longer to cook. For those seeking an extra tender bite, pounding the chicken breasts slightly before marinating ensures even thickness, leading to more uniform cooking.
Fresh Garlic Cloves
Freshly minced garlic is non-negotiable here! It forms the backbone of the spicy garlic flavor. Avoid pre-minced garlic from jars, as its flavor is often muted and can have a metallic aftertaste. For the best spicy garlic infusion, mince your garlic just before using it. If you’re a true garlic lover, feel free to add an extra clove or two!
Chili Flakes
These are key to the “spicy” in our spicy garlic chicken bowl. Use standard red pepper flakes for a direct, clean heat. The amount can be adjusted to your personal spice preference. For a slightly different, smokier heat, you could experiment with gochugaru (Korean chili flakes) or even a pinch of smoked paprika alongside the chili flakes for color and depth.
Olive Oil
A good quality extra virgin olive oil will provide a superior flavor base for both the chicken marinade and the salad. Its fruity notes complement the other ingredients beautifully and help create that essential spicy garlic oil for searing.
Hummus
This forms the creamy, tangy base of your cucumber salad. Use your favorite store-bought or homemade hummus. Plain, classic hummus works best, allowing the cucumber and chicken flavors to shine. For a twist, try a roasted red pepper hummus or a garlic hummus for an extra layer of flavor.
Cucumber
A crisp, refreshing cucumber is essential for balancing the richness of the chicken. English cucumbers or Persian cucumbers are excellent choices as they have fewer seeds and thinner skins, meaning less prep work. Ensure it’s sliced thinly or into bite-sized pieces for optimal texture in the salad.
Cooked Quinoa
Quinoa provides a light, fluffy, and nutritious base for your bowl. It’s a complete protein and adds a satisfying chew. You can also substitute with brown rice, farro, or even cauliflower rice for a lower-carb option to make this a truly versatile healthy chicken bowl.
Step-by-Step Instructions
Step 1: Marinating the Chicken for Maximum Flavor
In a medium bowl, combine your boneless, skinless chicken breasts. Add the minced garlic, chili flakes, salt, and pepper. Drizzle with 1 tablespoon of olive oil. Toss everything together to ensure the chicken is evenly coated. Let it marinate for at least 15 minutes at room temperature. For even deeper flavor, you can marinate it in the refrigerator for up to 2 hours, but aim for at least 15 minutes to allow the flavors to meld. This simple marination is crucial for infusing that signature spicy garlic essence.
Pro Tip: Don’t skip the marinating time! Even 15 minutes allows the garlic and chili flakes to start infusing their flavor into the chicken, setting the stage for a delicious garlic chicken recipe.
Step 2: Searing the Spicy Garlic Chicken to Perfection
Heat a tablespoon of olive oil in a skillet over medium heat. Once the oil is shimmering, carefully place the marinated chicken breasts into the pan. Cook for 5-7 minutes per side, depending on the thickness of your chicken, until golden brown and cooked through. The internal temperature should reach 165°F (74°C). Once cooked, transfer the chicken to a cutting board and let it rest for 5 minutes before slicing.
Common Mistake to Avoid: Overcrowding the pan! If you’re cooking more chicken than fits comfortably in a single layer, cook it in batches. Overcrowding will steam the chicken instead of searing it, preventing that beautiful golden-brown crust and flavorful caramelization.
Step 3: Crafting the Refreshing Hummus Cucumber Salad
While the chicken is cooking or resting, prepare your salad. In a separate bowl, combine the sliced cucumber with 1/2 cup of hummus. Gently mix until the cucumber is evenly coated. You can add a pinch of salt and pepper if desired, but often the hummus is seasoned enough. This creates a beautiful, creamy, and cool contrast to the warm, spicy chicken.
Pro Tip: For an extra layer of flavor and texture in your hummus cucumber salad, consider adding a sprinkle of fresh dill or mint, or a tablespoon of finely chopped red onion.
Step 4: Assembling Your Masterpiece Spicy Garlic Chicken Bowl
Now for the grand finale! Take your serving bowls. Start with a generous scoop of cooked quinoa at the bottom. Thinly slice the rested chicken breasts and arrange them over the quinoa. Top with a hearty portion of the hummus cucumber salad. This layered approach creates visual appeal and ensures every bite gets a taste of everything.
Pro Tip: If you want a more visually appealing presentation, fan out the sliced chicken on top of the quinoa before adding the salad.
Step 5: The Finishing Touches & Serving
Garnish your spicy garlic chicken bowl with a sprinkle of fresh herbs like parsley, cilantro, or mint for a burst of freshness and color. Serve immediately while the chicken is warm and the salad is cool for the ultimate taste and texture experience. Enjoy your incredible garlic chicken recipe!
Common Mistake to Avoid: Letting the assembled bowl sit for too long, especially if the chicken is very hot, can make the quinoa mushy and the cucumber less crisp. Serve right away for the best experience.
Serving & Presentation
To truly make this Spicy Garlic Chicken Bowl with Hummus Cucumber Salad shine, presentation is key. Serve in wide, shallow bowls to showcase the beautiful layers. For an extra touch of elegance, consider drizzling a tiny bit of extra olive oil or a swirl of tahini over the top. Garnishes aren’t just for looks; fresh herbs like chopped parsley, cilantro, or mint add a vibrant aroma and a final pop of flavor that complements both the spicy chicken and the cool salad. Freshly chopped chives or even a sprinkle of sumac can add a unique Mediterranean flair.
This bowl is a complete meal on its own, but it also pairs wonderfully with a variety of sides. A simple side salad with a light vinaigrette, some warm pita bread for scooping up extra hummus, or a side of roasted vegetables like broccoli or bell peppers would be excellent accompaniments. For a true Mediterranean feast, serve it alongside some Greek orzo salad or a fresh tabbouleh.
Make-Ahead & Storage Solutions
This healthy chicken bowl is fantastic for meal prep! Here’s how to keep it fresh and delicious for days:
Make-Ahead Strategy:
Chicken: Cook and slice the chicken up to 3 days in advance. Store it in an airtight container in the refrigerator. You can briefly reheat it in a skillet or microwave before assembling your bowls, or serve it cold if you prefer a truly chilled meal.
Quinoa: Cook the quinoa and store it in the refrigerator for up to 4 days. It can be served cold directly from the fridge.
Hummus Cucumber Salad: It’s best to prepare this component just before serving to maintain the cucumber’s crispness. However, you can chop the cucumber up to a day ahead and store it separately in the fridge. Mix it with the hummus no more than a few hours before you plan to eat. If you mix it ahead, the cucumber might soften slightly.
Assembly: To assemble, layer the cold quinoa, cold or reheated chicken, and the prepared salad in your bowls. Add fresh garnishes just before serving.
Storing Leftovers:
Store any leftover assembled bowls in an airtight container in the refrigerator for up to 2 days. Be aware that the cucumber might soften slightly over time.
The Best Way to Reheat:
If you’ve stored an assembled bowl, it’s best to reheat only the chicken and quinoa. Remove the cucumber salad from the bowl. Reheat the chicken and quinoa in a microwave for 60-90 seconds or in a skillet over medium heat until warmed through. Then, reassemble the bowl, adding the cool hummus cucumber salad and fresh garnishes. This method preserves the crispness of the salad while ensuring the protein and grains are warm and comforting.
Frequently Asked Questions (FAQ)
How long does it take to cook the spicy garlic chicken for the bowl?
The chicken itself takes approximately 10-14 minutes to cook in the pan, depending on its thickness. This is after the 15-minute marination time. So, plan for about 20-25 minutes for the chicken cooking process, which includes searing and resting.
What are the best vegetables to add to the hummus cucumber salad?
Besides cucumber, other excellent additions to the hummus cucumber salad include finely diced red onion for a sharp bite, chopped bell peppers (any color) for crunch and sweetness, cherry tomatoes halved for juiciness, or even some chopped Kalamata olives for a briny, Mediterranean flavor. Fresh herbs like mint, parsley, or dill are also fantastic additions.
Can I make the spicy garlic chicken ahead of time?
Yes, you absolutely can! Cooked and sliced chicken can be stored in an airtight container in the refrigerator for up to 3 days. It can be enjoyed cold or reheated before assembling your bowl. This makes it a perfect component for meal prep.
What kind of chili paste is best for the spicy garlic chicken?
This recipe uses chili flakes for a direct heat. If you prefer to use a chili paste, a good option would be a simple red pepper paste like Marash pepper paste or even a touch of Sambal Oelek. Use it sparingly, as pastes can be more concentrated than flakes. Start with about 1/2 teaspoon and adjust to your spice preference. Remember to adjust the salt accordingly as some pastes can be salty.
Can I make this recipe vegan/gluten-free?
Vegan Adaptation: To make this recipe vegan, substitute the chicken with firm or extra-firm tofu, tempeh, or seitan. Press and cube the tofu, then marinate and pan-fry it until golden and crispy. For tempeh, steam it briefly before cubing and marinating. Ensure your hummus is vegan (most are, but double-check ingredients). Serve over a gluten-free grain like quinoa or brown rice. Gluten-Free: The recipe as written is naturally gluten-free as long as your hummus and any optional added ingredients are certified gluten-free and you serve it with quinoa or another gluten-free grain. Always double-check the labels of pre-made ingredients like hummus.
Is this recipe truly healthy?
Absolutely! This healthy chicken bowl is packed with lean protein from the chicken, complex carbohydrates and fiber from the quinoa, and healthy fats and vitamins from the olive oil, hummus, and fresh vegetables. It’s a balanced meal designed to keep you full and energized without being heavy. The nutrition information (approx. 450 calories, 30g carbs, 20g fat, 35g protein) supports its “healthy” claim.
Tried This Recipe? Leave a Comment!
Did you make this recipe? I’d love to hear how it turned out! Please leave a comment and a rating below. Your feedback helps other home cooks and supports cookingwithemy!
For more delicious inspiration, follow me on Pinterest!
Cranberry Turkey Stuffing Balls: The Only Recipe You’ll Ever Need
The holiday season calls for special dishes, and if you’re searching for the best Cranberry Turkey Stuffing Balls recipe, you’ve landed in the right place! Forget dry, crumbly sides; these delightful little spheres are packed with festive flavor, turning your Thanksgiving or Christmas table into a masterpiece. We’re talking about a perfect balance of savory ground turkey, tart cranberries, aromatic herbs, and moistened stuffing, all baked into perfectly bite-sized morsels. This isn’t just another stuffing recipe; it’s an elevated appetizer and a side dish that will have everyone reaching for seconds. This easy stuffing recipe is designed for minimal fuss and maximum flavor impact.
Imagine biting into a warm, golden-brown ball. The initial crisp gives way to a moist, tender interior where the savory notes of the turkey mingle beautifully with the bright, zesty burst of fresh cranberries. Hints of fragrant sage and onion weave through each bite, creating a complex flavor profile that’s both comforting and exciting. The texture is utterly divine – not too dense, not too loose, but perfectly cohesive and satisfying. It’s the kind of dish that evokes warmth, celebration, and the joy of sharing a meal with loved ones, making it a must-have for any festive gathering.
At cookingwithemy.com, we believe in making delicious food accessible and enjoyable for everyone. This particular Cranberry Turkey Stuffing Balls recipe has been meticulously tested and refined to ensure foolproof results, even for beginner cooks. What sets this recipe apart is a clever combination of ingredients and a simple technique that guarantees moistness and incredible flavor. Get ready to discover the “Chef’s Secret” ingredient that elevates these stuffing balls from delicious to absolutely unforgettable. You’ll find yourself making these year after year!
Prep Time: 15 minutes
Cook Time: 25 minutes
Total Time: 40 minutes
Servings: 12 balls
Why This Cranberry Turkey Stuffing Balls Recipe is a Game-Changer
The Chef’s Secret: The Power of Moist Stuffing Mix & Fresh Cranberries
The secret to truly exceptional Cranberry Turkey Stuffing Balls lies in the foundation: the stuffing mix and the cranberries. Instead of over-hydrating the stuffing mix, we’re relying on the moisture from the ground turkey, the beaten egg, and just enough chicken broth to bind everything together. This technique ensures that the stuffing balls retain their shape and don’t become gummy. Fresh cranberries are non-negotiable here; their tartness cuts through the richness of the turkey and fat, providing a delightful counterpoint that makes each bite sing. Dried cranberries can be too sweet and lack that vibrant zing.
Unbeatable Texture: A Balance of Savory and Tart
Achieving the perfect texture in these turkey stuffing balls is paramount. The ground turkey provides a savory, slightly crumbly base, while the softened stuffing breadcrumbs soak up just enough moisture to create a tender interior. The fresh cranberries, when baked, soften and release some of their juices, adding pockets of moisture and a delightful chewiness that prevents the balls from being dry. The 1-inch ball shape ensures an even cooking surface, leading to a beautiful golden-brown exterior that offers just the right amount of contrast to the soft, flavorful inside.
Foolproof for a Reason
We understand that holiday cooking can sometimes feel overwhelming. That’s why this cranberry stuffing recipe has been tested repeatedly to ensure it’s as straightforward as possible. We’ve eliminated complex steps and focused on clear instructions that guarantee success. Whether you’re a seasoned chef or just starting your culinary journey, you can confidently follow this guide and produce a batch of Cranberry Turkey Stuffing Balls that will impress everyone. It’s designed for reliability, so you can focus on enjoying the process and the delicious outcome.
Ingredient Spotlight: Quality Makes the Difference
2 cups fresh cranberries
Fresh cranberries are the heart and soul of the tartness in these stuffing balls. Their bright, sharp flavor is essential for cutting through the richness of the turkey and broth, creating a balanced and exciting taste profile. When baked, they soften and release their juices, adding a beautiful moisture and a pop of festive color. You can find fresh cranberries in the produce section of most grocery stores during their peak season (fall and winter). If you can’t find fresh, frozen cranberries work as an excellent substitute, just make sure they are thawed and drained before use. Avoid dried cranberries as they will be too sweet and lack the desired tartness.
1 pound ground turkey
Ground turkey provides the savory, protein-rich foundation for our stuffing balls. Opt for a lean to medium grind (like 85/15 or 93/7) for the best flavor and moisture. Too lean and the balls could become dry, while a bit of fat content adds richness and helps bind the mixture. It’s crucial to use good quality ground turkey for the best taste; look for a reputable butcher or brand. For a different flavor profile or if you prefer not to use turkey, you can substitute with an equal amount of ground chicken or even finely crumbled Italian sausage (though sausage will add its own seasoning).
4 cups stuffing mix
This forms the bulk and texture of our stuffing balls. Whether you use a seasoned or unseasoned stuffing mix is largely a matter of preference, but seasoned mixes often offer a good baseline of classic stuffing flavors. If using an unseasoned mix, you might want to slightly increase the herbs and spices. Ensure the stuffing mix is a standard breadcrumb-based type. For a gluten-free version, you can use a gluten-free stuffing mix made from gluten-free bread. The key is that it’s dry and ready to absorb the liquids from the other ingredients.
1 onion, finely chopped
Onions are a flavor powerhouse, adding sweetness and depth. Finely chopping the onion ensures it cooks down and disperses its flavor evenly throughout the mixture. A yellow or sweet onion works best here, as it offers a pleasant sweetness without being overpowering. If you’re not a fan of onion pieces, you can sauté the onion until translucent before adding it to the mix, which will soften its texture and mellow its flavor considerably. Shallots can also be used for a milder onion flavor.
2 cloves garlic, minced
Garlic is another essential aromatic that enhances the savory notes of the turkey and stuffing. Minced garlic releases its pungent flavor beautifully when mixed into the stuffing balls. Ensure the garlic is fresh for the most vibrant taste. If you’re short on fresh garlic, you can substitute with 1/2 teaspoon of garlic powder, but the fresh flavor is definitely superior.
1/2 cup chicken broth
The chicken broth acts as a binder and adds moisture to help the stuffing balls hold their shape. It also infuses a subtle savory flavor. Use a low-sodium chicken broth so you can control the saltiness of the overall dish. Vegetable broth can be used as a vegetarian substitute, and for an even richer flavor, you could use turkey broth if available.
1 egg, beaten
The egg serves as a crucial binder, helping to hold all the ingredients together so the stuffing balls don’t fall apart during baking. It also adds a touch of richness. Ensure the egg is fully beaten before adding it to the mixture. For an egg-free version, you can try using 1 tablespoon of flaxseed meal mixed with 3 tablespoons of water and let it sit for 5-10 minutes until it forms a gel (a flax egg), or use a commercial egg replacer.
1 tablespoon fresh sage, chopped
Sage is a classic herb for stuffing, offering an earthy, slightly peppery flavor that complements turkey beautifully. Fresh sage has a more vibrant and nuanced taste than dried. If fresh sage isn’t available, you can use 1 teaspoon of dried sage, but be sure to crush it between your fingers to release its flavor before adding. Other complementary herbs include thyme or a pinch of rosemary.
1 teaspoon salt
Salt is essential for bringing out and balancing all the flavors in the dish. Adjust the amount based on the saltiness of your stuffing mix and broth.
1/2 teaspoon black pepper
Freshly ground black pepper adds a subtle warmth and bite.
Step-by-Step Instructions
Step 1: Preparing the Oven and Baking Sheet
Preheat your oven to 375°F (190°C). This temperature is ideal for ensuring the stuffing balls cook through evenly and develop a lovely golden-brown exterior without burning. Line a large baking sheet with parchment paper. This is a crucial step as it prevents the stuffing balls from sticking to the pan, making cleanup a breeze and ensuring they don’t get misshapen when you remove them.
Pro Tip: Ensure your baking sheet is large enough to accommodate all the balls without them touching. This allows hot air to circulate freely around each ball, promoting even browning.
Step 2: Combining the Dry Ingredients
In a large mixing bowl, combine the 4 cups of stuffing mix, 2 cups of fresh cranberries, 1 finely chopped onion, 2 minced cloves of garlic, 1 tablespoon of chopped fresh sage, 1 teaspoon of salt, and 1/2 teaspoon of black pepper. Gently toss these ingredients together to distribute them evenly. This ensures that all the flavor elements are present in every part of the stuffing mixture.
Common Mistake to Avoid: Don’t overmix at this stage. You simply want to combine the dry ingredients so they are ready for the wet ingredients. Overworking dry ingredients can sometimes lead to a tougher final product.
Step 3: Adding the Wet Ingredients and Binder
Add the 1 pound of ground turkey, 1 beaten egg, and 1/2 cup of chicken broth to the bowl with the dry ingredients. Now, it’s time to mix everything thoroughly. Use your hands or a sturdy spoon to combine the ingredients until everything is well incorporated. You want to ensure the ground turkey is evenly distributed and that the mixture holds together when squeezed.
Pro Tip: Wear food-safe disposable gloves for this stage. It makes mixing much easier and cleaner, especially with the ground turkey.
Step 4: Forming the Stuffing Balls
Once the mixture is well combined, it’s time to form the balls. Scoop about 1-2 tablespoons of the mixture at a time and roll it between your palms to form uniform 1-inch balls. Place each formed ball onto the prepared baking sheet, leaving a little space between them. Uniformity in size is key for even baking.
Common Mistake to Avoid: Don’t try to make the balls too large. Smaller, 1-inch balls cook more quickly and evenly, and are the perfect appetizer size. Also, avoid packing the mixture too tightly, as this can make them dense.
Step 5: Baking to Golden Perfection
Place the baking sheet with the formed stuffing balls into the preheated oven. Bake for 20-25 minutes, or until the balls are golden brown on the outside and any internal turkey is cooked through. You can check for doneness by inserting a thermometer into one of the largest balls; it should register 165°F (74°C).
Pro Tip: If some balls are browning faster than others, you can rotate the baking sheet halfway through the baking time.
Step 6: Cooling and Serving
Once baked to perfection, carefully remove the baking sheet from the oven. Let the Cranberry Turkey Stuffing Balls cool on the baking sheet for about 5 minutes before serving. This allows them to firm up slightly. They are best served warm!
Common Mistake to Avoid: Don’t serve them straight from the oven piping hot. A short cooling period makes them easier to handle and prevents potential burns.
Serving & Presentation
These Cranberry Turkey Stuffing Balls are incredibly versatile and can be presented in a multitude of ways to suit any occasion. For a festive appetizer, arrange them artfully on a rustic wooden board or a elegant serving platter. Garnish the platter with fresh rosemary sprigs, a sprinkle of extra fresh cranberries, or a few dollops of cranberry sauce for an extra touch of color and flavor. You can also serve them in individual small bowls for a more formal setting.
For a complete meal, these stuffing balls make an exceptional side dish. They pair wonderfully with roasted turkey, ham, prime rib, or a hearty vegetarian main course like stuffed squash. Consider serving them alongside other holiday favorites such as mashed potatoes, green bean casserole, or a crisp autumn salad. A small bowl of gravy or a tangy dipping sauce on the side can also elevate the experience even further. For extra flair, a drizzle of balsamic glaze over the platter can add a sophisticated touch.
Make-Ahead & Storage Solutions
Make-Ahead Strategy:
You can prepare the stuffing mixture up to 24 hours in advance. Simply combine all the ingredients as instructed in Step 3, cover the bowl tightly with plastic wrap, and refrigerate. When you’re ready to bake, let the mixture sit at room temperature for about 15-20 minutes to make it easier to form the balls, then proceed from Step 4. Alternatively, you can form the balls and place them on a parchment-lined baking sheet, cover them loosely with plastic wrap, and refrigerate for up to 24 hours. Bake as directed, adding a few extra minutes to the cook time if baking from cold.
Storing Leftovers:
Store any leftover Cranberry Turkey Stuffing Balls in an airtight container in the refrigerator for up to 3 days. Ensure they have cooled completely before storing to prevent condensation from making them soggy. They can also be frozen for longer storage. Place cooled balls in a single layer on a baking sheet and freeze until solid. Then, transfer them to a freezer-safe bag or container for up to 2 months.
The Best Way to Reheat:
For best results, reheat the stuffing balls in a single layer on a baking sheet in a preheated oven at 300°F (150°C) for 10-15 minutes, or until heated through and slightly crisped. This method helps restore their texture and warmth. If reheating from frozen, add an extra 5-10 minutes to the baking time, or until heated through. Microwaving is an option for a quick reheat, but it may result in a softer texture.
Frequently Asked Questions (FAQ)
How long do you bake cranberry turkey stuffing balls before they are done?
You should bake the Cranberry Turkey Stuffing Balls for 20-25 minutes at 375°F (190°C). They are done when they are golden brown on the outside and the internal temperature of the turkey reaches 165°F (74°C). Ensure they are cooked through for food safety and optimal texture.
Can I make cranberry turkey stuffing balls ahead of time and reheat them?
Yes, you absolutely can! You can prepare the mixture up to 24 hours in advance and refrigerate it. Form the balls, then bake them when ready, potentially adding a few extra minutes to the cooking time. Leftover baked balls can be stored in the refrigerator and reheated effectively in a 300°F (150°C) oven for about 10-15 minutes to regain their crispness.
What are the best herbs to use in cranberry turkey stuffing balls?
Sage is a classic and highly recommended herb for its earthy, savory flavor that pairs wonderfully with turkey and cranberries. Thyme is another excellent choice. A little bit of rosemary can also be lovely, but use it sparingly as its flavor can be strong. A blend of these herbs often results in the most complex and delicious stuffing flavor.
What kind of turkey or meat is best for stuffing balls with cranberries?
For the best balance of flavor and moisture, ground turkey with an 85/15 or 93/7 fat ratio is ideal. If you prefer, you can substitute with ground chicken or even finely crumbled Italian sausage for a different flavor profile. The key is to use a ground meat that isn’t overly lean to prevent the stuffing balls from becoming dry.
Can I use dried cranberries instead of fresh?
While you can use dried cranberries, fresh cranberries are highly recommended for this recipe. Fresh cranberries provide a burst of tartness that balances the savory flavors and moisture. Dried cranberries are much sweeter and will significantly alter the overall flavor profile, making the stuffing balls too sweet. If you must use dried, reduce the overall sweetness if serving as part of a savory dish by choosing unsweetened dried cranberries and perhaps adding a pinch more salt.
Can I make this recipe vegan/gluten-free?
To make this recipe gluten-free, simply use a gluten-free stuffing mix. The rest of the ingredients are naturally gluten-free. To make it vegan, you would need to substitute the ground turkey with a plant-based alternative like finely chopped mushrooms, lentils, or a commercial vegan ground meat substitute. You’ll also need to replace the egg binder with a flax egg (1 tbsp flaxseed meal + 3 tbsp water, let sit for 5-10 mins) or another vegan egg replacer, and use vegetable broth instead of chicken broth.
Tried This Recipe? Leave a Comment!
Did you make this recipe? I’d love to hear how it turned out! Please leave a comment and a rating below. Your feedback helps other home cooks and supports cookingwithemy!
For more delicious inspiration, follow me on Pinterest!
These Cranberry Turkey Stuffing Balls are a festive twist on traditional stuffing, combining tart cranberries with savory turkey and herbs for a delightful appetizer or side dish.
Ingredients
Scale
2 cups fresh cranberries
1 pound ground turkey
4 cups stuffing mix
1 onion, finely chopped
2 cloves garlic, minced
1/2 cup chicken broth
1 egg, beaten
1 teaspoon salt
1/2 teaspoon black pepper
1 tablespoon fresh sage, chopped
Instructions
Preheat oven to 375°F (190°C) and line a baking sheet with parchment paper.
In a large bowl, combine the stuffing mix, cranberries, onion, garlic, sage, salt, and pepper.
Add the ground turkey, egg, and chicken broth to the bowl; mix until well combined.
Form the mixture into 1-inch balls and place them on the prepared baking sheet.
Bake for 20-25 minutes, or until golden brown and cooked through.
Let cool for 5 minutes before serving.
Notes
For a vegetarian version, substitute ground turkey with mushrooms or lentils. Store leftovers in an airtight container for up to 3 days.
Prep Time:15 minutes
Cook Time:25 minutes
Method:Appetizer
Cuisine:American
Nutrition
Calories:150
Sugar:3g
Fat:7g
Carbohydrates:15g
Protein:10g
Hi I'm Emy
I’m passionate about sharing a diverse collection of sweet and savory recipes that I’ve meticulously tested and perfected in my own kitchen.