Slow Cooker Homestyle Beef Tips

Slow Cooker Homestyle Beef Tips: The Ultimate Comfort Food

There’s something magical about walking into a house that smells like slow-cooked beef—rich, savory, and downright comforting. If you’re craving a meal that feels like a warm hug but doesn’t require hours in the kitchen, these Slow Cooker Homestyle Beef Tips are your answer. Perfect for busy weeknights, lazy Sundays, or anytime you need a hearty dish that practically cooks itself, this recipe is a game-changer.

I first discovered the beauty of slow-cooked beef tips when my best friend dropped off a batch after I had my second baby. One bite, and I was hooked—tender chunks of beef swimming in a velvety gravy, served over buttery mashed potatoes. It was love at first taste. Since then, I’ve tweaked the recipe to make it even simpler (because who has time for fussy steps?) while keeping all that homestyle goodness. Whether you’re feeding a crowd or just meal prepping for the week, this dish delivers every time.

Why You’ll Love These Slow Cooker Beef Tips

This recipe is a winner for so many reasons. Here’s why it’ll become a regular in your rotation:

  • Effortless cooking: Just sear, dump, and let the slow cooker work its magic.
  • Budget-friendly: Uses affordable cuts like sirloin or stew meat.
  • Freezer-friendly: Makes great leftovers or meal prep.
  • Versatile: Serve over mashed potatoes, egg noodles, or even rice.

How to Make Slow Cooker Homestyle Beef Tips

This recipe is as simple as it gets, but a few key steps ensure maximum flavor. Here’s how to nail it:

Ingredients You’ll Need

  • 2 lbs beef sirloin or stew meat, cut into bite-sized pieces
  • 1 onion, diced
  • 3 cloves garlic, minced
  • 1 cup beef broth
  • 2 tbsp Worcestershire sauce
  • 1 tbsp tomato paste
  • 1 tsp thyme
  • Salt and pepper to taste
  • 2 tbsp cornstarch (for thickening)

Step-by-Step Instructions

  1. Sear the beef: In a skillet over medium-high heat, brown the beef tips in batches for better caramelization. Transfer to the slow cooker.
  2. Sauté aromatics: In the same skillet, cook onions and garlic until soft. Add to the slow cooker.
  3. Combine liquids: Whisk together beef broth, Worcestershire sauce, tomato paste, and thyme. Pour over the beef.
  4. Cook low and slow: Cover and cook on LOW for 6–7 hours or HIGH for 3–4 hours.
  5. Thicken the gravy: Mix cornstarch with 2 tbsp cold water, stir into the slow cooker, and cook for another 15–20 minutes until thickened.

Tips for the Best Beef Tips

Want to take this dish to the next level? Try these pro tips:

  • Don’t skip the sear: Browning the meat adds depth of flavor you can’t get otherwise.
  • Deglaze the pan: After sautéing onions, scrape up those browned bits with a splash of broth—it’s flavor gold!
  • Make it creamy: Stir in a splash of heavy cream or sour cream at the end for extra richness.

If you love easy slow cooker meals, you’ll adore my Slow Cooker Chicken and Dumplings—another family favorite!

Serving Suggestions

These beef tips are incredibly versatile. Here are my favorite ways to serve them:

  • Over a pile of creamy mashed potatoes (Food Network’s recipe is a winner!).
  • With buttery egg noodles or fluffy rice.
  • Alongside roasted veggies or a crisp green salad.

Frequently Asked Questions

Can I use frozen beef for slow cooker beef tips?
Yes, but thaw it first for even cooking. Searing frozen meat is tricky, and it may release too much liquid.

What’s the best cut of beef for beef tips?
Sirloin, stew meat, or chuck roast all work well. Avoid lean cuts like round steak—they can get tough.

Can I make beef tips without a slow cooker?
Absolutely! Simmer on the stovetop for 1.5–2 hours or try my Instant Pot Beef Stew method.

How do I store leftovers?
Keep in an airtight container for up to 4 days in the fridge or freeze for 3 months.

Can I add mushrooms?
Yes! Add sliced mushrooms with the onions for a earthy twist.

Why is my gravy too thin?
Mix a little extra cornstarch with cold water and stir it in, then simmer uncovered to thicken.

There you have it—a foolproof recipe for Slow Cooker Homestyle Beef Tips that’ll have your family begging for seconds. Whether you’re juggling a hectic schedule or just craving a taste of nostalgia, this dish delivers every time. Pair it with your favorite sides, and don’t forget the crusty bread for soaking up that delicious gravy. Happy cooking!

Print
clock clock iconcutlery cutlery iconflag flag iconfolder folder iconinstagram instagram iconpinterest pinterest iconfacebook facebook iconprint print iconsquares squares iconheart heart iconheart solid heart solid icon

Slow Cooker Homestyle Beef Tips


  • Author: Chef Comfort

Description

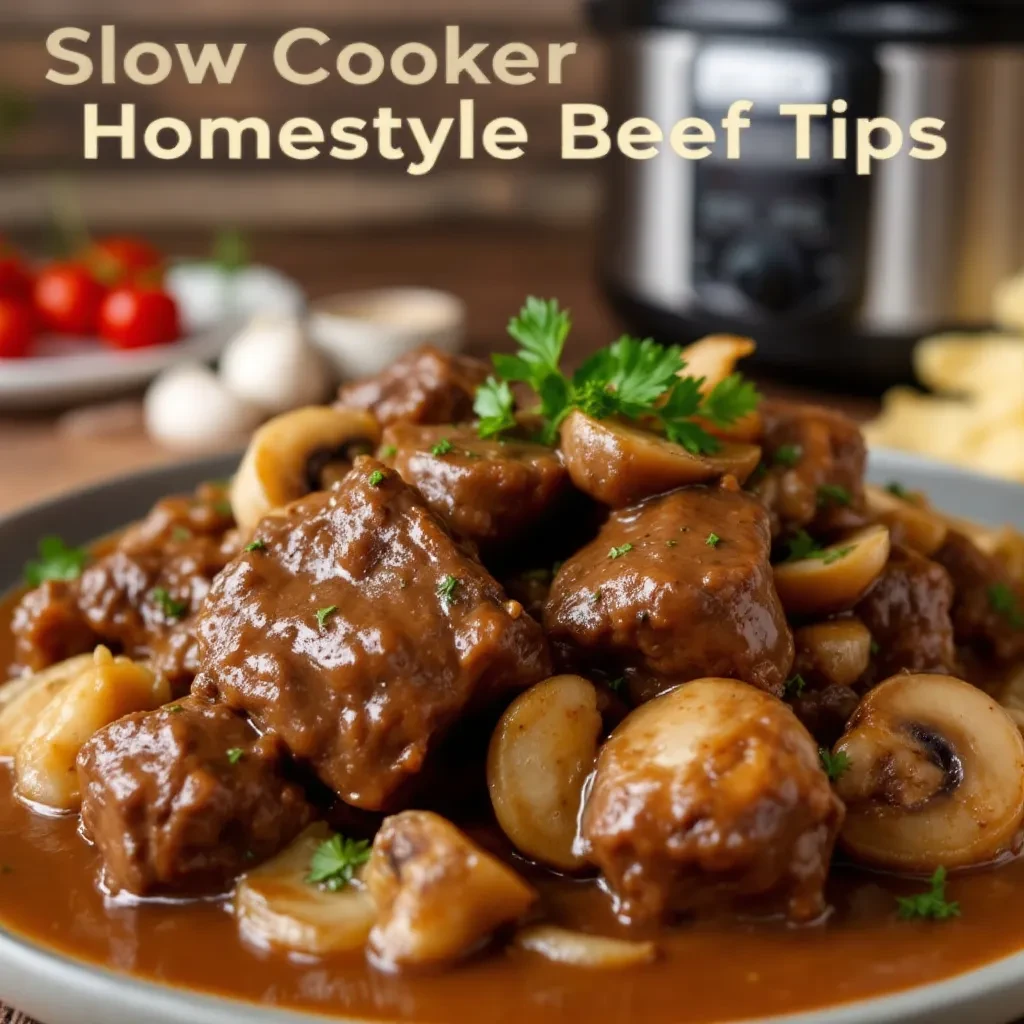
Tender beef tips slow-cooked in a rich, savory gravy with onions and mushrooms for the ultimate comfort meal. Perfect over mashed potatoes or egg noodles.


Ingredients

Scale

For the Crust:

  • For the Beef Tips:
  • 2 lbs beef stew meat, cubed
  • 1 tsp salt
  • 1 tsp black pepper
  • 1 tsp garlic powder
  • 1 tsp onion powder
  • 2 tbsp olive oil
  • For the Gravy:
  • 1 large yellow onion, diced
  • 8 oz mushrooms, sliced
  • 3 cloves garlic, minced
  • 2 cups beef broth
  • 1 tbsp Worcestershire sauce
  • 1 tbsp soy sauce
  • 1 tsp dried thyme
  • 1 tsp dried rosemary
  • 2 tbsp cornstarch
  • 2 tbsp water

Instructions

1. Prepare the Crust:

  1. 1. Season beef tips with salt, pepper, garlic powder, and onion powder.
  2. 2. Heat olive oil in a skillet over medium-high heat. Brown beef tips on all sides (about 3-4 minutes per batch). Transfer to slow cooker.
  3. 3. In the same skillet, sauté onions and mushrooms until softened (5 minutes). Add garlic and cook 1 more minute. Transfer to slow cooker.
  4. 4. Pour beef broth, Worcestershire sauce, soy sauce, thyme, and rosemary into the slow cooker. Stir gently.
  5. 5. Cover and cook on LOW for 7-8 hours or HIGH for 4-5 hours.
  6. 6. Before serving, mix cornstarch and water in a small bowl. Stir into the slow cooker and cook 15 more minutes to thicken gravy.

Notes

For extra richness, stir in 1/4 cup heavy cream at the end. Freezes well for up to 3 months. If gravy is too thick, thin with additional broth.

Ranch Chicken Potato Foil Packets

Ranch Chicken Potato Foil Packets: The Ultimate Easy Dinner

Ever have one of those nights where you just can’t with the dishes? Where the thought of scrubbing another pan makes you want to order takeout (again)? Enter: these gloriously simple Ranch Chicken Potato Foil Packets. They’re like a cozy hug for your dinner routine—tender chicken, crispy potatoes, and that irresistible ranch flavor, all cooked in a neat little foil parcel. No mess, no stress, just a meal that feels indulgent but secretly takes less effort than microwaving a frozen pizza.

I first made these on a chaotic weeknight when my toddler was helping (read: scattering measuring cups like confetti). The beauty? You toss everything together, fold it up, and let the oven do the work. Even better? They’re a hit for backyard BBQs, camping trips, or meal prep—swap the veggies based on what’s in your fridge, and you’ve got a customizable crowd-pleaser. Pro tip: Double the batch and stash extras in the freezer for future you (she’ll thank you).

Why You’ll Love These Ranch Chicken Potato Foil Packets

If you’re not already sold on the no dishes dream, here’s why this recipe deserves a spot in your rotation:

  • One-pan wonder: Foil = easy cleanup (just crumple and toss!).
  • Customizable: Add bell peppers, zucchini, or swap ranch for BBQ seasoning.
  • Meal prep magic: Assemble ahead and bake when ready.
  • Crowd-friendly: Great for picky eaters—kids love the fun unwrapping moment.

How to Make Ranch Chicken Potato Foil Packets

Ingredients You’ll Need

  • 1.5 lbs boneless, skinless chicken breasts (cut into 1-inch cubes)
  • 1 lb baby potatoes (halved or quartered)
  • 2 tbsp olive oil
  • 1 packet ranch seasoning (or homemade ranch mix)
  • 1 tsp garlic powder
  • Salt & pepper to taste
  • Fresh parsley (optional, for garnish)

Step-by-Step Instructions

  1. Prep: Preheat oven to 400°F (200°C). Cut four 12-inch foil squares.
  2. Season: In a bowl, toss chicken and potatoes with olive oil, ranch seasoning, garlic powder, salt, and pepper.
  3. Assemble: Divide mixture evenly among foil squares. Fold edges tightly to seal.
  4. Bake: Place packets on a baking sheet. Bake for 25–30 minutes until chicken reaches 165°F.
  5. Serve: Carefully open packets (steam alert!), garnish with parsley, and enjoy!

Tips for the Best Foil Packet Dinner

Want to level up your foil game? Try these tricks:

  • Don’t skimp on foil: Use heavy-duty or double-layer to prevent tears.
  • Veggie hack: Microwave potatoes for 2 minutes first to speed up cooking.
  • Grill option: Cook over medium heat for 15–20 minutes, flipping once.

For more easy one-pan ideas, check out my Garlic Butter Shrimp Foil Packs—another weeknight hero!

Frequently Asked Questions

Can I use chicken thighs instead? Absolutely! Thighs stay juicy and may need 5 extra minutes.

How do I store leftovers? Refrigerate sealed packets for up to 3 days. Reheat in the oven at 350°F.

Can I make these ahead? Yes! Assemble and refrigerate for up to 24 hours before baking.

Are these gluten-free? Check your ranch seasoning label, or use a GF ranch mix.

Can I add cheese? Of course! Sprinkle cheddar on top before sealing.

Why are my potatoes undercooked? Cut them smaller (½-inch pieces) or par-cook first.

There you have it—a dinner that’s as easy to make as it is delicious. Whether you’re wrangling kids, hustling through work deadlines, or just craving comfort food without the fuss, these Ranch Chicken Potato Foil Packets are here to save the day. Now go forth and conquer dinner (with zero guilt about the dishes). P.S. If you’re a ranch fanatic like me, don’t miss my Crispy Ranch Roasted Potatoes next!

Print
clock clock iconcutlery cutlery iconflag flag iconfolder folder iconinstagram instagram iconpinterest pinterest iconfacebook facebook iconprint print iconsquares squares iconheart heart iconheart solid heart solid icon

Ranch Chicken Potato Foil Packets


  • Author: The Foil Packet Chef

Description

An easy, flavorful one-packet meal with tender chicken, crispy potatoes, and zesty ranch seasoning—perfect for grilling or baking with minimal cleanup.


Ingredients

Scale

For the Crust:

  • For the chicken and potatoes:
  • 1.5 lbs boneless, skinless chicken breasts (cut into 1-inch cubes)
  • 1.5 lbs baby potatoes (quartered)
  • 1 red bell pepper (diced)
  • 1 small red onion (sliced)
  • 2 tbsp olive oil
  • For the ranch seasoning:
  • 1 packet (1 oz) dry ranch seasoning mix
  • 1 tsp garlic powder
  • 1/2 tsp smoked paprika
  • 1/4 tsp black pepper
  • For garnish:
  • 1/4 cup chopped fresh parsley
  • 1/2 cup shredded cheddar cheese (optional)

Instructions

1. Prepare the Crust:

  1. 1. Preheat grill to medium-high (400°F) or oven to 425°F.
  2. 2. In a large bowl, combine chicken, potatoes, bell pepper, and onion.
  3. 3. Drizzle with olive oil, then sprinkle ranch seasoning, garlic powder, paprika, and black pepper. Toss to coat evenly.
  4. 4. Divide mixture evenly among 4 large sheets of heavy-duty aluminum foil (about 12×18 inches each).
  5. 5. Fold foil over ingredients and seal edges tightly to form packets.
  6. 6. Grill for 25-30 minutes or bake for 30-35 minutes until chicken reaches 165°F and potatoes are tender.
  7. 7. Carefully open packets (steam will escape) and garnish with parsley and cheese if desired.

Notes

For crispier potatoes, open packets during last 5 minutes of cooking. Substitute Greek yogurt ranch dressing for a lighter option. Packets can be assembled 1 day ahead and refrigerated.

No-Bake Peanut Butter Cheesecake Bars


No-Bake Peanut Butter Cheesecake Bars: A Dreamy Dessert Without the Oven

There’s something magical about the combination of peanut butter and cheesecake—it’s rich, creamy, and just sweet enough to satisfy your deepest dessert cravings. And when you don’t have to turn on the oven? Even better. These No-Bake Peanut Butter Cheesecake Bars are the answer to busy days, last-minute gatherings, or those moments when you simply need a little indulgence without the fuss.

I first made these bars for a friend’s potluck when I was short on time (and energy). The result? They disappeared faster than I could say, Save me one! The best part? No one guessed how effortless they were to whip up. Whether you’re a seasoned baker or a kitchen newbie, this recipe is foolproof. Plus, it’s a fantastic make-ahead treat—just stash it in the fridge until you’re ready to serve. Trust me, your future self will thank you.

Why You’ll Love These No-Bake Peanut Butter Cheesecake Bars

If you need a little more convincing (though one bite will do the trick), here’s why this dessert is a must-try:

  • No oven required: Perfect for hot summer days or tiny kitchens.
  • Creamy meets crunchy: A buttery graham cracker crust pairs perfectly with the velvety peanut butter filling.
  • Make-ahead magic: These bars taste even better after chilling overnight.
  • Crowd-pleaser: Kids, adults, and even picky eaters will beg for seconds.

How to Make No-Bake Peanut Butter Cheesecake Bars

Ingredients You’ll Need

  • For the crust: Graham cracker crumbs, melted butter, and a pinch of salt.
  • For the filling: Cream cheese, creamy peanut butter, powdered sugar, vanilla extract, and whipped cream.
  • For topping (optional): Melted chocolate, crushed peanuts, or a drizzle of caramel.

Step-by-Step Instructions

  1. Prep the crust: Mix graham cracker crumbs with melted butter and press into a lined pan. Chill for 15 minutes.
  2. Make the filling: Beat cream cheese, peanut butter, powdered sugar, and vanilla until smooth. Fold in whipped cream.
  3. Layer and chill: Spread the filling over the crust and refrigerate for at least 4 hours (or overnight).
  4. Add toppings: Slice into bars and garnish as desired. Serve cold!

Tips for the Best No-Bake Cheesecake Bars

Want to take these bars to the next level? Here are my pro tips:

  • Use full-fat cream cheese for the creamiest texture.
  • For a chocolate twist, swap half the graham crumbs for Oreo crumbs.
  • Let the bars sit at room temperature for 5 minutes before slicing for cleaner edges.
  • Freeze leftovers (if there are any!) for a frosty treat later.

If you love no-bake desserts, you’ll adore my No-Bake Chocolate Cookie Bars—they’re another easy crowd favorite!

Frequently Asked Questions

Can I use natural peanut butter?

Yes, but opt for the creamy, no-stir variety. Natural peanut butter can make the filling too oily.

How long do these cheesecake bars last?

Store them covered in the fridge for up to 5 days, or freeze for up to 2 months.

Can I make these gluten-free?

Absolutely! Use gluten-free graham crackers or almond flour for the crust.

Why is my filling too soft?

If your filling hasn’t set, it may need more chilling time. The whipped cream should be stiff before folding in.

Can I use a different nut butter?

Sure! Almond butter or cashew butter work well, though the flavor will vary. Check out Food Network’s nut butter guide for inspiration.

What’s the best way to cut cheesecake bars cleanly?

Dip a sharp knife in hot water, wipe dry, and slice. Repeat between cuts for neat bars.

There you have it—the ultimate no-fuss dessert that tastes like you spent hours in the kitchen. These No-Bake Peanut Butter Cheesecake Bars are proof that the best things in life (or at least in dessert) don’t have to be complicated. Whip up a batch, share with friends, or keep them all to yourself—I won’t judge. For more easy sweet treats, try my 5-Minute Microwave Fudge or browse Bon Appétit’s dessert collection for extra inspiration. Happy no-baking!


Print
clock clock iconcutlery cutlery iconflag flag iconfolder folder iconinstagram instagram iconpinterest pinterest iconfacebook facebook iconprint print iconsquares squares iconheart heart iconheart solid heart solid icon

No-Bake Peanut Butter Cheesecake Bars


  • Author: Sweet Treats Kitchen

Description

Creamy peanut butter cheesecake filling atop a crunchy graham cracker crust, chilled to perfection without turning on your oven. These decadent bars are easy to make and perfect for any occasion.


Ingredients

Scale

For the Crust:

  • For the crust:
  • 1.5 cups graham cracker crumbs
  • 6 tbsp unsalted butter (melted)
  • 1/4 cup granulated sugar
  • For the filling:
  • 16 oz cream cheese (softened)
  • 1 cup creamy peanut butter
  • 1 cup powdered sugar
  • 1 tsp vanilla extract
  • 1 cup heavy whipping cream
  • For topping:
  • 1/2 cup chocolate chips
  • 2 tbsp peanut butter (melted)

Instructions

1. Prepare the Crust:

  1. 1. Line an 8×8 inch baking pan with parchment paper, leaving overhang for easy removal.
  2. 2. Make crust: Mix graham cracker crumbs, melted butter, and sugar until combined. Press firmly into prepared pan. Chill 15 minutes.
  3. 3. Make filling: Beat cream cheese until smooth. Add peanut butter, powdered sugar, and vanilla; mix until creamy.
  4. 4. In a separate bowl, whip heavy cream to stiff peaks. Fold into peanut butter mixture until no streaks remain.
  5. 5. Spread filling over chilled crust. Smooth top with spatula.
  6. 6. Make topping: Melt chocolate chips and peanut butter together, then drizzle over bars.
  7. 7. Chill at least 4 hours (preferably overnight) before slicing into squares.

Notes

For cleaner slices, dip knife in hot water before cutting. Store leftovers covered in refrigerator for up to 5 days. May be frozen for up to 1 month.

Buttery Garlic Parmesan Potatoes


Buttery Garlic Parmesan Potatoes: The Ultimate Comfort Food

There’s something magical about the combination of butter, garlic, and Parmesan—especially when it’s generously coating tender, golden potatoes. These Buttery Garlic Parmesan Potatoes are the kind of side dish that steals the spotlight, whether you’re serving them alongside a weeknight roast chicken or bringing them to a potluck where they’ll disappear in minutes. Crispy on the outside, fluffy on the inside, and packed with savory flavor, they’re the kind of recipe you’ll turn to again and again.

I first discovered this recipe during a cozy family dinner when my aunt surprised us with a tray of these golden bites. The aroma alone had everyone hovering around the kitchen, forks at the ready. Since then, I’ve tweaked the method to ensure maximum crispiness (because no one wants soggy potatoes!) and added a few extra garlic cloves because, let’s be honest, there’s no such thing as too much garlic. Whether you’re a seasoned home cook or just starting out, this dish is foolproof and guaranteed to earn rave reviews.

Why You’ll Love These Buttery Garlic Parmesan Potatoes

If you need convincing (though I doubt you will after the first bite), here’s why this recipe is a keeper:

  • Minimal prep, maximum flavor: Just a few simple ingredients transform humble potatoes into something extraordinary.
  • Crispy perfection: The baking method ensures a golden crust without deep-frying.
  • Versatile: Pair them with garlic herb roasted chicken or enjoy them as a snack on their own.
  • Crowd-pleaser: Kids and adults alike will devour them—no leftovers here!

How to Make Buttery Garlic Parmesan Potatoes

Ingredients You’ll Need

  • 2 lbs baby potatoes, halved (or Yukon Golds, cubed)
  • 4 tbsp unsalted butter, melted
  • 4 garlic cloves, minced
  • ½ cup grated Parmesan cheese
  • 1 tsp salt
  • ½ tsp black pepper
  • 1 tbsp fresh parsley, chopped (optional, for garnish)

Step-by-Step Instructions

  1. Prep the potatoes: Wash and dry them thoroughly, then halve or cube for even cooking.
  2. Toss with butter and garlic: In a large bowl, mix melted butter, garlic, salt, and pepper. Add potatoes and coat evenly.
  3. Roast: Spread potatoes on a baking sheet and bake at 400°F for 30 minutes. Flip halfway.
  4. Add Parmesan: Sprinkle cheese over potatoes and bake another 5–10 minutes until crispy.
  5. Garnish and serve: Top with fresh parsley and enjoy hot!

Tips for the Best Garlic Parmesan Potatoes

For extra crispy potatoes, avoid overcrowding the pan—give them space to breathe! If you’re a cheese lover, try adding a mix of Parmesan and Pecorino Romano for extra depth. And if you’re short on time, pre-roasting the potatoes can speed things up.

Frequently Asked Questions

Can I use olive oil instead of butter?
Yes, but butter adds richness. For a lighter version, try half butter, half olive oil.

How do I store leftovers?
Keep them in an airtight container in the fridge for up to 3 days. Reheat in the oven to maintain crispiness.

Can I make these potatoes ahead of time?
Prep the potatoes and coat them in butter/garlic, then refrigerate until ready to bake. Add cheese just before roasting.

What’s the best potato for roasting?
Baby potatoes or Yukon Golds hold their shape well. Russets can work but may get softer.

Can I add other seasonings?
Absolutely! Try smoked paprika, rosemary, or a pinch of red pepper flakes for heat.

Are these gluten-free?
Yes, as long as your Parmesan is gluten-free (check the label).

There you have it—a side dish so good it might just become the main event. Whether you’re cooking for a busy weeknight or a special gathering, these Buttery Garlic Parmesan Potatoes deliver comfort, flavor, and that irresistible golden crunch. For more easy, crowd-pleasing recipes, check out my comfort food favorites or explore Serious Eats’ potato guide for more spud inspiration. Now, go forth and roast!


Print
clock clock iconcutlery cutlery iconflag flag iconfolder folder iconinstagram instagram iconpinterest pinterest iconfacebook facebook iconprint print iconsquares squares iconheart heart iconheart solid heart solid icon

Buttery Garlic Parmesan Potatoes


  • Author: Chef Emily Carter

Description

Crispy roasted potatoes tossed in a rich buttery garlic sauce and finished with freshly grated Parmesan cheese. A simple yet decadent side dish perfect for any meal.


Ingredients

Scale

For the Crust:

  • For the potatoes:
  • 2 lbs Yukon Gold potatoes, cubed
  • 2 tbsp olive oil
  • 1 tsp salt
  • 1/2 tsp black pepper
  • For the garlic butter sauce:
  • 1/2 cup unsalted butter, melted
  • 4 cloves garlic, minced
  • 1 tbsp fresh parsley, chopped
  • 1/2 tsp red pepper flakes (optional)
  • For finishing:
  • 1/2 cup freshly grated Parmesan cheese
  • Extra parsley for garnish

Instructions

1. Prepare the Crust:

  1. Preheat oven to 400°F (200°C). Line a baking sheet with parchment paper.
  2. In a large bowl, toss cubed potatoes with olive oil, salt, and pepper until evenly coated.
  3. Spread potatoes in a single layer on the prepared baking sheet. Roast for 35-40 minutes, flipping halfway, until golden and crispy.
  4. While potatoes roast, prepare the sauce: In a small saucepan over low heat, melt butter. Add minced garlic and cook for 1-2 minutes until fragrant. Stir in parsley and red pepper flakes (if using). Remove from heat.
  5. Transfer roasted potatoes to a large bowl. Pour garlic butter sauce over potatoes and toss gently to coat.
  6. Sprinkle with Parmesan cheese and toss again until cheese begins to melt.
  7. Garnish with additional parsley and serve immediately.

Notes

For extra crispiness, soak cubed potatoes in cold water for 30 minutes before roasting and pat completely dry. Leftovers can be refrigerated for 3 days – reheat in oven or air fryer to maintain texture.

Ranch Chicken Potato Foil Packets

Ranch Chicken Potato Foil Packets: A Flavorful One-Pan Wonder

Ever have one of those days where dinner feels like a chore instead of a joy? You’re not alone. Between work, errands, and the endless pile of laundry, the last thing you want is a complicated recipe with a sink full of dishes. That’s where these Ranch Chicken Potato Foil Packets come in—your new best friend for busy nights. Imagine tender chicken, crispy potatoes, and melty cheese all wrapped up in a neat little foil package, bursting with ranch flavor. No fuss, no mess, just pure deliciousness.

I first discovered foil packet meals during a camping trip years ago, and let me tell you—they’re a game-changer. Whether you’re grilling outdoors or baking in the oven, these packets lock in moisture and flavor while keeping cleanup a breeze. Plus, they’re endlessly customizable. Got picky eaters? Let everyone assemble their own packet with their favorite toppings. It’s like a DIY dinner party, minus the stress. And if you love easy, hands-off meals, you’ll adore my Garlic Butter Salmon Foil Packets too!

Why You’ll Love Ranch Chicken Potato Foil Packets

This recipe is a winner for so many reasons:

  • Quick & Easy: Ready in 30 minutes with minimal prep.
  • One-Pan Magic: No messy cleanup—just toss the foil when you’re done.
  • Family-Friendly: Even the pickiest eaters gobble this up.
  • Versatile: Swap veggies, adjust spices, or add bacon for extra yum.

How to Make Ranch Chicken Potato Foil Packets

Ingredients You’ll Need

  • 1 lb boneless, skinless chicken breasts, cubed
  • 1 lb baby potatoes, halved
  • 1 tbsp olive oil
  • 1 packet ranch seasoning (or homemade blend)
  • 1 cup shredded cheddar cheese
  • Salt & pepper to taste
  • Fresh parsley for garnish (optional)

Step-by-Step Instructions

  1. Prep: Preheat oven to 400°F (or fire up the grill). Cut four large sheets of heavy-duty foil.
  2. Toss: In a bowl, mix chicken, potatoes, olive oil, ranch seasoning, salt, and pepper.
  3. Assemble: Divide mixture evenly among foil sheets. Fold edges to seal, leaving room for steam.
  4. Cook: Bake for 25–30 minutes (or grill for 20 minutes), then open packets, sprinkle cheese, and broil for 2 minutes.
  5. Serve: Garnish with parsley and dig in!

Tips for the Best Foil Packets

Want to take your packets to the next level? Try these tricks:

  • Double-wrap: Prevent leaks by using two layers of foil.
  • Customize: Add bell peppers, onions, or a dash of hot sauce for extra kick.
  • Make Ahead: Assemble packets in the morning and refrigerate until dinnertime.

For more easy dinner ideas, check out my 5-Ingredient Dump Dinners—perfect for hectic nights!

FAQs About Ranch Chicken Potato Foil Packets

Can I use frozen chicken?

Yes, but thaw it first for even cooking. Frozen chicken may release excess moisture.

Can I make these packets ahead?

Absolutely! Assemble and refrigerate for up to 24 hours before cooking.

What’s the best potato type?

Baby potatoes or Yukon Golds work best—they hold their shape and cook evenly.

Can I cook these on a campfire?

Yes! Place packets on hot coals and cook for 20–25 minutes, flipping once.

How do I store leftovers?

Transfer to an airtight container and refrigerate for up to 3 days. Reheat in the oven for best texture.

Can I use homemade ranch seasoning?

Definitely! Try this homemade ranch mix from Allrecipes for a preservative-free option.

There you have it—a meal that’s as easy to make as it is to love. Whether you’re feeding a crowd or just craving comfort food without the hassle, these Ranch Chicken Potato Foil Packets deliver every time. Pair them with a crisp salad or crusty bread, and you’ve got a dinner that feels special without the stress. Now, who’s ready to ditch the dishes?

Print
clock clock iconcutlery cutlery iconflag flag iconfolder folder iconinstagram instagram iconpinterest pinterest iconfacebook facebook iconprint print iconsquares squares iconheart heart iconheart solid heart solid icon

Ranch Chicken Potato Foil Packets


  • Author: The Foil Packet Chef

Description

An easy one-packet meal with tender chicken, crispy potatoes, and creamy ranch flavors, perfect for camping or weeknight dinners. No dishes to clean!


Ingredients

Scale

For the Crust:

  • For the chicken and potatoes:
  • 1.5 lbs boneless, skinless chicken breasts (cut into 1-inch cubes)
  • 1.5 lbs baby potatoes (quartered)
  • 1 red bell pepper (diced)
  • 1 small red onion (sliced)
  • 2 tbsp olive oil
  • For the ranch seasoning:
  • 1 packet (1 oz) dry ranch seasoning mix
  • 1 tsp garlic powder
  • 1/2 tsp smoked paprika
  • 1/4 tsp black pepper
  • For garnish:
  • 1/4 cup chopped fresh parsley
  • 1/2 cup shredded cheddar cheese (optional)

Instructions

1. Prepare the Crust:

  1. 1. Preheat grill to medium-high (400°F) or oven to 425°F.
  2. 2. In a large bowl, combine chicken, potatoes, bell pepper, and onion.
  3. 3. Whisk together olive oil, ranch seasoning, garlic powder, paprika, and black pepper in a small bowl.
  4. 4. Pour seasoning mixture over chicken and vegetables, tossing to coat evenly.
  5. 5. Divide mixture evenly among 4 large sheets of heavy-duty aluminum foil (about 12×18 inches each).
  6. 6. Fold foil over mixture and crimp edges tightly to form sealed packets.
  7. 7. Grill for 25-30 minutes or bake for 30-35 minutes until chicken reaches 165°F and potatoes are tender.
  8. 8. Carefully open packets (watch for steam) and garnish with parsley and cheese if desired.

Notes

• For crispier potatoes, open packets during last 5 minutes of cooking. • Substitute sweet potatoes for a healthier twist. • Store leftovers in sealed packets for up to 3 days in refrigerator.

No-Bake Peanut Butter Cheesecake Bars


No-Bake Peanut Butter Cheesecake Bars: A Creamy Dreamy Treat

No-Bake Peanut Butter Cheesecake Bars: A Creamy Dreamy Treat

There’s something magical about the combination of peanut butter and cheesecake—it’s rich, indulgent, and downright comforting. But let’s be real: turning on the oven in the middle of summer (or after a long day) isn’t always appealing. That’s where these No-Bake Peanut Butter Cheesecake Bars come in! They’re creamy, dreamy, and require zero baking, making them the perfect dessert for busy weeknights, last-minute gatherings, or when you just need a little peanut butter therapy.

I first made these bars during a heatwave when the thought of baking made me sweat just thinking about it. With a toddler tugging at my leg and a kitchen that felt like a sauna, I needed something quick, cool, and guaranteed to satisfy my sweet tooth. These bars delivered—and then some. The best part? They’re so simple that even if you’re not a dessert person, you’ll feel like a pastry pro. Plus, they’re a hit with kids and adults alike (my husband may or may not have hidden a few in the back of the fridge).

Why You’ll Love These No-Bake Peanut Butter Cheesecake Bars

If you need more convincing (though the words “peanut butter” and “cheesecake” should do the trick), here’s why these bars are a must-make:

  • No oven required—perfect for hot days or tiny kitchens.
  • Ready in under 30 minutes (plus chilling time).
  • Only 7 simple ingredients—most are pantry staples!
  • Customizable: Swap the crust, drizzle with chocolate, or add a sprinkle of sea salt.

How to Make No-Bake Peanut Butter Cheesecake Bars

Ingredients You’ll Need

  • For the crust: Graham crackers, melted butter, and a pinch of sugar.
  • For the filling: Cream cheese, creamy peanut butter, powdered sugar, vanilla extract, and whipped cream.

Step-by-Step Instructions

  1. Make the crust: Crush graham crackers into fine crumbs, mix with melted butter and sugar, then press into a lined pan. Chill for 10 minutes.
  2. Whip the filling: Beat cream cheese and peanut butter until smooth, then add powdered sugar and vanilla. Fold in whipped cream for fluffiness.
  3. Layer and chill: Spread the filling over the crust, smooth the top, and refrigerate for at least 4 hours (or overnight).
  4. Slice and serve: Cut into bars, drizzle with extra peanut butter or chocolate, and enjoy!

Tips for the Best No-Bake Cheesecake Bars

  • Use full-fat cream cheese for the creamiest texture.
  • Let the bars chill overnight for clean slices.
  • For a chocolate twist, swap the graham crackers for Oreo crumbs.

If you love no-bake desserts, you’ll adore my No-Bake Chocolate Pie—it’s another crowd-pleaser that requires minimal effort!

Frequently Asked Questions

Can I use natural peanut butter?

Yes, but the texture may be looser. Stick with creamy, no-stir peanut butter for best results.

How long do these bars last?

Up to 5 days in the fridge or 1 month in the freezer (wrap tightly).

Can I make these gluten-free?

Absolutely! Use gluten-free graham crackers or almond flour for the crust.

Why is my filling too soft?

It may need more chilling time, or the whipped cream was overfolded. Check out Bon Appétit’s no-bake cheesecake guide for troubleshooting.

Can I use a different nut butter?

Sure! Almond or cashew butter work, but the flavor will vary.

What’s the best way to cut clean slices?

Dip a sharp knife in hot water, wipe dry, and slice gently. Repeat between cuts.

Whether you’re craving a quick dessert, need a potluck hero, or just want to treat yourself, these No-Bake Peanut Butter Cheesecake Bars are the answer. They’re proof that the best things in life don’t always require an oven—just a little patience (and maybe an extra spoonful of peanut butter). Looking for more easy sweets? Try my 3-Ingredient Peanut Butter Cookies next!


Print
clock clock iconcutlery cutlery iconflag flag iconfolder folder iconinstagram instagram iconpinterest pinterest iconfacebook facebook iconprint print iconsquares squares iconheart heart iconheart solid heart solid icon

No-Bake Peanut Butter Cheesecake Bars


  • Author: Dessert Delights

Description

Creamy, rich peanut butter cheesecake filling atop a crunchy graham cracker crust—no oven required! These bars are perfect for hot summer days or anytime you crave a fuss-free dessert.


Ingredients

Scale

For the Crust:

  • For the crust:
  • 1 1/2 cups graham cracker crumbs
  • 6 tablespoons unsalted butter, melted
  • 2 tablespoons granulated sugar
  • For the filling:
  • 16 oz cream cheese, softened
  • 1 cup creamy peanut butter
  • 1 cup powdered sugar
  • 1 teaspoon vanilla extract
  • 1 cup heavy cream, whipped to stiff peaks
  • For the topping:
  • 1/4 cup melted peanut butter (for drizzling)
  • 1/4 cup crushed peanuts (optional)

Instructions

1. Prepare the Crust:

  1. 1. Line an 8×8-inch baking dish with parchment paper, leaving overhang for easy removal.
  2. 2. Make the crust: In a bowl, mix graham cracker crumbs, melted butter, and sugar until combined. Press firmly into the prepared dish. Chill for 15 minutes.
  3. 3. Make the filling: Beat cream cheese, peanut butter, powdered sugar, and vanilla until smooth. Gently fold in whipped cream until no streaks remain.
  4. 4. Spread filling over the chilled crust. Smooth the top with a spatula.
  5. 5. Drizzle with melted peanut butter and sprinkle crushed peanuts (if using).
  6. 6. Chill for at least 4 hours (or overnight) until set. Lift out using parchment, slice, and serve.

Notes

For a firmer texture, freeze for 1 hour before slicing. Store leftovers covered in the fridge for up to 5 days.

Buttery Garlic Parmesan Potatoes

Buttery Garlic Parmesan Potatoes: The Ultimate Comfort Side Dish

There’s something magical about the combination of buttery potatoes, fragrant garlic, and nutty Parmesan cheese. Whether you’re serving them alongside a juicy roast chicken, a perfectly seared steak, or just enjoying them straight from the pan, these Buttery Garlic Parmesan Potatoes are a guaranteed crowd-pleaser. They’re crispy on the outside, tender on the inside, and packed with so much flavor, you’ll want to make them every night of the week.

I first discovered this recipe on a cozy Sunday evening when I needed a quick but impressive side dish for a last-minute dinner party. With just a handful of pantry staples—potatoes, butter, garlic, and Parmesan—I whipped up a batch that had everyone asking for seconds (and the recipe!). Now, it’s my go-to whenever I need a side that feels indulgent but comes together effortlessly. Trust me, once you try these potatoes, they’ll become a regular on your table too.

Why You’ll Love These Buttery Garlic Parmesan Potatoes

These potatoes are the perfect balance of simplicity and decadence. Here’s why they’re a must-try:

  • Easy to make: Just toss, bake, and enjoy—no fancy techniques required.
  • Versatile: Pair them with anything from grilled fish to a hearty casserole.
  • Crispy and tender: Golden edges with a fluffy interior—texture perfection!
  • Family-friendly: Even picky eaters can’t resist the cheesy, garlicky goodness.

How to Make Buttery Garlic Parmesan Potatoes

Ingredients You’ll Need

  • 2 lbs baby potatoes, halved (or Yukon Golds, diced)
  • 4 tbsp unsalted butter, melted
  • 4 garlic cloves, minced
  • ½ cup grated Parmesan cheese
  • 1 tsp dried thyme (or rosemary)
  • ½ tsp salt
  • ¼ tsp black pepper
  • 2 tbsp fresh parsley, chopped (for garnish)

Step-by-Step Instructions

  1. Prep the potatoes: Preheat your oven to 400°F (200°C). Wash and dry the potatoes, then halve them (or dice if using larger potatoes).
  2. Toss with goodness: In a large bowl, mix the melted butter, garlic, Parmesan, thyme, salt, and pepper. Add the potatoes and toss until evenly coated.
  3. Bake to perfection: Spread the potatoes on a baking sheet in a single layer. Roast for 30–35 minutes, flipping halfway, until golden and crispy.
  4. Garnish and serve: Sprinkle with fresh parsley and extra Parmesan if desired. Enjoy hot!

Tips for the Best Garlic Parmesan Potatoes

Want to take these potatoes to the next level? Try these pro tips:

  • Don’t overcrowd the pan: Give the potatoes space to crisp up—use two baking sheets if needed.
  • Fresh garlic is key: Skip the jarred stuff for the best flavor. If you love garlic, add an extra clove!
  • Cheese variations: Swap Parmesan for Pecorino Romano or Asiago for a twist.
  • Make it a meal: Toss in some chopped bacon or chicken for a one-pan dinner. Check out my One-Pan Chicken Dinner for more ideas!

Frequently Asked Questions

Can I use olive oil instead of butter?
Yes! Olive oil works well, but butter adds richness. For a lighter version, try half butter, half oil.

How do I store leftovers?
Keep them in an airtight container in the fridge for up to 3 days. Reheat in the oven or air fryer to restore crispiness.

Can I make these potatoes ahead?
Prep the potatoes and coat them in the butter mixture up to 4 hours before baking. Store covered in the fridge until ready to roast.

What’s the best potato for roasting?
Baby potatoes or Yukon Golds are ideal—they hold their shape and crisp up beautifully. Learn more about potato varieties for cooking.

Can I freeze these potatoes?
Freezing isn’t recommended—they’ll lose their crispy texture. Enjoy them fresh!

Are these gluten-free?
Yes! This recipe is naturally gluten-free. For more gluten-free sides, try my Gluten-Free Dinner Ideas.

There you have it—a side dish so delicious, it might just steal the spotlight from your main course. These Buttery Garlic Parmesan Potatoes are proof that the simplest ingredients can create something truly extraordinary. Whether it’s a weeknight dinner or a holiday feast, they’re sure to bring warmth and smiles to your table. Happy cooking!

Print
clock clock iconcutlery cutlery iconflag flag iconfolder folder iconinstagram instagram iconpinterest pinterest iconfacebook facebook iconprint print iconsquares squares iconheart heart iconheart solid heart solid icon

Buttery Garlic Parmesan Potatoes


  • Author: Chef Emily Carter

Description

Crispy on the outside, tender on the inside, these Buttery Garlic Parmesan Potatoes are roasted to perfection with a rich garlic butter sauce and topped with freshly grated Parmesan cheese for an irresistible side dish.


Ingredients

Scale

For the Crust:

  • For the potatoes:
  • 2 lbs baby potatoes, halved
  • 2 tbsp olive oil
  • 1 tsp salt
  • 1/2 tsp black pepper
  • For the garlic butter sauce:
  • 1/2 cup unsalted butter, melted
  • 4 cloves garlic, minced
  • 1 tbsp fresh parsley, chopped
  • 1 tsp dried thyme
  • For topping:
  • 1/2 cup Parmesan cheese, freshly grated
  • Extra parsley for garnish

Instructions

1. Prepare the Crust:

  1. Preheat oven to 400°F (200°C). Line a baking sheet with parchment paper.
  2. In a large bowl, toss halved potatoes with olive oil, salt, and pepper until evenly coated.
  3. Spread potatoes in a single layer on the prepared baking sheet. Roast for 30 minutes, flipping halfway through.
  4. While potatoes roast, prepare garlic butter sauce by combining melted butter, minced garlic, parsley, and thyme in a small bowl.
  5. After 30 minutes, remove potatoes from oven. Drizzle with garlic butter sauce and sprinkle Parmesan cheese evenly over the top.
  6. Return to oven for 10-15 more minutes until potatoes are golden and crispy, and cheese is melted.
  7. Garnish with additional fresh parsley before serving.

Notes

For extra crispiness, broil for the last 2-3 minutes. Substitute dried parsley if fresh isn’t available. Leftovers can be stored in an airtight container for up to 3 days.

Ranch Chicken Potato Foil Packets

Ranch Chicken Potato Foil Packets: A Flavorful One-Pan Wonder

Ever have one of those nights where you just want dinner to magically appear without the mountain of dishes afterward? Enter Ranch Chicken Potato Foil Packets—your new best friend for busy evenings, lazy weekends, or even camping trips. These little foil-wrapped bundles of joy are packed with tender chicken, crispy potatoes, and that irresistible ranch flavor we all love. Plus, cleanup is as easy as tossing the foil (or recycling it, because we’re responsible like that).

As a mom of two and a self-proclaimed “lazy gourmet,” I’m always on the hunt for meals that deliver big flavor with minimal effort. This recipe checks all the boxes: it’s customizable (swap veggies based on what’s in your fridge!), kid-friendly, and practically foolproof. Even better? You can prep these ahead and pop them in the oven when hunger strikes. Whether you’re feeding a crowd or just craving a cozy night in, these foil packets are a game-changer.

Why You’ll Love These Ranch Chicken Potato Foil Packets

  • One-pan (well, one-foil) magic: No messy dishes—just toss and go!
  • Versatile: Swap in sweet potatoes, broccoli, or even bell peppers.
  • Meal-prep friendly: Assemble ahead and bake when ready.
  • Crowd-pleaser: Even picky eaters devour the ranch flavor.

How to Make Ranch Chicken Potato Foil Packets

Ingredients You’ll Need

  • 1 lb boneless, skinless chicken breasts (cut into 1-inch cubes)
  • 4 medium russet potatoes (diced)
  • 1 packet ranch seasoning (or 2 tbsp homemade ranch mix)
  • 2 tbsp olive oil
  • 1 cup shredded cheddar cheese (optional but highly recommended)
  • Salt & pepper to taste

Step-by-Step Instructions

  1. Prep: Preheat oven to 400°F (or fire up the grill to medium-high). Toss chicken and potatoes with olive oil, ranch seasoning, salt, and pepper.
  2. Assemble: Divide mixture evenly among 4 large sheets of heavy-duty foil. Fold edges to create sealed packets.
  3. Cook: Bake for 25–30 minutes (or grill for 20–25 minutes) until chicken reaches 165°F and potatoes are tender.
  4. Serve: Carefully open packets (steam is hot!), sprinkle with cheese, and dig in!

Tips for Foil Packet Success

Want to avoid rookie mistakes? Here’s my hard-earned wisdom:

  • Double-wrap for grill masters: Prevent leaks by using two layers of foil on the grill.
  • Size matters: Cut potatoes small (½-inch dice) so they cook evenly with the chicken.
  • Spice it up: Add a dash of smoked paprika or cayenne for a kick.

Pro tip: If you love easy sheet-pan meals, you’ll adore my Honey Garlic Salmon—another 30-minute wonder!

Foil Packet Variations

Mix it up with these tasty twists:

  • Tex-Mex: Swap ranch for taco seasoning and add black beans.
  • Italian: Use Italian dressing mix and mozzarella cheese.
  • Veggie-loaded: Add zucchini, carrots, or mushrooms for extra nutrients.

Frequently Asked Questions

Can I make ranch chicken foil packets ahead of time?
Absolutely! Assemble packets and refrigerate for up to 24 hours before cooking.

Can I use frozen chicken?
For food safety, thaw chicken first to ensure even cooking. Here’s a handy FDA guide on chicken prep.

How do I know when the chicken is done?
Use a meat thermometer—165°F is the magic number!

Can I cook these on a campfire?
Yes! Place packets on hot coals (not flames) and cook for 20–25 minutes, flipping once.

What sides go well with foil packet meals?
Keep it simple with a crisp avocado salad or garlic bread.

Can I use aluminum foil alternatives?
Parchment paper works for baking, but avoid it on grills (it burns!). For eco-friendly options, check out Real Simple’s tips.

There you have it—a meal so easy, you’ll wonder why you didn’t try foil packets sooner. Whether it’s a hectic Tuesday or a laid-back Saturday, these Ranch Chicken Potato Foil Packets deliver comfort without the chaos. Now, go enjoy that extra time you saved (maybe with a glass of wine? You’ve earned it).

Print
clock clock iconcutlery cutlery iconflag flag iconfolder folder iconinstagram instagram iconpinterest pinterest iconfacebook facebook iconprint print iconsquares squares iconheart heart iconheart solid heart solid icon

Ranch Chicken Potato Foil Packets


  • Author: The Foil Packet Chef

Description

An easy and flavorful one-packet meal with tender chicken, crispy potatoes, and zesty ranch seasoning, perfect for grilling or baking.


Ingredients

Scale

For the Crust:

  • For the chicken and potatoes:
  • 1.5 lbs boneless, skinless chicken breasts, cut into 1-inch cubes
  • 1.5 lbs baby potatoes, quartered
  • 2 tbsp olive oil
  • For the ranch seasoning:
  • 1 packet (1 oz) dry ranch seasoning mix
  • 1 tsp garlic powder
  • 1 tsp onion powder
  • 1/2 tsp smoked paprika
  • For garnish:
  • 1/4 cup chopped fresh parsley
  • 1/4 cup shredded cheddar cheese (optional)

Instructions

1. Prepare the Crust:

  1. 1. Preheat grill to medium-high heat (or oven to 400°F).
  2. 2. In a large bowl, toss chicken and potatoes with olive oil.
  3. 3. In a small bowl, mix ranch seasoning with garlic powder, onion powder, and smoked paprika.
  4. 4. Sprinkle seasoning mixture over chicken and potatoes, tossing to coat evenly.
  5. 5. Divide mixture evenly among 4 large sheets of heavy-duty aluminum foil (about 12×18 inches each).
  6. 6. Fold foil over mixture and crimp edges tightly to form sealed packets.
  7. 7. Grill for 25-30 minutes or bake for 35-40 minutes until chicken reaches 165°F and potatoes are tender.
  8. 8. Carefully open packets (watch for steam) and garnish with parsley and cheese if desired.

Notes

For crispier potatoes, open packets during last 5 minutes of cooking. Can substitute sweet potatoes or add vegetables like bell peppers or zucchini.

No-Bake Peanut Butter Cheesecake Bars

No-Bake Peanut Butter Cheesecake Bars: A Creamy Dream Come True

There’s something magical about the combination of peanut butter and cheesecake—it’s rich, indulgent, and downright comforting. But let’s be honest: turning on the oven in the middle of summer (or after a long day) isn’t always appealing. That’s where these No-Bake Peanut Butter Cheesecake Bars come in. They’re luxuriously creamy, require zero baking, and come together in under 30 minutes. Plus, they’re a guaranteed crowd-pleaser, whether you’re hosting a backyard BBQ or just treating yourself to a well-deserved dessert.

I first stumbled upon this recipe during a heatwave when my sweet tooth refused to be ignored. With a pantry full of graham crackers, cream cheese, and a near-obsessive love for peanut butter, these bars became my saving grace. Now, they’re a staple in my dessert rotation—especially when I need a fuss-free treat that feels decadent. The best part? You can customize them with chocolate drizzle, crushed peanuts, or even a sprinkle of sea salt for that perfect sweet-salty balance. Trust me, one bite and you’ll be hooked!

Why You’ll Love These No-Bake Peanut Butter Cheesecake Bars

If you need convincing (though I doubt you will after the first bite), here’s why these bars are a must-make:

  • No oven required—perfect for hot days or lazy bakers.
  • Only 8 simple ingredients—most of which you probably have on hand.
  • Make-ahead friendly—they firm up beautifully in the fridge overnight.
  • Endlessly customizable—add chocolate, caramel, or even a dollop of whipped cream.

How to Make No-Bake Peanut Butter Cheesecake Bars

Ingredients You’ll Need

  • 1 ½ cups graham cracker crumbs
  • 6 tbsp melted butter
  • ¼ cup granulated sugar
  • 16 oz cream cheese, softened
  • 1 cup creamy peanut butter
  • 1 cup powdered sugar
  • 1 tsp vanilla extract
  • ½ cup heavy cream

Step-by-Step Instructions

  1. Make the crust: Mix graham cracker crumbs, melted butter, and sugar until combined. Press firmly into a lined 8×8 pan and chill for 10 minutes.
  2. Whip the filling: Beat cream cheese, peanut butter, powdered sugar, and vanilla until smooth. In a separate bowl, whip the heavy cream to stiff peaks, then fold it into the peanut butter mixture.
  3. Assemble: Spread the filling over the crust and smooth the top. Refrigerate for at least 4 hours (or overnight) before slicing.
  4. Serve: Drizzle with melted chocolate or sprinkle with crushed peanuts for extra flair!

Tips for the Best No-Bake Cheesecake Bars

Want to take these bars from great to unforgettable? Here are my pro tips:

  • Use room-temperature cream cheese to avoid lumps in your filling.
  • Chill the crust before adding the filling—it helps prevent crumbling.
  • Freeze for cleaner slices: Pop the bars in the freezer for 15 minutes before cutting.

For more no-bake dessert inspiration, check out my favorite no-bake desserts or this guide to choosing the best cream cheese.

Frequently Asked Questions

Can I use crunchy peanut butter instead? Absolutely! It adds a fun texture, but creamy PB gives a smoother finish.

How long do these bars last in the fridge? Up to 5 days if stored in an airtight container—if they last that long!

Can I make these gluten-free? Yes! Swap graham crackers for gluten-free cookies or almond flour.

What’s the best way to soften cream cheese quickly? Microwave it for 10-second intervals or place it in a sealed bag in warm water.

Can I freeze these cheesecake bars? Yes! Freeze for up to 2 months—thaw in the fridge before serving.

What’s a good substitute for heavy cream? Coconut cream works well for a dairy-free version.

Whether you’re a peanut butter fanatic or just someone who appreciates a dessert that doesn’t require sweating over a hot oven, these No-Bake Peanut Butter Cheesecake Bars are your new best friend. They’re the kind of treat that feels special enough for a party but easy enough for a Tuesday night. So grab that jar of peanut butter (you know you have one) and let’s make magic happen—no baking required!

Print
clock clock iconcutlery cutlery iconflag flag iconfolder folder iconinstagram instagram iconpinterest pinterest iconfacebook facebook iconprint print iconsquares squares iconheart heart iconheart solid heart solid icon

No-Bake Peanut Butter Cheesecake Bars


  • Author: Dessert Delights

Description

Creamy, rich peanut butter cheesecake bars with a crunchy graham cracker crust—no oven required! Perfect for summer or when you need a quick dessert fix.


Ingredients

Scale

For the Crust:

  • For the crust:
  • 1 1/2 cups graham cracker crumbs
  • 1/4 cup granulated sugar
  • 6 tablespoons unsalted butter, melted
  • For the filling:
  • 16 oz cream cheese, softened
  • 1 cup creamy peanut butter
  • 1 cup powdered sugar
  • 1 teaspoon vanilla extract
  • 1 cup heavy whipping cream, whipped to stiff peaks
  • For the topping:
  • 1/2 cup melted chocolate chips
  • 2 tablespoons chopped peanuts

Instructions

1. Prepare the Crust:

  1. 1. Line an 8×8-inch baking pan with parchment paper, leaving overhang for easy removal.
  2. 2. Make the crust: In a bowl, mix graham cracker crumbs, sugar, and melted butter until combined. Press firmly into the pan. Chill for 15 minutes.
  3. 3. Make the filling: Beat cream cheese, peanut butter, powdered sugar, and vanilla until smooth. Gently fold in whipped cream.
  4. 4. Spread filling over the crust and smooth the top. Refrigerate for at least 4 hours (or overnight).
  5. 5. Drizzle with melted chocolate and sprinkle chopped peanuts before slicing into bars.

Notes

For a firmer texture, freeze for 1 hour before serving. Substitute almond butter for a nut-free version.

Buttery Garlic Parmesan Potatoes

Buttery Garlic Parmesan Potatoes: The Ultimate Comfort Side Dish

There’s something magical about potatoes—especially when they’re crispy on the outside, tender on the inside, and dripping with buttery garlic parmesan goodness. Whether you’re serving them alongside a juicy roast chicken or just craving a cozy weeknight side, these Buttery Garlic Parmesan Potatoes never disappoint. They’re the kind of dish that makes everyone at the table sneak seconds (and thirds) when they think no one’s looking.

I first made these potatoes on a hectic Tuesday when my pantry was nearly bare, but I had a bag of russets begging to be used. With just a handful of pantry staples—garlic, butter, and that trusty wedge of parmesan—I transformed humble spuds into something unforgettable. Now, they’re a family favorite, requested at everything from Sunday dinners to potlucks. The best part? They’re deceptively simple to make, but taste like you spent hours in the kitchen.

Why You’ll Love These Buttery Garlic Parmesan Potatoes

If you need convincing (though one bite will do the trick), here’s why this recipe deserves a permanent spot in your rotation:

  • Golden perfection: Crispy edges with fluffy centers—the ideal texture.
  • 5-star flavor, 10-minute prep: Just toss, bake, and devour.
  • Versatile: Pair with garlic herb salmon or steak, or enjoy solo!
  • Crowd-pleaser: Kids and adults alike go wild for these.

How to Make Buttery Garlic Parmesan Potatoes

Ingredients You’ll Need

  • 2 lbs russet or Yukon Gold potatoes, cubed
  • 4 tbsp melted butter (or olive oil for a lighter option)
  • 4 garlic cloves, minced
  • ½ cup grated parmesan cheese
  • 1 tsp salt + ½ tsp black pepper
  • 1 tbsp fresh parsley, chopped (optional but pretty!)

Step-by-Step Instructions

  1. Prep the potatoes: Scrub and cube them (no need to peel—extra fiber!). Soak in cold water for 10 minutes to remove starch, then pat dry.
  2. Toss with flavor: In a bowl, mix potatoes with melted butter, garlic, parmesan, salt, and pepper until evenly coated.
  3. Bake to crispy bliss: Spread on a parchment-lined baking sheet. Bake at 400°F for 35–40 minutes, flipping halfway, until golden.
  4. Garnish and serve: Sprinkle with fresh parsley and extra parmesan if desired. Watch them disappear!

Pro Tips for the Best Potatoes

Want to level up? Here are my secrets:

  • Dry = crispy: After soaking, dry potatoes thoroughly with a kitchen towel.
  • Cheese hack: Add half the parmesan before baking and the rest after for extra gooeyness.
  • Garlic love: For deeper flavor, roast whole garlic cloves with the potatoes, then mash and toss in after baking.

Frequently Asked Questions

Can I use pre-shredded parmesan?
Freshly grated melts better, but pre-shredded works in a pinch—just avoid the shelf-stable kind.

How do I store leftovers?
Keep in an airtight container for up to 3 days. Reheat in the oven or air fryer to revive crispiness.

Can I make these dairy-free?
Absolutely! Swap butter for olive oil and use a plant-based parmesan like this vegan parmesan.

Why soak the potatoes?
Soaking removes excess starch, preventing gummy potatoes and promoting crispiness.

Can I add other seasonings?
Try smoked paprika, rosemary, or a pinch of red pepper flakes for heat.

What’s the best potato type?
Russets get crispier, but Yukon Golds are creamier. For more potato tips, check out my potato guide.

There you have it—a side dish so good, it might just steal the spotlight. Whether you’re cooking for a busy weeknight or a holiday spread, these Buttery Garlic Parmesan Potatoes deliver comfort in every bite. And if you’re anything like me, you’ll soon be making double batches… because leftovers (if they happen) are a beautiful thing.

Print
clock clock iconcutlery cutlery iconflag flag iconfolder folder iconinstagram instagram iconpinterest pinterest iconfacebook facebook iconprint print iconsquares squares iconheart heart iconheart solid heart solid icon

Buttery Garlic Parmesan Potatoes


  • Author: Chef Emily Carter

Description

Crispy roasted potatoes tossed in a rich buttery garlic sauce and finished with freshly grated Parmesan cheese. A simple yet irresistible side dish perfect for any meal.


Ingredients

Scale

For the Crust:

  • For the potatoes:
  • 2 lbs Yukon Gold potatoes, cut into 1-inch cubes
  • 2 tbsp olive oil
  • 1 tsp salt
  • 1/2 tsp black pepper
  • For the garlic butter sauce:
  • 1/2 cup unsalted butter, melted
  • 4 cloves garlic, minced
  • 1 tbsp fresh parsley, chopped
  • 1/2 tsp onion powder
  • For finishing:
  • 1/2 cup freshly grated Parmesan cheese
  • Extra parsley for garnish

Instructions

1. Prepare the Crust:

  1. Preheat oven to 400°F (200°C). Line a baking sheet with parchment paper.
  2. In a large bowl, toss potato cubes with olive oil, salt, and pepper until evenly coated.
  3. Spread potatoes in a single layer on the prepared baking sheet. Roast for 35-40 minutes, flipping halfway, until golden and crispy.
  4. While potatoes roast, prepare sauce: In a small saucepan over low heat, melt butter. Add minced garlic and cook for 1 minute until fragrant. Remove from heat and stir in parsley and onion powder.
  5. Transfer roasted potatoes to a large bowl. Pour garlic butter sauce over potatoes and toss gently to coat.
  6. Sprinkle with Parmesan cheese and toss again until cheese begins to melt from the residual heat.
  7. Garnish with additional parsley and serve immediately.

Notes

For extra crispiness, soak cut potatoes in cold water for 30 minutes before roasting and pat completely dry. Freshly grated Parmesan works best as pre-shredded cheese contains anti-caking agents that prevent proper melting.