Slow Cooker Homestyle Beef Tips

Slow Cooker Homestyle Beef Tips: The Ultimate Comfort Food

There’s something magical about walking into a kitchen that smells like slow-cooked beef tips—rich, savory, and downright comforting. Whether you’re juggling work, kids, or just life in general, this Slow Cooker Homestyle Beef Tips recipe is here to save your dinner routine. It’s the kind of meal that feels like a warm hug, with tender chunks of beef swimming in a velvety gravy that pairs perfectly with mashed potatoes, rice, or buttered noodles.

I first discovered this recipe on a chaotic weeknight when my grocery plans fell apart (we’ve all been there). With a package of stew meat and a slow cooker, I threw together what I had—onions, garlic, beef broth—and let time work its magic. The result? A dish so good, my kids asked for seconds, and my husband declared it a keeper. Now, it’s a staple in our rotation, especially during busy seasons when simplicity is key.

Why You’ll Love These Slow Cooker Beef Tips

This recipe is a game-changer for so many reasons:

  • Effortless Prep: Just 10 minutes of hands-on time, and your slow cooker does the rest.
  • Budget-Friendly: Stew meat is affordable and transforms into something luxurious.
  • Freezer-Friendly: Make a double batch and freeze half for future busy nights.
  • Crowd-Pleasing: Perfect for family dinners or potlucks—everyone asks for the recipe!

How to Make Slow Cooker Homestyle Beef Tips

Ingredients You’ll Need

  • 2 lbs beef stew meat
  • 1 onion, diced
  • 3 cloves garlic, minced
  • 2 cups beef broth
  • 2 tbsp Worcestershire sauce
  • 1 tsp thyme
  • Salt and pepper to taste
  • 2 tbsp cornstarch (for thickening)

Step-by-Step Instructions

  1. Sear the Beef (Optional but Worth It): For extra flavor, brown the beef in a skillet over medium-high heat before adding it to the slow cooker.
  2. Layer Ingredients: Place the beef, onion, garlic, broth, Worcestershire sauce, thyme, salt, and pepper in the slow cooker.
  3. Cook Low and Slow: Cover and cook on LOW for 7–8 hours or HIGH for 4–5 hours, until the beef is fork-tender.
  4. Thicken the Gravy: Mix cornstarch with 2 tbsp cold water, stir into the slow cooker, and cook for another 15–20 minutes until the gravy thickens.

Tips for the Best Beef Tips

Here’s how to make this dish even more foolproof:

  • Don’t Skip the Sear: Browning the beef adds depth of flavor. If you’re short on time, it’s okay to skip, but it’s worth the extra step!
  • Low and Slow Wins: Cooking on LOW ensures the beef becomes melt-in-your-mouth tender.
  • Customize It: Add mushrooms, a splash of red wine, or a bay leaf for extra richness.

Pair this with my Creamy Garlic Mashed Potatoes for the ultimate comfort meal. Trust me, your family will thank you!

Frequently Asked Questions

Can I use a different cut of beef?

Yes! Chuck roast or sirloin work well too. Just cut them into 1-inch pieces.

Can I make this in an Instant Pot?

Absolutely! Cook on HIGH pressure for 25 minutes, then natural release for 10 minutes. Thicken the gravy as directed.

How do I store leftovers?

Store in an airtight container in the fridge for up to 3 days or freeze for up to 3 months.

What’s the best way to reheat?

Warm gently on the stovetop with a splash of broth to keep the gravy creamy.

Can I add vegetables?

Definitely! Carrots, potatoes, or mushrooms are great additions. Add them in the last 2 hours of cooking.

Is this recipe gluten-free?

Yes, if you use gluten-free Worcestershire sauce and cornstarch. Check labels to be sure!

There you have it—a hearty, no-fuss meal that’s as easy as it is delicious. Whether you’re feeding a hungry family or meal prepping for the week, these Slow Cooker Homestyle Beef Tips are sure to become a favorite. For more cozy recipes, try my Slow Cooker Chicken and Dumplings next. Happy cooking!

Print
clock clock iconcutlery cutlery iconflag flag iconfolder folder iconinstagram instagram iconpinterest pinterest iconfacebook facebook iconprint print iconsquares squares iconheart heart iconheart solid heart solid icon

Slow Cooker Homestyle Beef Tips


  • Author: Chef Sarah Johnson

Description

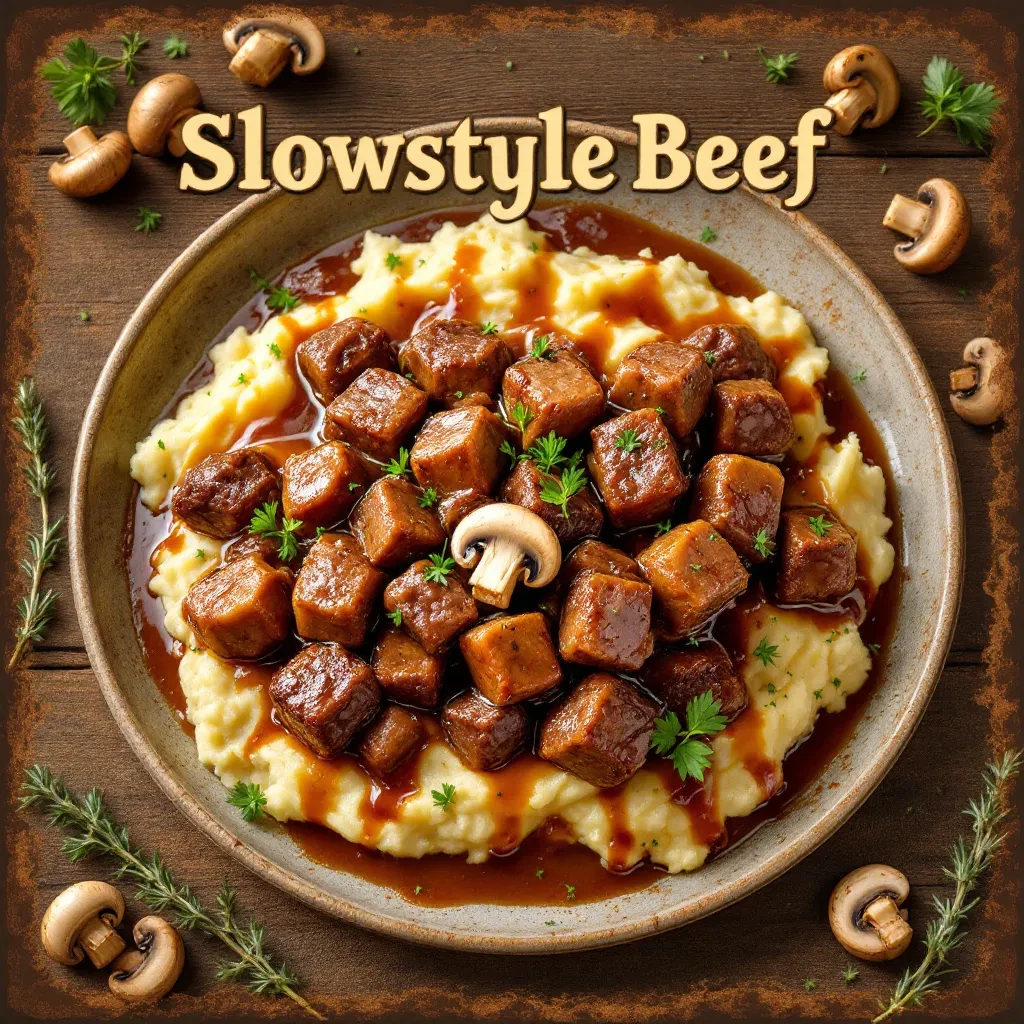
Tender beef tips slow-cooked in a rich, savory gravy with mushrooms and onions. Perfect served over mashed potatoes or egg noodles for a comforting meal.


Ingredients

Scale

For the Crust:

  • For the Beef Tips:
  • 2 lbs beef stew meat, cubed
  • 1 tsp salt
  • 1/2 tsp black pepper
  • 1 tsp garlic powder
  • 1 tsp onion powder
  • 1 tbsp Worcestershire sauce
  • For the Gravy:
  • 1 (10.5 oz) can cream of mushroom soup
  • 1 (1 oz) packet dry onion soup mix
  • 1 cup beef broth
  • 1 tbsp cornstarch
  • 2 tbsp water
  • For Vegetables:
  • 1 cup sliced mushrooms
  • 1 medium onion, diced
  • 2 cloves garlic, minced

Instructions

1. Prepare the Crust:

  1. 1. Season beef cubes with salt, pepper, garlic powder, and onion powder. Place in slow cooker.
  2. 2. In a bowl, whisk together cream of mushroom soup, dry onion soup mix, and beef broth. Pour over beef.
  3. 3. Add Worcestershire sauce, mushrooms, onion, and garlic to slow cooker. Stir gently to combine.
  4. 4. Cover and cook on LOW for 7-8 hours or HIGH for 4-5 hours until beef is tender.
  5. 5. In last 30 minutes, mix cornstarch with water to make a slurry. Stir into slow cooker to thicken gravy.
  6. 6. Serve hot over mashed potatoes, rice, or egg noodles.

Notes

For extra flavor, brown the beef in a skillet before adding to slow cooker. Leftovers keep well for 3-4 days refrigerated. Gravy will thicken more upon standing.

Ranch Chicken Potato Foil Packets

Ranch Chicken Potato Foil Packets: A Flavorful One-Pan Wonder

There’s something magical about a meal that comes together with minimal effort yet delivers maximum flavor. If you’re like me, juggling work, family, and the never-ending pile of laundry, you need recipes that are quick, delicious, and—bonus points—easy to clean up. That’s where these Ranch Chicken Potato Foil Packets come in. Imagine tender chicken, crispy potatoes, and a creamy ranch-infused sauce all cooked to perfection in a neat little foil pouch. No fuss, no mess, just pure comfort food.

Whether you’re firing up the grill for a summer BBQ, prepping a hassle-free camping meal, or just looking for a simple weeknight dinner, these foil packets are a game-changer. They’re customizable (hello, picky eaters!), packed with flavor, and ready in about 30 minutes. Plus, cleanup is as easy as tossing the foil—no sink full of dishes to dread. Trust me, once you try these, they’ll become a regular in your meal rotation, just like they did in mine after my third attempt to convince my kids that “yes, ranch makes everything better.”

Why You’ll Love Ranch Chicken Potato Foil Packets

If you need more convincing (though I doubt you will after the first bite), here’s why this recipe is a winner:

  • One-pan magic: No extra pots or pans to wash—just toss everything into foil and let the oven or grill do the work.
  • Customizable: Swap veggies, adjust the ranch flavor, or add cheese for extra indulgence.
  • Perfect for any occasion: Weeknight dinners, camping trips, or even meal prep—these packets are versatile.
  • Kid-approved: The ranch seasoning is a crowd-pleaser, even for the pickiest little eaters.

How to Make Ranch Chicken Potato Foil Packets

Ready to get cooking? Here’s everything you need to know to make these flavorful foil packets.

Ingredients You’ll Need

  • 1 lb boneless, skinless chicken breasts (cut into bite-sized pieces)
  • 1 lb baby potatoes (halved or quartered)
  • 1 bell pepper (sliced)
  • 1 small red onion (sliced)
  • 2 tbsp olive oil
  • 1 packet (1 oz) ranch seasoning mix
  • 1/2 tsp garlic powder
  • Salt & pepper to taste
  • Fresh parsley (optional, for garnish)

Step-by-Step Instructions

  1. Prep the ingredients: Chop the chicken, potatoes, bell pepper, and onion into even-sized pieces for even cooking.
  2. Season everything: In a large bowl, toss the chicken and veggies with olive oil, ranch seasoning, garlic powder, salt, and pepper.
  3. Assemble the foil packets: Divide the mixture evenly among 4 large sheets of heavy-duty foil. Fold the foil over and seal tightly to create a pouch.
  4. Cook: Grill over medium heat for 25–30 minutes or bake at 400°F for the same time, until chicken is cooked through and potatoes are tender.
  5. Serve: Carefully open the packets (steam will escape!), garnish with fresh parsley if desired, and enjoy!

Tips for the Best Foil Packets

  • Use heavy-duty foil: Regular foil can tear easily—opt for heavy-duty to avoid leaks.
  • Don’t overcrowd: Give the ingredients space to cook evenly.
  • Add cheese: Sprinkle shredded cheddar or mozzarella before sealing for extra gooey goodness.
  • Make ahead: Assemble packets in advance and refrigerate until ready to cook—perfect for meal prep!

Frequently Asked Questions

Can I use frozen vegetables in Ranch Chicken Potato Foil Packets?

Yes! Just thaw and pat them dry to avoid excess moisture. Fresh veggies work best for texture, but frozen is a great time-saver.

Can I make these packets ahead of time?

Absolutely! Assemble them up to 24 hours in advance and store in the fridge until ready to cook. Perfect for meal prep.

What’s the best way to cook foil packets—grill or oven?

Both work! Grilling adds a smoky flavor, while the oven is foolproof. Just adjust cooking time as needed.

Can I use chicken thighs instead of breasts?

Definitely! Thighs stay juicier and add extra flavor. Adjust cooking time slightly if needed.

How do I know when the chicken is fully cooked?

The chicken should reach an internal temperature of 165°F. Use a meat thermometer for accuracy.

What sides pair well with these foil packets?

Keep it simple with a crisp green salad or some crusty bread to soak up the ranch sauce.

There you have it—a meal that’s as easy to make as it is delicious. These Ranch Chicken Potato Foil Packets are proof that great flavor doesn’t have to come with a side of stress. Whether you’re feeding a hungry family, hosting a casual get-together, or just treating yourself to a no-fuss dinner, this recipe is sure to become a favorite. And hey, if anyone asks why dinner was so good tonight? Just smile and say, “It’s the ranch. Always the ranch.”

Print
clock clock iconcutlery cutlery iconflag flag iconfolder folder iconinstagram instagram iconpinterest pinterest iconfacebook facebook iconprint print iconsquares squares iconheart heart iconheart solid heart solid icon

Ranch Chicken Potato Foil Packets


  • Author: The Foil Packet Chef

Description

An easy one-packet meal with tender chicken, crispy potatoes, and creamy ranch flavors—perfect for grilling or baking with minimal cleanup.


Ingredients

Scale

For the Crust:

  • For the protein:
  • 1.5 lbs boneless, skinless chicken breasts (cut into 1-inch cubes)
  • For the vegetables:
  • 1.5 lbs baby potatoes (quartered)
  • 1 red bell pepper (diced)
  • 1 small red onion (sliced)
  • 2 cloves garlic (minced)
  • For the seasoning:
  • 1 packet (1 oz) ranch seasoning mix
  • 2 tbsp olive oil
  • 1 tsp smoked paprika
  • 1/2 tsp black pepper
  • 1/4 tsp salt
  • For garnish:
  • 2 tbsp fresh parsley (chopped)
  • 1/4 cup shredded cheddar cheese (optional)

Instructions

1. Prepare the Crust:

  1. 1. Preheat grill or oven to 400°F (200°C).
  2. 2. In a large bowl, combine chicken, potatoes, bell pepper, onion, and garlic.
  3. 3. Add olive oil, ranch seasoning, paprika, black pepper, and salt. Toss to coat evenly.
  4. 4. Divide mixture evenly among 4 large sheets of heavy-duty aluminum foil (about 12×18 inches each).
  5. 5. Fold foil over ingredients and seal edges tightly to form packets.
  6. 6. Grill or bake for 25-30 minutes until chicken reaches 165°F (74°C) and potatoes are tender.
  7. 7. Carefully open packets (steam will escape) and garnish with parsley and cheese if desired.

Notes

• For crispier potatoes, open packets during last 5 minutes of cooking. • Substitute Greek yogurt ranch seasoning for a healthier option. • Store leftovers in airtight containers for up to 3 days.

No-Bake Peanut Butter Cheesecake Bars

No-Bake Peanut Butter Cheesecake Bars: A Dreamy Dessert for Busy Days

There’s something magical about the combination of peanut butter and cheesecake—creamy, rich, and just sweet enough to satisfy your cravings without sending you into a sugar coma. And when you don’t have to turn on the oven? Even better. These No-Bake Peanut Butter Cheesecake Bars are the answer to your dessert prayers, especially when life gets hectic (which, let’s be honest, is most of the time).

I first made these bars during a week when my kids had back-to-back activities, my work deadlines were piling up, and the thought of baking anything felt like climbing Mount Everest. Enter: this no-bake wonder. With a buttery graham cracker crust and a silky peanut butter cheesecake filling, they’re decadent enough for a dinner party but simple enough for a Tuesday night treat. Plus, they’re gluten-free-friendly if you use gluten-free graham crackers—because everyone deserves a slice (or two) of happiness.

Why You’ll Love These No-Bake Peanut Butter Cheesecake Bars

If you’re still on the fence, here’s why these bars deserve a spot in your recipe rotation:

  • No oven required: Perfect for hot summer days or when you just don’t feel like baking.
  • Crowd-pleaser: Peanut butter lovers will swoon over these.
  • Make-ahead magic: They chill in the fridge, so you can prep them the night before.
  • Customizable: Swap in almond butter or Oreo crust for fun twists.

How to Make No-Bake Peanut Butter Cheesecake Bars

Ingredients You’ll Need

  • 1 ½ cups graham cracker crumbs (or gluten-free alternative)
  • 6 tbsp melted butter
  • ¼ cup granulated sugar
  • 16 oz cream cheese, softened
  • 1 cup creamy peanut butter
  • 1 cup powdered sugar
  • 1 tsp vanilla extract
  • 1 cup heavy whipping cream
  • ½ cup mini chocolate chips (optional, for topping)

Step-by-Step Instructions

  1. Make the crust: Mix graham cracker crumbs, melted butter, and sugar. Press into a lined 9×9-inch pan and chill for 15 minutes.
  2. Whip the filling: Beat cream cheese, peanut butter, powdered sugar, and vanilla until smooth. In another bowl, whip the heavy cream to stiff peaks, then fold it into the peanut butter mixture.
  3. Assemble: Spread the filling over the crust, sprinkle with chocolate chips, and refrigerate for at least 4 hours (or overnight).
  4. Slice and serve: Cut into bars and enjoy! Store leftovers in the fridge for up to 5 days.

Tips for the Best No-Bake Cheesecake Bars

Want to avoid common pitfalls? Here’s my advice:

  • Softened cream cheese is key: Cold cream cheese will leave lumps in your filling. Let it sit at room temp for 30 minutes first.
  • Don’t skip the chilling time: Patience pays off! These bars need time to set properly.
  • Drizzle with melted chocolate: For extra flair, melt chocolate chips with a splash of coconut oil and drizzle over the top.

If you love no-bake desserts, you’ll also adore my No-Bake Chocolate Haystacks—they’re another quick fix for sweet cravings!

Frequently Asked Questions

Can I use natural peanut butter?

Yes, but stick to the creamy, no-stir variety for the best texture. Natural peanut butter can sometimes separate and make the filling oily.

How long do these cheesecake bars last?

They’ll stay fresh in the fridge for up to 5 days—if they last that long!

Can I freeze no-bake peanut butter cheesecake bars?

Absolutely! Wrap them tightly and freeze for up to 2 months. Thaw in the fridge overnight before serving.

What can I use instead of graham crackers?

Try crushed Oreos, pretzels, or even digestive biscuits for a fun twist. Check out Food Network’s guide to graham cracker substitutes for more ideas.

Why is my filling too soft?

If your bars aren’t setting, you might have under-whipped the cream or not chilled them long enough. Pop them back in the fridge for another hour.

Can I make these dairy-free?

Yes! Use dairy-free cream cheese, coconut cream instead of heavy whipping cream, and vegan butter. For more dairy-free dessert inspo, try my Vegan Chocolate Avocado Mousse.

There you have it—a dessert that’s as easy to make as it is delicious. Whether you’re hosting friends, treating yourself after a long day, or just need a little peanut butter therapy, these No-Bake Peanut Butter Cheesecake Bars are here to save the day. Now, who’s ready to grab a fork?

Print
clock clock iconcutlery cutlery iconflag flag iconfolder folder iconinstagram instagram iconpinterest pinterest iconfacebook facebook iconprint print iconsquares squares iconheart heart iconheart solid heart solid icon

No-Bake Peanut Butter Cheesecake Bars


  • Author: Sweet Treats Kitchen

Description

Creamy peanut butter cheesecake filling atop a crunchy graham cracker crust, all without turning on your oven! These decadent bars are perfect for summer or anytime you crave a fuss-free dessert.


Ingredients

Scale

For the Crust:

  • For the crust:
  • 2 cups graham cracker crumbs
  • 1/2 cup unsalted butter, melted
  • 1/4 cup granulated sugar
  • For the filling:
  • 16 oz cream cheese, softened
  • 1 cup creamy peanut butter
  • 1 cup powdered sugar
  • 1 tsp vanilla extract
  • 1 cup heavy whipping cream
  • For topping:
  • 1/2 cup chocolate chips
  • 1/4 cup peanut butter
  • 1 tsp coconut oil

Instructions

1. Prepare the Crust:

  1. Line an 8×8 inch baking pan with parchment paper, leaving overhang for easy removal.
  2. Make crust: In a bowl, mix graham cracker crumbs, melted butter, and sugar until combined. Press firmly into the prepared pan. Chill 15 minutes.
  3. Make filling: Beat cream cheese and peanut butter until smooth. Add powdered sugar and vanilla, mixing well.
  4. In a separate bowl, whip heavy cream to stiff peaks. Gently fold into peanut butter mixture until no streaks remain.
  5. Spread filling over chilled crust. Smooth top with a spatula. Refrigerate 4 hours or overnight.
  6. Make topping: Melt chocolate chips, peanut butter, and coconut oil together in 30-second microwave intervals, stirring until smooth. Drizzle over chilled bars.
  7. Let topping set 10 minutes before slicing into squares. Store refrigerated.

Notes

For cleaner slices, dip knife in hot water before cutting. Substitute almond butter for peanut allergies. Bars keep for 5 days refrigerated.

Buttery Garlic Parmesan Potatoes

Buttery Garlic Parmesan Potatoes: The Ultimate Comfort Side Dish

There’s something magical about the combination of butter, garlic, and Parmesan—it’s like a culinary hug in every bite. These Buttery Garlic Parmesan Potatoes are my go-to side dish when I want something crispy, flavorful, and downright comforting. Whether you’re serving them alongside a juicy steak, roasted chicken, or just enjoying them straight from the pan (no judgment here!), they never disappoint.

I first discovered this recipe during a cozy family dinner when my aunt brought over a tray of golden, garlicky potatoes that disappeared within minutes. Since then, I’ve tweaked the method to ensure maximum crispiness and infused even more garlicky goodness into every forkful. The best part? They’re incredibly easy to make, requiring just a handful of pantry staples. If you’re looking for a side dish that feels indulgent but won’t keep you in the kitchen all night, these potatoes are your answer.

Why You’ll Love These Buttery Garlic Parmesan Potatoes

These potatoes are more than just a side—they’re a game-changer. Here’s why:

  • Perfectly crispy: Golden edges with a tender center.
  • Bursting with flavor: Garlic, butter, and Parmesan create a savory trio.
  • Versatile: Pair them with almost any main dish, from roast chicken to grilled salmon.
  • Easy prep: Just chop, toss, and bake—no fancy techniques required.

How to Make Buttery Garlic Parmesan Potatoes

Ingredients You’ll Need

  • 2 lbs baby potatoes, halved
  • 4 tbsp melted butter
  • 4 garlic cloves, minced
  • ½ cup grated Parmesan cheese
  • 1 tsp salt
  • ½ tsp black pepper
  • 1 tbsp fresh parsley, chopped (optional, for garnish)

Step-by-Step Instructions

  1. Preheat your oven to 400°F (200°C) and line a baking sheet with parchment paper.
  2. Toss the potatoes: In a large bowl, combine the halved potatoes, melted butter, minced garlic, salt, and pepper. Mix until evenly coated.
  3. Arrange and bake: Spread the potatoes in a single layer on the baking sheet. Roast for 30 minutes, flipping halfway, until golden and crispy.
  4. Add the Parmesan: Sprinkle the grated Parmesan over the potatoes and bake for another 5 minutes until melted and bubbly.
  5. Garnish and serve: Top with fresh parsley if desired, and enjoy hot!

Tips for the Best Garlic Parmesan Potatoes

Want to take these potatoes to the next level? Here are my pro tips:

  • Use baby potatoes: Their creamy texture and thin skins make them ideal for roasting.
  • Don’t skimp on the garlic: Fresh minced garlic delivers the best flavor, but you can also use roasted garlic for a mellower taste.
  • Flip for even crispiness: Turning the potatoes halfway ensures they brown evenly.
  • Try a cheesy twist: Add a sprinkle of mozzarella or Gruyère for extra gooeyness.

For more potato inspiration, check out my loaded potato skins recipe—another crowd-pleaser!

Pairing Suggestions

These potatoes are incredibly versatile. Here are a few of my favorite pairings:

  • Classic roast beef or pot roast (a hearty match!).
  • Grilled lemon-herb chicken for a lighter meal.
  • A simple green salad to balance the richness.

Frequently Asked Questions

Can I use regular potatoes instead of baby potatoes?
Yes! Just cut them into even 1-inch cubes for consistent roasting.

How do I store leftovers?
Keep them in an airtight container in the fridge for up to 3 days. Reheat in the oven for best texture.

Can I make these potatoes ahead of time?
You can prep the potatoes and coat them in butter/garlic up to a day in advance, then bake when ready.

What’s the best Parmesan to use?
Freshly grated Parmesan melts better than pre-shredded, which often contains anti-caking agents.

Are these potatoes gluten-free?
Yes! This recipe is naturally gluten-free.

Can I add other seasonings?
Absolutely! Try smoked paprika, rosemary, or a pinch of red pepper flakes for extra kick.

There you have it—a side dish so delicious, it might just steal the spotlight. These Buttery Garlic Parmesan Potatoes are proof that simple ingredients can create something extraordinary. Whether it’s a weeknight dinner or a holiday feast, they’re guaranteed to bring smiles (and empty plates!). If you’re craving more cozy recipes, don’t miss my creamy mashed potatoes for another comforting classic.

Print
clock clock iconcutlery cutlery iconflag flag iconfolder folder iconinstagram instagram iconpinterest pinterest iconfacebook facebook iconprint print iconsquares squares iconheart heart iconheart solid heart solid icon

Buttery Garlic Parmesan Potatoes


  • Author: Chef HomeCook

Description

Crispy roasted potatoes coated in a rich, buttery garlic parmesan sauce that melts in your mouth. Perfect as a side dish or even a snack!


Ingredients

Scale

For the Crust:

  • For Potatoes:
  • 2 lbs baby potatoes, halved
  • 2 tbsp olive oil
  • 1 tsp salt
  • 1/2 tsp black pepper
  • For Garlic Parmesan Sauce:
  • 1/2 cup unsalted butter, melted
  • 4 cloves garlic, minced
  • 1/2 cup grated parmesan cheese
  • 1 tsp dried parsley
  • 1/2 tsp paprika
  • 1/4 tsp red pepper flakes (optional)
  • For Garnish:
  • Fresh parsley, chopped
  • Extra parmesan cheese

Instructions

1. Prepare the Crust:

  1. Preheat oven to 400°F (200°C). Line a baking sheet with parchment paper.
  2. In a large bowl, toss halved potatoes with olive oil, salt, and black pepper until evenly coated.
  3. Spread potatoes in a single layer on the baking sheet. Roast for 30-35 minutes, flipping halfway, until golden and crispy.
  4. While potatoes roast, prepare the sauce: In a small saucepan, melt butter over low heat. Add minced garlic and sauté for 1 minute until fragrant.
  5. Remove from heat and stir in parmesan cheese, dried parsley, paprika, and red pepper flakes (if using). Mix until smooth.
  6. Once potatoes are done, transfer them to a large bowl. Pour the garlic parmesan sauce over them and toss gently to coat evenly.
  7. Garnish with fresh parsley and extra parmesan cheese before serving.

Notes

For extra crispiness, broil the potatoes for 2-3 minutes after roasting. Adjust garlic and red pepper flakes to taste.

Lemon Butter Garlic Shrimp and Grits

Lemon Butter Garlic Shrimp and Grits: A Zesty Southern Comfort Dish

There’s something magical about the way buttery shrimp, bright lemon, and creamy grits come together in one pan. It’s the kind of meal that feels indulgent but comes together in under 30 minutes—perfect for those nights when you’re craving comfort but don’t want to spend hours in the kitchen. Whether you’re a grits enthusiast or a skeptic (I was once one, too!), this Lemon Butter Garlic Shrimp and Grits recipe might just convert you. The tangy citrus cuts through the richness, while the garlic adds that irresistible savory depth we all love.

I first fell for this dish during a weekend trip to Charleston, where shrimp and grits are practically a religion. Back home, I tweaked the classic with a lemony twist to make it feel fresher and a tad lighter. Now, it’s my go-to when I need a meal that’s equal parts impressive and effortless. Serve it for brunch with a mimosa or as a cozy weeknight dinner—it’s versatile like that. Plus, it’s a fantastic way to use up that half-lemon lurking in your fridge (we’ve all been there).

Why You’ll Love This Lemon Butter Garlic Shrimp and Grits

This dish is a crowd-pleaser for so many reasons:

  • Quick & easy: Ready in 30 minutes flat—ideal for busy weeknights.
  • Bright & balanced: The lemon cuts through the richness for a perfect bite.
  • Meal prep-friendly: Grits reheat like a dream (hello, next-day leftovers!).
  • Customizable: Swap in your favorite herbs or add a pinch of red pepper flakes for heat.

How to Make Lemon Butter Garlic Shrimp and Grits

Ingredients You’ll Need

  • 1 lb large shrimp, peeled and deveined
  • 1 cup stone-ground grits
  • 4 cups chicken or vegetable broth
  • 3 tbsp butter, divided
  • 4 garlic cloves, minced
  • Zest and juice of 1 lemon
  • 1/4 cup grated Parmesan cheese
  • Salt, pepper, and fresh parsley to taste

Step-by-Step Instructions

  1. Cook the grits: Bring broth to a boil, then whisk in grits. Reduce heat and simmer for 20–25 minutes, stirring occasionally, until creamy. Stir in 2 tbsp butter and Parmesan.
  2. Sauté the shrimp: In a skillet, melt remaining butter over medium heat. Add garlic and cook for 30 seconds until fragrant. Add shrimp, lemon zest, and juice. Cook 2–3 minutes per side until pink.
  3. Serve: Spoon grits into bowls, top with shrimp, and garnish with parsley and extra lemon wedges.

Pro Tips

For the best results, use stone-ground grits—they have more texture and flavor than instant varieties. If your shrimp are frozen, thaw them overnight in the fridge or in a bowl of cold water for 15 minutes. And don’t skip the lemon zest! It packs a punch of flavor that elevates the whole dish. For more Southern-inspired recipes, try my Slow-Cooked Collard Greens or Flaky Buttermilk Biscuits.

Frequently Asked Questions

Can I use quick grits instead of stone-ground?

Yes, but adjust cooking time per package instructions. Stone-ground grits offer better texture, though!

How do I store leftovers?

Keep shrimp and grits separate in airtight containers for up to 2 days. Reheat grits with a splash of broth to revive creaminess.

What can I substitute for shrimp?

Try scallops or even crispy bacon for a vegetarian twist (skip the seafood broth).

Is this dish gluten-free?

Yes, if you use gluten-free broth. Always check labels to be safe!

Can I make it spicier?

Absolutely! Add a pinch of cayenne or red pepper flakes to the shrimp while cooking.

What wine pairs well with this?

A crisp Sauvignon Blanc or dry Rosé complements the lemon beautifully. Check out Wine Spectator’s picks for budget-friendly options.

There you have it—a dish that’s as comforting as it is vibrant. Whether you’re cooking for yourself or a table full of friends, this Lemon Butter Garlic Shrimp and Grits delivers every time. It’s the kind of recipe that feels special without demanding perfection, and honestly, isn’t that what we all need more of? If you’re craving more quick seafood dinners, my Garlic Butter Salmon is another weeknight hero worth bookmarking. Now, go forth and enjoy those creamy, zesty bites!

Print
clock clock iconcutlery cutlery iconflag flag iconfolder folder iconinstagram instagram iconpinterest pinterest iconfacebook facebook iconprint print iconsquares squares iconheart heart iconheart solid heart solid icon

Lemon Butter Garlic Shrimp and Grits


  • Author: Chef Emily Carter

Description

A Southern-inspired dish featuring succulent shrimp sautéed in a rich lemon butter garlic sauce, served over creamy, cheesy grits. Perfect for brunch or dinner!


Ingredients

Scale

For the Crust:

  • For the Shrimp:
  • 1 lb large shrimp, peeled and deveined
  • 3 cloves garlic, minced
  • 4 tbsp unsalted butter
  • 2 tbsp olive oil
  • 1/2 tsp red pepper flakes
  • 1/4 cup fresh lemon juice
  • 1/4 cup chicken broth
  • 2 tbsp fresh parsley, chopped
  • Salt and black pepper to taste
  • For the Grits:
  • 1 cup stone-ground grits
  • 4 cups water or chicken broth
  • 1/2 cup heavy cream
  • 1/2 cup sharp cheddar cheese, shredded
  • 2 tbsp unsalted butter
  • Salt to taste

Instructions

1. Prepare the Crust:

  1. 1. Prepare the grits: In a medium saucepan, bring water or chicken broth to a boil. Slowly whisk in the grits and reduce heat to low. Simmer, stirring occasionally, for 20-25 minutes until thickened.
  2. 2. Stir in heavy cream, cheddar cheese, and butter. Season with salt. Cover and keep warm.
  3. 3. Cook the shrimp: Heat olive oil and 2 tbsp butter in a large skillet over medium-high heat. Add shrimp and cook for 1-2 minutes per side until pink. Remove shrimp and set aside.
  4. 4. In the same skillet, melt remaining butter. Add garlic and red pepper flakes, sautéing for 30 seconds until fragrant.
  5. 5. Pour in lemon juice and chicken broth, scraping up any browned bits. Simmer for 2-3 minutes until slightly reduced.
  6. 6. Return shrimp to the skillet, tossing to coat in the sauce. Sprinkle with parsley and season with salt and black pepper.
  7. 7. Serve shrimp and sauce over warm grits. Garnish with extra parsley if desired.

Notes

For extra richness, substitute half the water with milk when cooking grits. Adjust red pepper flakes for desired spice level. Fresh lemon zest can be added for more citrus flavor.

Lemon Butter Garlic Shrimp and Grits

Lemon Butter Garlic Shrimp and Grits: A Zesty Southern Comfort Dish

There’s something magical about the combination of plump shrimp, creamy grits, and a bright lemon-butter sauce that feels like a warm hug on a busy weeknight. This Lemon Butter Garlic Shrimp and Grits recipe is my go-to when I crave something indulgent yet effortless—a dish that’s fancy enough for weekend brunch but simple enough for a Tuesday dinner scramble. (And let’s be honest, any meal that involves butter and garlic is a winner in my book.)

Growing up in the South, grits were a staple on our table, but it wasn’t until I tasted a version with shrimp at a tiny coastal café that I truly fell in love. The tangy lemon cuts through the richness of the butter, while the garlic adds just the right amount of punch. Whether you’re a grits skeptic or a die-hard fan, this recipe might just convert you—or at least make you lick the plate clean. Plus, it’s ready in under 30 minutes, making it a lifesaver when you’re juggling work, kids, or just a serious case of hangry-ness.

Why You’ll Love This Lemon Butter Garlic Shrimp and Grits

This dish is the ultimate comfort food with a gourmet twist. Here’s why it’s a keeper:

  • Quick & easy: Ready in 30 minutes flat—perfect for busy weeknights.
  • Bursting with flavor: Zesty lemon, rich butter, and savory garlic create a symphony of taste.
  • Versatile: Serve it for breakfast, brunch, or dinner (no judgment here).
  • Crowd-pleaser: Impress guests or treat yourself to a restaurant-quality meal at home.

How to Make Lemon Butter Garlic Shrimp and Grits

Ingredients You’ll Need

  • 1 lb large shrimp, peeled and deveined
  • 1 cup stone-ground grits
  • 4 cups chicken or vegetable broth
  • 4 tbsp unsalted butter
  • 3 cloves garlic, minced
  • 1 lemon (zest + juice)
  • 1/2 cup grated Parmesan cheese
  • Salt, pepper, and red pepper flakes to taste
  • Fresh parsley for garnish

Step-by-Step Instructions

  1. Cook the grits: Bring broth to a boil, then whisk in grits. Reduce heat and simmer for 20–25 minutes, stirring occasionally, until creamy. Stir in Parmesan and 2 tbsp butter.
  2. Sauté the shrimp: In a skillet, melt remaining butter over medium heat. Add garlic and sauté for 30 seconds until fragrant. Add shrimp, lemon zest, and juice. Cook 2–3 minutes per side until pink.
  3. Combine & serve: Spoon grits into bowls, top with shrimp and sauce, and garnish with parsley and a pinch of red pepper flakes.

Tips for the Best Shrimp and Grits

Want to take this dish to the next level? Here are my pro tips:

  • Use stone-ground grits for the creamiest texture (instant grits just don’t compare!).
  • Don’t overcook the shrimp—they’re done when they curl into a “C” shape.
  • Swap in smoked Gouda for Parmesan if you love a deeper, smoky flavor.
  • For a lighter twist, try my Healthy Grits Bowl recipe.

Pairing Suggestions

This dish pairs beautifully with a crisp green salad or roasted asparagus. For a true Southern feast, serve it alongside collard greens and a glass of chilled white wine. (I’m partial to a Sauvignon Blanc—its citrus notes complement the lemon perfectly.)

Frequently Asked Questions

Can I use frozen shrimp for Lemon Butter Garlic Shrimp and Grits?
Absolutely! Just thaw them overnight in the fridge or under cold running water before cooking.

What’s the best grits-to-liquid ratio?
I use a 1:4 ratio (1 cup grits to 4 cups liquid) for creamy results. Adjust slightly if you prefer thicker or looser grits.

Can I make this dish ahead of time?
The grits can sit covered for 20–30 minutes, but shrimp are best cooked fresh. Reheat grits with a splash of broth to loosen.

How do I store leftovers?
Store separately in airtight containers for up to 2 days. Reheat gently to avoid rubbery shrimp.

Is there a dairy-free version?
Yes! Use olive oil instead of butter and skip the cheese or use a dairy-free alternative like nutritional yeast.

Can I add other proteins?
Try crispy bacon or andouille sausage for a heartier twist—check out my Cajun Shrimp recipe for inspiration!

There you have it—a dish that’s as comforting as it is vibrant, with just the right balance of richness and zest. Whether you’re cooking for one or a whole table, this Lemon Butter Garlic Shrimp and Grits recipe is sure to become a regular in your rotation. Now, if you’ll excuse me, I have a date with a second helping… and possibly a nap.

Print
clock clock iconcutlery cutlery iconflag flag iconfolder folder iconinstagram instagram iconpinterest pinterest iconfacebook facebook iconprint print iconsquares squares iconheart heart iconheart solid heart solid icon

Lemon Butter Garlic Shrimp and Grits


  • Author: Chef Emily Carter

Description

A Southern-inspired dish featuring succulent shrimp sautéed in a rich lemon butter garlic sauce, served over creamy, cheesy grits. Perfect for brunch or dinner!


Ingredients

Scale

For the Crust:

  • For the Shrimp:
  • 1 lb large shrimp, peeled and deveined
  • 3 cloves garlic, minced
  • 3 tbsp unsalted butter
  • 1 tbsp olive oil
  • 1/2 tsp red pepper flakes
  • 1 lemon, juiced and zested
  • 1/4 cup fresh parsley, chopped
  • Salt and black pepper to taste
  • For the Grits:
  • 1 cup stone-ground grits
  • 4 cups water or chicken broth
  • 1/2 cup heavy cream
  • 1/2 cup sharp cheddar cheese, shredded
  • 2 tbsp unsalted butter
  • Salt to taste

Instructions

1. Prepare the Crust:

  1. 1. Prepare the grits: In a medium saucepan, bring water or chicken broth to a boil. Slowly whisk in the grits and reduce heat to low. Simmer for 20-25 minutes, stirring occasionally, until thickened.
  2. 2. Finish the grits: Stir in heavy cream, cheddar cheese, and butter. Season with salt. Keep warm.
  3. 3. Cook the shrimp: Heat olive oil and 1 tbsp butter in a large skillet over medium-high heat. Add shrimp and cook for 1-2 minutes per side until pink. Remove and set aside.
  4. 4. Make the sauce: In the same skillet, melt remaining butter. Add garlic and red pepper flakes, sauté for 30 seconds until fragrant. Stir in lemon juice and zest.
  5. 5. Combine: Return shrimp to the skillet, toss in the sauce. Sprinkle with parsley and season with salt and pepper.
  6. 6. Serve: Spoon creamy grits into bowls and top with lemon butter garlic shrimp. Garnish with extra parsley if desired.

Notes

For extra richness, substitute half the water with milk when cooking grits. Adjust red pepper flakes for preferred spice level. Freshly squeezed lemon juice is highly recommended.

Sheet Pan Chicken Parmesan


Sheet Pan Chicken Parmesan: The Easy, Cheesy Weeknight Hero

Let’s be real—some nights, the thought of juggling multiple pans, a mountain of dishes, and a hangry family feels downright overwhelming. That’s where this Sheet Pan Chicken Parmesan swoops in like a culinary superhero. Imagine golden, crispy chicken cutlets smothered in marinara and melted mozzarella, all baked to perfection on a single pan. No flipping, no fuss, and (best of all) minimal cleanup. It’s the kind of meal that makes you feel like you’ve got your life together—even if the laundry pile suggests otherwise.

I first stumbled upon this method during one of those chaotic evenings when my toddler declared war on nap time and my patience was thinner than a slice of prosciutto. Desperate for a win, I tossed everything onto a sheet pan, crossed my fingers, and prayed for the best. The result? A dinner so delicious, my husband asked if I’d hired a secret chef. Spoiler: I hadn’t. The magic lies in the simplicity—a few pantry staples, one pan, and 30 minutes. Whether you’re a busy parent, a meal-prep enthusiast, or just someone who loves a good cheesy crunch, this recipe’s for you.

Why You’ll Love This Sheet Pan Chicken Parmesan

This dish isn’t just easy—it’s a game-changer. Here’s why:

  • One-pan wonder: Say goodbye to splattered stovetops and hello to easy cleanup.
  • Crispy without frying: Baking delivers that perfect crunch without the oil-splatter stress.
  • Family-friendly: Picky eaters? Swap the marinara for pesto or skip the cheese for dietary needs.
  • Meal-prep magic: Leftovers reheat beautifully for lunches (if they last that long).

How to Make Sheet Pan Chicken Parmesan

Ingredients You’ll Need

  • 4 boneless, skinless chicken breasts (or thighs for extra juiciness)
  • 1 cup Italian-seasoned breadcrumbs (or make your own)
  • 1/2 cup grated Parmesan cheese
  • 1 egg, beaten
  • 1 cup marinara sauce (try my 5-minute marinara for a shortcut)
  • 1 cup shredded mozzarella
  • 2 tbsp olive oil
  • Fresh basil for garnish (optional but pretty)

Step-by-Step Instructions

  1. Prep the chicken: Pound breasts to even thickness (about 1/2 inch) so they cook evenly. Pro tip: Use a rolling pin or skillet if you don’t have a meat mallet.
  2. Breadcrumb magic: Mix breadcrumbs and Parmesan in a shallow dish. Dip chicken in egg, then coat with crumbs, pressing gently to adhere.
  3. Bake: Arrange chicken on a greased sheet pan. Drizzle with olive oil and bake at 400°F for 15 minutes. Flip, top with marinara and mozzarella, and bake 10 more minutes until bubbly.
  4. Serve: Garnish with basil and extra Parmesan. Pair with roasted veggies or garlic butter spaghetti.

Recipe Tips & Tricks

Shortcut alert: Use store-bought breaded chicken cutlets to shave off 10 minutes. Just add sauce and cheese! For a gluten-free version, swap breadcrumbs for almond flour or crushed pork rinds. And if you love sheet pan meals, don’t miss my sizzling sheet pan fajitas.

Frequently Asked Questions

Can I use frozen chicken? Yes! Thaw completely and pat dry to avoid soggy breading.

How do I store leftovers? Keep in an airtight container for up to 3 days. Reheat in the oven to maintain crispiness.

What’s the best cheese for chicken Parmesan? Fresh mozzarella melts beautifully, but pre-shredded works in a pinch.

Can I make this dairy-free? Skip the Parmesan or use nutritional yeast, and swap mozzarella for vegan cheese.

Why is my breading falling off? Ensure chicken is dry before breading, and press crumbs firmly. Chilling for 10 minutes pre-baking helps too.

Can I add veggies to the sheet pan? Absolutely! Toss zucchini or bell peppers around the chicken for a complete meal.

There you have it—a Sheet Pan Chicken Parmesan that’s as forgiving as it is flavorful. It’s the kind of recipe that proves weeknight dinners don’t have to be complicated to feel special. So next time chaos reigns (or you just don’t feel like washing five pans), let your sheet pan do the heavy lifting. After all, more time savoring cheesy goodness = less time scrubbing. That’s what I call a win.


Print
clock clock iconcutlery cutlery iconflag flag iconfolder folder iconinstagram instagram iconpinterest pinterest iconfacebook facebook iconprint print iconsquares squares iconheart heart iconheart solid heart solid icon

Sheet Pan Chicken Parmesan


  • Author: Chef Maria

Description

A quick and easy weeknight dinner that combines crispy breaded chicken with melted cheese and tangy marinara sauce, all baked together on a single sheet pan for minimal cleanup.


Ingredients

Scale

For the Crust:

  • For the chicken:
  • 4 boneless, skinless chicken breasts
  • 1 cup all-purpose flour
  • 2 large eggs, beaten
  • 1 cup Italian-style breadcrumbs
  • 1/2 cup grated Parmesan cheese
  • 1 teaspoon garlic powder
  • 1 teaspoon dried oregano
  • 1/2 teaspoon salt
  • 1/2 teaspoon black pepper
  • For the toppings:
  • 1 1/2 cups marinara sauce
  • 1 1/2 cups shredded mozzarella cheese
  • 1/4 cup grated Parmesan cheese
  • 1 tablespoon chopped fresh basil
  • For serving:
  • Cooked pasta or crusty bread
  • Extra marinara sauce (optional)

Instructions

1. Prepare the Crust:

  1. 1. Preheat oven to 400°F (200°C). Line a large sheet pan with parchment paper or foil.
  2. 2. Set up three shallow bowls: one with flour, one with beaten eggs, and one with breadcrumbs mixed with 1/2 cup Parmesan, garlic powder, oregano, salt, and pepper.
  3. 3. Dredge each chicken breast in flour, shaking off excess. Dip in egg, then coat with breadcrumb mixture, pressing to adhere.
  4. 4. Arrange chicken on prepared sheet pan. Bake for 20 minutes.
  5. 5. Remove pan from oven. Spoon 2-3 tablespoons marinara over each piece, then top with mozzarella and remaining Parmesan.
  6. 6. Return to oven and bake 5-7 more minutes until cheese is melted and bubbly.
  7. 7. Broil for 1-2 minutes for extra browning if desired.
  8. 8. Garnish with fresh basil and serve with pasta or bread.

Notes

For crispier chicken, place a wire rack on the sheet pan before adding breaded chicken. Leftovers keep well refrigerated for 3 days. Reheat in oven to maintain crispiness.

One-Pan Lemon Garlic Roasted Chicken

One-Pan Lemon Garlic Roasted Chicken: A Flavorful Weeknight Wonder

There’s something magical about a meal that comes together effortlessly yet tastes like you spent hours in the kitchen. This One-Pan Lemon Garlic Roasted Chicken is exactly that—a golden, juicy, flavor-packed dish with minimal cleanup. Whether you’re juggling work, kids, or just life’s endless to-do list, this recipe is your ticket to a stress-free dinner that feels special. Plus, who can resist the aroma of garlic and lemon wafting through the house? It’s practically a hug in food form.

I first stumbled upon this recipe during one of those chaotic evenings when takeout menus were calling my name. But instead of dialing for delivery, I threw together what I had—chicken thighs, a few lemons, and plenty of garlic—and let the oven do the work. The result? A dish so good it’s now in my regular rotation. The tangy lemon balances the richness of the chicken, while the garlic infuses every bite with warmth. And since it all cooks on one pan, you’ll have more time to relax (or tackle that laundry pile—no judgment here).

Why You’ll Love This One-Pan Lemon Garlic Roasted Chicken

This recipe is a winner for so many reasons. Here’s why it’ll become a staple in your kitchen:

  • Minimal cleanup: One pan means less time scrubbing dishes.
  • Bold flavors: Lemon and garlic create a bright, savory combo.
  • Versatile: Pair it with roasted veggies, rice, or a simple salad.
  • Perfect for leftovers: Toss the chicken into salads or wraps the next day.

How to Make One-Pan Lemon Garlic Roasted Chicken

Ingredients You’ll Need

  • 4 bone-in, skin-on chicken thighs
  • 2 lemons (sliced)
  • 6 garlic cloves (minced)
  • 2 tbsp olive oil
  • 1 tsp dried oregano
  • Salt and pepper to taste
  • Fresh parsley (for garnish)

Step-by-Step Instructions

  1. Prep the chicken: Pat the chicken dry and season generously with salt, pepper, and oregano.
  2. Layer the pan: Arrange lemon slices on a sheet pan and place the chicken on top.
  3. Add garlic: Drizzle with olive oil and sprinkle minced garlic over the chicken.
  4. Roast: Bake at 400°F for 35–40 minutes until the skin is crispy and the chicken reaches 165°F internally.
  5. Garnish and serve: Sprinkle with fresh parsley and enjoy!

Recipe Tips & Tricks

For the crispiest skin, pat the chicken dry before seasoning. If you’re short on time, swap chicken thighs for breasts—just reduce the cooking time by 5–7 minutes. Want extra veggies? Toss in some asparagus or baby potatoes for a complete meal. And if you love this method, try my One-Pan Honey Mustard Chicken next!

Fun fact: My kids call this sunshine chicken because of the lemony brightness. If that’s not a win, I don’t know what is.

Pairing Suggestions

This dish pairs beautifully with a simple herb-roasted potatoes or a crisp arugula salad. For wine lovers, a chilled Sauvignon Blanc complements the citrus notes perfectly. Need more one-pan inspiration? Check out Food Network’s guide to sheet-pan dinners.

Frequently Asked Questions

Can I use boneless chicken for this recipe?
Yes! Boneless thighs or breasts work, but reduce the cooking time by 5–10 minutes to avoid drying out.

How do I store leftovers?
Store in an airtight container in the fridge for up to 3 days. Reheat in the oven for best texture.

Can I add other vegetables?
Absolutely! Broccoli, carrots, or zucchini roast well alongside the chicken.

Is this recipe gluten-free?
Yes, this dish is naturally gluten-free. Just check any added seasonings for hidden gluten.

Can I make this dairy-free?
It’s already dairy-free! The richness comes from the chicken skin and olive oil.

What’s the best way to zest a lemon?
Use a fine grater or microplane, avoiding the bitter white pith. Here’s a handy guide from Simply Recipes.

There you have it—a dish that’s as easy to make as it is delicious. Whether you’re cooking for a crowd or just treating yourself, this One-Pan Lemon Garlic Roasted Chicken is sure to impress. And the best part? More time to savor the meal (and maybe even sneak in a little relaxation). Happy cooking!

Print
clock clock iconcutlery cutlery iconflag flag iconfolder folder iconinstagram instagram iconpinterest pinterest iconfacebook facebook iconprint print iconsquares squares iconheart heart iconheart solid heart solid icon

One-Pan Lemon Garlic Roasted Chicken


  • Author: Chef Maria

Description

A simple yet flavorful one-pan roasted chicken dish with bright lemon, aromatic garlic, and fresh herbs. Perfect for weeknight dinners with minimal cleanup!


Ingredients

Scale

For the Crust:

  • For the chicken:
  • 4 bone-in, skin-on chicken thighs
  • 2 bone-in, skin-on chicken drumsticks
  • 1 tsp salt
  • 1/2 tsp black pepper
  • 1 tbsp olive oil
  • For the vegetables:
  • 1 lb baby potatoes, halved
  • 1 large lemon, sliced
  • 1 head garlic, cloves separated (peeled or unpeeled)
  • 1 red onion, cut into wedges
  • 1 tbsp fresh rosemary, chopped
  • 1 tbsp fresh thyme leaves
  • For the sauce:
  • 3 tbsp melted butter
  • 2 tbsp lemon juice
  • 1 tsp garlic powder
  • 1/2 tsp red pepper flakes (optional)

Instructions

1. Prepare the Crust:

  1. Preheat oven to 425°F (220°C).
  2. Pat chicken dry and season with salt and pepper on both sides.
  3. In a large bowl, toss potatoes, lemon slices, garlic cloves, and red onion with olive oil, rosemary, and thyme.
  4. Spread vegetable mixture evenly on a large rimmed baking sheet.
  5. Arrange chicken pieces skin-side up on top of vegetables.
  6. In a small bowl, whisk together melted butter, lemon juice, garlic powder, and red pepper flakes.
  7. Brush half of the butter mixture over the chicken.
  8. Roast for 35 minutes, then brush with remaining butter mixture.
  9. Continue roasting for another 15-20 minutes until chicken reaches 165°F (74°C) internally and skin is crispy.
  10. Let rest for 5 minutes before serving.

Notes

For crispier skin, broil for the last 2-3 minutes. Leftovers keep well refrigerated for 3 days. Substitute dried herbs if fresh aren’t available (use 1/3 the amount).

Teriyaki Beef and Veggie Skewers

Teriyaki Beef and Veggie Skewers: A Flavor-Packed Weeknight Favorite

There’s something magical about food on a stick—maybe it’s the nostalgia of summer cookouts or the fun of dipping and savoring each bite. These Teriyaki Beef and Veggie Skewers are no exception. Tender strips of beef, caramelized bell peppers, and sweet onions soak up a glossy, homemade teriyaki glaze that’s equal parts tangy and sweet. Whether you’re firing up the grill or using your oven’s broiler, this recipe is a guaranteed crowd-pleaser.

I first fell in love with skewers during a family trip to Hawaii, where street vendors served them with pineapple chunks and an extra drizzle of sauce. Back home, I tweaked the recipe to make it weeknight-friendly without sacrificing flavor. The best part? You can prep the marinade ahead (or even use my easy meal-prep tricks), so dinner comes together in minutes. Plus, it’s a sneaky way to get my kids to eat more veggies—because everything tastes better on a skewer, right?

Why You’ll Love These Teriyaki Beef Skewers

Here’s why this recipe earns a permanent spot in my rotation:

  • Customizable: Swap in zucchini, mushrooms, or pineapple for the veggies.
  • Quick-cooking: Ready in under 30 minutes, marinade included.
  • Meal-prep friendly: Assemble skewers ahead and grill when needed.
  • Family-approved: Even picky eaters love the sweet-savory glaze.

How to Make Teriyaki Beef and Veggie Skewers

Ingredients You’ll Need

  • 1 lb flank steak or sirloin, thinly sliced
  • 2 bell peppers (any color), cut into chunks
  • 1 red onion, cut into wedges
  • ½ cup soy sauce (or tamari for gluten-free)
  • 3 tbsp honey or brown sugar
  • 2 cloves garlic, minced
  • 1 tbsp fresh ginger, grated
  • 1 tbsp rice vinegar
  • Wooden or metal skewers (soak wooden ones for 30 minutes)

Step-by-Step Instructions

  1. Marinate the beef: Whisk soy sauce, honey, garlic, ginger, and rice vinegar in a bowl. Reserve ¼ cup for basting, then toss the rest with the beef. Let sit for 15+ minutes.
  2. Skewer: Thread beef and veggies onto skewers, alternating pieces.
  3. Cook: Grill or broil for 3–4 minutes per side, brushing with reserved glaze.
  4. Serve: Garnish with sesame seeds and green onions. Pair with fluffy white rice or a crisp salad.

Pro Tips

Don’t overcrowd skewers—leave space for even cooking.
• For extra caramelization, broil on high for the last 2 minutes.
• Short on time? Use a quality store-bought teriyaki sauce (I won’t judge!).

FAQs About Teriyaki Beef Skewers

Can I use chicken instead of beef?

Absolutely! Chicken thighs work best for juiciness. Adjust cooking time to 5–6 minutes per side.

How do I prevent veggies from burning?

Cut them into larger chunks and soak skewers in water before grilling.

Can I bake these skewers?

Yes! Bake at 425°F for 12–15 minutes, flipping halfway. Broil at the end for char.

What’s the best cut of beef for skewers?

Flank steak or sirloin are ideal—they’re tender and quick-cooking.

How long can I marinate the beef?

Up to 24 hours for deeper flavor, but 15 minutes is the minimum.

Can I freeze assembled skewers?

Yes! Freeze before cooking, then thaw overnight in the fridge.

Whether it’s a busy Tuesday or a weekend barbecue, these Teriyaki Beef and Veggie Skewers deliver big flavor with minimal effort. The sticky-sweet glaze, the satisfying crunch of peppers, and the tender beef make every bite a little celebration. For more easy dinner wins, check out my 30-minute meal ideas—because life’s too short for complicated recipes. Now, who’s ready to fire up the grill?

Print
clock clock iconcutlery cutlery iconflag flag iconfolder folder iconinstagram instagram iconpinterest pinterest iconfacebook facebook iconprint print iconsquares squares iconheart heart iconheart solid heart solid icon

Teriyaki Beef and Veggie Skewers


  • Author: Chef Jamie Tanaka

Description

Juicy beef skewers marinated in homemade teriyaki sauce, grilled to perfection with colorful bell peppers and onions. A quick weeknight meal with restaurant-quality flavors.


Ingredients

Scale

For the Crust:

  • For the marinade:
  • 1/2 cup soy sauce
  • 1/4 cup brown sugar
  • 2 tablespoons honey
  • 2 cloves garlic, minced
  • 1 tablespoon fresh ginger, grated
  • 1 tablespoon rice vinegar
  • 1 teaspoon sesame oil
  • For the skewers:
  • 1.5 lbs flank steak, cut into 1-inch cubes
  • 1 red bell pepper, cut into chunks
  • 1 yellow bell pepper, cut into chunks
  • 1 large red onion, cut into chunks
  • 2 tablespoons vegetable oil
  • 1 teaspoon black pepper
  • For garnish:
  • 2 tablespoons sesame seeds
  • 2 green onions, thinly sliced

Instructions

1. Prepare the Crust:

  1. 1. Whisk together all marinade ingredients in a bowl until sugar dissolves.
  2. 2. Place beef cubes in a ziplock bag with 3/4 of the marinade. Reserve remaining marinade for basting. Marinate for at least 30 minutes (up to 4 hours).
  3. 3. Soak wooden skewers in water for 30 minutes to prevent burning.
  4. 4. Preheat grill or grill pan to medium-high heat (400°F).
  5. 5. Thread beef and vegetables alternately onto skewers, leaving small gaps between pieces.
  6. 6. Brush skewers with vegetable oil and sprinkle with black pepper.
  7. 7. Grill for 3-4 minutes per side (for medium-rare), basting with reserved marinade during last minute.
  8. 8. Remove when beef reaches 135°F internal temperature and vegetables are slightly charred.
  9. 9. Garnish with sesame seeds and green onions. Serve immediately over rice if desired.

Notes

For best results, don’t overcrowd skewers – leave space between pieces for even cooking. Can substitute chicken or tofu for beef. If using wooden skewers, wrap exposed ends in foil to prevent burning.

Grilled Herb-Crusted Pork Chops

Grilled Herb-Crusted Pork Chops: A Flavorful Summer Favorite

There’s something magical about the sizzle of pork chops hitting a hot grill—the aroma of smoky char mingling with fresh herbs is enough to make anyone’s mouth water. These Grilled Herb-Crusted Pork Chops are my go-to when I want a meal that feels fancy but comes together in under 30 minutes. Whether you’re hosting a backyard BBQ or just craving a hearty weeknight dinner, this recipe delivers juicy, tender chops with a crispy, herb-packed crust that’ll have everyone asking for seconds.

I first stumbled upon this recipe during a chaotic week when my fridge was nearly empty, save for a few pork chops and a sad-looking bunch of herbs. Desperation led to experimentation, and voilà—a new family favorite was born! The secret? A simple blend of rosemary, thyme, and garlic, plus a kiss of lemon zest to brighten everything up. Trust me, even if you’re not a grill master, these chops are forgiving and foolproof. (And if you’re like me and occasionally burn things, no judgment—we’ve all been there!)

Why You’ll Love These Grilled Herb-Crusted Pork Chops

These pork chops are more than just delicious—they’re versatile, quick, and packed with flavor. Here’s why they’ll become a staple in your kitchen:

  • Quick & Easy: Ready in under 30 minutes, perfect for busy weeknights.
  • Bursting with Fresh Herbs: Rosemary, thyme, and garlic create a fragrant crust.
  • Grill or Stovetop Friendly: No grill? No problem! A cast-iron skillet works too.
  • Family-Approved: Even picky eaters love the crispy, savory coating.

How to Make Grilled Herb-Crusted Pork Chops

Ingredients You’ll Need

  • 4 bone-in pork chops (about 1-inch thick)
  • 2 tbsp olive oil
  • 2 cloves garlic, minced
  • 1 tbsp fresh rosemary, finely chopped
  • 1 tbsp fresh thyme leaves
  • 1 tsp lemon zest
  • 1 tsp salt
  • ½ tsp black pepper

Step-by-Step Instructions

  1. Prep the Chops: Pat pork chops dry with paper towels to ensure a good sear.
  2. Make the Herb Crust: In a small bowl, mix olive oil, garlic, rosemary, thyme, lemon zest, salt, and pepper.
  3. Coat the Chops: Rub the herb mixture evenly over both sides of each chop.
  4. Grill to Perfection: Preheat grill to medium-high. Grill chops for 4–5 minutes per side, or until internal temperature reaches 145°F.
  5. Rest & Serve: Let chops rest for 5 minutes before slicing. Enjoy!

Tips for the Best Grilled Pork Chops

Want to take these chops to the next level? Here are my tried-and-true tips:

  • Don’t Skip the Rest: Letting the chops rest ensures juiciness—no dry pork here!
  • Fresh Herbs Matter: Dried herbs can work in a pinch, but fresh herbs make all the difference.
  • Watch the Heat: If your grill runs hot, reduce cooking time to avoid overcooking.

Pair these chops with a crisp summer salad or garlic mashed potatoes for a complete meal. And if you’re new to grilling, check out this grilling guide from Food Network for extra help!

Frequently Asked Questions

Can I use boneless pork chops?

Absolutely! Boneless chops work well—just reduce cooking time by 1–2 minutes per side.

What’s the best internal temperature for pork chops?

145°F is ideal for juicy, safe-to-eat pork. Use a meat thermometer for accuracy.

Can I make these ahead of time?

Yes! Prep the herb crust up to 24 hours in advance and store chops in the fridge until ready to grill.

What herbs can I substitute?

Sage, oregano, or parsley are great swaps—just keep the total amount similar.

How do I prevent sticking on the grill?

Oil the grates well and ensure they’re hot before adding the chops.

Can I bake these instead?

Yes! Bake at 400°F for 15–20 minutes, flipping halfway. For more baked pork recipes, try our baked pork tenderloin.

There you have it—a simple, flavorful recipe that’s sure to impress. Whether it’s a lazy Sunday or a last-minute dinner, these Grilled Herb-Crusted Pork Chops are a delicious way to bring a little joy to the table. Now, go fire up that grill and enjoy every juicy bite!

Print
clock clock iconcutlery cutlery iconflag flag iconfolder folder iconinstagram instagram iconpinterest pinterest iconfacebook facebook iconprint print iconsquares squares iconheart heart iconheart solid heart solid icon

Grilled Herb-Crusted Pork Chops


  • Author: Chef Jamie Wilson

Description

Juicy pork chops coated in a fragrant herb crust, grilled to perfection with a smoky char. This simple yet impressive dish pairs beautifully with roasted vegetables or a fresh salad.


Ingredients

Scale

For the Crust:

  • For the pork chops:
  • 4 bone-in pork chops (1-inch thick)
  • 2 tbsp olive oil
  • 1 tsp salt
  • 1 tsp black pepper
  • For the herb crust:
  • 3 tbsp fresh rosemary, finely chopped
  • 3 tbsp fresh thyme leaves
  • 2 tbsp fresh parsley, chopped
  • 4 garlic cloves, minced
  • 1 tbsp lemon zest
  • 2 tbsp Dijon mustard
  • 1/4 cup breadcrumbs
  • 2 tbsp grated Parmesan cheese

Instructions

1. Prepare the Crust:

  1. 1. Preheat grill to medium-high heat (400°F).
  2. 2. Pat pork chops dry and rub with olive oil, salt, and pepper.
  3. 3. In a bowl, mix rosemary, thyme, parsley, garlic, lemon zest, Dijon mustard, breadcrumbs, and Parmesan to form the herb crust.
  4. 4. Press the herb mixture firmly onto both sides of each pork chop.
  5. 5. Grill for 5-6 minutes per side until internal temperature reaches 145°F.
  6. 6. Let rest for 5 minutes before serving to retain juices.

Notes

For extra flavor, marinate chops in the herb mixture for 1 hour before grilling. Substitute panko for regular breadcrumbs for added crunch.