Irresistible Chocolate Maraschino Cherry Coconut Truffles for Dessert Lovers

Chocolate Maraschino Cherry Coconut Truffles Recipe

Indulge in the decadent flavors of Chocolate Maraschino Cherry Coconut Truffles, a delightful treat that brings together the rich essence of chocolate with the sweet and fruity zest of maraschino cherries. Perfect for gifting, entertaining, or simply enjoying as a luxurious snack, these truffles capture the essence of gourmet confections with ease.

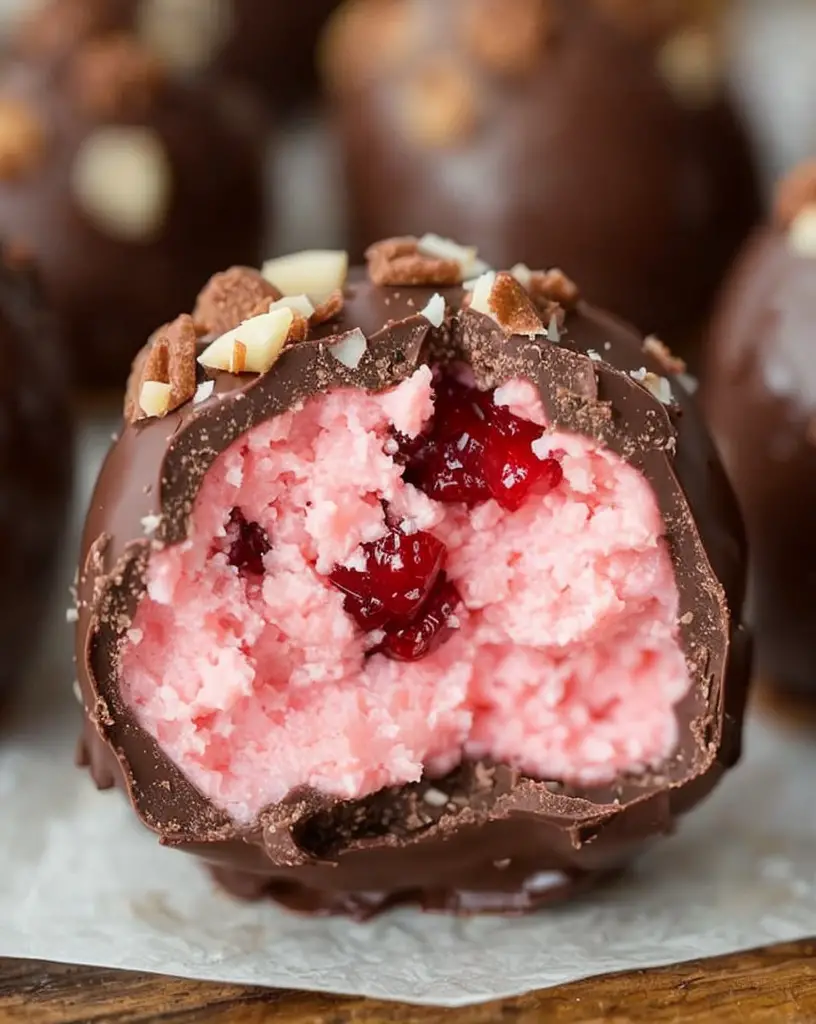
These truffles combine the creamy texture of chocolate with the lush, chewy bite of maraschino cherries and a subtle hint of coconut. The contrasting flavors and textures make them an irresistible temptation that will please any sweet tooth.

Crafting these delightful Chocolate Maraschino Cherry Coconut Truffles is simple and requires no intricate skills, making it an ideal recipe for both beginner and seasoned bakers. They are the perfect addition to holiday spreads or as a standout dessert at special occasions.

Quick Recipe Highlights

  • Flavor Profile: A sumptuous blend of rich chocolate, sweet maraschino cherries, and subtle coconut notes.
  • Texture: Silky smooth chocolate with a delightfully chewy cherry core.
  • Aroma: Sweet chocolate infused with nutty coconut and cherry undertones.
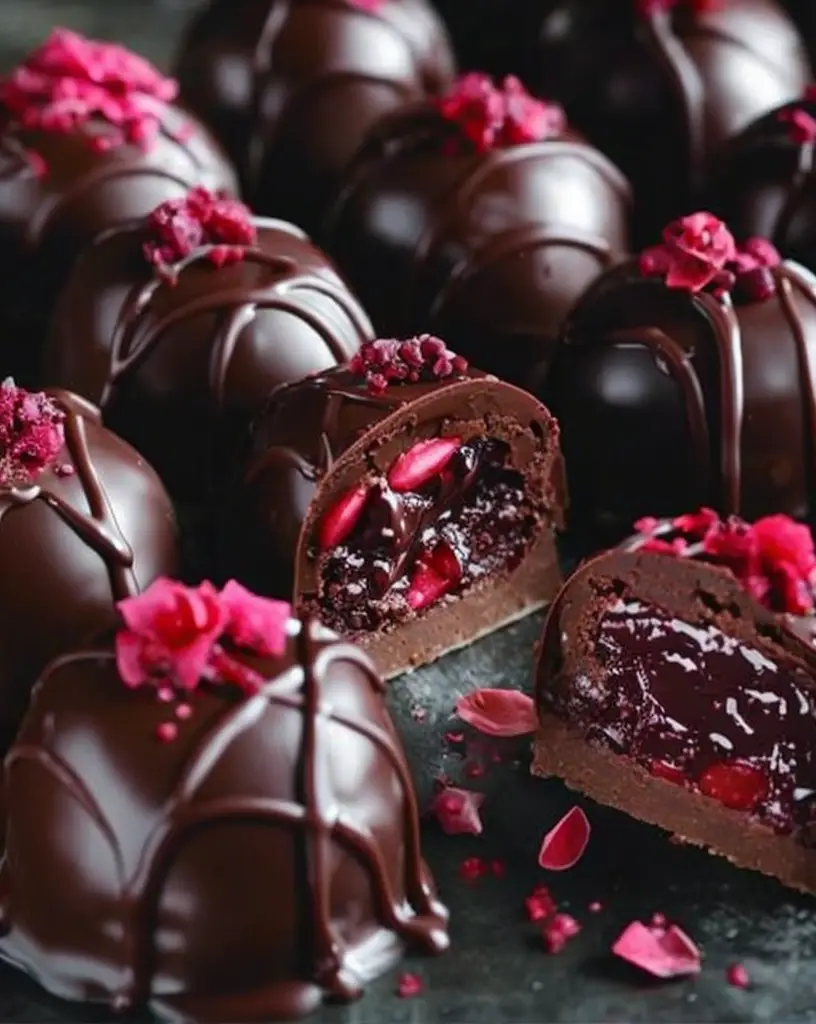
  • Visual Appeal: Dark, glossy truffles with bright cherry accents, often dusted with coconut.
  • Skill Level Needed: Beginner-friendly; no complex techniques required.
  • Special Equipment: None beyond basic kitchen tools such as mixing bowls and a baking sheet.

Recipe Overview

  • Difficulty Level: Easy; straightforward steps without the need for advanced baking skills.
  • Category: Dessert; perfect for casual treats or special events.
  • Cuisine: Modern fusion influenced by traditional confectionery practices.
  • Cost: Economical; cherries and chocolate are main expenses, with basic pantry items completing the ingredient list.
  • Season: Best in winter holiday seasons, but enjoyable year-round.
  • Occasion: Suitable for gifting, holiday celebrations, or as dinner party finisher.

Why You’ll Love This Recipe

The Chocolate Maraschino Cherry Coconut Truffles seamlessly blend the decadent and the delightful. The initial taste is a burst of rich, creamy chocolate which is soon complemented by the sweet juiciness of the maraschino cherry center. The coconut provides a subtle nutty background, enhancing the truffles without overpowering the principal flavors. Each bite is a multi-layered experience, with a smooth exterior giving way to a pleasantly chewy core.

This recipe is designed with convenience in mind. It requires minimal preparation and uses accessible ingredients that can typically be found in your local grocery store or pantry. The ease of preparation makes these truffles a go-to for quick, impressive desserts.

Nutritionally, while indulgent, these truffles offer a taste of luxury that can satisfy sweet cravings in small quantities, making them a mindful delight. Their rich nature means they’re best enjoyed in moderation, fitting easily into many diets without overwhelming caloric intake.

Socially, these truffles shine during gatherings and make excellent gifts. Their handcrafted feel conveys thoughtfulness and effort, making them perfect for holiday exchanges and housewarming gifts. Their striking appearance also makes for a stunning addition to any dessert table, drawing the eye before they tantalize the taste buds.

Cost-wise, the ingredients are common enough to be affordable yet distinctive enough to make the truffles feel special and luxurious. This balance of quality and cost ensures these truffles remain an accessible luxury within any budget.

Historical Background and Cultural Significance

The concept of chocolate truffles draws inspiration from French culinary traditions, originally named for their resemblance to the rare truffle fungus. Historically, chocolate confections have been a treasured luxury, often associated with festive and social occasions due to their indulgent nature.

Maraschino cherries, contrary to common belief, have a deep-rooted history starting as a delicacy among European aristocracy. Their distinct preparation methods, which included marinating in maraschino liqueur, led them to become a lavish ingredient in many high-end cuisines. Over time, their significance spread, and they became a common sweet component in desserts globally.

Combining these elements into Chocolate Maraschino Cherry Coconut Truffles represents a fusion of cultural tastes, pulling from French elegance, the fruit-centric traditions of Eastern Europe, and a widespread appreciation for chocolate’s universal appeal.

This recipe’s evolution reflects the blending of different dessert practices and shows how global influences can yield delightful, novel creations. While truffles remain a classic treat, their variations symbolize a modern culinary creativity that transcends borders.

Ingredient Deep Dive

**Chocolate:**
Chocolate serves as the heart of these truffles, providing the rich, creamy base that envelops the cherries. Culturally, chocolate has become synonymous with celebration and indulgence, often used in significant cultural festivities worldwide. When selecting chocolate, opt for high-quality dark or semi-sweet varieties to ensure a smooth melt and refined taste. Store chocolate in a cool, dry place to maintain its integrity, away from light and heat to prevent blooming.

**Maraschino Cherries:**
These cherries offer a vibrant, sweet contrast to the chocolate. Originating from Croatia, maraschino cherries were traditionally made using sour cherries marinated in maraschino liqueur. They are now more widely known for their bright red appearance and sugary coating. Always keep them refrigerated after opening to preserve their texture and flavor.

**Coconut:**
Coconut adds a subtle tropical note and textural variation, evoking warm climates and sunny cuisines. It’s also prized for its health benefits, being rich in healthy fats and dietary fiber. Desiccated coconut is often used; store it in an airtight container in a cool, dry place to prevent staleness.

Common Mistakes to Avoid

  • Using low-quality chocolate: Invest in good chocolate for superior taste and texture.
  • Skipping the tempering step: Ensures the chocolate melts smoothly and sets correctly.
  • Not drying cherries thoroughly: Excess moisture can lead to inconsistent texture.
  • Over-chopping coconut: Smaller flakes may diminish the textural contrast.
  • Overheating chocolate: This can cause burning and loss of flavor, use a gentle melt technique.
  • Rushing the setting process: Give truffles time to set for the best consistency.
  • Ignoring portion size: Ensures uniform cooking and presentation.
  • Improper storage: Can lead to spoilage or flavor degradation.

Essential Techniques

**Tempering Chocolate:** This technique involves slowly melting chocolate to stabilize the fat crystals, important for achieving that glossy finish and smooth texture. It’s essential for creating that signature snap when biting into a truffle.

**Rolling Truffles:** Consistent size and shape enhance both the visual appeal and the eating experience. Use a small scoop to extract the chocolate consistently before rolling by hand for uniformity.

**Coating Evenly:** Ensure the truffles are rolled in coconut or additional coatings thoroughly to maintain an attractive and comprehensive appearance, which also helps preserve the interior moisture.

Pro Tips for Perfect Chocolate Maraschino Cherry Coconut Truffles

1. **Ensure Quality:** Using high-grade chocolate transforms the flavor depth significantly. Aim for at least 70% cocoa content for richness.

2. **Chill Tools:** Keeping spatulas and mixing bowls cool assists in managing the chocolate’s temperature, preventing it from setting too quickly during working stages.

3. **Avoid Moisture:** While handling cherries, make sure they are thoroughly dried to reduce any additional moisture which could compromise the structure of the chocolate.

4. **Optimal Portioning:** Maintain uniformity in truffle size using a melon scoop or teaspoon measure. This ensures even setting and aesthetic consistency.

5. **Coconut Toasting (Optional):** Lightly toasting coconut before rolling can enhance the flavor profile significantly, adding a nutty richness.

6. **Gentle Melting:** A double boiler provides even heat distribution, crucial for melting chocolate without scorching.

7. **Rest Between Steps:** Allow each stage, particularly cooling, the optimal time to set. This prevents mixing of texture and flavor components unintendedly.

8. **Customize Coat:** While coconut is traditional, experiment with crushed nuts or cocoa powder for flavor diversity.

Variations and Adaptations

– **Regional Variations:** Use regional fruit substitutes such as raspberries or apricots for a local twist.

– **Seasonal Adaptations:** Incorporate seasonal fruits during specific holidays for a fresh touch.

– **Dietary Modifications:** Vegan versions using dairy-free chocolate and omitting or substituting cherries preserved in syrup can be easily crafted.

– **Flavor Variations:** Introduce subtle hints of flavor by adding spices like cardamom or cinnamon into the mixture.

– **Texture Modifications:** Adjust the texture by altering the level of coconut shreds, either fine or coarse.

– **Presentation Alternatives:** Serve truffles in decorative foil cases or on a tiered dessert stand for a more elaborate display.

Serving and Presentation Guide

– **Plating Techniques:** Arrange truffles on a decorative platter or individual serving plates with a drizzle of melted chocolate for elegance.

– **Garnishing Ideas:** Fresh mint leaves or spun sugar can provide attractive color contrast and added appeal.

– **Traditional Accompaniments:** Pair with biscotti or light coffee biscuits for a complete dessert plate.

– **Modern Serving Suggestions:** Incorporate in dessert charcuterie boards for variety.

– **Temperature Considerations:** Best served slightly chilled; storage at room temperature for too long may alter texture.

– **Portion Control Tips:** Serve in bite-sized portions, typically 2-4 truffles as a standard serving size to ensure guests can enjoy without overindulgence.

Wine and Beverage Pairing

– **Wine Pairings:** A fine port or a sweet, fruity red wine accentuates the cherry and chocolate notes.

– **Non-Alcoholic Alternatives:** Cherry or berry-flavored sparkling water for a refreshing contrast.

– **Coffee/Tea Pairings:** Rich, dark roasts or a spicy chai complement these sweets perfectly, enhancing the chocolate’s depth.

– **Temperature Considerations:** Fellow beverages should be lightly chilled or served at ambient room temperature to accentuate rather than overpower the truffles.

Storage and Shelf Life

– **Detailed Storage Methods:** Store truffles in an airtight container to maintain freshness.

– **Temperature Requirements:** Keep refrigerated to prevent spoilage, but allow light warming before serving.

– **Container Recommendations:** Use plastic or glass containers to ensure the integrity of truffles is maintained.

– **Signs of Spoilage:** Look for any discoloration or mushy texture, indicators of moisture infiltration.

– **Reheating Instructions:** Best served fresh; reheating not recommended.

– **Freezing Guidelines:** Can be frozen up to three months; thaw gently in the refrigerator when ready to enjoy.

– **Quality Expectations Over Time:** Best within two weeks of preparation when stored correctly.

Make Ahead Strategies

– **Detailed Prep Timeline:** Prepare chocolate mixture and cherries a day in advance to streamline assembly.

– **Storage Instructions Between Steps:** Store separated elements in the fridge to prevent mingling of flavors.

– **Quality Impact Assessment:** Truffles maintain their quality well when stored properly, allowing for make-ahead preparation without sacrificing taste.

– **Assembly Tips:** Prepare truffles completely and leave uncompleted yet coated until the day of serving.

– **Reheating Guidelines:** Allow to reach room temperature naturally before serving for best flavor.

– **Fresh Element Additions:** Add garnishes like coconut just before serving to ensure flavor and effect.

Scaling Instructions

– **How to Halve the Recipe:** Easy to halve by reducing each ingredient equally by 50%.

– **How to Double or Triple:** Scale up proportionally; chocolate and cherry quantities most crucial for maintaining balance.

– **Equipment Adjustments Needed:** Ensure ample fridge space for setting if increasing quantity significantly.

– **Timing Modifications:** Allow additional time for cooling if doubling or tripling.

– **Storage Considerations for Larger Batches:** Divide into several containers to maintain freshness.

Nutritional Deep Dive

– **Detailed Macro Breakdown:** Predominant macronutrients include fats and carbohydrates due to chocolate and cherries.

– **Micronutrient Analysis:** Contains iron and magnesium from chocolate, contributing to daily intake requirements.

– **Health Benefits:** A moderate indulgence that aligns with health goals when consumed in appropriate quantities.

– **Dietary Considerations:** Primarily plant-based, adaptable for several diets with minor modifications.

– **Portion Size Analysis:** Emphasize small portions due to calorie density.

– **Weight Management Tips:** Savor slowly to allow satisfaction with smaller servings, reducing the temptation for overindulgence.

Dietary Adaptations

– **Gluten-Free:** Naturally gluten-free; verify chocolate certification.

– **Dairy-Free:** Use dairy-free chocolate substitutes compatible for lactose-intolerant or vegan individuals.

– **Vegan:** Swap maraschino cherries for organic options to remove non-vegan components.

– **Low-Carb/Keto:** Focus on very dark chocolate, minimizing sugary maraschino quantity.

– **Paleo:** Utilize raw chocolate varieties and unsweetened cherries, maintaining diet integrity.

– **Low-FODMAP:** Monitor cherry portions to align with FODMAP guidelines due to potential fructose levels.

Recipe Notes

  • For a spicier twist, add a pinch of cayenne pepper to the chocolate mixture.
  • Substitute dark rum for vanilla extract for an adult version.
  • Check chocolate labels for containing cassia to avoid an overly harsh flavor profile.

Troubleshooting Guide

– **Texture Issues:** If truffles are too soft, increase chocolate ratio slightly or chill longer.

– **Flavor Balance:** Add a small amount of additional salt to bring deeper chocolate notes forward if needed.

– **Temperature Problems:** Ensure chocolate isn’t overheated during melting to avoid texture faults.

– **Equipment Challenges:** Use a silicone mat for rolling if surfaces are too sticky.

– **Ingredient Substitution Impacts:** If substituting coconut, watch for altered moisture content which may affect texture.

– **Timing Concerns:** Rushed processes can lead to incomplete setting; always allow plenty of cooling and preparation time.

Recipe Success Stories

– **Community Feedback:** Users praise the easy-to-follow structure and impressive result it yields, becoming a family favorite quickly.

– **Variation Successes:** Various readers have shared spin-offs featuring different fruit centers, all noted for maintaining wonderful consistency and balance.

– **Adaptation Stories:** Vegan substitutions were highly successful, noted for retaining flavor depth and indulgence level.

– **Serving Suggestions from Readers:** Seasonal decor additions such as edible flowers have gained traction among more creative presentations.

– **Photography Tips:** Engage with lighting angles that capture the glossy sheen of the chocolate to convey the truffles’ intricate texture.

Frequently Asked Questions

How long do these truffles need to set?

Typically, allow at least one hour in a cool, dry place or your refrigerator to ensure the truffles are properly set and firm before serving.

Can I use fresh cherries instead of maraschino?

Fresh cherries can be used, but ensure they are pitted, thoroughly dried, and possibly slightly cooked to concentrate the sweetness similar to maraschino cherries.

What’s the best way to melt chocolate if I don’t have a double boiler?

You can create a makeshift double boiler by placing a heatproof bowl over a pot of simmering water, ensuring the bowl does not touch the water to melt slowly and evenly.

Is it possible to make these truffles without coconut?

Absolutely, you can either skip the coconut altogether or replace it with finely chopped nuts or cocoa powder for a similar textural variety.

What types of chocolate are best for this recipe?

Choose high-quality semi-sweet or dark chocolate, preferably with at least 60-70% cocoa content, to balance the sweetness of the cherries beautifully.

How should I store truffles for gifting?

Place them in an airtight container, using parchment paper to separate layers, and keep them refrigerated until the day of gifting to maintain freshness.

Can this recipe accommodate nut allergies?

Yes, simply omit any optional nut coatings or substitutes and confirm chocolate is free from cross-contamination to accommodate those with allergies.

What’s the ideal serving temperature for these truffles?

Truffles are best served slightly cool – straight from the fridge tends to dull flavors, while room temperature enhances their rich taste and texture.

Are truffles a good make-ahead dessert?

They are excellent for making ahead, as they can be stored for up to two weeks when kept chilled, allowing flavors to meld beautifully over time.

Can I replace maraschino cherries with other fruit preserves?

Yes, other fruit preserves like raspberry or apricot can be substituted, bearing in mind the alteration in flavor profile and sweetness levels.

Additional Resources

– Explore other truffle recipes for diverse flavors
– Watch tutorial videos on tempering chocolate techniques
– Consult fruit preservation guides for homemade cherry options
– Consider reviews on reliable kitchen equipment
– Look for seasonal chocolate variations to inspire future adaptation

Join the Conversation

– Share your creation on social media using #ChocolateTruffles
– Offer your tips and adaptations in the comments
– Participate in our monthly truffle-making challenge
– Follow us for more dessert inspiration and tips
– Submit photos of your truffle presentation for community sharing

Chocolate Maraschino Cherry Coconut Truffles

Indulge in the decadent taste of Chocolate Maraschino Cherry Coconut Truffles. These delightful treats bring together the rich flavors of chocolate and coconut with the sweet tang of maraschino cherries for a truly irresistible dessert. Perfect for any occasion, these truffles are easy to make and sure to impress your guests with their luxurious taste and beautiful appearance.

The combination of smooth chocolate, chewy coconut, and vibrant cherries creates a symphony of flavors that dance on your palate. Whether you’re hosting a party or simply satisfying your sweet tooth, this recipe delivers a gourmet experience right in your kitchen.

⚖️
Difficulty
Easy

⏲️
Prep Time
20 mins

🕒
Cook Time
10 mins

⏱️
Total Time
30 mins

🍽️
Servings
24

Quick Recipe Highlights

  • Flavor Profile: Rich chocolatey goodness meets sweet cherries and creamy coconut
  • Texture: Smooth chocolate with chewy coconut and succulent cherries
  • Aroma: Enticing notes of chocolate with a hint of cherry
  • Visual Appeal: Elegant, bite-sized truffles perfect for serving
  • Skill Level Needed: Beginner-friendly, great for home bakers
  • Special Equipment: Mixing bowls, microwave, and a spoon

The Recipe

Chocolate Maraschino Cherry Coconut Truffles: A Sweet Indulgence

Serves: 24

Prep Time: 20 mins

Cook Time: 10 mins

Total Time: 30 mins

Kitchen Equipment Needed

  • Mixing bowls
  • Microwave-safe bowl
  • Spoon
  • Baking sheet
  • Parchment paper

Ingredients

  • 1 cup shredded coconut
  • 1/2 cup maraschino cherries, chopped
  • 1 cup dark or semi-sweet chocolate chips
  • 2 tablespoons coconut oil
  • 1/4 teaspoon almond extract
  • 1/4 teaspoon salt

Directions

  1. Line a baking sheet with parchment paper and set it aside.
  2. In a mixing bowl, combine shredded coconut, chopped maraschino cherries, and almond extract.
  3. In a microwave-safe bowl, melt the chocolate chips and coconut oil in the microwave, stirring every 30 seconds until smooth.
  4. Add salt to the melted chocolate mixture and stir well.
  5. Using a spoon, dip small portions of the coconut and cherry mixture into the melted chocolate and place them on the prepared baking sheet.
  6. Repeat until all the mixture is used up, then refrigerate the truffles for at least 10 minutes or until set.
  7. Serve cold and enjoy your homemade Chocolate Maraschino Cherry Coconut Truffles.

Recipe Notes

  • For a sweeter note, try adding white chocolate chips to the mixture.
  • Feel free to use milk chocolate for a creamier texture.
  • Truffles can be stored in an airtight container in the refrigerator for up to a week.

Cranberry-Glazed Butternut Squash Salad: A Festive Holiday Delight

Cranberry-Glazed Roasted Butternut Squash Salad Recipe

Delight your taste buds with the enticing flavors of the Cranberry-Glazed Roasted Butternut Squash Salad. This vibrant recipe combines the sweetness of roasted butternut squash, the tang of cranberries, and a medley of fresh greens to create a salad that’s perfect for any occasion. Ideal as a starter or a side, this salad is easy to make and loaded with nutritious goodness. Read on to discover how you can create this masterpiece in your kitchen.

Quick Recipe Highlights

  • Flavor Profile: A perfect balance of sweet roasted squash, tangy cranberries, and a hint of savory herbs
  • Texture: Soft, caramelized squash contrasting with crunchy nuts and crisp greens
  • Aroma: Inviting notes of roasted squash and fresh herbs
  • Visual Appeal: A colorful array of orange squash, ruby cranberries, and emerald greens
  • Skill Level Needed: Intermediate – requires roasting and glazing techniques
  • Special Equipment: Baking sheet, mixing bowl, and whisk

Recipe Overview

  • Difficulty Level: Intermediate – involves precise roasting and dressing preparation for optimal texture
  • Category: Appetizer, Side Dish
  • Cuisine: Contemporary fusion with hints of autumnal flavors
  • Cost: Butternut squash and cranberries are affordable, making this a budget-friendly dish
  • Season: Best made in fall and winter when squash is in season
  • Occasion: Perfect for holiday gatherings, family dinners, and potlucks

Why You’ll Love This Recipe

Fall in love with the Cranberry-Glazed Roasted Butternut Squash Salad for its rich and unique flavor profile. The sweet and savory elements create a harmonious blend that tantalizes your palate. Preparing this salad is both convenient and accessible, requiring minimal steps with ingredients that are readily available in markets. Nutritionally, it’s loaded with vitamins A and C, fiber, and antioxidants, making it a healthy choice for any meal. With its impressive presentation and vibrant colors, this salad is ideal for social gatherings and showing off culinary skills without requiring extensive time in the kitchen. Finally, the cost-effectiveness of the main ingredients allows you to enjoy a gourmet experience without breaking the bank.

Historical Background and Cultural Significance

This salad’s roots trace back to the timeless tradition of roasting vegetables, a method used across various cultures for centuries. Roasted squash is particularly esteemed in many cuisines due to its versatility and nutritional value. While cranberries have been a staple in North American diets for their zest and preservative qualities, it’s the fusion of these elements that brings a modern twist to this classic pairing. Over the years, this salad has evolved to incorporate a wide array of herbs and nuts, influenced by regional ingredients and tastes. Traditionally, such dishes would be served during harvest seasons, symbolizing prosperity and abundance.

Ingredient Deep Dive

Butternut Squash: This winter squash is a powerhouse of nutrients, rich in beta-carotene and fiber. Choose firm, unblemished squash with a matte finish for quality. Store in a cool, dry place and substitute with acorn squash if necessary.

Cranberries: Known for their tart flavor, fresh ones are preferable for the glaze. Packed with vitamin C, they add both health benefits and bold flavor. Store in the refrigerator to extend shelf life.

Greens: Use fresh, crisp options like spinach or arugula. They contribute vitamins K and A, adding a refreshing crunch to the salad. Consider using kale for a more robust nutrient profile.

Nuts: Walnuts or pecans provide a satisfying crunch and healthy fats. Toast lightly to enhance their flavor and aroma. Store in airtight containers to maintain freshness.

Common Mistakes to Avoid

  • Over-roasting the squash can lead to mushy texture; monitor closely.
  • Skipping the glazing step will reduce flavor intensity; glaze thoroughly.
  • Not toasting nuts before use reduces aroma and flavor; toast them.
  • Using waterlogged greens can cause sogginess; dry well before use.
  • Ignoring portion balance when serving leads to uneven flavors; mix well.
  • Storing leftovers improperly can result in sogginess; use airtight containers.
  • Skipping seasoning before roasting results in bland squash; season liberally.
  • Adding dressing too early will wilt the greens; dress right before serving.

Essential Techniques

Mastering the art of roasting is crucial for this recipe, as it ensures that the butternut squash becomes beautifully caramelized and tender. Begin by cutting the squash into evenly-sized cubes for consistent cooking. When preparing the glaze, a balance of sweet and acidic components (such as cranberry juice and a touch of sugar) is key, allowing for a glossy and flavorful finish.

Pro Tips for Perfect Cranberry-Glazed Roasted Butternut Squash Salad

– Use parchment paper to prevent squash from sticking to the baking sheet.
– Opt for fresh cranberries over dried for a more vibrant glaze.
– Add a pinch of cinnamon to the glaze for warm, spicy undertones.
– Toss the salad just before serving to maintain the crispness of the greens.
– Experiment with goat cheese for a creamy, tangy contrast.
– Incorporate a splash of balsamic vinegar in the dressing to enhance flavors.

Variations and Adaptations

For a Mediterranean twist, include feta cheese and olives for a savory punch. In summer, switch to lighter greens and incorporate berries in place of cranberries for a refreshing taste. Adapt for vegan diets by omitting cheese products and adding more nuts or seeds for protein. Enhance flavors by using maple syrup instead of sugar in the glaze for a richer sweetness.

Serving and Presentation Guide

For a stunning presentation, layer the salad on a large platter to show off its vibrant colors. Use a light hand when drizzling the glaze, and sprinkle toasted nuts for a decorative touch. Accompany with crusty bread or as a side to roasted meats for a complete meal. Serving at room temperature is ideal, allowing flavors to meld harmoniously.

Wine and Beverage Pairing

Pair this salad with a light, crisp white wine such as Sauvignon Blanc to complement its acidity and herbal notes. Non-alcoholic options include a chilled herbal tea with citrus tones. In cooler months, serve with a warming herbal infusion to balance the fresh components of the dish.

Storage and Shelf Life

Refrigerate leftovers in an airtight container for up to three days for optimal freshness. If making ahead, store the components separately to prevent sogginess. Consider freezing roasted squash for longer storage, but be aware that texture may change slightly. Always look for vivid coloration and absence of moisture buildup as signs of freshness.

Make Ahead Strategies

Prepare components separately a day in advance: roast the squash and prepare the glaze. Store dressing and greens separately, assembling them just before serving to preserve freshness and texture. This strategy ensures minimal effort on the day of serving, enhancing convenience for busy schedules.

Scaling Instructions

To halve the recipe, simply reduce all ingredients proportionately, using the same roasting times but monitoring to avoid overcooking. For larger gatherings, double or triple the recipe, using additional baking sheets if necessary to avoid crowding. Adjust glaze proportions to taste, keeping the balance of flavors in mind.

Nutritional Deep Dive

This salad offers a balanced macronutrient profile with high fiber content from butternut squash and greens. It provides essential micronutrients such as vitamins A and C, as well as potassium and magnesium. Suitable for weight management, its low-calorie density aids in maintaining healthy meal portions.

Dietary Adaptations

Adapt for gluten-free diets by ensuring all dressings and herbs are gluten-free. For dairy-free options, omit any cheese or creamy toppings. Vegans can enjoy this salad by using plant-based sweeteners for the glaze and avoiding animal-derived toppings.

Recipe Notes

  • Substitute maple syrup for a deeper, richer glaze flavor.
  • Use acorn squash if butternut is unavailable.
  • Incorporate a variety of nuts for added texture and taste diversity.

Troubleshooting Guide

Texture issues often arise from overcooking squash; aim for a tender yet firm consistency. Balance flavors by adjusting the sweet-to-acidic ratio in the glaze. Avoid temperature problems by allowing the roasted squash to cool slightly before mixing with greens, preventing wilting.

Recipe Success Stories

Join our community of culinary enthusiasts who have experimented with this versatile salad. Readers have shared variations featuring seasonal fruits and nuts, demonstrating the adaptability of this dish. Share your own creations on social media using #SquashSaladSuccess for a chance to be featured.

Frequently Asked Questions

Can I use frozen squash?

Fresh squash is ideal for roasting due to its lower moisture content, but frozen squash can be used if thawed and patted dry first to ensure caramelization.

How do I prevent the salad from becoming soggy?

Keep components separate until serving and thoroughly dry greens after washing to maintain crispness.

What can I substitute for nuts?

For a nut-free version, try using sunflower or pumpkin seeds, which also provide a crunchy texture.

Is there a low-sugar alternative for the glaze?

Use natural sweeteners like honey or stevia for a lower sugar content while maintaining sweetness.

Additional Resources

Explore related recipes such as Roasted Vegetable Medleys and Glazed Autumn Salads. Watch video tutorials on roasting techniques for perfect execution every time. For help with ingredient selection, refer to seasonal guides to optimize freshness and flavor.

Join the Conversation

Engage with fellow salad enthusiasts by sharing your culinary creations. Post your photographs using #ButternutBliss and connect with others embarking on similar gastronomic journeys. Participate in our seasonal challenges for a chance to win exclusive kitchen gadgets and have your recipe featured on our blog.

Cranberry-Glazed Roasted Butternut Squash Salad

Welcome to the delicious world of healthy and flavorful meals with our Cranberry-Glazed Roasted Butternut Squash Salad. This vibrant salad combines the sweetness of roasted butternut squash with the tangy zest of cranberry glaze, creating a perfect harmony of flavors. Ideal for autumn gatherings, the salad’s nutty crunch and sweet-tart dressing make it a crowd-pleaser.

In this recipe, you’ll find an enticing mix of roasted squash, warm spices, and a generous drizzle of cranberry glaze that transforms simple ingredients into a culinary masterpiece. Whether you are serving it as a side dish or a light main course, this salad offers an inviting and colorful addition to any meal.

Quick Recipe Highlights

  • Flavor Profile: Sweetness from squash, tartness from cranberries, balanced with earthy spices
  • Texture: Soft roasted squash with crispy leaf greens and crunchy nuts
  • Aroma: Inviting scents of roasting squash and cranberry glaze
  • Visual Appeal: Vibrant orange squash with deep red glaze over fresh greens
  • Skill Level Needed: Easy; basic roasting and mixing
  • Special Equipment: Baking sheet, mixing bowl

The Recipe

Cranberry-Glazed Roasted Butternut Squash Salad: A Nutritious Delight

Serves: 4

Prep Time: 15 mins

Cook Time: 35 mins

Total Time: 50 mins

Kitchen Equipment Needed

  • Baking sheet
  • Mixing bowl
  • Whisk
  • Serving platter

Ingredients

  • 1 butternut squash, peeled and cubed
  • 2 tablespoons olive oil
  • Salt and pepper to taste
  • 1/2 cup dried cranberries
  • 1/4 cup cranberry juice
  • 1 tablespoon maple syrup
  • Mixed greens (arugula or spinach)
  • 1/4 cup pecans, toasted

Directions

  1. Preheat your oven to 400°F (200°C).
  2. In a large bowl, toss the cubed butternut squash with olive oil, salt, and pepper.
  3. Spread the squash on a baking sheet and roast for 25-30 minutes or until tender and golden brown.
  4. Meanwhile, prepare the cranberry glaze by combining dried cranberries, cranberry juice, and maple syrup in a saucepan over medium heat. Let it simmer until thickened.
  5. Once the squash is roasted, let it cool slightly before tossing it with the greens and pecans in a large bowl.
  6. Drizzle with the cranberry glaze and toss to combine.
  7. Serve garnished with extra cranberries and pecans for added crunch and flavor.

Recipe Notes

  • For added protein, consider topping the salad with grilled chicken.
  • Substitute pecans with walnuts or almonds for a different nutty flavor.
  • Add feta cheese for a creamier texture.

Indulge in Irresistible Cherry Almond Snowball Cookies for Holiday Delight

Cherry Almond Snowball Cookies Recipe

Indulge in the delightful flavors of Cherry Almond Snowball Cookies, a holiday favorite that brings together the tartness of cherries with the rich, nutty taste of almonds. These cookies are perfect for festive gatherings, offering a melt-in-your-mouth texture that leaves a lasting impression. With their beautiful presentation and delicious flavor profile, Cherry Almond Snowball Cookies are sure to become a staple in your holiday baking repertoire.

Quick Recipe Highlights

  • Flavor Profile: Sweet and nutty with hints of tart cherry
  • Texture: Buttery and crumbly with a melt-in-your-mouth finish
  • Aroma: Rich almond and fruity cherry notes
  • Visual Appeal: Powdered sugar-coated balls with cherry specks
  • Skill Level Needed: Easy to moderate; basic baking skills required
  • Special Equipment: Stand mixer or hand mixer

Recipe Overview

  • Difficulty Level: Easy due to straightforward mixing and shaping techniques
  • Category: Dessert, cookie
  • Cuisine: American with European influences
  • Cost: Moderate; main costs from almonds and cherries
  • Season: Ideal for winter holiday baking
  • Occasion: Christmas, cookie swaps, and festive occasions

Why You’ll Love This Recipe

Cherry Almond Snowball Cookies offer a delectable combination of taste and texture that is sure to please. The cookies feature a harmonious blend of sweet cherries and nutty almonds, wrapped in a buttery dough that crumbles with every bite. One of the advantages of this recipe is its convenience; you can prepare the dough in advance and bake whenever you’re ready, making it an excellent choice for busy holiday seasons. Additionally, these cookies are a crowd-pleaser for social gatherings, providing an appealing and delicious treat that complements festive themes.

Historically, snowball cookies have been a popular holiday treat across different cultures, evolving from traditional European recipes. They hold cultural significance as they are commonly associated with Christmas celebrations, reflecting a sense of joy and festivity. Various regions have put their unique spin on these cookies, demonstrating the versatility and universal appeal of this classic confection.

Ingredient Deep Dive

Almonds are a central ingredient in these cookies, both in terms of flavor and texture. Not only do they add a nutty depth, but they also offer numerous nutritional benefits, such as healthy fats and vitamin E. When selecting almonds, opt for fresh, unsalted varieties, and store them in a cool, dry place to maintain freshness. You can substitute walnuts or pecans if needed, but the flavor profile will change slightly.

Cherries provide a pop of color and a fruity tartness that complements the sweetness of the cookie dough. Dried cherries are recommended for their intense flavor and ease of use, though fresh or frozen cherries can be incorporated when in season. Store cherries in an airtight container to preserve their moisture and flavor.

Common Mistakes to Avoid

  • Overmixing the dough: Mix just until ingredients are combined to prevent a tough texture.
  • Using salted butter: This can alter the flavor balance; stick to unsalted butter.
  • Skipping the chilling step: Chilling helps the cookies maintain their shape.
  • Substituting fresh cherries without adjusting moisture: Fresh cherries add more moisture and may cause spreading.
  • Forgetting to sift the powdered sugar: Ensures an even coating and prevents clumps.
  • Not allowing cookies to cool completely before rolling in sugar: Warm cookies can cause sugar to melt and not adhere properly.
  • Ignoring oven variations: Adjust baking time based on your oven’s quirks to prevent browning.
  • Using expired or stale baking ingredients: Freshness ensures the best flavor and texture.

Essential Techniques

Creaming butter and sugar until fluffy is crucial for achieving the tender crumb of these cookies. This technique incorporates air, which helps the cookies expand and maintain a light texture. Additionally, the folding of cherries and almonds should be done gently to ensure they are evenly distributed without breaking down.

Ensuring uniformity in cookie size will help them bake evenly. Use a cookie scoop or measure with a tablespoon to maintain consistency.

Pro Tips for Perfect Cherry Almond Snowball Cookies

  • Chill the dough for at least an hour to prevent spreading.
  • Use parchment paper or silicone mats to avoid sticking and burning.
  • Sift powdered sugar for the smoothest coating.
  • Allow cookies to cool completely before coating in powdered sugar to prevent melting.
  • Store baked cookies in an airtight container to maintain freshness.
  • Double up on almond extract for an intensified nutty flavor.
  • Experiment with different nuts to find your favorite variation.
  • Consider adding citrus zest for a refreshing twist.
  • Variations and Adaptations

    Explore regional variations by substituting almonds with pecans for a southern twist or hazelnuts for a rich, European-inspired flavor. Seasonal adaptations include using dried cranberries for a winter-centric version or incorporating citrus zest during the summer months. For dietary modifications, a gluten-free flour blend can replace all-purpose flour without sacrificing texture.

    Serving and Presentation Guide

    For a traditional presentation, arrange Cherry Almond Snowball Cookies on a festive platter with a light dusting of extra powdered sugar. Consider garnishing with slivered almonds or a cherry on top for added appeal. These cookies pair well with warm beverages, making them an excellent choice for tea or coffee gatherings.

    Wine and Beverage Pairing

    The sweet and nutty profile of Cherry Almond Snowball Cookies pairs beautifully with a light, fruity wine such as Riesling or Moscato. For a non-alcoholic option, consider serving with a cherry-flavored tea or almond milk. These cookies are also an excellent accompaniment to a robust cup of coffee.

    Storage and Shelf Life

    Store Cherry Almond Snowball Cookies in an airtight container at room temperature for up to one week. For longer storage, freeze the cookies for up to three months, allowing them to thaw at room temperature before serving. If you notice any off smells or staleness, it’s time to discard them.

    Make Ahead Strategies

    Prepare the dough ahead of time and refrigerate it for up to two days before baking. This pre-prep strategy ensures that you can bake fresh cookies quickly during busy holiday periods. Once baked, these cookies can be frozen and enjoyed later with minimal loss of quality.

    Scaling Instructions

    The recipe can be easily halved or doubled to accommodate your gathering size. Adjust the baking time as necessary for larger batches to ensure even cooking. If scaling up, consider investing in additional baking sheets to streamline the process.

    Nutritional Deep Dive

    Each Cherry Almond Snowball Cookie is a small indulgence with a balance of macros. While high in healthy fats from almonds, they remain a treat best enjoyed in moderation. Almonds contribute to the micronutrient content, offering doses of magnesium and vitamin E. For those watching caloric intake, portion control can be a key strategy to enjoy these cookies guilt-free.

    Dietary Adaptations

    To adapt this recipe for gluten-free diets, substitute the all-purpose flour with a gluten-free flour blend. Vegan adaptations can be made by using a plant-based butter alternative. For those on a low-carb or keto diet, consider using almond flour in place of all-purpose flour and a sugar substitute for the powdered sugar coating.

    Recipe Notes

    • Substitute pecans or walnuts for a different nut flavor.
    • Add a hint of cinnamon or cardamom for holiday warmth.
    • Experiment with different dried fruits for unique combinations.

    Troubleshooting Guide

    Achieve the perfect texture by ensuring proper mixing and chilling times. If spreading occurs, check that the dough is sufficiently cold before baking. For flavor balance, ensure that you’re using fresh ingredients and correct measurements. Equipment challenges can often be mitigated with careful monitoring and adjustments based on your baking environment.

    Recipe Success Stories

    Our readers have shared numerous success stories, highlighting various adaptations and creative presentations. Many have found adding white chocolate chips enhances the festive nature of these cookies, while others have enjoyed them paired with a selection of fine teas. Photography tips from the community include highlighting the contrast between the cookies’ powdered sugar coating and vibrant cherry specks.

    Frequently Asked Questions

    What is the best way to store Cherry Almond Snowball Cookies?

    Store them in an airtight container at room temperature and avoid exposure to light and humidity to maintain their fresh texture and flavor.

    Can these cookies be made with fresh cherries?

    Yes, but you should consider adjusting the moisture content by reducing other liquid ingredients to prevent the cookies from spreading.

    Additional Resources

    For more baking inspiration, explore recipes like Pistachio Cranberry Biscotti or Walnut Shortbread, and watch our technique videos for mastering the art of cookie-making. Visit our ingredient guides for tips on selecting the best nuts and cherries.

    Join the Conversation

    Share your Cherry Almond Snowball Cookies on social media using our hashtag #SnowballCookieJoy. Engage with our baking community by exchanging tips, photographing your creations, and participating in seasonal cookie challenges. Your feedback is invaluable, so leave a review and let us know how these cookies brightened your holiday festivities.

    ⚖️
    Difficulty
    Easy

    ⏲️
    Prep Time
    15 mins

    🕒
    Cook Time
    12 mins

    ⏱️
    Total Time
    27 mins

    🍽️
    Servings
    24 Cookies

    Cherry Almond Snowball Cookies are a delightful twist on traditional snowball cookies, combining the nutty flavor of almonds with the sweet, tart burst of cherries. These cookies are the perfect treat for holiday gatherings or any occasion that calls for a touch of sweetness. Easy to make and wonderfully festive, they bring a delicious surprise with every bite.

    Quick Recipe Highlights

    • Flavor Profile: A delightful combination of buttery almonds and sweet cherries.
    • Texture: Soft and crumbly with a slightly chewy center.
    • Aroma: Rich almond fragrance with hints of vanilla.
    • Visual Appeal: Classic round snowball shape dusted with powdered sugar.
    • Skill Level Needed: Basic baking skills are all you need.
    • Special Equipment: Baking sheet, mixing bowl, and an oven.

    The Recipe

    Cherry Almond Snowball Cookies: A Festive Treat

    Serves: 24 Cookies

    Prep Time: 15 mins

    Cook Time: 12 mins

    Total Time: 27 mins

    Kitchen Equipment Needed

    • Mixing bowl
    • Hand mixer or stand mixer
    • Baking sheet
    • Parchment paper
    • Wire cooling rack

    Ingredients

    • 1 cup unsalted butter, softened
    • 1/2 cup powdered sugar, plus more for coating
    • 1 teaspoon vanilla extract
    • 2 cups all-purpose flour
    • 1 cup finely chopped almonds
    • 1/2 cup chopped maraschino cherries, drained and dried

    Directions

    1. Preheat your oven to 350°F (175°C) and line a baking sheet with parchment paper.
    2. In a large mixing bowl, cream together the softened butter and 1/2 cup of powdered sugar until light and fluffy.
    3. Mix in vanilla extract until combined.
    4. Gradually add the flour and mix until just combined.
    5. Gently fold in the chopped almonds and maraschino cherries.
    6. Roll dough into 1-inch balls and place on the prepared baking sheet, spacing them about 2 inches apart.
    7. Bake for 12 minutes, or until the bottoms are lightly golden.
    8. Allow cookies to cool slightly, then roll in additional powdered sugar to coat.
    9. Let cookies cool completely on a wire rack before serving.

    Recipe Notes

    • Ensure cherries are thoroughly dried to prevent excess moisture.
    • For a more intense almond flavor, add 1/2 teaspoon almond extract.
    • Store cookies in an airtight container for up to one week.

    Irresistibly Delicious Cherry Chocolate Bonbons for a Sweet Treat

    Cherry Chocolate Bonbons Recipe: A Gourmet Delight

    Discover the delightful world of cherry chocolate bonbons, where the rich, creamy taste of chocolate meets the tangy burst of cherries. This cherry chocolate bonbons recipe is perfect for anyone looking to impress guests with a gourmet dessert that combines classic flavors. Perfect for any occasion, these bonbons are as beautiful to look at as they are delicious to eat. Read on to uncover the delicious details and learn how you can create these gourmet treats at home.

    Indulging in a cherry chocolate bonbon is like experiencing a mini flavor explosion in every bite. The harmonious blend of smooth chocolate, juicy cherries, and a hint of sweetness makes each piece an irresistible delight. Whether you’re a seasoned chocolatier or a home baker trying something new, you’ll find that these bonbons offer a perfect balance of taste, texture, and visual appeal.

    Quick Recipe Highlights

    • Flavor Profile: The smooth, rich taste of chocolate contrasts beautifully with the tangy and sweet cherries, creating an irresistible flavor combination.
    • Texture: A perfect blend of creamy chocolate and chewy cherries encapsulated in a crisp and shiny chocolate shell.
    • Aroma: Inviting chocolate aroma with a hint of cherry essence that tempts your senses.
    • Visual Appeal: Glossy chocolate with bursts of color from the cherry fillings, making each bonbon a feast for the eyes.
    • Skill Level Needed: Basic candy-making skills are required, with some experience in handling chocolate and cherries.
    • Special Equipment: Chocolate molds, double boiler, and candy thermometer for precision.

    Recipe Overview

    • Difficulty Level: Intermediate; involves tempering chocolate and carefully filling molds.
    • Category: Dessert, Confectionery
    • Cuisine: A delightful fusion of classic American and French confectionery techniques.
    • Cost: Moderate cost with chocolate and cherries being the primary ingredients.
    • Season: Best enjoyed in spring and summer when cherries are in peak season.
    • Occasion: Ideal for celebrations, dinner parties, or as gourmet gifts.

    Why You’ll Love This Recipe

    Cherry chocolate bonbons are a chocolate lover’s dream come true. The contrasting flavors of sweet-tart cherries and rich chocolate create a truly memorable taste experience. The textures are also a treat, with the smooth chocolate coating giving way to a chewy cherry center. These bonbons are perfect for making ahead, allowing you to enjoy an impressive dessert with minimal prep the day of your event.

    Nutritionally, these bonbons offer a modest indulgence. Cherries provide a good source of vitamins A and C, fiber, and antioxidants, while dark chocolate can offer heart-healthy benefits. With the right ingredients, you can enjoy these treats as part of a balanced diet.

    Socially, cherry chocolate bonbons make a beautiful centerpiece for any dessert table. Their sophistication and elegance often spark conversation and add a touch of class to any gathering. Whether as a treat for yourself or a gift for others, their delightful taste and aesthetic appeal are sure to please.

    Finally, the recipe uses readily available ingredients, making it cost-effective without compromising on quality. This combination of taste, style, and affordability ensures you’ll return to this recipe time and again.

    Historical Background and Cultural Significance

    The concept of combining chocolate and cherries can be traced back to the age-old tradition of pairing fruits with chocolate for a decadent dessert experience. The pairing finds its roots in European confectionery, where chocolatiers skillfully blend these ingredients to create luxurious sweets.

    In France, chocolate bonbons became popular in the 19th century as a gift for special occasions. They were often handmade by skilled artisans who transformed simple ingredients into masterpieces. Over time, this tradition spread worldwide, leading to diverse interpretations of this classic confection.

    In America, cherry chocolate bonbons gained popularity in the mid-20th century and became a staple during holidays and special occasions. Different regions have adapted the recipe to include local flavors and variations, showcasing cultural diversity and culinary creativity.

    Traditionally, these bonbons are enjoyed during festive events and are often shared with friends and family, symbolizing joy and celebration.

    Ingredient Deep Dive

    Cherries: Fresh cherries bring a natural sweetness and a vibrant color that enhances the visual appeal of the bonbons. They’re rich in vitamins A and C and offer antioxidants and anti-inflammatory properties. When selecting cherries, look for bright, firm fruit without blemishes. Store them in the fridge to maintain freshness.

    Chocolate: High-quality dark or semi-sweet chocolate provides a rich base for these bonbons. Look for chocolate with a cocoa content of at least 60-70% for a deeper flavor profile. Store chocolate in a cool, dry place to prevent blooming.

    Common Mistakes to Avoid

    • Failing to temper the chocolate correctly: Ensure you follow proper tempering methods to achieve a glossy finish.
    • Using low-quality chocolate: Opt for high-quality cocoa content for better flavor and texture.
    • Overfilling the molds: Keep a balance to avoid overflowing when sealing the bonbons.
    • Skipping the cooling step: Allow adequate time for bonbons to set properly.
    • Inconsistent cherry distribution: Ensure even cherry placement for consistent taste.
    • Improper storage: Store finished bonbons in a cool, dry place to retain their texture.
    • Working in a hot kitchen: Chocolate is temperature-sensitive, so keep your workspace cool.
    • Ignoring mold preparation: Clean and dry mold thoroughly for a smooth release.
    • Underestimating preparation time: Allocate ample time for each step to ensure success.
    • Forgetting proper sealing: Ensure chocolate is sealed properly to prevent fillings from leaking.

    Essential Techniques

    Tempering Chocolate: Critical for creating a smooth and shiny finish. Involves heating chocolate to a specific temperature, cooling it, and then warming it slightly.

    Filling Molds: Precision is key. Carefully fill each mold cavity with chocolate before adding the cherry filling.

    Sealing Bonbons: Seal each bonbon correctly to encase fillings and prevent leaks.

    Cooling and Setting: Patience is essential. Allow adequate time for the bonbons to cool and set for optimal texture.

    Pro Tips for Perfect Cherry Chocolate Bonbons

    Choose the Right Chocolate: Higher cocoa content ensures a richer flavor and a stable temper.

    Utilize Room-Temperature Cherries: Keeps the chocolate from seizing when adding the filling.

    Double Dip for Thickness: Dip the bonbons twice for a thicker shell.

    Work Quickly: Tempered chocolate sets fast, so maintain a steady pace while filling molds.

    Use a Thermometer: Precision is key in achieving the perfect temper.

    Refrigerate Briefly, If Needed: A short chill can help set the chocolate completely.

    Experiment with Garnishes: Add a cherry piece or dust of cocoa powder on top.

    Practice Patience: The more methodical you are, the better the outcome.

    Variations and Adaptations

    Regional Variations: Swap traditional for maraschino cherries, adding a unique taste and texture.

    Seasonal Adaptations: Use frozen cherries in off-seasons without sacrificing flavor.

    Dietary Modifications: Substitute dairy-free chocolate for a vegan option.

    Flavor Variations: Introduce a liqueur-soaked cherry for a gourmet twist.

    Texture Modifications: Add a thin layer of ganache for an extra creamy center.

    Presentation Alternatives: Use heart-shaped molds for Valentine-themed bonbons.

    Serving and Presentation Guide

    Plating Techniques: Arrange bonbons in a circle on an elegant platter or a rustic wooden board.

    Garnishing Ideas: Top with a cherry half or a dusting of gold powder.

    Traditional Accompaniments: Serve with coffee or espresso for a classic pairing.

    Modern Serving Suggestions: Accompany with a scoop of vanilla ice cream.

    Temperature Considerations: Serve at room temperature for the best flavor release.

    Portion Control Tips: Two to three bonbons per serving as part of a dessert ensemble.

    Wine and Beverage Pairing

    Wine Pairings: A ruby port or zinfandel complements the fruity and chocolate notes.

    Non-Alcoholic Alternatives: Black cherry soda or a rich hot chocolate intensifies flavors.

    Coffee/Tea Pairings: Espresso pairs beautifully, or a cherry-infused black tea refreshes the palate.

    Temperature Considerations: Serve chilled wines or warm beverages to contrast.

    Serving Suggestions: Offer beverages in small demure glasses or cups for elegance.

    Storage and Shelf Life

    Detailed Storage Methods: Store in an airtight container to prevent moisture absorption.

    Temperature Requirements: Keep in a cool, dry place like a pantry or cellar.

    Container Recommendations: Use layers of parchment paper to prevent bonbons from sticking.

    Signs of Spoilage: Look out for white spots (bloom) or an off scent.

    Reheating Instructions: Avoid reheating; serve once removed from storage.

    Freezing Guidelines: Freeze on a baking sheet then transfer to an airtight container.

    Quality Expectations Over Time: Best consumed within 2 weeks for peak quality.

    Make Ahead Strategies

    Detailed Prep Timeline: Prepare chocolate shells 1 day in advance.

    Storage Instructions Between Steps: Chill partially assembled bonbons briefly for ease.

    Quality Impact Assessment: The shells maintain their snap when prepped beforehand.

    Assembly Tips: Ensure fillings are consistent to maintain texture.

    Reheating Guidelines: None required for this no-bake approach.

    Fresh Element Additions: Garnish freshly before serving.

    Scaling Instructions

    How to Halve the Recipe: Simply reduce ingredient quantities and use smaller molds.

    How to Double or Triple: Ensure ample cooling space for larger batches.

    Equipment Adjustments Needed: Larger molds and additional trays as quantity increases.

    Timing Modifications: May need adjusted cooling times for larger volumes.

    Storage Considerations for Larger Batches: Layer carefully to avoid damage.

    Nutritional Deep Dive

    Detailed Macro Breakdown: Each bonbon has approximately 60 calories, with 5g of carbs, 4g of fat, and 1g of protein.

    Micronutrient Analysis: Offers vitamin A and C from cherries, a touch of iron from chocolate.

    Health Benefits: Antioxidants from cherries and dark chocolate support heart health.

    Dietary Considerations: These treats can fit into a balanced diet when consumed in moderation.

    Portion Size Analysis: Moderation is key due to high sugar content, limiting to three per serving.

    Weight Management Tips: Complement with a low-calorie meal to balance indulgence.

    Dietary Adaptations

    Gluten-Free: This recipe is naturally gluten-free.

    Dairy-Free: Use dairy-free chocolate for lactose sensitivity.

    Vegan: Select a certified vegan dark chocolate option.

    Low-Carb: Substitute reduced-sugar chocolate.

    Keto: Increase fat content with cocoa butter addition.

    Paleo: Use raw cacao and dried cherries.

    Low-FODMAP: Ensure cherries are portioned in FODMAP-friendly quantities.

    Recipe Notes

    • Substitute cherries with raspberries for an elegant twist.
    • For added crunch, include a thin almond layer.
    • A little sea salt enhances chocolate depth.

    Troubleshooting Guide

    Texture Issues: Ensure chocolate is tempered for crisp shells.

    Flavor Balance: Regularly taste test during assembly.

    Temperature Problems: Work in a cool environment to avoid chocolate seizing.

    Equipment Challenges: Ensure all tools are dry to prevent seizing.

    Ingredient Substitution Impacts: Test alternatives on a small batch first.

    Timing Concerns: Allocate enough time for setting and cooling stages.

    Recipe Success Stories

    One reader adapted the recipe with white chocolate, winning over kids at a birthday party. Another crafted heart-shaped bonbons for a delightful Valentine’s treat. Readers often pair these with rose-scented teas, a community favorite.

    Frequently Asked Questions

    Why does my chocolate have a dull finish?

    This results from improper tempering. Ensure the chocolate is heated and cooled to precise temperatures for optimum sheen.

    Can I use frozen cherries?

    Yes, just thaw and pat dry to remove excess moisture for a consistent texture.

    How do I prevent the filling from leaking?

    Sealing properly and not overfilling ensures a clean finish without leaks.

    Is it possible to make bonbons without molds?

    While molds provide a professional look, hand-rolled bonbons have a rustic, homemade charm.

    What’s the best way to store bonbons for gifting?

    Use small boxes or tins lined with parchment paper to maintain freshness and presentation.

    Can I use milk chocolate instead?

    While you can, it will result in a sweeter bonbon; adjust other sweet elements accordingly.

    How do I achieve a uniform shape?

    Mold rotation and ensuring even fillings will enhance shape uniformity.

    Do these bonbons need refrigeration?

    They don’t require refrigeration but should be kept in a cool environment to maintain texture.

    What’s the ideal serving temperature?

    Room temperature brings out the best flavors and textures.

    Can I add nuts to the filling?

    Yes, chopped nuts can be an excellent addition for crunch and flavor complexity.

    Why are my bonbons sticky?

    This could be due to untempered chocolate; ensure chocolate is cooled properly to solidify.

    Can I use artificial cherry flavoring?

    While possible, it’s best to use natural cherry flavor for authenticity and quality.

    Additional Resources

    Explore related recipes such as dark chocolate truffles and berry-infused chocolates, watch tempering chocolate technique videos, read up on chocolate and cherry ingredient guides, and find recommendations for the best chocolate molds.

    Join the Conversation

    Share your cherry chocolate bonbon creations on social media using #CherryChocolateBonbons. Join our community challenges for themed versions and enjoy photography tips to capture the beauty of your homemade bonbons. Don’t forget to leave a recipe review.

    Cherry Chocolate Bonbons: A Delightful Bite of Decadence

    ⚖️
    Difficulty
    Moderate
    ⏲️
    Prep Time
    30 mins
    🕒
    Cook Time
    10 mins
    ⏱️
    Total Time
    40 mins
    🍽️
    Servings
    12 bonbons

    Indulge in the rich flavors of these Cherry Chocolate Bonbons, a must-try dessert for any chocolate and cherry enthusiast. These bonbons deliver a delightful combination of decadent dark chocolate and the succulent tang of cherries, perfectly blending to create a heavenly treat. Whether you’re searching for a delicious homemade gift or a sumptuous after-dinner dessert, these bonbons are sure to impress.

    The recipe for Cherry Chocolate Bonbons is both a feast for the senses and an exciting culinary adventure. The dish’s allure lies in the contrast between the rich chocolate shell and the slightly tart cherry filling, making every bite a nuanced experience. Ideal for celebrations or intimate gatherings, these bonbons are the epitome of culinary elegance.

    Quick Recipe Highlights

    • Flavor Profile: Deep chocolate with a tangy cherry center
    • Texture: Smooth chocolate exterior with a juicy, soft interior
    • Aroma: Rich cocoa with hints of fruity cherry
    • Visual Appeal: Glossy chocolate with a vibrant cherry center
    • Skill Level Needed: Moderate, requires some tempering skills
    • Special Equipment: Candy thermometer, silicone mold

    The Recipe

    Serves: 12 bonbons

    Prep Time: 30 mins

    Cook Time: 10 mins

    Total Time: 40 mins

    Kitchen Equipment Needed

    • Candy thermometer
    • Silicone mold
    • Double boiler or microwave-safe bowl

    Ingredients

    • 200g dark chocolate, finely chopped
    • 12 fresh cherries, pitted
    • 1 tbsp cherry liqueur (optional)
    • 50g white chocolate, for decoration

    Directions

    1. Melt the dark chocolate in a double boiler, stirring regularly until smooth.
    2. Using a spoon, fill each mold cavity with a small amount of melted chocolate, swirling to coat all sides. Reserve the remaining chocolate.
    3. Place a cherry in the center of each mold and, if using, add a drop of cherry liqueur.
    4. Seal the bonbons by covering the cherry with more melted chocolate, ensuring it’s completely encased.
    5. Chill the bonbons in the refrigerator for at least 20 minutes to set.
    6. Melt the white chocolate and drizzle over the set bonbons for added decoration.
    7. Carefully remove the bonbons from the molds and serve.

    Recipe Notes

    • For a non-alcoholic version, omit the cherry liqueur.
    • Ensure the molds are fully coated to prevent any leaks.
    • Store bonbons in an airtight container in a cool place for up to a week.

    Irresistible German Chocolate Pecan Pound Cake Recipe for Dessert Lovers

    Mouth-watering German Chocolate Pecan Pound Cake Recipe

    Indulge in the rich and decadent flavors of the Mouth-watering German Chocolate Pecan Pound Cake, a dessert that’s sure to impress both family and friends. This classic cake combines the irresistible taste of German chocolate with crunchy pecans to create a sumptuous treat. Whether you’re a seasoned baker or trying your hand at this delicious cake for the first time, you’re in for an unforgettable culinary experience.

    The German Chocolate Pecan Pound Cake is a harmonious blend of dense, moist textures with the unmistakable flavors of chocolate and toasted pecans. Each bite delivers a delightful combination of richness and sweetness, while the nuts add an extra layer of crunch that perfectly complements the cake’s tender crumb. If you’re looking for a show-stopping dessert that’s perfect for any occasion, this cake is the ultimate choice.

    Quick Recipe Highlights

    • Flavor Profile: A luxurious balance of rich chocolate, buttery pecans, and sweet caramel-like notes.
    • Texture: Moist and dense with a satisfying crunch from pecans.
    • Aroma: Decadent chocolate aroma with hints of toasted nuts.
    • Visual Appeal: A beautiful golden-brown crust with speckles of pecans throughout the cake.
    • Skill Level Needed: Intermediate; requires basic baking skills and attention to detail with layering and folding techniques.
    • Special Equipment: Bundt cake pan, mixer for batter blending.

    Recipe Overview

    • Difficulty Level: Intermediate – requires precise ingredient measurements and specific baking technique execution.
    • Category: Dessert, baking
    • Cuisine: American with German-influenced chocolate elements.
    • Cost: Moderate – includes quality chocolate, pecans, and pantry-staple ingredients.
    • Season: Perfect for fall and winter when warm, comforting desserts are in high demand.
    • Occasion: Ideal for holiday gatherings, birthdays, or any special celebration needing a sweet touch.

    Why You’ll Love This Recipe

    The taste of German Chocolate Pecan Pound Cake is a delightful experience with its rich and sweet flavor, making it the perfect dessert for chocolate lovers. The cake’s texture is both moist and dense, providing a satisfying bite that’s accentuated by the crunchy pecans. Preparation is straightforward, making it convenient for both experienced bakers and those new to crafting layered cakes. The recipe is nutritionally rewarding when enjoyed in moderation, offering a sweet treat with some health benefits from pecans.

    This cake shines at social gatherings, drawing in friends and family with its delicious aroma and enticing appearance. Whether you serve it during a cozy family dinner or at a festive event, it’s bound to be a beloved hit. Its cost-effectiveness is another advantage, as most ingredients are pantry staples with pecans being a worthwhile indulgence.

    Historical Background and Cultural Significance

    The origin of the German Chocolate Pecan Pound Cake can be traced back to the traditional German chocolate cake, which was created not in Germany but by an American baker using a type of chocolate made by Samuel German. The cake gained popularity in the mid-20th century and has since evolved to incorporate regional variations and creative adaptations, such as the incorporation of pecans for added texture.

    Culturally significant in American households, especially in the southern United States, this cake represents the fusion of traditions and is often associated with festive gatherings. Over the years, variations of the recipe have emerged, embracing ingredients like pecans and adding a cultural twist to the classic dish.

    Ingredient Deep Dive

    – **Pecans**: Known for their cultural importance in southern American cuisine, pecans offer nutritional benefits such as healthy fats and antioxidants. They should be stored in a cool, dry place to maintain freshness and can be substituted with walnuts.
    – **German Chocolate**: This sweet chocolate variety is integral to the cake’s iconic flavor profile. When selecting chocolate, aim for high-quality brands to ensure a rich taste. Proper storage in a cool, dark place will prevent melting and discoloration.
    – **Butter**: Provides essential moisture and richness to the cake. It’s important to use unsalted butter to control the cake’s salt content. Store in the fridge to keep it fresh before use.

    Common Mistakes to Avoid

    • Overmixing the batter, which can result in a tough cake.
    • Using cold ingredients that prevent smooth incorporation.
    • Skipping the cooling step, leading to a fragile structure.
    • Improperly measuring flour, affecting batter consistency.
    • Baking at incorrect temperatures, resulting in uneven baking.
    • Neglecting to grease the pan, causing sticking.
    • Cutting the cake while still hot, leading to crumbling.
    • Substituting key ingredients without considering impacts on flavor and texture.
    • Underbaking the cake by not testing with a toothpick.
    • Failing to toast pecans before adding, which could dull flavor depth.

    Essential Techniques

    Mastering the creaming technique is crucial for achieving a light, fluffy texture in this German Chocolate Pecan Pound Cake. This involves beating butter and sugar until pale and fluffy, helping to incorporate air into the batter. Achieving the right batter consistency ensures that the cake rises correctly and maintains its moistness. Proper folding of pecans into the batter, ensuring even distribution without deflating the mix, is key for balanced flavor and texture.

    Pro Tips for Perfect German Chocolate Pecan Pound Cake

    – Ensure all ingredients are at room temperature for the best blending results.
    – Use a kitchen scale for precise ingredient measurements.
    – Toast pecans beforehand for enhanced flavor and fragrance.
    – Line the pan with parchment paper to prevent sticking and ensure easy removal.
    – Avoid opening the oven door frequently to maintain consistent baking temperature.
    – Allow the cake to cool in the tin before removing to retain its shape.
    – Frost with a light layer of cream cheese icing for added creaminess.
    – Use high-quality chocolate to capitalize on flavor and richness.

    Variations and Adaptations

    Explore regional variations of the cake by incorporating local nuts or flavors like coconuts or almonds. Seasonal adaptations could include adding spices like cinnamon or nutmeg during fall. To accommodate dietary restrictions, consider gluten-free flour blends or substitutes like almond milk for lactose intolerance. Experiment with flavor variations by incorporating citrus zests or different types of chocolate for unique twists.

    Serving and Presentation Guide

    When serving German Chocolate Pecan Pound Cake, slice into even portions, and garnish with a sprinkle of cocoa powder or additional toasted pecans for visual appeal. Traditional accompaniments might include a dollop of whipped cream or a scoop of vanilla ice cream. Serve the cake at room temperature to highlight its flavors, and consider presenting it on a cake stand for an elegant touch.

    Wine and Beverage Pairing

    Pair German Chocolate Pecan Pound Cake with a rich port wine to enhance its chocolatey notes. For non-alcoholic alternatives, a hot cup of coffee or black tea complements the cake’s decadence beautifully. For a refreshing contrast, consider serving alongside cold brew coffee, which highlights the chocolate elements distinctively.

    Storage and Shelf Life

    Store the cake in an airtight container at room temperature for up to three days to maintain moisture. It can be refrigerated for longer storage but should be brought to room temperature before serving for optimal texture. If freezing, wrap the cake slice tightly to prevent freezer burn and thaw at room temperature before enjoying.

    Make Ahead Strategies

    Prepare the cake batter a day in advance to allow flavors to develop. The baked cake can be cooled and wrapped in plastic wrap to store until ready to decorate or serve. Pre-toast and store pecans separately to ensure they stay crunchy. If creating a layered cake, each layer can be frozen then assembled and iced on the day of serving for ultimate freshness.

    Scaling Instructions

    For halving the recipe, divide ingredients evenly and use a smaller pan, adjusting baking time accordingly. When doubling, use a larger pan or multiple pans to ensure even cooking. For larger batches, ensure ample cooling and storage solutions to avoid spoilage.

    Nutritional Deep Dive

    Each serving of German Chocolate Pecan Pound Cake provides an indulgent treat with balanced macros, being primarily carbohydrates from sugar and flour, with fats from butter and pecans contributing to its rich flavor. Pecans offer heart-healthy fats, while the chocolate adds micronutrients like magnesium, beneficial for indulgence when consumed in moderation.

    Dietary Adaptations

    To accommodate gluten-free diets, use an appropriate gluten-free flour mix. Dairy-free adaptations include using almond or soy milk, and vegan adaptations can substitute eggs with flaxseed meal. For low-carb or keto options, almond flour can be used in place of regular flour, and sweeteners like erythritol instead of sugar.

    Recipe Notes

    • Substitute pecans with walnuts for a slightly different flavor.
    • Milk chocolate can be used for a sweeter cake profile.
    • Consider adding a caramel drizzle for added sweetness and visual appeal.

    Troubleshooting Guide

    – If the cake feels too dense, ensure proper creaming of sugar and butter.
    – Avoid overpoweringly sweet results by accurately measuring sugar.
    – If the cake sinks in the middle, check oven temperature and baking time consistency.
    – For dry cake, avoid overbaking and ensure proper ingredient ratios.
    – If the cake sticks to the pan, ensure thorough greasing and lining before baking.

    Recipe Success Stories

    Join our community by sharing your success stories and variations of the German Chocolate Pecan Pound Cake. Readers have creatively experimented with alternative nuts and chocolates, achieving delightful adaptations. Take inspiration from others’ plating techniques and presentation styles to further elevate your baking experience.

    Frequently Asked Questions

    What makes German Chocolate Pecan Pound Cake special?

    This cake is special because of its unique combination of dense pound cake texture with the rich flavors of German chocolate and pecans, delivering a delightful experience for chocolate and nut lovers.

    Can I make this cake ahead of time?

    Yes, the cake can be made in advance and stored. You can bake it ahead, wrap tightly in plastic wrap, and store to maintain freshness. It’s best assembled and served on the day of use for optimal texture.

    What should I do if my pound cake is too dense?

    If your cake is too dense, revisit the creaming process – butter and sugar should be beaten until light and fluffy, and ensure all other baking steps are precisely followed for the best results.

    Can I substitute pecans with another nut?

    Yes, walnuts or almonds can be used as substitutes, though they will impart a slightly different flavor and texture to the final cake.

    How do I prevent sticking in the bundt pan?

    To prevent sticking, grease the bundt pan thoroughly and dust with flour. Additionally, consider using non-stick spray specifically designed for baking.

    Is it possible to make this cake gluten-free?

    Absolutely, by using a high-quality gluten-free flour blend, you can adapt this recipe to be gluten-free without compromising on flavor.

    What is the best way to store leftover cake?

    The cake should be stored in an airtight container at room temperature for up to three days. To extend its shelf life, refrigeration is recommended, but it should be at room temperature when served.

    Why does my cake have a crack on top?

    Cracks can occur from oven temperature being too high, causing the outside to cook faster than the inside. Ensure your oven temperature is calibrated and avoid opening the oven door during baking.

    What complimentary beverages pair best with this cake?

    Complementary beverages include a rich port wine or a fresh cold brew coffee, which balance the cake’s sweetness and enhance its chocolate notes beautifully.

    Can I freeze the cake for later use?

    Yes, the cake can be frozen if wrapped tightly to prevent freezer burn. Thaw at room temperature and serve to enjoy its rich flavors and moist texture.

    Additional Resources

    Explore more with our related recipes, including classic German Chocolate Cake, step-by-step technique videos for perfect cake texture, ingredient guides for premium chocolate and pecans, and equipment recommendations for enhanced baking success.

    Join the Conversation

    We invite you to join our vibrant community! Share your creations via social media using our hashtag #ChocolatePecanCakeMagic, and tag us to showcase your successful bakes. Participate in community challenges and engage with fellow baking enthusiasts. We’d love to see your unique adaptations and hear your feedback!

    German Chocolate Pecan Pound Cake: A Decadent Delight

    ⚖️
    Difficulty
    Intermediate

    ⏲️
    Prep Time
    20 mins

    🕒
    Cook Time
    75 mins

    ⏱️
    Total Time
    95 mins

    🍽️
    Servings
    10

    Imagine slicing into a moist and tender German Chocolate Pecan Pound Cake, where the rich flavors of chocolate and pecans harmoniously blend to create a truly decadent dessert experience. This inviting cake is perfect for special occasions or as an indulgent treat. With its mouth-watering aroma and beautiful presentation, it is sure to impress your family and friends.

    This irresistible German Chocolate Pecan Pound Cake boasts a delightfully nutty flavor that pairs perfectly with the cake’s rich chocolate undertones. The combination of these classic flavors creates a delightful balance that you will savor in every bite. Served with a scoop of vanilla ice cream or a dollop of whipped cream, it becomes an unforgettable dessert experience.

    The German Chocolate Pecan Pound Cake is not only delicious but also visually stunning. Its deep chocolate color contrasted with the specks of toasted pecans offers a pleasing aesthetic on your table. This cake is perfect for bakers looking for a rewarding challenge with a sweet payoff.

    Quick Recipe Highlights

    • Flavor Profile: Rich chocolate with nutty pecan undertones
    • Texture: Moist, dense, with crunchy pecan pieces
    • Aroma: Sweet chocolate mingled with toasted nuts
    • Visual Appeal: Dark chocolate hues studded with pecans
    • Skill Level Needed: Intermediate—perfect for adventurous bakers
    • Special Equipment: Bundt pan, electric mixer

    The Recipe

    Serves: 10

    Prep Time: 20 mins

    Cook Time: 75 mins

    Total Time: 95 mins

    Kitchen Equipment Needed

    • Bundt pan
    • Electric mixer
    • Mixing bowls
    • Spatula
    • Measuring cups and spoons

    Ingredients

    • 1 cup unsalted butter, softened
    • 2 cups granulated sugar
    • 4 large eggs
    • 2 cups all-purpose flour
    • 1/2 cup unsweetened cocoa powder
    • 1 teaspoon baking powder
    • 1/2 teaspoon salt
    • 1 cup buttermilk
    • 1 teaspoon vanilla extract
    • 1 cup pecans, toasted and chopped

    Directions

    1. Preheat your oven to 325°F (165°C) and grease a Bundt pan thoroughly.
    2. In a large bowl, cream the butter and sugar together until light and fluffy using an electric mixer.
    3. Add the eggs one at a time, beating well after each addition.
    4. In a separate bowl, whisk together the flour, cocoa powder, baking powder, and salt.
    5. Gradually add dry ingredients to the creamed mixture, alternating with buttermilk, and mix until just combined.
    6. Stir in the vanilla extract and toasted pecans by hand.
    7. Pour the batter into the prepared Bundt pan and spread evenly.
    8. Bake for 75 minutes or until a toothpick inserted into the center comes out clean.
    9. Allow the cake to cool in the pan for 10 minutes before transferring to a wire rack to cool completely.

    Recipe Notes

    • Ensure butter is well softened for a creamer batter.
    • To toast pecans, bake at 350°F (175°C) for 8-10 minutes, stirring occasionally until fragrant.
    • This cake pairs excellently with a light dusting of powdered sugar or a chocolate glaze.

    Enjoy the delectable German Chocolate Pecan Pound Cake with a cup of coffee or as an after-dinner delight. Its rich flavors and delightful textures make it a go-to recipe for anyone seeking to impress with their baking skills.

    Irresistible Country Apple Fritter Bread Recipe for Homemade Delight

    Country Apple Fritter Bread: A Delightful Treat for Every Season

    The Country Apple Fritter Bread is a perfect blend of sweet, comforting flavors that evoke the essence of homemade baked goods. With its rich aroma and decadent texture, this delightful creation is a must-try for any baking enthusiast. Combining the tartness of apples with a cinnamon-infused batter, it offers a satisfying balance of flavors. This recipe turns simple pantry ingredients into a bakery-style bread that will quickly become a family favorite.

    Whether you’re looking for a sweet breakfast treat or an afternoon pick-me-up, the Country Apple Fritter Bread is an ideal choice. It captures the timeless flavors of fall but can easily be enjoyed throughout the year. The combination of fresh apples and a sugary cinnamon crust makes it both nostalgic and impossible to resist.

    Quick Recipe Highlights

    • Flavor Profile: A harmonious blend of sweet and tart with a cinnamon finish
    • Texture: Moist and tender with a slight crunch from the streusel topping
    • Aroma: Inviting notes of cinnamon and freshly baked apples
    • Visual Appeal: Golden brown with visible chunks of glazed apples
    • Skill Level Needed: Basic baking skills with simple techniques
    • Special Equipment: Mixing bowls, loaf pan, and a whisk

    Recipe Overview

    • Difficulty Level: Easy – Suitable for beginner bakers with basic steps
    • Category: Breakfast, Snack
    • Cuisine: American comfort food with a classic twist
    • Cost: Affordable – Apples and pantry staples make up the bulk of costs
    • Season: Best enjoyed in autumn, though delicious all year round
    • Occasion: Perfect for family gatherings, brunches, or as a tea-time treat

    Why You’ll Love This Recipe

    The taste of Country Apple Fritter Bread is a delightful combination of sweet apples served in a buttery bread with a hint of cinnamon spice. The texture is moist yet slightly firm, making it a versatile treat that can be enjoyed on its own or with a pat of butter. It’s a convenient recipe, requiring only basic ingredients and minimal preparation time, making it perfect for a quick homemade baking fix. Rich in antioxidants from apples and offering dietary fiber, this bread not only satisfies sweet cravings but also provides some nutritional benefits. The quick preparation and baking time make it an effortless option for social gatherings or as a homemade gift. Utilizing common ingredients, it’s both cost-effective and accessible, ensuring that you can enjoy this treat without stretching your budget.

    Historical Background and Cultural Significance

    The origins of apple fritters date back to ancient times, with apples being a staple ingredient across various cultures. The combination of apples and spiced batter has been a favorite throughout history, often served during harvest festivals and as a harvest-time dessert in Western Europe. As settlers brought these traditions to America, they adapted the recipes into more practical forms like the Apple Fritter Bread. Over time, this bread became synonymous with home baking, particularly during fall when apples are abundant. Each region has put its spin on this, with variations that reflect local produce and taste preferences. Traditionally, it’s served warm, often accompanied by a hot beverage.

    Ingredient Deep Dive

    – **Apples**: Essential to the recipe, providing natural sweetness and moisture. They are a symbol of autumn and are loaded with antioxidants and dietary fiber. Choose firm varieties like Granny Smith or Honeycrisp, and store them in a cool, dry place to extend freshness. Substitute with pears for a unique twist.
    – **Cinnamon**: Offers a warm, sweet-spicy flavor that is indispensable in this bread. Known for its antioxidant properties, cinnamon should be a staple in your pantry. Store in a cool, dark place and replace every six months for the best aroma.
    – **Brown Sugar**: Enhances the depth of flavor and contributes to the bread’s moistness. Often interchangeable with white sugar, but using brown sugar yields a richer taste and color. Store in an airtight container to keep it from hardening.

    Common Mistakes to Avoid

    • Overmixing the batter can result in a tough texture. Mix just until combined.
    • Using apples that are overly ripe to avoid a mushy consistency.
    • Skipping the sugar topping compromises the signature caramelized crust.
    • Underbaking leads to a gummy center; always check with a toothpick.
    • Forgetting to grease the pan may cause the bread to stick.
    • Not allowing the bread to cool before slicing increases crumbling.
    • Incorrect apple selection – avoid soft eating varieties.
    • Skipping the resting period before serving lessens the developed flavors.

    Essential Techniques

    Understanding the basic techniques of mixing, folding, and baking is crucial for this recipe. Proper mixing ensures a consistent texture, while folding helps incorporate apples without deflating the batter. Baking to the correct temperature is important to achieve the perfect crumb and avoid dryness. Visual cues like a golden-brown hue and a toothpick with only a few moist crumbs confirm doneness.

    Pro Tips for Perfect Country Apple Fritter Bread

    – Opt for tart apple varieties such as Granny Smith for a balanced flavor.
    – Allow ingredients, especially eggs and butter, to reach room temperature for easier blending.
    – Use parchment to line the loaf pan for easy removal.
    – Cinnamon can be substituted with nutmeg for a spicier note.
    – Enhance flavors by adding a small amount of nutmeg or cloves to the batter.
    – Add a touch of lemon juice to prevent apple browning and intensify apple tartness.
    – Let the bread rest overnight for a more intense flavor experience.
    – Freeze leftover bread for quick future treats by slicing and wrapping individually.

    Variations and Adaptations

    Try regional variations using local fruits like pears in place of apples. During spring, berries make for a refreshing change. For a gluten-free adaptation, substitute all-purpose flour with almond or coconut flour. To cater to dietary requirements, swap out butter with coconut oil for a dairy-free version. Enhance flavor by adding walnuts for crunch or caramel sauce for extra sweetness.

    Serving and Presentation Guide

    Slice and present the bread on a rustic wooden board to emphasize its farmhouse appeal. Garnish with a dusting of powdered sugar or a drizzle of glaze for added sweetness and visual appeal. Pair with vanilla ice cream for a dessert alternative, or serve with a dollop of whipped cream for celebration. Control portions by slicing thinly, offering it as part of a larger array of pastries. Serve chilled for a firmer texture or warmed for a softer, more luxurious experience.

    Wine and Beverage Pairing

    Pair this bread with a crisp white wine like Riesling to complement the apple and cinnamon flavors. For a non-alcoholic option, apple cider enhances the apple theme, while a robust coffee provides a contrasting rich bitter note. If you prefer tea, a chai blend echoes the spices in the bread. Serve beverages slightly chilled for enhanced refreshment, or warm for cozy enjoyment.

    Storage and Shelf Life

    Store apple fritter bread in an airtight container at room temperature for up to three days. For extended freshness, refrigerate for up to one week. Check for spoilage indicators like mold or unusual odor. To reheat, warm slices in an oven rather than a microwave to preserve texture. The bread freezes well; wrap slices tightly before placing them in a freezer-friendly bag, ideal for enjoying over a month.

    Make Ahead Strategies

    Prepare the batter beforehand and refrigerate overnight to enhance flavor infusion. Alternatively, bake a day in advance, wrap, and store at room temperature. This allows flavors to meld, providing a richer experience. When ready to serve, reheat quickly in a preheated oven to regain freshness. Adding fresh toppings like a glaze or sliced apples re-enlivens day-old bread.

    Scaling Instructions

    To halve the recipe, divide all ingredients by two, altering baking time as necessary—begin checking 5-10 minutes early. For larger batches, double the recipe but ensure proper mixing in a large enough bowl. Divide batter evenly between loaf pans to maintain a consistent bake. Remember, larger quantities may require additional baking time, and storage becomes crucial to maintaining freshness over days.

    Nutritional Deep Dive

    The Country Apple Fritter Bread is a good source of vitamin C, thanks to apples, and provides essential fiber to aid digestion. Balanced in sugars and fats, it offers a moderate calorie count, making it a feasible indulgence in a balanced diet. Each serving provides a comforting proportion of carbohydrates necessary for energy. Consider portion control when sharing as part of an overall dietary plan.

    Dietary Adaptations

    For a gluten-free version, replace standard flour with a gluten-free blend. Implement coconut oil in place of butter for a dairy-free requirement. Use alternatives like applesauce to reduce sugar content, making it suitable for low-sugar diets. Incorporate flaxseed meal in replacement of eggs for a vegan-friendly version, or skip the sugar topping to ensure keto compatibility.

    The Recipe

    Serves: 8

    Prep Time: 15 mins

    Cook Time: 55 mins

    Total Time: 70 mins

    Kitchen Equipment Needed

    • Mixing bowls
    • Whisk
    • Loaf pan
    • Oven
    • Measuring cups and spoons
    • Cooling rack

    Ingredients

    • 1/3 cup brown sugar
    • 1 teaspoon ground cinnamon
    • 2/3 cup white sugar
    • 1/2 cup butter, softened
    • 2 eggs
    • 1 1/2 teaspoons vanilla extract
    • 1 1/2 cups all-purpose flour
    • 1 3/4 teaspoons baking powder
    • 1/2 cup milk
    • 2 apples, peeled and chopped
    • 1 tablespoon butter
    • 1 tablespoon flour (for apples)
    • Brown sugar and cinnamon for topping

    Directions

    1. Preheat the oven to 350°F (175°C). Grease and flour a 9×5 inch loaf pan or line with parchment paper.
    2. Mix the brown sugar and cinnamon together in a small bowl. Set aside.
    3. Cream together the white sugar and butter until smooth in a large bowl. Beat in the eggs, one at a time, then add the vanilla extract.
    4. Combine the flour and baking powder together in a different bowl and blend into the creamed mixture. Mix in milk until smooth.
    5. Pour half the batter into the prepared pan. Cover with half of the apple mixture and half of the brown sugar mixture. Lightly pat the apple mixture into the batter.
    6. Pour the remaining batter over the apple layer; top with remaining apple mixture and brown sugar mixture. Lightly pat the apples into the batter and swirl the brown sugar mixture through the apples using a spoon.
    7. Bake in the preheated oven until a toothpick inserted in the center of the loaf comes out clean, about 50 to 60 minutes. Cool in the pan for about 10 minutes before removing to a wire rack to cool completely.

    Recipe Notes

    • Adding chopped nuts can introduce a crunchy texture.
    • Additional vanilla extract can enhance flavor depth.
    • Pour a simple glaze on top for extra sweetness.
    • Experiment with different spices for a unique taste.

    Troubleshooting Guide

    – If the texture seems dense, check the freshness of your baking powder.
    – For a too sweet bread, reduce the sugar topping.
    – Uneven cooking may be fixed by preheating longer or placing tin foil over the top mid-bake.
    – Dry bread often results from overbaking; check doneness just as a crust begins to form.
    – Adding excess apples can lead to undercooked areas; use a consistent amount.
    – Incorporating cold butter rather than softened impacts even mixing.

    Recipe Success Stories

    Join our community and share your creative adaptations or variations! Readers have enjoyed adding fresh berries and using unique local apple varieties. One baker successfully tried an almond glaze as a topping for enhanced richness. Share your presentation photos on social media using #CountryAppleFritterBread, and connect with others sharing your baking passion. We love to see how you make this recipe your own!

    Frequently Asked Questions

    Can I make this bread without a loaf pan?

    Yes, you can use muffin tins or a cake pan. Adjust the baking time accordingly to prevent overbaking. A muffin tin offers convenient snack portions and may require about 20-25 minutes in the oven.

    What’s the best way to store leftover bread?

    Keep the bread in an airtight container at room temperature for up to three days. For longer storage, freeze individual slices to maintain texture and flavor.

    Can I use green apples instead?

    Absolutely! Green apples like Granny Smith offer a delightful tartness that pairs well with the bread’s sweetness. Adjust sugar levels if you prefer a sweeter overall taste.

    How can I prevent the bread from sticking to the pan?

    Ensure proper greasing with butter and a light dusting of flour or use parchment paper lining to prevent sticking and ease removal.

    How important is the resting period?

    Resting allows the flavors to meld and the texture to stabilize, making the bread easier to slice and enjoy. It’s particularly important if planning to serve cut slices that hold shape.

    What should I do if my batter is too thick?

    If your batter is thick, it might be due to dry ingredients. Add a tablespoon of milk at a time, folding gently until reaching a smooth consistency.

    Can the recipe be made vegan?

    Yes, substitute the eggs with flax eggs and the butter with a vegan alternative like coconut oil.

    How to enhance the flavor more towards cinnamon?

    Incorporate a teaspoon of cinnamon into the main batter alongside its presence in the topping mixture.

    Why is my bread not rising properly?

    Ensure that your baking powder is fresh—bubbles should form when combining it with hot water. An expired leavening agent will affect rise significantly.

    Is it okay to add a glaze on top?

    Absolutely. Adding a simple powdered sugar glaze can heighten sweetness, and incorporating vanilla or citrus juice ensures a balanced flavor addition.

    Additional Resources

    Explore complementary recipes such as cinnamon rolls or apple pie to further indulge in classic flavors. View online technique videos for tips on perfect batter mixing, and check guides that enhance apple selection and preparation. Consider equipment recommendations for an efficient baking setup, and discover seasonal variations that align with locally available fruits.

    Join the Conversation

    Engage with us on social media by tagging your Country Apple Fritter Bread creations with #CountryAppleFritterBread. Discover photography tips to capture your masterpiece effectively, and join our seasonal community challenges to showcase your baking skills. We encourage detailed recipe reviews to share experiences and adaptations that others may benefit from. Your contributions help build a vibrant community focused on the shared love for baking.

    Country Apple Fritter Bread: A Delightful Homemade Treat

    ⚖️
    Difficulty
    Easy

    ⏲️
    Prep Time
    20 mins

    🕒
    Cook Time
    50 mins

    ⏱️
    Total Time
    70 mins

    🍽️
    Servings
    8

    There’s nothing quite as comforting as the aroma of freshly baked bread filling your kitchen. This Country Apple Fritter Bread combines juicy apples with a hint of spice, creating a delightful harmony of flavors. It’s the perfect recipe for those who enjoy the rich taste of apples in a moist and flavorful bread. Whether you’re looking for a delectable breakfast treat or a sweet afternoon snack, this apple fritter bread will surely satisfy your cravings.

    Quick Recipe Highlights

    • Flavor Profile: A sweet blend of cinnamon and nutmeg with tender apple chunks
    • Texture: Soft and moist with a slight crunch from apples
    • Aroma: Warm, inviting spices with fresh apple undertones
    • Visual Appeal: Golden brown crust with visible apple pieces
    • Skill Level Needed: Suitable for beginners and seasoned bakers alike
    • Special Equipment: Loaf pan, mixing bowls, and a whisk

    The Recipe

    Serves: 8

    Prep Time: 20 mins

    Cook Time: 50 mins

    Total Time: 70 mins

    Kitchen Equipment Needed

    • Loaf pan
    • Mixing bowls
    • Whisk

    Ingredients

    • 1/3 cup brown sugar
    • 1 teaspoon ground cinnamon
    • 2/3 cup white sugar
    • 1/2 cup butter, softened
    • 2 eggs
    • 1 1/2 teaspoons vanilla extract
    • 1 1/2 cups all-purpose flour
    • 1 3/4 teaspoons baking powder
    • 1/2 cup milk
    • 2 apples, peeled and chopped

    Directions

    1. Preheat your oven to 350°F (175°C). Grease and flour a loaf pan.
    2. In a small bowl, mix together brown sugar and cinnamon. Set aside.
    3. In a large bowl, beat sugar and butter together until smooth and creamy. Add the eggs one at a time, then stir in the vanilla extract.
    4. Combine flour and baking powder, then add to the creamed mixture. Stir in milk until smooth.
    5. Pour half the batter into the prepared pan. Add half the apples and half the cinnamon sugar mixture. Lightly swirl with a knife.
    6. Repeat with remaining batter, apples, and cinnamon sugar. Swirl the top layer gently.
    7. Bake for 50 minutes or until a toothpick inserted in the center comes out clean. Let cool in the pan before transferring to a wire rack.

    Recipe Notes

    • Try using a mix of apple varieties for enhanced flavor.
    • Consider adding nuts for additional crunch.
    • Can be stored in an airtight container for up to three days.

    Delicious Cranberry Orange Cake: The Ultimate Easy Holiday Dessert


    Cranberry Orange Cake – Easy Holiday Dessert

    ⚖️
    Difficulty
    Easy
    ⏲️
    Prep Time
    20 mins
    🕒
    Cook Time
    40 mins
    ⏱️
    Total Time
    60 mins
    🍽️
    Servings
    8

    Experience the perfect harmony of tart cranberries and bright orange citrus in this Cranberry Orange Cake Recipe. An easy holiday dessert that brings a touch of elegance and a burst of flavor to any festive table. Whether you are a seasoned baker or trying your hand at something new, this cake’s delightful combination of flavors and simple preparation make it an ideal choice for your holiday celebrations.

    Quick Recipe Highlights

    • Flavor Profile: A perfect balance of sweet and tart with a refreshing citrus kick.
    • Texture: Moist and tender crumb with bursts of juicy cranberries.
    • Aroma: Inviting blend of orange zest and baking aromas.
    • Visual Appeal: Bright, vibrant cranberries speckling a golden cake.
    • Skill Level Needed: Basic baking skills, suitable for beginners.
    • Special Equipment: Standard cake pan, mixing bowls, whisk.

    Recipe Overview

    • Difficulty Level: Easy, thanks to straightforward steps and minimal ingredients.
    • Category: Dessert, Cake
    • Cuisine: Part of festive and home-baking traditions.
    • Cost: Affordable, with common pantry ingredients complemented by seasonal cranberries and oranges.
    • Season: Ideal for winter holidays when cranberries are fresh and in abundance.
    • Occasion: Perfect for Christmas, Thanksgiving, and other festive gatherings.

    Why You’ll Love This Recipe

    The Cranberry Orange Cake is a delightful treat that’s both rich in flavor and visually stunning. Its taste lies in the refreshing blend of tart cranberries with sweet orange. The soft, moist texture makes it irresistible, while the recipe’s simplicity ensures minimal time in the kitchen, allowing more time to enjoy with family and friends. Nutritionally, it’s a balanced sweet treat as cranberries are antioxidant-rich. Economically, it’s made with budget-friendly essentials, making it accessible anytime. Shared at gatherings, this cake is sure to be the talk of the table, bringing joy and color to your holiday spread.

    Historical Background and Cultural Significance

    Cranberries, cherished in North America, have long been a seasonal favorite, especially during holidays like Thanksgiving and Christmas. Historically, cranberries were used by Native Americans for cooking and medicinal purposes. The combination with oranges is thought to have evolved with an influence from European flavors, integrating citrus which was a prized exotic fruit. This recipe reflects centuries of blending cultures and ingredients to create a timeless holiday staple.

    Ingredient Deep Dive

    Firstly, cranberries: renowned for their antioxidant properties, these tart jewels are a healthy addition, injecting color and tang. When selecting, choose firm, bright red berries. Store them for up to two weeks in the fridge or freeze for longer shelf life. Oranges are key for their zest and juice, providing natural sweetness and vitamin C. Opt for juicy navel oranges, and store them at room temperature for optimal flavor. Should you find yourself without fresh cranberries, dried cranberries can serve as a substitute, though they will introduce more sweetness.

    Common Mistakes to Avoid

    • Overmixing the batter—compromise texture by causing toughness.
    • Nutrient loss by not using fresh cranberries—opt for fresh whenever possible.
    • Skipping the zest—it’s crucial for aromatic depth.
    • Inaccurate measurements leading to dense cakes—always use a scale for precision.
    • Uneven baking temperature causing undercooked centers—ensure oven calibration.
    • Improperly preparing the cake pan—always grease thoroughly to prevent sticking.
    • Opening the oven door too early can cause sinking—peek only after 30 minutes of baking.
    • Storing in warm places causing fungus growth—store in cool conditions.
    • Incorrect folding technique when adding cranberries—gently fold to maintain the air in batter.
    • Forgetting to cool before slicing—allowing cake to fall apart.

    Essential Techniques

    Mastering the technique of folding is essential in this recipe. Proper folding ensures the batter remains light and airy—a crucial aspect when incorporating cranberries. It’s more than just mixing; it’s about preserving structure. Practice folding by gently using a wide spatula, cutting through the center, and rotating the bowl to combine ingredients thoroughly without deflating the mixture. Pay attention to the batter’s consistency, aiming for uniform distribution of cranberries for even flavor and texture throughout the cake.

    Pro Tips for Perfect Cranberry Orange Cake

    – Ensure all ingredients are at room temperature for better emulsification.
    – For a deeper citrus flavor, add an extra tablespoon of orange zest.
    – Chill the batter for 30 minutes to enhance texture and ease of handling.
    – Test your cake with a toothpick to check for doneness—look for a clean extraction.
    – Use fresh cranberries and zest for vibrant taste and color.
    – Brush the baked cake with orange syrup for added moisture and flavor.
    – Allow the cake to cool in the pan for 10 minutes to prevent breaking when unmolding.
    – For a festive touch, dust with powdered sugar once cooled.
    – Experiment with different citrus varieties like clementines for a unique twist.
    – Serve with a dollop of whipped cream or a scoop of vanilla ice cream for a decadent finish.

    Variations and Adaptations

    Each season brings its own twist; try blueberries and lemon in the summer or apple and cinnamon in the fall. Vegan or dairy-free options are simple: substitute butter with plant-based margarine and use almond milk instead of regular milk. For a gluten-free version, use almond or coconut flour, adjusting liquid quantities if needed. The cake’s base is versatile for creative flourishes—consider adding almonds or walnuts for crunch, or a hint of ginger for warmth.

    Serving and Presentation Guide

    For an elegant presentation, arrange the cake slices on a decorative platter with a sprinkle of fresh cranberries and orange wedges as garnish to highlight its ingredients. Dust lightly with confectioners’ sugar for a snowy effect, inviting seasonal charm. If serving warm, accompany it with a scoop of vanilla ice cream or a drizzle of freshly whipped cream. Keep the cake covered to prevent drying or serve shortly after icing or glazing for that fresh, moist bakery experience.

    Wine and Beverage Pairing

    Pairing this cake with a light sparkling wine elevates the citrusy notes, while a rich, creamy latte or a fragrant Earl Grey tea beautifully complements the cake’s fruity, tangy flavors. Orange Alsatian wines like Riesling or Gewürztraminer provide an aromatic overlay, enhancing the orange zest without overpowering the palate. For a non-alcoholic option, a spiced cranberry punch rounds off the holiday theme nicely.

    Storage and Shelf Life

    To maintain freshness, store your cranberry orange cake in an airtight container. At room temperature, it will stay fresh for up to two days, while refrigerating extends this to five days. For longer preservation, wrap the cake slices individually and freeze them. Thaw at room temperature or gently reheat in an oven. Always check for any signs of spoilage such as mold or unexpected changes in texture or smell, ensuring the cake remains safe to enjoy.

    Make Ahead Strategies

    The beauty of this cake lies in its readiness for early preparation. Bake the cake a day in advance, allowing flavors to develop fully. Store it within an airtight container and apply any frosting or glaze before serving for freshness. Consider prepping the citrus elements ahead by zesting and juicing oranges, storing them in airtight containers or zip-lock bags in the refrigerator. When it’s time to serve, simply reapply any desired toppings, ensuring a delightful yet effortless presentation.

    Scaling Instructions

    This cranberry orange cake is ideal for scaling to fit any occasion. To double or triple the recipe, maintain measurement ratios and use suitably sized pans to avoid altering cook times. If halving, consider using a smaller pan and checking for doneness earlier. Remember, larger batches might require more robust equipment, such as a stand mixer, to handle increased volume efficiently. Be mindful of space restrictions in your refrigerator or freezer when planning to scale up.

    Nutritional Deep Dive

    A slice of cranberry orange cake offers a balanced treat, delivering wholesome nutrition among your holiday indulgences. With approximately 350 calories per serving, it offers a moderate balance of carbohydrates and fats to satisfy sweet cravings without overindulgence. Fresh cranberries provide antioxidants and vitamin C, contributing to its health benefits. Opt for reduced sugar content or alternative sweeteners for those watching sugar intake, maintaining flavor without compromising dietary goals.

    Dietary Adaptations

    Creating dietary-friendly versions of the Cranberry Orange Cake is simple. For gluten-free guests, substitute flour with gluten-free blends or almond flour. For a dairy-free option, replace butter with a suitable vegan alternative like coconut oil, and use almond or soy milk instead of cow’s milk. To accommodate a vegan diet, flaxseed meal mixed with water serves as an egg substitute, ensuring the cake’s moisture and structure are preserved. Each adaptation maintains the cake’s delicious integrity, allowing everyone to indulge.

    The Recipe

    Serves: 8

    Prep Time: 20 mins

    Cook Time: 40 mins

    Total Time: 60 mins

    Kitchen Equipment Needed

    • Mixing bowls
    • Whisk
    • Spatula
    • Cake pan
    • Oven
    • Wire rack for cooling

    Ingredients

    • 2 cups all-purpose flour
    • 1 1/2 cups sugar
    • 1/2 cup butter, softened
    • 2 eggs
    • 1 cup fresh cranberries
    • 1 orange, zest and juice
    • 1 teaspoon baking powder
    • 1/2 teaspoon baking soda
    • 1/4 teaspoon salt
    • 1/2 cup milk

    Directions

    1. Preheat the oven to 350°F (175°C). Grease and flour a cake pan.
    2. In a bowl, cream together the butter and sugar until light and fluffy.
    3. Add the eggs one at a time, beating well after each addition.
    4. Stir in the orange zest and juice.
    5. In another bowl, sift together the flour, baking powder, baking soda, and salt.
    6. Gradually add the dry ingredients to the creamed mixture alternately with the milk, starting and ending with the flour mixture.
    7. Fold in the cranberries.
    8. Pour the batter into the prepared pan and smooth the top.
    9. Bake for 40 minutes or until a toothpick inserted into the center comes out clean.
    10. Allow to cool in the pan for 10 minutes, then turn out onto a wire rack to cool completely.

    Recipe Notes

    • For a sweeter cake, add 1/4 cup more sugar.
    • Substitute with fresh blueberries if cranberries are unavailable.
    • Add 1/4 cup chopped nuts for a crunchy texture.

    Troubleshooting Guide

    If your cake isn’t rising as expected, verify your baking powder and soda’s freshness. For uneven baking, ensure your oven is correctly calibrated and the pan is centered for even heat distribution. Should the texture seem off, check ingredient measurements. Excess batter on the sides may burn, so ensure proper cleaning of the pan lip before baking. Adjust baking time if your oven runs hot or cold, paying careful attention to the cake’s visual and sensory cues like aroma and color.

    Recipe Success Stories

    Our community loves this Cranberry Orange Cake Recipe for its ease and vibrant flavors. Many readers share their successful adaptations, such as adding a cream cheese frosting or integrating candied ginger for a spicy kick. An avid baker notes how substituting half the flour with almond flour transformed it into a denser, more nutritious delight. Engage with our vibrant community on social media platforms, sharing your stunning photos with the hashtag #CranberryOrangeDelight and contributing to our ever-growing gallery of creative takes.

    Frequently Asked Questions

    Can I use dried cranberries instead of fresh?

    Yes, but they will alter the texture and sweetness. Rehydrate them by soaking in orange juice for enhanced flavor.

    What can I substitute for orange zest?

    Lemon or lime zest can be used as alternatives, though they will change the flavor profile slightly.

    Can this cake be frozen?

    Absolutely! Wrap the cake tightly in cling wrap and store in the freezer for up to three months. Thaw at room temperature before serving.

    How can I make this cake gluten-free?

    Use a 1:1 gluten-free flour blend and ensure all other ingredients are gluten-free certified, which will maintain texture and flavor.

    Is there a vegan alternative for this recipe?

    Yes, replace eggs with flaxseed meal mixed with water, and use plant-based butter and milk substitutes.

    How should I store this cake to maintain freshness?

    Store in an airtight container at room temperature for up to 2 days or in the refrigerator for up to a week.

    Why did my cake turn out dense?

    Overmixing the batter or incorrect measurements can lead to a dense cake. Ensure precise ingredient quantities and gentle folding techniques.

    What is the nutritional information per serving?

    Each serving contains approximately 350 calories, with 50g of carbohydrates, 15g of fat, and 5g of protein.

    Can I prepare the batter in advance?

    Yes, you can store the prepared batter in the refrigerator for up to 24 hours before baking. Bring it back to room temperature beforehand for best results.

    How can I add a glaze to this cake?

    Make a simple orange glaze by combining powdered sugar with fresh orange juice until it reaches the desired consistency, then drizzle over the cooled cake.

    Additional Resources

    Enhance your baking repertoire with related recipes such as Lemon Blueberry Loaf or Orange Almond Cake. Explore technique videos on proper folding methods, or check ingredient guides for selecting the best citrus fruits. Discover seasonal inspirations like a Winter Berry Torte or a Spring Citrus Tart.

    Join the Conversation

    Share your Cranberry Orange Cake creations on social media with #CranberryOrangeDelight. Engage with fellow bakers for tips, feedback, and inspiration. Celebrate your unique flavors and presentation strategies by joining our monthly baking challenges and spotlight opportunities within our community gallery. Your success stories inspire others—let’s sweeten everyone’s holiday season together!

    Cranberry Orange Cake Recipe: A Delightful Holiday Dessert

    ⚖️
    Difficulty
    Easy
    ⏲️
    Prep Time
    15 mins
    🕒
    Cook Time
    45 mins
    ⏱️
    Total Time
    60 mins
    🍽️
    Servings
    8 servings

    Indulge your senses with this Cranberry Orange Cake Recipe, an easy and delightful holiday dessert perfect for festive gatherings. This cake combines the zesty freshness of oranges with the tartness of cranberries, resulting in an explosion of flavor in every bite. Whether you’re an experienced baker or trying your hand at baking for the first time, this cake is sure to impress.

    The Cranberry Orange Cake is a beautifully balanced dessert, both in taste and preparation. With a straightforward list of ingredients and simple steps, even novice bakers can achieve optimal results. Its vibrant colors and appealing aroma make it an ideal centerpiece for any holiday table.

    If you’re searching for a dessert that is both visually stunning and a treat for the taste buds, look no further than this Cranberry Orange Cake. Simple ingredients come together for an elegant and delicious finish.

    Quick Recipe Highlights

    • Flavor Profile: A delightful blend of sweet and tart with citrus notes.
    • Texture: Soft and moist with a slight crumb.
    • Aroma: Inviting scent of fresh oranges and baked cranberries.
    • Visual Appeal: A burst of red from cranberries with a golden-brown crust.
    • Skill Level Needed: Basic baking skills suitable for beginners.
    • Special Equipment: Bundt pan for traditional shape.

    The Recipe

    Serves: 8 servings

    Prep Time: 15 mins

    Cook Time: 45 mins

    Total Time: 60 mins

    Kitchen Equipment Needed

    • Mixing bowls
    • Electric mixer
    • Bundt pan
    • Cooling rack

    Ingredients

    • 1 cup fresh cranberries
    • 1 orange (zest and juice)
    • 1 cup granulated sugar
    • 1/2 cup unsalted butter, softened
    • 2 large eggs
    • 1 1/2 cups all-purpose flour
    • 1 tsp baking powder
    • 1/2 tsp salt

    Directions

    1. Preheat your oven to 350°F (175°C). Grease a bundt pan and set aside.
    2. In a large bowl, combine softened butter and sugar. Mix until light and fluffy.
    3. Add eggs one at a time, beating well after each addition.
    4. Stir in orange zest and juice.
    5. In another bowl, whisk together flour, baking powder, and salt. Gradually add to the butter mixture, mixing until just incorporated.
    6. Fold in cranberries gently.
    7. Pour the batter into the prepared bundt pan, smoothing the top.
    8. Bake for 45 minutes, or until a toothpick inserted into the center comes out clean.
    9. Allow cake to cool slightly before transferring to a cooling rack.

    Recipe Notes

    • Use fresh or frozen cranberries as a substitute based on availability.
    • For a gluten-free version, substitute with a 1:1 gluten-free flour mix.
    • Enhance flavors by adding a teaspoon of vanilla extract to the batter.

    Unlock the Secrets to Saving and Discovering Pinterest Pins

    ⚖️
    Difficulty
    Medium
    ⏲️
    Prep Time
    30 mins
    🕒
    Cook Time
    20 mins
    ⏱️
    Total Time
    50 mins
    🍽️
    Servings
    4

    Discover the perfect [Recipe Name], a true culinary masterpiece that combines both flavor and ease. This dish marries rich textures with bold flavors, leaving a lasting impression. It’s a welcoming addition to any dinner table, sure to please guests and family alike.

    Quick Recipe Highlights

    • Flavor Profile: A harmonious blend of savory and tangy notes
    • Texture: Satisfyingly crunchy and tender elements
    • Aroma: Inviting scents of herbs and spices
    • Visual Appeal: Vibrant colors bursting with freshness
    • Skill Level Needed: Basic to intermediate cooking skills
    • Special Equipment: Quality food processor recommended

    Recipe Overview

    • Difficulty Level: Suitable for home cooks with some experience
    • Category: Main Course, Comfort Food
    • Cuisine: Influenced by Mediterranean traditions
    • Cost: Approximately $15 – $20
    • Season: Perfect for all year round with seasonal variations
    • Occasion: Perfect for both casual family dinners and celebrations

    Why You’ll Love This Recipe

    With its tantalizing taste and texture, [Recipe Name] is a delight for food lovers. Preparation is a breeze, making it an ideal choice for busy weeknights. Packed with nutrition, it doesn’t compromise on health benefits. It’s versatile enough to wow guests during gatherings or quiet nights in. Plus, ingredients are both cost-effective and easily accessible.

    Historical Background and Cultural Significance

    The origins of [Recipe Name] are steeped in cultural heritage, tracing back to regional traditions where local ingredients play a central role. Over time, the dish has evolved, embracing diverse influences while maintaining its authentic charm. It embodies the rich culinary tapestry of the region, often served during special gatherings to celebrate community and tradition.

    Ingredient Deep Dive

    Key ingredients like [Ingredient 1] offer nutritional and flavorful benefits, enhancing the dish’s overall profile. Selecting the freshest produce guarantees superior taste. Storage is straightforward—airtight containers work best—and simple substitutions like [Alternative Ingredient] keep the recipe adaptable.

    Common Mistakes to Avoid

    • Overcooking can lead to tough textures—ensure proper timing
    • Under-seasoning results in blandness—taste, and adjust as necessary
    • Neglecting resting time—crucial for flavor melding
    • Improper knife technique influences presentation—practice makes perfect
    • Ignoring ingredient quality—opt for the freshest options
    • Poor equipment maintenance—invest in quality tools
    • Inefficient workspace—organize for efficiency
    • Rushing the process—allow time for each step
    • Incorrect temperatures—verify oven and stovetop settings
    • Skipping recipe reading—understand the process before starting

    Essential Techniques

    Master the art of sautéing, a technique integral to this recipe, ensuring even cooking and flavor development. Proper technique relies on consistent stirring and controlled heat, watching for visual cues like color changes to achieve desirable results.

    Pro Tips for Perfect [Recipe Name]

    Enhance your [Recipe Name] with these expert tips. Precise measuring ensures balanced flavors. Pre-prep all components for a streamlined cooking experience. Let your dish rest before serving for flavors to meld perfectly. Adjust spice levels to suit personal preferences.

    Variations and Adaptations

    Explore diverse flavors with regional adaptations or seasonal additions like fresh summer herbs. Dietary modifications, such as gluten-free options, expand its audience. Alter textures through ingredient swaps, enriching its overall appeal.

    Serving and Presentation Guide

    Elevate your dish with elegant plating, using garnish for visual interest. Complement with traditional sides or modern food pairings. Maintain optimal serving temperatures to enhance the dining experience.

    Wine and Beverage Pairing

    Select wines like a crisp Chardonnay or a robust Merlot to enhance the flavor profile. Non-alcoholic options like herbal tea also pair well. Ensure appropriate serving temperatures for all beverages to maximize enjoyment.

    Storage and Shelf Life

    Store leftovers in airtight containers in the fridge for up to three days. Freezing is an option but can affect texture. Reheat gently to preserve flavor, ensuring food safety at every step.

    Make Ahead Strategies

    Utilize make-ahead techniques by prepping ingredients a day before. Maintain freshness by storing components separately until assembly. Follow reheating instructions carefully to retain quality.

    Scaling Instructions

    Adjust recipe quantities to cater to two or a dozen guests with these scaling tips. Equipment adjustments might be necessary, and timing can require tweaking to accommodate larger batches without compromising quality.

    Nutritional Deep Dive

    Explore the nutritional benefits of [Recipe Name], offering a balanced intake of proteins and carbohydrates. Vitamins and minerals enrich each serving, supporting health goals. Adjust portion sizes for weight management purposes.

    Dietary Adaptations

    Modify the recipe to suit diverse dietary needs, accommodating gluten-free, dairy-free, vegan, and keto preferences. Simple substitutions enable you to tailor the meal while maintaining flavor integrity.

    The Recipe

    Serves: 4

    Prep Time: 30 mins

    Cook Time: 20 mins

    Total Time: 50 mins

    Kitchen Equipment Needed

    • Food processor
    • Chef’s knife
    • Sauté pan
    • Mixing bowls

    Ingredients

    • 1 cup Ingredient 1
    • 2 tbsp Ingredient 2
    • 3 oz Ingredient 3

    Directions

    1. Begin by prepping all ingredients as per the measurements above.
    2. Heat the sauté pan over medium flame, adding Ingredient 2 to release its flavors.
    3. Combine all ingredients in a bowl, and use the food processor for a smooth mixture.

    Recipe Notes

    • Substituting Ingredient 1 with [Alternative] alters the flavor slightly but remains delicious.
    • For a spicier kick, add a pinch of chili flakes.

    Troubleshooting Guide

    Address common challenges such as maintaining ideal texture—avoid over-processing to prevent mushiness. If the balance of flavors seems off, adjust seasoning according to your taste buds.

    Recipe Success Stories

    Share your variations and feedback with our community, showcasing personal twists. Gain insights from others who have achieved similar successes, and find creative serving ideas.

    Frequently Asked Questions

    How can I make this recipe nut-free?

    Swap any nuts with seeds like sunflower or pumpkin seeds to maintain texture and flavor balance.

    What is the best way to store leftovers?

    Place leftovers in an airtight container, storing them in the refrigerator for up to three days. For longer storage, consider freezing.

    Additional Resources

    Explore our collection of related recipes that complement [Recipe Name] beautifully. Watch technique videos and discover ingredient guides to expand your culinary skills.

    Join the Conversation

    Engage with our community by sharing your creations on social media. Use suggested hashtags to increase visibility, and participate in challenges to inspire others with your unique take on [Recipe Name].

    Delicious Homemade Lasagna: A Family Favorite Every Time

    ⚖️
    Difficulty
    Intermediate
    ⏲️
    Prep Time
    30 mins
    🕒
    Cook Time
    45 mins
    ⏱️
    Total Time
    75 mins
    🍽️
    Servings
    8

    Creating a homemade lasagna is an experience that combines rich flavors, nostalgic aromas, and comforting layers of cheesy goodness. This delightful homemade lasagna recipe will become a family staple with its harmonious blend of savory meats, creamy cheeses, and perfectly cooked noodles. Perfect for gatherings or a satisfying dinner, this recipe delivers in taste and texture.

    Quick Recipe Highlights

    • Flavor Profile: Savory with rich tomato notes, subtly sweet onions, and aromatic herbs
    • Texture: Smooth and creamy béchamel layered with tender pasta and melted cheese
    • Aroma: Herb-infused tomato sauce with notes of garlic and fresh basil
    • Visual Appeal: Layered presentation with golden, bubbly cheese on top
    • Skill Level Needed: Intermediate – involves layering and sauce preparation
    • Special Equipment: 9×13 inch baking dish, saucepan, whisk

    The Recipe

    Serves: 8

    Prep Time: 30 mins

    Cook Time: 45 mins

    Total Time: 75 mins

    Kitchen Equipment Needed

    • 9×13 inch baking dish
    • Large pot for boiling noodles
    • Saucepan
    • Whisk

    Ingredients

    • 9 lasagna noodles
    • 1 pound ground beef
    • 1 pound Italian sausage
    • 1 onion, chopped
    • 2 cloves garlic, minced
    • 1 can (28 oz) crushed tomatoes
    • 2 cups ricotta cheese
    • 2 cups shredded mozzarella cheese
    • 1 cup grated Parmesan cheese
    • 1 egg
    • Fresh basil leaves
    • Salt and pepper to taste

    Directions

    1. Preheat oven to 375°F (190°C). Boil the noodles according to package instructions, drain and set aside.
    2. In a saucepan, cook ground beef, sausage, onion, and garlic over medium heat until meats are browned. Drain excess fat.
    3. Add crushed tomatoes to the meat mixture. Season with salt and pepper. Simmer for 20 minutes.
    4. In a mixing bowl, combine ricotta cheese, egg, and half of the Parmesan cheese.
    5. Spread a thin layer of the meat sauce on the bottom of a 9×13 inch baking dish. Layer 3 noodles, half of the ricotta mixture, a third of the mozzarella, and a third of the meat sauce. Repeat layers.
    6. Top with remaining noodles, meat sauce, and mozzarella. Sprinkle remaining Parmesan cheese over the top.
    7. Bake for 45 minutes, until cheese is bubbly and golden brown. Let stand for 10 minutes before serving. Garnish with basil leaves.

    Recipe Notes

    • For extra creaminess, add a béchamel sauce layer.
    • Substitute ground turkey or chicken for a leaner option.
    • Fresh spinach can be layered between noodles for added nutrients.

    How to Make Perfect Chocolate Drop Cookies for Every Occasion

    Chocolate Drop Cookies: Irresistible Cocoa Drops Recipe

    ⚖️
    Difficulty
    Easy

    ⏲️
    Prep Time
    15 mins

    🕒
    Cook Time
    10 mins

    ⏱️
    Total Time
    25 mins

    🍽️
    Servings
    24 cookies

    Are you ready to experience the divine combination of cocoa and a soft cookie texture? Chocolate Drop Cookies, also known as Cocoa Drops, are the perfect choice for you. These cookies bring together luscious chocolate flavor with an easy and quick baking process that even beginners can master. Picture biting into a warm cookie, rich with the depth of cocoa, finished with a sugary crust that gives way to a tender crumb.

    Ideal for any occasion, from family gatherings to a cozy evening treat, Chocolate Drop Cookies are loved by all ages. Thanks to their simplicity, these cookies are a fantastic addition to your repertoire, allowing you to satisfy your chocolate cravings in no time.

    Quick Recipe Highlights

    • Flavor Profile: Rich, chocolaty, with a hint of vanilla
    • Texture: Soft and chewy interior with a slightly crisp edge
    • Aroma: Intense cocoa fragrance with sweet vanilla undertones
    • Visual Appeal: Deep brown color with a hint of sugary sparkle
    • Skill Level Needed: Suitable for beginners; minimal technique required
    • Special Equipment: Standard baking tools; no special equipment necessary

    The Recipe

    Serves: 24 cookies

    Prep Time: 15 mins

    Cook Time: 10 mins

    Total Time: 25 mins

    Kitchen Equipment Needed

    • Mixing bowl
    • Hand mixer or whisk
    • Baking sheet
    • Parchment paper
    • Measuring cups and spoons
    • Cooling rack

    Ingredients

    • 1 cup all-purpose flour
    • 1/2 cup unsweetened cocoa powder
    • 1/2 teaspoon baking soda
    • 1/4 teaspoon salt
    • 1/2 cup butter, softened
    • 1 cup sugar
    • 1 large egg
    • 1 teaspoon vanilla extract

    Directions

    1. Preheat your oven to 350°F (175°C) and line a baking sheet with parchment paper.
    2. In a bowl, whisk together flour, cocoa, baking soda, and salt.
    3. In a separate bowl, cream butter and sugar until light and fluffy using a hand mixer.
    4. Add in the egg and vanilla extract, mixing until well incorporated.
    5. Gradually add the dry ingredients to the wet mixture, mixing until just combined.
    6. Drop tablespoon-sized portions of dough onto the prepared baking sheet.
    7. Bake for 10 minutes or until the edges are firm but the centers are still soft.
    8. Allow cookies to cool on the baking sheet for 5 minutes before transferring them to a cooling rack.

    Recipe Notes

    • For added flavor, consider mixing in chocolate chips or chopped nuts.
    • You can store these cookies in an airtight container for up to a week.

    Irresistibly Creamy Pesto Shrimp Recipe for Perfect Weeknight Dinners

    Creamy Pesto Shrimp Recipe: Deliciously Easy Seafood Dish

    ⚖️
    Difficulty
    Easy

    ⏲️
    Prep Time
    15 mins

    🕒
    Cook Time
    20 mins

    ⏱️
    Total Time
    35 mins

    🍽️
    Servings
    4

    In this Creamy Pesto Shrimp Recipe, succulent shrimp mingles with rich pesto sauce to create a dish bursting with flavor. Perfect for a quick weekday meal or an impressive dinner party entrée, this recipe is both straightforward and delightfully flavorful. Shrimp, known for its quick cooking times and delicate taste, pairs beautifully with the bold flavors of pesto. The creamy texture of the sauce envelopes the shrimp, making each bite a luxurious experience.

    Quick Recipe Highlights

    • Flavor Profile: Combines nutty, garlicky pesto with creamy texture.
    • Texture: Smooth and velvety sauce with tender shrimp.
    • Aroma: Fresh basil and garlic notes dominate.
    • Visual Appeal: Vibrant green sauce with pink shrimp accents.
    • Skill Level Needed: Easy, suitable for beginner cooks.
    • Special Equipment: Skillet, blender or food processor.

    Recipe Overview

    • Difficulty Level: Easy; minimal prep and cooking skills needed.
    • Category: Main Course, Seafood.
    • Cuisine: Italian-inspired with a dash of gourmet flair.
    • Cost: Affordable, with pesto and shrimp as the main investments.
    • Season: Best enjoyed in warmer months due to fresh basil availability.
    • Occasion: Casual dinners, summer gatherings, or intimate dinners.

    Why You’ll Love This Recipe

    Indulge in the perfect harmony of tastes and textures with this Creamy Pesto Shrimp Recipe. The combination of fresh basil pesto and creamy sauce creates a mouthwatering dish that is both rich and refreshing. Ideal for busy weeknights, it brings a touch of elegance to your table without the fuss. Nutritionally, shrimp offers a low-calorie, high-protein option that’s packed with nutrients. This recipe’s convenience and quick preparation allow you to enjoy gourmet flavors even on your busiest days.

    Historical Background and Cultural Significance

    The Creamy Pesto Shrimp Recipe is an evolution of traditional Italian cuisine, showcasing the versatility of pesto sauce beyond pasta dishes. Pesto, originating from Genoa in the Liguria region of Italy, is a testament to the Mediterranean’s love for fresh, hearty ingredients. The integration of shrimp highlights the influence of coastal Italian regions, which often feature seafood prominently in their culinary traditions.

    Ingredient Deep Dive

    Pesto, the hero ingredient, is a blend of fresh basil, pine nuts, garlic, Parmesan cheese, and olive oil. Known for its rich flavor and nutritional benefits, basil is packed with antioxidants and anti-inflammatory properties. Shrimp, a lean protein option, offers health benefits such as omega-3 fatty acids, vitamin B12, and selenium. Selecting the freshest shrimp ensures the best flavors, and they should always be stored chilled and used promptly for utmost freshness.

    Common Mistakes to Avoid

    • Overcooking shrimp, leading to rubbery texture.
    • Insufficient blending of pesto, resulting in uneven texture.
    • Using pre-cooked shrimp, which can compromise flavor absorption.
    • Neglecting to season the dish adequately.
    • Using stale or poor-quality basil, diminishing freshness.
    • Adding too much oil, making pesto greasy.
    • Forgetting to taste and adjust seasoning before serving.
    • Overheating the sauce, which can curdle it.

    Essential Techniques

    Mastering a perfect Creamy Pesto Shrimp dish involves understanding key techniques such as preparing fresh pesto—blending at just the right speed to maintain texture and brightness. Timing is crucial when cooking shrimp; they should just turn pink and opaque. Proper technique ensures that each shrimp is juicy and succulent, not chewy or dry.

    Pro Tips for Perfect Creamy Pesto Shrimp

    – Use homemade pesto for the freshest taste and control over flavors.
    – Defrost shrimp thoroughly for even cooking.
    – Dry shrimp with a paper towel before cooking for better browning.
    – For a richer sauce, add a tablespoon of cream cheese.
    – Toasted pine nuts add extra crunch and flavor if sprinkled just before serving.
    – Add a squeeze of lemon juice at the end for a zesty finish.
    – Stir in freshly grated Parmesan for an additional layer of flavor.

    Variations and Adaptations

    Explore regional variations by substituting basil with spinach or arugula for a different pesto twist. Seasonal adaptations can include the incorporation of sun-dried tomatoes for added richness. For a dairy-free version, replace Parmesan with nutritional yeast. Adjust spices and herbs to customize the recipe to vegan or keto preferences, ensuring everyone can enjoy this delightful meal.

    Serving and Presentation Guide

    For optimal presentation, serve the Creamy Pesto Shrimp over a bed of al dente pasta or alongside grains like quinoa or rice. Garnish with fresh basil leaves or a sprinkle of Parmesan, and consider adding a side of crusty bread for dipping. Keep the dish simple yet elegant with clean lines and contrasting colors.

    Wine and Beverage Pairing

    Enhance the flavors of your Creamy Pesto Shrimp with a crisp white wine like Sauvignon Blanc or a light-bodied Pinot Grigio. Non-alcoholic options such as a sparkling water infused with lemon or lime complement the dish’s freshness. Consider serving a light herbal tea with subtle citrus notes for a warm beverage option.

    Storage and Shelf Life

    Store leftover Creamy Pesto Shrimp in an airtight container in the refrigerator for up to two days. Reheat gently over low heat to maintain sauce consistency and shrimp tenderness. Freezing is possible but may slightly alter the texture of the creamy sauce. Always check for signs of spoilage like foul odor or discoloration before consuming leftovers.

    Make Ahead Strategies

    Prepare the pesto sauce up to two days in advance and store in the refrigerator. Assemble the dish just before serving to ensure shrimp maintains its texture. Consider marinating the shrimp in a portion of the pesto for a few hours to deepen the flavor profile.

    Scaling Instructions

    To halve the recipe, adjust ingredients proportionately, ensuring that cooking times remain the same. Doubling requires a larger skillet to accommodate increased shrimp and sauce volume; extend cooking times slightly to ensure even heat distribution. Remaining ingredients like pesto can be scaled with a focus on maintaining the balance of flavors.

    Nutritional Deep Dive

    Each serving of the Creamy Pesto Shrimp Recipe provides a balanced macro profile with approximately 400 calories, high in healthy fats and protein, and moderate carbohydrates. Shrimp contributes a significant source of low-fat protein, while the pesto delivers robust flavors packed with vitamins A and C. Moderation is key to managing calorie intake while enjoying this rich, health-conscious dish.

    Dietary Adaptations

    For a gluten-free adaptation, replace pasta with gluten-free alternatives. Dairy-free and vegan variations can omit Parmesan in the pesto and use plant-based cream substitutes. Modify the recipe for low-carb or keto diets by serving the shrimp over cauliflower rice, maintaining the rich flavors while adhering to dietary constraints.

    The Recipe

    Serves: 4

    Prep Time: 15 mins

    Cook Time: 20 mins

    Total Time: 35 mins

    Kitchen Equipment Needed

    • Skillet
    • Blender or food processor
    • Wooden spoon
    • Knife
    • Cutting board

    Ingredients

    • 1 lb shrimp, peeled and deveined
    • 1 cup fresh basil leaves
    • 1/4 cup pine nuts
    • 2 cloves garlic
    • 1/2 cup Parmesan cheese, grated
    • 1/3 cup olive oil
    • 1 cup heavy cream
    • Salt and pepper to taste
    • Lemon wedges for serving

    Directions

    1. Blend basil, pine nuts, garlic, Parmesan, and olive oil to make pesto. Set aside.
    2. In a skillet, sauté shrimp over medium heat until just pink, about 3-4 minutes.
    3. Add heavy cream to the skillet; bring to a gentle simmer.
    4. Stir in pesto until well combined and heated through.
    5. Season with salt and pepper as desired.
    6. Serve immediately with lemon wedges.

    Recipe Notes

    • For a thicker sauce, reduce cream slightly longer in the skillet.
    • Fresh shrimp enhances the flavor and texture of the dish.
    • Customize the density of pesto according to your preference.

    Troubleshooting Guide

    Explore common issues such as a thin sauce by adding a thickening agent like cornstarch, adjusting seasoning to balance flavors, ensuring shrimp don’t become rubbery by monitoring cooking times, and recognizing saucepan hot spots for even cooking. Ingredient swaps and monitoring freshness are key to maintaining recipe integrity.

    Recipe Success Stories

    Join the community in sharing your journey with Creamy Pesto Shrimp Recipe, exploring different variations and adaptations, and showcasing your presentation skills through social media platforms. Capture the essence of the dish through photography and share your tips and feedback to inspire others.

    Frequently Asked Questions

    Can I use frozen shrimp for this recipe?

    Yes, just ensure you thaw and pat them dry before cooking for the best results.

    Can I make this dish in advance?

    While the dish is best enjoyed freshly made, you can prepare the pesto ahead and store; cook the shrimp fresh for serving.

    What pasta pairs well with creamy pesto shrimp?

    Consider linguine or fettuccine as they hold the sauce nicely, enhancing every bite.

    Can the recipe be adjusted for a larger group?

    Yes, simply scale up the ingredients proportionately and ensure you use a large enough skillet.

    Is there a vegan option for this recipe?

    Substitute shrimp with zucchini spirals, use plant-based cream, and replace Parmesan with nutritional yeast for a vegan version.

    Can I use store-bought pesto?

    Absolutely, though fresh homemade pesto will bring more depth of flavor. Choose a quality brand if using store-bought.

    What is the best cheese alternative for this recipe?

    Non-dairy cheese options like vegan Parmesan can substitute traditional cheese without impacting texture heavily.

    How can I ensure my sauce doesn’t separate?

    Maintaining a low simmer rather than boiling keeps the sauce creamy and cohesive.

    What vegetables complement this dish?

    Consider sautéed spinach or roasted cherry tomatoes for vibrant, complementary flavors and colors.

    Can this dish be made low-carb?

    Serve with zoodles or cauliflower rice as low-carb alternatives to traditional pasta.

    Additional Resources

    Explore more with related recipes, pesto-making tips, and shrimp selection guides to broaden your culinary repertoire. Check out videos demonstrating techniques such as making the perfect pesto to expand your cooking skills.

    Join the Conversation

    Engage in our community by sharing your experiences with the Creamy Pesto Shrimp Recipe using hashtags like #CreamyPestoShrimp. Participate in recipe challenges and swap tips with other home cooks, adding your own touch to this beloved dish.