Irresistible Creamy Pesto Shrimp: A Delicious Easy Dinner Recipe

Creamy Pesto Shrimp Recipe: Your Ultimate Indulgence in Flavor

⚖️
Difficulty
Medium

⏲️
Prep Time
15 mins

🕒
Cook Time
10 mins

⏱️
Total Time
25 mins

🍽️
Servings
4

Delight your taste buds with this creamy pesto shrimp recipe—a vibrant, flavor-packed fusion perfect for any occasion. Combining the aromatic herbs in pesto with succulent shrimp, this dish offers an inviting balance of creamy and rich textures. Ideal for both family dinners and fancy gatherings, the creamy pesto shrimp recipe is guaranteed to impress. Explore the restaurant-quality taste of this delectable dish, all within the comfort of your own kitchen.

Quick Recipe Highlights

  • Flavor Profile: Balanced richness with bold pesto undertones
  • Texture: Smooth and creamy sauce with tender shrimp
  • Aroma: Fresh basil with a hint of garlic
  • Visual Appeal: Vibrant green pesto with golden shrimp
  • Skill Level Needed: Intermediate culinary skills
  • Special Equipment: Food processor for pesto

Recipe Overview

  • Difficulty Level: Medium due to multiple preparation steps and sauce consistency
  • Category: Main Course
  • Cuisine: Italian-inspired
  • Cost: Moderate; shrimp and fresh herbs are main ingredients
  • Season: Year-round; uses readily available ingredients
  • Occasion: Perfect for family dinners or light lunch gatherings

Why You’ll Love This Recipe

This creamy pesto shrimp recipe stands out because of its balance of flavors and textures, making it a family favorite. Preparing this dish is convenient, requiring only a few common kitchen items and around 25 minutes from start to finish. The nutritional benefits of shrimp include lean protein and valuable vitamins, while fresh basil provides antioxidants. Great for social gatherings, the dish allows you to entertain with minimal fuss. The accessible ingredients and budget-friendly nature make this recipe a staple in any kitchen.

Historical Background and Cultural Significance

Originating from Italian culinary traditions, pesto brings a fragrant openness to many recipes. The amalgamation of shrimp and pesto in this recipe reflects the use of classic flavors dating back centuries, showcasing Genoese innovation. Traditionally, pesto involves grinding fresh basil, pine nuts, and Parmesan cheese, historically served over pasta or bread. This creamy version enjoys popularity worldwide, adapting wonderfully to modern tastes without losing cultural essence.

Ingredient Deep Dive

– Shrimp: Rich in protein and low in calories, perfect for a healthy diet. Use fresh or high-quality frozen shrimp for best results.
– Pesto: A blend of basil, pine nuts, Parmesan cheese, and garlic. Freshness is key—opt for vibrant, aromatic basil leaves.
– Cream: Adds richness and a silky texture to the dish. Choose heavy cream for the creamiest result or swap for a lighter alternative if desired.

Common Mistakes to Avoid

  • Overcooking shrimp: Monitor time closely; shrimp should be pink and firm.
  • Using pre-packed pesto: Fresh pesto enhances flavor significantly.
  • Not seasoning appropriately: Taste test towards the end to adjust for salt and pepper.

Essential Techniques

– Sautéing shrimp: Ensures even cooking and brings out shrimp’s natural sweetness.
– Pesto emulsion: Mastering this helps achieve a velvety, smooth sauce. Blend slowly, incorporating ingredients fully for best consistency.

Pro Tips for Perfect Creamy Pesto Shrimp

– Use high-quality fresh shrimp for the best taste.
– Make homemade pesto if time permits; its freshness makes all the difference.
– Allow shrimp to dry before cooking to ensure they sear beautifully.

Variations and Adaptations

– For a vegan option, substitute shrimp with tofu and cream with coconut milk.
– Add cherry tomatoes for a burst of color and sweetness.
– Experiment with different nuts like walnuts for a unique twist on traditional pesto.

Serving and Presentation Guide

Serve your creamy pesto shrimp over freshly cooked pasta or zucchini noodles for a low-carb option. Garnish with freshly grated Parmesan and basil leaves. For a modern touch, add a side of lightly toasted garlic bread for dipping.

Wine and Beverage Pairing

Pair with a crisp white wine like Sauvignon Blanc to complement the vibrant pesto flavors. For non-alcoholic choices, try lemon-infused sparkling water or a mildly sweet iced tea to balance the dish’s richness.

Storage and Shelf Life

Store any leftover creamy pesto shrimp in an airtight container in the refrigerator for up to 2 days. Reheat gently on a stovetop or microwave, adding a splash of milk to maintain sauce consistency. Avoid freezing, as this may affect the creaminess.

Make Ahead Strategies

Prepare the pesto sauce a day in advance and store it in a sealed jar in the refrigerator. Just before serving, cook the shrimp and combine, ensuring fresh and vibrant flavors.

Scaling Instructions

To halve the recipe, reduce all ingredients by half, adjusting cooking times slightly as needed. To double, ensure large enough kitchen equipment can accommodate the increase without overcrowding.

Nutritional Deep Dive

This creamy pesto shrimp recipe provides a well-rounded balance of macronutrients, with protein from shrimp, healthy fats from pesto, and vitamins from fresh herbs. Adjust portion sizes as needed to fit dietary goals.

Dietary Adaptations

For a gluten-free adaptation, serve over gluten-free pasta. Make it dairy-free by substituting cream with coconut milk, maintaining a luscious texture with a hint of sweetness.

The Recipe

Serves: 4

Prep Time: 15 mins

Cook Time: 10 mins

Total Time: 25 mins

Kitchen Equipment Needed

  • Large frying pan
  • Food processor
  • Cutting board and knife
  • Spatula

Ingredients

  • 1 lb fresh shrimp, peeled and deveined
  • 1 cup fresh basil leaves
  • 1/2 cup heavy cream
  • 1/4 cup Parmesan cheese, grated
  • 1/4 cup pine nuts
  • 2 cloves garlic
  • 2 tbsp olive oil
  • Salt and pepper to taste

Directions

  1. In a food processor, combine basil, pine nuts, Parmesan cheese, and garlic. Pulse until finely chopped.
  2. Slowly drizzle in olive oil while processing until sauce becomes smooth and creamy.
  3. In a large pan, heat additional olive oil over medium heat. Add shrimp and cook until pink, about 2-3 minutes per side.
  4. Add the prepared pesto and heavy cream to the skillet, stirring to coat the shrimp evenly.
  5. Season with salt and pepper. Simmer for another 2 minutes until the sauce thickens slightly.
  6. Serve immediately over your choice of pasta or zoodles.

Recipe Notes

  • For a nuttier flavor, lightly toast the pine nuts before using.
  • Adjust the cream amount to achieve your preferred sauce consistency.
  • Consider adding a squeeze of lemon for added brightness.

Troubleshooting Guide

If your sauce appears too thin, simmer it for additional time to thicken. Should the pesto taste too garlicky, balance with additional basil or cheese. Ensure shrimp don’t overcook by keeping a close eye on cooking time.

Recipe Success Stories

Our community loves experimenting with this adaptable dish—substituting with different proteins like chicken or even creating vegan versions with tofu. Share your version using #CreamyPestoShrimpRecipe and join the vibrant community feedback.

Frequently Asked Questions

Can I use frozen shrimp for this recipe?

Yes, you can use frozen shrimp. Ensure it’s completely thawed and dried before cooking for the best texture.

What can I substitute pine nuts with?

You can use walnuts, almonds, or cashews as a substitute for pine nuts in the pesto.

Is there a non-dairy substitute for the heavy cream?

Yes, coconut milk or cashew cream are great alternatives to achieve a creamy texture without dairy.

Additional Resources

Explore more Italian-inspired dishes like our homemade focaccia bread and light Caesar salad. Check out our technique videos for perfect shrimp cooking and pesto-making tips.

Join the Conversation

Share your creamy pesto shrimp creations with us on social media. Use #CreamyPestoShrimpRecipe and inspire others with your unique twist. Try our community challenges and discover new variations today!

Irresistibly Delicious Creamy Pesto Shrimp Recipe for a Quick Dinner

Creamy Pesto Shrimp: A Gourmet Seafood Delight

⚖️
Difficulty
Easy

⏲️
Prep Time
15 mins

🕒
Cook Time
10 mins

⏱️
Total Time
25 mins

🍽️
Servings
4

Indulge in the vibrant and savory notes of our Creamy Pesto Shrimp recipe, an enticing seafood dish that balances creaminess and zest impeccably. Blending well-cooked shrimp with rich pesto and cream, this recipe is the epitome of culinary delight for seafood enthusiasts. This dish not only pleases the palate with its indulgent flavors but also offers a pleasing aroma that fills your home with warmth.

Quick Recipe Highlights

  • Flavor Profile: Combines savory garlic and herbaceous pesto with creamy undertones.
  • Texture: Tender and juicy shrimp enveloped in a smooth, rich sauce.
  • Aroma: Fresh basil and parmesan create an inviting fragrance.
  • Visual Appeal: Vibrant green sauce with pink shrimp and white parmesan.
  • Skill Level Needed: Basic sautéing and sauce preparation skills.
  • Special Equipment: Non-stick skillet recommended for even cooking.

Recipe Overview

  • Difficulty Level: Easy, due to its straightforward cooking methods.
  • Category: Main Course, Seafood Dish
  • Cuisine: Italian-inspired flavors with a modern twist.
  • Cost: Moderately priced with shrimp being the main expense.
  • Season: Best enjoyed during summer when basil is fresh; however, suitable year-round.
  • Occasion: Ideal for family dinners, casual lunches, or upscale gatherings.

Why You’ll Love This Recipe

This Creamy Pesto Shrimp dish seamlessly marries taste and texture, creating a meal that is both sumptuous and satisfying. Its preparation is convenient, making it perfect for weekday dinners without compromising on quality. Nutritionally, shrimp provides a rich source of protein with low-calorie content, and the pesto introduces beneficial fats. The dish’s versatility makes it a hit at social gatherings, allowing you to impress your guests with minimal effort. Moreover, it uses everyday ingredients that are easy to find and transform into an indulgent experience.

Historical Background and Cultural Significance

Pesto, with its roots in Genoa, Italy, has been cherished for centuries. Traditionally, pesto integrates fresh basil, garlic, Parmesan, and pine nuts, ground together to form a verdant green paste. Shrimp, universally favored, varies in preparation throughout regions. The blend of pesto with shrimp signifies a modern culinary fusion, respecting traditional Italian elements while embracing global culinary trends. Cooperatively, this dish has become a popular iteration in various cultures, each adding unique touches to the classic recipe.

Ingredient Deep Dive

Shrimp, a staple in many cuisines, is celebrated for its delicate flavor and high protein content. To obtain the best taste, select shrimp that are firm and devoid of a fishy smell upon purchase. Keep shrimp refrigerated if used shortly or freeze for prolonged storage.

Pesto, a fragrant sauce, hinges on the freshness of its basil. Opt for vibrant green leaves without dark spots. Store pesto refrigerated and use it within days for optimal taste. For alternatives, consider arugula or spinach for a different pesto twist.

Common Mistakes to Avoid

  • Overcooking shrimp, leading to toughness—cook just until pink.
  • Using pre-cooked shrimp, which can become rubbery when reheated.
  • Burning garlic—sauté only until fragrant.
  • Skipping the parmesan garnish, which adds depth of flavor.
  • Using pesto sparingly—ensure shrimp are well-coated.
  • Adding too much oil, which may lead to a greasy texture.
  • Neglecting seasoning adjustments—taste and balance salt and pepper.
  • Inadequate heating of the skillet—ensure temperature consistency.
  • Storing improperly—keep in an airtight container to avoid odor absorption.
  • Not refrigerating leftovers promptly—shrimp spoils quickly at room temperature.

Essential Techniques

Mastering the art of sautéing shrimp is key to this recipe, requiring medium-high heat for optimal texture. Ensuring the skillet is adequately heated prevents sticking and enhances caramelization. Stirring the pesto and cream into the shrimp while maintaining gentle heat keeps the sauce from separating.

Pro Tips for Perfect Creamy Pesto Shrimp

1. Use high-quality extra virgin olive oil for the best flavor base.
2. Freshly grate Parmesan for enhanced fragrance and taste.
3. Consider homemade pesto for an authentic touch.
4. Coat shrimp evenly with sauce to ensure even cooking and flavor distribution.
5. Allow the cream to reach room temperature before use to prevent curdling.
6. Serve immediately after cooking to retain texture.
7. Use lemon zest for added brightness if desired.
8. Pair with crusty bread to soak up every bit of the delightful sauce.

Variations and Adaptations

Explore regional variations by adding a hint of red pepper flakes for spice or sun-dried tomatoes for sweetness. Swap in zucchini noodles for a low-carb option or integrate cream cheese for added richness. For a vegan adaptation, replace shrimp with artichoke hearts and use a vegan pesto alternative.

Serving and Presentation Guide

Serve this dish elegantly with a generous sprinkle of grated parmesan and a dash of red pepper flakes for color contrast. Pairing with a crisp salad or soft polenta complements its flavors. For a modern touch, serve in individual bowls with fresh microgreens as a garnish.

Wine and Beverage Pairing

Pair this dish with a crisp, chilled Sauvignon Blanc to balance the richness of the pesto and cream. Non-alcoholic options like a lemon-infused sparkling water offer a refreshing counterpart. Consider serving a light espresso post-meal for a touch of sophistication.

Storage and Shelf Life

Store Creamy Pesto Shrimp in an airtight container in the refrigerator for up to 2 days. Reheat carefully in a skillet over low heat to preserve texture and flavor. For freezing, separate the shrimp from the sauce, and freeze individually for up to a month, reheating gently before combining.

Make Ahead Strategies

Prepare the pesto ahead of time and store it in the refrigerator. You can also clean and devein the shrimp in advance, storing them in a sealed container until you’re ready to cook. Add fresh herbs and cheese just before serving to maintain their bright flavors.

Scaling Instructions

To halve the recipe, simply reduce each ingredient by half without adjusting cooking time significantly. Doubling requires a larger skillet to prevent overcrowding and ensure even cooking. When increasing the batch size, extend the sauté time slightly to accommodate the increased volume.

Nutritional Deep Dive

This recipe is rich in protein due to shrimp, while the pesto contributes healthy fats. Each serving provides an efficient balance of energy from fats and proteins, with carbohydrates kept low. The inclusion of fresh basil and garlic boosts micronutrient content, making it a modestly nutritious choice.

Dietary Adaptations

For gluten-free diners, ensure accompanying sides are devoid of gluten. To create a dairy-free version, substitute the cream with coconut cream and use nutritional yeast in place of Parmesan.

The Recipe

Serves: 4

Prep Time: 15 mins

Cook Time: 10 mins

Total Time: 25 mins

Kitchen Equipment Needed

  • Large non-stick skillet
  • Wooden spoon
  • Measuring cups and spoons
  • Garlic press or mincer

Ingredients

  • 1 pound shrimp, peeled and deveined
  • 1 cup heavy cream
  • 1/2 cup pesto
  • 2 cloves garlic, minced
  • 2 tablespoons olive oil
  • Salt and pepper, to taste
  • Grated Parmesan, for garnish
  • Fresh basil leaves, for garnish

Directions

  1. Heat olive oil in a large skillet over medium heat.
  2. Add shrimp and minced garlic; sauté until shrimp are pink and opaque.
  3. Stir in pesto and heavy cream; bring to a gentle simmer.
  4. Season with salt and pepper to taste.
  5. Serve immediately, garnished with Parmesan and basil.

Recipe Notes

  • Freshly made pesto elevates the dish and is recommended if time permits.
  • Use fresh basil for a more pronounced flavor profile.

Troubleshooting Guide

Ensure shrimp are precisely cooked to avoid a rubbery texture. Adjust sauce consistency by slowly adding cream while stirring. To address flavor imbalance, check for seasoning accuracy before serving.

Recipe Success Stories

This Creamy Pesto Shrimp recipe has delighted many, from quick weekday dinners to elegant dinner parties. Readers have shared praises for its simplicity and vibrant flavors, often incorporating their imaginative garnishes and sides.

Frequently Asked Questions

Can I use frozen shrimp?

Yes, thaw frozen shrimp before cooking to ensure even cooking and ideal texture.

What type of cream should I use?

Heavy cream is ideal for a rich, thick sauce that doesn’t break down when heated.

How can I make this recipe spicier?

Add crushed red pepper flakes or a dash of cayenne pepper to the pesto sauce.

Can I serve this with pasta?

Definitely! Pairing with linguine or fettuccine complements the creamy sauce well.

Is there a vegetarian substitute for shrimp?

You can use firm tofu or large portobello mushrooms sliced thickly as alternatives.

What should I do if the sauce curdles?

If the sauce begins to curdle, remove from heat immediately and stir to combine, adding a small splash of cold cream if needed.

How can I incorporate vegetables?

Vegetables like cherry tomatoes, asparagus, or zucchini slices pair well and can be sautéed with the shrimp.

Can I use store-bought pesto?

Yes, store-bought pesto is convenient and works well if fresh basil isn’t available. Look for high-quality brands.

How do you devein shrimp?

Use a small paring knife to cut along the back of each shrimp and lift out the dark vein with the tip of the knife or a skewer.

What wine pairs well with this dish?

A chilled glass of Sauvignon Blanc or a light Pinot Grigio complements the flavors exquisitely.

Additional Resources

Explore more seafood recipes on our site, find pesto-making tutorial videos, and discover top-rated kitchen tools recommendations to elevate your culinary experience.

Join the Conversation

Share your Creamy Pesto Shrimp creations with us on Instagram using #PestoShrimpDelight. Join our Facebook group for the latest recipes, cooking tips, and community challenges. We can’t wait to see your take on this delectable dish!

Irresistible Cherry Cheesecake Egg Rolls: A Sweet and Crispy Delight

Cherry Cheesecake Egg Rolls: A Sweet Fusion Delight

⚖️
Difficulty
Easy
⏲️
Prep Time
20 mins
🕒
Cook Time
10 mins
⏱️
Total Time
30 mins
🍽️
Servings
8

Indulge your taste buds with Cherry Cheesecake Egg Rolls, a delightful fusion of creamy cheesecake filling and tart cherry pie wrapped in crispy egg roll wrappers. This easy dessert is perfect for satisfying your sweet tooth, providing a unique twist on traditional cheesecake.

The Cherry Cheesecake Egg Rolls are an ideal treat when you’re craving something sweet yet unconventional. The crispy shell perfectly complements the smooth, rich filling, making each bite an explosion of flavors and textures. With just a few simple ingredients and minimal prep time, these egg rolls are not only delicious but incredibly easy to prepare.

Quick Recipe Highlights

  • Flavor Profile: A balance of sweet, creamy cheesecake, and tart cherry delight.
  • Texture: Crisp and crunchy exterior with a smooth, creamy filling.
  • Aroma: Sweet vanilla and cherry aromas that entice the senses.
  • Visual Appeal: Golden brown rolls with a dusting of powdered sugar, oozing with cherry goodness.
  • Skill Level Needed: Easy; perfect for dessert-loving beginners.
  • Special Equipment: Deep fryer or heavy pan for frying.

Recipe Overview

  • Difficulty Level: Easy due to simple preparation steps and minimal ingredients.
  • Category: Dessert and snack.
  • Cuisine: A creative fusion of American and Asian influences.
  • Cost: Affordable; main ingredients include cream cheese and cherry pie filling.
  • Season: Best enjoyed year-round, with cherries as the star.
  • Occasion: Perfect for parties, potlucks, and festive gatherings.

Why You’ll Love This Recipe

Cherry Cheesecake Egg Rolls are the perfect combination of luscious cheesecake and vibrant cherry flavors wrapped inside a crispy shell. The recipe is quick and convenient, making it suitable for both seasoned cooks and beginners. With inexpensive ingredients, these dessert rolls won’t break the bank and are easily accessible in most grocery stores.

Nutritionally, egg rolls balance decadent flavors with moderate calories, ensuring your indulgence doesn’t feel too guilty. Cherry Cheesecake Egg Rolls are a social treat; they’re conversation starters at gatherings due to their unique twist on the classic dessert. Enjoy them at parties, where they will be the talking point with their interesting presentation and delightful taste.

Historical Background and Cultural Significance

Cherry Cheesecake Egg Rolls find their roots in creative fusion cooking, where traditional American cheesecake meets the iconic Asian egg roll. Cheesecake’s storied history dates back centuries, celebrated for its creaminess and variety of flavors. Meanwhile, egg rolls have been a staple in Asian cuisine, renowned for their versatility.

The combination of these two classics caters to modern palates, offering a new experience while respecting their cultural origins. Over time, variations of this recipe have emerged in different regions, each bringing their own twist to the sweet filling or crispy coating. Traditionally, egg rolls are savory, but this dessert variant showcases the endless possibilities of fusion cuisine.

Ingredient Deep Dive

Cream Cheese: An essential ingredient for creamy texture and tang. Opt for full-fat or reduced-fat based on preference.
Cherry Pie Filling: Offers a tart contrast. Select high-quality brands for robust flavor.
Egg Roll Wrappers: Ensure they’re fresh and intact for easier handling. Keep covered to prevent drying.

Common Mistakes to Avoid

  • Avoid overfilling, as this may cause leaking during frying.
  • Ensure wrappers are sealed properly to prevent rupture.
  • Don’t fry at too high a temperature to avoid burning.
  • Refrain from overcrowding the fryer, which can lead to uneven cooking.
  • Use cream cheese at room temperature for easy mixing.
  • Ensure oil is adequately hot before frying.
  • Avoid using low-quality pie filling, which can affect flavor.
  • Testing your oil temperature with a small piece of wrapper can prevent overfrying.
  • Don’t rush the sealing process; water can help bind edges securely.
  • Keep moist wrappers ready to prevent them from drying out.

Essential Techniques

Folding and Sealing: Proper folding techniques ensure no leaks. Use a dab of water to securely seal edges.
Frying: Maintain a consistent temperature for even, golden frying. Use a thermometer to monitor the oil.
Assembly: Properly layering the cheesecake and cherry filling ensures an ideal texture contrast.

Pro Tips for Perfect Cherry Cheesecake Egg Rolls

Unlock the key to a mouthwatering treat with these Cherry Cheesecake Egg Roll secrets. To ensure the perfect roll, use a moderate amount of filling to prevent splitting. Always have the oil at optimal temperature, around 350°F, for a crispy finish. Texture is integral, so don’t overmix the filling; keep it fluffy. For a gourmet touch, consider using homemade cherry filling — it’s fresher and allows for customized sweetness.

When dusting with powdered sugar, wait until rolls cool slightly to prevent sugar from melting. Stagger your frying to avoid dropping oil temperature, leading to greasy rolls. Use parchment paper to keep wrappers from sticking when rolling. Enjoy these egg rolls warm or cool, but store leftovers in an airtight container to retain crispness. Drizzle with chocolate or vanilla glaze for an extra flavor boost.

Variations and Adaptations

Expand your Cherry Cheesecake Egg Roll repertoire with creative changes. Swap cherry with blueberry or raspberry pie filling for a berry twist, or blend different pie fillings for variety. Adjust the sweetness of the cheesecake mixture to taste, or integrate crushed graham crackers for traditional cheesecake elements. For a holiday theme, incorporate a dash of cinnamon or nutmeg. Consider altering the serving style with a scoop of vanilla ice cream or a dollop of whipped cream for an elegant presentation.

Serving and Presentation Guide

For an enticing visual appeal, dust Cherry Cheesecake Egg Rolls with icing sugar just before serving. Opt for a charming plate arrangement: staggered heights create depth. Garnish with fresh cherries or mint leaves. Pair with a scoop of ice cream or a side of whipped cream for added richness. Ensure the rolls are warm enough to maintain their crunch but cool enough not to melt accompanying creams. Offer plates for easy handling at parties.

Wine and Beverage Pairing

Complement Cherry Cheesecake Egg Rolls with a light, sparkling wine like Prosecco, which enhances their sweet and tart elements. If opting for a non-alcoholic beverage, a refreshing raspberry lemonade or elderflower cordial fits perfectly. For coffee lovers, consider pairing with a smooth, creamy cappuccino or a fragrant black tea to counterbalance the dessert’s sweetness.

Storage and Shelf Life

To keep your Cherry Cheesecake Egg Rolls at their best, store in an airtight container in the refrigerator for up to three days. For longer shelf life, freeze them in a single layer before storing in a bag or container, consuming within a month for optimal taste. Reheat fried egg rolls at 350°F in an oven, ensuring they’re crispy and heated through. Avoid microwave reheating to maintain texture. Watch for signs of spoilage like off-odors or limp texture.

Make Ahead Strategies

For efficient preparation, roll and freeze your Cherry Cheesecake Egg Rolls un-fried. They can be fried straight from the freezer—just extend cooking time slightly. This ensures freshness and crispness upon serving. Prepare the cheesecake filling in advance, storing it and the pie filling separately in refrigerated containers. Ensure wrappers are covered to prevent drying out. Reheat fried rolls in the oven for a few minutes before serving for a freshly-made experience.

Scaling Instructions

Easily adjust Cherry Cheesecake Egg Rolls for any size gathering. Halve the recipe for intimate gatherings or double it for parties. Adjust oil quantity based on batch size to ensure sufficient coverage for frying. If doubling, prepare and cook in batches to manage consistency and quality. Use the largest skillet available for frying multiple rolls in one go, but do not overcrowd.

Nutritional Deep Dive

Each Cherry Cheesecake Egg Roll provides a delicious balance of macronutrients. Watch fat intake due to frying, and consider a smaller portion for lighter choices. However, these rolls are a delightful occasional treat. When balancing your diet, incorporate these alongside fresh fruits or a light salad to mitigate their indulgent nature. Ensure conscious calorie consumption with mindful portion sizes, enjoying the rich taste with restraint.

Dietary Adaptations

To suit dietary needs, adapt Cherry Cheesecake Egg Rolls accordingly. For gluten-free versions, use alternative wrappers such as rice paper. If dairy-free, substitute cream cheese with a vegan cream cheese alternative. Creating a vegan version entails using dairy-free cream cheese and a vegan egg roll wrapper, ensuring all pie filling ingredients are plant-based. Low-carb enthusiasts can consider almond flour-based wraps for a reduced-carb option.

The Recipe

Serves: 8

Prep Time: 20 mins

Cook Time: 10 mins

Total Time: 30 mins

Kitchen Equipment Needed

  • Mixing bowl
  • Spoon
  • Deep fryer or large skillet
  • Tongs
  • Parchment paper

Ingredients

  • 8 egg roll wrappers
  • 1 cup cherry pie filling
  • 1 cup cream cheese, softened
  • 1/4 cup powdered sugar
  • 1 tsp vanilla extract
  • Oil for frying
  • Powdered sugar for dusting

Directions

  1. In a bowl, combine cream cheese, powdered sugar, and vanilla extract until smooth.
  2. Lay an egg roll wrapper on a clean surface.
  3. Place 2 tablespoons of cheesecake mixture in the center of the wrapper.
  4. Add a spoonful of cherry pie filling on top.
  5. Fold the wrapper sides over the filling, then roll tightly.
  6. Seal the edges with a little water.
  7. Heat oil in a pan over medium heat.
  8. Fry the egg rolls until golden brown, about 3 minutes per side.
  9. Remove and drain on paper towels.
  10. Dust with powdered sugar before serving.

Recipe Notes

  • Substitute cherry pie filling with your favorite fruits or compote.
  • Adjust sweetness in the cream cheese filling to taste preference.
  • For a more decadent version, drizzle with melted chocolate.
  • Try using coconut oil for frying for a unique flavor note.

Troubleshooting Guide

Texture issues: Avoid overfilling to maintain structural integrity.
Flavor balance: Adjust cream cheese and sugar ratio to enhance sweetness.
Temperature problems: Monitor oil heat with a thermometer.
Equipment challenges: Use non-stick pans to avoid sticking.
Ingredient substitution impacts: Opt for quality ingredients to maintain flavor profile.
Timing concerns: Ensure rolls are uniformly filled and sealed for even cooking.

Recipe Success Stories

Engage with our community by embracing their Cherry Cheesecake Egg Roll adventures. See how fellow readers adapt recipes to their tastes, discovering unique spins on the classic. Photography submitted captures their golden glow, often accompanied by delight-filled testimonials of successful parties.

Frequently Asked Questions

Can the rolls be baked instead of fried?

Yes, you can bake them at 400°F for 15 mins, brushing with oil for crispiness.

Can I use a different fruit filling?

Absolutely! Blueberry and raspberry fillings work excellently.

Are these egg rolls suitable for freezing?

Yes, freeze them pre-fried for best results. Fry directly from frozen with a longer cooking time.

How can I make them gluten-free?

Use gluten-free wrappers or delicate rice paper as an alternative.

What oil is best for frying?

Neutral oils like canola or vegetable oil are best for maintaining flavor balance.

Can I prepare them in advance?

Yes, prep and freeze them. Fry before serving to save time.

What if my wrappers tear during rolling?

Wrap tightly but gently, and use double wrappers if necessary.

How do I prevent oil from splattering?

Keep rolls dry on the outside and drain excess filling moisture.

What’s the best way to seal the wrappers?

Use a water seal by dampening wrapper edges for a firm closure.

Can they be reheated without losing crispiness?

Reheat in an oven at 350°F to maintain that crispy shell.

Additional Resources

Explore related dessert recipes with our comprehensive guides. Dive into step-by-step videos to master the art of frying, discover new ingredient combinations, and explore recommended equipment for quality cooking. Uncover a world of creative cheesecake twists to expand your culinary repertoire.

Join the Conversation

Share your Cherry Cheesecake Egg Roll creations on social media using #CheesecakeEggRolls. See different variations from cooks around the world and gather inspiration for your next culinary adventure. Engage with others through community challenges, where monthly themes bring fresh ideas into your kitchen.

Irresistible Easy Breakfast Cheese Danish Recipe for Busy Mornings

Easy Breakfast Cheese Danish: A Delicious Start to Your Day

Are you looking for a simple yet delectable treat to elevate your morning routine? The Easy Breakfast Cheese Danish might just be the answer to your culinary wishes. With its flaky pastry, creamy cheese filling, and a hint of sweet glaze, this recipe brings the perfect balance of flavors and textures to your breakfast table. Discover the secrets to making this beloved pastry at home with ease. As someone who has always enjoyed baking, I found this recipe by experimenting with my grandmother’s traditional Danish recipe and simplifying it for modern-day kitchen convenience.

It’s no surprise that Breakfast Cheese Danishes have gained immense popularity around cafes and brunch menus, particularly in the last few years. With their inviting appearance and satisfying flavor profile, they capture the essence of a timeless pastry that fits right into today’s grab-and-go culture. Whether you’re impressing guests with a home-cooked brunch or simply want to treat yourself, this easy cheese Danish is bound to make morning meals more exciting.

Quick Recipe Highlights

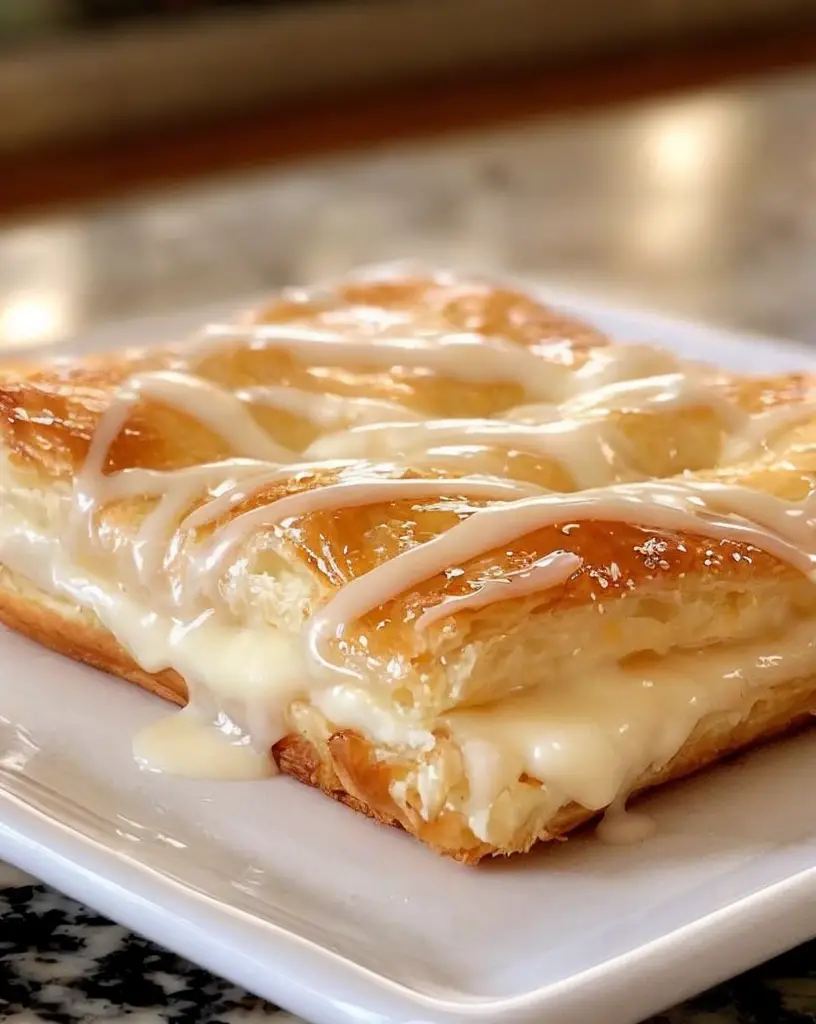
**Flavor Profile:** The Easy Breakfast Cheese Danish strikes a delightful balance between the tangy richness of cream cheese and the subtle sweetness of its glaze. The buttery layers of puff pastry offer a mild yet irresistible foundation that pairs perfectly with coffee or tea.

**Texture:** Expect a satisfying mix of textures; the crisp, flaky puff pastry contrasts beautifully with the creamy, smooth cheese filling. Each bite provides a diverse mouthfeel that’s both indulgent and comforting.

**Aroma:** The aroma of this dish is heavenly, with notes of vanilla and fresh pastry enveloping your senses as it bakes. The inviting scent makes it perfect for special mornings when you want to awaken the senses of your household.

**Visual Appeal:** Crafting a visually appealing Danish is all about layering the puff pastry and creating a glazed finish. By forming neat pinwheels or enveloping the filling in a braid, you can make each Danish aesthetically pleasing, adding a touch of elegance to your spread.

**Skill Level Needed:** This recipe is accessible to home cooks of all levels. Beginners will appreciate the use of store-bought puff pastry, while seasoned bakers might experiment with homemade pastry. Tips for mastering the technique are thoughtfully provided, ensuring successful results.

**Special Equipment:** A rolling pin is necessary for working with the pastry, and a pastry brush will help you apply the glaze perfectly. In the absence of a pastry brush, a spoon can be used to achieve similar results.

Recipe Overview

**Difficulty Level:** This recipe is classified as easy due to its straightforward steps and the use of pre-made puff pastry, which eliminates the complex process of creating the perfect dough from scratch. The step-by-step instructions are designed to guide even the most novice bakers to success.

**Category:** Enjoy this Danish as a breakfast staple or brunch item. It also fits well as a special treat for holiday mornings, when you want to offer something more luxurious without spending hours in the kitchen.

**Cuisine:** The Cheese Danish originates from Danish baking traditions, which have been adopted and adapted globally. It combines European pastry techniques with American influences, resulting in a universally loved delight.

**Cost:** Making this Danish at home is cost-effective. The primary ingredients include puff pastry, cream cheese, and a few pantry staples, amounting to a reasonable budget-friendly breakfast treat.

**Season:** While this Danish can be enjoyed year-round, it shines brightly in spring and summer when fresh fruits are in season for topping variations. During colder months, it serves as a cozy and warming treat thanks to its comforting flavors.

**Occasion:** Perfect for family gatherings, brunch events, or even a festive breakfast on Christmas morning, the Easy Breakfast Cheese Danish is a versatile addition to any spread, offering both indulgence and warmth to any occasion.

Why You’ll Love This Recipe

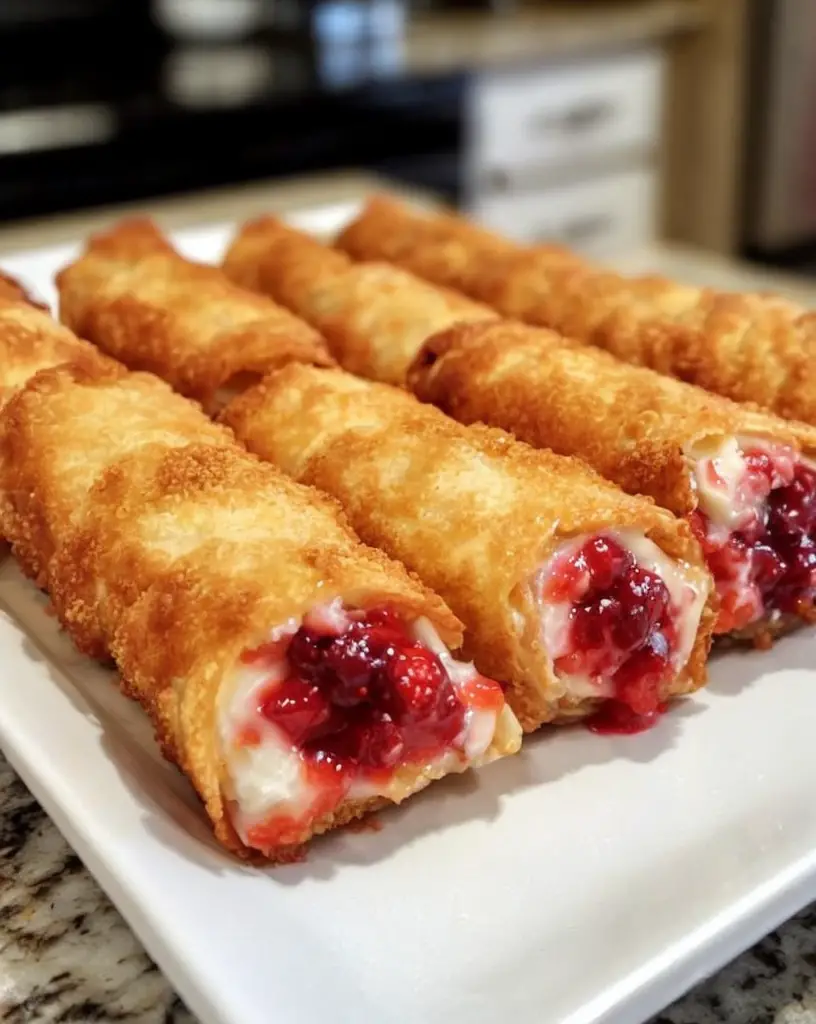
One of the standout features of this Easy Breakfast Cheese Danish is its unique flavor and texture combination. The rich and tangy cream cheese filling seamlessly marries the sweet, sticky glaze atop light and flaky layers of puff pastry. It’s a contrast of creaminess against crispness, sweetness balanced with slight sourness, that makes each bite so satisfying.

Convenience is key with this Danish. By using store-bought puff pastry, you save on prep time without compromising on flavor or texture, making it easy to whip up on a weekend morning or as a spur-of-the-moment treat. The recipe is forgiving, allowing for personalization and adjustments based on available ingredients or personal preference.

When considering the cost-effectiveness, you’ll find that the homemade version is far less expensive than those sold at bakeries, without any sacrifice in quality. Ingredients are readily available, often already present in your pantry, opening up the Danish to flexibility and accessibility.

This cheese Danish also packs a punch when it comes to entertaining. Impress your guests with its professional appearance and enticing aroma. With its ability to elevate gatherings, from intimate breakfast dates to larger festive occasions, it’s both a conversational piece and a reliable favorite. Again, thanks to its adaptable nature, it suits a broad range of palates, catering to varied tastes with ease.

Historical Background and Cultural Significance

The Cheese Danish, also known as “Ostebrod” in Danish, originates from the vibrant culinary traditions of Denmark. This pastry became popularized in the 19th century, during a time when Danish bakers sought to enrich their doughs with butter, cream cheese, and fruit toppings—elements that remain central to the Danish we know today.

The recipe traveled across Europe, adapting with local ingredients and techniques in regions it passed through. Eventually, the Danish pastry made its way to America, where it evolved to include all sorts of fillings and flavors, adding to its notoriety. Today, these pastries grace cafes and homes worldwide, renowned for their adaptability and indulgence.

Culturally, the Cheese Danish symbolizes a blend of tradition and innovation. In Denmark, they’re consumed not only as a breakfast item but also to mark special occasions or social gatherings. Over time, they have become a symbol of hospitality and warmth, given their historical use in celebrating home and hearth during shared meals.

Modern variations of the Cheese Danish include everything from fruit-laden toppings to more unconventional cheese pairings, reflecting both the culinary experimentations of contemporary kitchens and the growing cultural exchange between global cuisines.

Ingredient Deep Dive

**Puff Pastry:** A key component of the Cheese Danish, puff pastry provides the flaky, golden exterior. Traditionally defined by layers of dough interspersed with butter, the puff pastry relies on steam created during baking to rise and separate its layers. Store-bought varieties work excellently, but homemade versions can allow for customization, control over ingredients, and freshness.

**Cream Cheese:** This ingredient mustn’t be overlooked, as it forms the decadent heart of the Danish. Providing rich depth and a smooth texture, cream cheese balances the sweetness of the glaze with its savory profile. When selecting cream cheese, opt for full-fat varieties for the best flavor and texture.

**Sugar:** Used sparingly to sweeten the cheese filling and glaze, sugar adds the necessary sweetness to the Danish. Both granulated and powdered sugars serve different purposes; granulated sugar works in the cheese filling, while powdered sugar creates the glistening glaze.

**Vanilla Extract:** Adding an aromatic depth, vanilla extract complements both cheese filling and glaze, enhancing the entire pastry’s flavor profile. Pure vanilla extract is preferable over imitation for its authentic taste.

**Egg:** Eggs are used as a binding agent in the cheese filling and for an egg wash, which gives the pastry a shiny, golden finish. Free-range or organic eggs tend to provide superior flavor and ethical sustenance.

How to Customize This Recipe for Every Occasion

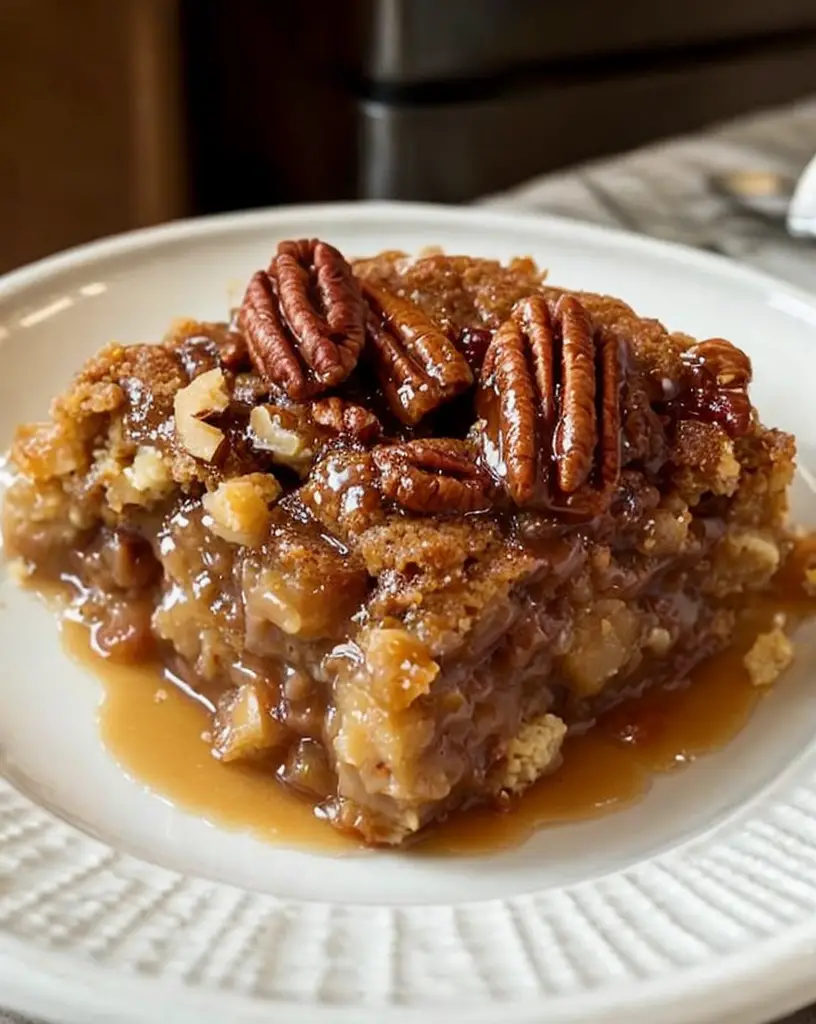
**Holiday Variations:** For festive occasions, consider incorporating seasonal ingredients such as pumpkin puree in the filling for Thanksgiving or cranberry toppings during Christmas. Sprinkle pumpkin spice or nutmeg to infuse holiday warmth.

**Seasonal Adaptations:** Pair the Danish with fresh fruits during the summer months. Sliced peaches, raspberries, or blueberries make excellent, colorful toppings, providing a fresh angle to the traditional recipe.

**Casual vs. Formal Meals:** For a casual brunch, serve the Danish in smaller, individual servings with a drizzle of honey. For formal occasions, opt for a braid or pinwheel presentation and include a dusting of powdered sugar for extra elegance.

Cooking Science Behind the Recipe

The success of the Cheese Danish relies on understanding the chemistry of its primary components. Puff pastry is leavened by steam, which forms between layers as the butter melts and moisture evaporates in the oven. This expansion creates the airy flakiness desired in a well-baked Danish.

Cream cheese contributes not only flavor but moisture and richness, which helps achieve the creamy consistency necessary for the filling. The cheese proteins coagulate during baking and stabilize the structure, preventing it from becoming runny.

The glaze represents an interplay of sugars, which bind with moisture to form a glossy surface. When heated, sugar recrystallizes, trapping moisture and creating a firm yet smooth finish that contrasts with the Danish’s flaky layers.

Understanding these interactions can greatly enhance the result, allowing for informed tweaks and a better grasp of pastry dynamics in the kitchen.

Pro Tips for Perfect Easy Breakfast Cheese Danish

1. **Use Cold Ingredients:** Ensure the puff pastry remains cold before baking to achieve the flakiest layers. If it becomes warm during prep, chill briefly before proceeding.

2. **Even Roll-Out:** Roll your pastry evenly with gentle pressure to prevent tearing and to ensure consistent baking across the entire sheet.

3. **Proper Seal:** When assembling, moisten seams with a touch of water or egg wash to seal edges and prevent leakage during baking.

4. **Avoid Over-Filling:** Overfilling will result in spillage and less attractive presentation. A heaped tablespoon of filling per Danish is usually sufficient.

5. **Cool After Baking:** Allow Danishes to cool slightly before glazing to prevent the glaze from thinning too quickly.

6. **Experiment With Fillings:** Play with variations such as lemon zest or almond extract to add complexity and fragrance to the cheese mixture.

7. **Watch the Oven:** Cook at a constant and even temperature, ensuring no hot spots which might cause uneven browning.

8. **Freshness of Ingredients:** Always use fresh cream cheese and well-selected pastry for superior taste and texture.

9. **Storage Tips:** Enjoy within 2 days for best results; beyond this, freshness diminishes notably.

10. **Practice Patience**: Let the puff pastry rest chilled, reducing gluten tension which will result in a lighter, crisper texture.

Common Mistakes to Avoid

1. **Overworking the Dough:** Handling the pastry too much can develop gluten, leading to tougher instead of flaky layers.

2. **Inadequate Chilling:** If your pastry becomes warm, re-chill to maintain structure and prevent greasy results.

3. **Forgetting Egg Wash:** Skip this, and you’ll miss out on a golden, appealing glaze.

4. **Undercooking:** Pastries should be golden brown all over, under-cooked puff pastry is unappealing and lacks defined structure.

5. **Using Low-Fat Cheese:** Full-fat cream cheese is essential for the right texture and creaminess.

6. **Improper Sealing:** Failure to seal pastry edges ensures filling leaks and a less tidy appearance.

7. **Overloading Glaze:** Exceeding recommended quantities may result in soggy textures and overly sweet surfaces.

8. **Skimping on Vanilla:** It’s a small portion but a major flavor player, don’t omit it.

9. **Loose Measurements:** Precision in both pastry and filling is key for desirable results.

10. **Ignoring Shelf Life:** Danishes have a short freshness span; keep this in mind for optimal texture and taste.

Variations and Adaptations

**Regional Variations:** Experiment by incorporating local favorites or regional specialties. In Italy, use mascarpone, while in France, opt for a hint of almond marzipan.

**Dietary Substitutions:**
– **Gluten-Free:** Replace standard puff pastry with a gluten-free version to accommodate dietary needs without losing its delightful structure.
– **Vegan Option:** Substitute dairy components with coconut cream cheese and plant-based butter alternatives.
– **Keto-Friendly:** Opt for low-carb, nut-flour-based puff pastry to make it suitable for keto diets.

**Flavor and Texture Modifications:** Spice up your Danishes by infusing fillings with spices such as cinnamon or nutmeg. Adding fruit preserves or chutneys can introduce a lovely contrast of textures and flavors, making each bite an unexpected delight.

Serving and Presentation Guide

**Plating Techniques:** For a classy impression, consider a large wooden board or marble platter to highlight the golden hues of the Danish. Arrange aesthetics geometrically to please the eye.

**Garnishing Ideas:** Dust with a fine veil of icing sugar or top with shavings of chocolate or sliced almonds to enhance elegance and visual allure.

**Accompaniments and Beverages:** Serve with contrasting elements – a dollop of whipped cream or a side of fresh berries highlights the flavors within the Danish. To drink, match with freshly brewed coffee or a cold glass of milk for a classic pairing.

Wine and Beverage Pairing

**Alcoholic Pairings:** Light, fruity sparkling wines, such as a chilled Moscato, complement the pastry’s delicate layers and sweet undertones without overpowering. A crisp cider can also deliver a refreshing, balanced counterpoint.

**Non-Alcoholic Pairings:** Herbal teas like chamomile or lavender offer a calming balance to the richness of the Danish. Iced teas with citrus notes or a fresh mimosa mocktail can provide a refreshing sip.

**Serving Temperatures:** Serve wine chilled, not ice-cold, for optimal aroma and a balanced blend of flavor.

Storage and Shelf Life

**Proper Storage Methods:** Store cooled Danish pastries in an airtight container at room temperature for up to 2 days. Refrigerate if located in a particularly warm environment to preserve ingredients’ integrity.

**Freezing and Reheating Instructions:** To freeze, wrap tightly in aluminum foil and place in a plastic wrap, storing for up to one month. Thaw in the refrigerator overnight, then reheat in a preheated oven at 350°F for about 10 minutes to revive crispness.

Make Ahead Strategies

**Prep Ahead Tips:** Assemble the Danishes the night before, wrapping securely in plastic wrap and refrigerating directly before baking. Transfer them directly to the oven for serving freshness.

**Storage:** Ensure proper storage to retain quality, especially with airy puff pastries, ensuring fillings maintain their coveted creaminess.

**Assembling in Advance:** Assemble your Danish pastries the day before standing events or brunches; refrigerate, cover, and bake right when you need them.

Scaling Instructions

**Halving the Recipe:** Simply reduce the ingredient measurements by half, ensuring even conversions. Adjust baking time as necessary while carefully monitoring progress.

**Doubling the Recipe:** Multiply ingredient quantities by two. Ensure your oven can accommodate increased batch sizes without compromising individual attention where necessary.

**Equipment Considerations:** Check all scaling aligns appropriately with your kitchen’s space. Multiple baking sheets or an additional oven rack may be necessary for larger batches.

Nutritional Deep Dive

**Macronutrients:** Expect a nutritional content boasting a balance of carbohydrates from the puff pastry, alongside fats from cheese, and the moderate protein content, forming a fulfilling breakfast option.

**Micronutrients:** The Danish incorporates micronutrients from dairy, such as calcium and vitamin D, essential for a healthy start.

**Dietary Benefits:** Besides providing energy and essential fats, Danish pastries align with mindful consumption practices considering portion sizes and frequency.

Troubleshooting Guide

**Undesired Texture:** If your Danish comes out soggy or dense, check puff pastry handling or baking temperature; accuracy here is crucial to desired flakiness.

**Imbalanced Flavors:** Ensure sugar and fillings are balanced to achieve a cohesive taste profile, adjusting if one flavor overpowers.

**Equipment-Related Problems:** For lingering issues rooted in equipment quirks, ensure oven calibration matches, maintaining even baking temperatures.

Recipe Success Stories

The beauty of these easy Danishes is their wide-spanning appeal. Suppose users’ testimonials share triumphs of upgrading store-bought varieties into family favorite dessert staples. In that case, their beloved adaptability becomes evident – social media often abounds with variations illustrating regional pairs.

Frequently Asked Questions

**Can I use croissant dough instead of puff pastry?**
Using croissant dough is a delightful alternative that introduces softer, airier textures; this will alter the final result but remains a suitable swap.

**How do I make the glaze less runny?**
Adjust the sugar-to-liquid ratio, ensuring a thicker consistency by slightly reducing the liquid or increasing sugar.

**Can I prepare this recipe gluten-free or vegan?**
Yes, substitutions exist for each dietary preference that retains quality and appeal while respecting restrictions.

**Best fruits or preserves to add?**
Consider options like fresh raspberries or blueberries for tartness, or apricot preserves ensure a sunny, rich counterpart.

**Can I freeze leftovers?**
Yes, these Danishes freeze well. Wrap single portions securely and thaw individually for effortless future indulgence.

**What if my pastry doesn’t puff properly?**
Monitor the temperature and storage before baking, ensuring it remains cold until entering the oven.

**How to prevent my filling from leaking?**
Sealing seams with water or egg wash and avoiding overfilling will help avoid unwanted leaks.

**Why are my Danishes burnt on top?**
Rest assured, careful oven placement and temperature adjustments will help avoid future burnt tops.

**Can cream cheese be replaced with a different cheese?**
Though traditional, selected ricotta or mascarpone could introduce subtle variation, respect the taste difference.

Additional Resources

Explore related recipes like fruit-filled pastries or savory cheese twists for complementary tastes.

Join the Conversation

Engage with other culinary enthusiasts by sharing your Cheese Danish creations on social media. Join online challenges to explore and learn new variations. Encourage feedback to enhance your future endeavors in creating memorable culinary experiences.

Indulge in This Delicious and Easy Creamy Pesto Shrimp Recipe

Creamy Pesto Shrimp: A Delectable Seafood Delight

Prep Time: 15 mins |
Cook Time: 10 mins |
Difficulty: Easy

Indulge in the luscious flavors of creamy pesto shrimp, a dish that blends the rich and nutty taste of homemade pesto with plump, juicy shrimp. Perfect for a quick weeknight dinner or an elegant weekend meal, this recipe combines the fresh, herbaceous notes of basil with the creamy texture of a sauce that’s both comforting and sophisticated. With just a few simple ingredients and a minimal time investment, you can create a gourmet experience that’s bound to impress.

The symphony of flavors in this creamy pesto shrimp will captivate your taste buds. The freshness of basil, combined with garlic and Parmesan, creates a fragrant pesto. When married with succulent shrimp and creamy sauce, it forms a dish that’s aromatic and savory, with just a hint of indulgence. The vibrant colors and inviting aroma will make this a favorite at the dinner table, whether for family or guests.

Quick Recipe Highlights

  • Flavor Profile: A harmonious blend of basil, garlic, Parmesan, and cream.
  • Texture: Creamy sauce with tender, juicy shrimp.
  • Aroma: Fresh basil with a hint of garlic and Parmesan.
  • Visual Appeal: Vibrant green pesto contrasted with pink shrimp and cream sauce.
  • Skill Level Needed: Beginner-friendly with step-by-step guidance.
  • Special Equipment: Blender or food processor for pesto preparation.

Recipe Overview

  • Difficulty Level: Simple enough for beginners, with a focus on timing and sauce preparation.
  • Category: Main Course, Seafood.
  • Cuisine: Italian-inspired with Mediterranean influences.
  • Cost: Affordable, with shrimp as the main expense.
  • Season: Best enjoyed in spring and summer when basil is freshest.
  • Occasion: Suitable for a casual dinner, special gatherings, or date nights.

Why You’ll Love This Recipe

The taste profile of creamy pesto shrimp is both rich and refreshing. The sauce offers a creamy base that complements the sweetness of shrimp, while the pesto adds depth with its basil and garlic notes. This dish is a testament to the beauty of simple ingredients creating complex flavors.

Convenience is a major benefit; with only 25 minutes from start to finish, it’s a perfect choice for busy weeknights. The ingredients are readily available, making it easy to whip up whenever the craving hits.

Nutritionally, shrimp are low in calories yet high in protein, while the pesto adds healthy fats from olive oil and pine nuts. This combination creates a balanced meal that doesn’t compromise on flavor or nutrition.

For those entertaining guests, this dish offers a touch of elegance without requiring intense preparation. Its vibrant presentation and rich taste make it an ideal centerpiece for any dining experience.

Cost-effectiveness is another appealing factor. While shrimp might be a bit pricier, the other ingredients are budget-friendly, keeping the overall cost reasonable without sacrificing quality or taste.

Historical Background and Cultural Significance

Shrimp and pesto have longstanding roots in Mediterranean cuisine. Pesto itself originates from Genoa, Italy, and has been a staple in Italian cooking for centuries. Traditionally, it was made using a mortar and pestle, a labor of love that highlights the region’s dedication to fresh, flavorful ingredients.

The combination of seafood and pesto is a natural fit in coastal Italy, where fresh shrimp and vibrant herbs are readily available. Over time, the pairing of shrimp with creamy sauces gained popularity, offering a luxurious take on these classic ingredients.

As the world became more interconnected, recipes like creamy pesto shrimp have evolved, incorporating diverse influences while maintaining their core elements. Regional variations might include different nuts or cheeses to suit local palates.

Today, creamy pesto shrimp is enjoyed globally, a testament to its universal appeal. It’s often served with pasta, rice, or crusty bread, making it a versatile addition to any meal plan.

Ingredient Deep Dive

– **Shrimp**: A globally beloved seafood, shrimp are prized for their tender texture and subtle, sweet flavor. They are rich in protein and low in fat, making them a nutritious choice. When selecting shrimp, fresh is best, but frozen can also be a great option. Look for firm, translucent flesh without any strong odors.

– **Pesto (Basil)**: Basil, the star of pesto, offers a fragrant aroma and vibrant green color. It’s packed with vitamins A and K and has natural anti-inflammatory properties. Choose bright, fresh leaves for the most flavor, and store them in the refrigerator or freeze pesto for long-term storage.

– **Parmesan Cheese**: Known for its rich umami flavor, Parmesan enhances the depth of the pesto. Opt for genuine Parmigiano-Reggiano for the best taste. Store it wrapped in parchment paper in the fridge to maintain freshness.

– **Garlic**: Adds a pungent, aromatic punch to the dish. When selecting garlic, choose firm bulbs with tight skin. Store in a cool, dry place for longevity.

– **Cream**: Contributes to the dish’s rich texture, balancing the strong flavors of pesto. Heavy cream provides a silky finish, while half-and-half can be used for a lighter version. Always keep cream refrigerated and use it before the expiry date for best results.

Common Mistakes to Avoid

  • Overcooking Shrimp: Cook just until they turn pink and are opaque; overcooking makes them tough.
  • Sauce Separation: Prevent by stirring the cream in slowly and maintaining a consistent heat.
  • Using Old Basil: Use fresh, vibrant leaves for the pesto to maintain its bright flavor and color.
  • Skipping the Marination: Briefly marinate shrimp for enhanced flavor.
  • Inadequate Seasoning: Taste and adjust salt and pepper to bring out all flavors.
  • Uneven Heating: Stir continuously to prevent sauce from sticking and burning.
  • Neglecting to Dry Shrimp: Pat shrimp dry to ensure a good sear and prevent extra moisture.
  • Improper Equipment: Use a high-quality blender or food processor for smooth pesto.
  • Salty Cheese: Over-salted Parmesan can overpower; balance with lemon juice if needed.
  • Ignoring Garnish: A sprinkle of fresh basil or a lemon wedge elevates the presentation.

Essential Techniques

Understanding the key techniques will elevate your dish:

– **Sautéing Shrimp**: Achieving that perfect sear is crucial. Heat the pan before adding shrimp, and cook over medium-high heat.

– **Blending Pesto**: Use short pulses to avoid over-processing, preserving the vibrant green color.

– **Incorporating Cream**: Gently heat the cream before adding it to prevent curdling.

– **Emulsifying Sauce**: Whisk cream and pesto for a smooth, unified sauce.

– **Adjusting Seasoning**: Taste throughout cooking, adding salt and pepper gradually.

Pro Tips for Perfect Creamy Pesto Shrimp

– Buy deveined shrimp to save time.
– Toast pine nuts for a deeper pesto flavor.
– Make pesto in advance to enhance its taste.
– Use freshly grated Parmesan for optimal flavor.
– Experiment with different nuts in pesto, like walnuts.
– Add a splash of lemon juice for vibrant acidity.
– Take care when salting; balance is key.
– Pair with crusty bread for dipping.

Variations and Adaptations

– **Regional Variations**: Substitute with other herbs like cilantro for a twist.
– **Seasonal Adaptations**: Incorporate seasonal vegetables like asparagus or spinach.
– **Dietary Modifications**: Substitute cream with coconut milk for a dairy-free version.
– **Flavor Variations**: Introduce red pepper flakes for heat.
– **Texture Modifications**: Add toasted breadcrumbs for a crunchy topping.
– **Presentation Alternatives**: Serve over zucchini noodles for a low-carb option.

Serving and Presentation Guide

For an appetizing presentation:
– Plate in shallow bowls, swirling the sauce around the shrimp.
– Garnish with freshly chopped basil or a sprinkle of red pepper flakes.
– Pair with a crisp side salad or a loaf of crusty bread.
– Serve with rice or pasta to make it a complete meal.
– Ensure warm plates to keep the dish at the perfect serving temperature.
– Manage portions with 6-8 shrimp per adult serving, depending on size.

Wine and Beverage Pairing

Pair this dish with:
– **White Wines**: Chardonnay or Sauvignon Blanc for creamy balance.
– **Non-Alcoholic Options**: Sparkling water with lime slices.
– **Coffee/Tea Pairings**: Serve with a lemony green tea post-meal.
– **Temperature Considerations**: Chill white wines to enhance freshness.
– **Serving Suggestions**: Let wines breathe before serving for full flavor.

Storage and Shelf Life

– Store leftovers in airtight containers in the fridge for up to 2 days.
– Use shallow containers to cool quickly.
– Signs of spoilage include off odors and sliminess.
– Reheat gently on the stovetop, stirring constantly to revive the sauce.
– Avoid freezing due to cream content, but pesto can be frozen separately.
– Quality declines if kept too long; consume promptly for best flavor.

Make Ahead Strategies

– Prepare pesto up to 3 days in advance.
– Store cooked shrimp separately to prevent overcooking.
– Assemble all components before guests arrive for stress-free entertaining.
– Gently reheat sauce, adding fresh cream if needed to refresh texture.
– Add freshly cooked elements, like pasta or vegetables just before serving.

Scaling Instructions

– To halve the recipe, reduce shrimp and sauce ingredients proportionally.
– To double, prepare pesto in batches to prevent overloading the blender.
– Larger equipment, like a bigger pan, helps when increasing recipe size.
– Adjust cooking times slightly when scaling; monitor shrimp for doneness.
– When making larger batches, ensure adequate storage for leftovers.

Nutritional Deep Dive

This dish offers:
– A balance of high protein from shrimp and healthy fats from pesto.
– Vitamins A, K, and E from basil.
– The macronutrient profile aligns with a balanced diet.
– Appropriate portion sizes contribute to weight management goals.
– Consider cream alternatives for a lighter version.
– A good source of Omega-3s with high-quality shrimp.

Dietary Adaptations

– **Gluten-Free**: Use gluten-free pasta if serving with carbs.
– **Dairy-Free**: Coconut milk as a cream replacement.
– **Vegan**: Use tofu or mushrooms instead of shrimp.
– **Low-Carb/Keto**: Serve with cauliflower rice or zucchini noodles.
– **Paleo**: Avoid dairy, focusing on additional herbs for pesto richness.
– **Low-FODMAP**: Use garlic-infused oil instead of raw garlic.
– Tailor to other diets by swapping out complementary ingredients.

Troubleshooting Guide

– **Texture Issues**: Ensure shrimp are dried and cooked properly; add cream slowly.
– **Flavor Balance**: Adjust lemon juice or Parmesan for acidity or saltiness.
– **Temperature Problems**: Maintain a steady, medium-low heat.
– **Equipment Challenges**: Use the right size pan to avoid crowding shrimp.
– **Ingredient Substitution Impacts**: Alter pesto ratios if using different herbs.
– **Timing Concerns**: Prepare all ingredients before starting to cook, maintaining fluid progress.

Recipe Success Stories

Join our community:
– Share your versions on social media using #CreamyPestoShrimp.
– Upload photos and inspire others with creative plating.
– Incorporate your innovations and rate the recipe on our site.
– Discover diverse adaptations from other readers worldwide.
– Explore new cooking tips from fellow enthusiasts.

Frequently Asked Questions

– Can I substitute frozen shrimp?
– How do I prevent the sauce from separating?
– What’s the best way to thicken the sauce?
– How can I reduce the fat content?
– What herbs can I use if I don’t have basil?
– Is there a non-dairy cheese option for pesto?
– How do I know if the shrimp are cooked thoroughly?
– Can this be made spicy?
– How can I store leftover pesto?
– What’s the best dessert to follow this meal?
– How can the recipe be adjusted for more servings?
– Do I need to shell the shrimp completely?

Additional Resources

Explore more:
– Try our other seafood recipes like Lemon Garlic Butter Shrimp.
– Watch videos on mastering the art of pesto.
– Learn about sustainable shrimp farming.
– Discover the best blenders for homemade sauces.
– Check out seasonal variations of pesto shrimp.

Join the Conversation

Engage with our culinary community:
– Share your creations on Instagram with tips for others.
– Submit a recipe review on our website.
– Participate in monthly cooking challenges.
– Use #PestoShrimpChallenge for community insights.
– Discuss favorite ingredient swaps in our comment section.

Irresistible Pecan Pie Cobbler: The Perfect Dessert for Any Occasion

Pecan Pie Cobbler: A Sweet Southern Delight

⚖️
Difficulty
Easy

⏲️
Prep time
15 mins

🕒
Cooking time
45 mins

⏱️
Total time
60 mins

🍽️
Servings
8

Indulge in the rich, nutty flavor of this Pecan Pie Cobbler, a dessert that combines the classic Southern pecan pie with the comforting texture of a cobbler. This easy-to-make dessert will quickly become a family favorite, offering the perfect blend of sweetness and texture.

Recipe Overview

  • Difficulty Level: Easy
  • Category: Dessert
  • Cuisine: Southern
  • Cost: $$

Why You’ll Love This Recipe

This Pecan Pie Cobbler is the ideal dessert for those who love a buttery, rich flavor with a satisfying crunch. The cobbler is easy to prepare and provides a delightful balance of sweet and savory that makes it perfect for holidays or special gatherings. You’ll love its caramel-like topping and the soft, spongy base that captures the essence of Southern comfort food.

Context/Background

Pecan pie has long been a staple of Southern cuisine, known for its buttery, sweet, and crunchy texture. By transforming this classic pie into a cobbler, you get the same beloved flavors in a more casual, spoon-friendly format. This dessert hearkens back to the traditional techniques of simplifying pie-making, allowing for delicious results with minimal effort.

Common Mistakes to Avoid

  • Using cold ingredients: Ensure that your ingredients are at room temperature for smooth mixing.
  • Skipping the boiling water: Pouring boiling water over the top is crucial for forming a caramel-like sauce.
  • Overbaking: Watch out, as overbaking can dry out the cobbler and sacrifice flavor.

Tips for Perfect Pecan Pie Cobbler

  • Use quality pecans for the best flavor and crunch.
  • Let the cobbler cool slightly before serving to allow the sauce to thicken.
  • Add a scoop of vanilla ice cream to complement the rich flavors.

Variations and Substitutions

  • Try adding a dash of bourbon for an extra depth of flavor.
  • Substitute walnuts if pecans aren’t available.
  • Incorporate chocolate chips for a decadent twist.

Serving Suggestions

Serve warm with a scoop of vanilla ice cream or a dollop of whipped cream. It pairs wonderfully with coffee for a sweet finish to your meal.

Storage and Leftovers

Store leftover cobbler covered in the refrigerator for up to 3 days. Reheat in the oven for best results.

Make Ahead Instructions

You can prepare the batter in advance and store it separately in the refrigerator. Assemble and bake the cobbler just before serving for the freshest experience.

Nutritional Information

  • Calories: 450
  • Protein: 5g
  • Carbohydrates: 55g
  • Fat: 25g
  • Fiber: 2g
  • Sugar: 40g

Dietary Notes

  • Vegetarian

The Recipe

Serves: 8

Prep Time: 15 mins

Cook Time: 45 mins

Total Time: 60 mins

Kitchen Equipment Needed

  • 9×13 inch baking dish
  • Mixing bowl
  • Whisk
  • Measuring cups and spoons

Ingredients

  • 1 cup pecan halves
  • 1 cup all-purpose flour
  • 1 cup granulated sugar
  • 1 cup brown sugar
  • 1 tablespoon baking powder
  • 1/4 teaspoon salt
  • 1 cup milk
  • 1/2 cup unsalted butter, melted
  • 1 teaspoon vanilla extract
  • 1 cup boiling water

Directions

  1. Preheat your oven to 350°F (175°C).
  2. Spread the pecan halves evenly in a 9×13 inch baking dish.
  3. In a mixing bowl, combine flour, granulated sugar, baking powder, and salt.
  4. Stir in milk and vanilla until smooth, then pour over the pecans.
  5. Drizzle melted butter over the batter.
  6. Sprinkle the brown sugar evenly over the top.
  7. Slowly pour the boiling water over the entire mixture.
  8. Bake for 45 minutes until golden brown and set.

Recipe Notes

  • The cobbler’s top should be crisp and golden, ensure not to overbake to maintain a moist interior.
  • Feel free to add a pinch of cinnamon for added warmth in flavor.

Community Tips and Photos

Share your experience with this recipe! Tag us using #PecanPieCobblerMagic on social media.

Questions and Answers

  • Can I make this cobbler with any other nuts? Absolutely, walnuts or almonds can work well.
  • Is it possible to make this cobbler vegan? Yes, substitute milk with almond milk and use vegan butter.

Deliciously Decadent Inside Out Chocolate Chip Cookies Recipe

“`html
Jump to Recipe

Inside Out Chocolate Chip Cookies: A Delicious Twist on a Classic Delight

Imagine taking a bite into a warm, gooey cookie where the rich gooey center of chocolate chips lies surrounded by a delicious golden brown exterior. This is the magic of Inside Out Chocolate Chip Cookies. With every morsel, the cookie envelops you with a balance of sweetness and texture that makes each bite unforgettable. Worth trying for its unique twist on the timeless chocolate chip cookie, this recipe captures the heart of comfort food with a delightful surprise.

Why You’ll Love This Recipe

The Inside Out Chocolate Chip Cookies are a baker’s dream come true for multiple reasons. First, they’re incredibly versatile, perfect for everything from an afternoon snack to an indulgent dessert. They evoke a sense of nostalgia, taking you back to the cherished memories of homemade treats shared with family or friends.

These cookies are also incredibly easy to make with staple ingredients typically found in your pantry. The combination of two types of chocolate chips adds an extra level of decadence, ensuring that each bite is as satisfying as the last.

Another reason to love these cookies is their adaptability. Whether you enjoy them as a traditional cookie or put your creative spin on them, they always turn out to be a batch of chocolatey perfection.

Health-conscious bakers will appreciate that this recipe can also be made healthier with a few simple ingredient swaps, which we’ll discuss later on.

Personal Story/Connection

This recipe holds a special place in my heart as it was introduced to me by my grandmother. I remember spending weekends in her cozy kitchen, the air thick with the scent of sweet cookies baking, as she taught me the art of making these Inside Out Chocolates. To this day, baking these cookies brings a wave of nostalgia and connection to those cherished memories, as well as a bond with my grandmother that lives on through shared recipes.

Context/Background

The chocolate chip cookie is a classic American dessert, first invented by Ruth Wakefield in the 1930s. However, the Inside Out Chocolate Chip Cookie takes this classic treat to another level by turning the chocolate chip experience inside out. This innovation delights those who crave a little extra surprise in their baked goods.

Over the years, the recipe has evolved through home bakers creatively incorporating different chocolate varieties and inclusions like nuts, bringing an exciting range of flavors and textures to the table.

It doesn’t just end there—the trend of inside-out desserts has expanded beyond cookies, influencing cakes, muffins, and even ice creams to everyone’s delight.

Tips for Perfect Inside Out Chocolate Chip Cookies

  • Ensure your butter is softened to room temperature to make creaming easier and to achieve a smoother dough.
  • For a more pronounced chocolate flavor, try using dark or semi-sweet chocolate chips.
  • To enhance the dough’s flavor, chill it for at least 30 minutes before forming the cookies.
  • For a chewy texture, slightly underbake the cookies, letting them set fully as they cool.
  • Use a combination of regular and mini chocolate chips to ensure that the chocolate is evenly distributed.

Serving Suggestions

These cookies make for a perfect addition to any dessert table. Serve them warm from the oven with a scoop of vanilla ice cream for a delightful contrast of warm and cold.

For a special touch, present them in a pretty wrap tied with a ribbon to gift to loved ones during holidays or celebrations.

You can also create a dessert platter by pairing these cookies with other baked favorites such as brownies and lemon bars for a sweet contrast.

Storage and Leftovers

Store your Inside Out Chocolate Chip Cookies in an airtight container at room temperature for up to a week. If you’ve made a large batch, consider freezing them for longer shelf life. Simply place the cooled cookies in a single layer in a resealable freezer bag with parchment paper between layers. They can be stored in the freezer for up to three months.

To enjoy later, thaw the cookies at room temperature or reheat them in the oven at 350°F for a few minutes to bring back that freshly-baked warmth and flavor.

Recipe Variations and Substitutions

For those following a gluten-free diet, simply replace the all-purpose flour with a gluten-free flour blend. The texture will delight just as much as the original.

Prefer a dairy-free version? Swap the butter for a plant-based alternative and the chocolate chips with vegan versions.

Add a nutty twist by folding in a handful of chopped walnuts or almonds for added crunch and protein.

FAQ

Can I make this ahead of time? Yes, the dough can be prepared ahead and refrigerated for up to 48 hours. This also helps the flavors meld together for a more indulgent cookie experience.

What substitutions can I use for butter? For a dairy-free or vegan option, replace the butter with coconut oil or a high-quality margarine.

How do I make this gluten-free? Substitute the all-purpose flour with a gluten-free blend to keep the recipe celiac-friendly.

Optional Nutritional Information

Each cookie typically contains approximately 180 calories with 9 grams of fat, 24 grams of carbohydrates, and 2 grams of protein.

Final Thoughts

These Inside Out Chocolate Chip Cookies are truly a remarkable adaptation of a beloved classic. Whether enjoyed as an indulgence on a cozy night in or baked as a gesture of love to share, they never fail to impress. We invite you to try this recipe and experience the joy of baking them for yourself.

Share your experiences or any questions in the comments below—your stories might inspire others to bring these delightful treats to life!

Recipe Section

Serves: 24 cookies

Prep Time: 15 minutes

Cook Time: 10-12 minutes

Total Time: 30 minutes

  • 1 cup unsalted butter, softened
  • 1 cup granulated sugar
  • 1 cup light brown sugar, packed
  • 2 large eggs
  • 1 teaspoon vanilla extract
  • 3 cups all-purpose flour
  • 1 teaspoon baking soda
  • 1/2 teaspoon salt
  • 2 cups chocolate chips
  • 1 cup mini chocolate chips
  1. Preheat the oven to 350°F and line a baking sheet with parchment paper.
  2. In a large mixing bowl, cream together the butter, granulated sugar, and brown sugar until light and fluffy.
  3. Add in the eggs one at a time, mixing well after each addition. Stir in the vanilla extract.
  4. In a separate bowl, whisk together the flour, baking soda, and salt. Gradually add the dry ingredients to the wet ingredients, mixing until just combined.
  5. Fold in the chocolate chips and mini chocolate chips until evenly distributed throughout the dough.
  6. Using a cookie scoop, place a spoonful of dough in the palm of your hand. Flatten it slightly and place a few more chocolate chips in the center. Roll the dough around the chocolate chips to create a cookie dough ball.
  7. Place the dough balls on the prepared baking sheet, spacing them about 2 inches apart. Bake for 10-12 minutes, or until the edges are lightly golden.
  8. Let the cookies cool on the baking sheet for 5 minutes before transferring them to a wire rack to cool completely.

“`

Irresistible Inside Out Chocolate Chip Cookies for Sweet Indulgence

# The Ultimate Guide to Baking Inside Out Chocolate Chip Cookies

## Introduction

### A Sweet Magic Moment Awaits You

Imagine yourself in the heart of a warm and inviting kitchen, enveloped by the heady scent of freshly baked cookies. That first bite into a luscious, melty Inside Out Chocolate Chip Cookie promises a taste of joy and satisfaction. These aren’t your average cookies; they’re the ultimate indulgence for every lover of sweet treats. Whether you’re a seasoned baker or a novice seeking perfection, these cookies are destined to be your go-to favorite.

## Ingredients & Equipment

### The Secret Ingredients for Your Perfect Cookie

Unlocking the magic of Inside Out Chocolate Chip Cookies requires the right blend of ingredients. Here’s how each component contributes to your baking success:

– **1 cup unsalted butter, softened**: This provides richness and aids in achieving that soft, chewy texture.
– **1 cup granulated sugar & 1 cup packed light brown sugar**: The combination delivers sweetness while ensuring a moist bite.
– **2 large eggs**: They bind the dough together and add structure.
– **1 teaspoon vanilla extract**: Elevates the flavor profile by adding warmth and depth.
– **3 cups all-purpose flour**: Forms the base of your dough while ensuring stability.
– **1 teaspoon baking soda & 1/2 teaspoon salt**: Together, they create the perfect rise and balance the sweetness.
– **2 cups chocolate chips**: Essential for that gooey, chocolatey experience that makes these cookies so divine.

### Essential Kitchen Tools for Your Baking Adventure

Ensure a smooth, hassle-free baking process by arming yourself with these necessary tools:

– **Baking sheet**: For evenly baked cookies.
– **Parchment paper**: Facilitates easy cookie removal and cleanup.
– **Large mixing bowl**: Allows room for thorough mixing.
– **Wire rack**: Crucial for cooling cookies evenly, maintaining the right texture.

## Step-by-Step Instructions

### Prepping for Your Baking Triumph

#### 1. Preheat the Oven

Begin your journey by setting your oven to 350°F. Line your baking sheet with parchment paper, preparing for cookie excellence.

#### 2. Craft the Perfect Creamy Base

In your mixing bowl, cream together the softened butter, granulated sugar, and brown sugar. Achieve a creamy, fluffy blend—this is your flavor foundation.

#### 3. Infuse Eggs and Vanilla Essence

Integrate the eggs one by one, followed by a dash of vanilla extract, blending until your mix becomes smooth and flavorful.

### Creating the Dough of Your Dreams

#### 1. Combine Dry Ingredients with Precision

In a separate bowl, whisk together your flour, baking soda, and salt. This step ensures even distribution and sets the stage for perfect dough.

#### 2. Achieve Dough Perfection

Slowly incorporate the dry mixture into your wet ingredients, stirring until a consistent dough forms, promising each bite is as good as the last.

#### 3. Add a Heart of Chocolate

Gently fold in the chocolate chips. They’re your key to the inside out chocolate richness you crave.

### Baking to Golden, Gooey Perfection

#### 1. Shape and Boost Chocolate Bliss

Scoop dough balls onto your baking sheet. Flatten gently and crown each with extra chocolate chips for visual and taste appeal.

#### 2. Know When Your Cookies Achieve Perfection

Bake for around 10-12 minutes. Look for golden-brown edges—your signal that these cookies are ready.

#### 3. Cool and Relish

Let your cookies rest briefly before moving them to a wire rack. This ensures they maintain their structure while the chocolate remains delightfully gooey.

## The Science Behind Each Bite

### Why the Inside Out Technique Elevates Your Cookie Game

– **Textural Delight**: The baking method promotes a gooey center while crisping the edges to perfect harmony.
– **Flavor Explosion**: Superior quality chocolate elevates your taste experience, creating layers of rich, sweet satisfaction.

## Recipe Table: Your Quick Reference

| Ingredient | Quantity |
|———————-|——————-|
| Unsalted Butter | 1 cup, softened |
| Granulated Sugar | 1 cup |
| Light Brown Sugar | 1 cup, packed |
| Large Eggs | 2 |
| Vanilla Extract | 1 teaspoon |
| All-Purpose Flour | 3 cups |
| Baking Soda | 1 teaspoon |
| Salt | 1/2 teaspoon |
| Chocolate Chips | 2 cups |

## Common Questions (FAQ)

### Why are my cookies spreading too much?

If you find your cookies spreading more than desired, chill your dough prior to baking. This helps maintain shape and form.

### Can dark chocolate chips enhance my cookies?

Absolutely! Opt for dark chocolate chips to introduce a richer, balanced sweetness that contrasts beautifully with the other ingredients.

### How can I ensure softer cookies?

Adjust the baking time if necessary, and never overbake. Watch the edges for a light golden tinge, indicating they are ready to enjoy.

## Conclusion

Your journey with Inside Out Chocolate Chip Cookies promises more than just a taste; it’s an exploration of happiness and home-baked goodness. Perfect for sharing or savoring alone, these cookies truly embody delicious magic. Indulge today—happy baking, and may every bite bring joy!

**Call to Action**: Ready to bake your batch of Inside Out Chocolate Chip Cookies? Share your experiences and variations with us, and join a community of cookie enthusiasts celebrating the joy of home baking.

Vanilla Cookie Decorating Buttercream: Easy Recipe for Perfect Designs

“`html
Jump to Recipe

Vanilla Cookie Decorating Buttercream: The Ultimate Sweet Canvas

Imagine the scent of freshly baked vanilla cookies floating through your kitchen, mingling with the rich, creamy aroma of a perfectly whipped buttercream. This Vanilla Cookie Decorating Buttercream is not just a topping; it’s an experience, a velvety blend of sweetness with the delicate dance of vanilla that transforms any cookie into a masterpiece of flavor and artistry. Whether you’re aiming for a simple elegance or a vibrant display of colors, this buttercream proves why it deserves a spot in every baker’s repertoire.

Why You’ll Love This Recipe

The Vanilla Cookie Decorating Buttercream is a celebration of flavors and textures, bringing joy to both novice and seasoned bakers. This recipe offers the ultimate flexibility, whether you’re looking to decorate a batch for a children’s party or add a touch of sophistication to an afternoon tea. It’s about turning ordinary cookies into extraordinary experiences, each bite a marriage of sugary swirl and buttery goodness.

Another highlight of this recipe is its effortless preparation. With just a few ingredients, you’ll achieve a professional-quality buttercream that impresses anyone who tastes it. And for those mindful of their dietary choices, the ability to tweak sweetness levels or add natural colors allows for a customized fit catering to any lifestyle or preference.

Furthermore, the emotions this buttercream can evoke are genuine. Whether it’s nostalgia from childhood baking memories or the shared smiles it brings during family gatherings, you’ll find warmth and happiness in every dollop.

Personal Story/Connection

This recipe carries fond memories of my childhood, holidays spent in the kitchen with my grandmother, who always had an apron dusted with flour and a heart full of warmth. Our bonding over baking sessions resulted in cookies so good that they’d disappear as soon as they were set. Crafting this buttery, sweet buttercream became our cherished tradition, passed down with love and laughter to complement any celebration.

Context/Background

The art of cookie decorating has roots that dive deep into various cultures, each adding its flair to the universally loved treat. Originating as early as the Middle Ages, buttercream has since taken on many forms and flavors, becoming a staple in modern confectioneries. The combination of vanilla extract here resonates purity and warmth, a nod to traditional favorites while allowing space for modern creativity.

This versatility showcases how baking has evolved, bridging gaps between old-world charm and contemporary indulgence. Our buttercream pairs this evolution beautifully, providing a canvas that welcomes endless artistic expressions.

Tips for Perfect Vanilla Cookie Decorating Buttercream

  • Ensure butter is softened, not melted, for a creamy texture.
  • Gradually add sugar to maintain smooth consistency and prevent clumping.
  • Adjust heavy cream quantity depending on desired thickness for piping or spreading.
  • For vibrant colors, start with a small amount of food coloring and build up intensity slowly.
  • Use high-quality vanilla extract for a richer flavor profile.

Serving Suggestions

This buttercream is perfect not only for vanilla cookies but also as a frosting for cupcakes, cakes, or as a delightful sandwich between soft biscuits. Picture a tiered platter filled with cookies dressed in pastel hues at a spring gathering, or vibrant rainbow cookies at a children’s birthday party, each one a testament to your creative flair.

Pair these beautifully decorated cookies with a warm cup of tea or lemonade for a refreshing afternoon treat, allowing the buttery sweetness to complement the beverage’s tartness or warmth.

You can also create themed cookie sets to match festive occasions, using seasonal colors and designs that capture the spirit of the moment, from winter whites to autumnal shades.

Storage and Leftovers

To enjoy your buttercream-adorned cookies at their best, store them in an airtight container at room temperature for up to a week. If the buttercream has been colored, keep them away from direct sunlight to prevent fading.

Should you find yourself with leftover buttercream, it freezes exceptionally well. Transfer it into a zip-lock bag, flattening it for easy thawing, and store in the freezer for up to three months. A gentle mix after thawing will restore its plush texture, ready for your next baking project.

Recipe Variations and Substitutions

To create a dairy-free version, substitute the butter with a high-quality vegan butter and the heavy cream with coconut cream, providing a slightly different but equally delicious flavor profile.

For a festive twist, consider adding a teaspoon of peppermint or almond extract in place of vanilla, offering a refreshing change to the palette.

Seasonal berries or citrus zest can also be folded into the buttercream for a fruity twist, each spreading cheer with unique flavors and bursts of color.

FAQ

Can I make this ahead of time? Yes, the buttercream can be made up to 3 days in advance. Just store it in an airtight container in the fridge and bring it back to room temperature before using.

What substitutions can I use for heavy cream? You can use milk or half-and-half in place of heavy cream, though the consistency may vary slightly.

How do I make this gluten-free or vegan? This recipe is naturally gluten-free. For a vegan version, use plant-based butter and coconut cream as substitutes.

Optional Nutritional Information

  • Calories: Approximately 200 per serving
  • Fat: 12g
  • Sugar: 24g
  • Protein: 0.2g

Final Thoughts

This Vanilla Cookie Decorating Buttercream is more than a recipe; it’s an invitation to create unforgettable moments. So gather your loved ones, unleash your creativity, and watch as your creations elicit smiles and admiration. Don’t forget to share your delightful results and any questions below—let’s keep the baking conversation going!

Recipe Section

Serves: Approximately 24 cookies | Prep Time: 15 minutes | Total Time: 15 minutes

  • 1 cup unsalted butter, softened
  • 4 cups powdered sugar
  • 2 tsp vanilla extract
  • 3-4 tbsp heavy cream
  • Food coloring (optional)
  1. In a mixing bowl, beat the softened butter until creamy and smooth.
  2. Gradually add in the powdered sugar, 1 cup at a time, until well combined.
  3. Mix in the vanilla extract.
  4. Add heavy cream, 1 tablespoon at a time, until the desired consistency is reached.
  5. If desired, separate the buttercream into bowls and add food coloring to achieve vibrant colors.
  6. Transfer the buttercream to piping bags fitted with decorating tips.
  7. Decorate vanilla cookies as desired with the buttercream.
  8. Allow the cookies to set before serving or storing.

#VanillaCookies #ButtercreamFrosting #CookieDecorating #SweetTreats

“`

Ultimate Guide to Perfect Vanilla Cookie Decorating Buttercream Recipe

# Vanilla Cookie Decorating Buttercream: Transform Your Treats with Delicious Creativity

## Introduction: The Sweet Art of Vanilla Buttercream

When it comes to cookie decorating, nothing beats the joy of turning a simple treat into a delightful masterpiece. The secret to achieving this, you ask? A smooth, delicious vanilla cookie decorating buttercream. This frosting doesn’t just add flavor—it becomes the canvas upon which you paint your sugary dreams. In this comprehensive guide, you’ll learn everything you need to know about creating a delectable vanilla buttercream that will elevate your cookie decorations to another level.

## Why Vanilla Buttercream is Perfect for Cookie Decorating

As you embark on your cookie decorating adventure, the choice of buttercream can influence the outcome significantly. Here’s why vanilla buttercream should be your go-to:

– **Versatility**: This buttercream offers the perfect consistency for both intricate piping and seamless coverage of larger areas, giving you flexibility in your designs.
– **Flavor**: The subtle vanilla essence perfectly complements the flavors of different cookies, enhancing without overpowering.
– **Customization**: Need a hue for a themed event? This buttercream tints effortlessly with food coloring for any occasion.

## Ingredients You’ll Need

Creating the ideal buttercream requires selecting the finest ingredients tailored for success. Below are the core elements that make the perfect frosting:

### Essential Components for Success

| Ingredient | Quantity |
|———————–|—————————|
| Unsalted Butter | 1 cup (softened) |
| Powdered Sugar | 4 cups |
| Vanilla Extract | 2 tsp |
| Heavy Cream | 2-3 tbsp |

Each ingredient plays a pivotal role—unsalted butter for a creamy base, powdered sugar for sweetness, vanilla for that classic touch, and heavy cream for the right consistency.

## Step-by-Step: Making Your Vanilla Buttercream

Achieving buttercream perfection involves careful preparation and technique. Follow these steps to create a frosting that’s spot on, every time you mix it.

### 1. Creaming the Butter

Begin by softening your unsalted butter. Beat it until light and fluffy; this ensures your buttercream starts with a solid base. The smoother the butter, the creamier your buttercream will be.

### 2. Incorporating the Sugar

Next, introduce powdered sugar gradually. Add it spoonful by spoonful, mixing thoroughly as you go. This method not only prevents a sugar cloud but also keeps your buttercream’s texture consistently smooth.

### 3. Adding the Vanilla

Stir in vanilla extract for that essential touch of flavor, blending thoroughly to ensure the essence permeates the mixture evenly.

### 4. Achieving Perfect Consistency

Your final step is adjusting the buttercream’s thickness. Gradually incorporate heavy cream, a tablespoon at a time, until you hit the sweet spot. Whether you need it thick for structured designs or slightly softer for easy spreading, this step is crucial for getting the consistency just right.

## Creative Decorating Ideas and Tips

Once your buttercream is ready, let your imagination take charge. The possibilities are endless, and each idea can add a unique flourish to your cookie creations:

– **Experiment with Colors**: Try using natural food colorings or gel-based ones for vibrant hues. Pastels and bold colors each bring their own charm to your cookies.
– **Add Texture**: Explore various piping tips to achieve different textures and patterns. Whether you want frilly edges or defined lines, the right tool can make all the difference.
– **Seasonal Themes**: Tailor your designs to fit the season or specific events. From snowflakes in winter to floral motifs in spring, themed accents can make your cookies truly stand out.

Remember, your creativity is your only limit!

## FAQ: Vanilla Cookie Decorating Buttercream

In your journey towards creating perfect buttercream, you might have some questions. Here’s a quick guide to ensure nothing puts a damper on your decorating experience:

### Can I use salted butter instead of unsalted?

While unsalted butter is recommended for complete control over flavor, you can substitute with salted butter if you prefer a savory undertone. It adds a slight contrast that’s quite delightful for some palates.

### How do I fix runny buttercream?

If your buttercream ends up runny, don’t panic. First, try chilling it for a few minutes in the refrigerator. If it remains too soft afterward, mix in a bit more powdered sugar until you reach the desired consistency.

### Can I store the buttercream?

Absolutely, you can! Store your buttercream in an airtight container in the refrigerator for up to a week. Before using, allow it to warm to room temperature and give it a brief whip to regain the ideal texture.

## Conclusion: Decorate with Joy and Flavor

Armed with this guide, you’re ready to take your cookie decorating skills up a notch. Vanilla cookie decorating buttercream is not just an ingredient; it’s a tool that turns your desserts from plain to spectacular. Whether you are a seasoned baker or a newcomer exploring the kitchen, this versatile recipe is a joyous path toward creative expression. So next time you reach for that piping bag, remember that every swirl you make could light up someone’s heart. Get started today, and let your creativity flow as you toast to beautiful, delectable treats.