Decadent No-Bake German Chocolate Cheesecake: A Sweet Indulgence

“`html

No-Bake German Chocolate Cheesecake: An Indulgent Treat Without the Oven

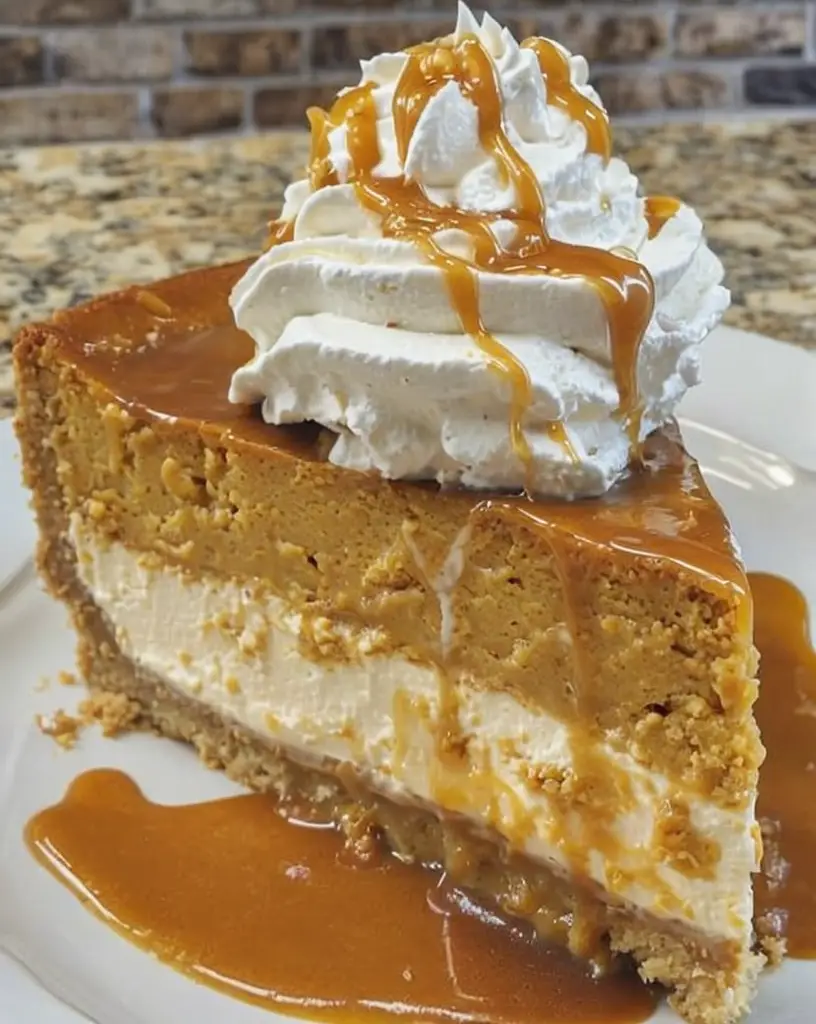
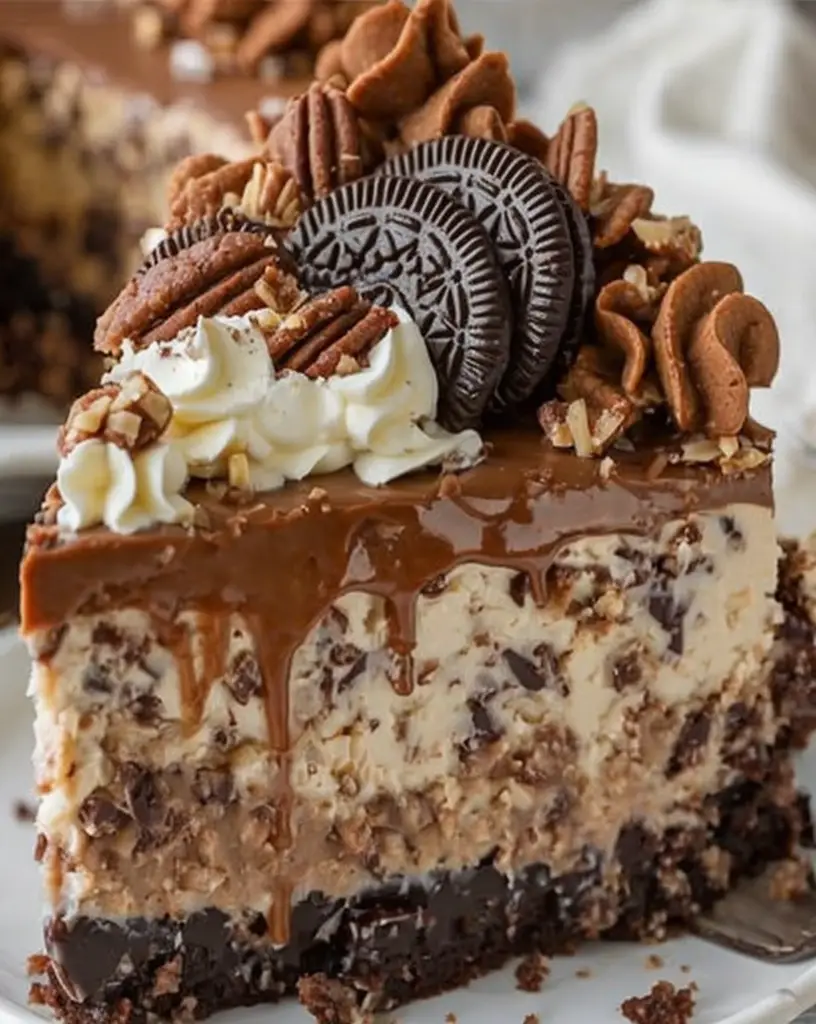
Experience the rich flavors of a traditional dessert without the fuss of baking with this No-Bake German Chocolate Cheesecake. It’s the perfect fusion of creamy cheesecake and decadent German chocolate, making it a showstopper for any occasion. This no-bake version ensures a delightful treat that’s both easy to make and irresistibly delicious!

Why You’ll Love This Recipe

This No-Bake German Chocolate Cheesecake is a game-changer for chocolate lovers everywhere. With its luscious chocolate-coconut topping and creamy cheesecake base, it brings a unique twist to classic desserts. Perfect for celebrations and gatherings, this dessert is a crowd-pleaser that will leave your guests asking for more. Plus, it’s an ideal make-ahead dessert for those who prefer to keep things simple in the kitchen.

Whether you’re short on time or not a fan of using the oven, this recipe offers the convenience of a no-bake dessert while maintaining the flavors you love. The combination of smooth, rich chocolate with the subtle tang of cream cheese makes each bite a delight.

Context/Background

The German Chocolate Cake, despite its name, is an American creation dating back to 1852. It gained popularity thanks to a recipe published by a Dallas newspaper in the 1950s. This no-bake version draws inspiration from this classic, melding together elements of cheesecake and German chocolate cake into one delightful dessert.

With no baking required, this recipe adopts a modern approach, capturing the essence of the beloved cake while simplifying the process. It’s a testament to the versatility of traditional recipes, adapting to contemporary cooking needs.

Recipe Details

Serves: 8

Prep Time: 25 minutes

Cook Time: 0 minutes

Total Time: 25 minutes

Ingredients

  • 1 cup chocolate cookie crumbs
  • 1/4 cup melted butter
  • 16 oz cream cheese, softened
  • 1 cup powdered sugar
  • 1 teaspoon vanilla extract
  • 8 oz semi-sweet chocolate, melted
  • 1 cup shredded coconut
  • 1/2 cup chopped pecans
  • 1/2 cup sweetened condensed milk

Directions

  1. In a medium bowl, combine chocolate cookie crumbs and melted butter. Press into the bottom of a 9-inch springform pan.
  2. In a large bowl, beat cream cheese until smooth. Gradually add powdered sugar and vanilla extract, mixing until combined.
  3. Stir in the melted chocolate and blend until fully incorporated.
  4. Pour the cream cheese mixture over the prepared crust, smoothing the top with a spatula.
  5. In a separate bowl, mix together coconut, pecans, and sweetened condensed milk. Spread evenly over the cheesecake layer.
  6. Refrigerate the cheesecake for at least 4 hours, or until set.

Tips for Perfect No-Bake German Chocolate Cheesecake

  • Ensure the cream cheese is fully softened for a smoother filling.
  • Chill the cheesecake thoroughly for clean, easy cutting.
  • Use high-quality chocolate for the best flavor profile.
  • Press the crust firmly to prevent crumbling when slicing.

Serving Suggestions

Slice and serve this cheesecake chilled for the best flavor. Pair with a dollop of whipped cream or a sprinkle of additional toasted coconut to enhance its decadent appeal.

Storage and Leftovers

Store any leftovers in an airtight container in the refrigerator for up to five days. For longer storage, freeze individual slices wrapped in plastic wrap and aluminum foil for up to two months.

Final Thoughts

This No-Bake German Chocolate Cheesecake is a must-try for dessert enthusiasts seeking convenience without sacrificing flavor. It’s a rich, indulgent treat that’s sure to become a household favorite. Whether you’re impressing guests or simply treating yourself, this cheesecake promises satisfaction in every bite.

Recipe Notes

  • Substitute pecans with walnuts for a different nutty flavor.
  • Add a hint of caramel sauce for an extra layer of decadence.
  • Use dark chocolate for a deeper chocolate taste.

“`

Irresistible Creamy Green Bean Casserole Perfect for Holiday Dinners

“`html

Jump to Recipe

Creamy Green Bean Casserole: The Ultimate Comfort Food Delight

Experience the warmth and comforting embrace of our Creamy Green Bean Casserole, a dish that marries the earthy tones of green beans with the rich, savory essence of cream of mushroom soup. The subtle crunch of French fried onions and the melted cheddar cheese creates a symphony of textures and flavors that’s both nostalgic and utterly satisfying. Perfect for holidays or any weeknight dinner, this casserole is a testament to the power of simplicity and love in cooking.

Why You’ll Love This Recipe

This timeless Creamy Green Bean Casserole offers everything you could want from a comforting dish. Its appeal lies in its simplicity—made primarily from pantry staples—and its ability to evoke cherished memories and emotions. Perfect for gatherings, it offers warmth with each bite and pairs beautifully with a wide variety of main courses.

The recipe is versatile. Whether you’re looking to serve it during the holidays or throw it together for an easy dinner side dish, its creamy texture and rich flavor make it a crowd-pleaser.

Additionally, it provides a quick and effortless assembly process, making it an excellent choice for busy weeknights or last-minute potlucks. The green beans are packed with fiber and nutrients, adding a healthful aspect to a dish that otherwise feels indulgent.

Personal Story/Connection

Growing up, the Green Bean Casserole was a holiday staple in our household. Every Thanksgiving, my grandmother would let me help her in the kitchen, and my job was always to sprinkle the fried onions generously atop the bubbling mix of green beans and mushroom soup. The aroma that filled the house as it baked was as comforting as her warm hugs. Now, I carry on the tradition, and each time I prepare it, I’m reminded of those cherished moments and smiles exchanged around the dinner table.

Context/Background

The Green Bean Casserole holds a special place in American culinary history. Created in 1955 by Dorcas Reilly at the Campbell Soup Company, it was designed as a quick and simple recipe that used ingredients commonly found in most kitchens. Over the decades, it became synonymous with holiday meals, particularly Thanksgiving, celebrated for its humble yet satisfying profile.

This dish has evolved, with various iterations and embellishments, but the core elements remain cherished in American households. The fried onions on top pioneered a unique texture contrast, ensuring the casserole’s place in the realm of comfort food royalty.

Tips for Perfect Creamy Green Bean Casserole

  • For extra creaminess, add a splash of heavy cream along with the milk.
  • Use freshly steamed green beans for a firmer texture instead of canned.
  • Try sautéing fresh mushrooms and adding them to the mix for enhanced flavor.
  • Ensure your oven is properly preheated to achieve a delightful golden top.
  • Mix in a teaspoon of soy sauce or Worcestershire sauce for a deeper umami taste.
  • For a spicy kick, sprinkle some red pepper flakes into the mixture.

Serving Suggestions

This Creamy Green Bean Casserole pairs beautifully with roasted turkey, ham, or chicken, making it a quintessential side for Thanksgiving or Christmas dinners. Consider adding a splash of color with a fresh cranberry salad or serving alongside cheesy mashed potatoes for that ultimate comfort meal synergy.

For casual meals, complement it with grilled meats or a crisp garden salad. Serve it in a rustic ceramic dish to enhance the homey appeal, and garnish with additional crispy onions or fresh herbs like parsley for a pop of freshness at the table.

Storage and Leftovers

To store the casserole, cover it tightly with plastic wrap or aluminum foil and place it in the refrigerator, where it will stay fresh for up to 3-4 days. When you’re ready to reheat, use an oven at 350°F until the desired temperature is reached, maintaining its crisp texture.

For an exciting twist, leftovers can be repurposed into a filling for savory crepes or added into a baked potato for a twist on traditional comfort food. Consider mixing it with cooked pasta and additional cheese for a quick and creamy pasta bake.

Recipe Variations and Substitutions

There are countless ways to customize this Classic Green Bean Casserole:

  • Vegetarian Delight: Use vegetable soup instead of cream of mushroom to accommodate different dietary needs.
  • Gluten-Free: Substitute traditional fried onions with a gluten-free version and ensure the soup used is gluten-free.
  • Vegan Option: Replace the milk and cheese with almond milk and a dairy-free cheese brand. Opt for a vegan mushroom soup base.
  • Flavor Twist: Add a tablespoon of balsamic vinegar for an unexpected burst of flavor or try smoked cheddar for a unique taste.

FAQ

Can I make this ahead of time? Absolutely! Prepare the casserole and store it covered in the fridge. Just add the onions and bake when you’re ready to serve.

What substitutions can I use for cream of mushroom soup? Cream of celery or cream of chicken works well if you prefer a different flavor profile or dietary restriction needs.

How do I make this gluten-free or vegan? Use gluten-free fried onions and ensure the mushroom soup is gluten-free. For a vegan version, substitute non-dairy alternatives for milk and cheese.

Final Thoughts

Our Creamy Green Bean Casserole is a testament to the enduring appeal of classic recipes. Its rich, comforting flavors make it a perfect addition to any meal, be it a festive gathering or a cozy family dinner. We invite you to try this recipe and make it a part of your culinary tradition. Share your experiences with us, or any creative twists you’ve added, in the comments below!

Recipe Section

Serves: 6-8 | Prep Time: 10 minutes | Cook Time: 30 minutes | Total Time: 40 minutes

  • 2 cans (14.5 oz each) green beans, drained
  • 1 can (10.5 oz) cream of mushroom soup
  • 1 cup shredded cheddar cheese
  • 1/2 cup milk
  • 1/2 cup French fried onions
  • Salt and pepper to taste
  1. Preheat oven to 350°F.
  2. In a mixing bowl, combine green beans, cream of mushroom soup, cheddar cheese, milk, salt, and pepper. Stir until well mixed.
  3. Transfer the mixture to a baking dish and spread it out evenly.
  4. Sprinkle French fried onions on top of the casserole.
  5. Bake in the oven for 25-30 minutes, or until bubbly and golden brown.
  6. Let it cool slightly before serving.
  7. Enjoy this creamy and delicious green bean casserole with your favorite main dish!

“`

Irresistible Homemade Salted Dark Chocolate Almond Toffee Recipe Guide

“`html
Jump to Recipe

Homemade Salted Dark Chocolate Almond Toffee: A Decadent Delight

Indulge your senses with a sublime blend of sweet and salty in this Homemade Salted Dark Chocolate Almond Toffee. Imagine the rich aroma of dark chocolate mingling with the buttery crunch of almond-infused toffee, finished off with a hint of sea salt. This toffee isn’t just a treat; it’s a culinary experience you won’t forget, leaving you with a taste that dances between rich decadence and a delightful crunch.

Why You’ll Love This Recipe

Our salted dark chocolate almond toffee is a crowd-pleaser that beautifully balances flavor and texture. Perfect for holiday gifts or treating yourself, its simplicity in preparation masks the luxurious taste it delivers. The dark chocolate offers a rich contrast to the buttery toffee, while the toasted almonds add a hearty crunch. Beyond taste, the recipe’s versatility shines, allowing easy adaptations to suit various dietary needs. Whether a toffee enthusiast or a casual snacker, this recipe evokes nostalgia, warmth, and comfort, reminiscent of cherished moments around a festive table.

Personal Story/Connection

Many years ago, during a chilly winter, my grandmother introduced me to the art of making toffee. Her kitchen was filled with the warm, inviting aroma of butter and sugar simmering gently on the stove. This recipe is a homage to those special times we shared—a timeless dessert that brings joy to my family, and I hope it does the same for yours, creating lasting memories.

Context/Background

Toffee has a fascinating history, tracing its roots back to the early 19th century. Believed to have originated in England, it quickly became a popular confection across Europe. The technique of caramelizing sugar and butter traces back even further, showcasing the timeless appeal of this sweet delight. Over the years, various cultures have added their unique twists, enriching the basic toffee recipe with regional ingredients like nuts and chocolate, leading to flavorful reinterpretations like this salted almond version.

Tips for Perfect Homemade Salted Dark Chocolate Almond Toffee

  • Ensure the butter is at room temperature to melt evenly and prevent splitting.
  • Use a candy thermometer to achieve the perfect hard crack stage at 300°F.
  • Quickly add vanilla after removing from heat to maximize its aroma.
  • Pre-measure ingredients to ensure smooth execution, as timing is crucial.
  • For a thicker toffee, use a smaller baking sheet for a denser layer.
  • Allow the toffee to cool completely at room temperature to avoid a sticky texture.

Serving Suggestions

Serve this toffee solo for a charming sweet treat, or elevate its impact by accompanying it with creamy vanilla ice cream to counterbalance the toffee’s intense flavors. During festive seasons, package it in decorative boxes for the perfect homemade gift. Alternatively, crumble pieces over a rich chocolate cake for added texture or stir it into your morning oatmeal for a special breakfast twist.

Storage and Leftovers

Store your salted almond toffee in an airtight container to maintain its crunch and flavor. Keep it at room temperature for about a week or refrigerate to extend its shelf life up to two weeks. If the toffee softens in humid conditions, briefly place it in the refrigerator to regain its original texture. Consider repurposing leftovers as a crumble topping for desserts or as an interesting mix-in for cookies or granola bars.

Recipe Variations and Substitutions

For those with dietary restrictions, substitute dairy-free butter and chocolate for a vegan-friendly version while maintaining the rich flavors. Swap dark chocolate chips with milk or white chocolate to cater to varied taste preferences. For a seasonal twist, sprinkle crushed peppermint during the holidays or add a dash of cinnamon for a warm, spiced variant during autumn months.

FAQ

Can I make this ahead of time?
Yes, prepare the toffee a few days in advance and store it in an airtight container until ready to serve.

What substitutions can I use for almonds?
Swap almonds for pecans or walnuts for a different nutty flavor, or omit for a nut-free option.

How do I make this gluten-free or vegan?
Ensure all ingredients, including chocolate chips, are certified gluten-free and use vegan butter and chocolate alternatives.

Optional Nutritional Information

  • Calories per serving: Approximately 150
  • Serving size: 1 piece (varies by size)
  • Fat: 9g | Carbohydrates: 18g | Protein: 1g

Final Thoughts

Embark on a delightful culinary journey with this homemade salted dark chocolate almond toffee. Its sublime combination of textures and flavors promises to elevate any occasion. Whether shared with family, friends, or enjoyed alone, this recipe is a testament to the joy that simple, well-crafted treats can bring. We invite you to try it out and share your experiences—it’s bound to become a cherished favorite.

Recipe

Servings: About 30 pieces
Prep Time: 10 minutes
Cook Time: 20 minutes
Total Time: 30 minutes

  • 1 cup unsalted butter
  • 1 cup granulated sugar
  • 1/4 tsp salt
  • 1 tsp vanilla extract
  • 2 cups dark chocolate chips
  • 1/2 cup sliced almonds, toasted
  • Sea salt flakes for garnish
  1. In a saucepan, melt the butter over medium heat. Add in the sugar and salt, stirring constantly until it reaches 300°F (hard crack stage) on a candy thermometer.
  2. Remove from heat and quickly stir in the vanilla extract. Pour onto a baking sheet lined with parchment paper, spreading it out evenly.
  3. Sprinkle the dark chocolate chips on top of the toffee. Let it sit for a few minutes to melt, then spread the chocolate with a spatula.
  4. Sprinkle the toasted almonds on top, pressing them gently into the chocolate. Finish with a sprinkle of sea salt flakes.
  5. Allow the toffee to cool completely at room temperature or in the refrigerator until set. Once set, break into pieces and enjoy!

“`

Irresistible Baked Honey BBQ Popcorn Chicken: Crunchy and Delicious Recipe

“`html
Jump to Recipe

Baked Honey BBQ Popcorn Chicken: A Crunchy Delight for Every Occasion

Imagine sinking your teeth into a piece of popcorn chicken that’s exceptionally crunchy on the outside yet succulent and juicy on the inside. Each bite is a harmonious blend of sweet and tangy flavors, thanks to the generous coating of honey-infused BBQ sauce. This Baked Honey BBQ Popcorn Chicken recipe is not just about taste; it’s an experience worth savoring. With its perfectly golden crust and irresistibly saucy appeal, it’s a dish that’s bound to become a household favorite.

Why You’ll Love This Recipe

What sets this Baked Honey BBQ Popcorn Chicken apart is its incredible texture and flavor profile. The crunchiness of the panko breadcrumbs complements the tenderness of the chicken perfectly, making each bite a mouthwatering delight. Whether you’re hosting a casual get-together or planning a family meal, this dish offers versatility in presentation and consumption.

This recipe is delightfully straightforward, ensuring you spend less time in the kitchen and more time enjoying the company of your guests. The ingredients are simple and likely already in your pantry, making it an accessible option for spontaneous cooking ventures.

Moreover, it’s a healthier alternative to traditional fried chicken, as baking cuts down on excessive oil use. You can relish the taste without the guilt, knowing you’re offering your loved ones a balanced, wholesome meal.

For those seeking creative culinary journeys, the honey BBQ sauce introduces an alluring depth of flavor. The carefully chosen blend of sweet honey and tangy barbecue connects with anyone who appreciates a good sauce that lingers on the palate.

Personal Story/Connection

I vividly recall the first time I prepared this Baked Honey BBQ Popcorn Chicken. It was a Sunday afternoon, and my family was craving something exciting yet comforting. The joy and satisfaction I felt as I witnessed their delight with each bite is something that adds a layer of fond emotion to this recipe. It’s now a tradition during our family gatherings, evoking smiles and happy memories time and again.

Context/Background

The concept of popcorn chicken traces back to the fervor of street food culture where quick, accessible bites took precedence. Originating in parts of Southeast Asia and popularized by Western fast-food chains, this culinary marvel saw various adaptations.

The fusion of honey and BBQ sauce amplifies its global touch, as these flavors are staples in many cuisines, celebrated for their ability to enhance grilled or baked meats. Over the years, this dish has been adopted and reinterpreted by various cultures, each adding their twist to the fundamental preparation method.

Tips for Perfect Baked Honey BBQ Popcorn Chicken

  • Use chicken breasts for uniform cooking and optimal tenderness. Feel free to experiment with thighs for a juicier texture.
  • Ensure consistent coating by patting the chicken dry before dredging it in the flour.
  • If you prefer a slightly spicier kick, consider adding a dash of smoked paprika or cayenne pepper to the breadcrumb mix.
  • Bake on a wire rack placed over a baking sheet for even crisping on all sides.
  • For a sticky, rich sauce coating, heat the honey BBQ mixture slightly before tossing the baked chicken in it.

Serving Suggestions

Transform your Baked Honey BBQ Popcorn Chicken into a gourmet dinner by serving it alongside a refreshing coleslaw and baked sweet potato fries. The cool, creamy crunch of the coleslaw balances the sweet and tangy heat of the chicken, while the fries add a hearty, comforting element.

For a fun appetizer at parties, stack the chicken pieces onto skewers and drizzle with additional warm honey BBQ sauce. This makes for an attractive and easy-to-eat snack that guests will love.

Expand your culinary horizon by incorporating these flavorful bites into tacos. Add them to soft corn tortillas, topped with avocado slices, cilantro, and a squeeze of lime for a vibrant and playful dish.

Storage and Leftovers

After your event, store any leftover popcorn chicken in an airtight container in the refrigerator for up to three days. When reheating, consider placing them in the oven at 350°F to retain their crispness.

Repurpose leftovers creatively; they serve well as toppings for salads, or added to a stir-fry for a quick meal full of exciting textures and flavors. Simply reheat in a skillet with a touch of olive oil and throw in some vegetables for a complete dish.

Recipe Variations and Substitutions

For a gluten-free version, use gluten-free panko breadcrumbs and swap all-purpose flour with almond or coconut flour. Ensure the barbecue sauce used is certified gluten-free as well.

Experiment with different sauces like buffalo or sriracha for a spicy twist, or coat them in teriyaki for an exotic Asian flair.

Swap chicken for firm tofu or cauliflower florets for a vegetarian variation, keeping the same method for coating and baking.

FAQ

Can I make this ahead of time?
Yes, you can prepare and coat the chicken pieces a day in advance. Store them, uncooked, in the fridge. Bake fresh to enjoy maximum crispiness.

What substitutions can I use for honey?
Maple syrup or agave nectar make excellent alternatives to honey, providing a similar sweetness with a slight twist in flavor.

How do I make this gluten-free or vegan?
For gluten-free use the recommendations mentioned in the variations. For a vegan adaptation, substitute chicken with tofu or cauliflower and use a plant-based egg substitute like flaxseed meal mixed with water for binding.

Optional Nutritional Information

  • Calories per serving: Approx. 340
  • Protein: 30g
  • Carbohydrates: 40g
  • Fat: 10g

Final Thoughts

This Baked Honey BBQ Popcorn Chicken recipe is undoubtedly a crowd-pleaser. Its inviting aroma, delightful crunch, and saucy allure make it a standout on any dining table. Whether paired with traditional sides or served as a unique entrée, it’s a dish that promises satisfaction and smiles. I invite you to try this recipe, make it your own, and share your delightful culinary experiences with us.

Recipe Section

Serves: 4 | Prep Time: 15 mins | Cook Time: 25 mins | Total Time: 40 mins

  • 1 lb boneless, skinless chicken breasts, cut into bite-sized pieces
  • 1 cup panko breadcrumbs
  • 1/2 cup all-purpose flour
  • 2 eggs, beaten
  • 1 cup barbecue sauce
  • 1/4 cup honey
  • Salt and pepper, to taste
  • Cooking spray
  1. Preheat the oven to 400°F and line a baking sheet with parchment paper.
  2. In one bowl, mix together the barbecue sauce and honey. In another bowl, mix the panko breadcrumbs with salt and pepper.
  3. Dredge the chicken pieces in the flour, then dip them in the beaten eggs, and finally coat them in the panko breadcrumbs. Place them on the prepared baking sheet.
  4. Lightly spray the coated chicken pieces with cooking spray to help them crisp up in the oven.
  5. Bake for 20-25 minutes, or until the chicken is cooked through and golden brown.
  6. Once the chicken is cooked, toss it in the honey BBQ sauce until evenly coated.
  7. Serve the baked honey BBQ popcorn chicken hot and enjoy the crunchy, saucy, and crowd-pleasing dish!

#BakedPopcornChicken #HoneyBBQ #CrunchyDelight #FamilyFavorite

“`

Cure Diabetes Naturally with Garlic, Apple Cider Vinegar, and Honey

“`html
Jump to Recipe

Garlic, Apple Cider Vinegar, and Honey Chicken: A Flavorful Journey to Well-Being

Treat your taste buds to the delightful combination of savory garlic, tangy apple cider vinegar, and the natural sweetness of honey with this delicious chicken dish. As you take the first bite, imagine the juicy tenderness of the chicken enhanced by the depth of garlic and the delicate balance of sweet and sour notes. It’s a meal that promises not just incredible flavor but also a host of health benefits. This is a must-try recipe that brings warmth and wellness to your dining table.

Why You’ll Love This Recipe

This recipe is more than just a dish; it’s an experience. With its complex yet harmonious flavors, it offers a medley of taste sensations that are sure to please. Our Garlic, Apple Cider Vinegar, and Honey Chicken is versatile enough for both busy weeknights and elegant dinner parties. It’s a nutritious option, which makes it ideal for those mindful of their health but unwilling to compromise on taste.

The simplicity of this recipe is deceiving. With minimal ingredients and a straightforward preparation, it fits perfectly into any schedule while delivering restaurant-quality results. The blend of garlic and apple cider vinegar brings not only flavor but also reputed wellness benefits that make this dish nourishing for the soul and body.

This dish evokes memories of comfort and togetherness with loved ones. It’s the kind of recipe that becomes a family favorite, passed down through generations for its timeless appeal.

The ease of preparation does not diminish the delight it offers. Whether you’re a seasoned cook or a kitchen novice, the recipe’s clear directions ensure a perfect dish every time, allowing you to enjoy the cooking process as much as the meal itself.

Personal Story/Connection

The first time I made this recipe, it was a chilly autumn evening, and I was in search of something comforting. The aroma that filled my kitchen transported me back to my grandmother’s house, where hearty, flavorful meals were a staple. As my family gathered around the table, the warmth of the meal became a conduit for conversation and connection. To this day, this dish reminds me of those cherished moments, a symbol of love and togetherness that food so often brings.

Context/Background

The combination of garlic, apple cider vinegar, and honey has been a staple in culinary traditions for centuries, known for its health benefits and ability to enhance flavor. Garlic, revered for its rich history in cuisine and medicine, is paired beautifully with apple cider vinegar and honey, creating a trifecta of taste and well-being.

Apple cider vinegar has seen a resurgence in popularity as more people explore its versatile applications in both cooking and holistic health. Combined with the rich, earthy notes of honey, these ingredients elevate ordinary chicken to an extraordinary culinary adventure.

Tips for Perfect Garlic, Apple Cider Vinegar, and Honey Chicken

  • Ensure the chicken breasts are of uniform thickness for even cooking.
  • Marinate the chicken an hour before cooking to deepen the flavors.
  • Use fresh garlic for the most robust flavor profile.
  • Adjust the honey and vinegar ratio to suit your flavor preference.
  • For a caramelized finish, broil the chicken briefly after baking.

Serving Suggestions

This chicken dish pairs beautifully with a light, fresh salad, enhancing the contrasting flavors of sweet and savory. Consider serving it alongside a simple arugula salad with sliced almonds and a lemon vinaigrette for a healthy, satisfying meal.

For a heartier option, accompany the chicken with roasted vegetables. The natural sweetness in the vegetables will complement the dish beautifully, enhancing its complex flavors.

If you’re hosting a special gathering, consider plating the chicken on a bed of wild rice, garnished with a lemon wedge and fresh herbs, to create a visually stunning presentation that intrigues both eyes and palate.

Storage and Leftovers

This chicken dish stores wonderfully in an airtight container in the refrigerator for up to three days. Reheat it gently in the oven at a low temperature to retain its moist and tender qualities.

Leftovers can become an exciting base for new creations. Shred the chicken and toss it into a fresh salad, or use it as a stuffing for wraps or tacos for an easy, flavorful lunch option.

Recipe Variations and Substitutions

For a vegetarian option, consider replacing chicken breasts with tofu or tempeh, using the same marinade to impart those delicious flavors.

Enhance the recipe with a touch of mustard for a spicy kick, complementing the sweetness of the honey and the tanginess of the vinegar.

To incorporate seasonal produce, consider adding sliced apples or pears to the baking dish, which will soften and sweeten alongside the chicken, adding another dimension to your meal.

FAQ

  • Can I make this ahead of time? Yes, you can prepare and marinate the chicken hours ahead, simply bake right before serving.
  • What substitutions can I use for garlic? Try shallots or onion powder as a milder alternative to minced garlic.
  • How do I make this gluten-free or vegan? The recipe is naturally gluten-free. For a vegan adaptation, substitute chicken with tofu and honey with maple syrup.

Optional Nutritional Information

  • Calories per serving: Approximately 320
  • Protein: 30g
  • Carbohydrates: 25g
  • Fat: 10g

Final Thoughts

This Garlic, Apple Cider Vinegar, and Honey Chicken recipe is an unforgettable culinary experience that’s sure to become a staple in your home. Its delightful flavor profile, combined with the simplicity of preparation, makes it a perfect choice for any occasion. I encourage you to try this recipe, share it with friends and family, and create your own stories around the dining table. Please feel free to leave comments or questions, and don’t forget to share your own creative twists on this dish!

Recipe Section (Final Element)

Serves: 4

Prep Time: 10 minutes

Cook Time: 25-30 minutes

Total Time: 35-40 minutes

  • 4 chicken breasts
  • 4 cloves of garlic, minced
  • 1/4 cup apple cider vinegar
  • 1/4 cup honey
  • Salt and pepper to taste
  • Fresh parsley for garnish
  1. Preheat your oven to 375°F (190°C).
  2. Place the chicken breasts in a baking dish.
  3. In a small bowl, mix together the minced garlic, apple cider vinegar, honey, salt, and pepper.
  4. Pour the mixture over the chicken breasts, ensuring they are evenly coated.
  5. Bake in the preheated oven for about 25-30 minutes, or until the chicken is cooked through and no longer pink in the center.
  6. Garnish with fresh parsley before serving.
  7. Enjoy this delicious and wholesome dish that is not only flavorful but also beneficial for your health!

Garlic, Apple Cider Vinegar, and Honey Chicken
“`

Irresistible Pumpkin Caramel Cheesecake Recipe for Fall Festivities

“`html

Pumpkin Caramel Cheesecake: A Decadent Fall Delight

Indulge in the creamy and rich flavors of our Pumpkin Caramel Cheesecake, a delightful fall treat that’s perfect for any occasion. With its smooth texture and the perfect blend of spices, this cheesecake is sure to become a favorite seasonal dessert for your family and friends.

Why You’ll Love This Pumpkin Caramel Cheesecake Recipe

This Pumpkin Caramel Cheesecake combines the traditional flavors of fall with a twist of elegance that will have everyone asking for seconds. The creamy, spiced pumpkin filling pairs beautifully with a buttery graham cracker crust and a luscious caramel topping. It’s perfect for holiday gatherings, Thanksgiving dinners, or simply to enjoy a cozy night in.

Not only does this cheesecake have an irresistible taste, but it also presents beautifully on any dessert table. The contrasting layers of pumpkin and caramel create an eye-catching dessert that is both sophisticated and comforting. Plus, it’s an excellent way to showcase the season’s vibrant flavors.

Context/Background

The tradition of pumpkin pie has long been a staple in American holiday celebrations, but this cheesecake offers a modern twist on the classic. By incorporating caramel and a creamy cheesecake base, we’ve elevated the dish into something spectacular. The technique of making cheesecake is believed to date back to ancient Greece, but the fusion with pumpkin and caramel is a contemporary take that delights modern palates.

Recipe Details

Serves: 8-10

Prep Time: 25 minutes

Cook Time: 1 hour

Total Time: 7 hours (including cooling time)

Ingredients

  • 1 1/2 cups graham cracker crumbs
  • 1/4 cup melted butter
  • 24 oz cream cheese, softened
  • 1 cup granulated sugar
  • 1 cup canned pumpkin puree
  • 3 large eggs
  • 1 teaspoon vanilla extract
  • 1 teaspoon ground cinnamon
  • 1/2 teaspoon ground nutmeg
  • 1/4 teaspoon ground ginger
  • Salt, a pinch
  • 1/2 cup caramel sauce

Directions

  1. Preheat your oven to 325°F (160°C). Grease a 9-inch springform pan with butter.
  2. In a bowl, mix graham cracker crumbs and melted butter. Press the mixture evenly into the bottom of the prepared pan to form the crust.
  3. In a large bowl, beat the cream cheese with sugar until smooth. Add in pumpkin puree, eggs, vanilla, cinnamon, nutmeg, ginger, and a pinch of salt. Beat until well combined.
  4. Pour the cheesecake filling over the crust, spreading evenly.
  5. Place the pan on a baking sheet and bake for 55-60 minutes, or until the center is set. Turn off the oven and let the cheesecake cool inside the oven with the door slightly ajar for 1 hour.
  6. Remove from the oven and refrigerate for at least 5 hours, preferably overnight.
  7. Before serving, drizzle caramel sauce over the top of the cheesecake. Slice and enjoy!

Tips for Perfect Pumpkin Caramel Cheesecake

  • For a perfectly smooth cheesecake, ensure all ingredients are at room temperature before mixing.
  • Bake the cheesecake in a water bath to prevent cracking.
  • Let the cheesecake cool gradually to avoid sudden temperature changes, preventing cracks.
  • Use high-quality caramel sauce for the best flavor enhancement.

Serving Suggestions

For an extra flair, serve this Pumpkin Caramel Cheesecake with a dollop of whipped cream and a sprinkle of cinnamon. It pairs beautifully with a hot cup of coffee or a spiced latte.

Storage and Leftovers

Store any leftover Pumpkin Caramel Cheesecake in an airtight container in the refrigerator for up to 4 days. To freeze, wrap individual slices in plastic wrap and place in a freezer bag for up to 3 months. Thaw in the refrigerator before serving.

Final Thoughts

This Pumpkin Caramel Cheesecake is a must-try fall dessert that promises to wow your taste buds and impress your guests. With its creamy texture, delightful spice blend, and luxurious caramel topping, it’s a dessert worth savoring and sharing. Try this recipe today and create delicious memories with your loved ones.

Recipe Notes

  • Feel free to substitute ginger snap cookies for graham crackers for a spicier crust.
  • You can use homemade caramel sauce if preferred for a more personal touch.
  • Add chopped pecans for an additional crunchy texture.

“`

Easy Blueberry Muffin Bread: Quick Bowl-to-Oven Recipe

Certainly! Below is a clean, SEO-optimized recipe blog post for Blueberry Muffin Bread, ready for WordPress integration:

Jump to Recipe

Blueberry Muffin Bread: A Sweet, Berry-Licious Delight

Indulge in the heavenly blend of moist, tender bread bursting with juicy blueberries in every bite. Our Blueberry Muffin Bread combines the classic, comforting flavors of muffins with the ease and simplicity of a bread loaf, creating a delightful treat that’s perfect for any time of the day. The warm aroma, the golden crust, and the burst of sweet, tangy blueberries make this recipe an absolute must-try!

Why You’ll Love This Recipe

This Blueberry Muffin Bread recipe is a staple you’ll want to keep in your kitchen repertoire. Its appeal lies in:

  • Simple Ingredients: You likely have most of these ingredients in your pantry and fridge already, making it a convenient go-to recipe.
  • Versatility: Whether for breakfast, brunch, or dessert, this bread fits any occasion. It pairs wonderfully with coffee or tea or stands alone as a sweet snack.
  • Easy Preparation: No fancy equipment needed—just mix, pour, bake, and enjoy!
  • Nutrient-Rich Blueberries: Packed with antioxidants, blueberries add both a healthful punch and a burst of natural sweetness.
  • Comforting and Nostalgic: Evoke memories of cozy mornings and loved ones with every delectable slice.

Personal Story/Connection

I remember the first time I baked this Blueberry Muffin Bread. It was a chilly weekend morning with family visiting, and the smell of the bread baking in the oven filled the air with warmth and comfort. That first bite—soft, sweet, and bursting with blueberries—was an instant hit. Since then, it has become a cherished tradition to bake this bread whenever we gather, marking those special moments with a taste that brings us all together.

Context/Background

Originating as a twist on the classic blueberry muffin, this bread has roots in the tradition of quick breads—known for their ease and speed of preparation. Quick breads gained popularity in American kitchens in the late 19th century, offering a fast alternative to yeast-based recipes. Adding blueberries, native to North America, both complements and elevates the simple quick bread into something uniquely delicious and culturally celebrated.

Tips for Perfect Blueberry Muffin Bread

  • Don’t Overmix: Mix the batter until the ingredients are just combined to keep your bread tender.
  • Coat the Berries: Toss blueberries in a little flour before folding into the batter to prevent them from sinking.
  • Use Fresh Berries: Fresh blueberries hold their shape and flavor better than frozen ones.
  • Adjust Baking Time: All ovens are different; check your bread at the 50-minute mark.
  • Let It Cool: Allow the bread to cool completely before slicing to ensure the slices hold their shape.

Serving Suggestions

Enjoy your Blueberry Muffin Bread with a pat of butter or a drizzle of honey for added sweetness. It’s an effortless yet elegant choice for a brunch spread. Serve alongside scrambled eggs and crispy bacon, or as a dessert accompanied by a scoop of vanilla ice cream. For special occasions, consider sprinkling a light dusting of powdered sugar on top for a beautiful presentation.

Storage and Leftovers

To keep your blueberry muffin bread fresh, wrap it tightly in plastic wrap or aluminum foil and store at room temperature for up to three days. For longer storage, freeze slices individually and reheat in a toaster oven for a quick breakfast option. Leftover bread can be transformed into a blueberry bread pudding or used to make decadent French toast.

Recipe Variations and Substitutions

  • Gluten-Free Option: Substitute all-purpose flour with a gluten-free flour blend.
  • Vegan Adaptation: Use a plant-based butter substitute and a flax egg (1 tbsp flaxseed meal + 2.5 tbsp water) instead of eggs.
  • Citrus Twist: Add the zest of one lemon for a refreshing citrus flavor.
  • Nutty Additions: Mix in a handful of chopped walnuts or almonds for a crunchy texture.

FAQ

Can I make this ahead of time? Yes, you can prepare and refrigerate the batter overnight, then bake fresh in the morning.

What substitutions can I use for milk? You can use any non-dairy milk like almond, soy, or oat milk for a dairy-free version.

How do I make this gluten-free or vegan? Follow the recipes’ variations sections for exact ingredient swaps to accommodate dietary needs.

Optional Nutritional Information

  • Calories per serving: Approx. 270
  • Carbohydrates: 36g
  • Protein: 4g
  • Fat: 11g
  • Sugar: 18g

Final Thoughts

Blueberry Muffin Bread is a delightful, versatile recipe sure to become a favorite in your home. Its simplicity and deliciousness make it a joy to bake and share. Try this recipe today and discover why it has become a timeless classic. We’d love to hear your experiences, so feel free to share photos or drop a question in the comments!

Recipe Section

Serves: 8 | Prep Time: 15 mins | Cook Time: 50-60 mins | Total Time: 1 hr 15 mins

  • 2 cups all-purpose flour
  • 1 cup granulated sugar
  • 1/2 cup unsalted butter, melted
  • 2 large eggs
  • 1/2 cup milk
  • 2 tsp baking powder
  • 1/2 tsp salt
  • 1 1/2 cups fresh blueberries
  1. Preheat the oven to 350°F and grease a 9×5 inch loaf pan.
  2. In a large bowl, mix together the flour, sugar, melted butter, eggs, milk, baking powder, and salt until just combined.
  3. Gently fold in the blueberries until evenly distributed throughout the batter.
  4. Pour the batter into the prepared loaf pan and smooth the top.
  5. Bake for 50-60 minutes, or until a toothpick inserted into the center comes out clean.
  6. Allow the bread to cool in the pan for 10 minutes before transferring to a wire rack to cool completely.
  7. Slice and serve this delicious blueberry muffin bread for a sweet treat that’s perfect for breakfast or dessert!

Unlock Pinterest’s Potential: Discover and Save Your Favorite Pins

“`html
Jump to Recipe

Soy Ginger Chicken: A Savory Symphony for Your Taste Buds

Prepare to be seduced by the intoxicating aroma and enticing flavors of this Soy Ginger Chicken—a dish that promises to envelop your senses with its rich, savory glaze. The tender, juicy chicken combined with the aromatic allure of ginger and garlic creates a symphony of taste and texture that is both comforting and exotic. Perfectly balanced with the gentle sweetness of honey and the umami punch of soy sauce, this dish is a culinary experience worth every bite.

Why You’ll Love This Recipe

This Soy Ginger Chicken recipe is more than just an easy dinner option; it’s a versatile masterpiece that can be adapted to suit any occasion. The harmonious blend of flavors not only delights your palate but also nourishes your soul, evoking warmth and joy in each mouthful. It’s a great choice whether you’re planning a weeknight family dinner or a more fancy gathering. Additionally, with its quick preparation and health-focused ingredients, this recipe ensures that you can indulge in a deliciously balanced meal without the guilt.

Personal Story/Connection

The first time I made this Soy Ginger Chicken, it was a chilly evening, and I was craving something comforting yet different. I stumbled upon this recipe while browsing Pinterest and decided to give it a go. The reaction from my family was overwhelming, marking the beginning of a dinnertime favorite that never fails to bring smiles and satisfied sighs. This dish has now become synonymous with cozy family moments and joyful gatherings.

Context/Background

Soy Ginger Chicken finds its roots in Asian cuisine, where soy sauce and ginger are staple ingredients used to impart rich, complex flavors. As culinary practices have spread across the globe, this beloved combination has evolved, gaining popularity for its ability to transform simple ingredients into delightful dishes. Today, Soy Ginger Chicken is celebrated for its adaptability and ease, making it a staple in homes worldwide.

Tips for Perfect Soy Ginger Chicken

  • For an even deeper flavor, marinate the chicken overnight in the refrigerator.
  • If available, use fresh ginger as it provides a brighter taste and aroma.
  • To ensure even cooking, pound the chicken breasts to an even thickness before marinating.
  • Use a heavy skillet or non-stick pan for a crispier exterior on the chicken.
  • Allow the chicken to rest after cooking to lock in juices and improve texture.

Serving Suggestions

This exquisite Soy Ginger Chicken pairs beautifully with a variety of sides. Consider accompanying it with steamed jasmine rice or fluffy quinoa to soak up the delicious sauce. For a touch of freshness, serve it alongside a crisp cucumber salad or steamed broccoli. If you’re looking to impress, present it on a serving platter topped with vibrant green onions and toasted sesame seeds for a delightful visual and taste experience.

Storage and Leftovers

Store any leftover Soy Ginger Chicken in an airtight container in the refrigerator for up to three days. For optimal results, reheat gently in a skillet over low heat, adding a splash of water to prevent drying out. Transform leftovers into a mouthwatering stir-fry by adding in some fresh vegetables and a splash of additional soy sauce or sesame oil.

Recipe Variations and Substitutions

For those seeking a gluten-free option, replace the soy sauce with tamari or coconut aminos. To create a vegan adaptation, consider substituting the chicken with tofu or tempeh and adjust cooking time as necessary. Add seasonal flair by incorporating citrus zest or a dash of chili flakes to heat things up.

FAQ

Can I make this ahead of time? Yes, you can prepare the marinade and let the chicken soak up the flavors overnight for an extra punch of taste.

What substitutions can I use for soy sauce? Tamari or coconut aminos are excellent gluten-free substitutes that maintain that savory umami taste.

How do I make this gluten-free or vegan? Use tamari in place of soy sauce for gluten-free and replace chicken with firm tofu for a vegan version.

Optional Nutritional Information

  • Calories: Approximately 350 per serving
  • Protein: 25g
  • Fat: 10g
  • Carbohydrates: 30g

Final Thoughts

The delightful fusion of flavors in this Soy Ginger Chicken recipe is sure to elevate any meal from ordinary to extraordinary. Whether you’re a seasoned cook or a kitchen novice, this dish offers simplicity and sophistication, making it a worthy addition to your culinary repertoire. Don’t forget to share your cooking adventures with us in the comments or on social media using #SoyGingerChicken!

Recipe Section

Serves: 4

Prep Time: 10 minutes

Cook Time: 15 minutes

Total Time: 25 minutes

  • 1 lb boneless, skinless chicken breasts
  • 1/2 cup soy sauce
  • 1/4 cup honey
  • 2 cloves garlic, minced
  • 1 tsp ginger, grated
  • 1/2 tsp black pepper
  • 1 tbsp olive oil
  • Sesame seeds and green onions for garnish
  1. In a bowl, whisk together soy sauce, honey, garlic, ginger, and black pepper.
  2. Place chicken breasts in a ziplock bag and pour in the marinade. Let it marinate in the fridge for at least 30 minutes.
  3. Heat olive oil in a skillet over medium heat. Add the chicken breasts and cook for 6-7 minutes per side, until cooked through.
  4. Once cooked, let the chicken rest for a few minutes before slicing.
  5. Serve the sliced chicken over a bed of rice, drizzle any remaining sauce on top, and sprinkle with sesame seeds and green onions.

“`

Pinterest Inspiration: How to Discover and Save Your Own Pins

“`html
Jump to Recipe

Teriyaki Chicken Stir-Fry: A Flavorful Fusion of East and West

Imagine juicy, marinated teriyaki chicken sizzling in a pan, surrounded by vibrant red and green bell peppers, sweet pineapple chunks, and aromatic onions. This Teriyaki Chicken Stir-Fry offers a symphony of flavors and textures that’s sure to delight your palate. Each bite is an experience, balancing sweet, savory, and slightly tangy elements that make this dish truly unforgettable. It’s the perfect blend of simplicity and exotic appeal, making it a must-try for everyone who loves delicious, easy-to-make meals.

Why You’ll Love This Recipe

There’s so much to adore about this Teriyaki Chicken Stir-Fry. First and foremost, it’s incredibly easy to prepare, making it ideal for weeknight dinners when time is of the essence. The combination of tender chicken and crisp vegetables offers a satisfying contrast, while the sweet and savory teriyaki sauce ties everything together perfectly.

This recipe is versatile enough to cater to everyone’s tastes. You can customize it by adding your favorite seasonal vegetables or adjusting the level of sweetness in the sauce for a more personalized dish. Additionally, Teriyaki Chicken Stir-Fry can evoke memories of joyous family dinners or casual get-togethers, bringing warmth and happiness with each serving.

From a health perspective, it’s a balanced meal offering lean protein, colorful vegetables, and carbohydrates. Furthermore, the cooking process retains most of the nutrients, making this not just a tasty choice but a nutritious one as well.

Whether you’re a fan of Asian-inspired dishes or just exploring new culinary horizons, this recipe is bound to satisfy your cravings!

Personal Story/Connection

Sometimes a recipe becomes more than just a meal—it transforms into a beloved tradition. For me, Teriyaki Chicken Stir-Fry goes back to weekend family lunches. It started out as a simple experiment and soon became a staple in our home. The laughter shared over the dinner table while savoring this recipe is a memory that I cherish deeply.

Context/Background

The technique of stir-frying has its roots in Chinese cooking, but over time, it has become a popular method across numerous cultures, including Japanese cuisine, particularly with recipes like Teriyaki Chicken. Teriyaki itself is a cooking method of Japanese origin where foods are cooked in a savory-sweet glaze of soy sauce, mirin, and sugar.

The western twist to the classic “Teriyaki Chicken” emerged with the addition of ingredients like bell peppers and pineapple, integrating American preferences into this traditional dish. It’s a testament to the way food beautifully bridges cultures and flavors, creating dishes loved universally.

Tips for Perfect Teriyaki Chicken Stir-Fry

  • Ensure the chicken is fully marinated for maximum flavor absorption. Let it marinate for at least 30 minutes, but longer if possible.
  • Cut all vegetables into uniform sizes for even cooking.
  • If you’re short on time, prepare the rice in advance and keep it ready.
  • For a more intense smoky flavor, consider grilling the chicken before combining it with the vegetables.
  • Use a large skillet or wok to prevent overcrowding, ensuring your stir-fry cooks evenly.
  • If you prefer a thicker sauce, add a teaspoon of cornstarch mixed with water to the teriyaki sauce before cooking.

Serving Suggestions

This Teriyaki Chicken Stir-Fry is incredibly versatile, perfect for both casual dinners and more formal gatherings. Serve it alongside some freshly steamed jasmine rice or your favorite type of noodles for a complete meal. If you’re hosting a party, consider serving this stir-fry as part of a larger Asian-themed dinner with other dishes like spring rolls or sushi for variety.

For extra flair, garnish each serving with sesame seeds and a sprinkle of freshly chopped green onions. The fresh onion adds a bit of bite and color contrast, while the sesame seeds offer a pleasant nutty aroma and a hint of crunch.

If you want to elevate this dish further, drizzle it with a bit of sriracha or your favorite hot sauce for a spicy kick.

Storage and Leftovers

Leftovers can be stored in an airtight container in the refrigerator for up to three days. To reheat, simply warm it on a stovetop on medium heat until heated through, or microwave it for around two minutes while stirring midway.

Repurpose leftovers by wrapping them in tortillas for a quick lunch wrap or transform them into a delicious filling for Asian-style omelets.

Recipe Variations and Substitutions

This recipe is highly adaptable. For a low-carb version, swap white rice for cauliflower rice. You can also use brown rice if you prefer a heartier meal. If you’re looking to add more vegetables, consider incorporating broccoli florets or snap peas for additional flavor and nutrition.

For a vegan alternative, substitute the chicken with tofu or tempeh while ensuring that the teriyaki sauce you’re using is vegan-friendly. You can also try experimenting with different fruits, like mango or even peaches, for a unique fruity twist.

FAQ

Can I make this ahead of time?
Absolutely! You can prepare the teriyaki chicken and chop the vegetables a day in advance. Store them separately, then stir-fry when ready to serve.

What substitutions can I use for pineapple?
Canned or fresh peaches make an excellent substitution for pineapple, offering a similar sweet-tangy flavor.

How do I make this gluten-free?
Ensure to use a gluten-free teriyaki sauce or make your own using tamari or coconut aminos instead of soy sauce.

Optional Nutritional Information

  • Calories: Approximately 400 per serving
  • Protein: 25g
  • Carbohydrates: 55g
  • Fat: 8g

Final Thoughts

Teriyaki Chicken Stir-Fry is more than just a meal—it’s an experience of flavors that resonates with comfort and delight. Whether you’re serving your family or hosting friends, this dish promises to elevate your dining experience with its delicious taste and vibrant presentation. Try it today, share your experience, and let it bring joy to your table as it has to mine.

Recipe Section

Servings: 4 | Prep Time: 35 minutes | Cook Time: 15 minutes | Total Time: 50 minutes

  • 1 lb boneless, skinless chicken breasts
  • 1/2 cup teriyaki sauce
  • 1 red bell pepper, chopped
  • 1 green bell pepper, chopped
  • 1/2 onion, chopped
  • 1 cup pineapple chunks
  • 2 cups cooked white rice
  • Sesame seeds and green onions for garnish
  1. Start by slicing the chicken breasts into bite-sized pieces.
  2. In a bowl, marinate the chicken with teriyaki sauce for about 30 minutes.
  3. In a large skillet, sauté the marinated chicken until cooked through.
  4. Add the chopped bell peppers, onion, and pineapple chunks to the skillet and stir-fry until vegetables are tender-crisp.
  5. Mix in the cooked white rice and toss everything together until well combined.
  6. Serve the teriyaki chicken stir-fry over rice, and garnish with sesame seeds and chopped green onions.
  7. Enjoy this flavorful and easy-to-make meal!

“`

Unlock Pinterest Potential: Discover and Save Your Own Pins

“`html
Jump to Recipe

Fudgy Chocolate Brownies: A Classic Delight

Imagine sinking your teeth into a luscious, ultra-fudgy chocolate brownie that melts in your mouth. The decadent cocoa aroma fills your kitchen, tantalizing your senses as you prepare this delightful treat. These rich brownies are a chocolate lover’s dream, offering the perfect balance of sweetness and indulgence. Whether you’re a seasoned baker or a beginner looking to impress, this recipe is your ticket to brownie heaven. With simple ingredients and straightforward steps, it’s time to unlock the magic of homemade brownies that everyone will adore.

Why You’ll Love This Recipe

What’s not to adore about our fudgy chocolate brownies? Firstly, they’re incredibly easy to prepare with pantry staples, making them perfect for a spontaneous bake. Their versatility allows you to customize and play with flavors, ensuring every batch is uniquely yours. The texture—dense, fudgy, with a slight crust on the top—will leave you and your guests reaching for more. For those who cherish sweet childhood memories, these brownies evoke nostalgia, serving as a warm reminder of simple pleasures.

Furthermore, brownies can be as uncomplicated or elegant as you prefer. Serve them as a quick family dessert or dress them up for social gatherings. They’re not just a treat; they’re an experience, bringing joy with every bite. Plus, you get all the indulgence without the hassle of elaborate baking. Who knew comfort food could be so straightforward and rewarding?

Personal Connection

I remember the first time I baked these brownies; it was a rainy afternoon, and the comforting aroma quickly filled the house, creating a cozy atmosphere. Sharing slices fresh from the oven with my family, it became an instant favorite. The joy and warmth they brought to our home turned baking these brownies into a cherished tradition, each batch echoing those cherished memories and love.

Context and Background

The origin of brownies is shrouded in a bit of culinary mystery, believed to have first appeared in the United States in the late 19th century. This delectable dessert has evolved from a happy baking accident into a staple delight loved globally. Brownies have captured the essence of simplicity and taste, transforming slightly over the decades. From classic chocolate variations to avant-garde gourmet versions, the humble brownie remains a canvas for creative expression in the baking world.

Tips for Perfect Fudgy Chocolate Brownies

  • Ensure your ingredients are at room temperature before you start; this helps in achieving a smooth batter.
  • Use high-quality cocoa powder and chocolate chips for the best chocolate flavor.
  • To avoid overbaking, start checking for doneness a few minutes before the recommended time; the toothpick should come out with a few moist crumbs.
  • Let the brownies cool completely before slicing for cleaner edges.
  • Experiment by adding nuts, berries, or a hint of coffee for unique flavors.

Serving Suggestions

These brownies are delightful on their own, but they become a showstopper with a few creative touches. Consider serving them warm with a generous scoop of vanilla ice cream. For a fancier presentation, drizzle with caramel or chocolate sauce, and top with whipped cream and fresh berries.

If you’re hosting a gathering, cut the brownies into small bites, skewering them with toothpicks for a charming dessert platter. For a festive touch, sprinkle with powdered sugar or edible glitter to make them sparkle. They are perfect for any occasion, from casual get-togethers to sophisticated dinner parties, bringing joy to any table.

Storage and Leftovers

Store your brownies in an airtight container at room temperature for up to a week. If you prefer them warm, gently reheat in the microwave or oven for a few seconds to revive their gooey texture.

Feeling creative with leftovers? Crumble brownies over your breakfast yogurt or incorporate them into a dessert trifle for an exciting play on textures and flavors. They’re a versatile treat that can easily transition into a new culinary adventure.

Recipe Variations and Substitutions

For a healthier twist, swap some of the flour for almond flour or use coconut sugar instead of granulated sugar. To make this recipe gluten-free, simply use a 1-to-1 gluten-free flour blend.

Want to try a different flavor profile? Incorporate orange zest for a citrusy kick, or add a teaspoon of espresso powder to enhance the chocolate depth. You can also fold in your favorite nuts or dried fruits for added texture and flavor variety.

FAQ

Can I make this ahead of time?

Absolutely! These brownies can be prepared a day in advance. Just store them in an airtight container, and they will remain delicious and fresh.

What substitutions can I use for butter?

If you need a butter alternative, try using coconut oil or a vegan butter substitute for a dairy-free version.

How do I make this gluten-free?

To make these brownies gluten-free, simply swap the all-purpose flour for a 1-to-1 gluten-free flour blend. Make sure all other ingredients, like chocolate chips, are also gluten-free.

Optional Nutritional Information

  • Calories: Approximately 250 per serving
  • Fat: 14g
  • Sugar: 22g
  • Protein: 3g

Final Thoughts

These fudgy chocolate brownies are more than just a dessert—they’re an opportunity to create cherished memories with loved ones. The rich, deep chocolate flavor and irresistibly gooey texture will quickly become a beloved part of your baking repertoire. I invite you to try this recipe and share the joy and warmth it brings. Feel free to leave comments with your baking stories, questions, or suggestions. Here’s to sweet baking adventures!

Recipe Section

Serves: 12-15

Prep Time: 15 minutes

Cook Time: 25-30 minutes

Total Time: 40-45 minutes

  • 2 cups all-purpose flour
  • 3/4 cup unsweetened cocoa powder
  • 2 cups granulated sugar
  • 1 tsp baking powder
  • 1/2 tsp salt
  • 1 cup unsalted butter, melted
  • 4 large eggs
  • 2 tsp vanilla extract
  • 1 cup chocolate chips
  1. Preheat your oven to 350°F and grease a 9×13 inch baking pan.
  2. In a large mixing bowl, combine the flour, cocoa powder, sugar, baking powder, and salt.
  3. Stir in the melted butter, eggs, and vanilla extract until well combined.
  4. Fold in the chocolate chips.
  5. Pour the batter into the prepared baking pan and spread it out evenly.
  6. Bake for 25-30 minutes or until a toothpick inserted comes out clean.
  7. Allow the brownies to cool before slicing and serving.
  8. Enjoy these rich and fudgy brownies with a glass of milk or a scoop of ice cream!

“`