Indulge in a Decadent Deeply Flavored Butterscotch Pudding Pie

“`html
Jump to Recipe

Deeply Flavored Butterscotch Pudding Pie: A Sweet Delight

Imagine indulging in a deeply flavored butterscotch pudding pie, where each bite delivers a harmonious blend of creamy, buttery sweetness and a flaky pie crust. This delightful dessert offers a symphony of textures, with the silky pudding complementing a golden crust. It’s not just a pie; it’s an experience that warms the soul and satisfies any sweet cravings you might have. Discover the magic of homemade butterscotch pudding in a pie, a unique treat that’s bound to become a family favorite.

Why You’ll Love This Recipe

This butterscotch pudding pie is a true crowd-pleaser with its rich flavor and smooth texture. It’s a versatile dessert that you can enjoy year-round, whether you’re serving it at a summer gathering or a cozy winter dinner. The recipe is straightforward, making it accessible to bakers of all levels. You’ll appreciate its simplicity, yet the result feels like an indulgence worthy of special occasions.

Butterscotch offers a nostalgic flavor that often brings a sense of comfort and warmth, evoking childhood memories of sweet treats shared with family. Plus, it’s not only delicious but also a great conversation starter, allowing you to surprise guests with a dessert that’s a step above the usual offerings.

Another reason to love this pie is its adaptability. With a few tweaks, you can modify it to suit different preferences or dietary needs, making it a versatile addition to your dessert repertoire. Moreover, crafting this pie from scratch gives a sense of achievement, turning simple ingredients into a show-stopping dessert.

Personal Story/Connection

I remember the first time I tasted a butterscotch pudding pie; it was during a chilly autumn evening at my grandmother’s house. She had a knack for transforming ingredients into something magical, and this pie was no exception. The butterscotch aroma filled the kitchen, and each slice was a testament to her love for baking and family. This recipe, passed down through generations, holds a special place in my heart as it reminds me of laughter and warmth shared across the dinner table.

Context/Background

Butterscotch has a long and storied history, dating back to the 19th century in Scotland where it was originally crafted as a hard candy. Over the years, it evolved, making its way into various confections as people fell in love with its distinct, buttery caramel notes. This evolution brought about the creamy version we adore today, often featured in desserts like pies and puddings.

The idea of combining pudding with a pie crust capitalizes on the comforting flavors embedded in culinary traditions, offering an easy-to-make yet elegantly sophisticated dessert option. This blending of classic buttery flavors with a creamy texture is what makes butterscotch pudding pie a cherished recipe.

Tips for Perfect Butterscotch Pudding Pie

  • Stir Constantly: While cooking the pudding, ensure to stir constantly to prevent lumps and achieve a smooth consistency.
  • Temper the Eggs: Whisk a small amount of the hot sugar mixture into the egg yolks to prevent curdling before adding them back into the saucepan.
  • Don’t Overbake: Bake the pudding only until set to maintain its creamy texture.
  • Cool Completely: Allow the pie to cool completely before refrigerating to ensure it sets properly.
  • Use Quality Ingredients: Opt for high-quality vanilla extract and butter to enhance the pudding’s flavor.

Serving Suggestions

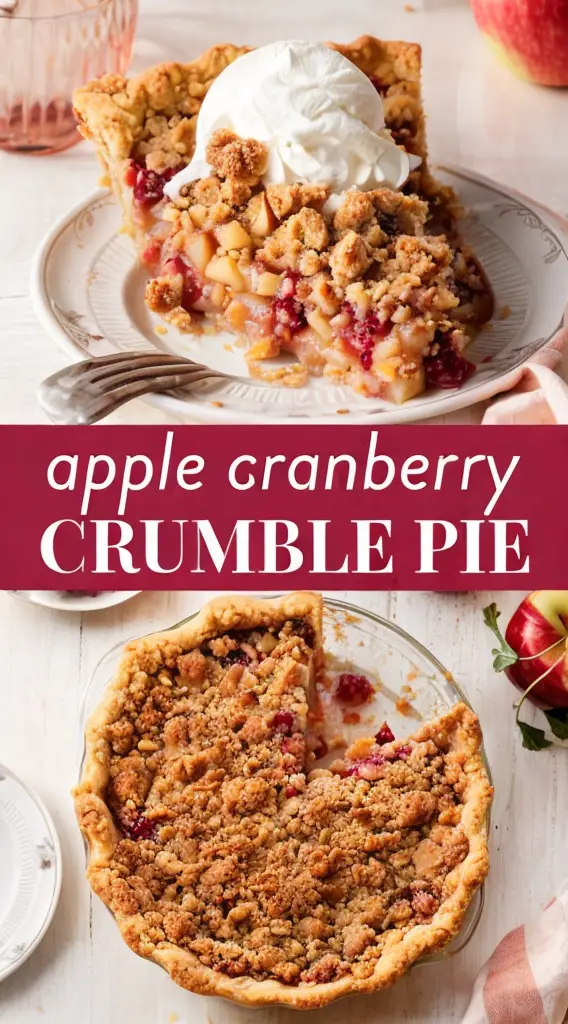
This butterscotch pudding pie can be creatively served depending on the occasion. For a classic presentation, top it with a dollop of homemade whipped cream and a drizzle of caramel sauce. If you’re hosting a festive meal, consider garnishing it with a sprinkle of sea salt and crushed toffee for added texture and a balance of flavors.

For pairing, a hot cup of coffee or tea complements the sweetness of the pie beautifully, making for a delightful end to any meal. Alternatively, serving it with a side of vanilla ice cream can make it a decadent treat suitable for summer evenings.

Storage and Leftovers

Store any leftover pie covered in the refrigerator for up to three days to keep it fresh. The flavors tend to meld together, making the pie taste even better a day after it’s made.

If you find yourself with excess, consider using the leftovers to make a layered dessert by combining chunks of pie with vanilla yogurt or pudding in a dessert cup. This repurposing transforms leftovers into an elegant parfait.

Recipe Variations and Substitutions

  • Coconut Twist: Substitute 1 cup of coconut milk for regular milk for a tropical twist.
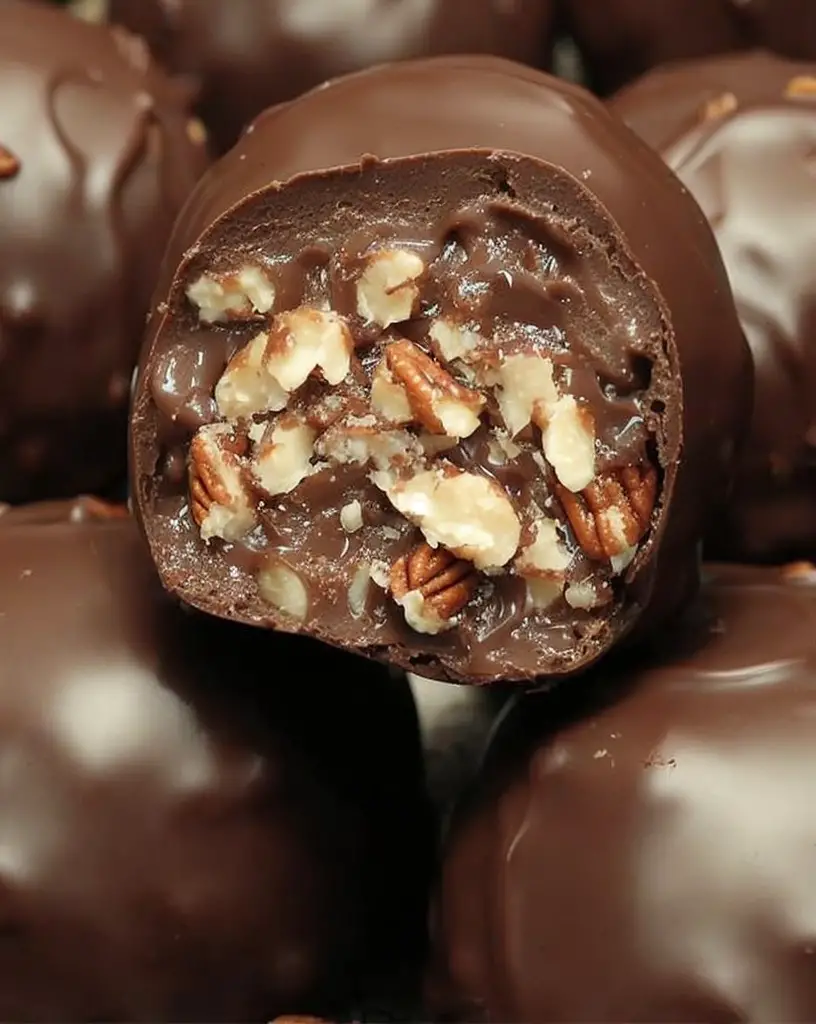
  • Nutty Delight: Incorporate a layer of crushed pecans between the crust and pudding for added crunch.
  • Vegan Version: Use almond milk and a plant-based butter substitute, along with a vegan pie crust to make it vegan-friendly.
  • Gluten-Free: Ensure the pie crust used is gluten-free, and consider using arrowroot powder as a thickener instead of cornstarch.

FAQ

Can I make this ahead of time? Yes, you can prepare the butterscotch pudding pie a day in advance and store it in the refrigerator until serving.

What substitutions can I use for milk? You can use almond, soy, or coconut milk as a dairy-free alternative without significantly altering the flavor.

How do I make this gluten-free? Use a gluten-free pie crust and ensure all other ingredients, particularly the cornstarch, are certified gluten-free.

Final Thoughts

This deeply flavored butterscotch pudding pie isn’t just a dessert; it’s an invitation to indulge in nostalgia while enjoying a culinary classic. Its rich, velvety texture and irresistible flavor make it a standout choice for any gathering. I encourage you to try this recipe, savor its simplicity and see for yourself why it remains a beloved favorite. Share your experiences or modifications in the comments—your story could inspire someone else to create this delicious pie!

Recipe Section

Serves: 8 | Prep Time: 15 minutes | Cook Time: 27 minutes | Total Time: 2 hours 45 minutes

  • 1 pre-made pie crust
  • 1 cup brown sugar
  • 1/4 cup cornstarch
  • 2 1/2 cups whole milk
  • 4 egg yolks
  • 2 tablespoons butter
  • 2 teaspoons vanilla extract
  • Whipped cream for topping
  1. Preheat oven to 350°F.
  2. Place the pie crust in a pie dish and set aside.
  3. In a saucepan, whisk together brown sugar and cornstarch.
  4. Gradually whisk in milk until smooth.
  5. Cook over medium heat, stirring constantly, until the mixture thickens.
  6. In a separate bowl, whisk egg yolks.
  7. Gradually whisk in 1 cup of the hot sugar mixture.
  8. Pour egg mixture back into the saucepan and cook for an additional 2 minutes.
  9. Remove from heat and stir in butter and vanilla until smooth.
  10. Pour the pudding mixture into the pie crust.
  11. Bake for 12-15 minutes or until set.
  12. Let cool, then refrigerate for at least 2 hours.
  13. Top with whipped cream before serving.

“`

Savor the Citrus Bliss with Irresistible Lime Meltaway Cookies

“`html
Jump to Recipe

Lime Meltaway Cheesecake: A Citrus Delight

Imagine a dessert that perfectly balances creamy textures with a vibrant citrus zing. Our Lime Meltaway Cheesecake is just that—a refreshing treat that combines the smooth richness of cream cheese with the bright, tangy flavors of fresh lime. Each bite is a flavor explosion that will melt in your mouth, leaving a delightful aftertaste that’s both zesty and sweet. Whether you’re a cheesecake lover or new to the world of citrus desserts, this is a must-try recipe that will uplift your taste buds and add a pop of freshness to your dessert repertoire.

Why You’ll Love This Recipe

Lime Meltaway Cheesecake stands out as a truly unique dessert for several reasons. First, the blend of ingredients creates a compelling contrast between creamy and tangy flavors, which instantly captivates the senses. The simplicity of its preparation makes it accessible even to novice bakers, while the sophisticated taste wows even the most discerning dessert enthusiasts.

This cheesecake is versatile enough to suit any occasion, from a cozy family dinner to an elegant party dessert. The fresh lime not only enhances its taste but also brings a sense of lightness, making it a perfect summer treat. Moreover, limes are rich in Vitamin C and antioxidants, adding a subtle health benefit to your indulgence.

When served, Lime Meltaway Cheesecake evokes nostalgia and joy, reminiscent of sunny days and family gatherings. This recipe is more than just a dessert; it’s an experience that promises cherished memories and happy taste-testing moments with your loved ones.

Personal Story/Connection

The Lime Meltaway Cheesecake holds a special place in my heart, as it was the centerpiece of our family gatherings. Growing up, we would eagerly wait for the summer family potluck, where my mom would unveil her perfectly baked cheesecake. The creamy lime surprise in each bite brought smiles and laughter, echoing through our garden patio. It became more than just a dessert; it was a symbol of our togetherness, laughter, and the sweet moments we shared.

Context/Background

Cheesecakes have a long and storied history, tracing back to ancient Greece where they were believed to be served to athletes during the first Olympic Games. Over centuries, this dish transcended cultural boundaries, evolving with local ingredients to capture regional tastes.

Our iconic Lime Meltaway Cheesecake is a modern twist on this timeless classic, infusing the distinct flavor of limes native to subtropical climates. This vibrant treat encapsulates the merging of traditional culinary practices with contemporary flavor adventures, highlighting how ingredients can transform basic recipes into gourmet experiences.

Tips for Perfect Lime Meltaway Cheesecake

  • Ensure your cream cheese is softened to achieve a smooth filling without lumps.
  • Zest the lime before juicing for maximum aroma and flavor.
  • Baking in a water bath can help prevent the cheesecake from cracking.
  • Allow the cheesecake to cool gradually in the oven with the door slightly open to avoid sudden temperature changes.
  • Refrigerate the cheesecake overnight for best results—a longer chill enhances the flavor.

Serving Suggestions

To elevate your Lime Meltaway Cheesecake, consider garnishing it with a vibrant lime glaze or a scattering of fresh berries for a pop of color. Serve individual slices with a dollop of homemade whipped cream for added decadence.

For pairing options, a glass of chilled Sauvignon Blanc or a citrus-infused iced tea complements the lime’s tangy notes beautifully. Serve during summer picnics or backyard barbecues to refresh your guests with this enticing citrus delight.

When planning a party, consider presenting the cheesecake on a tiered dessert tray adorned with edible flowers and slices of lime, creating an eye-catching centerpiece that doubles as a delicious offering.

Storage and Leftovers

Store leftover Lime Meltaway Cheesecake in the refrigerator, covered tightly to maintain freshness, for up to five days. For longer storage, wrap individual slices in plastic wrap and aluminum foil before freezing them for up to three months.

To enjoy reheated cheesecake, allow the frozen slices to thaw overnight in the fridge. Once defrosted, serve at room temperature for optimal flavor and texture.

Turn leftovers into a decadent breakfast by adding a slice to a bowl of warm oatmeal, topped with fresh berries and a sprinkle of granola. Alternatively, fold chunks of cheesecake into a fruit salad for an unexpected creamy twist.

Recipe Variations and Substitutions

  • For a gluten-free version, replace the graham cracker crumbs with gluten-free cookies or almond flour.
  • Swap lime for lemon or orange zest and juice to create a different citrus profile.
  • Add half a cup of crushed pistachios or shredded coconut to the crust for extra texture and flavor.
  • If you’re a fan of spicy-sweet blends, sprinkle a hint of chili powder or cayenne into the cheesecake mix for a bold variation.

FAQ

Can I make this ahead of time? Absolutely! This cheesecake is perfect for making a day or two in advance. Just keep it chilled until ready to serve.

What substitutions can I use for cream cheese? You can use Neufchâtel cheese for a lower fat option, or try vegan cream cheese to make it dairy-free.

How do I make this gluten-free or vegan? Use gluten-free crumbs for the crust and substitute cream cheese with a vegan alternative. Also, replace eggs with a flaxseed meal for a vegan version.

Optional Nutritional Information

  • Calories per serving: Approximately 320
  • Fat: 22g
  • Carbohydrates: 28g
  • Protein: 5g

Final Thoughts

Embrace the refreshing allure of Lime Meltaway Cheesecake—an inspired take on a dessert classic that’s perfect for any occasion. With its creamy texture and tantalizing lime zest, this cheesecake is sure to steal your heart and become a cherished recipe in your collection. Whether you’re new to baking or a seasoned pro, this dish invites you into a world of citrus delight. We’d love to hear about your experience—feel free to share your delicious creations and any questions you may have in the comments below.

Recipe Section

Serves: 8 | Prep Time: 20 mins | Cook Time: 50 mins | Total Time: 5 hours

  • 2 cups graham cracker crumbs
  • 1/2 cup melted butter
  • 24 oz cream cheese, softened
  • 1 cup sugar
  • 1/4 cup lime juice
  • Zest of 1 lime
  • 3 eggs
  • 1 tsp vanilla extract
  • Whipped cream and lime slices, for garnish
  1. Preheat your oven to 325°F and grease a springform pan.
  2. In a mixing bowl, combine the graham cracker crumbs and melted butter. Press the mixture into the bottom of the prepared pan to form the crust.
  3. In another bowl, beat the cream cheese and sugar until smooth.
  4. Add in the lime juice, lime zest, eggs, and vanilla extract. Mix until well combined.
  5. Pour the cheesecake mixture over the crust.
  6. Bake for 45-50 minutes, or until the center is almost set.
  7. Let the cheesecake cool completely, then refrigerate for at least 4 hours or overnight.
  8. Serve with a dollop of whipped cream and a slice of lime on top.
  9. Enjoy this refreshing lime meltaway cheesecake!

“`

Irresistible Gooey Caramel Chocolate Crunch Bars You Must Try

“`html

Gooey Caramel Chocolate Crunch Bars: The Ultimate Indulgence

Indulge in the delightful fusion of textures and flavors with Gooey Caramel Chocolate Crunch Bars. These irresistible treats combine rich caramel, decadent chocolate, and a satisfying crunch, creating the perfect dessert for any occasion.

Why You’ll Love This Recipe

These Gooey Caramel Chocolate Crunch Bars are the epitome of sweet indulgence. The classic combination of caramel and chocolate is enhanced by a delightful crunch, making each bite uniquely satisfying. Ideal for parties or a quick dessert fix, they’re beloved by both kids and adults alike.

One of the key benefits of this recipe is its versatility. Whether you’re aiming to impress at a dinner party or simply craving a sweet treat, these bars provide gourmet flavors with minimal effort. Plus, their rich, gooey texture will make them a hit at any gathering.

Context/Background

The Gooey Caramel Chocolate Crunch Bars draw inspiration from classic dessert bars with a modern twist. The combination of caramel and chocolate is a timeless favorite that has been enjoyed for generations, originating from European confectionery traditions before evolving into contemporary recipes beloved worldwide.

The technique of layering these flavors and textures harkens back to homemade caramel squares and chocolate treats, highlighting the evolution of dessert bars into a sophisticated yet accessible delicacy.

Recipe Details

Serves: 12

Prep Time: 20 minutes

Cook Time: 25 minutes

Total Time: 45 minutes

Ingredients

  • 1 cup granulated sugar
  • 1/2 cup unsalted butter
  • 1/4 cup light corn syrup
  • 1/4 cup sweetened condensed milk
  • 12 oz semisweet chocolate chips
  • 2 cups crushed graham crackers
  • 1 cup chopped nuts (optional)
  • 1/4 teaspoon sea salt

Directions

  1. Preheat your oven to 350°F (175°C) and line a baking dish with parchment paper.
  2. In a saucepan over medium heat, melt the sugar, butter, light corn syrup, and condensed milk together, stirring constantly until smooth and golden, about 8-10 minutes.
  3. Remove from heat and pour the caramel over the prepared dish lined with graham crackers.
  4. In a microwave-safe bowl, melt the chocolate chips in 30-second intervals, stirring between each, until fully melted and smooth. Spread evenly over the caramel layer.
  5. Top with chopped nuts and a sprinkle of sea salt for extra crunch and flavor if using.
  6. Bake in the preheated oven for 10-15 minutes, or until the chocolate is set and slightly bubbly.
  7. Allow to cool completely in the dish, then cut into bars and serve.

Tips for Perfect Gooey Caramel Chocolate Crunch Bars

  • Ensure the caramel is thickened properly before pouring it over the base for the best texture.
  • Use parchment paper to easily lift the bars out of the baking dish.
  • Experiment with different nuts or omit them altogether for a nut-free version.
  • Chilling the bars before cutting will help achieve clean edges.

Serving Suggestions

Enjoy these bars as they are for a delicious snack or serve them with a scoop of vanilla ice cream for an extra-special dessert. They also pair wonderfully with a hot cup of coffee or tea.

Storage and Leftovers

Store the Gooey Caramel Chocolate Crunch Bars in an airtight container at room temperature for up to 3 days or in the refrigerator for up to a week. For longer shelf life, freeze them in a tightly sealed container for up to a month.

Final Thoughts

These Gooey Caramel Chocolate Crunch Bars are a must-try for any dessert lover. Their irresistible combination of sweet, salty, and crunchy will leave you and your guests reaching for more. Perfect for any occasion, these bars are sure to become a favorite in your recipe collection.

Recipe Notes

  • To make these bars gluten-free, use gluten-free graham crackers.
  • Substitute dark chocolate chips for a richer chocolate flavor.
  • For a festive twist, top with holiday-themed sprinkles before the chocolate sets.

“`

Indulge in Irresistible Make-Ahead Maple Pecan Sticky Buns Today

“`html
Jump to Recipe

Make-Ahead Maple Pecan Sticky Buns: A Delicious Morning Delight

Imagine waking up to the sweet aroma of freshly baked sticky buns, the buttery richness of pecans melding perfectly with the deep, caramel-like notes of maple syrup. These Make-Ahead Maple Pecan Sticky Buns offer a mouthwatering combination of soft, tender dough and gooey, nutty topping that promises to transform any morning into a cozy breakfast celebration. Perfectly prepared the night before, these buns are an effortless way to delight in the flavor and warmth of homemade baking with minimal morning effort.

Why You’ll Love This Recipe

This sticky bun recipe is a quintessential comfort food, providing a warm, inviting start to your day. It’s a breeze to prepare, designed for busy mornings, offering the convenience of a make-ahead option. The rich flavors of maple and pecans effortlessly marry the soft, pillowy dough to create an irresistible breakfast treat.

Not only are these sticky buns a hit for breakfast, but their universal appeal can quickly turn any ordinary gathering into a cherished memory. The combination of maple syrup and pecans elevates traditional sticky buns, adding a unique twist that makes them a standout on any brunch table.

Health-conscious bakers can appreciate knowing exactly what goes into these buns, with an opportunity to use organic ingredients or alternative sweeteners without compromising taste.

Engage your senses with the comforting aroma as these buns bake, and share the joy of community and family through baking. The love that goes into these buns is palpable with every soft, syrupy bite.

Personal Story/Connection

I first stumbled upon this recipe during a family reunion. My aunt, renowned for her decadent breakfast creations, unveiled these Make-Ahead Maple Pecan Sticky Buns on a cool Sunday morning. That day, our family shared stories and laughter around the kitchen table, the sweet scent of maple and pecans hugging us like a comforting quilt. Ever since that morning, these sticky buns have been a staple at every family gathering, a delicious reminder of the memories and warmth of togetherness.

Context/Background

Sticky buns have a rich history that dates back centuries. Originally hailing from Europe, these sweet rolls made their way to the United States with German settlers, particularly in Pennsylvania. Over time, they evolved to incorporate local ingredients, leading to regional variations such as the addition of maple syrup in New England.

The blend of maple syrup and pecans ties deeply into the culinary heritage of North America, with maple trees providing syrup meticulously harvested each spring, and pecans, indigenous to North America, adding a buttery crunch. Today, these buns represent a delightful fusion of tradition and innovation, perfect for cozy breakfasts and celebrations alike.

Tips for Perfect Make-Ahead Maple Pecan Sticky Buns

  • Ensure your yeast is fresh and active by checking its expiration date, as this will affect the dough rise.
  • Use warm, not hot, liquids to activate the yeast without killing it.
  • Knead the dough until it’s smooth and elastic. This develops the gluten and results in tender, airy buns.
  • For a richer flavor, use Grade A dark or Grade B maple syrup.
  • Let the dough rise in a warm, draft-free area for best results.
  • If you prefer a more pronounced nutty flavor, toast the pecans lightly before using them in the recipe.

Serving Suggestions

These sticky buns shine when served warm, straight from the oven. Pair them with a steaming cup of coffee or a frothy latte to enhance their buttery, sweet flavors. For a delightful brunch, serve alongside fresh fruit, crispy bacon, and scrambled eggs, constructing a balanced spread with contrasting textures and flavors.

Setting a festive breakfast table? Add a sprinkle of powdered sugar over the buns for a snowy touch, or garnish with additional toasted pecans to emphasize the nutty flavors. Take it a notch further by serving with a side of whipped maple butter for an indulgent, melt-in-your-mouth delight.

Whether it’s a holiday breakfast feast or a casual weekend morning, these buns bring joy and warmth, perfect for gathering friends and family around your table.

Storage and Leftovers

Store any leftover sticky buns in an airtight container at room temperature for up to 2 days. For longer storage, place them in the refrigerator where they’ll last for up to a week.

To reheat, pop them in a preheated oven at 350°F for about 5-10 minutes, or until warmed through. This refreshes the texture and brings the flavors back to life. When reheating, cover with a layer of aluminum foil to prevent over-browning the tops.

Repurpose leftovers by tearing the buns into a bread pudding or using them as the base for a decadent French toast.

Recipe Variations and Substitutions

For those following a plant-based lifestyle, substitute the eggs with flax eggs and use a dairy-free butter alternative. Opt for a soy or almond milk in place of regular milk to make it vegan-friendly.

Swap out pecans for your favorite nuts, such as walnuts or almonds, to offer a new flavor dimension.

Add a hint of citrus by incorporating orange zest into the dough or the filling for a bright, refreshing take.

For a fall-inspired twist, mix in a teaspoon of cinnamon and nutmeg into the dough for warming spices that blend beautifully with the maple topping.

FAQ

Can I make this ahead of time?

Absolutely! Prepare the buns following the recipe steps, then cover and refrigerate overnight. Simply bake them fresh in the morning for a quick and easy breakfast.

What substitutions can I use for pecans?

You can use walnuts, almonds, or even hazelnuts in place of pecans. Each will offer a slightly different flavor and texture.

How do I make this gluten-free?

To adapt these buns for a gluten-free diet, use a 1:1 gluten-free all-purpose flour (such as Bob’s Red Mill or King Arthur Baking). Adjust the liquid slightly if the dough appears dry or too sticky as gluten-free flour behaves differently from regular flour.

Optional Nutritional Information

  • Calories per serving: Approximately 420
  • Fat: 20g
  • Carbohydrates: 56g
  • Protein: 7g

Final Thoughts

These Make-Ahead Maple Pecan Sticky Buns are more than just a breakfast treat; they’re a conversation starter, a morning comfort, and a burst of joy on any table. With their aromatic spices, gooey topping, and tender crumb, they elevate everyday moments into cherished memories. Give them a try, and don’t forget to share your magical morning experiences or any questions you have in the comments below!

Recipe Section

Serves: 12

Prep Time: 20 minutes

Cook Time: 25-30 minutes

Total Time: Approximately 2.5 hours including rising time

  • 1 package (2 1/4 tsp) active dry yeast
  • 1/4 cup warm water
  • 1/2 cup granulated sugar
  • 1/2 cup warm milk
  • 1/3 cup unsalted butter, melted
  • 1 tsp salt
  • 2 eggs
  • 4 cups all-purpose flour
  • 1 cup chopped pecans
  • 1/2 cup maple syrup
  • 1/2 cup brown sugar
  • 1/2 cup unsalted butter, softened
  1. In a small bowl, dissolve the yeast in warm water and let it sit for about 5 minutes until frothy.
  2. In a large mixing bowl, combine the sugar, warm milk, melted butter, salt, eggs, and half of the flour. Mix until smooth.
  3. Stir in the remaining flour to form a soft dough. Knead the dough on a floured surface for about 5-7 minutes, until it is smooth and elastic.
  4. Place the dough in a greased bowl, cover, and let it rise in a warm place for about 1-1.5 hours, until doubled in size.
  5. In a small saucepan, melt the 1/2 cup of butter with the brown sugar and maple syrup. Pour the mixture into a greased 9×13 baking dish and sprinkle with chopped pecans.
  6. Punch down the dough and roll it out into a 16×12 inch rectangle. Spread the softened butter over the dough and sprinkle with additional brown sugar and pecans.
  7. Roll up the dough from the long edge and cut into 12 equal pieces. Place the rolls in the prepared baking dish.
  8. At this point, cover the dish with plastic wrap and refrigerate overnight.
  9. In the morning, preheat the oven to 375°F and bake the sticky buns for 25-30 minutes, until golden brown.
  10. Let the sticky buns cool in the pan for a few minutes before inverting onto a serving platter. Enjoy warm!

“`

Indulge in Canada’s Classic Dessert with This Nanaimo Bars Recipe

“`html
Jump to Recipe

Nanaimo Bars: A Decadent Chocolate Layer Treat

Immerse yourself in the luscious layers of Nanaimo Bars, a no-bake treat that tantalizes the taste buds with its rich chocolate base, velvety custard filling, and a smooth chocolate topping that melts in your mouth. This iconic Canadian dessert seamlessly combines textures and flavors, inviting every dessert lover to indulge in its creamy bliss. Discover why this exquisite treat is not just a dessert but an experience worth savoring.

Why You’ll Love This Recipe

The Nanaimo Bars recipe appeals to both novice bakers and seasoned dessert enthusiasts. Its preparation doesn’t require an oven, making it a perfect choice for summertime treats or quick dessert fixes. The blend of nuts and coconut adds a delightful crunch, contrasting beautifully with the soft custard layer. While indulging in Nanaimo Bars, you might find yourself transported to a cozy family gathering or an elegant party, such is their versatility and charm. Health-wise, you can control the sweetness, making substitutions as needed, ensuring a treat that aligns with your dietary needs. Customization is easy, allowing you to craft a dessert perfectly tailored to your taste buds.

Personal Story/Connection

Nanaimo Bars hold a special place in my heart. Growing up in Canada, this dessert was a staple at every holiday gathering. I remember watching my grandmother prepare these bars with precision, her hands moving with the familiarity of tradition. The delight in my family’s eyes as they savored each bite is a memory I cherish. Sharing Nanaimo Bars with loved ones is sharing a piece of my heritage, bringing warmth and joy with every taste.

Context/Background

Nanaimo Bars originated in Nanaimo, British Columbia, and have become a beloved Canadian classic. They first appeared in the 1950s and quickly spread across North America due to their easy preparation and indulgent flavor. The no-bake, triple-layered bar gained popularity as a home-baking favorite and has since evolved into various versions. Despite these variations, the essence of Nanaimo Bars remains unchanged— a sweet, decadent delight that captures the heart of anyone who tries it.

Tips for Perfect Nanaimo Bars

  • Ensure the butter for the base is fully melted, enabling the crumbs to bind well for a sturdy foundation.
  • Chill the custard layer thoroughly before adding the chocolate topping to maintain distinct layers.
  • Use a microwave-safe bowl to melt the chocolate in short intervals to avoid burning.
  • To cut clean squares, use a warm knife, wiping between slices.
  • Experiment with different nuts or replace them with oats for a nut-free option.

Serving Suggestions

Nanaimo Bars can transform any event into a special occasion with their elegant presentation and irresistible taste. Serve them as part of a dessert platter at your next gathering, paired with fresh berries to complement the rich chocolate. For an indulgent afternoon snack, enjoy them with a hot cuppa coffee or tea. For an extravagant twist, top each piece with a dollop of whipped cream and a sprinkle of grated chocolate, making them a fitting end to a fancy dinner party.

Storage and Leftovers

Store Nanaimo Bars in an airtight container in the refrigerator, where they’ll stay fresh for up to a week. If you prefer them chewy and gooey, take them out 10 minutes before serving to let them soften slightly at room temperature. For longer storage, freeze them individually wrapped, ensuring each piece maintains its flavor. Leftover bars can be crumbled over ice cream or incorporated into a homemade sundae for a delightful twist.

Recipe Variations and Substitutions

Personalize your Nanaimo Bars with these variations:

  • To make gluten-free Nanaimo Bars, replace graham cracker crumbs with gluten-free alternatives or almond flour.
  • Switch the custard powder for vanilla pudding mix if custard isn’t available, ensuring the creamy texture remains intact.
  • Add a hint of espresso powder to the chocolate topping for coffee-flavored Nanaimo Bars.
  • Introduce a citrus twist by adding grated orange zest to the custard layer for a refreshing taste.

FAQ

Can I make this ahead of time? Yes, Nanaimo Bars can be made up to two days in advance and stored in the refrigerator until serving.

What substitutions can I use for nuts? Oats or additional graham crumbs can replace nuts for a nut-free version.

How do I make this gluten-free or vegan? For gluten-free bars, use a gluten-free graham cracker substitute. Ensure the custard and chocolate chips are vegan to adapt the recipe for a vegan diet.

Optional Nutritional Information

  • Calories per bar (estimated): 220
  • Total Fat: 14g
  • Sugars: 18g
  • Protein: 2g

Final Thoughts

Nanaimo Bars are an irresistible treat that will elevate any meal with their rich, layered decadence. Whether you’re making them for a festive occasion or a simple indulgence, their appeal is timeless. We’d love to hear how this recipe turned out for you. Feel free to leave comments or ask questions below and share your own creative variations!

Nanaimo Bars Recipe

Serves: 12

Prep Time: 20 minutes

Cook Time: 0 minutes

Total Time: 2 hours 20 minutes

Ingredients

  • 1/2 cup unsalted butter, melted
  • 1/4 cup granulated sugar
  • 5 tbsp cocoa powder
  • 1 large egg, beaten
  • 1 3/4 cups graham cracker crumbs
  • 1 cup shredded coconut
  • 1/2 cup chopped nuts (walnuts or almonds)
  • 1/2 cup unsalted butter, softened
  • 2 cups powdered sugar
  • 2 tbsp custard powder
  • 2 tbsp milk
  • 4 oz semi-sweet chocolate, chopped

Directions

  1. In a medium bowl, mix together melted butter, sugar, cocoa powder, egg, graham cracker crumbs, coconut, and nuts. Press into an ungreased 9×9 inch pan.
  2. In another bowl, cream together softened butter, powdered sugar, custard powder, and milk until light and fluffy. Spread over the crumb layer in the pan.
  3. Melt the chopped chocolate in a microwave-safe bowl, stirring every 30 seconds until smooth. Spread over the custard layer.
  4. Chill in the refrigerator until set, about 2 hours. Cut into bars and serve.

“`

Create a Stunning Yule Log Christmas Cake with Video Guide

“`html
Jump to Recipe

Delightful Yule Log Cake: A Festive Christmas Tradition

Imagine the taste of a rich, velvety chocolate sponge enveloped with creamy chocolate ganache, symbolizing the warmth of a roaring holiday fire. Our Yule Log Cake offers an indulgent journey into classic Christmas flavors, reimagined for the modern baking enthusiast. Adorned with shimmering powdered sugar and fresh berries, this dessert is as beautiful as it is delicious, making it the perfect centerpiece for your holiday table!

Why You’ll Love This Recipe

This Yule Log Cake recipe is a show-stopper with its classic appeal and lush flavors. Its versatility makes it perfect for all kinds of holiday gatherings, from intimate family events to grand festive parties. The delicate balance of rich chocolate and airy sponge will transport you back to cherished holiday memories, bringing joy and nostalgia to the forefront.

Not only is this dessert visually stunning, but it is also surprisingly easy to prepare, allowing even novice bakers to create a masterpiece. Whether you’re a traditionalist or someone seeking creative twists, this recipe provides the perfect canvas.

The ingredients are wholesome, emphasizing natural flavors, making this cake a relatively healthy indulgence. Each bite is a harmonious blend of chocolate delight, leaving a remarkable impression on your taste buds.

Personal Story/Connection

Growing up, the Yule Log Cake was a staple in our household during the holiday season. I fondly remember baking it alongside my grandmother, her kitchen imbued with the scents of cocoa and vanilla. Those moments shared with family have imprinted a sense of warmth and love into this recipe, turning it into a cherished tradition passed down through generations. Every time I bake this cake, I’m reminded of the joy it brought us, a feeling now shared with my own children.

Context/Background

The Yule Log Cake, or Bûche de Noël, originates from the 19th century in France, where the tradition of burning a Yule log during Christmas morphed into a culinary art form. Often crafted to resemble real wooden logs, these cakes have evolved over time to include various flavors and decorations, yet their essence remains deeply rooted in holiday celebrations.

Historically decorated with marzipan and powdered sugar to mimic snow, this dessert has been a symbol of prosperity and warmth. Today, it’s celebrated worldwide, each culinary adaptation showcasing unique regional flavors and ingredients.

Tips for Perfect Yule Log Cake

  • Ensure eggs are at room temperature before beating to achieve maximum volume.
  • When folding in dry ingredients, do it gently to preserve the batter’s airiness.
  • Roll the cake while warm to prevent cracking and to set the shape.
  • Allow chocolate ganache to cool completely before spreading to avoid melting the cake.
  • Use a serrated knife for clean slices when serving.

Serving Suggestions

Present your Yule Log Cake on a wide platter with sprigs of fresh mint and a dusting of powdered sugar for an elegant touch. This cake pairs beautifully with a hearty cup of hot cocoa or a warm glass of mulled wine, enhancing its festive charm.

For a unique twist, consider adding a dollop of whipped cream or a drizzle of raspberry sauce on the side. The tartness of berries balances the richness of the chocolate, creating a delightful harmony of flavors.

Use fresh or sugared cranberries, rosemary sprigs, and edible glitter to transform this dessert into a winter wonderland, perfect for Instagram-worthy holiday photos.

Storage and Leftovers

Store the Yule Log Cake in an airtight container in the refrigerator for up to 3 days. Bring it to room temperature before serving to enjoy its full flavor and texture.

To freeze, wrap the cake tightly in plastic wrap and foil, storing it for up to a month. Thaw overnight in the fridge when ready to enjoy.

Leftovers can be repurposed into fun cake truffles by crumbling the cake and mixing it with leftover ganache, then rolling into balls and setting with a chocolate coating.

Recipe Variations and Substitutions

For a gluten-free version, use almond flour in place of cake flour for a nutty flavor twist. Vegan adaptations include subbing eggs with aquafaba and using coconut cream and vegan chocolate for the ganache.

Citrus lovers can add a splash of orange zest to the batter and ganache for a refreshing zing. Consider incorporating a teaspoon of your favorite holiday spices, like cinnamon or nutmeg, for a seasonal flair.

Explore additional fillings like coffee or hazelnut spread for diversifying the flavor profile and pairing with espresso for a delightful coffee-themed dessert.

FAQ

Can I make this ahead of time? Yes, you can prepare the cake a day in advance, storing it in the fridge until ready to serve.

What substitutions can I use for cocoa powder? You can substitute with carob powder for a similar texture and sweetness.

How do I make this gluten-free or vegan? Use almond flour for gluten-free and replace eggs with aquafaba and dairy products with plant-based alternatives for a vegan version.

Optional Nutritional Information

  • Calories per slice: Approximately 350 kcal
  • Protein: 6g
  • Carbohydrates: 45g
  • Fat: 18g

Final Thoughts

Crafting a Yule Log Cake from scratch is more than just a baking endeavor; it’s an opportunity to slow down, indulge in holiday spirit, and create timeless memories. This decadent dessert has the power to elevate any festive meal, weaving joy into each slice. I encourage you to try it and share your creations or questions below. Happy baking and happy holidays!

Recipe Section

Serves: 8-10 | Prep Time: 20 mins | Cook Time: 15 mins | Total Time: 1 hr

  • 6 large eggs
  • 3/4 cup granulated sugar
  • 1/2 cup cake flour
  • 1/4 cup cocoa powder
  • 1 tsp baking powder
  • 1/4 tsp salt
  • 1 cup heavy cream
  • 8 oz dark chocolate, chopped
  • 1/2 cup unsalted butter, softened
  • 1 tsp vanilla extract
  • Powdered sugar, for dusting
  • Fresh berries and mint leaves, for garnish
  1. Preheat your oven to 350°F and grease a 10×15-inch jelly roll pan. Line it with parchment paper, leaving an overhang on all sides.
  2. In a large bowl, beat the eggs and sugar with a hand mixer until thick and pale, about 5 minutes.
  3. Sift in the cake flour, cocoa powder, baking powder, and salt. Gently fold until just combined.
  4. Pour the batter into the prepared pan and spread it out evenly. Bake for 12-15 minutes, or until the cake springs back when touched.
  5. While the cake is baking, heat the heavy cream in a saucepan until almost boiling. Remove from heat and add the chocolate. Let it sit for 2 minutes, then stir until smooth. Let it cool to room temperature.
  6. In another bowl, beat the butter until creamy. Gradually add the chocolate mixture and vanilla extract, beating until well combined and fluffy.
  7. Once the cake is done, immediately invert it onto a clean kitchen towel dusted with powdered sugar. Carefully peel off the parchment paper.
  8. Starting at one short end, roll up the cake along with the towel. Let it cool completely.
  9. Unroll the cake and spread the chocolate filling evenly over the cake. Re-roll without the towel and place it seam side down on a serving platter.
  10. Cut a diagonal slice from one end of the log and position it on the side to resemble a branch.
  11. Dust the cake with powdered sugar, decorate with berries and mint leaves, and enjoy the festive treat!

“`

Irresistible Apple Cranberry Crumble Pie for Your Holiday Dessert Table

“`html
Jump to Recipe

Apple Cranberry Crumble Pie: A Sweet Symphony of Fall Flavors

Experience the delightful embrace of autumn with every bite of our Apple Cranberry Crumble Pie. This exquisite dessert combines the crisp sweetness of apples with the tart burst of fresh cranberries, all nestled beneath a buttery oat crumble. Perfectly spiced with cinnamon and nutmeg, this pie promises warmth and comfort with a deliciously unique twist that’s sure to captivate your senses.

Why You’ll Love This Recipe

The Apple Cranberry Crumble Pie is a celebration of seasonal flavors that transforms simple ingredients into something truly special. The blend of soft, sweet apples and tangy cranberries creates a harmony that is both refreshing and comforting. The golden-brown crumble topping adds a delightful texture that contrasts beautifully with the tender fruit beneath. Moreover, it’s an easy and forgiving recipe, making it perfect for both novice and seasoned bakers.

Its versatility knows no bounds: whether it be a cozy family dinner or a festive holiday gathering, this pie shines on any occasion. Plus, for those keeping an eye on their diet, the fresh fruits provide a dose of vitamins and antioxidants, giving every indulgent slice a hint of wholesomeness.

This dessert evokes nostalgia; it reminds us of crisp fall evenings, cozy sweaters, and the warm aroma of spices filling the home. Baking it is as soothing as enjoying it is a delight, delivering joy with each step from preparation to that first delicious forkful.

Personal Story/Connection

Growing up, autumn always meant a kitchen bustling with activity and the tantalizing scent of baking pies. This Apple Cranberry Crumble Pie holds a special place in my heart, as it was a favorite during family gatherings. Watching my grandmother effortlessly mix the crumble and arrange the apples taught me not just the art of pie-making, but also the love that goes into it. To this day, recreating this recipe lets me relive those cherished memories and share the same warmth with my loved ones.

Context/Background

While apple pies are a staple of American cuisine, the addition of cranberries gives this pie an intriguing twist with historical roots. Cranberries, indigenous to North America, have been featured in regional recipes for generations. The holiday season wouldn’t be complete without some form of cranberry, be it in sauces or desserts. The crumble topping, popularized during WWII due to rationing, makes this pie both practical and scrumptious, echoing times when resourcefulness was key in celebrating life’s sweetness.

Tips for Perfect Apple Cranberry Crumble Pie

  • Choose firm apples like Granny Smith or Honeycrisp to prevent them from becoming mushy.
  • For a zesty kick, add a teaspoon of orange zest to the fruit mixture.
  • Chill the pie crust before adding the filling to prevent it from becoming soggy.
  • Use a pie shield or cover the edges with foil to prevent the crust from overbrowning.
  • If fresh cranberries are unavailable, frozen ones work well; just thaw and drain them first.
  • For extra aroma, sprinkle a hint of ground ginger on the fruit mixture before topping with crumble.

Serving Suggestions

This pie is a versatile masterpiece that fits right into any setting. Serve it warm with a scoop of vanilla ice cream for a classic dessert that is both comforting and decadent. For a sophisticated touch, try garnishing it with a dollop of whipped cream and a sprinkle of cinnamon.

If you’re presenting it at a festive dinner, consider pairing it with a dessert wine like a late harvest Riesling, which complements the pie’s sweetness and tartness. Alternatively, a cup of spiced cider or chai tea works beautifully, enhancing its autumnal essence.

The pie also serves as a lovely breakfast indulgence, paired with a steaming cup of coffee, offering a cozy start to chilly mornings.

Storage and Leftovers

To store the Apple Cranberry Crumble Pie, cover it loosely with aluminum foil or plastic wrap and keep it at room temperature, where it will remain fresh for up to two days. For longer storage, refrigerate it for up to five days.

Reheat individual slices in the microwave for a quick treat, or warm the entire pie in a preheated oven at 350°F for about 10 minutes. This pie also freezes well; wrap it tightly in plastic wrap and aluminum foil before freezing for up to three months. Thaw overnight in the refrigerator before reheating.

Recipe Variations and Substitutions

Adapt this recipe to suit different dietary needs or flavor preferences:

  • Gluten-Free: Substitute the all-purpose flour with a gluten-free blend and ensure oats are certified gluten-free.
  • Vegan: Use a vegan butter substitute and opt for a plant-based pie crust.
  • Nutty Twist: Add chopped pecans or walnuts to the crumble for an extra crunch.
  • Spice Up: Replace cinnamon with cardamom for a unique, aromatic flavor profile.

FAQ

Can I make this ahead of time?

Yes, prepare the pie up to two days in advance and store it covered at room temperature. Warm before serving for best flavor and texture.

What substitutions can I use for sweeteners?

Swap granulated sugar with coconut sugar or use a natural sweetener like honey or maple syrup, adjusting quantities to taste.

How do I make this gluten-free or vegan?

For a gluten-free version, use a gluten-free flour blend and gluten-free oats. For vegan, substitute butter with a dairy-free alternative and ensure the crust is plant-based.

Optional Nutritional Information

  • Approximate Serving Size: 1 slice (1/8 of the pie)
  • Calories: 320 per slice
  • Fat: 14g
  • Carbs: 46g
  • Protein: 3g

Final Thoughts

This Apple Cranberry Crumble Pie not only captures the flavors of fall but also delivers a comforting embrace with each bite. It is a recipe that invites you to slow down, savor, and share moments of joy with those you cherish. Whether it accompanies a festive holiday meal or a simple weekend dinner, it’s a dish destined to be a favorite.

I encourage you to try this delightful pie and discover the magic of its sweet-tart symphony. Share your creations, ask questions, or offer your own tips in the comments below. Happy baking!

Recipe Section

Recipe Details

Serves: 8

Prep Time: 20 minutes

Cook Time: 40-45 minutes

Total Time: 1 hour 5 minutes

  • 6 cups peeled and sliced apples
  • 1 cup fresh cranberries
  • 1/2 cup granulated sugar
  • 1/4 cup all-purpose flour
  • 1 tsp cinnamon
  • 1/4 tsp nutmeg
  • 1 pre-made pie crust
  • 1 cup old-fashioned oats
  • 1/2 cup brown sugar
  • 1/3 cup all-purpose flour
  • 1/2 cup butter, melted
  1. Preheat oven to 375°F.
  2. In a large bowl, combine apples, cranberries, granulated sugar, 1/4 cup flour, cinnamon, and nutmeg. Mix well.
  3. Pour the fruit mixture into the pie crust.
  4. In another bowl, mix oats, brown sugar, 1/3 cup flour, and melted butter until crumbly.
  5. Sprinkle the crumble mixture evenly over the fruit filling.
  6. Bake for about 40-45 minutes, or until the crust is golden brown and the filling is bubbly.
  7. Let it cool slightly before serving.
  8. Enjoy a slice of this warm and comforting Apple Cranberry Crumble Pie!

“`

Save and Share Your Favorite Pins with This Pinterest Guide

“`html
Jump to Recipe

Discover Delightful Sprinkle Cupcakes: A Sweet Celebration of Color

Imagine biting into a blissful creation that bursts with joy and color, the tender crumb melting in your mouth, and each bite revealing a surprise of vibrant rainbow sprinkles. These Sprinkle Cupcakes are not just a treat for your taste buds but a feast for your eyes. With a winning combination of buttery vanilla essence and a fun, nut-free promise, they are perfect for celebrations or simply as a pick-me-up treat. Why settle for ordinary when you can have a cupcake that adds a punch of happiness to your day?

Why You’ll Love This Recipe

These Sprinkle Cupcakes are a delightful intersection of simplicity and excitement. They cater to all ages, becoming the highlight of any event, whether it’s a child’s birthday party or a casual afternoon tea. The recipe is straightforward, allowing both novice bakers and seasoned pros to whip them up with confidence. Moreover, every bite brings a nostalgic joy reminiscent of childhood fairytales and carefree afternoons.

The beauty of this recipe lies in its versatility. You can dress these cupcakes up or down, making them suitable for any occasion. They carry the charm of classic desserts but with a playful twist that never fails to impress. Apart from their delightful taste and look, these cupcakes are free of any preservatives or artificial ingredients commonly found in store-bought variants, ensuring you indulge in something wholesome and homemade.

Sprinkle Cupcakes also offer a gateway to creativity. Swap the sprinkles for chocolate chips, or use different colored sprinkles to match a specific theme. They can even help ease the stress of planning for parties, providing a reliable go-to dessert option that guarantees smiles and satisfaction.

Personal Story/Connection

My love affair with these Sprinkle Cupcakes began during a family get-together. I still remember the look on my nephew’s face when he saw the rainbow colors peeking through the frosting. They quickly became a family favorite, first appearing at birthdays, then becoming a staple at any celebratory gathering. The best part? Watching loved ones’ faces light up with delight as they took their first bite.

Context/Background

The Sprinkle Cupcake, often known as Funfetti, originated from America’s rich tradition of colorful, celebratory desserts. Introduced in the late 20th century, these cupcakes quickly gained popularity for their festive appearance and simple preparation. The name “Funfetti” itself combines the words “fun” and “confetti,” perfectly capturing the essence of this dessert.

Fast forward to today, these cupcakes have become a beloved part of various cultures worldwide, evolving with creative spins and exciting flavors. They embody the joy that comes with celebration and the universal love for all things sweet and colorful.

Tips for Perfect Sprinkle Cupcakes

  • Ensure the butter is softened to room temperature for best creaming results.
  • Don’t overmix the batter; it should be just combined to keep the cupcakes fluffy.
  • Vary the sprinkles—nonpareils work well, but jimmies are less likely to bleed color.
  • Test with a toothpick: cupcakes are done when it comes out clean.
  • Let the cupcakes cool completely before frosting to prevent melting.

Serving Suggestions

These Sprinkle Cupcakes are incredibly versatile and can be served with a range of accompaniments. For a more refined touch, pair them with a delicate cream cheese frosting topped with a dusting of sprinkles for added flair. They make a delightful addition to a dessert plate, sitting cheekily beside a mound of velvety vanilla ice cream.

If you’re planning a party, consider creating a cupcake tower. Arrange these vibrant cupcakes in tiers, interspersed with variegated candy pieces or fresh berries for an eye-catching display. These cupcakes are also a great canvas for themed decorations, easily customizable to match seasonal events or special occasions like weddings and anniversaries.

Storage and Leftovers

To keep the Sprinkle Cupcakes fresh and moist, store them in an airtight container at room temperature for up to three days. If you need to keep them longer, consider refrigerating them; however, bring them to room temperature before serving for optimal taste and texture.

Leftover cupcakes can also be reinvented. Crumble them to make a delightful trifle with layers of fruit and cream, or use them as a charming topping on ice cream sundaes. The possibilities are endless and delicious!

Recipe Variations and Substitutions

  • For a chocolate twist, replace 1/4 cup of flour with cocoa powder and add chocolate sprinkles.
  • Substitute almond extract for vanilla to introduce a nutty aroma and flavor.
  • For a citrus kick, add a tablespoon of lemon or orange zest to the batter.
  • To accommodate dietary needs, use gluten-free flour or dairy-free alternatives like almond milk.

FAQ

Can I make these cupcakes ahead of time? Yes, you can bake them the day before and frost them before serving.

What substitutions can I use for butter? You can use margarine or a vegan butter stick for a dairy-free option.

How do I make this recipe gluten-free? Substitute the all-purpose flour with a 1:1 gluten-free baking flour mix.

Optional Nutritional Information

  • Calories: Approximately 200 per cupcake
  • Fat: 10g
  • Carbohydrates: 28g
  • Protein: 3g

Final Thoughts

The Sprinkle Cupcake is a dessert that holds the power to elevate any gathering—from casual family dinners to grand celebrations. Its vibrant appearance and delightful flavor are sure to win hearts and create lasting memories. Try the recipe today and experience the joy it brings. I’d love to hear your thoughts and any creative spins you put on this classic in the comments!

Sprinkle Cupcake Recipe

Serves: 12 | Prep Time: 15 mins | Cook Time: 18-20 mins | Total Time: 35-40 mins

  • 1 cup granulated sugar
  • 1/2 cup unsalted butter, softened
  • 2 large eggs
  • 1 teaspoon vanilla extract
  • 1 1/2 cups all-purpose flour
  • 1/2 teaspoon baking powder
  • 1/4 teaspoon salt
  • 1/2 cup milk
  • 1/4 cup rainbow sprinkles
  1. Preheat the oven to 350°F and line a 12-cup muffin tin with cupcake liners.
  2. Cream together sugar and butter until light and fluffy.
  3. Add in eggs one at a time, beating well after each addition. Stir in vanilla extract.
  4. In a separate bowl, whisk together flour, baking powder, and salt.
  5. Gradually add the dry ingredients to the wet ingredients, alternating with milk. Mix until just combined.
  6. Gently fold in the rainbow sprinkles.
  7. Divide the batter evenly among the cupcake liners, filling each about 2/3 full.
  8. Bake for 18-20 minutes or until a toothpick inserted into the center comes out clean.
  9. Allow the cupcakes to cool in the pan for a few minutes before transferring them to a wire rack to cool completely.
  10. Once cooled, frost with your favorite frosting and top with more sprinkles before serving.
  11. Enjoy these festive and fun sprinkle cupcakes!

“`

Decadent Chocolate Pecan Caramel Truffles Recipe for Sweet Indulgence

“`html

Chocolate Pecan Caramel Truffles: Heavenly Bites of Decadence

Indulge in the luxurious flavors of Chocolate Pecan Caramel Truffles, a delightful treat perfect for any occasion. These scrumptious truffles combine rich chocolate, crunchy pecans, and gooey caramel, making them irresistible to the taste buds. Whether it’s for a celebration, a homemade gift, or just a sweet craving, this recipe will be your go-to for creating bite-sized indulgence.

Why You’ll Love This Recipe

Chocolate Pecan Caramel Truffles are the epitome of indulgence, perfectly balancing the sweetness of caramel with the nutty flavor of pecans and the richness of smooth chocolate. These truffles not only taste divine but also bring a touch of elegance to any dessert table. Ideal for gifting, entertaining, or simply treating yourself, they are surprisingly easy to make and will surely impress your friends and family.

These truffles offer a unique combination of textures and flavors—velvety chocolate encasing crunchy pecans and a luscious caramel center. Each bite offers a delightful contrast that keeps you reaching for more. Plus, they’re perfect for occasions like Christmas, Valentine’s Day, or a fancy dinner party.

Context/Background

The art of making truffles dates back to the 19th century, originating in France as a decadent treat resembling the prized truffle fungi. Traditionally made with ganache, truffle recipes have evolved to include various coatings, fillings, and flavors. This Chocolate Pecan Caramel Truffle recipe pays homage to its French origins while incorporating the beloved flavors of American pecans and caramel, creating a cross-cultural delicacy.

Truffles have always been synonymous with luxury, and this version elevates the classic by adding the buttery crunch of pecans and the smooth, rich taste of caramel—each element working in harmony to create a confection that’s truly gourmet.

Recipe Details

Serves: 24
Prep Time: 30 minutes
Cook Time: 10 minutes
Total Time: 40 minutes

Ingredients

  • 12 oz semisweet chocolate chips
  • 1 cup heavy cream
  • 1 cup finely chopped pecans
  • 1 cup caramel sauce
  • 1 tsp vanilla extract
  • Pinch of sea salt
  • 2 tbsp cocoa powder for dusting

Directions

  1. In a saucepan, heat the heavy cream over medium heat until it begins to simmer. Remove from heat.
  2. Add chocolate chips to the hot cream, stirring until smooth. Stir in vanilla extract and sea salt.
  3. Fold in chopped pecans and let the mixture cool slightly.
  4. Scoop small portions of the chocolate mixture and flatten them in your hands, creating a small disc.
  5. Add a small spoonful of caramel sauce to the center of each disc and fold the chocolate around it to form a ball.
  6. Roll each truffle in cocoa powder to coat lightly.
  7. Place the truffles on a baking sheet and refrigerate for at least 2 hours to set.

Tips for Perfect Chocolate Pecan Caramel Truffles

  • Ensure chocolate is fully melted and smooth before adding other ingredients.
  • Chill the mixture slightly before shaping to make handling easier.
  • Adjust the size of truffles according to preference; smaller ones are perfect for sharing.
  • For a unique twist, try adding a dash of bourbon to the caramel filling.

Serving Suggestions

Serve these truffles as part of a dessert platter with fresh fruit and coffee. They also make a lovely favor at weddings or parties when wrapped individually in decorative boxes.

Storage and Leftovers

Store the Chocolate Pecan Caramel Truffles in an airtight container in the refrigerator for up to two weeks. For longer storage, keep them in the freezer and let them thaw slightly before serving.

Final Thoughts

These Chocolate Pecan Caramel Truffles are sure to become a favorite in your confectionary repertoire. With their delightful mix of textures and flavors, they’re not only pleasing to the palate but also a joy to make. Try this recipe, and treat yourself or your loved ones to something truly special.

Recipe Notes

  • For a dairy-free version, substitute heavy cream with coconut cream.
  • Consider using dark chocolate for a richer, less sweet flavor.
  • Experiment with different nut varieties, such as walnuts or almonds, for varied flavor profiles.

“`

How to Discover and Save Your Favorite Pinterest Pins Effortlessly

“`html
Jump to Recipe

Delicious BBQ Chicken Bake: An Easy Family Favorite

Imagine sitting down to a flavorful, aromatic delight that combines the tanginess of barbecue sauce with the creamy melt of mozzarella cheese, all topped with the freshness of green onions and the savory crunch of bacon. Our BBQ Chicken Bake is a sensory explosion, providing an unbeatable balance of flavors and textures that’s sure to impress. This dish is not just a meal—it’s a ticket to a dining experience that promises satisfaction with every bite.

Why You’ll Love This Recipe

This BBQ Chicken Bake is a celebration of simplicity and flavor. It’s a versatile recipe that can easily be adapted to suit dietary preferences without sacrificing taste. Whether you’re looking for a quick weeknight meal or a dish that will wow guests at a gathering, this recipe checks all the boxes. The ease of preparation ensures you’re not spending hours in the kitchen, making it perfect for days when you need a delicious, fuss-free meal. Plus, the combination of barbecue, cheese, and bacon evokes a sense of comfort and nostalgia, bringing warmth to your table.

Personal Story/Connection

Growing up, barbecue-based meals were a staple at every family gathering. I still remember the summer evenings when the tangy aroma of barbecue sauce mixed with laughter in the air. This BBQ Chicken Bake became a cherished recipe after a spontaneous experimentation led to an instant hit at a family reunion. Now, it’s not just a recipe; it’s a joyful tradition that brings us closer each time it’s served.

Context/Background

Originally inspired by classic barbecue chicken recipes, this dish brings a modern twist while retaining its roots. The infusion of mozzarella cheese and bacon into barbecue chicken creates an urban legend of culinary brilliance that’s beloved across households. While barbecue itself has a history rooted deeply in Southern American cooking, this adaptation showcases the evolution of beloved traditional flavors to suit contemporary palates.

Tips for Perfect BBQ Chicken Bake

  • Ensure the chicken breasts are of even thickness to promote uniform cooking.
  • Opt for a high-quality barbecue sauce to enhance the overall flavor.
  • For a smoky twist, consider grilling the chicken before baking.
  • You can use a meat thermometer to ensure the chicken reaches an internal temperature of 165°F.
  • If you prefer a spicier kick, add a dash of cayenne pepper or chili flakes to the barbecue sauce.

Serving Suggestions

This BBQ Chicken Bake is incredibly versatile when it comes to serving options. Pair it with a refreshing garden salad or crispy roasted vegetables to balance the dish’s rich flavors. For a more comforting meal, serve it alongside garlic mashed potatoes or creamy coleslaw. If you’re prepping for a party, consider transforming this into a slider filling using mini buns—perfect for easy, handheld dining!

Storage and Leftovers

Leftovers, if any, can be stored in an airtight container in the refrigerator for up to three days. When reheating, cover with foil and warm in the oven at 350°F to prevent the chicken from drying out. Alternatively, crowning a fresh bed of greens with sliced BBQ Chicken Bake, creates a light and satisfying salad for the next day’s lunch.

Recipe Variations and Substitutions

For a healthier version, swap mozzarella cheese with a low-fat option or use turkey bacon for a lighter twist. If accommodating a gluten-free diet, ensure your barbecue sauce is certified gluten-free. Vegetarians can even enjoy this dish by using thick, grilled portobello mushrooms as a base instead of chicken, carrying all the flavors beautifully.

FAQ

Can I make this ahead of time? Absolutely! Prepare the dish in advance, stopping before the final baking step, and refrigerate. Bake as directed when ready to serve.

What substitutions can I use for mozzarella cheese? Try provolone or cheddar for a different flavor profile.

How do I make this gluten-free? Ensure the barbecue sauce and bacon are gluten-free. Everything else is naturally gluten-free.

Final Thoughts

This BBQ Chicken Bake is more than just a dish—it’s an unforgettable culinary experience that’s perfect to make any occasion special. Whether you’re bringing loved ones together for a Sunday dinner or hosting a fun barbecue with friends, this recipe is poised to be a crowd favorite. We invite you to try it out and share your own twists and experiences!

Recipe Section

Serves: 4
Prep Time: 15 minutes
Cook Time: 30 minutes
Total Time: 45 minutes

  • 1 lb boneless, skinless chicken breast
  • 1 cup barbecue sauce
  • 1/2 cup shredded mozzarella cheese
  • 1/4 cup chopped green onions
  • 1/4 cup cooked and crumbled bacon
  1. Preheat the oven to 375°F.
  2. Season the chicken breast with salt and pepper, then grill or bake until fully cooked.
  3. Brush the cooked chicken with barbecue sauce, then top with mozzarella cheese, green onions, and bacon.
  4. Place the chicken back in the oven and bake for an additional 5-7 minutes, or until the cheese is melted and bubbly.
  5. Serve hot and enjoy this delicious and easy BBQ chicken dish!

“`