Irresistible German Chocolate Poke Cake Recipe for Sweet Tooth Lovers

“`html

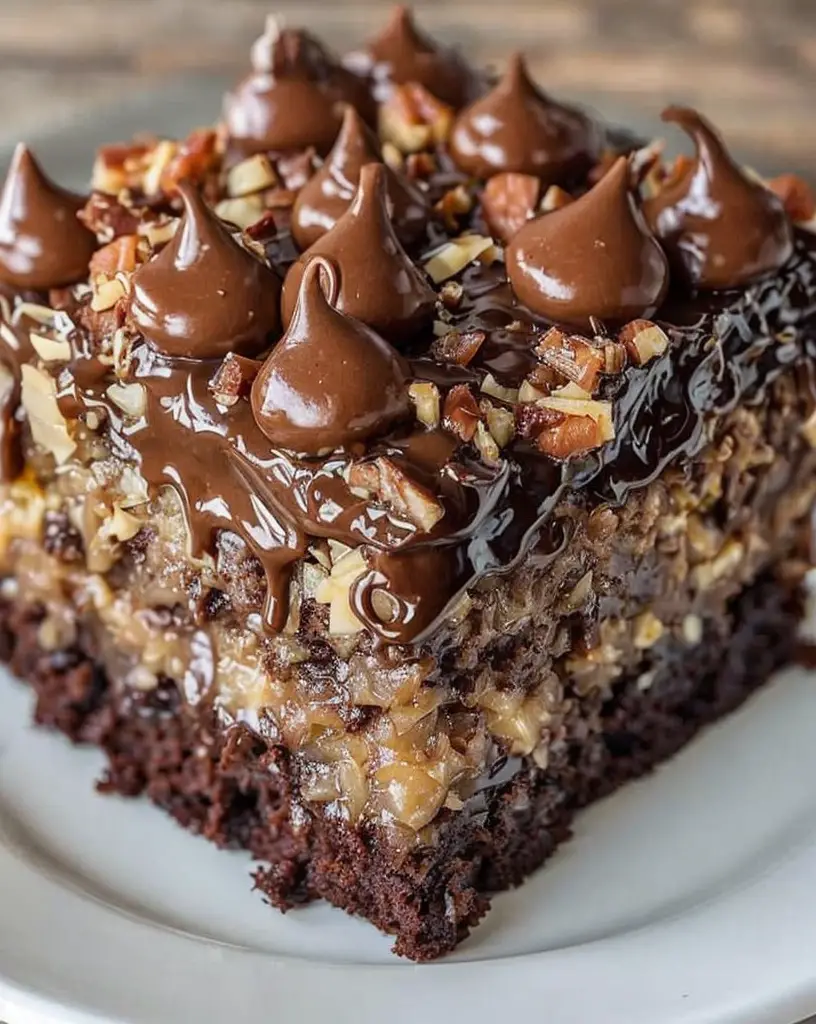
German Chocolate Poke Cake: A Decadent Dessert Experience

Indulge in the irresistible flavors of this German Chocolate Poke Cake, a treat that promises to leave your taste buds dancing with joy. Featuring a moist chocolate cake infused with an indulgent coconut-pecan filling, this cake brings the classic German chocolate cake to a whole new level with every bite.

Why You’ll Love This Recipe

This German Chocolate Poke Cake is a dessert lover’s dream, delivering a rich and luscious flavor profile that perfectly balances sweetness and texture. Its preparation makes it perfect for all skill levels, allowing you to wow at family gatherings, potlucks, or festive occasions. The gooey filling seeps into every bite, making it deliciously moist and flavorful.

The recipe is a wonderful twist on the traditional, offering a fun and accessible way to enjoy a beloved classic. The divine combination of chocolate, coconut, and pecans is sure to satisfy any craving, while the easy preparation process ensures it will become your go-to dessert for impressing guests effortlessly.

Context/Background

The German Chocolate Poke Cake is a modern take on the classic German chocolate cake, which actually hails not from Germany but from Texas in the United States. Created in the mid-19th century, the original recipe was named after an English-American named Samuel German, who developed a type of dark baking chocolate for the Baker’s Chocolate Company.

The poke cake variation involves “poking” holes into a baked cake and allowing a deliciously rich filling to seep throughout its layers. This innovative technique ensures maximum flavor penetration, making each slice a mouth-watering delight.

Recipe Details

Serves: 12
Prep Time: 20 minutes
Cook Time: 30 minutes
Total Time: 50 minutes

Ingredients

  • 1 box of chocolate cake mix
  • 1 cup shredded coconut
  • 1 cup chopped pecans
  • 1 can (14 ounces) sweetened condensed milk
  • 1 jar (12 ounces) caramel sauce
  • 1 tub (8 ounces) whipped topping, thawed
  • 1 cup German chocolate, finely grated

Directions

  1. Prepare the chocolate cake according to the package instructions. Once baked, allow it to cool slightly.
  2. Using the handle of a wooden spoon, poke holes across the surface of the cake at 1-inch intervals.
  3. In a bowl, combine the sweetened condensed milk and caramel sauce. Pour this mixture evenly over the cake, focusing on the holes.
  4. Sprinkle the shredded coconut and chopped pecans evenly across the top of the cake.
  5. Spread the thawed whipped topping over the coconut and pecans, creating a smooth, even layer.
  6. Finish with a generous sprinkle of grated German chocolate. Chill the cake for at least 2 hours before serving.

Tips for Perfect German Chocolate Poke Cake

  • Ensure the cake is warm when you pour the filling to help it absorb better.
  • Wait for the whipped topping to thaw completely for a smooth application.
  • Customize the sweetness by adjusting the amount of caramel sauce used.
  • For added decadence, toast the coconut and pecans beforehand.

Serving Suggestions

German Chocolate Poke Cake is perfect on its own but can also be paired with a scoop of vanilla ice cream. Serve it chilled directly from the fridge for a refreshing dessert on hot days.

Storage and Leftovers

Store the cake covered in the refrigerator for up to 3 days. If you need to store it longer, cut it into portions and freeze individual slices wrapped in plastic wrap and aluminum foil for up to a month.

Final Thoughts

This German Chocolate Poke Cake is more than just a dessert; it’s an experience that encapsulates sweet indulgence and happiness. Whether served at a dinner party or enjoyed as a personal treat, it’s a recipe you’ll want to revisit time and time again.

Recipe Notes

  • Substitute pecans with walnuts for a different nutty flavor.
  • Add a few drops of vanilla extract to the filling for an extra layer of flavor.
  • For a quicker version, use pre-shredded caramel coconut flakes available in grocery stores.

“`

Decadent Hot Fudge Brownie Bread: The Ultimate Chocolate Delight

“`html

Hot Fudge Brownie Bread Recipe: Ultimate Chocolate Treat

Indulge in the fudgy depths of chocolaty heaven with this Hot Fudge Brownie Bread Recipe. This ultimate chocolate treat is perfect for satisfying your sweet tooth, combining the moistness of a brownie with the comforting charm of bread. A must-have delight for chocolate lovers, it’s easy to make and even easier to devour!

Why You’ll Love This Recipe

This Hot Fudge Brownie Bread is a dream come true for any chocolate aficionado. Its rich, decadent flavor makes it the perfect dessert for a special occasion or when you simply crave something sweet and indulgent. The blend of warm chocolate and firm, cake-like bread creates a unique texture that will leave you reaching for another slice. Plus, it’s simple to prepare, allowing you more time to savor its luscious flavors.

Perfect for cozy gatherings or as a delightful homemade gift, this brownie bread is versatile and universally beloved. The recipe requires minimal effort, meaning you can whip this up any evening you are in need of a chocolate fix. It’s also a great base for experimenting with different mix-ins, such as nuts or chocolate chips, making it a customizable treat for every palate.

Context/Background

The Hot Fudge Brownie Bread brings together elements from both brownies and sweet breads, creating a delightful hybrid destined to captivate your taste buds. Brownies have been a staple American dessert since the late 19th century, evolving over time to include countless variations. This recipe takes the classic brownie a step further by incorporating a bread-like structure, resulting in a deliciously moist and tender loaf.

By utilizing traditional bread-making techniques combined with rich brownie ingredients, this recipe offers a unique twist on two beloved classics. The result is a comforting, chocolate-filled delicacy that’s ideal for enhancing any dessert spread.

Recipe Details

Serves: 8-10

Prep Time: 15 minutes

Cook Time: 45 minutes

Total Time: 1 hour

Ingredients

  • 1 cup all-purpose flour
  • 1/2 cup unsweetened cocoa powder
  • 1 cup sugar
  • 1/2 teaspoon baking powder
  • 1/4 teaspoon salt
  • 1/2 cup unsalted butter, melted
  • 2 large eggs
  • 1 teaspoon vanilla extract
  • 1/4 cup hot water
  • 1/2 cup hot fudge sauce

Directions

  1. Preheat your oven to 350°F (175°C) and grease a 9×5-inch loaf pan.
  2. In a large bowl, whisk together flour, cocoa powder, sugar, baking powder, and salt.
  3. In another bowl, combine melted butter, eggs, vanilla extract, and hot water. Mix well.
  4. Gradually add wet ingredients to the dry ingredients, stirring until just combined.
  5. Fold in the hot fudge sauce, ensuring a marbled effect in the batter.
  6. Pour the mixture into the prepared loaf pan, smoothing the top.
  7. Bake for 45 minutes or until a toothpick inserted in the center comes out clean.
  8. Let cool in the pan for about 10 minutes before transferring to a wire rack to cool completely.

Tips for Perfect Hot Fudge Brownie Bread

  • Ensure your hot fudge is slightly heated for easier integration into the batter.
  • Do not overmix the batter to maintain a light and airy texture.
  • Allow the bread to cool completely before slicing to avoid crumbling.
  • Experiment with mix-ins like chopped nuts or chocolate chips for added texture.

Serving Suggestions

Serve warm slices of Hot Fudge Brownie Bread with a scoop of vanilla ice cream or a dollop of whipped cream for a truly decadent dessert. For a special touch, drizzle additional hot fudge over the top.

Storage and Leftovers

Store leftover brownie bread in an airtight container at room temperature for up to three days. For longer storage, freeze slices wrapped individually in plastic wrap, and then placed in a resealable freezer bag for up to two months. Thaw at room temperature before serving.

Final Thoughts

This Hot Fudge Brownie Bread recipe is a deliciously rewarding way to satisfy your chocolate cravings. Its simple preparation and irresistible flavors make it a necessary addition to your baking repertoire. Whether you’re sharing it with loved ones or enjoying a slice solo, it guarantees a pleasurable experience with each bite.

Recipe Notes

  • Substitute chocolate syrup if hot fudge is unavailable, but adjust sweetness accordingly.
  • For a gluten-free version, use a 1:1 gluten-free flour blend.
  • Add a pinch of espresso powder to enhance the chocolate flavor.

“`

Irresistibly Delicious Luscious Country Apple Fritter Bread Recipe

“`html

Luscious Country Apple Fritter Bread: A Rural Delight You Can’t Resist

Welcome to the enchanting world of Luscious Country Apple Fritter Bread, a scrumptious treat that captures the essence of autumn in every bite. Bursting with the sweet and tangy flavors of fresh apples and hints of cinnamon, this bread is the perfect companion for cozy mornings or afternoons with a steaming cup of coffee.

Why You’ll Love This Recipe

This Luscious Country Apple Fritter Bread is a delightful fusion of classic apple fritters and moist bread, offering a texture that’s both soft and chewy. The caramelized apple chunks and the gentle spice from cinnamon will make your taste buds sing. It’s an ideal dessert for family gatherings, holiday baking, or simply transforming any day into a celebration.

Whether you’re an experienced baker or a beginner, this recipe’s simplicity and rich flavors will ensure it’s a favorite in your home. Its delightful aroma will fill your kitchen with the warmth and comforts of country living, reminding you of simpler times.

Context/Background

Our Luscious Country Apple Fritter Bread pays homage to the beloved apple fritter, a staple in many country kitchens around the world. This recipe takes inspiration from traditional baking methods passed down through generations, known for their straightforward techniques and reliance on wholesome ingredients. Embraced during autumn harvests, apple fritters are celebrated for their adaptability and comforting flavors.

Techniques like gentle folding and precise baking are crucial in achieving the tender crumb and mouthwatering crust that define this regional favorite.

Recipe Details

Serves: 8-10

Prep Time: 20 minutes

Cook Time: 50 minutes

Total Time: 1 hour 10 minutes

Ingredients

  • 2 cups all-purpose flour
  • 1/3 cup granulated sugar
  • 1/4 cup packed brown sugar
  • 1 tablespoon baking powder
  • 1 teaspoon ground cinnamon
  • 1/2 teaspoon salt
  • 1/2 cup milk
  • 1/4 cup unsalted butter, melted
  • 2 teaspoons vanilla extract
  • 1 large egg
  • 2 cups diced apples (Granny Smith or Honeycrisp)

Directions

  1. Preheat your oven to 350°F (175°C) and grease a 9×5-inch loaf pan.
  2. In a large bowl, whisk together flour, granulated sugar, brown sugar, baking powder, cinnamon, and salt.
  3. In a separate bowl, mix milk, melted butter, vanilla extract, and egg.
  4. Gently fold the wet ingredients into the dry ingredients until just combined.
  5. Fold in the diced apples.
  6. Pour the batter into the prepared loaf pan and smooth the top.
  7. Bake for about 50 minutes, or until a toothpick inserted in the center comes out clean.
  8. Let cool in the pan for about 10 minutes before transferring to a wire rack to cool completely.

Tips for Perfect Luscious Country Apple Fritter Bread

  • For a crunchy top, sprinkle a little sugar before baking.
  • Ensure apples are evenly diced for uniform baking.
  • Do not overmix the batter to prevent a dense texture.
  • Use fresh, tart apples for the best flavor.

Serving Suggestions

Serve this delicious bread slightly warm with a dollop of butter or cream cheese. It pairs wonderfully with a hot cup of tea or coffee, making it an ideal breakfast or dessert option.

Storage and Leftovers

Store your apple fritter bread in an airtight container at room temperature for up to 3 days. For longer storage, wrap in plastic wrap and refrigerate for up to a week. It freezes well too; just thaw it out at room temperature before serving.

Final Thoughts

If you’re searching for a delightful recipe that effortlessly marries warm spices and fresh apples, the Luscious Country Apple Fritter Bread is a must-try. Its comforting taste and aroma promise a delightful culinary experience that leaves you longing for more.

Recipe Notes

  • Feel free to add a handful of chopped nuts for added texture.
  • For a sugary glaze, mix powdered sugar with a drizzle of milk and pour over cooled bread.
  • You can substitute whole wheat flour for a portion of the all-purpose flour for a healthier version.

“`

Indulgent Cheesecake Stuffed Baked Apples: A Perfect Fall Dessert

“`html

Cheesecake Stuffed Baked Apples: A Delicious Dessert Delight

Creamy, sweet, and irresistibly delicious, Cheesecake Stuffed Baked Apples are the perfect dessert to impress your guests. This delightful treat combines the tartness of baked apples with the creamy goodness of cheesecake, creating a dish that is both comforting and indulgent. Whether you’re a cheesecake lover or simply looking for a unique dessert to try, this recipe is sure to satisfy your cravings.

Why You’ll Love This Recipe

These Cheesecake Stuffed Baked Apples are a delightful fusion of flavors and textures. The warm, tender apples create a perfect vessel for the rich, creamy cheesecake filling. This treat not only looks stunning but tastes incredible, making it an ideal choice for special occasions or cozy family gatherings.

Besides their irresistible taste, these baked apples offer a healthier alternative to traditional cheesecake by incorporating fresh fruit into the mix. It’s a dessert that feels indulgent without being overly heavy, providing the perfect balance of sweetness and creaminess.

Context/Background

The concept of stuffed baked apples hails from traditional American and European recipes, where various fillings are used to elevate the humble baked apple. Marrying this technique with the popular New York-style cheesecake brings a modern twist to a classic dessert. It’s a brilliant way to enjoy the flavors of cheesecake with a touch of nostalgia.

Recipe Details

Serves: 4

Prep Time: 15 minutes

Cook Time: 30 minutes

Total Time: 45 minutes

Ingredients

  • 4 large apples (such as Honeycrisp or Fuji)
  • 8 oz cream cheese, softened
  • 1/4 cup granulated sugar
  • 1 tsp vanilla extract
  • 1/2 tsp ground cinnamon
  • 1/4 cup crushed graham crackers
  • 2 tbsp melted butter
  • A pinch of salt

Directions

  1. Preheat your oven to 350°F (175°C).
  2. Core the apples, making sure to leave the bottom intact to hold the filling.
  3. In a bowl, mix cream cheese, sugar, vanilla extract, and a pinch of salt until smooth.
  4. Fill each apple with the cheesecake mixture.
  5. In a separate bowl, mix crushed graham crackers, cinnamon, and melted butter until combined.
  6. Sprinkle the graham cracker topping over the filled apples.
  7. Place the apples in a baking dish and bake for 30 minutes or until the apples are tender.

Tips for Perfect Cheesecake Stuffed Baked Apples

  • Select firm, large apples to hold the filling better.
  • Ensure the cream cheese is softened for a smooth filling.
  • Monitor the baking time to prevent the apples from becoming too mushy.
  • Experiment with different apple varieties for flavor variations.

Serving Suggestions

Serve the Cheesecake Stuffed Baked Apples warm, garnished with a drizzle of caramel sauce or a sprinkle of cinnamon. Pair with vanilla ice cream for an extra decadent touch.

Storage and Leftovers

Store any leftover baked apples in an airtight container in the refrigerator for up to 3 days. Reheat gently in the oven or microwave before serving.

Final Thoughts

Cheesecake Stuffed Baked Apples offer a delightful twist on traditional desserts, blending familiar flavors with a touch of innovation. This recipe is a must-try for cheesecake enthusiasts and apple lovers alike. Give it a try and enjoy a dessert that’s as pleasing to the eye as it is to the palate.

Recipe Notes

  • For a nutty twist, add chopped nuts to the graham cracker topping.
  • Substitute brown sugar for granulated sugar for a deeper flavor.
  • Consider using flavored cream cheese for a unique twist.

“`

Indulge in Irresistible Mini Chocolate Peanut Butter Pies Recipe

“`html

Irresistible Mini Chocolate Peanut Butter Pies: A Delightful Bite-Sized Treat

Indulge in the decadent world of these irresistible mini chocolate peanut butter pies, a dessert that brings together the beloved combination of chocolate and peanut butter in a bite-sized, blissful experience. Perfect for satisfying sweet cravings, these delightful pies are rich in flavor and easy to make, making them a must-try recipe for dessert lovers.

Why You’ll Love This Recipe

These mini chocolate peanut butter pies are an absolute crowd-pleaser, offering a harmonious blend of silky chocolate and creamy peanut butter encased in a buttery graham cracker crust. Perfect for parties, gatherings, or simply enjoying at home, their bite-sized nature makes them both fun and convenient to eat. Moreover, these pies can be made ahead of time, allowing hosts to focus on enjoying the company of their guests.

The recipe caters to various taste preferences with its adaptable nature, ensuring that whether you’re a chocolate enthusiast, peanut butter lover, or both, you will find these mini pies truly irresistible. Plus, the recipe is simple enough for novice bakers while still producing results that impress even the most discerning palates.

Context/Background

The divine pairing of chocolate and peanut butter has been a beloved combination for decades, celebrated in everything from candy bars to decadent desserts. These mini chocolate peanut butter pies draw inspiration from classic American baking traditions, where the fusion of these two ingredients creates a perfect harmony of sweet and salty flavors. The mini format adds a modern twist, enhancing their visual appeal and ease of serving.

Recipe Details

Serves: 12

Prep Time: 20 minutes

Cook Time: 15 minutes

Total Time: 35 minutes

Ingredients

  • 1 cup graham cracker crumbs
  • 1/4 cup melted butter
  • 2 tablespoons granulated sugar
  • 1 cup smooth peanut butter
  • 1/2 cup powdered sugar
  • 1 teaspoon vanilla extract
  • 1 cup heavy cream
  • 1 cup dark chocolate chips
  • 1 tablespoon vegetable oil

Directions

  1. Preheat your oven to 350°F (175°C). In a bowl, combine graham cracker crumbs, melted butter, and granulated sugar. Mix well until crumbly.
  2. Press the crumb mixture into mini pie molds or a muffin tin, creating a firm base. Bake for 10 minutes, then remove and cool.
  3. In another bowl, blend peanut butter, powdered sugar, and vanilla extract until smooth and creamy.
  4. Divide the peanut butter mixture evenly into each cooled pie crust.
  5. In a saucepan, heat heavy cream until it just begins to simmer. Remove from heat and pour over chocolate chips. Add vegetable oil and stir until the chocolate melts completely.
  6. Pour the chocolate over the peanut butter layer and let the pies cool at room temperature, then refrigerate until set.

Tips for Perfect Mini Chocolate Peanut Butter Pies

  • Ensure the graham cracker base is tightly packed to prevent crumbling.
  • Use high-quality chocolate for a richer taste.
  • Allow the pies to cool completely before serving for the best texture.
  • Experiment with adding a pinch of sea salt on top for an added flavor dimension.

Serving Suggestions

Serve these mini chocolate peanut butter pies chilled, as they make a refreshing contrast to the rich flavors. They pair beautifully with a scoop of vanilla ice cream or a dollop of whipped cream.

Storage and Leftovers

Store any leftovers in an airtight container in the refrigerator for up to five days. For longer storage, these pies can also be frozen for up to two months – just thaw in the refrigerator before serving.

Final Thoughts

Embrace the blissful indulgence of these irresistible mini chocolate peanut butter pies, a treat that’s not only easy to make but also offers a perfect balance of flavors. Whether you’re hosting a party or simply looking for a delightful dessert, these pies are sure to be a hit and leave everyone wanting more.

Recipe Notes

  • For a firmer pie, consider using more butter in the graham cracker crust.
  • Swap the dark chocolate with milk chocolate if you prefer a sweeter taste.
  • Add chopped roasted peanuts for an extra crunch in the filling.

“`

Indulge in Decadent Sparkling Pumpkin Spice Chocolate Truffles Today

“`html

Sparkling Pumpkin Spice Chocolate Truffles: A Festive Delight

Indulge your senses and bring some sparkle into your holiday season with these Sparkling Pumpkin Spice Chocolate Truffles. This delightful treat combines the warm and cozy flavors of pumpkin spice with the rich decadence of chocolate, offering a perfect festive treat that’s both indulgent and comforting.

Why You’ll Love This Recipe

These Sparkling Pumpkin Spice Chocolate Truffles are not only a feast for the taste buds but also a treat for the eyes. The shimmering coating adds a touch of elegance, making them ideal for holiday gatherings, dinner parties, or as a thoughtful homemade gift. Plus, the fusion of pumpkin spice and chocolate creates a harmonious flavor profile that’s hard to resist.

The truffles are incredibly easy to make and require just a few ingredients. This makes them a great choice for last-minute dessert preparations or for when you want to impress guests with minimal effort. Additionally, they are rich and satisfying, ensuring a little goes a long way.

Context/Background

The concept of truffles finds its roots in European confectionary, traditionally made with chocolate and cream to form rich, bite-sized delicacies. The addition of pumpkin spice is a nod to the autumn season, capturing the essence of cozy fall days in a single bite. The sparkle is an innovative twist, adding festivity and a modern touch to a classic treat.

Technique-wise, these truffles highlight the art of balancing flavors and textures. Mixing warm spices with rich chocolate, then finishing with a sparkling coating, creates a multi-sensory experience that’s both delightful and memorable.

Recipe Details

Serves: 24

Prep Time: 20 minutes

Cook Time: 10 minutes

Total Time: 30 minutes

Ingredients

  • 1 cup heavy cream
  • 8 oz dark chocolate, chopped
  • 2 tbsp pumpkin spice mix
  • 1 tsp vanilla extract
  • 1/4 tsp salt
  • Edible glitter or sparkling sugar, for coating

Directions

  1. Heat the heavy cream in a small saucepan over low heat until just beginning to simmer.
  2. Remove from heat, and add the chopped dark chocolate. Let sit for 2 minutes, then whisk until smooth.
  3. Stir in the pumpkin spice mix, vanilla extract, and salt until fully incorporated.
  4. Transfer the mixture to a bowl and refrigerate for at least an hour until firm but scoopable.
  5. Using a small scoop or spoon, form balls from the mixture and roll them between your palms to smooth.
  6. Roll each truffle in edible glitter or sparkling sugar to coat evenly.
  7. Store in the refrigerator until ready to serve.

Tips for Perfect Sparkling Pumpkin Spice Chocolate Truffles

  • Use high-quality chocolate for the best flavor and texture.
  • Ensure the cream is hot enough to melt the chocolate completely for a smooth ganache.
  • Refrigerate the mixture until it is firm enough to handle but not too hard.
  • For a different sparkle effect, try mixing different colors of edible glitter.

Serving Suggestions

Serve these truffles on a decorative platter as a dessert centerpiece, or include them in a holiday cookie tray. They also pair beautifully with a glass of red wine or hot cocoa.

Storage and Leftovers

Store the truffles in an airtight container in the refrigerator for up to two weeks. They can be frozen, though the sparkling coating may lose its luster over time. To freeze, place truffles on a parchment-lined tray and freeze until solid before transferring to a freezer-safe bag or container.

Final Thoughts

Whether you’re celebrating a special occasion or simply treating yourself, these Sparkling Pumpkin Spice Chocolate Truffles are sure to impress with their elegant appearance and scrumptious taste. Easy to make and delightfully indulgent, they are a must-try for any chocolate lover.

Recipe Notes

  • If you prefer a softer truffle center, reduce the chilling time slightly.
  • Feel free to customize the spice mix to your preference by altering the pumpkin spice ratios or adding a dash of nutmeg or cardamom.
  • For a dairy-free version, use coconut cream and dairy-free chocolate in place of cream and chocolate.

“`

Decadent Chocolate Maraschino Cherry Coconut Truffles Recipe for Sweet Indulgence

“`html

Chocolate Maraschino Cherry Coconut Truffles: A Decadent Delight

Indulge your sweet tooth with our Chocolate Maraschino Cherry Coconut Truffles. These bite-sized treats are a blend of rich chocolate, sweet cherries, and coconut, creating an irresistible flavor combination that will captivate your taste buds. Perfect for a luxurious dessert or festive gift, these truffles are as visually stunning as they are delicious.

Why You’ll Love This Recipe

The Chocolate Maraschino Cherry Coconut Truffles are more than just truffles; they’re a delightful experience. Their unique combination of flavors is perfect for any occasion, from holiday gatherings to an everyday indulgence. The contrast of bittersweet chocolate with the sweetness of maraschino cherries and the tropical touch of coconut makes them truly special.

This no-bake recipe saves time and effort while delivering gourmet-level satisfaction. With their elegant presentation, these truffles double as a beautiful handmade gift, impressing friends and family alike.

Context/Background

Truffles have long been a staple of fine chocolate-making, believed to have originated in France during the 1920s. This recipe adds a modern twist by incorporating maraschino cherries and coconut, blending traditional flavors with contemporary tastes. The process of making truffles has been simplified over the years, allowing home cooks to create these pleasure-filled confections with ease.

Recipe Details

Serves: 24 truffles
Prep Time: 20 minutes
Cook Time: No cooking required
Total Time: 60 minutes (includes chilling time)

Ingredients

  • 1 cup bittersweet chocolate chips
  • 1/2 cup heavy cream
  • 1/4 cup maraschino cherries, chopped
  • 1 cup shredded coconut
  • 1 tablespoon unsalted butter
  • 1 teaspoon vanilla extract
  • Pinch of salt

Directions

  1. In a small saucepan, heat the heavy cream until it just begins to simmer. Remove from heat and add the chocolate chips, stirring until melted and smooth.
  2. Stir in the butter, vanilla extract, and salt until fully combined.
  3. Fold in the chopped maraschino cherries and half of the shredded coconut.
  4. Refrigerate the mixture for about 30 minutes or until firm enough to handle.
  5. Using a small spoon, scoop out the mixture and roll into 1-inch balls.
  6. Roll each truffle in the remaining shredded coconut to coat.
  7. Place the truffles on a baking sheet lined with parchment paper and refrigerate until set, about 30 minutes.

Tips for Perfect Chocolate Maraschino Cherry Coconut Truffles

  • Ensure the chocolate mixture is firm yet workable by chilling it for the full time recommended.
  • If the mixture becomes too hard, allow it to sit at room temperature until it softens slightly.
  • Use high-quality chocolate for the best taste and texture.
  • Make sure the maraschino cherries are well-drained to avoid excess moisture.

Serving Suggestions

Serve your Chocolate Maraschino Cherry Coconut Truffles at room temperature alongside a cup of espresso or as part of a dessert platter. They pair wonderfully with a glass of port or a sparkling wine for a sophisticated touch.

Storage and Leftovers

Store truffles in an airtight container in the refrigerator for up to two weeks. For longer storage, freeze in a single layer on a baking sheet, then transfer to a sealed container for up to three months. Thaw in the refrigerator before serving.

Final Thoughts

Create a luxurious treat with these Chocolate Maraschino Cherry Coconut Truffles. Whether you make them for yourself or as a gift, their delightful taste and easy preparation make them a must-try. Enjoy the pleasure of making and sharing this irresistible chocolate indulgence.

Recipe Notes

  • Substitute dried cherries for maraschino cherries for a less sweet variation.
  • For an added crunch, include chopped nuts in the truffle mixture.
  • Experiment with different types of chocolate, such as milk or white, for varied flavor profiles.

“`

Irresistible No Bake Caramel Crunch Butterfinger Truffles Recipe

“`html

No Bake Caramel Crunch Butterfinger Truffles Recipe: Sweet Indulgence Meets Simplicity

Delight your taste buds with our No Bake Caramel Crunch Butterfinger Truffles Recipe, a heavenly dessert that’s quick, simple, and bursting with rich flavors. These truffles offer the perfect balance of creamy caramel, crunchy Butterfinger, and smooth chocolate, making them an irresistible treat for any sweet tooth.

Why You’ll Love This Recipe

This No Bake Caramel Crunch Butterfinger Truffles Recipe is a game-changer for dessert lovers. Not only does it capture the delightful caramel and peanut butter flavors of Butterfinger in a luxurious truffle form, but it also requires no baking, making it quick and convenient. Perfect for parties, holiday gatherings, or a midnight snack, these truffles are as versatile as they are delicious. Additionally, their bite-sized nature makes them an elegant addition to any dessert platter, effortlessly impressing guests.

Context/Background

Truffles, traditionally a confectionery from European chocolatiers, are often made with rich chocolate bases and assorted fillings. This no bake variation embraces the convenience and simplicity of modern culinary trends by incorporating popular candy components like Butterfinger, which adds a unique twist to the conventional truffle. This creative treat highlights the beloved combination of chocolate and peanut butter, celebrated worldwide for its irresistible allure.

Recipe Details

Serves: 12

Prep Time: 15 minutes

Cook Time: 0 minutes

Total Time: 15 minutes

Ingredients

  • 1 cup of crushed Butterfinger bars
  • 8 oz of cream cheese, softened
  • 1/2 cup of powdered sugar
  • 1 tsp of vanilla extract
  • 1/2 cup of caramel sauce
  • 1 cup of semi-sweet chocolate chips, melted

Directions

  1. In a mixing bowl, beat the cream cheese, powdered sugar, and vanilla extract until smooth and creamy.
  2. Stir in the caramel sauce and approximately 3/4 cup of the crushed Butterfinger bars, saving the rest for garnishing.
  3. Chill the mixture for about 30 minutes or until firm enough to handle.
  4. Once chilled, scoop out small portions and roll them into balls using your hands.
  5. Dip each ball into the melted chocolate, ensuring it is evenly coated.
  6. Place the truffles on parchment paper to set, and sprinkle the reserved crushed Butterfinger on top before the chocolate hardens.
  7. Refrigerate the truffles for about 15 minutes or until the chocolate coating is firm.

Tips for Perfect No Bake Caramel Crunch Butterfinger Truffles

  • Ensure the cream cheese is fully softened for a smooth truffle mixture.
  • For a firmer texture, add more powdered sugar to the mixture.
  • Use a fork to dip and roll the truffles in chocolate for even coverage.
  • Experiment with white chocolate for a unique twist on flavor and appearance.

Serving Suggestions

Serve these truffles chilled alongside a hot cup of coffee or a glass of milk for a delightful contrast. They also pair well with fresh strawberries for added freshness.

Storage and Leftovers

Store the truffles in an airtight container in the refrigerator for up to one week. For longer storage, freeze them and thaw before serving.

Final Thoughts

Our No Bake Caramel Crunch Butterfinger Truffles Recipe is a must-try for anyone who enjoys a combination of creamy caramel and crispy candy bars encased in decadent chocolate. Easy to make and utterly delicious, these truffles are sure to become a favorite treat in your household.

Recipe Notes

  • For a nut-free version, substitute another candy bar for Butterfinger.
  • Consider adding a sprinkle of sea salt on top for a sweet-and-salty contrast.

“`

Irresistible Maraschino Cherry Chocolate Chip Cookies Recipe for Sweet Lovers

“`html

Maraschino Cherry Chocolate Chip Cookies: A Deliciously Decadent Treat

Indulge in the delightful world of Maraschino Cherry Chocolate Chip Cookies—a deliciously decadent treat that combines the tangy sweetness of maraschino cherries with the rich, creamy goodness of chocolate chips. Perfect for holiday baking or as a sweet snack, these cookies offer a unique twist on the classic chocolate chip cookie, bringing bursts of cherry flavor in every bite.

Why You’ll Love This Recipe

Maraschino Cherry Chocolate Chip Cookies are a delightful fusion of sweet and tart that will become a favorite in your baking repertoire. With a slightly chewy texture and the surprise pop of cherries, these cookies are perfect for those who love combining fruit and chocolate. They’re also a hit at parties, potlucks, and as homemade gifts, bringing joy and a dash of nostalgia with every bite.

The vibrant red cherries add a colorful burst to your dessert table, making them just as visually appealing as they are delicious. Plus, the recipe is straightforward, making it accessible even for novice bakers. Enjoy these cookies with a glass of milk or as an after-dinner treat, and watch them disappear!

Context/Background

While the origins of chocolate chip cookies date back to the 1930s, the addition of maraschino cherries brings a modern twist to this classic treat. Maraschino cherries gained popularity in the 19th century, and their inclusion in desserts offers a nod to retro baking styles. The combination of cherries and chocolate is a beloved pairing, reminiscent of Black Forest cake and other classic desserts, ensuring these cookies are both familiar and intriguing.

Recipe Details

Serves: 24 Cookies

Prep Time: 15 minutes

Cook Time: 10 minutes

Total Time: 25 minutes

Ingredients

  • 1 cup unsalted butter, softened
  • 1 cup brown sugar, packed
  • 1/2 cup granulated sugar
  • 2 large eggs
  • 1 teaspoon vanilla extract
  • 3 cups all-purpose flour
  • 1 teaspoon baking soda
  • 1/2 teaspoon salt
  • 1 and 1/2 cups semi-sweet chocolate chips
  • 3/4 cup maraschino cherries, drained and chopped

Directions

  1. Preheat your oven to 350°F (175°C) and line a baking sheet with parchment paper.
  2. In a large mixing bowl, cream together the softened butter, brown sugar, and granulated sugar until smooth and creamy.
  3. Add the eggs one at a time, mixing well after each addition. Stir in the vanilla extract.
  4. In a separate bowl, whisk together the flour, baking soda, and salt. Gradually add to the wet ingredients, mixing until just combined.
  5. Fold in the chocolate chips and maraschino cherries until evenly distributed.
  6. Drop rounded tablespoons of dough onto the prepared baking sheet, spacing them about 2 inches apart.
  7. Bake for 8-10 minutes, or until the edges are lightly golden. Allow the cookies to cool on the baking sheet for 5 minutes before transferring to a wire rack to cool completely.

Tips for Perfect Maraschino Cherry Chocolate Chip Cookies

  • Ensure your butter is softened, not melted, for the best cookie texture.
  • Chop the maraschino cherries finely to ensure even distribution and prevent oversaturation of the dough.
  • For chewier cookies, slightly underbake them and let them finish cooking on the baking sheet.
  • Use quality chocolate chips for the richest flavor.

Serving Suggestions

Serve these Maraschino Cherry Chocolate Chip Cookies warm with a scoop of vanilla ice cream for a delightful dessert. They also pair beautifully with a cup of coffee or hot chocolate for a cozy afternoon treat.

Storage and Leftovers

Store any leftover cookies in an airtight container at room temperature for up to 5 days. To keep them fresh, place a small piece of bread in the container to maintain moisture. You can also freeze the cookie dough for up to 3 months—just thaw before baking.

Final Thoughts

Maraschino Cherry Chocolate Chip Cookies are an indulgent treat that combines beloved flavors in a delightful way. Whether you’re a fan of classic chocolate chip cookies or looking for a unique homemade gift, these cookies are sure to impress. Enjoy the process of baking these delicious cookies and sharing them with your loved ones!

Recipe Notes

  • For a gluten-free version, substitute all-purpose flour with a 1:1 gluten-free baking flour.
  • Try adding chopped nuts such as pecans or walnuts for extra texture.
  • If you prefer, substitute semi-sweet chocolate chips with white or dark chocolate chips for varied flavor profiles.

“`

Delicious Maple Pecan Rosemary Acorn Squash Recipe for Fall

“`html

Maple Pecan Rosemary Acorn Squash Recipe 🍁🌿 | Easy Fall Dish 🎃

Welcome the cozy flavors of autumn into your kitchen with this Maple Pecan Rosemary Acorn Squash Recipe. Perfect as a delightful side dish or a centerpiece for your fall gatherings, this easy fall dish combines the sweet and savory notes of maple syrup, pecans, and rosemary with the rich and nutty acorn squash. It’s a seasonal treat that captures the essence of autumn in every bite.

Why You’ll Love This Recipe

This Maple Pecan Rosemary Acorn Squash recipe is a harmonious blend of sweet and savory flavors, creating a deliciously complex taste that pairs perfectly with any fall meal. You’ll love how the natural sweetness of maple syrup enhances the nutty flavors of pecans and the herby notes of rosemary, while the acorn squash serves as the perfect canvas for these flavors to shine.

It’s not only delicious but also visually appealing, making it a great choice for special occasions like Thanksgiving or cozy family dinners. The best part? It’s easy to make and requires minimal ingredients, making it the ideal dish for both novice cooks and seasoned home chefs.

Context/Background

Acorn squash, a staple in autumn cuisine, has been cherished for its versatility and nutrient-rich profile. Its neutral flavor acts as a perfect base for various seasonings. The pairing of maple and pecans has its roots in the traditional North American palate, where maple syrup is a beloved autumn treat, and pecans add a crunchy texture to complement the squash.

The addition of rosemary is a modern twist that brings an unexpected yet delightful herbal note, elevating the entire dish with aromatic undertones. This combination of ingredients not only highlights fall flavors but also adds a sophisticated touch to the humble acorn squash.

Recipe Details

Serves: 4-6

Prep Time: 15 minutes

Cook Time: 45 minutes

Total Time: 1 hour

Ingredients

  • 2 medium acorn squash
  • 1/4 cup pure maple syrup
  • 1/2 cup chopped pecans
  • 2 tablespoons melted butter
  • 1 tablespoon fresh rosemary, chopped
  • Salt and pepper to taste

Directions

  1. Preheat your oven to 375°F (190°C).
  2. Cut the acorn squash in half lengthwise and scoop out the seeds.
  3. Place the squash halves cut-side up on a baking sheet.
  4. In a small bowl, mix the maple syrup, melted butter, chopped rosemary, salt, and pepper.
  5. Brush the maple mixture generously over the squash halves.
  6. Sprinkle the chopped pecans evenly over the squash.
  7. Bake in the preheated oven for about 45 minutes, or until the squash is tender and golden brown.
  8. Remove from oven and let cool slightly before serving.

Tips for Perfect Maple Pecan Rosemary Acorn Squash

  • Choose acorn squash that have smooth, dark green skin for the best flavor and texture.
  • For an extra caramelized finish, broil the squash for the last 5 minutes of baking.
  • Adjust the amount of maple syrup and rosemary according to your taste preference.
  • Use unsalted butter to better control the seasoning of the dish.

Serving Suggestions

This Maple Pecan Rosemary Acorn Squash pairs beautifully with roasted meats such as turkey or chicken, making it a fantastic side dish for a Thanksgiving feast. It can also be a standalone vegetarian option with a salad or some crusty bread.

Storage and Leftovers

Store leftovers in an airtight container in the refrigerator for up to 3 days. To reheat, place in the oven at 350°F until warmed through, or use a microwave on medium power.

Final Thoughts

This Maple Pecan Rosemary Acorn Squash is a must-try for anyone looking to embrace the flavors of fall. Its sweet and savory notes, combined with the ease of preparation, make it a recipe worth adding to your autumn repertoire. Gather your loved ones and share this delightful and comforting dish that perfectly complements the season.

Recipe Notes

  • You can substitute almonds or walnuts for pecans if preferred.
  • For a vegan version, replace butter with coconut oil or a plant-based alternative.
  • Add a sprinkle of cinnamon for an extra warm spice.

“`