“`html
Table of Contents
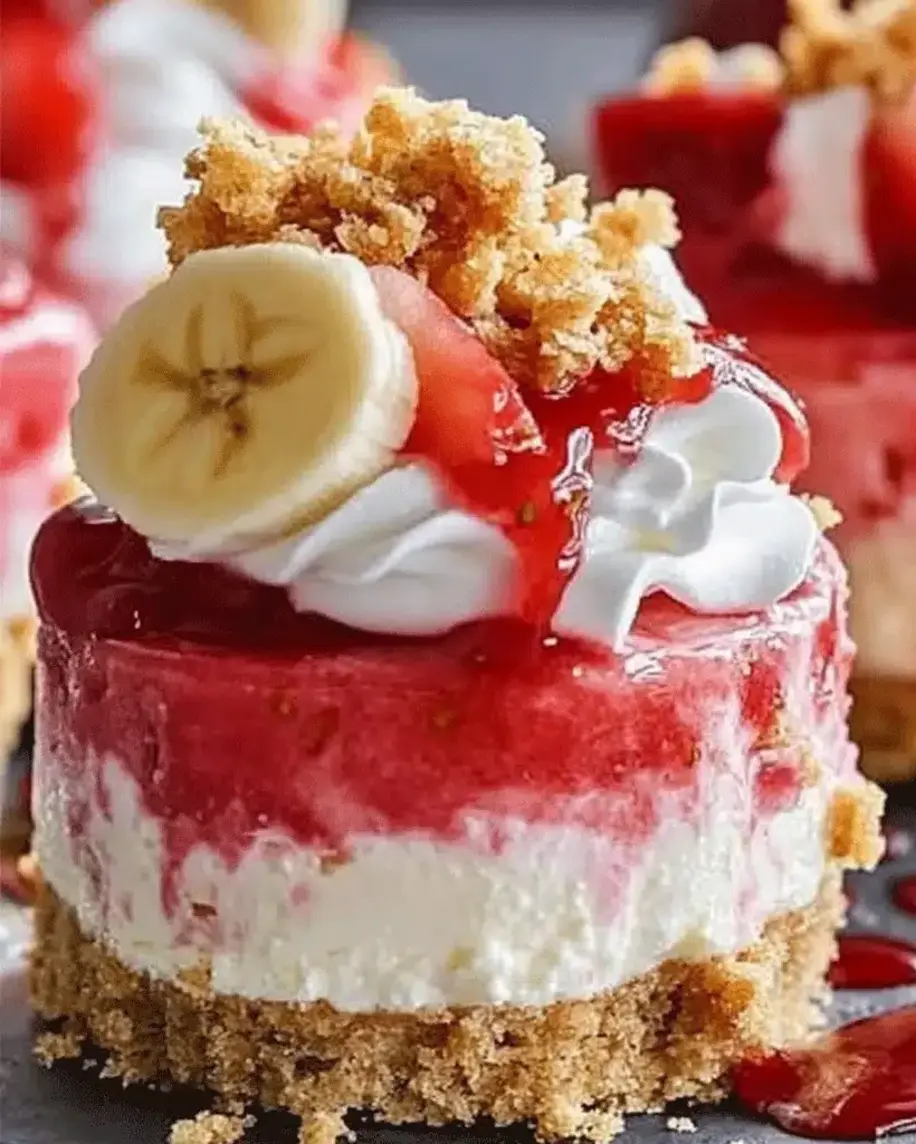
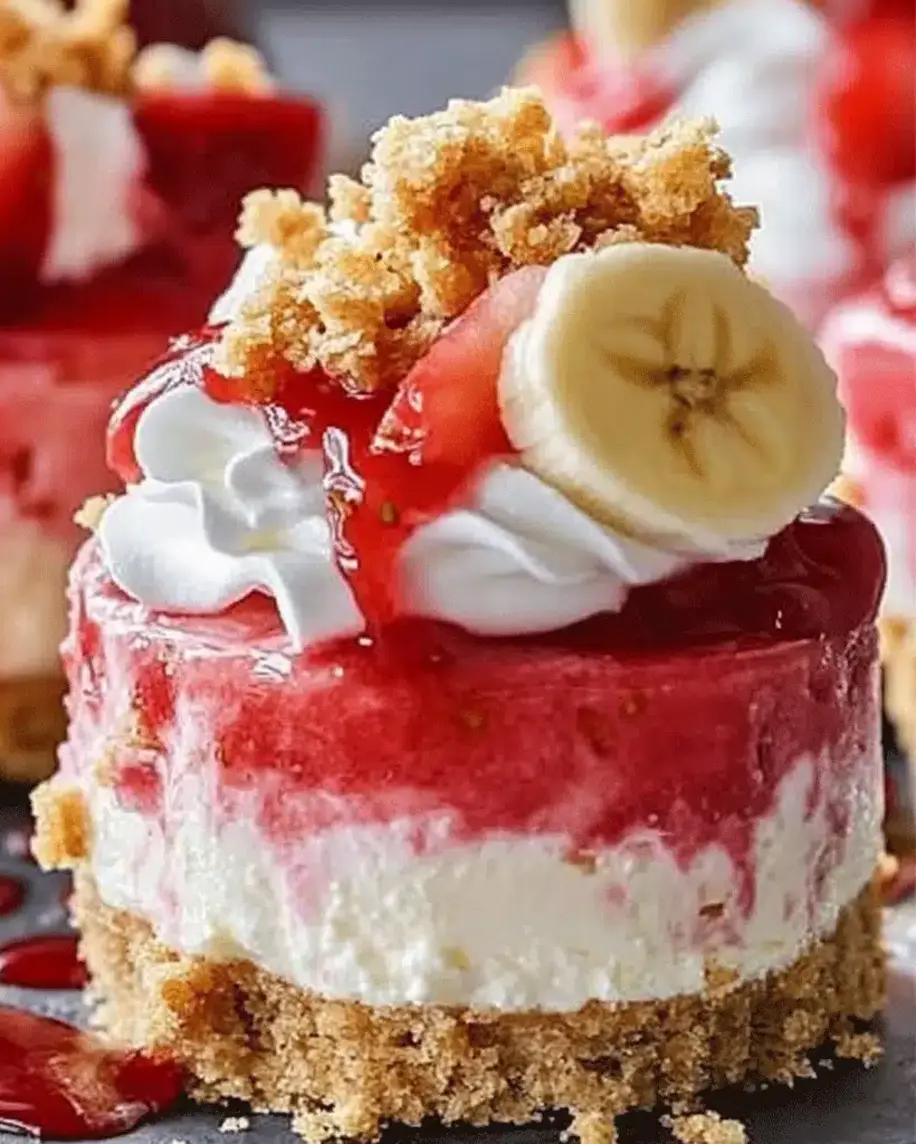
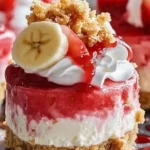
Easy No-Bake Mini Strawberry Banana Cheesecakes! 🥄
Craving a dessert that’s both decadent and delightfully easy?
Hello dessert lovers! Are you ready to indulge in a delightful, no-bake treat that’s perfect for any occasion? Our No-Bake Mini Strawberry Banana Pudding Crunch Cheesecakes are the perfect combination of fruity freshness and creamy sweetness, making them a must-try dessert for strawberry and banana fans alike. Plus, they’re super easy to whip up, so whether you’re prepping for a family dinner or a weekend treat, this recipe will surely delight!
In today’s fast-paced world, finding time for elaborate desserts can be a challenge. Many of us scroll through social media, dreaming of those perfectly crafted desserts, but the thought of intricate baking processes often leaves us disheartened. What if we told you that you could achieve a gourmet-level dessert experience with minimal effort and no oven required? These mini cheesecakes are designed to be your weeknight saviors and weekend showstoppers, offering a burst of flavor that’s both comforting and refreshing.
The magic of this recipe lies in its simplicity and the harmonious blend of classic dessert elements. The creamy cheesecake filling, the sweet and slightly tart strawberries, the mellow sweetness of bananas, and the delightful crunch of the biscuit base – it all comes together to create a symphony of textures and tastes. This is more than just a dessert; it’s an experience designed to bring joy and a touch of sweetness to your day, without the stress of baking.
Ingredients You’ll Need
Gather these simple ingredients, and you’ll be well on your way to dessert bliss. Substitutions are noted because we believe in making recipes work for everyone!
For the Crunchy Base:
- 1 ½ cups graham cracker crumbs (or digestive biscuits, finely crushed – for a slightly sweeter crunch)
- 6 tablespoons unsalted butter, melted (or coconut oil for a dairy-free option)
- 2 tablespoons granulated sugar (optional, if your biscuits are unsweetened)
For the Creamy Cheesecake Filling:
- 16 ounces cream cheese, softened to room temperature (ensure it’s truly soft for a smooth texture)
- ½ cup powdered sugar, sifted (sifting prevents lumps and ensures a silky smooth filling)
- 1 teaspoon vanilla extract (pure vanilla extract provides the best, most complex flavor)
- ½ cup heavy whipping cream, cold (for lightness; can substitute with evaporated milk for a richer, condensed milk-like texture)
For the Fruity Topping:
- 1 cup fresh strawberries, hulled and sliced (about 4-5 ounces, for that vibrant burst of red and tangy sweetness)
- 1 ripe banana, sliced (choose one that’s firm but ripe for a natural sweetness that complements the cheesecake)
- Optional: A sprinkle of brown sugar or a drizzle of honey for extra sweetness
Timing is Everything
One of the best things about this No-Bake Mini Strawberry Banana Cheesecake recipe is how quickly it comes together. No oven means no waiting for preheating or baking cycles!
Compared to traditional baked cheesecakes that can take hours of baking and cooling, this no-bake version is a breeze. Most baked cheesecakes require at least 1 hour of baking time, followed by several hours of cooling in the oven and then refrigeration. Our 20-minute active prep time means you can have these ready to chill with minimal fuss, making it a perfect last-minute dessert solution.
Step-by-Step Instructions
Let’s get started on creating these delightful little treats. Remember, patience during the chilling phase is key to a perfectly set cheesecake!
Step 1: Prepare the Crust
First, let’s get that fantastic crunchy base ready. In a medium bowl, combine your graham cracker crumbs (or crushed biscuits), melted butter, and sugar (if using). Stir until everything is evenly moistened, resembling wet sand. This is the foundation of our mini cheesecakes, providing a delightful contrast to the creamy filling.
Next, grab your mini muffin tin or your serving glasses/jars. If using a muffin tin, you can line it with mini paper liners for easy removal, or simply grease it lightly. For each cavity, spoon about 1-2 tablespoons of the crumb mixture and press it down firmly to create an even layer. You can use the bottom of a small glass or a mini tamper for this. Pop the muffin tin into the freezer for about 10 minutes while you prepare the filling, allowing the crusts to set.
Step 2: Mix the Cheesecake Filling
Now for the star of the show – the luscious cheesecake filling! In a large bowl, beat the softened cream cheese with an electric mixer until it’s perfectly smooth and creamy. Make sure there are no lumps; this is crucial for a professional-looking dessert. Gradually add the sifted powdered sugar and vanilla extract, continuing to beat until well combined and smooth.
In a separate, chilled bowl, whip the cold heavy cream until stiff peaks form. Gently fold the whipped cream into the cream cheese mixture. This step lightens the filling and gives it that characteristic airy, creamy texture. Be careful not to overmix at this stage; a gentle fold is all you need. If you’re using evaporated milk as a substitute, you’ll want to chill it thoroughly and whip it until it’s thick before folding it in. The goal is a smooth, luscious, and airy filling.
Step 3: Assemble the Mini Cheesecakes
Time to bring it all together! Take your chilled crusts out of the freezer. Carefully spoon or pipe the cheesecake filling evenly over each crust, filling the liners or glasses. Smooth the tops with the back of a spoon or an offset spatula for a neat finish. If you’re going for a more rustic look, you can simply dollop the filling on.
Now, prepare your beautiful fruit topping. Arrange the sliced strawberries and banana slices decoratively on top of the cheesecake filling. You can create a pretty pattern, or simply scatter them for a more informal, bountiful look. If you desire a bit more sweetness, you can lightly dust them with a touch of brown sugar or add a delicate drizzle of honey.
Step 4: Chill and Serve
This is perhaps the most critical step for no-bake cheesecakes: chilling! Place your assembled mini cheesecakes in the refrigerator for at least 2 hours to allow the filling to set properly. For the best texture and firmness, it’s ideal to let them chill for 3-4 hours, or even overnight if time permits. This allows the flavors to meld beautifully and the cheesecake to achieve its signature creamy, firm consistency.
Once thoroughly chilled and set, carefully remove the mini cheesecakes from the muffin tin (if used). If you used liners, they should slide out easily. If you greased the tin, you might need to gently loosen the edges with a thin knife. Serve them chilled and enjoy the delightful combination of textures and flavors!
Nutritional Snapshot
While specific nutritional information can vary based on exact ingredients and portion sizes, here’s a general idea of what you can expect from these mini cheesecakes. These figures are approximate per mini cheesecake:
- Calories: 200-250 kcal
- Carbohydrates: 20-25g
- Fat: 12-16g
- Protein: 3-5g
- Sugar: 15-20g (mostly from fruit and added sugar)
Please note: These values are estimates. For precise information, it’s recommended to use a nutritional calculator with your specific ingredients.
Healthier Alternatives & Flavor-Preserving Swaps
We love a good indulgence, but we also understand the desire for lighter options. Here are some ways to make these mini cheesecakes a bit healthier without sacrificing flavor:
- Crust: Instead of graham crackers, try using crushed whole-wheat biscuits or even a base of rolled oats mixed with a little almond flour and honey. For a lower-carb option, consider a base made from almond flour, a pinch of sweetener, and melted butter or coconut oil.
- Sweetener: Reduce the amount of powdered sugar in the filling. You can also explore natural sweeteners like a small amount of maple syrup or a few drops of stevia, but be mindful that these can affect the texture and stability slightly.
- Cream Cheese: Opt for light cream cheese or even whipped neufchâtel cheese for a reduced-fat alternative. The texture might be slightly lighter, but the creamy cheesecake flavor will still shine through.
- Topping: Focus on fresh fruits! While strawberries and bananas are fantastic, consider berries like blueberries or raspberries for added antioxidants and a different tartness profile. A light dusting of cinnamon can also add warmth and flavor without extra sugar.
Serving Suggestions
These mini cheesecakes are delightful on their own, but they also pair beautifully with a few additions:
- A dollop of freshly whipped cream or Greek yogurt.
- A light drizzle of chocolate sauce or caramel for an extra treat.
- A sprinkle of chopped nuts (like pistachios or almonds) for added texture.
- A sprig of fresh mint for a pop of color and freshness.
They are perfect for parties, picnics, baby showers, or simply as an after-dinner indulgence. Their small size makes them ideal for serving a crowd without overindulging.
Common Mistakes to Avoid
Even with an easy recipe, a few common pitfalls can be avoided:
- Using cold cream cheese: Make sure your cream cheese is truly at room temperature. Cold cream cheese will result in a lumpy filling.
- Overmixing the filling after adding whipped cream: This can deflate the airiness of the whipped cream, leading to a denser texture.
- Not chilling long enough: The chilling step is crucial for the cheesecake to set. Rushing this will result in a sloppy dessert.
- Using stale or damp crumbs for the base: Ensure your crumbs are dry and fresh for the best crunch and flavor.
Storing Your Mini Cheesecakes
These mini cheesecakes are best enjoyed fresh but can be stored in the refrigerator.
- Short-Term Storage: Store them in an airtight container in the refrigerator for up to 3 days. Make sure they are well covered to prevent them from absorbing other odors.
- Freezing: While not ideal as the texture can change upon thawing, you can freeze them. Place them on a baking sheet until firm, then transfer to a freezer-safe container or bag. Thaw overnight in the refrigerator. It’s best to add fresh fruit toppings after thawing.
Conclusion
There you have it – a simple, delicious, and utterly irresistible No-Bake Mini Strawberry Banana Pudding Crunch Cheesecake recipe that’s guaranteed to impress! These delightful creations are perfect for satisfying your sweet tooth any day of the week, offering a beautiful balance of creamy, fruity, and crunchy elements. They are a testament to the fact that you don’t need a complicated baking process to achieve stunning and delicious results.
So, what are you waiting for? Give these amazing mini cheesecakes a try this week! We’d love to hear how they turn out for you. Share your thoughts, variations, and delightful photos in the comments below. Happy no-baking!
Frequently Asked Questions
Can I make the crust ahead of time?
Yes, you can definitely prepare the crust mixture a day in advance. Store it in an airtight container at room temperature. You might need to add a tiny bit more melted butter if it seems too dry when you’re ready to press it into the tin.
What if I don’t have a mini muffin tin?
No problem! You can make one large cheesecake in a springform pan (follow standard cheesecake recipe instructions for size) or use individual serving glasses, ramekins, or even shot glasses. Layer the crust at the bottom, then add the filling and topping.
Can I use different fruits?
Absolutely! This recipe is very versatile. Other delicious fruit options include blueberries, raspberries, mango, peaches, or even a mix of berries. Just ensure they are fresh and not too watery.
My cheesecake filling is too soft, what went wrong?
This is usually due to insufficient chilling time or the cream cheese not being properly softened, leading to incomplete setting. Ensure you meet the minimum chilling requirements and that your cream cheese was at room temperature before starting.
No-Bake Mini Strawberry Banana Pudding Crunch Cheesecakes Recipe
Description
Hello dessert lovers! Are you ready to indulge in a delightful, no-bake treat that’s perfect for any occasion? OurNo-Bake Mini Strawberry Banana Pudding Crunch Cheesecakesare the perfect combination of fruity freshness and creamy sweetness, making them a must-try dessert for strawberry and banana fans alike. Plus, they’re super easy to whip up, so whether you’re prepping for a family dinner or a weekend treat, this recipe will surely delight!
Ingredients
- Optional substitutions:
Instructions
- Spoon a layer of the cheesecake mixture over the chilled crust.
- Add a layer of banana slices followed by a spoonful of strawberry compote or fresh diced strawberries.
- Top with another layer of the cheesecake mixture.
Notes
Use ripe bananas: They add natural sweetness and a more pronounced banana flavor.
For a firmer crust, press the graham cracker mixture firmly and chill it longer before adding the cheesecake filling.
Make it fancy: Garnish with fresh mint leaves or edible flowers for an elegant touch.
“`
