“`html
Table of Contents
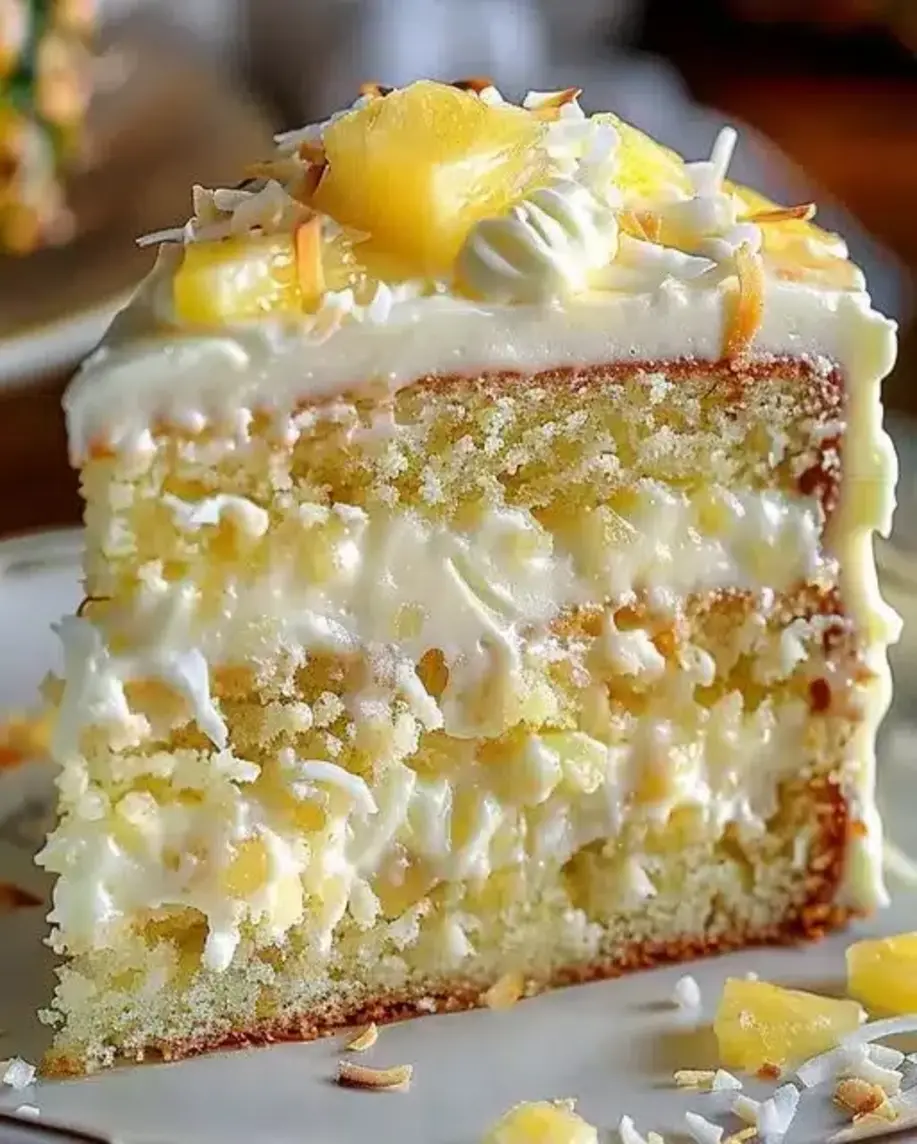
Easy Pineapple Coconut Dream Cake Recipe! 🥥
Hello, dear food enthusiasts! Today, we are diving into a tropical delight that is sure to brighten up your day and satisfy your sweet cravings. Get ready to embark on a culinary adventure with our Pineapple Coconut Dream Cake. This cake is not just a treat for your taste buds but also a feast for your eyes. Let’s get started!
Embark on a Tropical Bake Adventure
Did you know that the average person consumes over 20 pounds of sugar annually, and a significant portion of that comes from desserts? If you’re looking for a way to reduce refined sugar intake while still enjoying a delicious, vibrant dessert, you’re in the right place! This Easy Pineapple Coconut Dream Cake is our answer to that sweet craving. Imagine the luscious sweetness of pineapple mingling with the subtle, tropical aroma of coconut, all baked into a moist, tender cake. It’s the perfect escape to a sun-drenched beach, right in your own kitchen. Forget complicated recipes; this dream cake is designed for ease and maximum flavor impact. Whether you’re a seasoned baker or just starting, this recipe is your ticket to paradise. We’ll guide you through every step, ensuring a flawless, show-stopping dessert that’s as delightful to look at as it is to eat.
Ingredients for Your Dream Cake
The magic of this Pineapple Coconut Dream Cake lies in its harmonious blend of tropical flavors. We’ve chosen ingredients that enhance both the taste and texture, ensuring a moist and flavorful crumb.
For the Cake:
- All-Purpose Flour: 2 ½ cups. The foundation of our cake, providing structure. You can substitute with a gluten-free all-purpose blend if needed.
- Granulated Sugar: 1 ½ cups. For sweetness and moisture. For a slightly healthier option, you can use coconut sugar, though it will lend a deeper color and caramel note.
- Baking Soda: 2 teaspoons. Our leavening agent, crucial for a light and airy cake. Ensure it’s fresh for maximum lift.
- Salt: ½ teaspoon. Enhances all the other flavors and balances the sweetness.
- Unsalted Butter: ½ cup (1 stick), softened. Provides richness and tenderness. Margarine or a plant-based butter can be used as a substitute.
- Eggs: 2 large. Bind the ingredients and contribute to the cake’s structure and richness.
- Vanilla Extract: 1 teaspoon. A classic flavor enhancer that complements both pineapple and coconut.
- Cream of Coconut: 1 cup (the thick, sweetened kind, like Coco Lopez). This is key for that intense coconut flavor and super moist texture. Don’t confuse it with coconut milk or unsweetened coconut cream.
- Crushed Pineapple: 1 can (20 ounces), undrained. The star of the show! The juice adds moisture and a delightful tang.
- Shredded Sweetened Coconut: ½ cup, plus more for topping. Adds texture and reinforces the coconut flavor. Unsweetened coconut can be used, but you might need to adjust sugar elsewhere.
For the Optional Cream Cheese Frosting:
- Cream Cheese: 8 ounces, softened. Provides a tangy base for our frosting.
- Unsalted Butter: ¼ cup, softened. Adds smoothness and stability.
- Powdered Sugar: 2-3 cups, sifted. For sweetness and a creamy, spreadable consistency.
- Vanilla Extract: ½ teaspoon.
- Milk or Cream: 1-2 tablespoons, as needed for desired consistency.
Timing is Everything
This recipe is designed to be relatively quick and straightforward, making it perfect for a weeknight treat or a last-minute gathering. Let’s break down the time commitment:
This includes gathering ingredients and mixing the batter.
Baking time can vary slightly by oven.
Significantly faster than many elaborate cakes!
Comparison:
Many layered cakes can take 1.5 to 3 hours from start to finish due to complex preparations, multiple baking stages, and extensive cooling. Our Pineapple Coconut Dream Cake offers a delightful tropical escape in under an hour of active and baking time, making it an accessible choice for busy bakers.
Step-by-Step Instructions
Step 1: Preheat and Prepare
Before we begin mixing anything, let’s get our oven ready. Preheat your oven to 350°F (175°C). Grease and flour a 9×13 inch baking pan. Alternatively, you can line it with parchment paper for easy removal. This ensures your cake won’t stick and will bake evenly.
Step 2: Creaming the Butter and Sugar
In a large mixing bowl, cream together the softened unsalted butter and granulated sugar using an electric mixer. Beat them on medium-high speed until the mixture is light, fluffy, and pale yellow. This process incorporates air, which is essential for a tender cake crumb. Don’t rush this step; it’s the foundation of texture!
Step 3: Adding the Wet Ingredients
Add the eggs one at a time, beating well after each addition until fully incorporated. Then, stir in the vanilla extract and the cream of coconut. Mix until everything is just combined. The mixture might look a little curdled at this stage; that’s perfectly okay!
Step 4: Combining Dry Ingredients
In a separate medium bowl, whisk together the all-purpose flour, baking soda, and salt. Whisking ensures that the leavening agent and salt are evenly distributed throughout the flour, preventing any pockets of bitterness or uneven rising.
Step 5: Alternating Wet and Dry
Now, we’ll gradually add the dry ingredients to the wet ingredients, alternating with the crushed pineapple. Add about one-third of the dry ingredients to the wet mixture and mix on low speed until just combined. Then, add half of the undrained crushed pineapple and mix. Repeat this process, alternating: add another third of the dry ingredients, mix; add the remaining crushed pineapple, mix; and finally, add the last third of the dry ingredients and mix until just incorporated. Be careful not to overmix at this stage, as it can lead to a tough cake.
Step 6: Incorporating Pineapple
Gently fold in the shredded sweetened coconut. This adds lovely little bursts of texture and reinforces that delicious coconut flavor throughout the cake. Do this by hand with a spatula for best results, ensuring even distribution without overworking the batter.
Step 7: Baking Your Dream Cake
Pour the batter evenly into your prepared baking pan. Spread it out with your spatula to create a smooth surface. Place the pan in the preheated oven and bake for 30-35 minutes, or until a wooden skewer or toothpick inserted into the center comes out clean. The top should be golden brown and slightly springy to the touch.
Step 8: Cooling and Frosting
Once baked, let the cake cool in the pan on a wire rack for about 15-20 minutes. Then, carefully invert it onto the wire rack to cool completely. While the cake is cooling, prepare your frosting if desired. For the cream cheese frosting: Beat softened cream cheese and butter until smooth. Gradually add sifted powdered sugar, alternating with a tablespoon of milk or cream, until you reach a spreadable consistency. Stir in vanilla extract. Once the cake is entirely cool, spread the frosting evenly over the top and sprinkle with extra shredded coconut as a garnish. Slice and enjoy your tropical creation!
Nutritional Information
(Note: Nutritional values are approximate and can vary based on specific ingredients and brands used, especially for frosting. This estimate is for the cake without frosting.)
- Calories: Approx. 350-400 per serving
- Carbohydrates: Approx. 50-60g
- Fat: Approx. 15-20g
- Protein: Approx. 4-5g
- Sugar: Approx. 30-40g
Healthier Alternatives
Looking to make this tropical dream even healthier without sacrificing flavor? Here are a few swaps:
- Reduced Sugar: Use unsweetened crushed pineapple (drain it well and add a bit more liquid like coconut milk), and opt for unsweetened shredded coconut. You can also reduce the granulated sugar by ¼ to ½ cup, or substitute with a natural sweetener like erythritol or xylitol (adjusting sweetness to taste).
- Whole Wheat Flour: Substitute half of the all-purpose flour with whole wheat pastry flour for added fiber.
- Dairy-Free/Vegan: Use a plant-based butter, a flax egg (1 tbsp flax meal + 3 tbsp water, let sit for 5 mins) or commercial egg replacer, and ensure your cream of coconut is dairy-free (most are, check label). For the frosting, use vegan cream cheese and vegan butter.
- Lighter Frosting: A dollop of Greek yogurt mixed with a touch of honey and vanilla can offer a lighter, tangy topping alternative to cream cheese frosting.
Serving Suggestions
This cake is a delight on its own, but here are a few ways to elevate your serving experience:
- A la Mode: Serve warm slices with a scoop of vanilla bean or coconut ice cream.
- Fresh Fruit: Garnish with fresh pineapple chunks, toasted coconut flakes, or a few maraschino cherries for a pop of color.
- Coffee or Tea: It’s the perfect accompaniment to a warm cup of coffee or a refreshing iced tea.
Common Mistakes to Avoid
To ensure your Pineapple Coconut Dream Cake turns out perfectly every time, keep these common pitfalls in mind:
- Overmixing: Overmixing the batter after adding flour develops gluten, resulting in a tough, dense cake. Mix until just combined.
- Using Cool Ingredients: Ensure your butter and eggs are at room temperature for proper emulsification and a smooth batter.
- Not Draining Pineapple Enough (if using canned chunks): While we want the juice, too much excess liquid can make the batter too wet, leading to a gummy or undercooked cake. Draining is key.
- Opening the Oven Door Too Soon: This can cause your cake to collapse. Wait until the cake is mostly set before checking for doneness.
- Frosting a Warm Cake: Frosting will melt and slide off a warm cake. Always ensure the cake is completely cool before applying frosting.
Storing Your Dream Cake
Proper storage is key to maintaining the freshness and deliciousness of your cake:
- Room Temperature: If unfrosted, the cake can be stored in an airtight container at room temperature for up to 2 days. If frosted, especially with cream cheese frosting, it’s best to refrigerate it.
- Refrigeration: Cover the frosted cake tightly with plastic wrap or place it in an airtight container. It will keep well in the refrigerator for up to 4-5 days. Allow it to come to room temperature for about 20-30 minutes before serving for the best texture and flavor.
- Freezing: You can freeze unfrosted portions of the cake wrapped tightly in plastic wrap and then in aluminum foil for up to 2-3 months. Thaw overnight in the refrigerator. Though freezing frosting isn’t ideal, it can be done if well-wrapped.

Frequently Asked Questions
What is “Cream of Coconut” and where can I find it?
Cream of Coconut is a sweetened, thick, non-alcoholic coconut product, often brands like Coco Lopez or Cream o’ Coconut. It’s distinct from coconut milk or unsweetened coconut cream. You can typically find it in the cocktail mixer aisle or international foods section of most supermarkets.
Can I use fresh pineapple instead of canned?
Yes, you can! You’ll need about 1.5 to 2 cups of fresh pineapple, finely chopped. Make sure to drain off any excess liquid very well before adding it to the batter, as fresh pineapple can be more watery than canned.
Why is my cake so dense?
Density is often due to overmixing the batter, especially after adding the flour. This develops too much gluten. Ensure you mix only until ingredients are just combined and avoid overworking the batter.
Can I make cupcakes from this recipe?
Absolutely! This batter makes excellent cupcakes. Fill cupcake liners about two-thirds full and bake at 350°F (175°C) for 18-22 minutes, or until a toothpick inserted into the center comes out clean.
Conclusion: Your Tropical Escape Awaits!
There you have it – your very own Easy Pineapple Coconut Dream Cake! We hope this recipe brings a taste of the tropics and a wave of pure joy to your day. The delightful combination of sweet pineapple and fragrant coconut, all wrapped up in a moist, tender cake, is truly a slice of paradise. Don’t be afraid to experiment with healthier options or get creative with your decorations. Baking should be fun and delicious! So, gather your ingredients, preheat that oven, and get ready to create a masterpiece that will have everyone asking for seconds. Happy baking!
Pineapple Coconut Dream Cake Recipe – Tropical Delight
Description
Hello, dear food enthusiasts! Today, we are diving into a tropical delight that is sure to brighten up your day and satisfy your sweet cravings. Get ready to embark on a culinary adventure with ourPineapple Coconut Dream Cake. This cake is not just a treat for your taste buds but also a feast for your eyes. Let’s get started!
Ingredients
- Optional Substitutions:For a dairy-free version, you can use vegan butter and a dairy-free cream cheese alternative. You can also substitute the eggs with flax eggs (1 tablespoon ground flaxseed mixed with 3 tablespoons water per egg).
Instructions
- Preheatthe oven to 350°F (175°C). Grease and flour three 9-inch round cake pans.
- Whisktogether the flour, baking powder, and salt in a medium bowl. Set aside.
- Beatthe butter and sugar together in a large bowl until light and fluffy. Add the eggs one at a time, beating well after each addition. Stir in the vanilla extract.
- Gradually Addthe flour mixture to the butter mixture, alternating with the coconut milk, beginning and ending with the flour mixture. Mix until just combined.
- Foldin the crushed pineapple and shredded coconut until evenly distributed.
- Dividethe batter evenly among the prepared cake pans. Bake for 25-30 minutes, or until a toothpick inserted into the center comes out clean.
- Coolthe cakes in the pans for 10 minutes, then turn them out onto wire racks to cool completely.
- Frostthe cakes once cooled. Spread a layer of cream cheese frosting on top of one cake layer. Place the second cake layer on top and repeat the process with the third layer. Frost the top and sides of the cake.
- Garnishwith pineapple chunks and toasted coconut flakes.
Notes
Ensure the butter is at room temperature for easier mixing.
Drain the pineapple well to avoid excess moisture in the batter.
Toast the coconut flakes lightly to bring out their flavor.
“`
