“`html
Table of Contents
Irresistible Peanut Butter Truffles – Easy Homemade Treats!
Craving a decadent yet easy-to-make dessert?
Did you know that 62% of people consider chocolate their favorite dessert ingredient? And when you combine that with the irresistible allure of peanut butter, you get a match made in heaven! Welcome to the ultimate guide for making Peanut Butter Chocolate Truffles. These delightful treats, also known as Peanut Butter Chocolate Bliss Bites, are a heavenly combination of rich peanut butter and smooth chocolate. Perfect for any occasion, they’re a crowd-pleaser that’s easy to prepare. Whether you’re a chocolate lover or a peanut butter enthusiast, this recipe is sure to become a favorite in your dessert repertoire. Get ready to indulge in a little bit of bliss!
The Star Players: Ingredients You’ll Need
Gathering your ingredients is the first step to truffle perfection. The beauty of these truffles lies in their simplicity, relying on pantry staples to create something truly extraordinary. We’ve also included some sensory descriptions to help you choose the best quality ingredients, ensuring an even more delightful outcome.
- Peanut Butter: 1 cup (creamy or crunchy, unsalted). Opt for a natural peanut butter where the oil hasn’t separated completely; it should be smooth and spreadable, with a rich, roasted peanut aroma.
- Powdered Sugar: ½ cup, sifted. This is your sweetness binder, creating a smooth, melt-in-your-mouth texture. Sifting ensures no lumps!
- Butter: ¼ cup, softened (unsalted). This adds richness and helps bind the ingredients. It should be soft enough to indent with your finger but not greasy.
- Vanilla Extract: 1 teaspoon. A few drops can elevate the whole flavor profile, adding subtle warmth and depth.
- Chocolate Chips: 1 ½ cups (semi-sweet, milk, or dark, your preference). Choose a good quality chocolate for melting; it should smell rich and deeply chocolatey.
- Optional: A pinch of salt (if using unsalted butter and unsalted peanut butter, to enhance flavors and balance sweetness).
Substitutions: If you have a peanut allergy, almond butter or sunflower seed butter can be excellent dairy-free and nut-free alternatives. For the chocolate coating, you can use compound chocolate for easier melting or a mix of chocolate and a little coconut oil for a smoother finish.
The Sweet Timeline: Prep, Cook, and Total Time
15 minutes
30 minutes
20 minutes
1 hour 5 minutes
Compared to your average homemade dessert that can take hours, these Peanut Butter Truffles are incredibly efficient. Many elaborate chocolate recipes require tempering or long baking times, but these bliss bites come together in just over an hour, with minimal active cooking. This makes them perfect for last-minute gatherings or a quick sweet fix!
Crafting Your Bliss Bites: Step-by-Step
Step 1: Prep the Filling
In a medium bowl, combine your 1 cup of creamy or crunchy peanut butter, ½ cup of sifted powdered sugar, ¼ cup of softened butter, and 1 teaspoon of vanilla extract. If you’re using unsalted butter and peanut butter, this is also the time to add that tiny pinch of salt.
Step 2: Chill the Filling
Mix everything together until it forms a cohesive, dough-like consistency. It should be firm enough to roll into balls. If it’s too sticky, add a tablespoon more powdered sugar at a time. If it’s too dry, add a teaspoon more butter or a tiny splash of milk. Once it’s the right consistency, cover the bowl and refrigerate for at least 30 minutes. This makes it much easier to handle and roll.
Step 3: Melt the Chocolate
While the filling is chilling, prepare your chocolate coating. Place 1 ½ cups of your chosen chocolate chips in a microwave-safe bowl. Microwave on 50% power for 30-second intervals, stirring well after each interval, until the chocolate is mostly melted and smooth. Alternatively, you can use a double boiler over simmering water, stirring until melted and glossy. For a smoother, more dippable consistency, you can stir in 1-2 teaspoons of coconut oil or vegetable shortening.
Step 4: Dip the Truffles
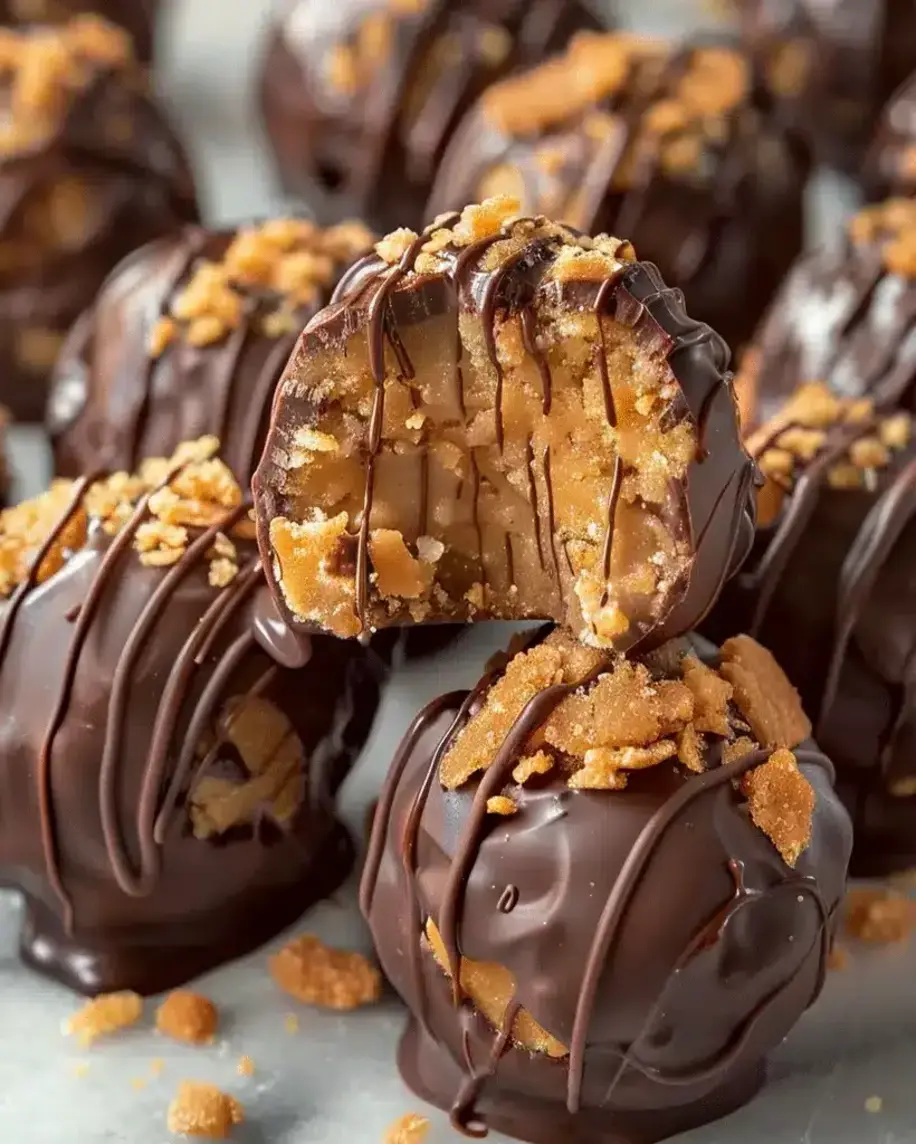
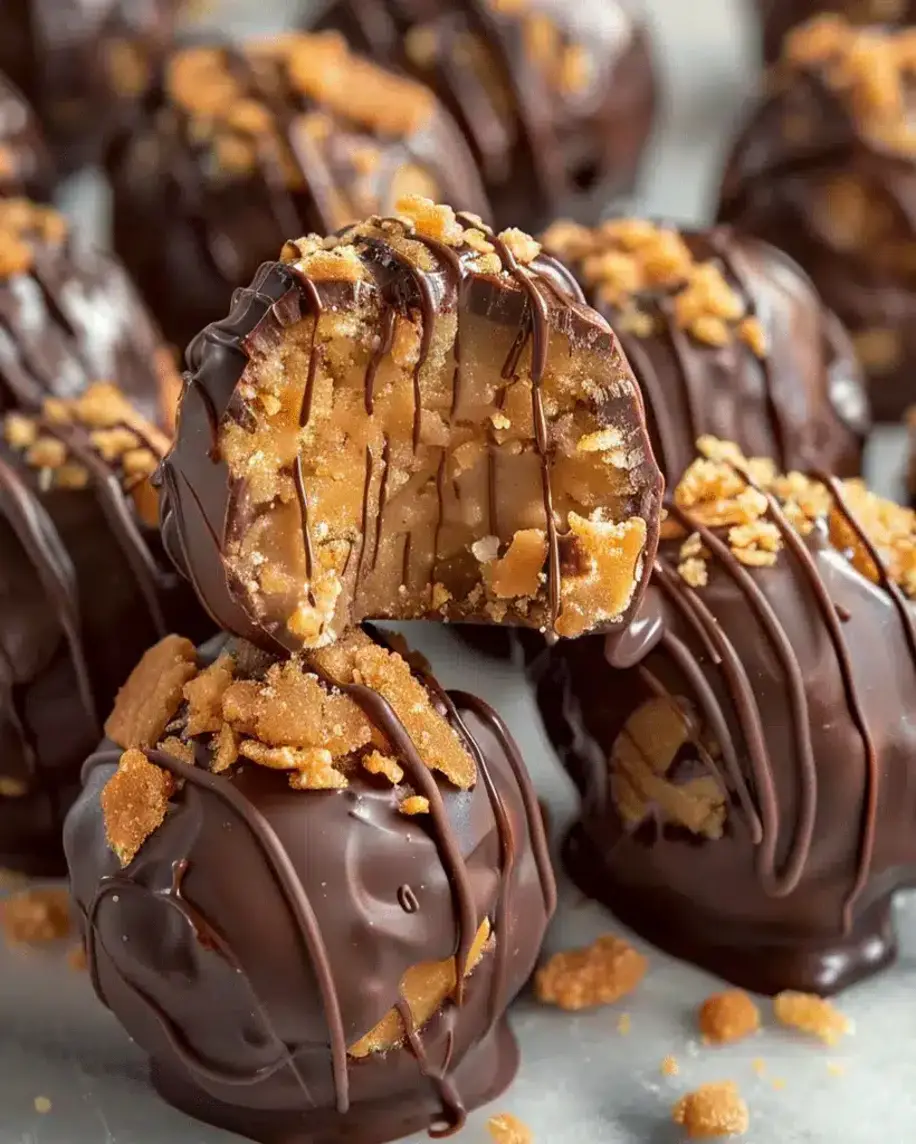
Once the peanut butter mixture is firm, scoop out small portions (about 1 tablespoon each) and roll them into smooth balls. You can place these on a parchment-lined baking sheet. Now, dip each ball into the melted chocolate using a fork or a dipping tool, ensuring it’s fully coated. Tap off any excess chocolate by gently tapping the fork against the side of the bowl. Place the coated truffles back onto the parchment-lined baking sheet.
Step 5: Let Them Set
Once all truffles are dipped, let them sit at room temperature for about 15-20 minutes until the chocolate has set. For a quicker set, you can place them in the refrigerator for about 10 minutes. You can also drizzle extra melted chocolate over the top for an extra decorative touch once the first layer has set slightly.
A Peek at the Goodness: Nutritional Information
While these are certainly a treat, knowing the approximate nutritional breakdown can be helpful. This is a general estimate per truffle, assuming 24 truffles per batch and using semi-sweet chocolate chips.
- Calories: Approximately 120-150 kcal
- Fat: Approximately 9-12g
- Carbohydrates: Approximately 10-13g
- Sugar: Approximately 8-10g
- Protein: Approximately 3-4g
Note: Actual values may vary based on the specific brands and types of ingredients used (e.g., natural vs. conventional peanut butter, type of chocolate).
Healthier Indulgence: Smarter Swaps
Who says you can’t enjoy your favorites with a healthier twist? Here are some ways to make these Peanut Butter Chocolate Truffles a little lighter without sacrificing flavor:
- Peanut Butter: Use natural, unsweetened peanut butter. Look for brands with just peanuts or peanuts and salt.
- Sweetener: Reduce the powdered sugar slightly, or opt for a natural sweetener like a touch of maple syrup or date paste (adjusting consistency).
- Chocolate Coating: Use dark chocolate (70% cacao or higher) which has less sugar and more antioxidants. You can also use a sugar-free chocolate alternative. For a lighter coating, consider a dusting of unsweetened cocoa powder or finely chopped nuts.
- Binder: For a creamier, richer base that uses less butter, you can experiment with adding a bit of Greek yogurt or cream cheese (though this will alter the flavor profile slightly).
Serving Suggestions for Maximum Delight
These truffles are incredibly versatile. Serve them year-round as a:
- Gourmet Dessert: A perfect ending to any meal, served alongside coffee or tea.
- Party Favor: Package them in small cellophane bags tied with a ribbon for a delightful take-home gift.
- Holiday Treat: Shape them into little ghosts or pumpkins, or drizzle with festive colors for holidays like Halloween or Christmas.
- Gift Basket Addition: Tuck them into a homemade gift basket for a special touch.
Truffle Troubleshooting: Common Mistakes to Avoid
Even simple recipes can have a few pitfalls. Here’s how to ensure your truffles are perfect every time:
- Oily Filling: If your peanut butter is too oily, the filling can become too soft. Ensure your peanut butter is well-stirred and at room temperature, but not oily.
- Sticky Dough: Not chilling the mixture long enough will result in a sticky dough that’s hard to roll. Be patient!
- Overheating Chocolate: Burnt chocolate is a sad sight. Always melt chocolate slowly at lower temperatures, stirring frequently.
- Water in Chocolate: Even a tiny bit of water can cause chocolate to seize and become grainy. Be sure your utensils and bowls are completely dry when melting chocolate.
Keep Them Fresh: Storing Your Truffles
These Peanut Butter Truffles are best enjoyed fresh, but they do store well. Keep them in an airtight container in the refrigerator. They will last for up to 2 weeks. Allow them to come to room temperature for about 15-20 minutes before serving for the best texture and flavor. If you live in a very warm climate, storing them in the fridge is highly recommended to prevent them from melting.
Your Truffle Questions Answered: FAQs
Can I make these ahead of time?
Absolutely! These truffles are perfect for making ahead and store well in the refrigerator for up to two weeks.
What kind of peanut butter is best?
Natural, unsalted peanut butter is ideal. Avoid peanut butters with added oils or sugars, as they can affect the texture and sweetness. Creamy or crunchy both work wonderfully!
Why is my chocolate seized when melting?
Chocolate seizes when it comes into contact with even a small amount of water. Ensure all your tools and bowls are completely dry. Adding a little extra fat (like coconut oil) can sometimes help revive slightly seized chocolate.
Can I freeze these truffles?
Yes, you can freeze them! It’s best to freeze them before dipping them in chocolate, or store dipped truffles in a single layer on a baking sheet in the freezer until firm, then transfer to an airtight container. Thaw them in the refrigerator.
How do I get a smooth coating?
Ensuring your chocolate is melted smoothly (without overheating) and adding a little coconut oil or vegetable shortening can help achieve a glossier, smoother coating. Also, allowing the peanut butter balls to chill makes them firmer and easier to coat evenly.
Your Sweet Success Awaits!
There you have it – your easy guide to creating absolutely irresistible Peanut Butter Chocolate Truffles! These delightful bites are proof that you don’t need fancy ingredients or complex techniques to achieve decadent results. They are the perfect balance of creamy, nutty peanut butter and rich, smooth chocolate, making them an instant hit for any occasion. Whether you’re baking for a party, a holiday, or just for yourself, this recipe delivers pure bliss with every bite. So, gather your ingredients, follow these simple steps, and prepare to be amazed by how easy it is to make these homemade treats. We’d love to see your creations – share your photos and thoughts in the comments below!

Peanut Butter Truffles Recipe – Easy Homemade Treats
Description
Welcome to the ultimate guide for makingPeanut Butter Chocolate Truffles! These delightful treats, also known asPeanut Butter Chocolate Bliss Bites, are a heavenly combination of rich peanut butter and smooth chocolate. Perfect for any occasion, they’re a crowd-pleaser that’s easy to prepare. Whether you’re a chocolate lover or a peanut butter enthusiast, this recipe is sure to become a favorite in your dessert repertoire.
Ingredients
- Truffles:
- Optional Substitutions:
Instructions
- In a large mixing bowl, combinepeanut butter,powdered sugar,vanilla extract,salt, andcrushed graham crackers. Mix thoroughly until a thick, pliable dough forms. If the mixture feels too sticky, add more crushed graham crackers.
- Using a small scoop or spoon, portion out the dough and roll it into bite-sized balls. Place the balls on a parchment-lined tray to prevent sticking. Once all the dough is shaped, freeze the tray for about 30 minutes. This step ensures the truffles hold their shape during the chocolate dipping process.
- While the truffles are chilling, melt thesemi-sweet chocolate chipswith the optionalcoconut oil. Use a microwave-safe bowl and heat in 15-second intervals, stirring in between, until the chocolate is smooth. Alternatively, melt the chocolate in a double boiler for a gentler process.
- Remove the chilled truffles from the freezer. Using a fork or dipping tool, coat each truffle in the melted chocolate, allowing any excess to drip off. Place the coated truffles back on the parchment-lined tray and sprinkle withcrushed peanutsorcookie crumbsfor added texture and flavor.
- Refrigerate the truffles for at least 1 hour or until the chocolate is fully set. Serve chilled or at room temperature and enjoy the perfect balance of creamy, crunchy, and chocolaty goodness.
Notes
Use high-quality chocolate chips for a smoother coating and richer taste.
For a perfectly round shape, roll the dough balls between your palms after freezing them for a few minutes.
A drizzle of white chocolate can add an elegant touch to the truffles.
If you don’t have a double boiler, place a heatproof bowl over a pot of simmering water to melt the chocolate evenly.
“`
