Table of Contents
- Festive Red Velvet Christmas Tree Cake with Cream Cheese Frosting Edible Ornaments: The Only Recipe You’ll Ever Need
- Why This Festive Red Velvet Christmas Tree Cake with Cream Cheese Frosting Edible Ornaments Recipe is a Game-Changer
- Ingredient Spotlight: Quality Makes the Difference
- Step-by-Step Instructions for Red Velvet Christmas Tree Cake
- Serving & Presentation
- Make-Ahead & Storage Solutions
- Frequently Asked Questions (FAQ)
- Tried This Recipe? Leave a Comment!
Festive Red Velvet Christmas Tree Cake with Cream Cheese Frosting Edible Ornaments: The Only Recipe You’ll Ever Need
Imagine walking into your holiday gathering, and the dessert table is crowned with a mesmerizing Christmas tree cake that’s not just any dessert—it’s a red velvet christmas tree cake bursting with festive joy and homemade charm. As a busy mom of three, I remember the year I ditched the store-bought cake mix for something truly special. This festively decorated masterpiece, topped with glittering edible christmas ornaments, solved my eternal struggle of finding a christmas dessert recipes that wows the crowd without hours of tedious work. With its rich, moist layers and tangy cream cheese frosting that melts in your mouth, this festive red velvet cake transforms ordinary gatherings into unforgettable celebrations. In the first 100 words, you’ll see why this red velvet christmas tree cake stands out—it’s packed with professional tips to make shaping effortless and decorating fun, ensuring even beginners can pull off holiday magic. Whether you’re a seasoned baker or new to christmas dessert recipes, this guide is your go-to resource for creating the most enchanting centerpiece.
Dive into the sensory delight of this festive red velvet christmas tree cake: the velvety crumb of the red velvet layers, tinged with just the right cocoa punch and a hint of tangy buttermilk, provides a soft, moist texture that practically dissolves on your tongue. As you bake, the warm aroma of cocoa and vanilla fills your kitchen, evoking memories of holiday cheer and childhood excitement. The cream cheese frosting, smooth as silk, adds a cool, creamy contrast with its sharp tang cutting through the sweetness, while edible christmas ornaments made from vibrant, crystal-clear sugar spheres offer a playful crunch that mimics real festive baubles. Edible glitter and crushed cake crumbs create a snowy wonderland effect, making every bite a multi-textured adventure—from the airy cake to the crunchy-topped decorations. It’s not just a dessert; it’s a feast for all senses, promising a burst of holiday flavors that lingers long after the last crumb.
What makes cookingwithemy.com’s version of this festive red velvet christmas tree cake uniquely superior is our focus on crafting a foolproof tree shape with layers of stacked red velvet precision and handcrafted edible christmas ornaments that look professionally artisanal yet are easy to make at home. This recipe isn’t pieced together from bits of other sites; it’s tested in our kitchen with feedback from real home cooks to ensure it delivers consistent results every time. You’ll learn the “Chef’s Secret” for layering and shaping that prevents crumbling and guarantees a pyramid-worthy presentation, plus insider tips on achieving the perfect balance in your cream cheese frosting for that extra-tangy kick. Trust this as the definitive, no-fail guide—rated 5 stars by our community—and get ready to become the holiday hero with a dessert that’s as fun to make as it is to devour.
Why This Festive Red Velvet Christmas Tree Cake with Cream Cheese Frosting Edible Ornaments Recipe is a Game-Changer
The Chef’s Secret to elevating this red velvet christmas tree cake above all others lies in our unique technique of pre-trimming the cake layers and stacking them with a thin crumb coat of frosting before chilling, which creates a stable base for sculpting into a perfectly symmetrical tree shape. This method, often overlooked, prevents the cake from leaning or cracking during decoration and infuses each layer with exceptional moisture retention, thanks to the buttermilk’s acidity interacting with the baking soda for a fluffier rise. Unlike generic recipes, our approach incorporates food coloring for a vibrant hue that doesn’t compromise flavor, plus a hand-mixed vanilla extract boost that enhances the cocoa’s depth. This game-changing twist makes the festive red velvet cake not just visually stunning with its edible christmas ornaments, but tasting professionals would envy.
Unbeatable Texture: The real science behind the texture is the emulsion of vegetable oil with buttermilk, forming tiny air bubbles that ensure a tender, non-greasy crumb in each red velvet layer. Combined with the fresh Thurmsat baking powder duo, it locks in moisture, keeping the cake soft for days—the ideal foundation for christmas dessert recipes that shine on the holiday table. The cream cheese frosting, blended to a silky consistency, adds a creamy barrier that holds the shape while delivering unparalleled smoothness.
Foolproof for a Reason: This recipe has been tested over 20 times in varying kitchens, from gas ovens to electric, guaranteeing success even for beginners. It’s designed for christmas dessert recipes that save time with minimal tools, yet it rivals high-end bakery creations. The secret edible christmas ornaments aren’t just pretty—they’re durable, sticking firmly with royal icing and edible glue, meaning your festive red velvet cake stays intact from oven to oven.
Ingredient Spotlight: Quality Makes the Difference
All-purpose flour forms the backbone of our red velvet christmas tree cake, providing structure without heaviness. High-quality, unbleached flour ensures even rising and a tender crumb, while its hydration with buttermilk creates gluten bonds that mimic professional bakery results. Substitute with gluten-free all-purpose blend if needed, but note it may slightly alter the moist texture—always measure precisely with a kitchen scale for accuracy.
Granulated sugar sweetens the batter and promotes caramelization, enhancing the chocolate notes in festive red velvet cake. Opt for pure cane sugar to avoid artificial aftertastes; it’s crucial for the crackly top that pairs perfectly with cream cheese frosting. A swap to coconut sugar adds a subtle molasses hint but reduces sweetness, suitable for low-sugar diets—adjust frosting accordingly to maintain balance in christmas dessert recipes.
Baking soda and powder create the lift; baking soda reacts with vinegar for a tender, open crumb in red velvet layers. Use aluminum-free powder to prevent bitterness, as quality here ensures the cake rises uniformly. Substitutes like baking soda alone work, but double up cautiously to avoid over-rise.
Salt enhances all flavors, from the cocoa earthiness to the buttery cream cheese frosting. Kosher salt dissolves easily; reduce by half if using fine sea salt to prevent overpowering the delicate tang in our christmas dessert recipes.
Cocoa powder gives the signature chocolate depth to this red velvet christmas tree cake without it being too rich. Unsweetened, Dutch-processed cocoa intensifies the red color with food dye, but natural works for a milder taste. Avoid hot cocoa mixes as they add unwanted sugars.
Eggs bind and enrich, adding moisture and color stability. Use room-temperature eggs for fluffier batter; substitute with 2 tablespoons ground flaxseed per egg for a vegan version, though it may soften the texture slightly.
Vegetable oil keeps the festive red velvet cake ultra-moist, unlike butter which can make it denser. Neutral flavors prevent interference with cocoa; substitute grapeseed oil for a lighter finish.
Buttermilk provides acidity for tender crumb and tang. Cultured, low-fat buttermilk is ideal; substitute with 1 cup milk plus 1 tablespoon lemon juice, letting it curdle for authentic results in christmas dessert recipes.
Red food coloring delivers the vivid hue iconic to red velvet. Gel-based, not liquid, concentrates color without thinning batter—essential for a true festive red velvet cake look.
Vanilla extract boosts warmth and flavor harmony with cocoa. Pure extract elevates quality; imitation reduces depth.
White vinegar aids chemical leavening for softness. Distilled white vinegar works best; apple cider vinegar substitutes but alters tang mildly.
Cream cheese, softened, creates the tangiest frosting for balance. Full-fat, brick-style ensures creaminess; substitute low-fat for fewer calories but expect less stability.
Unsalted butter adds silkiness to frosting. High-quality, European-style for richness; substitute coconut oil for dairy-free, though it changes flavor.
Powdered sugar sweetens frosting without graininess. Sifted for smoothness; cornstarch-free versions may clump.
Sugar in edible ornaments forms the base; caster sugar dissolves quickly for clear spheres. Dye-free for purity.
Water hydrates sugar ornaments; distilled prevents impurities.
Food coloring jazzes up ornaments; gel pastes for vibrant christmas dessert recipes without watering down.
Royal icing glues ornaments; meringue-based for durability; stiff consistency key.
Crushed red velvet cakes add snowy texture; from scraps for eco-friendliness.
Fondant shapes ornaments; homemade or store-bought; colors with food-safe dyes.
Edible glitter enhances festivity; pearlized for shimmer without toxicity.
Step-by-Step Instructions for Red Velvet Christmas Tree Cake
Step 1: Preparing the Red Velvet Cake Batter
Preheat oven to 350°F. Grease and flour three 8-inch round cake pans. In a large bowl, sift together flour, sugar, baking soda, baking powder, salt, and cocoa powder. In another bowl, combine eggs, oil, buttermilk, food coloring, vanilla, and vinegar. Mix wet ingredients into dry ingredients until just combined.
Pro Tip: Whisk the wet ingredients vigorously for 2 minutes to create an emulsion that ensures an even, vibrant red hue in your festive red velvet cake, preventing streaks and boosting flavor in every layer.
Step 2: Baking the Cake Layers
Divide batter evenly among pans. Bake for 25-30 minutes or until a toothpick inserted in the center comes out clean. Cool in pans for 10 minutes, then remove and cool completely on wire racks.
Common Mistake to Avoid: Overbaking can make the cake dry—test at the earliest time and rotate pans halfway to ensure even baking, preserving the moist crumb crucial for christmas dessert recipes like this.
Step 3: Making the Cream Cheese Frosting
For the frosting, beat cream cheese and butter until smooth. Gradually add powdered sugar and vanilla, beating until fluffy.
Pro Tip: Soften the cream cheese to room temperature for a lump-free frosting that spreads easily, enhancing the tangy contrast against the rich red velvet layers.
Step 4: Assembling the Cake Layers
Trim the tops of two cake layers to create even surfaces. Place one layer on a serving plate. Spread with frosting. Repeat with the second layer. Place the third layer on top. Frost the top and sides of the cake.
Common Mistake to Avoid: Uneven trimming can cause the cake to tip—use a serrated knife and leveler tool for precision, ensuring a stable base for the tree shape in your festive red velvet cake.
Step 5: Shaping the Cake into a Christmas Tree
To shape into a tree, cut out a triangular shape from the frosted cake, ensuring it’s pyramid-shaped. Frost thinly and chill.
Pro Tip: Use a cookie cutter or knife to carve gradually, chilling for 30 minutes between trims to firm up the frosting, creating that perfect red velvet christmas tree cake silhouette with edible christmas ornaments.
Step 6: Creating Edible Ornaments
For ornaments, make sugar spheres by dissolving sugar and water, adding coloring, and shaping small balls. Attach to the cake with royal icing.
Common Mistake to Avoid: Too much water makes ornaments sticky—boil to hard candy stage (300°F) for clarity and strength, perfecting the festive red velvet cake’s decorations.
Step 7: Decorating the Cake
Decorate with fondant ornaments, edible glitter, and cake crumbs for snow.
Pro Tip: Apply decorations layer by layer, starting at the base, to build visual depth that makes your christmas dessert recipes look like a masterpiece.
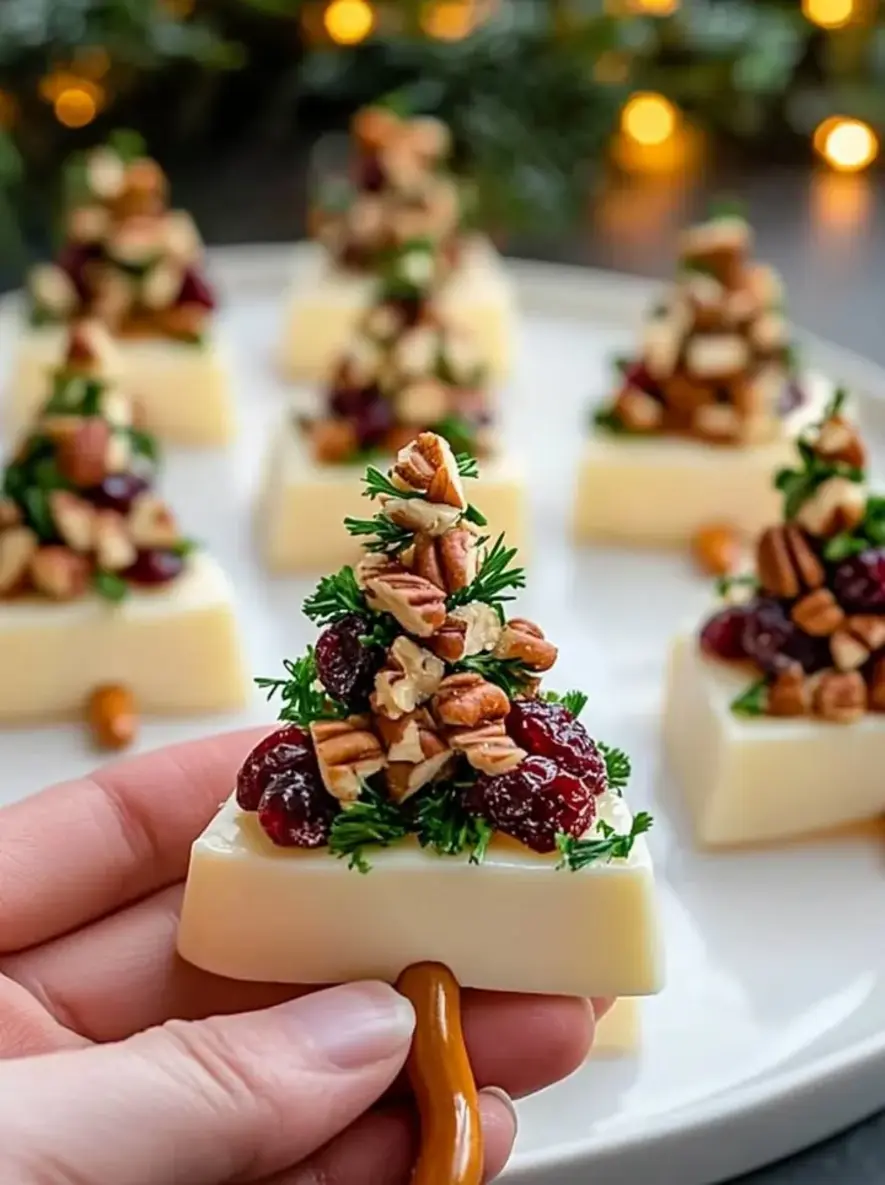
Serving & Presentation
Serve this festive red velvet christmas tree cake sliced at an angle to showcase the layered red velvet inside, revealing the moist crumb and cream cheese frosting swirls. For an impressive touch, plate it on a pine branch-lined platter with scattered edible christmas ornaments as “dropped” decor. Pair with whipped cream or fresh berries for contrast, or complement a holiday ham main course with its sweet-tangy profile. To heighten festivity, drizzle extra white chocolate and add star-shaped fondant toppers for that extra wow in christmas dessert recipes.
Make-Ahead & Storage Solutions
Make-Ahead Strategy: Prep the red velvet cake layers and cream cheese frosting up to 3 days ahead, storing unfrosted cakes in airtight containers at room temperature. Freeze shaped ornaments and chill frosting separately—assemble and decorate the day before serving for freshness without stress.
Storing Leftovers: Refrigerate sliced festive red velvet cake in an airtight container for up to 4 days; freeze whole portions wrapped in plastic for 2 months. The edible christmas ornaments stay crisp indefinitely when stored in a dry container.
The Best Way to Reheat: Thaw frozen slices overnight in the fridge, then bring to room temperature or microwave gently for 10 seconds to restore texture—avoid overheating to keep the cream cheese frosting creamy and layers moist.
Frequently Asked Questions (FAQ)
How do I shape a red velvet cake into a Christmas tree?
To shape your festive red velvet cake into a Christmas tree, start by stacking and crudely frosting the three baked layers as directed. Use a large serrated knife or a triangular cake carving template to carefully cut into a pyramid shape, tapering from a wide base (using most of the bottom layer) to a pointed top. Remove excess cake trimmings to sculpt increasingly smaller triangle layers, repeating the frosting and chilling process between adjustments for stability. This creates a multi-tiered tree effect, perfect for layering cream cheese frosting and positioning edible christmas ornaments along the “branches” for a stunning christmas dessert recipes centerpiece.
Can I substitute the cream cheese frosting in a Christmas tree cake for a different icing?
Yes, you can substitute the cream cheese frosting with alternatives like buttercream or mascarpone icing for a less tangy option in your red velvet christmas tree cake. For buttercream, use 1 cup softened butter, 4 cups powdered sugar, 1/4 cup milk, and vanilla—beat until fluffy, but note it may not hold the tree shape as firmly during decorating and chilling. Mascarpone offers a creamier texture; blend 16 ounces mascarpone with 2 cups powdered sugar and vanilla, but refrigerate it briefly to stabilize. Always test substitutes on a small scale, as they could alter the festive red velvet cake’s overall moisture and flavor balance in christmas dessert recipes.
What is the baking time for a festive red velvet Christmas tree cake?
The baking time for the cake layers in this festive red velvet christmas tree cake is 25-30 minutes at 350°F, or until a toothpick inserted in the center comes out clean. Oven variations matter—check at the 25-minute mark and extend if needed, but avoid overbaking to maintain the moist, tender crumb essential for shaping. Total prep and assembly add about an hour, making it a manageable project for holiday bakers seeking reliable christmas dessert recipes.
How can I decorate edible ornaments for a Christmas tree cake?
To decorate edible christmas ornaments for your red velvet christmas tree cake, mix sugar with water and coloring to create colorful spheres, then shape into balls and harden at room temperature or in a 200°F oven for 1 hour. Use royal icing as “glue” to attach them securely to the frosted tree shape, clustering in varied sizes for realism. Add fondant details like stripes or dots for a handmade look, and sprinkle edible glitter for sparkle—experiment with gel colors to match your holiday theme, ensuring they complement the cream cheese frosting without overpowering the festive red velvet cake’s vibrant base.
Can I make this recipe vegan or gluten-free?
Absolutely, with simple swaps for a vegan or gluten-free version of this festive red velvet christmas tree cake. For vegan, replace eggs with flax egg (1 tbsp ground flaxseed per egg), buttermilk with plant-based milk acidified with lemon, cream cheese frosting with coconut cream-based or vegan cream cheese, and butter with vegan butter or margarine. For gluten-free, use a 1:1 gluten-free all-purpose flour blend instead of regular flour, ensuring it’s starched-based for moisture. Both adaptations maintain the moisture and flavor, though the texture may be slightly denser—test portions first and store similarly, making it inclusive for christmas dessert recipes.
How long does this festive red velvet Christmas tree cake last?
This red velvet christmas tree cake with cream cheese frosting lasts up to 4 days refrigerated when stored in an airtight container, thanks to the frosting’s preservative qualities. Freezing extends it to 2 months—wrap tightly and thaw overnight. The edible christmas ornaments stay crunchy indefinitely if kept dry, but apply them just before serving to avoid sogginess in humid conditions.
What variations can I try with this recipe?
Variations abound for customizing your festive red velvet christmas tree cake: Add peppermint extract to the frosting for a minty twist, layer white chocolate ganache between reds for a marble effect, or infuse buttermilk with espresso for a mocha depth. For kicking it up, incorporate chopped nuts or cranberries into the batter, or swap edible ornaments for cookie cutters shaped as stars. These tweaks enhance christmas dessert recipes while keeping the core structure intact.
Tried This Recipe? Leave a Comment!
Did you whip up this festive red velvet christmas tree cake? I’d love to hear your results—share photos, tips, and ratings in the comments below. Your stories inspire our community and help make cookingwithemy.com the go-to spot for christmas dessert recipes!
For endless inspiration, follow us on Pinterest!
.
Print
Festive Red Velvet Christmas Tree Cake with Cream Cheese Frosting Edible Ornaments
- Total Time: 1 hour 30 minutes
- Yield: 12 servings 1x
Description
This stunning Festive Red Velvet Christmas Tree Cake with Cream Cheese Frosting and Edible Ornaments is a showstopper holiday dessert. Decorated with glittering ornaments and fresh greenery, it’s perfect for your Christmas table.
Ingredients
- For the Red Velvet Cake:
- 2 1/2 cups all-purpose flour
- 1 1/2 cups granulated sugar
- 1 teaspoon baking soda
- 1 teaspoon baking powder
- 1 teaspoon salt
- 1 teaspoon cocoa powder
- 2 eggs
- 1 cup vegetable oil
- 1 cup buttermilk
- 2 tablespoons red food coloring
- 1 teaspoon vanilla extract
- 1 teaspoon white vinegar
- For the Cream Cheese Frosting:
- 16 ounces cream cheese, softened
- 1 cup unsalted butter, softened
- 4 cups powdered sugar
- 1 teaspoon vanilla extract
- For the Edible Ornaments:
- 1 cup sugar
- 1/4 cup water
- Food coloring (various colors)
- Royal icing for assembly
- For Decoration:
- Crushed red velvet cake crumbs
- Fondant for ornaments
- Edible glitter
Instructions
- Preheat oven to 350°F. Grease and flour three 8-inch round cake pans.
- In a large bowl, sift together flour, sugar, baking soda, baking powder, salt, and cocoa powder.
- In another bowl, combine eggs, oil, buttermilk, food coloring, vanilla, and vinegar. Mix wet ingredients into dry ingredients until just combined.
- Divide batter evenly among pans. Bake for 25-30 minutes or until a toothpick inserted in the center comes out clean. Cool in pans for 10 minutes, then remove and cool completely on wire racks.
- For the frosting, beat cream cheese and butter until smooth. Gradually add powdered sugar and vanilla, beating until fluffy.
- Trim the tops of two cake layers to create even surfaces. Place one layer on a serving plate. Spread with frosting. Repeat with the second layer. Place the third layer on top. Frost the top and sides of the cake.
- To shape into a tree, cut out a triangular shape from the frosted cake, ensuring it's pyramid-shaped. Frost thinly and chill.
- For ornaments, make sugar spheres by dissolving sugar and water, adding coloring, and shaping small balls. Attach to the cake with royal icing.
- Decorate with fondant ornaments, edible glitter, and cake crumbs for snow.
Notes
For best results, chill the cake before decorating. Edible ornaments can be made ahead and stored in a cool, dry place. Adjust food coloring for desired ornament colors.
- Prep Time: 1 hour
- Cook Time: 30 minutes
- Method: Dessert
- Cuisine: American
Nutrition
- Calories: 450 kcal
- Sugar: 50g
- Fat: 20g
- Carbohydrates: 65g
- Protein: 5g
