
Table of Contents
Air Fryer Blooming Onion – Restaurant-Quality at Home
I’ll never forget the first time I ate a blooming onion. It was at a bustling sports bar in Midtown Manhattan, a few months after I’d moved from Paris to New York. The moment that golden, crispy “flower” arrived at our table, I knew I had to recreate it at home — but lighter, crunchier, and without a deep fryer. Today I’m sharing my air fryer blooming onion recipe, a restaurant-quality appetizer that uses far less oil yet delivers that same addictive, spicy crunch. Inspired by the spice blends of my Moroccan childhood and the precise techniques I learned in Paris, this version is crispy, flaky, and absolutely unforgettable.
Imagine pulling apart petal after petal of a perfectly seasoned onion — the exterior shatters with the lightest bite, while the inside stays tender and sweet. The paprika and cayenne give it a warm, smoky heat, and the cumin and oregano add a subtle earthiness that complements the onion’s natural sugars. Every piece is coated in a light, airy crust that browns beautifully in the air fryer’s circulating heat. No greasy fingers, no heavy oil smell — just pure, golden satisfaction.
As a trained chef who now runs a food blog from my tiny NYC kitchen, I’ve tested this recipe countless times to get the texture just right. The secret? A double-dredge method and a short rest in the fridge that helps the coating adhere firmly. And I’ll let you in on the biggest mistake home cooks make: skipping the chilling step. Without it, the breading slides right off in the air fryer. Stick with me, and you’ll have a blooming onion that looks and tastes like it came from a steakhouse — but made in your own air fryer, in under an hour.
Why This Air Fryer Blooming Onion Recipe Is the Best
The flavor secret. My spice blend is directly inspired by the ras el hanout my mother used to make in our kitchen in Fez. Paprika, cayenne, cumin, thyme, and oregano come together to create a warm, aromatic crust that tastes far more complex than it is. I add a touch of black pepper and salt to balance the heat, and the milk-egg wash gives the flour mixture something to cling to, creating that signature craggy texture.
Perfected texture. During my pastry training at Le Cordon Bleu in Paris, I learned how crucial temperature control is for achieving crispness. By refrigerating the breaded onion for 20 minutes before air frying, the coating sets and won’t slide off during cooking. Then, using an aluminum foil sling to lower it into the basket keeps the delicate petals intact. Spritzing with oil mid-cooking ensures every nook and cranny turns golden brown.
Foolproof & fast. Unlike deep frying which requires a gallon of oil and lots of cleanup, this air fryer method is beginner-friendly. You don’t need a thermometer or any special equipment. The recipe is forgiving — even if some petals stick together, you can gently separate them with a fork after cooking. It’s the kind of crowd-pleasing snack that makes you look like a star without the stress.
Air Fryer Blooming Onion Ingredients
I buy my sweet onions from the Union Square Greenmarket in the fall, or from any well-stocked grocery store year-round. The rest of the ingredients are pantry staples — the kind that fill my spice drawer with the aromas of Morocco and Europe. Every component here has a job to do, and I’ll show you exactly how to choose them.
Ingredients List
- 1 large sweet onion (like Vidalia or Walla Walla)
- 2 ½ cups all-purpose flour
- 1 tablespoon paprika
- 1 teaspoon cayenne pepper
- ½ teaspoon ground cumin
- ½ teaspoon dried thyme
- ½ teaspoon dried oregano
- 2 large eggs
- 1 cup milk (whole or 2%)
- 1 cup water
- Salt and pepper to taste
- Oil in a spray bottle (avocado or vegetable oil)
Ingredient Spotlight
Sweet onion is non‑negotiable. Regular yellow or white onions are too sharp and won’t soften properly in the center. A sweet onion like Vidalia has high sugar content that caramelizes beautifully, giving you that tender, almost buttery interior. If you can’t find a sweet onion, use a large yellow onion and soak the cut pieces in cold water for 10 minutes to mellow the bite.
Paprika and cayenne are the heart of the spice mix. I use smoked paprika for an extra layer of depth — it reminds me of the smoky tagines my aunt made. Cayenne provides the kick; adjust it to your heat tolerance. For a milder version, reduce cayenne to ½ teaspoon and add a pinch of garlic powder.
Eggs and milk create the wash that helps the flour stick. The milk adds a touch of richness and encourages browning. I’ve tested this with buttermilk and it adds a pleasant tang, but regular milk works perfectly. For a dairy‑free version, use unsweetened almond milk mixed with 1 tablespoon of cornstarch to mimic the binding.
All‑purpose flour gives the crunchy coating. You can substitute with rice flour for a gluten‑free option, but note that rice flour creates a lighter, slightly more brittle crust. If you want extra crunch, replace ¼ cup of the flour with cornstarch or fine cornmeal.
| Original Ingredient | Best Substitution | Flavor / Texture Impact |
|---|---|---|
| Sweet onion | Large yellow onion (soaked) | Mildly sharper; still tender after soaking |
| Paprika | Smoked paprika + ½ tsp chili powder | Smokier, slightly sweeter |
| Cayenne | ½ tsp red pepper flakes (crushed) | Less even heat, more flaky texture |
| Whole milk | Unsweetened almond milk + 1 tbsp cornstarch | Slightly less rich, still binds well |
| All‑purpose flour | Rice flour (for gluten‑free) | Lighter, crispier, but more delicate |
How to Make Air Fryer Blooming Onion — Step-by-Step
Don’t be intimidated by the cutting technique — I promise, after the first onion you’ll be a pro. Follow these steps, and you’ll have a beautiful blooming onion ready for the air fryer.
Step 1: Bloom the Onion
Cut off about ½ inch from the top of the onion (the pointy end) and peel off the dry outer skin. Place the onion cut‑side down on a cutting board. Starting about ½ inch from the root, make a downward cut all the way through to the board. Repeat to make four evenly spaced cuts around the onion, then make three additional cuts between each section — you’ll end up with 16 evenly spaced cuts. Turn the onion over and let it sit for 5 minutes. The petals will naturally relax and open.
💡 emy’s Pro Tip: Use a very sharp chef’s knife. A dull blade will crush the onion layers and make the cuts uneven. If the petals feel tight after 5 minutes, gently pry them apart with your fingers.
Step 2: Prepare the Breading Station
In a large bowl, whisk together 2½ cups flour, 1 tablespoon paprika, 1 teaspoon cayenne, ½ teaspoon cumin, ½ teaspoon dried thyme, ½ teaspoon dried oregano, 1 teaspoon salt, and ½ teaspoon black pepper. In a separate deep bowl, whisk 2 large eggs, 1 cup milk, and 1 cup water until smooth. Set both bowls side by side.
Step 3: Coat the Onion
Place the bloomed onion in a clean bowl, cut‑side up. Pour about ¾ of the flour mixture over the top, using a large spoon to work the flour deep between the petals. Turn the onion over and gently pat off any excess flour. Reserve the remaining flour in a separate bowl. Next, submerge the onion in the egg mixture, turning to coat every piece. Let the excess drip off, then transfer it back into the reserved flour bowl and repeat the coating process. Tap off extra flour — some will remain in the bowl.
⚠️ Common Mistake to Avoid: Don’t press the flour into the onion — it will form a dense, doughy crust. Use a gentle spooning motion to let the flour fall naturally between the petals.
Step 4: Chill the Breaded Onion
Transfer the fully coated onion to a plate or baking sheet and refrigerate uncovered for at least 20 minutes. This step firms up the coating so it stays put during air frying. Meanwhile, preheat your air fryer to 350°F (175°C) for 10 minutes.
💡 emy’s Pro Tip: While the onion chills, prepare the aluminum foil sling. Tear off a 12‑inch sheet of foil, fold it lengthwise into a 3‑inch wide strip, then fold again to create a sturdy sling. You’ll use it to gently lower the onion into the basket and lift it out without breaking the petals.
Step 5: Air Fry to Perfection
Remove the onion from the fridge and spray generously with vegetable oil from a spray bottle. Place the foil sling under the onion and transfer it cut‑side up into the air fryer basket. Set the timer for 25 minutes. Every 8–10 minutes, open the basket and spray the onion again with oil — especially any spots where you see dry flour. After 25 minutes, the onion should be deep golden brown and crispy. Use the sling to lift it out, season with salt and pepper, and serve immediately.
⚠️ Common Mistake to Avoid: Skipping the mid‑cooking spritzes. The air fryer’s circulating air can leave some flour patches pale. A quick spray ensures even browning and crunch.
| Step | Action | Duration | Key Visual Cue |
|---|---|---|---|
| 1 | Bloom the onion | 5 minutes | Petals open like a flower |
| 2 | Prepare breading station | 5 minutes | Two bowls — dry and wet |
| 3 | Coat the onion | 10 minutes | All petals evenly dusted |
| 4 | Chill in refrigerator | 20 minutes | Coating feels dry and firm |
| 5 | Air fry at 350°F | 25 minutes | Deep golden brown, crispy |
Serving & Presentation
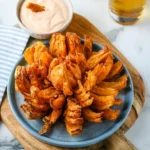
The best part of a blooming onion is the sheer drama of it. Place it on a large platter with a small bowl of dipping sauce in the center — I love a simple blend of mayonnaise, ketchup, and a pinch of smoked paprika (my quick version of the classic Outback steakhouse dip). You can also serve it with a tangy ranch dressing or a spicy sriracha mayo. Garnish with a sprinkle of fresh parsley and a few lemon wedges for brightness.
In Morocco, we often serve fried onions with a harissa dipping sauce for heat. In Paris, a classic aïoli is the go‑to. But here in my NYC kitchen, I’ve found that a creamy chipotle dip is the perfect balance to the crispy, spicy petals. For game day, arrange the onion on a board with celery sticks, carrot sticks, and extra dip — it disappears in minutes.
| Pairing Type | Suggestions | Why It Works |
|---|---|---|
| Side Dish | French fries, sweet potato wedges, coleslaw | Adds crunch and freshness alongside the rich onion |
| Sauce / Dip | Creamy chipotle, ranch, garlic aioli, spicy ketchup | Cools the heat and adds creamy contrast |
| Beverage | Lager, iced tea, margarita, sparkling water | Crisp, cold drinks balance the spicy, fried flavors |
| Garnish | Fresh parsley, lemon wedges, sesame seeds | Adds color and a fresh pop of flavor |
Make-Ahead, Storage & Reheating
Because my weekdays are a whirlwind of recipe testing and blog work, I often prep the breaded onion the night before. Once I’ve coated and chilled it, I wrap it loosely in plastic wrap and keep it in the fridge until I’m ready to air fry. On game day, all I have to do is spray with oil and cook.
| Method | Container | Duration | Reheating Tip |
|---|---|---|---|
| Refrigerator | Airtight container (lined with paper towels) | 3–4 days | Air fry at 350°F for 5–6 minutes until hot and crisp |
| Freezer | Freezer‑safe bag (par‑freeze on a tray first) | 2 months | Air fry from frozen at 350°F for 8–10 minutes, no thawing |
| Make-Ahead | Wrap coated onion in plastic, then foil | Up to 24 hours | Spray with oil directly before air frying — no extra prep needed |
For the best texture, I recommend reheating leftovers in the air fryer rather than the microwave. The microwave turns the coating soggy, while the air fryer brings back the crunch in just a few minutes. If you’re reheating from the fridge, you might need an extra minute or two — keep an eye on it so it doesn’t burn.
Variations & Easy Swaps
| Variation | Key Change | Best For | Difficulty Impact |
|---|---|---|---|
| Spicy Harissa Blooming Onion | Add 1 tbsp harissa paste to the egg wash | Moroccan‑inspired heat lovers | Easy (just an extra ingredient) |
| Gluten‑Free Blooming Onion | Use 2½ cups rice flour + ½ cup cornstarch | Celiac or gluten‑sensitive diners | Medium (handling delicate rice flour crust) |
| Cheesy Onion Blossom | Mix ½ cup grated Parmesan into the flour mixture | Extra‑savory, umami‑packed appetizer | Easy (Parm dries out slightly — watch cooking time) |
Spicy Harissa Blooming Onion
In my Moroccan kitchen, harissa is a staple. Stir a spoonful into the egg wash for a bold, smoky heat that complements the paprika and cumin. The harissa also adds a beautiful red tint to the coating. Serve with a cooling yogurt dip (Greek yogurt mixed with lemon and mint) to balance the spice.
Gluten‑Free Blooming Onion
I’ve tested this with rice flour and cornstarch, and the result is a lighter, more delicate crust that shatters beautifully. Be extra gentle when handling the coated onion — rice flour doesn’t stick as firmly as wheat flour. The chilling step becomes even more important here. Use a gluten‑free all‑purpose blend if you prefer, but avoid heavy bean flours — they can make the crust taste gritty.
Cheesy Onion Blossom
Fold ½ cup of finely grated Parmesan into the dry flour mixture. The cheese melts and browns, creating an extra‑crunchy, savory crust that tastes like you’ve added a secret ingredient. This variation is perfect for cheesy appetizer lovers. Just keep an eye on the cooking time — the cheese can burn quickly, so start checking at 22 minutes instead of 25.
How do you cut an onion to make it bloom?
Start by cutting about ½ inch off the top of the onion and peeling away the outer skin. Place the onion cut‑side down on a cutting board. Make a downward cut about ½ inch from the root, slicing all the way through to the board. Repeat to make four evenly spaced cuts around the onion, then make three additional cuts between each section (you’ll have 16 cuts total). Flip the onion over and let it sit for 5 minutes so the petals open naturally. Use a sharp chef’s knife for clean cuts.
Can I use a regular yellow onion instead of sweet onion?
You can, but the result will be sharper and less tender. Sweet onions like Vidalia or Walla Walla have a higher sugar content that caramelizes beautifully and gives a mellow, almost buttery interior. If you only have yellow onions, soak the cut onion in cold water for 10 minutes after blooming — this helps reduce the pungency and adds a bit of moisture that helps the breading stick.
Why do I have to refrigerate the breaded onion before air frying?
Refrigerating the coated onion firms up the flour‑egg mixture so it adheres firmly to the petals. Without this chilling step, the breading can slide off during cooking, leaving you with bare onion patches. The 20‑minute rest also helps the coating dry slightly, which promotes a crisper texture in the air fryer. It’s a simple trick that makes a huge difference.
Can I make this blooming onion recipe without an air fryer?
Absolutely. You can bake the blooming onion in a conventional oven. Preheat to 425°F, place the onion on a foil‑lined baking sheet, and bake for 20–25 minutes, flipping halfway if possible. The texture will be slightly less crunchy than the air fryer version, but still delicious. For a deep‑fried version, heat 2 inches of oil in a heavy pot to 350°F and fry the onion for 5–7 minutes until golden, using a slotted spoon to baste the petals.
How do I reheat leftover blooming onion so it stays crispy?
The best way to reheat is in the air fryer at 350°F for 5–6 minutes. Spread the petals in a single layer if possible (you can separate them after the first reheating). Avoid the microwave — it makes the coating soggy. If you’re reheating from frozen, add 2–3 minutes. For a quick fix, you can also reheat in a 400°F oven for 8 minutes on a wire rack set over a baking sheet.
What dipping sauce goes best with air fryer blooming onion?
Classic choices include a creamy ranch dressing, a spicy sriracha mayo, or a quick “blooming onion dip” made from equal parts mayonnaise and ketchup with a pinch of cayenne and smoked paprika. I also love a garlic aïoli (mayo + minced garlic + lemon juice) or a Moroccan‑inspired harissa yogurt dip. The key is to have a cooling, creamy element to balance the spice from the coating.
Can I prepare the blooming onion ahead of time for a party?
Yes! You can fully bread the onion up to 24 hours in advance. After coating, wrap it loosely in plastic wrap (without pressing) and refrigerate. When you’re ready to serve, spray with oil and air fry directly. This is perfect for game day — you can do all the messy work the night before and just cook it fresh. If you need to hold it after cooking, keep it warm on a wire rack in a 200°F oven for up to 30 minutes.
Is this air fryer blooming onion healthier than deep‑fried?
Definitely. Traditional deep‑fried blooming onions absorb a significant amount of oil — often several tablespoons per serving. This air fryer version uses just a light spray of oil (about 1–2 teaspoons total) to achieve the same crispy, golden exterior. The calorie count is dramatically lower: one serving has about 278 calories and 6g of fat, compared to roughly 400+ calories and 20g+ of fat for the deep‑fried restaurant version.
How do I prevent the blooming onion from sticking to the air fryer basket?
The aluminum foil sling is your best friend here. Cut a sheet of foil about 12 inches long, fold it lengthwise into a 3‑inch wide strip, then fold again to make a sturdy sling. Place the onion on the sling, then lower it carefully into the basket. The sling also makes it easy to lift the finished onion out without breaking the petals. Make sure the sling doesn’t block the air vents — keep it as flat as possible.
Can I use a different spice blend for the coating?
Absolutely. Feel free to customize the spices to your taste. For a Cajun twist, add ½ teaspoon garlic powder, ½ teaspoon onion powder, and ¼ teaspoon white pepper. For a sweeter version, reduce cayenne to ¼ teaspoon and add 1 tablespoon brown sugar to the flour. My Moroccan roots say harissa and cumin, but the beauty of this recipe is its flexibility — just keep the total dry seasoning volume about 2 tablespoons to maintain the coating ratios.
Share Your Version!
Now it’s your turn to bring this crispy air fryer blooming onion to your table. I’d love to hear how it turned out for you — did you stick with the classic spice blend or try one of the variations? Leave a star rating and a comment below to let me know. And if you snap a photo, tag me on Instagram @cookingwithemi — I genuinely get so excited seeing your beautiful creations.
One question for you: which dipping sauce are you most excited to try? I’m always looking for new ideas, so share your favorite in the comments! From my NYC kitchen to yours — I hope this recipe brings as much warmth to your table as it does to mine. — emy 🧡
Love This Recipe? Save It to Pinterest!
If you enjoyed this Air Fryer Blooming Onion recipe, don’t let it get lost in your browser tabs! 😄 Pin it now so you can find it again anytime — and explore hundreds more tried-and-tested recipes waiting for you on my Pinterest boards.
👉 Follow emy on Pinterest @exorecipe
📌 Pin this recipe · 🔁 Re-pin your favorites · 💬 Tag me when you make it — I love seeing your creations!
⭐️ Did you make this recipe?
I’d love to hear your feedback! Please leave a star rating below and share your experience in the comments. Don’t forget to tag me on Instagram @cookingwithemi when you try it — happy cooking! 🧡
From my NYC kitchen to yours — emy
Air Fryer Blooming Onion
Description
Learn how to make this restaurant quality appetizer at home for a fun game day snack that your family and friends will love!
Ingredients
- 1 large sweet onion
- 2 ½ cups all-purpose flour
- 1 tablespoon paprika
- 1 teaspoon cayenne pepper
- ½ teaspoon ground cumin
- ½ teaspoon dried thyme
- ½ teaspoon dried oregano
- 2 large eggs
- 1 cup milk
- 1 cup water
- Salt and pepper to taste
- Oil in a spray bottle
Instructions
- Slice the onion to make it bloom. Start by cutting off 1/2 inch from the top of the onion, then peel the outer skin from the onion.
- Place the onion cut-side down. Starting about 1/2 inch from the root, make a downward cut all the way through to the cutting board.
- Repeat to make four evenly spaced cuts around the onion. Make 3 additional cuts between each section until you have 16 evenly spaced cuts.
- Turn the onion over and set aside for 5 minutes to allow the petals to relax.
- Prior to breading use your fingers to gently separate the outer pieces.
- Whisk the flour, paprika, cayenne, cumin, thyme, oregano, salt and pepper in a large bowl. In a medium deep bowl, whisk the eggs, milk, and water.
- Place the onion in a clean bowl, cut-side up, and pour the flour mixture on top. Using a large spoon to coat the onion with the flour mixture, especially between the onion petals. Turn the onion over and pat off the excess flour. Reserve the bowl of flour.
- Put the onion in the egg mixture and coat evenly. Remove and let the excess drip off.
- Then transfer the onion back into the reserved flour mixture and repeat the flouring process. Be sure you gently tap off extra flour. There will be leftover flour in the bowl when you are done.
- Place the onion in the refrigerator.
- Preheat the air fryer for 10 minutes to 350ºF.
- Remove the onion from the refrigerator and spray generously with vegetable oil from a spray bottle.
- After making a sling from a sheet of aluminum foil transfer the onion cut side up into the fryer basket.
- Set the timer for 25 minutes and cook. Spray the onion with the cooking oil 2-3 times as you cook it. If any spots still have visible flour spray them with the oil.
- After 25 minutes remove onion using the aluminum foil sling and season with salt and pepper.
- Serve with the blooming onion dip.
