
Table of Contents
BEST Sweet and Sour Sauce – Better Than Store-Bought in 10 Minutes
I still remember the first time I made this BEST sweet and sour sauce from scratch. It was a rainy Tuesday in my tiny New York City apartment, and I was craving the tangy, glossy sauce from my favorite Chinese takeout spot. But as a trained pastry chef from Le Cordon Bleu in Paris, I knew I could make it better. So I rummaged through my pantry, grabbed some pineapple juice I had leftover from a Moroccan breakfast, and started experimenting. The result? A sauce so vibrant, so perfectly balanced, that my husband declared it “better than takeout.” This isn’t just any sweet and sour sauce—it’s the one that will make you never buy a bottle from the store again.
Close your eyes and imagine it: a brilliant, jewel-toned sauce that clings to crispy chicken or shrimp like a second skin. The first hit is pure pineapple sweetness, followed by a bright tang from rice vinegar that makes your mouth water. There’s a savory depth from soy sauce and a faint tomato note from ketchup that rounds everything out. It’s thick enough to coat a spoon but not syrupy—a velvety texture that I perfected by using a cornstarch slurry, a technique I learned from my French training. The aroma? Like a walk through the night market in Marrakech, where smoky and sweet meet in the most delicious way.
What makes my version truly the BEST is that it’s completely free of artificial colors, high-fructose corn syrup, and preservatives. I use real pineapple juice for authentic fruit flavor, and I’ll show you how to get that iconic restaurant color naturally. Plus, I’m sharing a 💡 emy’s Pro Tip for avoiding a common mistake that ruins many homemade sauces: a lumpy texture. One simple trick and you’ll have a silky, smooth sweet and sour sauce every single time. Ready to ditch the bottled stuff? Let’s get cooking.
Why This Sweet and Sour Sauce Recipe Is the Best
The Flavor Secret: The magic here lies in using canned pineapple juice as the base. It’s naturally sweeter and more acidic than fresh pineapple at most grocery stores, giving you a consistent result every time. Growing up in Morocco, we always had cans of pineapple in the pantry for a family treat. Now in my NYC kitchen, I combine that sweetness with light brown sugar and a splash of rice vinegar to create a sweet and sour sauce that’s complex, not cloying. This is the unique angle that sets my recipe apart.
Perfected Texture: A great sweet and sour sauce needs to be thick enough to coat, but not so thick it turns into jelly. The trick, which I learned in Paris, is to dissolve your cornstarch completely in cold water before adding it to the hot liquid. This “slurry” method prevents lumps and guarantees a glossy, smooth sauce that looks as good as it tastes. I’ll guide you through the exact moment to add it—right when the sauce reaches a boil—for perfect results.
Foolproof & Fast: With just three minutes of prep and seven minutes on the stove, this sweet and sour sauce is practically effortless. It’s a 10-minute recipe that even a beginner can master. No weird ingredients, no complicated techniques—just a saucepan, a whisk, and a few pantry staples. This is the kind of sauce that makes you feel like a chef, even on a busy weeknight.
Sweet and Sour Sauce Ingredients
I find all of these ingredients at my local New York City grocery store—no specialty Asian market needed (unless you want to explore!). The rice vinegar is usually in the international foods aisle, and the canned pineapple juice is next to the fruit juices. It reminds me of my mother’s kitchen in Morocco, where she’d always have a can of pineapple waiting for a special occasion. Here’s exactly what you need for this BEST sweet and sour sauce.
Ingredients List
- 1 cup canned pineapple juice (see note)
- 3/4 cup packed light brown sugar OR brown sugar alternative (for low sugar option)
- 1/3 cup rice vinegar (found in the Asian or general vinegar section of any grocery store, or you can substitute apple cider vinegar)
- 3 tablespoons ketchup
- 2 tablespoons soy sauce or tamari (GF)
- For the Cornstarch Slurry: 1 1/2 tablespoons cornstarch dissolved in 2 tablespoons water
- Optional: 2-3 drops natural red food coloring
Ingredient Spotlight
Pineapple Juice: This is the backbone of your sweet and sour sauce. Use canned, unsweetened pineapple juice for the most reliable flavor. Fresh pineapple juice can work, but it’s less consistent in sweetness. Look for a brand with no added sugar. For a tested substitution, you can use a 20-ounce can of crushed pineapple and strain out the juice, but you’ll get a slightly pulpy texture.
Rice Vinegar: This mild, slightly sweet vinegar is what gives the sauce its authentic tang. It’s milder than white vinegar, so the result is less harsh. Substitute with apple cider vinegar in a pinch—just use 1/4 cup plus 1 teaspoon, as it’s stronger. The flavor will be slightly fruitier, but still delicious.
Ketchup: Don’t skip this! It adds a subtle tomato flavor and helps develop that iconic red-orange color. Use a good quality brand like Heinz. For a cleaner option, use tomato paste (1 tablespoon) mixed with 2 teaspoons of honey and 1 teaspoon of vinegar.
| Original Ingredient | Best Substitution | Flavor / Texture Impact |
|---|---|---|
| Canned pineapple juice | Fresh pineapple juice (strained, from about 1/2 pineapple) | More variable sweetness; slightly thinner |
| Light brown sugar | Coconut sugar or brown sugar alternative (like Swerve) | Deeper, more caramel-like flavor; slightly lower sweetness |
| Rice vinegar | Apple cider vinegar (use 1/4 cup + 1 tsp) | Fruitier, slightly sharper tang |
| Soy sauce | Coconut aminos (for soy-free) | Slightly sweeter, less salty; still savory |
How to Make Sweet and Sour Sauce — Step-by-Step
Trust me, this is the easiest homemade sauce you’ll ever make. Just follow these simple steps and you’ll have a restaurant-quality sweet and sour sauce in minutes.
Step 1: Combine Base Ingredients
Place 1 cup of canned pineapple juice, 3/4 cup packed light brown sugar, 1/3 cup rice vinegar, 3 tablespoons ketchup, and 2 tablespoons soy sauce in a small saucepan. Whisk everything together until the sugar is mostly dissolved. Don’t worry if it looks a little cloudy—it will clear as it heats.
💡 emy’s Pro Tip: Use a small saucepan (about 2 quarts) so the liquid doesn’t spread too thin. This helps the sauce heat evenly and thicken faster.
Step 2: Bring to a Boil
Set the saucepan over medium-high heat and bring the mixture to a rolling boil. Stir occasionally to prevent the sugar from burning on the bottom. You’ll see large bubbles breaking the surface—that’s your cue to move to the next step. This takes about 4-5 minutes.
⚠️ Common Mistake to Avoid: Don’t walk away! Once it starts boiling, it can foam up quickly. Keep an eye on it to prevent a sticky mess on your stove.
Step 3: Add the Cornstarch Slurry
In a small bowl, whisk 1 1/2 tablespoons cornstarch with 2 tablespoons cold water until completely smooth. This is your slurry. With the boiling sauce still on the heat, pour the slurry in a steady stream while whisking constantly. The sauce will thicken almost immediately.
💡 emy’s Pro Tip: Make sure the slurry is smooth before adding it—any lumps of dry cornstarch will create lumpy sauce. I like to use a fork to whisk it thoroughly.
Step 4: Simmer and Finish
Reduce the heat to low and simmer the sweet and sour sauce for 1 minute, stirring constantly. You’ll see it go from a thin liquid to a glossy, thick sauce that coats the back of a spoon. If using natural red food coloring (like from beet juice), stir in 2-3 drops now. Remove from heat and let it cool completely.
⚠️ Common Mistake to Avoid: Don’t overcook after adding the slurry! Over-simmering can break down the cornstarch and make the sauce thin again. One minute is all you need.
| Step | Action | Duration | Key Visual Cue |
|---|---|---|---|
| 1 | Whisk base ingredients in saucepan | 1 min | Sugar mostly dissolved, liquid cloudy |
| 2 | Bring to a boil | 4-5 min | Large, rolling bubbles cover the surface |
| 3 | Add cornstarch slurry while whisking | 10 sec | Sauce thickens instantly |
| 4 | Simmer and finish | 1 min | Glossy, coats the back of a spoon |
Serving & Presentation
This BEST sweet and sour sauce is incredibly versatile. In my NYC kitchen, I love to pair it with crispy fried chicken or shrimp for a classic restaurant-style dish. Just toss the hot, crispy protein in the sauce right after frying, and watch the magic happen—the sauce clings beautifully. For a vegetarian option, try it with crispy tofu or tempura vegetables. The contrast of crunchy and sticky is absolutely addictive.
For a beautiful presentation, drizzle the sauce over your main dish with a spoon, then garnish with thinly sliced green onions and toasted sesame seeds. I like to serve it alongside steamed jasmine rice and a simple side of steamed broccoli or snow peas. The sauce also works as a dipping sauce for spring rolls, wontons, or even chicken nuggets. It brings back memories of my mother’s table in Morocco, where a sweet and tangy sauce was always the star of the meal.
| Pairing Type | Suggestions | Why It Works |
|---|---|---|
| Side Dish | Steamed jasmine rice, vegetable fried rice, cucumber salad | Neutral starches balance the tangy sweetness |
| Sauce / Dip | Spring rolls, fried wontons, chicken nuggets, egg rolls | Crispy textures contrast with the glossy sauce |
| Beverage | Iced green tea, crisp lager, or a light Riesling | Refreshing drinks cut through the sweetness |
| Garnish | Green onions, toasted sesame seeds, fresh cilantro | Adds color, freshness, and crunch |
Make-Ahead, Storage & Reheating
This sweet and sour sauce is a meal-prepper’s dream. In my busy NYC schedule, I always make a double batch on Sunday and keep it in the fridge for quick stir-fries and dipping sauces all week. Let the sauce cool completely before storing—this prevents condensation from diluting it. Here’s how to keep it fresh.
| Method | Container | Duration | Reheating Tip |
|---|---|---|---|
| Refrigerator | Airtight glass jar or container | 2-3 weeks | Reheat gently in a saucepan over low heat, whisking. Add 1-2 teaspoons of water if too thick. |
| Freezer | Freezer-safe jar or zip-top bag (leave 1/2 inch headroom) | 3 months | Thaw overnight in the fridge. Reheat as above. |
| Make-Ahead | Same jar as fridge method | Up to 3 days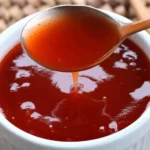 BEST Sweet and Sour SauceDescriptionMaking your own sweet and sour sauce couldn’t be any easier! Plus it’s free of junk ingredients and tastes MUCH better than store-bought! Ingredients
Scale
Instructions
|
