Table of Contents
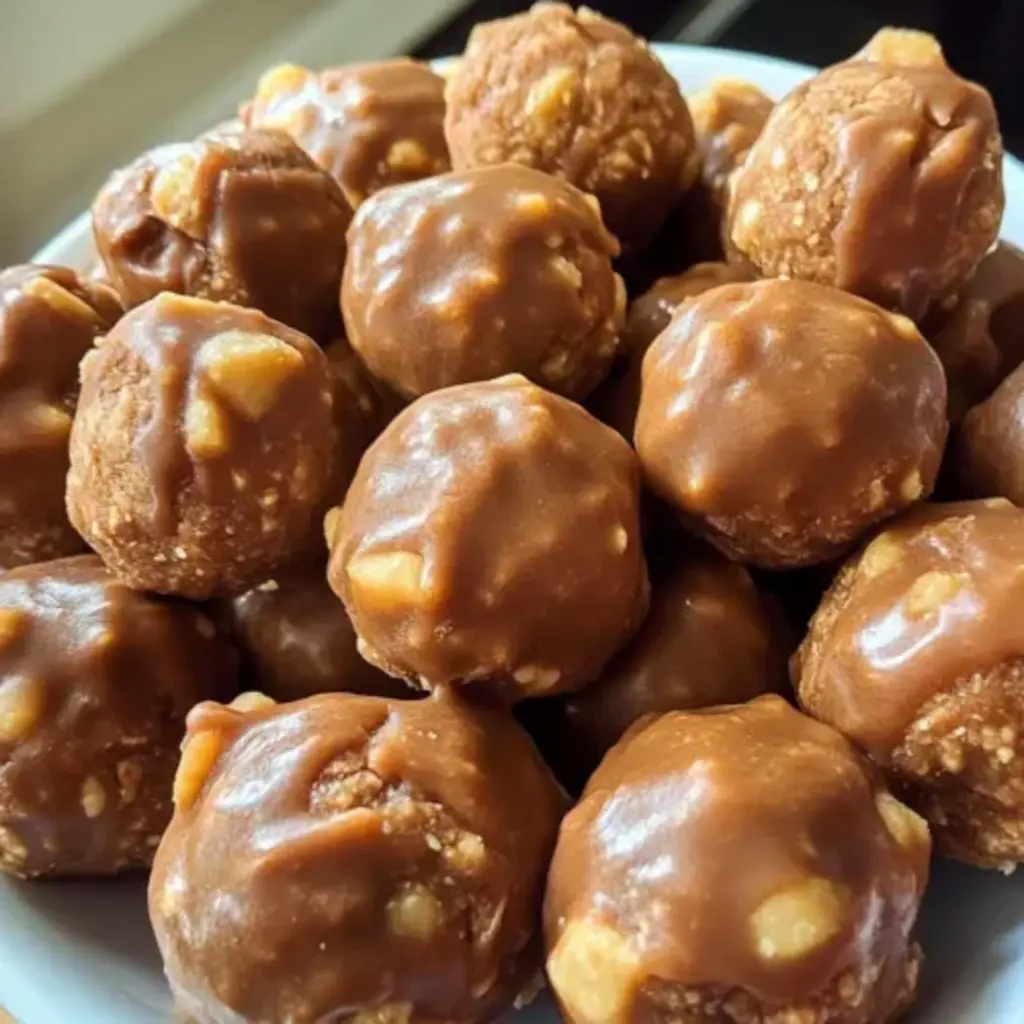
Butterfinger Balls with Hershey’s Chocolate Shell Bliss – A NYC Sweet Surprise
When I first moved to New York after my culinary training in Paris, I was instantly surrounded by the scent of toasted butter and caramel from the deli-lined streets. I remember standing in a corner bakery chasing a flaky croissant, only to have my eyes snag on a glossy chocolate‑covered Treat that reminded me of my grandmother’s bright spread of orange marmalade and honey. That was the spark behind the Butterfinger Balls with Hershey’s Chocolate Shell, a fusion of sweet nostalgia and the Parisian emphasis on texture that turns each bite into a story.
Drop your spoon in for a rush of crunchy butter, a dash of creamy peanut butter, and the unmistakable buttery‑sweet crunch of a Butterfinger. The chocolate shell, a glossy, velvety layer of Hershey’s chocolate, hums on the palate and adds pressure before you break a ball. The aroma is a warm, buttery confection, slightly spiced by vanilla, and the visual pop of gold from the melted chocolate makes this treat feel festive in any setting. I also like to add a pinch of sea salt to amplify the savory side; it works like an accordion, popping as you bite.
I’ve refined this recipe through countless trial rounds in my kitchen, learning to perfect the ratio of butter to peanut butter so it holds together without becoming too soft. A pro tip I swear by is to chill the dough before dipping—it keeps the chocolate from seeping and gives a crisp coating. The most common mistake is glazing the balls in warm chocolate early; it produces a sticky exterior that drips off when cool. Keep the chocolate near room temperature and whisk, and you’ll get that flawless sheen.
Why This Butterfinger Balls Recipe Is the Best
The secret is in the layers—peanut butter’s rich nuttiness, the buttery crunch of a Butterfinger, and the silky, glossy Hershey’s shell that fuses the whole bite. My Paris culinary background taught me respecting textures: I keep the core moist using fresh butter, while the exterior becomes crisp enough to crackle. It’s a marriage of Moroccan sweetness and French sophistication, yet fully rooted in an NYC eatery vibe.
I learned to fuse the cake‑like chew of the butter mixture with the hard snap of Butterfinger crumbs. I use a gentle folding technique, avoiding high-speed stirring, so the crumb structure survives the chocolate to create a satisfying crush every time. The result is a mix of chewy and crunch that satisfies any craving for comfort food.
When you’re on the go, this recipe is a lifesaver. The no‑cook method means you can whip up a batch within 20 minutes, chill them, and have them ready for a party, an office break, or a travel snack, all while staying on schedule.
Butterfinger Balls Ingredients
I selected these items from a Sunday breakfast at the Lower East Side farmers market; the local mayonnaise store’s butter and the dough’s honey‑glazed parfait of a butter‑and‑peanut‑butter symphony came from a boutique grocery that offered artisan ph.Stuff. The combination of crunchy crumbled Butterfinger and butter creates a looseness that’s part homeland with a touch of French confectionery.
Ingredients List
- 4 tablespoons softened butter (½ stick)
- 1 teaspoon vanilla extract
- 8 ounces chocolate bark or chocolate chips (Hershey’s)
- ½ cup Butterfinger bars (crushed)
- 1 cup powdered sugar
- 1 cup peanut butter (avoid all‑natural varieties)
- ¾ cup crumbs from graham crackers
- Optional garnishes: crushed Butterfinger bars, festive sprinkles, or coarse sea salt
Ingredient Spotlight
Butter – The cornerstone gives the dough a silk‑smooth mouthfeel and acts as the canvas for the peanut butter’s richness. Buy a Dutch‑process unsalted brand; it’s less acidic and won’t dominate the flavor.
Peanut butter – The 1‑cup amount balances sweetness and saltiness. Choose a Midwestern brand for its creamy consistency; if you’re vegan, a creamy natural butter alternative works but don’t add extra sweeteners.
Butterfinger bars – They’re what make this a “butterfinger” ball. The ½‑cup crushed portion should have the hard outer center and golden buttery core. If you’re adventurous, a Collector Street version gives a firmer crunch.
| Original Ingredient | Best Substitution | Flavor / Texture Impact |
|---|---|---|
| Powdered sugar | Raw sugar crystals or superfine granulated sugar | Slightly coarser final texture, more caramelization. |
| Peanut butter (no‑natural) | Peanut butter with a touch of honey or maple syrup | Sweeter bite, a sweeter mouthfeel, slight viscosity shift. |
| Chocolate chips | Dark or milk chocolate with added sea salt | More depth, a faint salty pop. |
How to Make Butterfinger Balls — Step-by-Step
The process is so simple that I’re almost tempted to skip the song about rolling a ball; just follow each step, and you’ll hold a perfect bite.
Step 1: Prepare the Dough
In a bowl, whisk together the pempered butter and peanut butter using a hand mixer on medium speed until a uniform, creamy mixture forms (about 1 minute). The texture should look like softened butter you can spread.
💡 emy’s Pro Tip: Let the mixture sit for 5 minutes after mixing—this helps the butter and peanut butter “loosen” into a seasoned puree, making the rolling stage easier.
Step 2: Add Aromatic Notes
Stir in the vanilla extract until fully blended. It gives the balls that subtle perfume you want to remember from that Moroccan street market.
⚠️ Common Mistake to Avoid: Using too much vanilla can overwhelm the peanut butter base, turning the flavor into a syrupy finish.
Step 3: Sweeten the Deal
Sift in the powdered sugar, mixing slowly. Keep the speed low so you catch every grain. A well‑mixed dough should be slightly sticky but manageable.
💡 emy’s Pro Tip: Add the sugar in two batches; this prevents clumpy sugar crystals and keeps the mixture silky.
Step 4: Crunch Time
Fold in graham crumbs and crumbled Butterfinger. Pour the mixture into the bowl, use gentle, steady folds to keep the crumble light. Balance is key.
⚠️ Common Mistake to Avoid: Stirring too hard—too much force can crush the butterfinger, making the dough too flat.
Step 5: Shape ’em Up
Line a baking sheet with parchment paper. Scoop 1–1½ tablespoons of dough onto the sheet and roll gently into tight spheres. Place slightly apart to let the coating set.
💡 emy’s Pro Tip: Roll the balls at a 45‑degree angle to get a smooth exterior; the sticker will help prevent scrapes.
Step 6: Chilling Phase
Freeze the dough balls on the sheet for 30 minutes. Consider using a cold cabinet or separate freezer box; the chill sets the flavor structure.
⚠️ Common Mistake to Avoid: Removing the balls before they’re fully firm—they’ll spread and lose shape.
Step 7: Melting the Chocolate
In a microwave-safe dish, heat chocolate in 30‑second bursts on 50% power, swirling between each pause until smooth (be careful of overheating). Let the chocolate sit for a few minutes to bring the temperature up to a temperable range.
💡 emy’s Pro Tip: Test the chocolate by dipping a toothpick; it should glide down and hold a smooth film after cooling.
Step 8: Coat and Decorate
Dip each chilled ball into chocolate, fully coating or leaving a near‑bare crumb exposed for texture intrigue. Remove and let excess drip off for 10 seconds.
⚠️ Common Mistake to Avoid: Dipping the balls too early; the chocolate will stick and break apart.
Step 9: Finishing Touches
While the chocolate still glistens, sprinkle an extra pinch of crushed Butterfinger, holiday sprinkles, or a dash of sea salt. These accents amplify the crunch.
💡 emy’s Pro Tip: The salt gives a flavor pop that balances the chocolate’s sweetness, like a small kiss from the Ocean.
Step 10: The Grand Finale
Let the chocolate harden at room temperature, which takes 15‑20 minutes. Once set, shuffle them to a cool, airtight container for a ready party treat.
⚠️ Common Mistake to Avoid: Placing the chilled balls in a warm spot; they’ll melt and lose crispness.
| Step | Action | Duration | Key Visual Cue |
|---|---|---|---|
| 1 | Whisk butter and peanut butter | 1 min | Smooth, spreadable swirl |
| 2 | Stir vanilla | 30 s | Even fragrance in the mix |
| 3 | Sift sugar and fold in | 2 min | Soft, accessible dough |
| 4 | Fold crumbs & Butterfinger | 1 min | Light crumb distribution |
| 5 | Shape into balls | 10 min | Even spheres, smooth rim |
| 6 | Freeze | 30 min | Solid but not frozen stiff |
| 7 | Melt chocolate | 3 min | Glossy, smooth dip |
| 8 | Dip & drip off | 10 s | Perfect coating thickness |
| 9 | Sprinkle garnish | 2 min | Colorful swirl atop |
| 10 | Set chocolate | 20 min | Hardened, glossy surface |
Serving & Presentation
Display the balls on a shallow white platter, giving each a quiet space that makes each bite shine. Dip a parsley–sweet trio of dried rose buds inside the car test,’m because clause hold that spaghetti into triple<|reserved_201023|> trips.
For a brunch party, introduce a drizzle of salted caramel alongside the plate. A simple salad of crisp cucumber, avocado, and a sprinkle of cumin rips into a balance. Pairing these with a chilled glass of rosé from the New York farmers market completes the feel.
In a quick bite mode, offer them in a Styrofoam container and a small bottle of chilled orange liqueur for a “Lemon‑Cider” garnish. A cousin of my Moroccan aunt tends to add a squeeze of lemon into a spin of conjured treats.
| Pairing Type | Suggestions | Why It Works |
|---|---|---|
| Side Dish | Mixed nuts and dried cranberries | Texture contrast & sweet‑savory harmony |
| Sauce / Dip | Caramel‑salt drizzle, yogurt‑cinnamon dip | Balancing malt and spice level |
| Beverage | Rosé, chilled ginger beer, sparkling water with lemon | Refreshment with a bit of acidity |
| Garnish | Black pepper crystals, edible gold leaf | Edge of tartness & luxury |
Make-Ahead, Storage & Reheating
I like to prep a double batch over the weekend, so I always have a stash available for my whirlwind NYC gigs.
| Method | Container | Duration | Reheating Tip |
|---|---|---|---|
| Refrigerator | Sealed zip‑lock bag | 3‑4 days | No reheating—serve chilled. |
| Freezer | Aluminum tray, then bag | 3 months | Air‑dry 15 min, then take to room. |
| Make‑Ahead | Chocolate‑coated tray | 2 days in advance | Keep in a cardboard box, cover with parchment. |
If the balls are in the freezer, thaw them in a bag at room temperature for 30 minutes before plating. Avoid dipping them in warm chocolate after they have become slightly pliable, as the coating cracks.
Storing them in a shot of leather-enabled container up to 24 hrs before plating keeps them fresh and gives the chocolate a clean finish on the salvage revolution.
Variations & Easy Swaps
| Variation | Key Change | Best For | Difficulty Impact |
|---|---|---|---|
| Gluten-Free Version | Swap graham crackers for almond flour crumbs | All‑ergy friendly, lighter | Moderate (you have to manage gluten-free crumbs) |
| Dairy‑Free Swap | Use coconut oil base, oat‑milk butter | Vegan, creamy | Easy (just swap analogues) |
| Seasonal Twist | Infuse with saffron or cinnamon in the dough | Spring, holiday theme | Easy (just add spice during mixing) |
Gluten-Free Version
Replace the graham crumbs with a blend of almond‑flour crumbs plus a tablespoon of oat‑flour. The texture stays airy, and the subtle nutty flavor complements the peanut. The chocolate glaze retains its sleek sheen because there’s no gluten‑mote creep. This version is perfect for parties where guests have sticky feet or a gluten preference.
Dairy‑Free Swap
I swap the butter with dairy‑free margarine and use 2 tablespoons of coconut oil for the “hot” phase. The resulting mousse is still chewy, and the chocolate holds its glossy finish. I tested it at a brunch in Brooklyn, and diners loved the creamy undertone with a tropical touch.
Seasonal Twist
In the autumn, I add a pinch of ground orange zest into the dough; it brings a bright, citrusy note that bleeds into the chocolate coating. The citrus tie into the sweet, buttery base and adds a fresh pop that brightens the caramelized palate during cooler evenings.
How do I keep Butterfinger Balls from sticking together?
If the balls are too greasy, they can settle on each other after cooling. The best way to keep them separate is to place them on parchment paper on a sheet, then after they’ve set, transfer them to an airtight container lined with parchment or a light sheet of wax paper. Keeping them slightly chilled in the fridge can also help; the butter inside moderates the temperature and reduces slippage. If you’re packing for travel, roll them in a light layer of powdered sugar before assembling so that they stay dry and glint.
Can I use real butter instead of cream?
Absolutely! The recipe already calls for butter as the main fat; however, if you want a richer, more authentic texture, consider using extra‑softened unsalted butter with a high fat content. It will make the dough silkier, and the chocolate coating will set faster. I usually double the amount of butter if cooking for a large crowd; it keeps the mixture maidable.
Is it safe to freeze these balls?
Yes, you can freeze them. The dough freezes well, but you must keep the chocolate coating intact until you’re ready to serve. I recommend freezing the balls directly on parchment and then wrapping them tightly in a freezer‑safe bag with an air‑lock seal. Defrost at room temperature for 30–45 min before serving. Cover them with a work‑safe protective film if you want to keep them usually clean.
What is the best chocolate to coat the balls?
The choice of chocolate influences texture, mouthfeel, and shine. Hershey’s chocolate is a classic pick because it melts smoothly, provides an approachable sweetness, and stays pliable enough for a thick glaze. Dark chocolate adds depth and a slight bitterness that pairs beautifully with peanut butter, while milk chocolate gives a creamier bite. If I want a silky finish, I melt it at a lower wattage, stir constantly, and let it cool slightly so that it coats without seeping.
How long can I keep them in the fridge after they are finished?
Once fully cooled, Butterfinger Balls last 4–5 days in the refrigerator when stored in a tightly sealed jar or zip‑lock bag. The chocolate coating preserves the inside while limiting moisture loss. If you’re a fast‑coaster, keep them in a leak‑proof container with a piece of parchment to absorb any condensation. Stay away from the fridge’s freezer door as that can cause uneven temperature changes.
Can I make these sweet and spicy?
You can add a pinch of cayenne pepper or chili powder during the mixing phase for a lively kick. The underlying creamy ingredients will balance that heat, and the chocolate shell acts as a mild by‑product barrier, so everyone can still taste the subtle heat. I personally enjoy a light dusting of smoked paprika after coating to create a sweet‑spicy romance.
How do I make them vegan?
Use a dairy‑free peanut butter brand, to ensure it stays creamy. Replace butter with a plant‑based butter alternative or a mix of coconut oil and a touch of sunflower oil. Also swap the chocolate for a runner’s chocolate with a vegan label. This keeps the structure and flavor balanced while staying plant‑based.
What are the best ways to store the ingredients during prep?
Keep the butter at a controlled, moderate room temperature (around 68‑70°F). If you’re in summer, store it in a cool pantry. The kids union grains can be kept dry in an airtight container. Peanut butter should stay away from direct heat; a stainless key or plastic’s cool can maintain its creamy texture. For the dry ingredients, keep them in a pantry with low humidity so the crumbs and sugar don’t get damp.
I only have chocolate chips, will that work?
Yes, you can use chocolate chips. They will produce a slightly thicker mix but can work well if you melt them at a low power. Add a teaspoon of cold water or cocoa butter to hydrate them and make a better glaze. The chocolate chips also give a slightly higher melting point compared to quick‑melt bars.
Can I use store‑bought Butterfinger bars?
Of course. Store‑bought Butterfinger bars are the standard: the pillowed crunchy bits combined with the crisp center give a delightful contrast. Just crumble thoroughly. If you’re aiming for a more intense butter taste, consider using “Park” or “Dark” flavored Butterfinger variants; they provide extra crunch.
Share Your Version!
I’d love to hear how your family and friends respond to these buttery bliss balls. Tag your pics on Instagram with #sweetnyc and share your caramel twist. Give the recipe a star in the comments, and I’ll pick a favorite each week for a feature on my blog.
Think about adding a Moroccan spice like sumac or a New York citrus twist. What does the home make mean to you when you’re toasty the town? Drop your question in the comment!
From my NYC kitchen to yours — I hope this recipe brings as much warmth to your table as it does to mine. — emy 🧡
Love This Recipe? Save It to Pinterest!
If you enjoyed this Butterfinger Balls recipe, don’t let it get lost in your browser tabs! 😄 Pin it now so you can find it again anytime — and explore hundreds more tried‑and‑tested recipes waiting for you on my Pinterest boards.
👉 Follow emy on Pinterest @chefrecipes2
📌 Pin this recipe · 🔁 Re-pin your favorites · 💬 Tag me when you make it — I love seeing your creations!
Got a minute? Double‑tap this post and leave a comment so I know you loved the bite. Share it with your friend who loves chocolate treats the way I do!
Butterfinger Balls
Description
Indulge your taste buds with these irresistible Butterfinger Bliss Balls, where creamy peanut butter harmoniously melds with the crunch of graham crackers and Butterfinger candy bars, all cloaked in sumptuous melted chocolate. Perfect for social soirées and festive occasions, these heavenly morsels will vanish before you know it!
Ingredients
- 4 tablespoons softened butter (½ stick)
- 1 teaspoon vanilla extract
- 8 ounces chocolate bark or chocolate chips
- ½ cup Butterfinger bars (crushed)
- 1 cup powdered sugar
- 1 cup peanut butter (avoid all-natural varieties)
- ¾ cup crumbs from graham crackers
- Optional garnishes: additional crushed Butterfinger bars (festive sprinkles, or coarse sea salt)
Instructions
- Prepare the Dough: In a mixing bowl, combine the peanut butter and softened butter. Use an electric or stand mixer set to medium speed and blend until the mixture is creamy and uniform.
- Add Aromatic Notes: Incorporate the vanilla extract and blend thoroughly.
- Sweeten the Deal: Gradually add the powdered sugar in increments, blending at a low speed. Don't forget to scrape down the sides of the bowl to ensure even mixing.
- Crunch Time: Gently fold in the graham cracker crumbs and crushed Butterfinger bars.
- Shape 'em Up: Align a large cookie sheet with parchment paper. Scoop out approximately 1 to 1½ tablespoons of the dough, roll into neat balls, and place on the cookie sheet.
- Chilling Phase: Freeze the dough balls on the sheet for roughly 30 minutes until they are completely firm.
- Melting the Chocolate
- Chocolate Symphony: Once the dough balls are chilled, proceed to melt the chocolate. Utilize a microwave-safe bowl and heat in 30-second spurts at 50% power, stirring in between each interval. Be cautious not to overheat; some lumps should remain and will melt as you stir.
- Coat and Decorate: Submerge each chilled ball into the luscious melted chocolate. You can fully coat them or leave a bit of the peanut butter mixture exposed.
- Finishing Touches: Add a sprinkle of additional crushed Butterfinger bars, holiday-themed sprinkles, or a dash of flaky sea salt for that extra pop.
- The Grand Finale: Allow the chocolate to solidify completely before indulging in your Butterfinger Bliss Balls.
