Start your day off right with our collection of delicious and satisfying breakfast recipes! Whether you’re craving something quick and easy, hearty and filling, or sweet and indulgent, we’ve got you covered.
From fluffy pancakes and crispy waffles to savory egg dishes and protein-packed bowls, our recipes are perfect for busy mornings or leisurely weekend brunches. Looking for something healthy? Try our smoothies, overnight oats, or wholesome breakfast bakes.
No matter your preference, these recipes are designed to bring warmth and energy to your mornings. Get ready to make breakfast your favorite meal of the day! 🍳🥞☕
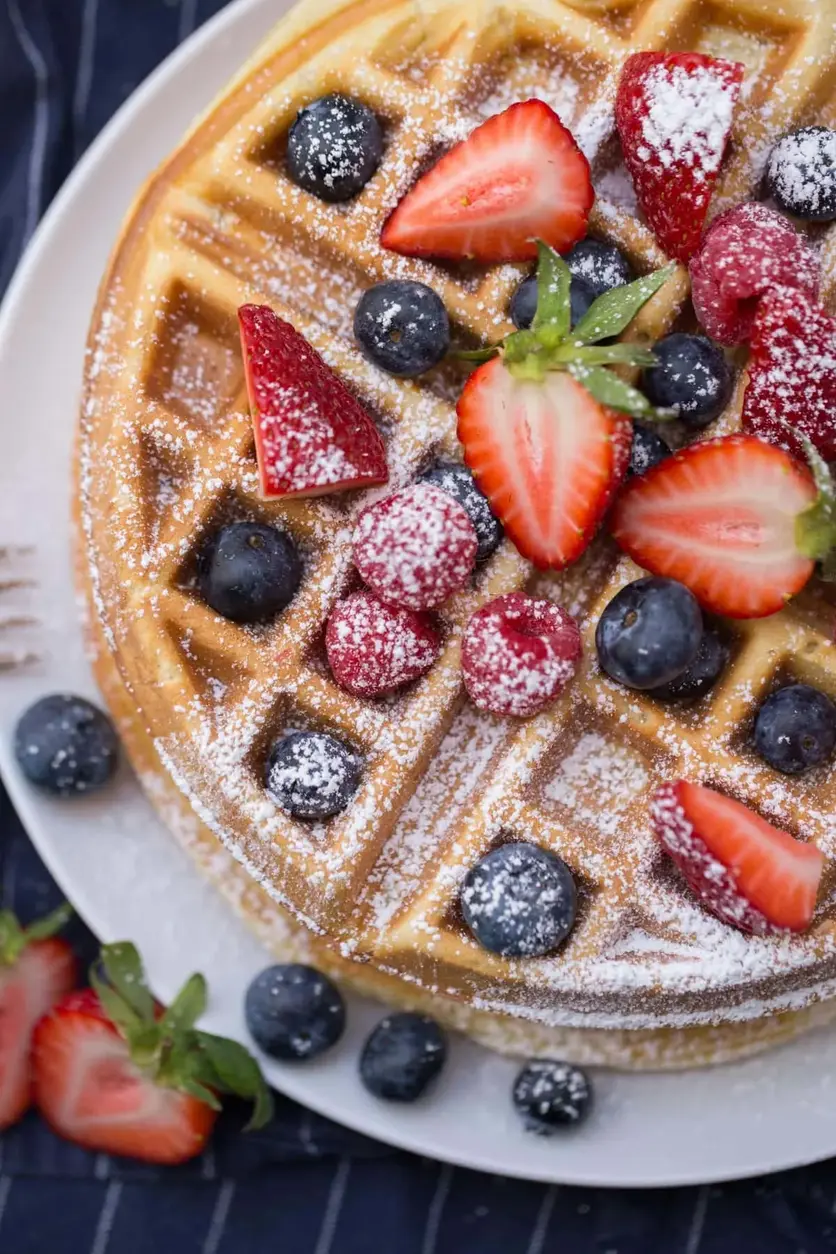
Belgian waffles are such a classic weekend breakfast. Grab a few pantry items and make these with this easy, fail-proof Belgian Waffle Recipe.
Ingredients
Scale
2 1/4 cups all purpose flour
1/4 cup granulated sugar
1 1/2 teaspoons baking powder
1/2 teaspoon baking soda
1/2 teaspoon salt
1 1/2 cups cold milk
1/4 cup melted butter or canola oil
1 teaspoon vanilla extract
2 eggs beaten
Instructions
In a large bowl, whisk flour, sugar, baking powder, baking soda, and salt until well combined. Create well in the center.
Into the well of the dry ingredients, pour in remaining ingredients (milk, melted butter, vanilla extract, and eggs). Whisk to incorporate and create a batter.
If it seems too thick, add in an extra splash of milk. You want your waffle batter to be the consistency of white school glue.
Preheat Belgian waffle maker. Brush generously with melted butter and pour in about 1/2 cup batter into the center. Close and cook according to waffle maker instructions.
Repeat with remaining batter until all waffles have been cooked. Serve warm with berries, whipped cream, powdered sugar, maple syrup and/or butter.
Separate your eggs into whites and yolks. Add egg whites into a large bowl and whip with a stand mixer until stiff peaks form. Set aside.
In another large bowl, whisk flour, sugar, baking powder, baking soda, and salt until well combined. Create well in the center.
Pour in remaining ingredients (milk, melted butter, vanilla extract, and egg yolks). Whisk to incorporate and create a batter.
Gently fold in the whipped egg whites.
Preheat Belgian waffle maker. Brush generously with melted butter and pour in about 1/2 cup batter into the center. Close and cook according to waffle maker instructions.
Repeat with remaining batter until all waffles have been cooked. Serve warm with berries, whipped cream, powdered sugar, maple syrup and/or butter.
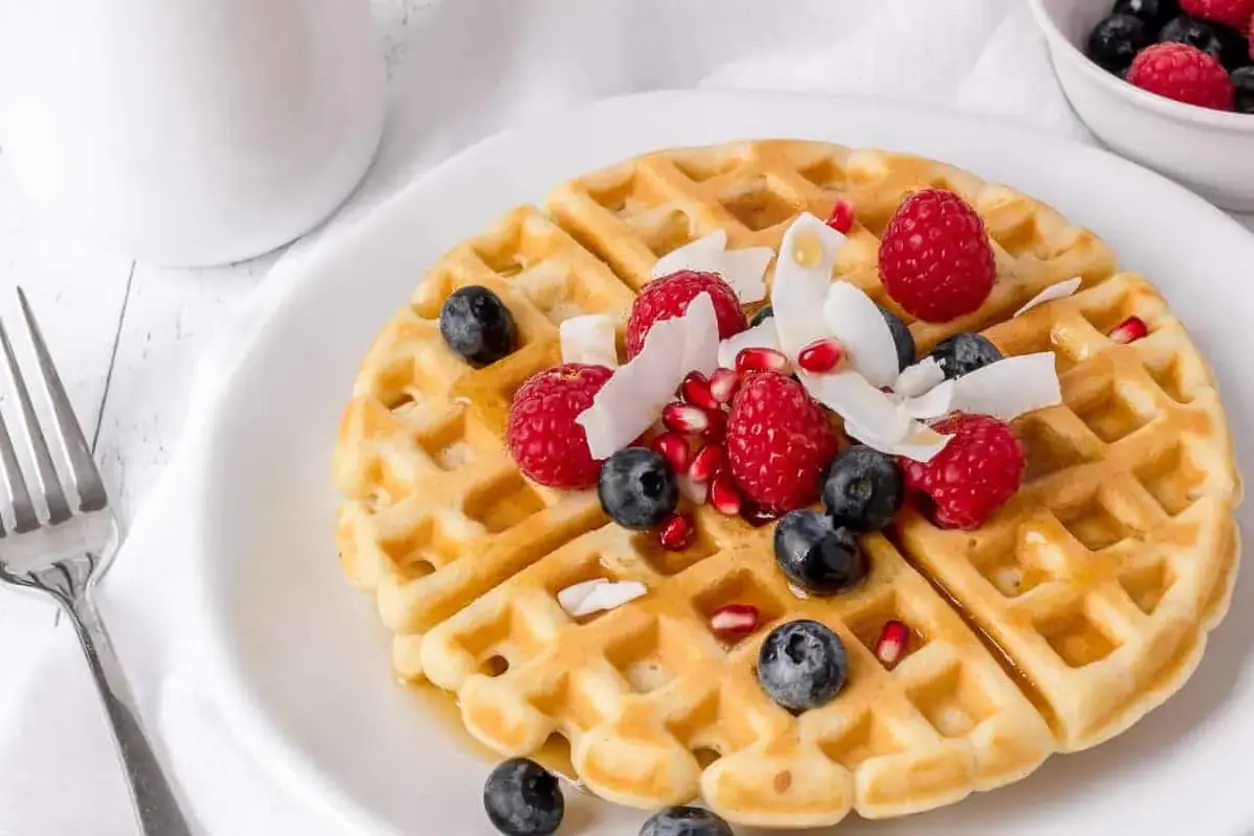
This made from scratch gluten free waffle recipe will make the best gluten free waffles you have ever had. Made with Bob’s Redmill 1 to 1 Gluten Free Flour, this easy to make recipe produces fluffy waffles with crisp, golden brown edges. This recipe can easily be made dairy free by substituting your favorite plant based milk for the whole milk in the recipe.
Ingredients
Scale
2 cups gluten free flour I used Bob's RedMill 1:1
3 tablespoons sugar
1 tablespoon baking powder
1 teaspoon sea salt
1.25 cups whole milk add up to ¼ cup more to smooth out your batter
3 tablespoons canola oil melted coconut oil works well too
2 large eggs
1 tablespoon vanilla
Instructions
Whisk together the gluten free flour, sugar, baking powder and salt in your mixing bowl.
In a large measuring cup, combine 3 tablespoons of oil (canola or melted coconut oil work well) with the vanilla extract and milk. Finally, you will whisk the eggs. Mix the liquid ingredients until well combined.
Add the liquid ingredients with the dry ingredients and mix until just combined. The batter may be slightly lumpy which is good. If the batter feels too thick, add a splash of milk and mix again. You want the batter to be smooth enough to pour or drizzle into your waffle iron.
Choose your favorite waffle iron and turn it on to warm up. Spray the iron with a little bit of canola oil or nonstick cooking spray. Once the waffle iron is warm, use a measuring cup or ladle to pour a cup of batter onto the hot waffle iron. Cook waffles, following the directions on your waffle maker. Mine has a little orange light that turns off when the waffle is ready.
Serve waffles with some fresh fruit and warm maple syrup.
You can store leftover waffle batter in an airtight container in the refrigerator for 2-3 days. To make fresh waffles, simply warm your waffle iron and scoop batter directly from the refrigerator.
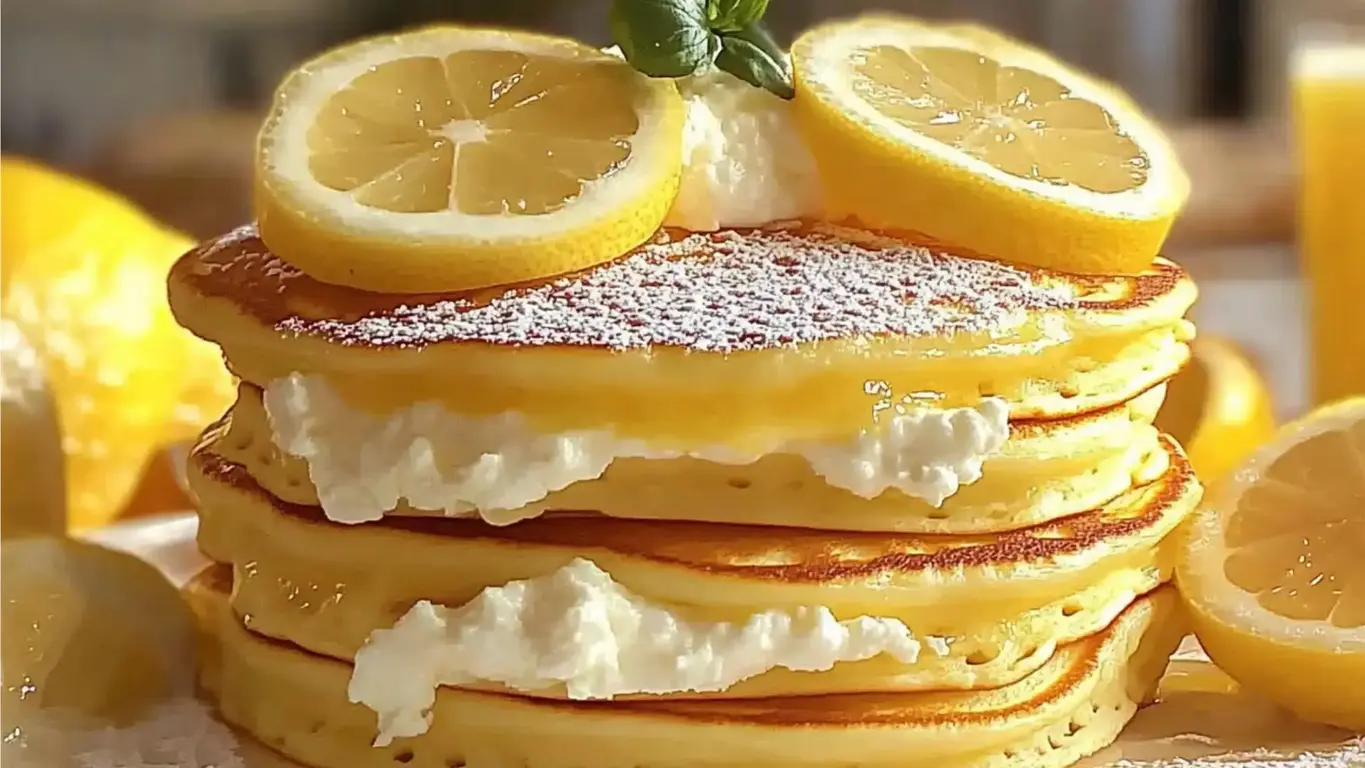
Whip up these easy lemon ricotta pancakes for a cooked breakfast that feels special yet simple to prepare! #LemonRicottaPancakes #CookedBreakfast #SpecialBreakfast #BreakfastBites
Theres something magical about the mornings in my grandmothers tiny kitchen in Tuscany. ezstandalone.cmd.push(function { ezstandalone.showAds(136); });
Ingredients
Scale
1 cup whole milk ricotta cheese
2 large eggs, separated
1 tablespoon lemon zest (from about 1 large lemon)
3 tablespoons lemon juice (freshly squeezed)
¾ cup all-purpose flour
2 tablespoons granulated sugar
1 teaspoon baking powder
¼ teaspoon baking soda
¼ teaspoon salt
½ teaspoon vanilla extract
cup whole milk
Butter or oil, for cooking
Instructions
Notes
Berry Burst: Add blueberries or raspberries into the batter before cooking.
Citrus Swap: Try using orange zest and juice for a slightly sweeter version.
Nutty Twist: Sprinkle chopped pistachios or almonds on top for a Mediterranean feel.
Honey Drizzle: Swap maple syrup for Italian acacia honey for a more authentic twist.
Lemon Ricotta Pancakes are the quintessential “elevated” pancake recipe. Tart-but-sweet, with fresh lemon juice and zest and ricotta. Yum!
Ingredients
Scale
1 ½ cups all-purpose flour
1 tablespoon baking powder
3 tablespoons white sugar
½ teaspoon salt
1 cup milk
1/2 cup ricotta cheese
2 large eggs
1 teaspoon vanilla extract
2 tablespoons fresh lemon juice
1 tablespoon fresh lemon zest
2 tablespoons butter for cooking
Instructions
Grab two bowls, one large, one medium.
In the large bowl, whisk together dry ingredients: 1 ½ cups all-purpose flour, 1 tablespoon baking powder, 3 tablespoons white sugar, and ½ teaspoon saltuntil well combined.
In the medium bowl, add the 1 cup milk and 1/2 cup ricotta cheese and whisk until well blended. Then add the 2 large eggs, beating between each. Then add the 1 teaspoon vanilla extract, 2 tablespoons fresh lemon juice and 1 tablespoon fresh lemon zest.
Make a well in the dry ingredients and add the blended wet ingredients – just fold it in gently, until JUST combined. Don’t over mix – you’ll have tough pancakes. We want fluffy pancakes!
Melt or brush 2 tablespoons butteronto a large griddle and heat to medium.
Add pancake batter, a cup at a time (or smaller if you want smaller pancakes).
When you get bubbles, flip the pancakes over and cook on the other side. Should be a minute or two per side, and golden brown.
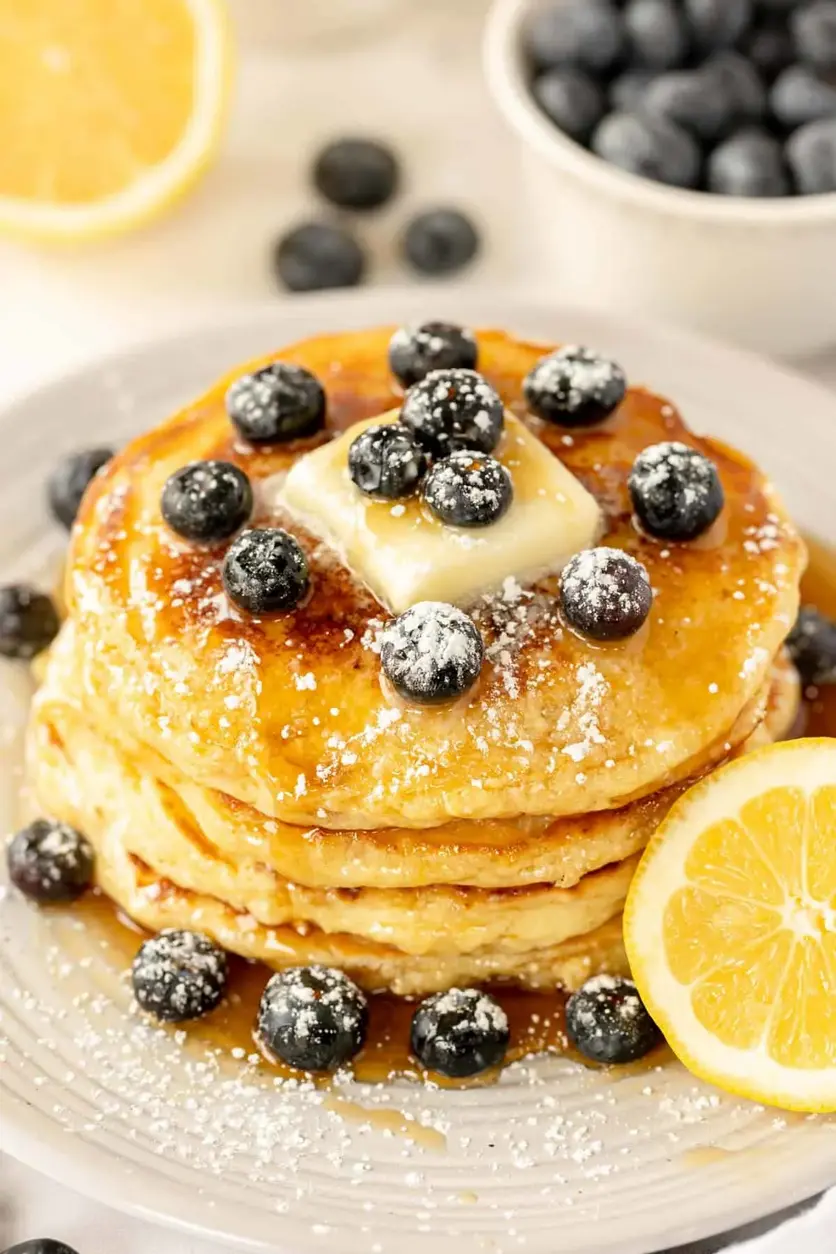
Serve with extra ricotta, lemon zest, powdered sugar and blueberries.
Devour.
Notes
Notes What kind of ricotta? – I use a lower fat ricotta, but not not fat free. All versions will work, but I’ve found the fat free just doesn’t taste good. You can make your own ricotta too, if you wish! Don’t over-mix batter – use separate bowls for wet and dry ingredients (so you don’t over-mix resulting in tough pancakes). What do lemon ricotta pancakes taste like? – Tart but sweet! They have a definite tang due to the lemon juice and zest. They’re fluffier than regular buttermilk pancakes. What goes with lemon ricotta pancakes? Whatever you fancy! I dust mine with powdered sugar, some extra ricotta, a little zest… and a few blueberries. Sometimes maple syrup. You can do raspberries too, they work really well with these pancakes. Whipped cream is also a good choice!
Nutrition
Calories:328kcal
Sugar:13g
Protein:13g
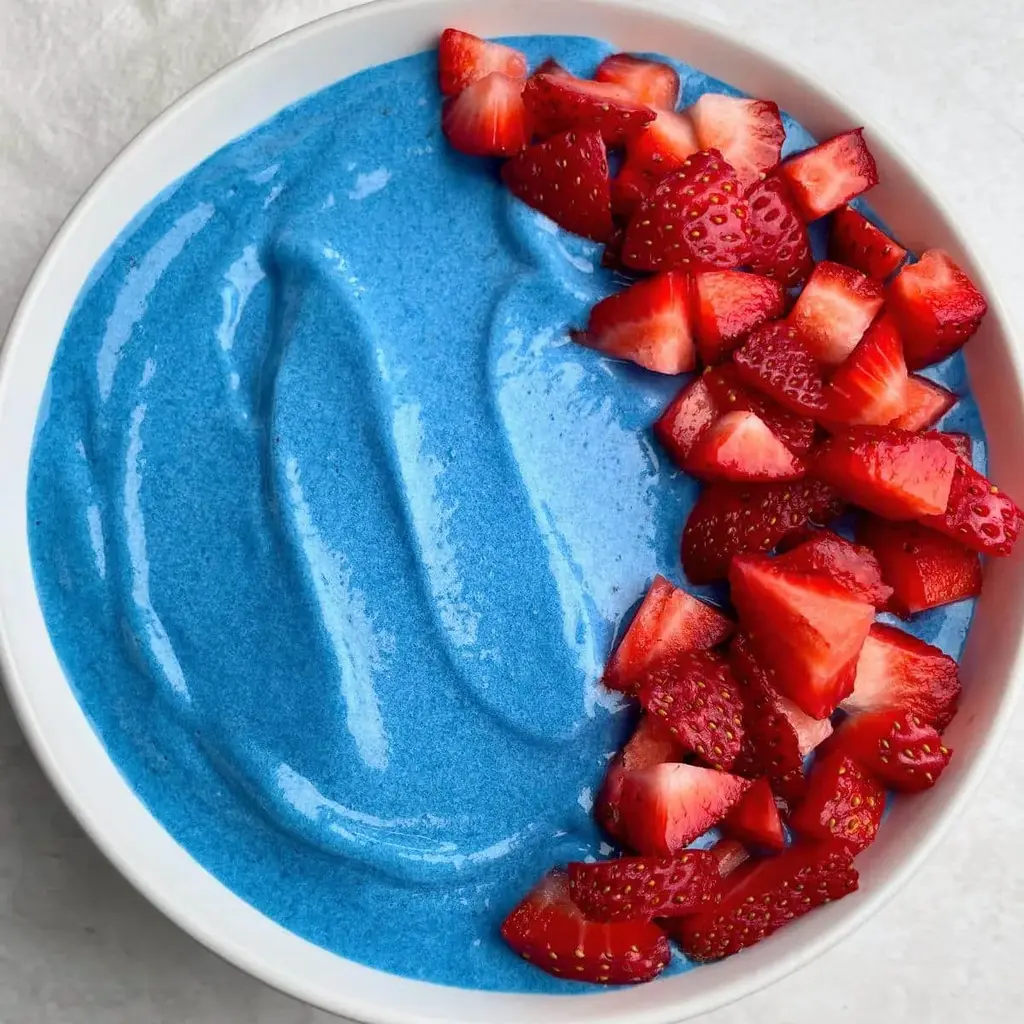
Blue Smoothie Bowl
This irresistible Blue Smoothie Bowl is so healthy and refreshing! It has just a handful of ingredients including frozen tropical fruit and blue spirulina for a gorgeous blue color.
This irresistible Blue Smoothie Bowl is so healthy and refreshing! It has just a handful of ingredients including frozen tropical fruit and blue spirulina for a gorgeous blue color.
Ingredients
Scale
2 ripe bananas
2 white peaches, peeled
1 cup fresh pineapple,
1/4 cup coconut yogurt
1 tbsp maple syrup
1 1/2 tsp blue spirulina powder
1 tsp vanilla extract
Instructions
Line a small cookie sheet with parchment paper. Cut the fresh fruit into chunks and spread them onto the cookie sheet in a single layer. Freeze the fruit for about 2 hours.
Gather your ingredients so that you can work fast once you take the fruit out of the freezer. Add the frozen fruit, coconut yogurt, maple syrup, vanilla, and spirulina to a blender. Pulse it into a creamy mixture, pausing occasionally to scrape down the sides.
Spoon the smoothie mixture into bowls and top them with coconut shreds, strawberries, and any other favorites. Enjoy!
Notes
Placing the fruit chunks on parchment paper makes them easier to pop off once they are frozen.
You can put the fruit in freezer bags or containers if you dont plan to blend the smoothie bowl right away.
Gather your ingredients beforehand to save time because the fruit starts to defrost and soften once its out of the freezer.
Put your bowls in the freezer while blending the ingredients so that the smoothie stays colder longer when youre eating it.
Cover leftovers and store them in the freezer for up to 2 weeks. Let the smoothie sit on the counter for a few minutes just before enjoying it.
Nutrition
Calories:156kcal
Sugar:22.8g
Protein:7.6g
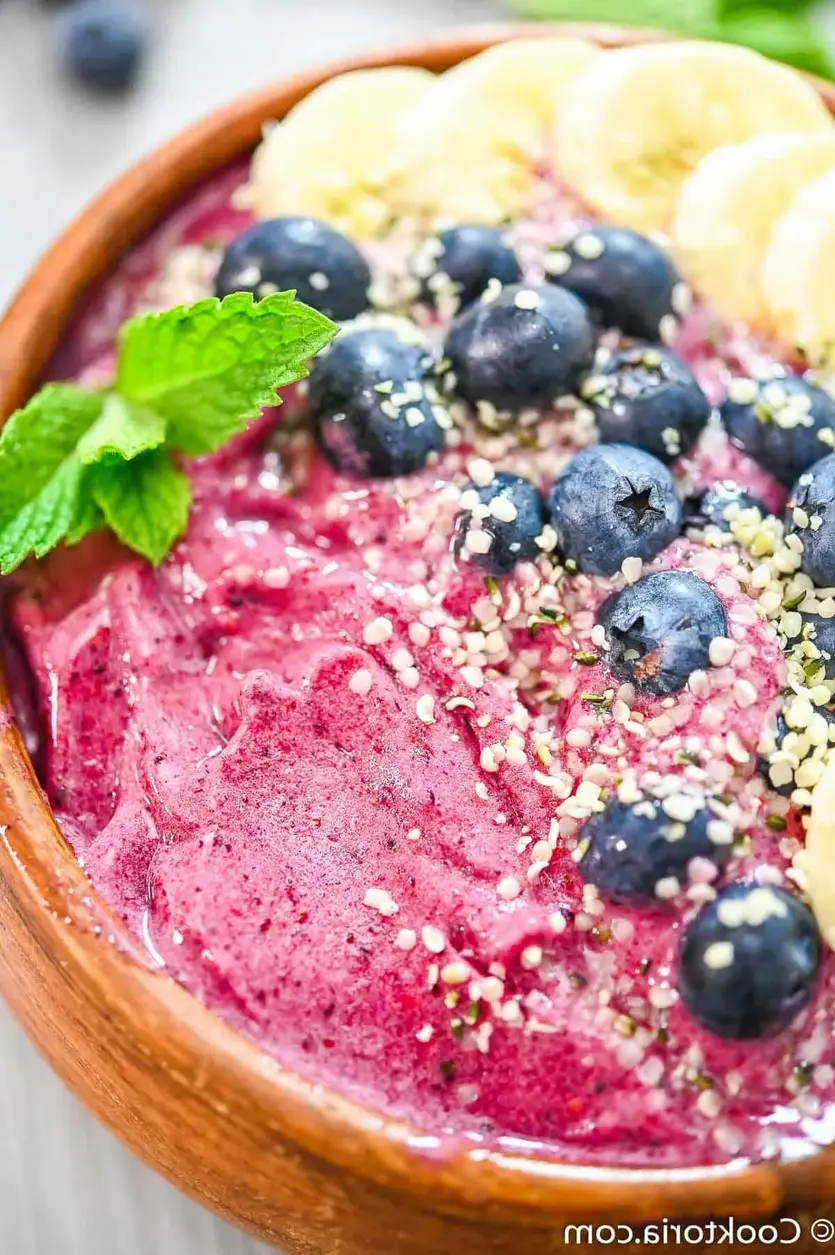
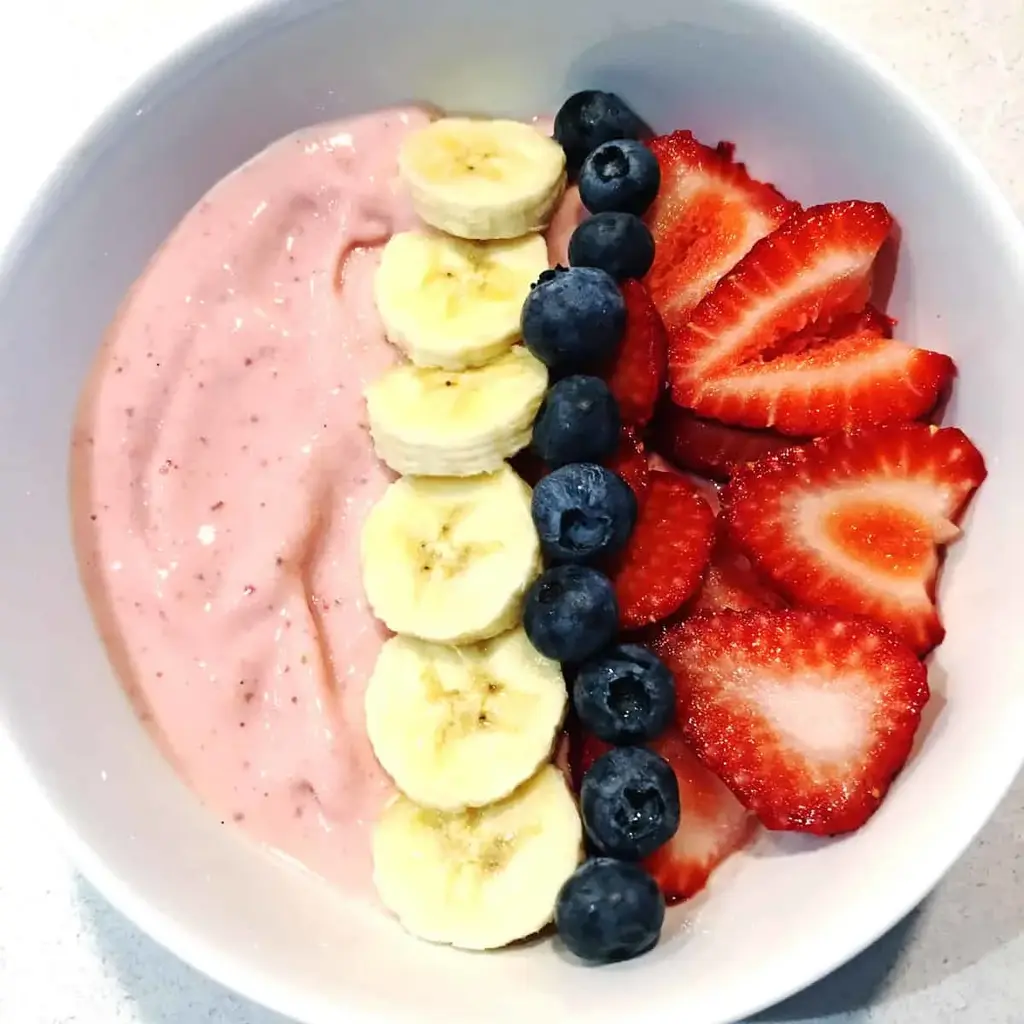
Banana Berry Smoothie Bowl
This creamy Banana Berry Smoothie Bowl is the perfect summer treat. Sweet, tart, and refreshing, it’s a tasty and healthy way to start the day. FOLLOW Cooktoria for more deliciousness! #smoothie #berries #banana #breakfast #vegan #plantbased #vegetarian #cooktoria
This creamy Banana Berry Smoothie Bowl is the perfect summer treat. Sweet, tart, and refreshing, its a tasty and healthy way to start the day.
Ingredients
Scale
2 large ripe bananas sliced and frozen
2 cups frozen berry mix I used blueberry, raspberry, and blackberry mix
½ cup coconut yogurt or dairy yogurt
Instructions
Place the frozen bananas and berries into a food processor and pulse until small crumbles are formed. Give a quick scrape to get everything off the lid and sides for better blending.
Add the yogurt and process again until it reaches a smooth texture with no chunks.
Transfer the mixture into a bowl. Garnish this smoothie bowl with your desired toppings. Serve.
Notes
NotesTOPPING IDEAS FOR SMOOTHIE BOWLS Fruit. Add sliced bananas, strawberries, or pineapple. Layer on more berries, like blueberries and raspberries. You can also use cubes of mango or any other favored fruit. Nuts. Sprinkle almond slivers, nut butter, or cashew pieces on top of your smoothie bowl. This gives it a great protein boost that will also increase satiation. Seeds. This Banana Berry Smoothie Bowl tastes great with lots of different seeds, including hemp, chia, flax, or sesame. You could also add wheat germ.
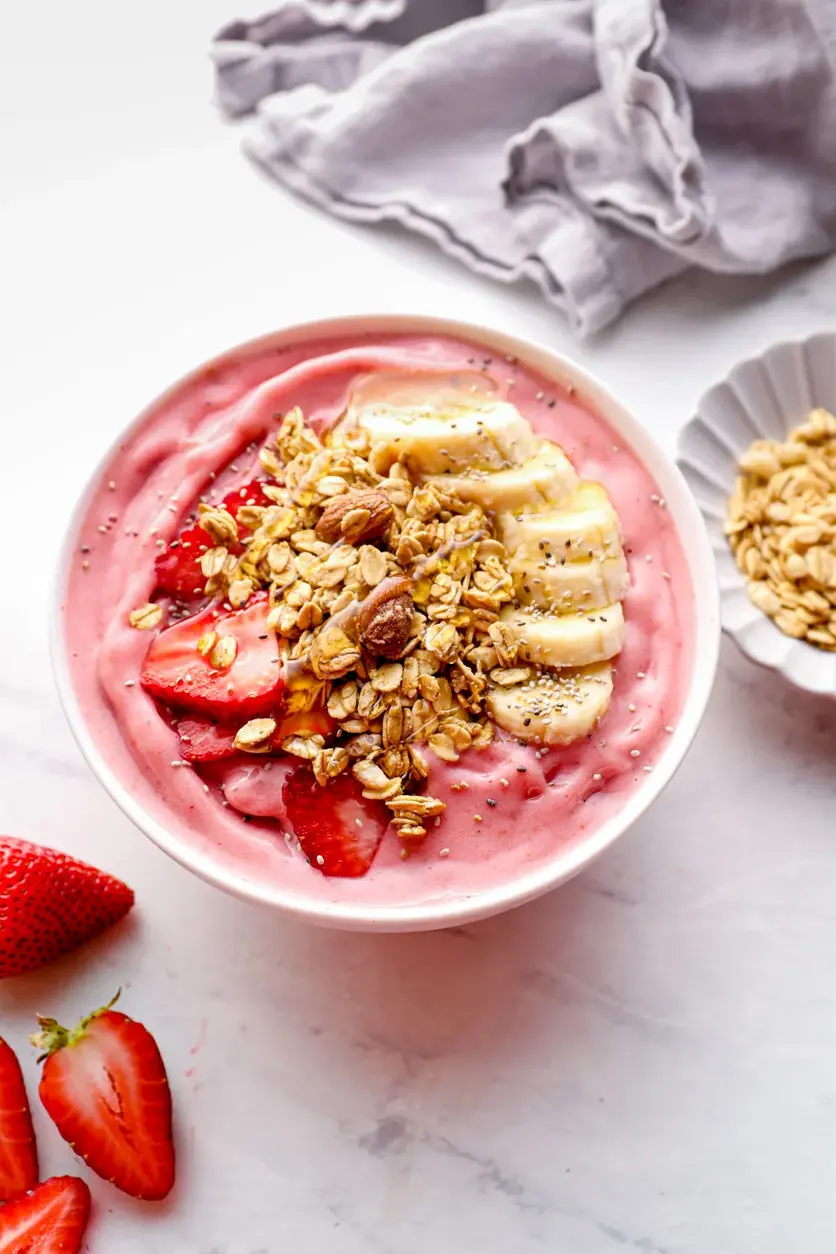
This easy smoothie bowl recipe with Greek yogurt is thick, creamy, and ready in just 5 minutes. A perfect single-serve breakfast or snack.
Ingredients
Scale
1 banana
1 cup frozen strawberries
cup frozen pineapple chunks
½ cup vanilla Greek yogurt whole milk or low-fat
Instructions
Chop banana into 1-inch pieces and freeze for at least 1-2 hours if possible (or overnight).1 banana
Add all ingredients to food processor fitted with a standard S blade and process for 2-4 minutes, stopping to scrape the sides down with a plastic spatula as needed.1 cup frozen strawberries, cup frozen pineapple chunks, ½ cup vanilla Greek yogurt
Once everything is incorporated and smooth, scoop out mixture into individual bowls. Add any desired toppings, and enjoy immediately.
Notes
Food processor: If you don’t have a food processor, a high-speed or regular blender will work too. Just choose a lower blend speed and use a plunger as necessary to push everything down towards the blade.
Storage: Best eaten right away. If needed, refrigerate up to 24 hours, but texture will soften. Stir before eating.
Nutrition
Calories:269kcal
Sugar:40g
Protein:12g
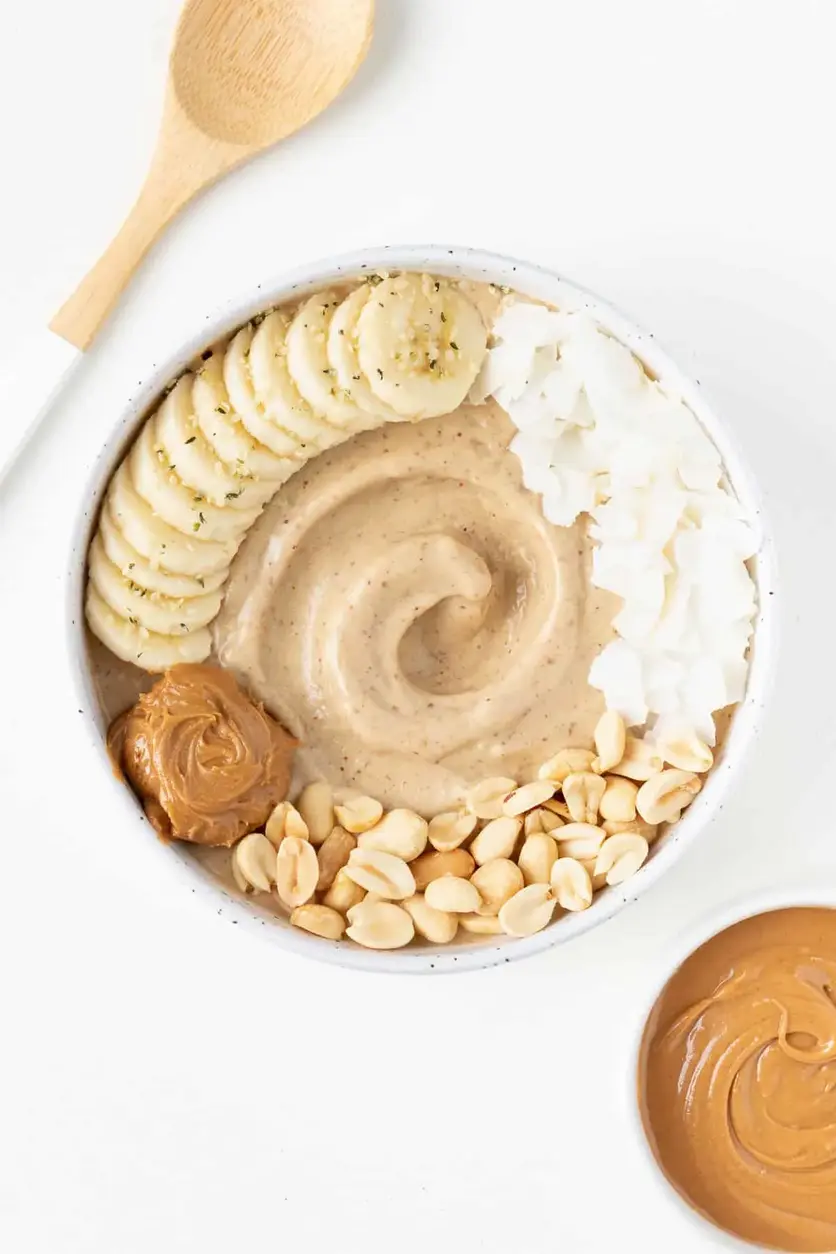
Peanut Butter Banana Smoothie Bowl
This peanut butter banana smoothie bowl recipe is healthy, easy, and packed with protein! Made with 5 ingredients and no yogurt needed. Combine bananas, peanut butter, flaxseed, vanilla, and almond milk to make this breakfast. #smoothie #bananasmoothie #peanutbuttersmoothie #smoothiebowl #vegan #dairyfree #breakfast #healthybreakfast
This peanut butter banana smoothie bowl is creamy, nutty, and so easy to make! It’s a healthy recipe that tastes just like soft serve ice cream. Enjoy it for breakfast or as a nutritious dessert!
Ingredients
Scale
2 ripe bananas, peeled and frozen
2 tbsp creamy peanut butter
2 tbsp flaxseed meal (optional)
1/2 tsp vanilla extract (optional)
1/4 cup nondairy milk (such as almond or coconut)
Instructions
Add ingredients to the blender.
Blend until smooth and creamy. Note: Adjust the amount of liquid as needed, but I highly suggest keeping it to 1/4 cup or less. Remember more liquid creates a thinner smoothie while less liquid creates a thicker smoothie. If you want it to be super thick and creamy, try to use the least amount of liquid as possible. If you have a high-powered blender (like a Vitamix blender), you can get by with no liquid at all.
Transfer smoothie to a bowl. Add any desired toppings and enjoy with a spoon.
Notes
Be sure to use frozen ripe bananas. Wait for the bananas to ripen (the peel should be yellow with brown specks), then remove the peel and place in a ziplock bag or container in the freezer. Bananas will keep fresh for at least 1 month in the freezer.
Did you know that over 75% of people consider French toast their favorite weekend breakfast treat? If you’re looking for a simple, foolproof way to create a delightful breakfast that feels gourmet without the fuss, you’ve found it. This Easy French Toast Recipe transforms humble ingredients like brioche bread, eggs, milk, and a hint of cinnamon and vanilla into a morning masterpiece. Perfect for busy weekdays or lazy weekend brunches, this recipe is your ticket to a consistently delicious start. Forget soggy or bland versions—our method ensures a golden, custardy interior with a beautifully crisp edge every single time. Let’s dive into why this recipe works and how you can master it in minutes.
Ingredients List
Gathering the right ingredients is the first step to perfect French toast. Here’s what you’ll need for 4 generous servings:
Brioche Bread (8 slices, 1-inch thick): The star of the show. Brioche’s rich, buttery flavor and soft, pillowy texture absorb the custard beautifully, yielding a melt-in-your-mouth result. Substitution: Challah, Texas toast, or a day-old French baguette work wonderfully. For a denser bite, try sourdough.
Large Eggs (4): They form the base of our custard, providing structure and that signature rich, golden color.
Whole Milk (1 cup): Adds creaminess and helps create a smooth, pourable batter. Substitution: For extra richness, use half-and-half or heavy cream. For a dairy-free version, unsweetened almond or oat milk works well.
Pure Vanilla Extract (1 teaspoon): A non-negotiable for warmth and aromatic depth. You’ll smell its sweet, floral notes as it cooks.
Ground Cinnamon (1/2 teaspoon): Provides a warm, comforting spice that defines classic French toast. For a more complex spice profile, add a pinch of nutmeg or cardamom.
Granulated Sugar (1 tablespoon): Just enough to caramelize the surface for a gorgeous golden-brown crust. Substitution: Maple syrup or honey can be whisked directly into the batter.
Pinch of Salt: Balances the sweetness and enhances all the other flavors.
Butter or Neutral Oil (for cooking): Butter delivers unmatched flavor and promotes even browning. For a higher smoke point, use avocado oil or ghee.
Timing
Prep Time 10 minutes
Cook Time 10 minutes
Total Time 20 minutes
This Easy French Toast Recipe clocks in at just 20 minutes from start to finish. Compared to the average recipe that can take 30+ minutes with complicated steps, our streamlined process saves you precious morning time. The 10-minute prep is mostly hands-off whisking, while the cook time is fast and efficient. You’ll spend less time at the stove and more time enjoying a delightful breakfast with family or friends.
Watching the custard-soaked brioche sizzle in butter is part of the magic.
Step-by-Step Instructions
Step 1: Prepare the Egg Wash
In a wide, shallow bowl—a pie dish works perfectly—vigorously whisk the 4 large eggs until they are completely smooth and uniform in color. You shouldn’t see any strands of egg white. This is crucial for an even coating. Then, pour in the whole milk, vanilla extract, sugar, cinnamon, and salt. Whisk again until everything is fully incorporated and the mixture is a beautiful, speckled pale yellow. Take a moment to smell it; that’s the scent of breakfast bliss. Pro Tip: Let this custard mixture sit for 5 minutes to allow the sugar to dissolve and the flavors to marry.
Step 2: Soak the Bread
Heat a large non-stick or cast-iron skillet or griddle over medium heat. Add a generous pat of butter (about 1/2 tablespoon) and let it melt and foam slightly. While the pan heats, take one slice of your thick-cut brioche and submerge it in the egg wash. Press down gently to ensure it’s fully saturated, then flip it and let the other side soak. The key here is timing: 20-30 seconds per side is ideal. You want the bread to drink up the custard but not become so soggy it falls apart. It should feel heavy and saturated but still hold its shape.
Step 3: Cook to Perfection
Lift the soaked bread slice, let any excess custard drip off for a second, and then place it gently into the preheated, buttered skillet. You should hear a satisfying sizzle. Cook for 3-4 minutes on the first side, without moving it, until it’s deeply golden brown and crisp. Peek at the edges to check. Using a wide spatula, carefully flip the toast. It should release easily if it’s properly browned. Cook for another 2-3 minutes on the second side until equally golden. Transfer the cooked French toast to a wire rack set over a baking sheet (this keeps the bottom crisp—avoid stacking on a plate where steam will make it soggy). Repeat with remaining slices, adding more butter to the pan as needed.
Step 4: Serve Immediately
French toast is at its absolute peak when served straight from the pan. The contrast between the crispy, caramelized exterior and the soft, warm, custardy center is sublime. This is the moment to add your favorite toppings and dig in.
Nutritional Information
(Per serving, based on 4 servings, using whole milk and 1 tbsp butter for cooking, without toppings.)
Calories: ~320 kcal
Protein: 12g
Carbohydrates: 35g
Dietary Fiber: 1g
Sugars: 10g
Fat: 15g (Saturated: 7g)
Cholesterol: 220mg
Sodium: 280mg
Healthier Alternatives
You can easily adapt this Easy French Toast Recipe to fit various dietary preferences without sacrificing the delightful breakfast experience:
Bread Swap: Use 100% whole wheat or multigrain bread for added fiber and nutrients. The nutty flavor pairs beautifully with cinnamon.
Dairy-Free & Lower Fat: Replace whole milk with unsweetened almond milk or oat milk. Use a light spray of avocado oil instead of butter for cooking.
Reduced Sugar: Omit the granulated sugar from the batter entirely. The natural sweetness from the brioche and your toppings (like fresh fruit) is often sufficient. You can also use a zero-calorie sweetener like monk fruit.
Protein Boost: Add a scoop of vanilla or unflavored protein powder to the egg wash mixture. You may need to add a tablespoon or two more milk to maintain the right consistency.
Serving Suggestions
The beauty of this French toast is its versatility. Transform your plate with these topping ideas:
Classic Elegance: A generous drizzle of pure maple syrup and a dusting of powdered sugar.
Fresh & Fruity: A heap of mixed berries (strawberries, blueberries, raspberries), sliced bananas, or sautéed apples with a dollop of Greek yogurt.
Indulgent Treat: A spoonful of whipped cream, a sprinkle of chopped nuts (pecans or walnuts), and a caramel or chocolate sauce drizzle.
Savory Twist: Skip the cinnamon and vanilla. Add a pinch of black pepper and grated Parmesan to the batter. Top with avocado, a fried egg, and hot sauce.
Common Mistakes
Using Fresh, Thin-Sliced Bread: This is the #1 cause of soggy, mushy French toast. Stale, thick-cut bread is essential for structure. If your bread is fresh, lightly toast it in a dry oven first to dry it out.
Over-Soaking the Bread: Soaking for more than a minute total can cause the bread to disintegrate. Aim for a thorough but quick dip.
Incorrect Pan Temperature: Too hot, and the outside burns before the inside cooks. Too low, and you get pale, greasy toast. Medium heat is perfect for a steady, golden cook.
Crowding the Pan: Give each slice room. Crowding lowers the pan temperature and steams the toast instead of frying it.
Serving on a Stacked Plate: This traps steam and turns your crispy masterpiece soggy in minutes. Always use a wire rack.
Storing Tips
To Store: Let cooked French toast cool completely on a wire rack. Place in a single layer in an airtight container or zip-top bag, separated by parchment paper. Refrigerate for up to 2 days.
To Freeze: After cooling, flash-freeze slices on a baking sheet for 1 hour, then transfer to a freezer bag. They’ll keep for up to 2 months.
To Reheat: For best results, reheat from refrigerated or frozen directly in a toaster, toaster oven, or a 375°F oven for 5-10 minutes until hot and re-crisped. Avoid the microwave, which makes it rubbery.
The final, glorious presentation—ready to make any morning special.
Hi I'm Emy
I’m passionate about sharing a diverse collection of sweet and savory recipes that I’ve meticulously tested and perfected in my own kitchen.