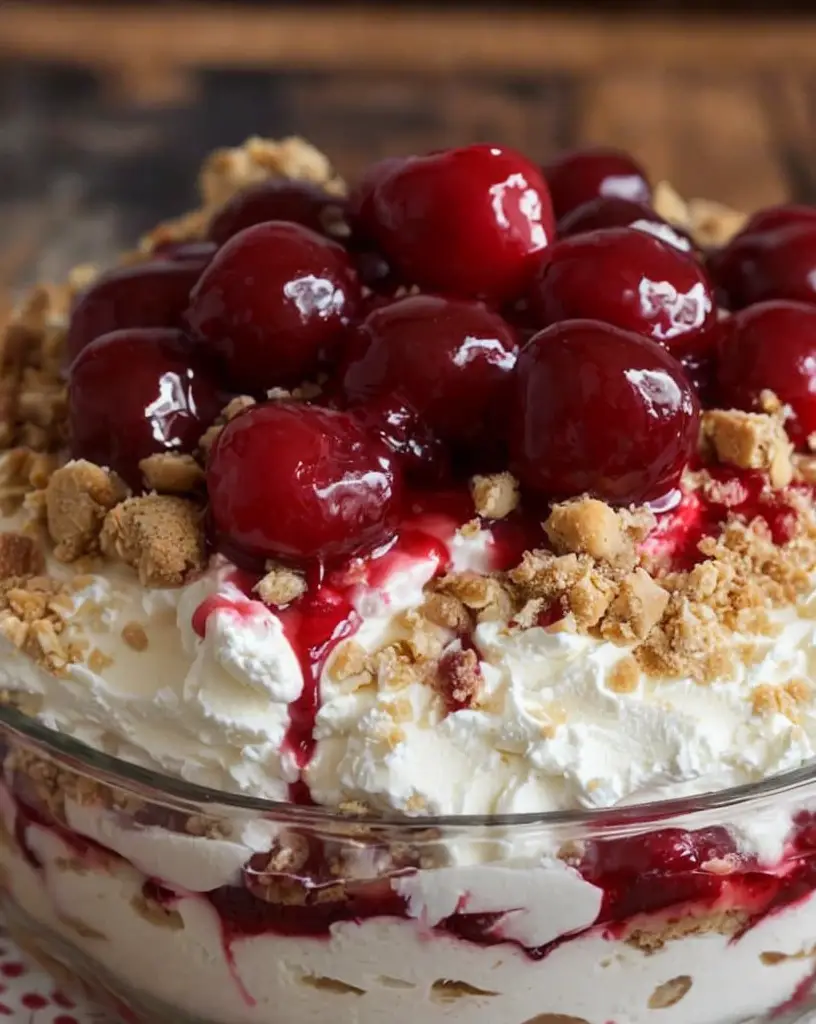
Irresistible Banana Pudding Recipe That Everyone Will Love

The Best Banana Pudding Recipe: A Creamy Delight for Any Occasion

⚖️
Difficulty
Easy

⏲️
Prep Time
20 mins

🕒
Cook Time
10 mins

⏱️
Total Time
30 mins

🍽️
Servings
8 servings

Banana pudding is a classic dessert that brings back fond memories of family gatherings and warm summer days. This recipe for the best banana pudding combines rich and creamy ingredients that create a mouthwatering experience with every bite. The sweet bananas meld beautifully with the velvety pudding, complemented by layers of soft vanilla wafers for an indulgent treat. Perfect for any occasion, this dessert is not only easy to make but is also sure to impress friends and family alike.

With this banana pudding recipe, you’ll find yourself falling in love with the delightful flavors and textures. The combination of fresh bananas, fluffy whipped cream, and smooth custard will tantalize your taste buds. Whether served at potlucks, birthday parties, or enjoyed during a quiet evening at home, this banana pudding is a comforting classic that never goes out of style.

Quick Recipe Highlights

  • Flavor Profile: This banana pudding is a wonderful balance of sweet and creamy flavors, with hints of vanilla and the natural taste of ripe bananas bursting through.
  • Texture: Expect a delightful contrast between the smooth, creamy pudding and the soft yet slightly crisp vanilla wafers, providing a satisfying mouthfeel.
  • Aroma: The aroma of this dessert is heavenly, with the sweet scent of bananas mingling with the warm notes of vanilla and cream.
  • Visual Appeal: Layered in a glass dish, this banana pudding showcases vibrant yellow bananas against the creamy white pudding for a tantalizing visual feast.
  • Skill Level Needed: This recipe is perfect for beginners, requiring minimal cooking techniques and simple ingredients to master.
  • Special Equipment: All you need is a mixing bowl, whisk, and a serving dish to make this delightful dessert.

Recipe Overview

  • Difficulty Level: This banana pudding recipe is classified as easy, making it accessible to novice bakers. With straightforward instructions and minimal steps, anyone can create this delicious dessert.
  • Category: This recipe falls into the dessert category, perfect for satisfying your sweet tooth.
  • Cuisine: Banana pudding is a staple in American cuisine, often associated with Southern comfort food traditions.
  • Cost: The approximate cost to prepare this banana pudding is budget-friendly, making it an affordable indulgence for anyone.
  • Season: Ideal for summer when bananas are in abundance, it can also be enjoyed year-round as a delightful treat.
  • Occasion: Perfect for picnics, potlucks, and celebrations, this dessert is always a crowd-pleaser.

Why You’ll Love This Recipe

This banana pudding celebrates a classic flavor that many adore. Its sweet taste and creamy texture combine to create a delightful indulgence that’s hard to resist. Each layer reveals a generous helping of ripe bananas surrounded by smooth, silky pudding, making it an irresistible treat for dessert lovers. The subtle hint of vanilla adds an elegant touch, enhancing the overall flavor profile and making it a perfect dessert for any occasion.

The convenience of this banana pudding recipe is another highlight. It requires minimal effort and time, allowing even the busiest of people to whip up this delightful treat. The ability to prepare it in advance adds to its appeal, as you can layer the ingredients and let them chill in the refrigerator until it’s time to serve. This means less stress and more enjoyment when entertaining guests.

Nutritionally, bananas are rich in potassium and fiber, making this pudding a better option than many other desserts. The use of fresh ingredients not only enhances the flavor but also adds health benefits, making this pudding a guilty pleasure that you can feel good about indulging in.

Banana pudding also holds a special place in social gatherings, often serving as the centerpiece of potlucks and family reunions. It’s a dessert that encourages sharing and conversation, bringing people together over a fond childhood favorite.

Finally, its cost-effectiveness ensures that anyone can enjoy this delicious dessert without breaking the bank. Simple ingredients, readily available at any grocery store, make this banana pudding both accessible and economical for home cooks everywhere.

Historical Background and Cultural Significance

The origin of banana pudding can be traced back to the mid-19th century in the United States. With the introduction of bananas to American cuisine via the Caribbean, the popular dessert began to take shape. Initially enjoyed on its own, the combination of bananas with custard and wafers evolved, resulting in the beloved dish we know today.

Culturally, banana pudding is synonymous with Southern hospitality. It evokes nostalgia and comfort, often reminding people of family gatherings and festive occasions. Whether enjoyed at a family picnic or served at holiday celebrations, this dessert has woven itself into the fabric of American culinary traditions.

Over the years, the recipe for banana pudding has seen significant evolution, adapting to changing tastes and ingredient availability. The introduction of instant pudding mixes in the mid-20th century simplified the preparation process, allowing more people to enjoy this classic treat without spending hours making it from scratch.

Within the United States, you can find regional variations of banana pudding that showcase local ingredients and preferences. From incorporating different flavors to using unique textures, these adaptations reflect the diverse culinary landscape and the enduring popularity of this dessert.

Ingredient Deep Dive

Bananas: The star of this recipe, bananas are not only delicious but also packed with nutrients. They provide a healthy dose of potassium, vitamin C, and dietary fiber. When selecting bananas for pudding, look for ripe ones with a few brown spots, as they offer a natural sweetness that enhances the dessert. Store bananas at room temperature, but refrigerate them if they become overly ripe to prolong freshness. If fresh bananas aren’t available, you can use frozen, though they should be thawed and drained before use.

Vanilla Wafers: These crisp cookies are a traditional component of banana pudding, offering a satisfying crunch that complements the creaminess of the pudding and the softness of ripe bananas. Choose a brand that uses real vanilla for the best flavor. Store in an airtight container to maintain their crispness, and if you’re looking for a variation, consider using graham crackers or even crushed shortbread cookies as substitutes.

Pudding Mix: While making homemade pudding is always an option, using instant pudding mix simplifies the process tremendously. It provides consistent results and allows for quick preparation. Look for varieties that are free of artificial flavors and colors for a more natural taste. Keep the mix stored in a cool, dry place, and always check the expiration date to ensure freshness before use.

Heavy Whipping Cream: This is key to achieving the light and airy texture of the banana pudding. It adds richness and creaminess that elevates the dessert. When selecting cream, opt for the freshest option available, and remember that it can be whipped until soft peaks form for topping. Store heavy cream in the refrigerator and use it within a week of opening for optimal taste.

Common Mistakes to Avoid

  • Using Overripe Bananas: While bananas should be ripe for flavor, using ones that are too mushy can affect the pudding’s overall texture. Look for bananas that are ripe with a few brown spots, but still firm.
  • Not Allowing the Pudding to Set: If you don’t allow the pudding to chill before serving, it won’t firm up properly, resulting in a soupy consistency. Chill for at least 2 hours to achieve the best texture.
  • Skipping the Whipping of Cream: Failing to whip the cream can lead to a heavy pudding rather than a light and airy one. Take the time to whip until soft peaks form for the perfect balance.
  • Assembling Too Early: Assembling banana pudding too soon before serving can cause the wafers to become soggy. Layer just before serving for the best texture.
  • Using Instant Potatoes Instead of Pudding Mix: Double-check to ensure you’re using pudding mix and not instant mashed potatoes; it sounds silly, but mistakes do happen!
  • Overmixing: When folding whipped cream into the pudding, be gentle. Overmixing can deflate the whipped cream, resulting in a denser pudding.
  • Neglecting to Taste: Always taste your pudding before serving. This step will help you adjust sweetness and flavor to your preference.
  • Not Layering Wisely: Be strategic when layering ingredients. Start with pudding followed by wafers and bananas for a beautiful presentation and balanced flavors.
  • Ignoring Storage Instructions: This dessert should be covered and refrigerated to keep it fresh. Leaving it out can lead to spoilage.
  • Not Using Enough Pudding: Ensure you have enough pudding to layer adequately; skimping can result in a pudding lacking in richness and depth.

Essential Techniques

Whipping Cream: This technique is vital for achieving the lightness needed in banana pudding. Use chilled beaters and bowl for best results. Whip until just soft peaks form; avoid over-whipping, which can turn cream into butter. A common pitfall is neglecting to chill your tools, which can make whip cream preparation a bigger challenge. Look for the cream to hold its shape yet still be soft for the best outcome.

Layering: Proper layering enhances both texture and visual appeal. Start with a layer of pudding, followed by bananas and wafers, repeating until all ingredients are used. A common mistake is to layer too densely; be cautious to keep layers balanced for a beautiful presentation and ideal mouthful of flavors. Visual cues for success include seeing distinct layers that showcase each ingredient.

Pro Tips for Perfect Banana Pudding

1. Use fresh, perfectly ripe bananas to enhance flavor; avoid overly mushy ones as they can affect the pudding’s texture.
2. Chill your tools before whipping cream to achieve the best volume and airiness in your whipped topping.
3. Always taste the pudding for sweetness and flavor before assembling; adjust as necessary for personal preference.
4. For a unique twist, add a layer of peanut butter between the pudding layers for a delicious flavor contrast.
5. Consider adding a sprinkle of crushed nuts on top for added texture and flavor complexity.
6. Try using homemade vanilla pudding mix for a fresh, rich twist on traditional banana pudding.
7. Serve banana pudding in individual cups for a more sophisticated presentation at gatherings.
8. Experiment by adding flavors like chocolate or coconut to the pudding mix for variations on the classic taste.

Variations and Adaptations

Regional variations of banana pudding often incorporate local ingredients, such as coconut or bourbon, offering regional flavors alongside the traditional recipe. In the southern United States, you might find recipes that use sweetened condensed milk for added creaminess.

Seasonal adaptations could include berries or stone fruits layered in place of bananas, allowing fruit lovers to enjoy pudding throughout the year, matching the season’s best offerings.

Dietary modifications can make banana pudding accessible for various preferences. For gluten-free options, almond or gluten-free vanilla wafers provide a suitable alternative, while coconut cream can replace heavy cream for a vegan version.

Flavor variations also abound; consider incorporating chocolate pudding or butterscotch to elevate the classic banana flavor with alternative sweetness and depth. For texture modifications, add layers of caramel sauce or layer in crushed graham crackers instead of wafers for a unique crunch.

Presentation alternatives, such as serving in a trifle dish or individual glasses, can enhance the visual appeal of your dessert and make it more festive for special occasions.

Serving and Presentation Guide

Presentation is key for banana pudding. Use a clear glass dish to showcase the beautiful layered effects of the dessert. Garnishing with fresh banana slices on top or a sprinkle of crushed vanilla wafers can add visual appeal and suggest deliciousness.

For a modern twist, consider individual dessert cups; they can be prepped in advance and make it easy for guests to serve themselves. Additionally, pairing with traditional accompaniments like whipped cream or a light dusting of nutmeg can elevate the experience.

Pay attention to temperature; serving banana pudding chilled not only enhances the creamy texture but prevents it from becoming mushy. For portion control, small serving sizes in individual cups can keep servings elegant and prevent overindulgence.

Wine and Beverage Pairing

When it comes to pairing beverages with banana pudding, a light dessert wine like Moscato complements the sweet flavors beautifully. Alternatively, a chilled glass of Prosecco can provide refreshing effervescence that balances the creaminess of the pudding.

For non-alcoholic options, a tall glass of iced tea with a splash of lemon can offer a bright contrast to the rich dessert.

If you prefer coffee, a robust espresso makes an excellent pairing, cutting through the sweetness with its deep flavor.

Consider serving these beverages chilled to enhance the overall dessert experience, keeping the presentation light and refreshing for a perfect pairing with banana pudding.

Storage and Shelf Life

For optimal storage, cover banana pudding tightly with plastic wrap or transfer to an airtight container and refrigerate. This dessert can be refrigerated for up to 3 days before serving, but it’s best enjoyed within 1-2 days for the freshest taste and texture.

If you’ve made too much pudding, consider freezing individual portions in freezer-safe containers; banana pudding can be frozen for up to 2 months. However, keep in mind that freezing may alter the texture of the bananas and cream upon thawing.

Signs of spoilage include an off smell or excessive liquid pooling at the bottom, indicating that it’s past its prime.

For reheating, not recommended for banana pudding, consider making fresh individual servings instead of trying to revive previously stored pudding.

Make Ahead Strategies

When making banana pudding ahead of time, prepare all components separately and assemble just before serving. This strategy prevents mushy wafers and maintains a firmer texture in the dessert.

If possible, slice bananas about an hour before serving to prevent browning; treating them with a little lemon juice can help maintain their vibrant color.

As for storage between steps, keep the pudding stored in the refrigerator, but ensure that the whipped cream is not folded in until close to serving to retain its volume and texture.

Reheating is unnecessary, as banana pudding tastes best when served chilled. Adding fresh bananas to the top layer right before serving keeps everything fresh and beautiful.

Scaling Instructions

Scaling this banana pudding recipe is straightforward. To halve the recipe, simply divide all ingredient quantities by two; it’s perfect for smaller gatherings or intimate dinners.

Doubling or tripling the recipe is equally effortless. Just ensure you have a large enough bowl and dish for assembly. Timing modifications may be necessary as you scale, especially when it comes to chilling times, which could extend with larger quantities.

Storage considerations are vital with larger batches. Ensure you have sufficient airt-tight containers if preparing in advance. A good tip is to label with the serving size if storing individual portions to keep track of leftovers.

Nutritional Deep Dive

Banana pudding is relatively balanced, especially if made with fresh ingredients. In terms of macronutrients, the dessert offers carbohydrates primarily from the bananas and wafers, while providing a decent source of fat from cream.

Vitamins and minerals, especially potassium from bananas and calcium from dairy, add essential nutrients. Each serving generally falls within acceptable ranges for desserts, promoting good energy while allowing for a satisfying sweet experience.

Dietary considerations should always be taken into account; portions should be moderated for those watching sugars or looking to maintain a balanced diet.

With smart ingredient swaps, banana pudding can also be modified to fit various dietary needs without sacrificing flavor, ensuring everyone can enjoy this classic treat.

Dietary Adaptations

For those requiring gluten-free options, use gluten-free wafers or cookies in place of traditional vanilla wafers to enjoy banana pudding without gluten concerns.

Dairy-free adaptations can be achieved by substituting coconut milk for heavy cream and using dairy-free pudding mix. This enables vegans to relish the flavors without compromising dietary choices.

Low-carb substitutions can be made by opting for low-carb sweeteners and almond flour cookies, paving the way for a keto-friendly take on banana pudding.

Lastly, paleo enthusiasts can employ natural sweeteners and nut-based crusts to recreate this dessert without straying from their dietary preferences. With mere adjustments, anyone can enjoy the classic bliss of banana pudding that caters to their lifestyle.

Troubleshooting Guide

For texture issues, ensure your bananas are ripe but not overly mushy, which can lead to an undesirable consistency in the pudding. Adjust any layering decisions to keep these textures appealing.

If the flavor balance feels off, it’s crucial to taste during assembly. A little added vanilla or a pinch of salt can elevate the overall flavor profile remarkably.

Temperature problems may arise if the pudding is served too warm. Always refrigerate before serving; a chilled dessert is essential for texture and flavor enjoyment.

Equipment challenges, like a hand mixer failing, can be resolved by using manual whisking techniques. It may take longer, but a stable direct approach will maintain your cream’s integrity.

Ingredient substitutions require caution; ensure that alternatives provide similar consistency and flavor. Typically, cornstarch is a safe alternative for thickeners.

Timing concerns can be minimized with thorough preparation. Always allow plenty of time for chilling and assembling layers correctly to achieve the best results.

Recipe Success Stories

Community feedback often highlights the nostalgic feelings evoked by making and sharing banana pudding. Many readers have emphasized that their family members love revisiting this recipe, often asking for it during family gatherings.

Some variations have turned into success stories as well, with readers adding their personal twist through unexpected flavors like Nutella or peanut butter, garnering rave reviews.

Adaptations have also played a role in expanding the dessert’s reach – sharing modifications for dietary needs, which has helped others enjoy banana pudding in new ways.

Many have contributed photography tips, showing how to beautifully present the dessert in layers, often featured in family albums during special celebrations.

Reinforcing that community engagement around this recipe is rich and varied, readers share tales of how this dessert has bonded family and friends over sweet memories and delicious flavors.

Frequently Asked Questions

1. Can I make banana pudding in advance?

Yes! You can prepare all components separately and assemble them just before serving to maintain the wafer’s texture. The pudding itself can be made a day before for the best flavor.

2. How can I prevent the bananas from browning?

Sprinkling a little lemon juice on the sliced bananas can help delay browning, keeping them fresh for longer.

3. What if I don’t have vanilla wafers?

You can substitute vanilla wafers with graham crackers or any other sweet cookie that holds its structure well in layers.

4. Is it possible to make banana pudding vegan?

Absolutely! Use coconut milk or almond milk in place of dairy products, along with dairy-free whipped toppings for a vegan-friendly banana pudding.

5. Can I freeze banana pudding?

While it’s possible to freeze individual portions, the texture may change. It’s best when consumed fresh within a few days of preparation.

6. How should banana pudding be stored?

Cover the dessert tightly with plastic wrap or store in an airtight container in the refrigerator. Consume within 3 days for the best quality.

7. Can I add other fruits?

Definitely! Adding other fruits like strawberries or blueberries can create a delicious twist on the classic banana pudding.

8. What’s the best way to serve banana pudding?

Serve in a clear glass dish or individual cups to showcase the layers. Garnish with fresh bananas or a dollop of whipped cream for added appeal.

9. What’s the difference between homemade and instant pudding?

Homemade pudding usually has a richer flavor and better texture, while instant pudding is quicker and easier to prepare.

10. Can I use different flavors of pudding mix?

Yes! While vanilla is traditional, feel free to experiment with chocolate, butterscotch, or other flavors to create a unique banana pudding experience.

Additional Resources

Explore related recipes such as classic chocolate pudding or a fruit trifle to accompany your banana pudding. Technique guides for whip cream and custard preparation can enhance your skills further.

Ingredient information detailing benefits of bananas and cream can also be useful when presenting the dish to guests, along with equipment recommendations for home chefs looking to perfect their dessert-making toolkit.

Consider seasonal variations to keep recipes exciting, ensuring there’s something new to try with each passing month.

Join the Conversation

We encourage you to share your own banana pudding success stories on social media, showcasing your creations with stunning photography. Feel free to leave recipe reviews in the comments below, providing feedback and tips based on your experience.

Engaging with the community helps us all grow as cooks and discover new variations on beloved recipes. Join our journey of delicious exploration and share your banana pudding variations with us.

The Recipe

The Best Banana Pudding

Serves: 8 servings

Prep Time: 20 mins

Cook Time: 10 mins

Total Time: 30 mins

Kitchen Equipment Needed

  • Mixing bowl
  • Whisk or electric mixer
  • Spatula
  • Serving dish or individual dessert cups

Ingredients

  • 4 ripe bananas, sliced
  • 1 box (5.1 oz) of instant vanilla pudding mix
  • 2 cups cold milk
  • 2 cups heavy whipping cream
  • 1 cup powdered sugar
  • 1 teaspoon vanilla extract
  • 1 box (11 oz) vanilla wafers

Directions

  1. In a mixing bowl, combine the vanilla pudding mix and cold milk. Whisk until smooth and let sit for 5 minutes to thicken.
  2. In a separate bowl, whip the heavy cream until soft peaks form. Gradually add the powdered sugar and vanilla extract, continuing to whip until stiff peaks form.
  3. Gently fold the whipped cream into the pudding mixture until well combined.
  4. In a serving dish, create layers by spreading some pudding mixture at the bottom, followed by a layer of vanilla wafers and a layer of sliced bananas.
  5. Repeat the layers until all ingredients are used, finishing with a layer of pudding on top.
  6. Chill the assembled banana pudding in the refrigerator for at least 2 hours before serving.

Recipe Notes

  • For best results, use fully ripened bananas and serve the pudding within two days.
  • Feel free to customize the recipe with your favorite ingredients like peanut butter or chocolate.
  • Cover with plastic wrap to prevent any browning on the bananas while stored in the fridge.

Indulge in Heavenly Banana Split Fluff Delight Recipe Today

Banana Split Fluff Delight Recipe: A Sweet Treat for All Occasions

⚖️
Difficulty
Easy

⏲️
Prep Time
15 mins

🕒
Cook Time
0 mins

⏱️
Total Time
15 mins

🍽️
Servings
8 servings

The Banana Split Fluff Delight is a nostalgic dessert that will take you back to your childhood. This delightful dish blends the classic flavors of a banana split into a fluffy, creamy treat that’s perfect for parties, barbecues, or a simple family gathering. The combination of ripe bananas, whipped cream, and pudding creates a luscious texture, making each bite a blissful experience. With just a few simple ingredients, you can whip up this easy recipe that promises smiles all around!

Picture a bowl brimming with a medley of colors and flavors — luscious yellow bananas, velvety chocolate drizzle, and vibrant strawberries. The creamy fluffiness contrasts delightfully with the crunchy nuts sprinkled on top. Not only is this recipe eye-catching, but it is also incredibly easy to prepare. In no time, you’ll have a delicious dessert that feels indulgent yet is uncomplicated enough for beginner cooks.

Quick Recipe Highlights

  • Flavor Profile: This dessert offers a sweet burst of banana, the richness of chocolate, and a hint of vanilla from the pudding.
  • Texture: The combination of smooth whipped cream and soft bananas creates a creamy texture, contrasted with crunchy toppings.
  • Aroma: Aromatic notes of ripe bananas coupled with vanilla sweetness fill the air, inviting everyone to indulge.
  • Visual Appeal: Brightly colored ingredients are beautifully layered, making it a visually stunning addition to any table.
  • Skill Level Needed: This recipe is perfect for cooks of all skill levels due to its simplicity and quick preparation.
  • Special Equipment: No special equipment is required, just a mixing bowl and a whisk!

Recipe Overview

  • Difficulty Level: This Banana Split Fluff Delight recipe is straightforward, requiring no baking. It’s ideal for novice cooks as well as experienced chefs looking for something quick.
  • Category: This dessert fits perfectly into the category of no-bake treats, making it an easy choice when you want something sweet without heating up the kitchen.
  • Cuisine: While this recipe draws inspiration from classic American desserts, it reflects a universal love for fruit and cream combinations, transcending culinary boundaries.
  • Cost: The estimated cost of this dessert is low, as common ingredients like bananas, pudding mix, and whipped cream can be found at affordable prices.
  • Season: Perfect for any season, this dessert shines in the summer at picnics, but it’s also a comforting treat in the colder months.
  • Occasion: This Banana Split Fluff Delight is suitable for all occasions, from birthday parties to family dinners or summer cookouts.

Why You’ll Love This Recipe

The Banana Split Fluff Delight stands out for its incredible taste and texture. The harmony of flavors — from the sweetness of bananas to the richness of chocolate and cream — creates an unforgettable dessert. Each mouthful delivers a delicious contrast, delightful for any palate.

In terms of convenience, this recipe requires minimal prep time and no cooking, making it an excellent option for last-minute gatherings or serving unexpected guests. You can prepare it in a few minutes and chill it while you tidy up or focus on other dishes.

Nutritionally speaking, bananas provide essential vitamins and minerals, making this dessert not just indulgent but also a source of nutrition. The ingredient profile allows for lighter versions without significantly compromising on flavor, appealing to health-conscious individuals.

For social occasions, this dessert sparks joy and nostalgia among guests. It serves as an icebreaker, evoking fond memories of childhood treats and fun outings, creating a communal experience in every bite.

Lastly, the affordability and accessibility of ingredients make this recipe a budget-friendly choice without sacrificing taste. The use of common kitchen staples means you may already have most of the components on hand, making it easy to create this delightful dessert any day of the week.

Historical Background and Cultural Significance

The banana split, a staple in American dessert culture, traces its origins back to the early 1900s, widely believed to have been invented in 1904 by David Strickler, a 23-year-old pharmacist. He created the treat in Latrobe, Pennsylvania, and from there, it gained immense popularity, becoming a symbol of indulgence in ice cream parlors nationwide.

Culturally, the banana split has been celebrated as a whimsical dessert, often featured in diners and ice cream shops, capturing the hearts of many generations. This dessert has transcended its humble beginnings, finding a beloved place in various regional adaptations, which adds to its charm.

Over time, the banana split has evolved from a simple concoction of bananas, ice cream, and toppings to be integrated into countless dessert forms. It influences many recipes, such as sundaes and trifles, showing its versatility in dessert preparation.

Regionally, variations of the banana split have emerged, incorporating local favorites. From caramelized fruits to innovative toppings, each area has added its flair to this classic dessert, solidifying its position as a beloved treat in American cuisine.

Ingredient Deep Dive

Bananas: Bananas are not only a delicious fruit but also an excellent source of potassium and vitamins. They have been enjoyed since ancient times, originating in Southeast Asia before making their way to America in the 19th century. When selecting bananas, choose ones that are ripe with a few brown spots for optimal sweetness. Store them at room temperature, and if overripe, they can be used in smoothies or baked goods.

Pudding Mix: The pudding mix adds a creamy, rich thickness to the fluff. It’s a convenient ingredient that brings nostalgia to many desserts. Made from a blend of cornstarch and flavorings, it requires no cooking for easy preparation. Consider choosing instant pudding mixes for quicker results, and store any unopened packages in a cool, dry place.

Common Mistakes to Avoid

  • Using overripe bananas can cause the dessert to turn too mushy. Select just ripe or slightly unripe bananas for the best texture.
  • Not chilling the dessert long enough can lead to a runnier consistency. Aim for at least 1-2 hours in the refrigerator before serving.
  • Overmixing the whipped cream can cause it to become grainy. Mix just until soft peaks form for a smooth texture.
  • Forgetting to layer ingredients can affect the overall flavor profile. Layering helps to combine flavors beautifully with each bite.
  • Not tasting the mixture during preparation might lead to unbalanced flavors. Adjust sweetness with sugar or other flavors as needed.
  • Neglecting to garnish appropriately can diminish the visual appeal. Add nuts or chocolate shavings for an attractive finish.
  • Using flavored yogurt instead of whipped cream can alter the texture significantly. Stick with heavy whipped cream for the fluffiest result.
  • Failing to store leftover fluff properly can lead to spoilage. Keep it in an airtight container in the fridge to maintain freshness.

Essential Techniques

Layering: Mastering the layering technique is essential for creating a visually appealing dessert. Start with a base layer of bananas, followed by pudding and whipped cream. Use a gentle hand to evenly distribute layers, avoiding mixing, which can ruin the effect. Visual cues for success include distinct layers and a clean edge on the serving glass.

Whipping Cream: Whipping cream should be whisked to soft peaks to achieve the right texture. Start with chilled cream and a cold bowl; this helps stabilize the whipping process. Common pitfalls include over-whipping, which can lead to a grainy texture. Stop once soft peaks form to ensure a smooth consistency.

Pro Tips for Perfect Banana Split Fluff Delight

– Use chilled mixing bowls to help whip the cream faster and maintain its stability.
– Add a splash of vanilla extract or almond extract to elevate the dessert’s flavor.
– Incorporate various toppings to cater to different tastes, such as crushed cookies or sprinkles.
– Allow the dessert to sit overnight for flavors to meld beautifully.
– Switch it up with different fruits based on the season for delightful variations.
– Use dairy-free whipped cream alternatives for a lighter version without sacrificing flavor.
– Keep some pudding mixture aside to drizzle on top before serving for added richness.
– Try swapping standard chocolate sauce with Nutella for a creamy, hazelnut twist.

Variations and Adaptations

Explore regional variations by incorporating local fruits into your Banana Split Fluff Delight, such as peaches in summer or apples in fall. For a seasonal adaptation, add autumn spiced ingredients like cinnamon to the cream or switch your fruit selections to match seasonal harvests.

Dietary modifications can include using coconut whipped cream for a vegan version or substituting traditional pudding with almond or coconut milk pudding for a dairy-free treat. Flavor variations may include adding a touch of coffee or mocha for a unique flair or experimenting with different candy toppings to electrify the taste experience.

Texture modifications could involve blending frozen bananas for a creamier pudding base or using crushed graham crackers in the layers for added crunch. For presentation alternatives, serve in individual jars for a modern touch, enhancing the dining experience visually.

Serving and Presentation Guide

A key to serving this dessert is how you plate your Banana Split Fluff Delight. Use large bowls or individual glasses to create an inviting visual presentation. For garnishing, consider whipped cream peaks topped with a cherry or chocolate drizzle for that classic look.

You can pair this dessert with fresh fruit on the side to enhance the flavors and provide a colorful contrast. To modernize your serving, consider adding edible flowers for a surprising pop. Serve chilled for optimal taste, but use room temperature servings to ensure accessibility for all guests.

Portion control is also crucial; consider using smaller bowls to encourage guests to indulge but not overfill, making it ideal for social settings where multiple desserts are offered.

Wine and Beverage Pairing

To complement your Banana Split Fluff Delight, consider pairing it with a sweet dessert wine like Moscato or a light, fruity rosé. Both choices enhance the dessert’s sweetness without overpowering it.

For non-alcoholic alternatives, serve it alongside iced sweet tea or lemonade to maintain a refreshing balance. If coffee lovers are at the table, a light roast coffee or even flavored coffee, such as hazelnut, can serve as a delightful pairing.

Temperature should be considered; serve desserts chilled and drinks at a moderate temperature to create a refreshing contrast on the palate.

Storage and Shelf Life

To store your Banana Split Fluff Delight, transfer it to an airtight container and refrigerate to maintain its freshness. It will typically last up to three days in the fridge, but for the best texture and taste, consume it within two days.

Temperature requirements call for refrigeration; avoid leaving it at room temperature for extended periods. If transferred into a larger container, ensure it seals tightly to prevent moisture loss or fridge odors from seeping in.

Signs of spoilage include an off smell or liquid separation; always check before indulging. For reheating, avoid microwave usage and instead serve cold directly from the refrigerator to maintain its delicious fluffiness.

Freezing guidelines recommend against freezing this dessert, as the texture will be compromised when thawed.

Make Ahead Strategies

To make your Banana Split Fluff Delight ahead of time, prepare the ingredients a day in advance. Slice bananas just before layering to prevent browning.

Store any pudding or whipped cream components separately to maintain their structure until you’re ready to assemble. The fluff mixture can be prepped and chilled, allowing for easier gathering.

The quality impact assessment suggests that while freezing is not advisable, preparing the fluff mix a few hours ahead enhances the flavor melding process. When serving, feel free to wait for guests to arrive before folding in the bananas for freshness.

Add any fresh elements, such as nuts or fruits, right before serving to maintain their crunch and visual appeal.

Scaling Instructions

Scaling the Banana Split Fluff Delight recipe is straightforward. To halve the recipe, simply divide the quantity of each ingredient by two while maintaining the overall proportions.

For larger gatherings, doubling or tripling the recipe is a breeze. Ensure your mixing bowls are large enough to accommodate increased volumes, and consider using an industrial-sized container for easier mixing.

Timing modifications may be necessary, especially if preparing multiple batches at once; space out your mixing sessions to avoid overwhelming your workspace. Store any leftovers accordingly, maintaining freshness and quality.

Nutritional Deep Dive

Delving into the nutrition of this dessert reveals it’s primarily fueled by carbohydrates and sugars from bananas and pudding. While high in sugar, bananas contribute vital vitamins and minerals including potassium and vitamin C, promoting heart health and overall wellness.

Micronutrient analysis shows that using whole ingredients, like heavy cream, provides calcium while offering a balance to the overall fat content. Adjusting portion sizes can also ensure a lighter dessert experience that aligns with dietary goals.

Health benefits of incorporating bananas and moderation with sweet ingredients make this fluff dessert less guilt-inducing. For individuals mindful of their weight, consider lowering ingredient quantities while retaining flavor integrity.

Portion control tips include using smaller dishes to manage serving sizes effectively, encouraging diners to enjoy a taste without overindulgence.

Dietary Adaptations

Adapting the Banana Split Fluff Delight for dietary preferences opens up possibilities. For a gluten-free version, use certified gluten-free pudding mix and ensure toppings like cookies or granola are gluten-free as well.

For a dairy-free option, simply use almond or coconut-based whipped creams and pudding mixes, accommodating vegan diets without losing original flavors.

Low-carb options can explore sugar-free pudding mixes and heavy cream alternatives like coconut milk, providing delicious results while staying within dietary limits.

Keto and Paleo-friendly adaptations emphasize whole ingredients, like opting for fresh fruits and low-sugar bases, resulting in a fresher flavor while managing carbohydrate levels effectively.

Specific diets should consider the sensitivities involved. For instance, low-FODMAP diets can exclude certain fruits, offering a tailored version such as the Banana Split Fluff Delight with only lactose-free ingredients included.

Troubleshooting Guide

When facing texture issues in this dessert, overmixing the whipped cream can lead to a grainy result. To correct this, ensure you monitor whipping closely and stop when soft peaks form, mixing lightly.

Flavor balance can sometimes skew toward overly sweet. In such cases, adjust the sweetness in the pudding mix, or add a dash of salt to enhance flavors and bring out the creaminess.

If the temperature proves problematic, a lack of chilling can result in runniness. Always refrigerate adequately before serving; a minimum of two hours ensures better consistency.

Equipment challenges may occur, such as incorrect bowl sizes affecting mixing. Use large bowls for optimal whipping space to improve performance.

Ingredient substitutions might inadvertently change textures. When swapping ingredients, try to mimic the initial flavor profile to maintain balance; for instance, using Greek yogurt instead of whipped cream.

Timing concerns can be resolved by ensuring proper chilling times; rushing this process can compromise the fluff’s integrity. Be patient and allow it to set, ensuring an enjoyable serving experience.

Recipe Success Stories

Community feedback has shown that the Banana Split Fluff Delight remains a favorite among families, often praised for its nostalgic flavors. Parents appreciated its simplicity in introducing their children to cooking, allowing for shared kitchen moments.

Variation successes are highlighted through social media, where users have shared delightful twists on this classic dish, inviting different fruits or toppings, turning it into a family favorite.

Adaptation stories often feature crowd-pleasing modifications, incorporating seasonal fruits or local ingredients, showcasing the versatility of this easy recipe.

Reader suggestions continually emerge, with enthusiasts experimenting with their favorite toppings, igniting creativity in presentation and flavor combinations.

Photography tips have inspired many home cooks to showcase this visually appealing dessert, enhancing the online conversation and community engagement around this delightful treat.

Frequently Asked Questions

Can I use frozen bananas instead of fresh? While fresh bananas yield the best flavor and texture, frozen bananas can work in a pinch. They will alter the consistency a bit, but they’re a fantastic option for smoothies or blended desserts.

How long can I store the Banana Split Fluff Delight? It’s best consumed within two to three days when stored properly in an airtight container in the refrigerator to ensure maximum freshness and flavor.

Can I make this recipe vegan? Absolutely! Use plant-based whipped cream and pudding options to create a delicious vegan version of this delightful dessert.

What toppings can I add to my fluff? Feel free to get creative with toppings! Crushed nuts, chocolate chips, or sprinkles are all great choices to enhance the texture and flavor.

Is it necessary to refrigerate before serving? Yes, allowing the Banana Split Fluff to chill helps the flavors meld and the texture to firm up, ensuring a delightful serving experience.

Can I use different flavors of pudding? Certainly! Chocolate, vanilla, or even strawberry pudding can be used to create unique variations of the Banana Split Fluff Delight.

What’s the best way to serve this dessert? Serve it chilled, either in large bowls or individual cups for a more casual gathering. Garnish with extra fruit or chocolate sauce for a polished finish.

Can this dessert be frozen? It’s not recommended to freeze this dessert as the texture might change once thawed. It’s best enjoyed fresh or refrigerated.

How can I adjust the sweetness? You can adjust the sweetness by modifying the amount of pudding mix or using sugar alternatives if you prefer a less sweet dessert.

What if I can’t find ripe bananas? If ripe bananas are unavailable, you can let slightly green ones sit at room temperature until they ripen or use mashed bananas as an alternative.

Additional Resources

Expand your dessert repertoire with related recipes that focus on easy, no-bake options for summer gatherings. Technique guides can help refine your whipping and layer techniques for various desserts.

Ingredient information is available for those interested in exploring more about bananas, their health benefits, and their availability according to the season.

Consider investing in quality equipment for dessert preparation, such as mixing bowls and electric mixers, to enhance your cooking experience and efficiency.

For seasonal variations, check out fruit-specific recipes that blend fun flavors into classic elements like the Banana Split Fluff Delight, enticing guests with new spins on beloved traditions.

Join the Conversation

We invite you to share your Banana Split Fluff Delight experiences on social media! Post pictures of your creations and don’t forget to tag us to join our vibrant community.

Feel free to leave reviews, share tips, or suggest variations that make your versions unique. Engaging questions and feedback can offer fresh perspectives and inspire others to create delicious memories in their kitchens.

Don’t hesitate to contribute to our repository of recipe stories, sharing your success or even misadventures in crafting this delightful dessert. Every shared experience can help others enhance their culinary journeys!

The Recipe

Banana Split Fluff Delight

Serves: 8 servings

Prep Time: 15 mins

Cook Time: 0 mins

Total Time: 15 mins

Kitchen Equipment Needed

  • Mixing bowl
  • Whisk or hand mixer
  • Measuring cups and spoons
  • Serving bowls or glasses

Ingredients

  • 4 ripe bananas, sliced
  • 1 package (3.4 oz) instant vanilla pudding mix
  • 2 cups milk
  • 1 cup heavy whipped cream
  • ½ cup chocolate syrup
  • ½ cup chopped nuts (optional)
  • 1 cup sliced strawberries (optional)

Directions

  1. In a large mixing bowl, whisk together the pudding mix and milk until smooth and set aside.
  2. In another bowl, whip the heavy cream until soft peaks form.
  3. Gently fold the whipped cream into the pudding mixture until well combined.
  4. In a serving dish, layer the sliced bananas, pudding fluff, chocolate syrup, and strawberries if using.
  5. Repeat the layering until all ingredients are used, finishing with a top layer of whipped cream and a drizzle of chocolate sauce.
  6. Cover and refrigerate for about 1-2 hours to chill and set before serving.

Recipe Notes

  • Feel free to substitute different fruits based on your preference, such as mango or peach slices.
  • This dessert can be made ahead and stored in the refrigerator for up to two days.
  • For a delightful twist, consider adding a splash of vanilla or almond extract to the whipped cream.

Delightful Hawaiian Carrot Pineapple Cake Recipe for a Tropical Twist

Delicious Hawaiian Carrot Pineapple Cake: A Tropical Delight for Every Occasion

⚖️
Difficulty
Medium

⏲️
Prep Time
20 mins

🕒
Cook Time
30 mins

⏱️
Total Time
50 mins

🍽️
Servings
12 servings

The Hawaiian Carrot Pineapple Cake is an inviting treat that perfectly embodies the vibrant and tropical flavors of Hawaii. Combining shredded carrots, crushed pineapple, and moist vanilla cake, each slice brings a slice of paradise to your table. The sweet and tangy pineapple, along with the earthiness of carrots, creates a delightful balance of flavors that tantalizes the taste buds. As you cut into this colorful cake, it promises a lush and delicious experience that you, your family, and friends won’t soon forget.

This cake is more than just a dessert; it’s a celebration of flavors and textures. With its soft crumb that melts in your mouth and the subtle crunch from the carrots, every bite feels indulgent. It’s not just about satisfying a sweet tooth; it’s about trailblazing paths of nostalgia and creating new memories. It makes for an ideal dessert for birthday parties, potlucks, or simply as a comforting afternoon treat paired with a cup of coffee or tea.

Quick Recipe Highlights

  • Flavor Profile: A delightful mixture of sweet pineapple and aromatic spices mingles beautifully with the carrots, creating a tropical escape in every bite.
  • Texture: The cake boasts a moist, tender crumb thanks to the addition of crushed pineapple, while shredded carrots add a slight chewiness.
  • Aroma: The baking process releases a wonderfully sweet and spicy aroma, enticing everyone nearby with notes of cinnamon and vanilla.
  • Visual Appeal: The vibrant orange from the carrots contrasted with the sunny yellow pineapple makes for an eye-catching dessert that’s sure to impress.
  • Skill Level Needed: This recipe is perfect for home bakers with some experience, as it requires mixing and measuring but no specialized techniques.
  • Special Equipment: Standard kitchen tools such as mixing bowls, a whisk, and a cake pan are all you need to create this delightful cake.

Recipe Overview

  • Difficulty Level: With a medium difficulty level, the Hawaiian Carrot Pineapple Cake offers a fun challenge for home bakers while ensuring a rewarding outcome.
  • Category: This cake falls under the dessert category and is great for any celebratory occasion, serving as a sweet end to your meals.
  • Cuisine: Drawing its roots from Hawaiian culinary tradition, this cake blends tropical fruits with classic cake elements popular in many festive gatherings.
  • Cost: Made with affordable ingredients like flour, sugar, and carrots, this cake is budget-friendly without sacrificing deliciousness.
  • Season: Perfect year-round, especially in spring and summer when fresh fruits are plentiful, this cake adds a refreshing touch to warm days.
  • Occasion: Ideal for birthdays, holidays, or even casual gatherings, this cake caters to all occasions, making it a versatile dessert choice.

Why You’ll Love This Recipe

The Hawaiian Carrot Pineapple Cake is an indulgent treat that perfectly marries the flavors of sweet pineapple and earthy carrots. Each slice delivers a moist cake texture, and the combination of spices creates an inviting warmth that is simply irresistible. You’ll find it’s not just a cake; it’s a flavorful journey that delights your senses.

One of the top reasons to adore this cake is the convenience it offers in preparation. With a straightforward mixing method, it quickly comes together – ideal for when you’re pressed for time yet want to impress guests. Plus, it requires no complex layering or intricate decoration, letting your focus remain on enjoying the baking process.

Nutritionally, this cake provides a moderate intake of vitamins from both carrots and pineapple, making it a more wholesome dessert option than many others. It’s packed with fibers, offering a satisfying treat without the guilt, ensuring you savor each bite knowing it includes some health benefits.

Socially, this cake shines as a crowd-pleaser. Its tropical flavors appeal to wide audiences, creating an opportunity to establish connections over shared bites of moist heaven. It sparks conversation and compliments, leaving a joyous vibe at any gathering.

Finally, this Hawaiian Carrot Pineapple Cake is a cost-effective choice, requiring standard ingredients that most homes have on hand. You can bake a stunning dessert without breaking the bank, all while bringing a piece of the tropics to your table.

Historical Background and Cultural Significance

The Hawaiian Carrot Pineapple Cake has intriguing origins, reflecting the melting pot flavors of Hawaii. The use of pineapple highlights the state’s agricultural bounty, as pineapples thrive in its tropical climate. Traditionally, cakes from this region often incorporate local ingredients, transforming simple recipes into delicious representations of Hawaiian culture.

Further, this dessert embodies the spirit of ‘Aloha,’ as it is often served during family gatherings and luaus, symbolizing togetherness and hospitality. The vibrant tropical fruits and spices contribute to a dish that not only nurtures the body but also the soul, enhancing every celebration with flavors of warmth and community.

The evolution of the cake has seen many adaptations, from the addition of coconut to variations in spices, each offering a new take on the classic. Changes like these honor both the rich culinary history and modern influences from chefs who infuse their creativity into traditional recipes.

Regional variations can also be noted, showcasing different types of frosting or added flavors such as coconut or nutmeg. This adaptability has allowed the cake to remain relevant and adored among cake lovers and food enthusiasts alike across generations.

Ingredient Deep Dive

Carrots

Carrots have a prominent place in culinary history, valued for their sweet flavor and nutritional benefits. High in beta-carotene, they support eyesight and immunity. When selecting carrots for this cake, look for firm, vibrant ones without blemishes. Store them in the refrigerator and use within a week for optimal freshness.

Pineapple

As a tropical fruit, pineapple carries cultural significance in Hawaii and represents hospitality. Rich in bromelain, pineapple aids digestion and adds tropical sweetness to dishes. Opt for fresh pineapple when possible, as its flavor surpasses canned varieties. Store uncut pineapple at room temperature and refrigerate once sliced.

Common Mistakes to Avoid

  • Overmixing the batter: Overmixing can lead to a dense cake. Mix just until combined to ensure a light, fluffy texture.
  • Not measuring ingredients accurately: Baking requires precision. Use proper measuring cups and spoons for consistent results.
  • Skipping the pineapple draining step: Excess moisture can make the cake soggy, so ensure you drain the pineapple thoroughly before adding it.
  • Not tasting the batter: Always taste your batter before baking; it allows you to adjust sweetness and flavors to your preference.
  • Using old baking powder: Ensure your leavening agents are fresh to achieve the desired rise in your cake.
  • Baking at the wrong temperature: Always preheat your oven to ensure even baking, and consider using an oven thermometer for accuracy.
  • Not letting the cake cool properly: Allowing the cake to cool fully helps in easy removal from the pan and prevents it from breaking.
  • Forgetting spices: Spices like cinnamon and nutmeg are essential for flavor depth; be sure to add them as instructed.
  • Icing when the cake is warm: Wait for your cake to cool completely before icing to prevent melting and sliding.
  • Ignoring storage tips: Improper storage can lead to spoilage; always store the cake in an airtight container when not serving.

Essential Techniques

To master creating the Hawaiian Carrot Pineapple Cake effectively, it’s crucial to understand effective mixing techniques. Mixing just until combined helps maintain a light texture, allowing the cake to rise beautifully. Use medium speed on your mixer and only mix until no dry flour is visible.

Additionally, understanding how to properly fold ingredients is essential. Gently folding in the carrots and pineapple prevents overworking the batter and retains the airiness. Visual cues include seeing small pockets of carrots and pineapple throughout, which indicate a well-mixed batter.

Pro Tips for Perfect Hawaiian Carrot Pineapple Cake

1. Use fresh ingredients for the best flavor; fresh carrots and ripe pineapple vastly improve taste and texture.
2. Let your eggs and butter reach room temperature before use for better emulsification in the batter.
3. Try adding a touch of coconut for a tropical twist that complements the cake beautifully.
4. Consider using a frosting made from cream cheese for a tangy, rich topping that pairs wonderfully with the cake’s sweetness.
5. For a spiced version, add a pinch of nutmeg or ginger for a warm flavor kick.
6. Layer with additional crushed pineapple or toasted coconut between cake layers for added flavor and texture.
7. Decorate with nuts on the sides for a crunchy contrast to the soft cake.
8. For a simple finishing touch, dust with powdered sugar before serving for an elegant presentation.

Variations and Adaptations

Regional variations of the Hawaiian Carrot Pineapple Cake often include ingredients such as coconut or macadamia nuts for an added layer of richness. With seasonal adaptations, you can incorporate fresh fruits like mango or peaches during their peak seasons for a refreshing twist.

For dietary modifications, consider gluten-free flour options to make this cake suitable for those with gluten sensitivities while maintaining the original texture. Vegan adaptations can include subbing eggs with flaxseed meal and utilizing non-dairy yogurt or cream for frosting.

Flavor variations can be achieved by adding almond extract or orange zest, enhancing the overall taste profile, and giving it a unique flair. Texture modifications might include swapping some all-purpose flour for almond flour for moistness.

Presentation alternatives can involve creating mini cakes or cupcakes, allowing for individual serving sizes without compromising on taste or look.

Serving and Presentation Guide

When serving Hawaiian Carrot Pineapple Cake, consider using vibrant plates to enhance the visual appeal of your dish. A simple garnishing of fresh mint or edible flowers adds a sophisticated touch that captures attention.

Traditional accompaniments include a scoop of vanilla ice cream or a dollop of whipped cream to balance out the sweetness. A light drizzle of caramel or coconut sauce could also elevate your dessert experience, enhancing the tropical flavors.

Maintaining optimal temperature when serving is vital; a lightly chilled cake can bring forward the flavors while softening the texture for an exquisite mouthfeel. For portion control, cut the cake into smaller, manageable slices that encourage guests to enjoy without overindulgence.

Wine and Beverage Pairing

Pairing the Hawaiian Carrot Pineapple Cake with wine can enhance your dining experience. A fruity Sauvignon Blanc or a sweet Riesling complements the cake’s tropical flavors, balancing sweetness beautifully. Alternatively, consider pairing it with a light sparkling wine, which can cut through the cake’s richness.

For non-alcoholic alternatives, fresh fruit juices like pineapple or citrus blends can be refreshing accompaniments. If coffee or tea is preferred, a lightly brewed chai or vanilla latte can echo the spice notes of the cake while creating a cozy atmosphere.

Serving wines chilled can enhance the overall taste of the dessert, ensuring a refreshing finish to the meal. Presentation matters, so serving the drinks in elegant glassware adds to the festive feeling of any occasion you’re celebrating.

Storage and Shelf Life

To store the Hawaiian Carrot Pineapple Cake effectively, wrap it in plastic wrap or store it in an airtight container to maintain moisture and prevent it from drying out. Stored correctly at room temperature, it can last for about three days.

For extended shelf life, consider refrigerating the cake, where it can last up to a week without loss of flavor. When freezing, slice the cake first, wrap thoroughly in plastic, and then in aluminum foil; it can hold for around three months.

Watch for signs of spoilage such as unusual odors or dry texture when stored for extended periods. When reheating, use low oven settings to retain moisture and avoid overheating.

Freezing guidelines include ensuring the cake is entirely cooled before wrapping and freezing, which helps it retain moisture.

Make Ahead Strategies

To make your baking schedule manageable, consider prepping your Hawaiian Carrot Pineapple Cake components ahead of time. Grating carrots and measuring dry ingredients a day in advance can save significant effort when it comes to baking day.

Allow the cake to cool before wrapping and storing it in the refrigerator if prepared a day before serving. Chilling enhances flavor development, making it even more delicious. For optimal freshness, frost the cake only on the day you plan to serve it, avoiding sogginess from prolonged icing.

Consider prepping extra crushed pineapple so you can incorporate it into frostings or fillings for future uses. This forward-thinking strategy can elevate your cake’s flavor profile without added effort on serving day.

Scaling Instructions

Scaling the Hawaiian Carrot Pineapple Cake recipe is an easy process. For halving the recipe, simply adjust the ingredient measurements accordingly and check the baking time, reducing it slightly for a smaller cake.

If you plan to double or triple the recipe for gatherings, ensure you use larger cake pans and baking sheets. Monitor the baking time closely, as larger quantities may require adjustments.

Equipment adjustments include using larger bowls or mixing machines to accommodate increased batter volume without overflow.

Adjust timing based on the size of the pans used; smaller cakes bake faster than larger ones. It’s advisable to test with a toothpick for doneness to avoid undercooking or overbaking.

Nutritional Deep Dive

Analyzing the nutritional composition of Hawaiian Carrot Pineapple Cake reveals a balance of macronutrients. The cake is typically higher in carbohydrates due to sugar and flour, providing energy, but it also brings beneficial fiber from carrots and fruits.

Pineapple contributes vitamins like vitamin C and manganese, supporting immune health and metabolic functions. The carrots further enhance nutrient levels, delivering beta-carotene and antioxidants.

With portion control and moderation, enjoying this cake fits well within a balanced diet. Consider distributing servings based on dietary needs, ensuring the cake satisfies sweet cravings without excess.

Weight management can benefit from mindful eating, savoring each slice’s flavor and texture, creating a fulfilling dessert experience without overindulgence.

Dietary Adaptations

For those with gluten sensitivities, adapt the Hawaiian Carrot Pineapple Cake using gluten-free flour blends that mimic the texture of all-purpose flour. Achieving the right consistency may require trial and error, but it’s certainly worthwhile.

Dairy-free modifications can include substituting regular yogurt or cream cheese frosting with coconut yogurt or nut-based alternatives, retaining richness while making it suitable for vegans.

If you are following a low-carb or keto diet, consider using almond flour and a sweetener like erythritol instead of sugar, ensuring careful calculations for ingredient ratio changes.

Following paleo guidelines, focus on whole, unprocessed ingredients, omitting refined sugar and opting for natural sweeteners like honey or maple syrup.

Each modification allows everyone to enjoy this thriving dish while catering to individual dietary needs and preferences.

Troubleshooting Guide

To address texture issues in your Hawaiian Carrot Pineapple Cake, ensure proper measurements for flour to prevent dryness or possible sogginess related to excess pineapple juice.

If flavor balance seems off, consider adjusting spice levels, adding cinnamon or nutmeg for improved depth. Incorrect baking temperatures can lead to issues as well, so always ensure your oven is appropriately calibrated.

Equipment challenges may arise if your baking pans are uneven; select high-quality, non-stick bakeware for consistent results.

Ingredient substitutions should be handled with care to ensure the balance of flavors remains intact. For example, swapping all-purpose flour with whole wheat may change the texture and moisture levels.

Timing concerns can become problematic if not monitored closely. It’s crucial to test with a toothpick or cake tester to ensure even cooking without underbaking centers.

Recipe Success Stories

Community feedback on the Hawaiian Carrot Pineapple Cake often highlights its delightful taste and moist texture. Many home bakers enjoy sharing stories of their variations, whether through additional fruits or using different frostings.

Readers have raved about how successful their experimentation with flavors turned out, like adding coconut flakes or nuts to the mix, leading to satisfied family and friends.

Photography of the cake showcases vibrant colors and an inviting presence, encouraging sharing on social media. These tips provide users inspiration and encouragement to bake, making the recipe come alive in their own hands.

Variations based on reader suggestions often entice newcomers to adapt and innovate on the original recipe, allowing the tradition to grow and evolve through many hands.

Frequently Asked Questions

1. Can I use canned pineapple instead of fresh?
Yes, canned pineapple works well, but make sure to drain it thoroughly to avoid excess moisture. Fresh pineapple will yield better flavor, but both options can deliver delicious results.

2. How do I store the cake once it’s baked?
The cake should be stored in an airtight container at room temperature for up to three days or in the refrigerator for about a week. Ensure it’s cooled completely before storing to maintain freshness.

3. Is it possible to make this cake in advance?
Yes! You can prepare the cake a day ahead by allowing it to cool, wrapping it, and storing it in the refrigerator. For best results, frost it on the day of serving.

4. Can I freeze the cake?
Absolutely! Slices can be frozen in an airtight container for up to three months. Wrap them individually to ensure they maintain moisture and flavor.

5. What can I use instead of eggs in this recipe?
You can use flaxseed meal mixed with water (1 tablespoon flaxseed meal + 2.5 tablespoons water = 1 egg) or a commercial egg replacer for egg-free versions.

6. How can I make the cake gluten-free?
Using a gluten-free flour blend will work perfectly! Make sure to check your brand instructions to ensure a similar texture to all-purpose flour.

7. Can I add nuts to the recipe?
Yes! Adding chopped walnuts or pecans enhances the texture and adds flavor. Just be mindful of the overall moisture content and adapt accordingly.

8. What should I do if my cake comes out dry?
If the cake is dry, ensure your oven temperature is accurate. Additionally, make sure not to overmix the batter as this can lead to dryness.

9. Can I omit the spices?
While spices like cinnamon and nutmeg enhace the flavor, you can adjust them to taste. If you prefer a milder flavor, reduce or omit them completely.

10. How does the cake taste with cream cheese frosting?
The tangy sweetness of cream cheese frosting pairs wonderfully with the tropical elements of the cake, creating a more decadent dessert experience.

Additional Resources

Looking to expand your baking repertoire? Check out related recipes that feature tropical flavors or carrot-based desserts. Learning about ingredient substitutions can pave the way for creative adaptations tied to your dietary preferences or available pantry items.

Investing in good quality cookware will also elevate your baking game, ensuring consistent results on each bake. Be sure to explore technique guides covering mixing methods and ingredient preparation to refine your skills in the kitchen.

For seasonal baking, learn about variations that incorporate different fruits or spices based on time of year, thus enhancing not only flavor but also your culinary creativity.

Join the Conversation

We would love to hear about your baking experiences with the Hawaiian Carrot Pineapple Cake! Share your photos on social media, and engage with our community of baking enthusiasts. Offering tips and tricks enriches everyone’s experience, and your feedback could inspire others to try variations or adaptations of the recipe.

Encouraging reviews and discussions not only connect bakers but also foster a sense of community around shared food experiences. Your stories and photographs bring life to this cherished recipe, creating a collection of success stories that embody the joy of baking together.

The Recipe

Hawaiian Carrot Pineapple Cake

Serves: 12 servings

Prep Time: 20 mins

Cook Time: 30 mins

Total Time: 50 mins

Kitchen Equipment Needed

  • Mixing bowls
  • Whisk or electric mixer
  • Measuring cups and spoons
  • Spatula
  • 9-inch round cake pan

Ingredients

  • 2 cups all-purpose flour
  • 2 cups sugar
  • 1 teaspoon baking soda
  • 1 teaspoon baking powder
  • 1 teaspoon cinnamon
  • ½ teaspoon nutmeg
  • 1 teaspoon salt
  • 4 large eggs
  • 1 cup vegetable oil
  • 2 cups grated carrots
  • 1 cup crushed pineapple, drained
  • ½ cup walnuts, chopped (optional)
  • 1 teaspoon vanilla extract

Directions

  1. Preheat your oven to 350°F (175°C) and grease your cake pan.
  2. In a large bowl, sift together flour, baking soda, baking powder, cinnamon, nutmeg, and salt.
  3. In another bowl, whisk the eggs, then blend in oil, vanilla extract, and sugar.
  4. Gradually add the dry ingredients into the wet mixture until combined.
  5. Fold in carrots, pineapple, and walnuts gently until mixed.
  6. Pour the mixture into the prepared cake pan and smooth the top.
  7. Bake in the oven for 30-35 minutes or until a toothpick comes out clean.
  8. Cool the cake in the pan for 10 minutes before transferring it to a wire rack.
  9. Once cooled, frost as desired or enjoy plain.

Recipe Notes

  • This cake tastes even better the next day as flavors meld.
  • Feel free to adjust spices to your liking.
  • Consider adding coconut for an extra layer of texture.

Indulge in a Decadent Black Forest Roll Cake Recipe

Black Forest Roll Cake – A Chocolate & Cherry Delight

⚖️
Difficulty
Medium

⏲️
Prep Time
30 mins

🕒
Cook Time
15 mins

⏱️
Total Time
45 mins

🍽️
Servings
8 servings

The Black Forest Roll Cake is a delightful twist on the classic Black Forest Cake, using a light chocolate sponge rolled with a luscious cream filling and tart cherries. This cake presents a wonderful balance of flavors—the rich chocolate complements the sweet, juicy cherries perfectly while the whipped cream adds a lightness that makes each bite heavenly. Whether you’re celebrating a special occasion or simply treating yourself, this indulgent dessert promises to entice chocolate lovers and cherry enthusiasts alike.

As you slice into this magnificent roll cake, the stunning contrast of rich brown chocolate and vibrant red cherries captures the eye. The fluffy cream peeking out invites you to take a bite, promising a taste experience that is both nostalgic and new. The ease of preparation combined with the elegant presentation makes the Black Forest Roll Cake a showstopper at any gathering.

Quick Recipe Highlights

  • Flavor Profile: This dessert combines the rich taste of chocolate with the fruity tartness of cherries, creating a beloved classic that satisfies every sweet craving.
  • Texture: The cake is light and fluffy, providing a soft bite contrasted by the luscious cream and juicy cherries, leading to a delightful mouthfeel.
  • Aroma: The delightful aroma of chocolate fills the air, complemented by the sweet scent of cherries that tantalizes your taste buds.
  • Visual Appeal: The rolling technique creates stunning swirls of chocolate, cream, and cherries, making for a visually striking centerpiece on any dessert table.
  • Skill Level Needed: This recipe is medium in difficulty, requiring basic baking skills along with a little finesse in rolling the cake.
  • Special Equipment: A jelly roll pan and parchment paper are essential for this recipe to ensure a successful bake and easy rollout.

Recipe Overview

  • Difficulty Level: The medium complexity of this recipe makes it accessible for intermediate bakers who have some experience in making rolled cakes.
  • Category: This dish fits perfectly in the dessert category, specifically for cake lovers looking for something unique and festive.
  • Cuisine: Originating from Germany, the Black Forest Roll Cake combines traditional German chocolate cake elements with flavors inspired by the Black Forest region.
  • Cost: With affordable ingredients like flour, eggs, and cherries, this cake is budget-friendly, particularly when cherries are in season.
  • Season: This dessert is best enjoyed in late spring or summer when cherries are juicy and ripe, making the flavor even more pronounced.
  • Occasion: Ideal for birthdays, anniversaries, and holiday celebrations, the Black Forest Roll Cake is a festive treat for any gathering.

Why You’ll Love This Recipe

The Black Forest Roll Cake offers an indulgent taste experience that harmoniously balances chocolate and cherry, creating an exceptionally satisfying dessert. The light texture of the cake and the fluffy whipped cream filling provide a delightful mouthfeel, making each bite melt in your mouth. It is a decadent treat that appeals to both chocolate lovers and those who appreciate the refreshing zest of cherries.

Preparation and convenience are also highlights of this recipe. Unlike traditional layered cakes, rolling this cake simplifies serving, making it easy to slice and share. The visually appealing swirls of chocolate and cherry create an impressive dessert while minimizing prep time, allowing you to enjoy more moments with your guests.

In addition to being a crowd-pleaser, this cake can be lighter than many alternatives, particularly when made with reduced sugar or low-fat cream. You can enjoy this decadent dessert without feeling guilty, making it suitable for various dietary preferences.

Social gatherings benefit from this cake, as its stunning presentation and exceptional flavor often make it the star of the dessert table. Conversations shift to praises and recipe requests as guests relish in its deliciousness, fostering camaraderie and shared joy around food.

Cost-effectiveness is an important aspect of the Black Forest Roll Cake. Most ingredients are pantry staples, making it financially accessible to prepare while still delivering an exquisite dessert experience that rivals store-bought cakes.

Historical Background and Cultural Significance

The Black Forest Roll Cake is a delightful variation of the traditional Black Forest Cake, whose origins trace back to the Black Forest region in Germany. This cake was originally inspired by the flavors of Schwarzwälder Kirschtorte, a layered chocolate cake filled with cherries and whipped cream. Just like its predecessor, the roll cake captures the essence of the Black Forest’s lush cherry orchards and renowned chocolate delicacies.

Culturally, the Black Forest Cake holds a significant place in German culinary heritage. It reflects the region’s rich agricultural history of cherry production and the art of baking with chocolate. Through variations like the roll cake, this dessert format emphasizes both tradition and creativity, enabling bakers to enjoy the essence of Black Forest flavors in new forms.

Over the years, the recipe has evolved to include many adaptations, including variations to accommodate different dietary preferences such as gluten-free or vegan. Modern twists have made it easier to prepare without sacrificing flavor, allowing fans of the classic dessert to explore new ways to enjoy it.

Regionally, while the Black Forest roll cake is celebrated in Germany, its popularity has led to greater acceptance and adaptation worldwide. From bakeries to home kitchens, this cake continues to inspire bakers to create delicious iterations that honor its flavorful foundations while embracing contemporary tastes.

Ingredient Deep Dive

Chocolate: Chocolate is a beloved ingredient that adds depth and richness to desserts. It has a long history dating back to ancient civilizations, where cacao beans were a form of currency and center of culinary traditions. In the realm of nutrition, dark chocolate offers antioxidants and potential heart-healthy benefits, while its creamy texture enhances the overall experience of desserts. When selecting chocolate, opt for high-quality brands with cacao content between 60-80% to maximize flavor. Store chocolate in a cool, dry place to preserve its unique characteristics.

Cherries: Cherries, particularly tart varieties, are synonymous with the Black Forest region. This fruit boasts a rich cultural background as a key ingredient in traditional pastries. Cherries are not only delicious but also provide nutritional benefits such as vitamin C and fiber. When purchasing cherries, always look for firm, bright-colored fruits without blemishes. Store fresh cherries in the refrigerator and consume within a few days to enjoy their peak flavor. For a twist, consider using frozen cherries; just be sure to adjust for added moisture in your recipe.

Common Mistakes to Avoid

  • Overbaking the cake: This can lead to a dry texture. Keep an eye on the bake time and perform the toothpick test to ensure moisture.
  • Not cooling the cake properly: Rolling a hot cake can result in cracks. Allow it to cool in the pan before turning it out.
  • Using too much filling: Overstuffing can cause the roll to break. Spread a thin, even layer of filling for best results.
  • Poorly preparing the pan: Not lining the pan can lead to sticking. Make sure to use parchment paper and grease the sides.
  • Rolling too tightly: A tight roll can force filling out. Roll gently to maintain structure without compressing the cake.
  • Skipping the chilling step: Allowing the rolled cake to set in the fridge helps it maintain shape. Don’t skip this crucial step!
  • Using the wrong sugar type: For whipping cream, use granulated sugar, as powdered sugar may alter the desired texture.
  • Not tasting before serving: Ensure the cake’s flavors are well balanced. Adjust sweetness as needed before serving.
  • Ignoring recipe ratios: Baking is a science. Stick closely to ingredient ratios for consistent outcomes.
  • Inadequate ingredient prep: Measure and prepare all ingredients before starting. It streamlines the process and prevents mistakes.

Essential Techniques

Cake Rolling: This technique is crucial for achieving a beautiful roll cake. To master it, carefully remove the cake from the pan while it is still warm and place it onto a clean kitchen towel dusted with powdered sugar. Roll the cake with the towel while it’s still warm to prevent cracking. Aim for a gentle approach to avoid compressing it. After rolling, allow it to cool completely before adding the filling to ensure it retains its shape when unrolled later.

Whipping Cream: Whipping cream to the right consistency is essential for your roll cake. Use chilled cream and a cold mixing bowl for optimal results. Start at medium speed and gradually increase to high until soft peaks form. Avoid whipping too long to prevent creating butter. It’s best to stop just before firm peaks, maintaining a fluffy texture for spreading.

Pro Tips for Perfect Black Forest Roll Cake

1. Use fresh, high-quality ingredients. Fresh cherries and premium chocolate make a significant difference in taste.
2. Always preheat your oven. A properly heated oven ensures even baking and prevents soggy spots.
3. Be mindful of the filling. Add a tangy element, like a splash of cherry juice, to elevate your cream mixture.
4. Experiment with flavors. Add a hint of vanilla or almond extract to the cream for extra flavor.
5. Keep an eye on the baking time. Ovens can vary; start checking for doneness a few minutes early to avoid overbaking.
6. Allow the cake to cool completely before adding the cream. Filling on a warm cake can cause it to become soggy.
7. Don’t be afraid to personalize. Try incorporating different fruits or flavoring in your cream to make the recipe your own.
8. Practice makes perfect. If your first roll doesn’t look perfect, keep trying! Each attempt helps with technique.

Variations and Adaptations

One of the beauty of the Black Forest Roll Cake is its adaptability. For regional variations, consider incorporating local fruits, such as strawberries or raspberries, for a unique take on the classic flavors. Seasonal adaptations can include using pumpkin puree or spices in the fall, transforming this chocolate delight into a cozy dessert fit for autumn events.

For dietary modifications, going gluten-free is achievable by substituting standard flour with almond or coconut flour, ensuring a deliciously nutty flavor profile to the cake. If you’re looking to reduce sugar, consider using a natural sweetener like stevia or honey in the whipped cream, while still retaining the cake’s charm.

Flavor variations can also be explored by adding different extracts to the cream filling, such as peppermint for a wintery twist or citrus zest for a refreshing summer dessert. The texture can be altered by filling the cake with a layer of crunchy chocolate or almond pieces, adding a satisfying crunch with each bite.

Finally, presentation alternatives enhance the visual appeal. Consider dusting the rolled cake with cocoa powder, or garnishing with mint leaves and chocolate shavings to elevate the cake’s look on the dessert table.

Serving and Presentation Guide

When serving your Black Forest Roll Cake, presentation is key. Start by slicing the cake into even pieces, ensuring each slice reveals the beautiful swirl of chocolate, cream, and cherries. For an appealing display, place slices on a decorative platter or individual dessert plates. Elevate the visual aspect by garnishing each slice with a dollop of whipped cream, chocolate curls, and fresh cherries.

Consider traditional accompaniments, such as vanilla ice cream or a light dusting of powdered sugar, to enhance the cake’s flavor and presentation. Temperature matters; serve the roll cake chilled or at room temperature to showcase its softness and creamy filling.

Portion control tips include slicing the roll on a diagonal for a more elegant presentation, making it appear larger and more inviting. If serving at a party, provide small dessert forks to encourage guests to savor each bite.

Wine and Beverage Pairing

Pair this decadent dessert with a rich red wine, such as a Pinot Noir or Merlot, which complements the chocolate and cherry flavors beautifully. For a sparkling option, consider a fruity Prosecco that refreshes the palate between bites.

If you prefer non-alcoholic alternatives, a vibrant cherry soda or homemade cherry lemonade can create refreshing contrasts to the creamy cake. For a warm beverage pairing, serve with a nice cup of coffee or espresso; its bold flavors enhance the richness of the dessert while calming the chocolate’s sweetness.

Pay attention to serving temperatures—wines should be served at room temperature, while carbonated drinks are best chilled to balance the decadent richness of the cake.

Storage and Shelf Life

To preserve your Black Forest Roll Cake, store it in an airtight container in the refrigerator. Ideally, consume the cake within 2-3 days for optimal freshness, as the cream can begin to lose its texture over time. If you want to extend shelf life further, consider freezing the rolled cake before adding the cream layer.

For freezing, wrap the unfilled cake tightly in plastic wrap and then in aluminum foil. When ready to enjoy, allow the cake to thaw in the refrigerator overnight and fill it just before serving. Signs of spoilage to watch for include an off odor or sour taste to the cream.

For reheating instructions, avoid microwaving the rolled cake directly, as it may alter the texture. Instead, allow the thawed cake to sit at room temperature for a while before serving to entice the flavors once again.

Make Ahead Strategies

Making the Black Forest Roll Cake ahead of time is a fantastic strategy for busy bakers. The sponge cake can be prepared a day or two in advance, allowing it to cool and set properly. Store the cooled cake well-wrapped to prevent drying.

Once you’re ready to serve, fill and roll the cake on the day of your event to maintain the texture of the cream filling. For those pressed for time, consider preparing the filling a day in advance, storing it properly in the refrigerator, which allows for easy assembly.

Quality impact remains high when the cake is made ahead; however, for a fresher taste, adding elements like whipped cream should be done just before serving. Fresh elements, like grated chocolate or freshly diced cherries as a topping, can also be sprinkled just before presentation to create a stunning dessert that looks and tastes recent.

Scaling Instructions

When scaling the recipe, if you plan to halve it, simply reduce the ingredient quantities proportionally. This approach ensures you don’t miss out on any essential components, maintaining the fundamental flavors and textures crucial to the cake’s success.

For doubling or tripling the recipe, anticipate potential adjustments to bake time and the size of your baking pan. Ensure you have properly sized pans that can accommodate larger quantities without affecting the cooking evenly.

Timing modifications may also include longer bake times when using larger pans. Always check for doneness in the cake center and adjust based on baking conditions.

Storage considerations are vital; ensure that you have enough containers on hand or consider gifting some of the extras to friends or family to share the deliciousness of your efforts.

Nutritional Deep Dive

Nutritionally, the Black Forest Roll Cake offers a delightful balance. A standard slice typically provides a moderate amount of carbohydrates primarily contributed by sugar and flour. The presence of cherries introduces beneficial antioxidants, vitamins C and K, promoting overall health.

In terms of fat content, the whipped cream contributes saturated fats, which should be consumed in moderation. Consider using light cream or substituting non-dairy options for a healthier version to reduce calorie counts without sacrificing flavor.

Portion analysis suggests serving sizes should be mindful, given the cake’s rich ingredients. Balancing a no more than a slice with a healthy meal can assist in maintaining a well-rounded diet, particularly when entertaining.

Additionally, weight management tips might suggest enjoying smaller slices and savoring slower to truly appreciate the flavors—this can often lead to overall satisfaction despite smaller servings.

Dietary Adaptations

For those requiring a gluten-free option, use a simple blend of gluten-free flour and almond flour to create a deliciously moist roll cake without sacrificing flavor or texture.

Individuals needing dairy-free alternatives can replace cream with coconut cream or almond milk-based whipped cream, allowing for modifications that cater to diverse dietary needs.

To accommodate those pursuing vegan options, utilize flax eggs as substitutes, and opt for cashew cream to mimic the traditional creamy filling. This adaptation retains the spirit of the dish while aligning with vegan standards.

Low-carb and keto dieters can benefit from using almond flour with sugar substitutes like erythritol, adapting their favorite flavors into a diet-friendly treat.

For those following a paleo diet, avoid processed sugars and dairy, leaning into natural sweeteners like honey and full-fat coconut milk, which result in an equally enticing dessert without compromising dietary principles.

Troubleshooting Guide

If your cake ends up too dry, check your measurements, as wrong proportions can lead to density issues. Avoid overbaking to maintain that moist texture. If the flavors lack balance, try adjusting sweetness slowly.

Improper rolling can lead to cracks. To prevent this, ensure adequate cooling and use a light touch when rolling techniques are implemented.

For equipment challenges, such as issues with pans sticking, always use parchment paper or non-stick spray to ease the release. Ingredient substitution errors should be carefully managed; always measure accurately, particularly when using alternative sweeteners or flours.

If timing is a concern, remember to set multiple timers and prepare as much as possible ahead, so you maintain a steady progress in your baking.

Recipe Success Stories

Our community of bakers has experimented with the Black Forest Roll Cake, leading to incredible stories of success. Many have adapted the recipe for special diets, achieving rave reviews during family gatherings or celebrations.

Some bakers share how the simpler roll format has made cakes more approachable for beginning bakers, allowing their children to join in the baking fun. These shared adaptations promote creativity, encouraging everyone to put their unique spin on the traditional roll cake.

Photographic success is also noteworthy, with users sharing stunning images of their cakes on social media. These visuals help to inspire others to attempt the cake, proving that with a little patience and practice, beautiful results are achievable.

By connecting through recipe variations, the community is empowered to share tips, learn from each other’s experiences, and feel confident in their baking journeys, ultimately celebrating the joy of creating memorable desserts.

Frequently Asked Questions

Can I make the cake in advance? Yes, you can bake the chocolate sponge ahead of time. Store it well-wrapped and fill it the day you plan to serve.

What if my cake cracks during rolling? If the cake cracks, don’t worry! Just fill it as best as you can and it will still taste amazing.

How can I make it gluten-free? You can substitute regular flour with a gluten-free flour blend or almond flour for a delicious variation.

Can I use frozen cherries? Absolutely! Just thaw them and pat them dry to prevent excess moisture in your cake.

Is there a non-alcoholic option for pairing? Yes, cherry soda or sparkling grape juice pairs beautifully with this dessert.

What’s the best way to store leftovers? Store any leftover cake in an airtight container in the fridge, and it should be consumed within a few days.

Can I modify the cream filling? Yes! Feel free to add flavorings like vanilla extract or chocolate to customize the cream.

How can I avoid a soggy bottom? Be sure to properly pre-bake the cake layer without overstuffing it with the filling, and don’t skip the chilling step.

What type of chocolate should I use? High-quality dark chocolate (60-70% cacao) works best, enhancing flavor without being too sweet.

Can I use dairy-free cream? Yes, coconut cream or other non-dairy alternatives work well for those avoiding dairy.

Additional Resources

If you enjoyed this Black Forest Roll Cake, consider exploring related desserts like a classic Black Forest Cake, Chocolate Swiss Roll, or Cherry Clafoutis for more indulgent options.

For tips on achieving perfect sponge cakes, check out our baking technique guides covering the fundamentals of cake batter preparation and baking time adjustments.

Seasonal variations like Peach Roll Cake or Strawberry Roll Cake may spark inspiration, as they invite you to experiment with flavors that reflect the bounty of summer and spring.

For equipment recommendations, ensure you have quality mixing bowls, whisking tools, and a reliable jelly roll pan to make your baking journey seamless.

Join the Conversation

Recipe sharing is a wonderful way to connect with fellow bakers! Share your photos and experiences of making the Black Forest Roll Cake on social media platforms. Your photography skills can ignite inspiration and motivate others to try their hand at baking.

Engage with other cooking enthusiasts through reviews and feedback, contributing to a vibrant community filled with creativity and enjoyment.

Participating in discussions about recipe variations encourages exploration of new flavors while opening the door for more engaging interactions about baking experiences. Let your baking journey be a shared adventure as you cook and create delicious memories with loved ones!

The Recipe

Black Forest Roll Cake

Serves: 8 servings

Prep Time: 30 mins

Cook Time: 15 mins

Total Time: 45 mins

Kitchen Equipment Needed

  • Jelly roll pan
  • Parchment paper
  • Mixing bowls
  • Electric mixer
  • Cooling rack

Ingredients

  • 1/2 cup all-purpose flour
  • 1/3 cup cocoa powder
  • 4 large eggs
  • 1/2 cup granulated sugar
  • 1/4 cup milk
  • 1/4 cup vegetable oil
  • 1 cup heavy whipping cream
  • 1 cup tart cherries, pitted and halved
  • 1/4 cup powdered sugar, for sweetening cream
  • Chocolate shavings, for garnish

Directions

  1. Preheat the oven to 350°F (175°C) and line the jelly roll pan with parchment paper.
  2. In a bowl, whisk together flour, cocoa powder, and salt. Set aside.
  3. In a separate mixing bowl, beat eggs and sugar until pale and fluffy.
  4. Gradually add dry ingredients to the egg mixture, folding gently.
  5. Incorporate milk and vegetable oil, mixing until combined.
  6. Pour the batter onto the prepared pan and spread evenly.
  7. Bake for about 15 minutes or until the cake springs back when touched.
  8. Remove from the oven and let cool slightly before rolling with a clean kitchen towel.
  9. While cooling, whip heavy cream with powdered sugar until stiff peaks form.
  10. Once the cake is cool, carefully unroll it and spread whipped cream evenly, topping with cherries.
  11. Roll the cake back up and refrigerate for at least an hour before serving.
  12. Slice and garnish with chocolate shavings before serving.

Recipe Notes

  • For a richer flavor, consider adding vanilla extract to the whipped cream.
  • You can make the cake in advance and store it without the cream filling until ready to serve.

Delightful Raspberry Lemon Heaven Cupcakes for Any Occasion

Raspberry Lemon Heaven Cupcakes: A Delightful Citrus Treat

⚖️
Difficulty
Moderate

⏲️
Prep Time
30 mins

🕒
Cook Time
20 mins

⏱️
Total Time
50 mins

🍽️
Servings
12 cupcakes

The Raspberry Lemon Heaven Cupcakes are more than just a dessert; they are an experience. Infused with the vibrant flavors of fresh raspberries and zesty lemon, these cupcakes bring a burst of summer to your palate with each bite. The combination of sweet and tangy creates a delightful balance that will have everyone reaching for seconds. Topped with a luscious lemon buttercream frosting and garnished with a plump raspberry, these cupcakes are not only delicious but also visually stunning, making them the perfect treat for any occasion.

Baking these Raspberry Lemon Heaven Cupcakes is a beautiful way to bring friends and family together. There’s something truly special about the process of creating these delightful confections from scratch, and the fragrant aroma of lemon zest and fresh raspberries wafting through the kitchen will awaken your senses. Whether it’s a birthday party, brunch, or simply a gathering with loved ones, these cupcakes are sure to be a hit and will create lasting memories of joy and celebration.

Quick Recipe Highlights

  • Flavor Profile: Each cupcake offers a refreshing citrus tang from the lemon, complemented by the sweet touch of ripe raspberries.
  • Texture: The moist cake coupled with creamy frosting creates a delectable experience that melts in your mouth.
  • Aroma: Expect a delightful fragrance of citrus and berries that fills your kitchen, enticing everyone nearby.
  • Visual Appeal: Bright pinks and yellows make these cupcakes a stunning centerpiece for any dessert table.
  • Skill Level Needed: These cupcakes are moderately challenging, perfect for bakers looking to expand their skills.
  • Special Equipment: Standard baking tools will suffice; however, a mixer can help with frosting texture.

Recipe Overview

  • Difficulty Level: These cupcakes require some baking techniques, including mixing, frosting, and decorating, making them suitable for those with intermediate skills.
  • Category: This recipe falls under desserts, specifically cupcakes, perfect for sweet cravings or celebratory occasions.
  • Cuisine: Rooted in Western baking traditions, these treats represent a fusion of classic and modern flavor preferences.
  • Cost: Ingredients are fairly accessible and moderately priced, fitting comfortably within a standard dessert budget.
  • Season: Ideal for spring and summer seasons, as the light flavors of lemon and raspberry celebrate the freshness of these warmer months.
  • Occasion: Perfect for birthday parties, baby showers, or simply as a delightful afternoon treat with friends.

Why You’ll Love This Recipe

Raspberry Lemon Heaven Cupcakes deliver exceptional taste and texture that will impress your friends and family. The deliciously sweet and sauce-like raspberry filling pairs beautifully with the zesty lemon cake, creating a perfect harmony of flavors. Each bite envelops you in a light, fluffy cupcake, delicately balancing sweetness and tartness, making them irresistible for dessert lovers.

Convenience plays a significant role in these cupcakes, as they require minimal prep time compared to their complex flavor profile. The use of fresh ingredients enhances the overall quality of the cupcakes, allowing you to deliver delicious results without spending the entire day in the kitchen. Once baked and frosted, these treats are easy to serve and store, making them a hassle-free choice for any event.

From a nutritional standpoint, raspberries are packed with antioxidants, fiber, and vitamins, making these cupcakes a slightly healthier indulgence compared to other dessert options. The addition of lemon also adds a boost of vitamin C, further enhancing their appeal. While these cupcakes are a treat, they still provide added benefits from the wholesome ingredients used in the recipe.

These delectable cupcakes are perfect for social gatherings and entertaining. Sharing your Raspberry Lemon Heaven Cupcakes will undoubtedly draw praise and create a cheerful atmosphere at any event. Their bright colors and inviting appearance are sure to spark conversation and delight your guests, making them a memorable addition to your dessert table.

Cost-effective and accessible, the ingredients for this cupcake recipe are easy to find and typically budget-friendly. With just a handful of essential items, you can create a batch of 12 beautiful cupcakes, ensuring no one walks away unsatisfied. Their stunning presentation combined with their delightful flavors makes these cupcakes worth every penny.

Historical Background and Cultural Significance

The origins of cupcakes can be traced back to 18th century America, where they were originally baked in small, individual molds. These little cakes soon became a popular treat for celebrations, evolving into the well-loved cupcake we enjoy today. The blend of raspberry and lemon in this recipe reflects a more modern twist that highlights the evolving nature of dessert culture.

Culturally, desserts like these cupcakes symbolize community and celebration. They are often featured at festive gatherings and milestones, shedding light on the ways food connects people and creates joyful memories. The mix of bright flavors evokes summer, celebrating the season’s bounty with fresh fruits that everyone loves.

Through time, recipes have evolved, with different regions incorporating their interpretations of flavors and ingredients into the traditional cupcake format. The Raspberry Lemon Heaven Cupcakes showcase how flavors can intertwine to create a sweet treat celebrating various culinary traditions.

Regional variations of these cupcakes are also fascinating. Some cultures use different bases, such as almond flour or coconut flour, to cater to dietary preferences, demonstrating how a classic dessert can transform based on local ingredients and traditions.

Ingredient Deep Dive

When it comes to flour, it’s essential to choose the right type for the perfect cupcake texture. All-purpose flour is commonly used in cupcake recipes due to its balanced protein content, allowing for a tender crumb. Look for high-quality flour, and store it in a cool, dry place to preserve freshness. If you need a gluten-free alternative, almond flour or gluten-free blends can be suitable substitutes, although adjustments in liquid may be necessary.

Raspberries, the star ingredient of these cupcakes, are known for their vibrant color and tart flavor. They’re rich in antioxidants, fiber, and vitamins, making them not only delicious but also nutritious. When selecting fresh raspberries, look for plump and firm berries with a rich color, as they will provide the best flavor. Store them in the fridge and consume them within a few days for optimum freshness.

Lemons add a bright acidity that balances the sweetness of the cupcakes. The zest is particularly aromatic and can elevate the overall flavor profile. When choosing lemons, look for firm specimens with vibrant yellow skin. For long-term storage, lemons can be refrigerated but should be used as soon as possible for the best flavor. You can also substitute them with lime or orange for different flavor profiles.

Butter is a key ingredient that helps achieve a moist and flavorful cupcake. Unsalted butter is recommended to allow better control over the total salt content in your recipe. Choose high-quality butter for the best flavor, and remember to let it reach room temperature before mixing to ensure a well-emulsified batter. Alternatives such as coconut oil can offer a dairy-free option, but texture may slightly differ.

Eggs provide structure and moisture in cupcakes, and using fresh, high-quality eggs will yield the best results. If you’re looking for a vegan alternative, consider using flax eggs or applesauce, though the results may vary slightly in taste and texture. Always remember to check for freshness by doing a float test; fresh eggs will sink, while older eggs will float.

Common Mistakes to Avoid

  • Overmixing the batter can lead to dense and chewy cupcakes. Mix until just combined to achieve a light texture.
  • Not using room temperature ingredients can affect the emulsion and result in uneven baking. Always allow butter and eggs to come to room temperature.
  • Filling the cupcake liners too full can cause overflow during baking. Fill liners about two-thirds full to achieve perfect dome-shaped cupcakes.
  • Opening the oven door too early can lead to deflation. Avoid checking on your cupcakes for the first 15 minutes of baking.
  • Underbaking can result in raw centers. Use a toothpick to check doneness; it should come out clean or with a few crumbs.
  • Improperly storing cupcakes can lead to dryness. Keep them in an airtight container at room temperature for optimal moisture preservation.
  • Not letting the cupcakes cool before frosting can cause the frosting to melt. Allow cupcakes to cool completely before applying frosting.
  • Using inferior ingredients can compromise flavor. Always opt for fresh and high-quality components for the best results.
  • Not adapting baking time for different ovens may lead to inconsistent baking results. Always monitor and adjust as necessary based on your oven’s performance.
  • Ignoring the importance of flavor balancing between sweet and tart can make the cupcakes one-dimensional. Taste and adjust the frosting to achieve a balanced flavor.

Essential Techniques

Master the creaming technique, which involves beating butter and sugar together until light and fluffy. This process incorporates air, resulting in a lighter cupcake texture. Be sure to scrape down the sides of the bowl to ensure even mixing. Stop once the mixture appears pale and fluffy, as over-creaming can lead to dense cupcakes.

Frosting effectively is another key technique. For the perfect buttercream, ensure your butter is at room temperature for easy blending. Beat the butter first until fluffy, then gradually add powdered sugar and flavoring. Adjust the consistency with milk for a creamier texture. Practice piping techniques by using different tips for decorative effects or simply applying with a spatula for a rustic look.

Pro Tips for Perfect Raspberry Lemon Heaven Cupcakes

Use fresh, high-quality ingredients to enhance flavor. The fresher the ingredients, the better the overall taste of your cupcakes. Opt for organic raspberries and lemons when possible.

Chill your frosting if it becomes too soft. If your buttercream is too runny, refrigerate it for about 15 minutes before re-whipping to achieve the right consistency.

Experiment with flavor infusions. Add a splash of vanilla extract or lemon extract to your batter for deeper flavor profiles.

Pre-sift your flour and powdered sugar to avoid clumps. This will result in a smoother cupcake batter and frosting.

Allow the cupcakes to cool completely before frothing. If you frost warm cupcakes, the icing will melt and lose its shape.

Consider making a double batch. These cupcakes are popular, and making extra ensures you have enough for everyone!

Variations and Adaptations

Try different fruit fillings to create unique twists on this recipe. Substitute raspberries with strawberries or blueberries for an equally delightful flavor profile.

For seasonal adaptations, incorporate pumpkin puree or spices in the fall, or switch to tropical fruits like pineapple during summer.

Adapting for dietary variations can be simple. Use gluten-free flour or almond flour for a gluten-sensitive version, and swap butter for coconut oil to make it dairy-free.

Enhancing flavors can also be fun. Consider adding a pinch of cardamom or a drizzle of honey to the frosting or batter for an aromatic touch.

For texture, mix in some finely chopped nuts or sprinkles to the batter for a delightful crunch.

Presentation can be modified by using edible flowers or colorful sprinkles on top of the frosting for an eye-catching finish.

Serving and Presentation Guide

When plating your cupcakes, consider using tiered stands for an elegant display. Stacking cupcakes on different levels adds height and visual interest.

Garnish your cupcakes with fresh raspberries or lemon slices for a burst of color and a touch of freshness. Edible flowers can also enhance presentation and provide a sophisticated touch.

Traditional accompaniments could include a scoop of vanilla ice cream or a dollop of whipped cream for added indulgence.

Serve your cupcakes at room temperature to ensure that flavors shine through. Allow guests to enjoy them without the distraction of cold textures.

Distributing cupcakes in appropriate portion sizes ensures everyone gets to taste the deliciousness without overindulging. Consider cutting larger cupcakes in half for sample sizes during events.

Wine and Beverage Pairing

Pair your Raspberry Lemon Heaven Cupcakes with a refreshing Moscato or Prosecco to complement the sweetness and citrus notes. The mild sparkle from these wines enhances the flavors of the dessert and adds a celebratory touch.

For non-alcoholic alternatives, consider serving with sparkling lemonade or iced tea. Both options provide refreshment while matching the flavor profile of your cupcakes.

Tea enthusiasts can enjoy these cupcakes with a light Earl Grey or chamomile tea, whose floral notes and subtle flavors beautifully align with the sweetness of the cupcakes.

Ensure beverages are served chilled to balance the sweet richness of the cupcakes and enhance the overall experience.

Storage and Shelf Life

To maintain cupcake freshness, store them in an airtight container at room temperature for up to 3 days. This helps keep them moist and flavorful.

For extended storage, consider refrigerating cupcakes, especially if frosted. Wrapped properly, they can last for about one week in the freezer, though it’s best to freeze them without frosting for optimal texture.

Signs of spoilage include a dry texture or changes in color. Check for unusual smells or mold before consuming older cupcakes.

When reheating, do so gently in the microwave for a few seconds to restore softness, but avoid overheating, which can dry them out.

Freezing guidelines recommend separating layers of cupcakes with parchment paper to prevent sticking and maintain shape.

Make Ahead Strategies

Prepare the cupcake batter a day in advance by storing it in the refrigerator until you’re ready to bake. This can enhance flavors as they meld overnight.

For assembly, bake the cupcakes ahead of time and frost them on the day you plan to serve. Frosted cupcakes are best enjoyed fresh, but they can be stored for a couple of days at room temperature.

For longer storage, freeze unfrosted cupcakes. Once cooled, wrap them tightly in plastic wrap and store them in an airtight container.

When planning your timeline, consider making frosting in advance. Simply store it in the refrigerator; then, re-whip before applying to the cupcakes.

Add fresh elements, like berries or citrus zest, right before serving to ensure a vibrant presentation and a burst of freshness.

Scaling Instructions

To halve the recipe, simply divide all ingredient amounts by two, and the baking time may be slightly reduced, so monitor closely while baking.

Doubling or tripling the recipe is straightforward; however, you may need to bake in batches depending on your oven’s capacity. Adjust baking times as needed.

Be mindful of equipment adjustments; when scaling recipes, larger mixers or baking sheets may be required for efficiency.

Timing modifications are crucial; larger batches could require more mixing time to ensure even distribution of ingredients.

Consider storage options; if you plan to scale up, ensure you can properly store the additional cupcakes once baked.

Nutritional Deep Dive

Raspberry Lemon Heaven Cupcakes offer a delightful balance of carbohydrates and dietary fiber, thanks to the inclusion of fresh fruit. With each cupcake averaging around 200 calories, they provide a sweet indulgence without excessive guilt, especially when enjoyed in moderation.

The micronutrient profile of this recipe can be impressive, considering the vitamin C from lemons and antioxidants from raspberries. These nutrients contribute to overall health and well-being, making these cupcakes a treat you can feel slightly better about.

For those watching their intake, analyzing portion sizes can help manage caloric and sugar consumption effectively. Consider enjoying these cupcakes alongside fruit or other light snacks to balance out portion sizes.

Be mindful of dietary considerations, as this recipe contains gluten and dairy. Modifications can cater to various preferences, so adjusting ingredients can help meet diverse dietary needs.

Weight management tips include savoring each cupcake slowly and being attentive to flavor and texture, promoting a more satisfying experience without overindulging.

Dietary Adaptations

To create gluten-free Raspberry Lemon Heaven Cupcakes, substitute all-purpose flour with a 1:1 gluten-free baking mix. Ensure other ingredients, like baking powder, are gluten-free as well.

Dairy-free options can be achieved by using coconut oil instead of butter and almond milk in place of dairy milk, providing a rich and tasty alternative without compromising flavor.

For vegan adaptations, utilize flax eggs as a binding agent and opt for a plant-based buttercream to achieve similar flavors and textures as traditional recipes.

Low-carb variations would allow the use of almond flour and erythritol sweeteners, significantly reducing the sugar content while retaining the cupcake’s desired flavor.

Keto-friendly adaptations could include incorporating protein powder in place of some of the flour and adjusting the sweetener to keep carb count low while maintaining taste.

Paleo diets can benefit from using almond or coconut flour, honey instead of refined sugars, and ensuring organic fruit ingredients are used for an entirely clean treat.

For those adhering to a low-FODMAP diet, focus on limiting fruit portions or using suitable fruits in moderation while following ingredient recommendations for other aspects of the recipe.

Troubleshooting Guide

Texture issues can arise from overmixing or using cold ingredients, resulting in a dense cupcake. Ensure a light hand while mixing and use room temperature components.

Flavor balance can be a concern if too much sweetness from frosting drowns out the cupcake’s flavor. Adjust by incorporating citrus juices into your buttercream if needed.

Temperature problems may lead to uneven baking; invest in an oven thermometer to check against inaccurate heat settings within your appliance.

Equipment challenges can occur if you lack specific tools. Substituting a fork for a whisk or using a coffee grinder for sugar can aid in achieving desired results.

Ingredient substitutions may not always yield similar outcomes; keep that in mind if you switch out butter with oil or flour types, as they all behave differently in recipes.

Timing concerns can affect the moisture level of your cupcakes. Always set a timer and check for doneness a few minutes early to avoid overbaking.

Recipe Success Stories

Community feedback on the Raspberry Lemon Heaven Cupcakes has been overwhelmingly positive, with many home bakers sharing their own adaptations and successes through social media platforms.

Variation successes abound, with readers experimenting with different fruit combinations and frosting techniques, showcasing the flexibility and appeal of this delicious recipe.

Adaptation stories often highlight how families have made these cupcakes a tradition for celebrations, connecting generations and creating fond memories around baking.

Many have shared photography tips online, emphasizing the importance of natural lighting to capture the vibrant colors of their baked creations.

Recipe reviewers frequently mention that these cupcakes exceeded expectations in flavor and presentation, encouraging others to try their hand at baking this delightful treat.

Frequently Asked Questions

1. Can I make the batter ahead of time? Yes, you can prepare the cupcake batter a day in advance and store it in the refrigerator. Bake fresh on the day you plan to serve them for the best results.

2. How do I store leftover cupcakes? Store the cupcakes in an airtight container at room temperature for up to three days. For longer shelf life, refrigerate or freeze un-frosted cupcakes.

3. Can I use frozen raspberries instead of fresh? Yes, frozen raspberries can be used, but they may release more juice, resulting in a wetter batter. Adjust the overall liquid if necessary.

4. Is there a substitute for eggs? For a vegan alternative, you can use flax eggs or unsweetened applesauce to replace eggs in the recipe.

5. How can I make the frosting more stable? To stabilize your frosting, add more powdered sugar or some cornstarch, which can help firm it up and make it easier to pipe.

6. Can I adjust the sweetness level of the cupcakes? Absolutely! You can reduce the sugar in the batter or frosting to match your taste preferences while still maintaining flavor integrity.

7. What is the best way to frost my cupcakes? Use a piping bag fitted with your favorite tip for a professional look, or spread frosting with a spatula for a rustic approach.

8. How do I know when my cupcakes are done baking? When a toothpick inserted into the center comes out clean, the cupcakes are done. Check at the minimum baking time indicated.

9. Can I make these cupcakes gluten-free? Yes, substitute all-purpose flour with a gluten-free mix. Adjustments in liquid may be needed to ensure the right texture.

10. What should I do if the cupcakes sink in the middle? This usually occurs due to underbaking or overmixing. To avoid sinking, ensure proper mixing techniques and always test for doneness.

11. Is there a way to enhance the lemon flavor? Yes, increase the lemon zest and juice in the recipe. You can also add a small amount of lemon extract for an extra boost.

12. How can I add a layer between cupcakes? To create a layered cupcake, scoop out a portion of the center of the cupcake and fill it with lemon curd or raspberry jam before frosting.

Additional Resources

Explore related recipes that enhance your baking repertoire, such as a classic vanilla cupcake or a rich chocolate ganache topping. Each recipe will offer new techniques and flavors to enrich your dessert-making skills.

Invest in technique guides covering essential baking methods, ensuring your cupcakes turn out perfect every time. Resources about mixing, folding, and baking techniques can make you more confident in the kitchen.

Ingredient information can help you learn more about the fruits you’re using, from seasonal availability to buying tips, enhancing your baking outcomes significantly.

Equipment recommendations are beneficial to optimize your baking experience. Consider investing in high-quality pans and mixers that ensure excellent results with every batch.

Seasonal variations are crucial to keep your baking fresh and exciting. Learn how to adapt your favorite recipes for holidays and changing seasons to keep your dessert game strong.

Join the Conversation

Engage with friends and family by sharing your Raspberry Lemon Heaven Cupcakes on social media. Post pictures of your creations, and encourage others to try out the recipe for themselves.

Photography tips can help elevate your baking posts. Use natural light, select vibrant backgrounds, and fresh garnishes to highlight the beauty of your baked goods.

Recipe reviews are invaluable; share your experience and feedback to help others. Invite your audience to share their versions, creating a collaborative baking community.

Community engagement is essential; encourage conversations about flavor pairings, ingredient swaps, and baking techniques to build a supportive space for all bakers.

Highlight recipe variations, sharing personal twists and adaptations, inspiring others to try unique takes on classic cupcakes. Together, let’s celebrate creativity in the kitchen!

The Recipe

Raspberry Lemon Heaven Cupcakes

Serves: 12 cupcakes

Prep Time: 30 mins

Cook Time: 20 mins

Total Time: 50 mins

Kitchen Equipment Needed

  • Mixing bowl
  • Electric mixer
  • Measuring cups and spoons
  • Baking pans (standard muffin tin)
  • Piping bags and tips for frosting

Ingredients

  • 1 1/2 cups all-purpose flour
  • 1 cup granulated sugar
  • 1/2 cup unsalted butter, softened
  • 2 large eggs
  • 1/2 cup milk
  • 1 teaspoon vanilla extract
  • 1 teaspoon baking powder
  • 1/4 teaspoon salt
  • Zest of 1 lemon
  • 1/2 cup fresh raspberries

Directions

  1. Preheat your oven to 350°F (175°C) and line a muffin tin with cupcake liners.
  2. In a mixing bowl, cream together the butter and sugar until fluffy.
  3. Add the eggs one at a time, mixing well after each addition.
  4. Gradually add the flour, milk, baking powder, salt, lemon zest, and vanilla, mixing until just combined.
  5. Gently fold in the raspberries.
  6. Fill the cupcake liners about two-thirds full and bake for 18-20 minutes or until a toothpick comes out clean.
  7. Allow cupcakes to cool completely before frosting.
  8. Frost with lemon buttercream and garnish with fresh raspberries if desired.

Recipe Notes

  • For added flavor, consider replacing vanilla extract with lemon extract.
  • Leftover cupcakes can be frozen without frosting for later enjoyment.
  • Be mindful of not overfilling the cupcake liners to ensure proper baking.

Indulge in No-Bake Chocolate Cheesecake Delight Today

No-Bake Chocolate Cheesecake Delight: A Decadent Treat for Every Occasion

⚖️
Difficulty
Easy

⏲️
Prep Time
15 mins

🕒
Cook Time
0 mins

⏱️
Total Time
3 hours (chilling)

🍽️
Servings
8 servings

Indulge in the luscious flavors of our No-Bake Chocolate Cheesecake Delight. This easy yet sophisticated dessert combines rich chocolate and velvety cream cheese to create a melt-in-your-mouth experience. Perfect for chocolate lovers, this no-bake treat boasts a buttery graham cracker crust that complements the creamy filling exceptionally well. Whether it’s for a family gathering, party, or just a sweet craving at home, this dessert is sure to impress both family and friends alike.

The joy of making this no-bake cheesecake delight lies in its simplicity—no baking required! With just a few ingredients and minimal effort, you can whip up a dessert that tastes like it came straight from a fancy bistro. Serve it cold for maximum enjoyment, and watch as your guests rave about each luscious bite. This delightful dessert is a perfect way to celebrate special moments or simply indulge yourself.

Quick Recipe Highlights

  • Flavor Profile: The chocolatey richness pairs perfectly with a hint of creaminess from the cheesecake filling, creating a delightful balance that is sure to satisfy any sweet tooth.
  • Texture: This dessert features a silky-smooth filling over a buttery and crumbly crust, offering a sumptuous mouthfeel that melts in your mouth.
  • Aroma: The enticing scent of chocolate wafts through the air, delivering a warm and inviting aroma that simply beckons you to indulge.
  • Visual Appeal: The glossy chocolate layer on top and the creamy white cheesecake provide an eye-catching contrast that makes for an impressive presentation.
  • Skill Level Needed: This no-bake recipe is beginner-friendly, making it accessible for those new to the kitchen.
  • Special Equipment: All you need is a mixing bowl, a whisk or electric mixer, and a springform pan to achieve that perfect layered cheesecake.

Recipe Overview

  • Difficulty Level: This No-Bake Chocolate Cheesecake Delight is considered easy, making it perfect for novice bakers who want to create an impressive dessert without the complexity.
  • Category: This dessert falls into the sweet treats category and can be enjoyed at any time of day, from a delicious brunch to sweet evening gatherings.
  • Cuisine: Inspired by classic American desserts, our no-bake cheesecake brings a modern twist to traditional flavors, perfect for any culinary enthusiast.
  • Cost: With a few straightforward and affordable ingredients, this recipe remains budget-friendly, making it a fantastic option for everyday celebrations.
  • Season: This dessert shines year-round, but it’s especially delightful during summer when a cool treat is most refreshing.
  • Occasion: Ideal for birthdays, anniversaries, or holiday gatherings, No-Bake Chocolate Cheesecake Delight is the perfect show-stopping dessert for special occasions.

Why You’ll Love This Recipe

This No-Bake Chocolate Cheesecake Delight not only tantalizes your taste buds but also pleases your palate with its creaminess and decadent flavor. Each bite encapsulates a perfect blend of rich chocolate enveloping a smooth cheesecake filling. The texture is creamy and rich, yet light enough that you can savor multiple pieces without feeling overwhelmed, making it an irresistible option for gathering with friends.

In addition to its deliciousness, this recipe offers convenience. Forget about preheating the oven or watching the clock; you simply mix the ingredients, pour them into a crust, and let the refrigerator do the rest. This allows you to focus more on entertaining guests or enjoying the moment without fussing over a complicated baking process. Prepare it ahead of events, and it’ll be ready when you are!

Furthermore, this no-bake treat delivers nutritional benefits too. While indulgent in flavor, it’s made with cream cheese, providing some protein. The use of cocoa powder introduces antioxidants, which can be beneficial. Plus, you can easily modify the ingredients to fit healthier choices by opting for low-fat cream cheese or a gluten-free crust, ensuring everyone can enjoy a slice.

Social gatherings are made richer with this dessert option. Its sophisticated appearance and luxurious flavor make it a conversation starter, allowing it to take center stage at any event. Whether at a casual get-together or a more formal gathering, this treat encourages connections over a shared love of delicious desserts.

Cost-effectiveness plays a significant role in its appeal. The ingredients are simple and widely available, allowing you to create an impressive dessert without breaking the bank. This means you can share your love for dessert with friends and family, making it a fantastic option for budget-conscious hosts looking to impress.

Historical Background and Cultural Significance

The origins of cheesecake can be traced back to ancient Greece, where it was served to athletes during the first Olympic Games in 776 BC. The simple blend of cheese and honey was a source of energy for competitors. As civilizations evolved, cheesecake recipes transformed, making their way to America, where they became a staple dessert.

The significance of cheesecake, especially the chocolate variety, has seen it cemented in pop culture. It features heavily in celebrations, with many families passing down treasured recipes through generations. The combination of chocolate and cream cheese has made this dessert a favorite, especially for those with a penchant for the sweeter side of life.

Through the years, the recipe has evolved with various regional influences, adapting to local tastes and ingredient availability. From classic New York-style cheesecake to contemporary no-bake versions, there are countless adaptations to cater to diverse palates around the world. Each unique twist provides a glimpse into different culinary traditions while maintaining the charming essence of cheesecake.

No-Bake Chocolate Cheesecake Delight exemplifies this evolution, offering an easy-to-make version that captures the indulgence we associate with traditional cheesecakes. As it finds a home in celebratory occasions, it remains a reminder of the dessert’s rich history and cultural significance.

Ingredient Deep Dive

Chocolate

Chocolate has a fascinating history, originating from the ancient Mesoamericans who created a beverage from cacao beans. Rich in flavor and a beloved ingredient worldwide, chocolate also boasts numerous health benefits, including antioxidants that can reduce inflammation and improve heart health. When selecting chocolate for this recipe, opt for high-quality semi-sweet or dark chocolate to maximize flavor. Store unused chocolate in a cool, dark place, and consider substituting with cocoa powder for a low-calorie option.

Cream Cheese

Cream cheese emerged in the United States in the 19th century and has become an essential ingredient in pastries and spreads. It is known for its creamy texture and mild flavor, making it perfect for cheesecakes. Additionally, cream cheese offers calcium and protein, which contribute to a balanced diet. When storing cream cheese, keep it refrigerated and use it within a few weeks for the best freshness. For a healthier take, consider low-fat cream cheese as an alternative.

Graham Crackers

Graham crackers have a long-standing association with desserts, primarily as a base for many beloved sweet treats. Invented in the 19th century, these crunchy snacks are made primarily from whole-wheat flour, making them a healthier choice for crusts. They offer a slight sweetness that pairs beautifully with rich cheesecake. Select crisp, fresh crackers, and store them in an airtight container to maintain their crispness. Substitute gluten-free crackers to accommodate dietary preferences.

Sugar

Sugar enhances the flavors of this recipe and contributes to its sweetness. While sugar’s roots go back thousands of years, it is often advised to consume it in moderation. For this cheesecake, regular granulated sugar is recommended, but alternatives like coconut sugar or stevia can provide different flavor profiles while reducing calorie intake. Store sugar in a dry, cool environment to prevent clumping.

Common Mistakes to Avoid

  • Overmixing the cream cheese: Mixing too vigorously can incorporate excess air, leading to a lighter texture than desired. Mix until just combined for creamy results.
  • Skipping the chilling step: Allowing the cheesecake to chill is essential for proper setting. Skipping this step will result in a runny filling.
  • Using low-quality chocolate: Cheap chocolate may not melt smoothly, affecting the final texture and flavor of your cheesecake. Invest in good-quality chocolate for best results.
  • Incorrect measurements: Precision matters in baking and no-bake recipes. Use measuring cups and spoons for accuracy to ensure balanced flavors.
  • Neglecting to grease the pan: Not greasing the pan can make it hard to release the cheesecake after chilling. Lightly grease the sides of the springform pan for easy removal.
  • Not checking for doneness: Although it’s a no-bake recipe, visually check the filling after chilling to ensure it has set. If it’s still liquid, chill longer.
  • Rushing through the recipe: Patience is key for achieving the best results. Take time during preparation and chilling for optimal flavor and consistency.
  • Skipping garnishes: The dessert is visually inviting, and garnishes heighten the appeal. Don’t miss out on adding toppings like whipped cream or chocolate shavings!
  • Incorrect storage: Storing the cheesecake in an open container can lead to dryness. Use plastic wrap or an airtight container to maintain freshness.
  • Using sweeteners incorrectly: If using alternatives, ensure you understand their sweetness levels to avoid overly sweet or bland cheesecakes.

Essential Techniques

Mixing Cream Cheese

Mixing cream cheese properly is critical for a smooth cheesecake filling. Begin with room temperature cream cheese to prevent lumps. Use a hand mixer or stand mixer on low speed to combine and gradually increase to medium speed. Look for a creamy consistency without visible lumps; this ensures a luscious filling that will set beautifully.

Chocolate Melting

Melting chocolate can be done on the stovetop or in the microwave. In the stovetop method, use a double boiler to prevent direct heat. For microwave melting, heat in 30-second intervals and stir between each to avoid scorching. Melted chocolate should be glossy and smooth, serving as a key flavor component in this dessert.

Crust Preparation

Creating the perfect graham cracker crust involves finely crushing the crackers and mixing them with melted butter. Be sure to press the mixture firmly into the springform pan’s base and sides to create a sturdy support for the cheesecake filling. This not only provides texture but helps the crust hold its shape during slicing and serving.

Chilling

Chilling the cheesecake is an essential step to ensure it sets properly. After pouring the filling over the crust, cover the cheesecake to prevent it from absorbing odors. A minimum of 3 hours is recommended for optimal firmness, but overnight chilling provides the best flavor and texture.

Pro Tips for Perfect No-Bake Chocolate Cheesecake Delight

1. Use high-quality chocolate for a richer flavor; it makes a noticeable difference in the final taste.
2. Make sure your cream cheese is at room temperature to prevent lumps in your filling.
3. Chill the cheesecake overnight for the best texture and flavor.
4. Experiment with different toppings to add variety; whipped cream, fruit, or nuts can enhance the dessert.
5. Always press the crust mixture firmly into the pan to avoid crumbling when slicing.
6. If you’re short on time, freeze individual slices for a quick dessert option later.
7. Add a pinch of salt to the chocolate mixture to enhance the flavor profile further.
8. If you’re planning to serve the cheesecake outdoors, keep it chilled until serving to maintain the consistency.

Variations and Adaptations

You can customize this No-Bake Chocolate Cheesecake Delight in various delightful ways. Consider creating a flavored cheesecake by adding your favorite extracts, like vanilla or almond, to the filling. You can also try switching it up with white chocolate for a different flavor profile while maintaining that creamy texture you’re looking for.

Seasonal adaptations can breathe new life into this dessert; for example, add fresh berries in the summer or crushed peppermint during the holiday season. You can also swap the graham cracker crust with crushed cookies like Oreos or chocolate wafers for a more intense chocolate experience.

Dietary modifications are easy too. For a gluten-free version, use gluten-free graham crackers or a nut-based crust. Those looking for lower sugar options can try using natural sugar substitutes without sacrificing flavor. Lastly, if you’re interested in a vegan version, replace the cream cheese with cashew cream and the gelatin with a plant-based alternative to set the dessert.

Serving and Presentation Guide

When presenting your No-Bake Chocolate Cheesecake Delight, consider plating techniques that elevate its visual appeal. A simple way to serve slices is to use a heated knife for clean cuts. Add a drizzle of chocolate sauce or a dollop of whipped cream on top for a decadent finish.

Garnishing with fresh mint or seasonal fruits can create color contrast and brighten the overall presentation. You might also consider serving individual portions in small dessert cups for a modern twist alongside a scoop of ice cream.

Temperature matters when serving this dessert; it should remain chilled to preserve its texture. Keep it in the refrigerator until ready to serve, and be sure to slice it carefully to maintain the layering of the crust and filling.

Wine and Beverage Pairing

Pairing wine or beverages with No-Bake Chocolate Cheesecake Delight can enhance the tasting experience. A rich dessert like this pairs beautifully with a glass of Merlot or Malbec, as their fruity notes complement the chocolate and creamy filling.

For a non-alcoholic option, consider serving it with a refreshing iced coffee or a rich hot chocolate to maintain the chocolate experience. Additionally, pairing it with herbal teas, such as peppermint or chai, can provide a delightful contrast to the cheesecake’s richness.

When serving, remember to balance the sweetness of the cheesecake with the drink’s flavor profile to create a harmonious pairing for your guests.

Storage and Shelf Life

To maintain the quality of your No-Bake Chocolate Cheesecake Delight, store it in the refrigerator covered with cling film. It generally lasts around 5-7 days, although freshness is best enjoyed within the first few days. Use an airtight container to keep it moisture-free and prevent it from absorbing other odors in the fridge.

Significant changes in texture or flavor can indicate spoilage, so look for any changes in aroma or an unusual texture before consuming leftovers. If you plan to keep it for an extended period, consider freezing it. Wrap individual slices tightly in plastic wrap and seal them in a container to maintain their quality for up to three months.

Make Ahead Strategies

Making No-Bake Chocolate Cheesecake Delight in advance is an excellent approach for reducing stress on the day of your gathering. Prepare the cheesecake up to a day ahead, allowing it to chill properly for maximum flavor development and texture.

For longer storage, you can assemble the crust a day in advance and keep it covered. Alternatively, prepare the filling and store it in the refrigerator until it’s time to assemble and chill the dessert. Always be sure to give enough time for the cheesecake to set after assembly.

At serving time, top with fresh garnishes to add a touch of freshness and maintain visual appeal. You can also prepare your toppings ahead and keep them stored separately to ensure the cheesecake maintains its original form until presentation.

Scaling Instructions

If you want to adjust the serving size for your No-Bake Chocolate Cheesecake Delight, scaling the recipe is straightforward. Halve the ingredients for a smaller dessert or double them to make more for larger gatherings.

When doubling or tripling the recipe, ensure you have an adequately sized pan to accommodate the larger volume. Adjust the chilling time accordingly, as larger cheesecakes may take longer to set properly.

Keep in mind that if you’re adjusting ingredient proportions, consider the balance of flavors, especially if you’re adding more chocolate or sugar. Smaller group gatherings might benefit from reducing sugar slightly to allow the chocolate’s natural richness to shine through.

Nutritional Deep Dive

Assessing the nutritional value of No-Bake Chocolate Cheesecake Delight requires a closer look at its ingredients. Each slice contains a balance of macronutrients, with proteins from cream cheese and carbohydrates from the graham cracker crust. The chocolate also provides healthy antioxidants which can contribute positively to your diet.

It’s essential to consider the micronutrients contributed by cream cheese and chocolate, including calcium and iron, essential for maintaining optimal health. If you substitute ingredients for healthier alternatives, your dessert can be tailored to merely meet dietary needs, making it versatile.

When planning portion sizes, remember the richness of this dessert; smaller servings often suffice, especially when paired with lighter accompaniments. This balance will provide satisfaction without overindulging.

Dietary Adaptations

Creating dietary adaptations for No-Bake Chocolate Cheesecake Delight allows you to cater to various preferences. For gluten-free individuals, use gluten-free graham crackers or alternative crusts made from oats or almond flour to keep the dish enjoyable for everyone.

Dairy-free and vegan versions can be made by substituting cream cheese with alternatives such as cashew cream or coconut cream. For a lower-carb option, consider a keto-friendly crust made from crushed nuts and butter and replace sugar with a suitable low-carb sweetener.

Experimenting with flavor profiles is also possible to accommodate a broader range of tastes. For example, users can incorporate different extracts or flavors like matcha for a unique twist that aligns with specific diets.

Troubleshooting Guide

For perfect results every time with your No-Bake Chocolate Cheesecake Delight, here’s how to troubleshoot some common issues. If your cheesecake isn’t setting, ensure you allowed adequate chilling time; it may need additional time in the refrigerator to firm up properly.

If the texture turns out grainy, it might be due to overmixing or not allowing the cream cheese to soften sufficiently before stirring. Always mix until just combined to achieve the desired smoothness.

For flavor balance, if the cheesecake ends up overly sweet, consider reducing the sugar in future batches or adding a pinch of salt to elevate flavors. If you encounter cracks on the surface after chilling, it could indicate rapid temperature changes; avoid placing it directly in the refrigerator immediately after mixing.

Recipe Success Stories

Many enthusiastic bakers have shared their experiences with making No-Bake Chocolate Cheesecake Delight, raving about its ease and flavor. Customers frequently report omitting effort and time without compromising taste, ensuring this recipe remains a crowd favorite. Photographs shared across social media showcase stunning variations, depicting creative garnish ideas like fresh mint and colorful sprinkles.

Readers also express their triumphs in customizing flavors to suit diverse palettes, which showcases the recipe’s versatility. Some have used flavored cheeses or alternative crusts, resulting in a unique dessert experience. The mutual support and inventive suggestions foster a sense of community among dessert lovers, inspiring even those new to baking to try their hand at this delightful recipe.

Frequently Asked Questions

Can I use a different type of crust?

Yes! While a graham cracker crust is traditional, you can easily switch to an Oreo crust for a chocolate version or a gluten-free option made from almond flour.

How long will the cheesecake last in the refrigerator?

It usually lasts about 5-7 days when stored correctly in an airtight container in the fridge.

Can I freeze this cheesecake?

Yes, you can! Wrap individual slices tightly in plastic wrap and place them in a suitable container to freeze for up to three months.

Is there a vegan option for this cheesecake?

Absolutely! Substitute the cream cheese with cashew cream, and use a vegan crust. Ensure any sweeteners used are also plant-based for best results.

Why didn’t my cheesecake set properly?

It may need longer chilling time. Ensure you’ve covered it well and allow it to sit for a minimum of 3 hours, ideally overnight for best results.

Can I make this cheesecake ahead of time?

Certainly! It can be prepared a day in advance. Just cover it tightly and store it in the refrigerator until serving.

What can I use instead of sugar?

You can opt for natural sweeteners like honey, agave syrup, or sugar substitutes like stevia depending on your dietary needs.

How do I prevent cracks in my cheesecake?

Chilling slowly and avoiding rapid temperature changes can help. Ensure your cream cheese is at room temperature before mixing, and don’t overmix!

Can I use low-fat cream cheese?

Yes! Low-fat or reduced-fat cream cheese can be used in place of regular cream cheese, though the texture and taste may differ slightly.

What’s the best way to decorate the cheesecake?

Decorate with chocolate shavings, fresh fruits, or a drizzle of caramel or chocolate sauce to accentuate its appearance and flavor.

Additional Resources

Explore related recipes that complement your No-Bake Chocolate Cheesecake Delight, including assorted fruit tarts or chocolate lava cakes to further satiate dessert cravings. Check out our guides on essential baking techniques that can enhance your skills and provide tips for working with different ingredients.

For further ingredient information, such as sourcing high-quality chocolates or tips for making the best cheese mixtures, feel free to peruse our detailed articles. With seasonal variations often inspiring new recipes, consider trying other fruity no-bake desserts as you venture to expand your culinary repertoire.

Join the Conversation

We love hearing from our readers! Share your own experiences with No-Bake Chocolate Cheesecake Delight and tag us on social media with your culinary creations. Your stunning photographs and feedback inspire others in the community to try their hands at this delicious recipe.

Feel free to leave a review, offering suggestions or adjustments you’ve made to tailor the dessert to your tastes. Engaging with our community is essential, and we encourage recipe variations that may spark new favorites among fellow dessert enthusiasts.

The Recipe

No-Bake Chocolate Cheesecake Delight

Serves: 8 servings

Prep Time: 15 mins

Cook Time: 0 mins

Total Time: 3 hours (chilling)

Kitchen Equipment Needed

  • Springform pan
  • Mixing bowl
  • Hand or stand mixer
  • Spatula
  • Measuring cups and spoons

Ingredients

  • 1 ¾ cups graham cracker crumbs
  • ½ cup unsalted butter, melted
  • 2 cups cream cheese, softened
  • 1 cup powdered sugar
  • 2 cups semi-sweet chocolate, melted
  • 1 teaspoon vanilla extract
  • 1 cup whipped cream (for topping)

Directions

  1. In a mixing bowl, combine graham cracker crumbs and melted butter. Press mixture firmly into the bottom and up the sides of a greased springform pan.
  2. In another bowl, beat the softened cream cheese and powdered sugar until creamy. Add melted chocolate and vanilla extract, mixing until well combined.
  3. Gently fold in the whipped cream until fully integrated. Pour the mixture over the crumb crust and smooth the top.
  4. Cover and refrigerate for at least 3 hours, or until set. For best results, chill overnight.
  5. Once set, remove the cheesecake from the springform pan, slice, and serve decorated with additional whipped cream as desired.

Recipe Notes

  • Feel free to add different toppings such as chocolate curls, berries, or nuts for added texture and flavor.
  • If you’re using alternative sweeteners, adjust the quantity according to their sweetness level.
  • For a chocolate lover’s dream, consider drizzling chocolate sauce over each slice when serving.

Indulge in Irresistible Butterfinger Chocolate Caramel Crunch Truffles

Butterfinger Chocolate Caramel Crunch Truffles: A Decadent Treat!

⚖️
Difficulty
Medium

⏲️
Prep Time
30 mins

🕒
Cook Time
15 mins

⏱️
Total Time
45 mins

🍽️
Servings
24 Truffles

Indulge in the delightful world of Butterfinger Chocolate Caramel Crunch Truffles. These luscious treats offer a heavenly combination of creamy chocolate, crunchy Butterfinger pieces, and gooey caramel, making them a perfect dessert for any occasion. With a rich flavor profile that tantalizes the taste buds, each bite melts in your mouth, delivering a burst of decadent sweetness that chocolate lovers will adore.

Whether you are preparing for a festive gathering, a cozy movie night, or simply treating yourself, these truffles stand out as an impressive and delicious treat. The blend of textures—the smooth chocolate outer layer, the crispy Butterfinger bits, and the chewy caramel—creates a fascinating experience that will leave everyone craving more. Get ready to elevate your dessert game with this Butterfinger Chocolate Caramel Crunch Truffles recipe!

Quick Recipe Highlights

  • Flavor Profile: Sweet chocolate mingling with the salty crunch of Butterfingers and warm caramel.
  • Texture: A texture enthusiasts’ dream—smooth, crunchy, and chewy all in one bite.
  • Aroma: Aromas of rich chocolate and caramel waft through the air, inviting everyone to indulge.
  • Visual Appeal: Beautifully rolled truffles coated in chocolate topped with crushed Butterfinger pieces.
  • Skill Level Needed: Accessible for home bakers with some basic confectionery skills.
  • Special Equipment: A microwave or double boiler for melting chocolate and a baking sheet for resting truffles.

Recipe Overview

  • Difficulty Level: Medium—requires some patience and precision, but is achievable for most home cooks.
  • Category: Perfect as a dessert for parties, special events, or a delightful homemade gift.
  • Cuisine: A sweet treat often found in American dessert culture, merging traditional confectionery techniques with modern flavors.
  • Cost: Budget-friendly; most ingredients can be sourced for under $15, making it an affordable indulgence.
  • Season: Great year-round, especially during holidays or celebrations when sweet treats are in high demand.
  • Occasion: Ideal for birthdays, holiday parties, or as a special surprise for loved ones.

Why You’ll Love This Recipe

Treat your tastebuds to a delightful experience with these Butterfinger Chocolate Caramel Crunch Truffles. The combination of rich chocolate and the distinct sweetness of Butterfingers creates a flavor explosion that’s irresistible. Each bite offers a unique experience—smooth outside, with a delightful crunch and chewy caramel center that pops with flavor.

Convenience is another fantastic aspect of this recipe. With just a few steps and easily accessible ingredients, you can whip up a batch of truffles that look and taste gourmet. They are perfect for sharing at gatherings or keeping around for a sweet treat at home.

Not only are these truffles a delight to eat, but they also bring some nutritional benefits. Dark chocolate provides antioxidants, while the caramel offers a quick energy boost. Enjoy them in moderation, and you can satisfy your sweet tooth while indulging in a little treat.

Socially, these truffles are a show-stopper. When you serve them at parties or give them as gifts, you’re sure to impress your friends and family. They’re perfect for sharing, bonding, and creating sweet moments together.

Moreover, the affordability of this recipe makes it accessible. With common pantry ingredients, you can prepare a delicious dessert without breaking the bank, making these truffles a delightful addition to your cooking repertoire without the guilt of overspending.

Historical Background and Cultural Significance

The origin of truffles dates back centuries, with roots in French cuisine. As chocolate confections gained popularity worldwide, American bakers began to innovate and play with different flavor combinations, leading to delightful creations like the Butterfinger Chocolate Caramel Crunch Truffles that we enjoy today.

In American culture, chocolate truffles symbolize indulgence and luxury, often associated with celebration and special occasions. These sweet treats have become a staple at parties, weddings, and holidays, representing joy and celebration in many families.

The evolution of truffle recipes has witnessed fascinating adaptations over time. As innovative chefs and home bakers experiment with flavors and ingredients, we see variations like these Butterfinger truffles, combining nostalgic candies with gourmet chocolate techniques, showcasing the endless possibilities of dessert creation.

Regionally, the popularity of chocolate varies, with truffles being particularly loved across the nation. Each region might adapt recipes based on local tastes, but the fundamental appeal of chocolate truffles remains universally cherished.

Ingredient Deep Dive

Chocolate: Chocolate is perhaps the centerpiece of this recipe, rich in history and significance. Originating from sources like the cacao bean, it dates back to ancient Mesoamerican cultures. This ingredient provides numerous health benefits, especially dark chocolate, which contains flavonoids, contributing to heart health and improved mood. When selecting chocolate, opt for high-quality brands with at least 60% cocoa for the best flavor and texture. Store chocolate in a cool, dry place away from strong odors. If you need to substitute, consider any quality dark or semi-sweet chocolate.

Butterfingers: A beloved candy bar, Butterfingers are known for their unique combination of crunchy peanut butter and chocolate. This candy has strong cultural ties in America, often evoking nostalgia for many who grew up enjoying it. Nutritionally, they are higher in sugar and fat, so moderation is key, but they do provide a fun crunch to desserts. When selecting Butterfingers, ensure they are within their expiration date for optimum freshness. For alternatives, consider other crunchy peanut butter candies for a similar effect.

Common Mistakes to Avoid

  • Not tempering chocolate properly can lead to a dull finish and undesirable texture.
  • Using low-quality chocolate can affect the overall flavor of your truffles; always choose good quality chocolate.
  • Skipping the cooling step may result in melted truffles that don’t hold their shape.
  • Forgetting to crush Butterfinger pieces finely can cause uneven texture in the truffles.
  • Not allowing caramel to cool adequately can make it too runny when filling the truffles.
  • Overfilling the truffles with caramel may cause them to burst during the coating process.
  • Failing to chill the truffles sufficiently before serving can lead to soft and difficult-to-handle treats.
  • Not pressing the top firmly can cause the crushed Butterfingers to slide off or not adhere properly.
  • Using the wrong size chocolate chips or pieces can alter melting time and texture.
  • Not keeping an eye on the cooking time can lead to burnt chocolate or overcooked caramel.

Essential Techniques

Melt the chocolate carefully using a microwave or double boiler to ensure it doesn’t seize. Stir consistently and watch for visual cues; chocolate should be glossy and smooth when properly melted. Avoid overheating, as this can cause the chocolate to become grainy and unusable.

Chilling the truffles is crucial for achieving the right texture. After rolling the truffles, allow them to rest in the refrigerator until firm. This helps maintain shape and prevents melting during the coating process. Always use a proper cooling time to ensure the final product achieves the desired consistency.

Pro Tips for Perfect Butterfinger Chocolate Caramel Crunch Truffles

– Use high-quality chocolate for melting for the best flavor and texture—cheap chocolate often results in a lackluster taste.
– Chill your hands briefly in cold water before rolling the truffles to prevent the chocolate from melting during shaping.
– Experiment with flavored chocolates, such as milk or dark, to create unique variations—you can customize the sweetness and richness.
– If you’re sensitive to sugar, use sugar-free alternatives that work well in melting chocolate and candy bars.
– Ensure the crushed Butterfingers are fresh and not stale for the best crunch and flavor impact.
– Allow the truffles to rest after coating to give the chocolate a chance to set before serving.
– For a more sophisticated look, consider drizzling white chocolate over the finished truffles for added decoration.
– Serve them chilled for the best texture and flavor profile; the chocolate will have a delightful snap when cold.

Variations and Adaptations

Explore different flavor profiles by switching up the chocolate types used in the recipe. Try using peppermint-flavored chocolate for a festive twist or dark chocolate for a richer flavor. Seasonal adaptations can also be made with festive elements like pumpkin spice or cinnamon for autumn treats.

Creating dietary modifications is also possible; for a vegan option, substitute dairy chocolate with high-quality vegan chocolate and use a plant-based caramel. For those following low-carb or keto diets, consider using sugar-free Butterfinger alternatives and sugar-free chocolate to keep the indulgence guilt-free.

For flavor variations, consider adding a hint of sea salt on top of the melted chocolate for a salted caramel effect, or infuse some espresso powder into the chocolate to enhance the flavor complexly.

Presentation alternatives can include placing the truffles in decorative wrappers or serving them on a tiered dessert stand for visual appeal at gatherings.

Serving and Presentation Guide

When plating your Butterfinger Chocolate Caramel Crunch Truffles, use vibrant decorative plates or a rustic wooden board to enhance their visual appeal. Garnish with additional crushed Butterfinger pieces scattered artfully around the truffles for added texture.

Traditionally, these truffles might be served at room temperature, but they are particularly delightful when chilled. Small cupcake liners make for an excellent serving suggestion for individual presentation and easy handling.

For modern takes, consider serving the truffles alongside a rich chocolate dipping sauce or a scoop of ice cream. The combination of cold ice cream and chocolaty warmth elevates the entire experience.

Portion control is essential as well; aim for one to two truffles per serving, as they are rich and satisfying. This encourages guests to enjoy without overindulging.

Wine and Beverage Pairing

Consider pairing these Butterfinger Chocolate Caramel Crunch Truffles with a rich red wine like a Merlot or a bold Zinfandel, which complements the sweetness of the chocolate and caramel. The fruity notes in the wine balance perfectly with the dessert’s flavors.

For non-alcoholic alternatives, a rich chocolate milkshake or a creamy vanilla latte provides a delicious pairing without the alcohol. The creaminess enhances the overall flavor profile of the truffles while keeping the indulgence alive.

In warmer months, consider serving chilled sparkling water with a wedge of lemon for a refreshing complement that cleanses the palate and prepares you for another bite of your decadent truffles.

Storage and Shelf Life

To store your Butterfinger Chocolate Caramel Crunch Truffles, keep them in an airtight container at room temperature for up to one week. If you prefer longer shelf life, refrigerate them, which can extend freshness to two weeks.

Ensure to separate layers with wax paper to prevent sticking. Avoid storing them near strong odors, as chocolate can easily absorb unwanted scents. Signs of spoilage usually include a dull appearance or changes in texture; if the chocolate blooms, it doesn’t affect the flavor but may alter the visual appeal.

If you wish to freeze the truffles, line them up on a baking sheet to freeze individually before placing them in a freezer-safe container. Thaw in the refrigerator just before serving for the best texture and flavor recovery.

Make Ahead Strategies

These truffles can be made ahead of time, allowing for several days of preparation. Prepare the chocolate and caramel filling a day prior, and let them chill overnight for optimal flavor melding.

Store the truffles in an airtight container in the fridge and allow to come to room temperature before serving for the best flavor experience. When planning a party, consider making them a week in advance, ensuring they are kept chilled until the day of the event.

For fresher elements, consider adding sprinkle toppings or fresh fruit garnishes the day before serving to keep their appearance vibrant and enticing.

Scaling Instructions

If you want to halve the recipe for a smaller gathering, simply divide all ingredient amounts by two, adjusting cooking times slightly as needed. This ensures you maintain the perfect flavor and consistency without waste.

When doubling or tripling the recipe, ensure you have adequate melting equipment; you might need to work in batches if using a microwave or smaller bowls. Additionally, carefully monitor the melting times to avoid scorching chocolate in larger quantities.

Adjust storage containers accordingly—larger batches will need appropriate scaling to avoid overflow. If times are a concern, consider preparing larger amounts in advance to save prep time on the serving day.

Nutritional Deep Dive

When analyzing the nutritional profile of Butterfinger Chocolate Caramel Crunch Truffles, keep in mind that one truffle approximately contains around 150 calories, primarily from sugars and fats. These provide instant energy; however, moderation is key for maintaining a balanced diet.

Checking the macro breakdown, these truffles have a significant amount of carbohydrates, primarily from sugars, with moderate amounts of fat predominantly contributing to texture and richness. Tracking these macronutrients can help balance your overall daily intake.

On the micronutrient side, these truffles may contain small amounts of iron and magnesium like that found in dark chocolate. This showcases the benefits of treating yourself occasionally; however, keep dietary considerations in mind for a well-rounded approach to indulgence.

The health benefits of dark chocolate shouldn’t be overlooked—antioxidants present can help improve heart health when consumed in moderation. Always consider your daily intake when indulging in sweet treats.

Dietary Adaptations

For those seeking gluten-free options, these truffles can readily be made gluten-free by using certified gluten-free candy bars. Be sure to read labels to ensure no cross-contamination occurs during ingredient sourcing.

For a dairy-free or vegan version, opt for vegan chocolate and plant-based caramel alternatives that effectively replace traditional ingredients, ensuring the recipe remains just as delightful without using animal products.

Low-carb and keto dieters can enjoy these truffles by selecting sugar-free chocolates and low-carb alternative butterfinger components, allowing for a guilt-free treat that aligns with dietary restrictions.

For paleo dieters, modifications can include using nut-based chocolates or raw sweeteners like honey or maple syrup in small quantities. Adopting these practices ensures that you can still enjoy these indulgent desserts while adhering to dietary needs.

Troubleshooting Guide

If your truffles struggle with texture issues, ensure all ingredients are properly tempered before utilizing them together, as improper temperatures can lead to undesired outcomes. Always check melting techniques to confirm uniform consistency.

For flavor balance, adjust the sweetness by incorporating small amounts of sea salt or a touch of espresso to counteract overly sweet notes. Tasting during preparation can help prevent flavor disparities.

In cases of temperature problems during the melting process, invest in a thermometer to check the chocolate; overheating can lead to a ruined batch. Instead, try melting in smaller bursts for an even finish.

If you encounter challenges with your equipment while coating the truffles, consider using a fork for ease of handling or work on ensuring melted biscuits remain at a controlled warm temperature throughout the process.

Timing concerns can often lead to truffles not firming correctly; be diligent in sticking to chilling times and avoid rushing through essential steps to produce perfect outcomes regularly.

Recipe Success Stories

Over the years, numerous readers have shared their delightful experiences with Butterfinger Chocolate Caramel Crunch Truffles. From birthday celebrations to holiday parties, they have consistently been a hit, garnering rave reviews for their rich flavors and impressive appearance.

Variations have resulted in creative adaptations, including even using flavored chocolates, such as orange or mint, enriching the traditional recipe. Success stories showcase community engagement with the recipe, sparking creativity among home bakers who share their personal versions.

Many readers report success in taking these truffles to social gatherings, expressing how they became the talk of the party, leading people to request the recipe. The sharing and community drive associated with this recipe are a testament to its appeal.

Photography tips shared amongst community members have also inspired others to showcase their beautiful creations online, helping others become inspired to recreate these lovely treats in their own kitchens.

Frequently Asked Questions

Can I use other types of candy in the truffles?

Absolutely! You can experiment with various candy bars for a customized flavor. Just ensure the taste pairs well with chocolate and caramel, such as Reese’s Peanut Butter Cups or Twix bars.

How should I store leftover truffles?

Store leftover truffles in an airtight container at room temperature or in the refrigerator with parchment separating layers to prevent sticking. They can last up to two weeks if kept properly.

Can I make these truffles ahead of time?

Yes! These truffles can be made a day or two in advance, storing them in the fridge. Just let them come to room temperature before serving for the best texture.

What if my chocolate seized when melting?

If your chocolate seizes, don’t panic! Adding a small spoonful of vegetable oil or coconut oil can help restore a smooth consistency. Stir it in slowly to reintroduce moisture.

Can I freeze these truffles?

Yes, Butterfinger truffles freeze well! Place them in a sealed container, separating layers with paper, and they can last up to three months in the freezer. Thaw them in the refrigerator before serving.

What type of chocolate is best for this recipe?

Using high-quality dark chocolate or semi-sweet chocolate delivers the best flavor. Look for chocolate that contains at least 60% cocoa for optimal balance between bitterness and sweetness.

What can I substitute for Butterfinger?

If you cannot find Butterfinger, consider using other crunchy candy bars like Heath bars or Milky Way for a similar texture and flavor, though it will slightly alter the taste.

How can I make these truffles dairy-free?

To make the truffles dairy-free, swap out regular chocolate for dairy-free chocolate and use a vegan caramel alternative. Both are easily accessible in many grocery stores.

What other toppings can I use on top of the truffles?

Topping ideas include crushed nuts, sea salt flakes, or a drizzle of white chocolate for a decorative finish. Experiment to find your perfect topping combination!

Can I use chocolate chips instead of chocolate bars?

Yes, chocolate chips can be used, but they may include stabilizers that can affect melting quality. Choose high-quality brands for the best results.

Additional Resources

Looking to expand your dessert-making skills? Explore related recipes like chocolate-covered strawberries or caramel-filled cupcakes, which elevate your sweet treats game. For technique guides, search out those focused on truffle making or tempering chocolate to enhance your cooking skill set.

Ingredient information is crucial too; understanding the nuances between different types of chocolate can arm you with the knowledge to make informed purchasing decisions for future recipes. Finally, don’t overlook equipment recommendations that can make preparation smoother—investing in proper melting tools can save frustration and enhance results.

Join the Conversation

We invite you to share your creations and experiences with Butterfinger Chocolate Caramel Crunch Truffles on social media! Use our hashtag to connect with others who have made the recipe, and don’t forget to include photography tips to help fellow bakers improve their skills.

Provide your recipe reviews and suggestions, as we’re eager to hear about any variations you’ve successfully tried! Engaging with our community not only fosters creativity but also provides delightful new ideas to try in your kitchen.

The Recipe

Butterfinger Chocolate Caramel Crunch Truffles

Serves: 24 Truffles

Prep Time: 30 mins

Cook Time: 15 mins

Total Time: 45 mins

Kitchen Equipment Needed

  • Microwave or double boiler
  • Baking sheet
  • Parchment paper
  • Mixing bowls
  • Food processor (for crushing Butterfingers)

Ingredients

  • 2 cups dark chocolate chips
  • 1 cup crushed Butterfinger candy bars
  • 1/2 cup caramel sauce
  • 1/2 cup heavy cream
  • A pinch of salt

Directions

  1. In a microwave-safe bowl, melt chocolate chips in heating intervals of 30 seconds, stirring until smooth.
  2. In another bowl, mix crushed Butterfinger and caramel sauce until well combined.
  3. Chill the chocolate mixture in the fridge for 10 minutes to firm up slightly.
  4. Using a scoop, form into small balls, then make a depression in the center and fill with the Butterfinger caramel mixture.
  5. Roll the chocolate mixture around the caramel to form a truffle shape.
  6. Dip each truffle into the melted chocolate to coat evenly, then place them on a parchment-lined baking sheet.
  7. Sprinkle additional crushed Butterfinger on top before the chocolate sets.
  8. Once set, store in an airtight container.

Recipe Notes

  • Feel free to experiment with toppings like crushed nuts or sprinkles for added flavor.
  • Truffles can be stored in the refrigerator or at room temperature for a week.
  • Adjust the caramel amount for a chewier or gooey center based on your preference.

Delicious Homemade Apple Turnovers: A Perfect Fall Treat

Delicious Apple Turnovers: A Sweet and Flaky Delight

⚖️
Difficulty
Medium

⏲️
Prep Time
30 mins

🕒
Cook Time
25 mins

⏱️
Total Time
55 mins

🍽️
Servings
8 turnovers

Apple turnovers are the perfect dessert to satisfy your sweet cravings while offering a delightful homemade touch. These flaky pastries, enveloping a luscious apple filling, evoke feelings of warmth and nostalgia with every bite. As you take your first bite, you’ll experience the crispiness of the golden pastry dance with the tender, cinnamon-spiked apples—a combination that is simply irresistible. This recipe is not only easy to follow but also allows for creativity in using various types of apples and spices, ensuring each turnover reflects your personal touch.

The best part about making apple turnovers at home is the ability to savor their aroma as they bake in the oven— the wafting scent of butter, sugar, and cinnamon filling your kitchen is a promise of the sweet rewards to come. These apple turnovers can be enjoyed warm with a scoop of vanilla ice cream on the side or cooled with a light glaze drizzled over the top, making them a versatile treat for gatherings or quiet family afternoons.

Quick Recipe Highlights

  • Flavor Profile: Enjoy the balance of sweet and tart apples, enhanced by warm spices like cinnamon and nutmeg.
  • Texture: The contrast between the flaky, crispy outer layer and the soft, juicy apple filling adds an exciting mouthfeel.
  • Aroma: The delightful fragrance of baking apples and warm spices fills the air, creating an inviting atmosphere.
  • Visual Appeal: Golden brown pastries with visible apple chunks, dusted with powdery sugar, look as good as they taste.
  • Skill Level Needed: This recipe is achievable for beginners while offering enough depth to challenge more experienced bakers.
  • Special Equipment: You’ll need basic baking tools, including a baking sheet, rolling pin, and parchment paper.

Recipe Overview

  • Difficulty Level: Apple turnovers present a medium difficulty, making them perfect for those looking to improve their pastry skills without the need for advanced techniques.
  • Category: These delightful pastries fall under dessert and can easily be served as a sweet breakfast option or afternoon snack.
  • Cuisine: While often associated with American baking traditions, apple turnovers have roots in various cultures, showcasing unique ways to celebrate apple harvests.
  • Cost: Ingredients are readily available and budget-friendly, making batches of apple turnovers a cost-effective choice for satisfying a crowd.
  • Season: Autumn is the perfect season for baking apple turnovers as it showcases the best apples at their peak flavor.
  • Occasion: Whether it’s a family gathering, holiday celebration, or simply a cozy night in, apple turnovers are always a welcomed treat.

Why You’ll Love This Recipe

Apple turnovers are an ideal blend of flavor and texture that delights the palate. The sweetness of the baked apples, coupled with the buttery, flaky pastry, creates a satisfying combination that is hard to resist. Not only are they delicious, but they also allow for versatility in flavor by experimenting with different types of apples or adding other ingredients like nuts or raisins.

Preparing apple turnovers is a convenient option for busy bakers. They can be made ahead of time and stored, making them an excellent choice for impromptu gatherings or occasions where time is limited. The simplicity of assembling turnovers allows you to enjoy the baking process without feeling overwhelmed by the intricacies of pastry-making.

Nutritionally, apple turnovers can offer benefits from the fruit itself, providing fiber and essential vitamins, especially when made with fresh, wholesome ingredients. You can even opt for lower-sugar designs or use whole-wheat pastry for a healthier twist without compromising taste.

For social gatherings, these pastries are a hit. Their glossy appearance and inviting aroma create an inviting atmosphere, encouraging conversation and a sense of community among friends and family as they enjoy warm apple turnovers.

Moreover, this recipe showcases cost-effectiveness. With minimal ingredients needed, you can easily make a batch that feeds a crowd without stressing about your budget, making apple turnovers a popular choice for many occasions.

Historical Background and Cultural Significance

The origin of apple turnovers can be traced back to various European traditions of wrapping fruits in dough. Many countries have similar pastry dishes that showcase local produce, particularly seasonal fruits, thus varying the filling based on regional availability.

These pastries are significant culturally, as they often celebrate the harvest season. Many recipes have evolved over generations, incorporating different fruits and spices, and showcasing the creativity of families during festive periods.

Over time, the recipe for apple turnovers has evolved from its basic form into numerous variations, with people incorporating different spices like cardamom or even incorporating caramel in the filling for a decadent twist. Each adaptation tells a unique story of the baker’s influence and the local culture.

Regional variations also abound, with some cultures adding distinctive touches—like a sugar glaze or fresh cream—showcasing how similar recipes can be beautifully unique across the world.

Ingredient Deep Dive

Apple turnovers primarily revolve around the star ingredient—apples. Apples have been cultivated for thousands of years, with documented cultivation as early as 6500 B.C. They hold significant cultural importance in many societies, symbolizing knowledge and temptation in biblical tales. Nutritionally, apples are rich in dietary fiber, vitamin C, and antioxidants. When selecting apples for your turnover, look for firm varieties like Granny Smith or Honeycrisp, which hold their shape well during baking. Store apples in a cool, dry place for maximum freshness, and consider keeping them in the fridge for extended shelf life.

Pastry dough is another essential ingredient. The evolution of pastry recipes dates back centuries, with various cultures contributing to the development of flaky crusts. The beauty of homemade pastry lies in its versatility and the ability to customize it for different fillings, from savory to sweet. The nutritional benefits include complex carbohydrates and fats, contributing to energy levels. When selecting pastry dough, choose one that feels pliable and smooth without cracks. For storage, keep it wrapped in plastic and refrigerated—this will preserve freshness and maintain its texture.

Common Mistakes to Avoid

  • Overworking the dough: This leads to tough turnovers instead of flaky layers. Handle the dough delicately, mixing just until combined.
  • Not chilling the dough: Chilling the pastry before baking helps create a flakier texture. Always allow it to rest in the fridge.
  • Filling too much: While generous filling is tempting, overstuffing can lead to leaks during baking. Follow recommended amounts for best results.
  • Ignoring egg wash: An egg wash provides a golden sheen to your pastry. Skipping this step can lead to lackluster color.
  • Using watery fillings: Ensure the apple mix isn’t too moist. Strain excess liquid or cook the filling slightly to prevent soggy turnovers.
  • Baking on an ungreased tray: Always use parchment paper or oil the baking sheet to avoid sticking.
  • Not preheating the oven: Always preheat your oven before placing in the turnovers to ensure they bake evenly.
  • Using stale ingredients: Always ensure your ingredients, especially spices and flour, are fresh for the best flavor.
  • Skipping cooling: Allow the turnovers to cool slightly before serving—this enhances flavor and texture.
  • Choosing the wrong apple variety: Use apples that hold their shape well when baking; avoid mushy varieties.

Essential Techniques

To master rolling out pastry dough is crucial for creating the ideal base for your apple turnovers. The dough should be rolled out to an even thickness to ensure uniform baking. When rolling, make sure to gently flour your workspace and rolling pin to prevent sticking. It’s important to maintain the dough’s chill, as warmer dough can lead to a tough texture after baking.

Mastering the art of assembling the turnovers is another essential technique. Once you’ve cut the pastry into squares, place the filling in the center, ensuring there’s enough space around the edges for sealing. Be sure to press down the edges firmly and crimp with a fork or fingers to prevent the filling from leaking while they bake.

Additionally, knowing how to glaze your pastries can elevate their presentation and flavor. The egg wash achieves a beautiful gloss and encourages even browning—apply it gently using a pastry brush for a professional finish.

Pro Tips for Perfect Apple Turnovers

Start with chilled ingredients to keep the pastry flaky. When the butter is cold and the dough is well chilled, it creates steam during baking, leading to a delightful rise and flaky texture.

Use a mix of apples for a more complex flavor profile. Combining tart and sweet varieties can significantly enhance the taste, providing a well-rounded filling that pleases all palates.

Cut uniform apple pieces for even cooking. Uniformity ensures that all pieces cook at the same rate, preventing some from being mushy while others remain crunchy.

Test your filling’s sweetness before sealing. Taste your apple mixture, adding sugar or spices as desired to achieve the right flavor before sealing the turnovers.

Experiment with spices for a personalized touch. Beyond the usual cinnamon, consider adding nutmeg or cloves for a creative variation that can really uplift your turnovers.

Create a double batch and freeze the extras. Assemble turnovers and freeze before baking for a quick dessert option that can be ready to go at a moment’s notice.

Dust with powdered sugar or drizzle with caramel for a stunning visual effect. Presentation can elevate the perceived value of homemade desserts, making them suitable for any occasion.

Keep an eye on the baking time. Each oven is different, so monitor your turnovers as they bake to avoid burning or undercooking.

Variations and Adaptations

Regional variations of apple turnovers can include local fruits or integrate specific spices that characterize a cultural cuisine. For instance, a southern twist might incorporate peaches along with apples for a unique summer flavor.

Seasonal adaptations keep the recipe fresh. Substituting apples with seasonal fruit like pears or berries can make delightful hybrid turnovers perfect for various times of the year.

For those with dietary needs, explore gluten-free or dairy-free dough recipes that suit specific lifestyles. This adaptability allows everyone to enjoy a delicious turnover regardless of dietary restrictions.

Flavor variations create exciting twists. Adding ingredients like caramel, chocolate, or even a hint of bourbon can elevate the turnover filling, offering an indulgent dessert experience.

Texture modifications can also be explored by mixing in nuts like walnuts or pecans, adding a crunch that complements the soft apple filling.

Presentation alternatives, like serving in a mini tart form, can give a refreshing giveaway for gatherings and parties, transforming your beloved apple turnovers into trendy finger foods.

Serving and Presentation Guide

Crafting the perfect plating is essential when serving apple turnovers. Place turnovers on a beautiful platter or wooden board, allowing their warm, golden exterior to shine.

Garnishing with fresh mint or a sprinkle of powdered sugar offers a nice visual contrast, making your dessert appealing to guests.

Pair with ice cream, whipped cream, or a dollop of crème fraîche beside each turnover for a delightful combination that balances flavors and textures.

Serve warm for optimal enjoyment, as it enhances the flavor of the filling and keeps the pastry crispy.

Consider portion control by slicing larger turnovers in half and serving with a small scoop of ice cream, ensuring everyone can enjoy a taste without overindulgence.

Temperature plays a role too. Always allow turnovers to cool slightly before serving, creating a delightful contrast between hot filling and a warm pastry shell.

Wine and Beverage Pairing

Selecting the right wine can enhance your apple turnover experience significantly. A sweet Riesling or a light Moscato can complement the sweetness of the baked apple filling, allowing for a harmonious balance of flavors.

For non-alcoholic options, consider homemade apple cider or iced tea, both of which bring refreshing acidity to complement the richness of the turnovers.

Should you prefer a coffee or tea pairing, a medium roast coffee or an herbal tea like chamomile can create a lovely interplay with the spices in the pastry, enhancing the overall experience.

Temperature considerations are important as well. Serve the selected drinks chilled or warm to match the pastries and encourage people to enjoy them in various ways.

Lastly, create a versatile serving suggestion by offering a selection of drinks, allowing your guests to choose their favorite pairing with the apple turnovers.

Storage and Shelf Life

To store apple turnovers, keep them in an airtight container at room temperature for up to 2 days. For longer storage, they can be refrigerated, although this may affect their flakiness.

Reheating in an oven rather than the microwave will help retain the pastry’s crispiness. Set your oven to 350°F (175°C) and heat for about 10 minutes or until warmed through.

For freezing, place fully assembled turnovers in a single layer on a baking sheet to freeze, then transfer them into freezer bags for up to 3 months. Do not bake them first to maintain fresh flavors upon reheating.

When it comes to signs of spoilage, be vigilant for changes in texture or an increase in moisture inside the container. If the turnover feels soggy or has a strange smell, it’s best to err on the side of caution and discard them.

Make Ahead Strategies

Preparing components ahead of time can significantly ease the cooking process. You can chop and prepare the apple filling in advance, storing it in the refrigerator for up to 3 days before using it.

Consider making the pastry dough in advance, allowing it to chill. This can help the flavors meld and saves time on baking day.

When ready to bake, assemble the turnovers and freeze them uncooked. Bake directly from the freezer, adding a few extra minutes to the baking time for perfectly cooked pastries.

Think about quality impact after refrigerating or freezing. Refrigerated turnovers may lose some crispness, so reheating properly is crucial to ensuring the quality remains high.

Incorporate finishing touches just before serving. Dust with powdered sugar or drizzle with a simple icing to elevate the turnovers right before they hit the table.

Scaling Instructions

Scaling your recipe can easily accommodate larger gatherings or small family needs. When halving the recipe, simply divide all ingredients accordingly while maintaining the same cooking times.

Doubling or tripling the quantities works well, but always ensure enough space for the baking sheets. A larger oven might be necessary to bake more batches simultaneously.

Adjust equipment as needed—large-batch baking might require larger trays or pans to ensure even cooking without crowding.

Maintain similar timing modifications even when scaling. Keep an eye on each turnover during baking, as ovens may behave differently when full of pastries.

Consider storage implications as you scale up. Ensure that you have enough containers or freezer space if preparing in advance.

Nutritional Deep Dive

Understanding the nutritional profile of your apple turnovers is vital for healthier living. Each turnover contains an array of macronutrients, with carbohydrates stemming from both the pastry and the fruit filling.

In terms of micronutrient analysis, apples bring vitamin C and potassium. Choosing whole-wheat flour for the dough can enhance fiber content, offering additional health benefits.

Health benefits of apples include digestive support due to their high fiber content, while apples are linked to heart health through their antioxidant properties.

Dietary considerations should account for missing nutrients if modifying the recipe. Aim for balanced filling by ensuring an adequate amount of apples to keep benefits high.

Pay attention to portion analysis. Limiting to one turnover per serving allows enjoyment without excessive calorie intake, supporting weight management efforts.

Savoring apple turnovers in moderation allows a delightful treat while contributing nutritional value to your diet.

Dietary Adaptations

To cater to gluten-free needs, consider almond or coconut flour as a replacement for traditional flour in pastry-making. This not only accommodates gluten-sensitive individuals but also offers a unique flavor experience.

For dairy-free versions, swap butter for coconut oil or vegan margarine. Ensure all other ingredients suit dairy-free diets, such as considering non-dairy milk for any glaze.

Vegan adaptations can also be embraced by using egg replacements like flaxseed meal or chia seeds to wash the pastry without losing structure.

Low-carb options can focus on almond flour, creating a pastry that aligns with keto diets while enhancing the nutty flavor profile of turnovers.

Individuals following a paleo diet can utilize almond or coconut flour while ensuring all ingredients remain unprocessed. These minor adjustments can yield delicious results without compromising values.

Low-FODMAP diets can consider low-fructose apple varieties and controlled serving sizes to enjoy apple turnovers without distress.

Troubleshooting Guide

Common texture issues often arise when the dough is overworked or too warm. Remedy this by ensuring proper chilling times and gentle handling to maintain crispness.

Flavor balance can feel off if the spices are uneven. Consider taste-testing your apple mixture before sealing to adjust sweetness or spice levels where needed.

Temperature problems in the oven can affect baking results. Ensure that the oven is preheated properly, and rotate trays halfway through baking for even cooking.

Equipment challenges like insufficient space can lead to a crowded baking sheet. Baking in batches might be necessary to maintain airflow around pastries, allowing for optimal results.

Ingredient substitutions must be carefully accounted for when altering recipes. Aim to recreate textures of original ingredients in your replacements.

Timing concerns, particularly with larger batches, may result in uneven baking. Monitoring the pastries closely while using a baking thermometer can help prevent mishaps.

Recipe Success Stories

Our community has shared wonderful feedback about personal adaptations made to the apple turnover recipe, many highlighting their unique twist on spices or filling options.

Readers have reported successful variations involving seasonal fruits, showcasing how versatile the recipe can be, turning simple apple turnovers into exciting culinary experiences.

Photography tips from amateur bakers have highlighted appealing ways to capture the turnover’s golden exterior and inviting fillings, encouraging others to appreciate their baking endeavors.

Success stories from family gatherings spotlight this recipe as a crowd favorite, with many sharing how easy it was to outsell store-bought pastries, leaving guests raving about the homemade touch.

Engagement from the community has been fantastic, with discussions circling around the best apple varieties and country-specific adaptations, showcasing the pride of collective baking adventures.

Frequently Asked Questions

Can I freeze apple turnovers before baking?

Yes! Freeze assembled, uncooked turnovers on a baking sheet until firm, then transfer to a freezer bag and bake straight from frozen. Adjust time slightly for baking.

What type of apples are best for baking?

Firm varieties like Granny Smith and Honeycrisp are recommended for their balance of sweetness and tartness, which holds well during cooking.

How do I reheat apple turnovers to keep them flaky?

Reheat in the oven at 350°F for about 10 minutes. This method ensures the pastry remains crisp rather than soggy.

Can I make turnovers without sugar?

Absolutely! Consider using unsweetened apples or natural sweeteners like maple syrup, adjusting the amount to taste.

How long do baked turnovers last?

Baked turnovers can be stored in an airtight container at room temperature for 2 days or in the refrigerator for up to a week.

Can I use store-bought pastry dough?

Yes, using store-bought dough is a great time-saver! Just roll it out before use and follow the assembly instructions as usual.

What’s the best way to serve apple turnovers?

Warm is best, served with a scoop of ice cream, whipped cream, or a dusting of powdered sugar, elevating their presentation.

Can I add nuts to the filling?

Definitely, adding chopped nuts like walnuts or pecans can provide a lovely crunch alongside the soft apple filling!

What can I serve with apple turnovers?

Consider pairing your turnovers with drinks like coffee, tea, or sweet cider, which enhances the overall serving experience.

Are they suitable for kids?

Yes! With their sweet apple filling and flaky pastry, these turnovers are a hit with kids – just be wary of serving them hot.

Additional Resources

If you’re interested in exploring more recipes, check out our comprehensive dessert section that features similar pastries, showcasing other fruit fillings and flavor profiles.

Technique guides to perfect pastry-making can be found throughout our blog, detailing essential skills like dough handling and basic baking science.

Understanding the ingredients used can boost your confidence in cooking. Our ingredient information spotlight delves deeper into using fresh produce and pantry staples more efficiently.

Moreover, consider our equipment recommendations for the best tools to assist you in creating beautifully baked goodies, ensuring quality in your results.

During seasonal variations, we offer recommendations on using fresh, seasonal fruits in your desserts, promoting a sustainable and delicious cooking approach.

Join the Conversation

We encourage you to share your apple turnover creations on social media! Using dedicated hashtags helps others to discover your baking success while allowing us to connect with our amazing community.

Our photography tips also provide insight on capturing the beauty of your homemade treats, encouraging others with similar baking interests in elevating their food photography.

We invite you to leave reviews of these turnovers or share your inventive variations. Engage with others by discussing your experiences, challenges, and successes with this delightful recipe.

Consider starting a conversation about your favorite fillings and flavors—what twists have you tried, and how have they turned out?

Your recipes can inspire others to explore the simple yet satisfying pleasure of homemade apple turnovers, affirming the essence of baking as a shared joy.

The Recipe

Apple Turnovers

Serves: 8 turnovers

Prep Time: 30 mins

Cook Time: 25 mins

Total Time: 55 mins

Kitchen Equipment Needed

  • Rolling pin
  • Baking sheet
  • Parchment paper
  • Mixing bowls
  • Pastry brush
  • Knife or pastry cutter
  • Measuring cups and spoons

Ingredients

  • 2 cups all-purpose flour
  • 1 teaspoon salt
  • 1 cup unsalted butter, chilled and diced
  • 6-8 tablespoons ice water
  • 4-5 medium apples, peeled, cored, and chopped
  • ¾ cup sugar
  • 1 teaspoon cinnamon
  • 1 tablespoon lemon juice
  • 1 egg, beaten (for egg wash)

Directions

  1. In a large bowl, mix flour and salt. Cut in butter until mixture resembles coarse crumbs. Stir in ice water, a tablespoon at a time, until dough forms.
  2. Wrap dough in plastic wrap and refrigerate for at least 30 minutes.
  3. In another bowl, combine apples, sugar, cinnamon, and lemon juice. Set aside.
  4. Preheat oven to 375°F (190°C). Roll out chilled dough on a floured surface to ⅛-inch thick. Cut into squares or circles.
  5. Place a spoonful of apple mixture in the center of each piece of dough.
  6. Fold dough over filling to create a triangle or crescent shape. Seal edges tightly with a fork.
  7. Brush the top of each turnover with the beaten egg.
  8. Bake for 25 minutes or until golden brown. Allow to cool slightly before serving.

Recipe Notes

  • Feel free to spice up your filling with nutmeg or cloves.
  • For extra sweetness, consider adding caramel pieces with the apple filling.
  • These turnovers freeze well, so consider making a double batch!

Deliciously Rich Old-Fashioned Penuche Fudge Recipe to Try!

Old-Fashioned Penuche Fudge: A Sweet Delight

⚖️
Difficulty
Medium

⏲️
Prep Time
15 mins

🕒
Cook Time
20 mins

⏱️
Total Time
35 mins

🍽️
Servings
24 pieces

Penuche fudge is a delightful treat that brings back memories of simpler times and family gatherings. This old-fashioned candy resonates with nostalgia, tantalizing your taste buds with its rich, caramel-like flavor and creamy texture. Made with brown sugar, butter, and whole milk, this fudge melts in your mouth, transporting you to grandma’s kitchen with every heavenly bite.

The allure of this old-fashioned penuche fudge lies not only in its taste but in its charming simplicity. This recipe is straightforward, making it accessible even to novice cooks. The process yields an irresistible fudge that can turn any occasion into a celebration, whether it’s a holiday gathering or a quiet evening at home. There is something magical about enjoying homemade fudge that enhances the flavors of life, inviting you to savor the sweet moments.

Quick Recipe Highlights

  • Flavor Profile: The heavenly blend of caramel and vanilla in penuche fudge offers an exquisite taste that is both rich and creamy.
  • Texture: This fudge boasts a smooth, melt-in-your-mouth consistency that is perfectly satisfying.
  • Aroma: As it cooks, the warm scent of brown sugar and buttery goodness fills your kitchen, drawing everyone in.
  • Visual Appeal: Penuche fudge is typically light tan, invitingly contrasted with darker, rich toppings for a delightful presentation.
  • Skill Level Needed: While this recipe requires some basic cooking techniques, it remains beginner-friendly with clear instructions.
  • Special Equipment: A candy thermometer and a sturdy saucepan are essential for crafting the perfect fudge.

Recipe Overview

  • Difficulty Level: Creating old-fashioned penuche fudge requires a balance of patience and attention. While it’s moderately challenging, with practice, anyone can master it.
  • Category: This recipe falls under desserts, specifically candy-making, making it a perfect ending to any meal.
  • Cuisine: Penuche fudge is rooted in traditional American baking, reflecting the culinary influences of the Northeastern United States.
  • Cost: This recipe is economical, utilizing common pantry staples such as sugar, butter, and milk, which are budget-friendly ingredients.
  • Season: Penuche fudge shines particularly during the fall and winter seasons, complementing holiday celebrations wonderfully.
  • Occasion: It’s a classic treat perfect for gifting during holidays or serving at family gatherings.

Why You’ll Love This Recipe

The taste and texture of old-fashioned penuche fudge make it truly irresistible. Rich and buttery flavors meld seamlessly with the sweetness of brown sugar, providing a comforting dessert experience. The creamy, melt-in-your-mouth consistency adds to its appeal, making each bite a delightful indulgence. It’s a treat that transcends generations, reminding us of lazy afternoons spent enjoying simple pleasures.

In terms of convenience, this recipe is as straightforward as they come. With just a few ingredients, you can whip up a rich and indulgent fudge that is ready to share with friends and family. The preparation time is quick, allowing you to produce a batch in under an hour. This makes it an excellent option for those last-minute dessert needs or festive celebrations.

Nutritionally, while fudge is a treat meant to be enjoyed in moderation, it offers some benefits due to the inclusion of real butter and whole milk, which provide fat-soluble vitamins. When made at home, you have control over the ingredients and can avoid any preservatives found in store-bought varieties, making it a healthier choice.

Socially, penuche fudge plays a significant role in gatherings, serving as a delicious conversation starter and an inviting gift during holidays. The act of sharing homemade treats strengthens bonds and creates lasting memories, making this fudge a perfect addition to any occasion.

From a cost-effectiveness standpoint, old-fashioned penuche fudge is a great value. It allows you to create a gourmet experience at home without breaking the bank. The simple ingredients are readily available year-round, making this recipe both accessible and economical.

Historical Background and Cultural Significance

The origin of penuche fudge can be traced back to New England, where the rich tradition of candy-making flourished in the 19th century. Penuche, derived from the Spanish word for “brown sugar,” symbolizes the utilization of locally sourced ingredients during early American settlements. Its simple preparation reflects the resourcefulness of home cooks who sought to create delicious treats with available pantry items.

Culturally, penuche fudge holds a special place in American culinary heritage. It is often associated with family gatherings, particularly during the holidays, where it serves as a sweet reminder of cherished traditions. Many families pass down their unique recipes through generations, making this fudge a symbol of both culinary creativity and familial love.

Over the years, the recipe has evolved, with various adaptations emerging that incorporate different flavors such as chocolate, nuts, and spices. These regional variations demonstrate the versatility of penuche fudge while maintaining its classic foundation. As home bakers experiment, the essence of this sweet treat continues to resonate, appealing to both old and new generations.

In contemporary culture, penuche has retained its status as a beloved confection. Its allure is found in its nostalgic flavors and homemade touch, making it a staple at potlucks and gatherings. Whether enjoyed plain or dressed up with toppings, old-fashioned penuche fudge remains a celebrated dessert that resonates with sweet memories.

Ingredient Deep Dive

Brown Sugar: Brown sugar is the quintessential element that defines penuche’s flavor. It contains molasses, which contributes to the fudge’s characteristic caramel tones. Nutritionally, it retains some minerals and has a lower glycemic index compared to white sugar. Look for a soft, moist variety, and store it in an airtight container to prevent hardening. For substitutes, you can use white sugar with a splash of molasses.

Butter: In this fudge recipe, real butter provides richness and flavor, serving as the base for the creamy texture. It also enhances the mouthfeel and plays a critical role in achieving the correct consistency. Consider using unsalted butter for better control over flavor, and store it in a cool, dry place. Should you need a dairy-free alternative, coconut oil or vegan butter can be used instead.

Whole Milk: Whole milk adds moisture and a creamy texture to the fudge, creating a rich base that binds the ingredients together. It’s a good source of calcium and vitamin D, contributing to overall dietary health. When selecting milk, opt for fresh, high-quality products, and keep it refrigerated. As a substitute, you can use heavy cream for a richer taste or a plant-based milk for dairy-free options.

Common Mistakes to Avoid

  • Not Using a Candy Thermometer: Without a thermometer, it’s challenging to reach the correct temperature, leading to inconsistent results.
  • Overcooking the Fudge: Cooking the fudge too long can result in a grainy texture, so watch the temperature carefully.
  • Under-Whipping: Insufficient whipping can cause the fudge to lose its creamy texture, so be sure to incorporate air during cooling.
  • Inadequate Cooling Time: Cutting into warm fudge can lead to a crumbly mess, so allow it to set properly before slicing.
  • Not Greasing the Pan: Fudge can stick to pans, so be sure to lightly grease your dish or line it with parchment paper.
  • Using Cold Ingredients: Cold ingredients can impact the melting process, resulting in a lumpy texture, so ensure all items are at room temperature.
  • Poor Storage: Improper storage can lead to fudge drying out or absorbing odors, so wrap it tightly in plastic wrap.
  • Ignoring Ingredients: Always follow the measurements precisely; small variances can seriously affect the outcome of your fudge.

Essential Techniques

Temperature Control: Mastering temperature control is crucial when making penuche fudge. Proper temperature ensures that the sugar dissolves fully, creating a smooth texture. To master this, always use a reliable candy thermometer and regularly check on the cooking process. Look for signs that indicate readiness, such as a grainy texture dissolving into a shiny surface.

Whipping the Fudge: Once removed from the heat, whipping the fudge allows it to aerate and obtain its creamy consistency. Aim for a vigorous stirring motion; this introduces air that helps the fudge maintain its structure as it cools. Beware of common pitfalls like over-whipping, which can lead to a too-stiff consistency; aim for a spreadable texture with a slight sheen.

Pro Tips for Perfect Old-Fashioned Penuche Fudge

1. Use fresh ingredients for the best flavor; stale sugar or butter can negatively impact the taste.
2. Opt for a heavy-bottomed saucepan to distribute heat evenly and prevent burning.
3. Allow the fudge to cool slightly before pouring to prevent it from sticking to the sides of the pan.
4. Experiment with flavor variations by adding vanilla extract or chopped nuts for a unique twist.
5. Taste your fudge mixture before allowing it to set; tweak sweetness if necessary.
6. For a more indulgent treat, top with chocolate ganache or sprinkle sea salt on top.
7. Keep it cool and stored properly to maintain its creamy texture.
8. Remember that practice makes perfect; don’t be discouraged by the first attempt, as techniques improve over time.

Variations and Adaptations

Penuche fudge can be tailored to suit various tastes and preferences. Consider adding regional flavors, such as maple syrup or whiskey for a unique twist on the traditional taste. Seasonal adaptations can include spices like cinnamon or nutmeg during the cold months for a warm, cozy flavor profile.

Dietary modifications are also possible; for a gluten-free version, simply ensure no additives are included in your sugar and other ingredients. For a more health-conscious approach, try using alternatives like coconut oil instead of butter or agave syrup in place of traditional sugar.

Flavor variations can expand beyond the classic caramel-like taste by incorporating ingredients like espresso or citrus zest. For those who enjoy added texture, consider mixing in mini marshmallows or dried fruits for delightful surprises in each bite.

Finally, presentation alternatives can elevate your old-fashioned fudge into a gourmet treat. Slice the fudge into different shapes or layer it within a gift box arranged with toppings, making it visually appealing for any occasion.

Serving and Presentation Guide

When serving old-fashioned penuche fudge, presentation matters. Cut the fudge into neat squares or rectangles for a polished appearance. Consider stacking the pieces or arranging them on a decorative platter surrounded by nuts or fruit for a stylish touch.

Garnish the fudge with a light dusting of powdered sugar or drizzle with melted chocolate for an enhanced visual allure. Temperature-wise, serve fudge at room temperature to maintain its creamy texture, allowing guests to savor each bite fully.

Pair your fudge serving with coffee or tea, offer it as part of a dessert platter at gatherings, or include it in a homemade gift basket. Portion control is also essential; aim for bite-sized pieces that satisfy without overwhelming your guests’ palates.

Wine and Beverage Pairing

Pairing wines with old-fashioned penuche fudge can elevate your dessert experience. A sweet dessert wine like Sauternes or Port harmonizes beautifully with the fudge’s buttery notes. For a more adventurous option, consider a spiced mead that complements the caramel flavors.

For non-alcoholic alternatives, rich hot chocolate or spiced chai lattes provide a comforting backdrop to the fudge. If you desire a refreshing accompaniment, iced herbal teas can cleanse the palate between bites.

When serving these beverages, consider their temperatures; warm drinks should be paired with warm fudge for a cozy experience. Offering a variety of options ensures that all guests can find their perfect match for indulging in this classic treat.

Storage and Shelf Life

Storing old-fashioned penuche fudge properly can significantly extend its shelf life. Store it in an airtight container at room temperature to maintain its texture and flavor. If your home is particularly warm, refrigerating the fudge can help it stay fresh longer.

Each piece should be wrapped individually in plastic wrap or wax paper to prevent sticking and maintain freshness. Be sure to check for signs of spoilage, such as an off smell or dry texture, which can indicate it’s time to toss the fudge.

If you wish to freeze your fudge, cut it into pieces and store it in a freezer-friendly bag. Thaw pieces overnight in the refrigerator before serving for the best texture. Reheating isn’t necessary; simply allow it to return to room temperature for a delightful, soft bite.

Make Ahead Strategies

Preparing old-fashioned penuche fudge ahead of time not only saves time but also enhances the beauty of your gatherings. Aim to make the fudge at least a day in advance; this allows the flavors to deepen and the texture to set perfectly.

You can store the fudge in an airtight container while leaving it at room temperature between steps. The quality remains intact when stored properly, so you can focus on other preparations leading up to your event.

When you’re almost ready to serve, consider adding fresh elements like sprinkle toppings or a drizzle of chocolate for a last-minute, eye-catching enhancement. Reheating isn’t necessary but ensure you allow the fudge to reach room temperature before serving for optimal flavor and texture.

Scaling Instructions

If you want to enjoy more or less fudge than the original recipe offers, scaling is straightforward. For halving the recipe, reduce all ingredients accordingly, ensuring measurement precision is maintained for the best results.

When doubling or tripling the recipe, be mindful of your saucepan size; a larger pot may be necessary to accommodate increased volume without overflowing. Adjust cooking times slightly, as larger batches may require extra simmering.

Additionally, consider storage adjustments. More fudge translates to additional containers or bags to store your treats properly. Always monitor the texture and temperature to match the original recipe regardless of your final quantity.

Nutritional Deep Dive

Understanding the nutritional value of old-fashioned penuche fudge can inform your enjoyment of this decadent treat. Each serving primarily comprises sugars and fats, typical for desserts, making moderation key.

The macronutrient breakdown typically reveals a significant carbohydrate content, primarily from sugars, while the fats from butter play a crucial role in flavor and texture. Additionally, one can glean micronutrient insights, such as vitamins and minerals, derived from whole milk and brown sugar.

As with all treats, portion analysis is vital, especially if you’re managing calorie intake. Enjoying one or two pieces at a time can satisfy cravings without derailing dietary goals, allowing you to relish the rich flavors without guilt.

Dietary Adaptations

Old-fashioned penuche fudge can be modified to cater to various dietary needs. For a gluten-free version, simply ensure all your ingredients are free from gluten additives; this fudge naturally meets that criterion.

Dairy-free adaptations can be made by substituting cow’s milk with almond or coconut milk and using dairy-free butter alternatives in place of traditional butter. For a vegan twist, consider opting for a plant-based cream for the same creamy texture.

If you’re looking for low-carb or keto adaptations, consider using sugar substitutes like erythritol or monk fruit, creating a similarly rich flavor without the carbs. Each of these modifications allows penuche fudge to accommodate different dietary preferences while maintaining its delightful charm.

Troubleshooting Guide

If you encounter texture issues with your fudge, note that this often results from either overcooking or undercooking. If it’s too runny, a return to the heat for a brief period can help it set better. Conversely, boiling it for too long leads to a dry outcome; balancing temperature and timing is crucial.

Flavor balance is another common issue. If your fudge is too sweet, consider adjusting the recipe next time by reducing sugar slightly or adding a pinch of salt to enhance flavor depth. For too much butter flavor, cutting back on the butter can yield a more balanced taste.

Challenges with equipment may arise, particularly with candy thermometers. If you find readings inconsistent, ensure that your thermometer is calibrated properly. Invest in a quality tool to guarantee accurate temperature readings for fudge-making.

Timing concerns can affect how fudge sets. Make sure you allow adequate cooling time before cutting into pieces; patience is vital for achieving the best texture and presentation.

Recipe Success Stories

Our community is filled with success stories featuring old-fashioned penuche fudge. Family traditions often share the joy of creating and perfecting this recipe, with many posting adaptations and variations that highlight their creativity.

Some readers have embraced flavor ideas from local culinary customs, exploring new possibilities that blend heritage with innovation, resulting in unique twists on the classic fudge. These personalized tales add to the richness of the recipe and inspire others to experiment with their versions.

Photography and presentation tips from our community have showcased indulgent servings of penuche fudge, often paired with complementary items that enhance both appearance and taste. Sharing these moments fosters connection and encourages dialogue around beloved traditions.

Frequently Asked Questions

Q: Why is my fudge grainy?

A: Graininess often occurs when sugar crystallizes, possibly due to undercooking or stirring too vigorously. Ensure to maintain proper cooking temperature and avoid excessive agitation after removing it from heat.

Q: Can I use light brown sugar instead of dark?

A: Yes, light brown sugar can be used, but it will result in a milder flavor. The darker sugar will impart more complexity, so choose according to your taste preference.

Q: How do I know when my fudge is ready?

A: When the fudge reaches the soft-ball stage at around 234°F (112°C) on a candy thermometer, it is ready. The mixture should hold its shape when dropped into cold water.

Q: Can I add nuts to my fudge?

A: Absolutely! Chopped nuts such as walnuts or pecans can be added just before pouring the mixture into a pan. This introduces a delightful crunch and adds flavor complexity.

Q: How long does penuche fudge last?

A: When stored properly in an airtight container, penuche fudge can last up to two weeks at room temperature and even longer if refrigerated or frozen.

Q: Can I freeze penuche fudge?

A: Yes, penuche fudge freezes well. Wrap it securely in plastic wrap or aluminum foil, place it in a freezer bag, and it can be kept for up to three months. Thaw in the fridge before serving.

Q: Is penuche fudge suitable for gifting?

A: Definitely! Penuche fudge makes a wonderful homemade gift. Package it neatly in a box or jar, and it’s perfect for sharing with family and friends during the holidays.

Q: How can I make my fudge softer?

A: If your fudge turns out too hard, try adding a little extra butter or cream when reheating it gently on the stove. This will help to soften the texture.

Q: Can I reduce the sugar in the recipe?

A: While you can reduce sugar, it may alter both flavor and texture. Consider using sugar substitutes if you aim for lower sweetness while retaining the fudge-like qualities.

Q: Do I need a special pan for making fudge?

A: A heavy-bottomed saucepan is recommended to avoid burning. Additionally, a square baking pan lined with parchment paper makes for easy cutting and cleanup.

Additional Resources

If you loved making old-fashioned penuche fudge, exploring related recipes can inspire new culinary adventures. Check out similar confections like chocolate fudge, peanut butter fudge, or caramel candies to broaden your dessert repertoire.

Deepen your knowledge with technique guides on candy-making, including tips on tempering chocolate or mastering various types of syrups. For ingredient information, understand the varieties of sugars and their impacts on flavor and texture.

Investing in quality kitchen equipment will enhance your cooking experience, and exploring seasonal variations can introduce fresh, delightful elements that spark creativity in the kitchen.

Join the Conversation

We invite you to join our vibrant community of dessert enthusiasts! Share your own experience with old-fashioned penuche fudge or post pictures of your beautifully crafted pieces on social media. Engage with other bakers to exchange tips and variations you’ve tried.

Your feedback on this recipe can help others as they embark on their own fudge-making adventures. We encourage you to leave a review or comment about how you personalized your fudge to inspire creativity in our kitchen community!

The Recipe

Old-Fashioned Penuche Fudge

Serves: 24 pieces

Prep Time: 15 mins

Cook Time: 20 mins

Total Time: 35 mins

Kitchen Equipment Needed

  • Candy thermometer
  • Heavy-bottomed saucepan
  • Wooden spoon or spatula
  • Square baking pan (8-inch)
  • Parchment paper

Ingredients

  • 2 cups brown sugar
  • 1/2 cup whole milk
  • 1/2 cup unsalted butter
  • 2 teaspoons vanilla extract
  • 1/4 teaspoon salt

Directions

  1. In a heavy-bottomed saucepan, combine the brown sugar, whole milk, and butter. Cook over medium heat, stirring frequently until the mixture comes to a boil.
  2. Attach a candy thermometer to the side of the pan and continue to cook the mixture, without stirring, until it reaches 234°F (soft ball stage).
  3. Remove the pan from heat and let it cool for a few minutes until it cools to about 200°F.
  4. Stir in the vanilla extract and salt until well combined, then beat the fudge mixture with a wooden spoon or spatula until it thickens and loses its gloss.
  5. Quickly pour the fudge into a greased or parchment-lined baking pan, spreading evenly.
  6. Let the fudge cool completely at room temperature before cutting into squares.

Recipe Notes

  • For added flavor, you can mix in chopped nuts or top the cooled fudge with sea salt.
  • Store fudge in an airtight container at room temperature or refrigerate for extended freshness.
  • Fudge can be frozen for up to three months. Just make sure it’s well wrapped to prevent freezer burn.

Irresistible Strawberry Cheesecake Cookie Cups: Easy Christmas Dessert Delight

Irresistible Strawberry Cheesecake Cookie Cups: The Perfect Easy Christmas Dessert

⚖️
Difficulty
Easy

⏲️
Prep Time
20 mins

🕒
Cook Time
15 mins

⏱️
Total Time
35 mins

🍽️
Servings
12 Cookie Cups

Strawberry Cheesecake Cookie Cups are the quintessential festive dessert that can brighten up any gathering. As you bite into these delightful cookie cups, the sweet and creamy cheesecake filling perfectly complements the tangy burst of fresh strawberries, creating a harmonious flavor profile that is irresistible. Perfectly sized as single servings, these cookie cups not only satisfy your sweet cravings but also provide a visual treat with their vibrant colors and delightful textures.

There’s something undeniably comforting about homemade desserts, especially during the holiday season. With their buttery cookie base and luscious cheesecake filling, these cookie cups are remarkably simple to prepare yet yield impressive results. Whether you’re entertaining guests or simply seeking a cozy treat at home, these cookies will undoubtedly bring joy and festivity to your table.

Quick Recipe Highlights

  • Flavor Profile: Sweet, creamy cheesecake paired with fresh strawberries makes each bite a delightful experience.
  • Texture: A perfect balance of soft cookie and creamy filling gives a delightful mouthfeel.
  • Aroma: The scent of baked sugar cookies mingled with fresh strawberries creates a warm and inviting aroma.
  • Visual Appeal: The red strawberries atop the creamy white filling make for an eye-catching presentation.
  • Skill Level Needed: This recipe requires basic baking skills, making it perfect for beginners and seasoned bakers alike.
  • Special Equipment: You will need a muffin tin and mixing bowls to create these delicious treats.

Recipe Overview

  • Difficulty Level: These Irresistible Strawberry Cheesecake Cookie Cups are classified as easy to make, making them accessible for all levels of bakers.
  • Category: They fit perfectly into the dessert category, ideal for serving at parties, family gatherings, or as a holiday treat.
  • Cuisine: This dessert draws inspiration from classic cheesecake recipes, blending traditional techniques with modern flair.
  • Cost: Approximately $15 to make 12 cookie cups, depending on ingredient quality and local prices.
  • Season: The best time to enjoy these delicious cookie cups is during holidays and summer, when strawberries are at their peak.
  • Occasion: Perfect for Christmas gatherings, birthday celebrations, or any festive occasion that calls for delightful sweets.

Why You’ll Love This Recipe

The combination of taste and texture in these Strawberry Cheesecake Cookie Cups is simply enchanting. Each bite presents a wonderful mix of the soft cookie base and the smooth, rich cheesecake filling, contrasted by the freshness of the strawberries. This layered experience not only captivates the palate but also leaves a lasting impression on dessert lovers.

Convenience is another great aspect of this recipe. It can be prepared in under an hour, allowing you to whip up a beautiful dessert even on a busy day. The simplicity of the preparation means you can enjoy more time with your loved ones during festive gatherings, rather than being stuck in the kitchen.

Nutritionally, these cookie cups can be enjoyed in moderation as part of a balanced diet. Strawberry Cheesecake Cookie Cups contain a source of calcium from the cream cheese and fresh vitamin C from strawberries, making them a delightful treat with some health benefits.

Socially and entertaining-wise, these cookie cups serve as a fantastic conversation starter at any gathering. Guests will be thrilled by the vibrant colors and elegant presentation, making them eager to taste these adorable desserts.

Finally, the cost-effectiveness of this dessert is hard to beat. With simple, accessible ingredients, you can create an attractive and delicious treat that’s sure to impress without breaking the bank. These cookie cups prove that great desserts don’t have to be complicated or expensive.

Historical Background and Cultural Significance

The cookie cup concept merges the beloved traditional cheesecake with a modern twist, making it a fun and portable version of the classic dessert. Cheesecake itself has a rich history dating back to Ancient Greece, where it was served to athletes during the first Olympic Games. Over centuries, various cultures have put their spin on cheesecake, leading us to the many variations we enjoy today.

Culturally, desserts often bring people together, celebrating both everyday moments and special occasions. The Strawberry Cheesecake Cookie Cup is no exception—it has become a favorite among families during holiday celebrations, particularly in American culture, where both strawberries and cream cheese are widely embraced.

As for the recipe’s evolution, it has transformed from classic cheesecake slices into creative forms like these cookie cups. This innovative approach allows for easier serving and enjoyment at events, reinforcing that desserts can be both practical and delightful.

Regional variations often appear with this dessert, incorporating different fruits such as blueberries or raspberries, depending on local preferences and seasonal availability. These variations allow bakers to personalize their creations and engage with their local heritage.

Ingredient Deep Dive

Strawberries: Strawberries are a symbol of summer and celebration, often featured in various global cuisines. They offer numerous health benefits, including high levels of vitamin C, antioxidants, and dietary fiber. When selecting strawberries, look for bright red, firm fruit without blemishes. Store them in the refrigerator and consume them within a few days for the best flavor—frozen strawberries can also be used as a substitute.

Cream Cheese: Cream cheese serves as the heart of the cheesecake filling, bringing a rich, velvety texture. Originating in the United States in the late 19th century, cream cheese has since become a staple in many desserts. Nutritionally, it provides essential fats and calcium. Choose full-fat cream cheese for the best results, and keep it refrigerated until needed. If you’re looking for a lighter alternative, consider using Greek yogurt, though the texture will differ slightly.

Granulated Sugar: As a foundational sweetener, granulated sugar enhances the flavors of every ingredient in the cookie cups while promoting a lovely caramelization. Use sugar with caution, balancing sweetness with other flavors. Store sugar in a cool, dry place, and consider alternatives like honey or maple syrup in moderation if you’re experimenting with different flavors.

Unsalted Butter: Butter is vital for creating a flaky cookie base. It brings richness and moisture, making every bite satisfying. Unsalted butter is preferred to control salt levels in baking. Look for high-quality butter for the best taste. Store butter in the fridge and allow it to soften before use. Coconut oil can be an interesting dairy-free substitute in some recipes.

Common Mistakes to Avoid

  • Overmixing the Dough: Overworking the batter can lead to tough cookie cups. Mix just until combined to keep the texture soft.
  • Underbaking: If you remove the cookie cups too early, they may collapse. Look for a golden edge to ensure proper baking.
  • Skipping Chilling Time: Not chilling the dough can make it difficult to shape. Chill for proper consistency and easier handling.
  • Using Cold Ingredients: Cold cream cheese can create lumps in the filling. Let it sit at room temperature to soften before mixing.
  • Overfilling the Cups: Filling too much can lead to overflowing during baking. Stick to the recommended amount for perfect results.
  • Using Old Ingredients: Ensure everything, especially baking powder and dairy, is fresh; expired ingredients can ruin the taste.
  • Neglecting To Adjust Oven Temperatures: Each oven behaves differently; using an oven thermometer can help get the right temperature.
  • Rushing the Cooling Process: Allowing the cookie cups to cool properly before serving will ensure they hold their shape and flavor.
  • Inconsistent Sizing: Use a cookie scoop for even sizing; this will help ensure all cookie cups bake uniformly.
  • Ignoring Flavorings: Adding vanilla extract or lemon zest can enhance the flavor—don’t skip on flavor enhancers!

Essential Techniques

Preparing Cookie Cups: Creating the perfect cookie cup shape is essential for holding the filling. Start by greasing the muffin tin well, then press the dough evenly into the bottom and sides of the cups. This technique ensures even baking and easy release from the pan. Watch for a golden brown color to indicate doneness.

Making the Cheesecake Filling: Combine cream cheese, sugar, and flavorings gently. It’s important to cream these ingredients until smooth, but don’t overmix as it can incorporate too much air, causing cracks during baking. Look for a creamy consistency without lumps for the best texture.

Pro Tips for Perfect Irresistible Strawberry Cheesecake Cookie Cups

1. Use fresh strawberries for the best flavor, or consider macerating them in a little sugar to enhance their sweetness.
2. Let the cream cheese sit out before mixing; a softer texture will help prevent lumps in the filling.
3. For an added twist, consider using a graham cracker crust base instead of a cookie dough for a true cheesecake effect.
4. Refrigerate the cookie cups after baking to help them set properly and enhance their texture before serving.
5. Top the assembled cups with whipped cream for an elegant finishing touch that adds extra flavor and visual appeal.
6. Experiment with flavored extracts—like almond or lemon— for unique takes on the classic filling.
7. Store any leftovers in an airtight container in the refrigerator for freshness.
8. Consider adding a touch of vanilla extract to the cookie dough for enhanced flavor throughout.

Variations and Adaptations

One popular regional variation of the Strawberry Cheesecake Cookie Cups is to incorporate different seasonal fruits—like blueberries, raspberries, or even peaches—creating a delightful medley of flavors. Alternatively, adding chocolate chips to the cookie base brings a rich and decadent twist.

For seasonal adaptations, try spicing up the filling during the fall with pumpkin puree or ginger spices for a seasonal flavor enhancement. Those with dietary restrictions can also modify the cookie base to be gluten-free using almond flour or coconut flour while ensuring all ingredients align with their dietary needs.

If you’re looking for creative presentation alternatives, consider placing individual cookie cups in decorative cupcake liners or serving them on a tiered cake stand for visually stunning arrangements at gatherings.

Serving and Presentation Guide

Plating techniques for these cookie cups can be simple yet elegant. Consider arranging the cookie cups on a beautiful platter garnished with fresh strawberries and mint leaves to contrast with the vibrant colors of the dessert.

To elevate the experience, you might garnish the tops with a dollop of whipped cream or a drizzle of chocolate sauce. Simple decorations like powdered sugar or crushed nuts can also add an attractive touch.

Traditionally, these cookie cups are perfect as standalone desserts; however, pairing them with a side of vanilla ice cream or a fruit coulis can add a delightful twist. For temperature considerations, serve the cups chilled, allowing the cheesecake filling to hold its shape while indulging in every heavenly bite.

Wine and Beverage Pairing

Pairing these Strawberry Cheesecake Cookie Cups with a sweet dessert wine like Moscato can enhance the overall experience, bringing out the fruity notes in the strawberries while balancing the creamy texture of the cheesecake. Alternatively, a light sparkling rosé can provide refreshing contrasts.

For non-alcoholic options, consider serving with iced tea garnished with lemon. A strawberry lemonade can also complement the flavors beautifully, providing a refreshing balance to the richness of the cookie cups.

If you enjoy coffee or tea, a cup of smooth cappuccino or a chai latte can enhance the dessert experience, providing warmth and depth to the sweet and tangy flavors.

Storage and Shelf Life

These Strawberry Cheesecake Cookie Cups are best stored in an airtight container in the refrigerator, where they will stay fresh for up to 3-4 days. To prevent the cookie base from getting soggy, place parchment paper between layers if stacking.

When reheating them, use a microwave in short intervals to avoid melting the cheesecake filling completely. The cookie cups can also be frozen for up to a month; wrap them tightly in plastic wrap or use freezer-safe containers for longer storage.

Be mindful of signs of spoilage, such as off-odors or changes in texture. If there are any uncertainties around freshness, it’s better to err on the side of caution and discard them.

Make Ahead Strategies

To make these Strawberry Cheesecake Cookie Cups ahead of time, prepare the cookie dough and store it in the refrigerator for up to 24 hours before baking. The cheesecake filling can also be made a day in advance and stored separately.

For optimal freshness, consider freezing the assembled cookie cups, placing them in the freezer right after baking. Allow them to thaw in the refrigerator before serving. This method will help maintain texture while providing convenience on the day of your event.

When assembling, add fresh strawberries just before serving to retain their color and freshness, enhancing the overall presentation and flavor.

Scaling Instructions

Scaling these Strawberry Cheesecake Cookie Cups is easy; simply double or triple the ingredient amounts according to your desired servings. Keep in mind that batch sizes should fit within your available mixing and baking equipment.

For halving the recipe, keep an eye on the baking time as smaller batches may require less time in the oven. Additionally, if you choose to utilize multiple pans, make sure to rotate them during cooking for consistent results.

When adjusting portions, be sure to calculate any necessary changes in baking times while ensuring the proper working temperature for ingredients. Extra care should be taken if you’re using a larger pan to accommodate more cookie cups.

Nutritional Deep Dive

The nutritional breakdown of each Strawberry Cheesecake Cookie Cup offers a delightful treat that still contains essential nutrients. Each cookie cup typically includes carbohydrates from the cookie base, fats from the cream cheese, and proteins that lend themselves to a balanced dessert in moderation.

A serving provides a good source of calcium and vitamins, particularly if you incorporate fresh strawberries, which contribute antioxidants that fight inflammation and boost the immune system. Balancing dessert intake with a nutrient-rich diet is key for maintaining health and wellness.

While enjoying these delicious treats, keep portion sizes in mind to manage calorie intake effectively. Remember, desserts can fit into a healthy lifestyle when enjoyed in moderation and balanced with nutritious foods.

Dietary Adaptations

Accommodating various dietary needs is possible with Strawberry Cheesecake Cookie Cups. For a gluten-free version, substitute all-purpose flour with almond flour or gluten-free flour blends, keeping consistency in mind.

Dairy-free options can be achieved using vegan cream cheese and dairy-free butter, offering a similar flavor and texture. For those on vegan diets, ensure all ingredients align, including the sugar used.

For low-carb or keto adaptations, switching to almond flour and using a sugar substitute like erythritol will allow compliance without sacrificing flavor. Each adaptation ensures that everyone can enjoy these delightful cookie cups.

Troubleshooting Guide

Should texture issues arise, check the cookie base for overmixing, which can create a dense product. Incorporate just enough until the ingredients are combined to maintain softness.

If flavor balance seems off, ensure to sample during preparation—adding more vanilla or sugar can often help achieve a delightful equilibrium.

Temperature problems can typically be solved with an accurate oven thermometer to ensure the right baking temperature. If ingredients aren’t at room temperature when combining, this could affect the cookie and filling’s consistency.

If facing equipment challenges, like sticky cookie dough, lightly flour your hands or work surface to help manage it better. Prepare for any adjustments that your specific tools may require.

Timing concerns can be managed with a well-prepared baking timeline, checking cookies regularly to ensure they aren’t under or overbaked.

Recipe Success Stories

Bakers from across our community have shared their success with these delightful Strawberry Cheesecake Cookie Cups. Many reported impressing guests at holiday celebrations, where the cookie cups not only tasted delicious but also added vibrant color to dessert tables.

Readers have enjoyed adapting the recipe, substituting strawberries with alternatives like peaches or blueberries, yielding incredible results and rave reviews from family members. The versatility of this recipe proves that small changes can lead to delightful discoveries in flavor combinations.

Photographers capturing these cookie cups have highlighted the visual aspect, noting how the red strawberries pop against the creamy filling, inspiring others to share their own creations online. Positive feedback reinforces that these cookie cups are a household favorite.

Frequently Asked Questions

Can I freeze the cookie cups?

Absolutely! These cookie cups can be frozen for up to a month. Just ensure they are wrapped tightly and stored in an airtight container. Allow them to thaw in the refrigerator when you’re ready to enjoy them.

How do I know when the cookie cups are done?

Look for a golden brown color on the edges of the cups. The centers might still look slightly soft, but they will firm up as they cool.

Can I use other fruits?

Yes, this recipe is quite adaptable! You can replace strawberries with your choice of fruits like blueberries, raspberries, or even seasonal fruits like peaches. Adjust the sweetness as needed.

What do I do if my cheesecake filling is lumpy?

If your filling is lumpy, it may be due to cold cream cheese. Ensure your cream cheese is at room temperature before mixing. If lumps persist, you can blend it briefly until smooth.

Is there a way to make them gluten-free?

Absolutely! Simply substitute all-purpose flour with a gluten-free blend, almond flour, or oat flour to keep the recipe gluten-free and still delicious.

Can I make these cookie cups ahead of time?

Yes! You can prepare the cookie dough and filling a day ahead. Store them separately until you’re ready to assemble and bake.

What other toppings can I use?

Consider topping them with whipped cream, chocolate drizzle, or sprinkle crushed nuts for an added crunch. You can even use a berry compote for a berry-rich experience!

How should I store leftover cookie cups?

Keep the cookie cups in an airtight container in the refrigerator for 3-4 days. Consider layering parchment paper if stacking to avoid sogginess.

Can I substitute sugar with a sugar alternative?

Yes, feel free to use sugar replacements like stevia or erythritol in equal portions according to your preference for reduced sugar options.

Will these cookie cups hold their shape when baked?

Yes! If the dough is well-made and pressed evenly in the muffin tin, they will hold their shape wonderfully during baking.

Additional Resources

For more delightful dessert recipes that complement these Strawberry Cheesecake Cookie Cups, check out our guides on making classic cheesecakes, exploring seasonal fruit-infused desserts, or crafting simple cookie bases. You may also find tips on the best kitchen tools to streamline your baking process, alongside insights into seasonal dessert trends.

Join the Conversation

We encourage you to share your experiences and variations of the Strawberry Cheesecake Cookie Cups on social media. Tag us in your baking photos, share tips, or leave feedback on how your cookie cups turned out. Engaging with our community allows everyone to learn new ideas and celebrate their creative efforts!

The Recipe

Irresistible Strawberry Cheesecake Cookie Cups

Serves: 12 Cookie Cups

Prep Time: 20 mins

Cook Time: 15 mins

Total Time: 35 mins

Kitchen Equipment Needed

  • Muffin tin
  • Mixing bowls
  • Electric mixer
  • Spoon or cookie scoop
  • Parchment paper (optional)

Ingredients

  • 1 cup all-purpose flour
  • 1/2 cup granulated sugar
  • 1/2 cup unsalted butter, softened
  • 1 cream cheese (8 oz), softened
  • 1/4 cup granulated sugar for filling
  • 1 egg
  • 1 teaspoon vanilla extract
  • 12 fresh strawberries, cut in half
  • Pinch of salt

Directions

  1. Preheat the oven to 350°F (175°C) and grease the muffin tin.
  2. In a mixing bowl, cream together the butter and sugar until light and fluffy.
  3. Add the flour and salt, mixing until just combined.
  4. Press the cookie dough evenly into the muffin cups to form a base.
  5. Bake for 10-12 minutes, or until golden brown.
  6. In another bowl, beat together cream cheese, sugar, egg, and vanilla until smooth.
  7. Once cookie cups are baked, pour the cheesecake filling into each cup.
  8. Top each with a half strawberry, pressing lightly into the filling.
  9. Bake for an additional 10-12 minutes until the filling is set.
  10. Let cool completely before removing from the tin; serve chilled or at room temperature.

Recipe Notes

  • Feel free to use different fruits for topping based on your seasonal preferences.
  • These cookie cups can be made ahead of time and stored in an airtight container for freshness.
  • Substitute sugar with a sweetener of your choice for a healthier alternative.