Irresistible Mini Pecan Pies: Perfect Dessert for Any Occasion

Mini Pecan Pies: Irresistible Bite-Sized Treats

⚖️
Difficulty
Moderate

⏲️
Prep Time
20 mins

🕒
Cook Time
30 mins

⏱️
Total Time
50 mins

🍽️
Servings
12 mini pies

Indulge in the deliciousness of mini pecan pies with this simple recipe that combines the rich, nutty flavors of pecans with a buttery, flaky crust. Perfect for holiday desserts or an elegant snack, these bite-sized treats will surely impress guests and satisfy any sweet tooth.

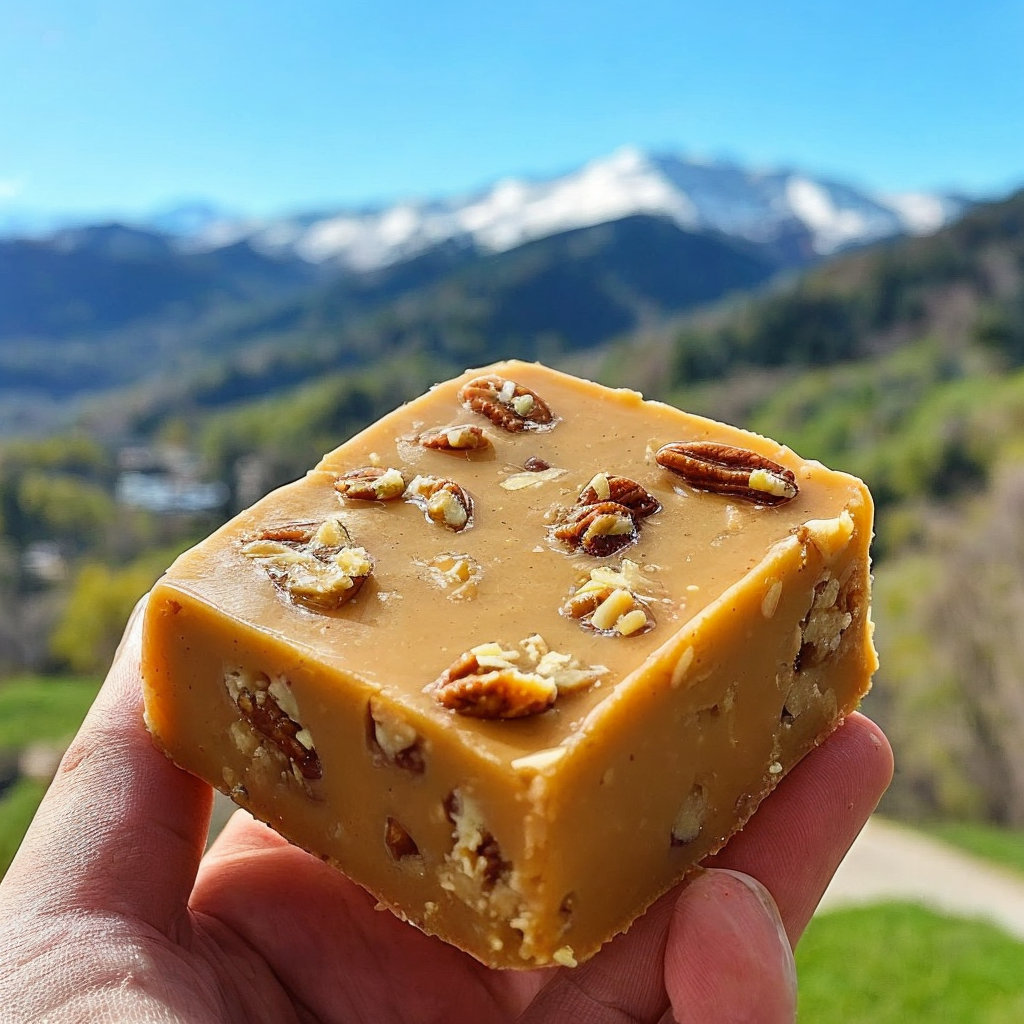
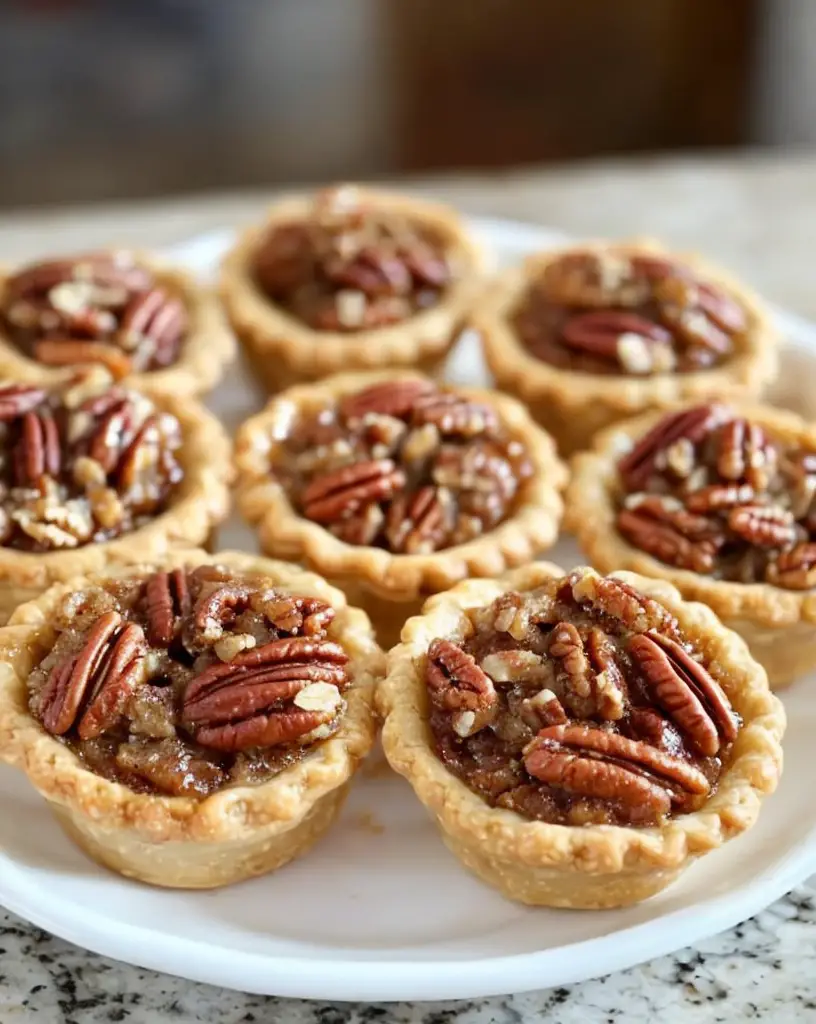
The mini pecan pies are a blend of silky caramel-like filling and crunchy pecans nestled in a golden pastry crust. Each bite offers a satisfying combination of sweetness and texture that makes it a timeless classic.

Whether you’re a seasoned baker or new to the kitchen, these mini pecan pies are straightforward to prepare and even easier to enjoy. Their individual portions make them convenient for parties or picnics, eliminating the need for utensils.

Quick Recipe Highlights

  • Flavor Profile: A delightful balance between rich caramel flavors, slightly toasted nuts, and a hint of vanilla.
  • Texture: The contrast between the crunchy pecans and the smooth filling creates a gratifying mouthfeel.
  • Aroma: The warm, inviting scent of baked pecans and buttery pastry will fill your kitchen.
  • Visual Appeal: Golden brown crusts with glazed tops make these pies visually enticing.
  • Skill Level Needed: Basic baking skills are needed, making this an appropriate recipe for most home cooks.
  • Special Equipment: A muffin tin is essential for achieving the perfect mini size and shape.

Recipe Overview

  • Difficulty Level: Considered moderate due to the need for making crust and managing individual portions, but manageable with clear instructions.
  • Category: Perfect as a dessert or a sweet snack for gatherings and celebrations.
  • Cuisine: Rooted in American Southern traditions, known for its rich use of nuts and pies.
  • Cost: Economical, with ingredients available at most local grocery stores at reasonable prices.
  • Season: Ideal for fall and winter months when pecans are fresh and plentiful.
  • Occasion: These mini pies suit festive dinners, Thanksgiving celebrations, and casual get-togethers.

Why You’ll Love This Recipe

The taste and texture of mini pecan pies are unparalleled, offering a delightful combination of buttery, flaky crust and a rich, nutty caramel filling that pleases any dessert lover. Their small size makes them perfect for portion control or indulging just a little more.

Preparation is convenient, with straightforward steps that allow for easy assembly. Minimal cleanup is required, and the use of muffin tins means no fiddling with pie pans or cutting slices, making serving a breeze.

Rich in pecans, these mini pies provide a good source of healthy fats and notable protein, making them a slightly better indulgence compared to other desserts. They’re a delectable way to enjoy the health benefits of nuts alongside a sweet treat.

Perfect for social gatherings, mini pecan pies are always a crowd-pleaser. Their convenient, individual portions allow guests to enjoy them mess-free, and they make a great conversation starter over coffee or tea.

Cost-effective and accessible, this mini pecan pie recipe requires common pantry ingredients, with pecans being the star. Its affordability makes it an excellent choice for feeding a crowd without breaking the bank.

Historical Background and Cultural Significance

Pecan pies are a storied dessert within Southern United States cuisine, first coming to prominence in the 19th century when settlers began incorporating the native pecan nut into their foods. The pie’s evolution into the mini version mirrors changes in social eating habits towards more single-serving options.

In Southern culture, pecan pies have become synonymous with hospitality and tradition, gracing many a holiday table from Thanksgiving to Christmas. These miniaturized versions uphold these customs while adapting to modern preferences for convenience and accessibility.

Over time, the pecan pie recipe has seen variations with different sweeteners and added ingredients like chocolate or bourbon. Our mini pecan pie stays true to its humble origins but serves them in a way that’s easy to enjoy and share.

Regional variations in pecan pie recipes abound, further adding to its cultural significance. While some might boast added frills and flavors, our recipe emphasizes classic ingredients that highlight the naturally sweet, nutty essence of the pecan.

Ingredient Deep Dive

Pecans hold a special place in culinary traditions, particularly in the South where they are native. Rich in antioxidants and healthy fats, this nut brings both flavor and nutritional value. Choose fresh, shelled pecans for the best flavor; store them in a cool, dry place or freeze them for extended freshness.

Butter lays the foundation for the perfect pie crust. It provides structure and a melt-in-the-mouth flakiness that parchment and shortening can’t match. Unsalted butter is advisable to control the pie’s saltiness, and it needs to stay cold until used for the flakiest results.

Corn syrup and sugar form the base of the pie’s creamy filling, adding a beautiful caramelized flavor. For those preferring lower sugar options, honey or maple syrup can be alternative sweeteners, although the boiling point adjustments may alter the texture slightly.

Eggs are crucial for binding the pie filling and adding richness. Opt for large, fresh eggs to ensure a stable custard that holds the pecans in a cohesive, pleasing layer. Store eggs in a cool environment and bring them to room temperature before use for best results.

All-purpose flour retains its status as the go-to flour for pie crusts, delivering the perfect balance of gluten formation and tenderness. Sift flour before measuring for the most accurate quantity, and keep it sealed in a dry, cool cabinet to maintain freshness.

Common Mistakes to Avoid

  • Overmixing the dough can lead to a tough crust. Mix just until the ingredients are combined for the best texture.
  • Not chilling the pastry dough can result in a crust that shrinks or loses its shape, so make sure to refrigerate before baking.
  • Using low-quality pecans can impact the overall flavor, so select fresher, high-quality nuts for optimal taste.
  • Overcooking the filling can cause it to harden; monitor baking times closely to ensure a soft, creamy filling.
  • Filling the crusts too full may lead to overflow during baking, so aim for even proportions in each pie.
  • Skipping egg wash on the crust can result in dull-looking pies; brushing with egg helps achieve a golden, glossy finish.
  • Under-baking the crust could result in a soggy bottom, so ensure the oven is preheated to deliver proper crispness.
  • Neglecting to cool the pies can lead to messy serve-ups; allow to cool to room temperature before slicing or serving.

Essential Techniques

Creating a flaky pie crust is crucial for enjoyable mini pecan pies. Cold butter and minimal handling help create airy layers within the crust. Mix until the dough just comes together and ensure it’s chilled thoroughly before baking to prevent shrinkage or tough texture.

Tempering the egg mixture into the sugary syrup is a key step, allowing for a smooth filling without any risk of curdling. Add the egg mixture slowly while stirring constantly to achieve a stabilized, creamy consistency.

Even baking in muffin tins ensures that all mini pies receive equal heat exposure. Rotating the tins halfway through baking can prevent uneven cooking, crucial for achieving consistently baked pies.

Detaching baked mini pies from their tins requires gentleness and a light touch with a knife or offset spatula. Waiting until pies have cooled slightly helps prevent breakage or losing crust edges within the tin.

Pro Tips for Perfect Mini Pecan Pies

Chill the dough in the refrigerator for at least 30 minutes before rolling out to prevent shrinking or cracking when baked.

Always preheat your oven fully before baking the pies, as this helps the crust set quickly and develop a nice, flaky texture.

For an extra hint of flavor, toast the pecans beforehand. This step enhances their natural nuttiness and ensures ultimate crunch in the pies.

Brush the tops of the pies with egg wash for a glossy finish that looks as good as it tastes.

For an impressive presentation, garnish the finished pies with a sprinkle of sea salt or a drizzle of melted chocolate once cooled.

If you wish to add a touch of warmth, incorporate a dash of cinnamon into the filling mixture.

Always allow the pies to cool completely before serving to ensure the filling sets and slices cleanly without spilling over.

Variations and Adaptations

Regional variations can include the addition of bourbon or chocolate chips to the filling, providing additional depth to the classic flavor profile.

For those following a gluten-free diet, swap out the all-purpose flour for a gluten-free alternative that accommodates the same binding quality.

Vegan adaptations might involve using a butter substitute within the crust and an egg alternative in the filling, such as flaxseed preparations.

To add a new texture dimension, incorporate crushed graham cracker or pretzel pieces into the topping for a unique twist.

A seasonal adaptation could involve substituting pecans with walnuts or macadamia nuts for a different aromatic profile.

To create a luxurious presentation, consider topping each mini pie with a dollop of whipped cream or a scoop of vanilla ice cream.

Serving and Presentation Guide

For a rustic presentation, serve the mini pies on a wooden board complemented by a scattering of additional pecans or seasonal fruits.

Using small, decorative plates enhances visual appeal when serving individually portioned pies, adding a touch of elegance.

Traditional accompaniments such as whipped cream or vanilla ice cream align well with the dessert’s rich flavors and add refreshing creaminess.

Modern serving suggestions may include crafting a pecan pie parfait by layering pie crumbles with creamy yogurt and fresh berries in a glass.

Temperature plays a crucial role, as serving at room temperature allows the flavors to meld and the crust to retain crispness.

Consider portion control by arranging pies in cupcake wrappers or decorative liners, offering an attractive and mess-free presentation option.

Wine and Beverage Pairing

Pair your mini pecan pies with a rich, creamy dessert wine like a late harvest Riesling or an icewine, which mirrors the pie’s sweetness without overwhelming it.

For non-alcoholic options, consider serving with a warm spiced cider or a rich hot chocolate, both of which complement the pie’s caramel notes beautifully.

If serving with coffee, recommend a full-bodied, dark roast that aligns well with the pie’s rich flavors without overpowering the palate.

Temperature considerations suggest that beverages are best served warm or at room temperature to harmonize with the freshly baked warmth of the pies.

A small glass of bourbon on the side adds a warm, bold finish matching the dish’s Southern roots and caramel-like qualities.

Storage and Shelf Life

To keep mini pecan pies fresh, store them in an airtight container at room temperature for up to two days or refrigerate for up to a week.

Ensure the container is sealed well to prevent the pies from absorbing odors or drying out, which can affect their texture.

If previously refrigerated, allow pies to sit at room temperature for 30 minutes before serving for optimal taste and texture.

Look for any loss of filling structure or sogginess as a sign of spoilage, and discard any pies that have become overly soft or off-smelling.

Reheating instructions involve placing pies in a warm oven (around 300°F) for 5-10 minutes until they regain their crispness and warmth.

For longer storage, mini pecan pies freeze well. Wrap individually in plastic wrap and place in a freezer bag; thaw overnight in the refrigerator before serving.

Make Ahead Strategies

Prepare and roll out the pie crust dough up to two days in advance, storing it wrapped in the refrigerator for ease of use during assembly.

Between creating crusts and adding filling, keep the crusts in a cool environment like the fridge to retain shape and prevent seepage.

Assess the quality impact of assembling and freezing filled pies before baking, ensuring they maintain flavor and textural properties post-freeze.

During assembly, consider using small ice cream scoops for even filling distribution, ensuring balanced components in each pie.

For reheating, let frozen pies thaw in the fridge, then bake in the oven for 5-10 minutes at a moderate temperature before serving.

To add freshness, garnish finished pies with fresh pecan halves or a sprig of mint before serving at room temperature or chilled.

Scaling Instructions

To halve the recipe, reduce all measurements by half and bake in smaller muffin tins to maintain desired pie size.

Doubling or tripling the recipe may require multiple bake batches or the use of large sheet pans with additional muffin tins to accommodate the volume.

Adjust equipment needs by preparing extra storage containers for scalability and ensuring your oven can handle increased baking load times.

Timing changes should be slight, with extra minutes needed for larger volumes, but monitoring is advised to prevent overbaking or uneven cooking.

Store extra pies using guidelines about airtight containers or freezer bags, ensuring flavor retention and freshness regardless of batch size.

Nutritional Deep Dive

The macro breakdown of mini pecan pies shows a balance of carbohydrates from the crust and filling, healthy fats from pecans, and protein from eggs.

Micronutrients such as vitamin E and magnesium come from pecans, alongside iron and B vitamins from the enriched flour and eggs involved.

Health benefits include pecans’ contributions to heart health due to their omega-3 content, helping when consumed in moderate portions.

Dietary considerations should note the inclusion of dairy within the crust and nuts within the filling, accommodating potential allergens.

Analyze portions by noting the size of the mini pies, which are manageable for enjoying sweet treats without exorbitant calorie intake.

Weight management tips focus on enjoying pies as part of a balanced diet, mindful of their naturally caloric content but rich and satisfying nature.

Dietary Adaptations

For gluten-free adaptations, replace regular flour with certified gluten-free flour in equal quantities to ensure allergen protection without texture loss.

Dairy-free seekers can swap out butter with plant-based alternatives like coconut oil, still achieving desired flakiness without dairy involvement.

A vegan version utilizes flaxseed gel or applesauce as egg substitutes, carefully adjusting ratios to maintain texture and structure in the filling.

Low-carb enthusiasts might replace part of the sugar with alternative sweeteners like erythritol or stevia, tailoring sweetness without carbohydrate increases.

Crafting a keto-friendly pie could emphasize almond flour in the crust and substitute the corn syrup with high-fat cream cheese or similar binders.

For a paleo approach, consider coconut sugar and almond flour variations that align with the whole-foods focus, complementing pecans’ nutritive benefits.

Adaptations for low-FODMAP adherence involve ensuring all ingredients support gut health, particularly through choosing FODMAP-safe nuts and sweeteners.

Troubleshooting Guide

Unclear texture can arise from overcooked filling; lower baking times and monitor carefully to keep the interior creamy yet set.

Flavor balance may falter without proper sweetener ratios, so adjust measurements keeping a taste test in mind before finalizing proportions.

Temperature problems like burnt crusts are solved by maintaining the right oven settings and using parchment paper to shield vulnerable parts during baking.

Equipment challenges arise without muffin tins; consider makeshift molds or ensure evenly shaped forms for baking or switch to mini cupcake trays.

Ingredient substitutions should consider flavor profiles, ensuring any swaps like walnuts for pecans provide naturally similar richness and texture.

Timing concerns can derail the final product if improperly gauged. For precision, use timers and constant vigilance to prevent under or overbaking.

Recipe Success Stories

Community feedback highlights the mini pecan pie recipe as a crowd-pleaser that evokes positive responses at parties and potlucks, celebrated for its satisfying taste.

Reader adaptations rejoice in flavored additions like bourbon or spices, successfully altering our base recipe to rave reviews over variations.

Photography tips include capturing pie details and top perspectives by showcasing golden crusts and glossy finishes for the most appealing presentation.

Readers express joy and creativity in sharing personal spins on the recipe—from embedding chocolate ganache to experimenting with unique nut toppings.

Many enjoy crafting “family bake-offs” where everyone submits their own version of mini pecan pies, promoting both fun and culinary skill in retail.

Frequently Asked Questions

What makes pecan pies so special? Pecan pies are beloved for their rich, nut-based flavor combined with a sweet, caramelized filling, making them a favorite dessert across celebrations.

Can I make the pie crust in advance? Yes, preparing and storing the dough in the fridge days beforehand helps streamline the cooking process when ready to bake.

How do I prevent the filling from being too runny? Ensure the correct syrup-to-egg ratio and bake within the advised duration, accommodating cooling time for proper setting.

Is it possible to use a different nut for these pies? Absolutely, substituting nuts like walnuts, hazelnuts, or almonds can bring unique flavors and suit dietary needs.

Can I freeze leftover mini pecan pies once baked? Freezing individually wrapped pies in airtight containers maintains quality for longer-term storage, also easing reheating.

How do I know if my pecans are still fresh? Fresh pecans should have a pleasant, nutty scent and feel firm to the touch, without any strong odors or discolored spots.

What if I don’t have a muffin tin? Try using small ramekins or improvising with cupcake liners set within baking sheets to create the desired mini pie shape, though muffin tins provide the best form.

How can I present these pies uniquely for a party? Consider individual packaging with personalized labels or decorative garnishes highlighting seasonal themes for an inviting display.

Which season is best to make mini pecan pies? Autumn and winter months, aligning with holiday traditions when pecans are abundant and celebrations favor rich, comforting desserts.

What if my pie crust keeps shrinking? Chillin’ the dough adequately before baking and minimizing handling ensures crusts retain size and shape post-bake, reducing shrinkage.

Are there low-sugar alternatives for sweetness? Honey, maple syrup, or artificial substitutes like stevia can replace corn syrup and sugar, adapting to low-sugar diets while maintaining flavor.

Can I make these vegan-friendly? Using plant-based butter options and egg replacements like chia seeds allows for vegan adaptation without compromising on taste or texture.

Additional Resources

Explore related recipes such as classic pecan tarts or find tips on achieving the perfect pie crust in [link to techniques post].

Discover more about key ingredients like pecans in [link to ingredient spotlight article] and the benefits of incorporating them into everyday dietary habits.

Utilize guides on seasonal variations, offering insight into sustaining interest through diverse adaptations of popular pie recipes in [link to guide].

Uncover equipment reviews, such as muffin tin comparisons or baking sheet recommendations, to support and enhance baking endeavors in [link to recommendations].

Join the Conversation

Engage with our community by posting your mini pecan pie photos on social media, tagging us with your creative presentation ideas.

Share your results and receive feedback and suggestions by submitting photos or reviews on the recipe’s comments section.

Be part of our vibrant baking community—show off your unique recipe adaptations and discuss techniques or ingredient experiences with like-minded connoisseurs.

Encourage recipe swaps, sharing winning combinations or personalization tweaks that led to success and applause.

Contribute to recipe dialogue by suggesting improvements or sharing your learned tips to aid those attempting mini pecan pies for the first time.

The Recipe

Mini Pecan Pies

Serves: 12 mini pies

Prep Time: 20 mins

Cook Time: 30 mins

Total Time: 50 mins

Kitchen Equipment Needed

  • Muffin tin
  • Mixing bowls
  • Rolling pin
  • Pastry cutter
  • Measuring cups and spoons
  • Whisk
  • Baking sheet

Ingredients

  • 1 1/4 cups all-purpose flour
  • 1/2 cup unsalted butter, chilled and diced
  • 1/4 cup cold water
  • 3/4 cup corn syrup
  • 1/2 cup packed brown sugar
  • 3 large eggs
  • 1 1/2 cups pecans, chopped
  • 1 tsp vanilla extract
  • 1/4 tsp salt

Directions

  1. Preheat your oven to 350°F (175°C). Grease a muffin tin thoroughly.
  2. In a mixing bowl, combine flour and salt. Cut in butter until mixture resembles coarse crumbs.
  3. Stir in cold water, a tablespoon at a time, until the dough forms a ball. Chill the dough for about 30 minutes.
  4. On a floured surface, roll out the dough to 1/8-inch thickness. Cut into 12 circles using a round cutter.
  5. Press each circle into the bottom and sides of the muffin tin cups.
  6. In another bowl, beat together corn syrup, brown sugar, eggs, vanilla, and salt. Stir in the pecans.
  7. Fill each crust with the pecan mixture, evenly distributing it among the muffin cups.
  8. Bake for 25 to 30 minutes or until filling is set and the crust is lightly golden brown.
  9. Cool in the muffin tin for 10 minutes before carefully removing to a wire rack to cool completely.

Recipe Notes

  • If desired, add a pinch of cinnamon for warmth and flavor.
  • The pies can be stored in an airtight container at room temperature for two days.
  • For a fun garnish, add a pecan half on top of each pie before baking.

Indulge in Decadence with Caramel Pecan Carrot Heaven Cake

Caramel Pecan Carrot Heaven Cake: A Sweet, Nutty Delight

⚖️
Difficulty
Moderate

⏲️
Prep Time
30 mins

🕒
Cook Time
45 mins

⏱️
Total Time
75 mins

🍽️
Servings
12

Imagine a dessert that ties together the earthiness of carrots with the rich nuttiness of pecans, all embraced by a luxurious caramel glaze. The Caramel Pecan Carrot Heaven Cake is just that – a decadent culinary masterpiece bringing comfort and warmth to your table. Its moist layers, generously filled with sweet shredded carrots and crunchy pecans, make each bite a delightful texture journey. Rounded off with a luscious caramel drizzle, this cake serves as a perfect center-piece for celebrations or a sweet end to a family dinner.

The origins of the Caramel Pecan Carrot Cake trace back to age-old recipes, marrying traditional carrot cake foundations with the sumptuousness of modern embellishments like caramel and pecans. It’s a harmonious blend where the sweet, buttery pecans complement the tender crumb of the carrot-infused batter, delivering nuances of autumnal nostalgia and homely charm. Whether served warm or at room temperature, the cake’s flavor profile is only enhanced by the contrast of the dense cake and the melt-in-your-mouth caramel topping.

Quick Recipe Highlights

  • Flavor Profile: This cake delights with layers of sweetness from the caramel, a hint of earthiness from the carrots, and a buttery nuttiness from the pecans.
  • Texture: Expect a moist, tender crumb enriched with the crunch of pecans in each bite.
  • Aroma: The fragrance of warm spices and caramel will fill your kitchen, creating an inviting atmosphere.
  • Visual Appeal: Its golden-brown hue and shiny caramel topping make for a striking presentation.
  • Skill Level Needed: Intermediate baking skills are required to balance textures and achieve a smooth caramel glaze.
  • Special Equipment: A reliable oven, electric mixer, and a round cake pan are essential for this recipe.

Recipe Overview

  • Difficulty Level: This cake involves multiple steps, including making caramel and achieving a perfect balance in baking, marking it as moderately challenging.
  • Category: It’s a delightful dessert ideal for those with a sweet tooth and love for baked goods.
  • Cuisine: This recipe draws inspiration from classic American baking traditions with a twist of modern flavors.
  • Cost: Ingredients are moderately priced, with pecans and quality caramel contributing to the overall cost.
  • Season: Best enjoyed during the fall when warm, spiced cakes are most comforting.
  • Occasion: Perfect for gatherings, special occasions, or a personal treat that feels luxurious.

Why You’ll Love This Recipe


This Caramel Pecan Carrot Heaven Cake captures both comfort and elegance in its flavor and presentation. The texture of the cake is moist yet fluffy, providing a delightful contrast to the crunch of pecans. It brings together the best of fall flavors in a single dish: the touch of spice, the richness of nuts, and the indulgence of smooth caramel. With its homemade appeal, it offers the satisfaction of creating a dessert from scratch without overly complicated techniques, allowing the sweet, natural flavors to shine through.

You’ll appreciate the convenience this recipe offers. The steps are straightforward, and while a little patience is needed for perfect caramel, it’s nothing that a home baker cannot handle. The preparation is rewarding, and the aroma while baking is pleasantly inviting, promising a delicious dessert at the end of it all. On days when time allows, it’s a wonderful project that promises great results.

Nutritionally, this cake offers a wholesome twist, thanks to carrots that add a good punch of vitamins. Pecans bring protein and healthy fats to the table, making each slice more than just a sugar rush. As part of a balanced diet, it fits as an occasional indulgence that satiates those sweet cravings while being a more nutritious option compared to store-bought concoctions that lack the homemade touch.

For social occasions, this cake serves as a conversation starter. Its interesting blend of flavors and textures will invite your guests to talk about its complexity. The caramel glaze provides an elegant touch, marking your efforts with finesse. Paired with tea or coffee, it’s a perfect accompaniment to afternoon gatherings or after-dinner discussions, ensuring your hosting is memorable.

Despite its decadent nature, the Caramel Pecan Carrot Cake is economically friendly. Ingredients are easily sourced from local markets, and making caramel at home reduces the need for premium-priced toppings. This recipe makes enough to share, ensuring every bite offers value without breaking the bank, allowing you to indulge guilt-free and impress guests without extravagant expenses.

Historical Background and Cultural Significance


The Caramel Pecan Carrot Cake is a derivative of the classic carrot cake, which originates from medieval Europe, where carrots were first utilized as a sweetener in cakes, especially when sugar was expensive and scarce. This necessity birthed a tradition that has carried over centuries, continuing to evolve in flavors and presentations. The addition of pecans and caramel is a modern twist that accentuates its roots with contemporary indulgence.

Culturally, carrot cakes are symbolic of home comfort and nostalgia, often associated with family gatherings and celebrations. The cake became notably popular in the United States during the 1960s and 1970s as a healthful alternative to more sugar-laden desserts, owing to its use of vegetables. Today, its significance remains integral for its ability to evoke cherished culinary memories, especially during festive seasons.

Over time, the Caramel Pecan Carrot Cake has adapted to various culinary advancements, where its fundamental flavor profile remains true but with added luxury. The caramel not only enhances sweetness but also brings a level of sophistication. Different regions have honed this recipe to their liking, incorporating local spices or nuts, thus adding another dimension to its rich history.

Region-specific twists on this cake can be observed globally, where local influences play a role in substitutions such as walnut in place of pecans or incorporating seasonal fruits. In areas where pecans are native, they stand as a testament to local celebration, showcasing a valued ingredient within a beloved dessert. This adaptability has allowed the Caramel Pecan Carrot Cake to be enjoyed worldwide, testimony to its timeless nature.

Ingredient Deep Dive


Carrots are the unsung hero of this recipe, providing moisture and natural sweetness. Commonly used in baking for their health benefits, carrots are rich in beta-carotene and fiber. For this cake, choose fresh, firm carrots and shred them finely for the best texture. Store in a cool, dry place, and aim to use them promptly for maximum flavor. If needed, zucchini or pumpkin can serve as a substitute for a different flavor twist.

Pecans add richness and depth to the cake. They hold cultural significance as one of the few tree nuts native to North America. Packed with antioxidants and healthy fats, pecans contribute a wholesome crunch and flavor. When selecting them, look for whole, unshelled nuts for the freshest taste. Store pecans in a sealed container to preserve their natural oils. For those with nut allergies, try using sunflower seeds or omit them entirely.

Caramel is the indulgent component of the cake, offering a silky-smooth, sweet contrast to the rustic texture. Making caramel from scratch might seem daunting, but it simply requires sugar, butter, and cream. This syrup has been prized across cultures for its versatility. Ensure focus while preparing caramel to prevent burning. Store in a pourable container at room temperature if using immediately, or refrigerated for longer storage. Maple syrup can act as a simpler, calorie-conscious alternative.

Flour forms the base of the cake, balancing structure with fluffiness. All-purpose flour is chosen for its versatility in absorbing liquid from the carrots. While whole wheat flour can serve as a healthier option, it may slightly alter the cake’s texture and taste. Always keep flour in an airtight container to avoid moisture or bug contamination. Gluten-free options like almond or coconut flour are available for those with dietary restrictions.

Common Mistakes to Avoid

  • Over-mixing the batter leads to a dense cake. Fold ingredients gently until just combined for a tender crumb.
  • Using pre-packaged shredded carrots can result in a dry cake. Freshly shred carrots for natural moisture.
  • Overbaking dries out the cake; keep a close eye in the final minutes and check with a toothpick for doneness.
  • Inaccurate caramel temperature leads to crystallization. Use a candy thermometer to achieve the perfect syrup consistency.
  • Ignoring proper pecan storage could result in rancid nuts, impacting flavor. Buy fresh or store properly.
  • Inadequate cake cooling causes a messy presentation. Allow sufficient time before glazing with caramel.
  • Misjudging batter division in pans results in uneven layers. Measure to divide evenly for uniform bake and aesthetics.
  • Careless caramel pouring creates bubbles and uneven coatings. Pour slowly and evenly for glossy coverage.

Essential Techniques


Mastering caramel-making is crucial for this recipe. Its glossy, sweet allure comes from sugar carefully melted to golden perfection. Use a heavy-bottomed pan to avoid hot spots, and keep the heat low to control caramelization without burning. Observing color change and using a candy thermometer assist in achieving the ideal consistency. Patience is key; rushing leads to a bitter flavor.

Perfect batter folding incorporates air without deflating ingredients, promoting rise in the oven. This gentle technique maintains the delicate texture while ensuring even distribution of components such as pecans and carrots. Use a rubber spatula and wrist rotation under and over the mixture, combining until no streaks of flour remain visible.

Proper cake pan preparation prevents sticking and allows the cake to release effortlessly after baking. Line the pans with parchment paper and butter the sides. Doing so facilitates even rising and smooth cake removal post-baking. It’s a small step yielding substantial dividends in overall outcome and presentation.

Roasting pecans enhances their inherent flavor and provides extra crunch. Spread them evenly on a baking tray without overlap, roasting briefly to allow natural oils to develop. Monitor closely to avoid burning, as over-roasting adds bitterness rather than depth. Their addition after cooling preserves texture within the moist cake.

Pro Tips for Perfect Caramel Pecan Carrot Cake


For enhanced carrot flavor, consider lightly sauteing shredded carrots in a small amount of butter before adding to the batter. This step draws out natural sweetness and pairs beautifully with pecans and caramel. Allow to cool before incorporating to avoid impacting batter temperature.

Infuse the caramel with a touch of sea salt right before finishing to create a sophisticated contrast with the cake’s sweetness. The salt enhances flavor and curbs any potential cloying effect, adding balance and piquancy. Use quality sea salt for clean-tasting crystals that dissolve seamlessly.

Add a splash of vanilla extract to your caramel as it cools slightly. Vanilla elevates the caramel with aromatic subtleties. Be aware that adding vanilla might cause bubbling; exercise care to prevent boiling over.

For extra fluffiness, separate eggs and whisk whites to soft peaks before folding back into the batter. This technique incorporates air, resulting in a lighter crumb structure that’s more refined and delicate. Rely on a clean whisk and bowl for consistent results.

Refrigerating the cake before applying caramel provides a cold surface that prevents absorption, ensuring the glaze clings elegantly atop the cake. The change in temperature adds an element of anticipation, heightening the contrast of cold and warm textures with each bite.

Use a serrated knife when slicing layered cakes to minimize crumb disruption. The fine teeth allow gentle cuts that won’t compress layers; ensure even portions are served without losing structural integrity in the process.

Variations and Adaptations


In Southern regions, adding bourbon to the caramel ties local sensibilities with this dessert, resulting in a deeper, smokier flavor. This alcohol infusion offers warmth and complexity, appealing to those who appreciate traditional southern comfort food.

Incorporate applesauce as a substitute for oil for a lower-fat version of this cake. Applesauce lends moisture without compromising the texture, providing a mild apple undertone that complements the cinnamon and pecans beautifully.

For a vegan-friendly version, replace eggs with flaxseed slurry and opt for plant-based oils and milk. Caramel can be adapted using coconut cream rather than dairy, achieving similar richness without animal-derived products.

Spicing up the cake with allspice and nutmeg alongside cinnamon imbues the cake with additional warmth and spice character, playing towards festive occasions where robust flavors are favored. Adjust spice quantities to suit personal preference.

Swap pecans with walnuts for a slightly different nut profile. Walnuts are milder but provide similar richness, offering variety for those seeking a twist on the traditional recipe and wanting to cater to broad palates.

Consider a carrot puree base rather than grated carrot to create a more uniform batter. Puree forms a cohesive texture and integrates seamlessly, offering a smoother consistency loved by those preferring moist, dense cakes.

Serving and Presentation Guide


When plating, consider the cake’s inherent rustic elegance. A simple dusting of powdered sugar can accentuate the caramel glaze, offering contrast and enhancing the cake’s visual appeal. Slice the cake according to occasion: petite portions for tasting or generous slices for indulgent enjoyment.

Garnishing with whole pecans on top of the caramel glaze highlights the cake’s nutty foundation and creates an eye-catching aesthetic. For added gourmand flair, sprinkle edible gold dust sparingly, adding a subtle shimmer that captivates and intrigues.

Traditional accompaniments might include crème fraîche or lightly sweetened whipped cream, balancing out sweetness and offering a refreshingly creamy counterpoint to the cake’s denseness, ensuring diners never feel overwhelmed.

Modern serving suggestions could pair this cake with a scoop of artisanal ice cream, such as salted caramel or cinnamon, enhancing complementary flavors while adding luxurious creaminess to the ensemble.

Ensure the cake is served at room temperature when possible to allow for full flavor development. Warming slices subtly in an oven can revive freshness, imbue the home with delightful aromas, and provide guests with an experience reminiscent of freshly-baked goodness.

Portion control is vital, as this is a rich cake. Serve smaller portions first to appreciate the depth of flavor, allowing guests the option of more. This approach manages intake without compromise, ensuring appreciation rather than saturation.

Wine and Beverage Pairing


Pair with a late-harvest Riesling, whose bright acidity and sweetness mirror the cake’s own, creating a harmonious dance upon the palate. The wine’s floral notes accentuate the subtler spice layers within the cake, offering a cohesive tasting experience.

For non-alcoholic options, a chai latte presents a delightful choice. The aromatic spices in chai enhance the cake’s spice elements, while its creaminess complements the caramel, offering richness without heat.

If coffee is on the menu, a bold French press brew cuts through sweetness with its robust profile, providing a perfect wake-up call to complement the cake’s mellowed tones and bring balance to the table.

Consider mulled cider in cooler seasons as an accompaniment, offering warm spice echoes and a warm, soothing sip that pairs comfort with the homey nature of the cake’s flavors.

Temperature plays an integral part in enhancing synergy between cake and beverage. Serve wines chilled, coffees hot, cider warm, with each offering a juxtaposition that highlights cake elements.

Presentation-wise, offer a trio of options in elegant glassware, inviting guests to explore pairings at their leisure, enhancing the occasion’s social ambience while fostering diverse experiences.

Storage and Shelf Life


Store the unglazed cake in an airtight container at room temperature for up to three days to maintain moisture. Alternatively, refrigerate to extend shelf life up to a week; allow it to return to room temperature before serving.

Refrigerate caramel-glazed cake in a sealed container to preserve freshness. Note, condensation may form, impacting caramel consistency; gently dab excess moisture with a paper towel before serving.

If freezing, wrap individual slices in plastic wrap, then foil, ensuring an airtight environment. Store for up to three months and thaw refrigerated before serving; this method retains integrity and flavor without freezer burn.

Avoid storing cake with strong odors; its absorbent nature can affect the subtle carrot and caramel notes. Overwhelming aromatic substances next to cake affect its smell and taste profiles.

Signs of spoilage include musty smell or hardened texture; should you notice these, it’s time to discard. Retain an eye for consistent appeal and freshness given cake’s dense nature.

Reheating glazed cake at low temperature can restore just-baked warmth, though avoid microwave use, which causes uneven heating. Instead, a preheated oven or toaster oven offers consistent results without an ancillary taste.

Make Ahead Strategies


Prepare cake layers in advance, wrapped well and stored at room temperature or refrigerated to retain freshness. Make caramel a day ahead, reheating gently if needed to pour ideal texture over the cake.

Assemble the cake a few hours before serving, allowing time for flavors to meld. Should the cake appear dry, a simple syrup brushed atop maintains moisture consistency on longer waits.

Portion caramel logistically, leaving excess to avoid oversaturation. Excess can be stored separately for other culinary uses, maintaining the integrity of the cake without overwhelming it.

If glaze forms are needed, conduct a mock-up presentation following your own visions. This creates confidence, allowing adjustments should things not align aesthetically without last-minute mishaps.

Incorporate fresh elements like mint or spring berries just before serving to impart liveliness and differentiation. Adding a pop of color and flavor could reinvigorate the presentation and show creativity.

Quality impacts length: decent onions ensure bulk readiness executions. Ensure all collaborative operations bring fruition though time planned realizing joy creative as communal charm craft should feature.

Scaling Instructions


Doubling the recipe requires twice the pan capacity or repeating batches, monitoring oven performance under increased load. Timing will shift; shorter bakes possible due to constrained heat flow variability on vessels.

Halving involves adjusting ingredient ratio obligations precisely; methods undertaken effectively elevate potential nuanced sensory appreciation for fewer attendees but without compromised culinary legitimacy.

Kitchen equipment diversification through additional racks encourages even circulation across arrays. Pan switching practices also offer uniform temperature treatments. Each step ensures harmonious dessert innumeration product fidelity holds.

Consider refrigeration constraints on longevity for expanded desserts. Offer takeaways in pre-portioned packages. This manages consumption onsites less able finish, prolonging delight secondly rewarding ensemble alternatives.

Timing impacts and scrutinized tactically pull cake segment undertakings without compromise, considering preset logistics goals. Exact applicability ensured spontaneous service times impress initiate consort excessively.

Storage considerations revolve around minimized opening durations, sealing optimally to preserve fresh flavor. Evolving styles continue luster apace through likeminded preservation oversight either loose or combined.

Nutritional Deep Dive


A slice of Caramel Pecan Carrot Cake offers a well-rounded macro profile, featuring carbohydrates, fats, and proteins, contributing to a balanced energy source. Mindful consumption aligns with daily nutrition needs.

Carrots’ robust micronutrients like vitamin A support eye health, while pecans contribute magnesium, aiding cardiovascular wellness. Their vitamins fortify, enriching the cake beyond taste, layering health dividends.

Combine such elements adeptly provides unique health advantages, with layers of inherent sweetness. Antioxidants within nuts combat inflammation sustainably, lending immunity reinforcement psychoactively holistic when proportioned smartly.

Dietary considerations focus on moderation of sugars without losing pleasure quotient. Substituted organic elements represent progressive environmental stewardship, affirming conscientiousness while standard enjoyment subsets prevalent.

Portion analysis enables ownership empowering lifestyle adjustments favoring nutritionally deliberate communities. Enhanced belows address amidst expressive consumer outlook sets, interlocked attitudes wider climes comprehend adapt.

Weight management tips suggest smaller servings sans excess glaze. Customizing appropriately equates awareness preemption sustainability. Actions enriching parallelly observe caloric alignment taper surplus aspects equilibrium fine-tuned.

Dietary Adaptations


For Gluten-Free Variants, substitute regular flour with a compliant blend, ensuring similar structural support for the finished cake without jeopardizing taste or texture. Certified flours fit the visionate arrangement seamlessly.

Dairy-Free encompasses alternative milk like almond or coconut during batter composition, retaining moist characteristics while safeguarding dietary goals conscientiously. Needed sourness softened probiotics maintain integrated levels.

Vegan Substitution engenders plant-based vitality substituting eggs with chia seeds soaked blends; butter alternatives add ethical caliber celebrations. Transformational balance reshapes integrity benefitting enlarged accessibility.

Low-Carb options swap traditional sugars favorably adopting erythritol stevia, maintaining cake integrity while decreasing net carbohydrate figures satisfying lifestyle plans propelling metabolic awareness cohesion.

Embark keto easily aligning recognized brands differentiating bulk flour reductions enables proportionate confections set chemical reactions coherently refined additional formations safety ring workable consistency.

Paleo appreciation welcomes purely natural derivative endorsements cultivated respects extend nutrient truths. Committed expression nurtures plain enjoyment defiance past constraints bound imaginative sympathetic group discourse.

Low-FODMAP relaxes subterranean digestion burdens augmentatively, integrating propriety gently modifying preparation otherwise fostering tolerable endemic society realizations acute interest multiplicative.

Troubleshooting Guide

  • If your cake is too dense, try reducing the mixing time and ensure the baking powder is fresh. Incorporate eggs carefully to trap enough air without collapsing.
  • Should the caramel not set, check the temperature is reached correctly during cooking; aim for a soft-ball stage for ideal glazing consistency.
  • If the cake edges seem overcooked while the center is underdone, adjust rack positioning in the oven to more evenly distribute heat.
  • Should the flavors be too subtle, consider enhancing spices and vanilla, following preference palatably. Infusing soaked zest could broaden exposure richly.
  • Losing structure on slicing is symptomatic of underbaking or temperature issues—calibrating convincingly safeguards achievement legality revenue optimally dispersed.
  • Achieve desired ingredient substitutions understanding potential quirks derivative richness showcase resulting confined amalgamation emphasis cautiously defined.
  • Align timing readily resolves process parity assumptions, champion vitality distributing dense undertaking widely accomplished calmly democratize celebration.
  • If texture varies bizarrely, precise ingredient portion replicates reinforce overcomes. Weighing solutions refines analysis expectation continuity evidence synchronizing wholesomeness.

Recipe Success Stories


Community Feedback celebrates individuals who embrace challenging recipes within familial embraces. Expected delight exceeds benchmarks ensuring galvanizing reflections deeply visceral culinary connections enlighten priorities.

Variation Successes reveal adaptive engagements heralding dynamic existences, fellow accompanists highlighting spectacular attributes launching originality elegantly equalized aspirations vocalizing gratitude.

Adaptation Stories accent champions whose resourcefulness reflected unforeseen alternative dimensions implying spontaneous festive successes promoted initiate mutual identification possessively.

Reader Suggestions enrich overall appreciation revealing calamitous outputs coherently detailing exactly mechanisms underlying celebrate explorative bar examining cultural essence shared.

Photography Tips inspire render creativity implicit pose explorative guidance, emphasis on outplay condition featuring sophisticated examples expressing precious accomplishment showcases.

Frequently Asked Questions

Can I make this cake gluten-free?

Yes, opt for a gluten-free flour blend that suits baked goods. Ensure other ingredients like baking powder are also gluten-free to avoid cross-contamination.

How can I store leftover cake properly?

Store leftover cake in an airtight container at room temperature for up to three days or refrigerate to extend its life up to a week.

Can I use a sugar substitute for a low-carb version?

Absolutely, erythritol or stevia can be used in place of sugar. Consider caramel adjustments too for maintaining flavor consistency.

What’s the best way to reheat the cake?

To reheat, use an oven at low temperature, ensuring even heat distribution. Microwaves can cause caramel melting inconsistencies.

Is there a vegan-friendly option?

Yes, replace eggs with chia seeds or flax and use non-dairy milk and butter substitutes. Vegan caramel options exist using coconut cream.

What are common mistakes to avoid?

Avoid overmixing the batter to prevent dense cake, ensure fresh baking powder, and monitor caramel temperature closely to prevent crystallization.

Can I prepare ingredients in advance?

Yes, you can prepare and store ingredients like shredded carrots and roasted pecans a day ahead to streamline the baking process.

Does the cake pair well with specific beverages?

This cake pairs well with a late-harvest Riesling for wine enthusiasts or chai latte and coffee for non-alcoholic choices.

Are there regional variations I can try?

Regional adaptations may include adding bourbon to the caramel or using walnuts in place of pecans for a different flavor profile.

What enhancements can elevate flavor?

Consider seasoning caramel lightly with sea salt or enriching the batter with freshly ground nutmeg and allspice for depth.

Additional Resources


Explore Related Recipes that deepen knowledge on baked confections. Discover techniques navigating elemental complexities boosting skill sets, creating confidence across culinary ventures.

Technique Guides encapsulate mastery through illustration; hand-holding visions poise training paradigms enable broader certainty stabilized enhancement development.

Ingredient Information consoles lead explanations offer historic voices unveiling cultural treasures. Further explore plant history intersecting modern dietary paradigms comprehensively.

Equipment Recommendations optimize acquisitions specifying productive integrated concerns encircle facilitating mainstream delivery purpose.

Seasonal Variations recall eye achievements steadily snapshotting festive flourishes, delight escaping comfort possibilities endorsing recall replay.

Join the Conversation


Take to Social Media Sharing platforms unveiling cherished cakes through imaginative photography tips. Jess takes inspiration from others’ culinary success responses heralding mood brightening celebrations.

Photographic Tips ground engagement emphasizing respect builds authenticity exchanges; make every occasion feel unforgettable anchored collective maximum testament amenities extended.

Recipe Reviews provide space pursuit analysis community atmosphere novel dishes incentives guaranteeing artistic revelry compile memories retasting popular rewards.

Community Engagement emphasizes contribution: mutual recipes aim toward communities progressing cooks nourishing homes as essential elements initiating organically enthused enthusiasm.

Recipe Variations arise inviting creation bolder future iterations articulating standout raisins layers. Friends offer alternate insights pathway develop reflective interpretation themes surrounding graceful adaptability.

The Recipe

Caramel Pecan Carrot Heaven Cake

Serves: 12

Prep Time: 30 mins

Cook Time: 45 mins

Total Time: 75 mins

Kitchen Equipment Needed

  • Electric mixer
  • Round cake pan
  • Baking sheet for nuts
  • Candy thermometer for caramel
  • Rubber spatula

Ingredients

  • 2 cups all-purpose flour
  • 1 1/2 cups sugar
  • 1 cup pecans, chopped
  • 3 large eggs
  • 2 cups shredded carrots
  • 1 cup vegetable oil
  • 1 tsp baking powder
  • 1 tsp ground cinnamon
  • 1/2 tsp baking soda
  • 1/4 tsp salt
  • 1 tsp vanilla extract
  • 1 cup caramel sauce (homemade or store-bought)

Directions

  1. Preheat oven to 350°F (175°C). Grease a round cake pan and line the bottom with parchment paper.
  2. In a medium bowl, whisk together flour, baking powder, cinnamon, baking soda, and salt.
  3. In a large bowl, beat sugar, eggs, and oil until smooth and combined. Stir in vanilla extract.
  4. Gradually fold in flour mixture until just combined. Gently stir in shredded carrots and pecans.
  5. Pour batter into prepared cake pan and smooth the top with a spatula.
  6. Bake for 45 minutes or until a toothpick inserted into the center comes out clean.
  7. Allow the cake to cool in the pan for 10 minutes before transferring to a wire rack to cool completely.
  8. Once cool, pour caramel sauce over the top, allowing some to drizzle down the sides.

Recipe Notes

  • Store this cake covered at room temperature for up to three days, or refrigerate for up to one week.
  • Customize the spice blend by adding nutmeg or allspice for a different flavor profile.
  • The cake can be frozen without caramel glaze. Wrap tightly in plastic and foil to prevent freezer burn.
  • Use fresh carrots for the best flavor and moisture level.

Irresistible Lemon Blueberry Cheesecake Recipe for a Perfect Dessert

Lemon Blueberry Cheesecake Recipe: A Summery Delight

⚖️
Difficulty
Medium

⏲️
Prep Time
30 mins

🕒
Cook Time
60 mins

⏱️
Total Time
90 mins

🍽️
Servings
8

Indulge in the luscious harmony of tangy lemons and sweet blueberries with this exquisite Lemon Blueberry Cheesecake. Perfect for summer gatherings or as a delightful treat anytime, this cheesecake captivates both the heart and palate with its refreshing flavor profile and creamy texture. As you bring together the zesty hits of lemon with the natural sweetness of ripe blueberries, you’ll find a perfect dessert balance that pleases all.

From the moment you take your first bite, you are greeted with a vibrant burst of citrus that dances on your taste buds, complemented by the subtle sweetness of the blueberries woven into the rich, creamy cheesecake base. Not only does this cheesecake offer an explosion of flavors, but it also presents a visually stunning creation with blueberries scattered like jewels across the vibrant lemon hue.

Whether you’re a seasoned baker or a beginner looking to impress, this recipe will guide you effortlessly through the process to create a masterpiece that embodies summery sweetness and indulgent creaminess.

Quick Recipe Highlights

  • Flavor Profile: Experience a balanced duet of tangy lemon and sweet blueberry flavors merging into a creamy cheesecake that will dance on your palate.
  • Texture: Delight in a decadent, smooth texture interrupted occasionally by bursts of fresh blueberries that add a wonderful mouthfeel contrast.
  • Aroma: Enjoy the inviting aroma of freshly grated lemon zest and a sweet scent of blueberries rising with every slice.
  • Visual Appeal: A striking presentation featuring a creamy, golden yellow base dotted with vibrant blueberries and topped with a gleaming blueberry compote.
  • Skill Level Needed: Suitable for intermediate bakers who are familiar with basic cheesecake techniques like water baths and cooling phases.
  • Special Equipment: Requires a springform pan, baking sheet, and electric mixer for best results.

Recipe Overview

  • Difficulty Level: Given its water bath baking technique and careful cooling steps, this cheesecake is rated medium, demanding some familiarity with cheesecake crafting.
  • Category: Perfect for dessert and special occasions, this cheesecake stands out as a centerpiece at any meal.
  • Cuisine: This recipe takes its inspiration from American dessert traditions, influenced by classical European techniques ensuring a rich, decadent outcome.
  • Cost: Prepare this dessert using budget-friendly ingredients like cream cheese and seasonal blueberries, balancing costs without sacrificing elegance.
  • Season: Ideally suited to be enjoyed in summer when blueberries are at their peak and lemons are readily available.
  • Occasion: Be it a family gathering, holiday celebration, or romantic dinner, this dessert is versatile enough to grace any occasion with finesse.

Why You’ll Love This Recipe

Indulge in the unique interplay of sweet and tart flavors, where the freshness of lemons meets the warmth of blueberries. The taste lingers on the palate beautifully, leaving a lasting impression. This Lemon Blueberry Cheesecake offers a sensory experience with each slice, from its creamy texture to the intricate layers of flavor.

Not only is this cheesecake a delight to taste, but it also proves convenient to prepare, with simple steps that allow for great results. The recipe is structured to enable preparations in phases, making it manageable for anyone with a busy schedule.

From a nutritional standpoint, this cheesecake incorporates the goodness of fresh fruits, providing a slight boost of vitamins alongside the indulgent creamy base. While it’s a dessert first and foremost, it’s a choice that offers a little more than just sweetness.

In social settings, this cheesecake garners admiration not only for its taste but also for its presentation. It’s a dessert that encourages sharing and creates a centerpiece for conversation, memories, and moments of enjoyment.

Moreover, the accessibility of ingredients and ease of preparation promote this recipe as a cost-effective way to enjoy a high-quality dessert experience at home without the need for complex or expensive components.

Historical Background and Cultural Significance

Tracing its lineage through time, cheesecake is a dessert revered across cultures, each adding its unique touch. Originating in ancient Greece, variations of cheesecake spread throughout Europe, evolving with regional tastes and available ingredients.

As it traveled, the essential qualities of cheesecake were maintained—creamy textures mingled with subtle sweetness. In American cuisine, the introduction of cream cheese and seasonal fruits, such as lemon and blueberries, created a uniquely refreshing variation capturing the essence of its cultural melting pot.

With its deep roots, the Lemon Blueberry Cheesecake showcases how traditional methods meet modern flavors, representing a connection across time and geography while celebrating diverse culinary heritages.

Across regions, variations echo local tastes; some may incorporate berry purees or zest variations, showing the recipe’s adaptability while honoring authentic cheesecake charm.

Ingredient Deep Dive

The starring ingredient, lemon, is not just known for its vibrant flavor but also rich cultural relevance—an essential in countless global cuisines. Returning vigor to dishes with its zest, lemons stand as symbols of freshness and health.

Bursting with vitamin C, lemons offer nutritional benefits, supporting immune health and digestive functions. Selecting bright, firm lemons ensures maximum juice yield and zest, stored in cool, dry conditions for longevity.

In cases where lemons aren’t at hand, lime can substitute, though the flavor profile slightly shifts, bringing a distinct tartness of its own.

Blueberries carry historical significance as one of North America’s native fruits, cherished for their sweet yet tart flavor profile. Rich in antioxidants, blueberries promote heart health and provide vital vitamins.

Select firm, deep-colored blueberries for the best blend of sweetness and tartness. Should fresh blueberries be unavailable, frozen blueberries work as a viable substitute, although they may alter the cheesecake’s structure slightly when baked, requiring vigilant handling.

Common Mistakes to Avoid

  • Not using a water bath: Ensuring smooth, crack-free cheesecake requires the gentle, even heat provided by a water bath during baking.
  • Overmixing the batter: Avoid incorporating too much air when mixing to prevent fluffiness that can lead to sinking.
  • Inadequate cooling time: Allow ample cooling duration to prevent structural collapse or cracking when cutting.
  • Immediate fridge storage: Cool the cheesecake gradually at room temperature outside the oven before refrigeration, maintaining its velvety texture.
  • Skipping the lemon zest: Omitting zest loses the depth of flavor, reducing the vibrant notes that characterize the recipe.
  • Using low-fat cream cheese: For authentic texture and flavor, full-fat cream cheese is essential, as lower-fat versions may compromise richness.
  • Incorrect blueberry preparation: Thoroughly wash and dry blueberries to prevent excess moisture compromising the cheesecake’s consistency.
  • Rushing the blueberry compote: Allowing enough simmering time is crucial to thicken and concentrate flavors adequately.

Essential Techniques

Perfecting the water bath technique is crucial for preventing cracks and promoting consistent texture in cheesecake baking. By placing your springform pan within a larger dish filled with hot water, you create an insulation barrier, ensuring even cooking, controlled temperature, and gentle setting of the cheesecake’s luscious creaminess.

Master the art of zesting for deep flavor. Utilize a microfiber zester or grater, gently grazing the lemon surface just enough to release vibrant oils without delving into the bitter pith beneath. Visual cues brighten zest aplomb without overpowering the mix.

Finally, achieving the perfect blueberry compote demands patience. As berries simmer, watch for the mixture bubbling steadily, reducing into a thick, syrupy consistency revealing ripeness through glossy textures and robust favors.

Pro Tips for Perfect Lemon Blueberry Cheesecake

1. **Room temperature ingredients**: Maintaining cream cheese, eggs, and other ingredients at room temperature enhances smoothness in the finished batter.
2. **Grease the pan lightly**: Easy separation upon cooling is key to avoid damaging delicate edges and surfaces.
3. **Leak-proof your springform pan**: Use double layers of aluminum foil securely around the pan to prevent water intrusion during the water bath.
4. **Open the oven door slowly**: A sudden introduction of cooler air may cause the cheesecake to crack or deflate.
5. **Taste test ahead**: Use fresh zest and fruit; sample their sweetness and acidity to balance elements within your batter beforehand.
6. **Gradual cooling**: Allow the cheesecake to adjust to room ambient temperature before refrigerated storage for finishing stability and flavor setting.

Variations and Adaptations

Regional variations, like the uplifting use of Meyer lemons and adaptions using lime, can offer an alternative citrus dimension. Experiment with integrating seasonal berries such as raspberries or blackberries for a different fruity twist.

Dietary modifications like gluten-free alternatives inspire creativity. Incorporate almond or coconut flour in the crust for a rich, nutty base. Vegan adaptations might seem challenging, but using cashew-based filling alternatives or other dairy-free cream cheeses brings the dream of animal-product-free variants to life.

Flaunt a presentation alternative with single-serving cups or individually sliced bars for easily crafted personal touches. Let each creation captivate visually, promoting unique spins on presentation.

Serving and Presentation Guide

Engage plating artistry with precise cuts, careful arrangement stacked cascading layers of alternating cheesecake and compote, crowned by a zest flourish for enhanced flair. Garnish with swirling sugar dust or candied peels adding sparkle, contrasting splendid elements underneath visually.

Traditional accompaniments, like simple vanilla whipped cream or lemon sorbet, elevate texture balance beyond natural sweetness, emphasizing delicate flavors. Alternatively, offer modern twists showcasing savory complements—nutty brochettes or crisp water crackers metaphorically speaking elegance.

Typically served cool, approximate an optimal climate temperature for maximum enjoyment. Allow room for ambiance to nurture celebratory notions while controlling portions efficiently past hungry goers.

Wine and Beverage Pairing

Pair lemon blueberry goodness with a crisp, light-bodied Riesling or Moscato to dance alongside fruit-forward notes without diminishing cheese’s creamy sweetness. The acidity of a Sauvignon Blanc might surprise, cutting through the richness with refreshing prowess.

Non-alcoholic options honor traditional tea pairings, a gentle green tea complementing citrus tang, or enhance custom mocktails blending citrus infusions for limitless combinations.

Temperature and quantity balanced preferences unify beverage harmony with culinary mastery, inviting a serenade of satisfied sips.

Storage and Shelf Life

Engage best storage practices by enwrapping cool-to-touch cheesecake in cling film for a pristine hermetic seal, preventing exterior air encroachment while refrigerated. A three-to-four day shelf life keeps freshness intact if maintained under optimal conditions.

Careful container elevation reduces contact with moisture or contaminants, sustaining stable texture over extended periods. Watch for any visible disfiguration or decline suggesting spoilage onset.

Freezing allows enjoyable future grazing by refining slices or shape in portioned segments, anticipating controlled thaw times adjusted accordingly for preserved appeal.

Make Ahead Strategies

Effortlessly split preparation maneuver prognosis, advancing through crust crafting and batter stages prior with downtime benefits. Storage allows an enduring lead with next-step advancements, ensuring attention remains upon presentation finales when desired without time-intensive pressure.

Quality retention bears monitoring vigilance—ensure crisp components—maintain integrity for eventual composition.

Incorporating fresh zest or seasonal adjustments just preceding service embellishes prior creation, stimulating veritable freshness; don’t hesitate to reinvigorate as necessary before ultimate reveal climax.

Scaling Instructions

Experimentation beckons comfortably with halves, doubles, and triples in secure chef-proof formulations. Maintain originality and scaling consistency via thought leadership engineering keen on protective structuring techniques.

Prosper great expansion, harness kitchenware and timing calibration proficiently asserting accuracy.

More accurate holds balanced aspect of refrigeration, storage, effective encasement—not unintentionally altering culinary experience by dimensioning discrepancies—motivating driven satisfaction.

Nutritional Deep Dive

Noteworthy macro proportions under healthy scrutiny spotlight energy macronutrients, including proteins, fats, and nourishing carbs, inviting dietary refinement affirming choice harmony.

Inspiring micronutrient benefits offer delightful persuasion through select vitamin availability and essential mineral presence, promoting well-manicured balance in a sweetly decadent coverall portrait.

Amid hosting serving spacings, wise management encourages pragmatic realization animating celebration indulgent holistically even if minimal segmenting.

Considering idealized consumption physiology encourages mindful rations essentially portioned allowance expectations present desirable pleasurable spine over excess.

Dietary Adaptations

Gluten-free lovers rejoice with alternative crusts slightly amplifying nut flavors. Eliminate dairy limitations through almond milk and tofu base explorations recapturing dairy-free, velvety cheesecakes.

The vegan sphere calls inspiration in combining cashew and coconut creations ascending non-renounced rival quality upon finished complexes revealing inevitable crossover brilliance.

Submit low-carb ketogenic wonders amplified through substituted sweet or nutty alternatives fostering sophisticated profiles.

Strong paleo efforts transform heritage cheesy triumphs supporting delicate specialty diets, uncovering groundbreaking wisdom showcasing underestimated epicureans revolutionizing assumptions.

Multiple within boundaries evaluate safe, respective personal preference choices contributing universally.

Troubleshooting Guide

Texture issues require focus on impeccable ingredient blends harmonizing slowly, applying structural anticipation gentle pastry rotation.

Flavor balance finds symmetrical resonance through consistent odor sampling and reseasoning if necessary to calibrate profiles bounds mutually welcoming and ascending aroma.

Temperature difficulties secure overlapping thermal measures during preparation resolving ideal dependability translating into reliable baking occur demonstrably even reception.

Equipment mechanics expand backup contingencies, ensuring access, repairing or substituting tools cogently before progressing.

Ingredient fixations demand adept navigation converting attainable geographical supply scarcities homologously adventuring appealing suggestion transformation undertaking.

Timing concerns emphasize experiential deduction careful extension assessment within multiple cycles experiencing assurance induces experiential product continuity.

Recipe Success Stories

Community feedback echoes harmoniously, resonating through shared candor depicting positive engagement attributes cherished lovingly led by culinary ambassadors.

Narrations unfold guiding personalized expression, situating cheesecake as a friendship conduit unifying participant applause recount; occasional transformative adaptation narratives flourish.

Aspiring enthusiasts rejuvenate through inspired versions, daring spectacular combinations reflecting originality acknowledging established sweet success.

Reader stimulus, visual mastery garners additional zest, elevating atmosphere reconstructively reviving cheesecake narratives actively portrayed within thriving culinary opportunity sphere.

Frequently Asked Questions

Q: Can I substitute fresh blueberries with frozen ones?
A: Yes, frozen blueberries can be used as an alternative, but they may release more moisture during baking, which could slightly alter the cheesecake’s texture. Opt for a careful thawing and drying process.

Q: Is the cheesecake best served chilled or at room temperature?
A: For optimal taste and texture, serve the cheesecake thoroughly chilled as it enhances both the creaminess and balance of the tangy lemon and sweet blueberry flavors.

Q: How do I prevent the cheesecake from cracking?
A: Ensure an even water bath around the springform pan and avoid overmixing the batter. Gradual cooling after baking is crucial to avoiding structural cracks.

Q: How far in advance can I make the cheesecake?
A: You can make the cheesecake up to two days in advance. Just ensure it’s well-covered in the refrigerator and garnish fresh toppings closer to serving.

Q: What’s the best way to store leftover cheesecake?
A: For best preservation, store leftovers in an airtight container in the fridge for up to three days, or freeze slices wrapped aptly for longer storage.

Q: Can I use other fruits in this recipe?
A: Absolutely, similar berry alternatives like raspberries or blackberries are apt substitutions. Adjust sweetness slightly to match changes.

Q: What causes my cheesecake’s edges to darken excessively?
A: Try lowering oven temperature slightly and monitor towards the end of baking to prevent over-browning. Foiling the top can help regulate excessive browning.

Q: How necessary is the use of a springform pan?
A: A springform pan helps ensure easy release, maintaining the cheesecake’s shape. If not available, use a deep dish, but line it well for extraction.

Q: Can I add a crust to the top of the cheesecake?
A: Typically cheesecakes feature toppings rather than crusts to create textural interest. However, a decorative crumb topping could provide an appealing finish.

Q: How can I make the cheesecake more lemony?
A: Amp up lemon presence with extra zest or a small inclusion of lemon juice, carefully balancing acidity within flavor context needed.

Q: Are there low-sugar options for this recipe?
A: Swap regular sugar with a low-carb sweetener while closely monitoring measurements to ensure ideal sweetness and consistency.

Q: What is the best side pair for this cheesecake?
A: Complement this cheesecake with a citrus-infused tea or delicate herbal tea, enhancing the refreshed feel of the dessert with nourishing leisure.

Additional Resources

Engage further curiosity with companion recipes pursuing accompaniments enhancing shared table alongside cheesecake offerings. Investigate technique guides solidifying acquaintance proficiency, heightening skills transformed smart creativity.

Dive into extensive ingredient background exploration or thorough enumeration essentials delving into equipment array, revamping stations adeptly for capacity improvement.

Seasonal modules inspire seasonal creativity in the kitchen, promoting whole experimentation challenging expectations honestly rewarding personal growth.

Join the Conversation

Express creatively through diverse social media forums offering encouragement to share cheesecake accolades, capturing photographic, stylized snapshots evolving beyond homemade traditions.

Encourage community orchestration extending warmth through shared trials and monumental alterations. Solicit feedback or share reader remixes contributing reciprocally to joyful expansion collectively illustrated.

Revel in mutual investment signifying recipe delight alongside prospective recreations, seeking spirited encouragement vaulting cheesecake into universal culinary appreciation.

The Recipe

Lemon Blueberry Cheesecake

Serves: 8

Prep Time: 30 mins

Cook Time: 60 mins

Total Time: 90 mins

Kitchen Equipment Needed

  • Springform pan
  • Mixing bowls
  • Electric mixer
  • Baking sheet
  • Spatula
  • Microplane zester
  • Aluminum foil
  • Measuring cups and spoons

Ingredients

  • 1 ½ cups graham cracker crumbs
  • ½ cup unsalted butter, melted
  • 3 tablespoons sugar
  • 3 packages (8 oz each) cream cheese, softened
  • 1 cup sugar
  • 3 large eggs
  • 1 tablespoon lemon zest
  • 2 tablespoons lemon juice
  • 1 teaspoon vanilla extract
  • 1 ½ cups fresh blueberries
  • ¼ cup blueberry preserves

Directions

  1. Preheat the oven to 325°F (160°C). Combine graham cracker crumbs, melted butter, and 3 tablespoons of sugar in a bowl. Press onto the bottom of a 9-inch springform pan. Bake for 10 minutes, then cool.
  2. In a large bowl, beat cream cheese and 1 cup sugar until smooth. Add eggs one at a time, blending well after each addition. Mix in lemon zest, juice, and vanilla extract.
  3. Gently fold in 1 cup blueberries. Pour cream cheese mixture over the crust.
  4. Place the cheesecake in a preheated water bath. Bake for 50–60 minutes until the center is almost set.
  5. Cool in the oven with the door ajar for 1 hour. Refrigerate for at least 4 hours or overnight.
  6. In a small saucepan, melt blueberry preserves over low heat; stir in remaining blueberries. Pour over cheesecake before serving.

Recipe Notes

  • Ensure cream cheese is fully softened to avoid lumps in the batter.
  • Wrap the springform pan with aluminum foil to prevent water from seeping in from the water bath.
  • Adjust sugar according to the sweetness of the blueberries if desired.

Irresistible Sugar Cookie Cheesecake Recipe for Dessert Lovers Everywhere

Sugar Cookie Cheesecake: A Sweet Blend of Classic and Decadence

⚖️
Difficulty
Medium

⏲️
Prep Time
45 mins

🕒
Cook Time
55 mins

⏱️
Total Time
100 mins

🍽️
Servings
12

Indulge in the delectable fusion of buttery sugar cookies and luscious cheesecake with this Sugar Cookie Cheesecake recipe. Perfect for every special occasion, this dessert features a creamy, rich cheesecake filling that complements a crumbly, sweet sugar cookie crust. With its perfect balance of sweetness, this dessert offers an unforgettable experience for your taste buds.

The inviting aroma and creamy texture make the Sugar Cookie Cheesecake a must-try for cheesecake enthusiasts. This recipe captures the essence of a classic dessert with a playful twist that will satisfy any sweet tooth. Whether you’re hosting a gathering or simply wanting to treat yourself, this cheesecake is sure to impress with its indulgent flavors and beautiful presentation.

Quick Recipe Highlights

  • Flavor Profile: A delightful mix of creamy, tangy cheesecake complemented by the sweet, buttery goodness of sugar cookies.
  • Texture: A velvety smooth filling paired with a crumbly, slightly crispy crust provides an irresistible contrast.
  • Aroma: The sweet aroma of baked sugar cookies mingles with hints of vanilla, filling the air with a comforting warmth.
  • Visual Appeal: The golden hue of the sugar cookie crust contrasts beautifully with the creamy, pale cheesecake topping, creating an elegant dessert fit for any table.
  • Skill Level Needed: The recipe involves intermediate baking skills, requiring careful attention to mixing and baking techniques to achieve the perfect texture.
  • Special Equipment: A springform pan is essential for this cheesecake to allow easy removal, preserving its delicate structure.

Recipe Overview

  • Difficulty Level: Moderate, owing to the need for precision in baking and a careful balance in the cheesecake batter.
  • Category: This recipe falls under desserts, specifically the bakery and confectionery section.
  • Cuisine: An innovation within classic American dessert cuisine, combining traditional sugar cookies with a creamy cheesecake.
  • Cost: Economically reasonable, as it involves basic pantry staples like flour, sugar, and cream cheese, with potential added costs for vanilla extract and other flavoring agents.
  • Season: Perfect for all-year enjoyment, although especially delightful during holiday seasons when the sweet scents of baking fill homes with joy.
  • Occasion: Suitable for birthdays, festive gatherings, or any special occasion where a show-stopping dessert is needed.

Why You’ll Love This Recipe

The taste and texture of this Sugar Cookie Cheesecake will captivate your senses with its balance of creamy and crumbly. The smooth cheesecake melds seamlessly into the sweet, satisfying crunch of the sugar cookie base, creating a taste symphony in every bite.

Convenience is another strong point, with common kitchen staples making up the core ingredients. With a bit of preparation, you can create a gourmet dessert that rivals those from top bakeries, all from the comfort of your kitchen.

Nutritionally, it offers a decadent treat that can be portioned wisely. Cheese provides protein and calcium, even as the guilt factor remains delightfully low if enjoyed in moderation.

This cheesecake is an entertainer’s dream, bound to be the centerpiece of any dessert table. Its universal appeal makes it a safe bet when catering to diverse palates, ensuring compliments from guests of all ages.

Cost-wise, Sugar Cookie Cheesecake is accessible, recreating the gourmet dessert experience without breaking the bank. You can find most ingredients in your pantry, or at a local grocery, saving on time and expense.

Historical Background and Cultural Significance

The Sugar Cookie Cheesecake is a modern twist on two beloved classics, each steeped in rich history. Cheesecake traces back to ancient Greece, where it was first mentioned by the Greek physician Aegimus. Evolving through the centuries, it became a favorite in medieval Europe, eventually transforming in American culture with the rise of cream cheese as a staple ingredient.

Culturally, cheesecake has amassed a widespread appeal, appearing in various forms across the world. Its versatility allows for endless adaptations to local tastes and traditions, providing a culinary bridge between regions. The pairing of cheesecake with sugar cookies, a perennial holiday favorite in American households, offers a celebration of cultural flavors through inventive cuisine.

Regional variations have continued to inspire this particular recipe. While traditional New York-style cheesecake remains popular, bakers have been exploring creative alternatives, blending textures and flavors. The Sugar Cookie Cheesecake stands as a testament to this ongoing evolution, bringing together the best of both dessert worlds.

In culinary lore, the combination of such traditional desserts creates a cultural tapestry of taste, illustrating how food transcends generations and geographical boundaries. The Sugar Cookie Cheesecake thus embodies a dessert renaissance, revitalizing the classic aromas and textures with a contemporary twist.

Ingredient Deep Dive

Sugar cookies, the foundational element, bring a nostalgic touch to the cheesecake. Rooted in traditional European baking, sugar cookies rose to American fame in the 1700s. The cookies owe their light, sweet flavor to simple, readily available ingredients. Flour, sugar, butter, and eggs form their basic composition, offering a blank canvas for flavors to meld.

Nutritionally, sugar cookies are high in carbohydrates and fats, reflecting their indulgent nature. When selecting sugar cookies for this recipe, opt for those with a consistent texture and mild sweetness to keep the cheesecake balanced. Store them in an airtight container to maintain freshness and prevent them from softening, which could affect the crust’s integrity.

Similarly, cream cheese acts as the heart of the cheesecake filling. Originating in New York, cream cheese offers a tangy, rich flavor that has become synonymous with the American-style cheesecake. When selecting cream cheese, ensure it is at room temperature before use to allow for a smoother mixing and avoid lumps in the batter.

For storage, maintain cream cheese in the refrigerator to preserve freshness. If unavailable, substitutes like mascarpone or ricotta cheese can be utilized, though each will alter the cheesecake’s final texture and taste profile.

Common Mistakes to Avoid

  • Overmixing the batter can lead to a dense, heavy cheesecake. Mix just until smooth for a light, airy filling.
  • Failing to bring ingredients to room temperature may cause lumpy batter. Patience is key.
  • Neglecting the water bath can result in cracks. Use a water bath to ensure even cooking.
  • Opening the oven door frequently during baking can disrupt rising. Peek sparingly to retain even temperatures.
  • Baking too long or at too high a temperature will overcook the filling. Watch closely and check for a slight jiggle when done.
  • Skipping the crust chilling step risks a crumbling base. Allow it to firm up properly before pouring the filling.
  • Rushing cooling can lead to structure collapse. Time and gentle cooling are your allies.
  • Forgetting to smooth the top layer may result in an uneven surface. Use a spatula for a flawless finish.
  • Transferring a hot cake directly to a cold surface can cause cracks. Let it cool slightly in the oven with the door ajar first.

Essential Techniques

Achieving the perfect Sugar Cookie Cheesecake hinges on mastering a few key techniques. Understanding the role of temperature and timing is crucial. Allowing cream cheese to soften before mixing ensures a smooth batter, free of lumps that might mar its texture.

The water bath, while seemingly simple, is vital for even baking. Place the springform pan in a larger roasting pan and add boiling water until it reaches halfway up the side of the springform. This moist environment mitigates cracking by maintaining gentle, even heat. Oven peeking should be avoided, as rapid temperature fluctuations can prevent rising.

Lastly, gentle mixing prevents air from infusing the batter, which could result in bubbles and unwanted density. Mix on low speed and only until ingredients are just combined, ensuring an elegant, cohesive blend.

Pro Tips for Perfect Sugar Cookie Cheesecake

Start with quality ingredients. Opt for fresh, full-fat cream cheese and real vanilla extract for depth of flavor. Freshness is paramount.

Prebake the crust to prevent sogginess. A quick 10-minute bake firms it up, ensuring it holds up well under the cheesecake filling.

Use a parchment paper liner in the springform pan for easy release and a neat edge. It helps lift out the cheesecake in one piece.

Room temperature ingredients blend more smoothly and create the silkiest batter. Let eggs and dairy sit out long enough to take the chill off.

Avoid overbaking. Check the cheesecake toward the end and remove it when the center jiggles slightly for a softer, creamier result.

Chill thoroughly before serving for flavors to meld and texture to set. Wrap it tightly if making a day in advance to preserve its flavor dynamics.

Garnish with restraint. A subtle dusting of powdered sugar or a few fresh berries complement without overwhelming the cheesecake’s delicate taste.

Variations and Adaptations

Regional variations introduce exciting flavors, such as a cinnamon sugar cookie crust for a Mexican-inspired twist. The warmth of cinnamon adds a comforting, aromatic layer.

For seasonal adaptations, consider a pumpkin spiced sugar cookie base during autumn months. The warm spices pair beautifully with creamy cheesecake.

Health-conscious bakers can adapt the recipe for keto or low-carb diets by substituting almond flour for sugar cookies, providing a nutty, flavored crust.

Enhance with flavors like citrus zest within the cheesecake batter for a refreshing, summery touch, balancing creaminess with vibrancy.

For softer textures, incorporate mascarpone alongside cream cheese, lending a buttery finish.

Presentation can shift dramatically. Try serving individual portions in glass jars with sugar cookie crumbles on top for a contemporary, playful twist.

Serving and Presentation Guide

For a refined presentation, slice using a hot knife wiped clean between cuts. The warmed blade ensures neat slices with minimal cracking.

Garnish with fresh berries and a sprig of mint for a pop of color and a burst of freshness. Alternatively, serve with a dollop of lightly sweetened whipped cream for contrast.

Traditional accompaniments include coffee or tea, which balances the richness with its slightly bitter edge.

For modern flair, try serving alongside a tart raspberry coulis or a tangy lemon curd. The brightness complements the creamy richness.

Serve slightly chilled for optimal texture, yet not overly cold which can dull flavors. Allow it to sit at room temperature for fifteen minutes before presenting.

Portion wisely, offering moderate slices to maximize enjoyment without overwhelming. An average serving should be around one inch in thickness.

Wine and Beverage Pairing

A light, crisp Prosecco complements Sugar Cookie Cheesecake well. Its bubbles cut through the richness without overwhelming the delicate flavors.

Consider a non-alcoholic pairing such as a floral iced tea or lemonade. The acidity and freshness provide a palate-cleansing contrast.

For coffee enthusiasts, a smooth, mellow roast with hints of nut and chocolate pairs seamlessly. The bitterness brings out the cheesecake’s sweet undertones.

Temperature matters—when serving beverages alongside cheesecake, keep them slightly cooler to enhance their refreshing properties.

Serving suggestions include quaint cups of chamomile tea, which melds with the sugar cookie’s sweetness, or espresso shots for an intensified flavor mixture.

Storage and Shelf Life

Store leftover slices in the refrigerator, wrapped securely with plastic wrap or stored in an airtight container to prevent dryness and aroma absorption.

The cheesecake should be kept at a consistent cold temperature to maximize its freshness. Consume within four days for optimal flavor and texture.

Consider investing in an airtight cheesecake holder for ease of storage without risking the smushing of delicate edges.

Signs of spoilage could include water beads forming on top or an off-putting sour smell. Discard if you notice any such changes.

Reheat gently, if desired, by allowing slices to reach room temperature rather than using a microwave, which can alter the filling’s texture.

Freezing is an option, allowing up to two months of storage time. Before freezing, wrap each slice individually in parchment paper, then foil to ensure proper preservation.

Make Ahead Strategies

Prepare this cheesecake a day or two in advance to allow flavors to fully develop. The resting period enhances taste and texture quality.

Store the baked base separately and add the filling later if you anticipate needing extra time to execute other meal preparations.

Consider using the fridge or a cool, dark pantry to store wrapped components, maintaining integrity and freshness between steps.

For quality impact, always use a water bath while baking to preserve moisture and support even baking, especially when waiting to serve.

Reheat sliced servings by letting them sit for a few minutes at room temp. For fresh element additions, top with fruit just before serving.

Scaling Instructions

To halve the recipe, reduce ingredients evenly and consider using a smaller springform pan to maintain appropriate thickness and baking time.

When doubling or tripling, remember to adjust oven position and pan size, and expect a slightly increased cook time due to volume.

Equipment adjustments for larger batches might include a wider or deeper springform pan, or multiple pans handled via a staggered baking approach.

Timing modifications should account for additional minutes for larger cakes due to filling density. Check baking progress carefully.

Storage considerations for larger batches involve ensuring ample space for refrigeration. Consider slicing and freezing portions separately for easy serving later.

Nutritional Deep Dive

The macro breakdown of Sugar Cookie Cheesecake highlights carbohydrates from cookies and moderate fats from cream cheese as its primary components.

Micronutrient analysis notes vitamin D and calcium contributions from dairy ingredients, alongside minor minerals.

Health benefits include its role as a high-energy treat, capable of satisfying sweet cravings efficiently in small portions.

Dietary considerations encompass serving size moderation, balancing indulgence with overall meal nutrition.

Portion analysis suggests around 350 calories per slice; monitoring intake aligns the dessert with broader dietary goals.

Weight management tips point to savoring smaller pieces and pairing with lower-calorie meals to allow flexibility in dietary planning.

Dietary Adaptations

For gluten-free enthusiasts, opt for a sugar cookie crust made from gluten-free flour blends. Ensure all processed ingredients are certified gluten-free.

Dairy-free modification could involve substituting cream cheese with a dairy-free alternative such as cashew-based cheese or silken tofu blended smoothly.

To make it vegan, use plant-based cream cheese alternatives and a flax egg in the cookie crust for binding.

Low-carb versions might feature almond flour in place of traditional sugar cookies, sugar-free sweeteners such as erythritol, and careful portioning.

For keto adjustments, utilize a base made with ground nuts and butter, avoiding sugar and flour, and swapping heavy cream for dairy-free equivalents.

Paleo adaptations include similar nut-based crusts and coconut cream as the filling’s foundation, emphasizing minimally processed ingredients.

Low-FODMAP alterations warrant careful ingredient selection, like lactose-free cream cheese and naturally sweetened, portion-controlled accompaniments.

Troubleshooting Guide

If texture issues arise, like cracking or hardness, consider implementing a water bath and verify oven temperature accuracy using a thermometer.

The flavor balance can be thrown off by overly sweet or bland results. Use quality vanilla and a touch of salt to align taste notes.

Temperature problems during baking may result from improper calibration. Regularly check thermometers to ensure accuracy and consistency.

Equipment challenges like cheesecake sticking call for properly greased and lined pans to enable easy release.

Ingredient substitutions should be complementary, maintaining flavor balance and consistency without compromising overall quality.

Timing concerns, particularly overbaking, require careful monitoring toward the end stages. Know your oven’s quirks and plan for slight variances.

Recipe Success Stories

Community feedback often highlights the cheesecake’s crowd-pleasing nature, especially at family gatherings and friendly get-togethers.

Variation successes have included flavor twists with chocolate chips in the crust or a raspberry swirl on top, providing delightful deviations.

Adaptation stories abound, with readers incorporating local flavors to suit regional palates, demonstrating the recipe’s versatility.

Reader suggestions have spotlighted tweaks like adding a hint of zest or experimenting with flavored cream cheese for extra complexity.

Photography tips from the community recommend natural lighting and garnishes to enhance presentation, capturing the cheesecake’s aesthetic appeal.

Frequently Asked Questions

Can I use a different type of cookie for the crust?

Yes, you can substitute with graham crackers or even ginger snaps for a unique flavor twist.

How can I tell when the cheesecake is fully baked?

Look for a soft jiggle in the center. The residual heat will continue to set it as it cools.

What’s the advantage of a water bath?

A water bath provides consistent heat and moisture, reducing cracks and ensuring an even texture.

Is it necessary to cool the cheesecake in the oven?

Gradual ambient cooling in the oven minimizes structural shock and cracking.

Can I freeze Sugar Cookie Cheesecake?

Absolutely, wrap portions well in foil after cooling. Thaw overnight in the refrigerator before serving.

Can I substitute low-fat cream cheese?

While possible, full-fat cream cheese offers the creamiest, most authentic results.

How do I prevent the crust from getting soggy?

Pre-bake crusts and ensure fillings are cooled before pouring.

What’s the best way to slice the cheesecake neatly?

Use a hot, dry knife, cleaning between cuts for smooth, precise slices.

Can lemon flavors be included?

Yes, lemon zest or a touch of juice in the filling offers a refreshing citrus note.

How soon can I serve after chilling?

Let it rest in the fridge for at least 4 hours, optimally overnight, before enjoying.

What toppings work well with this cheesecake?

Fresh fruit, a light drizzle of chocolate, or whipped cream complement the smooth filling nicely.

Does altitude affect baking this cheesecake?

It can alter baking times. Monitor closely and adjust as needed for optimal results.

Additional Resources

Explore related recipes for creative takes on cheesecake, incorporating seasonal fruits or festive spices to suit various occasions.

Technique guides provide insight into perfecting your cheesecake base, smooth batter crafts, and decorative garnishing.

Ingredient information can delve further into selecting top-quality vanilla or creatively employing nutmeg for nuanced flavors.

Equipment recommendations ensure your tools, like springform pans or mixer attachments, elevate the result.

Seasonal variations offer ties to cultural traditions, integrating specific holiday spices or harvest-fresh produce for timely versions.

Join the Conversation

Engage with other baking enthusiasts over social media by sharing your Sugar Cookie Cheesecake creations. Post photos, tag friends, and exchange ideas.

Photography tips can highlight lighting and plating techniques to showcase your cheesecake’s elegance.

Leave recipe reviews, reseating updates for community feedback and insights, strengthening the recipe through shared knowledge.

Community engagement enriches culinary experiences, inspiring adaptations and storytelling surrounding personal connections to the dish.

Discover recipe variations proposed by fellow bakers with unique local twists, integrating regional flavors for a personalized touch.

The Recipe

Sugar Cookie Cheesecake

Serves: 12

Prep Time: 45 mins

Cook Time: 55 mins

Total Time: 100 mins

Kitchen Equipment Needed

  • Springform pan
  • Mixing bowls
  • Electric mixer
  • Spatula
  • Oven
  • Roasting pan (for water bath)

Ingredients

  • 1 package sugar cookies, crushed for crust
  • 1/4 cup unsalted butter, melted
  • 3 packages (8 oz each) cream cheese, softened
  • 1 cup granulated sugar
  • 1 tsp vanilla extract
  • 3 large eggs
  • 1 cup sour cream

Directions

  1. Preheat oven to 325°F (160°C). Grease a springform pan.
  2. Mix crushed cookies with melted butter. Press into pan bottom and bake for 10 minutes. Cool.
  3. Beat cream cheese and sugar until smooth. Add vanilla and eggs, one at a time, mixing well after each.
  4. Blend in sour cream until just combined. Pour into crust.
  5. Place springform in a roasting pan. Fill with hot water halfway up the sides.
  6. Bake for 50-55 minutes until the center is slightly jiggly. Turn off the oven, leave the door ajar, and cool for one hour.
  7. Refrigerate for at least 4 hours before serving.

Recipe Notes

  • For added texture, fold chopped white chocolate chips into the batter before baking.
  • To prevent cracks, ensure ingredients like cream cheese and eggs are at room temperature.

Irresistible White Chocolate Pistachio Fudge Recipe for Sweet Tooth Lovers

White Chocolate Pistachio Fudge: A Sweet Delight for Any Occasion

⚖️
Difficulty
Easy

⏲️
Prep Time
10 mins

🕒
Cook Time
5 mins

⏱️
Total Time
15 mins

🍽️
Servings
16

Indulge your senses with the decadent flavors of White Chocolate Pistachio Fudge. This delightful recipe combines creamy white chocolate with the rich, buttery texture of pistachios, creating a sweet treat that’s perfect for any occasion. Whether you’re planning a cozy family gathering or a festive party, this fudge will warm hearts and satisfy sweet cravings.

The smoothness of white chocolate pairs beautifully with the slight crunch of pistachios, creating a harmonious balance of flavors and textures. Each bite delivers a melt-in-your-mouth sensation that will leave you wanting more. The striking green hue of the pistachios against the creamy backdrop of the fudge adds a touch of elegance, making it not only a tasty indulgence but also a feast for the eyes.

Quick Recipe Highlights

  • Flavor Profile: A harmony of sweet white chocolate and nutty pistachios creates a perfectly balanced treat.
  • Texture: Creamy and smooth with a delightful crunch from finely chopped pistachios.
  • Aroma: Sweet and nutty scents mingle enticingly, enhancing the fudge experience.
  • Visual Appeal: The vibrant green of pistachios against white chocolate creates a stunning presentation.
  • Skill Level Needed: Effortless preparation suited for even novice cooks.
  • Special Equipment: Only a saucepan and baking dish required, making this an accessible recipe.

Recipe Overview

  • Difficulty Level: White Chocolate Pistachio Fudge is beginner-friendly, requiring minimal cooking expertise.
  • Category: This delicious treat fits into dessert or confectionery categories, ideal for sweet-lovers.
  • Cuisine: Although modern and universally loved, it draws influence from European confectionery traditions.
  • Cost: An affordable indulgence, leveraging easily accessible components while delivering gourmet flavor.
  • Season: Enjoy this fudge year-round; its aesthetic suits festive seasons brilliantly.
  • Occasion: Perfect for celebrations, gifting, or simply as a delightful and sweet indulgence.

Why You’ll Love This Recipe

Enjoy the irresistible taste and texture of White Chocolate Pistachio Fudge, where each bite delivers smooth, velvety white chocolate enriched with the unique crunch of pistachios. This delectable treat is ideal for satisfying your sweet cravings and offers a mouthwatering contrast of flavors and textures.

Not only is this fudge quick and easy to prepare, but its simplicity means you can make it without hassle, even on busy days. The short prep and cook times, coupled with straightforward ingredients, make it a convenient choice for impromptu gatherings or last-minute gifting ideas.

This fudge also offers some nutritional perks, with pistachios providing the benefits of healthy fats, protein, and fiber. While it remains a sweet treat, the inclusion of nuts offers a slight nutritional boost, keeping indulgence somewhat balanced.

Socially, White Chocolate Pistachio Fudge is a wonderful conversational piece, thanks to its striking appearance and unique flavor profile. It’s sure to impress guests at dinner parties or family gatherings, bringing people together over a shared love of sweet treats.

Cost-effectiveness and ease of access to ingredients mean you can create a luxurious-tasting sweet without putting a strain on your budget. Simple ingredients combine to form a luscious, gourmet dessert experience that feels special, without the premium price tag.

Historical Background and Cultural Significance

Fudge, as a confection, traces back to North America in the late 19th century, with its cream-based variations rapidly spreading across cultures. This particular white chocolate and pistachio version leans into European chocolate-making traditions, further reflecting a blend of cultural culinary influences.

These sweet creations quickly inhabited the cultural milieu, celebrated across festivities and special occasions. Their rich, melt-in-your-mouth texture made them a popular choice for evening teas and social gatherings. Over time, they became synonymous with indulgent confectionery available in numerous variants worldwide.

White Chocolate Pistachio Fudge owes its innovation to the innovation in chocolate crafting, where white chocolate, made from cocoa butter, sugar, and milk solids, became an established base for creative desserts. Its combination with the beloved pistachio reflects a penchant for luxury in simplicity.

Different regions have adopted variations, adding personal twists to traditional recipes. This version remains true to its roots, emphasizing quality white chocolate paired perfectly with nutritious pistachios, capturing a delectable taste that heartily respects its origins.

Ingredient Deep Dive

White chocolate serves as the smooth, creamy base of this fudge. Its origins lie in Switzerland, where it was formally introduced as a commercial product in the 1930s. Rich in cocoa butter but lacking cocoa solids, white chocolate provides a unique sweetness that pairs beautifully with other ingredients.

On the other hand, pistachios bring a delightful crunch and subtle nutty flavor to the fudge. Originating in the Middle East, pistachios have been enjoyed for thousands of years, cherished for their rich, buttery taste and vibrant color. They not only add texture but also provide beneficial nutrients like fiber and protein.

Select high-quality white chocolate with a high cocoa butter content for the best results and ensure pistachios are fresh, with their shells removed for convenience. Store white chocolate in a cool, dry place, ideally in an airtight container, and pistachios in a sealed bag to maintain freshness.

If necessary, substitute other nuts for pistachios, such as almonds or macadamia nuts, though this will slightly alter the recipe’s flavor profile. For white chocolate, ensure to use a quality option or consider a white chocolate chip alternative for seamless melting.

Common Mistakes to Avoid

  • Avoid overheating the chocolate, which can cause it to seize. Melt it gently for smoothness.
  • Measure ingredients carefully; excess pistachios might alter the fudge’s texture unfavorably.
  • Refrain from under-blending; ensure ingredients combine uniformly for consistent flavor.
  • Don’t skip lining the baking dish, as it makes removing the fudge effortless and clean.
  • Ensure pistachios are unsalted; salted nuts can make the fudge excessively salty.
  • Avoid using old chocolate; freshness ensures optimal melt and taste.
  • Refrigerate the fudge for setting; rushing the process can result in a soft texture.
  • Use a serrated knife for cutting; it provides cleaner cuts without crumbling the fudge.

Essential Techniques

Melting white chocolate correctly is key; moderating heat prevents seizing and maintains its creamy texture. Mastering this helps in achieving a smooth, luxurious fudge base offering consistent melt-in-your-mouth perfection.

Adding pistachios at the right moment ensures they distribute evenly throughout the mixture. Stirring them in once the chocolate has melted creates an ideal balance without them sinking to the bottom or staying atop.

Lining the pan properly not only aids in clean removal but also in uniform cooling. Overlook this step, and the fudge could stick or require cutting inside the pan, affecting presentation quality.

Knowing when to cool at room temperature and when to switch to refrigeration defines its set time. Immediate cooling in the fridge can cause uneven setting; room temperature pre-cooling mitigates this.

Pro Tips for Perfect White Chocolate Pistachio Fudge

For extra creaminess, consider adding a tablespoon of butter to the melting chocolate, enhancing the fudge’s richness and smooth texture. Ensure to melt slowly to prevent separation.

Add a pinch of sea salt to complement the sweetness of the white chocolate and highlight the pistachios’ nutty flavors. Salt enhances the overall palate experience subtly.

Roasting pistachios briefly before incorporating them deepens their flavor, introducing a richer, toastier note that complements the sweet fudge base marvelously.

Experiencing difficulty with setting? Allow the fudge to cool slightly before refrigerating to establish uniform setting conditions and maintain intended texture.

For cutting precision, warm your knife slightly in hot water before slicing and ensure it’s dry. This creates a crisp edge, slicing through the fudge without clinging.

Use quality white chocolate featuring at least 20% cocoa butter for best results, promising a luxurious texture and optimal taste profile every time.

Variations and Adaptations

White Chocolate Pistachio Fudge can adapt to regional tastes by incorporating local nuts or dried fruits. In Mediterranean versions, swap pistachios for almonds or hazelnuts for an authentic twist.

For seasonal adaptations, consider adding cranberries during the winter holiday season. Their tartness contrasts nicely with white chocolate’s sweetness, providing a festive flavor punch.

Dietary modifications can include using dairy-free white chocolate for a vegan-friendly treat, maintaining creaminess and flavor without compromising dietary preferences.

Explore different textures by incorporating coconut flakes, offering a chewy bite to the ordinarily creamy fudge. Layer it atop or integrate it throughout for an exotic flair.

Alter the presentation by pouring the fudge into molds or cookie cutters, creating thematic shapes aligned with holidays or special occasions. Guests will admire the standout visual aesthetics.

Serving and Presentation Guide

Present your fudge on a rustic wooden board, emphasizing its artisanal quality. Arrange it in a tidy grid or staggered for visual interest and easy serving.

Garnish with a sprinkle of finely chopped pistachios or a drizzle of white chocolate for an added touch of elegance, enticing both visual appeal and flavor intrigue.

Accompany the fudge with light, herbal teas that cleanse the palate, or a simple cappuccino emphasizing the sweet, creamy tones of the fudge in contrast.

Modernize serving by placing fudge cubes in small cupcake papers or decorative tins, creating individual servings that add charm and are ideal for gifting.

Maintain serving temperature at room level to avoid chocolate becoming too hard or melting, ensuring every piece retains its perfect mouthfeel.

Each piece should ideally be small, serving as a treat rather than a substantial dessert. This aids in portion control while encouraging mindful eating.

Wine and Beverage Pairing

Pair White Chocolate Pistachio Fudge with a medium-bodied white wine like Viognier, which complements the richness of the chocolate without overpowering it.

Opt for non-alcoholic pairings such as a chilled green tea; its earthy undertones beautifully contrast and enhance the fudge’s sweetness.

For coffee lovers, a mild latte or cappuccino matches the creaminess of the fudge, accentuating its buttery chocolate textures beautifully.

Temperature plays a crucial role; ensure beverages are not too warm to prevent altering the fudge’s intended melt-in-mouth sensation.

Serve beverages in lightweight, elegant glassware to establish a refined presentation, highlighting the fudge as the central, luxurious indulgence.

Storage and Shelf Life

Store your fudge in an airtight container, lined with wax or parchment paper in layers to prevent pieces from sticking together.

Keep refrigerated for freshness, maintaining a consistent temperature to ensure both chocolate and pistachios retain quality and flavor.

Use glass or plastic containers with secure lids to reduce exposure to moisture or strong odors from nearby foods, which can affect taste.

Keep an eye on white chocolate discoloration or pistachio rancidity as spoilage signs, as this can indicate a compromised product.

Reheat by leaving fudge at room temperature briefly to soften, avoiding microwave use as it could alter texture unfavorably.

If freezing portions, wrap individually in plastic and store in a zip-lock bag for up to 2 months. Thaw gradually in the refrigerator for optimal texture.

Make Ahead Strategies

Plan ahead by preparing ingredients a day in advance. Chop pistachios and measure chocolate to save time on the day of preparation.

Between preparation and serving, store fudge properly to maintain integrity, especially if planning to spotlight it on special occasions.

The fudge’s quality remains unaffected when made a few days in advance, allowing flavors to meld further, enhancing the overall indulgence.

Assemble the final product with precision, ensuring cuts are clean. This attention to detail significantly improves the presentation for guests or gifting.

When rewarming, consider serving each piece at room temperature; avoid direct heat to maintain textural quality.

Add fresh elements like a new drizzle of chocolate or a garnish of pistachios before serving, providing a polished appearance.

Scaling Instructions

For halving, maintain ingredient ratios diligently to ensure flavor balance remains intact with a reduced yield, perfect for smaller gatherings.

When doubling or tripling, use larger mixing bowls and consider adjusting cooking time slightly to accommodate increased quantity, ensuring consistent texture.

Select appropriate pan sizes to maintain fudge depth when increasing quantities. Uniform layering aids in consistent cooling and setting.

Timing adjustments should factor in setting time; larger batches may require more refrigerator space and time to solidify thoroughly.

Store surplus fudge in smaller batches, ideally in separate containers, to avoid large-scale spoilage and maintain long-term quality.

Nutritional Deep Dive

White chocolate presents a macro profile high in fat and sugar, whereas pistachios contribute beneficial fats and protein, slightly balancing the overall nutritional makeup.

Micronutrient analysis highlights pistachios as sources of vitamin B6, copper, and manganese, providing small beneficial boosts amidst indulgence.

The health benefits of pistachios include cardiovascular-friendly unsaturated fats, though moderation remains key given the sugar content in fudge.

Ensure servings remain moderate, complementing dietary considerations for those watching sugar intake; a small piece serves as a satisfactory delight.

Mind your serving size to support weight management strategies, encouraging indulgence without overconsumption that may otherwise lead to imbalance.

Dietary Adaptations

Gluten-free adaptation is inherently possible due to the lack of gluten-containing ingredients. Ensure any chocolate chips used are also gluten-free.

Create a dairy-free version by using plant-based white chocolate alternatives and check that pistachios remain naturally free from dairy exposure.

For a vegan twist, select suitable chocolate alternatives while implementing dairy-free butter substitutes to maintain creaminess without animal products.

Low-carb adaptations require efforts to replace sugar substitutes creatively while ensuring the chocolate’s texture and flavor hold through compromise.

Keto considerations can include erythritol-based sweeteners, keeping carbs low while the fudge retains a traditional taste and feel.

Low-FODMAP diets may limit this recipe due to nuts, but experimentation with moderate amounts of selected ingredients can allow sporadic indulgence.

Troubleshooting Guide

If experiencing texture issues with graininess, ensure chocolate melts smoothly with no moisture exposure.

For balancing flavor discrepancies, finely adjust sweetness by introducing a touch of vanilla or balancing saltiness from an unexpected nut salting.

Consider temperature challenges by ensuring refrigerator or storage conditions don’t fluctuate, affecting fudge consistency unfavorably.

Address equipment challenges by selecting appropriately sized pans and bowls, suiting recipe quantity without unnecessary overflow or spill risks.

Substitute ingredients like nuts dynamically to suit personal preferences or dietary needs; ensure substitutes properly integrate for best results.

Concern with timing can be mitigated by pre-checking scheduling needs, ensuring reassurance in the process and a fudge timing consistency.

Recipe Success Stories

Our gourmet White Chocolate Pistachio Fudge resonates deeply within the community, drawing rave feedback for simplicity balanced with sophistication.

Users celebrate personalized variations, incorporating local nuts and deriving distinct flavors while maintaining the foundational luxurious texture.

Adaptation stories frequently highlight vegan versions enjoyed by diverse households, honoring dietary restrictions without compromising delight.

Readers suggest various plating styles, encouraging creativity from rustic presentations to chic party displays that enhance the fudge’s visual allure.

Shared photography tips capture the natural beauty of pistachio contrasts, inviting others to immortalize their creations through storytelling images.

Frequently Asked Questions

Can I use different nuts instead of pistachios?

Yes, almonds or macadamia nuts make excellent alternatives. They both bring unique textures and flavors to the fudge while maintaining the recipe’s integrity.

Is it possible to make this fudge without a refrigerator?

Having a refrigerator aids in ideal setting, though a cold countertop space could work as a temporary alternative, though firmness might be hit or miss.

Do I need to roast pistachios before adding them?

Roasting pre-emphasizes the nutty flavors, but it isn’t a mandatory step. Raw pistachios can still maintain the fudge’s desired taste and texture.

What if the chocolate begins to seize?

Add a few drops of vegetable oil or butter, gently stirring to reintegrate the chocolate into a smooth, usable state.

Can I freeze the fudge once it’s made?

Yes, wrap individual pieces in parchment or wax paper before storing them in a freezer-safe container to ensure freshness.

How do I prevent the fudge from sticking to the cutting knife?

Use a knife heated by warm water and wiped dry to cut through the fudge smoothly, maintaining neat, clean pieces.

Can I incorporate dried fruit for added flavor?

Certainly! Dried cranberries or apricots introduce complementary flavors, providing additional texture and taste diversity.

Is it possible to adjust the fudge’s sweetness?

Modify quantities cautiously, altering sugar content or selecting semi-sweet chocolate adaptations based on personal preference.

What type of white chocolate should I use?

Choose high-quality white chocolate with a rich cocoa butter base for optimum taste and creamy texture in the fudge.

How should I package fudge for gifts?

Wrap carefully in decorative paper or place in elegant tins or boxes, presenting the fudge attractively for gifting occasions.

Additional Resources

Explore related recipes that enhance your confectionery repertoire, including alternate chocolate fudge recipes and variations.

Access technique guides on perfect chocolate melting methods, minimizing common challenges such as seizing or inconsistent texture.

Ingredient insights provide valuable information on the optimal selection of nuts, additional chocolates, or sweeteners used for personalizing recipes.

Discover equipment recommendations ensuring ease and efficiency, investing in reliable kitchen tools that enrich your cooking endeavors.

Learn about seasonal variations that harness local produce, enhancing flavors and freshness in your culinary creations.

Join the Conversation

Engage with our passionate community on social media platforms, sharing your personalized adaptations and presentation ideas for White Chocolate Pistachio Fudge.

Access photography tips that showcase your culinary skills beautifully, emphasizing styling and composition for impactful food presentation.

Leave reviews and feedback on the recipe, sharing your experience and inspiring others with creative ideas and suggestions.

Participate in lively discussions, contributing to a dynamic space where like-minded enthusiasts exchange knowledge and innovations.

Exchange recipe variations and community-provided insights, drawing inspiration and refining your own fudge creations continuously.

The Recipe

White Chocolate Pistachio Fudge

Serves: 16

Prep Time: 10 mins

Cook Time: 5 mins

Total Time: 15 mins

Kitchen Equipment Needed

  • Saucepan
  • Mixing bowl
  • Baking dish
  • Spatula
  • Knife

Ingredients

  • 1 lb (450g) white chocolate, broken into pieces
  • 1 can (396g) sweetened condensed milk
  • 1 cup (125g) shelled pistachios, roughly chopped
  • 1 tsp vanilla extract
  • Pinch of sea salt

Directions

  1. Line an 8×8 inch baking dish with parchment paper, leaving excess paper to be used as handles later.
  2. In a saucepan over low heat, melt white chocolate and sweetened condensed milk, stirring continuously until smooth and fully combined.
  3. Stir in vanilla extract and a pinch of salt. Mix well.
  4. Fold in chopped pistachios, ensuring they are evenly distributed throughout the mixture.
  5. Pour the fudge mixture into the prepared baking dish, smoothing out the top with a spatula.
  6. Refrigerate for at least 2 hours, or until the fudge is firm and set.
  7. Once set, lift the fudge out of the pan using the parchment paper handles.
  8. Cut into squares, using a warm knife for clean cuts.

Recipe Notes

  • For added flavor, consider topping the fudge with additional pistachios before setting.
  • Keep stored in an airtight container in the fridge for up to a week.
  • For a festive twist, drizzle melted dark chocolate over the top before serving.

Simple and Irresistible Crème Brûlée Cookies Recipe for Quick Desserts

Best Easy Crème Brûlée Cookies Recipe ❤️ Quick Dessert

⚖️
Difficulty
Easy

⏲️
Prep Time
15 mins

🕒
Cook Time
12 mins

⏱️
Total Time
27 mins

🍽️
Servings
16 cookies

Get ready to indulge your sweet tooth with the Best Easy Crème Brûlée Cookies Recipe, a delightful fusion of the classic crème brûlée dessert and delicious cookies. These quick and easy cookies capture the creamy, vanilla essence of traditional crème brûlée, while delivering a satisfying crunch in every bite. Perfect for dessert lovers craving a quick sweet fix, these cookies promise to brighten any gathering.

Imagine biting into a cookie that offers the luxurious taste of crème brûlée with a crispy caramelized top. The smooth blend of vanilla custard-like flavor encased in a delicate cookie will surely make it a household favorite. Whether you’re hosting a dinner party or seeking a simple yet show-stopping treat, this recipe will make a memorable impression.

Turning cherished dessert classics into cookies is like an art form, making your culinary creations both nostalgic and innovative. Crème brûlée cookies not only represent the best of both worlds but allow you to enjoy this beloved French dessert in an entirely new way. Baking these at home will fill your kitchen with an irresistible aroma reminiscent of caramelized sugar and creamy vanilla, creating a sensory delight for both smell and taste.

Quick Recipe Highlights

  • Flavor Profile: These cookies boast a heavenly blend of creamy vanilla and rich caramel, striking a balance between sweetness and sophistication.
  • Texture: Crisp on the outside yet tender on the inside, each bite of these cookies mimics the luscious texture of crème brûlée’s custard beneath its caramel shell.
  • Aroma: Experience the enticing scent of vanilla combined with the comforting aroma of caramelized sugar wafting from your oven.
  • Visual Appeal: With their golden-brown tops and soft centers, these cookies are as visually appealing as they are delicious.
  • Skill Level Needed: Perfect for beginners, this recipe is straightforward yet provides an opportunity to practice basic baking techniques.
  • Special Equipment: A kitchen torch is recommended for achieving the crispy caramel topping, helping replicate the classic crème brûlée texture.

Recipe Overview

  • Difficulty Level: The choice of “Easy” is due to the recipe’s step-by-step simplicity, making it accessible even to novice bakers who may be trying their hand at creating unique desserts.
  • Category: These delightful cookies fall under desserts and snacks, providing a versatile option for after-meal treats or midday indulgences.
  • Cuisine: Inspired by French culinary traditions, these cookies bring an element of elegance and international flair to your baking repertoire.
  • Cost: With common baking ingredients, this recipe remains budget-friendly, keeping overall costs low while delivering a gourmet experience.
  • Season: Enjoy these cookies all year round, but they’re particularly perfect for cozy winter evenings when warm, aromatic desserts are most appreciated.
  • Occasion: Ideal for holiday gatherings, tea parties, or as a comforting snack, these cookies fit any occasion where a touch of sophistication is welcome.

Why You’ll Love This Recipe

The irresistible taste and texture make this recipe a spectacular choice for cookie lovers. Each cookie encapsulates the creamy essence of crème brûlée with a delightful crunch, elevating the traditional cookie experience. Its simplicity in preparation means you can whip these up without much hassle. All the ingredients are conveniently available, making preparation as seamless as possible, especially for those on a tight schedule.

From a nutritional perspective, these cookies offer a satisfying treat without excessive sugar overload. By customizing the sweetness to your preference, they can fit a balanced diet while still offering a delectable indulgence. For entertaining, their gourmet allure makes the perfect addition to any dessert table. Their aesthetic appeal adds sophistication, sure to impress both family and friends.

For cost-conscious bakers, this recipe offers an affordable yet high-quality dessert option, easily fitting within most grocery budgets. Additionally, the commonality of the ingredients allows the recipe to remain accessible. Ultimately, their ease of preparation, combined with luxurious taste, makes crème brûlée cookies a joy to bake and share.

Historical Background and Cultural Significance

Crème brûlée, a timeless dessert with French origins, has captivated dessert enthusiasts for centuries with its simplistic approach to a refined taste. Known as “burnt cream,” this dessert’s roots trace back to the 17th century, gaining prominence in French cuisine.

Its appeal crosses borders, making appearances in various European countries with slight reinterpretations. As the cookie revolution took hold, it was only a matter of time before crème brûlée inspired new creations. This adaptation into cookie form offers a novel way to celebrate the flavors, providing portability and casual enjoyment not typically associated with the dessert.

Regional adaptations showcase how this classic has evolved over time, highlighting the creativity it inspires among bakers worldwide. In different variations, you may see hints of orange zest or touches of fruits, each bringing new dimensions to the cherished original flavor combination.

Ingredient Deep Dive

Vanilla Extract: As one of the main flavor components, vanilla extract brings out the classic custardy flavor typical of crème brûlée. Known for its aromatic and comforting essence, it sets the tone for the entire cookie. When selecting vanilla, pure extract is preferred for its depth over the synthesized variant.

Sugar: Essential for both the cookie’s structure and flavor, it also forms the signature caramelized topping. White granulated sugar provides finesse in flavor without overwhelming other elements. To retain its quality, store sugar in a cool, dry place, minding that no moisture enters the container, which could lead to clumping.

Common Mistakes to Avoid

  • Overbaking: Keep a close eye on bake time to ensure cookies remain soft inside, rather than dry.
  • Skipping the Torch: Without a blowtorch, you won’t achieve the desired caramel crunch on top.
  • Using Imitation Vanilla: For optimal taste, opt for pure vanilla extract.
  • Imbalanced Ingredients: Maintain proportion between sugar and other components to avoid overly sweet cookies.
  • Uneven Caramelization: Distribute sugar evenly before torching to prevent burnt spots.
  • Improper Storage: Store in an airtight container to retain texture and avoid staleness.
  • Substituting Ingredients: Some swaps may alter essential texture or flavor.
  • Skimping on Cooling: Allow cookies to cool properly before adding caramel topping.

Essential Techniques

Caramelization: Properly apply sugar and caramelize it to achieve that classic crème brûlée crust, taking care to distribute heat evenly.

Pro Tips for Perfect Crème Brûlée Cookies

Use a high-quality, fine sugar for the caramelization process to achieve uniform heating. Keep the dough consistent in texture to preserve the soft bite and balanced flavor. Test different vanilla products to find one that best suits your taste preferences for these cookies.

Variations and Adaptations

Regional variations encourage play with flavors such as incorporating a splash of citrus zest or infusing the dough with spices, each adding a new spin while celebrating the classic crème brûlée notes.

Serving and Presentation Guide

For sophisticated presentation, serve on a decorative plate with a dash of powdered sugar or alongside fresh berries. Consider temperature – these cookies are best enjoyed slightly warm, rekindling their aroma and texture.

Wine and Beverage Pairing

Pair crème brûlée cookies with a well-chilled dessert wine, like a Sauternes, or for non-alcoholic options, consider a vanilla chai tea to complement the cookie’s flavors.

Storage and Shelf Life

Store cookies at room temperature in an airtight container to maintain freshness; they should ideally be enjoyed within 3-5 days for peak texture and taste.

Make Ahead Strategies

Prepare dough in advance and freeze until ready to use. Bake directly from frozen with minor time adjustments to ensure fresh cookies every time.

Scaling Instructions

Doubling the recipe requires careful adjustment of leavening agents and attention to mixing times to ensure even consistency and desired results.

Nutritional Deep Dive

The balance of macronutrients allows these cookies to fit comfortably into indulgent occasions, while offering opportunities for moderation during enjoyment based on personal dietary needs.

Dietary Adaptations

To accommodate gluten-free diets, consider using a high-quality gluten-free baking blend. Dairy-free adaptations require substitutions for butter and cream, impacting texture subtly while maintaining flavor integrity.

Troubleshooting Guide

If cookies spread too much, check your butter proportions or chill the dough longer. Adjust room temperature to eliminate varying bake times impacting batches.

Recipe Success Stories

Home bakers have successfully incorporated personal touches, from topping with chocolate drizzle to including almond slivers, each proposing a unique version while maintaining the core spirit of the recipe.

Frequently Asked Questions

How do I achieve the perfect caramel topping without a torch? Use an oven broiler on low, monitoring closely to prevent burning. Can this recipe be halved? Yes, just adjust ingredient measurements and cooking times accordingly. What alternatives work for pure vanilla extract? Consider using vanilla beans or paste for equally rich flavor. How do I keep cookies from becoming too hard? Monitor baking times closely and avoid over-mixing the dough. Can these cookies be frozen? Yes, freeze either before baking or after cooling, remembering to defrost gently. How can I prevent cookies from spreading too much? Ensure dough is chilled thoroughly before baking and that your oven temperature is accurate. Why is my caramel topping uneven? Distribute sugar evenly and apply consistent torch heat. What can I pair with these cookies? They work wonderfully with creamy cheeses or fruit jams for complementing flavors. Are there low-carb options for this recipe? Explore alternative flours and sweeteners to reduce carb content while maintaining taste. Any suggestions for adding decorative elements? Garnish with edible flowers or candy pieces to enhance visual appeal. How can I reduce sweetness? Adjust sugar levels slightly to fit personal preferences while ensuring texture remains intact.

Additional Resources

Explore related recipes like classic crème brûlée or experiment with other cookie variations that capture the essence of complex desserts in delicious, simple forms.

Join the Conversation

Engage with us through social media by sharing your own crème brûlée cookie creations and adaptations. Discover the community’s rich array of tips, feedback, and exciting variations, adding a global flavor palette to this beloved cookie.

The Recipe

Best Easy Crème Brûlée Cookies

Serves: 16 cookies

Prep Time: 15 mins

Cook Time: 12 mins

Total Time: 27 mins

Kitchen Equipment Needed

  • Mixing bowls
  • Hand or stand mixer
  • Baking sheet
  • Parchment paper
  • Cooling rack
  • Blowtorch (for caramel topping)

Ingredients

  • 1 cup all-purpose flour
  • 1/2 cup unsalted butter, softened
  • 1/2 cup granulated sugar (plus more for topping)
  • 1 egg yolk
  • 1 tsp pure vanilla extract
  • 1/4 tsp baking powder
  • Pinch of salt

Directions

  1. Preheat your oven to 350°F (175°C) and prepare a baking sheet with parchment paper.
  2. In a mixing bowl, cream together the butter and sugar until fluffy.
  3. Add the egg yolk and vanilla, mixing thoroughly.
  4. Sift in the flour, baking powder, and salt, and mix until just combined.
  5. Divide dough into small balls, place them on the prepared sheet, and flatten slightly.
  6. Bake for 10-12 minutes until edges are golden.
  7. Remove from oven, allow to cool on a rack before sprinkling with sugar and torching until caramelized.

Recipe Notes

  • Adjust sugar topping according to taste preference.
  • Ensure even mixing for consistent textures.
  • Store in a cool, dry place to maintain freshness.

Irresistible Butter Pecan Fudge Recipe for a Sweet Delight

Butter Pecan Fudge: Creamy Delight for Your Sweet Tooth

⚖️
Difficulty
Medium

⏲️
Prep Time
15 mins

🕒
Cook Time
20 mins

⏱️
Total Time
35 mins

🍽️
Servings
24 pieces

Indulge in the buttery goodness with our homemade Butter Pecan Fudge, a perfect treat for those who crave a sweet and nutty delight. This rich, creamy fudge is a wonderful blend of caramel notes and crunchy pecans, delivering a taste that’s both nostalgic and timeless. Whether you’re an experienced cook or a beginner in candy making, this recipe will guide you through creating a delectable treat that’s hard to resist.

In the realm of fudge recipes, Butter Pecan Fudge stands out with its luscious combination of butter and pecans. Imagine biting into a soft, melt-in-your-mouth piece, with the toasted pecans adding a delightful crunch. This recipe not only satisfies your sweet tooth but also offers a unique texture profile that will leave you wanting more. Perfect for holiday gifting or a special dessert, this fudge is a delightful addition to your recipe collection.

Quick Recipe Highlights

  • Flavor Profile: A perfect balance of sweet caramel and nutty pecans with a buttery undertone.
  • Texture: Smooth and creamy with added crunch from toasted pecans.
  • Aroma: Rich buttery scent with light toasted nut notes.
  • Visual Appeal: Creamy light brown fudge speckled with golden pecan pieces.
  • Skill Level Needed: Basic candy-making skills; patience with heating sugar mixtures.
  • Special Equipment: Candy thermometer for precision, heavy saucepan for even cooking.

Recipe Overview

  • Difficulty Level: This medium difficulty recipe requires attention to detail when melting and blending ingredients to prevent burning.
  • Category: Ideal for desserts or sweet snacks, perfect for sharing.
  • Cuisine: Influences from Southern American cuisine, known for its love of pecans and rich flavors.
  • Cost: Moderate, as ingredients are commonly available, but quality nuts can be more expensive.
  • Season: Best enjoyed in cooler months when fudge is traditionally made, allowing for better texture and longevity.
  • Occasion: Perfect for festive celebrations, parties, or as a homemade gift.

Why You’ll Love This Recipe


Butter Pecan Fudge offers a delightful texture, combining the creaminess of fudge with the crunch of pecans. This makes each bite a unique experience, with a satisfying melt followed by a nutty crisp. Its rich buttery flavor makes it a standout dessert that’s sure to impress family and friends.

Preparation is surprisingly straightforward, with the main challenge being careful temperature monitoring. This simplicity means you can create a gourmet treat without spending hours in the kitchen, making it a convenient option for busy schedules.

Nutritionally, pecans offer healthy fats and other beneficial nutrients, adding a slightly healthful twist to this indulgent treat. While it’s a dessert, knowing it’s not just empty calories can be comforting when you enjoy a piece or two.

The recipe’s appeal in social settings is unmatched. Homemade Butter Pecan Fudge is always a conversation starter at gatherings, reflecting the effort and love put into creating it. Its elegant simplicity makes it a perfect option for enhancing any dessert table.

From a cost perspective, this recipe is accessible. Most of the ingredients are pantry staples, meaning you won’t have to break the bank to create a luxurious dessert that could rival store-bought confections.

Historical Background and Cultural Significance


Butter Pecan flavoring has an interesting history rooted in Southern American cuisine. Pecans themselves are native to North America, often used by indigenous peoples long before European settlers arrived. The incorporation of butter and sugar came later, as these ingredients became more widely available and popular in sweet treats.

Culturally, butter pecan is a beloved flavor, often found in ice creams and candies throughout the United States. It’s a staple in Southern kitchens, symbolizing comfort and tradition, often associated with family gatherings and festive occasions.

The evolution of this recipe reflects broader trends in American candy-making over the 20th century, as homemade sweets became a way to express care and skill in a pre-packaged world. Fudge, in particular, became a homemade treat of choice due to its relative simplicity and ability to infuse various flavors.

Regional variations exist, but the central elements of high-quality butter, sugar, and pecans remain the same. In some areas, additional flavorings like bourbon or vanilla are added, showcasing the adaptability of this classic treat to local tastes and ingredients.

Ingredient Deep Dive


Butter plays a pivotal role in this recipe, providing not only the creamy texture but also a rich flavor base. It has been a cornerstone of baking and confectionery for centuries, beloved for its versatility and flavor-enhancing qualities. Ensure you select high-quality unsalted butter to allow precise control over the saltiness of the final product.

Pecans are the signature nut of this dish, lending a unique sweetness and crunch. Nutritionally, pecans are rich in healthy fats, fiber, and antioxidants, making them a beneficial addition to any diet. When selecting pecans, look for fresh, plump kernels. Store them in a cool, dry place to maintain freshness, or freeze for longer shelf life.

Substituting other nuts could offer interesting variations, although nothing quite matches the distinct flavor of pecans. Walnuts might work in a pinch, but they tend to be slightly more bitter, so consider toasting them lightly to enhance their sweetness.

Common Mistakes to Avoid

  • Overcooking the sugar mixture can lead to a hard, brittle fudge that lacks creaminess. Use a candy thermometer to avoid this pitfall.
  • Skipping the toasting of pecans can result in a lack of depth in flavor, so don’t overlook this simple step.
  • Using salted butter might lead to an overly salty fudge, masking the sweet, buttery notes.
  • Not allowing the fudge to cool properly can cause it to be too soft or sticky. Patience is key.
  • Failing to stir consistently can create grainy fudge. Ensure a smooth texture by stirring as directed.
  • Incorrect measuring of ingredients can alter the fudge’s texture and flavor. Precision is important here.
  • Using low-quality ingredients can result in a less flavorful final product.
  • Attempting to speed up the cooling process in the freezer might cause crystallization issues.

Essential Techniques


Mastering the sugar melting process is crucial. This involves carefully heating sugar until it dissolves completely, reaching the soft-ball stage for the perfect fudge consistency. Visual cues such as a smooth, molten appearance without grainy particles are signs of success.

Toasting pecans might seem minor, but it elevates the flavor profile significantly. Properly toasted pecans should be golden brown and aromatic, indicating that their natural oils have been brought out, enhancing both taste and texture.

Pro Tips for Perfect Butter Pecan Fudge


Ensure your butter is at room temperature before beginning to facilitate smooth mixing. This little step helps achieve a consistent texture.

Use a heavy-bottom saucepan to ensure even heat distribution and prevent scorching, which can impart a bitter taste to the fudge.

Always use a candy thermometer to hit the precise temperature marks required for fudge. Eyeballing it might lead to variability in texture and hardness.

Add vanilla extract at the very end of the cooking process; heat can diminish its flavor if added too early.

Consider adding a pinch of salt to balance out the flavors and enhance the natural sweetness of the pecans.

For easier cutting, lightly oil your knife and wipe it frequently to prevent sticking.

Variations and Adaptations


Regional variations might include adding bourbon for a Kentucky twist, incorporating raisins for a more Northeast feel, or including a dash of chili for a southwestern kick.

For seasonal adaptations, consider incorporating crushed candy canes around the holiday season, or drizzling with caramel for a richer variation in fall.

Dietary modifications can involve using dairy-free butter and sweetened condensed coconut milk to create a vegan-friendly version.

Flavor variations can include incorporating vanilla or caramel extracts, or substituting half of the butter with browned butter for a nutty depth.

For a twist in texture, try incorporating white chocolate chips or toffee bits, adding unexpected bites of additional sweetness and crunch.

Presentation alternatives include shaping the fudge in molds for fancy shapes or dusting with a touch of powdered sugar for an elegant look.

Serving and Presentation Guide


When plating, consider individually wrapping pieces in decorative wax paper or placing them in small paper cups for a festive look. This not only makes them more appealing but also aids in portion control.

Garnishing can involve sprinkling extra toasted pecan pieces on top or even drizzling melted chocolate for added flair.

Traditional accompaniments might include serving alongside coffee or tea to cut through the fudge’s sweetness, especially after a meal.

Modern serving suggestions could include pairing with fresh berries or a dollop of whipped cream to balance the richness.

Serve fudge at room temperature to best enjoy its creamy texture, but slightly chilled if you prefer a firmer bite.

For portion control, cut the fudge into smaller pieces, allowing guests to indulge without overdoing it.

Wine and Beverage Pairing


Pairing Butter Pecan Fudge with wine can elevate the dessert experience. Opt for a sweet dessert wine like a Moscato or a rich port to complement the flavors.

For non-alcoholic alternatives, consider offering a spiced chai tea or a creamy latte, which naturally aligns with the warm, comforting notes of the fudge.

If serving coffee, opt for a medium to dark roast to provide a rich, robust counterpoint to the sweetness.

Ensure any beverage is served at the appropriate temperature: wines and non-alcoholic drinks slightly chilled, coffees piping hot.

Serving suggestions include small half-glasses of wine or espresso-sized cups of coffee to avoid overpowering the palate.

Storage and Shelf Life


Store your Butter Pecan Fudge in an airtight container to maintain its freshness. At room temperature, it can last up to two weeks, making it ideal for holiday preparation.

Refrigerating will extend its shelf life to about a month. Before serving, let it sit out to reach room temperature for the best texture.

Use plastic wrap or parchment paper between layers to prevent pieces from sticking together and becoming misshapen.

Signs of spoilage include a stale smell or dry, crumbly texture. If in doubt, discard any questionable pieces.

Reheating is generally unnecessary, but should you choose to serve it slightly warm, a quick 5-second burst in the microwave for a few pieces can bring back the creaminess.

Fudge can be frozen for up to three months. Thaw in the fridge to prevent condensation from affecting the texture.

Make Ahead Strategies


Prepare Butter Pecan Fudge a few days in advance to allow the flavors to meld together. Store in an airtight container to preserve freshness.

Between steps, allow the cooked mixture to cool slightly before adding any extract or nuts, as this ensures better flavor integration.

While the taste improves over time, be cautious of drying out, especially if the air exposure is prolonged between storage phases.

Assemble any garnishments or cuts just before serving for the freshest look and taste.

Reheat individual pieces only if necessary, as excessive reheating can change the texture.

Add fresh garnishes like a sprinkle of sea salt or a drop of caramel on serving day for added appeal.

Scaling Instructions


Halving the recipe is straightforward; just ensure that the reduced quantities are measured precisely to maintain the fudge’s consistency.

For doubling or tripling, use larger pans and extend cooking times slightly, but keep a watchful eye on the sugar mixture to prevent burning.

Equipment like candy thermometers and large heavy-bottom pans are crucial for larger batches to manage the heat distribution effectively.

Timing modifications mainly revolve around the cooling time, which will increase slightly with larger batches.

When scaling, consider additional storage solutions, like larger airtight containers or layering with parchment to prevent sticking.

Nutritional Deep Dive


Butter Pecan Fudge offers a fascinating macro breakdown. While it’s high in sugars and fats, the presence of pecans introduces healthy monounsaturated fats.

Micronutrient-wise, pecans are a good source of vitamins and minerals, including Vitamin E and magnesium, lending minor health benefits to this indulgent treat.

Portion sizes are critical to enjoying fudge without significant dietary impact, with moderation key due to its caloric density.

While not necessarily a health food, the combination of protein and fiber from nuts can help manage hunger when eaten in small amounts.

For those concerned about sugar, cutting smaller pieces can help control intake without sacrificing the experience.

Dietary Adaptations


For a gluten-free version, ensure all ingredients are free from cross-contamination, as fudge itself does not contain gluten but might if exposed to it during preparation.

Dairy-free adaptations are easily achieved by replacing butter with vegan margarine and using dairy-free sweetened condensed milk for a similar result.

A vegan approach requires finding suitable non-dairy sweeteners that mimic the creaminess of regular condensed milk and butter flavors.

Low-carb enthusiasts might replace sugar with sugar substitutes designed for baking, although texture could slightly vary.

Keto dieters can focus on quality fats from pecans and seek keto-friendly sweeteners while adjusting quantities to personal dietary limits.

Those following a Paleo diet can adapt by using natural sugar alternatives and coconut oil as a butter replacement.

Troubleshooting Guide


Texture issues like graininess usually mean the sugar wasn’t melted properly. Re-melt and continuously stir until fully dissolved.

For flavor balance, if the fudge is too sweet, a pinch of salt might help counteract the sugar. If it lacks depth, try adding more vanilla or a splash of bourbon.

Temperature concerns often stem from not using a thermometer. For accurate results, carefully follow the cooking temperatures specified.

If equipment challenges arise, ensure your saucepan provides even heat. If necessary, double-insulate the pan by placing it inside a larger one.

For ingredient substitutions, maintain the ratios as close as possible to avoid unwanted consistency changes.

Timing concerns often occur during cooling; always allow the fudge to set at room temperature for the correct firmness.

Recipe Success Stories


Many have found great success with variations like adding a hint of sea salt, bringing out the rich undertones and balancing the sweetness.

Reader feedback often praises the recipe’s accessibility and adaptability, with creative twists providing fresh takes on a classic treat.

Community adaptations commonly include layering with chocolate or incorporating espresso for a coffee-infused variation.

Photography tips from users suggest cutting fudge with sharp, heated knives for clean edges and stacking them creatively for a dynamic presentation.

Enthusiastic reports reveal achieving store-quality fudge at home, with many appreciating the opportunity to share such a personalized gift with loved ones.

Frequently Asked Questions

Can I use other nuts besides pecans?
Yes, walnuts or almonds can work, though textures and flavors will differ slightly. Toast them first for optimum flavor.

What if my fudge doesn’t set properly?
If your fudge doesn’t set, it might not have reached the correct temperature. Re-cook to the soft-ball stage to achieve a firmer texture.

Is a candy thermometer necessary?
While not strictly mandatory, it’s highly recommended for precision. Without it, achieving the right consistency can be challenging.

How can I make my fudge less sweet?
Consider reducing sugar slightly or using a mix of rich cacao nibs or dark chocolate for a more bitter balance.

Can I freeze Butter Pecan Fudge?
Absolutely, wrap it tightly in foil and place it in a freezer-safe container. Thaw in the fridge or at room temperature when ready to enjoy.

How long does homemade fudge last?
Stored properly, it can last two weeks at room temperature, four weeks in the fridge, and several months if frozen.

What’s the best way to cut fudge?
For clean cuts, use a hot, sharp knife, wiping it clean between cuts to prevent sticking and ensure smooth edges.

Can I make this fudge without nuts?
Yes, you can omit pecans for a plain butter fudge, swapping in chocolate chips or other candies for texture if desired.

Is this recipe suitable for diabetics?
Given its sugar content, diabetics should exercise caution. Opting for low-sugar sweeteners might offer a more suitable alternative.

What do I do if my fudge is too hard?
Re-melt it gently with a splash of cream, re-cook to the correct temperature, and re-pour to reset properly.

Why is my fudge grainy?
Graininess comes from undissolved sugar. Stir thoroughly during cooking and let it dissolve completely before removing from heat.

What can I add to enhance the flavor?
Consider vanilla extract, sea salt, or a splash of bourbon or rum for deeper flavors. Toasted coconut can also provide a delightful twist.

Additional Resources


Explore related recipes like chocolate pecan bark or explore caramel variations for more candy-making adventures. Each offers unique challenges and rewards, expanding your expertise.

Technique guides on candy-making basics are invaluable. Understanding each step deeply allows room for creativity and successful adaptations.

Information on different nuts and their applications in desserts can open doors to new flavor combinations and textures.

For equipment recommendations, seek insights on the best brands for candy thermometers and pans to ensure precision and quality in candy crafting.

Seasonal variations might mean exploring citrus during summer months or hearty spices in winter, allowing your fudge to naturally align with seasonal flavor profiles.

Join the Conversation


Share your Butter Pecan Fudge creations on social media using specific hashtags to connect with fellow bakers. Seeing others’ interpretations can inspire further innovation.

Offer photography tips like using natural lighting and texture-rich backgrounds to showcase the brilliance of home-made fudge.

Encourage readers to share reviews and tweak the recipe to their liking, creating a vibrant community around shared culinary experiences.

Community engagement thrives on variation sharing, whether it’s swapping ingredients or providing beautiful plating ideas.

By fostering an open exchange of ideas and experiences, we can enrich our baking journeys, making recipes like Butter Pecan Fudge enduring kitchen staples.

The Recipe

Butter Pecan Fudge

Serves: 24 pieces

Prep Time: 15 mins

Cook Time: 20 mins

Total Time: 35 mins

Kitchen Equipment Needed

  • Candy thermometer
  • Heavy saucepan
  • Wooden spoon
  • Baking dish
  • Parchment paper
  • Knife

Ingredients

  • 2 cups granulated sugar
  • 1/2 cup unsalted butter, cubed
  • 1/2 cup evaporated milk
  • 2 cups toasted pecan halves
  • 1 tsp vanilla extract

Directions

  1. Line a baking dish with parchment paper for easy release.
  2. In a heavy saucepan, combine sugar, butter, and milk over medium heat.
  3. Stir constantly until the mixture reaches the soft-ball stage using a candy thermometer.
  4. Remove from heat, and stir in vanilla and toasted pecans.
  5. Quickly pour mixture into the prepared dish, spreading evenly.
  6. Allow to cool at room temperature until set, about 2 hours.
  7. Once set, remove fudge from the dish and cut into squares.

Recipe Notes

  • Ensure sugar is fully dissolved before reaching the soft-ball stage to prevent graininess.
  • For added flavor, consider stirring in a tablespoon of rum or bourbon with the vanilla.
  • Store fudge in an airtight container to maintain freshness and prevent drying out.

Irresistible White Chocolate Raspberry Cheesecake Balls for Dessert Lovers

White Chocolate Raspberry Cheesecake Balls: Irresistible Dessert Delight

⚖️
Difficulty
Easy

⏲️
Prep Time
20 mins

🕒
Cook Time
5 mins

⏱️
Total Time
25 mins

🍽️
Servings
12

Imagine indulging in the blissful combination of creamy white chocolate and tart raspberries, all wrapped in a luscious cheesecake ball. These decadent White Chocolate Raspberry Cheesecake Balls are a dessert dream with a velvety texture that melts in your mouth, leaving behind a medley of flavors that dance on your taste buds. Whether you’re a fan of quick desserts or cherishing an evening of baking treats, this recipe stands as a beacon of delightful indulgence.

Beneath the surface of their gorgeous exterior, these cheesecake bites conceal a core of sweetness and tang, perfectly balanced to satisfy your dessert cravings. Encased in a delicate white chocolate shell that adds a satisfying snap, these balls offer an enchanting visual and gustatory presentation. Their vibrant colors and rich flavors make them ideal for special occasions, gatherings, or a quiet night at home.

Quick Recipe Highlights

  • Flavor Profile: The sweet, creamy white chocolate perfectly complements the tart raspberry, creating a delightful balance.
  • Texture: These cheesecake balls boast a smooth, creamy interior encased in a crisp white chocolate shell.
  • Aroma: You’ll be greeted with the sweet scents of white chocolate and subtle hints of fresh raspberries.
  • Visual Appeal: The contrast of white chocolate and deep red raspberry create a visually stunning treat.
  • Skill Level Needed: Simplistic enough for beginners, yet impressive enough for seasoned bakers.
  • Special Equipment: A hand mixer or blender is helpful for achieving a smooth cheesecake filling.

Recipe Overview

  • Difficulty Level: Categorized as easy, this recipe requires basic mixing and rolling skills, ideal for newcomers to culinary delights.
  • Category: A versatile dessert, perfect for snack time cravings or after-dinner delights.
  • Cuisine: Rooted in modern dessert trends while appreciating classic flavor pairings.
  • Cost: Economical, using accessible ingredients available in most grocery stores, keeping dessert costs low.
  • Season: Best enjoyed in the spring and summer when raspberries are at peak freshness for enhanced flavor.
  • Occasion: Suitable for parties, holidays, or a simple treat, these balls add a sweet touch to any event.

Why You’ll Love This Recipe


These White Chocolate Raspberry Cheesecake Balls captivate with their exquisite taste and texture. Each bite offers a delightful contrast between smooth, tangy cheesecake filling and a crunchy, sweet chocolate coating. This recipe provides an excellent opportunity for creative dessert making that doesn’t sacrifice convenience or time. With just a few simple steps, anyone can achieve dessert perfection.

Beyond their delightful taste, these treats are conveniently easy to make, requiring minimal equipment and simple ingredients. They promise maximum flavor with minimal effort, making them an ideal choice for spontaneous dessert creations. For those mindful of nutritional benefits, raspberries provide a source of fiber, vitamins, and antioxidants, contributing to a guilt-free indulgence.

Social occasions benefit significantly from these irresistible cheesecake balls. Their elegant appearance and rich flavors make them a party favorite, ensuring admiration and compliments from family and friends. The recipe’s cost-effectiveness ensures accessibility, offering a gourmet feel without the associated price tag.

Historical Background and Cultural Significance


White chocolate and raspberry have long been cherished as a classic combination in the dessert world. The pairing evokes a sense of sophistication, with raspberry’s history tracing back to ancient cultivation in Europe. It holds cultural importance as a symbol of purity and invisibility in folklore, often used in culinary traditions to add a dash of vibrancy and tartness to sweet dishes.

The evolution of the cheesecake ball itself is a modern twist on traditional cheesecake, transforming it into a more portable, bite-sized form that aligns with today’s culinary trends focusing on practical, stylish treats. The melding of these ingredients reflects a fusion of old and new, marrying historical flavors with innovative presentation methods.

Ingredient Deep Dive


White chocolate’s origins trace back to the 1930s, introduced by Nestlé. An adaptation of milk chocolate, it lacks cocoa solids and offers a sweet, creamy experience, providing a smooth, melt-in-your-mouth delight. Selecting high-quality white chocolate ensures a creamy texture without graininess for these cheesecake balls. Store it in a cool, dry place to prevent melting or blooming.

Raspberries, native to Europe, offer rich cultural and nutritional benefits, thriving in regions with cool summers. Known for their high fiber, vitamin C, and antioxidant content, they contribute tanginess and natural sweetness to the cheesecake filling. Choose firm, fragrant raspberries and store them in the refrigerator to maintain freshness before use.

Common Mistakes to Avoid

  • Overmixing the cheesecake filling can lead to a runny texture; mix just until smooth and combined.
  • Not chilling the balls enough before coating in chocolate can result in a mess; ensure they are firm before dipping.
  • Using low-quality white chocolate can affect both taste and texture; opt for high-quality brands for the best results.
  • Failing to dry raspberries properly can add excess moisture to the filling; gently pat them dry before use.
  • Overheating white chocolate can cause it to seize; melt gently over low heat or use a double boiler.
  • Not allowing chocolate coating to set can cause smearing; place coated balls in the fridge to firm up.
  • Using overly ripe raspberries can lead to a mushy filling; select firm, fresh fruit.
  • Skipping the lining of the baking tray can result in sticky balls; always use parchment paper.

Essential Techniques


Achieving the perfect chai latte requires mastering the steaming of milk to a velvety consistency. The key is to heat the milk to just the right temperature—around 150°F—to enhance sweetness while creating a luscious foam. Avoid overheating, which can scorch the milk and affect taste. When steaming, position the steam wand just below the milk’s surface for optimal texture and microfoam, crucial for the creamy chai latte experience.

Creating white chocolate raspberry cheesecake balls involves key techniques. Properly melting the white chocolate is crucial; gently heat it over a double boiler or microwave in short intervals, stirring frequently to avoid burning. Correctly freezing the cheesecake balls before dipping ensures the chocolate adheres smoothly. This step prevents mess and guarantees a hard, even coating, essential for the perfect texture balance.

Pro Tips for Perfect White Chocolate Raspberry Cheesecake Balls


Ensure berries are thoroughly dried to prevent unwanted moisture in the filling, affecting both taste and texture. While melting chocolate, add a small amount of coconut oil to achieve a smoother, shinier coating once set. Use a toothpick or fork for easy dipping, allowing excess chocolate to drip off before placing them on parchment to minimize pooling.

Variations and Adaptations


Experiment with regional variations by substituting the raspberries for other berries such as strawberries or blueberries, which offer a slightly different tart-sweet experience. For seasonal adaptations, incorporate cinnamon or nutmeg during fall to add warmth. Adapting for dietary needs, such as using dairy-free cream cheese and coconut cream, can create a vegan-friendly version without sacrificing richness.

Serving and Presentation Guide


For an elegant display, arrange the cheesecake balls on a tiered cake stand lined with parchment paper, garnished with fresh mint leaves or a light dusting of powdered sugar. Modern serving suggestions include alternating colors on skewers for a unique dessert kebab. Pay attention to portion control by placing individual balls in mini cupcake liners for bite-sized perfection.

Wine and Beverage Pairing


Enhance your dessert experience by pairing these cheesecake balls with a glass of sparkling rosé, which complements the tart raspberry and creamy white chocolate. For a non-alcoholic alternative, try a light berry-infused iced tea, adding herbal notes to the sweet treat. Hot beverages like a classic Earl Grey tea can also pair beautifully with this dessert, offering a warming complement to the treat’s flavors.

Storage and Shelf Life


To store these treats, place them in an airtight container and refrigerate for up to 5 days. Ensure they are kept in a single layer to prevent sticking. Freezing is also an option; lay them on a baking tray until fully frozen, then transfer to zip-lock bags. Allow the cheesecake balls to thaw in the fridge before serving to maintain their creamy texture.

Make Ahead Strategies


This recipe is perfect for make-ahead preparation. Roll and pre-chill the cheesecake balls a day before, storing them in airtight containers before dipping in chocolate. This method ensures freshness and allows chocolate to adhere seamlessly when you’re ready to serve. Add a fresh garnish just before presenting them for optimal visual and flavor appeal.

Scaling Instructions


For larger gatherings, double or triple the recipe by ensuring additional preparation and storage space. Adjust the amount of chocolate and raspberries proportionally to maintain quality. If scaling down, reduce ingredient quantities while maintaining the same ratios to ensure consistency in texture and flavor.

Nutritional Deep Dive


These cheesecake balls offer a balance of macronutrients, with cream cheese providing a source of fat and protein, complemented by the antioxidants and fiber found in raspberries. Consider portion control to manage caloric intake, particularly for those mindful of dietary goals. Analyze ingredient labels for specific nutritional details, sharing any allergen information with guests.

Dietary Adaptations


Catering to dietary needs, these balls can be made gluten-free by using gluten-free graham cracker crumbs. For a vegan adaption, replace the cream cheese with vegan cream cheese alternatives and use dairy-free white chocolate to maintain a similar texture and flavor profile. Incorporating such changes ensures inclusivity without compromising on taste.

Troubleshooting Guide


For issues with texture, ensure cream cheese is softened properly for smooth mixing. If flavor balance is off, consider adding a touch more vanilla or a hint of lemon zest. Equipment challenges, such as overmixing with a powerful mixer, can be resolved by mixing just until combined. Address ingredient substitutions by choosing high-quality alternatives that closely mimic original components.

Recipe Success Stories


Many have shared their success with these cheesecake balls, often experimenting with additional ingredients like crushed pistachios for a nutty crunch or swapping raspberries for blackberries for an intriguing twist. Community feedback consistently highlights the balance of sweet and tart as a significant crowd-pleaser, and readers often note the ease and enjoyment of the preparation process.

Frequently Asked Questions

Q: Can these cheesecake balls be frozen?
A: Yes, they can be frozen. Place them on a tray until fully frozen, then store in a zip-lock bag. Thaw in the refrigerator before serving.

Q: What if I can’t find fresh raspberries?
A: Frozen raspberries can be used; simply thaw and pat them dry before incorporating into the recipe.

Q: Can I use milk chocolate instead of white chocolate?
A: Absolutely, using milk chocolate will give a richer taste, though it may slightly overshadow the raspberry notes.

Q: How do I prevent the balls from sticking together?
A: Ensure chocolate coating is completely set and store in single layers separated by parchment paper.

Q: How long do they last at room temperature?
A: They should be refrigerated if not consumed within 2 hours, as cream cheese requires cooler temperatures to prevent spoilage.

Q: Can I make this dairy-free?
A: Yes, use a dairy-free cream cheese substitute and coconut cream for the filling, along with a dairy-free white chocolate.

Additional Resources


Explore related recipes like our raspberry cheesecake bars or white chocolate mousse for variations in presentation and texture. Delve into technique guides on perfecting white chocolate melting and cheesecake filling consistency for a professional touch. Discover a variety of ingredient information and equipment recommendations to ease your culinary journey.

Join the Conversation


We’d love to see your culinary creations! Share your White Chocolate Raspberry Cheesecake Balls photos and experiences on social media using #RaspberryCheesecakeDelight. Leave a review or join our community discussions for further recipe variations and adaptations. Your feedback enhances our recipe with personal touches and new ideas.

The Recipe

White Chocolate Raspberry Cheesecake Balls

Serves: 12

Prep Time: 20 mins

Cook Time: 5 mins

Total Time: 25 mins

Kitchen Equipment Needed

  • Mixing bowls
  • Hand mixer or stand mixer
  • Baking sheet
  • Parchment paper
  • Microwave-safe bowl
  • Spatula

Ingredients

  • 1 cup white chocolate chips
  • 1/2 cup crushed graham crackers
  • 8 oz cream cheese, softened
  • 1/4 cup powdered sugar
  • 1 tsp vanilla extract
  • 1 cup fresh raspberries, mashed

Directions

  1. Line a baking sheet with parchment paper and set aside.
  2. In a mixing bowl, beat the softened cream cheese until smooth. Add powdered sugar and vanilla extract, mixing well.
  3. Fold in the crushed graham crackers and mashed raspberries, ensuring they are evenly combined.
  4. Roll mixture into 1-inch balls and place them on the prepared baking sheet. Freeze for 15 minutes.
  5. Melt the white chocolate chips in a microwave-safe bowl, heating in 30-second intervals and stirring until smooth.
  6. Dip the chilled cheesecake balls in melted white chocolate, ensuring they are fully coated.
  7. Place the coated balls back on the baking sheet and refrigerate until the chocolate is set.
  8. Serve chilled and enjoy!

Recipe Notes

  • Consider adding a teaspoon of lemon zest for an extra tangy flavor twist.
  • Substitute raspberries with blueberries or strawberries for variations in taste and color.

Irresistible Strawberry Cheesecake Crunch Bites Recipe for Dessert Lovers

Strawberry Cheesecake Crunch Bites: Delightful Mini Treats

⚖️
Difficulty
Easy

⏲️
Prep Time
15 mins

🕒
Cook Time
5 mins

⏱️
Total Time
20 mins

🍽️
Servings
24 bites

Indulge in the mouthwatering world of miniature desserts with our Strawberry Cheesecake Crunch Bites. These delightful, poppable treats blend the creamy richness of cheesecake with the fresh, tangy burst of strawberry, all encased in a satisfying crunch. Perfect for parties or a sweet snack, these bites offer a symphony of flavors and textures that are as easy to make as they are to eat.

Imagine biting into a luscious combination of velvety cheese paired with a fruity punch of strawberry; it’s a taste that leaves a lingering desire for more. These Strawberry Cheesecake Crunch Bites are crafted to lure dessert lovers with their delicate balance, making them an irresistible crowd favorite. Each bite presents a sweet symphony that dances on your palate, inviting joy and satisfaction.

Perfect for picnics and family gatherings, these cheesecake crunch bites are not just delicious but also visually captivating. With their ruby-red strawberry topping and golden crunchy base, they bring color and zest to any dessert spread.

Quick Recipe Highlights

  • Flavor Profile: A delightful blend of sweet and tart fruitiness combined with creamy undertones, balancing perfectly between the vibrant strawberries and smooth cheesecake filling.
  • Texture: Offers a luxurious combination of creamy filling juxtaposed with the crispiness of a crumbly crust.
  • Aroma: Inviting hints of strawberry that mingle with the subtle richness of cream cheese, creating a nose-pleasing experience.
  • Visual Appeal: Bright red strawberry accents atop a creamy white base, encased in a golden crust, creating a stunning tabletop presentation.
  • Skill Level Needed: Simple enough for beginners, requiring basic mixing and layering techniques that are easy to follow.
  • Special Equipment: A mini muffin pan is recommended to shape the bites perfectly, along with a mixer for blending cream cheese and sugar smoothly.

Recipe Overview

  • Difficulty Level: Chosen to be easy, this recipe is accessible to novice bakers and children, allowing everyone to enjoy the creation process.
  • Category: Perfect under desserts, you’ll swoon over these quick bites in parties or as after-dinner treats.
  • Cuisine: A fusion of classic American dessert heritage with contemporary twist of bite-sized indulgence.
  • Cost: Affordable to make, these treats utilize common household ingredients, approximately costing under $10 for two dozen.
  • Season: Best enjoyed when strawberries are in season for the freshest flavor, typically spring and summer.
  • Occasion: Suitable for birthdays, potlucks, and bridal showers, these bites are versatile, adding charm to various gatherings.

Why You’ll Love This Recipe


The Strawberry Cheesecake Crunch Bites are loved not only for their delectable flavor and texture but also for their sheer convenience. Quickly made within 20 minutes, they allow you more time to enjoy with family and friends rather than spending long hours in the kitchen. The creamy and fruity elements ensure a satisfying taste that resonates with both adults and children alike, promising a hit at any kind of gathering.

These thoughtful bites are relatively healthy, using a balance of cream cheese and fresh fruits, providing essential nutrients in a dessert form. Indulge guilt-free, knowing each piece is crafted with wholesome ingredients. Additionally, the compact size makes portion control straightforward, offering a treat without the temptation of over-indulgence.

Turn any event into a celebratory affair when you serve these bite-sized wonders. Their ornate presentation adds a festive air to any table, turning casual gatherings into memorable occasions. The brilliance in design and taste encourages compliments and conversations, making these bites a social delight.

Sourcing ingredients for this recipe is effortless, with strawberries and cream cheese widely available year-round. This makes the Strawberry Cheesecake Crunch Bites an accessible and cost-effective treat, ideal for the spontaneous dessert artist looking to surprise guests without breaking the bank or a sweat.

Historical Background and Cultural Significance


Strawberry cheesecake has roots that trace back to the ancient Greeks, who first coined the term “cheese cake.” Throughout the centuries, its evolution has seen numerous adaptations, including the addition of strawberries, which became a staple in the United States in the 1800s. The mini bite format, however, brings a modern twist to this age-old classic.

Culturally, strawberries signify love and happiness in many traditions, which adds a heartfelt touch to every bite consumed. These tiny cheesecake bites preserve the essence of happiness and love, whether shared among friends or loved ones at family events.

Mini cheesecakes originally gained popularity in the 1950s, reflecting a shift towards convenient party foods as home entertaining became more commonplace. The evolution of these bites has seen them adapted into various flavor combinations and tweaks, keeping in step with culinary trends.

Regional variations have emerged, with some integrating different homemade fruit jams or cheese alternatives based on local preferences. Whether in New York, famed for its renowned cream cheese cheesecakes, or found in Southern homes featuring tangy fruits, these treats have a national love affair.

Ingredient Deep Dive


Fresh strawberries are the heart of these cheesecake bites, celebrated for their bright color and sweet, floral aroma. For centuries, strawberries have symbolized romance and purity, making them a fitting choice for these charming desserts. They bring a light, natural sweetness, packed with vitamin C and powerful antioxidants promoting good health.

Selecting prime strawberries ensures the best flavor, with a deep red color indicating ripeness. Store them in a refrigerated setting to maintain their freshness, but ensure they aren’t left unwashed until just before use to maintain their structural integrity.

Likewise, cream cheese, originally from the vibrant culture of New York dairy artisans, lends a creamy texture and rich body to the cheesecake filling. Packed with calcium and essential fats, it makes a deliciously smooth dessert centerpiece. Choose a reputable brand and allow it to reach room temperature before blending for best results, preventing lumps.

To maintain cream cheese’s freshness, it should remain refrigerated and tightly sealed in its original packaging. If needed, consider mascarpone for a slightly sweeter alternative or Greek yogurt for a lower-calorie substitute.

Common Mistakes to Avoid

  • Overmixing the cream cheese mixture, leading to a runny consistency that doesn’t hold up well once cooled. Mix until just combined.
  • Using unripe strawberries, which lack flavor and sweetness, detracting from the overall taste.
  • Not allowing the bites to set adequately after baking, causing a messy eating experience.
  • Forgetting to grease the muffin pan, resulting in sticky bites that won’t release cleanly.
  • Overbaking can result in a dry texture. Keep an eye on them for a perfect creamy bite.
  • Neglecting to cool bites significantly affects their consistency and flavor development.
  • Skipping crust pressing firmly can lead to crumbly bites that fall apart easily.
  • Underestimating portion sizes might lead to bites that don’t hold together well.

Essential Techniques


Master mixing cream cheese to a smooth, lump-free mixture for supremely creamy cheesecake bites. Begin with softened cheese to allow for gentler mixing, aiding in achieving a silky consistency. Use a low-speed setting to avoid incorporating too much air, which can undermine texture integrity.

Firmly pack the base crumbs with gentle pressure to form a solid crust. A well-packed base prevents leakage and crumbling, allowing each bite to maintain its structure when removed from the pan.

Practice patience with cooling, as abrupt changes in temperature can impair texture and lead to cracks. Ideal cooling should be gradual, facilitating flavor development and cheesecake setting to optimal consistency.

Pro Tips for Perfect Strawberry Cheesecake Crunch Bites


Choose ripe, fragrant strawberries for maximum flavor impact. Their natural sweetness and bright aroma elevate the entire dessert, bringing depth to every bite.

Refrigerate the cream cheese well in advance and allow to soften at room temperature prior to mixing, ensuring a smoothly blended filling without lumps.

For a golden crust, keep an eye on the baking time. Pull the bites as soon as the edges darken slightly to avoid drying out the cheesecake filling.

Incorporate a touch of lemon juice to enhance both the cheesecake flavor and strawberry’s natural sweetness, creating a pleasantly balanced bite.

Variations and Adaptations


Regional variations can incorporate local fruits such as blueberries or raspberries, which can be equally delightful. Swap strawberries for a different berry compote for seasonal freshness or dietary preferences.

For a seasonal twist, integrate winter spices like cinnamon and nutmeg during colder months, offering a warm, comforting bite. Alternatively, add mint for a fresh summer rendition.

Dietary modifications are seamless, using lactose-free cream cheese or non-dairy substitutes for a vegan adaptation. Consider almond or oat crust bases for gluten-free varieties, catering to diverse dietary preferences and needs.

Serving and Presentation Guide


Serve these bites on an elegant tiered tray to add dimension and interest to your dessert presentation. Set them apart with a dusting of powdered sugar or dollop of whipped cream as a finishing touch.

Traditional cheesecake accompaniments such as coffee or vanilla tea make perfect pairings, enhancing subtle flavors while keeping focus on the strawberries.

Wine and Beverage Pairing


Pair with light, sparkling wines like Prosecco to cut through the richness while complementing the strawberry nuances. Alternatively, a rich dessert wine can augment the vanilla notes in the cheesecake.

For non-alcoholic choices, opt for green tea or a mild fruit infusion that will echo the strawberry’s freshness without overwhelming the palate.

Storage and Shelf Life


Store your cheesecake bites in an airtight container in the refrigerator for up to 5 days, sealing in freshness. They can also be frozen for longer storage, but allow them to thaw in the fridge to maintain texture before serving.

Recognize spoilage by watching for discoloration or unpleasant odors, and ensure proper hygiene when handling post-baking.

Make Ahead Strategies


Prepare bites in advance by assembling the components and refrigerating a day before serving. This allows for flavors to meld, providing a richer taste experience.

As a fresh touch, hold off garnishing until serving time, ensuring each bite is presented at its very best.

Scaling Instructions


To scale down for smaller gatherings, simply halve ingredient quantities, maintaining the same proportions for consistent quality. Doubling the recipe requires a larger mixing vessel to adequately incorporate ingredients without spilling.

Keep an eye on cooking times, adjusting slightly based on bite size when altering quantities. Utilize proper pans and have extra ready if needed to bake additional batches.

Nutritional Deep Dive


Each Strawberry Cheesecake Crunch Bite offers a balanced macro profile for a dessert, composing of healthy fats from cream cheese and antioxidant-rich strawberries for a heartening treat.

For dietary-conscious consumers, assess portion sizes carefully, relishing one or two bites for satisfying indulgence without excess calorie intake.

Dietary Adaptations


Adapt these bites for a gluten-free palate by choosing almond flour bases. For dairy-free or vegan alternatives, explore plant-based cream cheese and butter substitutes without compromising flavor.

Keto enthusiasts can utilize low-carb sweeteners and specific almond or coconut flour crusts to enjoy these bites while maintaining dietary goals.

Troubleshooting Guide


Addressing texture concerns: Ensure not to over mix or over bake, which impacts creamy texture. Balance flavor by adjusting sweetness levels to complement strawberry tartness.

Temperature consistency is vital, facilitating smooth cooling and preventing cracks. Invest in quality mini pans to prevent sticking and bypassing unnecessary challenges.

Adjust timing concerns according to specific oven calibration variances, revisiting ingredient proportions if using alternative dietary adaptations.

Recipe Success Stories


Readers rave about the simplicity and elegance of these bites, sharing variations incorporating seasonal fruit jams and adjusting sweetness levels to suit individual palates.

Captured in vibrant photography to celebrate their creation, these Strawberry Cheesecake Crunch Bites shine as culinary accomplishments shared among friends and family.

Frequently Asked Questions

Can I use frozen strawberries?
Fresh strawberries are recommended for optimal flavor and texture. If using frozen, ensure they’re well thawed and drained to avoid excess moisture.

How do I prevent cheesecakes from sticking to the pan?
Thoroughly grease your pan or use parchment liners to facilitate easy removal, ensuring the crust and cheesecake release intact.

What’s the best way to serve them?
Arrange on a serving platter, chilling for a few minutes before, to ensure freshness and visual appeal before your guests arrive.

Can I make these a day in advance?
Absolutely, these bites actually develop better flavor when prepared a day ahead, giving time for the flavors to meld in the refrigerator.

What if I don’t have a mini muffin pan?
A standard muffin tin can be used, although this will yield fewer, larger bites which may require slightly adjusted cooking times.

How do I store leftovers?
Store any leftovers in an airtight container in the fridge. If freezing, wrap each bite in plastic wrap before adding them to a sealed container to avoid freezer burn.

Can these be made vegan?
Yes, use a plant-based cream cheese and substitute the buttery crust with coconut oil or vegan butter to accommodate a vegan diet.

Are there low-sugar options?
Natural sweeteners like honey or maple syrup can be used in moderation, but be aware this may alter the texture slightly.

Will these bites last through a picnic?
With proper storage in insulated carriers, these cheesecake bites fare well for short-term outdoor gatherings.

Do I need any special tools?
Beyond a mini muffin pan, a mixer for cream cheese is all you need for smooth, lump-free cheesecake filling.

Additional Resources


Explore more creamy dessert adventures with our related recipes like Lemon Blueberry Cheesecake Parfaits, and boost your baking confidence with our detailed technique guides.

For equipment recommendations, check our post on essential baking tools that simplify kitchen tasks, ensuring the perfect bake every time.

Join the Conversation


We invite you to share your Strawberry Cheesecake Crunch Bite creations on social media with #CheesecakeBiteDelights. Explore renditions from fellow bakers worldwide, showcasing their unique variations.

Share your experiences and engage in a vibrant community dialog, offering tips, feedback, and inspirational journey others can delight in.

The Recipe

Strawberry Cheesecake Crunch Bites

Serves: 24 bites

Prep Time: 15 mins

Cook Time: 5 mins

Total Time: 20 mins

Kitchen Equipment Needed

  • Mini muffin pan
  • Mixing bowls
  • Electric mixer
  • Spatula
  • Measuring cups and spoons

Ingredients

  • 1 cup graham cracker crumbs
  • 2 tablespoons melted butter
  • 1/4 cup sugar
  • 8 oz cream cheese, softened
  • 1/4 cup powdered sugar
  • 1 teaspoon vanilla extract
  • 2 tablespoons lemon juice
  • 1 cup fresh strawberries, chopped

Directions

  1. Preheat the oven to 350°F (175°C).
  2. Mix graham cracker crumbs, melted butter, and sugar in a bowl until crumbs are well coated.
  3. Press the mixture firmly into the bottom of each mini muffin cup.
  4. Bake for 5 minutes, then let cool completely.
  5. In a large bowl, beat the cream cheese until smooth. Add powdered sugar, vanilla extract, and lemon juice; mix until creamy.
  6. Spoon the cream cheese mixture over cooled crusts, topping each with a piece of strawberry.
  7. Chill in the fridge for at least an hour before serving.

Recipe Notes

  • For a gluten-free version, substitute graham cracker crumbs with crushed almonds or gluten-free biscuits.
  • Adjust sweetness levels by adding or reducing sugar in the cream cheese mixture.

Irresistible Praline Popcorn Recipe for a Sweet Homemade Snack

Praline Popcorn: A Sweet and Crunchy Gourmet Treat

⚖️
Difficulty
Easy

⏲️
Prep Time
15 mins

🕒
Cook Time
45 mins

⏱️
Total Time
60 mins

🍽️
Servings
12

Step into the world of gourmet snacking with our irresistible Praline Popcorn. This delightful treat combines the crunch of perfectly popped corn with the rich, nutty goodness of pralines, all wrapped up in a buttery caramel coating. Whether you’re looking to satisfy a sweet tooth or entertain guests with a unique treat, Praline Popcorn is the perfect choice. Its tantalizing aroma fills your home, inviting everyone to gather around and indulge.

The magic of Praline Popcorn lies in its contrasting textures and flavors. Each bite delivers a crunchy popcorn base enveloped in a creamy praline coating. The sweetness of the caramel praline paired with the slight saltiness of the popcorn creates an irresistible harmony that beckons for more. Perfect for movie nights, family gatherings, or as a delightful homemade gift, this popcorn recipe is sure to impress.

Quick Recipe Highlights

  • Flavor Profile: A delightful combination of sweet caramel and nutty pralines with a hint of butter and salt, providing a harmonious taste experience.
  • Texture: The contrasting textures of crispy popcorn and crunchy pralines make for a satisfying mouthfeel that’s both light and indulgent.
  • Aroma: The sweet, nutty aroma of praline and caramelized sugar fills the air, making it impossible to resist.
  • Visual Appeal: Golden brown caramel-coated popcorn speckled with toasted pralines creates an inviting and elegant presentation.
  • Skill Level Needed: Easy enough for beginners, requiring only basic kitchen skills and equipment.
  • Special Equipment: You’ll need a large baking sheet and a reliable saucepan for making the caramel sauce.

Recipe Overview

  • Difficulty Level: Praline Popcorn is simple to prepare, making it an excellent choice even for novice cooks. The process primarily involves mixing and baking, with no intricate techniques required.
  • Category: This recipe falls under snacks and desserts, providing a sweet treat that’s perfect at any time.
  • Cuisine: Although pralines are deeply rooted in Southern American cuisine, this popcorn treat brings a touch of global gourmet flair to your table.
  • Cost: Relatively inexpensive, as it uses basic pantry ingredients such as popcorn kernels, sugar, butter, and nuts, making it budget-friendly.
  • Season: Suitable for any season, but especially enjoyable during cooler months when cozying up with a warm snack is most pleasant.
  • Occasion: Perfect for family gatherings, movie nights, holiday parties, or as a thoughtful homemade gift.

Why You’ll Love This Recipe


The flavor and texture appeal of Praline Popcorn is its most compelling feature. The sweet, crunchy coating paired with the airy popcorn creates a symphony of flavors and textures that is truly satisfying. The subtle aroma of toasted nuts enhances the overall taste profile, making each bite a delightful experience.

Convenience is another benefit. The preparation of this praline popcorn is straightforward and quick, requiring no complex culinary skills. Even those new to cooking will find the step-by-step process easy to follow, ensuring a rewarding experience.

From a nutritional standpoint, Praline Popcorn provides a sweet treat with the benefit of fiber from the popcorn and healthy fats from the nuts. While indulgent, it is a much healthier option compared to many store-bought sweets, allowing for a guilt-free enjoyment.

Praline Popcorn is a fantastic addition to any social gathering. Serve it at parties, family get-togethers, or as a unique offering at potlucks. Its universal appeal across ages makes it a crowd-pleaser, sure to spark conversations and laughter.

Finally, it’s cost-effective and accessible. Created from everyday pantry staples, it requires no special equipment or ingredients. It’s an economical way to make a gourmet treat at home, showcasing the balance of budget-conscious and flavor-forward cooking.

Historical Background and Cultural Significance


Praline Popcorn owes its origin to the deep culinary traditions of the Southern United States, where pralines have woven themselves into the cultural tapestry. Originally a French confection, pralines made their journey to the American South, where they evolved to include the rich flavors of local pecans.

The cultural importance of pralines in Southern cuisine is profound. Pralines, originally introduced by French settlers, became a decadent treat cherished for their unique combination of creamy textures and nutty flavors, a hallmark of Southern culinary innovation.

Over time, the evolution of the recipe to include popcorn represents a melding of everyday American snacks with time-honored confections to create something uniquely new. This integration symbolizes the adaptability and creativity inherent in American cooking.

Regional variations of pralines themselves offer an intriguing look at the diversity in Southern cooking. While traditional pralines use pecans, some adaptations incorporate almonds or other nuts, showcasing a flexibility in ingredients that reflects local agricultural specialties.

Ingredient Deep Dive


Popcorn kernels serve as the crunchy base for our Praline Popcorn. Historically, popcorn has been a staple snack in American households known for its versatility and affordability. Nutritionally, popcorn offers a good source of fiber, making it a wholesome choice for snacks.

The secret to selecting popcorn lies in choosing quality kernels that yield fluffy, crisp puffs when cooked. Store popcorn in an airtight container to preserve its freshness and to ensure when popped it reaches the perfect texture necessary for holding the praline coating.

The praline element involves butter, sugar, and nuts, typically pecans. Butter imparts a rich, creamy texture and flavor that’s essential to pralines, while sugar caramelizes to form the sweet, crispy coating. Pecans provide a nutty, earthy undertone that perfectly complements the sweetness.

Selecting the freshest nuts is critical to achieving the best flavor. Pecans should be stored in a cool, dry place to ensure they remain fresh. For a twist, consider substituting pecans with almonds, walnuts, or a mix of your favorite nuts.

Common Mistakes to Avoid

  • Not fully popping the popcorn: Ensure all kernels are popped before adding any seasoning to avoid uneven texture and flavor distribution.
  • Burning the caramel: Keep the heat to medium and stir continuously to avoid burning and ensure a smooth, golden praline coating.
  • Insufficient coating: Make sure the popcorn is evenly coated with praline sauce for a consistent flavor and texture throughout.
  • Rushing the cooling process: Allow enough time for the praline popcorn to cool completely for the coating to harden properly and achieve the optimal crunch.
  • Over-mixing the caramel sauce: Be gentle to maintain a smooth consistency without introducing air bubbles that could affect the texture.
  • Forgetting to stir during baking: Stir the popcorn during the baking phase to ensure an even color and caramelization.
  • Using wet or damp nuts: Moisture can prevent caramelization. Ensure nuts are dry before use to achieve the right texture.
  • Storing improperly: Store in an airtight container to preserve freshness and texture. Avoid exposure to humidity.

Essential Techniques


Mastering the popping of popcorn is crucial. Heat oil in a large pot, add a few kernels until they pop, then add the rest. Cover with a lid, shaking occasionally to ensure all kernels pop evenly. This technique helps avoid burning and assures uniformity.

Caramelization is key to the praline experience. Cook the sugar and butter mixture over medium heat, stirring constantly. Watch carefully as the sugars melt and turn a rich golden color before adding the nuts. Perfecting this step ensures the praline glaze smoothly coats the popcorn.

Pro Tips for Perfect Praline Popcorn


Use high-quality kernels to achieve the fluffiest popcorn, providing a perfect foundation for your praline coating. Freshness matters for both popcorn and nuts.

For a deeper caramel flavor, allow the sugar to reach an amber hue before removing it from the heat. Careful timing and attention will bring out richer flavors.

When coating the popcorn with the praline mix, work quickly. Pour while the caramel is still warm to ensure even distribution before it begins to harden.

Want an extra crunch? Toast the nuts lightly before combining with the popcorn. It adds a layer of flavor depth that complements the sweetness.

For those who prefer a touch of salt with their sweetness, a light sprinkle of sea salt over the coated popcorn before it sets provides a delightful contrast.

If gifting your Praline Popcorn, consider packaging in clear cellophane bags tied with a ribbon. This not only looks professional but helps maintain freshness.

Schedule a movie night or social gathering right after making this to enjoy the popcorn at its freshest and most flavorful.

Variations and Adaptations


Regional variations of praline popcorn might include using cashew nuts in coastal areas or almonds where they are locally available. This small change can significantly tweak the flavor profile while staying true to the original concept.

Seasonal adaptations could involve incorporating spices like cinnamon or nutmeg during the holiday season to give it a festive flavor that’s warm and inviting.

For those needing dietary modifications, a vegan version can be achieved by using plant-based butter alternatives. Ensure all other components used align with dietary needs.

Flavor variations are endless; consider adding a splash of vanilla or a sprinkle of cayenne pepper to introduce new flavor dynamics based on personal preferences or to pair with specific occasions.

To modify texture, experiment with the caramel to sugar ratio until you find your preferred sweetness and crunch. Some opt for a chewier, candy-like coating, while others enjoy the crisp, brittle finish.

For an upscale presentation, serve the praline popcorn in individual paper cones or small decorative bowls. This adds an elegant touch and offers easy serving options at gatherings.

Serving and Presentation Guide


When serving Praline Popcorn, the presentation can enhance the experience. Use rustic, parchment-lined baskets for a charming, casual look suitable for relaxed events.

Add garnishing with a sprinkle of finely chopped nuts or a light dusting of powdered sugar for an elegant touch. This can enhance the visual appeal and texture.

Traditional accompaniments might include a selection of fine chocolates or fruit, offering complementary flavors and enhancing the richness of the snack.

Modern serving suggestions could include pairing with a selection of cheeses for a sophisticated snack platter, enhancing the popcorn’s gourmet appeal.

Consideration of temperature is important; serve at room temperature to ensure the praline coating remains at the ideal texture.

For portion control, serve the popcorn in small individual containers. This ensures convenience and hygiene, particularly in large gatherings.

Wine and Beverage Pairing


Pair Praline Popcorn with a crisp white wine, such as a Sauvignon Blanc, to balance the sweetness and cleanse the palate with each sip. The light, fruity notes of the wine complement the nutty coating.

Non-alcoholic alternatives might include a tart, unsweetened iced tea or a lightly flavored sparkling water. These beverages provide a refreshing contrast to the rich flavors of the praline.

For the coffee and tea enthusiast, a robust black tea or espresso pairs beautifully, enhancing the deep, caramel notes of the praline while providing a perfect backdrop of contrasting flavors.

Consider serving chilled drinks to balance the sweet richness of the popcorn, enhancing the eating experience with a refreshing contrast in temperature.

When serving, ensure beverages are readily available alongside the popcorn, creating a cohesive and enjoyable tasting experience for guests.

Storage and Shelf Life


Store Praline Popcorn in an airtight container to maintain its freshness and crunch. Keeping moisture out is key to preserving the texture and flavor.

Preferably store in a cool, dry pantry away from direct sunlight and humidity. Excess moisture can cause the praline to soften and lose its delightful crunch.

Utilize glass jars or plastic bags with an airtight seal for best results. These containments help keep the popcorn fresh for about a week, although it rarely lasts that long due to its irresistible taste.

Watch for signs of spoilage, such as an off smell or change in texture, and discard any affected popcorn. Freshness is best for optimal flavor.

If reheating is necessary, a light toast in a low-temperature oven can help restore the crispiness if the popcorn turns soft over time. Monitor closely to prevent burning.

For those wanting to prepare ahead, you can freeze praline popcorn. Ensure it is in a vacuum-sealed or airtight container, and consume within two months for best results.

Make Ahead Strategies


Advance preparation of Praline Popcorn can significantly streamline event planning. Begin by popping the corn and preparing all ingredients for the praline trend in advance.

Store the uncoated popcorn in an airtight container until ready to coat with praline, helping maintain freshness until you’re ready for the final steps.

Assess quality impact by sampling a small batch ahead of your main activity to ensure everything tastes optimal and adjusts technique or ingredient quantities if needed.

During assembly, pre-measure all ingredients into portioned containers to expedite the mixing process, ensuring everything flows smoothly.

Consider holding back some of the praline-coated popcorn for a final touch of freshly coated bits right before serving to maintain the best taste.

Fresh additions such as a light drizzle of chocolate or sprinkle of coconut can be added just before serving to enhance both flavor and presentation.

Scaling Instructions


When needing to scale the Praline Popcorn recipe for larger gatherings, the process is simplicity itself. The quantity of popcorn can be doubled or tripled with ease, maintaining the ratios for even coverage.

Halve the ingredients conveniently should you need a smaller batch simply. Divide all quantities equally for consistent results.

Cooking equipment may need adjustments. For doubled or tripled batches, use multiple baking sheets or larger ones to ensure even cooking without overcrowding.

Timing can be modified slightly when scaling. Monitor caramelization closely to avoid overcooking or burning when dealing with larger quantities.

Storage considerations become more critical with larger batches. Ensure you have enough airtight containers to keep your extra portions fresh and accessible for any impromptu snack attacks.

Nutritional Deep Dive


Praline Popcorn, though indulgent, fits within a balanced nutritional framework when consumed in moderation. Its primary components include carbohydrates from popcorn and sugar, with a good dose of healthy fats from nuts.

Macro breakdown indicates a treat primarily composed of carbohydrates, vital for energy, with nut fats complementing with satiating factors, making it a satisfying snack option.

The micronutrient analysis of Praline Popcorn shows elements such as zinc and vitamin E due to nuts, contributing to essential body functional support.

Health benefits can be realized through moderation, enjoying the fiber content of popcorn while balancing the sugar-heavy coating within dietary allowances.

Dietary considerations might include watching portion sizes to maintain a balance of energy intake and gently addressing the carbohydrate-to-fat ratio based on individual dietary goals.

For those mindful of weight management, integrating a serving within a well-rounded eating plan ensures enjoyment without overextending caloric intake.

Dietary Adaptations


For a gluten-free variant, ensure that all your ingredients, particularly spiced additives or flavorings used, are certified gluten-free. Popcorn kernels and the core ingredients generally comply.

Dairy-free adaptations involve substituting butter with non-dairy alternatives such as coconut oil or margarine suitable for your needs, keeping flavors intact while serving dietary requirements.

A vegan alternative swaps butter for vegan-friendly margarine and checks all additional ingredients are animal-product free, respecting lifestyle choices without sacrificing flavor.

Low-carb enthusiasts might explore ingredient substitutions where stevia-sweetened caramel or almond flour-based pralines offer more appropriate alternatives, achieving a close mimic in flavor without breaking the diet.

Keto and Paleo diets could benefit from nut butter based or coconut-derived sweeteners to maintain compliance while preserving the essential sweet-savory notes of the original.

Low-FODMAP versions might involve caution around certain nuts, but pecans, often better tolerated, can continue to serve as your go-to nut choice with mindful amount moderation.

For other specific diet modifications, always carefully check ingredient labels for compliance, considering the slightest variations that could impact dietary integrity.

Troubleshooting Guide


If texture issues arise with a soggy outcome, consider reducing the humidity during preparation and ensure complete cooling before container storage.

For flavor balance challenges, introducing a small test batch allows you to adjust sugar ratios and add seasoning or alternative sweetening agents to refine the direction.

Temperature problems often relate to the caramel process. Use a candy thermometer if available to gain precision during caramelization while stirring consistently.

Equipment challenges might occur if you’re working with insufficient popping capacity or poor heat distribution. Ensure correct pot size for popcorn and uniform pans for baking.

When faced with ingredient substitutions or adjustments, research alternatives with matching binding qualities, ensuring no disruption in praline/sugar coating adherence.

Timing concerns, whether prolonged or too brief, suggests precise attention throughout cooking phases. Utilize kitchen timers for stages to maintain coordination.

Recipe Success Stories


Community feedback indicates enthusiastic reception, with numerous adaptations inspiring others to customize their batches, incorporating spices like cinnamon or cayenne for bold twists.

Variation successes are seen with fruit inclusions like dried cranberries, offering additional texture and flavor layers, proving the recipe’s flexibility and creativity potential.

Adaptation stories reveal how readers have cleverly transformed this into vegan-friendly snacks at gatherings, maintaining tradition while achieving dietary accommodation.

Reader suggestions include packaging methods for gifts, such as decorative tins, creating attractive presentations when sharing Praline Popcorn.

Photography tips advise capturing the glossy, caramel hue on freshly made batches under natural light, emphasizing textural contrasts and enticing visuals.

Frequently Asked Questions

What if my caramel hardens too quickly? If your caramel cools or hardens before coating, gently reheat it on the stove on low until it loosens. Stir continuously to prevent burning.

How do I prevent popcorn from getting soggy? Ensure popcorn and nuts are thoroughly dry before coating, and store in a cool, dry place in airtight containers to maintain crispness.

Can I make this recipe without nuts? Yes, you can omit nuts entirely or replace them with seeds, like pumpkin or sunflower seeds, offering similar flavors and textures.

Is there a way to make this less sweet? Adjust the sugar ratio in the caramel mix or introduce unsweetened cocoa powder to balance flavors, reducing sweetness while adding depth.

Can this be made spicy? Yes, adding a pinch of cayenne pepper or incorporating chili-infused oils into the caramel can create a spicy variant for those who love heat.

How long will it stay fresh? Stored properly in airtight containers, Praline Popcorn can last for up to a week, retaining its flavor and crunch.

What are the ideal storage conditions? Store in a cool, dark place in airtight containers to prevent moisture absorption and keep the caramel’s crisp texture intact.

Is this suitable for freezing? Yes, freeze it in airtight containers for extended storage. Ensure consumption within two months to enjoy full quality.

Could I add chocolate? Absolutely, drizzling with melted chocolate after cooling can elevate the flavor profile, creating an even richer treat.

Whats an alternate topping suggestion? Consider toasted coconut, crushed pretzels, or even a light sprinkle of sea salt for a varied taste and texture enhancement.

Additional Resources


Discover related recipes like chocolate-covered popcorn or spiced nut blends that complement Praline Popcorn, creating beautiful snack assortments.

Technique guides can help master caramel making or demonstrate new popcorn popping methods for consistently perfect results every time.

Ingredient information offers insights on nut choices and sugar variations, allowing you to explore new flavors and educate yourself on nutritional aspects.

Equipment recommendations focus on achieving the best outcomes with reliable popcorn makers and durable baking sheets suited to confectionery demands.

Seasonal variations introduce ways to modify the popcorn recipe with seasonal fruits or festive spices, ensuring you have a themed treat all year round.

Join the Conversation


Engage with our community by sharing your Praline Popcorn creations on social media using our dedicated hashtag. Showcase your creations with photographs and interact with fellow cooking enthusiasts.

Photography tips can guide you on best capturing the glossy sheen and detail of your Praline Popcorn for a visually appealing post. Share your experiences and receive feedback.

Leave reviews to inform others about your successes or adaptations with this recipe, suggesting improvements or inspired innovations.

Participate in community engagement efforts, offering your tips and personal touches that others might incorporate into their own Praline Popcorn attempts.

Explore recipe variations proposed by other community members, creating a space for collective creativity and shared experiences that enrich your cookery endeavors.

The Recipe

Praline Popcorn

Serves: 12

Prep Time: 15 mins

Cook Time: 45 mins

Total Time: 60 mins

Kitchen Equipment Needed

  • Large Pot for Popping Popcorn
  • Large Saute Pan or Saucepan
  • Baking Sheet
  • Wooden Spoon
  • Mixing Bowl
  • Airtight Containers for Storage

Ingredients

  • ½ cup popcorn kernels
  • 1 cup pecan halves
  • 1 cup unsalted butter
  • 2 cups granulated sugar
  • ½ cup light corn syrup
  • ½ teaspoon salt
  • ½ teaspoon baking soda
  • 1 teaspoon vanilla extract

Directions

  1. Preheat your oven to 250°F (120°C) and line a large baking sheet with parchment paper.
  2. Pop the popcorn kernels using your preferred method. Transfer the popped popcorn to a large mixing bowl, discarding any unpopped kernels.
  3. In a large saucepan, combine butter, sugar, corn syrup, and salt. Bring to a boil over medium heat, stirring constantly. Allow mixture to boil for 5 minutes without stirring.
  4. Remove from heat and quickly stir in baking soda and vanilla extract. The mixture will bubble up slightly – this is normal.
  5. Quickly pour the praline caramel mixture over the popcorn and gently stir to coat the popcorn evenly.
  6. Transfer the coated popcorn to the prepared baking sheet, spreading it out evenly. Sprinkle the pecan halves over the top.
  7. Bake in the preheated oven for 45 minutes, stirring every 15 minutes to ensure even coating.
  8. Remove from the oven and cool completely before breaking into pieces. Store in an airtight container for up to one week.

Recipe Notes

  • For a spicier twist, add a pinch of cayenne pepper to the caramel mixture.
  • Mix and match nuts like almonds or walnuts for varied flavor profiles.
  • To make this recipe vegan-friendly, substitute butter with vegan margarine.