Delicious Fruit Bread Recipes to Try Today

“`html

Delicious Fruit Bread Recipes to Try Today

Introduction to Fruit Bread

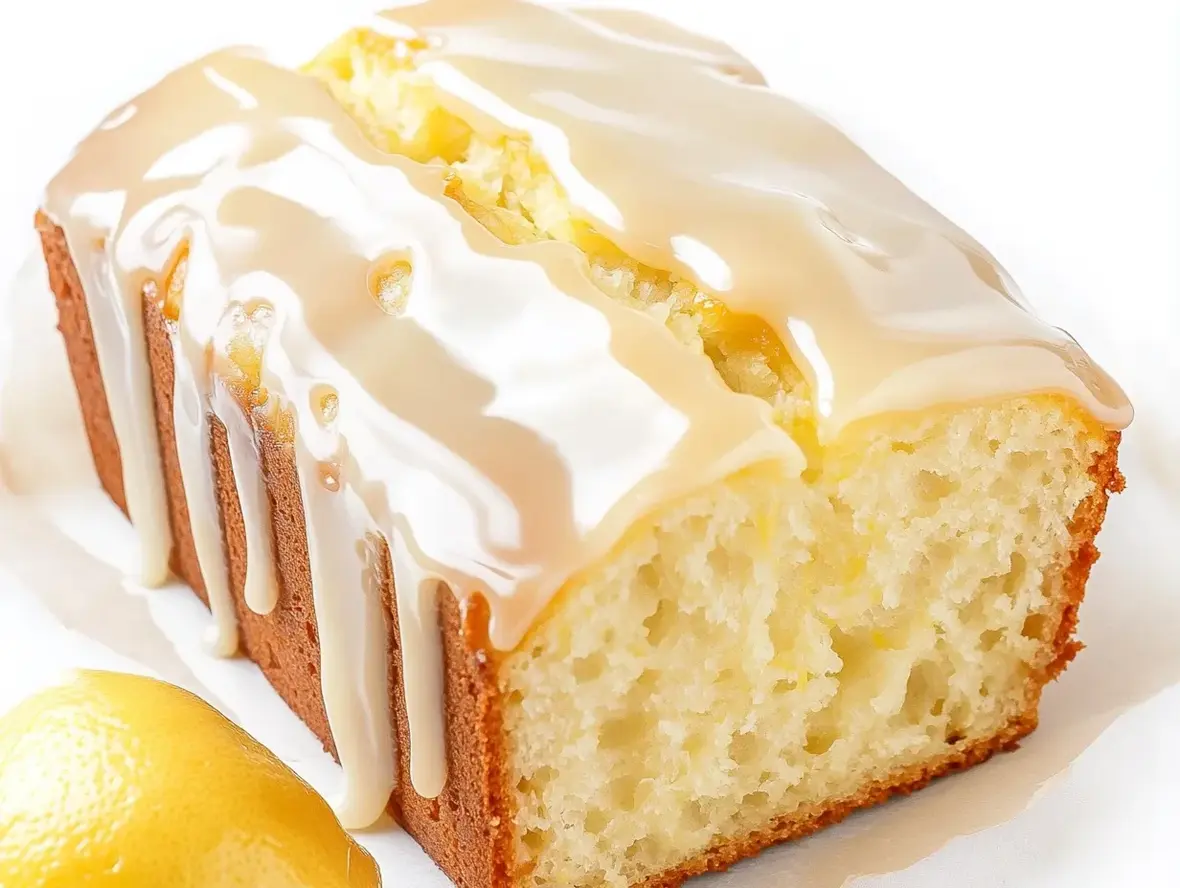
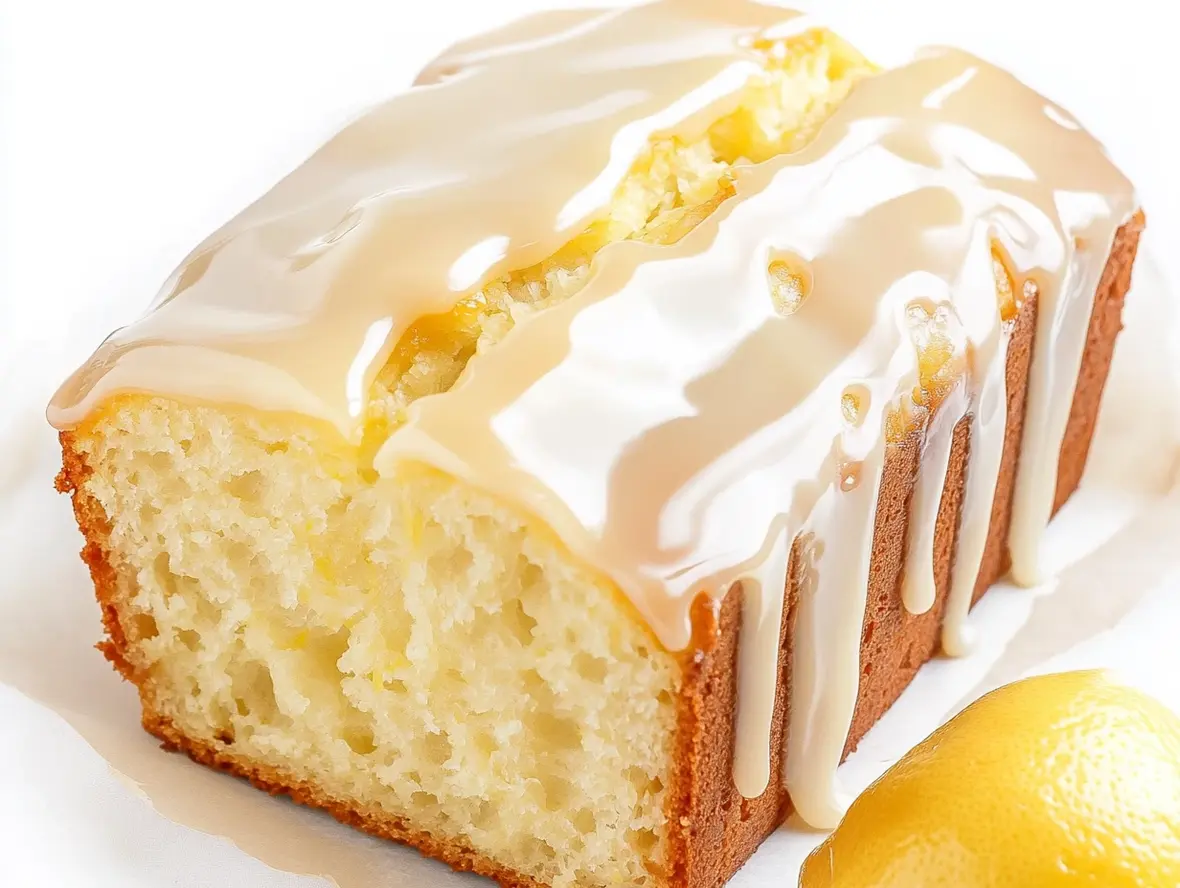
Are you looking for a delightful way to start your day or a perfect treat to accompany your afternoon tea? In a world where quick breakfasts are the norm, did you know that up to 65% of people still enjoy a good baked good in the morning? Fruit breads offer a fantastic balance, bringing natural sweetness and wholesome goodness to your table. Whether you crave the zesty tang of citrus, the deep sweetness of berries, or the comforting warmth of dried fruits, there’s a fruit bread recipe out there to suit every palate and every season. Forget complicated pastries; these recipes are designed for ease and incredible flavor, making them perfect for beginner bakers and seasoned pros alike.

Essential Ingredients for Baking Delicious Fruit Bread

The magic of fruit bread lies in the harmonious blend of simple, yet crucial, ingredients. Each component plays a vital role in creating that perfect texture, moisture, and burst of flavor. Let’s explore what makes a fruit bread truly exceptional:

Flour: The Foundation

All-purpose flour is the standard for most fruit bread recipes, providing the structure. Its balanced protein content creates a tender crumb without being too dense. For a slightly nuttier flavor and added fiber, you can substitute up to half of the all-purpose flour with whole wheat flour. For gluten-free options, a good quality gluten-free all-purpose blend that includes xanthan gum will work wonders.

Sweeteners for That Perfect Bite

While granulated sugar is common, honey, maple syrup, or brown sugar add depth and moisture. Honey offers a floral sweetness, maple syrup a rich, earthy tone, and brown sugar a caramel-like note. A common substitution is to replace half the granulated sugar with one of these liquid sweeteners, slightly reducing the other liquids in the recipe to compensate.

Leavening Agents for a Light Texture

Baking powder and baking soda are your allies in achieving a light, airy crumb. Baking soda requires an acidic ingredient (like buttermilk, yogurt, or fruit juice) to activate, while baking powder is a complete leavening system. Ensure both are fresh for optimal rise. There isn’t a direct substitute for leavening agents, as they are critical for texture.

Fats for Moisture and Richness

Butter provides a rich flavor and tender crumb, while vegetable oil (like canola or sunflower) offers superior moisture and a softer texture. For a dairy-free option, coconut oil (melted) or a neutral-flavored vegetable oil works perfectly. You can often substitute melted butter for oil or vice-versa, 1:1.

Fruits: The Stars of the Show

This is where the fun truly begins! Fresh berries (blueberries, raspberries, strawberries), chopped apples or pears, mashed bananas, or vibrant citrus zest (lemon, orange, lime) are fantastic choices. Dried fruits like cranberries, raisins, apricots, or dates also lend a chewy texture and concentrated sweetness. Aim for about 1 to 1.5 cups of fruit per loaf. For fresh fruit, avoid overmixing to prevent it from bleeding into the batter. For dried fruits, a quick soak in warm water or juice can plump them up beautifully.

Liquids to Bring It All Together

Milk, buttermilk, yogurt, sour cream, or fruit juice provide the necessary moisture. Buttermilk and yogurt add a delightful tang and contribute to a tender crumb. Water or plant-based milks (almond, soy, oat) are also suitable options.

A pinch of salt balances sweetness. Spices like cinnamon, nutmeg, or cardamom add warmth. Vanilla extract is a classic enhancer. Nuts like walnuts or pecans add a delightful crunch, and a hint of citrus zest brightens up the overall flavor profile.

Timing is Everything for Perfect Fruit Bread

Prep Time: 15 minutes
Cook Time: 45-60 minutes
Total Time: 60-75 minutes

Compared to an average quick bread recipe which typically takes around 50-65 minutes total, these fruit breads are right in line for a simple, yet rewarding bake. The key is not to rush the baking process, ensuring the center is fully cooked through.

A perfectly baked fruit bread loaf, golden brown and studded with colorful fruits, sliced to reveal a moist interior.

Step-by-Step Guide to Baking Your Masterpiece

Let’s get baking! Follow these simple steps to create a loaf of fruit bread that will have everyone asking for seconds.

Step 1: Preheat and Prepare

Preheat your oven to 350°F (175°C). Grease and flour a standard loaf pan (9×5 inches), or line it with parchment paper for easy removal. This step prevents sticking and ensures a beautiful, evenly baked loaf.

Step 2: Mix the Dry Ingredients

In a large mixing bowl, whisk together your flour, sugar (or other sweetener), baking powder/soda, salt, and any spices like cinnamon or nutmeg. Whisking ensures these dry ingredients are evenly distributed, preventing pockets of leavening agents or salt.

Step 3: Combine Wet Ingredients

In a separate medium bowl, whisk together your eggs, melted butter or oil, milk (or other liquid), vanilla extract, and any citrus zest. Ensure everything is well combined.

Step 4: Gently Combine Wet and Dry

Pour the wet ingredients into the bowl with the dry ingredients. Using a spatula or wooden spoon, mix *just until combined*. Overmixing develops the gluten in the flour, which can lead to a tough, dense bread. A few streaks of flour are okay; they will disappear as you fold in the fruit.

Step 5: Fold in Your Fruits

Gently fold in your chosen fruits (fresh or dried), and any nuts. Toss fresh berries with a tablespoon of the flour mixture before adding to prevent them from sinking to the bottom. Mix just enough to distribute them evenly throughout the batter.

Step 6: Bake to Golden Perfection

Pour the batter into the prepared loaf pan and spread it evenly. Bake for 45-60 minutes, or until a wooden skewer or toothpick inserted into the center comes out clean. If the top starts to brown too quickly, you can loosely tent it with aluminum foil during the last 15-20 minutes of baking.

Step 7: Cool and Enjoy

Let the bread cool in the pan for about 10 minutes, then carefully remove it and place it on a wire rack to cool completely before slicing. This prevents the bottom from becoming soggy and makes for easier slicing.

Nutritional Highlights of Fruit Bread

  • Calories: Varies significantly based on ingredients, but typically ranges from 150-250 calories per slice.
  • Carbohydrates: Provides energy, with natural sugars from fruits and starches from flour.
  • Fiber: Especially when using whole wheat flour or fruits like apples and berries, it contributes valuable dietary fiber.
  • Vitamins & Minerals: Fruits bring antioxidants, Vitamin C, potassium, and other essential nutrients.

Healthier Alternatives for a Guilt-Free Treat

Making fruit bread healthier doesn’t mean sacrificing flavor. Try these simple swaps:

  • Flour: Substitute half the all-purpose flour with whole wheat flour or oat flour for increased fiber.
  • Sweetener: Reduce the overall sugar quantity by 25% and use unsweetened applesauce or mashed banana to provide moisture and natural sweetness.
  • Fat: Replace half the butter or oil with plain Greek yogurt or unsweetened applesauce (about a 1/4 cup replacement per 1/2 cup fat).
  • Add-ins: Load up on fresh or dried fruits and consider adding a handful of nuts or seeds for extra fiber and healthy fats.

Serving Creations: Elevate Your Fruit Bread Experience

While delicious on its own, fruit bread can be elevated:

  • Toasted with Butter: A timeless classic that brings out the aroma.
  • With Cream Cheese: A delightful contrast, especially with berry or citrus breads.
  • As French Toast: Thicker slices make for an amazing breakfast or brunch treat.
  • With a dollop of yogurt or a drizzle of honey.

Common Mistakes to Avoid

  • Overmixing the batter: This is the most common culprit for dense, tough bread. Mix until just combined.
  • Not preheating the oven: An oven that isn’t hot enough will result in a pale, flat loaf.
  • Opening the oven door too early: This can cause the bread to sink in the middle. Wait until at least two-thirds of the baking time has passed before checking.
  • Cutting while too hot: Allowing the bread to cool properly ensures the internal structure has set, preventing a gummy texture.

Storing Your Delicious Fruit Bread

Once completely cooled, fruit bread can be stored at room temperature in an airtight container or wrapped tightly in plastic wrap for 2-3 days. For longer storage, it freezes beautifully. Wrap slices or the whole loaf tightly in plastic wrap, then in aluminum foil, and freeze for up to 3 months. Thaw at room temperature or gently reheat.

Close-up of a slice of fruit bread, showing the moist crumb and abundance of fruit pieces, perfect for a snack.

Frequently Asked Questions About Fruit Bread

***What is the best fruit to use in fruit bread?***

The “best” fruit is subjective and depends on your preference! Berries, apples, bananas, and citrus fruits are popular choices for fresh fruit. For dried fruits, cranberries, raisins, and dates are excellent. Consider balancing tart and sweet fruits. Tossing fresh berries with a little flour helps prevent them from sinking.

***My fruit bread is too dense. What did I do wrong?***

The most common reason for dense fruit bread is overmixing the batter. Mix the wet and dry ingredients only until they are just combined. A few streaks of flour remaining are perfectly fine.

***Can I make fruit bread gluten-free?***

Yes! Use a good quality gluten-free all-purpose flour blend that contains xanthan gum. You may need to adjust the liquid slightly, as gluten-free flours can absorb moisture differently.

***How long does fruit bread last?***

Stored properly at room temperature in an airtight container, fruit bread typically lasts for 2-3 days. For longer storage, freeze it.

Print
clock clock iconcutlery cutlery iconflag flag iconfolder folder iconinstagram instagram iconpinterest pinterest iconfacebook facebook iconprint print iconsquares squares iconheart heart iconheart solid heart solid icon

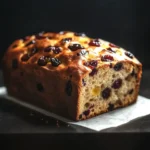
Homemade Fruit Bread


  • Author: Chef Emy

Description

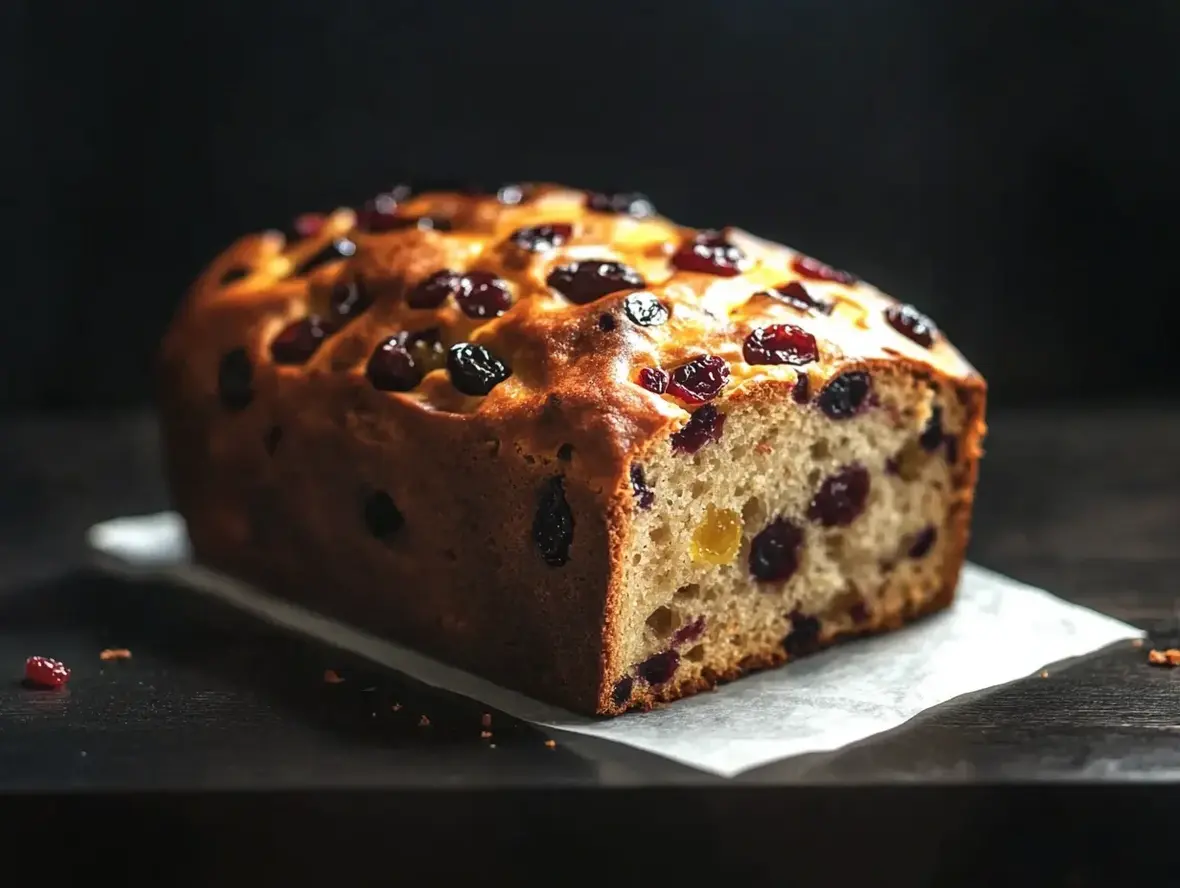
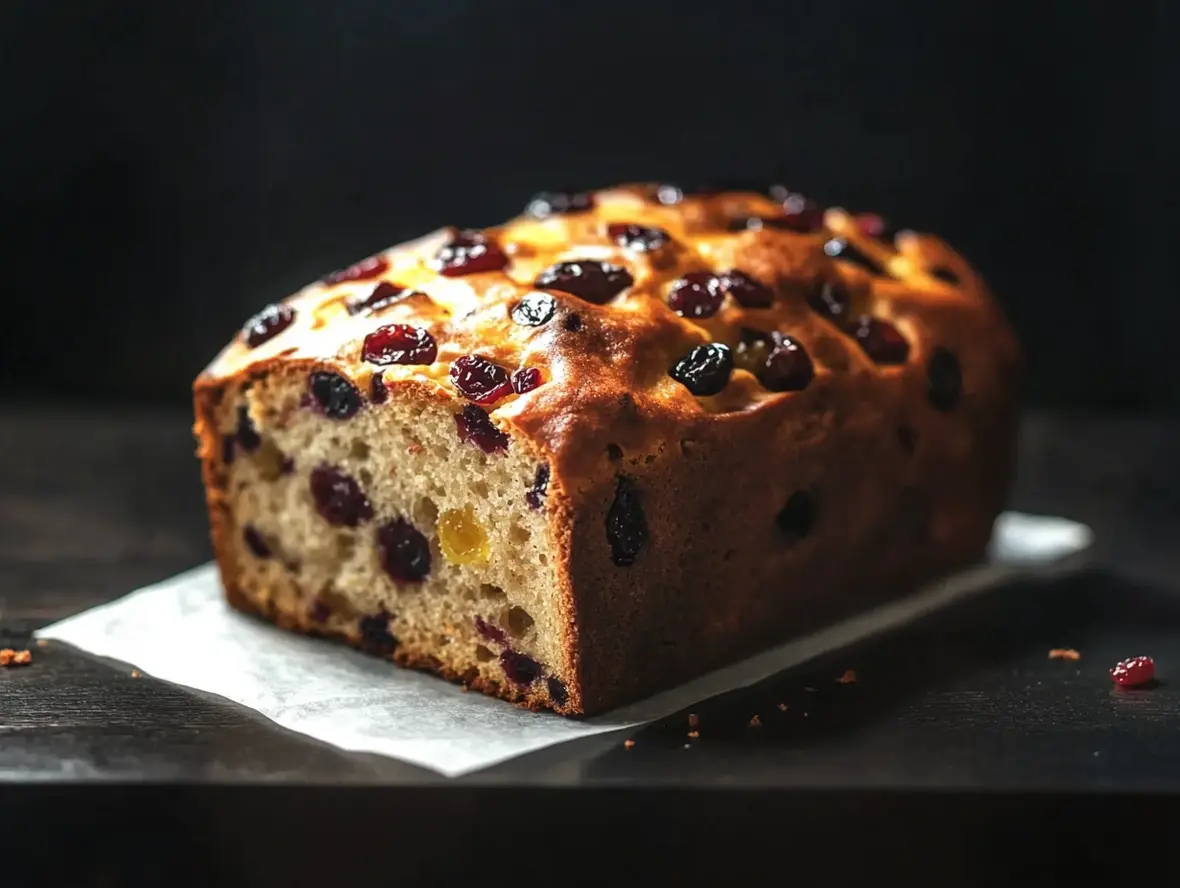
Thisfruit breadis soft, slightly spiced, and packed with a mix of delicious dried fruits. It’s a perfect treat for breakfast, snacks, or even as a base for decadent French toast. The recipe is simple, no-knead, and full of warm spices that complement the sweetness of the dried fruits.


Ingredients

Scale
  • 357 g(2 3/4 cupsloosely packed) all-purpose flour210ml (1 cup minus 2 tbsp) warm water1 tspinstant yeast (or1 1/4 tspactive dry yeast)1 tspsalt (5.9 g)42.6 g(3 tbsp) butter, melted32 g(2 1/2 tbsp) sugar (adjust to taste)
  • 210ml (1 cup minus 2 tbsp) warm water1 tspinstant yeast (or1 1/4 tspactive dry yeast)1 tspsalt (5.9 g)42.6 g(3 tbsp) butter, melted32 g(2 1/2 tbsp) sugar (adjust to taste)
  • 1 tspinstant yeast (or1 1/4 tspactive dry yeast)1 tspsalt (5.9 g)42.6 g(3 tbsp) butter, melted32 g(2 1/2 tbsp) sugar (adjust to taste)
  • 1 tspsalt (5.9 g)42.6 g(3 tbsp) butter, melted32 g(2 1/2 tbsp) sugar (adjust to taste)
  • 42.6 g(3 tbsp) butter, melted32 g(2 1/2 tbsp) sugar (adjust to taste)
  • 32 g(2 1/2 tbsp) sugar (adjust to taste)
  • 8090g (1/2 cup) dried cranberries80–90g (1/2 cup) raisins60–70g (1/2 cup) currants80–90g (1/2 cup) dried whole cherries (optional)1/2 tspcinnamon powder1/4 tspcardamom powder1/4 tspnutmeg powder (optional)1/2 tspvanilla sugar or1/2 tsppure vanilla extract
  • 8090g (1/2 cup) raisins60–70g (1/2 cup) currants80–90g (1/2 cup) dried whole cherries (optional)1/2 tspcinnamon powder1/4 tspcardamom powder1/4 tspnutmeg powder (optional)1/2 tspvanilla sugar or1/2 tsppure vanilla extract
  • 6070g (1/2 cup) currants80–90g (1/2 cup) dried whole cherries (optional)1/2 tspcinnamon powder1/4 tspcardamom powder1/4 tspnutmeg powder (optional)1/2 tspvanilla sugar or1/2 tsppure vanilla extract
  • 8090g (1/2 cup) dried whole cherries (optional)1/2 tspcinnamon powder1/4 tspcardamom powder1/4 tspnutmeg powder (optional)1/2 tspvanilla sugar or1/2 tsppure vanilla extract
  • 1/2 tspcinnamon powder1/4 tspcardamom powder1/4 tspnutmeg powder (optional)1/2 tspvanilla sugar or1/2 tsppure vanilla extract
  • 1/4 tspcardamom powder1/4 tspnutmeg powder (optional)1/2 tspvanilla sugar or1/2 tsppure vanilla extract
  • 1/4 tspnutmeg powder (optional)1/2 tspvanilla sugar or1/2 tsppure vanilla extract
  • 1/2 tspvanilla sugar or1/2 tsppure vanilla extract

Instructions

  1. 1️⃣Prepare the Dough:
  2. In a large bowl, mix warm water, sugar, salt, and yeast until dissolved.Stir in melted butter.Gradually add flour to the liquid mixture, stirring until combined into a shaggy dough with no dry patches.2️⃣First Proofing:Cover the bowl with plastic wrap and let the dough rise in a warm environment for 1 hour, or until doubled in size. If the room is cooler, allow up to 1 1/2 hours.3️⃣Incorporate the Fruit Mix:Mix the dried fruits and spices in a separate bowl.Gently fold the fruit mix into the risen dough, deflating it slightly in the process. Avoid overworking to prevent the dough from becoming too elastic.4️⃣Shape the Dough:Lightly press the dough into a rectangle. The width should match the length of your loaf pan.Roll the rectangle into a log and place it seam-side down in a greased loaf pan. Cover with plastic wrap.5️⃣Final Rising:Let the dough rise again in a warm place for 90 minutes, until it has risen significantly.6️⃣Egg Wash and Bake:Preheat the oven to 350°F (175°C). Brush the dough with a lightly beaten egg for a glossy finish.Bake for 34-35 minutes. Reduce the temperature to 325°F (160°C) and bake for an additional 4-5 minutes.If the top browns too quickly, tent it with foil after 25 minutes.7️⃣Cool the Bread:Remove the bread from the oven and let it sit in the pan for 2-3 minutes. Then demold it to prevent sogginess.Cool completely for 2-3 hours to allow the residual baking to finish.8️⃣Serve and Enjoy:Slice the bread once fully cooled. It’s delicious as-is, toasted, or turned into French toast
  3. Stir in melted butter.Gradually add flour to the liquid mixture, stirring until combined into a shaggy dough with no dry patches.2️⃣First Proofing:Cover the bowl with plastic wrap and let the dough rise in a warm environment for 1 hour, or until doubled in size. If the room is cooler, allow up to 1 1/2 hours.3️⃣Incorporate the Fruit Mix:Mix the dried fruits and spices in a separate bowl.Gently fold the fruit mix into the risen dough, deflating it slightly in the process. Avoid overworking to prevent the dough from becoming too elastic.4️⃣Shape the Dough:Lightly press the dough into a rectangle. The width should match the length of your loaf pan.Roll the rectangle into a log and place it seam-side down in a greased loaf pan. Cover with plastic wrap.5️⃣Final Rising:Let the dough rise again in a warm place for 90 minutes, until it has risen significantly.6️⃣Egg Wash and Bake:Preheat the oven to 350°F (175°C). Brush the dough with a lightly beaten egg for a glossy finish.Bake for 34-35 minutes. Reduce the temperature to 325°F (160°C) and bake for an additional 4-5 minutes.If the top browns too quickly, tent it with foil after 25 minutes.7️⃣Cool the Bread:Remove the bread from the oven and let it sit in the pan for 2-3 minutes. Then demold it to prevent sogginess.Cool completely for 2-3 hours to allow the residual baking to finish.8️⃣Serve and Enjoy:Slice the bread once fully cooled. It’s delicious as-is, toasted, or turned into French toast
  4. Gradually add flour to the liquid mixture, stirring until combined into a shaggy dough with no dry patches.
  5. 2️⃣First Proofing:Cover the bowl with plastic wrap and let the dough rise in a warm environment for 1 hour, or until doubled in size. If the room is cooler, allow up to 1 1/2 hours.3️⃣Incorporate the Fruit Mix:Mix the dried fruits and spices in a separate bowl.Gently fold the fruit mix into the risen dough, deflating it slightly in the process. Avoid overworking to prevent the dough from becoming too elastic.4️⃣Shape the Dough:Lightly press the dough into a rectangle. The width should match the length of your loaf pan.Roll the rectangle into a log and place it seam-side down in a greased loaf pan. Cover with plastic wrap.5️⃣Final Rising:Let the dough rise again in a warm place for 90 minutes, until it has risen significantly.6️⃣Egg Wash and Bake:Preheat the oven to 350°F (175°C). Brush the dough with a lightly beaten egg for a glossy finish.Bake for 34-35 minutes. Reduce the temperature to 325°F (160°C) and bake for an additional 4-5 minutes.If the top browns too quickly, tent it with foil after 25 minutes.7️⃣Cool the Bread:Remove the bread from the oven and let it sit in the pan for 2-3 minutes. Then demold it to prevent sogginess.Cool completely for 2-3 hours to allow the residual baking to finish.8️⃣Serve and Enjoy:Slice the bread once fully cooled. It’s delicious as-is, toasted, or turned into French toast
  6. Cover the bowl with plastic wrap and let the dough rise in a warm environment for 1 hour, or until doubled in size. If the room is cooler, allow up to 1 1/2 hours.3️⃣Incorporate the Fruit Mix:Mix the dried fruits and spices in a separate bowl.Gently fold the fruit mix into the risen dough, deflating it slightly in the process. Avoid overworking to prevent the dough from becoming too elastic.4️⃣Shape the Dough:Lightly press the dough into a rectangle. The width should match the length of your loaf pan.Roll the rectangle into a log and place it seam-side down in a greased loaf pan. Cover with plastic wrap.5️⃣Final Rising:Let the dough rise again in a warm place for 90 minutes, until it has risen significantly.6️⃣Egg Wash and Bake:Preheat the oven to 350°F (175°C). Brush the dough with a lightly beaten egg for a glossy finish.Bake for 34-35 minutes. Reduce the temperature to 325°F (160°C) and bake for an additional 4-5 minutes.If the top browns too quickly, tent it with foil after 25 minutes.7️⃣Cool the Bread:Remove the bread from the oven and let it sit in the pan for 2-3 minutes. Then demold it to prevent sogginess.Cool completely for 2-3 hours to allow the residual baking to finish.8️⃣Serve and Enjoy:Slice the bread once fully cooled. It’s delicious as-is, toasted, or turned into French toast
  7. 3️⃣Incorporate the Fruit Mix:
  8. Mix the dried fruits and spices in a separate bowl.Gently fold the fruit mix into the risen dough, deflating it slightly in the process. Avoid overworking to prevent the dough from becoming too elastic.4️⃣Shape the Dough:Lightly press the dough into a rectangle. The width should match the length of your loaf pan.Roll the rectangle into a log and place it seam-side down in a greased loaf pan. Cover with plastic wrap.5️⃣Final Rising:Let the dough rise again in a warm place for 90 minutes, until it has risen significantly.6️⃣Egg Wash and Bake:Preheat the oven to 350°F (175°C). Brush the dough with a lightly beaten egg for a glossy finish.Bake for 34-35 minutes. Reduce the temperature to 325°F (160°C) and bake for an additional 4-5 minutes.If the top browns too quickly, tent it with foil after 25 minutes.7️⃣Cool the Bread:Remove the bread from the oven and let it sit in the pan for 2-3 minutes. Then demold it to prevent sogginess.Cool completely for 2-3 hours to allow the residual baking to finish.8️⃣Serve and Enjoy:Slice the bread once fully cooled. It’s delicious as-is, toasted, or turned into French toast
  9. Gently fold the fruit mix into the risen dough, deflating it slightly in the process. Avoid overworking to prevent the dough from becoming too elastic.4️⃣Shape the Dough:Lightly press the dough into a rectangle. The width should match the length of your loaf pan.Roll the rectangle into a log and place it seam-side down in a greased loaf pan. Cover with plastic wrap.5️⃣Final Rising:Let the dough rise again in a warm place for 90 minutes, until it has risen significantly.6️⃣Egg Wash and Bake:Preheat the oven to 350°F (175°C). Brush the dough with a lightly beaten egg for a glossy finish.Bake for 34-35 minutes. Reduce the temperature to 325°F (160°C) and bake for an additional 4-5 minutes.If the top browns too quickly, tent it with foil after 25 minutes.7️⃣Cool the Bread:Remove the bread from the oven and let it sit in the pan for 2-3 minutes. Then demold it to prevent sogginess.Cool completely for 2-3 hours to allow the residual baking to finish.8️⃣Serve and Enjoy:Slice the bread once fully cooled. It’s delicious as-is, toasted, or turned into French toast
  10. 4️⃣Shape the Dough:
  11. Lightly press the dough into a rectangle. The width should match the length of your loaf pan.Roll the rectangle into a log and place it seam-side down in a greased loaf pan. Cover with plastic wrap.5️⃣Final Rising:Let the dough rise again in a warm place for 90 minutes, until it has risen significantly.6️⃣Egg Wash and Bake:Preheat the oven to 350°F (175°C). Brush the dough with a lightly beaten egg for a glossy finish.Bake for 34-35 minutes. Reduce the temperature to 325°F (160°C) and bake for an additional 4-5 minutes.If the top browns too quickly, tent it with foil after 25 minutes.7️⃣Cool the Bread:Remove the bread from the oven and let it sit in the pan for 2-3 minutes. Then demold it to prevent sogginess.Cool completely for 2-3 hours to allow the residual baking to finish.8️⃣Serve and Enjoy:Slice the bread once fully cooled. It’s delicious as-is, toasted, or turned into French toast
  12. Roll the rectangle into a log and place it seam-side down in a greased loaf pan. Cover with plastic wrap.5️⃣Final Rising:Let the dough rise again in a warm place for 90 minutes, until it has risen significantly.6️⃣Egg Wash and Bake:Preheat the oven to 350°F (175°C). Brush the dough with a lightly beaten egg for a glossy finish.Bake for 34-35 minutes. Reduce the temperature to 325°F (160°C) and bake for an additional 4-5 minutes.If the top browns too quickly, tent it with foil after 25 minutes.7️⃣Cool the Bread:Remove the bread from the oven and let it sit in the pan for 2-3 minutes. Then demold it to prevent sogginess.Cool completely for 2-3 hours to allow the residual baking to finish.8️⃣Serve and Enjoy:Slice the bread once fully cooled. It’s delicious as-is, toasted, or turned into French toast
  13. 5️⃣Final Rising:
  14. Let the dough rise again in a warm place for 90 minutes, until it has risen significantly.6️⃣Egg Wash and Bake:Preheat the oven to 350°F (175°C). Brush the dough with a lightly beaten egg for a glossy finish.Bake for 34-35 minutes. Reduce the temperature to 325°F (160°C) and bake for an additional 4-5 minutes.If the top browns too quickly, tent it with foil after 25 minutes.7️⃣Cool the Bread:Remove the bread from the oven and let it sit in the pan for 2-3 minutes. Then demold it to prevent sogginess.Cool completely for 2-3 hours to allow the residual baking to finish.8️⃣Serve and Enjoy:Slice the bread once fully cooled. It’s delicious as-is, toasted, or turned into French toast
  15. 6️⃣Egg Wash and Bake:Preheat the oven to 350°F (175°C). Brush the dough with a lightly beaten egg for a glossy finish.Bake for 34-35 minutes. Reduce the temperature to 325°F (160°C) and bake for an additional 4-5 minutes.If the top browns too quickly, tent it with foil after 25 minutes.7️⃣Cool the Bread:Remove the bread from the oven and let it sit in the pan for 2-3 minutes. Then demold it to prevent sogginess.Cool completely for 2-3 hours to allow the residual baking to finish.8️⃣Serve and Enjoy:Slice the bread once fully cooled. It’s delicious as-is, toasted, or turned into French toast
  16. Preheat the oven to 350°F (175°C). Brush the dough with a lightly beaten egg for a glossy finish.
  17. Bake for 34-35 minutes. Reduce the temperature to 325°F (160°C) and bake for an additional 4-5 minutes.If the top browns too quickly, tent it with foil after 25 minutes.7️⃣Cool the Bread:Remove the bread from the oven and let it sit in the pan for 2-3 minutes. Then demold it to prevent sogginess.Cool completely for 2-3 hours to allow the residual baking to finish.8️⃣Serve and Enjoy:Slice the bread once fully cooled. It’s delicious as-is, toasted, or turned into French toast
  18. If the top browns too quickly, tent it with foil after 25 minutes.7️⃣Cool the Bread:Remove the bread from the oven and let it sit in the pan for 2-3 minutes. Then demold it to prevent sogginess.Cool completely for 2-3 hours to allow the residual baking to finish.8️⃣Serve and Enjoy:Slice the bread once fully cooled. It’s delicious as-is, toasted, or turned into French toast
  19. 7️⃣Cool the Bread:
  20. Remove the bread from the oven and let it sit in the pan for 2-3 minutes. Then demold it to prevent sogginess.Cool completely for 2-3 hours to allow the residual baking to finish.8️⃣Serve and Enjoy:Slice the bread once fully cooled. It’s delicious as-is, toasted, or turned into French toast
  21. Cool completely for 2-3 hours to allow the residual baking to finish.8️⃣Serve and Enjoy:Slice the bread once fully cooled. It’s delicious as-is, toasted, or turned into French toast
  22. 8️⃣Serve and Enjoy:
  23. Slice the bread once fully cooled. It’s delicious as-is, toasted, or turned into French toast

Notes

Adjust the fruit mix to your liking—swap in dried apricots, figs, or dates.Smearing the top with butter after baking will soften the crust.Store in an airtight container for up to 4 days or freeze for longer shelf life.
Smearing the top with butter after baking will soften the crust.Store in an airtight container for up to 4 days or freeze for longer shelf life.
Store in an airtight container for up to 4 days or freeze for longer shelf life.

“`

Best Crème Brûlée French Toast Recipe You’ll Love

“`html

Best Crème Brûlée French Toast Recipe You’ll Love

Indulge in the Ultimate Crème Brûlée French Toast

Are you searching for a breakfast or brunch dish that screams luxury and decadent flavor? Did you know that over 70% of home cooks aspire to recreate restaurant-quality desserts at home, and a dish like Crème Brûlée French Toast is the perfect starting point? If you’re dreaming of a breakfast that melds the beloved crackly, caramelized sugar top of crème brûlée with the comforting, pillowy texture of French toast, you’ve landed in the right place. This recipe transforms ordinary bread into an extraordinary indulgence, featuring a rich, creamy custard soak and a glorious, caramelized sugar crust that shatters with every bite. It’s perfect for weekend mornings, special occasions, or simply when you want to treat yourself to something truly unforgettable.

Ingredients You’ll Need

The magic of Crème Brûlée French Toast lies in the quality of its ingredients. Think rich, eggy, and a touch of sweetness, all coming together to create a symphony of textures and flavors.

  • Brioche Loaf or Challah: 1 large loaf (about 1 pound), sliced about 1-inch thick. The richness and slight sweetness of brioche are ideal, but challah offers a similar eggy, soft crumb that soaks up the custard beautifully. For a slightly less sweet option, a sturdy day-old French baguette can work, though it will absorb less custard.
  • Eggs: 6 large. These are the backbone of our custard, providing richness and binding everything together.
  • Heavy Cream: 2 cups. The key to a luscious, decadent custard. It’s what gives French toast its signature creamy mouthfeel. You can substitute with half-and-half for a lighter version, but the richness will be slightly diminished.
  • Granulated Sugar: 1/2 cup, plus more for topping. This sweetness is essential for the custard and the ultimate caramelization. The topping sugar needs to be coarse enough to form a beautiful, crackly crust.
  • Vanilla Extract: 2 teaspoons. Pure vanilla extract is crucial for that classic, comforting flavor that complements the richness perfectly.
  • Ground Cinnamon: 1 teaspoon. A whisper of warm spice enhances the overall flavor profile without overpowering the custardy sweetness. Nutmeg or a pinch of cardamom are interesting alternatives.
  • Salt: A pinch. Balances the sweetness and enhances all the other flavors.
  • Butter: For greasing the pan and for cooking. Unsalted butter is preferred to control the saltiness.

Mastering the Timing

Achieving the perfect Crème Brûlée French Toast is all about patience and precise timing. Unlike a quick weeknight meal, this recipe rewards a little foresight.

Prep Time: 15 minutes
Soaking Time: 30 minutes to 2 hours (or overnight)
Cook Time: 10-15 minutes per batch
Total Time: Approximately 1 hour 25 minutes to 3 hours+ (including soaking)

Compared to average French toast recipes that might take 20-30 minutes total, this Crème Brûlée version requires additional soaking time to ensure the bread becomes tender and infused with flavor. The caramelization step also adds a bit more time, but the payoff is well worth it!

Finished Crème Brûlée French Toast stacked with a caramelized top and berries.

Crafting the Perfect Crème Brûlée French Toast

Let’s get cooking! Follow these simple steps to create a breakfast masterpiece.

Step 1: Prepare the Brioche for Perfection

Start by slicing your brioche loaf into thick, 1-inch pieces. If your loaf is very fresh and soft, it’s best to let the slices sit out for about an hour or even toast them lightly to give them a bit more structure. This prevents them from becoming too soggy when they soak in the custard.

Step 2: Whisk the Custard Magic

In a wide, shallow dish (large enough to fit a slice of bread without overcrowding), whisk together the eggs, heavy cream, 1/2 cup granulated sugar, vanilla extract, cinnamon, and salt. Whisk vigorously until the mixture is smooth and well combined. You want an even consistency with no streaks of egg white.

Step 3: Soak and Infuse

Carefully place the brioche slices into the custard mixture. Let them soak for at least 30 minutes on each side, or up to 2 hours at room temperature. For the best results, cover the dish and refrigerate overnight. The longer soak allows the bread to fully absorb the luxurious custard, resulting in a tender interior.

Step 4: The Golden Sear

Heat a lightly buttered griddle or non-stick skillet over medium heat. Carefully lift a soaked brioche slice from the custard, letting any excess drip back into the dish. Place it on the hot griddle and cook for about 3-4 minutes per side, until golden brown and cooked through. Don’t overcrowd the pan; cook in batches if necessary. Remove the cooked French toast to a plate.

Step 5: The Caramel Kiss

This is where the magic happens! Once your French toast is cooked and arranged on a baking sheet (or individual oven-safe plates if you prefer), generously sprinkle the tops with additional granulated sugar. Using a kitchen torch, carefully melt and caramelize the sugar until it forms a beautiful, glassy, golden-brown crust. Move the torch around to ensure even caramelization and avoid burning. If you don’t have a torch, you can *carefully* place them under a hot broiler for a minute or two, watching VERY closely to prevent burning.

Nutritional Highlights

While this is a decadent treat, here’s a general idea of its nutritional profile. Specific values can vary based on exact ingredients and portion sizes.

  • Calories: Approximately 400-550 per serving (depending on bread, amount of cream/sugar).
  • Fat: Rich in healthy fats from cream and eggs.
  • Carbohydrates: Primarily from the bread and sugar.
  • Protein: Good source from eggs and dairy.

Healthier Alternatives Without Compromising Flavor

You can make this beloved dish a little lighter without sacrificing its deliciousness. The key is smart swaps:

  • Bread Choice: Opt for whole wheat brioche or even thick-sliced whole grain bread for added fiber.
  • Dairy: Substitute half of the heavy cream with whole milk or unsweetened almond milk. For an even lighter touch, use half-and-half.
  • Sweetener: Reduce the sugar in the custard slightly, or use a natural sweetener like maple syrup (though this will alter the caramelization). For the topping, a sugar-free caramel syrup drizzle can offer a similar effect.
  • Portion Control: Serve with a generous side of fresh berries to add natural sweetness and volume.

Serving Suggestions to Elevate Your Meal

Elevate your Crème Brûlée French Toast with these delightful accompaniments:

  • Fresh Berries: A classic pairing that adds a burst of freshness and color. Strawberries, blueberries, raspberries, and blackberries are delightful.
  • Maple Syrup: A drizzle of pure maple syrup enhances the sweetness.
  • Whipped Cream: A dollop of lightly sweetened whipped cream adds extra indulgence.
  • Powdered Sugar: A light dusting of powdered sugar can add an elegant finish.
  • Aromatic Coffee or Tea: Pair with your favorite hot beverage for a complete breakfast experience.

Common Mistakes to Avoid

Steer clear of these pitfalls to ensure Crème Brûlée French Toast success:

  • Using Stale Bread: While day-old bread is good, bread that is too stale won’t absorb the custard properly. Use a relatively fresh, but not overly soft, loaf.
  • Over-Soaking: Soggy bread is unappealing. While a good soak is important, too long can make the bread fall apart.
  • Pan Too Hot: Cooking the French toast on a skillet that’s too hot will burn the outside before the inside is cooked through. Medium heat is key.
  • Burning the Caramel: Be vigilant when caramelizing the sugar. It can go from perfectly golden to burnt in seconds!

Storing Your Crème Brûlée French Toast

Leftovers are rare, but if you do have any:

  • Before Caramelizing: Store un-caramelized French toast in an airtight container in the refrigerator for up to 2 days. Reheat gently in a skillet or oven before caramelizing.
  • After Caramelizing: The caramelized sugar topping does not store well and will likely become soft and sticky. It’s best to caramelize just before serving.
Close-up of the caramelized sugar crust on Crème Brûlée French Toast.

Why You’ll Adore This Crème Brûlée French Toast

This Best Crème Brûlée French Toast recipe is more than just a meal; it’s an experience. It delivers the satisfying crunch of caramelized sugar followed by a tender, custardy interior. It’s the perfect way to elevate your breakfast or brunch, turning any morning into a special occasion. Ready to impress yourself and your loved ones with this divine creation? Give this recipe a try, and prepare to fall in love with French toast all over again.

Frequently Asked Questions

***What kind of bread is best for Crème Brûlée French Toast?***

Brioche or Challah are highly recommended due to their rich, eggy, and slightly sweet nature, which allows them to absorb the custard beautifully and become incredibly tender. Day-old French baguette can also work if you prefer a slightly less rich option.

***Can I make the custard mixture ahead of time?***

Yes, you can whisk together the custard mixture and store it in an airtight container in the refrigerator for up to 24 hours. Just be sure to bring it closer to room temperature before soaking the bread.

***How do I get a perfect caramel crust without a kitchen torch?***

If you don’t have a kitchen torch, you can carefully place the sprinkled French toast under a hot broiler. Keep a very close eye on it, as it can burn quickly, and rotate the baking sheet for even caramelization.

***Can I freeze Crème Brûlée French Toast?***

It’s best to avoid freezing after the caramelization step, as the sugar crust won’t hold up well. You can freeze the un-caramelized French toast. Place individual slices on a baking sheet to freeze, then transfer them to a freezer-safe bag. Reheat thoroughly before caramelizing.

***What if my brioche is too soft?***

If your brioche is very fresh and soft, you can lightly toast the slices in a toaster or oven for a few minutes before soaking. This will give them a bit more structure to prevent them from falling apart in the custard.

Print
clock clock iconcutlery cutlery iconflag flag iconfolder folder iconinstagram instagram iconpinterest pinterest iconfacebook facebook iconprint print iconsquares squares iconheart heart iconheart solid heart solid icon

Overnight Crème Brûlée French Toast


  • Author: Chef Emy

Description

Indulge in this rich and custardy overnight French toast, finished with a caramelized sugar topping that gives it a crème brûlée flair. Perfect for a decadent breakfast or brunch!


Ingredients

Scale
  • 1loaf French bread, sliced 1-inch thick5large eggs1 cuphalf-and-half1 cupwhole milk1 teaspoonvanilla extract2/3 cupgranulated sugar (plus extra for topping)1/4 teaspoonground cinnamon1/4 teaspoonground nutmeg1/4 cupunsalted butter, cut into small piecesMaple syrup, for serving
  • 5large eggs1 cuphalf-and-half1 cupwhole milk1 teaspoonvanilla extract2/3 cupgranulated sugar (plus extra for topping)1/4 teaspoonground cinnamon1/4 teaspoonground nutmeg1/4 cupunsalted butter, cut into small piecesMaple syrup, for serving
  • 1 cuphalf-and-half1 cupwhole milk1 teaspoonvanilla extract2/3 cupgranulated sugar (plus extra for topping)1/4 teaspoonground cinnamon1/4 teaspoonground nutmeg1/4 cupunsalted butter, cut into small piecesMaple syrup, for serving
  • 1 cupwhole milk1 teaspoonvanilla extract2/3 cupgranulated sugar (plus extra for topping)1/4 teaspoonground cinnamon1/4 teaspoonground nutmeg1/4 cupunsalted butter, cut into small piecesMaple syrup, for serving
  • 1 teaspoonvanilla extract2/3 cupgranulated sugar (plus extra for topping)1/4 teaspoonground cinnamon1/4 teaspoonground nutmeg1/4 cupunsalted butter, cut into small piecesMaple syrup, for serving
  • 2/3 cupgranulated sugar (plus extra for topping)1/4 teaspoonground cinnamon1/4 teaspoonground nutmeg1/4 cupunsalted butter, cut into small piecesMaple syrup, for serving
  • 1/4 teaspoonground cinnamon1/4 teaspoonground nutmeg1/4 cupunsalted butter, cut into small piecesMaple syrup, for serving
  • 1/4 teaspoonground nutmeg1/4 cupunsalted butter, cut into small piecesMaple syrup, for serving
  • 1/4 cupunsalted butter, cut into small piecesMaple syrup, for serving
  • Maple syrup, for serving

Instructions

  1. 1️⃣Prepare the baking dish:Generously butter a 9×13-inch baking dish. Arrange the French bread slices in a single layer, slightly overlapping if necessary.
  2. 2️⃣Make the custard:In a large mixing bowl, whisk together the eggs, half-and-half, milk, vanilla extract, sugar, cinnamon, and nutmeg until smooth and well-combined.3️⃣Soak the bread:Pour the custard mixture evenly over the bread slices, ensuring every slice is thoroughly coated. Use a spatula or your hands to gently press the bread into the custard.4️⃣Refrigerate overnight:Cover the dish tightly with plastic wrap and refrigerate overnight to allow the bread to absorb the custard.5️⃣Bake the French toast:Preheat your oven to 350°F (175°C). Remove the baking dish from the refrigerator and discard the plastic wrap. Dot the bread with small pieces of butter and sprinkle a light layer of sugar over the top. Bake for 35-40 minutes, or until the French toast is puffed and golden.6️⃣Caramelize the sugar topping:Remove the dish from the oven and let it cool slightly. Sprinkle an even layer of granulated sugar on top of the bread. Use a kitchen torch or the broiler setting on your oven to caramelize the sugar until it is golden and crisp.7️⃣Serve:Allow the French toast to cool for a few minutes before serving. Drizzle with maple syrup and enjoy!
  3. 3️⃣Soak the bread:Pour the custard mixture evenly over the bread slices, ensuring every slice is thoroughly coated. Use a spatula or your hands to gently press the bread into the custard.4️⃣Refrigerate overnight:Cover the dish tightly with plastic wrap and refrigerate overnight to allow the bread to absorb the custard.5️⃣Bake the French toast:Preheat your oven to 350°F (175°C). Remove the baking dish from the refrigerator and discard the plastic wrap. Dot the bread with small pieces of butter and sprinkle a light layer of sugar over the top. Bake for 35-40 minutes, or until the French toast is puffed and golden.6️⃣Caramelize the sugar topping:Remove the dish from the oven and let it cool slightly. Sprinkle an even layer of granulated sugar on top of the bread. Use a kitchen torch or the broiler setting on your oven to caramelize the sugar until it is golden and crisp.7️⃣Serve:Allow the French toast to cool for a few minutes before serving. Drizzle with maple syrup and enjoy!
  4. 4️⃣Refrigerate overnight:Cover the dish tightly with plastic wrap and refrigerate overnight to allow the bread to absorb the custard.
  5. 5️⃣Bake the French toast:Preheat your oven to 350°F (175°C). Remove the baking dish from the refrigerator and discard the plastic wrap. Dot the bread with small pieces of butter and sprinkle a light layer of sugar over the top. Bake for 35-40 minutes, or until the French toast is puffed and golden.6️⃣Caramelize the sugar topping:Remove the dish from the oven and let it cool slightly. Sprinkle an even layer of granulated sugar on top of the bread. Use a kitchen torch or the broiler setting on your oven to caramelize the sugar until it is golden and crisp.7️⃣Serve:Allow the French toast to cool for a few minutes before serving. Drizzle with maple syrup and enjoy!
  6. 6️⃣Caramelize the sugar topping:Remove the dish from the oven and let it cool slightly. Sprinkle an even layer of granulated sugar on top of the bread. Use a kitchen torch or the broiler setting on your oven to caramelize the sugar until it is golden and crisp.7️⃣Serve:Allow the French toast to cool for a few minutes before serving. Drizzle with maple syrup and enjoy!
  7. 7️⃣Serve:Allow the French toast to cool for a few minutes before serving. Drizzle with maple syrup and enjoy!

Notes

For a deeper flavor, substitute brown sugar for some or all of the granulated sugar in the custard.Leftovers can be stored in the refrigerator for up to 2 days and reheated in the oven.Customize the dish with fresh fruit or a dollop of whipped cream when serving.
Leftovers can be stored in the refrigerator for up to 2 days and reheated in the oven.Customize the dish with fresh fruit or a dollop of whipped cream when serving.
Customize the dish with fresh fruit or a dollop of whipped cream when serving.

“`

Holiday Wreath Cookies – A No-Bake Delight

“`html

Holiday Wreath Cookies – A No-Bake Delight

Kickstart Your Holiday Baking Fun!

Looking for a fun, festive, and fuss-free holiday treat that even the youngest bakers can help create? Are you wondering how to add a unique, edible centerpiece to your festive spread this year? You’re not alone! Many home bakers seek simple yet show-stopping recipes during the busy holiday season. These adorable no-bake Christmas wreath cookies are the answer! They require no oven time, are incredibly easy to assemble, and the decorating process is pure joy for all ages. Get ready to spread some serious holiday cheer with these delightful, edible wreaths.

Festive Ingredients for Your Wreath Cookies

The magic of these wreath cookies lies in their simplicity. We’re using familiar ingredients that come together to create something truly special. Here’s what you’ll need:

  • 2 cups Rice Krispies cereal (or similar puffed rice cereal): These provide a delightful crunch and airy texture, forming the perfect base for our wreaths. For a slightly chewier bite, you *could* try a mix with another cereal, but rice krispies are classic for a reason!
  • 1/4 cup unsalted butter: This is our binder, giving the cereal clusters their shape and richness. You can substitute with dairy-free butter if needed.
  • 1/4 cup light corn syrup: This sticky sweetener helps hold everything together and gives the cookies a glossy finish. Maple syrup can be used as a substitute, though it will impart a stronger flavor and may not set quite as firmly.
  • 1/4 cup granulated sugar: For a touch of sweetness that complements the cereal.
  • 1/2 teaspoon vanilla extract: A classic flavor enhancer that adds warmth.

For the Icing

  • 1 cup powdered sugar: The base for our simple, sweet drizzle. Sifted is best to avoid lumps.
  • 1-2 tablespoons milk (or water): Adjust this amount to achieve your desired drizzling consistency. Almond milk or oat milk work too.
  • 1/2 teaspoon vanilla extract (optional): For an extra hint of flavor in the icing.

For Decorating

  • Red and Green sprinkles: Think festive jimmies, nonpareils, or even small round sprinkles to mimic ornaments.
  • Small edible candies: Like red M&Ms, silver dragees (use sparingly and check for edibility), or even small red gummy candies.

Timing is Everything

Prep time: 15 minutes
Chill time: 30 minutes
Total time: 45 minutes

Compared to average baked cookies that can take 15-20 minutes to bake per batch plus cooling time, these no-bake wonders are incredibly efficient. You’ll be decorating them in a fraction of the time, leaving more moments for enjoying the holiday spirit!

Holiday Wreath Cookies assembled and decorated

Crafting Your Edible Masterpieces

Let’s get started on these charming no-bake treats. Remember, the fun is in the process, so grab your helpers and enjoy!

Step 1: Prepare the Base

In a large microwave-safe bowl, combine the butter, corn syrup, and granulated sugar. Microwave on high for 1 minute, stir, then microwave for another 1 minute. Stir until the butter is melted and the sugar is dissolved. Stir in the vanilla extract. Add the Rice Krispies cereal and stir gently until all the cereal is lightly coated. Be careful not to crush the cereal too much, as you want to maintain its airy texture.

Step 2: Form the Wreaths

Lightly grease your hands with butter or cooking spray to prevent sticking. Take about 1/2 cup of the cereal mixture and press it into a ring shape on a parchment-lined baking sheet. Aim for a hole in the center, creating that classic wreath silhouette. You can use a greased donut cutter or even the end of a greased glass to help form the center. Repeat with the remaining mixture until you have several wreath shapes.

Step 3: Whip Up the Icing

In a small bowl, whisk together the powdered sugar, 1 tablespoon of milk, and vanilla extract (if using). Add more milk, a teaspoon at a time, until you reach a drizzling consistency – thick enough to coat but thin enough to flow easily from a spoon or piping bag.

Step 4: Decorate with Cheer

This is where the real holiday magic happens! Drizzle the icing over the cereal wreaths in a decorative pattern, mimicking frosting. While the icing is still wet, generously sprinkle with red and green sprinkles and add your chosen candies to resemble festive ornaments and bows. Get creative!

Step 5: Let Them Set

Allow the decorated wreath cookies to sit at room temperature for at least 30 minutes, or until the icing has set. This will help them hold their shape and keep all those beautiful decorations in place.

Nutritional Snapshot

While exact nutritional values can vary based on specific ingredient brands and portion sizes, here’s a general estimate per cookie (assuming 10 cookies per batch):

  • Calories: Approximately 150-200 kcal
  • Fat: 5-8g
  • Carbohydrates: 25-35g
  • Sugar: 15-25g
  • Protein: 1-2g

Please note: These are estimates. For precise information, calculate using your specific ingredients.

Healthier Holiday Twists

Want to make these a bit lighter without sacrificing flavor? Try these swaps:

  • Use whole grain puffed cereal: If available, opt for a whole-grain puffed cereal for added fiber.
  • Reduce the binder: Slightly decrease the corn syrup and butter, and add a touch more honey or agave if needed for binding, being mindful of sweetness.
  • Natural sweeteners: For the icing, consider using a simple glaze made with powdered erythritol or xylitol (if using, be aware of pet toxicity) and a touch of natural fruit juice for color.
  • Fruit-based decorations: Use small dried cranberries or finely chopped dried apricots as ‘ornaments’.

Serving Suggestions to Spark Joy

These wreath cookies are perfect on their own, but they also shine when presented creatively:

  • Arrange them on a festive platter as a centerpiece.
  • Package them in small cellophane bags tied with a ribbon as edible gifts for neighbors, teachers, or friends.
  • Pair them with a glass of cold milk or a warm mug of hot chocolate for a classic holiday treat.
  • Use them to decorate the edges of a larger holiday cake or cupcake display.

Common Mistakes to Avoid

Here are a few common pitfalls to steer clear of for perfect wreath cookies:

  • Over-mixing the cereal: This can break down the cereal and result in dense, hard cookies instead of light and crispy ones.
  • Not greasing hands: The cereal mixture is sticky! Greasing your hands is essential for easy shaping.
  • Icing too thin or too thick: Adjust the milk in the icing carefully. Too thin and it runs off; too thick and it’s difficult to drizzle.
  • Decorating too early: Wait for the base cookie to set slightly before decorating, especially if using heavier candies.

Storing Your Wreath Cookies

Once fully set, these cookies can be stored at room temperature in an airtight container for up to 3-4 days. Avoid refrigerating them, as this can make the cereal lose its crispness and the icing or decorations potentially sticky.

Close-up of decorated Holiday Wreath Cookies

Wrap Up Your Holiday Baking Bliss!

Holiday Wreath Cookies are more than just a sweet treat; they are an activity, a decoration, and a delicious memory in the making. Their no-bake nature makes them accessible for everyone, and their festive charm ensures they’ll be a hit at any holiday gathering. So, gather your ingredients, invite your loved ones, and let the no-bake holiday fun begin!

Frequently Asked Questions

***Are these cookies difficult to make?***

Not at all! These are designed to be incredibly simple and are perfect for beginners and children. The most “difficult” part is shaping the ring, which is easily managed with greased hands.

***Can I use different types of cereal?***

While Rice Krispies are ideal for their texture and binding properties, you can experiment with other puffed rice or corn cereals. However, they might not hold their shape as well or require slight adjustments to the binder mixture.

***How much icing should I use?***

Start with the recommended amount and adjust gradually. You want a consistency that’s easy to drizzle but not so thin that it completely runs off the cookie. It’s better to add more milk a tiny bit at a time than to add too much at once.

***Can I make these ahead of time?***

Yes! As long as they are stored in an airtight container at room temperature, they will keep well for a few days. They are best enjoyed within 2-3 days for optimal crispness.

***What other decorations can I use?***

Get creative! You can use small red fruit candies, silver dragees, edible glitter, white chocolate chips, or even finely chopped nuts if no allergies are present. Small bows made from fondant can also add a nice touch.

Print
clock clock iconcutlery cutlery iconflag flag iconfolder folder iconinstagram instagram iconpinterest pinterest iconfacebook facebook iconprint print iconsquares squares iconheart heart iconheart solid heart solid icon

Stovetop Maple Candied Pecans (or Mixed Nuts)


  • Author: Chef Emy

Description

Quick, easy, and naturally sweetened, these Stovetop Maple Candied Pecans (or Mixed Nuts) are the perfect snack or topping for salads, desserts, and more. Made with pure maple syrup and a hint of cinnamon, these crunchy nuts are ready in just 20 minutes and are endlessly customizable.


Ingredients

Scale
  • 4 cupspecan halves (or any mixture of raw nuts like cashews and almonds)
  • 1/2 cuppure maple syrup
  • 2 teaspoonsvanilla extract
  • 1 1/2 tablespoonscinnamon
  • 1/2 teaspoonsea salt

Instructions

  1. Heat a skillet over medium heat. Add maple syrup, vanilla extract, and sea salt. Stir and warm for 1 minute.
  2. Add nuts and stir constantly to coat them in the syrup mixture.
  3. Sprinkle cinnamon over the nuts and stir again to ensure an even coating.
  4. Continue stirring as the maple syrup boils. Cook for 5–7 minutes, until the syrup is absorbed and no liquid remains in the skillet.
  5. Transfer nuts onto a parchment-lined surface and spread them out to cool. Optional: Sprinkle with a cinnamon-sugar mix for extra sweetness.
  6. Once cooled, break apart the nuts and store them in an airtight container.

Notes

Stir continuously to avoid burning the nuts.
You can omit the cinnamon for a simpler flavor or experiment withspiceslike nutmeg or cardamom.
Store in an airtight container at room temperature for up to 2 weeks, or freeze for up to 2 months.

Nutrition

  • Calories: 201
  • Sugar: 7g
  • Fat: 18g
  • Carbohydrates: 11g
  • Protein: 2g

“`

Snowball Coconut Fudge Truffles – Keto Treat!

“`html

Snowball Coconut Fudge Truffles – Keto Treat!

Indulge Guilt-Free with Keto Snowball Coconut Fudge Truffles!

Are you constantly searching for a decadent dessert that doesn’t derail your healthy eating goals? Do you find yourself craving something sweet but are hesitant to indulge because of the sugar content? You’re not alone! In the world of keto and low-carb diets, finding truly satisfying treats can be a challenge. Many store-bought options are loaded with hidden sugars or artificial sweeteners that leave you wanting more. But what if I told you there’s a way to satisfy those sweet cravings with a treat that’s not only delicious but also keto-friendly, sugar-free, and incredibly easy to make? Enter these Snowball Coconut Fudge Truffles! These delightful morsels are the perfect blend of creamy fudge and tropical coconut, rolled into bite-sized balls that resemble sweet snowballs. They are so rich and satisfying, you’ll hardly believe they’re guilt-free. Save this recipe for your next sweet craving, because your taste buds (and your waistline) will thank you!

Keto Snowball Coconut Fudge Truffles Ingredients

Crafting these simple yet exquisite truffles requires just a few key ingredients, focusing on quality and low-carb options. Feel free to adjust based on your preferences and what you have on hand.

Main Ingredients

  • Sugar-Free Chocolate Chips/Bar: The foundation of our fudge. Opt for a good quality sugar-free dark chocolate (70% cacao or higher is usually best for keto) or sugar-free milk chocolate if you prefer a sweeter profile. About 1 cup (170g).
  • Full-Fat Coconut Cream: This is crucial for that rich, creamy texture. Ensure it’s full-fat (from a can, not the carton) and chilled so you can skim off the thick cream. About 1/2 cup (120ml).
  • Melted Coconut Oil: Helps to bind the ingredients and provides a smooth texture. About 2 tablespoons (30g).
  • Keto-Friendly Sweetener: Erythritol, xylitol (caution: toxic to pets), or a monk fruit blend works wonderfully. Adjust to your sweetness preference. Start with 2-3 tablespoons (25-35g) and taste as you go.
  • Unsweetened Shredded Coconut: For that lovely coconut flavor and texture within the truffle. About 1/2 cup (40g), plus more for rolling.
  • Vanilla Extract: A teaspoon to enhance the overall flavor profile.
  • Pinch of Salt: Balances the sweetness and deepens the chocolate flavor.

Optional Add-ins

  • Chopped Nuts: Almonds, walnuts, or pecans add a delightful crunch.
  • Sugar-Free Extracts: A drop of peppermint or orange extract can add an exciting twist.
  • Espresso Powder: For a mocha-flavored truffle.

Coating Options

  • Unsweetened Shredded Coconut: For the classic “snowball” look.
  • Cocoa Powder: For a rich, dark truffle.
  • Chopped Nuts: For added texture and nutty flavor.
  • Melted Sugar-Free Chocolate: For a glossy, decadent finish.

Timing for Perfect Truffles

This recipe is wonderfully quick to prepare, making it an ideal last-minute treat. Unlike traditional fudge that can take hours to set, these keto truffles come together in a flash!

Prep time: 20 minutes
Chill time: 1-2 hours
Total time: 1 hour 20 minutes – 2 hours 20 minutes (mostly inactive chilling time)

Compared to traditional fudge recipes which often require significant cooking and cooling times, these keto truffles are much faster, with the majority of the time being inactive chilling.

Snowball Coconut Fudge Truffles - Keto Treat!

Crafting Your Keto Snowball Coconut Fudge Truffles

Follow these simple steps to create your own batch of delicious keto snowball coconut fudge truffles. The process is designed to be straightforward and rewarding.

Step 1: Melt the Sugar-Free Chocolate

In a heatproof bowl, combine your sugar-free chocolate chips (or chopped bar) and coconut oil. Gently melt them together. You can do this using a double boiler (place the bowl over a saucepan of simmering water, ensuring the bottom of the bowl doesn’t touch the water) or in the microwave. If microwaving, heat in 30-second intervals, stirring well after each interval, until smooth and creamy. Be careful not to overheat, as chocolate can seize.

Step 2: Combine the Creamy Goodness

Once the chocolate is melted and smooth, stir in the thick coconut cream (scrape the thick part from the top of the chilled can). Add your keto sweetener, unsweetened shredded coconut, vanilla extract, and a pinch of salt. Mix everything together thoroughly until you have a thick, fudgy batter. If you’re adding any optional ingredients like chopped nuts or espresso powder, stir them in now.

Step 3: Chill for Perfect Consistency

Cover the bowl with plastic wrap, pressing it directly onto the surface of the mixture to prevent a skin from forming. Place the bowl in the refrigerator for at least 1-2 hours, or until the mixture is firm enough to scoop and roll into balls. The chilling process is essential for the truffles to hold their shape.

Step 4: Form and Shape the Snowballs

Once the mixture is firm, prepare a small plate or baking sheet with your chosen coating (e.g., shredded coconut, cocoa powder, chopped nuts). Scoop out portions of the chilled fudge mixture using a small spoon or a cookie scoop. Roll each portion into a ball between your palms. If the mixture becomes too soft to handle, pop it back in the fridge for a few minutes to firm up again.

Step 5: Coat and Decorate Your Truffles

Gently roll each truffle in your prepared coating until evenly covered. If you’re using melted sugar-free chocolate, dip each ball into the melted chocolate and place on parchment paper to set. If you want a more elaborate look, you can drizzle melted chocolate over the coated truffles or press a small nut or sugar-free sprinkle onto the top. Place the finished truffles on a plate or baking sheet lined with parchment paper.

Nutritional Snapshot: Keto Snowball Truffles

These truffles are designed to be a low-carb, high-fat treat. Actual nutritional values will vary based on the specific brands and amounts of ingredients used. The following is an estimate per truffle (assuming 12 truffles):

  • Calories: 100-150 kcal
  • Total Fat: 10-15g
  • Net Carbs: 1-3g (depending on the sweetener and chocolate used)
  • Protein: 1-2g
  • Sugar: <1g

Please calculate your own nutritional information based on your specific ingredients for accuracy.

Healthier Alternatives and Flavor Variations

While this recipe is already keto-friendly, you can further customize it for different needs or flavor profiles:

  • Dairy-Free: The recipe is naturally dairy-free if you use dairy-free sugar-free chocolate.
  • Nut-Free: Simply omit any optional nuts and ensure your chocolate chips are nut-free.
  • Lower Fat: While not ideal for strict keto, you could slightly reduce the coconut oil if needed, but this may impact texture. Using sugar-free milk chocolate instead of dark can also slightly change the fat profile.
  • Flavor Boosts: Add a teaspoon of instant coffee granules for a mocha twist, a few drops of peppermint extract for minty truffles, or a bit of orange zest for a citrusy kick.
  • Sweetener Options: If you are not keto, you can use regular sugar or maple syrup, but be mindful of the carb count.

Serving Suggestions for Your Snowball Truffles

These truffles are perfect for:

  • A satisfying dessert after a keto meal.
  • A sweet pick-me-up during the day.
  • Holiday gatherings or special occasions.
  • As part of a keto-friendly charcuterie board.
  • A thoughtful homemade gift.

Serve them slightly chilled for the best texture.

Avoiding Common Mistakes

To ensure your truffles turn out perfectly every time, keep these common pitfalls in mind:

  • Overheating Chocolate: Can cause it to become grainy or seize up. Melt gently and stir frequently.
  • Using Low-Fat Coconut Milk: Stick to full-fat canned coconut cream for the best richness and setting properties.
  • Not Chilling Enough: A common mistake! The mixture needs to be firm enough to handle. If it’s too soft, it will be messy.
  • Ingredient Temperature: Ensure your coconut cream is fully chilled to get the thick cream separate from the liquid.

Storing Your Keto Truffles

Store your Snowball Coconut Fudge Truffles in an airtight container in the refrigerator. They will keep well for up to 1-2 weeks. For longer storage, you can freeze them for up to 2-3 months. Thaw them in the refrigerator before serving.

Close-up of Keto Snowball Coconut Fudge Truffles

Frequently Asked Questions

***Will xylitol keep my pets safe?***

No, xylitol is highly toxic to dogs and can be harmful to cats. If you have pets, it’s best to use erythritol, stevia, or monk fruit sweetener as your keto-friendly sweetener.

***Can I use regular chocolate chips?***

For a keto-friendly recipe, it’s essential to use sugar-free chocolate chips or bars. Regular chocolate chips contain a significant amount of sugar and added carbohydrates that will take you out of ketosis.

***My truffle mixture is too hard, what should I do?***

If your mixture becomes too hard to scoop and roll, let it sit at room temperature for a few minutes, or gently warm your hands before rolling. If it’s still too firm, you can try gently microwaving the entire bowl for 10-15 seconds, but be careful not to melt it completely.

***Can I make these ahead of time?***

Absolutely! These truffles are perfect for making ahead. They are best stored in the refrigerator and can be made up to a week in advance.

***What if I don’t have coconut cream?***

For the best results and keto compliance, focus on using full-fat canned coconut cream. If absolutely unavailable, you *could* try very thick heavy cream, but this will alter the flavor and nutritional profile and may not set as well.

Print
clock clock iconcutlery cutlery iconflag flag iconfolder folder iconinstagram instagram iconpinterest pinterest iconfacebook facebook iconprint print iconsquares squares iconheart heart iconheart solid heart solid icon

Snowballs Coconut Fudge Truffles Recipe (Keto & Sugar-Free!)


  • Author: Chef Emy

Description

Indulge in these festive Snowballs Coconut Fudge Truffles—a keto-friendly, sugar-free treat with nearly zero net carbs per truffle. Perfect for the holiday season, they’re creamy, coconut-packed, and irresistibly easy to make!


Ingredients

Scale
  • ½ cup(120 g) heavy whipping cream or coconut cream
  • 4 tablespoons(56 g) unsalted butter or coconut oil, melted
  • 3scoops (90 g) unflavored whey protein
  • ½ cup(96 g) powdered sweetener
  • ½ cup(60 g) coconut flour
  • ¾ cup(64 g) unsweetened grated coconut, plus extra for rolling
  • 1 teaspoonvanilla extract (optional)

Instructions

  1. In a food processor or large bowl, combine all ingredients in this order: heavy whipping cream, melted butter, whey protein, powdered sweetener, coconut flour, grated coconut, and vanilla extract (if using).
  2. Blend or mix until the ingredients form a smooth, firm dough (about 15–20 seconds in a food processor).
  3. Divide the dough into 16 equal portions and roll into balls.
  4. Roll the balls in extra shredded coconut to create the “snowy” look.
  5. Chill for at least 30 minutes in the refrigerator before serving.

Notes

Vanilla-flavored whey protein can be used, and additional sweetener may not be needed.
Ensure your sweetener is powdered to avoid a gritty texture.
For a firmer dough, chill the mixture briefly before rolling.

Nutrition

  • Calories: 109
  • Sugar: 0
  • Fat: 8g
  • Carbohydrates: 2,9g
  • Protein: 6,2g

“`

Delicious Lemon Loaf Recipe You Need to Try

“`html

Delicious Lemon Loaf Recipe You Need to Try

Embark on a Culinary Adventure with the Perfect Lemon Loaf

Are you searching for that one incredibly moist, bursting-with-flavor lemon loaf recipe that will have your friends and family begging for the secret? Baking a truly exceptional lemon loaf isn’t just about following steps; it’s about understanding the science behind its delightful texture and vibrant taste. This recipe, perfected over countless bakes, guarantees a tender crumb and a zesty punch that’s simply irresistible. In a world where many baked goods can be dry or bland, a truly magnificent lemon loaf stands out, offering a refreshing burst of citrus that brightens any occasion. Let’s dive into how you can consistently achieve bakery-quality results right in your own kitchen, ensuring your next bake is a showstopper.

Essential Ingredients for an Unforgettable Lemon Loaf

The magic of a great lemon loaf lies in the quality and balance of its ingredients. Each component plays a crucial role in achieving that perfect texture and bright, tangy flavor. Here’s what you’ll need:

  • All-Purpose Flour: The foundation of our loaf. Cake flour can be used for an even more tender crumb, but all-purpose is perfectly suited. (2 ½ cups)
  • Granulated Sugar: For sweetness and moisture. (1 ½ cups)
  • Baking Powder: Our primary leavening agent, ensuring a good rise. (2 teaspoons)
  • Salt: Balances the sweetness and enhances flavors. (½ teaspoon)
  • Unsalted Butter: Softened to room temperature. This is crucial for creaming and creating a tender texture. (1 cup / 2 sticks)
  • Large Eggs: At room temperature, these bind the ingredients and add richness. (3 large)
  • Sour Cream or Greek Yogurt: For incredible moisture and a slight tang. This is the secret to that “moist” factor. (½ cup)
  • Milk (Whole or 2%): Helps achieve the right batter consistency. Room temperature is best. (½ cup)
  • Fresh Lemons: You’ll need both the zest and juice of at least 2-3 medium lemons for that intense, authentic citrus flavor. (Zest and juice of 2-3 lemons)
  • Vanilla Extract: Enhances sweetness and depth of flavor. (1 teaspoon)

For the Lemon Glaze:

  • Powdered Sugar (Confectioners’ Sugar): For a smooth, sweet glaze. (1 ½ cups)
  • Fresh Lemon Juice: To thin the glaze and add that signature zing. (2-4 tablespoons, adjust for consistency)

Substitutions & Sensory Notes:
– If you don’t have sour cream, full-fat Greek yogurt offers a similar tang and moisture. Even a good quality plain yogurt works, though it might be slightly less rich.
– For an extra vibrant yellow hue and flavor, a tablespoon of lemon extract can be added, but fresh lemon zest is irreplaceable for true aromatic depth.
– Ensure your butter and eggs are at room temperature; they should yield slightly when pressed gently, not be melty or cold. This is vital for emulsification and a smooth batter.

Timing is Everything: Prep, Bake, and Enjoy

This lemon loaf recipe is designed for both deliciousness and efficiency. While some recipes can be a weekend-long affair, this one is achievable even on a weeknight!

Prep Time: 20 minutes
Cook Time: 50-60 minutes
Total Time: 1 hour 10 minutes – 1 hour 20 minutes

Compared to other elaborate cakes, this loaf’s relatively short baking time and straightforward preparation make it a perfect choice for when you need a delicious treat without an all-day commitment. The active prep time is minimal, with most of the time spent waiting for the magic to happen in the oven.

A beautiful, golden-brown lemon loaf sits on a cooling rack, ready to be glazed.

Step-by-Step Instructions: Crafting Your Zesty Masterpiece

Follow these clear instructions to bake a lemon loaf that’s both beautiful and incredibly delicious. Each step is designed to help you achieve that perfect, moist, and flavorful result.

Step 1: Preheat and Prepare Your Pan

Begin by preheating your oven to 350°F (175°C). Grease and flour a standard 9×5 inch loaf pan. For easier removal and to prevent sticking, you can also line the pan with parchment paper, leaving an overhang on the sides to lift the loaf out once baked. This ensures a clean release and preserves the loaf’s perfect shape.

Step 2: Cream the Butter and Sugar

In a large mixing bowl, cream together the softened unsalted butter and granulated sugar using an electric mixer on medium-high speed. Beat until the mixture is light, fluffy, and pale yellow, which usually takes about 3-5 minutes. This process incorporates air, which is essential for a tender crumb and helps the sugar dissolve properly.

Step 3: Add Eggs and Vanilla

Add the room-temperature eggs one at a time, beating well after each addition until fully incorporated. Scrape down the sides of the bowl as needed. Stir in the vanilla extract and the lemon zest (reserving about 1 teaspoon of zest for the glaze if you like). The zest releases its fragrant oils when rubbed into sugar or mixed into the batter, providing an intense lemon aroma and flavor.

Step 4: Combine Dry Ingredients

In a separate medium bowl, whisk together the all-purpose flour, baking powder, and salt. Whisking ensures that the leavening agent and salt are evenly distributed throughout the flour, preventing pockets of uneven rising or flavor.

Step 5: Alternate Wet and Dry Ingredients

Now it’s time to combine the wet and dry ingredients. Add about one-third of the dry ingredients to the butter mixture and mix on low speed until just combined. Then, add half of the wet ingredients (sour cream/yogurt and milk) and mix until just incorporated. Repeat this process, alternating dry and wet ingredients, ending with the dry ingredients. Be careful not to overmix; overmixing can develop the gluten in the flour, leading to a tough, dense loaf.

Step 6: Add the Lemon Zest and Juice

Gently fold in the fresh lemon juice until just combined. The batter might appear slightly curdled at this stage, which is perfectly normal due to the acidity of the lemon juice reacting with the dairy. It will bake out!

Step 7: Bake the Loaf

Pour the batter evenly into the prepared loaf pan. Smooth the top with a spatula. Bake in the preheated oven for 50-60 minutes, or until a wooden skewer or toothpick inserted into the center comes out clean. If the top of the loaf begins to brown too quickly before it’s fully baked, you can loosely tent it with aluminum foil.

Step 8: Prepare the Lemon Glaze

While the loaf is baking or cooling, prepare the glaze. In a small bowl, whisk together the powdered sugar and 2 tablespoons of lemon juice. Add more lemon juice, a teaspoon at a time, until you reach your desired drizzling consistency. If you reserved some lemon zest, you can stir it into the glaze for extra flavor and visual appeal.

Step 9: Glaze the Loaf

Once the loaf has baked, let it cool in the pan for about 10-15 minutes before carefully removing it and transferring it to a wire rack to cool completely. Once the loaf is completely cool, drizzle or spread the lemon glaze over the top. The glaze will harden slightly as it sets, creating a delicious, tangy crust.

Nutritional Snapshot

While exact nutritional values can vary based on specific ingredients and portion sizes, a typical slice of this lemon loaf (serving 10-12 slices) contains approximate values per slice:

  • Calories: 300-350 kcal
  • Macronutrients: (approximate)
    • Carbohydrates: 40-50g
    • Fat: 15-20g
    • Protein: 4-6g
  • Note: This includes the glaze. The loaf itself will have fewer calories and lower sugar/fat content.

Making it Lighter: Healthier Swaps

Looking for ways to make this delightful loaf a bit lighter without sacrificing flavor? Here are some smart substitutions:

  • Flour: Substitute half of the all-purpose flour with whole wheat pastry flour or almond flour for added fiber and nutrients.
  • Sugar: Reduce the granulated sugar by ¼ cup and replace it with an equivalent amount of a natural sweetener like maple syrup (adjust liquid accordingly) or erythritol for a sugar-free option.
  • Fat: For a lower-fat version, you can try replacing about half of the butter with unsweetened applesauce or mashed banana, though this will alter the texture and flavor slightly. Keep the sour cream/yogurt for moisture.
  • Glaze: Use a glaze made with a sugar substitute and a touch of lemon extract, or opt for a smaller amount of glaze or a dusting of powdered sugar.

Elevate Your Serving

This lemon loaf is delightful on its own, but here are some ideas to make it even better:

  • With Tea or Coffee: It’s the perfect accompaniment to your morning coffee or afternoon tea.
  • As a Dessert: Serve a slice with a dollop of fresh whipped cream or a scoop of vanilla bean ice cream.
  • With Berries: A small bowl of fresh berries, like raspberries or blueberries, can add a lovely contrast to the sweet and tart flavors.
  • Brunch Star: A fantastic addition to any brunch spread, offering a bright, refreshing element.

Common Mistakes to Avoid

Even experienced bakers can encounter issues. Here are common pitfalls and how to avoid them:

  • Overmixing the Batter: This develops gluten, leading to a tough, dense loaf. Mix only until ingredients are just combined.
  • Using Cold Ingredients: Room temperature butter, eggs, and dairy create a smoother, more emulsified batter and a better rise.
  • Opening the Oven Door Too Soon: This can cause the loaf to sink. Wait until the baking time is almost up before checking.
  • Not Zesting Lemons Properly: Only zest the yellow part of the peel to avoid the bitter white pith.
  • Glazing a Warm Loaf: The glaze will melt and create a sticky mess instead of a defined coating. Ensure the loaf is completely cool.

Storing Your Lemon Loaf

To keep your lemon loaf fresh and flavorful:

  • At Room Temperature: Store the completely cooled loaf in an airtight container or wrap it tightly in plastic wrap. It will stay fresh for 2-3 days.
  • In the Refrigerator: For longer storage (up to a week), keep it tightly wrapped in the refrigerator. Let it come to room temperature before serving for the best texture and flavor.
  • Freezing: Wrap the cooled, un-glazed loaf tightly in plastic wrap, then in foil, and freeze for up to 3 months. Thaw overnight in the refrigerator and glaze once defrosted.
A close-up view of the glazed lemon loaf, showing its moist texture and vibrant citrus notes.

Bake Your Way to Citrus Perfection

This delicious lemon loaf recipe is more than just a bake; it’s an experience. It’s about the vibrant aroma filling your kitchen, the satisfying slice revealing a tender, moist crumb, and the bright, zesty flavor that delights every palate. Whether you’re a seasoned baker or just starting, this recipe is designed for success, bringing a ray of sunshine to any occasion. So gather your ingredients, preheat that oven, and get ready to bake the most delightful lemon loaf you’ve ever had. Your taste buds (and everyone you share it with) will thank you!

Frequently Asked Questions

***What is the best way to get a strong lemon flavor?***

Using fresh lemon zest is key! The oils in the zest are packed with intense lemon flavor and aroma. Don’t be shy with it – and remember to taste your batter and glaze to adjust lemon juice to your preference.

***Why is my lemon loaf dry?***

Dryness usually comes from overbaking, overmixing the batter, or not enough fat/moisture. Ensure you follow the baking time closely, don’t overmix, and use ingredients like sour cream or Greek yogurt for inherent moisture.

***Can I make this recipe without a mixer?***

Yes! You can cream the butter and sugar together vigorously with a whisk or wooden spoon until light and fluffy. The rest of the steps can also be done by hand with a whisk and spatula. It will require a bit more arm work but is entirely possible.

***How do I achieve the signature cracks on top of some lemon loaves?***

The characteristic cracks often happen when the sugar has more time to crystallize on the surface during baking, particularly if the batter is a bit thicker or if there’s a good amount of leavening. However, this recipe focuses on moistness and flavor, so don’t worry too much if yours doesn’t crack perfectly – it will still taste amazing!

***Can I add other flavors to my lemon loaf?***

Absolutely! Fresh blueberries or raspberries are a wonderful addition. Gently fold them into the batter just before pouring into the pan. A poppy seed swirl or a touch of lavender can also be intriguing additions.

Print

clock clock iconcutlery cutlery iconflag flag iconfolder folder iconinstagram instagram iconpinterest pinterest iconfacebook facebook iconprint print iconsquares squares iconheart heart iconheart solid heart solid icon

Lemon Loaf with Glaze


  • Author: Chef Emy

Description

This moist and tangy lemon loaf is bursting with citrus flavor, thanks to fresh lemon juice, zest, and extract. Topped with a sweet, velvety glaze, it’s a delightful treat for any time of day. Perfect for breakfast, dessert, or as a tea-time snack!


Ingredients

  • For the Lemon Loaf:
  • For the Lemon Glaze:1 cuppowdered sugar1 tablespoonlemon juice1 tablespoonmilk1 tablespoonbutter, melted

Instructions

  1. 1️⃣Preheat the Oven:Preheat your oven to 325°F (165°C). Grease a 4×8 or 5×9-inch loaf pan and set aside.2️⃣Mix the Dry Ingredients:In a medium bowl, whisk together the flour, baking powder, and salt. Set aside.3️⃣Cream the Butter and Sugar:In a large mixing bowl, use an electric mixer to cream the softened butter and sugar together until light and fluffy.4️⃣Incorporate Wet Ingredients:Beat in the eggs, one at a time, until fully incorporated. Add the sour cream, lemon zest, lemon juice, and lemon extract, mixing until smooth.5️⃣Combine with Dry Ingredients:Gradually add the flour mixture to the wet ingredients, stirring until just combined. Do not overmix.6️⃣Bake the Loaf:Pour the batter into the prepared loaf pan and smooth the top with a spatula. Bake for 55-65 minutes, or until a toothpick inserted into the center comes out clean.7️⃣Cool the Loaf:Remove the loaf from the oven and let it cool in the pan for 10 minutes. Run a knife along the edges to loosen, then turn the loaf out onto a wire rack to cool completely.8️⃣Prepare the Glaze:In a small bowl, whisk together the powdered sugar, lemon juice, milk, and melted butter until smooth. Adjust the consistency if needed by adding more lemon juice or powdered sugar.9️⃣Glaze the Loaf:Once the lemon loaf is completely cool, drizzle the glaze evenly over the top. Spread it gently with the back of a spoon.🔟Serve:Slice the lemon loaf and enjoy its tangy-sweet goodness!
  2. 2️⃣Mix the Dry Ingredients:In a medium bowl, whisk together the flour, baking powder, and salt. Set aside.3️⃣Cream the Butter and Sugar:In a large mixing bowl, use an electric mixer to cream the softened butter and sugar together until light and fluffy.4️⃣Incorporate Wet Ingredients:Beat in the eggs, one at a time, until fully incorporated. Add the sour cream, lemon zest, lemon juice, and lemon extract, mixing until smooth.5️⃣Combine with Dry Ingredients:Gradually add the flour mixture to the wet ingredients, stirring until just combined. Do not overmix.6️⃣Bake the Loaf:Pour the batter into the prepared loaf pan and smooth the top with a spatula. Bake for 55-65 minutes, or until a toothpick inserted into the center comes out clean.7️⃣Cool the Loaf:Remove the loaf from the oven and let it cool in the pan for 10 minutes. Run a knife along the edges to loosen, then turn the loaf out onto a wire rack to cool completely.8️⃣Prepare the Glaze:In a small bowl, whisk together the powdered sugar, lemon juice, milk, and melted butter until smooth. Adjust the consistency if needed by adding more lemon juice or powdered sugar.9️⃣Glaze the Loaf:Once the lemon loaf is completely cool, drizzle the glaze evenly over the top. Spread it gently with the back of a spoon.🔟Serve:Slice the lemon loaf and enjoy its tangy-sweet goodness!
  3. 3️⃣Cream the Butter and Sugar:In a large mixing bowl, use an electric mixer to cream the softened butter and sugar together until light and fluffy.
  4. 4️⃣Incorporate Wet Ingredients:Beat in the eggs, one at a time, until fully incorporated. Add the sour cream, lemon zest, lemon juice, and lemon extract, mixing until smooth.5️⃣Combine with Dry Ingredients:Gradually add the flour mixture to the wet ingredients, stirring until just combined. Do not overmix.6️⃣Bake the Loaf:Pour the batter into the prepared loaf pan and smooth the top with a spatula. Bake for 55-65 minutes, or until a toothpick inserted into the center comes out clean.7️⃣Cool the Loaf:Remove the loaf from the oven and let it cool in the pan for 10 minutes. Run a knife along the edges to loosen, then turn the loaf out onto a wire rack to cool completely.8️⃣Prepare the Glaze:In a small bowl, whisk together the powdered sugar, lemon juice, milk, and melted butter until smooth. Adjust the consistency if needed by adding more lemon juice or powdered sugar.9️⃣Glaze the Loaf:Once the lemon loaf is completely cool, drizzle the glaze evenly over the top. Spread it gently with the back of a spoon.🔟Serve:Slice the lemon loaf and enjoy its tangy-sweet goodness!
  5. 5️⃣Combine with Dry Ingredients:Gradually add the flour mixture to the wet ingredients, stirring until just combined. Do not overmix.6️⃣Bake the Loaf:Pour the batter into the prepared loaf pan and smooth the top with a spatula. Bake for 55-65 minutes, or until a toothpick inserted into the center comes out clean.7️⃣Cool the Loaf:Remove the loaf from the oven and let it cool in the pan for 10 minutes. Run a knife along the edges to loosen, then turn the loaf out onto a wire rack to cool completely.8️⃣Prepare the Glaze:In a small bowl, whisk together the powdered sugar, lemon juice, milk, and melted butter until smooth. Adjust the consistency if needed by adding more lemon juice or powdered sugar.9️⃣Glaze the Loaf:Once the lemon loaf is completely cool, drizzle the glaze evenly over the top. Spread it gently with the back of a spoon.🔟Serve:Slice the lemon loaf and enjoy its tangy-sweet goodness!
  6. 6️⃣Bake the Loaf:Pour the batter into the prepared loaf pan and smooth the top with a spatula. Bake for 55-65 minutes, or until a toothpick inserted into the center comes out clean.
  7. 7️⃣Cool the Loaf:Remove the loaf from the oven and let it cool in the pan for 10 minutes. Run a knife along the edges to loosen, then turn the loaf out onto a wire rack to cool completely.8️⃣Prepare the Glaze:In a small bowl, whisk together the powdered sugar, lemon juice, milk, and melted butter until smooth. Adjust the consistency if needed by adding more lemon juice or powdered sugar.9️⃣Glaze the Loaf:Once the lemon loaf is completely cool, drizzle the glaze evenly over the top. Spread it gently with the back of a spoon.🔟Serve:Slice the lemon loaf and enjoy its tangy-sweet goodness!
  8. 8️⃣Prepare the Glaze:In a small bowl, whisk together the powdered sugar, lemon juice, milk, and melted butter until smooth. Adjust the consistency if needed by adding more lemon juice or powdered sugar.9️⃣Glaze the Loaf:Once the lemon loaf is completely cool, drizzle the glaze evenly over the top. Spread it gently with the back of a spoon.🔟Serve:Slice the lemon loaf and enjoy its tangy-sweet goodness!
  9. 9️⃣Glaze the Loaf:Once the lemon loaf is completely cool, drizzle the glaze evenly over the top. Spread it gently with the back of a spoon.
  10. 🔟Serve:Slice the lemon loaf and enjoy its tangy-sweet goodness!

Notes

For extra lemon flavor, add a touch more lemon zest or a splash of lemon juice to the glaze.Ensure the loaf is fully cooled before glazing to prevent the glaze from melting and running off.Store the lemon loaf in an airtight container at room temperature for up to 3 days or refrigerate for up to a week.
Ensure the loaf is fully cooled before glazing to prevent the glaze from melting and running off.Store the lemon loaf in an airtight container at room temperature for up to 3 days or refrigerate for up to a week.
Store the lemon loaf in an airtight container at room temperature for up to 3 days or refrigerate for up to a week.


“`

Blueberry Pastry Rings with Vanilla Cream

“`html

Blueberry Pastry Rings with Vanilla Cream

Craving Café-Style Treats?

Did you know that on average, consumers spend over $50 per month on baked goods from cafés and bakeries? If you’re one of them, or just dream of recreating that “just bought from a cozy coffee shop” taste at home, then you’re in for a treat! These Blueberry Pastry Rings with Vanilla Cream are your ticket to a gourmet breakfast or an elegant dessert that rivals any professional pâtisserie. Imagine flaky, buttery pastry cradling a luscious, velvety vanilla cream and bursting with sweet, tangy blueberries – it’s a symphony of textures and flavors that will make your taste buds sing. Let’s elevate your baking game and bring a touch of café magic into your kitchen!

Here’s What You’ll Need

For the Pastry Dough

  • 2 ½ cups All-Purpose Flour: The sturdy base that provides that satisfying crisp. Substitution: Use bread flour for a chewier texture, or a gluten-free blend if needed.
  • 1 teaspoon Granulated Sugar: A whisper of sweetness to complement the butter.
  • 1 teaspoon Salt: Balances the flavors and enhances the dough.
  • 1 cup (2 sticks) Cold Unsalted Butter, cut into ½-inch cubes: The crucial element for flaky layers. Ensure it’s very cold for maximum puff!
  • ½ cup Ice Water, plus more if needed: Binds the dough without overworking it. The colder, the better!

For the Vanilla Cream Filling

  • 8 ounces Cream Cheese, softened: The tangiest, creamiest foundation. Substitution: Use mascarpone for a richer, sweeter cream, or a dairy-free cream cheese alternative.
  • ½ cup Powdered Sugar: For a silken, smooth sweetness. Sifted to prevent lumps.
  • 1 teaspoon Vanilla Extract: The aromatic heart of the filling. Use pure extract for the best flavor.
  • ¼ cup Heavy Cream: To achieve that luxuriously smooth, pipeable consistency. Substitution: Use half-and-half for a lighter cream or a non-dairy whipping cream.

For the Blueberry Filling

  • 2 cups Fresh or Frozen Blueberries: Plump and bursting with summery goodness. If using frozen, do not thaw.
  • 2 tablespoons Granulated Sugar: To coax out their natural sweetness and add a slight glaze.
  • 1 tablespoon Cornstarch (or arrowroot): To thicken the juices into a jammy consistency.
  • 1 teaspoon Lemon Zest: Brightens the blueberry flavor and adds a zesty zing.

For the Egg Wash

  • 1 Large Egg: Creates a beautiful golden sheen.
  • 1 tablespoon Milk or Water: Thins the egg for even application.
Blueberry pastry rings with vanilla cream elegantly arranged on a plate.

Timing is Everything

Prep time: 45 minutes
Cook time: 20-25 minutes
Total time: 1 hour 10 minutes (approx.)

Most puff pastry recipes can take hours for chilling and resting. This recipe streamlines that process, aiming for a delicious outcome in just over an hour, making it a perfect weekend project or a sweet surprise for a weekday morning!

Let’s Make Magic Happen!

Step 1: Prepare the Pastry

In a large bowl, whisk together the flour, sugar, and salt. Add the cold, cubed butter. Using a pastry blender, your fingertips, or a food processor, cut the butter into the flour mixture until it resembles coarse crumbs with some pea-sized pieces of butter remaining. This is key for flakiness! Gradually add the ice water, 1 tablespoon at a time, mixing until the dough just comes together. Do not overmix! Form the dough into a flat disc, wrap it tightly in plastic wrap, and refrigerate for at least 30 minutes (or up to 2 days). This chilling period is crucial for the butter to firm up, creating those delightful layers when baked.

Step 2: Whip Up the Vanilla Cream

While the dough chills, prepare the luxurious vanilla cream. In a medium bowl, beat the softened cream cheese until smooth and creamy. Gradually beat in the powdered sugar and vanilla extract until well combined and fluffy. Slowly drizzle in the heavy cream while beating on low speed until the mixture is smooth, thick, and pipeable. Be careful not to overbeat, or it might become too soft. Cover and refrigerate until ready to assemble.

Step 3: Create the Blueberry Filling

In a small saucepan, combine the blueberries, sugar, cornstarch, and lemon zest. Cook over medium heat, stirring gently, until the blueberries begin to burst and the mixture thickens to a jam-like consistency, about 5-7 minutes. If using frozen blueberries, this might take a minute or two longer. Remove from heat and let it cool completely. This concentrated burst of blueberry flavor is what will make these rings truly irresistible.

Step 4: Assemble the Rings

Preheat your oven to 400°F (200°C) and line a baking sheet with parchment paper. On a lightly floured surface, roll out the chilled pastry dough into a large rectangle, about ¼-inch thick. Using a sharp knife or a pizza cutter, cut the dough into long strips, about 1-inch wide. Gently spread a thin layer of the vanilla cream onto one side of each strip, leaving a small border. Spoon a small amount of the cooled blueberry filling down the center of the cream. Carefully fold the dough strip in half lengthwise, enclosing the filling, and gently press to seal. Then, form the filled strip into a ring shape, tucking the ends and securing them with a little water or egg wash if needed. Place each ring onto the prepared baking sheet.

Step 5: Bake to Golden Perfection

In a small bowl, whisk together the egg and milk/water to create the egg wash. Brush the tops of each pastry ring generously with the egg wash. This step is vital for achieving that beautiful, glossy golden-brown finish. Bake for 20-25 minutes, or until the pastry is puffed, golden brown, and cooked through. Keep an eye on them to prevent burning, especially since the sugars can caramelize quickly.

Step 6: Assemble and Serve

Once baked, let the pastry rings cool on the baking sheet for a few minutes before transferring them to a wire rack to cool completely. For an extra touch of elegance, you can dust them with a little powdered sugar or drizzle with a simple glaze made from powdered sugar and a splash of milk. Serve these delightful rings as is, or with an extra dollop of vanilla cream on the side.

Close-up of a blueberry pastry ring with vanilla cream, showing the flaky layers and berry filling.

Nutritional Highlights

  • Calories: Approximately 350-450 per serving (varies based on exact ingredients and portion size).
  • Fat: Rich in healthy fats from butter and cream cheese.
  • Carbohydrates: Provides energy from the flour and natural sugars in the blueberries.
  • Protein: Contributes from the flour, eggs, and dairy.
  • Fiber: A good source due to the blueberries. (Note: This is an estimated nutritional value and can fluctuate.)

Healthier Twists for Lighter Indulgence

  • Whole Wheat Pastry: Swap half the all-purpose flour for whole wheat flour for added fiber and nutrients.
  • Reduced Fat Cream Cheese: Use light cream cheese for a similar creamy texture with fewer calories.
  • Natural Sweeteners: Reduce the sugar in the filling and consider using a touch of maple syrup or honey.
  • Greek Yogurt Base: For a lighter cream, blend Greek yogurt with a touch of honey and vanilla extract.
  • Oat Flour Crust: Experiment with an oat flour-based crust for a nuttier flavor and higher fiber content.

Perfect Pairings & Presentation

  • Morning Delight: Serve warm with a cup of freshly brewed coffee or herbal tea for a delightful breakfast.
  • Elegant Dessert: Pair with a scoop of vanilla bean ice cream or a side of fresh berries for a sophisticated dessert.
  • Garnish: A dusting of powdered sugar, a few fresh blueberries, or a delicate sprig of mint can elevate the presentation.
  • Brunch Star: Arrange a platter of these rings for your next brunch gathering – they are always a crowd-pleaser!

Avoid These Common Pitfalls

  • Warm Butter: Using butter that isn’t cold is the biggest enemy of flaky pastry. Ensure it’s firm to the touch.
  • Overworking the Dough: Too much kneading develops gluten, resulting in a tough pastry instead of a tender, flaky one. Mix *just* until combined.
  • Not Chilling Enough: Patience is a virtue! Insufficient chilling time means the butter melts too quickly, leading to a greasy, dense pastry.
  • Soggy Bottoms: Ensure your blueberry filling is thickened properly and cooled before assembly. Baking on parchment paper also helps create a barrier.

Keeping Them Fresh

  • Room Temperature: Best enjoyed the day they are made. Store cooled pastry rings in an airtight container at room temperature for up to 2 days.
  • Refrigeration: For longer storage, refrigerate in an airtight container for up to 3-4 days. The pastry might lose some crispness. Gently reheat in a low oven (around 300°F/150°C) for a few minutes to revive them.
  • Freezing: Baked and cooled pastry rings can be frozen. Wrap them individually in plastic wrap, then in foil, and store in a freezer-safe bag for up to 1 month. Thaw at room temperature and reheat to enjoy.

Frequently Asked Questions

***Do I have to use puff pastry?***

This recipe uses a homemade pastry dough designed to puff. While you *could* use store-bought puff pastry sheets, the texture and flavor will be different. This recipe aims for a more tender, less laminated pastry that holds up well to the filling.

***Can I make the filling ahead of time?***

Yes! The vanilla cream and blueberry filling can be made a day in advance and stored separately in airtight containers in the refrigerator. This can save you time on the day of assembly.

***Why are my pastry rings not puffing up?***

This is often due to warm butter, overworking the dough, or not chilling the dough sufficiently. Ensure your butter is very cold and your dough is well-chilled before rolling and baking.

***Can I use other fruits?***

Absolutely! Raspberries, blackberries, or even a mixed berry blend would work wonderfully. Adjust sweetness and cornstarch as needed depending on the fruit’s juiciness.

Print
clock clock iconcutlery cutlery iconflag flag iconfolder folder iconinstagram instagram iconpinterest pinterest iconfacebook facebook iconprint print iconsquares squares iconheart heart iconheart solid heart solid icon

Blueberry Pastry Rings with Vanilla Cream Filling: A Symphony of Sweet Flavors and Textures


  • Author: Chef Emy

Description

Delight in the perfect combination of flaky puff pastry, creamy homemade vanilla filling, and fresh, juicy blueberries. These Blueberry Pastry Rings are easy to make yet elegant enough to impress guests, perfect for brunches, celebrations, or afternoon tea.


Ingredients

  • For the Pastry:
  • For the Vanilla Cream Filling:
  • For the Topping:

Instructions

  1. Prepare the Pastry:Preheatovento 190°C (374°F) and line a baking sheet withparchment paper.Use a pastry cutter to cut circles from the puff pastry. Cut smaller holes in half of the circles to create rings. Stack the rings on top of the solid circles, pressing gently to adhere.Brush the pastry with the egg yolk and milk mixture. Bake for 20 minutes or until golden brown. Cool completely.
  2. Preheatovento 190°C (374°F) and line a baking sheet withparchment paper.
  3. Use a pastry cutter to cut circles from the puff pastry. Cut smaller holes in half of the circles to create rings. Stack the rings on top of the solid circles, pressing gently to adhere.
  4. Brush the pastry with the egg yolk and milk mixture. Bake for 20 minutes or until golden brown. Cool completely.
  5. Make the Vanilla Cream Filling:Heat most of the milk in asaucepanuntil warm. In a bowl,whisktogether the remaining milk, egg yolks, sugar, cornstarch, flour, and salt.Gradually add the warm milk to the bowl, whisking constantly. Return the mixture to thesaucepanand cook over medium heat, stirring, until thickened.Remove from heat and stir in the butter and vanilla extract. Cover withplastic wrap(touching the surface) and let cool.
  6. Heat most of the milk in asaucepanuntil warm. In a bowl,whisktogether the remaining milk, egg yolks, sugar, cornstarch, flour, and salt.
  7. Gradually add the warm milk to the bowl, whisking constantly. Return the mixture to thesaucepanand cook over medium heat, stirring, until thickened.
  8. Remove from heat and stir in the butter and vanilla extract. Cover withplastic wrap(touching the surface) and let cool.
  9. Assemble the Pastries:Spoonor pipe the cooled vanilla cream into the pastry rings.Top with fresh blueberries and dust with powdered sugar for a stunning finish.
  10. Spoonor pipe the cooled vanilla cream into the pastry rings.
  11. Top with fresh blueberries and dust with powdered sugar for a stunning finish.

Notes

Ensure the puff pastry stays cold before baking for the flakiest results.
The vanilla cream can be made a day in advance and stored in the fridge.
For a more festive look, add a drizzle ofhoneyor garnish with mint leaves.

Nutrition

  • Calories: 210
  • Sugar: 9g
  • Fat: 10g
  • Carbohydrates: 24g
  • Protein: 4g

“`

Chocolate Snowball Cookies: Your Go-To Holiday Treat!

“`html

Chocolate Snowball Cookies: Your Go-To Holiday Treat!

Introduction to Chocolate Snowball Cookies

There’s something undeniably magical about holiday baking. The aroma of spices, the warmth of the oven, and, of course, the joy of sharing delicious homemade treats. Among the pantheon of festive cookies, the Chocolate Snowball Cookie stands out as a quiet, yet impactful, star. These aren’t your average crumbly cookies; they boast a unique tender texture, a deep chocolate flavor, and that signature dusted appearance that evokes freshly fallen snow. Perfect for cookie platters, edible gifts, or simply enjoying with a warm mug of cocoa, these cookies are designed to spread cheer effortlessly. Get ready to impress your guests and your family with this foolproof recipe that promises delightful results every single time. Let’s dive into creating these little gems of holiday joy!

Ingredients for Chocolate Snowball Cookies

The beauty of these Chocolate Snowball Cookies lies in their simplicity and the quality of ingredients you use. We’re aiming for a tender, slightly crumbly texture that melts in your mouth, complemented by a rich chocolate flavor. Here’s what you’ll need:

  • 2 cups (250g) All-Purpose Flour: The backbone of our cookie. This provides structure. Substitution: You can use a gluten-free all-purpose flour blend, ensuring it contains xanthan gum for binding.
  • 1/2 cup (45g) Unsweetened Cocoa Powder: For that deep, glorious chocolate flavor. Opt for a good quality cocoa for the best results, something that smells rich and intensely chocolatey. Substitution: Dutch-processed cocoa will yield a darker color and smoother flavor, but natural cocoa works beautifully too.
  • 1/2 teaspoon Baking Soda: Our leavening agent, ensuring a slight lift without making the cookies cakey.
  • 1/4 teaspoon Salt: A pinch of salt enhances all the flavors, especially the chocolate, and balances the sweetness.
  • 1 cup (227g) Unsalted Butter, softened: Crucial for that melt-in-your-mouth texture. Make sure it’s truly softened to room temperature – yielding to the touch but not greasy. Substitution: You can use salted butter, but reduce the added salt to 1/8 teaspoon. For a dairy-free option, use a good quality vegan butter stick.
  • 3/4 cup (150g) Granulated Sugar: Provides sweetness and contributes to the cookie’s tender structure.
  • 1 teaspoon Vanilla Extract: Vanilla rounds out the chocolate flavor and adds a subtle aromatic complexity. Use pure vanilla extract for the best flavor.
  • 1 Large Egg Yolk: Adds richness and helps bind the dough.
  • 1/2 cup (60g) Powdered Sugar: For dusting the cooled cookies, giving them their iconic “snowball” look. Ensure it’s finely sifted for a smooth coating.

Timing is Everything

Prep time: 20 minutes
Cook time: 10-12 minutes
Total time: Approximately 30-35 minutes (plus cooling time)

Compared to the average cookie recipe that often requires longer chilling or baking times, these Chocolate Snowball Cookies are delightfully quick. Most cookie recipes can take anywhere from 45 minutes to over an hour when factoring in chilling and baking multiple batches. Our speedy preparation and baking ensure you can have a batch ready with minimal fuss, leaving more time for festive preparations and enjoyment!

Pile of round chocolate snowball cookies dusted with powdered sugar.

How to Make Chocolate Snowball Cookies

Ready to create some magic? Follow these simple steps for irresistibly delicious Chocolate Snowball Cookies:

Step 1: Cream the Butter and Sugar

In a large mixing bowl, beat the softened unsalted butter and granulated sugar together using an electric mixer on medium speed until light and fluffy. This typically takes about 2-3 minutes. The mixture should be pale yellow and visibly airy. This step is crucial for creating a tender cookie.

Step 2: Add the Wet Ingredients

Beat in the vanilla extract and the egg yolk until well combined. Scrape down the sides of the bowl as needed to ensure everything is incorporated. The mixture might look slightly curdled, which is perfectly normal.

Step 3: Combine the Dry Ingredients

In a separate medium bowl, whisk together the all-purpose flour, unsweetened cocoa powder, baking soda, and salt. Whisking them together ensures that the leavening agent and salt are evenly distributed, preventing pockets of bitterness or uneven rising.

Step 4: Form the Snowballs

Gradually add the dry ingredients to the wet ingredients, mixing on low speed until just combined. Be careful not to overmix, as this can lead to tough cookies. The dough will be thick and slightly sticky. Using a tablespoon or a small cookie scoop, scoop out portions of dough and roll them into balls, about 1 inch in diameter. Place these balls about 2 inches apart on parchment-lined baking sheets.

Step 5: Bake to Perfection

Preheat your oven to 350°F (175°C). Bake the cookie balls for 10-12 minutes, or until the edges are set and the centers appear slightly soft. They shouldn’t spread too much. They will continue to cook slightly from residual heat after being removed from the oven. Let them cool on the baking sheets for 5 minutes before transferring them to a wire rack to cool completely.

Step 6: The Final Dusting

Once the cookies are completely cool – this is important so the powdered sugar doesn’t melt – place the powdered sugar in a shallow bowl. Gently roll each cooled cookie in the powdered sugar until evenly coated. For an extra snowy effect, you can roll them a second time.

Nutritional Information for Chocolate Snowball Cookies

Please note that nutritional information is an estimate and can vary based on specific ingredients and portion sizes. This estimation is per cookie, assuming 24 cookies per batch.

  • Calories: Approximately 120-150 kcal
  • Fat: Approximately 7-9g
  • Saturated Fat: Approximately 4-5g
  • Carbohydrates: Approximately 15-18g
  • Sugar: Approximately 10-12g
  • Protein: Approximately 1-2g
  • Fiber: Approximately 1g

Healthier Alternatives for Chocolate Snowball Cookies

Looking to make these treats a bit lighter without sacrificing flavor? Here are a few swaps:

  • Flour: Substitute half of the all-purpose flour with whole wheat pastry flour for added fiber and nutrients.
  • Sweetener: Reduce the granulated sugar slightly and consider using a touch of maple syrup or coconut sugar for a different flavor profile and potentially a lower glycemic impact.
  • Fat: While butter is key to texture, you could experiment with using a portion of unsweetened applesauce or mashed ripe banana to replace some of the butter, though this will alter the texture and flavor slightly.
  • Dusting: For a less sweet dusting, you can mix a bit of unsweetened cocoa powder with your powdered sugar, or use a very light dusting of the powdered sugar.

Serving Suggestions

These Chocolate Snowball Cookies are incredibly versatile. They are:

  • Perfect alongside a steaming mug of hot chocolate or coffee.
  • A delightful addition to any holiday cookie platter alongside gingerbread, sugar cookies, and shortbread.
  • Wonderful as a sweet treat after a holiday dinner.
  • Packaged in festive tins or cellophane bags as thoughtful edible gifts for friends, family, or neighbors.

Common Mistakes to Avoid

Even simple recipes have small pitfalls. Here’s how to steer clear:

  • Overmixing the Dough: Overworking the flour develops gluten, leading to tough, chewy cookies instead of tender ones. Mix until just combined.
  • Not Softening Butter Properly: Cold butter won’t cream well, resulting in a dense cookie. Melted butter will make them spread too much. Use room-temperature butter that yields to gentle pressure.
  • Baking Too Long: These cookies are meant to be slightly soft in the center. Overbaking will result in dry, hard cookies. Watch them closely.
  • Dusting While Warm: Powdered sugar will melt and create a sticky mess if applied to warm cookies. Ensure they are completely cool.

Storing Your Chocolate Snowballs

Proper storage is key to maintaining their delightful texture and appearance:

  • Store completely cooled cookies in an airtight container at room temperature.
  • Place parchment paper between layers of cookies to prevent them from sticking, especially if they’re still slightly powdery from the dusting.
  • They generally stay fresh for about 4-5 days. For longer storage, you can freeze them in an airtight container for up to 2-3 months.
Close-up of chocolate snowball cookies dusted with powdered sugar on a rustic wooden surface.

Frequently Asked Questions About Chocolate Snowball Cookies

***Can I add chocolate chips to these cookies?***

While you could add chocolate chips, it would change the classic texture and chocolate flavor profile of a snowball cookie. The idea is for the cookie dough itself to be chocolatey and then coated in powder, not to have chunks of chocolate. If you want chocolate chips, a different cookie recipe might be more suitable.

***Why are my snowball cookies spreading too much?***

Spreading can be caused by several factors: the butter being too soft or melted, too much sugar, or not enough flour. Ensure your butter is at room temperature but not greasy, and measure your flour accurately (spoon and level it into the cup, don’t scoop directly with the measuring cup).

***Can I make these cookies dairy-free?***

Yes, you can make them dairy-free by using a high-quality vegan butter stick in place of unsalted butter. Ensure your other ingredients like cocoa powder are also dairy-free.

***How do I get that perfect snowball shape?***

Using a cookie scoop or a tablespoon to portion the dough and then gently rolling it between your palms helps create uniform, round shapes. Don’t overwork the dough when rolling, as it can make them tough.

***Can I skip the egg yolk?***

The egg yolk adds richness and tenderness. Skipping it might result in a slightly drier, less decadent cookie. If you need to omit it, you might try adding an extra tablespoon of softened butter, but the texture will likely change.

There you have it – the ultimate guide to creating delightful Chocolate Snowball Cookies! They are a testament to how simple ingredients can come together to create something truly special, especially during the festive season. Whether you’re a seasoned baker or just starting out, this recipe is designed for success and guaranteed to bring smiles.

Don’t wait for the holidays to roll around! Whip up a batch this weekend and experience the joy. And if you try this recipe, we’d love to hear about it! Share your creations in the comments below or tag us on social media. Happy baking!

Print
clock clock iconcutlery cutlery iconflag flag iconfolder folder iconinstagram instagram iconpinterest pinterest iconfacebook facebook iconprint print iconsquares squares iconheart heart iconheart solid heart solid icon

Chocolate Snowball Cookies


  • Author: Chef Emy

Description

TheseChocolate Snowball Cookiesare buttery, melt-in-your-mouth treats with a rich cocoa flavor and a snowy powdered sugar coating. Perfect for the holidays or any occasion, these cookies are easy to make and customizable for gluten-free or nut-free diets.


Ingredients

Scale
  • 1 cupunsalted butter, softened½ cuppowdered sugar (plus extra for rolling)1 teaspoonvanilla extract2 cupsall-purpose flour¼ cupcocoa powder½ teaspoonsalt1 cupfinely chopped nuts (optional, such as pecans or walnuts)
  • ½ cuppowdered sugar (plus extra for rolling)1 teaspoonvanilla extract2 cupsall-purpose flour¼ cupcocoa powder½ teaspoonsalt1 cupfinely chopped nuts (optional, such as pecans or walnuts)
  • 1 teaspoonvanilla extract2 cupsall-purpose flour¼ cupcocoa powder½ teaspoonsalt1 cupfinely chopped nuts (optional, such as pecans or walnuts)
  • 2 cupsall-purpose flour¼ cupcocoa powder½ teaspoonsalt1 cupfinely chopped nuts (optional, such as pecans or walnuts)
  • ¼ cupcocoa powder½ teaspoonsalt1 cupfinely chopped nuts (optional, such as pecans or walnuts)
  • ½ teaspoonsalt1 cupfinely chopped nuts (optional, such as pecans or walnuts)
  • 1 cupfinely chopped nuts (optional, such as pecans or walnuts)

Instructions

  1. 1️⃣Prepare the Oven and Baking Sheet:Preheat your oven to 350°F (175°C). Line a baking sheet with parchment paper.2️⃣Mix the Dough:In a large mixing bowl, cream the softened butter and powdered sugar together until light and fluffy. Mix in the vanilla extract.3️⃣Add Dry Ingredients:Gradually sift in the flour, cocoa powder, and salt. Mix until the dough is smooth and fully combined.4️⃣Fold in Nuts (Optional):If using nuts, gently fold them into the dough until evenly distributed.5️⃣Shape the Cookies:Roll the dough into 1-inch balls and place them on the prepared baking sheet, leaving about 1 inch of space between each cookie.6️⃣Bake the Cookies:Bake in the preheated oven for 12–15 minutes, or until the edges are set. Allow the cookies to cool on the baking sheet for 5 minutes.7️⃣Add the “Snow” Coating:While the cookies are still warm, roll them in powdered sugar for the first snowy coating. Once cooled, roll them again in powdered sugar for a festive, snowball-like finish.
  2. 2️⃣Mix the Dough:In a large mixing bowl, cream the softened butter and powdered sugar together until light and fluffy. Mix in the vanilla extract.
  3. 3️⃣Add Dry Ingredients:Gradually sift in the flour, cocoa powder, and salt. Mix until the dough is smooth and fully combined.4️⃣Fold in Nuts (Optional):If using nuts, gently fold them into the dough until evenly distributed.5️⃣Shape the Cookies:Roll the dough into 1-inch balls and place them on the prepared baking sheet, leaving about 1 inch of space between each cookie.6️⃣Bake the Cookies:Bake in the preheated oven for 12–15 minutes, or until the edges are set. Allow the cookies to cool on the baking sheet for 5 minutes.7️⃣Add the “Snow” Coating:While the cookies are still warm, roll them in powdered sugar for the first snowy coating. Once cooled, roll them again in powdered sugar for a festive, snowball-like finish.
  4. 4️⃣Fold in Nuts (Optional):If using nuts, gently fold them into the dough until evenly distributed.5️⃣Shape the Cookies:Roll the dough into 1-inch balls and place them on the prepared baking sheet, leaving about 1 inch of space between each cookie.6️⃣Bake the Cookies:Bake in the preheated oven for 12–15 minutes, or until the edges are set. Allow the cookies to cool on the baking sheet for 5 minutes.7️⃣Add the “Snow” Coating:While the cookies are still warm, roll them in powdered sugar for the first snowy coating. Once cooled, roll them again in powdered sugar for a festive, snowball-like finish.
  5. 5️⃣Shape the Cookies:Roll the dough into 1-inch balls and place them on the prepared baking sheet, leaving about 1 inch of space between each cookie.
  6. 6️⃣Bake the Cookies:Bake in the preheated oven for 12–15 minutes, or until the edges are set. Allow the cookies to cool on the baking sheet for 5 minutes.7️⃣Add the “Snow” Coating:While the cookies are still warm, roll them in powdered sugar for the first snowy coating. Once cooled, roll them again in powdered sugar for a festive, snowball-like finish.
  7. 7️⃣Add the “Snow” Coating:While the cookies are still warm, roll them in powdered sugar for the first snowy coating. Once cooled, roll them again in powdered sugar for a festive, snowball-like finish.

Notes

For a festive twist, add a pinch of cinnamon or peppermint extract to the dough.Store the cookies in an airtight container for up to a week or freeze for longer storage.
Store the cookies in an airtight container for up to a week or freeze for longer storage.

“`

Holiday Raspberry Chocolate Bites

“`html

Holiday Raspberry Chocolate Bites

Introduction: Elevating Holiday Desserts With Raspberry Chocolate Bites

Are you looking to add a touch of elegance and irresistible flavor to your holiday dessert spread this year? In the whirlwind of festive preparations, finding desserts that are both show-stopping and simple to make can feel like a quest. These no-bake Holiday Raspberry Chocolate Bites offer a seamless blend of rich, velvety chocolate and the bright, tangy burst of raspberries, making them the perfect sweet indulgence to elevate your Christmas celebrations and other winter festivities. Imagine small, perfectly formed chocolate cups cradling a ruby-red raspberry filling – a true delight for the senses that requires minimal fuss.

Ingredients: Rich Chocolate and Tangy Raspberry Bliss

The magic of these Raspberry Chocolate Bites lies in their simplicity and the quality of their ingredients. We’re focusing on flavors that sing together: the deep, satisfying notes of chocolate and the vibrant zest of raspberries. Here’s what you’ll need:

  • Chocolate: 12 ounces (about 340g) good quality bittersweet or semi-sweet chocolate chips or finely chopped chocolate. Use a chocolate you genuinely enjoy eating on its own, as its flavor will be prominent. For a deeper, more complex taste, consider a 60-70% cacao content.
  • Raspberries: 1 cup (about 150g) fresh raspberries. Look for plump, firm berries with a vibrant red hue and a sweet, slightly tart aroma. If fresh raspberries are out of season, you can use thawed frozen raspberries, but be sure to drain them very well to avoid excess moisture.
  • Sweetener (Optional): 1-2 tablespoons powdered sugar or a swirl of honey/maple syrup, to taste, for sweetening the raspberry filling. This is especially helpful if your raspberries are very tart.
  • Optional Flavor Enhancer: 1/4 teaspoon pure vanilla extract. This rounds out the flavors beautifully.
  • For Garnish (Optional): A few extra fresh raspberries, a dusting of powdered sugar, or a sprinkle of edible glitter for that extra holiday sparkle.

Substitutions and Tips:

  • Chocolate Type: While semi-sweet or bittersweet is recommended, you can experiment with dark chocolate for a more intense flavor or even milk chocolate if a sweeter profile is desired. White chocolate pairs surprisingly well with raspberries too, offering a different but equally delightful experience.
  • Berry Alternatives: If raspberries aren’t your favorite, consider using small, fresh strawberries (halved or quartered if large), blueberries, or even a mix of berries. Ensure they are similar in size to the raspberries.
  • Seedless Pleasure: If raspberry seeds are a concern for texture, you can gently mash the raspberries and pass them through a fine-mesh sieve to remove them before incorporating them into the filling.

Timing: Effortless Holiday Prep

Prep Time:
15 minutes
Cook Time:
5 minutes (for melting chocolate)
Chill Time:
30-60 minutes
Total Time:
50-80 minutes

One of the biggest advantages of these Holiday Raspberry Chocolate Bites is their minimal active time. With just about 15 minutes of preparation and a quick 5 minutes for melting the chocolate, the majority of the time is hands-off chilling. This is significantly less than average no-bake desserts which can sometimes require more intricate steps or longer setting periods. They are perfect for busy holiday schedules – you can prepare them the day before and simply bring them out when guests arrive!

Holiday Raspberry Chocolate Bites arrangement with fresh raspberries.

Step-by-Step Instructions: Crafting Your Chocolate Raspberry Delights

Creating these beautiful little bites is a straightforward process that yields professional-looking results. Let’s get started!

Step 1: Prepare Your Molds

To ensure your chocolate bites release smoothly, you’ll need a mini muffin tin lined with paper or foil liners. If you don’t have liners, you can lightly grease the mini muffin cups themselves, though liners make for cleaner presentation and easier handling. Ensure your molds are clean and dry.

Step 2: Melt the Chocolate

Place your chocolate chips or chopped chocolate in a heatproof bowl. You can melt it using a double boiler (placing the bowl over a saucepan of simmering water, ensuring the bottom of the bowl doesn’t touch the water) or in the microwave. If microwaving, heat in 30-second intervals, stirring well after each interval, until the chocolate is smooth and fully melted. Be patient; don’t overheat, as chocolate can seize and become grainy.

Step 3: Create the Chocolate Shells

Once your chocolate is smoothly melted, spoon about 1-2 teaspoons of chocolate into each mini muffin liner. Using the back of the spoon or a small offset spatula, gently spread the chocolate up the sides of the liner, creating a cup shape. Ensure there are no large gaps, especially at the bottom. You want a solid shell that will hold the filling. Place the prepared tin in the freezer for about 5-10 minutes to allow the chocolate shells to set quickly.

Step 4: Add the Raspberry Filling

While the chocolate shells are setting, prepare your filling. In a small bowl, gently mash the raspberries with a fork. If you’re adding sweetener and vanilla, stir them in now. Taste and adjust sweetness as needed. You want a vibrant, slightly tart and sweet raspberry mixture.

Step 5: Top with Chocolate

Retrieve the muffin tin from the freezer. Spoon about 1 teaspoon of the raspberry filling into the center of each set chocolate shell. Be careful not to overfill, as you need room for the top layer of chocolate. You can also add a small fresh raspberry on top of the mashed filling if you like for an extra burst of flavor and visual appeal.

Now, melt the remaining chocolate if you used it all for the shells, or reserve some if you only coated the bottom. Spoon the remaining melted chocolate over the raspberry filling, ensuring the filling is completely covered to create a sealed bite. Smooth the tops with your spoon or spatula.

Step 6: Chill and Unmold

Return the muffin tin to the refrigerator (or freezer for faster setting) for at least 30-60 minutes, or until the chocolate is completely firm. Once set, carefully remove the chocolate bites from the muffin tin. If you used liners, gently peel them away. If you greased the molds, you might need to gently loosen the edges with a small, thin knife or spatula.

Step 7: Garnish and Serve

Arrange your Holiday Raspberry Chocolate Bites on a festive platter. For an extra touch of holiday magic, you can garnish them with a single fresh raspberry on top of each bite. A light dusting of powdered sugar can also add elegance. Serve chilled.

Nutritional Information: Decadent Yet Balanced

While these are a treat, understanding their nutritional profile can help in enjoying them mindfully. Please note that these are approximate values and can vary based on the specific chocolate used and portion size.

  • Calories: Approximately 150-200 per bite.
  • Fat: Primarily from the chocolate.
  • Carbohydrates: From chocolate and raspberries, with natural sugars.
  • Sugar: Varies depending on the sweetness of the chocolate and added sweetener.
  • Fiber: A small amount from the raspberries.

These bites offer a delightful balance of rich chocolate indulgence and the natural goodness of fruit, making them a satisfying way to satisfy a sweet craving.

Healthier Alternatives: Sweet Swaps

For those looking to make these treats even lighter without sacrificing flavor, consider these simple swaps:

  • Chocolate Choice: Opt for dark chocolate with a higher cacao percentage (70% or more). It contains less sugar and more antioxidants. You can also use sugar-free chocolate chips.
  • Sweetener: If you use any sweetener in the raspberry filling, opt for natural sweeteners like a touch of honey, maple syrup, or stevia, used sparingly.
  • Portion Control: Due to their richness, a single bite is often perfectly satisfying, making them a great choice for mindful indulgence.
  • Berry Focus: Emphasize the raspberries! Using a generous amount of fresh, naturally sweet raspberries in the filling helps to balance the richness of the chocolate.

Serving Suggestions: Holiday Perfection

These Raspberry Chocolate Bites are incredibly versatile. Serve them as:

  • A sophisticated addition to your Christmas cookie platter.
  • A delightful petit four alongside coffee or tea.
  • A festive treat for a holiday party or potluck.
  • A charming homemade gift for friends and family.
  • Paired with a glass of sparkling wine or a festive cocktail for an extra special touch.

Common Mistakes to Avoid

  • Overheating Chocolate: This can cause chocolate to seize, becoming thick and grainy, making it unworkable. Melt chocolate slowly and gently.
  • Adding Wet Ingredients to Melted Chocolate: Ensure your raspberries are well-drained if using thawed frozen ones, and that no water gets into your melted chocolate, as this can also cause it to seize.
  • Uneven Chocolate Coating: Not spreading the chocolate evenly up the sides of the molds can lead to brittle shells or holes, making them difficult to fill and handle.
  • Overfilling the Bites: Too much filling can cause the chocolate to seep out when you add the top layer, leading to a messy finish.
  • Not Chilling Long Enough: Rushing the chilling process will result in soft, melty bites that are difficult to unmold and easily damaged.

Storing Tips for Lasting Flavor

Store your Holiday Raspberry Chocolate Bites in an airtight container in the refrigerator for up to 3-5 days. The cold will help maintain their shape and freshness. If you’re stacking them, place parchment paper between layers to prevent sticking. For longer storage, you can freeze them. Place them in a single layer on a baking sheet until frozen, then transfer to a freezer-safe container or bag. Thaw them in the refrigerator before serving.

Close-up of a Holiday Raspberry Chocolate Bite showing the raspberry filling.

FAQs: Your Burning Questions Answered

***Can I make these ahead of time for holiday entertaining?***

Absolutely! These bites are perfect for making ahead. In fact, they are best when they’ve had time to fully set in the refrigerator. You can prepare them a day or two in advance and store them in an airtight container in the fridge.

***What’s the best way to unmold them without breaking?***

Ensure the chocolate is fully set and firm. If using liners, gently peel them away. If your chocolate bites seem stuck to the mold, a few minutes in the refrigerator or freezer will help them firm up. You can also try gently warming the bottom of the mold with your hands before attempting to remove them, but be very careful not to melt the chocolate.

***Can I use different types of chocolate?***

Yes! While semi-sweet or bittersweet is recommended for a classic flavor, you can experiment with dark chocolate for a richer taste, milk chocolate for a sweeter profile, or even white chocolate. Just ensure the chocolate you use melts smoothly.

***My chocolate seized when I tried to melt it. What went wrong?***

Chocolate can seize if it comes into contact with even a tiny amount of water, or if it’s overheated. Try again by using a scrupulously clean bowl and utensils. Melt the chocolate gently over low heat, stirring constantly, or use the microwave in short bursts, stirring well in between. If you’re using a double boiler, make sure no steam or water splashes into the chocolate.

***Can I use frozen raspberries?***

Yes, you can use thawed frozen raspberries, but it’s crucial to drain them extremely well. Lay them on paper towels and gently press to remove as much moisture as possible. Excess moisture can make the filling watery or affect the chocolate’s setting.

Conclusion: Sweet and Simple Holiday Joy

These Holiday Raspberry Chocolate Bites are more than just a dessert; they’re a little piece of edible joy that brings flavor, elegance, and simplicity to your holiday season. Their no-bake nature, combined with the irresistible pairing of rich chocolate and tart raspberries, makes them a guaranteed hit. Whether you’re looking for a quick treat to whip up or a sophisticated dessert to impress your guests, these bites deliver. So go ahead, add them to your holiday baking list – your taste buds will thank you!

Print
clock clock iconcutlery cutlery iconflag flag iconfolder folder iconinstagram instagram iconpinterest pinterest iconfacebook facebook iconprint print iconsquares squares iconheart heart iconheart solid heart solid icon

Raspberry Chocolates Recipe


  • Author: Chef Emy

Description

Decadent Raspberry Chocolates filled with silky, seedless raspberry cream and encased in a rich chocolate shell. Perfect for gifting, sharing, or indulging in a sweet treat.


Ingredients

  • Raspberry Cream Filling
  • Chocolate Candy Cup Shells

Instructions

  1. In a mediumsaucepan,whiskmaple syrup and tapioca starch until smooth. Add frozen raspberries and heat over medium-high, stirring until thickened.
  2. Remove from heat and stir in almond extract, vanilla extract, and coconut oil. Strain the mixture through a fine mesh sieve to remove seeds. Cool to room temperature.
  3. Blend the cooled raspberry filling in a high-powered blender until smooth.
  4. Melt chocolate chips and coconut oil in adouble boilerover low heat, stirring until smooth.
  5. Line 14–16 muffin cups with paper liners.Spoonmelted chocolate into each, tilting to coat the bottom and sides about 1/2 inch. Refrigerate until set (10 minutes).
  6. Add 1 tablespoon of raspberry cream filling to each chocolate shell. Cover with the remaining melted chocolate, ensuring the filling is sealed.
  7. Sprinkle freeze-dried raspberries on top if desired. Refrigerate until fully set (2–3 hours).

Notes

Raspberry Chocolates can be stored in the fridge for up to a week or frozen for up to three months.
White chocolate can be used for a sweeter alternative.
Blend the raspberry filling thoroughly to ensure the coconut oil is fully emulsified.

Nutrition

  • Calories: 216
  • Sugar: 12g
  • Fat: 16g
  • Carbohydrates: 17g
  • Protein: 2g

“`

Easy Peanut Butter Balls Recipe with Cream Cheese

“`html

Easy Peanut Butter Balls Recipe with Cream Cheese

Craving a Quick & Delicious Treat?

The Magic Trio: Ingredients for Easy Peanut Butter Balls with Cream Cheese

The beauty of these peanut butter balls lies in their simplicity. You only need a few key ingredients to achieve that irresistible creamy texture and rich flavor. Here’s what you’ll need:

Creamy Peanut Butter

The star of our show! For the best texture and flavor, opt for a smooth, creamy peanut butter. Natural peanut butters can sometimes separate, so a conventional creamy variety often works best here to ensure a consistent, smooth dough. We’re looking for that rich, roasted peanut aroma that signals pure deliciousness.

Luscious Cream Cheese

This is the secret ingredient that elevates these from good to gourmet, adding an incredible creaminess and a slight tang that perfectly balances the sweet peanut butter. Make sure your cream cheese is fully softened to room temperature for easy mixing; this is crucial for a smooth, lump-free dough.

Sweetener for that Perfect Finish

Powdered sugar (also known as confectioners’ sugar or icing sugar) is the classic choice here. It not only sweetens but also helps to create the perfect dough consistency. It dissolves beautifully, leaving no graininess behind. You can adjust the amount slightly based on your preference for sweetness and the type of peanut butter you use.

Optional Coatings for Extra Flair

While these peanut butter balls are divine on their own, a coating takes them to the next level. Consider these delightful options:

  • Melted Chocolate: Dark, milk, or white chocolate – choose your favorite! This provides a satisfying snap and a classic confectionery finish.
  • Chopped Peanuts: For an extra nutty crunch and a boost of peanut flavor.
  • Sprinkles: Add a festive touch that’s perfect for parties and holidays.

Timing is Everything: Prep, Cook, and Enjoy

Prep Time:
15 minutes
Chill Time:
30 minutes
Total Time:
45 minutes

Compared to most traditional candy recipes which can take hours with cooling and setting times, these peanut butter balls are incredibly swift. The active preparation is minimal, making them ideal for when you need a sweet fix without a huge time commitment. The chilling times are essential for the balls to firm up, ensuring they hold their shape.

Plate of finished peanut butter balls with cream cheese, some coated in chocolate.

Crafting Your Creamy Peanut Butter Balls: Step-by-Step

Let’s dive into the surprisingly simple process of creating these delightful treats. You’ll be amazed at how quickly you can whip these up!

Step 1: Soften and Combine

Start by ensuring your cream cheese is genuinely soft. If it’s still firm, microwave it in 10-second intervals, checking between each, until it’s pliable but not melted. In a medium mixing bowl, add the softened cream cheese and your creamy peanut butter. Give them a good stir with a spatula or wooden spoon until they are just combined. Don’t over-mix at this stage; we want to incorporate them evenly.

Step 2: Mix it Up!

Gradually add the powdered sugar, about a cup at a time, mixing well after each addition. Continue adding powdered sugar until the mixture becomes a thick, cohesive dough that’s easy to handle. You should be able to scoop it without it being too sticky. The dough should have a wonderful, soft texture that smells absolutely divine.

Step 3: Chill for Perfect Rollability

Cover the bowl with plastic wrap and refrigerate the dough for at least 30 minutes. This chilling step is crucial! It firms up the mixture, making it much easier to roll into neat balls without sticking excessively to your hands. Patience here will pay off in perfectly shaped treats.

Step 4: Roll into Perfect Spheres

Once chilled, scoop out portions of the dough. I find a tablespoon or a small cookie scoop works perfectly for uniform size. Roll each portion between your palms to form smooth, compact balls. If the dough becomes too soft while you’re rolling, pop it back into the refrigerator for a few minutes to firm up again.

Step 5: Coat and Chill Again

Now for the fun part! If you’re using a coating:

  • For Chocolate Coating: Melt your chosen chocolate chips (with a teaspoon of oil or shortening for smoother melting) in a microwave-safe bowl in 30-second intervals, stirring each time, until smooth. Dip each peanut butter ball into the melted chocolate, ensuring it’s fully coated. You can use a fork to lift them out and let the excess drip off. Place the coated balls on a parchment-lined baking sheet.
  • For Nut Coating: Roll the balls in finely chopped peanuts until evenly coated.

Once coated (or if you’re enjoying them plain!), place the peanut butter balls back onto the parchment-lined baking sheet. Refrigerate for at least another 15-30 minutes, or until the coating is set. This final chill ensures they are firm and ready to be devoured!

Nutritional Insights

While exact nutritional values will vary based on portion size and specific ingredients used (especially coatings), a typical serving of these peanut butter balls is generally rich in fats and carbohydrates, offering a good energy boost. They are particularly high in fat from the peanut butter and cream cheese, with a significant portion coming from saturated fats. Carbohydrates are primarily from the powdered sugar. Protein content is moderate, mainly from the peanut butter.

  • Calories: Varies greatly with size and coating, but expect roughly 100-150 calories per ball (without heavy coating).
  • Fat: Primarily from peanut butter and cream cheese.
  • Carbohydrates: Mostly from powdered sugar.
  • Protein: Moderate, from peanut butter.
  • Sugar: Can be high, especially with sweet coatings.

*Note: These are approximate values. For precise information, it’s best to calculate based on the exact ingredients and quantities you use.*

Healthier Twists for Guilt-Free Indulgence

You can absolutely enjoy these peanut butter delights with some mindful adjustments:

  • Reduced Sugar: Use less powdered sugar and potentially add a touch of a natural sweetener like maple syrup or honey (note: this will change the dough consistency).
  • Nut Butter Choice: Opt for natural peanut butter with no added sugar or oils. You can also experiment with almond butter or cashew butter for a different flavor profile.
  • Healthier Coatings: Dip in melted dark chocolate (70% cacao or higher for less sugar) or simply roll in unsweetened shredded coconut or finely chopped nuts.
  • Portion Control: Make the balls smaller to satisfy a sweet craving with fewer calories.

Serving Suggestions: Elevate Your Treat Experience

These peanut butter balls are perfect as is, but here are a few ideas to make them even more special:

  • Serve them on a festive platter with other cookies and candies for a dessert buffet.
  • Pair them with a glass of cold milk or a warm cup of coffee or tea.
  • Drizzle a contrasting chocolate (e.g., white chocolate drizzle over dark chocolate-coated balls) for an extra decorative touch.
  • Wrap them individually in small candy wrappers or foil for delightful party favors or treats to share.

Beware the Pitfalls: Common Mistakes to Avoid

To ensure your peanut butter balls are perfect, keep these common mistakes in mind:

  • Not Softening Cream Cheese Properly: Lumpy dough is the result. Let that cream cheese come to room temperature!
  • Using Runny Peanut Butter: Natural peanut butters that have separated can make the dough too oily and difficult to handle.
  • Skipping the Chill Time: The dough will be too sticky to roll, leading to messy hands and misshapen balls.
  • Over-Mixing: Especially after adding powdered sugar, you want to mix until just combined to avoid a tough texture.
  • Not Letting Chocolate Set: If you try to move chocolate-coated balls before the chocolate has hardened, you’ll end up with smudges.

Storing Your Delicious Creation

These cream cheese peanut butter balls are best stored in an airtight container in the refrigerator. Because of the cream cheese, they have a shorter shelf life than traditional peanut butter cookies and must be kept chilled for food safety. They will stay fresh and delicious for about 5-7 days.

Close-up of peanut butter balls with cream cheese being dipped in chocolate.

The Sweetest Ending

There you have it – an incredibly easy, undeniably delicious recipe for peanut butter balls with cream cheese that’s sure to become a household favorite. With just a few simple ingredients and minimal effort, you can whip up a batch of these creamy, dreamy treats that are perfect for satisfying any sweet craving. Whether you’re a seasoned baker or a complete beginner, this recipe is foolproof and incredibly rewarding.

So, what are you waiting for? Gather your ingredients, get mixing, and prepare to be amazed. Enjoy every bite of these delightful peanut butter balls!

Frequently Asked Questions

***Can I use crunchy peanut butter instead of creamy?***

You absolutely can! Using crunchy peanut butter will add an extra layer of texture to your peanut butter balls. Just be aware that the texture of the dough might be slightly different.

***How do I make sure the dough isn’t too sticky?***

The key is to ensure your cream cheese is at room temperature and that you add enough powdered sugar. Chilling the dough for at least 30 minutes is also crucial for making it easier to handle.

***Can I omit the cream cheese and just use peanut butter and powdered sugar?***

Traditionally, no-bake peanut butter balls are made with peanut butter and powdered sugar, but the addition of cream cheese is what makes this recipe uniquely creamy and rich. Omitting it will result in a different texture, more akin to a classic peanut butter fudge ball.

***How long do these peanut butter balls last?***

Because they contain cream cheese, these peanut butter balls should be stored in an airtight container in the refrigerator and are best consumed within 5-7 days.

***Can I freeze these peanut butter balls?***

Yes, you can freeze them! Place them in a single layer on a baking sheet in the freezer until firm, then transfer them to a freezer-safe container or bag. They should last for up to 3 months. Thaw them in the refrigerator before serving.

Print

clock clock iconcutlery cutlery iconflag flag iconfolder folder iconinstagram instagram iconpinterest pinterest iconfacebook facebook iconprint print iconsquares squares iconheart heart iconheart solid heart solid icon

3-Ingredient Peanut Butter Balls


  • Author: Chef Emy

Description

These creamy and indulgent peanut butter balls are incredibly easy to make with just three simple ingredients. Perfect as a no-bake treat for parties or snack time, they offer a delicious balance of nutty, sweet, and tangy flavors!


Ingredients

Scale
  • 8 ozcream cheese, softened1 cupcreamy peanut butter1 cuppowdered sugar
  • 1 cupcreamy peanut butter1 cuppowdered sugar
  • 1 cuppowdered sugar

Instructions

  1. 1️⃣Mix the cream cheese and peanut butter
  2. In a medium mixing bowl, combine the softened cream cheese and peanut butter.Use a hand mixer or a sturdy spatula to blend until the mixture is smooth and creamy.2️⃣Incorporate the powdered sugarGradually add the powdered sugar to the mixture, stirring well after each addition.Continue mixing until the dough is thick and holds together. If the mixture feels too sticky, add a little more powdered sugar, one tablespoon at a time.3️⃣Shape and chillScoop out small portions of the dough and roll them into 1-inch balls using your hands or a small cookie scoop.Place the formed balls onto a baking sheet lined with parchment paper or wax paper.Refrigerate forat least 30 minutesto firm up before serving.
  3. Use a hand mixer or a sturdy spatula to blend until the mixture is smooth and creamy.2️⃣Incorporate the powdered sugarGradually add the powdered sugar to the mixture, stirring well after each addition.Continue mixing until the dough is thick and holds together. If the mixture feels too sticky, add a little more powdered sugar, one tablespoon at a time.3️⃣Shape and chillScoop out small portions of the dough and roll them into 1-inch balls using your hands or a small cookie scoop.Place the formed balls onto a baking sheet lined with parchment paper or wax paper.Refrigerate forat least 30 minutesto firm up before serving.
  4. 2️⃣Incorporate the powdered sugar
  5. Gradually add the powdered sugar to the mixture, stirring well after each addition.Continue mixing until the dough is thick and holds together. If the mixture feels too sticky, add a little more powdered sugar, one tablespoon at a time.3️⃣Shape and chillScoop out small portions of the dough and roll them into 1-inch balls using your hands or a small cookie scoop.Place the formed balls onto a baking sheet lined with parchment paper or wax paper.Refrigerate forat least 30 minutesto firm up before serving.
  6. Continue mixing until the dough is thick and holds together. If the mixture feels too sticky, add a little more powdered sugar, one tablespoon at a time.3️⃣Shape and chillScoop out small portions of the dough and roll them into 1-inch balls using your hands or a small cookie scoop.Place the formed balls onto a baking sheet lined with parchment paper or wax paper.Refrigerate forat least 30 minutesto firm up before serving.
  7. 3️⃣Shape and chill
  8. Scoop out small portions of the dough and roll them into 1-inch balls using your hands or a small cookie scoop.Place the formed balls onto a baking sheet lined with parchment paper or wax paper.Refrigerate forat least 30 minutesto firm up before serving.
  9. Place the formed balls onto a baking sheet lined with parchment paper or wax paper.Refrigerate forat least 30 minutesto firm up before serving.
  10. Refrigerate forat least 30 minutesto firm up before serving.

Notes

Storage: Store the peanut butter balls in an airtight container in the refrigerator for up to1 weekor in the freezer for up to3 months.Serving suggestion: Serve chilled for the best texture, but let them sit at room temperature for a few minutes if they’ve been in the freezer.
Serving suggestion: Serve chilled for the best texture, but let them sit at room temperature for a few minutes if they’ve been in the freezer.


“`

🍭 Holiday Peppermint White Chocolate Crackers Made Easy!

“`html

🍭 Holiday Peppermint White Chocolate Crackers Made Easy!

Taste the Holidays: Peppermint White Chocolate Crackers

The holiday season is magical, filled with twinkling lights, cherished traditions, and of course, an abundance of delicious treats. Among these festive delights, the combination of peppermint and white chocolate reigns supreme, evoking cozy evenings and joyful gatherings. What if I told you that you could bring this quintessential holiday flavor into your kitchen with an incredibly simple recipe that requires minimal effort but delivers maximum festive impact? These Peppermint Crunch Graham Crackers are precisely that treat! They take humble graham crackers and transform them into a stunning, crave-worthy confection that’s as beautiful as it is delicious. Imagine the satisfying crunch of a graham cracker enrobed in creamy white chocolate, then generously adorned with festive, crushed candy canes. It’s a symphony of textures and tastes that perfectly encapsulates the joy of the holidays. Whether you’re a seasoned baker or a complete novice, this recipe is designed to be foolproof, making it an ideal activity to share with family or a delightful solo project to de-stress during the busy festive period. Get ready to spread some serious holiday cheer, one delicious cracker at a time!

Luscious Ingredients for Festive Flavors

The beauty of these holiday crackers lies in their simple yet impactful ingredients. Each component plays a crucial role in creating that irresistible festive flavor and satisfying crunch. We’re not using a complex list; just a few pantry staples and holiday favorites to create something truly special!

The Crispy Foundation

You’ll need graham crackers – the classic rectangular ones work best. Their slightly sweet, honey-kissed flavor provides the perfect sturdy base for our toppings. Look for a brand you love; their subtle cinnamon notes will complement the other flavors beautifully. If you can’t find regular graham crackers, honey graham crackers will also work wonderfully, adding an extra layer of sweetness.

Creamy White Chocolate Magic

This is where the creamy indulgence comes in! Opt for good quality white chocolate chips or a white chocolate bar chopped into small pieces. The key to a smooth, luscious coating is using chocolate that melts well. Avoid “white confectionery coating” as it often contains less cocoa butter and can result in a waxy texture. For this recipe, we’re looking for that melt-in-your-mouth smooth experience that only real white chocolate can provide. The subtle vanilla notes in the white chocolate are a perfect canvas for the peppermint.

A Burst of Holiday Cheer

No peppermint cracker is complete without the star of the show: crushed candy canes! Their bright, sharp peppermint flavor is the ultimate holiday signature. You can buy pre-crushed candy cane pieces, or simply place whole candy canes in a sturdy zip-top bag and gently crush them with a rolling pin or the bottom of a heavy pan. The rough, irregular pieces add a delightful textural contrast and a beautiful visual appeal, like festive jewels scattered across the crackers. Ensure they are crushed to a size that’s easy to eat, not too large or too fine.

Optional Sparkle

For an extra touch of festive flair, consider adding some holiday-themed sprinkles! Red and green jimmies, festive nonpareils, or edible glitter can elevate these crackers from delicious to dazzling. This is purely for aesthetics, but it’s a fun way to personalize your creations and make them even more eye-catching, especially for parties or gifting.

A close-up overhead shot of peppermint white chocolate crackers arranged attractively on a white surface, sprinkled with crushed candy canes and some red and green sprinkles.

Effortless Holiday Timing

One of the biggest draws of this recipe is its speed and simplicity. Unlike many holiday bakes that require hours of prep and oven time, these crackers come together in a flash. A typical average cookie recipe often involves 20-30 minutes of prep and 30-45 minutes of baking. These festive crackers, however, sidestep most of that!

Prep time: 15 minutes
Chill time: 15-20 minutes
Total time: 30-35 minutes

This minimal time commitment means you can whip them up even on a busy holiday afternoon or as a last-minute addition to a cookie platter. The chilling time is essential for the chocolate to set properly, ensuring a clean break and a perfect finish.

Crafting Your Festive Crunchers

Let’s get started on creating these delightful holiday treats! The process is straightforward, ensuring that anyone, regardless of their culinary experience, can achieve delicious results. Follow these simple steps for maximum festive impact!

Step 1: Prep Your Station

First things first, let’s get organized. Line a large baking sheet or tray with parchment paper or wax paper. This is crucial for preventing any sticking and making cleanup a breeze. Have your graham crackers laid out in a single layer, ready to be adorned. If you haven’t already, crush your candy canes and have them readily accessible. Measure out your white chocolate and have it in a microwave-safe bowl.

Step 2: Melt the Chocolate

Place your white chocolate chips or chopped white chocolate in a microwave-safe bowl. Microwave on 50% power for 30-second intervals, stirring well after each interval. Continue this process until the chocolate is mostly melted and smooth. Be patient; white chocolate can be a bit finicky and can scorch easily if microwaved too quickly. Alternatively, you can melt the chocolate using a double boiler over simmering water. Once smooth and completely melted, remove from heat and let it cool slightly for a minute or two. This prevents it from being too hot to spread onto the crackers.

Step 3: Coat the Crackers

Now for the fun part! Using a spatula or a small offset spatula, generously spread the slightly cooled, melted white chocolate evenly over one side of each graham cracker. Aim for a smooth, even layer that covers the cracker from edge to edge. Don’t worry if it’s not perfectly smooth; rustic charm is part of the appeal! Work in batches if necessary to ensure the chocolate doesn’t start to set before you’ve coated all your crackers.

Step 4: Add the Crunch

While the white chocolate is still wet and melty, it’s time to add that festive peppermint crunch! Generously sprinkle the crushed candy canes over the chocolate-covered crackers. Ensure you get a good amount on each one for that maximum flavor and visual impact. If you’re using optional sprinkles, add them now as well, pressing them gently into the chocolate so they adhere. These additions are best done immediately after coating the crackers, as the chocolate will start to set.

Step 5: Set and Enjoy

Once all your crackers are coated and sprinkled, carefully transfer the baking sheet to the refrigerator. Let them chill for about 15-20 minutes, or until the white chocolate is completely set and firm. This chilling step is crucial for the chocolate to harden properly, giving you that satisfying snap when you bite into the cracker. Once set, you can carefully peel them off the parchment paper. They are now ready to be served, gifted, or simply savored!

Nutritional Snapshot

While these festive crackers are a treat, it’s helpful to have an idea of their nutritional content. Please note that these values are approximate and can vary based on specific brands and exact quantities used.

  • Calories: Approximately 150-200 per cracker (depending on chocolate coverage and candy cane amount)
  • Fat: Around 8-12g
  • Carbohydrates: Approximately 18-25g
  • Sugar: Around 12-18g (primarily from white chocolate and candy canes)
  • Protein: Less than 1g

These crackers are best enjoyed in moderation as part of a balanced diet.

Healthier Twists on Tradition

Looking for ways to make these festive treats a bit lighter without sacrificing flavor? Here are a few swaps that can help:

  • Dark Chocolate Drizzle: Instead of white chocolate, try a drizzle of dark chocolate. Dark chocolate generally has less sugar and beneficial antioxidants. You can also use dairy-free dark chocolate.
  • Lower Sugar White Chocolate: Some brands offer reduced-sugar white chocolate options. While they might have a slightly different flavor profile, they can be a good compromise.
  • Sugar-Free Candy Canes: If you’re watching sugar intake, look for sugar-free peppermint candies to crush. Their flavor is often very similar!
  • Whole Wheat Graham Crackers: Opt for whole wheat versions of graham crackers for added fiber.
  • Portion Control: The simplest “healthier” alternative is often mindful portioning. Enjoying one or two of these rich treats is perfectly reasonable!

Serving Your Festive Creations

These peppermint white chocolate crackers are incredibly versatile! Here are some ideas for how to serve them:

  • Holiday Cookie Platters: They are a beautiful and festive addition to any cookie assortment. The vibrant red and white pops against darker cookies.
  • Edible Gifts: Package them in cellophane bags tied with festive ribbon for charming, homemade gifts for teachers, neighbors, or friends.
  • Dessert Garnish: Break them into pieces and use them to garnish hot chocolate, coffee, or even ice cream sundaes.
  • Party Favors: Tuck a couple into small bags as sweet takeaways for your holiday party guests.
  • Simple Snack: Enjoy them with a glass of milk or eggnog for a simple, satisfying holiday treat any time of day.

Common Mistakes to Avoid

Even with a simple recipe, a few common pitfalls can be avoided:

  • Burning the Chocolate: White chocolate can burn easily. Always use lower heat settings (like 50%) and short intervals when microwaving, stirring frequently.
  • Adding Toppings Too Late: The crushed candy canes and sprinkles need to go on while the chocolate is still wet. If the chocolate starts to set, they won’t stick.
  • Inconsistent Crushing of Candy Canes: Too fine and they might dissolve, too coarse and they’re hard to eat. Aim for a medium crumb.
  • Not Using Parchment Paper: This can lead to frustration trying to pry stuck crackers off your baking sheet. Always use it!
  • Trying to Rush the Setting Process: While chilling in the fridge is quick, don’t try to speed it up too much with the freezer, as it can cause the chocolate to bloom or crack unevenly.

Storing Your Sweet Delights

Proper storage is key to keeping your peppermint crackers fresh and delicious:

  • Airtight Container: Once completely set and firm, store the crackers in an airtight container at room temperature.
  • Layering: If stacking them, place a layer of parchment or wax paper between layers to prevent them from sticking together.
  • Avoid Humidity: Keep them away from moisture, as this can cause the chocolate to soften and the crackers to become soggy.
  • Shelf Life: Properly stored, these crackers will stay fresh for about 1 to 2 weeks, though they are often devoured much faster!
A plate of holiday peppermint white chocolate crackers, some whole and some broken, dusted with crushed candy canes, ready to be enjoyed.

Frequently Asked Questions

***What kind of white chocolate is best for this recipe?***

Using good quality white chocolate chips or a white chocolate bar (like Ghirardelli or good quality baking chocolate) will give you the smoothest melt and best flavor. Avoid ‘confectionery coating’ as it may not melt as smoothly.

***Can I use chocolate melts instead of real white chocolate?***

Yes, chocolate melts (also known as candy melts) are designed to melt very smoothly and set firm, making them a foolproof option for coating. They are a great alternative if you’re concerned about melting real chocolate.

***How finely should I crush the candy canes?***

Aim for a coarse to medium crumb. You want small pieces that will stick to the chocolate and provide a nice crunch, but not so fine that they are like dust. If they are too large, they might fall off easily.

***Can I make these ahead of time for holiday parties?***

Absolutely! These crackers store very well at room temperature in an airtight container for up to two weeks, making them perfect for preparing in advance.

***My white chocolate looks grainy after melting. What happened?***

This usually happens if the chocolate overheats or if any water gets into it. White chocolate is sensitive. Try adding a teaspoon of vegetable shortening or coconut oil and stirring vigorously to try and smooth it out. If it’s too far gone, it’s best to start over with fresh chocolate.

Conclusion

There you have it – a simple, delightful way to bring the quintessential flavors of the holidays right into your home! These Peppermint White Chocolate Crackers are proof that you don’t need to be a master baker to create something truly special and festive. With just a few ingredients and minimal effort, you can craft these beautiful, crunchy, and incredibly satisfying treats. They’re perfect for sharing with loved ones, gifting to friends and family, or simply enjoying yourself with a warm drink on a cold winter’s night. So go ahead, embrace the holiday spirit and whip up a batch. Your kitchen (and your taste buds) will thank you!

Ready to spread some holiday cheer? Try this recipe and let the festive flavors begin!

Print
clock clock iconcutlery cutlery iconflag flag iconfolder folder iconinstagram instagram iconpinterest pinterest iconfacebook facebook iconprint print iconsquares squares iconheart heart iconheart solid heart solid icon

Peppermint Crunch White Chocolate Covered Graham Crackers: A Festive Treat!


  • Author: Chef Emy

Description

ThesePeppermint Crunch White Chocolate Covered Graham Crackersare a quick and festive treat perfect for the holiday season! With creamy white chocolate, crunchy graham crackers, and refreshing crushed peppermint, they’re easy to make, beautiful to gift, and absolutely delicious!


Ingredients

Scale
  • 10 oz. Ghirardelli White Chocolate Melting Wafers
  • 8graham crackers
  • Crushed peppermint

Instructions

  1. Place Ghirardelli White Chocolate Melting Wafers in amicrowave-safe container.
  2. Microwavechocolate for 1 minute. Stir thoroughly until smooth. If needed,microwaveat 15-second intervals, stirring each time, until fully melted. Avoid overheating.
  3. Dip each graham cracker into the melted chocolate, coating both sides. Use a fork to lift and place onparchment paper.
  4. Sprinkle crushed peppermint on top of the chocolate-coated graham crackers.
  5. Let the graham crackers sit at room temperature until the chocolate is set.

Notes

For added flavor, try milk or dark chocolate instead of white chocolate.
Store in an airtight container for up to a week, or refrigerate if your home is warm.
Crushed candy canes can be used as a substitute for peppermint.

Nutrition

  • Calories: 120
  • Sugar: 10g
  • Fat: 6g
  • Carbohydrates: 16g
  • Protein: 1g

“`