Table of Contents
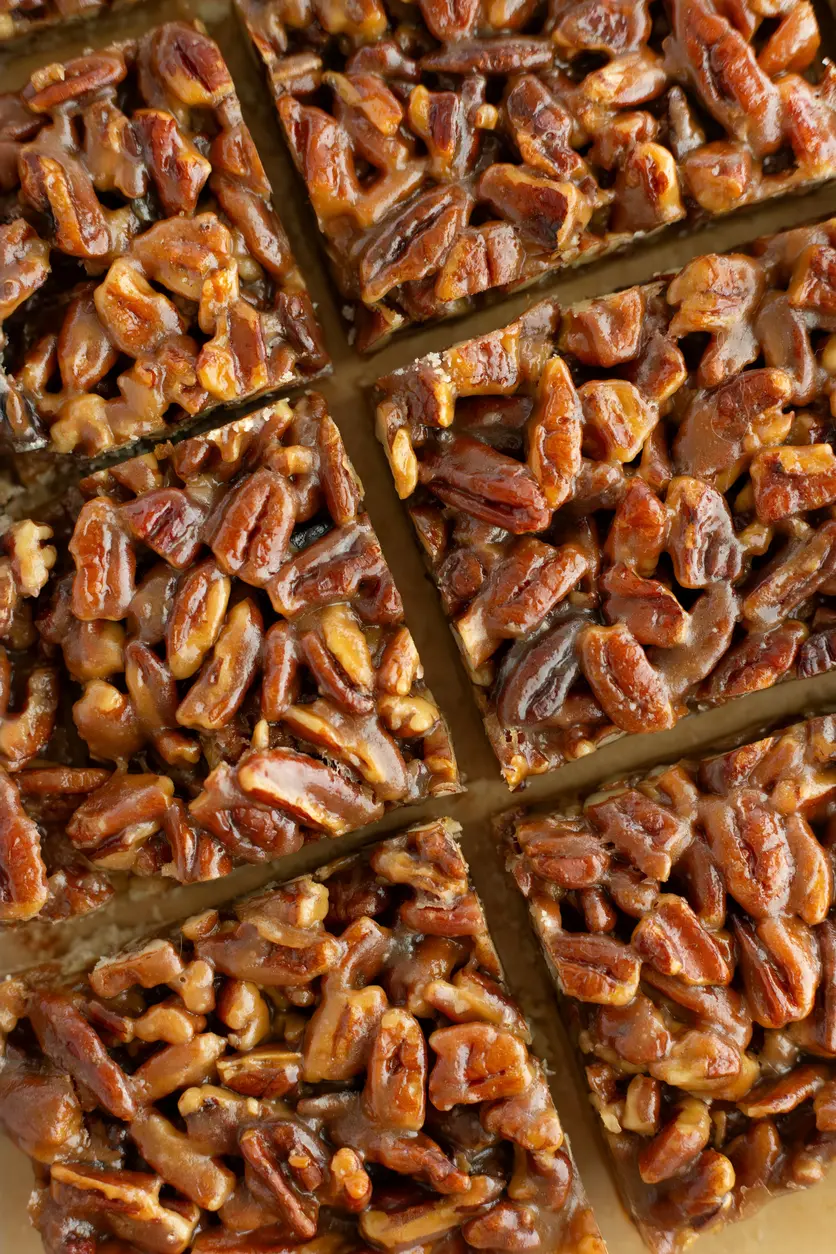
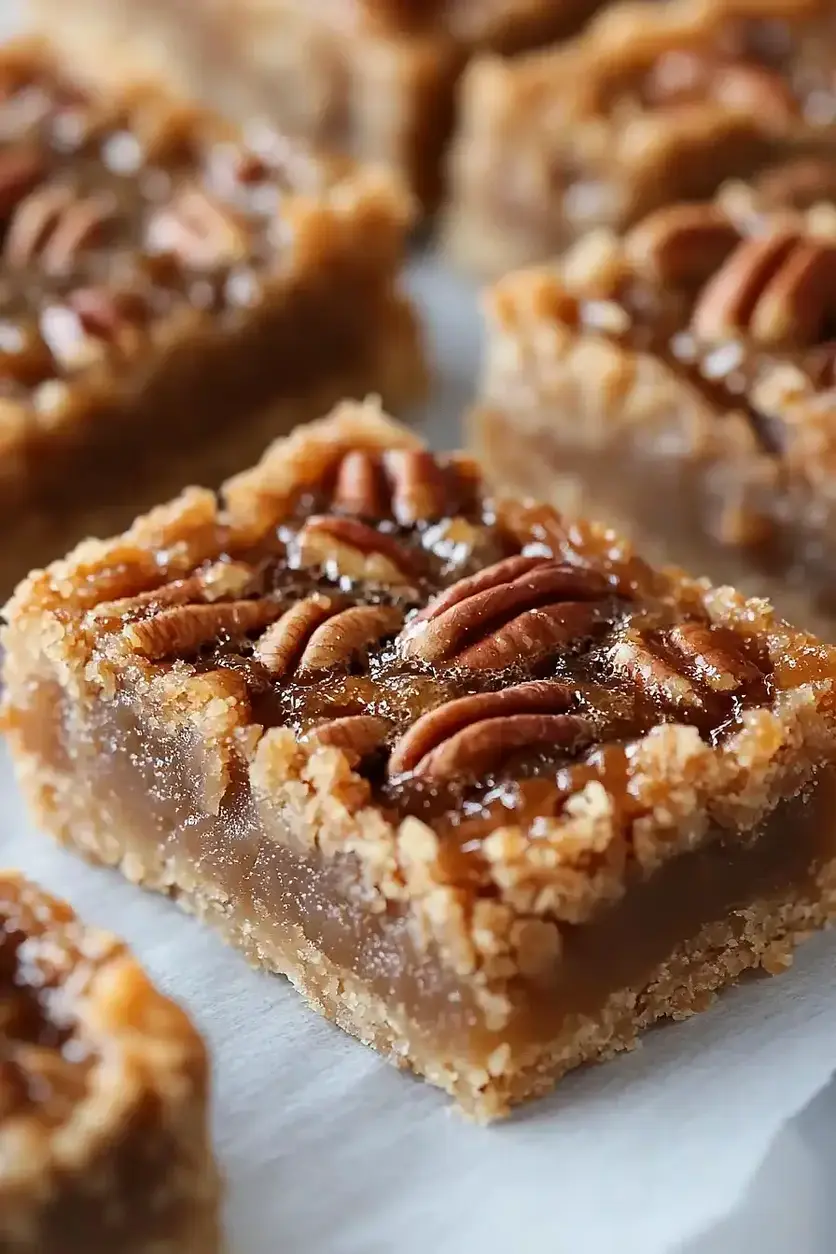
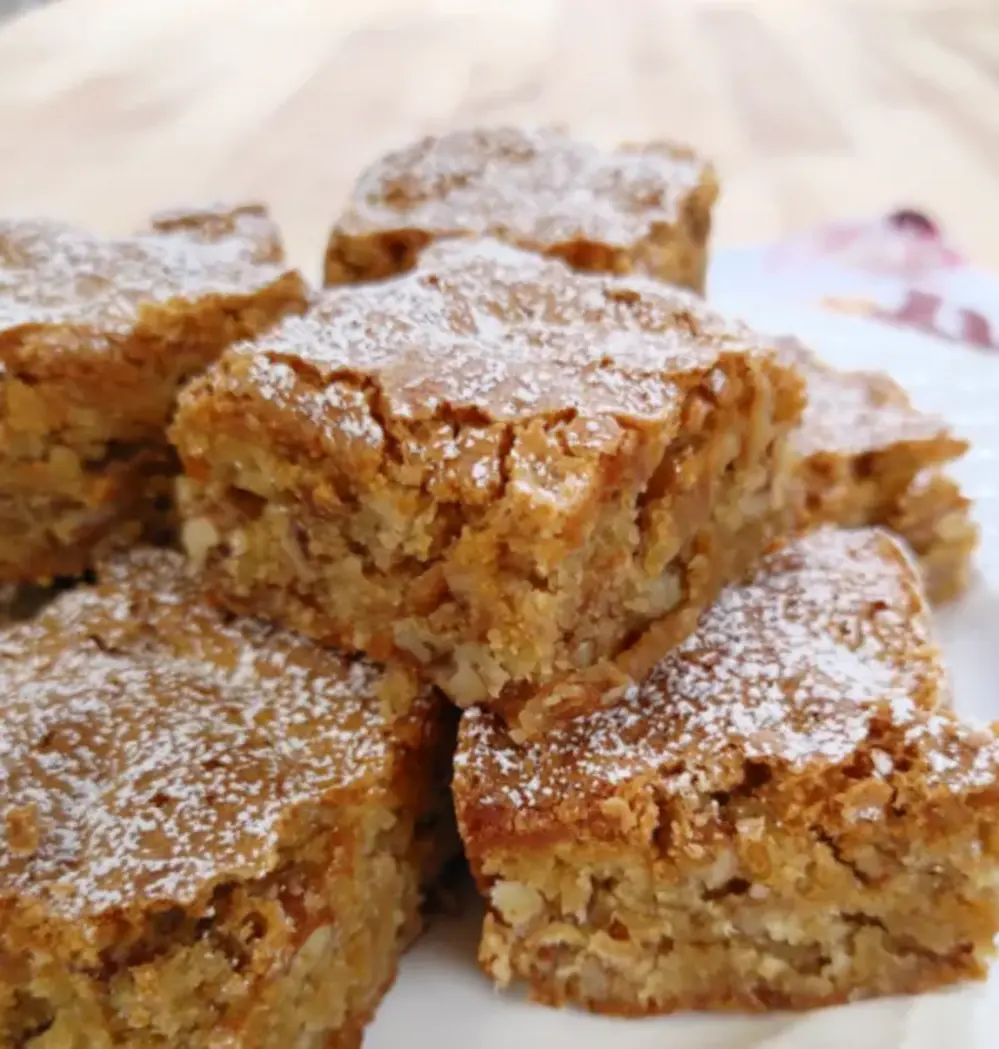
The Best Bourbon Chocolate Pecan Pie: A Boozy, Decadent Thanksgiving Showstopper
Introduction: The Ultimate Holiday Pie
There’s something magical about a slice of pecan pie that’s been elevated with rich, melted chocolate and a splash of smooth bourbon. This Best Bourbon Chocolate Pecan Pie is not just another Thanksgiving dessert — it’s the one your guests will whisper about all evening. The combination of toasted pecans, semisweet chocolate chips, and the warm, oaky notes of Gentleman’s Jack Whiskey creates a depth of flavor that’s absolutely irresistible.
At The Kitchen Team, we believe that holiday baking should be both impressive and approachable. That’s why we’ve perfected this recipe to deliver a perfectly set, not-too-sweet filling with a crisp, buttery crust. Whether you’re hosting a grand Thanksgiving feast or simply craving a cozy fall baking project, this pie delivers every time.
We’ve tested this recipe in our own kitchens (and with our families — the toughest critics!) to ensure every bite is balanced, boozy, and beautiful. Ready to bake the best pie of your life? Let’s dive in.
🏆 Why This Is the Best Bourbon Chocolate Pecan Pie
You’ve seen dozens of pecan pie recipes, so what makes this one worthy of the title “The Best”? We’re glad you asked. Here’s what sets our version apart:
- Perfect Balance of Sweet & Boozy: The dark corn syrup and sugar provide classic sweetness, while the bourbon cuts through with warmth and complexity. You taste the whiskey, but it never overpowers.
- Semisweet Chocolate Chips: Instead of milk chocolate or cocoa powder, we use semisweet chips that melt into velvety pockets throughout the filling. They add richness without making the pie cloying.
- Gentleman’s Jack Whiskey: This particular bourbon brings a smooth, slightly smoky character that complements the pecans and chocolate beautifully. You can adjust the amount to suit your taste.
- Foolproof Method: By tempering the eggs with a warm (not hot) syrup mixture, we guarantee a silky, crack-free filling every time. No more weeping or curdling!
- Freezes Like a Dream: This pie freezes for up to 6 months, making it the ultimate make-ahead dessert for the holidays.
Trust us — once you make this Bourbon Chocolate Pecan Pie, you’ll never go back to plain pecan pie again.
🛒 Ingredients for the Best Bourbon Chocolate Pecan Pie
Here’s everything you’ll need. We recommend using high-quality ingredients for the best results — especially the bourbon and chocolate.
| Ingredient | Amount |
|---|---|
| Pecan halves | 1 cup |
| Dark corn syrup | 1 cup |
| Unsalted butter | 4 tablespoons (½ stick) |
| Granulated sugar | 1 cup |
| Semisweet chocolate chips | 1 cup |
| Gentleman’s Jack Whiskey (or your favorite bourbon) | ⅓ cup (adjust to taste) |
| Large eggs | 3 |
| Pure vanilla extract | 1 teaspoon |
| Unbaked 9-inch or 10-inch pie crust | 1 (homemade or store-bought) |
Note: If you prefer a less boozy pie, reduce the bourbon to ¼ cup. For a non-alcoholic version, substitute with strong brewed coffee or bourbon extract.
👩🍳 Step-by-Step Instructions
Follow these simple steps for a flawless bourbon chocolate pecan pie. We’ve broken it down so even beginner bakers can succeed.
| Step | Action |
|---|---|
| 1 | Preheat the oven to 350°F. Place your pie crust in a 9-inch or 10-inch pie dish. If desired, crimp the edges decoratively. Set aside. |
| 2 | Make the syrup base: In a 2-quart saucepan over medium heat, combine the butter, sugar, vanilla, and dark corn syrup. Cook, stirring frequently, until the butter and sugar are completely melted and the mixture is smooth (about 5 minutes). Do not let it boil. |
| 3 | Cool the syrup: Remove the saucepan from heat and let it stand for 10 minutes. You want the mixture to be warm but not hot — this is crucial for tempering the eggs. |
| 4 | Whisk the eggs: In a separate medium bowl, lightly whisk the 3 eggs until just combined. Do not overbeat. |
| 5 | Combine everything: Slowly pour the warm syrup mixture into the whisked eggs while stirring constantly. This prevents the eggs from scrambling. Add the chocolate chips, bourbon, and pecans. Mix until everything is evenly distributed. |
| 6 | Fill the crust: Pour the filling into the prepared pie crust. Use a spatula to spread the pecans and chocolate chips evenly. |
| 7 | Protect the crust: If you have a pie crust shield or a strip of aluminum foil, gently wrap it around the rim of the pie to prevent over-browning. |
| 8 | Bake: Place the pie on the center oven rack and bake at 350°F for 55 minutes to 1 hour. The pie is done when the center is set but still slightly jiggly (like a cheesecake). A knife inserted 1 inch from the edge should come out clean. |
| 9 | Cool completely: Transfer the pie to a wire rack and let it cool fully — at least 2 hours. The filling will continue to set as it cools. |
| 10 | Serve or store: Slice and serve at room temperature or slightly warm. For storage, cover and refrigerate for up to 1 week. |
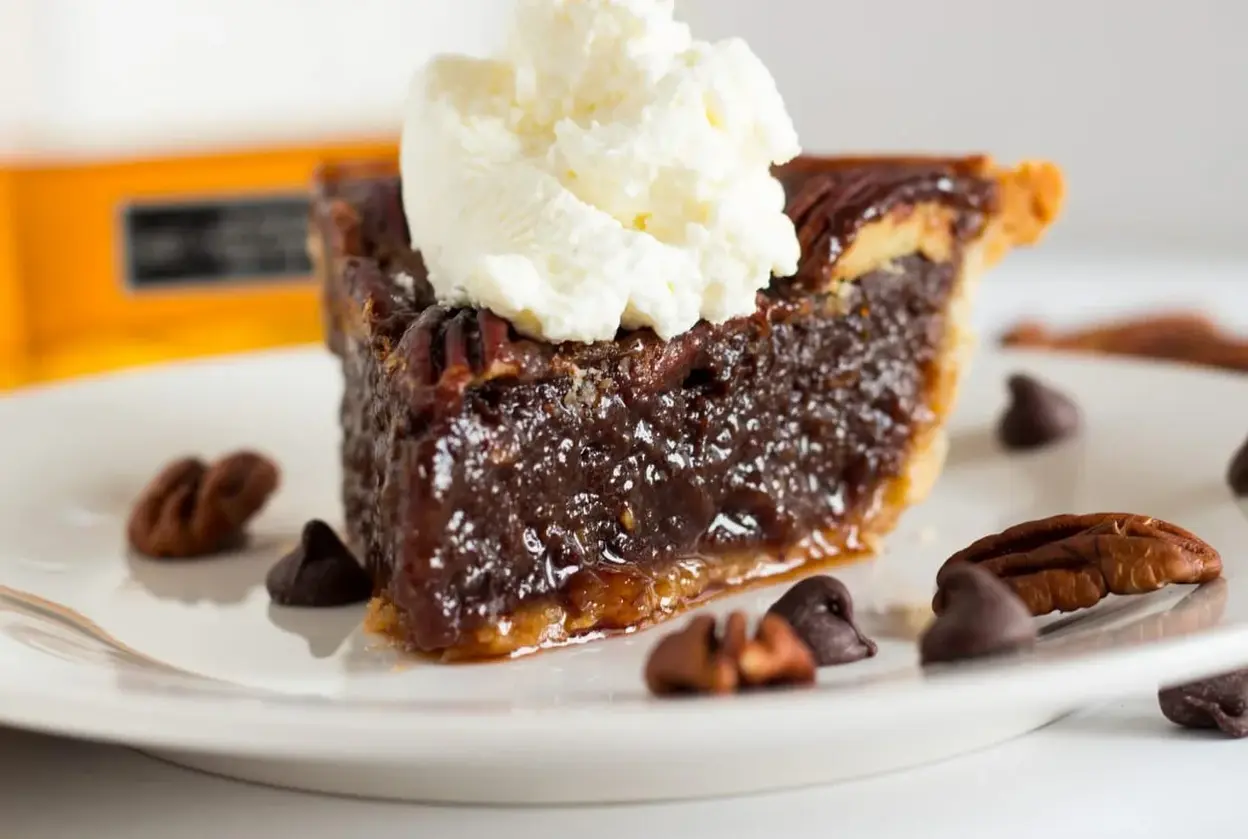
🍽️ Serving Suggestions
This Bourbon Chocolate Pecan Pie is spectacular on its own, but here are a few ways to make it even more memorable:
- With whipped cream: A dollop of lightly sweetened whipped cream (or bourbon-spiked whipped cream!) balances the richness.
- À la mode: A scoop of vanilla bean ice cream melts into the warm pie for a classic contrast.
- Drizzle of caramel: Add a salted caramel sauce over the top for extra indulgence.
- Garnish: Sprinkle flaky sea salt and a few extra toasted pecans on top just before serving.
This pie pairs beautifully with coffee, espresso, or even a small glass of bourbon on the rocks.
❄️ Storage & Freezing
One of the best things about this pie is how well it keeps. Here’s how to store it properly:
- Refrigerator: Cover the cooled pie tightly with plastic wrap or aluminum foil. Store in the fridge for up to 1 week. Bring to room temperature before serving.
- Freezer: Wrap the completely cooled pie (in its dish) in a layer of plastic wrap, then a layer of heavy-duty foil. Freeze for up to 6 months. Thaw overnight in the refrigerator before serving.
- Reheating: To warm individual slices, microwave for 15-20 seconds. For the whole pie, reheat in a 300°F oven for 10-15 minutes.
✨ Variations & Substitutions
Feel free to get creative with this recipe! Here are some tried-and-true variations:
- Chocolate Swap: Use dark chocolate chunks, milk chocolate chips, or even white chocolate for a different flavor profile.
- Bourbon Alternatives: Rye whiskey, spiced rum, or even a good quality brandy work beautifully.
- Nut-Free Option: Substitute pecans with roasted pumpkin seeds or omit nuts entirely for a chocolate-bourbon custard pie.
- Gluten-Free: Use a gluten-free pie crust (store-bought or homemade) — the filling is naturally gluten-free.
- Extra Boozy: Soak the pecan halves in bourbon for 30 minutes before adding them to the filling. Drain slightly before using.
❓ Frequently Asked Questions
1. Can I use light corn syrup instead of dark?
Yes, but dark corn syrup adds a deeper, caramel-like flavor that complements the bourbon and chocolate. If you only have light, add 1 tablespoon of molasses to mimic the color and taste.
2. Why is my pecan pie runny in the center?
This usually happens if the pie is underbaked. The center should be slightly jiggly when you remove it from the oven — it will set as it cools. Also, make sure your oven is fully preheated and you’re using an oven thermometer for accuracy.
3. Can I make this pie without alcohol?
Absolutely! Replace the bourbon with an equal amount of strong brewed coffee or 1-2 teaspoons of bourbon extract mixed with water. The flavor will be different but still delicious.
4. How do I prevent the crust from burning?
Use a pie crust shield or wrap the edges with foil before baking. You can also use a silicone pie crust protector. Check the crust after 30 minutes and adjust shielding as needed.
5. Can I use a store-bought crust?
Yes, a high-quality refrigerated or frozen pie crust works perfectly. We recommend blind-baking it for 5-7 minutes before adding the filling to ensure a crisp bottom crust.
6. What’s the best bourbon for this recipe?
We love Gentleman’s Jack for its smooth, oaky flavor, but any good quality bourbon like Maker’s Mark, Bulleit, or Woodford Reserve will work. Avoid “budget” bourbons as they can taste harsh.
7. Can I double this recipe?
Yes! Simply double all ingredients and use two pie crusts. Bake both pies on the same rack, rotating halfway through. You may need to add 5-10 minutes to the bake time.
8. How do I know when the pie is fully baked?
The pie is done when the edges are puffed and set, the center is slightly jiggly, and a knife inserted 1 inch from the edge comes out clean. The internal temperature should be around 200°F.
9. Can I add chocolate chips on top of the pie?
Absolutely! Sprinkle a handful of chocolate chips over the hot pie right after it comes out of the oven. Let them melt slightly, then spread for a glossy chocolate glaze effect.
10. How far in advance can I make this pie?
You can bake this pie up to 3 days ahead and store it in the refrigerator. It also freezes beautifully for up to 6 months — perfect for holiday prep!
📢 Share Your Creation!
We love seeing your kitchen triumphs! When you make this Best Bourbon Chocolate Pecan Pie, snap a photo and tag us on social media. Don’t forget to use the hashtag #CookingWithEmy so we can feature your masterpiece.
Follow us on Pinterest for more delicious recipes: @cookingwithemy
📌 Save This Recipe for Later!
Pin this Bourbon Chocolate Pecan Pie to your favorite Thanksgiving or Dessert board so you never lose it.
© 2025 The Kitchen Team at CookingWithEmy.com — All rights reserved.
The Best Bourbon Chocolate Pecan Pie + VIDEO
Description
Bourbon Chocolate Pecan Pie is easy to make and absolutely delicious! Freezes well too.
Ingredients
Scale
- 1 cup pecan halves
- 1 cup dark corn syrup
- 4 tbs butter
- 1 cup sugar
- 1 cup semisweet chocolate chips
- 1/3 cup Gentleman’s Jack Whiskey (or less to taste)
- 3 eggs
- 1 tsp vanilla
- 1 10″ pie crust
Instructions
- Pre heat oven to 350F
- In a two qt. sauce pan on medium heat, cook butter, sugar, vanilla and corn syrup on medium heat until butter and sugar are melted and well mixed with the corn syrup (about 5 minutes.) Let stand off heat for about 10 minutes.
- Meanwhile, whisk eggs. When corn syrup mixture is still warm but not hot, add whisked eggs, chocolate chips, Bourbon and pecans. Mix well and pour into pie shell. If you have a pie crust shield, add it to the rim to protect crust from over browning or burning.
- Bake at 350F on center oven shelf with a pie crust cover for one hour to 1 hour or until center is set. Let pie cool completely. Store covered in refrigerator for up to one week. Freeze up to six months. Pie freezes well.
Notes
Store this pie in the refrigerator for several days and freeze it up to 6 months in an airtight container or freezer bag.
Nutrition
- Calories: 632cal
- Sugar: 67g
- Protein: 6g