Table of Contents
- Heavenly Lemon Raspberry Meringue Cheesecake: The Only Recipe You’ll Ever Need
- Why This Heavenly Lemon Raspberry Meringue Cheesecake Recipe is a Game-Changer
- Ingredient Spotlight: Quality Makes the Difference
- Step-by-Step Instructions
- Step 1: Preparing the Graham Cracker Crust
- Step 2: Creating the Luscious Cheesecake Filling
- Step 3: Folding in the Raspberries
- Step 4: Baking the Cheesecake to Perfection
- Step 5: Cooling the Cheesecake
- Step 6: Crafting the Heavenly Meringue Topping
- Step 7: Topping and Broiling the Meringue
- Step 8: Garnishing and Serving
- Serving & Presentation
- Make-Ahead & Storage Solutions
- Frequently Asked Questions (FAQ)
- How do I prevent the meringue from weeping on a lemon raspberry meringue cheesecake?
- What is the best way to get a smooth, no-crack cheesecake filling for this recipe?
- Can I use frozen raspberries in a lemon raspberry meringue cheesecake?
- How long should a lemon raspberry meringue cheesecake bake and cool?
- Can I make this recipe vegan/gluten-free?
Heavenly Lemon Raspberry Meringue Cheesecake: The Only Recipe You’ll Ever Need
Are you dreaming of a dessert that’s both elegant and bursting with incredible flavor combinations? Do you find yourself scrolling endlessly for that perfect Lemon Raspberry Meringue Cheesecake recipe that promises no tears, just pure bliss? You’ve landed in the right place! At cookingwithemy.com, we understand the craving for a truly spectacular cheesecake – one that balances the bright zing of lemon, the tart sweetness of raspberries, and the ethereal lightness of a perfectly baked meringue. This isn’t just another cheesecake; it’s an all-in-one symphony of textures and tastes designed to impress, and surprisingly, it’s an easy lemon raspberry cheesecake to master. Forget complicated techniques or disappointing results. We’ve perfected this rendition to be your ultimate go-to for celebrations, special occasions, or simply when you deserve an extraordinary treat.
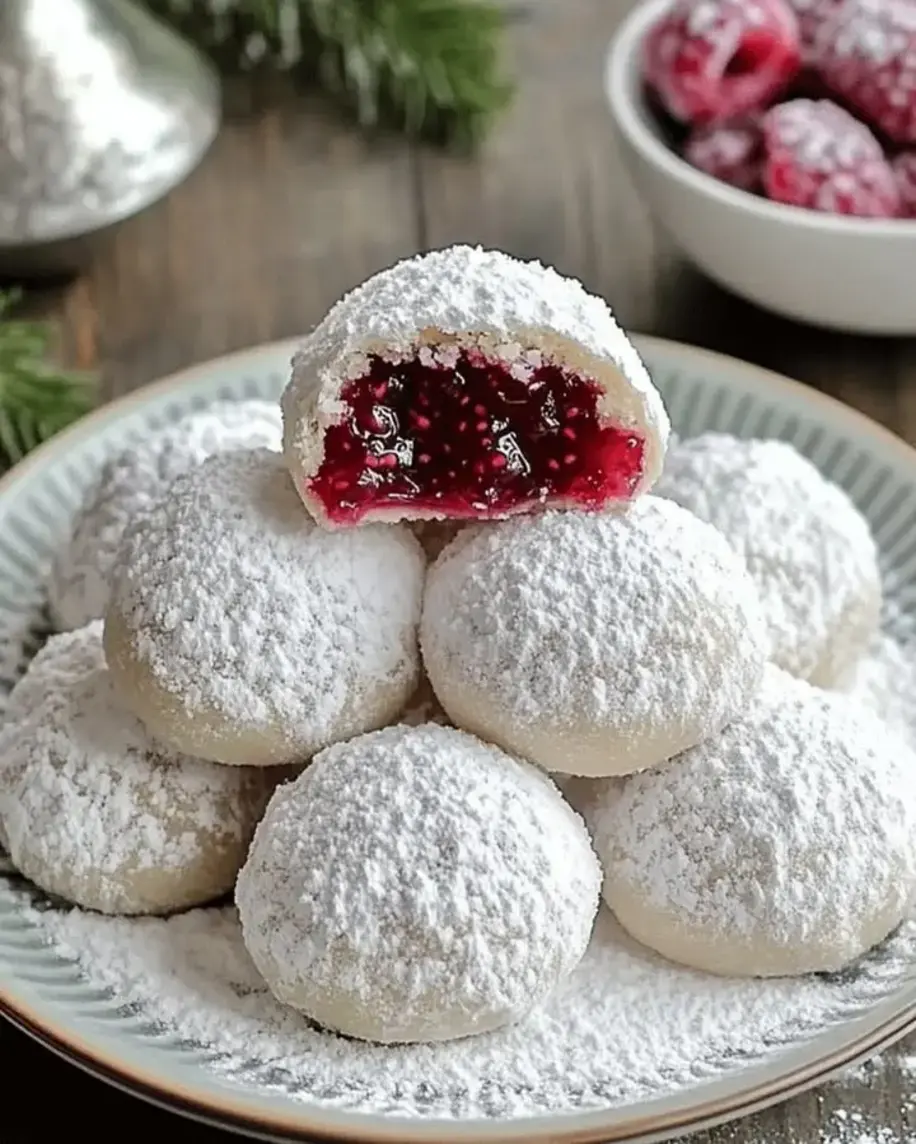
Imagine sinking your fork into a velvety, creamy cheesecake, its rich tanginess cut by the bright, juicy bursts of fresh raspberries. As you delve deeper, the crisp, buttery graham cracker crust provides a satisfying contrast, a foundation of pure comfort. But the magic doesn’t stop there. Crowned atop this masterpiece is a cloud-like meringue, kissed by the broiler to a delicate golden hue, offering a subtle sweetness and a melt-in-your-mouth texture that rivals any professional bakery. The aroma alone, a captivating blend of warm vanilla, zesty citrus, and sweet berries, is enough to make your mouth water. This lemon cheesecake with meringue is an experience for all the senses, a true indulgence that feels both sophisticated and delightfully comforting.
What sets this easy lemon raspberry cheesecake apart is our unique approach to achieving that restaurant-quality finish without the fuss. We call it the “Whisper-Light Meringue Technique,” and it’s our little secret to ensuring your meringue is stable, glossy, and sings with flavor, not sweetness. This guide will walk you through every single step, demystifying the process and empowering you to create a truly heavenly dessert. We’ve meticulously tested this recipe to ensure a smooth, crack-free filling and a perfectly set cheesecake every single time. Get ready to bake the best Lemon Raspberry Meringue Cheesecake of your life – Chef Sally’s signature recipe is now yours to master!
Why This Heavenly Lemon Raspberry Meringue Cheesecake Recipe is a Game-Changer
The Chef’s Secret: The Whisper-Light Meringue Technique
The true magic of this Lemon Raspberry Meringue Cheesecake lies in its ethereal meringue topping, and our “Whisper-Light Meringue Technique” is the key to its perfection. Unlike traditional methods that can result in weeping or overly sweet meringue, this technique involves gradually incorporating superfine granulated sugar into perfectly whipped egg whites. This gradual addition ensures each sugar crystal fully dissolves, creating a stable, glossy emulsion that holds its shape beautifully. The result is a meringue that’s wonderfully light and airy, with a delicate crispness on the outside and a soft, marshmallow-like interior. It complements the rich cheesecake without overpowering it, adding a sophisticated layer of texture and flavor that elevates the entire dessert. By using superfine sugar (or pulsing regular granulated sugar in a food processor), we ensure it dissolves almost instantly, preventing a grainy texture and a weeping mess.
Unbeatable Texture: The Art of Creamy, Crack-Free Cheesecake
Achieving that classic, velvety smooth, crack-free cheesecake filling is an art form, and this recipe masters it. The secret lies in two crucial elements: using room temperature ingredients and the gentle folding technique for the raspberries. Softened cream cheese and room-temperature eggs emulsify much more effectively, creating a homogenous batter that bakes evenly. This prevents the mixture from becoming overworked, which is a common cause of cracks. Furthermore, instead of vigorously mixing in the fresh raspberries, we gently fold them in. This preserves their delicate structure, allowing them to distribute throughout the filling as beautiful pockets of flavor and color, rather than being crushed into a puree that can release too much moisture during baking. This careful approach ensures a dense, incredibly creamy texture that is the hallmark of an exceptional cheesecake.
Foolproof for a Reason: Tested for Your Success
We understand that cheesecake can sometimes feel intimidating. That’s why this easy lemon raspberry cheesecake recipe has been tested, re-tested, and refined multiple times by Chef Sally and our team. We’ve paid meticulous attention to every detail, from the precise baking temperature and time to the cooling process. Our instructions are clear, concise, and designed with the home baker in mind, ensuring that even if this is your first time making a meringue-topped cheesecake, you’ll achieve stunning results. We’ve included specific tips and common pitfalls to avoid, giving you the confidence to tackle this recipe and create a dessert that will undoubtedly be the star of any gathering. You can trust that this recipe will deliver a consistently delicious and visually appealing Lemon Raspberry Meringue Cheesecake every single time.
Ingredient Spotlight: Quality Makes the Difference
Graham Cracker Crumbs for the Crust
The foundation of any great cheesecake is its crust, and for this recipe, we’re using classic graham cracker crumbs. They provide a subtly sweet, nutty base that holds up perfectly to the rich filling. For the best flavor and texture, opt for full graham crackers that you grind yourself in a food processor. This ensures a finer, more uniform crumb compared to pre-crushed versions, which can sometimes be dusty or contain larger, uneven pieces. When it comes to substitutions, digestive biscuits or even shortbread cookies can be used, but be mindful of their sweetness and flavor profile. If using a sweeter cookie, you might opt to slightly reduce the added sugar in the crust. Ensure your graham cracker crumbs are fresh; stale crumbs can impart an undesirable taste.
Cream Cheese: The Heart of the Cheesecake
For that signature creamy, luscious texture, full-fat block cream cheese is non-negotiable. Avoid the spreadable cream cheese in a tub, as its higher water content can lead to a softer filling and potential cracks. Use good quality, full-fat brick-style cream cheese, and most importantly, ensure it is softened to room temperature. This is critical for achieving a smooth, lump-free batter. Cold cream cheese will remain lumpy no matter how vigorously you beat it, leading to an inconsistent texture. If you can find European-style cream cheese, which often has a higher fat content, it will contribute to an even richer, more decadent cheesecake.
Fresh Lemons: Zest and Juice for Zesty Perfection
The vibrant, zesty punch in this cheesecake comes from fresh lemons. Don’t rely on bottled lemon juice or lemon extract; the flavor just isn’t the same. Zest from two medium lemons provides concentrated citrus oils that are packed with aromatic flavor, while the fresh lemon juice adds tang and balances the richness of the cream cheese. When zesting, be sure to use a microplane or fine grater to get just the yellow part of the peel, avoiding the bitter white pith underneath. For juicing, rolling the lemons on the counter firmly before cutting can help release more juice. If you absolutely must substitute, use a high-quality pure lemon extract at a reduced quantity, then add more juice to compensate for the tartness.
Fresh Raspberries: Jewels of Tartness
Fresh raspberries are crucial for both the flavor pockets within the cheesecake filling and the beautiful garnish. Their tartness is the perfect counterpoint to the sweet, creamy cheesecake and bright lemon. When selecting raspberries, look for plump, firm berries that are vibrant in color. Gently rinse them and pat them dry *just before* folding them into the batter to prevent them from bleeding too much color or becoming mushy. If fresh raspberries are out of season or unavailable, high-quality frozen raspberries can be used, but be sure to thaw them completely and drain them extremely well before adding them to the filling. This step is vital to prevent excess moisture from affecting the cheesecake’s texture.
Egg Whites for the Swirls of Meringue
The egg whites are the foundation of the light and airy meringue topping. For the best results with the “Whisper-Light Meringue Technique,” use large, fresh egg whites that are at room temperature. Room temperature egg whites whip up to a greater volume than cold ones. You can separate your eggs a few hours in advance and let them sit on the counter. It’s imperative that there is absolutely no trace of yolk in the egg whites, as even a tiny bit of fat will prevent them from whipping properly. Ensure your mixing bowl and whisk attachment are impeccably clean and dry. Using cream of tartar (a pinch, added with the egg whites) can also help stabilize the meringue, though it’s not strictly necessary with this sugar-incorporation method.
Step-by-Step Instructions
Step 1: Preparing the Graham Cracker Crust
Preheat your oven to 325°F (163°C). Lightly grease a 9-inch springform pan. This step is important to prevent sticking and ensure easy removal of the finished cheesecake. In a medium bowl, thoroughly combine the graham cracker crumbs and granulated sugar. Pour in the melted unsalted butter and mix until all the crumbs are evenly moistened. The mixture should resemble wet sand. Press this crumb mixture firmly and evenly into the bottom of the prepared springform pan. You can use the bottom of a glass or a flat measuring cup to get a compact, even layer. Bake for 10 minutes, then remove from the oven and let it cool completely on a wire rack while you prepare the filling.
Pro Tip: For an extra flavorful crust, you can add a pinch of cinnamon or a tablespoon of finely chopped pecans to the graham cracker mixture.
Step 2: Creating the Luscious Cheesecake Filling
In a large mixing bowl, beat the softened cream cheese and 1 cup of granulated sugar together with an electric mixer on medium speed until the mixture is completely smooth and creamy, with no lumps. This usually takes about 2-3 minutes. Scrape down the sides and bottom of the bowl often. Add the 3 large eggs, one at a time, beating well after each addition until just incorporated. Be careful not to overmix at this stage, as excessive air incorporation can lead to cracks. Stir in the zest of 2 lemons and 1/4 cup of fresh lemon juice, mixing until just combined.
Common Mistake to Avoid: Overbeating the filling after adding the eggs. This introduces too much air, which can cause the cheesecake to puff up excessively during baking and then collapse, leading to cracks. Mix until just combined.
Step 3: Folding in the Raspberries
Gently rinse and pat dry 1 cup of fresh raspberries. Add the prepared raspberries to the cheesecake filling. Using a spatula, carefully fold them into the batter until they are just distributed. The goal is to integrate them without crushing them, creating beautiful bursts of color and flavor throughout the cheesecake. This gentle folding technique helps maintain their shape and prevent them from bleeding too much into the batter, which can affect the swirl and texture.
Pro Tip: If you prefer a more marbled effect, reserve a small amount of plain filling and swirl it into the raspberry-filled batter for an artistic touch.
Step 4: Baking the Cheesecake to Perfection
Pour the raspberry-filled cheesecake batter evenly over the cooled graham cracker crust in the springform pan. Smooth the top with your spatula. Bake in the preheated oven at 325°F (163°C) for 55-60 minutes. The cheesecake is done when the edges are set, but the center still has a slight jiggle when the pan is gently nudged. It will continue to set as it cools.
Common Mistake to Avoid: Overbaking. An overbaked cheesecake will be dry and prone to cracking. Err on the side of slightly underbaked in the center, as it will firm up considerably during the cooling process.
Step 5: Cooling the Cheesecake
Once baked, turn off the oven, but leave the cheesecake inside with the oven door slightly ajar (you can prop it open with a wooden spoon). Let it cool in the oven for 1 hour. This gradual cooling process is crucial for preventing sudden temperature changes that cause cracks. After the hour, remove the cheesecake from the oven and let it cool completely on a wire rack at room temperature. Once fully cooled to room temperature, cover the cheesecake loosely with plastic wrap and refrigerate for at least 4 hours, or preferably overnight, to allow it to firm up completely.
Pro Tip: You can create a water bath (bain-marie) for a more evenly baked, moist cheesecake. Wrap the outside of your springform pan tightly with heavy-duty aluminum foil, place it in a larger roasting pan, and pour about an inch of hot water into the roasting pan before baking.
Step 6: Crafting the Heavenly Meringue Topping
This is where our “Whisper-Light Meringue Technique” shines. In a scrupulously clean, dry bowl of your standing mixer (or using a hand mixer with clean beaters), beat the 4 large egg whites on medium speed until they form soft peaks. Gradually add the 1 cup of granulated sugar, a tablespoon at a time, while continuing to beat on high speed. Keep beating until the meringue is stiff, glossy, and the sugar is completely dissolved. To check for dissolved sugar, rub a small amount of meringue between your fingers; it should feel smooth, not gritty.
Common Mistake to Avoid: Overbeating the meringue after the sugar is added. This can make it dry and brittle. Stop as soon as stiff, glossy peaks form.
Step 7: Topping and Broiling the Meringue
Once the cheesecake has chilled and firmed up, carefully remove the sides of the springform pan. Spread the prepared meringue evenly over the top of the chilled cheesecake, creating decorative swirls and peaks with your spatula. Ensure the meringue seals the edges of the cheesecake to prevent the filling from leaking under the meringue. Place the cheesecake back into the oven on the center rack. Turn the broiler on high and broil for 1-3 minutes, watching *very carefully* and rotating the pan as needed, until the meringue is beautifully golden brown. This step happens very quickly!
Pro Tip: If you don’t have a broiler or are nervous about it, you can achieve a golden-brown effect with a kitchen torch, which offers more control.
Step 8: Garnishing and Serving
Remove the browned meringue cheesecake from the oven and let it cool slightly at room temperature for about 15-20 minutes before garnishing. Arrange 1 cup of fresh raspberries decoratively over the golden meringue. At this point, the cheesecake is ready to be enjoyed, but chilling it for another 30 minutes to an hour in the refrigerator will help the meringue set further and the flavors meld beautifully. For the absolute best texture and flavor, serve chilled.
Pro Tip: A dusting of powdered sugar or a sprig of mint can add an extra touch of elegance to your garnish.
Serving & Presentation
This Lemon Raspberry Meringue Cheesecake is a showstopper on its own, but a few thoughtful touches can elevate its presentation even further. For a rustic yet elegant look, serve generous slices directly from the chilled cheesecake. A scattering of additional fresh raspberries, perhaps a few fresh mint leaves, or even a light dusting of powdered sugar over the top can add visual appeal. If you want to highlight the beautiful layers, a delicate drizzle of raspberry coulis on the plate before placing the cheesecake slice can create a stunning contrast. This dessert pairs wonderfully with a light, sparkling wine like Prosecco, or a crisp, iced herbal tea that complements its fruity and tangy notes without competing. For a more substantial dessert experience, consider serving it after a light grilled chicken or fish dish.
Make-Ahead & Storage Solutions
The beauty of this easy lemon raspberry cheesecake is that it’s a fantastic make-ahead dessert, making entertaining a breeze. You can prepare the graham cracker crust and bake it up to 2 days in advance. The cheesecake filling can also be prepared and baked up to 2 days ahead of time, then chilled thoroughly. The meringue topping is best prepared and broiled just before serving, as it can soften over time. If you need to prepare it a few hours in advance, cover and refrigerate. Store any leftover cheesecake loosely covered in the refrigerator for up to 3 days. Freezing the cheesecake is possible, but the meringue topping may not freeze and thaw as well. If you must freeze it, do so without the meringue topping, wrap it tightly in plastic wrap and then in foil, and it will keep for up to 1 month. Thaw slowly in the refrigerator. Reheating is not recommended; this cheesecake is best served chilled, directly from the refrigerator, to maintain its optimal texture and flavor.
Frequently Asked Questions (FAQ)
How do I prevent the meringue from weeping on a lemon raspberry meringue cheesecake?
Meringue weeping, often called “weeping” or “beading,” occurs when moisture separates from the sugar and egg whites. To prevent this on your Lemon Raspberry Meringue Cheesecake, ensure your sugar is fully dissolved into the egg whites – this is the core of our “Whisper-Light Meringue Technique.” Use superfine sugar or pulse regular granulated sugar in a food processor until finely ground, which dissolves more readily. Avoid over-whipping the meringue after the sugar is added, and make sure all your equipment is clean and dry, free from any grease or fat. Baking or broiling the meringue until it’s lightly browned also helps seal in moisture. Lastly, serve the meringue-topped cheesecake relatively soon after topping and browning; extended storage can sometimes lead to condensation.
What is the best way to get a smooth, no-crack cheesecake filling for this recipe?
Achieving a smooth, crack-free filling for your Lemon Raspberry Meringue Cheesecake is all about temperature and technique. First, ensure your cream cheese and eggs are at room temperature; this allows them to emulsify smoothly without over-beating. Beat the cream cheese and sugar until completely smooth *before* adding the eggs. Add eggs one at a time and beat only until incorporated. Avoid overmixing the batter once the eggs are in, as this incorporates too much air, causing the cheesecake to puff up and then crack as it cools. A slow and gradual cooling process, as outlined in Step 5 (cooling in the oven with the door ajar), is also critical to prevent sudden temperature shifts that lead to cracks.
Can I use frozen raspberries in a lemon raspberry meringue cheesecake?
Yes, you can use frozen raspberries in this Lemon Raspberry Meringue Cheesecake if fresh ones are unavailable. However, it’s crucial to thaw them completely and drain them *very thoroughly* on paper towels before folding them into the cheesecake filling. Excess moisture from frozen raspberries can make the filling too wet, potentially leading to cracks or a soupy texture. Gently pat them dry to remove as much liquid as possible to achieve the best results. Be aware that frozen raspberries may bleed color into the batter more than fresh ones, creating a more uniformly pinkish filling rather than distinct red pockets.
How long should a lemon raspberry meringue cheesecake bake and cool?
For this Lemon Raspberry Meringue Cheesecake, the baking time is approximately 55-60 minutes at 325°F (163°C). The cheesecake is ready when the edges are set but the center still has a slight jiggle. Coo- l it by turning off the oven and leaving it inside with the door ajar for 1 hour. Then, let it cool completely at room temperature on a wire rack for several hours before refrigerating for at least 4 hours, or preferably overnight. This slow, gradual cooling process is key to achieving a perfect texture and preventing cracks.
Can I make this recipe vegan/gluten-free?
Adapting this Lemon Raspberry Meringue Cheesecake to be vegan or gluten-free requires significant ingredient substitutions. For a vegan version, you would need to replace the cream cheese with a high-quality vegan cream cheese alternative, use flax eggs (1 tbsp ground flaxseed + 3 tbsp water, let sit for 5 mins) or commercial egg replacers instead of eggs, and find a vegan meringue alternative (such as aquafaba-based meringue, which is a more advanced technique). For a gluten-free crust, use gluten-free graham crackers or a blend of almond flour, oat flour (certified gluten-free), and a binding agent. It’s challenging to achieve the exact texture of a traditional cheesecake with these substitutions, and you may need to adjust baking times and temperatures.
Tried This Recipe? Leave a Comment!
Did you make this recipe? I’d love to hear how it turned out! Please leave a comment and a rating below. Your feedback helps other home cooks and supports cookingwithemy!
For more delicious inspiration, follow me on Pinterest!
.
Print
Heavenly Lemon Raspberry Meringue Cheesecake
- Total Time: 90 minutes
- Yield: 10
Description
A luscious cheesecake combining zesty lemon, tart raspberries, and a light meringue topping for a heavenly dessert.
Ingredients
- For the Crust: 1 1/2 cups graham cracker crumbs
- For the Crust: 1/4 cup granulated sugar
- For the Crust: 1/2 cup unsalted butter, melted
- For the Filling: 24 oz cream cheese, softened
- For the Filling: 1 cup granulated sugar
- For the Filling: 3 large eggs
- For the Filling: Zest of 2 lemons
- For the Filling: 1/4 cup fresh lemon juice
- For the Filling: 1 cup fresh raspberries
- For the Meringue: 4 large egg whites
- For the Meringue: 1 cup granulated sugar
- For the Topping: 1 cup fresh raspberries for garnish
Instructions
- Preheat the oven to 325°F (163°C) and grease a 9-inch springform pan.
- For the crust: Mix graham cracker crumbs, sugar, and melted butter. Press into the bottom of the pan and bake for 10 minutes. Let cool.
- For the filling: Beat cream cheese and sugar until smooth. Add eggs one at a time, then mix in lemon zest and juice. Gently fold in raspberries.
- Pour filling over the crust and bake for 55-60 minutes, or until set. Let cool completely.
- For the meringue: Beat egg whites until soft peaks form, then gradually add sugar until stiff peaks form. Spread over the cooled cheesecake.
- Broil the meringue for 1-2 minutes until golden. Garnish with fresh raspberries and chill before serving.
Notes
Ensure all ingredients are at room temperature for best results. Store in the refrigerator for up to 3 days.
- Prep Time: 30 minutes
- Cook Time: 60 minutes
- Method: Dessert
- Cuisine: American
Nutrition
- Calories: 450
- Sugar: 35g
- Fat: 28g
- Carbohydrates: 45g
- Protein: 7g