📖 Table of Contents
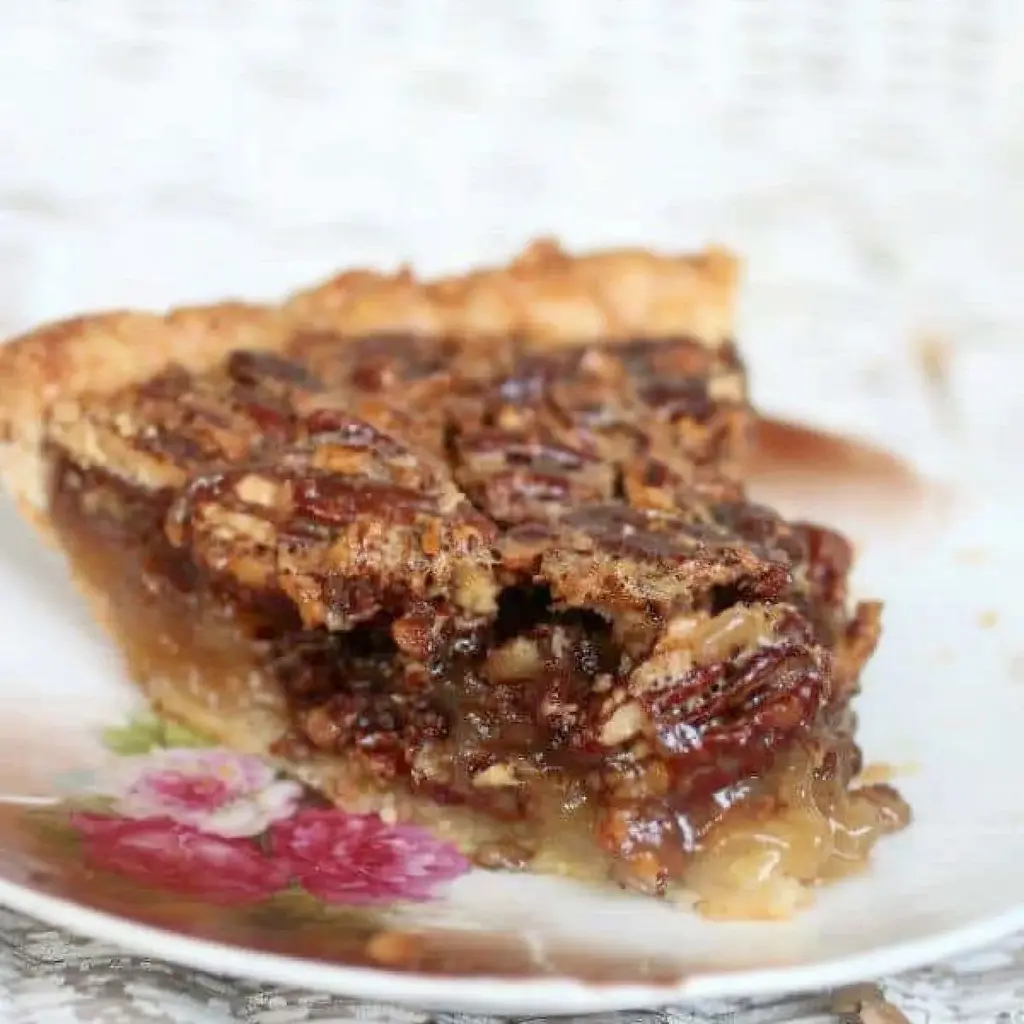
The Ultimate Easy Southern Pecan Pie: A Thanksgiving Classic Made Simple
Yield: One 9-inch pie

🥧 Introduction
Welcome to the kitchen, friends! Today, The Kitchen Team is sharing our absolute favorite easy southern pecan pie recipe. This isn’t just any pecan pie—it’s the one we serve every Thanksgiving, Christmas, and special family gathering. It’s the pie that disappears first, the one that gets asked for year after year, and the one that proves you don’t need to be a pastry chef to create something truly spectacular.
What makes this southern pecan pie so special? It’s the perfect balance of sweet, nutty, and buttery flavors, all wrapped in a flaky crust. With only eight simple ingredients and ten minutes of prep, this recipe is designed for busy home cooks who want to impress without the stress. Whether you’re hosting your first Thanksgiving or you’re a seasoned pro, this pie will earn you rave reviews.
At Cooking With Emy, we believe that great food brings people together. This pecan pie is a testament to that philosophy: simple ingredients, loving preparation, and a result that feels like a warm hug. Let’s dive into why this recipe works so beautifully.
🌟 Why This Is the Best Southern Pecan Pie
After testing dozens of pecan pie recipes, The Kitchen Team has perfected this version. Here’s why it stands out:
- Effortless Preparation: Only 10 minutes of active prep time. No complicated techniques or special equipment needed.
- Perfect Texture Every Time: The filling sets beautifully—firm edges with a soft, slightly jiggly center that’s pure heaven.
- Bold Southern Flavor: The combination of brown sugar, cinnamon, and vanilla creates a deep, caramel-like richness that’s unmistakably southern.
- Versatile & Forgiving: Works with store-bought or homemade crust, light or dark corn syrup, and even different types of brown sugar.
- Make-Ahead Friendly: This pie actually tastes better the next day, making it perfect for holiday prep.
🛒 Ingredients
Here’s everything you need for this easy southern pecan pie. All ingredients are at room temperature unless noted.
| Ingredient | Amount | Notes |
|---|---|---|
| Unbaked pie crust (9-inch) | 1 | Store-bought or homemade (see notes) |
| Pecans, coarsely chopped | 2 ½ cups | Leave some halves for texture |
| Large eggs, room temperature | 3 | Essential for structure |
| Light or dark corn syrup | 1 cup | Dark = richer flavor |
| Light or dark brown sugar, packed | ¾ cup | Dark = more molasses flavor |
| Unsalted butter, melted & slightly cooled | 3 tablespoons | Use salted? Reduce salt to ¼ tsp |
| Vanilla extract | 1 teaspoon | Pure vanilla preferred |
| Ground cinnamon | 1 teaspoon | Freshly ground is best |
| Salt | ½ teaspoon | Balances sweetness |
👩🍳 Step-by-Step Instructions
Follow these simple steps for a flawless southern pecan pie every time.
- Preheat oven to 350°F. Position a rack in the lower third of the oven. This helps the bottom crust bake thoroughly.
- Prepare the crust. Place your unbaked pie crust in a 9-inch pie dish. If using homemade, crimp the edges decoratively. Place on a rimmed baking sheet for easy handling.
- Add pecans. Spread the coarsely chopped pecans evenly over the bottom of the crust. Don’t pack them down—just let them settle naturally.
- Make the filling. In a large bowl, whisk together the eggs until frothy. Add the corn syrup, brown sugar, melted butter, vanilla, cinnamon, and salt. Whisk until smooth and well-combined, about 1 minute.
- Pour filling. Slowly pour the filling mixture over the pecans. The pecans will rise to the top as the pie bakes, creating that classic pecan pie look.
- Bake. Place the pie in the preheated oven and bake for 55-60 minutes. The pie is done when the edges are set and puffed slightly, but the center still has a gentle jiggle—like firm Jell-O.
- Cool completely. Remove from oven and place on a wire rack. Cool for at least 2 hours before slicing. This step is crucial for the filling to set properly.
🍨 Serving Suggestions
This easy southern pecan pie is delicious on its own, but here are some ways to elevate it:
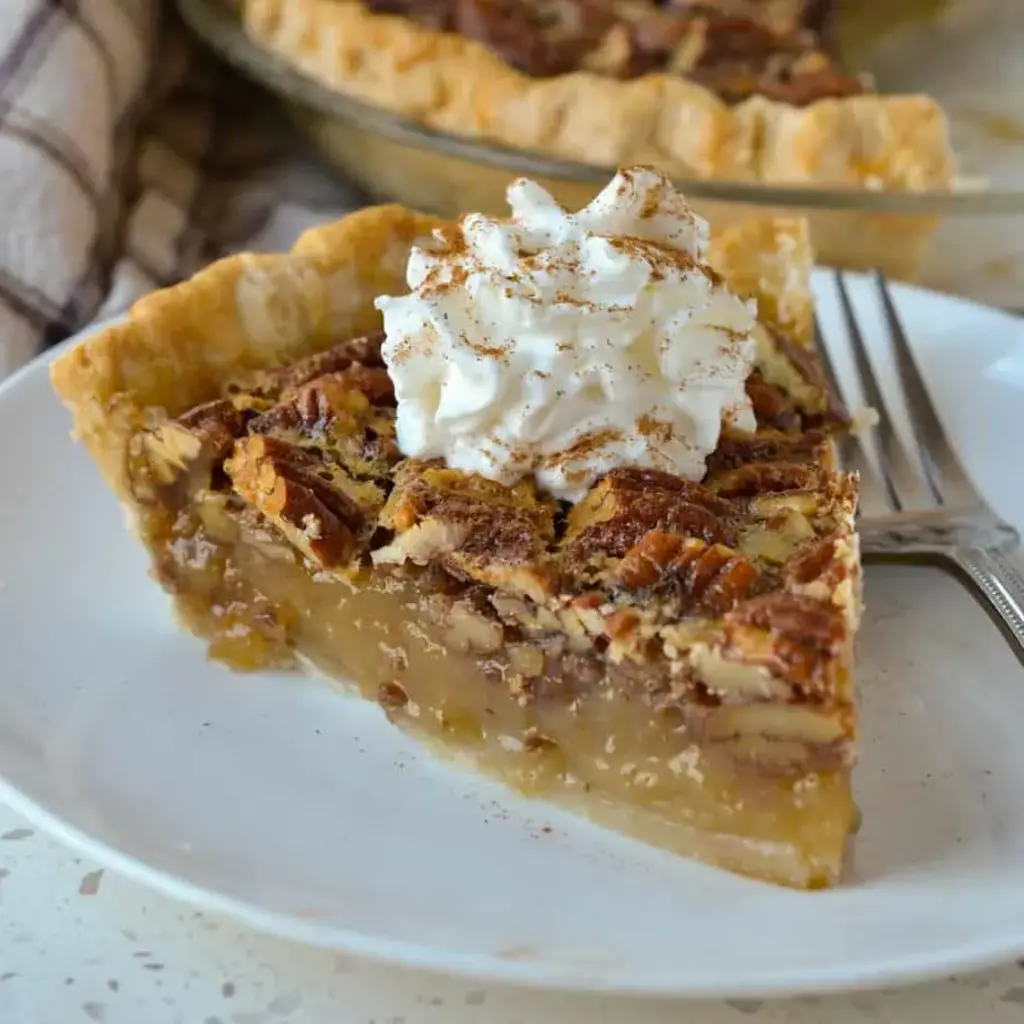
- Classic: Serve warm (not hot) with a dollop of freshly whipped cream and a dusting of cinnamon.
- Indulgent: Add a scoop of vanilla bean ice cream. The cold creaminess pairs perfectly with the rich, nutty pie.
- Southern Style: Drizzle with bourbon caramel sauce for an adult twist.
- Breakfast Treat: Yes, pecan pie for breakfast is a thing! A thin slice with coffee is a wonderful morning indulgence.
For the perfect whipped cream: beat 1 cup heavy cream with 2 tablespoons powdered sugar and ½ teaspoon vanilla until soft peaks form. Simple and heavenly.
📦 Storage Instructions
Proper storage keeps your pecan pie fresh and delicious for days.
| Storage Method | Duration | Tips |
|---|---|---|
| Room Temperature | 1-2 days | Cover loosely with foil or plastic wrap. Keep in a cool, dry place. |
| Refrigerator | Up to 5 days | Wrap tightly in plastic wrap or store in an airtight container. Bring to room temp before serving. |
| Freezer | Up to 3 months | Wrap in plastic wrap, then aluminum foil. Thaw overnight in the fridge. Reheat at 300°F for 10 minutes. |
🎨 Delicious Variations
One of the best things about this southern pecan pie recipe is how adaptable it is. Try these twists:
- Chocolate Pecan Pie: Add ½ cup semi-sweet chocolate chips to the pecans before pouring filling. The chocolate melts into gooey pockets of goodness.
- Bourbon Pecan Pie: Replace 2 tablespoons of corn syrup with good-quality bourbon. Adds incredible depth.
- Maple Pecan Pie: Substitute half the corn syrup with pure maple syrup. The result is less sweet with a complex, woodsy flavor.
- Gluten-Free: Use a gluten-free pie crust (many store-bought options work well) and ensure all other ingredients are certified gluten-free.
- Mini Pecan Pies: Use a muffin tin lined with pie dough. Fill each cup with pecans and filling, bake for 20-25 minutes. Perfect for parties!
❓ Frequently Asked Questions
Can I use dark corn syrup instead of light?
Absolutely! Dark corn syrup has a richer, more robust flavor with hints of molasses. It will make your southern pecan pie deeper in color and flavor. Light corn syrup produces a milder, sweeter pie. Both work perfectly.
Why is my pecan pie runny?
A runny pie usually means it was underbaked. Remember: the center should have a slight jiggle when you remove it from the oven. It will continue to set as it cools. Also, ensure you cooled the pie for the full 2 hours before slicing.
Can I make this pie without corn syrup?
Yes! You can substitute with a combination of ½ cup maple syrup and ½ cup golden syrup, or use 1 cup of honey (the flavor will be stronger). The texture may be slightly different, but still delicious.
Do I need to pre-bake the pie crust?
No, this recipe uses a “blind bake” method where the crust bakes along with the filling. The key is baking on the lower oven rack to ensure the bottom crust gets fully cooked. If you’re worried about a soggy bottom, brush the crust with a beaten egg white before adding pecans.
How do I know when pecan pie is done?
The perfect pecan pie has set edges (they should be puffed and stable) and a center that jiggles slightly when you gently shake the pan. The internal temperature should reach 200°F if you use a thermometer. Overbaking leads to cracks, so err on the side of slightly underdone.
Can I use frozen pecans?
Yes, but thaw them completely and pat dry with paper towels to remove excess moisture. Toasting the pecans before adding them to the pie (350°F for 5-7 minutes) enhances their flavor significantly.
How do I prevent the crust from burning?
Use a pie shield or make one from aluminum foil. Cover the edges after the first 30 minutes of baking. You can also use a silicone pie crust protector. If the edges start browning too quickly, tent the entire pie with foil.
Can I add chocolate to this pecan pie?
Definitely! See our variation above. You can also drizzle melted chocolate over the finished pie or add chocolate chips to the pecan layer. Chocolate and pecans are a match made in heaven.
How far in advance can I make pecan pie?
You can make this pie 1-2 days ahead. Store it in the refrigerator once completely cooled. Bring to room temperature before serving. You can also freeze it for up to 3 months—just thaw overnight in the fridge and reheat gently.
Can I use a store-bought crust?
Absolutely! A high-quality refrigerated pie crust works wonderfully. We recommend using a deep-dish crust if available. For an even easier option, use a frozen deep-dish pie shell—no thawing required. Just add pecans and filling directly.
📌 Pin This Recipe for Later
Save this easy southern pecan pie to your favorite Pinterest board! Perfect for Thanksgiving, Christmas, or any time you need a show-stopping dessert.
📌 Follow Cooking With Emy on Pinterest
Don’t forget to click here to pin directly to your boards!
Easy Southern Pecan Pie
Description
Impress your guests with this perfect Southern Pecan Pie. With eight easy ingredients and only ten minutes of prep time, you too, can cook like a chef.
Ingredients
Scale
- 1 (9 inch) unbaked or frozen pie crust
- 2 ½ cups pecans coarsely chopped
- 3 large eggs room temperature
- 1 cup light corn syrup or dark corn syrup
- ¾ cup packed light or dark brown sugar
- 3 tablespoons melted unsalted butter slightly cooled
- 1 teaspoon vanilla extract
- 1 teaspoon ground cinnamon
- 1/2 teaspoon salt
Instructions
- Preheat oven to 350 degrees. Add pecans to the unbaked pie shell.
- In a large bowl, stir together the eggs, corn syrup, brown sugar, melted butter, vanilla, cinnamon, and salt. Pour the mixture over the pecans.
- Bake for 55-60 minutes or until the center has just a slight jiggle but the edges are stable and set. Cool for at least 2 hours before slicing.
Notes
If you have the time, make a delicious
homemade
pie crust. Simply cut this recipe in half since it is for a double crust. It wont take long at all, and your guests will be so impressed with your cooking.
Dont chop your pecan halves too much. Just a quick coarse chop. There should still be whole halves and some quarters for the best texture.
The pie should still be ever so slightly jiggly in the middle when it is done; however, the outside should be set and steady.
For the ultimate pleasure, top with fresh whipped cream and a pinch of cinnamon.
Once cooled, store the pecan pie covered in the fridge for up to 4 days or freeze for up to 2 months.
Nutrition
- Calories: 590kcal
- Sugar: 54g
- Protein: 7g