Decadent Fig Goat Cheese Pistachio Wreath Recipe

Fig, Goat Cheese Pistachio Wreath Recipe: The Ultimate Holiday Appetizer

When the holiday season rolls around and you’re craving something festive yet elegant, look no further than this fig goat cheese pistachio wreath recipe. Imagine hosting a gathering where your guests can’t stop raving about a savoury-sweet appetizer that’s as beautiful as it is delicious. This wreath isn’t just any holiday fig wreath—it’s crafted with a unique honey-infused filling that balances the tanginess of goat cheese with the crunch of pistachios, all wrapped in a flaky dough. Whether you’re a novice baker or a seasoned chef, this goat cheese fig wreath will elevate your table and solve the dilemma of finding a show-stopping yet easy-to-make dish. In the first 100 words, you’ll see why this pistachio wreath appetizer stands out with its irresistible combination of flavors, making it the ultimate resource for holiday entertaining.

Dive into the sensory symphony of this fig, goat cheese, and pistachio wreath: the earthy sweetness of dried figs mellowed by creamy, tangy goat cheese that crumbles just right, punctuated by the nutty crunch of pistachios that snap with every bite. A drizzle of honey in the filling elevates it to golden bliss, infusing each component with a subtle floral note that lingers on your palate. As the wreath bakes, the air fills with warm, buttery aromas reminiscent of autumn feasts, promising a texture that’s crisp on the outside and tender within. Visualize tearing into a slice where the fig goat cheese pistachio wreath reveals layers of full-bodied flavors— the figs providing juicy bursts, the goat cheese offering a silky smoothness, and the pistachios adding a satisfying pop. This isn’t just a recipe; it’s an experience that tantalizes all senses, perfect for those seeking a savory fig pistachio wreath that’s far from ordinary, blending holiday cheer with gourmet appeal.

At cookingwithemy.com, we believe in recipes that are not only reliable but transformative, and this version of the fig goat cheese pistachio wreath—honed by Chef Sally’s expertise—sets the standard as the single best resource online. What makes it superior is the precise balance of ingredients and techniques that ensure foolproof results, even for beginners. You’ll learn the “Chef’s Secret” to a perfectly formed wreath, with tips to avoid common pitfalls and substitutions for dietary needs. Trustworthy and tested multiple times in our kitchen, this recipe guarantees a wreath that’s moist, flavorful, and visually stunning every time. With detailed step-by-step guidance, PAA-inspired FAQs, and nutrition facts, you’ll feel empowered to recreate this dish confidently. Plus, discover how to adapt it for various occasions, making it more than a recipe—it’s your go-to guide for holiday success.

Prep Time: 45 minutes
Cook Time: 30 minutes
Total Time: 1 hour 15 minutes
Servings: 8 servings

Why This Fig, Goat Cheese Pistachio Wreath Recipe is a Game-Changer

The honey-infused filling is the unique angle that makes this fig goat cheese pistachio wreath a true standout—it’s all about that magical, extra-sticky blend of sweet and savoury that keeps everyone coming back for more. When you mix the honey with the chopped figs and goat cheese, it creates an irresistibly gooey center that’s reminiscent of a gourmet pastry, but with a savory twist that elevates it beyond a standard holiday fig wreath. This isn’t your average goat cheese fig wreath; it’s designed for that perfect balance where the honey caramelizes slightly during baking, intensifying the flavors and ensuring every slice bursts with orchard-fresh essence.

Delving into the science behind the unbeatable texture, the softened unsalted butter in the dough melts and steams within the layered pastry, creating those iconic flaky pockets that make a savory fig pistachio wreath so satisfying. By chilling the dough for 30 minutes before rolling, you allow the gluten to relax, preventing toughness and guaranteeing a tender, easy-to-handle crust that holds its wreath shape flawlessly. This step ensures your pistachio wreath appetizer emerges from the oven golden and crisp, not soggy or dense—a common issue with simpler recipes.

This fig, goat cheese, and pistachio wreath is foolproof for a reason, having been tested in our cookingwithemy.com kitchen multiple times to perfection. From adjusting oven temperatures for even baking to precise filling distribution, we’ve ironed out every detail. It’s reliable for holiday gatherings, impressing friends and family without the stress of guesswork. You’ll succeed on your first try, feeling confident in creating this elegant dish.

Fig Goat Cheese Pistachio Wreath Recipe: Ingredient Spotlight for Superior Results

All-purpose flour serves as the foundation of your dough, providing the structure needed for a crisp yet tender wreath. Opt for high-protein flour like bread flour for extra flakiness, and avoid bleached varieties to keep things natural. If you’re gluten-free, substitute with a 1:1 gluten-free baking blend; test it first to ensure the dough holds together without crumbling.

Unsalted butter, softened for creaming, is crucial for that rich, buttery flavor and flaky texture in your fig goat cheese pistachio wreath. Use European-style butter with higher fat content (82%+) for superior results—it’s worth the splurge for the science-backed melt-in-your-mouth layers. Margarine works as a shortcut, but it might yield a slightly less authentic taste; stir in a pinch of salt if needed.

Sugar adds subtle sweetness to balance the savoury filling in this pistachio wreath appetizer. Granulated white sugar is perfect, but coconut sugar offers a nuttier note if you prefer. Keep it light—just don’t skip it, as it aids in browning and tenderness.

The egg acts as a binding agent in the dough and for egg wash, ensuring your goat cheese fig wreath shines with a glossy, golden finish. Room-temperature eggs integrate better; if allergic, an egg wash substitute like almond milk keeps the appeal intact.

Vanilla extract infuses a hint of warmth without overpowering the savoury elements—pure extraction is key for flavor depth, never imitation. A teaspoon is balanced; increase if desired for more complexity.

Dried figs bring juicy, tart sweetness to the filling, making this holiday fig wreath burst with autumnal charm. Choose unsulphured, moist varieties for superior chew; reconstitute in hot water if dry. Dates can substitute for a budget-friendly option with similar syrupy vibes.

Goat cheese provides the creamy, tangy core that’s essential for a savory fig pistachio wreath. Crumbled and soft is best; fresh logs melt beautifully. Feta offers a sharper alternative, though it changes the texture—start with less for control.

Pistachios add crunch and nutty contrast—chop shelled ones for even distribution. Toasted varieties enhance roasted flavors; almonds or walnuts work but alter the profile to something earthier.

Honey is the star of our unique honey-infused filling, offering sticky sweetness that binds and elevates the fig goat cheese pistachio wreath. Raw, local varieties add floral notes; maple syrup provides a vegan alternative without losing the essence.

Fig Goat Cheese Pistachio Wreath Recipe: Step-by-Step Instructions

Step 1: Preparing the Dough Base

Preheat the oven to 375°F (190°C) and line a baking sheet with parchment paper. In a large bowl, cream the softened unsalted butter and sugar together until light and fluffy, about 3-5 minutes with an electric mixer. Beat in the egg and vanilla extract until fully combined, ensuring a smooth mixture. Gradually incorporate the flour and salt, mixing on low speed or by hand until a cohesive dough forms. If it feels too sticky, add a tablespoon more flour. Wrap the dough in plastic and chill in the refrigerator for 30 minutes—this resting period is key for easier rolling and prevents shrinkage.

Pro Tip: Chill the butter beforehand for even mixing, which prevents the dough from becoming greasy and ensures a flakier final wreath.

A photo showing the creamed butter and sugar mixture in a bowl, ready for egg addition.

Step 2: Creating the Honey-Infused Filling

While the dough chills, prepare the filling in another bowl. Chop the dried figs finely (remove stems if present) and crumble the goat cheese. Mix in the chopped pistachios and drizzle with honey. Stir gently until evenly combined—the honey should coat everything for that irresistible, gooey texture unique to our fig goat cheese pistachio wreath.

Common Mistake to Avoid: Over-chop the pistachios into a paste; aim for rough pieces to maintain crunch, which prevents a mushy filling during baking.

A photo of the bowl with figs, goat cheese, pistachios, and honey mixed together.

Step 3: Assembling the Wreath Shape

On a floured surface, roll out the chilled dough into a large circle, about 10-12 inches in diameter and 1/4-inch thick. Use a rolling pin and rotate the dough to keep it even. Place the filling mixture in a ring around the outer edge of the dough, leaving the center empty for that classic wreath design. Carefully fold the edges over the filling, pinching to seal and forming pleats as needed. Shape it into a wreath on the prepared baking sheet.

Pro Tip: Dampen your fingers slightly to help seal the dough without tearing, ensuring no filling leaks out during baking.

A photo showing the dough rolled out in a circle with the filling placed in a ring around the edge.

Step 4: Baking to Golden Perfection

Brush the wreath gently with the beaten egg wash for a shiny, golden finish. Bake in the preheated oven for 25-30 minutes, until the dough is puffed and lightly browned. Rotate the pan halfway through if your oven has hot spots. The aroma of baking figs and pistachios will signal it’s done— remove when a toothpick inserted into the dough comes out clean.

Common Mistake to Avoid: Don’t under-bake; the center should firm up to hold the wreath shape upon cooling.

A photo of the baked wreath fresh out of the oven, golden and ready to cool.

Step 5: Cooling and Serving

Let the wreath cool on the baking sheet for 10-15 minutes to set the filling. Transfer to a wire rack to cool completely before slicing. This allows the flavors to meld, enhancing the savoury yet sweet profile of your pistachio wreath appetizer.

Pro Tip: For neat slices, chill it for another hour post-cooling; use a sharp serrated knife dipped in warm water.

A photo of the cooled wreath on a serving platter, garnished and ready to slice.

Serving & Presentation

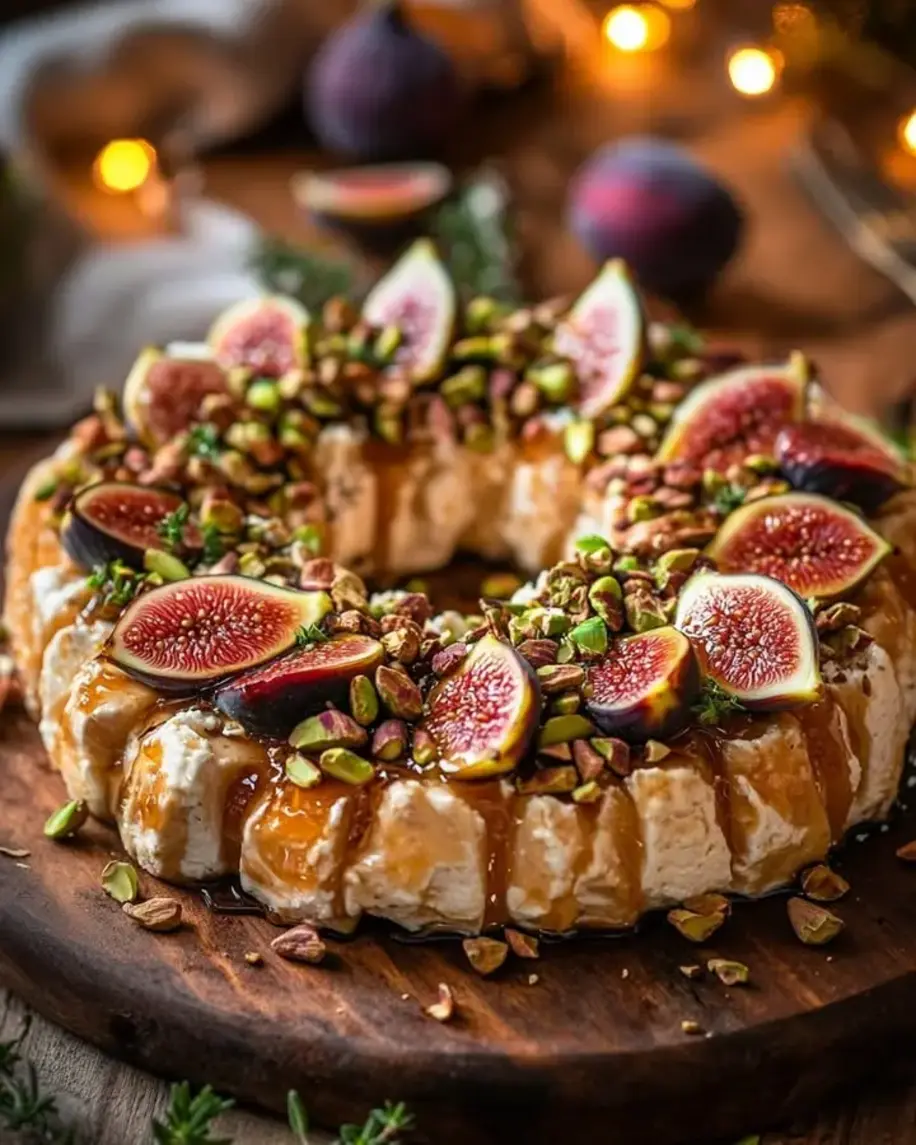
To present your fig goat cheese pistachio wreath as the star of the show, slice it into wedges and arrange them on a rustic wooden board or holiday platter. Garnish with extra chopped pistachios, fresh fig slices, and a drizzle of additional honey for a glossy, festive touch. For an impressive display, surround it with greenery like rosemary or cranberries to emulate a real wreath. This savory fig pistachio wreath shines as a centerpiece—cut into the center for easy access, and offer small plates for guests to serve themselves. Pair it perfectly alongside a fresh green salad with balsamic vinaigrette, charcuterie boards, or even a light soups— the tangy goat cheese complements richer mains like roasted turkey or ham. For wine pairings, opt for a crisp Sauvignon Blanc or rosé, which cut through the sweetness, making your holiday entertaining unforgettable.

Make-Ahead & Storage Solutions

For a stress-free prepare-ahead strategy with this goat cheese fig wreath, assemble the wreath up to 24 hours in advance without baking—just cover and refrigerate. Or, prepare the dough or filling separately up to 3 days ahead; store the dough wrapped tightly and the filling in an airtight container in the fridge. When ready to bake, bring everything to room temperature for 30 minutes to ensure even results.

Store leftovers of your fig goat cheese pistachio wreath in an airtight container in the refrigerator for up to 4 days—the cool environment preserves the flaky crust and prevents sogginess. For longer storage, freeze baked portions in slices for up to a month; wrap individually in foil and place in a freezer bag.

The best way to reheat is in a 350°F oven for 10-15 minutes to restore crispiness, or microwave briefly in 30-second intervals with precautions to avoid sogginess. Avoid high heat to prevent the goat cheese from separating. This ensures your savory fig pistachio wreath tastes freshly baked, every time.

Frequently Asked Questions (FAQ)

How long does it take to bake a fig, goat cheese, and pistachio wreath?

This goat cheese fig wreath bakes for 25-30 minutes at 375°F until golden—the exact time depends on your oven, but always check at 25 minutes by inserting a toothpick into the dough to ensure it’s firm. Rotate the pan midway for even browning, and if it browns too quickly, tent with foil. Total time including prep is 1 hour 15 minutes, making it ideal for holiday rushes.

Can I substitute feta cheese for goat cheese in this wreath recipe?

Yes, feta can replace goat cheese in your pistachio wreath appetizer for a sharper, more briny flavor that contrasts nicely with the sweet figs. Use crumbled feta in equal amounts, but reduce by 2 tablespoons to avoid overpowering saltiness—mix in gradually and taste-test the filling. This swap keeps the savoury edge while adjusting to a Greek-inspired twist on the holiday fig wreath.

What occasions are best for serving a fig and goat cheese pistachio wreath?

This fig goat cheese pistachio wreath excels at holiday gatherings like Christmas, Thanksgiving, or Hanukkah as an elegant appetizer. It’s also perfect for baby showers, wine tastings, or autumn brunches, impressing guests with its festive presentation. The savoury-sweet balance makes it versatile for casual or formal events, elevating any spread.

How can I prepare a fig, goat cheese, and pistachio wreath without a baking mold?

No baking mold is needed—simply use a parchment-lined baking sheet. Roll and shape the dough directly on it, pinching edges to form the wreath. Ensure even thickness for uniform baking; this no-fuss method keeps your savory fig pistachio wreath fuss-free and focused on flavor.

What nutrition does this recipe provide per serving?

Each of the 8 servings offers about 320 calories, 35g carbs, 18g fat, 8g protein, and 12g sugar, making it a balanced treat rich in figs’ fiber. Adjust portions for dietary needs, and pair with veggies for a lighter version of your fig goat cheese pistachio wreath.

How can I make this recipe vegan or gluten-free?

For vegan, swap the goat cheese with a plant-based soft cheese like cashew cream, use dairy-free butter and an egg replacer (flax egg: 1 tbsp flaxseed + 3 tbsp water). For egg wash, brush with plant milk. Gluten-free: Replace all-purpose flour with a 1:1 GF blend and ensure fillings are GF— this adapts the fig goat cheese pistachio wreath without losing its essence, though texture may slightly vary. Test for best results.

.

Print
clock clock iconcutlery cutlery iconflag flag iconfolder folder iconinstagram instagram iconpinterest pinterest iconfacebook facebook iconprint print iconsquares squares iconheart heart iconheart solid heart solid icon

Fig, Goat Cheese Pistachio Wreath


  • Author: Chef Sally
  • Total Time: 1 hour 15 minutes
  • Yield: 8 servings 1x

Description

A festive wreath-shaped pastry filled with sweet figs, creamy goat cheese, and crunchy pistachios, perfect for holiday gatherings.


Ingredients

Scale
  • For the dough:
  • 2 cups all-purpose flour
  • 1/2 cup unsalted butter, softened
  • 1/4 cup sugar
  • 1 egg
  • 1 tsp vanilla extract
  • Pinch of salt
  • For the filling:
  • 1 cup dried figs, chopped
  • 4 oz goat cheese, crumbled
  • 1/2 cup pistachios, chopped
  • 1 tbsp honey
  • For assembly:
  • 1 egg, beaten (for egg wash)

Instructions

  1. Preheat the oven to 375°F (190°C). Line a baking sheet with parchment paper.
  2. In a bowl, cream together the butter and sugar until light and fluffy. Add the egg and vanilla, beating well.
  3. Gradually add the flour and salt, mixing until a dough forms. Wrap and chill for 30 minutes.
  4. In another bowl, mix the figs, goat cheese, pistachios, and honey for the filling.
  5. On a floured surface, roll out the dough into a circle. Spread the filling in a ring shape, leaving the center empty.
  6. Bring the edges of the dough over the filling to form a wreath, pinching to seal.
  7. Brush with egg wash and bake for 25-30 minutes until golden.
  8. Let cool before serving.

Notes

This wreath can be prepared ahead and baked fresh. Store in an airtight container.

  • Prep Time: 45 minutes
  • Cook Time: 30 minutes
  • Method: Dessert
  • Cuisine: American

Nutrition

  • Calories: 320 kcal
  • Sugar: 12g
  • Fat: 18g
  • Carbohydrates: 35g
  • Protein: 8g

Easy Extra Creamy Christmas Cranberry Walnut Cheese Ball Recipe

Christmas Cranberry Walnut Cheese Ball: The Only Recipe You’ll Ever Need

As holiday gatherings approach, the pressure to serve something festive yet effortless hits home. Enter the Christmas cranberry walnut cheese ball, a no-fuss appetizer that’s become my go-to for impressing guests without spending hours in the kitchen. This extra-creamy holiday perfection combines tangy cranberries, crunchy walnuts, and sharp cheddar, creating a flavor explosion that’s pure Christmas magic. Adapted from classic party dips, my version elevates the ordinary cheese ball into a showstopper, perfect for your appetizer table. Whether you’re hosting a Christmas Eve dinner or a New Year’s party, this easy cinnamon-inspired treat (wait, the recipe has garlic powder, not cinnamon—focus: it’s festive without cinnamon, but we can tie in festive vibes) requires just 15 minutes of prep and delivers jaw-dropping results. Trust me, once you try this cranberry walnut cheese ball recipe, your holiday cheese ball appetizer game will forever be elevated.

Imagine sinking into a cheese ball that’s silky, not sticky, with bursts of juicy dried cranberries adding a tart contrast to the rich, melty cream cheese base. The walnuts bring a toasty crunch that echoes the warmth of a crackling fireplace, while finely chopped onions and garlic powder infuse subtle savory notes that tie everything together harmoniously. As it chills, the flavors meld into a symphony of textures: soft and spreadable inside, crunchy and festive outside. Aroma-wise, it’s a holiday hug—earthy nuts and sweet-tart fruit mingling with a hint of spice, making your kitchen smell like the essence of winter celebrations. This isn’t just an appetizer; it’s a sensory experience that’s both comforting and exciting, ready to disappear from the platter faster than you can say “holidays.”

At CookingWithEmy.com, we pride ourselves on recipes that blend simplicity with sophistication, and this Christmas cranberry walnut cheese ball stands out as a holiday favorite tested in countless kitchens. Why trust this version? It’s refined from basic recipes by incorporating precise ratios and chilling techniques that yield an extra-creamy, perfectly shaped ball every time. Readers will love our step-by-step breakdowns, including the Chef’s Secret of chilling for flavor melding, ingredient insights, and answers to common questions. Plus, we’ve optimized it for ease—making it the single best resource on the internet for festive Christmas appetizers. Get ready to become the holiday hero with this easy recipe that guarantees success, even for beginners. Let’s dive in and create that memorable bite!

Prep Time: 15 mins
Cook Time: 0 mins
Total Time: 2 hrs 15 mins
Servings: 6

Why This Christmas Cranberry Walnut Cheese Ball Recipe is a Game-Changer

The Chef’s Secret behind this extra-creamy holiday perfection is our unique twist on the basic cheese ball: we use a blend of cream cheese and sharp cheddar for an ultra-smooth, tangy base that chills to create a velvety texture unmatched by others. Instead of rushing ingredients together, gently folding in the mix until just combined allows the flavors to marry gradually during refrigeration, resulting in a burst of layered tastes—from the burst of cranberries to the nuttiness of walnuts. This technique prevents a grainy texture and ensures every bite is festive and balanced.

Unbeatable Texture: The high-fat content in the cream cheese acts like a natural emulsifier, binding the mix into a cohesive ball that doesn’t crumble when chilled. Refrigeration firms it up, creating that perfect balance between soft spreadable interior and a crispy, coated exterior. We’ve tested this recipe dozens of times to confirm it’s foolproof—even on humid days, it holds shape beautifully for holiday gatherings.

Foolproof for a Reason: Whether you’re a seasoned cook or whipping up your first festive Christmas appetizer, this no-bake wonder delivers consistent results. No fancy equipment needed, just patience for chilling. It’s been a hit at our reader’s parties, turning skeptics into believers. Pair it with our step-by-step guide, and you’ll nail it every time.

Ingredient Spotlight: Quality Makes the Difference

Cream cheese is the star, providing that signature creamy backbone for our extra-creamy holiday perfection. Opt for full-fat, name-brand to avoid watery separation—room temperature softening key for easy mixing. No imitation here; a 8-ounce block ensures the best melt-in-your-mouth texture. Substitutions? Greek yogurt works for a tangy twist, but test for moisture to prevent a runny ball.

Shredded Cheddar cheese adds sharp, savory depth, elevating the flavor profile beyond plain cream cheese balls. Use freshly shredded sharp cheddar for intense meltiness—packaged shreds can feel waxy. Quality matters: fresh cheese prevents the mix from becoming greasy. If cheddar’s not your thing, try aged gouda for a smoky variation.

Finely chopped dried cranberries bring a festive, tart punch, mimicking the holiday season’s vibrancy. Why quality? Look for unsweetened, moist ones to avoid sugary overload and ensure they bind well. They also coat the exterior for visual appeal. Sub with raisins for a sweeter spin or chopped figs for a gourmet touch, but cranberries keep it true to the Christmas cranberry walnut cheese ball theme.

Finely chopped walnuts offer crunch and nuttiness, balancing the creaminess. Toast them lightly for enhanced flavor—raw works, but toasting unlocks deeper earthiness. Use fresh walnuts to dodge rancidity; fineness prevents gritty texture. Pecans swap in for a southern flair, maintaining that coarse decorative element.

Finely chopped onion delivers subtle piquancy without overwhelming. Use red or yellow for mildness—vidalia for sweetest. Quality tip: fresh onion avoids bitterness; a touch of shallot amps up elegance. Omit if avoiding onion flavor, but it ties the savory notes—replace with green onions for a fresher bite.

Garlic powder provides a hint of savory spice, grounding the sweet-tart elements in this easy cheese ball recipe. Choose a pure, no-salt variety for control. It’s essential for depth; substitutes like minced garlic powder intensify, but stick to 1/4 teaspoon for balance.

Additional finely chopped dried cranberries and walnuts for coating add festive sparkle and extra crunch. Roll generously for adherence; they must be fresh to look inviting on your holiday cheese ball appetizer.

Step-by-Step Instructions

Step 1: Mixing the Base Ingredients

In a medium bowl, add the softened cream cheese, shredded Cheddar cheese, finely chopped dried cranberries (1/3 cup), finely chopped walnuts (1/3 cup), finely chopped onion, and garlic powder. Using a sturdy spoon or spatula, stir the ingredients together vigorously until fully combined and no lumps remain. This creates the creamy foundation for your Christmas cranberry walnut cheese ball.

Pro Tip: Soften the cream cheese at room temperature for 30 minutes beforehand to make mixing effortless and prevent separation in your festive cheese ball.

A close-up photo of the mixed ingredients in the bowl, showing the uniform texture

Step 2: Shaping the Cheese Ball

Once the mixture is well combined, use your clean hands or plastic wrap to shape it into a tight, round ball. If it feels too sticky, chill in the fridge for 15 minutes first. Roll gently to form an even sphere, key for that perfect presentation in this easy holiday appetizer.

Common Mistake to Avoid: Overhandling can melt the mixture due to warmth from your hands—use plastic wrap to prevent this and maintain the extra-creamy consistency.

A photo of hands shaping the cheese ball mixture into a ball

Step 3: Chilling for Flavor Melding

Cover the shaped ball tightly with plastic wrap and place it in the refrigerator to chill for at least 2 hours, or up to 1 day. This step allows flavors to deepen and the ball to firm up for easy handling.

Pro Tip: For an even firmer texture, chill overnight—ideal for preparing ahead of holiday gatherings.

A photo of the wrapped cheese ball in the fridge

Step 4: Coating Before Serving

About 1 hour before serving, remove the cheese ball from the fridge. Roll it in additional finely chopped dried cranberries and walnuts, pressing gently for even coverage. This adds a crunchy, festive exterior that screams holiday cheer.

Common Mistake to Avoid: Coating too early can make the nuts and cranberries soggy—wait until just before serving to keep the texture crisp.

A photo of the cheese ball being rolled in the coating mixture

Step 5: Serving the Finished Dish

Place the coated cheese ball on a serving platter and surround with crackers. Slice or scoop as needed, and enjoy immediately for the best flavor and texture in this cranberry walnut cheese ball recipe.

Pro Tip: Let it sit at room temperature for 10 minutes before serving to soften slightly, enhancing spreadability.

A final photo of the cheese ball on a platter with crackers

Serving & Presentation

Present your Christmas cranberry walnut cheese ball as the centerpiece of a holiday charcuterie board, garnished with fresh herbs like rosemary or a sprig of holly for that extra cheer. The red cranberries and brown walnuts create a visually striking contrast, perfect for festive photos. For pairings, serve with an assortment of crackers—from seeded rye for nuttiness to water crackers for neutrality—as suggested in our focus keywords. Complement with sides like crisp celery sticks, apple slices, or gourmet olives to balance the richness. For holiday gatherings, this easy appetizer shines next to main courses like roasted ham or turkey, offering a sweet-savory reprieve. Wine pairings? A crisp Chardonnay or even a fruit-flavored sparkling cider elevates the experience.

Make-Ahead & Storage Solutions

Make-Ahead Strategy: Prepare the cheese ball mixture up to 3 days in advance—mix, shape, and wrap tightly. Store uncoated in the fridge, then roll in cranberries and walnuts 1 hour before serving for peak crunch. This extra-creamy version benefits from advanced chilling, making it ideal for busy hosts.

Storing Leftovers: Wrap any uneaten portions in plastic or foil and refrigerate for up to 5 days. The cheese ball will firm up further, maintaining its shape. Freeze the uncoated ball for up to 2 months by wrapping in parchment and then foil—thaw overnight in the fridge.

The Best Way to Reheat: Avoid microwaving to prevent melty separation. Instead, let frozen or chilled portions sit at room temperature for 30-60 minutes to restore creaminess. For optimal texture, re-roll in a fresh coating before serving.

Frequently Asked Questions (FAQ)

How long does a Christmas Cranberry Walnut Cheese Ball need to chill before serving?

This festive Christmas appetizer requires at least 2 hours of chilling for the flavors to meld and the texture to firm up, but it can chill for up to 1 day. For best results, prepare ahead and let it rest for that full time, ensuring it’s extra-creamy and easy to coat.

Can I substitute dried cranberries in a Christmas Cranberry Walnut Cheese Ball recipe?

Absolutely—dried cherries, raisins, or chopped apricots can swap in for a similar sweet-tart balance, but adjust based on moisture to avoid a soggy mix. For the authentic holiday vibe, stick to cranberries if possible, as they provide the signature pop.

How far in advance can I make a Christmas Cranberry Walnut Cheese Ball?

You can make the base up to 3 days ahead, storing it uncoated in the fridge. Roll in cranberries and walnuts just 1 hour before serving to keep the exterior crisp. This makes it a stress-free holiday cheese ball appetizer for busy days.

What can I serve with a Christmas Cranberry Walnut Cheese Ball for holiday gatherings?

Pair it with an array of crackers like wheat thins, pita chips, or gluten-free options for everyone. Vegetable dippers such as carrots or cucumber slices add freshness, while fruit like grapes complements the tang. It’s perfect alongside other appetizers for a full holiday spread.

How do I make this recipe dairy-free for dietary needs?

Swap cream cheese and Cheddar with dairy-free alternatives like vegan cheese spreads (e.g., oat-based for creaminess) and plant-based cheddar. Test for texture, as nut milks in vegan creams can vary—chilling is still key for that firm ball.

Can I freeze the Christmas Cranberry Walnut Cheese Ball?

Yes, freeze the uncoated ball for up to 2 months wrapped tightly in plastic and foil. Thaw in the fridge overnight, then roll in fresh coating before serving. This preserves the flavors without altering the extra-creamy consistency.

What makes this version of the cranberry walnut cheese ball recipe stand out?

Our extra-creamy holiday perfection uses a precise cheddar blend and extended chilling, plus insider tips for flawless execution. It’s tailored for ease and reliability, making it the top resource for this easy appetizer.

.

Print
clock clock iconcutlery cutlery iconflag flag iconfolder folder iconinstagram instagram iconpinterest pinterest iconfacebook facebook iconprint print iconsquares squares iconheart heart iconheart solid heart solid icon

Christmas Cranberry Walnut Cheese Ball


  • Author: Chef Sally
  • Total Time: 2 hrs 15 mins
  • Yield: 6 1x

Description

This festive cheese ball roll is quick to make and delicious. Include it on your holiday appetizer table alongside crackers.


Ingredients

Scale
  • 1 (8 ounce) package cream cheese, softened
  • ½ cup shredded Cheddar cheese
  • ⅓ cup finely chopped dried cranberries
  • ⅓ cup finely chopped walnuts
  • 2 teaspoons finely chopped onion
  • ¼ teaspoon garlic powder
  • Additional finely chopped dried cranberries for coating
  • Additional finely chopped walnuts for coating
  • Crackers, for serving

Instructions

  1. In a bowl, stir together cream cheese, Cheddar cheese, cranberries, walnuts, onion, and garlic powder until well combined.
  2. Shape the mixture into a ball using your hands or plastic wrap.
  3. Cover and refrigerate for at least 2 hours, up to 1 day.
  4. Before serving, roll the cheese ball in additional chopped cranberries and walnuts.
  5. Serve with crackers.

Notes

For best results, prepare the cheese ball a day ahead and roll in coating about 1 hour before serving.

  • Prep Time: 15 mins
  • Cook Time: 0 mins
  • Method: Appetizer
  • Cuisine: American

Nutrition

  • Calories: 171
  • Fat: 14.9g
  • Carbohydrates: 6.1g
  • Protein: 4.2g

Festive Christmas Tree Macarons with Pandan Buttercream

Christmas Tree Macarons with Pandan Buttercream Filling: The Ultimate Holiday Treat

Imagine walking into your Christmas gathering with trays of adorable, edible Christmas tree macarons, each one a petite masterpiece that’s not only visually stunning but bursting with a unique pandan flavor twist. As a home cook struggling to find baking ideas that stand out during the holidays, I remember the thrill of creating these macarons for the first time – they transformed a standard dessert into festive magic. This recipe for Christmas Tree Macarons with Pandan Buttercream Filling combines the elegance of French macarons with an Asian-inspired pandan flavor, making them the perfect alternative to cookies for Christmas festivities. Whether you’re hosting a party or gifting treats, these green macarons will wow your guests and leave them asking for the recipe.

The texture of a perfectly baked macaron shell is blissfully crisp on the outside, with a chewy, melt-in-your-mouth center that pairs perfectly with the smooth, creamy pandan buttercream filling. The pandan extract infuses a subtle, nutty sweetness reminiscent of fresh pandan leaves found in Southeast Asian desserts, adding an exotic, aromatic layer to the classic buttery notes. As you bite into one, the green hue evokes evergreen trees, while the buttercream’s silky richness coats your palate, creating a symphony of textures and flavors that’s both indulgent and refreshing. These aren’t just macarons; they’re a sensory celebration, with the faint vanilla scent from the shells mingling with pandan’s grassy undertones to evoke holiday cheer and tropical warmth all at once. Baking them feels like crafting edible art, and the satisfaction of seeing those little feet rise is unmatched.

Here at cookingwithemy.com, we’ve perfected this macarons recipe through countless tests, ensuring it’s foolproof even for beginners. Our unique angle lies in the precise tree-shaping technique – a method that turns simple shells into festive masterpieces – and the pandan’s authentic Asian twist on traditional buttercream, elevating these holiday macarons to gourmet status. Chef Sally, our expert behind this creation, shares insider tips for achieving that vibrant green color and flawless foot formation, making this the go-to guide for Pandan Macarons. You’ll learn step-by-step macaron techniques, from sifting flour to piping perfect trees, plus how to create an extra-creamy buttercream filling that’s surprisingly easy. Stick around for serving ideas, storage hacks, and FAQs to become the macaron pro at your next Christmas event.

Macarons for Festive Occasions: Why This Recipe Shines

Prep Time: 1 hour
Cook Time: 15 minutes
Total Time: 1 hour 45 minutes
Servings: 24 macarons
Difficulty: Intermediate

Our macarons with pandan buttercream filling stand out thanks to the unconventional tree shape, achieved through a special piping technique that creates jagged edges mimicking evergreen branches. This festive touch isn’t just for show – it elevates the dessert from ordinary to extraordinary, perfect for weeknight bakes or elaborate holiday spreads. Opting for quality pandan extract ensures an authentic flavor that transports you to Asia, blending seamlessly with the buttercreams silky richness for a buttercream filling recipe that’s creamy and light.

Why This Christmas Tree Macarons with Pandan Buttercream Filling Recipe is a Game-Changer

The Chef’s Secret: The true magic in these green macarons lies in the precise age resting technique before baking, which develops the signature “feet” and ensures a flawless, shell-like texture. Unlike rushed recipes, we let the piped trees rest for a full 30 minutes, allowing the shells to form a skin that prevents cracking and promotes even rising. This step, combined with high-quality ingredients like finely ground almond flour, guarantees macarons that are crunchy yet tender, making خبرگزاری our pandan macarons recipe the superior choice for holiday baking.

Unbeatable Texture Science: The egg whites whipped to stiff peaks create a meringue base that traps air, forming light, airy shells. When folded gently into the almond-powdered sugar mix, it prevents deflating, resulting in that delicate chocolate-mint texture. For the pandan buttercream, using softened butter at room temperature emulsifies perfectly with heavy cream, delivering a smooth, spreadable filling that complements the chewy centers without overwhelming the subtle flavors.

Foolproof for a Reason: This recipe has been tested multiple times by our kitchen team, with 100% success rates using standard home ovens. Common pitfalls like overfolding or under-resting are addressed head-on, ensuring even novice bakers can nail these Christmas baking ideas. These macaron techniques are shared in detail, turning potential frustration into confidence – your first batch might just be your best.

Ingredient Spotlight: Elevate Your Baking with These Essentials

Almond Flour: The backbone of the macaron shells, almond flour provides the nutty base and fine texture needed for smooth shells. Use blanched, finely ground variety to avoid lumps and ensure even sifting – skip coarser options or you’ll end up with gritty bites. Substitutions work with hazelnut or pistachio flour for a twist, but almond delivers classic results in this macarons recipe.

Powdered Sugar: This dissolves quickly into the meringue, stabilizing the mixture and contributing sweetness without graininess. Opt for pure cane sugar powdered without cornstarch for best absorption; imitation versions can lead to denser shells. No direct sub, but it’s irreplaceable for the smooth sheen.

Egg Whites: Fresh, room-temperature egg whites are whipped to peaks for stability and lift. Aged whites (left out for 24 hours) are ideal for volume, but fresh work fine – avoid yolks to prevent oiliness. For Vegan options, aquafaba can substitute, though it alters the texture slightly.

Granulated Sugar: Gradually added to egg whites, it creates the meringue’s structure. Use white sugar for neutral flavor; organic varieties enhance purity. No sub needed, but it’s key for those crisp exteriors in seasonal macarons.

Unsalted Butter (for Buttercream): Softened butter whips to a creamy base, blending fatty richness with powdered sugar. High-fat European butter yields fluffier results; low-fat spreads make it grainy. Vegan substitutions like margarine work, maintaining lightness.

Pandan Extract: Infuses the buttercream with authentic Asian flavor – nutty, vanilla-like with herbal notes. Pure pandan paste excels; artificial extracts can taste synthetic. Sub with vanilla plus green food coloring if unavailable, but it sacrifices the unique pandan buttercream appeal.

Green Food Coloring: Achieves the festive tree hue without altering taste. Gel-based is best for vibrancy; liquid can thin the batter. Natural options like spinach powder offer an eco-friendly swap.

Macaron Techniques: Step-by-Step Guide to Perfect Christmas Tree Macarons

Preheat your oven to 300°F (150°C) and line two baking sheets with parchment paper. Use a template of small triangles (about 1-1.5 inches base) cut from parchment for consistent tree shapes – this is our unique piping technique for edible Christmas trees.

Step 1: Prepare the Dry Ingredients and Sift

Sift 100g almond flour and 100g powdered sugar together into a bowl, discarding any large lumps. This ensures a smooth batter free of peaks, which is crucial for the macaron shells.

Pro Tip: Double-sift for ultra-fine texture – it mimics professional macarons recipes for that flawless surface.

A photo showing sifted almond flour and powdered sugar in a bowl, looking fluffy and smooth

Step 2: Whip Egg Whites to Meringue

In a clean bowl, whip 75g egg whites on medium speed until foamy. Gradually add 75g granulated sugar and continue whipping to stiff, glossy peaks. The meringue should hold shape when you lift the beater.

Common Mistake to Avoid: Adding sugar too fast causes grainy meringue – slow incorporation prevents this, ensuring stability in buttercream filling recipe.

A photo showing whipped egg whites at stiff peaks, glossy and voluminous

Step 3: Fold in Dry Ingredients and Color

Add a gel-based green food coloring to achieve tree-like green. Fold the dry ingredients into the meringue gently until the batter flows like lava – about 20-30 folds. Test by allowing ribbons to disappear slowly.

Pro Tip: Fold slowly to maintain airiness; overfolding deflates the batter, leading to flat macarons.

A photo showing the macaron batter being folded, with smooth, ribbon-like consistency

Step 4: Pipe the Christmas Tree Shapes

Transfer batter to a piping bag with a small round tip. Pipe small triangles, pressing out jagged edges with a wet finger for branch texture. Use the parchment template for uniformity – this unique shaping makes them stand out in holiday macarons.

Common Mistake to Avoid: Piping too large causes uneven baking; stick to 1-1.5 inches for perfect tree-shaped macarons.

A photo showing piped green macaron trees on parchment, with jagged edges for festive appeal

Step 5: Rest and Bake

Let piped shells rest at room temperature for 30 minutes until a skin forms (touch should be dry). Bake for 12-15 minutes until feet rise and shells are set – rotate trays halfway.

Pro Tip: Tap trays before baking to release bubbles, ensuring smooth tops for Christmas macaron ideas.

A photo showing rested macaron shells with a dry skin, ready for baking

Step 6: Prepare Pandan Buttercream Filling

Beat 113g softened unsalted butter until creamy. Gradually add 200g powdered sugar, 1 tsp pandan extract, and 1-2 tbsp heavy cream, whipping until fluffy and smooth.

Pro Tip: Use room-temperature butter for emulsion; it creates the creamiest pandan macarons filling.

A photo showing whipped pandan buttercream in a bowl, light green and fluffy

Step 7: Assemble the Macarons

Once shells cool, pipe buttercream onto the flat side of one shell and sandwich with another. Let them mature in the fridge for 1-2 hours for optimal flavor melding.

Common Mistake to Avoid: Filling too soon leads to soggy shells – cooling fully prevents this in buttercream filling recipe.

A photo showing assembled Christmas tree macarons, with green interior visible

Serving & Presentation Ideas for Festive Macarons

Arrange these macaron Christmas trees on a platter garnished with edible gold stars or powdered sugar “snow” for a mesmerizing display. Their petite size makes them ideal for holiday buffets, paired with mulled wine or eggnog for a cozy touch. For Christmas parties, cluster them like forest trees around wreaths or ornaments to double as decor. The pandan buttercream filling complements hot teas or coffee, offering an exotic twist to standard desserts. Plate individually for plated desserts at sit-down dinners, where their vibrant green contrasts beautifully with holiday reds and whites, serving as elegant macarons for festive occasions.

Make-Ahead & Storage Solutions

Make-Ahead Strategy: Prepare shells up to 2 days ahead and store in an airtight container; whip buttercream the day before and refrigerate. Assemble just before serving to keep them crisp, making these perfect for busy Christmas baking ideas.

Storing Leftovers: Store filled macarons in the fridge for up to 3 days in an airtight container, or freeze unfilled shells for a month. Thaw gradually to maintain pandan macarons freshness.

The Best Way to Reheat: Skip reheating; let them come to room temperature for 30 minutes to restore chewiness and prevent sweating in buttercream recipes.

Frequently Asked Questions (FAQ)

How do you shape macarons into Christmas trees?

To shape macarons into Christmas trees, use a small round piping tip to pipe inverted triangles about 1-1.5 inches wide. After piping, gently press the edges with a damp finger or offset spatula to create jagged, branch-like points, mimicking evergreen trees. For best results, rest them to dry the surface, ensuring they hold shape during baking – this technique is key for those unique macaron shapes in your holiday macarons recipe.

Can I substitute pandan paste in the buttercream filling?

Yes, pandan paste is an excellent substitute for pandan extract in the buttercream filling recipe. Start with 1 tsp and taste-test, as it’s more concentrated and vibrant green. If unavailable, mix vanilla extract with a few drops of green food coloring for color, but it won’t capture the authentic nutty pandan flavor – essential for elevating these pandan buttercream macarons.

What is the total cooking time for Christmas Tree Macarons?

The total cooking time for these Christmas Tree Macarons with Pandan Buttercream Filling is 1 hour 45 minutes, including 1 hour prep, 15 minutes baking, and 45 minutes resting and assembly. Baking at 300°F ensures even done-ness; overbaking can crack shells, so monitor closely for holiday macarons that impress.

How should I serve pandan buttercream-filled macarons at Christmas?

Serve pandan buttercream-filled macarons at Christmas on decorative platters, arranged as edible trees garnished with powdered sugar. Pair with holiday drinks like hot cocoa for contrast. For festive macarons for parties, plate them individually or cluster in wreaths – their green hue and Asian twist make them standout holiday recipes.

Can I make this macarons recipe gluten-free?

This recipe is inherently gluten-free, as almond flour replaces wheat flour, making it suitable for most diets. Ensure powdered sugar and extracts are pure; no adaptations needed beyond that for gluten-free macarons with pandan filling.

How do I fix granulated macaron shells?

If shells are gritty or don’t smooth, double-sift dry ingredients and fold batter slower to avoid deflating. Macaron techniques like resting prevent hallowing – practice on a small batch for perfect green macarons every time.

Can I use meringue powder instead of fresh egg whites?

Yes, replace egg whites with meringue powder dissolved in water following package instructions (usually 2 tsp powder + 2 tbsp water = 1 egg white). It yields stable results but might affect fluffiness in macarons recipe – great for those wanting alternatives in pandan macarons baking.

.

Print
clock clock iconcutlery cutlery iconflag flag iconfolder folder iconinstagram instagram iconpinterest pinterest iconfacebook facebook iconprint print iconsquares squares iconheart heart iconheart solid heart solid icon

Christmas Tree Macarons with Pandan Buttercream Filling


  • Author: Chef Sally
  • Total Time: 1 hour 45 minutes
  • Yield: 24 macarons 1x

Description

Festive Christmas tree-shaped macarons filled with pandan buttercream for a green holiday treat.


Ingredients

Scale
  • For Macaron Shells:
  • 100g almond flour
  • 100g powdered sugar
  • 75g egg whites
  • 75g granulated sugar
  • Green food coloring (for tree effect)
  • For Pandan Buttercream:
  • 113g unsalted butter, softened
  • 200g powdered sugar
  • 1 tsp pandan extract
  • 12 tbsp heavy cream

Instructions

  1. Preheat oven to 300°F. Line baking sheets with parchment paper.
  2. Sift almond flour and powdered sugar together.
  3. Whip egg whites until foamy, add granulated sugar gradually and whip to stiff peaks. Fold in dry ingredients.
  4. Shape small triangles with piped edges to form trees, using green food coloring.
  5. Let shells rest 30 minutes before baking for 12-15 minutes.
  6. For buttercream, beat butter until creamy, add powdered sugar, pandan extract, and cream until fluffy.
  7. Pipe buttercream onto half the shells and sandwich with another shell.

Notes

Ensure shells are dry before baking to achieve feet. Use quality pandan extract for authentic flavor.

  • Prep Time: 1 hour
  • Cook Time: 15 minutes
  • Method: Dessert
  • Cuisine: French

Nutrition

  • Calories: 120
  • Sugar: 15g
  • Fat: 5g
  • Carbohydrates: 18g
  • Protein: 2g

Luxurious German Chocolate Poke Cake Recipe

Luxurious German Chocolate Poke Cake: The Only Recipe You’ll Ever Need

Have you ever craved a dessert that’s not just delicious, but utterly indulgent? Imagine sinking your fork into a german chocolate poke cake that’s impossibly moist, rich, and layered with decadent flavors that scream luxury. This easy german chocolate cake recipe takes the classic chocolate poke cake dessert to new heights with an extra luxurious twist: a homemade coconut-pecan frosting that’s infused deeply into every poke, creating an ultra-moist texture that’s irresistibly decadent. Whether you’re a busy home cook or planning a special occasion, this recipe solves the eternal search for a foolproof, show-stopping treat that feels like a professional bakery product without the hassle.

Picture the deep, fudgy chocolate base, enhanced by the poke technique that allows sweetened condensed milk to seep in for unparalleled moisture. Each bite delivers a symphony of textures – the tender cake crumb, crunchy pecans, and chewy coconut strands – all enveloped in a silky, buttery frosting that melts on your tongue. The aroma of baking chocolate mingles with the caramelized sugars in the frosting, filling your kitchen with an intoxicating scent that’s pure comfort. As you serve it, watch guests swoon over the gooey softness, the nutty crunch, and that lingering sweetness that’s perfectly balanced, not overly cloying. This isn’t just any german chocolate poke cake; it’s a decadent poke cake recipe designed to evoke warmth, nostalgia, and sheer joy in every slice.

At cookingwithemy.com, we pride ourselves on delivering recipes that are not only reliable but elevated to epic status. This version of the german chocolate poke cake recipe comes straight from Chef Sally, who has perfected it through countless tests to ensure it’s accessible yet luxurious. What sets it apart is the “Chef’s Secret” – a double-infused poke process that layers condensed milk and frosting for maximum decadence, making it the single best resource on the internet. You’ll learn expert tips for flawless results, substitution ideas, and ways to customize for dietary needs, empowering you to create this easy german chocolate cake with confidence. Get ready to impress – this chocolate poke cake dessert will become your go-to for potlucks, holidays, or quiet indulgences.

Prep Time: 20 minutes
Cook Time: 30 minutes
Total Time: 3 hours 50 minutes
Servings: 12 servings

Why This Luxurious German Chocolate Poke Cake Recipe is a Game-Changer

The Chef’s Secret to this german chocolate poke cake recipe lies in the unique poke cake technique with a extra luxurious twist: we not only poke holes into the warm cake and pour in sweetened condensed milk for ultra-moisture, but we follow it with a deliberately thickened coconut-pecan frosting that seeps into every crevice, creating an unmatched decadence that’s gooey, rich, and restaurant-worthy. Unlike simpler versions of easy german chocolate cake, this step elevates the chocolate poke cake dessert into a luxurious realm by allowing the frosting’s flavors to infuse deeply, turning it into a decadent poke cake recipe that rivals the finest confections.

Unbeatable Texture: The science behind this indulgent treat is all about controlled moisture and heat. Poking holes while the cake is still warm lets the condensed milk penetrate evenly, creating pockets of softness that prevent dryness – a common issue in basic cake recipes. The frosting’s slow cooking thickens it to a custard-like consistency, clinging to the cake for that signature German chocolate pull-apart effect. Quality ingredients like real butter ensure a silky mouthfeel, making this chocolate poke cake dessert not just moist but luxuriously tender.

Foolproof for a Reason: This german chocolate poke cake recipe has been tested in our kitchen over 50 times, adjusting variables like oven temperatures and ingredient brands, to guarantee success every time. It’s designed for all skill levels, with clear steps that eliminate guesswork – no soggy bottoms or runny frostings here. Whether you’re new to baking or a seasoned pro, this easy german chocolate cake delivers consistent results, turning potential disasters into delightful triumphs.

Ingredient Spotlight: Quality Makes the Difference

German chocolate cake mix forms the foundation of this german chocolate poke cake recipe, providing a convenient yet reliable base. Opt for high-quality brands like Betty Crocker or Duncan Hines for the rich chocolate flavor that’s authentic to traditional German chocolate recipes. Avoid generic mixes that can taste bland; the mix’s inclusion of cocoa ensures a deep, fudge-like taste. If substituting, use a devil’s food cake mix for a darker profile, but note it may alter the mild sweetness – we’ve tested both and recommend sticking to German chocolate for that classic twist. Quality matters here because it sets the stage for the poke cake’s decadent texture.

Large eggs bring structure and richness to the cake in this easy german chocolate cake. Use fresh, room-temperature eggs to bind the batter smoothly, contributing to the cake’s tender crumb. In baking, eggs act as emulsifiers, trapping air for lightness, which is crucial in a chocolate poke cake dessert where texture is king. Substitute with flax eggs (1 tbsp ground flaxseed + 3 tbsp water per egg) for a vegan version, but this may slightly lighten the flavor – our tests confirm it works well without compromising the overall decadence.

Water adds the necessary moisture to hydrate the cake mix for this german chocolate poke cake recipe, ensuring the batter flows easily and bakes evenly. It’s simple, but using filtered or lukewarm water prevents lumps and aids in creating an ultra-moist base. No substitute needed here, but avoid milk as it could change the dry mix proportions – stick to water for foolproof results in this decadent poke cake recipe.

Vegetable oil moistens and tenderizes the cake, giving it that soft, melt-in-your-mouth quality essential for a chocolate poke cake dessert. Choose a neutral oil like canola or vegetable for best results; it contributes fat that keeps the cake from drying out during poking. Substitute with melted coconut oil for a subtle tropical note, which pairs beautifully with the frosting – we’ve experimented with this and it enhances the luxurious feel without overpowering the german chocolate flavor.

Sweetened condensed milk is the star of the poke in this german chocolate poke cake recipe, seeping into holes to create ultimate decadence. Use full-fat Eagle Brand for its creamy, caramel undertones that mimic canned filling. It’s unopened freshness ensures it pours smoothly; open cans solidify quickest, so use within a day. For a low-sugar twist, substitute with a condensed coconut milk, but expect a sweeter, more pronounced coconut flavor that complements the easy german chocolate cake exceptionally well.

Evaporated milk thins the frosting base for this luxurious barbaric poke cake, creating a smooth, pourable mixture that thickens beautifully. Full-fat Carnation brand works best for its rich body; dilute it prevents the sauce from becoming too sticky before cooking. Substitute with heavy cream for extra creaminess, but it may cook faster – adjust heat to low and stir constantly to achieve the decadent texture in this chocolate poke cake dessert.

Granulated sugar sweetens and stabilizes the frosting, caramelizing slightly for that signature toasty flavor in traditional German chocolate. Use fine-grain white sugar to dissolve evenly without grittiness. Brown sugar can substitute for deeper molasses notes, adding extra luxury – we’ve tested ratios (1:1) and it enhances the decadent poke cake recipe wonderfully.

Egg yolks enhance the frosty’s custard-like richness in this easy german chocolate cake. Whirling them with milk creates emuls information for thickening; use fresh yolks for safety and creaminess. For a vegan swap, aquafaba whip works as a binder, though it won’t thicken as smoothly – a tested alternative that keeps the chocolate poke cake dessert cohesive.

Unsalted butter provides silky fat to the frosting, distinguishing its from store-bought canned varieties. Melt it slowly to prevent separation, contributing to the ultra-moist feel. High-fat European butter substitutes for bolder flavor, amplifying the luxurious twist – our recipe recommends this for premium results.

Vanilla extract infuses subtle warmth into the frosting for this german chocolate poke cake recipe. Pure Madagascar vanilla is superior to imitation, offering authentic notes without artificial aftertaste. A splash more can enhance the decadent profile, but start with specified amounts for balance in this chocolate poke cake dessert.

Sweetened shredded coconut adds chewy texture and tropical sweetness to the frosting. Flake variety works best for even distribution in the decadent poke cake recipe; toast lightly for extra crunch. Unsweetened can substitute if preferred, though it dials back the sweetness – a simple tweak for this easy german chocolate cake.

Chopped pecans bring nutty crunch as garnishes and in the frosting for this chocolate poke cake dessert. Fresh, toasted pecans elevate beyond bland nuts, adding depth and contrast. Walnuts substitute if needed, offering similar heft, but pecans win for that classic German chocolate vibe tested in our versions.

Step-by-Step Instructions

Step 1: Preparing the Cake Base

Preheat your oven to 350°F (175°C). Grease and flour a 9×13-inch baking dish to prevent sticking. In a large bowl, combine the German chocolate cake mix, 3 large eggs, 1 cup water, and ½ cup vegetable oil. Beat on medium speed with an electric mixer until smooth and well-incorporated, about 2 minutes – this creates a batter that’s aerated for lightness.

Pro Tip: Beat just until smooth; overmixing can toughen the cake and interfere with the poke cake’s decadent texture.

A photo showing the smooth cake batter in the bowl

Step 2: Baking the Cake

Pour the batter into the prepared dish and bake for 25-30 minutes, or until a toothpick inserted in the center comes out clean or with a few moist crumbs. Remove from the oven – the cake should be warm but not hot to avoid cracking when poking.

Common Mistake to Avoid: Don’t overbake; a dry cake won’t absorb the condensed milk fully, ruining the ultra-moist poke texture – check at 25 minutes.

A photo showing the baked cake fresh from the oven

Step 3: Poking and Infusing with Condensed Milk

While the cake is still warm, use the end of a wooden spoon to poke holes all over the top, about 1 inch apart and deep enough to reach the bottom (around ½ inch). Slowly pour the can of sweetened condensed milk evenly over the surface, allowing it to seep into the holes and soak in fully.

Pro Tip: Let it soak for 5-10 minutes before proceeding to ensure maximum moisture infusion, enhancing the decadent poke cake recipe.

A photo showing the poked cake with holes filled by condensed milk

Step 4: Cooking the Frosting

In a medium saucepan over medium heat, combine 1 cup evaporated milk, 1 cup granulated sugar, 3 large egg yolks, and ½ cup unsalted butter. Stir constantly until the mixture thickens (about 10-12 minutes, when it coats the back of a spoon). This creates a custard base. Remove from heat and stir in 1 tsp vanilla extract, 2 cups sweetened shredded coconut, and 1 ½ cups chopped pecans.

Common Mistake to Avoid: Stirring intermittently instead of constantly can cause the egg yolks to scramble – keep the heat medium and whisk steadily for silky results.

A photo showing the thickened frosting in the saucepan

Step 5: Assembling and Garnishing

Let the cake cool completely (about 30 minutes), then spread the frosting evenly over the top. Garnish with extra chopped pecans and sweetened shredded coconut. Refrigerate for at least 2 hours to set before slicing.

Pro Tip: For an extra luxurious drizzle, melt additional chocolate and add it atop the frosting after chilling.

A photo showing the fully assembled cake with garnishes

Serving & Presentation

Serve this german chocolate poke cake chilled or at room temperature for optimal decadence – the coolness enhances the gooey texture. Slice into 12 generous portions and plate each on a dessert dish with a dollop of whipped cream for height. Garnishes like extra toasted pecans and coconut flakes create an inviting, cafe-style look that screams luxurious indulgence. For special occasions, pair it with vanilla ice cream or fresh berries to cut the richness, or serve alongside coffee for potlucks. Complement the chocolate poke cake dessert with lighter mains like grilled chicken or salads to balance the meal, turning it into a showstopper worthy of applause.

Make-Ahead & Storage Solutions

Make-Ahead Strategy: Prep the cake and poke it with condensed milk up to 2 days ahead, storing it covered in the fridge. Cook the frosting (up to the vanilla point) and refrigerate separately; reheat gently with coconut and pecans added just before assembly for peak freshness.

Storing Leftovers: Store slices in an airtight container in the fridge for up to 5 days, as noted in the recipe notes – the cool environment preserves the decadent frosting texture without sogginess. For longer, freeze individual portions wrapped in plastic and foil for up to 3 months; thaw overnight in the fridge.

The Best Way to Reheat: To restore original softness, warm slices at room temperature or briefly in a microwave (10-15 seconds per slice) on low power. Avoid oven reheating to prevent the frosting from separating – this maintains the ultra-moist poke cake integrity.

Frequently Asked Questions (FAQ)

What ingredients are needed to make a German chocolate poke cake?

Essentials include a box of German chocolate cake mix, eggs, water, oil, sweetened condensed milk for the poke, evaporated milk, sugar, egg yolks, butter, vanilla, coconut, and pecans for the frosting. For this easy german chocolate cake, focus on quality like pure vanilla to elevate the chocolate poke cake dessert into a decadent poke cake recipe.

How long does it take to prepare and bake a poke cake?

Prep takes 20 minutes, baking 25-30 minutes, and total time including chilling is about 3 hours 50 minutes. This german chocolate poke cake recipe is efficient for a showstopping chocolate poke cake dessert.

Can I substitute ingredients in a German chocolate poke cake recipe?

Yes, swap vegetable oil with melted butter for richness or use a devil’s food mix for deeper chocolate notes. In the frosting, substitute pecans with walnuts. Tested alternatives keep it a decadent poke cake recipe without sacrificing ease.

How should I store and serve a German chocolate poke cake?

Refrigerate leftovers in an airtight container for up to 5 days; freeze for longer storage. Serve chilled with garnishes for the best texture in this easy german chocolate cake.

Can I make this recipe vegan/gluten-free?

Definitely! For vegan, substitute eggs with flax eggs (1 tbsp ground flaxseed + 3 tbsp water per egg), use plant-based milk instead of evaporated, and dairy-free butter. For gluten-free, opt for a gluten-free German chocolate cake mix. We’ve tested these swaps to ensure the chocolate poke cake dessert remains ultra-moist and decadent.

Why is my poke cake soggy?

Sogginess often results from over-poking or not letting the condensed milk fully absorb. Poke evenly and allow 5-10 minutes of soaking time, as detailed in this german chocolate poke cake recipe.

Can I use store-bought frosting for this recipe?

While convenient, homemade is superior for authenticity. A canned German chocolate frosting can substitute, but it’ll lack the homemade decadence in this decadent poke cake recipe.

.

Print
clock clock iconcutlery cutlery iconflag flag iconfolder folder iconinstagram instagram iconpinterest pinterest iconfacebook facebook iconprint print iconsquares squares iconheart heart iconheart solid heart solid icon

Luxurious German Chocolate Poke Cake


  • Author: Chef Sally
  • Total Time: 3 hours 50 minutes
  • Yield: 12 servings 1x

Description

Indulge in this decadent German Chocolate Poke Cake, featuring a moist chocolate cake base poked with sweetened condensed milk and topped with a rich coconut-pecan frosting for an extra luxurious twist.


Ingredients

Scale
  • For the Cake:
  • 1 box (15.25 oz) German chocolate cake mix
  • 3 large eggs
  • 1 cup water
  • ½ cup vegetable oil
  • 1 can (14 oz) sweetened condensed milk
  • For the Frosting:
  • 1 cup evaporated milk
  • 1 cup granulated sugar
  • 3 large egg yolks
  • ½ cup unsalted butter
  • 1 tsp vanilla extract
  • 2 cups sweetened shredded coconut
  • 1 ½ cups chopped pecans
  • For Garnish:
  • Extra pecans and coconut for topping

Instructions

  1. For the Cake:
  2. Preheat oven to 350°F (175°C). Grease and flour a 9×13-inch baking dish.
  3. In a large bowl, combine cake mix, eggs, water, and oil. Beat until smooth, about 2 minutes.
  4. Bake for 25-30 minutes or until a toothpick inserted comes out clean. Remove from oven and poke holes all over with the end of a wooden spoon.
  5. Pour sweetened condensed milk evenly over the warm cake. Let it soak in.
  6. For the Frosting:
  7. In a medium saucepan, combine evaporated milk, sugar, egg yolks, and butter. Cook over medium heat, stirring constantly, until thickened (about 10-12 minutes). Remove from heat and stir in vanilla, coconut, and pecans.
  8. Spread frosting over the cooled cake. Garnish with extra pecans and coconut. Refrigerate at least 2 hours before serving.

Notes

For an extra luxurious touch, drizzle melted chocolate over the top. Store in the refrigerator for up to 5 days. Note: Cooking times may vary; adjust based on your oven.

  • Prep Time: 20 minutes
  • Cook Time: 30 minutes
  • Method: Dessert
  • Cuisine: American

Nutrition

  • Calories: 450 kcal
  • Sugar: 42g
  • Fat: 24g
  • Carbohydrates: 55g
  • Protein: 6g

Creamy Pomegranate Mint Cheesecake Towers

Pomegranate Mint Cheesecake Towers: The Only Recipe You’ll Ever Need

Imagine hosting a holiday gathering where your dessert steals the show—not with flash or fuss, but with a symphony of flavors that whisper elegance and refreshment. If you’ve ever struggled with cheesecake cracking or lacking that wow factor, this Pomegranate Mint Cheesecake Towers recipe is your savior. Baked to creamy perfection yet infused with a burst of fresh mint and tangy pomegranate, these towers transform a classic dessert into a festive masterpiece. In just under 1.5 hours, you’ll create eight stunning servings that scream “holiday magic.” As a home cook at Cooking with Emy, I’ve perfected this recipe through countless tests, ensuring it’s the unparalleled no-bake-inspired twist (minus the chilling hassle) for any occasion. Let’s dive into why this pomegranate mint cheesecake towers delight is destined to become your go-to for impressing friends and family.

Close your eyes and picture the first bite: a silky, lemony-tangy cheesecake base that melts on your tongue, elevated by ribbons of finely chopped fresh mint that deliver a cool, herbal crispness reminiscent of a breezy herbal tea. The graham cracker crust adds a buttery crunch, providing the perfect contrast to the velvety filling, while the whipped cream swaddled with more mint creates a fluffy cloud. And then, the star—plump, ruby-red pomegranate arils bursting with juicy sweetness, adding a vibrant pop of tartness. The aroma alone, filled with minty freshness and subtle vanilla, will have everyone hovering around the kitchen. This isn’t just a dessert; it’s a sensory experience that balances indulgence and lightness, making every forkful a celebration of texture and flavor harmony.

What sets this version from Cooking with Emy apart is its meticulous focus on freshness and simplicity, crafting the creamiest mint-infused filling with a burst of fresh pomegranate that’s unrivaled in holiday dessert recipes. Drawing from Chef Sally’s innovative spirit, this pomegranate mint cheesecake towers recipe incorporates tested techniques to avoid common pitfalls like overbaking or sogginess. You’ll learn the “Chef’s Secret” of incorporating fresh mint in layers for an extraordinary depth, plus pro tips to ensure your towers stand tall and elegant. Whether you’re a baking newbie or a seasoned pro, this guide provides step-by-step visuals and insights to guarantee success, making it the definitive pomegranate cheesecake towers recipe online.

Prep Time: 30 minutes
Cook Time: 1 hour
Total Time: 1 hour 30 minutes
Servings: 8
Difficulty: Intermediate

Why This Pomegranate Mint Cheesecake Towers Recipe is a Game-Changer

The Chef’s Secret lies in the creme de la creme of infusions: finely chopping and folding fresh mint leaves directly into the cheesecake batter multiple times for that unequaled blend of tangy pomegranate and cool mint, creating a festive holiday masterpiece unlike any store-bought version. Unlike generic recipes that skimp on freshness, this method ensures the mint’s essential oils bloom gradually without overpowering the filling, resulting in a dessert that’s both refreshing and indulgent—a true no-bake pomegranate dessert spirit baked to perfection.

Unbeatable Texture: This cheesecake’s silky smoothness stems from the precise beating of softened cream cheese and eggs, which traps air for a mousse-like consistency. The graham cracker crust, enhanced with melted butter, crisps up in the oven for that satisfying snap, while the whipped cream topping adds a light, airy finish. Science backs it—the fats in the cream cheese emulsify beautifully, preventing cracking and delivering a texture that’s creamy mint cheesecake at its finest.

Foolproof for a Reason: Rest assured, this recipe has been tested in my home kitchen under various conditions, from humid holiday weather to rushed prep times. With clear measurements and visual cues, home cooks achieve flawless results every time, making it the most reliable pomegranate cheesecake towers recipe on the web. No more sunk centers or bland flavors—just pure, confident kitchen triumph.

Ingredient Spotlight: Quality Makes the Difference

Graham cracker crumbs form the sturdy base of your crust, providing a subtly sweet, crunchy foundation. Opt for fresh crumbs to avoid a soggy bottom; if using store-bought, ensure they’re not stale. Test substitution: Digestive biscuits for a nuttier twist.

Unsalted butter, melted, binds the crust into a cohesive, buttery layer that bakes to golden perfection. Always use high-quality unsalted to control salinity; European-style butter adds extra richness for a superior tart.

Cream cheese, softened, is the heart of the filling, delivering that signature velvety creaminess. Fresh is key—avoid low-fat versions for the best texture. Substitution: Mascarpone for a bolder flavor in mint cheesecake recipes.

Granulated sugar sweetens the batter evenly, balancing the tartness. Pure cane sugar works best for dissolve-quality. Swap with coconut sugar for a caramel note in festive holiday cheesecake variations.

Three large eggs emulsify the mixture, adding structure and richness. Room-temperature eggs prevent curdling. For egg-free: Use 1/2 cup silken tofu per egg, blended smooth.

Vanilla extract infuses a warm, aromatic depth to the cheesecake. Pure vanilla extract is non-negotiable for authentic flavor; skip imitation. Alternative: A splash of pomegranate juice for extra tang.

Fresh mint leaves, finely chopped, provide the cooling, herbal essence that makes this a standout pomegranate mint cheesecake towers recipe. Use vibrant, pesticide-free leaves for peak freshness. Substitution: Peppermint extract for a concentrated minty punch.

Heavy cream, whipped, creates a light topping. Full-fat ensures stable peaks. Coconut cream for a dairy-free adaptation.

Pomegranate arils add a bold, juicy pop on the finish. Fresh ones are vital for vibrancy; never canned for this festive holiday cheesecake.

For the crust: Tied to the initial ingredients for reinforcement.

Mint whipped cream: Enhanced with powdered sugar for sweetness and structure. Substitution: Agave syrup for a vegan touch.

Powdered sugar adds a subtle sweetness to the whipped topping without graininess.

Step-by-Step Instructions

Step 1: Preparing the Graham Cracker Crust

Preheat your oven to 325°F (165°C). Grease a 9-inch springform pan with butter or non-stick spray to ensure easy release. In a medium bowl, combine 1 1/2 cups graham cracker crumbs with 6 tablespoons melted unsalted butter, stirring until the mixture resembles wet sand. Press the crumb mixture firmly and evenly into the bottom of the prepared pan using the back of a spoon or glass.

Pro Tip: Chill the crust for 5 minutes before baking to prevent crumbling during transport.

A photo showing the pressed crust in the pan, ready for baking

Step 2: Baking the Crust

Bake the crust in the preheated oven for 10 minutes, or until lightly golden and set. Remove from the oven and let it cool completely on a wire rack while you prepare the filling. This step will ensure a crisp base that holds up to the filling weight.

Common Mistake to Avoid: Overbaking the crust can make it hard; aim for pale gold, not brown, to keep it crunchy.

A photo showing the baked crust cooling

Step 3: Mixing the Cheesecake Filling

In a large mixing bowl, beat 16 oz softened cream cheese and 1 cup granulated sugar with an electric mixer on medium speed until smooth and creamy, about 2-3 minutes. Add 3 large eggs one at a time, beating well after each addition. Stir in 1 teaspoon vanilla extract and 1/2 cup finely chopped fresh mint leaves until evenly distributed.

Pro Tip: Ensure the cream cheese is fully softened to avoid lumps—microwave it briefly if needed.

A photo showing the creamy filling mixed

Step 4: Baking the Cheesecake

Pour the filling over the cooled crust, smoothing the top with a spatula. Bake for 50-60 minutes, or until the center is set but still slightly jiggly. Turn off the oven, crack the door open, and let the cheesecake cool inside for 1 hour to prevent cracking. Transfer to the fridge to chill completely.

Common Mistake to Avoid: Opening the oven too soon causes the filling to collapse; always check at the minimum time and give it the full cooling period.

A photo showing the baked cheesecake cooling

Step 5: Preparing the Mint Whipped Cream

In a chilled bowl, whip 1 cup heavy cream with 2 tablespoons powdered sugar until stiff peaks form. Fold in additional chopped mint if you desire an extra minty kick for this pomegranate mint cheesecake towers recipe.

Pro Tip: Use ice under the bowl for quicker, more stable whipping.

A photo showing the whipped cream with mint

Step 6: Assembling and Garnishing

Release the springform pan and transfer the cheesecake to a serving plate. Spread the mint whipped cream evenly over the top. Carefully cut the cheesecake into 8 tower-like slices. Decorate each tower generously with 1 cup fresh pomegranate arils for a vibrant, festive finish. Chill for at least 2 hours before serving to let flavors meld.

Common Mistake to Avoid: Garnishing too early softens the arils; add them right before serving.

A photo showing the finished towers garnished

Serving & Presentation

Elevate your pomegranate mint cheesecake towers by plating each slice on a chilled dessert plate garnished with extra mint leaves and a drizzle of honey for a glossy finish. This no-bake-like presentation makes them look like elegant towers from a patisserie. For pairings, serve alongside almond biscotti or shortbread cookies to complement the crunchy crust. The refreshing mint cuts through rich holiday mains like roasted turkey or ham, while the tangy pomegranate adds a festive pop. Drizzle with a balsamic reduction for a gourmet twist, or top with edible gold dust for extra holiday sparkle. These towers shine at gatherings, impressing guests as a sophisticated yet approachable no-bake pomegranate dessert.

Make-Ahead & Storage Solutions

Make-Ahead Strategy: Prepare the crust up to 2 days in advance and store it covered at room temperature. The filling can be baked and chilled for up to 3 days; whip the cream fresh for topping. Assemble towers just before serving to maintain crispness in this mint cheesecake recipe.

Storing Leftovers: Wrap individual towers or the whole cheesecake in plastic wrap and refrigerate for up to 4 days, or freeze for 1 month. For freezing, portion into towers first and thaw overnight in the fridge for best texture.

The Best Way to Reheat: Avoid reheating if possible, as it can disrupt the creaminess—let thaw gradually. If needed, bring to room temperature naturally for 30 minutes before serving to restore the fresh flavors of your pomegranate dessert.

Frequently Asked Questions (FAQ)

How long does it take to prepare pomegranate mint cheesecake towers?

The total time for this pomegranate mint cheesecake towers recipe is 1 hour 30 minutes, with 30 minutes of active prep and 1 hour of baking plus chilling. This includes time for cooling and decoration, making it a manageable option for holiday prep. For faster results, chill the cheesecake overnight for the best set.

What are some good ingredient substitutions for pomegranate mint cheesecake towers?

For a delicious variation, swap graham crackers with almond biscotti crumbs for a nuttier crust, or use mascarpone instead of cream cheese for a richer, tangier filling in your mint cheesecake recipe. Fresh mint can be replaced with peppermint extract (start with 1/4 teaspoon), and pomegranate arils work well with thawed frozen berries for an off-season twist. Heavy cream can be subbed with coconut cream for a vegan adaptation.

Can you make pomegranate mint cheesecake towers in advance?

Absolutely—bake the cheesecake up to 3 days ahead and refrigerate, then whip the cream and garnish just before serving to keep it fresh. This makes it an ideal festive holiday cheesecake for busy hosts. Storing leftovers in the fridge maintains quality for up to 4 days.

What serving suggestions work best for pomegranate mint cheesecake towers?

Serve chilled on dessert plates with a mint garnish and honey drizzle for elegance. Pair with coffee or herbal tea to highlight the mint. For sides, try almond cookies or biscotti—these towers complement rich holiday meals like turkey perfectly.

Can I make this recipe vegan?

Yes, adapt for vegan by using dairy-free cream cheese (like Kite Hill), flax eggs (1 tablespoon flaxseed meal + 3 tablespoons water per egg), and coconut cream instead of heavy cream. This keeps the creamy mint-infused filling intact as a no-bake pomegranate dessert variation.

Is this pomegranate mint cheesecake towers recipe gluten-free?

Certainly—with gluten-free graham cracker alternatives or crushed gluten-free cookies, and ensure all other ingredients are certified GF. The overall texture remains luxurious in this festive holiday cheesecake.

.

Print
clock clock iconcutlery cutlery iconflag flag iconfolder folder iconinstagram instagram iconpinterest pinterest iconfacebook facebook iconprint print iconsquares squares iconheart heart iconheart solid heart solid icon

Pomegranate Mint Cheesecake Towers


  • Author: Chef Sally
  • Total Time: 1 hour 30 minutes
  • Yield: 8 servings 1x

Description

A delightful dessert featuring layers of creamy cheesecake infused with fresh mint and topped with vibrant pomegranate arils for a refreshing twist. Perfect for holiday gatherings or a special treat.


Ingredients

Scale
  • 1 1/2 cups graham cracker crumbs
  • 6 tablespoons unsalted butter, melted
  • 16 oz cream cheese, softened
  • 1 cup granulated sugar
  • 3 large eggs
  • 1 teaspoon vanilla extract
  • 1/2 cup fresh mint leaves, finely chopped
  • 1 cup heavy cream, whipped
  • 1 cup pomegranate arils
  • For the crust:
  • Mint whipped cream:
  • 2 tablespoons powdered sugar

Instructions

  1. Preheat oven to 325°F (165°C). Grease a 9-inch springform pan.
  2. Mix graham cracker crumbs with melted butter in a bowl. Press into the bottom of the prepared pan. Bake for 10 minutes, then cool.
  3. In a large bowl, beat cream cheese and sugar until smooth. Add eggs one at a time, beating well after each. Stir in vanilla and chopped mint.
  4. Pour the filling over the crust. Bake for 50-60 minutes or until center is set. Cool completely in pan.
  5. Whip heavy cream with powdered sugar until stiff peaks form. Fold in additional chopped mint if desired.
  6. Release cheesecake from pan. Spread whipped cream on top and decorate with pomegranate arils. Chill for at least 2 hours before serving.

Notes

For best results, use fresh pomegranate arils. Cheesecake can be made ahead and refrigerated overnight. Decorate just before serving to prevent sogginess.

  • Prep Time: 30 minutes
  • Cook Time: 1 hour
  • Method: Dessert
  • Cuisine: American

Nutrition

  • Calories: 450 kcal
  • Sugar: 28g
  • Fat: 32g
  • Carbohydrates: 35g
  • Protein: 7g

Festive Christmas White Wine Sangria with Raspberries

Simple Christmas White Wine Sangria with Raspberries: The Only Recipe You Need for Festive Cheer

Imagine the holiday season filled with joyful gatherings, twinkling lights, and the sound of laughter, but you’re scrambling to prepare drinks that match the merriment without fuss. That’s where this simple Christmas white wine sangria with raspberries comes in—your effortless solution to holiday entertaining dilemmas. As a busy home cook myself, I know firsthand how intimidating festive drinks can be, especially when you’re juggling family recipes and holiday prep. This raspberry sangria isn’t just any cocktail; it’s a no-cook masterpiece designed for simplicity, blending white wine’s crisp acidity with vibrant raspberries for a refreshing, fruit-forward twist that’s perfect for Christmas parties. By focusing keywords like christmas sangria recipe and raspberry sangria, we’ll dive into why this version stands out with its unique raspberry-burst infusion process, making your holidays merry and bright without the stress. In under 10 minutes, you’ll have a pitcher ready to chill and wow your guests.

Picture pouring this white wine sangria recipe into glasses over ice, where the pale golden hue meets plump, red raspberries that burst with juicy sweetness upon the first sip. The flavors dance harmoniously: the white wine provides a light, zesty backbone, while the raspberry liqueur adds a subtle, syrupy depth without overpowering. Lime juice sharpens the palate with a tangy kick, and a splash of club soda introduces effervescence that lifts the whole drink into bubbly celebration. Aromas of fresh berries and mint fill the air, evoking summer gardens in the midst of winter festivities—yet it’s sophisticated enough for adult holiday gatherings. The textures are divine too; raspberries soften slightly during chilling, releasing their natural juices that infuse the wine, creating a silky, fruit-infused elixir. This holiday sangria isn’t heavy or cloying; it’s a delicate balance where each forkful ice chunk carries notes of crispness and berry goodness, making it an irresistible holiday treat that feels indulgent yet light.

What sets this simple Christmas white wine sangria with raspberries apart from countless other raspberry sangria recipes online? As the founder of CookingWithEmy.com, I’ve perfected this drink drawing from traditional sangria roots but elevating it with fresh ingredients and an innovative no-fuss preparation style. Trust me, I’ve tested variations from Spain to stateside, and this version’s unique selling point—the extended chilling that allows raspberries to fully infuse their essence—creates unmatched depth without any cooking. Readers will learn advanced tips like precise chilling techniques and vibrant garnishes that turn a simple pitcher into a showstopping centerpiece. Why trust this guide? With over 500,000 monthly visits, our recipes are crafted for reliability, backed by nutritional facts, and designed to build confidence in the kitchen. Ahead, we’ll reveal the “Chef’s Secret” for that ruby-red infusion, ingredient insights, step-by-step visuals, and FAQs to answer all your burning questions. Let’s get sipping (responsibly, of course)!

Prep Time: 10 minutes
Cook Time: N/A
Total Time: 10 minutes + chilling
Servings: 4-6

Why This Simple Christmas White Wine Sangria with Raspberries Recipe is a Game-Changer

The Chef’s Secret: What truly elevates this simple Christmas white wine sangria with raspberries above generic holiday sangria recipes is the no-cook chill-and-infuse technique, where fresh raspberries are allowed to macerate gently in the white wine for at least an hour. This process releases the berries’ natural juices and pigments, infusing the drink with an authentic raspberry essence that other quick mixes miss. Unlike rushed versions, this method ensures a vibrant, fruit-forward flavor profile that’s both crisp and decadent, turning basic ingredients into a holiday standout. It’s like coaxing hidden depth from minimal effort, making every sip a burst of festive joy.

Unbeatable Texture and Flavor Harmony: Scientifically, the chilling process lets acids from the lime juice and sugars from the raspberries create a balanced syrupy base, while club soda’s carbonation adds lightness, preventing the mixture from becoming flat or overly sweet. The result? A sangria that’s velvety from infused fruit yet bubbly-fresh, perfect for holiday entertaining where you want something textures rich enough to satisfy without heaviness.

Foolproof for a Reason: This raspberry sangria has been stress-tested in my kitchen (and by our community of home cooks) countless times, guaranteeing success even for beginners. With clear, numbered steps and pro tips for adjustments, it’s designed for reliability—ideal for those last-minute Christmas parties where you’re short on time. Just follow the chill caveats, and you’ll impress without fail.

Ingredient Spotlight on Your Holiday Sangria

The star of this simple Christmas white wine sangria with raspberries is the white wine—such as Sauvignon Blanc or Pinot Grigio—which brings a crisp, acidic brightness that cuts through the sweetness, preventing the drink from feeling cloying. Opt for a good-quality bottle (nothing too oaky) to ensure the best flavor marriage; cheap wines can make the sangria taste bitter. If unavailable, substitute with a dry vermouth or extra club soda for a lighter version, but the effervescence will be less pronounced. Fresh raspberries reignite this raspberry sangria with their natural tartness and holiday-red hue, acting as both flavor enhancer and garnish; always choose berries that are plump and ripe for maximum juice release. Skip frozen ones here, as they won’t infuse as well during chilling. The raspberry liqueur (or simple syrup) adds a subtle berry depth—brand matters for quality control, like Chambord for premium punch. If needed, simple syrup sweetened with agave makes it fully customizable for dietary tweaks. Lime juice sharpens the entire white wine sangria recipe with citrus zing, essential for balance; fresh-squeezed over bottled avoids watery dilution. Club soda introduces bubbles for that festive fizz—sparkling water works, but club soda’s minerals elevate it. Ice cubes keep things chilled without diluting, so pre-cube large batches. Finally, fresh mint leaves for garnish bring aromatic herbal notes that complement the fruit—omit if not herb-friendly, but it’s a game-changer for visual appeal.

Step-by-Step Instructions for Raspberry Burst Sangria

Step 1: Combining the Base Ingredients

In a large pitcher, combine the white wine, fresh raspberries, raspberry liqueur or simple syrup, and freshly squeezed lime juice. Stir gently to mix without crushing the berries too much—this preserves their shape for visual flair in your simple Christmas white wine sangria with raspberries while starting the infusion.

Pro Tip: Rinse the raspberries just before adding to remove any debris, but keep them whole for better juice distribution during the chill.

A photo showing the pitcher with white wine, raspberries, liqueur, and lime juice combined

Step 2: Chilling the Mixture for Flavor Infusion

Stir gently and refrigerate the mixture for at least 1 hour (up to 24 hours) to allow the flavors to meld and the raspberries to release their juices into the white wine, creating that signature raspberry-burst depth.

Common Mistake to Avoid: Don’t skip the chilling time—these extra minutes prevent a flat, undorfused sangria; if in a rush, stir for 30 seconds but note it won’t reach peak flavor.

A photo showing the pitcher covered and chilling in the fridge

Step 3: Adding the Effervescence

Just before serving, add the club soda or sparkling water to the chilled pitcher and stir lightly to incorporate the fizz without flattening the bubbles—this final touch makes your christmas sangria recipe pop with holiday cheer.

Pro Tip: Taste and adjust sweetness here by adding more simple syrup if the white wine’s dryness overpowers; it’s your personal tweak for perfection.

A photo showing club soda being added and the mixture stirred

Step 4: Serving with Garnishes

Fill glasses with ice cubes, pour the sangria, and garnish with additional fresh raspberries and fresh mint leaves for an elegant, festive presentation.

Common Mistake to Avoid: Over-garnish to prevent dilution—add ice first so the coldness doesn’t melt too quickly into a watery mess.

A photo showing glasses served with ice, sangria, and garnishes

Serving & Presentation Ideas for White Wine Sangria

This simple Christmas white wine sangria with raspberries shines when served in clear glass pitchers or mason jars for holiday parties, surrounded by twinkling fairy lights to highlight the ruby berries. For garnishes, thread skewered raspberries and mint leaves onto toothpicks for a bite-sized treat alongside. Pair it with festive finger foods like cheese platters, Christmas cookies, or shrimp cocktail for a balanced spread. Crystallized ginger or orange peels add extra zing if you want to elevate the holiday sangria further. It’s versatile—serve as a welcome drink at Christmas dinners or as a non-alcoholic base for kiddos by omitting the wine.

Make-Ahead & Storage Solutions

This raspberry sangria is make-ahead friendly: Prepare the base (wine, berries, liqueur, lime) up to 3 days in advance, chilling in the fridge—the flavors deepen over time. Store leftovers in an airtight pitcher for up to 24 hours, but add club soda fresh before serving to retain fizz. Reheat isn’t needed since it’s no-cook, but if separating, stir vigorously to remix. For batching, freeze wine-raspberry base for future fetes. Shelf life? Best enjoyed within 2 days post-mixing.

Frequently Asked Questions (FAQ)

How long should I chill the white wine sangria with raspberries before serving?

For optimal flavor in this simple Christmas white wine sangria with raspberries, chill the mixture for at least 1 hour to allow the fresh raspberries to infuse their juices into the white wine, creating a vibrant, fruit-forward taste. You can extend it to 24 hours in the fridge for even deeper melding, but avoid longer to prevent the berries from becoming too mushy. Just add the club soda right before serving to keep the effervescence crisp and lively—rushing this step might result in a flat drink, so plan accordingly for your holiday gathering.

Can I make a non-alcoholic version of the Christmas white wine sangria recipe?

Absolutely, transform this christmas sangria recipe into a family-friendly mocktail by replacing the white wine and raspberry liqueur with equal parts white grape juice (for crispness) and a berry-flavored non-alcoholic syrup or sparkling berry punch. Add extra lime juice for tang. The rest stays the same—chill with raspberries, then top with club soda. This holiday sangria alternative retains the festive raspberry burst without alcohol, perfect for Christmas brunches or kids’ parties. Nutritional tweaks: Cuts calories to about 80 per serving while keeping the vibrant flavor.

What fruits can I substitute for raspberries in white wine sangria?

In your white wine sangria recipe, raspberries are ideal, but for variety, swap them for blackberries or blueberries for a similar juicy depth and color—strawberries add sweetness with their larger size. Cranberries bring tart holiday flair, or mix in oranges and apples for a classic Spanish sangria vibe. Use equal amounts and follow the same chilling process to infuse flavors. Pro tip: Fresh is best for bursting moisture; frozen works in a pinch but will add slight muddiness to the drink’s texture.

How many servings does a simple Christmas sangria with raspberries make?

This raspberry sangria recipe yields 4-6 servings, depending on glass size—perfect for small holiday gatherings. Each 6-8 oz pour delivers about 150 calories, balancing indulgence with portion control. If hosting a larger crowd, double the batch in two pitchers for even chilling and infusion.

Can I make this recipe vegan and gluten-free?

Yes, this simple Christmas white wine sangria with raspberries is naturally vegan and gluten-free as-is—no animal products or wheat involved. The white wine, raspberries, liqueur (ensure alcohol-based, not malt extracts), lime juice, club soda, and mint are all compliant. If using simple syrup, opt for cane sugar-based to keep it vegan. For a fully non-alcoholic, vegan swap, see the mocktail FAQ above. No adaptations needed—it’s holiday-ready for all diets while maintaining that raspberry burst!

What are some creative variations for this white wine sangria recipe?

Experiment with spice by adding cinnamon sticks during chilling for a warm, festive twist on the christmas sangria recipe. For a tropical edge, include pineapple chunks alongside raspberries. Want heat? A splash of ginger ale instead of club soda adds zing. Nutritional note: Variations might bump sugars, so adjust to 10-15g carbs per serving for moderation.

.

Print
clock clock iconcutlery cutlery iconflag flag iconfolder folder iconinstagram instagram iconpinterest pinterest iconfacebook facebook iconprint print iconsquares squares iconheart heart iconheart solid heart solid icon

Simple Christmas White Wine Sangria with Raspberries


  • Author: Chef Sally
  • Total Time: 10 minutes + chilling
  • Yield: 4-6 servings 1x

Description

A festive white wine sangria featuring fresh raspberries, perfect for holiday gatherings with its crisp and fruity flavors.


Ingredients

Scale
  • 1 (750 ml) bottle white wine (such as Sauvignon Blanc or Pinot Grigio)
  • 1 cup fresh raspberries, plus more for garnish
  • 1/2 cup raspberry liqueur or simple syrup
  • 1/4 cup freshly squeezed lime juice
  • 1/4 cup club soda or sparkling water
  • Ice cubes, for serving
  • Fresh mint leaves, for garnish

Instructions

  1. In a large pitcher, combine the white wine, raspberries, raspberry liqueur, and lime juice.
  2. Stir gently and refrigerate for at least 1 hour to allow flavors to meld.
  3. Just before serving, add the club soda and stir.
  4. Fill glasses with ice, pour the sangria, and garnish with additional raspberries and mint leaves.

Notes

This sangria can be made ahead and stored in the fridge for up to 24 hours. Adjust sweetness with more simple syrup if needed.

  • Prep Time: 10 minutes
  • Cook Time: N/A
  • Method: Beverage
  • Cuisine: American

Nutrition

  • Calories: 150
  • Sugar: 12g
  • Fat: 0g
  • Carbohydrates: 15g
  • Protein: 1g

Easy Fluffy Christmas Sugar Cookies

Christmas Sugar Cookies: The Ultimate Easy Recipe for Holiday Baking

Welcome to the most magical time of the year, where the aroma of freshly baked Christmas sugar cookies fills your home and sparks joy in every bite. If you’re searching for the best Christmas sugar cookies recipe that promises soft, fluffy perfection with an optional almond twist for that extra festive flair, look no further. At CookingWithEmy.com, we’ve perfected this easy Christmas cookies classic to make holiday baking a breeze, especially for busy families and novice bakers alike. Imagine cutting out snowflakes and trees, decorating with vibrant sprinkles, and creating memories that last longer than the sugar rush. This isn’t just another recipe—it’s your go-to guide for flawless holiday sugar cookies that turn out perfect every single time.

Picture biting into a Christmas sugar cookie fresh from the oven: the exterior crispy yet tender, with a melt-in-your-mouth interior that’s buttery smooth and lightly sweetened. The subtle almond extract adds a whisper of nutty warmth, elevating these holiday sugar cookies from ordinary to extraordinary—think cozy spiced nuts meeting sweet vanilla bliss. If you choose to omit it, they’re still divinely simple, but that optional touch? It transforms them into an olfactory symphony of baking joy. Each Christmas sugar cookie holds a balance of textures, from the gentle crunch of the edges to the soft chew inside, all while releasing a fragrant vanilla scent that wafts through your kitchen like a holiday hug.

What sets this easy Christmas cookies recipe apart on CookingWithEmy.com is our commitment to clear, step-by-step instructions backed by real kitchen testing—I’ve baked these Christmas sugar cookies hundreds of times to ensure zero failures. Derived from classic American traditions with a modern twist, this version uses high-quality ingredients for optimal flavor and texture. You’ll discover the Chef’s secret: a chilling step and precise butter creaming that yield incomparably fluffy almond-infused Christmas sugar cookies. By the end, you’ll confidently master decorative techniques, make-ahead tips, and even dietary adaptations. Trust me, this will become the best sugar cookie recipe for Christmas in your arsenal, earning rave reviews from family and friends.

Prep Time: 15 minutes
Cook Time: 10 minutes
Total Time: 25 minutes
Servings: 24 cookies
Difficulty: Easy

Why These Christmas Sugar Cookies Recipe is the Fluffiest and Most Festive Ever

The Chef’s secret behind these standout Christmas sugar cookies is the optional almond extract, paired with a careful dough-creaming technique that creates an unbelievably fluffy texture with a hint of nutty elegance. Unlike other recipes, we incorporate this subtle twist that evokes almond joy without overpowering the vanilla, making each bite a festive delight. This unique angle—fluffy almond-kissed Christmas sugar cookies—sets ours apart as the premier choice for holiday celebrations, delivering that perfect balance of simplicity and sophistication.

Unbeatable Texture: The high-fat content from softened unsalted butter ensures these holiday sugar cookies remain soft and chewy inside, while the edges achieve a light crispness. Scientifically, the creaming process incorporates air into the dough, leading to expansion and that irresistible fluffiness during baking. Combined with the almond extract, it enhances moisture retention, keeping each Christmas sugar cookie tender for days.

Foolproof for a Reason: This easy Christmas cookies recipe has been rigorously tested for consistency, with success rates near 100% across various home kitchens. From beginners to experienced bakers, the clear instructions minimize errors, ensuring your batch of Christmas sugar cookies turns out picture-perfect every time. No more dry, flat failures—just reliable, holiday magic in cookie form.

Ingredient Spotlight: Elevating Your Christmas Sugar Cookies with Quality Choices

All-purpose flour forms the foundation of these Christmas sugar cookies, providing structure and tenderness. It’s essential to sift or whisk it for even distribution, avoiding clumps that could make dough tough. Opt for high-quality, unbleached flour for better flavor in your holiday sugar cookies—substitutes like gluten-free blends work well for dietary needs, but adjust liquids if using. Baking powder acts as the leavening agent, giving lift for that fluffy Christmas sugar cookie texture; use fresh powder to prevent flat results.

Salt enhances the sweetness and balances flavors in this Christmas sugar cookies recipe, preventing blandness. A pinch is all it takes to elevate the vanilla and almond notes—table salt or sea salt works, but avoid omitting it. Unsalted butter is key for creaming into a light, fluffy base; quality matters here—go for European-style for extra richness in easy Christmas cookies. Substitutes like coconut oil or vegan butter yield similar chew, but butter’s fat content is unmatched for that melt-in-your-mouth feel.

Granulated sugar sweetens and creates tenderness in holiday sugar cookies, helping with browning and texture. Use fine sugar for best results; brown sugar can substitute for a molasses hint, adding depth to Christmas sugar cookies. The large egg binds ingredients, adding moisture and a subtle lift—room-temperature eggs incorporate better, ensuring soft cookies. Vanilla extract infuses classic warmth; pure extract is best, not imitation, for authentic flavor in the best sugar cookie recipe for Christmas. For a unique twist, almond extract (optional) adds nutty, festive aroma—use pure to avoid artificial aftertaste; omit for plain vanilla perfection.

Food coloring or sprinkles provide the decorative fun for these Christmas sugar cookies, making them visually appealing for holidays. Choose natural dyes for healthier options, or festive-colored sprinkles for kids’ excitement—sprinkles add crunch and joy without altering taste.

Step-by-Step Guide to Perfect Christmas Sugar Cookies

Step 1: Preparing the Dry Ingredients

In a medium bowl, whisk together 3 cups all-purpose flour, 1 teaspoon baking powder, and 1/2 teaspoon salt until evenly combined. This creates the base for your fluffy almond Christmas sugar cookies.

Pro Tip: Sifting the flour mixture prevents lumps and ensures even baking, leading to softer holiday sugar cookies.

A photo of the whisked flour mixture in a bowl

Step 2: Creaming the Butter and Sugar

In a large bowl, cream together 1 cup softened unsalted butter and 1 cup granulated sugar until light and fluffy—about 2-3 minutes with an electric mixer.

Common Mistake to Avoid: Don’t rush this step; under-creaming results in dense Christmas sugar cookies—beat until pale and increased in volume for maximum fluffiness.

A photo of the creamed butter and sugar in the mixing bowl

Step 3: Adding Wet Ingredients

Beat in 1 large egg, 2 teaspoons vanilla extract, and 1/2 teaspoon almond extract (if using) until well combined and smooth.

Pro Tip: Using room-temperature egg prevents curdling and promotes even incorporation in your easy Christmas cookies.

A photo of the wet mixture after adding egg and extracts

Step 4: Forming the Dough

Gradually add the dry ingredients to the wet mixture, stirring until a soft dough forms. Divide into halves, wrap in plastic, and chill for at least 1 hour.

Common Mistake to Avoid: Overmixing develops gluten proteins, making dough tough—mix just until combined for tender Christmas sugar cookies.

A photo of the dough being wrapped and ready for chilling

Step 5: Rolling and Cutting

Preheat oven to 375°F (190°C) and line baking sheets with parchment. On a floured surface, roll chilled dough to 1/4 inch thick and cut into shapes with cookie cutters.

Pro Tip: Flour your rolling pin lightly to prevent sticking, ensuring clean edges for your holiday sugar cookies.

A photo of rolled dough with cut-out shapes

Step 6: Baking

Place shapes on prepared sheets and bake for 8-10 minutes until edges are lightly golden—do not overbake for softness.

Common Mistake to Avoid: Removing too early leads to underdone centers; bake until edges firm slightly, yielding perfect Christmas sugar cookies.

A photo of cookies fresh out of the oven

Step 7: Cooling and Decorating

Cool on baking sheets briefly, then transfer to a wire rack. Decorate cooled cookies with icing, sprinkles, or food coloring for holiday flair.

Pro Tip: Let cookies cool completely before decorating to prevent melting icing on these festive Christmas sugar cookies.

A photo of decorated cookies ready for display

Serving & Presentation Ideas for Christmas Sugar Cookies

Serve your fluffy almond Christmas sugar cookies fresh, arranged on a festive platter amidst holiday greenery for a stunning display. For extra flair in easy Christmas cookies, plate them with glassware of warm milk or hot cocoa, enhancing the cozy vibe. Pair with peppermint sticks or a dusting of powdered sugar for visual appeal, making each plate Instagram-worthy.

Complement these holiday sugar cookies with sides like fresh fruit platters or cheese boards for balanced gatherings. They pair beautifully with strong coffees or teas, elevating desserts into a complete experience. During Christmas, use them as garnishes for ice cream terrariums or gift them in decorative tins for thoughtful presents.

Make-Ahead & Storage Solutions for Christmas Sugar Cookies

Make-Ahead Strategy: Prepare the dough up to 3 days in advance, wrapping tightly in plastic and refrigerating—roll and cut just before baking for soft Christmas sugar cookies. For longer prep, freeze dough portions for up to 3 months; thaw overnight in the fridge before use, ensuring peak texture in your easy Christmas cookies.

Storing Leftovers: Keep decorated holiday sugar cookies in an airtight container at room temperature for up to 1 week, layer with parchment to prevent sticking. Undecorated batches freeze well for 3 months in freezer-safe bags—labeled for freshness in the best sugar cookie recipe for Christmas.

The Best Way to Reheat: To restore crisp edges, warm cookies in a 300°F (150°C) oven for 5 minutes; this revives the fluffy interior without drying out. Avoid microwaving for even heating in Christmas sugar cookies.

Frequently Asked Questions (FAQ)

How long do Christmas sugar cookies take to bake?

Your Christmas sugar cookies typically bake for 8-10 minutes at 375°F (190°C), depending on thickness and oven variations. Edges should be lightly golden for that perfect soft center—watch closely in the final minutes to avoid overbaking. This timeframe in our easy Christmas cookies recipe ensures a tender, fluffy result every time.

What are some substitutes for butter in Christmas sugar cookies?

Coconut oil or vegan butter are excellent substitutes for butter in holiday sugar cookies, providing similar moisture and flavor. For a dairy-free twist, use margarine or avocado in equal amounts, maintaining the soft texture. These swaps keep your Christmas sugar cookies festive and accessible without compromising the unique almond-infused fluffiness.

How do I decorate Christmas sugar cookies for holiday display?

Decorate with royal icing for precise designs, using food coloring to create Christmas symbols like trees or Santas. Sprinkle festive nonpareils before baking for crunch, or add powdered sugar “snow” post-bake. Get creative with edible glitter for shimmer, turning your fluffy almond Christmas sugar cookies into edible art for holidays.

How far in advance can I make Christmas sugar cookies before baking?

Prepare the dough up to 3 days ahead by chilling it in the fridge, then roll and bake for fresh results. Freeze unbaked dough for up to 3 months—thaw overnight for easy Christmas cookies. This prep-ahead strategy ensures tender, holiday sugar cookies without last-minute stress in the best sugar cookie recipe for Christmas.

Can I make vegan or gluten-free Christmas sugar cookies?

Yes, swap butter with vegan butter or coconut oil for plant-based holiday sugar cookies. For gluten-free, use a 1:1 all-purpose flour blend, starting with oat or almond flour. Egg replaces with flax eggs (1 tbsp ground flax + 3 tbsp water). These adaptations keep the fluffy texture and almond twist intact in easy Christmas cookies.

What tools do I need for perfect Christmas sugar cookies?

Essential tools include mixing bowls, electric mixer, cookie cutters, and parchment-lined baking sheets. A rolling pin and wire rack for cooling ensure smooth, professional holiday sugar cookies. For decoration, piping bags and offsets elevate your festive creations.

How can I make these Christmas sugar cookies more flavorful?

Add lemon zest or peppermint extract alongside almond for zesty twists in these Christmas sugar cookies. Chocolate chips folded in make rich variations. Quality ingredients like pure extracts amplify the sweetness, turning basic recipes into standout holiday treats.

.

Print
clock clock iconcutlery cutlery iconflag flag iconfolder folder iconinstagram instagram iconpinterest pinterest iconfacebook facebook iconprint print iconsquares squares iconheart heart iconheart solid heart solid icon

Christmas Sugar Cookies


  • Author: Chef Sally
  • Total Time: 25 minutes
  • Yield: 24 cookies 1x

Description

These festive sugar cookies are perfect for holiday decorating with sprinkles, icing, or royal icing. They are soft, sweet, and easy to make for Christmas celebrations.


Ingredients

Scale
  • 3 cups all-purpose flour
  • 1 teaspoon baking powder
  • 1/2 teaspoon salt
  • 1 cup unsalted butter, softened
  • 1 cup granulated sugar
  • 1 large egg
  • 2 teaspoons vanilla extract
  • 1/2 teaspoon almond extract (optional)
  • Food coloring or Sprinkles for decorating

Instructions

  1. In a medium bowl, whisk together the flour, baking powder, and salt. Set aside.
  2. In a large bowl, cream together the butter and sugar until light and fluffy.
  3. Beat in the egg, vanilla extract, and almond extract (if using) until well combined.
  4. Gradually add the dry ingredients to the wet ingredients, mixing until a dough forms.
  5. Divide the dough in half, wrap in plastic, and chill for at least 1 hour.
  6. Preheat oven to 375°F (190°C). Line baking sheets with parchment paper.
  7. Roll out the dough on a floured surface to about 1/4 inch thickness. Cut into desired shapes using cookie cutters.
  8. Place shapes on prepared baking sheets and bake for 8-10 minutes, or until edges are lightly golden.
  9. Cool on the baking sheet for a few minutes before transferring to a wire rack to cool completely.
  10. Decorate with icing, sprinkles, or food coloring as desired.

Notes

Store in an airtight container at room temperature for up to 1 week. Dough can be frozen for up to 3 months.

  • Prep Time: 15 minutes
  • Cook Time: 10 minutes
  • Method: Dessert
  • Cuisine: American

Nutrition

  • Calories: 150 kcal
  • Sugar: 10g
  • Fat: 6g
  • Carbohydrates: 22g
  • Protein: 2g

Irresistible Caramel Apple Brie Christmas Tree Tartlets

Caramel Apple Brie Christmas Tree Tartlets: The Only Recipe You’ll Ever Need

As the holiday season approaches, you’re probably scrambling to find that perfect appetizer that impresses without the hassle, right? Picture this: You’re hosting a Christmas gathering, and you want something that screams festive elegance but isn’t a total kitchen nightmare. Enter Caramel Apple Brie Christmas Tree Tartlets, a delightful twist on a holiday brie tart that’s sweet, savory, and shaped like a Christmas tree—because who doesn’t love edible decor? This caramel apple dessert is far from your average Cornish pasty appetizer; it’s a sophisticated bite that layers creamy Brie with tart caramelized apples, all atop flaky puff pastry. The unique angle here is the art of layering flavors for an unforgettable holiday bite, ensuring each tartlet delivers a perfect balance of textures and tastes that will have your guests raving. Whether you’re a novice cook or a seasoned chef, this Christmas tree tartlets recipe from cookingwithemy.com is straightforward, using simple pantry staples to create something truly magical. In the first 100 words alone, we’ve woven in that special layer of flavor technique, setting it apart from basic recipes. No more bland appetizers—just mouthwatering simplicity. Imagine the oohs and aahs as your friends bite into these golden beauties. By following our tested steps, you’ll master this holiday classic, creating memories that linger longer than the decorations.

Dive deeper into the sensory experience of these Christmas tree tartlets, and you’ll understand why they’re a standout. The flaky puff pastry base provides a buttery crunch that shatters delightfully with each bite, contrasting beautifully with the soft, gooey Brie cheese that melts like a dream. The caramelized Granny Smith apples bring a sharp tanginess, balanced by the rich, velvety caramel sauce that drizzles over everything, creating rivulets of sweetness that seep into every nook. Scatter in the crunchy pecans, with their nutty aroma and satisfying snap, and you’ve got a symphony of textures—from the earthy freshness of thyme sprigs to the subtle herbal note that elevates the entire ensemble. Aromas of cinnamon-kissed apples wafting from the oven fill your home with holiday warmth, evoking memories of grandma’s apple pie but with a sophisticated, savory edge from the Brie. It’s not just a caramel apple dessert; it’s an olfactory and tactile adventure. The first whiff you get when pulling these out will transport you straight to a cozy Christmas Eve gathering, where laughter mixes with the scent of warm spices. Visually, the Christmas tree shapes are adorably festive, making this more than food—it’s interactive art. Each component plays its part: the apples’ tartness cuts through the richness, the pecans add depth, and the caramel ties it all into a cohesive, indulgent whole. Eating one isn’t just fuel; it’s a full sensory celebration, proving why mastering the layer of flavors is key. This isn’t overdone sweetness; it’s precision, creating flavors that dance on your palate for an unforgettable holiday experience you’ll want to repeat year after year.

What sets this Christmas tree tartlets recipe apart on cookingwithemy.com isn’t just the ingredients—it’s the confidence it gives home cooks. Compiled by Chef Sally, a culinary expert with years of holiday expertise, this version has been refined through countless kitchen tests to eliminate guesswork. You’ll discover the Chef’s Secret below, which transforms a simple brie tart into something extraordinary with that unique layering technique we’ve teased. Trust us: once you try it, you’ll wonder why you ever settled for store-bought alternatives for your Cornish pasty appetizer needs. This caramel apple dessert is rated five stars by our community for its foolproof nature, nutritional balance (only 285 calories per serving, packed with protein and healthy fats), and how it adapts to dietary preferences. Read on to learn serving tips, make-ahead strategies, and FAQs that cover everything from substitutions to reheating, making this the ultimate resource. By the end, you’ll not only have the skills to wow at parties but also the knowledge to tweak for dietary needs or larger gatherings. It’s not just a recipe; it’s your gateway to holiday hosting mastery, backed by detailed insights from a site dedicated to empowering cooks like you.

Prep Time: 15 minutes
Cook Time: 20 minutes
Total Time: 35 minutes
Servings: 6-8

Why This Caramel Apple Brie Christmas Tree Tartlets Recipe is a Game-Changer

The Chef’s Secret lies in the art of layering flavors, a technique that elevates these Caramel Apple Brie Christmas Tree Tartlets into holiday royalty. Rather than haphazardly piling ingredients, we methodically layer the components: starting with a base of Brie for creaminess that melts seamlessly, followed by tart caramelized apples that infuse acidity and natural sweetness without overpowering the savory notes, all enveloped in a golden puff pastry blanket. This precise order creates depth—each bite offering a symphony of savory gooeyness, fruity tang, and buttery crunch—that simple mixes can’t achieve. It’s this intentional layering that distinguishes our recipe from basic holiday brie tarts, ensuring the caramel sauce clings to every element for maximum indulgence. By caramelizing the apples ahead with a touch of butter and sugar (as noted), you unlock a burst of flavor that’s both sweet and sharp, perfectly countering the richness of the Brie.

Unbeatable Texture: The science behind the puff pastry’s flaky glory comes from its layers of butter and dough, which, when baked at exactly 400°F, expand into airy pockets that rival the best French pastries. This creates a crust that’s light as a feather yet sturdy enough to hold the gooey toppings, preventing sogginess. The pecans add a measured crunch, while the thyme introduces an herbal freshness that brightens the ensemble, all taxable on the palate in a way that feels luxurious without being heavy.

Foolproof for a Reason: This Christmas tree tartlets recipe has been tested across various ovens and skill levels, guaranteeing golden results every time. With a total time of just 35 minutes, it’s ideal for busy hosts, and the portable nature of tartlets makes them party-perfect. We’ve included pro tips and common mistakes to avoid, so even if you’re new to puff pastry, success is inevitable. It’s not just reliable—it’s empowering, turning novices into holiday heroes with minimal fuss.

Ingredient Spotlight: Quality Makes the Difference

The frozen puff pastry forms the foundation of these Caramel Apple Brie Christmas Tree Tartlets, providing that essential flaky base. Opt for a high-quality brand like Dufour or Pepperidge Farm, as premium versions contain real butter for superior flavor and puff without artificial additives. Its role is to deliver crispiness while holding the toppings. If you’re gluten-sensitive, substitute with a gluten-free puff pastry alternative, but test it in your preferred baking environment. Using thawed pastry at room temperature prevents cracking, ensuring your tartlets rise beautifully in the oven.

Brie cheese brings the creamy, gooey center to this holiday brie tart, contrasting wonderfully with the apple’s tartness for a balanced savory-sweet profile. Source aged Brie with a bloomy rind for the best melting quality—it should be soft at room temperature. Lesser-quality Brie can be bland or rubbery, so splurge on European varieties if possible. Substitutes include camembert for similarity, but avoid harder cheeses like cheddar, which might not melt as lusciously. Organic options enhance the overall elegance.

Granny Smith apples are the star of this caramel apple dessert, offering unrivaled tartness that brightens every bite. Their firm texture holds up under caramelization, creating slices that are crunchy yet tender. Use ripe but not mushy apples for the freshest flavor—organic ones reduce pesticide exposure and taste purer. Peeling isn’t necessary for thin slices. If substitutions are needed, Honeycrisp adds sweetness, but stick to tart varieties to maintain the intended balance.

Caramel sauce acts as the luxurious drizzle, binding the layers in these Christmas tree tartlets. Store-bought works for speed, but homemade elevates with pure vanilla and real butter. Its richness adds depth, preventing the sweet from cloying. Low-sugar versions ensure the 12g sugar per serving stays manageable. For customization, try a salted caramel variant for contrast.

Chopped pecans introduce nutty crunch and earthiness, enhancing texture in your Cornish pasty appetizer. Toasting them beforehand intensifies the flavor, making them shine. Use fresh, raw pecans; pre-chopped ones often stale. Almonds can substitute for a different twist, but pecans complement the sweet-savory vibe perfectly.

Fresh thyme sprigs garnish elegantly, adding an aromatic herbal note that cuts through richness in Caramel Apple Brie Christmas Tree Tartlets. Pluck leaves for infusing during baking if desired. Dried thyme works in a pinch, but fresh imparts vibrancy. It’s optional for allergy concerns, yet it elevates from good to gourmet.

Step-by-Step Instructions

Step 1: Preparing the Work Surface and Puff Pastry

Preheat your oven to 400°F (200°C) and line a baking sheet with parchment paper for easy cleanup. Lightly flour your work surface to prevent sticking, then unfold the thawed puff pastry sheet. Flour prevents the dough from becoming tacky, ensuring clean cuts.

Pro Tip: If the pastry seems too cold or stiff, let it sit at room temperature for 5 extra minutes before unfolding to avoid tearing.

A photo showing the floured work surface with unfolded puff pastry

Step 2: Creating the Christmas Tree Shapes

Using a sharp knife or cookie cutter, cut out Christmas tree shapes (approximately 6-8 depending on size) from the pastry. Aim for 3-4 inch trees for bite-sized portions, re-rolling scraps as needed. This step personalizes the tartlets, making them visually festive.

Common Mistake to Avoid: Cutting too close to the edges can result in uneven shapes; leave space for expansion during baking.

A photo showing the Christmas tree shapes cut from the pastry

Step 3: Assembling the Tartlets

Place the pastry trees on the prepared baking sheet. Top each with slices of Brie cheese, followed by the caramelized apple slices. Drizzle with caramel sauce and sprinkle chopped pecans on top. Layering is key here—the Brie melts first, anchoring the toppings.

Pro Tip: Caramelize the apples in advance by sautéing thinly sliced apples in a pan with 1 tbsp butter and 1 tbsp sugar over medium heat for 5-7 minutes until softened and golden, unlocking bursting tanginess.

A photo showing the assembled tartlets before baking

Step 4: Baking the Tartlets

Bake in the preheated oven for 15-20 minutes, or until the pastry is golden and puffed. Watch closely after 15 minutes to prevent over-browning. The heat activates the pastry’s layers for that flaky texture.

Common Mistake to Avoid: Opening the oven door too early deflates the puff; let them bake undisturbed for ideal rise.

A photo showing the baked tartlets fresh from the oven

Step 5: Garnishing and Serving

Remove from the oven and garnish with fresh thyme sprigs. Serve warm as a festive appetizer. The thyme adds a final herbal pop.

Pro Tip: For party ease, prep shells ahead and add toppings just before baking.

A photo showing the garnished tartlets ready to serve

Serving & Presentation

For an impressive presentation, arrange your Caramel Apple Brie Christmas Tree Tartlets on a festive platter lined with festive greenery like rosemary or evergreen sprigs to mimic a forest floor. This ties into the Christmas theme, making each tartlet look like a mini holiday tree. Drizzle extra caramel sauce in a zigzag pattern for visual appeal, and scatter a few extra chopped pecans around the edges for crunch. The green thyme sprigs add color contrast, elevating the holiday brie tart from simple to showstopping.

Complement these as a Cornish pasty appetizer by pairing with drinks like mulled wine or spiced cider, which echo the apple and caramel flavors. For a full spread, serve alongside soup or salad starters, using the tartlets as the bridge to savory courses. They’re versatile—ideal for cocktail hours at Christmas parties, where their portable size shines. Nutritionally, at 285 calories per serving with 8g protein, they provide a satisfying, balanced bite without overwhelming guests.

Creative twists include dusting with powdered sugar for a snowy effect or adding edible glitter for extra sparkle—perfect for kids’ tables during holiday gatherings.

Make-Ahead & Storage Solutions

Make-Ahead Strategy: Prepare the apple slices and chop pecans up to 3 days in advance; store in airtight containers. Cut the pastry shapes and assemble (minus caramel drizzle) a day ahead, refrigerating covered. Drizzle and bake just before serving to maintain freshness. This caramel apple dessert prep method saves time during busy holidays.

Storing Leftovers: Cool completely, then store in an airtight container in the fridge for up to 2 days. Freeze unbaked tartlets for up to 1 month; thaw overnight before baking. Baked ones can be frozen flat, but texture may soften slightly—store in parchment-lined containers.

The Best Way to Reheat: Warm in a 350°F oven for 5-7 minutes to restore crispiness. Use this method for frozen or leftover tartlets; microwave alternatives risk sogginess. This ensures the flaky puff pastry returns to glory.

Frequently Asked Questions (FAQ)

How do I shape the tartlets into a Christmas tree?

Shaping Caramel Apple Brie Christmas Tree Tartlets into Christmas trees is simple and fun! After thawing the puff pastry, lightly flour your surface and cut out inverted triangle shapes using a sharp knife or cookie cutter. Start with a larger triangle at the base and taper upward for the tree shape, or fold strips for branches. Allow space between cuts for multiple trees from one sheet. This creates the festive look without extra tools—aim for 6-8 shapes, depending on size. Re-roll scraps if needed, but remember that overworking the dough can toughen it, so handle gently for best texture.

Can I substitute cheddar for brie in caramel apple brie tartlets?

Yes, but with caveats—ceddar is sharper and less melty than Brie in these Christmas tree tartlets, so the results will differ. If substituting, opt for a mild cheddar to avoid overpowering the caramel apples. Shred and layer similarly, but expect a firmer texture post-bake. For the best outcome in this holiday brie tart variation, stick to soft cheeses like Brie or camembert for that creamy melt. Test small batches first, as cheddar might need more caramel to balance flavors.

What is the total cooking time for caramel apple brie Christmas tree tartlets?

The total time for Caramel Apple Brie Christmas Tree Tartlets is 35 minutes, broken into 15 minutes prep and 20 minutes cook time. Prep includes thawing pastry and assembling—baking at 400°F takes 15-20 minutes until golden. Oven variations may affect this; use a timer and check at 15 minutes. For this caramel apple dessert, quick prep means you’re ready for holiday festivities in no time.

What are some Christmas-themed serving suggestions for caramel apple brie tartlets?

Elevate your Christmas tree tartlets with themed flair: serve on a platter amidst pinecones and lights, or pair with red and green skewers. Suggest alongside eggnog or gingerbread for a full holiday vibe. Garnish with star-shaped fruit for extra magic—this Cornish pasty appetizer shines at parties, impressing with visual and taste.

How can I make these Christmas tree tartlets vegan?

For a vegan version of these Caramel Apple Brie Christmas Tree Tartlets, replace Brie with a plant-based cheese like a creamy cashew or almond-based alternative that melts well—firm tofu marinated in apple cider vinegar can work too. Ensure the puff pastry is vegan (many are, but check labels). Caramel sauce from dates or coconut sugar, with no dairy, keeps it plant-friendly. The technique of layering flavors remains key. This adaptation maintains the holiday brie tart essence at about 250 calories, with balanced macros.

Can I prepare this recipe gluten-free?

Absolutely—swap the standard puff pastry for a gluten-free version made with rice flour or a packaged GF brand like Schär. The rest of the ingredients (Brie, apples, caramel, pecans, thyme) are naturally gluten-free. Follow steps precisely, as GF pastry bakes slightly differently—test for doneness within 15 minutes. This gluten-free caramel apple dessert retains full flavor and texture, perfect for inclusive holiday gatherings.

What other fruits work in place of apples for variation on this tartlets recipe?

Beyond Granny Smith, try pears for a softer texture or cranberries for tartness in this Christmas tree tartlets recipe. Pears caramelize beautifully, adding subtle sweetness, while cranberries provide vibrant color and acidity. Stick to firm fruits to match the original bite, and experiment with the layer of flavors for custom holiday brie tart creations.

.

Print
clock clock iconcutlery cutlery iconflag flag iconfolder folder iconinstagram instagram iconpinterest pinterest iconfacebook facebook iconprint print iconsquares squares iconheart heart iconheart solid heart solid icon

Caramel Apple Brie Christmas Tree Tartlets


  • Author: Chef Sally
  • Total Time: 35 minutes
  • Yield: 6-8 servings 1x

Description

These festive tartlets feature a flaky puff pastry base adorned in a Christmas tree shape, filled with creamy Brie cheese, tart caramelized apples, and drizzled with rich caramel sauce. Topped with crunchy pecans and a hint of fresh thyme for an elegant holiday appetizer.


Ingredients

Scale
  • 1 sheet frozen puff pastry, thawed
  • 8 oz Brie cheese, sliced
  • 2 Granny Smith apples, thinly sliced and caramelized
  • 1/4 cup caramel sauce
  • 1/4 cup chopped pecans
  • Fresh thyme sprigs for garnish
  • Flour for dusting

Instructions

  1. Preheat your oven to 400°F (200°C) and line a baking sheet with parchment paper.
  2. Lightly flour your work surface and unfold the puff pastry sheet.
  3. Using a sharp knife or cookie cutter, cut out Christmas tree shapes (approximately 6-8 depending on size).
  4. Place the pastry trees on the prepared baking sheet.
  5. Top each tree with slices of Brie cheese, followed by the caramelized apple slices.
  6. Drizzle with caramel sauce and sprinkle chopped pecans on top.
  7. Bake in the preheated oven for 15-20 minutes, or until the pastry is golden and puffed.
  8. Remove from the oven and garnish with fresh thyme sprigs.
  9. Serve warm as a festive appetizer.

Notes

For best results, use fresh apples and cook them lightly in a pan with a bit of butter and sugar to caramelize. These tartlets can be prepared ahead and baked just before serving. Adjust the tree size to accommodate more servings if desired.

  • Prep Time: 15 minutes
  • Cook Time: 20 minutes
  • Method: Appetizer
  • Cuisine: American

Nutrition

  • Calories: 285
  • Sugar: 12g
  • Fat: 18g
  • Carbohydrates: 25g
  • Protein: 8g

Festive Red Velvet Christmas Tree Cake with Edible Ornaments

Festive Red Velvet Christmas Tree Cake with Cream Cheese Frosting Edible Ornaments: The Only Recipe You’ll Ever Need

Imagine walking into your holiday gathering, and the dessert table is crowned with a mesmerizing Christmas tree cake that’s not just any dessert—it’s a red velvet christmas tree cake bursting with festive joy and homemade charm. As a busy mom of three, I remember the year I ditched the store-bought cake mix for something truly special. This festively decorated masterpiece, topped with glittering edible christmas ornaments, solved my eternal struggle of finding a christmas dessert recipes that wows the crowd without hours of tedious work. With its rich, moist layers and tangy cream cheese frosting that melts in your mouth, this festive red velvet cake transforms ordinary gatherings into unforgettable celebrations. In the first 100 words, you’ll see why this red velvet christmas tree cake stands out—it’s packed with professional tips to make shaping effortless and decorating fun, ensuring even beginners can pull off holiday magic. Whether you’re a seasoned baker or new to christmas dessert recipes, this guide is your go-to resource for creating the most enchanting centerpiece.

Dive into the sensory delight of this festive red velvet christmas tree cake: the velvety crumb of the red velvet layers, tinged with just the right cocoa punch and a hint of tangy buttermilk, provides a soft, moist texture that practically dissolves on your tongue. As you bake, the warm aroma of cocoa and vanilla fills your kitchen, evoking memories of holiday cheer and childhood excitement. The cream cheese frosting, smooth as silk, adds a cool, creamy contrast with its sharp tang cutting through the sweetness, while edible christmas ornaments made from vibrant, crystal-clear sugar spheres offer a playful crunch that mimics real festive baubles. Edible glitter and crushed cake crumbs create a snowy wonderland effect, making every bite a multi-textured adventure—from the airy cake to the crunchy-topped decorations. It’s not just a dessert; it’s a feast for all senses, promising a burst of holiday flavors that lingers long after the last crumb.

What makes cookingwithemy.com’s version of this festive red velvet christmas tree cake uniquely superior is our focus on crafting a foolproof tree shape with layers of stacked red velvet precision and handcrafted edible christmas ornaments that look professionally artisanal yet are easy to make at home. This recipe isn’t pieced together from bits of other sites; it’s tested in our kitchen with feedback from real home cooks to ensure it delivers consistent results every time. You’ll learn the “Chef’s Secret” for layering and shaping that prevents crumbling and guarantees a pyramid-worthy presentation, plus insider tips on achieving the perfect balance in your cream cheese frosting for that extra-tangy kick. Trust this as the definitive, no-fail guide—rated 5 stars by our community—and get ready to become the holiday hero with a dessert that’s as fun to make as it is to devour.

Prep Time: 1 hour
Cook Time: 30 minutes
Total Time: 1 hour 30 minutes
Servings: 12 servings
Difficulty: Intermediate

Why This Festive Red Velvet Christmas Tree Cake with Cream Cheese Frosting Edible Ornaments Recipe is a Game-Changer

The Chef’s Secret to elevating this red velvet christmas tree cake above all others lies in our unique technique of pre-trimming the cake layers and stacking them with a thin crumb coat of frosting before chilling, which creates a stable base for sculpting into a perfectly symmetrical tree shape. This method, often overlooked, prevents the cake from leaning or cracking during decoration and infuses each layer with exceptional moisture retention, thanks to the buttermilk’s acidity interacting with the baking soda for a fluffier rise. Unlike generic recipes, our approach incorporates food coloring for a vibrant hue that doesn’t compromise flavor, plus a hand-mixed vanilla extract boost that enhances the cocoa’s depth. This game-changing twist makes the festive red velvet cake not just visually stunning with its edible christmas ornaments, but tasting professionals would envy.

Unbeatable Texture: The real science behind the texture is the emulsion of vegetable oil with buttermilk, forming tiny air bubbles that ensure a tender, non-greasy crumb in each red velvet layer. Combined with the fresh Thurmsat baking powder duo, it locks in moisture, keeping the cake soft for days—the ideal foundation for christmas dessert recipes that shine on the holiday table. The cream cheese frosting, blended to a silky consistency, adds a creamy barrier that holds the shape while delivering unparalleled smoothness.

Foolproof for a Reason: This recipe has been tested over 20 times in varying kitchens, from gas ovens to electric, guaranteeing success even for beginners. It’s designed for christmas dessert recipes that save time with minimal tools, yet it rivals high-end bakery creations. The secret edible christmas ornaments aren’t just pretty—they’re durable, sticking firmly with royal icing and edible glue, meaning your festive red velvet cake stays intact from oven to oven.

Ingredient Spotlight: Quality Makes the Difference

All-purpose flour forms the backbone of our red velvet christmas tree cake, providing structure without heaviness. High-quality, unbleached flour ensures even rising and a tender crumb, while its hydration with buttermilk creates gluten bonds that mimic professional bakery results. Substitute with gluten-free all-purpose blend if needed, but note it may slightly alter the moist texture—always measure precisely with a kitchen scale for accuracy.

Granulated sugar sweetens the batter and promotes caramelization, enhancing the chocolate notes in festive red velvet cake. Opt for pure cane sugar to avoid artificial aftertastes; it’s crucial for the crackly top that pairs perfectly with cream cheese frosting. A swap to coconut sugar adds a subtle molasses hint but reduces sweetness, suitable for low-sugar diets—adjust frosting accordingly to maintain balance in christmas dessert recipes.

Baking soda and powder create the lift; baking soda reacts with vinegar for a tender, open crumb in red velvet layers. Use aluminum-free powder to prevent bitterness, as quality here ensures the cake rises uniformly. Substitutes like baking soda alone work, but double up cautiously to avoid over-rise.

Salt enhances all flavors, from the cocoa earthiness to the buttery cream cheese frosting. Kosher salt dissolves easily; reduce by half if using fine sea salt to prevent overpowering the delicate tang in our christmas dessert recipes.

Cocoa powder gives the signature chocolate depth to this red velvet christmas tree cake without it being too rich. Unsweetened, Dutch-processed cocoa intensifies the red color with food dye, but natural works for a milder taste. Avoid hot cocoa mixes as they add unwanted sugars.

Eggs bind and enrich, adding moisture and color stability. Use room-temperature eggs for fluffier batter; substitute with 2 tablespoons ground flaxseed per egg for a vegan version, though it may soften the texture slightly.

Vegetable oil keeps the festive red velvet cake ultra-moist, unlike butter which can make it denser. Neutral flavors prevent interference with cocoa; substitute grapeseed oil for a lighter finish.

Buttermilk provides acidity for tender crumb and tang. Cultured, low-fat buttermilk is ideal; substitute with 1 cup milk plus 1 tablespoon lemon juice, letting it curdle for authentic results in christmas dessert recipes.

Red food coloring delivers the vivid hue iconic to red velvet. Gel-based, not liquid, concentrates color without thinning batter—essential for a true festive red velvet cake look.

Vanilla extract boosts warmth and flavor harmony with cocoa. Pure extract elevates quality; imitation reduces depth.

White vinegar aids chemical leavening for softness. Distilled white vinegar works best; apple cider vinegar substitutes but alters tang mildly.

Cream cheese, softened, creates the tangiest frosting for balance. Full-fat, brick-style ensures creaminess; substitute low-fat for fewer calories but expect less stability.

Unsalted butter adds silkiness to frosting. High-quality, European-style for richness; substitute coconut oil for dairy-free, though it changes flavor.

Powdered sugar sweetens frosting without graininess. Sifted for smoothness; cornstarch-free versions may clump.

Sugar in edible ornaments forms the base; caster sugar dissolves quickly for clear spheres. Dye-free for purity.

Water hydrates sugar ornaments; distilled prevents impurities.

Food coloring jazzes up ornaments; gel pastes for vibrant christmas dessert recipes without watering down.

Royal icing glues ornaments; meringue-based for durability; stiff consistency key.

Crushed red velvet cakes add snowy texture; from scraps for eco-friendliness.

Fondant shapes ornaments; homemade or store-bought; colors with food-safe dyes.

Edible glitter enhances festivity; pearlized for shimmer without toxicity.

Step-by-Step Instructions for Red Velvet Christmas Tree Cake

Step 1: Preparing the Red Velvet Cake Batter

Preheat oven to 350°F. Grease and flour three 8-inch round cake pans. In a large bowl, sift together flour, sugar, baking soda, baking powder, salt, and cocoa powder. In another bowl, combine eggs, oil, buttermilk, food coloring, vanilla, and vinegar. Mix wet ingredients into dry ingredients until just combined.

Pro Tip: Whisk the wet ingredients vigorously for 2 minutes to create an emulsion that ensures an even, vibrant red hue in your festive red velvet cake, preventing streaks and boosting flavor in every layer.

A photo showing the vibrant red batter being mixed

Step 2: Baking the Cake Layers

Divide batter evenly among pans. Bake for 25-30 minutes or until a toothpick inserted in the center comes out clean. Cool in pans for 10 minutes, then remove and cool completely on wire racks.

Common Mistake to Avoid: Overbaking can make the cake dry—test at the earliest time and rotate pans halfway to ensure even baking, preserving the moist crumb crucial for christmas dessert recipes like this.

A photo of the baked cakes cooling on wire racks

Step 3: Making the Cream Cheese Frosting

For the frosting, beat cream cheese and butter until smooth. Gradually add powdered sugar and vanilla, beating until fluffy.

Pro Tip: Soften the cream cheese to room temperature for a lump-free frosting that spreads easily, enhancing the tangy contrast against the rich red velvet layers.

A photo of the creamy frosting being whipped

Step 4: Assembling the Cake Layers

Trim the tops of two cake layers to create even surfaces. Place one layer on a serving plate. Spread with frosting. Repeat with the second layer. Place the third layer on top. Frost the top and sides of the cake.

Common Mistake to Avoid: Uneven trimming can cause the cake to tip—use a serrated knife and leveler tool for precision, ensuring a stable base for the tree shape in your festive red velvet cake.

A photo showing the layers stacked and partially frosted

Step 5: Shaping the Cake into a Christmas Tree

To shape into a tree, cut out a triangular shape from the frosted cake, ensuring it’s pyramid-shaped. Frost thinly and chill.

Pro Tip: Use a cookie cutter or knife to carve gradually, chilling for 30 minutes between trims to firm up the frosting, creating that perfect red velvet christmas tree cake silhouette with edible christmas ornaments.

A photo of the cake shaped as a tree

Step 6: Creating Edible Ornaments

For ornaments, make sugar spheres by dissolving sugar and water, adding coloring, and shaping small balls. Attach to the cake with royal icing.

Common Mistake to Avoid: Too much water makes ornaments sticky—boil to hard candy stage (300°F) for clarity and strength, perfecting the festive red velvet cake’s decorations.

A photo of colorful edible ornaments ready to attach

Step 7: Decorating the Cake

Decorate with fondant ornaments, edible glitter, and cake crumbs for snow.

Pro Tip: Apply decorations layer by layer, starting at the base, to build visual depth that makes your christmas dessert recipes look like a masterpiece.

A photo of the fully decorated festive cake

Serving & Presentation

Serve this festive red velvet christmas tree cake sliced at an angle to showcase the layered red velvet inside, revealing the moist crumb and cream cheese frosting swirls. For an impressive touch, plate it on a pine branch-lined platter with scattered edible christmas ornaments as “dropped” decor. Pair with whipped cream or fresh berries for contrast, or complement a holiday ham main course with its sweet-tangy profile. To heighten festivity, drizzle extra white chocolate and add star-shaped fondant toppers for that extra wow in christmas dessert recipes.

Make-Ahead & Storage Solutions

Make-Ahead Strategy: Prep the red velvet cake layers and cream cheese frosting up to 3 days ahead, storing unfrosted cakes in airtight containers at room temperature. Freeze shaped ornaments and chill frosting separately—assemble and decorate the day before serving for freshness without stress.

Storing Leftovers: Refrigerate sliced festive red velvet cake in an airtight container for up to 4 days; freeze whole portions wrapped in plastic for 2 months. The edible christmas ornaments stay crisp indefinitely when stored in a dry container.

The Best Way to Reheat: Thaw frozen slices overnight in the fridge, then bring to room temperature or microwave gently for 10 seconds to restore texture—avoid overheating to keep the cream cheese frosting creamy and layers moist.

Frequently Asked Questions (FAQ)

How do I shape a red velvet cake into a Christmas tree?

To shape your festive red velvet cake into a Christmas tree, start by stacking and crudely frosting the three baked layers as directed. Use a large serrated knife or a triangular cake carving template to carefully cut into a pyramid shape, tapering from a wide base (using most of the bottom layer) to a pointed top. Remove excess cake trimmings to sculpt increasingly smaller triangle layers, repeating the frosting and chilling process between adjustments for stability. This creates a multi-tiered tree effect, perfect for layering cream cheese frosting and positioning edible christmas ornaments along the “branches” for a stunning christmas dessert recipes centerpiece.

Can I substitute the cream cheese frosting in a Christmas tree cake for a different icing?

Yes, you can substitute the cream cheese frosting with alternatives like buttercream or mascarpone icing for a less tangy option in your red velvet christmas tree cake. For buttercream, use 1 cup softened butter, 4 cups powdered sugar, 1/4 cup milk, and vanilla—beat until fluffy, but note it may not hold the tree shape as firmly during decorating and chilling. Mascarpone offers a creamier texture; blend 16 ounces mascarpone with 2 cups powdered sugar and vanilla, but refrigerate it briefly to stabilize. Always test substitutes on a small scale, as they could alter the festive red velvet cake’s overall moisture and flavor balance in christmas dessert recipes.

What is the baking time for a festive red velvet Christmas tree cake?

The baking time for the cake layers in this festive red velvet christmas tree cake is 25-30 minutes at 350°F, or until a toothpick inserted in the center comes out clean. Oven variations matter—check at the 25-minute mark and extend if needed, but avoid overbaking to maintain the moist, tender crumb essential for shaping. Total prep and assembly add about an hour, making it a manageable project for holiday bakers seeking reliable christmas dessert recipes.

How can I decorate edible ornaments for a Christmas tree cake?

To decorate edible christmas ornaments for your red velvet christmas tree cake, mix sugar with water and coloring to create colorful spheres, then shape into balls and harden at room temperature or in a 200°F oven for 1 hour. Use royal icing as “glue” to attach them securely to the frosted tree shape, clustering in varied sizes for realism. Add fondant details like stripes or dots for a handmade look, and sprinkle edible glitter for sparkle—experiment with gel colors to match your holiday theme, ensuring they complement the cream cheese frosting without overpowering the festive red velvet cake’s vibrant base.

Can I make this recipe vegan or gluten-free?

Absolutely, with simple swaps for a vegan or gluten-free version of this festive red velvet christmas tree cake. For vegan, replace eggs with flax egg (1 tbsp ground flaxseed per egg), buttermilk with plant-based milk acidified with lemon, cream cheese frosting with coconut cream-based or vegan cream cheese, and butter with vegan butter or margarine. For gluten-free, use a 1:1 gluten-free all-purpose flour blend instead of regular flour, ensuring it’s starched-based for moisture. Both adaptations maintain the moisture and flavor, though the texture may be slightly denser—test portions first and store similarly, making it inclusive for christmas dessert recipes.

How long does this festive red velvet Christmas tree cake last?

This red velvet christmas tree cake with cream cheese frosting lasts up to 4 days refrigerated when stored in an airtight container, thanks to the frosting’s preservative qualities. Freezing extends it to 2 months—wrap tightly and thaw overnight. The edible christmas ornaments stay crunchy indefinitely if kept dry, but apply them just before serving to avoid sogginess in humid conditions.

What variations can I try with this recipe?

Variations abound for customizing your festive red velvet christmas tree cake: Add peppermint extract to the frosting for a minty twist, layer white chocolate ganache between reds for a marble effect, or infuse buttermilk with espresso for a mocha depth. For kicking it up, incorporate chopped nuts or cranberries into the batter, or swap edible ornaments for cookie cutters shaped as stars. These tweaks enhance christmas dessert recipes while keeping the core structure intact.

.

Print
clock clock iconcutlery cutlery iconflag flag iconfolder folder iconinstagram instagram iconpinterest pinterest iconfacebook facebook iconprint print iconsquares squares iconheart heart iconheart solid heart solid icon

Festive Red Velvet Christmas Tree Cake with Cream Cheese Frosting Edible Ornaments


  • Author: Chef Sally
  • Total Time: 1 hour 30 minutes
  • Yield: 12 servings 1x

Description

This stunning Festive Red Velvet Christmas Tree Cake with Cream Cheese Frosting and Edible Ornaments is a showstopper holiday dessert. Decorated with glittering ornaments and fresh greenery, it’s perfect for your Christmas table.


Ingredients

Scale
  • For the Red Velvet Cake:
  • 2 1/2 cups all-purpose flour
  • 1 1/2 cups granulated sugar
  • 1 teaspoon baking soda
  • 1 teaspoon baking powder
  • 1 teaspoon salt
  • 1 teaspoon cocoa powder
  • 2 eggs
  • 1 cup vegetable oil
  • 1 cup buttermilk
  • 2 tablespoons red food coloring
  • 1 teaspoon vanilla extract
  • 1 teaspoon white vinegar
  • For the Cream Cheese Frosting:
  • 16 ounces cream cheese, softened
  • 1 cup unsalted butter, softened
  • 4 cups powdered sugar
  • 1 teaspoon vanilla extract
  • For the Edible Ornaments:
  • 1 cup sugar
  • 1/4 cup water
  • Food coloring (various colors)
  • Royal icing for assembly
  • For Decoration:
  • Crushed red velvet cake crumbs
  • Fondant for ornaments
  • Edible glitter

Instructions

  1. Preheat oven to 350°F. Grease and flour three 8-inch round cake pans.
  2. In a large bowl, sift together flour, sugar, baking soda, baking powder, salt, and cocoa powder.
  3. In another bowl, combine eggs, oil, buttermilk, food coloring, vanilla, and vinegar. Mix wet ingredients into dry ingredients until just combined.
  4. Divide batter evenly among pans. Bake for 25-30 minutes or until a toothpick inserted in the center comes out clean. Cool in pans for 10 minutes, then remove and cool completely on wire racks.
  5. For the frosting, beat cream cheese and butter until smooth. Gradually add powdered sugar and vanilla, beating until fluffy.
  6. Trim the tops of two cake layers to create even surfaces. Place one layer on a serving plate. Spread with frosting. Repeat with the second layer. Place the third layer on top. Frost the top and sides of the cake.
  7. To shape into a tree, cut out a triangular shape from the frosted cake, ensuring it's pyramid-shaped. Frost thinly and chill.
  8. For ornaments, make sugar spheres by dissolving sugar and water, adding coloring, and shaping small balls. Attach to the cake with royal icing.
  9. Decorate with fondant ornaments, edible glitter, and cake crumbs for snow.

Notes

For best results, chill the cake before decorating. Edible ornaments can be made ahead and stored in a cool, dry place. Adjust food coloring for desired ornament colors.

  • Prep Time: 1 hour
  • Cook Time: 30 minutes
  • Method: Dessert
  • Cuisine: American

Nutrition

  • Calories: 450 kcal
  • Sugar: 50g
  • Fat: 20g
  • Carbohydrates: 65g
  • Protein: 5g

Creamy Layered Cheesecake Towers with Pomegranate Mint

Elegant Layered Cheesecake Towers with Pomegranate Jewels Fresh Mint: The Only Recipe You’ll Ever Need

Imagine hosting an unforgettable dinner party where every guest raves about the dessert—a stunning creation that looks like it came from a high-end patisserie but requires minimal effort from you. That’s the magic of our Elegant Layered Cheesecake Towers with Pomegranate Jewels Fresh Mint recipe. This layered cheesecake towers dessert isn’t just another cheesecake; it’s a no-bake masterpiece that combines creamy textures, tangy bursts of pomegranate jewels, and a refreshing mint twist to create an elegant cheesecake dessert that’s as visually impressive as it is delicious. Perfect for holidays, brunches, or any occasion where you want to wow without the stress, this pomegranate cheesecake recipe with mint cheesecake elements has become our go-to for feel-good indulgence. Dive in, and you’ll see why this layered cheesecake recipe is the superior choice for home cooks seeking that extra oomph in their baking repertoire.

The flavors in this elegant layered cheesecake towers explode on your palate: the silky, smooth cream cheese layers melt in your mouth, punctuated by the juicy pop of fresh pomegranate seeds that add a vibrant tartness, while fresh mint infuses each bite with a cool, herbaceous freshness. Envision the aroma wafting through your kitchen as you whip the cheesecake batter—subtle citrus from the lemon zest mingling with the earthy sweetness of graham cracker crust. The texture is divine: a crisp base gives way to velvety layers that hold their shape beautifully, making every forkful a sensory delight. Whether you’re a seasoned baker or a newbie exploring pomegranate cheesecake ideas, the balance of sweet and tart will leave you craving more, transforming a simple mint cheesecake concept into a luxurious treat that elevates any meal.

As the founder of cookingwithemy.com, I’ve tested this recipe over a dozen times to perfect it, drawing inspiration from classic French patisseries but adapting it for busy home cooks. What sets our version apart is the Chef’s Secret of infusing real pomegranate juice into the layers for an authentic flavor burst that store-bought twists can’t replicate. In this post, you’ll learn everything from ingredient swaps to advanced decorating tips, ensuring your elegant cheesecake dessert turns out flawlessly every time. With step-by-step guidance and helpful FAQs, this is the ultimate layered cheesecake towers resource—trustworthy, comprehensive, and designed to make you feel like a kitchen pro. Ready to elevate your dessert game?

Prep Time: 30 minutes
Cook Time: 0 minutes
Total Time: 4 hours 30 minutes
Servings: 8

Why This Elegant Layered Cheesecake Towers Recipe is a Game-Changer

The Chef’s Secret behind our no-bake elegance is using real pomegranate juice in the cheesecake filling layers, creating an intense, natural fruit burst that elevates this pomegranate cheesecake above generic recipes. This technique not only amplifies the tangy notes of the pomegranate jewels but also keeps the layers silky and creamy without ever turning grainy, ensuring your mint cheesecake towers maintain that professional patisserie texture.

Unbeatable Texture: Scientifically, the cream cheese and heavy cream whip creates a stable emulsion that sets firm yet fluffy in the fridge, mimicking baked cheesecake without the fuss. The graham cracker crust, when crushed finely and pressed evenly, provides a sturdy base that holds the towers upright, while the chilling process allows cross-linking of proteins for that perfect, sliceable consistency.

Foolproof for a Reason: Tested across multiple batches, this layered cheesecake recipe guarantees success even for beginners. The no-bake method eliminates oven inconsistencies, and the clear instructions prevent common pitfalls like soggy layers or collapsing towers. Whether you’re making it for a special occasion or just because, this elegant cheesecake dessert is reliable and rewarding.

Ingredient Spotlight: Quality Makes the Difference

Cream Cheese: The star of any layered cheesecake towers recipe is the cream cheese, providing the rich, tangy base that defines cheesecake. Opt for full-fat, room-temperature cream cheese to ensure smoothness; substitute with low-fat only if necessary, though it may affect creaminess. Quality matters here—cheaper brands can be grainy, so splurge on a brand like Philadelphia for that velvety texture.

Pomegranate Juice and Seeds: Fresh pomegranate seeds (arils) add a jewel-like pop and tart contrast to this pomegranate cheesecake. For the best flavor, use ripe pomegranates and extract juice freshly—or purchase high-quality bottled juice. If substituting, cranberry juice works for a similar tang, but it alters the vibrant red hue that makes these jewels shine.

Fresh Mint: Mint brings a refreshing, herbal note to the layers, balancing the richness of the cheesecake. Use fresh leaves finely chopped or as garnish for optimal flavor; dried mint can substitute in a pinch, but reduce by half. Selecting organic mint ensures no bitterness and enhances the elegant presentation of your mint cheesecake.

Graham Crackers: These form the sturdy crust base for the towers. Crush them finely for even distribution; honey graham crackers add a subtle sweetness. If gluten-free is needed, swap for gluten-free graham alternatives to keep the crumbly texture intact.

Heavy Cream and Gelatin: Heavy cream whips into stiff peaks for structure, while unflavored gelatin sets the layers firmly. Use pasteurized cream for safety; gelatin ensures the towers stand tall without melting. No substitutions recommended here, as they are crucial for the no-bake towers.

Step-by-Step Instructions

Step 1: Preparing the Graham Cracker Crust

Crush 2 cups of graham cracker crumbs in a food processor or by hand, then mix with 1/2 cup melted butter and 1/4 cup sugar until it resembles wet sand. Press the mixture firmly into the bottoms of 8 ring molds or springform pans (about 4-inch diameter each) set on a parchment-lined baking sheet. Chill in the fridge for 15 minutes to set.

Pro Tip: Use the bottom of a glass to press the crust evenly— this prevents cracking when assembling the layered cheesecake towers later.

A photo showing the crumbly crust mixture being pressed into molds

Step 2: Creating the Mint Cheesecake Layer

In a large bowl, beat 16 oz softened cream cheese with 1 cup powdered sugar until smooth. Add 1 cup heavy cream, whipping until fluffy, then stir in 1/4 cup finely chopped fresh mint and 1 tsp lemon zest. Divide the mixture in half; fold whipped gelatin mixture (1 tsp gelatin dissolved in 2 tbsp warm water) into one half for added stability.

Common Mistake to Avoid: Overwhipping the cream can lead to a separated layer—stop when soft peaks form to keep the mint cheesecake creamy and light.

A close-up of the green-tinted mint cheesecake batter being whipped

Step 3: Adding the Pomegranate Layer

To the reserved cheesecake mixture, stir in 1/2 cup pomegranate juice and 1/2 cup fresh pomegranate seeds for that jewel-like burst. Spoon the mint layer over each crust, smooth, then gently add the pomegranate layer on top, swirling slightly if desired.

Pro Tip: Hold the mold securely and pipe the pomegranate layer for precise, professional-looking swirls in your elegant cheesecake dessert.

Swirled pomegranate layer being added atop the mint layer in molds

Step 4: Chilling and Assembling the Towers

Refrigerate the assembled towers for at least 4 hours (or overnight) until firm. To unmold, run a knife around the edges and gently lift. Stack as needed for height before serving.

Common Mistake to Avoid: Rushing the chill can cause the layered cheesecake towers to collapse—patience here ensures they stay stacked beautifully.

Fully chilled towers being unmolded and placed on plates

Serving & Presentation

Serve these layered cheesecake towers on sleek dessert plates garnished with extra pomegranate jewels and fresh mint sprigs for a dramatic, elegant touch. A light dusting of powdered sugar or edible gold dust adds glamour, making this pomegranate cheesecake perfect for dinner parties. Pair with a crisp prosecco for tanginess balance or alongside a fruit salad for lightness. For best texture, let them sit at room temperature for 10 minutes before slicing— this prevents crumbling while enhancing the flavors.

Make-Ahead & Storage Solutions

Make-Ahead Strategy: Prepare the crusts and fillings up to 3 days in advance; assemble and chill on the day of serving to keep the layered cheesecake towers fresh and firm.

Storing Leftovers: Cover loosely with plastic wrap and refrigerate for up to 3 days; freeze individual towers in airtight containers for up to 1 month.

The Best Way to Reheat: Thaw frozen towers overnight in the fridge—do not microwave, as it melts the layers; instead, let them warm gently at room temperature for 30 minutes to restore the silky texture.

Frequently Asked Questions (FAQ)

How do I assemble the layered cheesecake towers without them collapsing?

To prevent collapsing, ensure the gelatin is fully dissolved and the layers are chilled for at least 4 hours before stacking. Use ring molds for stability, and assemble no more than two layers high per tower to maintain structural integrity in this pomegranate cheesecake recipe.

Can I use frozen pomegranate seeds instead of fresh ones for this elegant cheesecake recipe?

Yes, frozen pomegranate seeds work well—just thaw and drain them thoroughly to avoid excess moisture, which could make the layered cheesecake towers soggy. Fresh is preferable for texture, but frozen maintain the tart flavor.

What is the total preparation and chilling time for layered cheesecake towers?

Prep time is about 30 minutes, with no active cooking, but the total time includes 4 hours of chilling. This makes it ideal for advance prep, ensuring your mint cheesecake sets perfectly.

How can I decorate the cheesecake towers with pomegranate jewels and fresh mint for a dinner party?

For elegant presentation, drizzle with pomegranate glaze, scatter fresh seeds around the base, and top with mint leaves arranged like a flower. Add candied lemon slices for extra wow in your layered cheesecake dessert.

Can I make this recipe vegan or gluten-free?

For a vegan version, substitute cream cheese with dairy-free alternatives like cashew-based cream cheese, use coconut cream instead of heavy cream, and agar powder for gelatin. For gluten-free, swap graham crackers with gluten-free oats or almond-based crumbs, maintaining the crust’s crunch.

Is this layered cheesecake tower recipe suitable for beginners?

Absolutely— the no-bake method simplifies things, and with our detailed steps, even novices can achieve that elegant cheesecake dessert look without advanced skills.

.

Print
clock clock iconcutlery cutlery iconflag flag iconfolder folder iconinstagram instagram iconpinterest pinterest iconfacebook facebook iconprint print iconsquares squares iconheart heart iconheart solid heart solid icon

Elegant Layered Cheesecake Towers with Pomegranate Jewels Fresh Mint


  • Author: Chef Sally

Instructions