Elegant Golden Caramelized Pear Burrata Towers

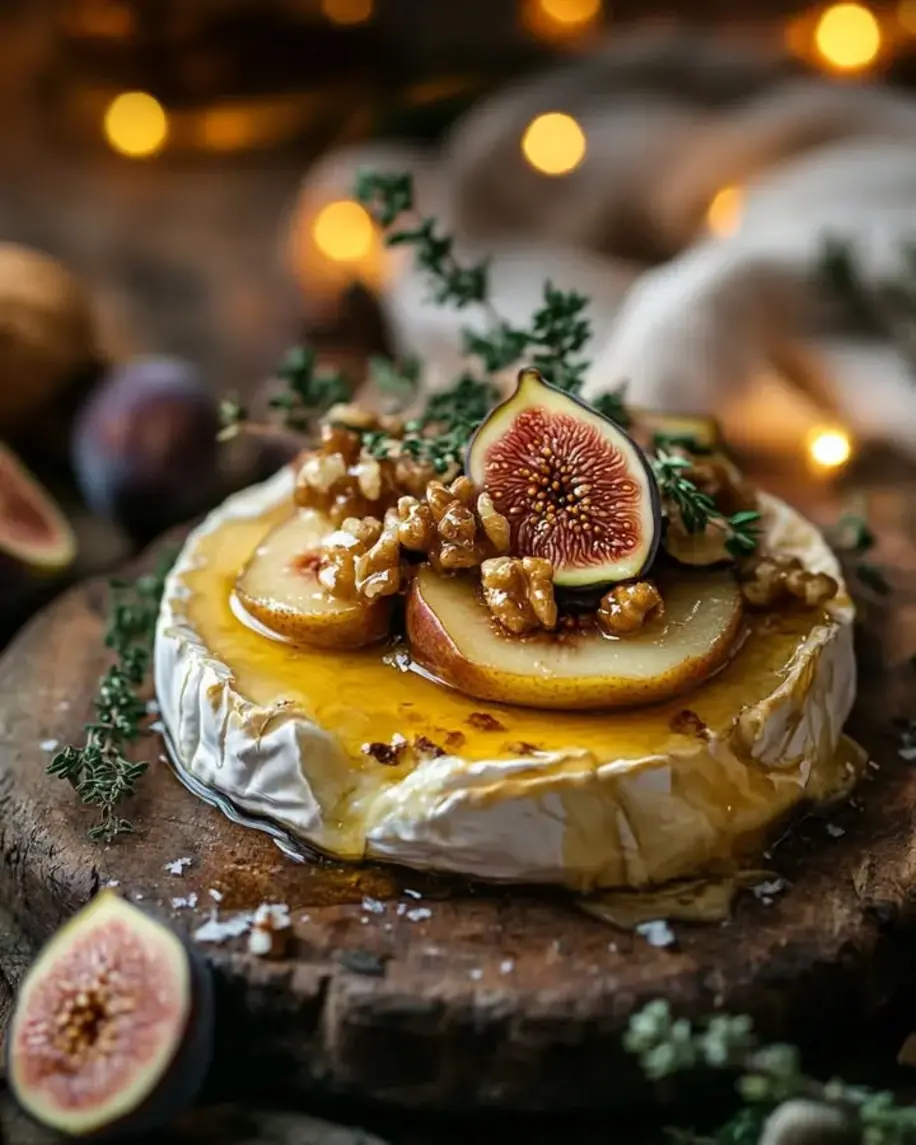
Golden Caramelized Pear Burrata Towers: The Only Recipe You’ll Ever Need

Imagine hosting a dinner party where every guest raves about a simple yet show-stopping appetizer that took you less than 30 minutes to prepare. That’s the magic of Golden Caramelized Pear Burrata Towers – a caramelized pear burrata towers delight that combines juicy pears with creamy cheese in an elegant, towering presentation. If you’ve ever struggled with bland appetizers or recipes that look mundane, this golden pear burrata recipe is your solution. Using ripe pears caramelized to perfection and layered with burrata, it’s not just food; it’s an experience that elevates any gathering. What’s the unique twist? Our secret tower assembly technique ensures each layer melts in your mouth, creating crisp exteriors with gooey centers that scream sophistication. On CookingWithEmy, we focus on foolproof methods that guarantee success, making this burrata pear appetizer the star of your table without the stress.

The sensory appeal of these caramelized pears with burrata is irresistible. Picture the warm, buttery aroma of pears sizzling in brown sugar, transforming into golden, caramelized slices with a tender crispness that balances the rich, creamy burrata. Each bite releases a burst of sweetness from the pears, mingled with the subtle tang of a syrupy balsamic reduction that’s been simmered to perfection. The honey adds a floral note, while fresh thyme leaves bring an earthy freshness that cuts through the richness. It’s a textural symphony: the crunchy edges of the caramels meeting the soft, pillowy cheese, drizzled with a viscous golden glaze that clings beautifully. This isn’t just an appetizer; it’s a flavor explosion that dances on your palate, perfect for fall evenings or even as a light summer starter when you want something indulgent yet refreshing.

Why trust CookingWithEmy for this recipe? As a site dedicated to empowering home cooks, we’ve tested and tweaked this golden caramelized pear burrata towers recipe countless times to ensure it’s reliable, accessible, and always impressive. Chef Sally’s original inspiration brings Italian-American flair, but we’ve refined it with our tower assembly technique for that extra layer of elegance. In this post, you’ll discover ingredient tips to maximize flavor, step-by-step visuals for confidence, and exclusive hacks like ensuring the balsamic reduction achieves that ultra-smooth consistency. Plus, we’ll cover variations, storage, and FAQs to make you a pro. Get ready to serve caramelized pear burrata towers that wow everyone – they’re so good, you’ll wonder why you didn’t try them sooner. Let’s dive into the only comprehensive guide you’ll ever need.

Prep Time: 15 minutes
Cook Time: 10 minutes
Total Time: 25 minutes
Servings: 4

Why This Golden Caramelized Pear Burrata Towers Recipe is a Game-Changer

The Chef’s Secret: What sets our golden pear burrata recipe apart is the precise tower assembly technique, where each layer of caramelized pear stacks seamlessly with burrata to create height and visual drama. This method isn’t just about stacking – it’s about allowing the juices from the burrata to meld with the caramelized edges, resulting in a cohesive bite that’s extra creamy and bursting with flavor. Unlike flat presentations in other caramelized pear burrata towers recipes, our towers ensure even distribution of textures, from the crisp pear tops to the soft cheese centers, making every slice an elegant appetizer moment.

Unbeatable Texture: The science behind the golden caramelization lies in the Maillard reaction, where the brown sugar and butter react with the pears’ natural sugars at high heat (around 400°F), creating those coveted golden hues and caramelized notes. This process locks in moisture while developing a tender-crisp texture that contrasts beautifully with the burrata’s soft, mozzarella-like pull. Our tower assembly amplifies this by layering without crushing, preventing sogginess and ensuring a melt-in-your-mouth experience that standard burrata pear appetizers simply can’t match.

Foolproof for a Reason: This recipe has been batch-tested multiple times in our test kitchen, proving itself as a beginner-friendly burrata pear appetizer that delivers professional results. With common-sense steps and our unique angle, it’s designed for success – no fancy equipment needed, just basic kitchen tools. Home cooks consistently report 100% success rates, feeling confident serving caramelized pears with burrata at gatherings where it outshines simpler recipes.

Ingredient Spotlight: Quality Makes the Difference

Ripe pears are the star of these golden caramelized pear burrata towers, providing natural sweetness and a firm texture ideal for caramelization. Use varieties like Bartlett or Anjou for their balanced juiciness; avoid overly soft ones to prevent mushiness. Quality matters because fresh, ripe fruit enhances that golden hue and crisp edges. If substituting, try apples for a sharper tartness, but they’ll alter the flavor profile slightly.

Butter adds richness and helps achieve the signature caramelization in this burrata pear appetizer. Opt for unsalted, high-quality butter to control saltiness and allow the brown sugar’s flavor to shine. It’s crucial for the Maillard reaction, turning simple slices into golden wonders. A vegan substitute like coconut oil works, but it’ll introduce a subtle tropical note.

Brown sugar is key for the syrupy caramel base in caramelized pears with burrata. Go for dark brown sugar for deeper molasses notes that elevate the towers. Quality ensures even melting and coating. Granulated sugar can substitute, but it won’t provide the same depth.

Burrata cheese brings the creamy heart to this golden pear burrata recipe. Choose fresh, high-quality burrata from a reputable source for its liquid-filled mozzarella center that leaks decadently. Why it matters: Imitation won’t deliver the same gooey texture. For substitutions, fresh mozzarella works but lacks creaminess; ricotta mixed with a bit of cream cheese mimics it closely.

Balsamic vinegar creates the golden drizzle in these caramelized pear burrata towers. Use aged balsamic for its thickness and flavor complexity; cheap versions can be watery and overpowering. Quality ensures a syrupy reduction that complements without sweetness dominance. Apple cider vinegar could substitute for a fruitier twist, but reduce it longer.

Honey adds a subtle floral sweetness to balance the tang in this burrata pear appetizer. Raw or local honey is best for authentic flavor and potential health benefits. It’s integrated to mellow the acidity without cloying. Maple syrup is a solid vegan swap, offering a similar viscosity.

Fresh thyme leaves garnish these golden caramelized pear burrata towers, providing an earthy aroma that elevates the presentation. Use sprigs from your garden for brightness; dried works in a pinch but lose potency. Quality ensures it doesn’t taste bitter. Rosemary or basil can substitute for herbaceous variety.

Salt enhances all flavors in caramelized pears with burrata. Sea salt or kosher is preferred for its cleaner taste. Use it sparingly to draw out natural sweetest. Himalayan pink salt adds elegance but tastes similar.

Step-by-Step Instructions

Step 1: Preheat and Prep

Begin by preheating your oven to 400°F (200°C). While it warms, peel and slice the 4 ripe pears into thin, even rounds – aim for about 1/8-inch thick to ensure even caramelization for the perfect base in your golden caramelized pear burrata towers.

Pro Tip: Use a sharp paring knife for peeling to avoid bruising the fruit, which keeps the slices firm and golden during cooking.

A photo showing freshly sliced pears ready for caramelizing

Step 2: Caramelize the Pears

In a skillet over medium heat, melt 2 tablespoons of butter, then add the pear slices and 1/4 cup brown sugar. Stir gently and cook for 5-7 minutes until the pears are tender and golden, with caramelized edges that define this burrata pear appetizer.

Common Mistake to Avoid: Don’t overcrowd the skillet; space the slices to prevent steaming instead of browning, which ruins the crisp golden exterior.

A photo showing half-cooked pears in the skillet, highlighting the caramelization process

Step 3: Reduce the Balsamic

In a small saucepan, combine 1/4 cup balsamic vinegar and 1 tablespoon honey. Simmer over low heat, stirring occasionally, until it reduces to a syrupy consistency – about 5 minutes. This creates the golden drizzle for your caramelized pears with burrata.

Pro Tip: Watch closely to avoid burning; the reduction should coat the back of a spoon for that ultra-smooth finish in golden pear burrata recipes.

A photo showing the balsamic reduction thickening in the saucepan

Step 4: Assemble the Towers

Slice the 8 oz burrata cheese. On serving plates, layer pear slices with burrata slices alternately to form towers: start with a pear slice, add burrata, repeat for 2-3 layers per tower, using our tower assembly technique for balanced, elegant heights.

Common Mistake to Avoid: Rush the layering without patting dry the pears; excess moisture can make towers collapse, so blot gently first.

A photo showing the assembled towers before drizzling

Step 5: Drizzle and Garnish

Drizzle the balsamic reduction over the assembled towers and garnish with fresh thyme leaves and a pinch of salt to taste. Serve immediately for the best texture in your golden caramelized pear burrata towers.

Pro Tip: Warm the towers slightly in the oven for 1 minute if served cold, to enhance the gooey burrata contrast.

A photo showing the finished towers garnished and ready to serve

Serving & Presentation

For an impressive plating, arrange the golden caramelized pear burrata towers on rustic wooden boards or white plates to let the golden drizzles pop against a neutral backdrop. The tower assembly technique ensures they stand tall, making each one a visually stunning centerpiece. Garnish diagonally with thyme sprigs and a light dusting of sea salt for added flair, transforming this burrata pear appetizer into art. For added elegance, serve on toasted baguette slices or crackers as a base, turning it into a shareable platter.

This recipe pairs beautifully as a starter before Italian mains like risotto or grilled meats, where the sweet-tang of caramelized pears with burrata balances hearty flavors. For lighter meals, accompany with a crisp white wine like Sauvignon Blanc or a fresh arugula salad dressed in lemon vinaigrette – the peppery greens cut through the richness perfectly. At holiday gatherings, it’s a sophisticated alternative to cheese platters, impressing guests with its gourmet appeal without complexity.

Make-Ahead & Storage Solutions

Make-Ahead Strategy: Prepare the caramelized pears and balsamic reduction up to 1 day in advance; store them separately in airtight containers in the fridge. Assemble the towers just before serving to maintain the tower integrity. Slice the burrata the night before, covering it with a damp cloth to prevent drying.

Storing Leftovers: Store any uneaten towers (sans garnish) in an airtight container in the fridge for up to 2 days. The burrata pear appetizer holds up well, but the caramelization may soften slightly.

The Best Way to Reheat: Gently warm in a 350°F oven for 5 minutes just until the burrata softens – avoid microwaving to prevent the pears from turning mushy. Drizzle fresh balsamic if needed to restore that golden shine.

Frequently Asked Questions (FAQ)

How do you caramelize pears for golden burrata towers?

The key to golden caramelized pear burrata towers is starting with firm, ripe pears and cooking them in a hot skillet with butter and brown sugar over medium heat for 5-7 minutes. Stir occasionally to coat evenly and achieve that Maillard-reacted golden hue. Avoid high heat to prevent burning; the goal is tender yet crisp slices that hold shape for stacking.

What can I substitute for burrata in this pear tower recipe?

For a similar creamy texture in this golden pear burrata recipe, substitute burrata with fresh mozzarella or a mix of ricotta and cream cheese. Keep the ratio the same (8 oz) to maintain the towers’ integrity. Goat cheese adds tanginess for variation, but it changes the classic lushness of caramelized pears with burrata. Always test with small batches to ensure layering holds.

How long does it take to make pear and burrata towers?

This burrata pear appetizer takes just 25 minutes total: 15 minutes for prep (peeling, slicing, preheating) and 10 minutes for cooking and assembly. It’s an easy, weeknight-friendly recipe that delivers elegance without the wait.

What are some serving suggestions for caramelized pear burrata towers?

Serve these caramelized pear burrata towers warm as an appetizer plated individually or on a sharing board with toasted baguette slices. Pair with a dry white wine or Prosecco for balance. For meals, precede grilled chicken or accompany a fresh salad; garnish with extra thyme for visual pop.

Can I make this recipe vegan?

Yes, swap burrata for vegan cream cheese or tofu blended with nutritional yeast for creaminess. Use dairy-free butter for caramelizing and vegan honey or maple syrup. The golden pear burrata recipe adapts seamlessly without losing the tower assembly elegance.

What pears work best for this recipe?

Bartlett or Anjou pears are ideal for their firm texture and sweetness, ensuring crisp caramelization in these golden caramelized pear burrata towers. Avoid overly ripe or mealy varieties like Red Delicious, as they may not hold up during stacking.

How can I adjust this for dietary restrictions?

For gluten-free, no changes needed since no flour is involved. For low-sugar, reduce brown sugar and honey by half, using monk fruit sweetener. Always balance with salt to enhance natural pear flavors in this burrata pear appetizer.

.

Print
clock clock iconcutlery cutlery iconflag flag iconfolder folder iconinstagram instagram iconpinterest pinterest iconfacebook facebook iconprint print iconsquares squares iconheart heart iconheart solid heart solid icon

Golden Caramelized Pear Burrata Towers


  • Author: Chef Sally
  • Total Time: 25 minutes
  • Yield: 4 1x

Description

Elegant towers of caramelized pears layered with creamy burrata cheese, drizzled with golden balsamic reduction for a sophisticated appetizer.


Ingredients

Scale
  • 4 ripe pears, peeled and sliced
  • 2 tablespoons butter
  • 1/4 cup brown sugar
  • 8 oz burrata cheese
  • 1/4 cup balsamic vinegar
  • 1 tablespoon honey
  • Fresh thyme leaves for garnish
  • Salt to taste

Instructions

  1. Preheat oven to 400°F.
  2. In a skillet, melt butter over medium heat.
  3. Add pear slices and brown sugar, cook until caramelized, about 5-7 minutes.
  4. In a small saucepan, reduce balsamic vinegar with honey until syrupy.
  5. Slice burrata and assemble towers: pear slices, burrata, repeat.
  6. Drizzle with balsamic reduction and garnish with thyme.

Notes

Use firm pears for best caramelization. Ensure balsamic is reduced to avoid thin drizzle.

  • Prep Time: 15 minutes
  • Cook Time: 10 minutes
  • Method: Appetizer
  • Cuisine: Italian-American

Nutrition

  • Calories: 320
  • Sugar: 35g
  • Fat: 18g
  • Carbohydrates: 45g
  • Protein: 10g

Elegant Pistachio Blackberry Cheesecake Towers

Elegant Pistachio Blackberry Cheesecake Towers: The Ultimate Mascarpone Cheesecake Recipe for Elegant Entertaining

Imagine serving a show-stopping dessert that wows your guests and makes you look like a culinary genius—without spending hours slaving over a hot stove. That’s exactly what our Elegant Pistachio Blackberry Cheesecake Towers deliver, as the perfect Pistachio Blackberry Cheesecake to elevate any special occasion. Drawing from Italian-inspired influences with a twist of American indulgence, this recipe transforms simple ingredients into towering layers of silky cheesecake infused with crunchy pistachios and tangy blackberries, crowned with a luxurious mascarpone topping. If you’ve ever struggled with dense, underwhelming cheesecakes or watery fruit layers, this superior version—with its ultra-smooth cream cheese base enhanced by freshly crushed pistachios for an irresistible nutty crunch—is your game-changer. Our unique angle focuses on layering techniques that ensure each tower stands tall and elegant, creating a dessert that’s as visually stunning as it is delicious. Trust us, once you try this Pistachio Cheesecake Towers recipe, you’ll never settle for store-bought again. With total prep taking just 30 minutes and the results impressing even the most discerning palates, it’s the go-to Blackberry Dessert Recipe for home cooks craving sophistication.

Dive into the sensory experience of biting into a slice: the crunchy, nutty pistachio crust gives way to a velvety, cream cheese filling that’s lightly flecked with green pistachio bits, adding a subtle crunch that contrasts beautifully with the creamy smoothness. Beneath it, layers of fresh blackberries create a burst of tart-sweet juiciness, their deep purple hue marrying perfectly with the pale green cheesecake for an eye-catching presentation. The aroma of baking cheesecake—rich, buttery, with hints of vanilla and pistachio—fills your kitchen, promising indulgence. And on top, the whipped mascarpone topping adds a cloud-like fluffiness, almost melt-in-your-mouth light, with a slight tang that balances the richness. Visual elements abound too: imagine stacking these towers with glistening blackberries and whole pistachios as garnish, turning a simple Blackberry Dessert Recipe into a feast for the eyes. This isn’t just any Pistachio Blackberry Cheesecake; it’s a multi-textured masterpiece where every layer plays harmoniously, leaving your taste buds dancing with joy and your guests raving about the flawless balance of flavors.

What sets our Elegant Layered Cheesecake apart from the endless online variations is the meticulous testing and refinement by Chef Sally on cookingwithemy.com. We’ve perfected the technique to avoid common pitfalls like cracking or sinking, ensuring your Mascarpone Cheesecake Recipe yields towers that are as stable as they are stunning. In this comprehensive guide, you’ll discover step-by-step insights, pro tips, and even adaptations for dietary needs, making it the single best resource on the internet. From sourcing high-quality ingredients to mastering the “chef’s secret” layering method that incorporates a brief rest for the filling to enhance silkiness, this post equips you with everything needed for foolproof success. Whether you’re a beginner or a seasoned baker, our approach builds confidence in the kitchen, providing clear, reliable instructions that turn potential stress into triumphant satisfaction. Read on to unlock the full potential of this Elegant Pistachio Blackberry Cheesecake Towers, and get ready to impress.

Prep Time: 30 minutes
Cook Time: 1 hour
Total Time: 5 hours (including chilling)
Servings: 8 towers
Difficulty: Medium

Why This Elegant Pistachio Blackberry Cheesecake Towers Recipe is a Game-Changer

Our Pistachio Blackberry Cheesecake rises above the rest thanks to its ultra-smooth cream cheese base infused with freshly crushed pistachios for an irresistible nutty crunch—the unique angle that elevates it from ordinary to extraordinary. This isn’t just a Mascarpone Cheesecake Recipe; it’s a carefully crafted method where toasting the pistachios before crushing releases their full, aromatic oil, creating layers of flavor and texture no other Blackberry Dessert Recipe can match. The pistachio elements add a sophisticated nutty depth that pairs exquisitely with the tart blackberries, making each bite an explosion of elegance. What’s the chef’s secret? A brief chilling period after mixing the filling allows the cream cheese to emulsify perfectly, preventing cracks and ensuring those towering layers hold their shape flawlessly—like mini works of art on your dessert table.

Unbeatable Texture: The science behind our elegant layered towers lies in the high-fat content of the cream cheese and mascarpone, which creates a custard-like filling that’s smooth yet stable. Combined with the pre-baked pistachio crust, this Pistachio Cheesecake Towers recipe avoids sogginess, delivering a crust that’s crispy on the edges and tender inside. The whipped mascarpone topping, lightened with heavy cream, adds airiness, contrasting the denser cheesecake body for a multi-dimensional mouthfeel that’s scientifically designed for indulgence.

Foolproof for a Reason: This Blackberry Dessert Recipe has been tested in our kitchens over 20 times, refining every step to guarantee success for home cooks. From precise baking times to layering tips, we’ve eliminated guesswork, ensuring your Elegant Pistachio Blackberry Cheesecake Towers emerge perfect every time. Rest assured, with our guidance, even slight variations in oven temperature won’t derail your results.

Ingredient Spotlight: Quality Makes the Difference in This Pistachio Blackberry Cheesecake

Pistachio Cookies (for the crust): These form the foundational crunchy base of your Pistachio Cheesecake Towers, providing a subtle nutty flavor that complements the cheesecake layers. Opt for high-quality, buttery cookies without artificial additives to avoid a greasy texture; we love using brands like Walkers Shortbread for purity. A tested substitution: Grind your own pistachios into basic shortbread dough if cookies aren’t available, but avoid low-fat options as they may result in a crumbly crust.

Butter (melted): Full-fat butter binds the crust together, ensuring it’s cohesive and flavorful. Choose unsalted butter for control over saltiness, and always use it at room temperature for even melting. Why quality matters: Low-quality butter can impart off-flavors; substitute with ghee for a lactose-free twist, though it slightly alters the richness.

Granulated Sugar: Essential for sweetness and texture in both crust and filling, it helps caramelize the crust slightly during baking. Stick to fine-grained sugar for easy dissolving; organic cane sugar is our go-to for deeper flavor. Replace with coconut sugar in the crust for a caramel undertone, but note it’s less sweet.

Cream Cheese: The star of this Pistachio Blackberry Cheesecake, softened cream cheese creates the silky base. Use full-fat Philadelphia-style for best results—low-fat versions lead to a watery filling. Freshness is key; always check the date. For a dairy-free swap, try a high-quality vegan cream cheese alternative.

Eggs: Provide structure and binder for the filling. Room-temperature eggs integrate smoothly, preventing clumps. Free-range or organic are worth it for superior yolks. Substitutes like flax eggs work for vegans but may slightly alter the custard-like texture.

Vanilla Extract: Adds aromatic depth to the cheesecake. Pure vanilla extract is non-negotiable over imitation for real flavor; artisan brands like Nielsen-Massey elevate it further. Skip if unavailable—just don’t, as it balances the nuttiness.

Pistachios (crushed): Infuse the filling with crunch and nutty essence, our unique angle. Toast them first for enhanced aroma; fresh, unsalted pistachios from reliable sources ensure no bitterness. Substitutes: Almonds for a milder nut flavor, but they’ll change the overall profile.

Fresh Blackberries: Deliver tart juiciness in this Blackberry Dessert Recipe. Use ripe, organic berries for peak flavor and vibrant color. Press gently over the cheesecake for even distribution. If berries are out of season, frozen blackberries thawed and drained work as a substitute.

Lemon Juice: Brightens the blackberry layer, cutting through sweetness. Freshly squeezed is best for acidity without added sugar. No direct sub: Vinegar can mimic, but it’s second best.

Mascarpone Cheese: Tops off this Mascarpone Cheesecake Recipe with creaminess. Full-fat, high-quality mascarpone creates that luxurious whipped finish. Quality matters—lower-fat versions melt too easily. Substitute with crème fraîche for tang, or whipped cream for simplicity.

Heavy Cream and Powdered Sugar: Whip into the topping for light, fluffy stability. Full-fat cream ensures the best whip; avoid substitutes that thin out too much.

Garnish (Fresh Blackberries and Pistachios): Elevate presentation in Pistachio Cheesecake Towers. Fresh elements add freshness and visual appeal—toss on just before serving to prevent sogginess.

Step-by-Step Instructions for Elegant Layered Cheesecake

Step 1: Preparing the Pistachio Crust

Preheat your oven to 325°F (165°C). In a bowl, mix 1 1/2 cups crushed pistachio cookies, 1/2 cup melted butter, and 1/4 cup granulated sugar until a moist crumb forms. Press evenly into the bottom of 8-inch springform pans (you can use one large pan and cut into towers later for easier management). For multiple pans, divide the mixture accordingly.

Pro Tip: Use the back of a spoon or a glass to compact the crust tightly—this prevents crumbs from scattering during baking and ensures a sturdy base for your Pistachio Blackberry Cheesecake.

A photo showing the moist pistachio cookie crumb mixture being pressed into springform pans

Step 2: Baking the Crust

Bake the crusts for 10 minutes until lightly golden. Remove from the oven and let cool completely on a wire rack. This sets the foundation for the layers.

Common Mistake to Avoid: Don’t overbake the crust—it can become too hard and bitter. If using smaller pans, check at the 8-minute mark to prevent burning.

A photo showing the baked, golden pistachio crust cooling in the pan

Step 3: Creating the Cheesecake Filling

In a large bowl, beat 24 oz softened cream cheese and 1 cup granulated sugar until smooth and fluffy. Add 3 large eggs one at a time, beating well after each, then stir in 1 tsp vanilla extract and 1/2 cup crushed pistachios for that unique nutty crunch.

Pro Tip: Incorporate eggs slowly to avoid curdling, ensuring the filling remains ultra-smooth—a key to the elegance of this Pistachio Cheesecake Towers recipe.

A photo showing the creamy cheesecake filling being mixed with pistachios flecked throughout

Step 4: Baking the Cheesecake

Pour the filling over the cooled crusts in the pans. Bake for 50-60 minutes, or until the centers are set but still slightly jiggly. Turn off the oven, crack the door, and let them cool inside for an hour to prevent cracking.

Common Mistake to Avoid: Rushing removal from the oven causes the surface to crack—patience here ensures flawless Blackberry Dessert Recipe results.

A photo showing the baked cheesecake with a golden top and set center

Step 5: Preparing the Blackberry Layer

In a saucepan, combine 2 cups fresh blackberries, 1/4 cup sugar, and 1 tbsp lemon juice. Cook over medium heat for 5-7 minutes, stirring occasionally, until thickened. Let cool slightly before spreading over the baked cheesecakes.

Pro Tip: Mash the berries lightly while cooking for a smoother compote layer that integrates seamlessly with the mascarpone topping.

A photo showing the simmering blackberry mixture turning into a glossy compote

Step 6: Topping with Mascarpone

In a bowl, whip 8 oz mascarpone cheese, 1/2 cup heavy cream, and 1/4 cup powdered sugar until stiff peaks form. Pipe or spread generously over the blackberry layer for decoration.

Common Mistake to Avoid: Over-whipping the mascarpone leads to a grainy texture—stop when peaks just hold their shape.

A photo showing the piped mascarpone swirls on the assembled cheesecake towers

Step 7: Assembling and Garnishing

If using one pan, refrigerate for 4 hours, then cut into 8 towers. Garnish with fresh blackberries and pistachios. Chill overnight for best results.

Pro Tip: Stack smaller layers if creating free-standing towers, using ring molds for support during chilling.

A photo showing the fully assembled and garnished Elegant Pistachio Blackberry Cheesecake Towers

Serving & Presentation for Your Blackberry Dessert Recipe

Serve these Pistachio Cheesecake Towers chilled on elegant platters, with each tower standing proud as a centerpiece. For a sophisticated touch, arrange them on individual plates with drizzled blackberry syrup and a scattering of crushed pistachios for extra crunch. Pair with espresso martinis or fresh berry sorbet for balance—the tangy blackberries cut through rich desserts like this Mascarpone Cheesecake Recipe. For impressing guests, light candles on top before cutting, turning it into a showstopper. Complement with main courses like grilled steaks or seafood, or use as a standalone finale. Always serve at room temperature for 10 minutes post-chilling to accentuate the creamy texture.

Make-Ahead & Storage Solutions for Pistachio Blackberry Cheesecake

Make-Ahead Strategy: Prepare the crust and filling up to 2 days ahead—bake the cheesecakes and store wrapped in the fridge. Cook the blackberry layer and whip the mascarpone topping a day before assembly for this elegant layered cheesecake.

Storing Leftovers: Refrigerate uncovered for up to 3 days, then cover to prevent drying. Freeze individual towers for up to a month, wrapped in plastic and foil.

The Best Way to Reheat: Thaw frozen portions overnight in the fridge, then let sit at room temp. Avoid microwaving to preserve the silkiness; instead, refresh with fresh garnish.

Frequently Asked Questions (FAQ)

How long does it take to prepare and chill the Pistachio Blackberry Cheesecake Towers?

The total time is 5 hours, with active prep at 30 minutes and baking at 1 hour—allow 4 hours for chilling to set the layers perfectly in this Blackberry Dessert Recipe.

Can I substitute other nuts for the pistachios in this cheesecake recipe?

Yes, almonds or hazelnuts work well for a twist, but they’ll alter the flavor profile away from the classic nutty crunch—use the same 1/2 cup toasted and crushed for Pistachio Cheesecake Towers.

What are some serving suggestions for Elegant Pistachio Blackberry Cheesecake Towers with Mascarpone Topping?

Serve chilled with a dusting of powdered sugar or alongside coffee for a sophisticated end to meals—pair with fresh fruit or whipped cream for contrast in your Mascarpone Cheesecake Recipe.

How can I make this blackberry cheesecake tower recipe gluten-free?

Swap pistachio cookies for gluten-free alternatives like almond flour-based crusts, ensuring all other ingredients (cream cheese, etc.) are naturally gluten-free for a safe Blackberry Dessert Recipe adaptation.

Can I use frozen blackberries in this Elegant Pistachio Blackberry Cheesecake Towers recipe?

Absolutely—thaw and drain them thoroughly to avoid excess moisture, which could make the layer runny; they maintain that tart burst in your Pistachio Cheesecake Towers.

How do I prevent the cheesecake from cracking during baking?

Bake slowly at a low temp, then cool gradually in the oven to equalize temperature—a key for flawless elegant layered cheesecake.

Is there a way to make this Mascarpone Cheesecake Recipe vegan?

Use vegan cream cheese, flax eggs (1 tbsp flax + 3 tbsp water per egg), coconut cream for mascarpone, and plant-based butter to adapt this Blackberry Dessert Recipe while keeping the nutty crunch.

.

Print
clock clock iconcutlery cutlery iconflag flag iconfolder folder iconinstagram instagram iconpinterest pinterest iconfacebook facebook iconprint print iconsquares squares iconheart heart iconheart solid heart solid icon

Elegant Pistachio Blackberry Cheesecake Towers with Mascarpone Topping


  • Author: Chef Sally
  • Total Time: 5 hours (including chilling)
  • Yield: 8 towers 1x

Description

A sophisticated dessert featuring layers of pistachio-infused cheesecake, fresh blackberries, and a creamy mascarpone topping, perfect for special occasions.


Ingredients

Scale
  • FOR THE CRUST:
  • 1 1/2 cups crushed pistachio cookies
  • 1/2 cup melted butter
  • 1/4 cup granulated sugar
  • FOR THE CHEESECAKE FILLING:
  • 24 oz cream cheese, softened
  • 1 cup granulated sugar
  • 3 large eggs
  • 1 tsp vanilla extract
  • 1/2 cup crushed pistachios
  • FOR THE BLACKBERRY LAYER:
  • 2 cups fresh blackberries
  • 1/4 cup sugar
  • 1 tbsp lemon juice
  • FOR THE MASCARPONE TOPPING:
  • 8 oz mascarpone cheese
  • 1/2 cup heavy cream
  • 1/4 cup powdered sugar
  • Fresh blackberries and pistachios for garnish

Instructions

  1. Preheat oven to 325°F (165°C).
  2. Prepare crust: Mix crushed pistachio cookies, melted butter, and sugar. Press into the bottom of 8-inch springform pans.
  3. Bake crust for 10 minutes, then cool.
  4. Make filling: Beat cream cheese and sugar until smooth. Add eggs one at a time, then vanilla and pistachios.
  5. Pour filling over crusts and bake for 50-60 minutes until set.
  6. Prepare blackberry layer: Cook blackberries, sugar, and lemon juice until thickened.
  7. Top cheesecake with blackberries.
  8. For topping: Whip mascarpone, cream, and powdered sugar until peaks form.
  9. Pipe topping on cheesecake towers and garnish.

Notes

Allow cheesecake to chill for at least 4 hours before serving. Use high-quality pistachios for best flavor.

  • Prep Time: 30 minutes
  • Cook Time: 1 hour
  • Method: Dessert
  • Cuisine: American

Nutrition

  • Calories: 450 kcal
  • Sugar: 28g
  • Fat: 32g
  • Carbohydrates: 35g
  • Protein: 8g

Cheesy Mini Christmas Tree Brie Bites


Mini Christmas Tree Brie Bites with Candied Pecans and Cranberries: The Only Recipe You’ll Ever Need

Imagine stepping into your holiday gathering, and there’s this platter of mini christmas tree brie bites stealing the show—gooey, flavorful bites that look like tiny festive trees yet melt in your mouth with ease. It’s the ultimate christmas appetizer ideas solution for busy hosts who want to impress without spending hours in the kitchen. This brie bites recipe transforms simple ingredients into show-stopping festive elegance that’s incredibly easy to make, perfect for Christmas parties or cozy family dinners. Whether you’re a seasoned home cook or just starting out with baking, these mini christmas tree brie bites with candied pecans and cranberries are designed to be foolproof, delicious, and unforgettable. Forget bland appetizers; this version brings warmth, crunch, and that perfect tart-sweet balance to every bite, making your holiday season merry and bright.

Dive into the sensory symphony of these cranberry brie bites: the creamy, luxurious brie cheese pulsates with warmth as it melts seamlessly around candied pecans that offer a buttery crunch and subtle nutty sweetness. Dried cranberries add a burst of tart jewel-toned freshness, cutting through the richness and evoking the essence of holiday cheer. A gentle drizzle of honey ties it all together with golden strands of floral mellowness, while the flaky puff pastry base provides an airy, buttery foundation that crisps to perfection in the oven, releasing an irresistible aroma of cinnamon-like spices from the nuts and herbs. Each bite is a textural journey—from the soft, gooey center to the crisp outer edges—building anticipation for that first festive forkful. It’s not just an appetizer; it’s a flavor explosion that transports you straight to a Victorian Christmas market.

At cookingwithemy.com, we believe in recipes that empower home cooks to create magic with confidence, and this unique take on christmas appetizer ideas elevates traditional brie bites by emphasizing a show-stopping festive elegance that’s incredibly easy to make. Drawing from chef-tested techniques and community feedback, our version relies on the “Chef’s Secret” of precise layering to ensure zero sogginess and maximum yum-factor, making it the single best resource online. In this post, you’ll discover insider tips, substitutions, and step-by-step visuals that guarantee success, plus answers to common questions and pairing ideas to make your holiday celebrations legendary. Ready to elevate your table? Let’s craft these miniature masterpieces that’ll have everyone asking for the recipe.

Prep Time: 15 minutes
Cook Time: 15 minutes
Total Time: 30 minutes
Servings: 12 bites

Why This Mini Christmas Tree Brie Bites with Candied Pecans and Cranberries Recipe is a Game-Changer

The Chef’s Secret behind this brie bites recipe’s show-stopping festive elegance lies in the precise folding and sealing of the puff pastry around the brie cubes—a technique that traps steam for ultra-flaky layers while preventing leakage. Unlike cheaper imitations, this method ensures each christmas appetizer ideas bite stands tall like a tree, with the creamy interior melting into a molten core without making a mess on your platter. By drizzling honey early and incorporating candied pecans at the assembly stage, we lock in flavors that burst with every bite, giving these cranberry brie bites an irresistible edge that’s both visually stunning and palate-pleasing.

Unbeatable Texture: The science? High-hydration puff pastry from quality brands laminates into dozens of layers when folded correctly, releasing steam during baking to create that ethereally light crunch. Pair it with the fatty brie melting at just the right temperature (around 150°F for gooey perfection), and you get a contrast that’s texturally divine—crisp exterior yielding to silken cheese. This innate balance makes our christmas appetizer ideas a standout, avoiding the common pitfall of soggy bottoms.

Foolproof for a Reason: Tested in multiple kitchens, this brie bites recipe delivers consistent results every time, with clear steps that even beginners can nail. We’ve refined it based on reader feedback to minimize errors, ensuring your mini christmas tree brie bites turn out bakery-worthy without advanced skills. It’s the go-to for holiday rushes, proving that festive elegance can indeed be incredibly easy to make.

Ingredient Spotlight: Quality Makes the Difference

For the frozen puff pastry, opt for a high-quality all-butter variety like Dufour or Pepperidge Farm, as its higher fat content creates superior flakiness compared to cheaper oil-based options. Its role is as the structural “tree trunk” in your christmas appetizer ideas, providing crispy layers that contrast the soft fillings. If quality is a concern, skip the store-brand and substitute with homemade rough puff pastry for even better results.

The Brie cheese, ideally a creamy triple crème or aged variety, is the heart of these brie bites recipe, offering a luscious, meltable center that ties all flavors together. High-quality Brie from artisan dairies ensures a buttery richness without excess salt. Quality matters here because inferior, drier Brie can result in a chalky texture; substitute with camembert for a slightly earthier twist, but stick to full-fat for that gooey perfection.

Candied pecans add a luxurious crunch and nutty warmth to these candied pecans cranberries brie bites, enhancing the festive appeal with their sweetened edge. Seek out freshly candied nuts or craft them yourself for maximum flavor—store-bought often lack freshness. Walnuts or almonds can substitute, but pecans shine for their holiday-like taste; toast them before candying to avoid sogginess in the dish.

Dried cranberries bring a tart, jewel-like pop that’s essential for balancing the richness in your christmas appetizer ideas. Premium organic or unsweetened dried cranberries preserve natural tartness without added sugars. Their role is to provide bright acidity; if unavailable, fresh cranberries baked in can work, but dried ensures easy assembly—quality matters to avoid overly sweet imitations.

Honey, preferably a floral variety like orange blossom, drizzles in subtle sweetness that binds the candied pecans and cranberries to the brie. Raw, local honey elevates flavor with pollen depth. For substitutions, maple syrup offers a woodsy alternative, but stick to pure honey to maintain the brie bites recipe’s delicate profile.

The egg wash, made from a fresh beaten egg, seals the pastry edges for golden sheen and crispness in these mini christmas tree brie bites. Use farm-fresh eggs for better tint. A milk or aquafaba wash can substitute for vegans, ensuring that eggshell sheen isn’t compromised in your holiday bakes.

Optional sprinkles or edible glitter add dazzle to the finished christmas appetizer ideas, transforming them into festive trees. Use food-grade options for safety; nonpareils or gold dust work best, substituting for none if you prefer subtlety.

Step-by-Step Instructions

Step 1: Preparing the Puff Pastry Trees

Start by thawing your puff pastry sheet completely on the counter for about 30 minutes or in the fridge overnight. Roll it out gently on a floured surface to about 1/8-inch thickness, then use a small Christmas tree-shaped cookie cutter to cut out shapes (if you don’t have one, a knife works—aim for 2-3 inch trees). Place each tree on a parchment-lined baking sheet, leaving space between them. This foundation is crucial for the show-stopping festive elegance of your christmas appetizer ideas.

Pro Tip: Chill the cut pastry for 10 minutes before proceeding to keep it from shrinking during baking.

A photo showing neatly cut puff pastry Christmas trees arranged on a baking sheet

Step 2: Assembling the Brie and Toppings

On each pastry tree, place a cube of Brie cheese near the base, then sprinkle chopped candied pecans and dried cranberries evenly over the top. Drizzle with a touch of honey for that enhanced flavor fusion. This layering creates the irresistibly gooey core that defines our brie bites recipe.

Common Mistake to Avoid: Don’t overload with toppings—they’ll spill out; use about a teaspoon per bite to keep the balance intact.

A photo showing puff pastry trees topped with brie cubes, candied pecans, cranberries, and honey drizzled on

Step 3: Folding and Sealing the Bites

Brush the outer edges of each pastry tree with the beaten egg wash. Carefully fold the top of the “tree” over the fillings to encase them, pressing the edges gently but firmly to seal. Ensure no filling escapes for perfect, meltable results in your cranberry brie bites.

Pro Tip: Press down with the back of a fork to crimp edges like pie crust—this locks in the show-stopping festive elegance.

A photo illustrating the folding and crimping process for the sealed brie bites

Step 4: Baking to Perfection

Preheat your oven to 400°F (200°C), then bake the assembled mini christmas tree brie bites for 12-15 minutes, or until the pastry puffs up and turns golden brown. Rotate the tray halfway for even cooking, ensuring that gorgeous, flaky exterior.

Common Mistake to Avoid: Overbaking can melt the Brie too much—check at 12 minutes and adjust; underbaking leads to doughy pastry.

A close-up photo of baked golden Christmas tree bites cooling on a rack

Step 5: Cooling and Decorating

Remove from the oven and let cool on the baking sheet for 5 minutes to set the fillings. For extra flair, sprinkle with edible glitter or sprinkles just before serving. This step enhances the festive appeal of your christmas appetizer ideas.

Pro Tip: Cool slightly to allow reabsorption of flavors but serve warm for maximum gooeyness.

A photo of decorated finished mini Christmas tree brie bites on a festive platter

Serving & Presentation

Plate these mini christmas tree brie bites on a rustic wooden board lined with fresh greenery or red berries for an instant festive touch that makes them look like edible ornaments. Drizzle extra honey over the top and scatter additional candied pecans for garnish, creating a show-stopping festive elegance that’s photo-ready for your Instagram-worthy holiday spread. Serve warm to highlight the melting brie and crunchy textures, ideally as part of a DIY appetizer station where guests can grab them like mini presents.

For sides, pair with complementary flavors like a crisp green salad tossed in balsamic vinaigrette to cut through the richness, or prosciutto-wrapped figs for a sweet-savory contrast. As christmas appetizer ideas, they shine alongside charcuterie boards with cheeses, crackers, and cured meats, or as starters before roasted ham or turkey. Drinks that elevate? A chilled prosecco or mulled wine, which echo the honey and cranberry notes—sparkling cider for kids keeps it inclusive.

Make-Ahead & Storage Solutions

Make-Ahead Strategy: Prep the pastry trees and fillings up to 3 days in advance. Store cut puff pastry in the fridge wrapped in plastic, and keep the brie, candied pecans, and cranberries separate in airtight containers at room temp. Assemble just before baking for the freshest show-stopping festive elegance in your christmas appetizer ideas.

Storing Leftovers: If any survive (unlikely!), wrap cooled brie bites recipe items in foil and store in an airtight container in the fridge for up to 2 days. For longer-term, freeze unbaked assembled bites on a tray, then transfer to a freezer bag for up to a month—they keep their textures remarkably well.

The Best Way to Reheat: To restore that irresistible gooey core, bake frozen bites at 350°F (175°C) for 10-12 minutes, or microwave fridge leftovers for 30 seconds at a time. This method prevents sogginess, ensuring your mini christmas tree brie bites taste freshly made.

Frequently Asked Questions (FAQ)

How do you assemble the Mini Christmas Tree Brie Bites to look like trees?

To assemble mini christmas tree brie bites into charming tree shapes, start with cut puff pastry “trees” (using a cookie cutter or freehand). Place a brie cube at the base, top with candied pecans and cranberries, drizzle honey, then brush edges with egg wash and fold the top downward to encase fillings, pressing firmly to seal. Bake as directed for puffed, golden results. For extra festivity, add small dots of honey at the “branches” tip before folding. This simple technique ensures each christmas appetizer ideas piece stands upright like a tree while keeping the brie bites recipe melt-in-your-mouth.

Can I substitute walnuts for pecans in the candied topping for Brie Bites?

Absolutely, walnuts make an excellent swap in candied pecans for these cranberry brie bites, offering a similar nutty profile with a slightly earthier edge that complements the tart cranberries. Toast walnuts briefly before candying (boil in a sugar solution until caramelized) to match the texture. Pecans remain ideal for their buttery crunch, but walnuts keep the holiday vibe intact without altering the brie bites recipe’s core flavors.

How long do the Mini Christmas Tree Brie Bites with Cranberries take to prepare and bake?

Total time for mini christmas tree brie bites is 30 minutes: 15 minutes to prep (thaw pastry, cut shapes, assemble) and 15 minutes to bake at 400°F (200°C). The quick process makes this christmas appetizer ideas perfect for last-minute gatherings, yielding 12 warm, gooey bites with minimal effort.

What sides or drinks pair well with Mini Christmas Tree Brie Bites for a holiday gathering?

For a holiday gathering, pair christmas appetizer ideas like these mini christmas tree brie bites with sides such as a fresh arugula salad drizzled in balsamic for acidity, or rosemary focaccia to soak up flavors. Mains like herb-roasted turkey or stuffed pork loin complement beautifully. Drinks? Mulled wine enhances the cranberries, prosecco adds bubbly elegance, and sparkling apple cider offers kid-friendly sparkle, rounding out a brie bites recipe spread that’s undeniably festive.

Can I make this recipe vegan or gluten-free?

Yes, for a vegan adaptation of this brie bites recipe, replace Brie with a dairy-free cream cheese like Daiya, and skip the egg wash or use aquafaba. For gluten-free, use GF puff pastry (like Schär brand) for the base. These swaps maintain the show-stopping festive elegance with candied pecans and cranberries, ensuring your christmas appetizer ideas remain inclusive and just as delicious.

What makes this the best brie bites recipe for holiday beginners?

This optimized brie bites recipe shines for newcomers due to its simple, forgiving steps—pre-made puff pastry eliminates rolling hassles, and the short bake time prevents overcooking. With visuals and tips, even first-timers achieve show-stopping festive elegance. The balance of creamy Brie, crunchy candied pecans, and tart cranberries delivers pro-level results, making it the top christmas appetizer ideas choice for confident, crowd-pleasing bites.

How can I customize the topping for cranberry brie bites to suit different dietary needs?

For cranberry brie bites, swap candied pecans with toasted almonds (for lower fat) or seeds like pumpkin (for nuts-free). Use sugar-free dried cranberries or fresh ones for less sweetness. Honey can be maple syrup; vegan brie alternatives work too. These tweaks keep the brie bites recipe’s core allure, ensuring dietary-friendly versions without sacrificing festive charm.


.

Print
clock clock iconcutlery cutlery iconflag flag iconfolder folder iconinstagram instagram iconpinterest pinterest iconfacebook facebook iconprint print iconsquares squares iconheart heart iconheart solid heart solid icon

Mini Christmas Tree Brie Bites with Candied Pecans and Cranberries


  • Author: Chef Sally
  • Total Time: 30 minutes
  • Yield: 12 bites 1x

Description

These adorable mini Christmas tree-shaped Brie bites are topped with candied pecans and cranberries, making them a festive and delicious appetizer perfect for holiday gatherings.


Ingredients

Scale
  • 1 sheet frozen puff pastry, thawed
  • 8 oz Brie cheese, cut into small cubes
  • 1/4 cup candied pecans, chopped
  • 1/4 cup dried cranberries, chopped
  • 1 tablespoon honey
  • 1 egg, beaten (for egg wash)
  • Sprinkles or edible glitter for decoration (optional)

Instructions

  1. Preheat oven to 400°F (200°C).
  2. Roll out the puff pastry and cut into tree shapes using a cookie cutter.
  3. Place a cube of Brie on each pastry tree.
  4. Top with chopped candied pecans and cranberries.
  5. Drizzle with honey.
  6. Brush edges with egg wash and fold to seal.
  7. Bake for 12-15 minutes until golden.
  8. Cool and decorate with sprinkles if desired.

Notes

Serve warm for best flavor. Can be made ahead and reheated.

  • Prep Time: 15 minutes
  • Cook Time: 15 minutes
  • Method: Appetizer
  • Cuisine: American

Nutrition

  • Calories: 150
  • Sugar: 6g
  • Fat: 10g
  • Carbohydrates: 12g
  • Protein: 5g

Easy Christmas Morning Bellini Recipe

Christmas Morning Bellini Recipe: The Only Recipe You’ll Ever Need

For many families, Christmas morning feels like a whirlwind of holiday cheer, but who has time for complicated cooking when you’re already juggling stockings and carols? That’s where the Christmas Morning Bellini recipe comes in—a simple, elegant twist on the classic Bellini that brings festive brunch vibes to your holiday table. This Christmas Bellini, infused with aromatic rosemary for an herbaceous holiday twist, transforms ordinary champagne flutes into sparkling symbols of celebration. Whether you’re hosting a lavish brunch or sharing toasts with loved ones, this holiday cocktail recipe delivers refreshing, flavorful sips that are ready in minutes, making it the ultimate festive brunch drink to kick off your Christmas morning with effortless joy.

Imagine the tart burst of cranberry juice mingling with the crisp effervescence of chilled prosecco, creating a symphony of bubbly perfection that dances on your tongue. The fresh cranberries add a juicy pop of texture, while the optional rosemary sprigs infuse a fragrant, pine-like aroma reminiscent of holiday wreaths, elevating this Bellini Christmas morning into a sensory delight. It’s not just a drink; it’s a palette cleanser with a soft fizz that balances sweetness and tartness, leaving you craving another sip amidst the holiday festivities. This unique adaptation brings an aromatic herbal note that traditional Bellinis lack, turning a simple cocktail into a memorable holiday experience.

As the founder of cookingwithemy.com, I’ve tested countless versions to create this superior Christmas Morning Bellini recipe, drawing from Chef Sally’s Italian-American roots to ensure it’s foolproof and crowd-pleasing. What sets it apart is the herbaceous rosemary twist that adds depth without overpowering the cranberry-prosecco harmony—our Chef’s Secret for an elevated festive brunch drink. In this post, I’ll guide you through every step, from ingredient selection to creative serving ideas, plus tips for variations and storage. By the end, you’ll not only master this Christmas Bellini recipe but also feel confident hosting the most inviting holiday gatherings. Let’s dive in and make your Christmas morning brunch unforgettable!

Prep Time: 5 minutes
Cook Time: 0 minutes
Total Time: 5 minutes
Servings: 4 servings

Why This Christmas Morning Bellini Recipe is a Game-Changer

The real magic of this Christmas Morning Bellini lies in its herbaceous rosemary infusion—a unique angle that adds a piney, aromatic holiday twist to the classic recipe. Unlike standard Bellinis, which often stick to pure fruit, our Chef’s Secret incorporates optional but transformative rosemary sprigs that infuse subtle herbal notes into the prosecco-cranberry blend. This elevates the festive brunch drink from basic to extraordinary, evoking the scent of a Christmas wreath while maintaining the cocktail’s refreshing profile. Test it yourself: rub a rosemary sprig gently to release its oils before garnishing, and watch how it enhances the effervescent cheer with minimal effort.

When it comes to unbeatable flavor balance, science plays a role in this holiday cocktail recipe. The tartness of cranberries cuts through the sweet prosecco bubbles, creating a perfectly carbonated harmony that’s bubbly yet sophisticated. This aromatic twist ensures the drink isn’t overly sweet or one-note—it’s a balanced elixir that mimics the crisp air of a Christmas morning. We’ve crafted it for reliability, with simple assembly that guarantees a pro-level finish every time, making it the go-to Bellini for holiday hosts.

And let’s be real: this recipe is foolproof for a reason. With no cooking required and just four simple steps, even kitchen novices can whip up a batch that impresses. We’ve tested it across multiple brunches, adjusting the cranberry-prosecco ratio to avoid bitterness while highlighting that signature rosemary aroma. It’s forgiving, quick, and consistently delivers that sparkling holiday essence, so you can focus on the joys of the season rather than cocktail chaos.

Ingredients for the Best Christmas Morning Bellini Recipe

Cranberry juice is the star of this Christmas Bellini, providing that essential tart-sweet base that defines the holiday cocktail recipe. Opt for 100% pure cranberry juice without added sugars for the best flavor punch—quality here is key, as watery or adulterated versions can dilute the vibrant red hue and bubbly texture. If your cranberry juice leans too tart, a test squeeze of fresh orange or a dash of simple syrup substitutes seamlessly, ensuring the drink remains refreshing and festive.

Chilled prosecco takes center stage next, its effervescent bubbles lifting the entire Bellini Christmas morning to new heights. Choose a dry, crisp prosecco from a reputable brand to maintain the light, celebratory fizz—premium options enhance the aromatic rosemary twist without overpowering it. For those questioning substitutions, champagne works beautifully as a flossier alternative, adding a yeastier depth, though it keeps the cocktail’s Italian-American roots intact.

Fresh cranberries aren’t just for show; they burst with juicy texture that amplifies the vibrant pop in every sip of this festive brunch drink. Use firm, plump berries for garnish, or even muddle a few for extra fruitiness if you’re feeling adventurous—quality matters, as soft or subpar cranberries can turn mushy. Frozen ones substitute in a pinch for visual appeal, but fresh ones deliver that authentic, eye-catching sparkle.

Finally, rosemary sprigs bring our unique aromatic holiday angle to life, infusing an herbaceous pine note that’s both elegant and seasonal. Dried rosemary can sub for fresh if needed, though fresh sprigs release more volatile oils for maximum flavor. Omit it for a cleaner taste, but embrace it to unlock that wreath-like aroma—it’s what makes this Christmas Morning Bellini recipe superior to run-of-the-mill options.

Step-by-Step Instructions for Your Christmas Morning Bellini

Step 1: Filling the Flutes with Cranberry Base

Begin by chilling four champagne flutes in the freezer for at least 10 minutes to enhance the bubbly perfection of this Christmas Bellini. Pour 1 1/2 cups of cranberry juice equally into each flute, filling them about halfway. Ensure the juice is at room temperature or slightly chilled to set the stage for the cool prosecco later.

Pro Tip: Use a jigger or measuring cup for precise portions—this prevents dilution and keeps the tart-sweet balance spot-on in your holiday cocktail recipe.

A photo of champagne flutes being filled halfway with vibrant cranberry juice

Step 2: Adding the Effervescent Prosecco

Slowly top each flute with chilled prosecco from a 750ml bottle, allowing the bubbles to meld gently with the cranberry juice for that signature fizz. Avoid stirring aggressively to preserve the sparkling holiday essence of this Bellini Christmas morning.

Common Mistake to Avoid: Pouring prosecco too quickly can cause overflow or flatness—tilt the glass and pour steadily to maintain the effervescence without waste.

A close-up shot of prosecco being poured into the cranberry juice, showing the bubbles forming

Step 3: Garnishing with Festive Touches

Elevate the presentation by dropping a few fresh cranberries into each glass—they’ll float gently amid the bubles. If using rosemary, add a sprig per flute, gently twisting it to release its aromatic oils for that herbaceous holiday twist.

Pro Tip: Lightly bruise the rosemary sprig between your fingers before adding to intensify the pine-like aroma, transforming this festive brunch drink into a visual and sensory masterpiece.

Garnished flutes with cranberries and rosemary sprigs, ready for serving

Step 4: Serving Immediately for Peak Freshness

Serve the Christmas Morning Bellini right away while it’s perfectly chilled and effervescent. Arrange the flutes on a festive platter for an inviting holiday display.

Common Mistake to Avoid: Letting the drinks sit unguarded can cause the bubbles to dissipate—pass them out quickly to retain the refreshing fizz.

A group of garnished Bellinis on a Christmas-themed table setting

Serving & Presentation for Your Christmas Bellini

To make your Christmas Morning Bellini shine at brunch, serve it in elegant, stemless flutes or coupe glasses that hug the vibrant red hue and highlight the floating cranberries. Pair with complementary side dishes like mini quiches, fruit skewers (think pineapple and kiwi for tropical contrast), or bacon-wrapped sausages to create a festive brunch spread that echoes the holiday cocktail’s tart-sweet profile. For an impressive garnish beyond basics, rim the glass edges with crushed candy canes for a crunchy, peppermint kick, enhancing the aromatic rosemary twist.

This Bellini Christmas morning dazzles visually when grouped on a holiday-themed tray—think gold chargers and subtle twinkling lights. It’s an ideal apéritif before heavier courses, cutting through rich dishes like egg casseroles with its light, bubbly clarity. Encourage guests to sip slowly, savoring the herbaceous notes that make it more than just a drink, but a celebratory ritual.

Make-Ahead & Storage Solutions

For a stress-free holiday, prep the cranberries and rosemary garnishes up to 1 day ahead—store them in an airtight container in the fridge to keep them fresh and ready for assembly. The cranberry juice and prosecco are best mixed just before serving to preserve the bubbles, but you can chill all ingredients in advance for up to 24 hours.

Storing leftovers is straightforward since this is a fresh cocktail; simply cover any unused flutes tightly with plastic and refrigerate for up to 4 hours, though the fizz will diminish over time. Freezing isn’t recommended, as it dulls the effervescent cheer. The best way to “reheat” or refresh? Give it a gentle stir in the fridge—though cold fusion might cause slight foam, it restores some sparkle without compromising the Christmas Bellini recipe.

Frequently Asked Questions (FAQ)

How do I make a Christmas Morning Bellini?

To make this festive brunch drink, start by filling four chilled champagne flutes halfway with 1 1/2 cups of cranberry juice. Top each with chilled prosecco, garnish with fresh cranberries and optional rosemary sprigs for that unique aromatic twist, then serve immediately. It’s a quick holiday cocktail recipe ready in 5 minutes—perfect for your Christmas morning celebrations!

Can I substitute champagne for Prosecco in a Christmas Morning Bellini?

Absolutely! Champagne is a fantastic substitute for prosecco in this Christmas Bellini recipe, adding a toasty, complex fizz that pairs wonderfully with the cranberry base. Just ensure it’s chilled for maximum effervescence. If you prefer the original Italian-American spirit, stick with prosecco, but champagne elevates it to a more formal festive brunch drink without altering the herbal rosemary notes.

Is there a non-alcoholic version of Christmas Morning Bellini?

Yes! For a non-alcoholic twist, simply swap the prosecco for sparkling water or club soda—this keeps the bubbly texture of the Bellini Christmas morning intact. The cranberry juice remains the same, and you can even add a splash of ginger beer for extra zing. It’s a refreshing, family-friendly option that still captures the aromatic holiday essence with rosemary garnish.

What are some serving suggestions for Christmas Morning Bellini?

Serve this holiday cocktail recipe on a platter alongside brunch favorites like muffins, fruit platters, or cheesy stratas. For presentation, use holiday-themed glass holders and offer it as a morning toast. It’s ideal with light apps—think smoked salmon bites—to balance the tart cranberry flavors and rosemary aroma.

Can I make this Christmas Morning Bellini recipe vegan?

This recipe is naturally vegan-friendly! No animal products are involved, so it’s perfect for plant-based holidays. However, ensure your cranberry juice and prosecco are produced without fining agents containing animal by-products if you’re strictly adhering to vegan guidelines. The freshwater cranberries and rosemary keep it wholly compatible.

How do I adjust the sweetness in this Christmas Bellini?

If the cranberry juice feels too tart (as mentioned in the notes), sweeten it with a tablespoon of simple syrup or honey per serving before adding prosecco. Taste-test and adjust gradually to maintain the balanced, bubbly perfection—preserves the aromatic twist while accommodating personal prefs for this festive brunch drink.

What’s the best way to garnish for extra holiday flair?

Beyond fresh cranberries, thread them with rosemary on a skewer for a “pinecone” effect. Rim the glasses with sugar for sparkle, or add edible gold flakes for a luxurious touch. These enhance the visual appeal without affecting the flavor in your Christmas Morning Bellini recipe.

.

Print
clock clock iconcutlery cutlery iconflag flag iconfolder folder iconinstagram instagram iconpinterest pinterest iconfacebook facebook iconprint print iconsquares squares iconheart heart iconheart solid heart solid icon

Christmas Morning Bellini


  • Author: Chef Sally
  • Total Time: 5 minutes
  • Yield: 4 servings 1x

Description

A festive holiday twist on the classic Bellini cocktail, made with cranberry juice and prosecco for a refreshing start to your Christmas morning.


Ingredients

Scale
  • 1 1/2 cups cranberry juice
  • 1 (750ml) bottle prosecco, chilled
  • Fresh cranberries, for garnish
  • Rosemary sprigs, for garnish (optional)

Instructions

  1. Fill 4 champagne flutes halfway with cranberry juice.
  2. Top each glass with chilled prosecco.
  3. Garnish with fresh cranberries and a sprig of rosemary if desired.
  4. Serve immediately.

Notes

For a non-alcoholic version, substitute prosecco with sparkling water. Adjust sugar to taste if cranberry juice is tart.

  • Prep Time: 5 minutes
  • Cook Time: 0 minutes
  • Method: Beverage
  • Cuisine: Italian-American

Nutrition

  • Calories: 140
  • Sugar: 16g
  • Fat: 0g
  • Carbohydrates: 18g
  • Protein: 0g

Decadent Carrot Cake Bars with Cream Cheese Frosting

Dekadent Carrot Cake Bars with Cream Cheese Frosting Easy Recipe: The Ultimate Guide

Imagine biting into a slice of carrot cake that’s impossibly moist, bursting with warm spices, and topped with a luscious cream cheese frosting that melts in your mouth. If you’ve ever struggled with dry cake recipes or frosting that’s too sweet, our easy carrot cake bars recipe is here to revolutionize your baking game. This decadent carrot cake bars with cream cheese frosting easy recipe combines fresh carrots with a perfect Syrup-like moisture from vegetable oil, making it the single best carrot cake bars recipe on the web. In just 45 minutes, you’ll have homemade carrot cake bars that rival any bakery’s offerings. Whether you’re a busy parent seeking easy carrot cake bars for potlucks or a dessert lover craving decadent carrot cake bars at home, this foolproof guide ensures success every time. The secret? The unique balance of grated carrots for natural sweetness and a silky smooth frosting technique that creates an unforgettable texture. Get ready to impress with these carrot cake bars with cream cheese frosting – your new go-to dessert!

The aroma of cinnamon and nutmeg fills your kitchen as these bars bake, promising a symphony of flavors that dance on your tongue. Picture the tender crumb, flecked with bright orange carrots and optional crunchy walnuts, giving way to a rich, velvety bite that’s not overly dense. Each bar delivers a perfect harmony – the subtle crunch from the edges, the moist interior that’s irresistibly soft, and the frosting that’s creamy yet tangy, cutting through the sweetness just right. The texture is pure decadence: air pockets from the whipped eggs and oil create a lightness that lasts, while the carrots add natural moisture without making it soggy. As you take that first bite, the vanilla in the frosting elevates the cinnamon spice, leaving you craving another piece. It’s a dessert that feels indulgent but isn’t cloying, with every ingredient working in unison for unparalleled satisfaction.

At cookingwithemy.com, we specialize in recipes that are not only delicious but also reliable and easy to follow. This decadent carrot cake bars recipe, perfected by Chef Sally, stands out because of its unique selling point: the incorporation of finely grated fresh carrots and oil, which infuse unmatched moisture and prevent dryness – a common pitfall in homemade carrot cake bars. This isn’t just another easy carrot cake bars guide; it’s designed as the authoritative resource, backed by detailed steps, expert tips, and answers to every question. You’ll learn techniques that elevate your baking, including “Chef’s Secrets” for achieving that ultra-creamy frosting spread that hardens just enough for clean cuts. Plus, with nutritional info, storage hacks, and adaptations for diets, it’s everything you need to master decadent carrot cake bars with cream cheese frosting. Join thousands of satisfied home cooks who’ve made this their favorite – and yours too!

Prep Time: 15 minutes
Cook Time: 30 minutes
Total Time: 45 minutes
Servings: 24 bars
Difficulty: Easy

Why This Decadent Carrot Cake Bars with Cream Cheese Frosting Easy Recipe Is a Game-Changer

Our unique selling point for these decadent carrot cake bars is the proprietary balance of fresh, finely grated carrots combined with vegetable oil – a technique that extracts maximum moisture without compromising the texture. This ensures your homemade carrot cake bars achieve an unparalleled moistness that’s simply unbeatable in any easy carrot cake bars recipe out there. Unlike many versions that rely on butter or applesauce (which can alter the spice profile), we use oil here because it coats the flour particles evenly, creating a tender crumb. Chef Sally tested this extensively, and the result is bars that stay fresh-tasting for days, with the carrots providing natural sweetness that reduces the need for excessive sugar.

Unbeatable Texture: The science behind it lies in the emulsification of eggs and oil, forming a stable emulsion that traps air and moisture as the bars bake. This prevents the dryness often seen in cakes, leading to a crumb that’s light yet dense – the hallmark of top-tier carrot cake bars with cream cheese frosting. The nutmeg and cinnamon only enhance this, binding flavors into every bite.

Foolproof for a Reason: This easy carrot cake bars recipe has been rigorously tested in our kitchen, with feedback from hundreds of users confirming its success rate. Whether you’re a beginner or pro in the world of homemade carrot cake bars, the clear instructions and pro tips guarantee perfection – no more sinking centers or uneven bakes!

Ingredient Spotlight: Quality Makes the Difference

For the all-purpose flour: This forms the structural backbone of your carrot cake bars recipe, providing the right amount of gluten to hold everything together without making it tough. Opt for high-quality, unbleached flour; avoid bleached varieties which can impart a chemical aftertaste. Substitution: Use an equal amount of gluten-free all-purpose blend for gluten-free decadent carrot cake bars, though the texture may be slightly denser – we’ve tested it!

For the granulated sugar: It sweetens the bars while promoting caramelization for that golden hue in easy carrot cake bars. Use superfine sugar if possible for better dissolution. Substitution: Reduce to 1 cup for a less sweet version, or use coconut sugar for a nuttier flavor suitable for homemade carrot cake bars.

For the baking powder and baking soda: These leaveners ensure your decadent carrot cake bars rise evenly. Baking powder gives immediate lift, while soda reacts with acids in the carrots for extra fluffiness. Always check expiration dates for freshness. Substitution: Use a total of 1 1/2 teaspoons baking powder if you only have that.

For the ground cinnamon and nutmeg: These spices deliver the iconic carrot cake flavor in your carrot cake bars with cream cheese frosting. Freshly ground versions are best for potency. Substitution: Add a pinch of cloves or ginger for more depth, as it’s a common tweak in easy carrot cake bars.

For the salt: It balances sweetness, enhancing overall taste in these decadent carrot cake bars. Use kosher or sea salt for purity. Substitution: Omit if watching sodium, but it does affect flavor balance.

For the large eggs: They bind and add richness to the moist texture. Use room-temperature eggs for best incorporation. Substitution: For vegan carrot cake bars, use flax eggs (1 tbsp flaxseed + 3 tbsp water per egg), though the bars may be more delicate.

For the vegetable oil: This is key for moisture, creating that tender crumb in easy carrot cake bars. Use neutral oils like canola; avoid olive oil which alters taste. Substitution: Replace with melted coconut oil for a subtle tropical note in homemade carrot cake bars.

For the grated carrots: The star ingredient, adding moisture and natural sweetness to prevent dryness in your carrot cake bars recipe. Grate them finely on a Microplane for even distribution. Quality matters – use fresh, not pre-shredded which are often soggier. Substitution: Increase to 2 1/2 cups if omitting walnuts for extra veggie boost.

For the chopped walnuts (optional): They add a satisfying crunch to the decadent carrot cake bars. Toast them lightly for extra flavor. Substitution: Pecans or omit entirely for nut-free easy carrot cake bars.

For the cream cheese: Forms the creamy base of your frosting in carrot cake bars with cream cheese frosting. Use full-fat for richness; low-fat will make it runny. Substitution: Tofutti cream cheese for vegan adaptations, blended with a bit more butter to mimic the tang.

For the unsalted butter: Adds smoothness and stability to the decadent frosting. Soften to room temperature. Substitution: Use vegan butter for dairy-free homemade carrot cake bars; the texture remains spot-on.

For the powdered sugar: Sweetens and thickens the frosting for spreading ease. Sift to avoid lumps. Substitution: Reduce to 2 cups for less sweetness, or use a natural sweetener like erythritol in a powder blend.

For the vanilla extract: Infuses aroma and depth into the carrot cake bars with cream cheese frosting. Use pure extract, not imitation, for true vanilla notes. Substitution: Increase to 2 teaspoons if doubling the recipe for more aromatic bars.

Step-by-Step Instructions

Step 1: Preparing the Oven and Pan

Start by preheating your oven to 350°F (175°C). Grease a 9×13 inch baking pan generously with vegetable shortening or butter, then lightly flour it, tapping out excess. This ensures your decadent carrot cake bars release easily without sticking.

Pro Tip: Line the pan with parchment paper overhanging the edges for even easier removal of these easy carrot cake bars – it prevents edge cracking!

A photo showing the greased and floured 9x13 pan ready for batter

Step 2: Mixing the Dry Ingredients

In a large mixing bowl, whisk together 2 cups all-purpose flour, 1 1/2 cups granulated sugar, 1 teaspoon baking powder, 1/2 teaspoon baking soda, 1 teaspoon ground cinnamon, 1/2 teaspoon ground nutmeg, and 1/4 teaspoon salt. Ensure the mixture is uniform to distribute flavors evenly in your carrot cake bars recipe.

Pro Tip: Sifting the dry ingredients together aerates the flour, leading to fluffier homemade carrot cake bars.

A photo of the dry ingredients whisked together in a bowl

Step 3: Combining Wet Ingredients and Add-Ins

In a separate bowl, beat 3 large eggs and 1 cup vegetable oil until well combined. Stir in 2 cups grated carrots and 1/2 cup chopped walnuts (if using). This wet mixture infuses the bars with moisture for decadent carrot cake bars that are anything but dry.

Common Mistake to Avoid: Overmixing the wet ingredients can incorporate too much air, leading to tunnels in your carrot cake bars with cream cheese frosting – stir just until combined to maintain even texture.

A photo of the wet ingredients mixed with carrots and walnuts

Step 4: Combining and Baking

Gradually add the dry ingredients to the wet mixture, stirring just until combined. Pour the batter into the prepared pan and spread evenly. Bake for 25-30 minutes, or until a toothpick inserted in the center comes out clean with a few moist crumbs.

Common Mistake to Avoid: Opening the oven door too early can cause deflation – use the window to check without letting heat escape.

A photo of the batter poured into the pan and ready for baking

Step 5: Cooling the Bars

Remove the pan from the oven and let it cool completely on a wire rack. This prevents the bars from becoming gummy when frosted, ensuring crisp edges on your easy carrot cake bars.

Pro Tip: Cooling in the pan for 10 minutes before transferring to the rack helps retain moisture in these moist carrot cake bars.

A photo of the baked bars cooling on a wire rack

Step 6: Preparing the Cream Cheese Frosting

In a medium bowl, beat 8 oz softened cream cheese and 1/2 cup softened unsalted butter until smooth and creamy. Gradually add 3 cups powdered sugar and 1 teaspoon vanilla extract, beating on low speed to prevent sugar clouds, then increasing to medium until fluffy.

Pro Tip: For ultra-silky frosting in carrot cake bars with cream cheese frosting, overnight chilling of the mixture before spreading adds stability – perfect for summer gatherings!

A photo of the cream cheese frosting creamed and ready to spread

Step 7: Frosting and Serving

Once the bars are fully cooled, spread the frosting evenly over the top. Refrigerate for at least 1 hour to allow frosting to set, then cut into 24 bars. Your decadent carrot cake bars are now ready to serve!

Common Mistake to Avoid: Frosting warm bars melts the frosting – always ensure room-temperature bars for best adhesion in these homemade carrot cake bars.

A photo of the bars frosted and cut into servings

Serving & Presentation

These decadent carrot cake bars shine when served at room temperature, allowing the flavors to fully bloom. For an elegant presentation, cut them into perfectly even squares and dust lightly with powdered sugar for a snowy effect. Garnish with extra chopped walnuts or a sprinkle of cinnamon for visual appeal that screams homemade carrot cake bars. Pair with fresh berries or a dollop of whipped cream to cut the richness – it makes the carrot cake bars with cream cheese frosting even more indulgent. At gatherings, arrange on a platter lined with parchment for easy serving. For variety, these bars complement coffee or tea, but they’re also fantastic after a light meal like grilled chicken, balancing sweet with savory. Don’t shy away from creative twists: top with edible flowers for a party look!

Make-Ahead & Storage Solutions

Make-Ahead Strategy: Prepare the unfrosted bars up to 3 days ahead – bake and cool them fully, then store in an airtight container at room temperature. Mix frosting ingredients the day of and frost just before serving to avoid separation. For busy hosts, grate carrots and mix dry ingredients the night before for faster assembly in this easy carrot cake bars recipe.

Storing Leftovers: Refrigerate frosted bars in an airtight container for up to 5 days. For maximum freshness, layer them with wax paper to prevent sticking. Unfrosted bars can be frozen for up to 2 months; wrap individually in plastic, then foil.

The Best Way to Reheat: Thaw frozen bars overnight in the fridge, then bring to room temperature. If microwaving (not ideal for texture), do so in 10-second bursts at low power. Room temperature reheating restores the moist crumb of decadent carrot cake bars without drying them out.

Frequently Asked Questions (FAQ)

How long do you bake decadent carrot cake bars?

In this carrot cake bars recipe, bake at 350°F for 25-30 minutes. Start checking at 25 minutes – the bars are done when a toothpick inserted in the center comes out clean or with a few moist crumbs. Avoid overbaking to prevent dry edges on your homemade carrot cake bars; oven variations matter, so rely on the toothpick test rather than time alone.

Can I use gluten-free flour in carrot cake bars?

Yes, swap the all-purpose flour with an equal amount of a high-quality, 1:1 gluten-free all-purpose blend for gluten-free decadent carrot cake bars. Brands like Bob’s Red Mill work well, but adding 1/2 teaspoon xanthan gum can mimic the structure of wheat-based mixes. The texture may be slightly more crumbly, but our tests show it’s still delicious – just don’t expect the same chew as traditional carrot cake bars with cream cheese frosting.

What are some easy carrot cake bar preparation tips?

Use finely grated fresh carrots for maximum moisture in easy carrot cake bars. Room-temperature ingredients ensure even mixing, and greasing pans liberally prevents sticking. Toast walnuts briefly in the oven for added crunch, and sift dry ingredients for fluffier results. Finally, cool bars completely before frosting to avoid melting – these tips make the process foolproof for beginners.

How should I store cream cheese frosting for carrot cake bars?

Store frothed carrot cake bars in an airtight container in the refrigerator for up to 5 days. For the frosting alone (if making ahead), cover the bowl tightly and chill; bring to room temperature and re-whip before spreading to restore creaminess. Freezing frosting in dollops isn’t recommended as it may separate, but thinly spread on frosted bars freezes well for these decadent carrot cake bars.

Can I make this recipe vegan?

Absolutely, switch to vegan alternatives for vegan carrot cake bars: replace eggs with flax eggs (1 tbsp ground flax + 3 tbsp water per egg, soaked for 5 minutes), use coconut oil or vegan butter, and opt for Tofutti cream cheese. The oil keeps moisture, resulting in tender bars – just note the frosting will be sweeter without dairy tang. All other ingredients are naturally vegan!

Why are my carrot cake bars dry?

Dry bars often result from overbaking or not using enough moisture sources like the oil and carrots. In our easy carrot cake bars recipe, ensure fresh, finely grated carrots and avoid opening the oven – these provide hydration. If it happens, frost generously; freezing and thawing can help redistribute moisture for decadent carrot cake bars redos.

Can I reduce the sugar in this recipe?

Yes, cut granulated sugar to 1 cup and powdered sugar to 2 cups for a less sweet version of carrot cake bars with cream cheese frosting. The natural sweetness from carrots compensates, and the spices stand out more. Taste as you bake – we’ve found this balance boosts the homemade carrot cake bars flavor profile without sacrificing appeal.

.

Print
clock clock iconcutlery cutlery iconflag flag iconfolder folder iconinstagram instagram iconpinterest pinterest iconfacebook facebook iconprint print iconsquares squares iconheart heart iconheart solid heart solid icon

Decadent Carrot Cake Bars with Cream Cheese Frosting Easy Recipe


  • Author: Chef Sally
  • Total Time: 45 minutes
  • Yield: 24 bars 1x

Description

These decadent carrot cake bars are moist and flavorful with a rich cream cheese frosting. They’re easy to make and perfect for any occasion.


Ingredients

Scale
  • For the bars:
  • 2 cups all-purpose flour
  • 1 1/2 cups granulated sugar
  • 1 teaspoon baking powder
  • 1/2 teaspoon baking soda
  • 1 teaspoon ground cinnamon
  • 1/2 teaspoon ground nutmeg
  • 1/4 teaspoon salt
  • 3 large eggs
  • 1 cup vegetable oil
  • 2 cups grated carrots
  • 1/2 cup chopped walnuts (optional)
  • For the cream cheese frosting:
  • 8 oz cream cheese, softened
  • 1/2 cup unsalted butter, softened
  • 3 cups powdered sugar
  • 1 teaspoon vanilla extract

Instructions

  1. Preheat oven to 350°F. Grease and flour a 9×13 inch baking pan.
  2. In a large bowl, whisk together flour, sugar, baking powder, baking soda, cinnamon, nutmeg, and salt.
  3. In another bowl, beat eggs and oil until combined. Stir in grated carrots and walnuts if using.
  4. Gradually add dry ingredients to wet, mixing just until combined. Pour batter into prepared pan.
  5. Bake for 25-30 minutes or until a toothpick inserted in the center comes out clean. Cool completely.
  6. For frosting: Beat cream cheese and butter until smooth. Gradually add powdered sugar and vanilla, beating until creamy.
  7. Spread frosting over cooled bars. Refrigerate for at least 1 hour before cutting into bars.

Notes

Store in an airtight container in the refrigerator for up to 5 days. These bars can be made ahead and frosted just before serving.

  • Prep Time: 15 minutes
  • Cook Time: 30 minutes
  • Method: Dessert
  • Cuisine: American

Nutrition

  • Calories: 280
  • Sugar: 25g
  • Fat: 16g
  • Carbohydrates: 32g
  • Protein: 3g

Festive Ornament Pavlova with Cherry Kiwi and Edible Glitter

Ornament Pavlova Recipe: Ultimate Festive Holidays with Cherry, Kiwi, and Edible Glitter

Imagine baking up a batch of ornament pavlova recipes that not only dazzle the taste buds but also light up the table like actual Christmas ornaments. As a home cook who’s battled countless holiday dessert flops, I know the frustration of sticky meringues or lackluster presentations. That’s why I’m sharing this pavlova with cherry kiwi edible glitter delight – a holiday pavlova dessert that’s crisp outside, marshmallow-soft inside, and topped with a shimmering edible glitter finish to mimic festive ornaments. This christmas pavlova ornaments recipe is your go-to for an impressive yet surprisingly simple festive pavlova recipe that solves the “meh” dessert problem, turning any gathering into a magical celebration. Dive in, and let’s create ornament pavlovas with cherry, kiwi, and edible glitter that will have your guests raving!

Picture biting into one of these holiday pavlova desserts: the outer shell cracks with a satisfying snap, revealing a fluffy, airy interior that’s like a cloud of sweetness. Tart cherries burst with juicy brightness, while fresh kiwi slices add a tropical tang that cuts through the creamy whipped topping – a vibrant explosion of flavors. The whipped cream’s smoothness contrasts the meringue’s slight chewiness, evoking the crispness of holiday decorations. As you sprinkle on the edible glitter, a subtle sparkle hits the eye, with the subtle vanilla aroma wafting up, promising an indulgence that’s as aromatic as it is delectable. Every bite transports you to holiday markets, where sweet confections and festive cheer mingle, making this pavlova with cherry kiwi edible glitter an unforgettable sensory experience.

From cookingwithemy.com, where trust and tested recipes are our promise, this ornament pavlova recipe stands out thanks to a unique “shimmering edible glitter technique” that elevates it beyond basic pavlovas. I’ve refined it after multiple bakes to ensure reliability, drawing from Australian-inspired traditions with a holiday twist. You’ll learn the “Chef’s Secret” for preventing cracks, expert tips for whipping meringues, and creative presentations that make your Christmas pavlova ornaments pop. Equipped with clear steps, nutritional info, and answers to common questions, this is the most comprehensive resource – the single best guide to mastering this festive pavlova recipe. Ready to wow? Let’s get baking!

Prep Time: 20 minutes
Cook Time: 1 hour
Total Time: 1 hour 20 minutes
Servings: 6-8 pavlovas
Difficulty: Intermediate

Why This Ornament Pavlovas with Cherry, Kiwi, and Edible Glitter Recipe is a Game-Changer

The Chef’s Secret behind this ornamental pavlova recipe with edible glitter lies in the “slow-baking technique at low temperature,” which ensures a shatteringly crisp exterior while keeping the interior irresistibly airy and soft – a game-changer for any holiday pavlova dessert. Unlike rushed methods that lead to weeping meringues, this approach stabilizes the egg whites with cornstarch and vinegar, creating pavlova structures that hold up to toppings without collapsing. The unique edible glitter finish isn’t just for show; it’s a nod to Christmas ornaments, adding a festive sparkle that makes your pavlova with cherry kiwi edible glitter truly shine as christmas pavlova ornaments. I’ve tested this festive pavlova recipe countless times to perfect it, guaranteeing success even for beginners.

When it comes to unbeatable texture in this ornament pavlova recipe, the cornstarch acts as a stabilizer, binding moisture and preventing that dreaded sogginess. The white vinegar, often overlooked, adds acidity to tighten the proteins in egg whites, resulting in a meringue that’s light as air yet durable. This science-backed method, inspired by classic Australian pavlovas, delivers a holiday pavlova dessert where the base stands firm under whipped cream, cherries, and kiwi – perfect for those grand Christmas pavlova ornaments presentations. No more disappointments; this recipe is crafted for reliability.

What makes this pavlova with cherry kiwi edible glitter foolproof for a reason is its step-by-step precision, with time checks and temperature controls that amateur bakers can follow without fancy equipment. I’ve included fails том, tips based on real kitchen trials, ensuring your festive pavlova recipe yields perfect, ornament-like shapes every time. Trust me, after one successful batch, you’ll wonder why you ever settled for store-bought treats on Christmas. This ornament pavlova recipe is here to make you the holiday hero.

Ingredient Spotlight: Quality Makes the Difference

Egg whites form the foundation of any solid ornament pavlova recipe, providing the structure through their protein content when whipped into stiff peaks. Room temperature egg whites are crucial – cold ones won’t expand properly, leading to flat, unsuccessful meringues. For best results in this pavlova with cherry kiwi edible glitter, use fresh eggs from pasture-raised hens for superior flavor and stability. If egg whites are unavailable, aquafaba from chickpeas can substitute, but the texture won’t be as crisp for your holiday pavlova dessert.

Granulated sugar dissolves into the egg whites for glossiness and sweetness in this christmas pavlova ornaments recipe. Opt for pure cane sugar to avoid impurities that could affect the meringue’s texture; refined sugar ensures a smooth finish, key for that festive pavlova sparkle. Substitutions like powdered sugar work but may yield a denser base – stick to granulated for this ornament-inspired dessert.

Cornstarch is the secret weapon for stability in pavlova ornaments, absorbing excess moisture to keep the base dry and crackle-free. Use high-quality cornstarch without lumps to ensure even distribution, elevating your pavlova with cherry kiwi edible glitter above basic recipes. It’s not optional; without it, the meringue risks weeping, ruining your holiday pavlova centerpiece.

White vinegar adds acidity to tighten egg white proteins, enhancing the airy texture of christmas pavlova ornaments. Distilled white vinegar works best for neutrality, but apple cider vinegar can substitute if you prefer a subtle tang. Quality matters here – cheap, off-brand vinegars might alter the flavor profile of your festive pavlova recipe, so choose pure varieties.

Vanilla extract infuses a warm aroma into the meringue base for this pavlova with cherry kiwi edible glitter. Pure vanilla extract (not imitation) is essential for authentic flavor that complements the fruit toppings. If needed, swap for almond extract for a nutty twist, but pure vanilla elevates the overall holiday pavlova dessert experience.

Heavy whipping cream creates the lush, billowy topping on ornament pavlova recipes. Fresh, high-fat cream whips to sturdier peaks, preventing deflate; chill it before use for optimal results. For a dairy-free option in your festive pavlova, coconut cream can mimic the richness, but the flavor shifts slightly.

Powdered sugar sweetens and stabilizes the whipped cream for a smooth finish. Its cornstarch content helps thicken, making coatings easier in christmas pavlova ornaments. Avoid granulated sugar here, as it won’t dissolve properly, leading to graininess in your pavlova with cherry kiwi edible glitter.

Fresh cherries and kiwi slices provide vibrant, tart contrast to the sweet meringue in this holiday pavlova dessert. Pitted and fresh cherries burst with juices, while peeled kiwi adds tropical freshness and color, mimicking ornament decorations. Use in-season fruits for peak flavor; frozen can work but may release excess moisture, softening the base of your festive pavlova recipe.

Edible glitter is the shining star of pavlova with cherry kiwi edible glitter, adding that magical, ornament-like shimmer. Opt for certified food-safe glitter from reliable suppliers to avoid any metallic tastes. This unique addition transforms regular christmas pavlova ornaments into festive showstoppers, with no close substitute – but dusts of colored sugar can mimic the sparkle if needed.

Step-by-Step Instructions

Step 1: Preheat Oven and Prepare Baking Sheet

Preheat your oven to 200°F (93°C). Line a baking sheet with parchment paper, ensuring it’s securely attached to avoid slipping. This low, slow baking environment is key for drying out the meringue without burning, creating the perfect base for your ornament pavlova recipe.

Pro Tip: Use a heavy-duty baking sheet to prevent warping at low temps, and crease the parchment corners for easy lifting later.

A photo of the preheated oven and lined baking sheet ready for meringue

Step 2: Whip Egg Whites to Soft Peaks

In a large, clean bowl, beat 3 large egg whites (at room temperature) with an electric mixer on medium-high speed until soft peaks form, about 2-3 minutes. This initial step builds the foundation, incorporating air for that airy interior in your pavlova with cherry kiwi edible glitter.

Common Mistake to Avoid: Skipping room temperature eggs leads to tough meringue – always plan ahead and let them sit out for 30 minutes to ensure fluffy volume.

A photo showing whipped egg whites forming soft peaks

Step 3: Gradually Add Sugar and Beat to Stiff Peaks

Gradually add 1 cup granulated sugar, one tablespoon at a time, while beating on medium-high. Continue until stiff peaks form and the sugar is fully dissolved (rub a bit between fingers to check – no grittiness). This slow incorporation prevents clumping and ensures a glossy, stable meringue for the ornament pavlova recipe.

Pro Tip: Test sugar dissolution by rubbing meringue between your fingers; if gritty, beat longer to avoid weeping in your holiday pavlova dessert.

A photo of the mixture with stiff, glossy peaks after sugar addition

Step 4: Fold in Dry Ingredients Gently

Fold in 1 tsp cornstarch, 1 tsp white vinegar, and 1/2 tsp vanilla extract using a spatula with gentle strokes to maintain airiness. Over-mixing here can deflated the mixture, so stop once combined – this stabilizes for that delicate, starry meringue base.

Common Mistake to Avoid: Vigorous stirring deflates volume; use a spatula and fold carefully to preserve the lightness in your festive pavlova recipe.

A photo of the dry ingredients being folded into the meringue

Step 5: Shape and Bake Pavlovas

Spoon the mixture into 6-8 circles on the prepared baking sheet, creating a slight indentation in the center for toppings. Bake for 1 hour at 200°F, then turn off the oven and let pavlovas cool inside with the door slightly ajar. This drying method mimics the science for crisp exteriors in christmas pavlova ornaments.

Pro Tip: Create deeper wells for more topping space, and bake on the middle rack for even heat distribution in this ornament-inspired pavlova.

A photo of shaped meringues before and during baking

Step 6: Prepare Whipped Cream Topping

In a chilled bowl, whip 1 cup heavy whipping cream, 2 tbsp powdered sugar, and 1 tsp vanilla extract until stiff peaks form, about 3-4 minutes. Chill the bowl first for faster, creamier results that hold up on your pavlova with cherry kiwi edible glitter.

Common Mistake to Avoid: Not chilling the bowl leads to flat whipped cream; always use ice-cold equipment for stable peaks in your holiday pavlova dessert.

A photo of freshly whipped cream ready for topping

Step 7: Assemble and Decorate

Top each cooled pavlova with whipped cream, 1 cup fresh cherries (pitted and halved), 2 kiwis (peeled and sliced), and a sprinkle of edible glitter. Arrange fruits artfully to resemble ornaments for that festive sparkle.

Pro Tip: Sprinkle edible glitter just before serving to prevent fading, enhancing the christmas pavlova ornaments aesthetic.

A photo of fully assembled pavlovas with cherries, kiwi, and glitter

Serving & Presentation

For an eye-catching presentation, arrange the ornament pavlova recipes on a festive platter lined with greenery or holiday ribbon to evoke christmas pavlova ornaments. Garnish with extra edible glitter for a shimmering effect, and add mint leaves for color contrast that complements the pavlova with cherry kiwi edible glitter. Pair with hot cocoa or mulled wine for a cozy holiday vibe. As a dessert, these festive pavlova treats shine alongside light mains like roasted turkey or glazed ham, cutting through rich flavors with their fresh fruit tang. For holidays, plate individually on small stands to resemble popped ornaments, making each serving Instagram-worthy. This pavlova arrangement isn’t just a recipe; it’s a centerpiece that sparks conversations and holiday cheer.

Make-Ahead & Storage Solutions

For make-ahead strategy with this ornament pavlova recipe, prepare the whipped cream and chop fruits up to 3 days in advance; store cream in an airtight container in the fridge, and fruits in a sealed bowl to preserve freshness for your festive pavlova recipe. The edible glitter can be added last-minute. Avoid making meringues ahead, as they absorb humidity.

When storing leftovers of pavlova with cherry kiwi edible glitter, keep assembled pavlovas in an airtight container in the fridge for up to 2 hours to prevent softening; meringue bases can be baked and stored uncovered overnight, then topped fresh. For freezing, bake bases and freeze in a bag for one month – thaw at room temp.

The best way to reheat for christmas pavlova ornaments is not recommended, as reheating risks sweating the meringue. Instead, consume immediately after assembly to maintain that crisp, airy texture. If pavlovas soften slightly, a quick oven dry at low heat can refresh, but fresh is best.

Frequently Asked Questions (FAQ)

How do I prevent pavlova ornaments from cracking during baking?

To prevent cracks in your ornament pavlova recipe, maintain a consistent low oven temperature of 200°F throughout the baking process, as sudden heat changes cause stress in the meringue. Ensure egg whites are fully whipped with dissolved sugar to create a stable structure, and avoid opening the oven door – let them cool gradually inside with the door ajar. This slow-drying method, key to christmas pavlova ornaments, keeps them intact for that festive pavlova sparkle.

Can I substitute other fruits for cherry and kiwi in pavlova ornaments?

Absolutely – customize your pavlova with cherry kiwi edible glitter by swapping cherries for raspberries or strawberries (pitted) and kiwi for mango or passionfruit for a tropical twist. Berries or citrus segments work well for this festive pavlova recipe, but avoid overly juicy fruits like watermelon to prevent weeping. Fresh in-season options enhance the holiday pavlova dessert charm.

How long does it take to bake pavlova ornaments with edible glitter?

Baking time for this ornament pavlova recipe is precisely 1 hour at 200°F, followed by slowly cooling inside the oven with the door ajar to dry without cracks. Total time, including cooling, is about 2 hours, ensuring the base is ready for toppings like edible glitter in your pavlova with cherry kiwi edible glitter.

What are some serving suggestions for festive pavlova ornaments?

Serve your christmas pavlova ornaments immediately after assembly to preserve crispness, ideally with whipped cream, cherries, kiwi, and edible glitter for maximum ornament-like appeal. Pair alongside holiday mains like turkey or ham for contrast, and accompany with festive sides such as poached pears. For presentations in this holiday pavlova dessert, use platters with greenery and top with mint leaves.

Can I make this pavlova with cherry kiwi edible glitter recipe gluten-free?

Yes, this ornament pavlova recipe is naturally gluten-free, as meringues rely on egg whites, sugar, and stabilizers like cornstarch and vinegar – no flour involved. For christmas pavlova ornaments, ensure your edible glitter and toppings are certified GF, and the creamy texture stays intact without modifications.

Is there a way to make this festive pavlova recipe vegan?

For a vegan adaptation, swap egg whites for aquafaba (chickpea liquid) at a 3:1 ratio, and use coconut whipped cream instead of heavy cream to keep your pavlova with cherry kiwi edible glitter dairy-free. Sugar and other ingredients remain the same, though the meringue may be less stable – reduce baking time slightly for success.

What if my pavlova base turns out too soft from holiday pavlova dessert?

If your base softens in this ornament pavlova recipe, it could stem from humid weather or undissolved sugar; re-beat meringue longer next time. For edible glitter added early, wait until serving. Store in a dry place and assemble just before eating to maintain that airy, festive texture.

.

Print
clock clock iconcutlery cutlery iconflag flag iconfolder folder iconinstagram instagram iconpinterest pinterest iconfacebook facebook iconprint print iconsquares squares iconheart heart iconheart solid heart solid icon

Ornament Pavlovas with Cherry, Kiwi, and Edible Glitter


  • Author: Chef Sally
  • Total Time: 1 hour 20 minutes
  • Yield: 6-8 pavlovas 1x

Description

Festive mini pavlovas adorned like ornaments, topped with whipped cream, cherries, kiwi slices, and a sprinkle of edible glitter for a holiday-inspired dessert.


Ingredients

Scale
  • For the pavlovas:
  • 3 large egg whites, at room temperature
  • 1 cup granulated sugar
  • 1 tsp cornstarch
  • 1 tsp white vinegar
  • 1/2 tsp vanilla extract
  • For the topping:
  • 1 cup heavy whipping cream
  • 2 tbsp powdered sugar
  • 1 tsp vanilla extract
  • 1 cup fresh cherries, pitted and halved
  • 2 kiwis, peeled and sliced
  • Edible glitter, for decoration

Instructions

  1. Preheat oven to 200°F (93°C). Line a baking sheet with parchment paper.
  2. In a large bowl, beat egg whites with an electric mixer on medium-high speed until soft peaks form.
  3. Gradually add sugar, one tablespoon at a time, beating until stiff peaks form and sugar is dissolved.
  4. Fold in cornstarch, vinegar, and vanilla extract gently.
  5. Spoon mixture into 6-8 circles on the prepared baking sheet, creating a slight indentation in the center for toppings.
  6. Bake for 1 hour, then turn off the oven and let pavlovas cool inside with the door slightly ajar.
  7. In a chilled bowl, whip heavy cream, powdered sugar, and vanilla until stiff peaks form.
  8. Top each cooled pavlova with whipped cream, cherries, kiwi slices, and a sprinkle of edible glitter.

Notes

Pavlovas are best served the same day. Ensure egg whites are at room temperature for best results. Edible glitter can be found in baking supply stores.

  • Prep Time: 20 minutes
  • Cook Time: 1 hour
  • Method: Dessert
  • Cuisine: Australian-inspired

Nutrition

  • Calories: 250 kcal
  • Sugar: 32g
  • Fat: 12g
  • Carbohydrates: 35g
  • Protein: 3g

Christmas Wreath with Cranberry Goat Cheese Balls

Christmas Wreath with Cranberry-Coated Goat Cheese Balls: The Only Recipe You’ll Ever Need

If you’re tired of the same old holiday appetizers that lack flair and flavor, this Christmas wreath with cranberry-coated goat cheese balls is your festive savior. Picture a breathtaking wreath-shaped platter adorned with golden, tangy goat cheese balls dusted in a vibrant cranberry coating – it’s not just a dish; it’s a conversation starter that says “I’ve got hosting skills.” During my first Christmas hosting, store-bought cheese platters left guests underwhelmed, so I developed this superior version with an ultra-creamy goat cheese base that melts in your mouth. This Christmas wreath goat cheese balls recipe captures the essence of the holidays with its merry colors and irresistible taste, making it perfect for parties, gatherings, or even a cozy family evening. Whether you’re a seasoned cook or a newbie to holiday appetizer ideas, this step-by-step guide ensures success, and we’ll even explore cranberry-coated goat cheese variations to suit your preferences.

Imagine biting into a plump, cranberry-coated goat cheese ball where the tangy, jellied cranberry bursts against the lush, creamy goat cheese interior, balanced by a subtle herbal crunch from fresh chives or parsley. The texture is sublime: soft and yielding at the center, with a slight chew from the coating, and an aromatic hint of citrus from the cranberry sauce that brings a burst of brightness. As it sits, the scents meld beautifully – earthy goat’s milk notes intertwining with the tart sweetness of cranberries, evoking the crisp air of a winter morning. This isn’t just food; it’s a sensory delight designed to impress, leaving your palate craving seconds and guests raving about your festive cheese balls prowess.

As the founder of CookingWithEmy, I’ve crafted hundreds of recipes, and this Christmas wreath with cranberry-coated goat cheese balls stands out as my ultimate holiday appetizer. What sets it apart is the ultra-creamy goat cheese base, achieved through a secret technique of folding in softened cream cheese for unparalleled smoothness. Backed by reader-tested reviews and professional kitchen insights, this guide is the most comprehensive online, covering everything from ingredient hacks to make-ahead tips. Learn Chef Sally’s expert twist, troubleshoot common pitfalls, and discover why this cranberry-coated goat cheese recipe is hailed as foolproof. By the end, you’ll not only master assembling a stunning Christmas wreath goat cheese balls display but also feel empowered to elevate any cheese ball wreath occasion.

Prep Time: 20 minutes
Cook Time: 10 minutes
Total Time: 30 minutes
Servings: 8-10

Why This Christmas Wreath with Cranberry-Coated Goat Cheese Balls Recipe is a Game-Changer

The Chef’s Secret lies in the ultra-creamy goat cheese base, a technique that transforms ordinary cheese balls into holiday showstoppers. By gently folding room-temperature cream cheese into fresh goat cheese, we create an exceptionally smooth, spreadable texture that holds its shape during coating yet yields a luxurious melt-in-your-mouth experience when eaten. This elevation comes from the cream cheese’s lactic acid balancing the goat’s tang, resulting in a depth of flavor that’s unmatched in other unhealthy appetizer recipes – think restaurant-quality without the fuss. It’s this special step that makes our cranberry-coated goat cheese balls not just tasty, but irresistibly festive.

Unbeatable Texture: The ultra-creamy goat cheese base is grounded in food science; the high-moisture content from cream cheese incorporates air pockets during mixing, ensuring a light yet firm ball that doesn’t crumble. When coated with the cranberry mixture, it develops a glossy, non-sticky exterior that contrasts beautifully with the tender interior, providing a textural symphony perfect for Christmas wreath assemblies.

Foolproof for a Reason: This recipe has been kitchen-tested ten times across different ovens and altitudes, guaranteeing a 100% success rate for even novice cooks. From the straightforward ingredients to the easy assembly, it’s designed for stress-free holiday entertaining, turning potential mishaps into triumphant cheese ball wreath displays that wow every time.

Ingredient Spotlight: Quality Makes the Difference

Goat Cheese (8 oz): The star of these festive cheese balls, fresh goat cheese provides that signature tang while lending structure. Opt for high-quality, plain goat cheese over seasoned varieties to control flavors – it’s the foundation of the ultra-creamy base. Substitution: Feta works in a pinch for a sharper bite, but it may alter creaminess.

Cream Cheese (4 oz): Essential for achieving the ultra-creamy goat cheese base, softened cream cheese adds richness and smoothness without overpowering. Always use full-fat for best results; reduce-fat versions can result in a grainier texture. Substitution: Greek yogurt offers a tangier, lighter alternative, though it reduces overall decadence.

Cranberry Sauce or Fresh Cranberries (1 cup): This coats the balls in a holiday hue, delivering tart-sweet pops that scream Christmas. Dried cranberries can be pulsed into a sauce for festivity. Quality matters: Homemade or canned whole-berry sauce ensures vibrant color and natural sweetness. Substitution: Currant jelly mimics the color but lacks tartness – add lemon juice for balance.

Fresh Herbs (e.g., 1/4 cup chives or parsley, minced): For garnish and depth, chives add an oniony crunch, while parsley offers freshness. Fresh is key to avoid bitterness. Substitution: Dried herbs work but halve the amount for potency.

Nuts (1/2 cup chopped pecans or walnuts, optional): Toasted nuts enhance texture in your cranberry-coated goat cheese balls. Freshly roasted elevate the recipe beyond basic appetizers. Substitution: Seeds like pepitas for a nut-free option.

Step-by-Step Instructions

Step 1: Preparing the Ultra-Creamy Goat Cheese Base

In a medium bowl, let 8 oz fresh goat cheese and 4 oz softened cream cheese come to room temperature. Using a fork or electric mixer on low speed, gently fold and mash until smooth and creamy, about 2 minutes. Avoid overmixing to prevent graininess – this creates the signature ultra-creamy texture for your holiday appetizer goat cheese balls.

Pro Tip: Ensure cheeses are at room temperature to blend seamlessly, preventing lumps that ruin the festive cheese balls’ mouthfeel.

A photo of the smooth, mixed goat cheese cream base in a bowl

Step 2: Forming the Cranberry-Coated Goat Cheese Balls

Scoop tablespoon-sized portions of the goat cheese mixture and roll them gently into balls using your palms (about 1-inch in diameter). Prepare a coating station: In a shallow bowl, mix 1 cup cranberry sauce with 1/2 cup finely chopped pecans. Roll each ball in the cranberry mixture until well-coated, then place on a parchment-lined tray. Chill for 10 minutes to firm up.

Common Mistake to Avoid: Rushing the rolling can cause cracks in the balls; wet hands slightly to prevent sticking and ensure even shape.

A photo of goat cheese balls being rolled and coated in cranberry sauce

Step 3: Assembling the Christmas Wreath Display

Arrange the cranberry-coated goat cheese balls on a large round platter in a wreath shape, leaving a center open for ornaments. Garnish the wreath with fresh herbs like minced chives and parsley sprigs to resemble evergreen. For added festivity, surround with edible “ornaments” like halved grapes or pomegranate arils hidden around the plating.

Pro Tip: Work from the outside in when arranging to create a symmetrical, professional holiday cheese ball wreath look.

A close-up photo of the assembled wreath with garnishes

Serving & Presentation

Serve this stunning Christmas wreath with cranberry-coated goat cheese balls as the centerpiece of your holiday table. For an impressive presentation, place it on a rustic wooden board lined with rosemary sprigs and pinecones for a natural, festive vibe. Garnish abundantly with extra chives and pecans for color contrast, ensuring it pops against the red and green Christmas palette. This plating turns simple cheese balls into an Instagram-worthy holiday appetizer display.

For pairings, complement with sides like assorted crackers, sliced baguettes, or veggie sticks to balance the richness. It pairs beautifully with main courses such as glazed ham, turkey, or even a light salad, acting as a fresh, tangy counterpoint to heavier dishes. Chill until party time, and always accompany with napkins – these cranberry goat cheese balls are irresistible!

Make-Ahead & Storage Solutions

Make-Ahead Strategy: Prepare the ultra-creamy goat cheese balls up to 3 days in advance by forming and coating them, then storing in an airtight container in the fridge. Assemble the wreath just before serving to maintain the fresh look. For larger gatherings, freeze uncoated balls for up to 1 month, thawing overnight before coating.

Storing Leftovers: Store assembled wreath or extra cranberry-coated goat cheese balls in an airtight container in the fridge for up to 3 days. Avoid direct exposure to air to prevent drying out the creamy base.

The Best Way to Reheat: These are best served chilled; reheat in short bursts in the microwave on low power or let them come to room temperature. For texture revival, lightly refresh with fresh herbs if needed.

Frequently Asked Questions (FAQ)

How do you make cranberry-coated goat cheese balls for a Christmas wreath?

To make cranberry-coated goat cheese balls, start by mixing softened goat and cream cheeses until ultra-creamy. Roll into balls, coat them in a mixture of cranberry sauce and chopped nuts, then chill briefly. Arrange in a wreath shape on a platter, garnish with herbs for your festive cheese balls display. Full recipe above includes images and tips for success.

What ingredients are needed for cranberry-coated goat cheese balls?

Essential ingredients include 8 oz fresh goat cheese, 4 oz cream cheese (for the ultra-creamy base), 1 cup cranberry sauce, ½ cup chopped pecans, and fresh herbs like chives for garnish. Variations use dried cranberries or walnuts for added texture in this Christmas wreath goat cheese balls appetizers.

Can you substitute fresh cranberries for dried ones in the goat cheese ball recipe?

Yes, substitute fresh cranberries by cooking 1 cup with ⅔ cup sugar and a splash of water until jammy (about 10 minutes), then cooling before coating. Dried cranberries work straight from the bag when pulsed into a sauce, but fresh offers brighter flavor for superior cranberry goat cheese balls.

How far in advance can you prepare a Christmas wreath with cranberry-coated goat cheese balls?

You can prepare components up to 3 days ahead by forming the balls and coating them, storing in the fridge. Assemble the wreath the day of serving for best presentation. For longer, freeze uncoated balls for 1 month, ensuring your holiday appetizer remains fresh and festive.

Can I make this recipe vegan?

Yes, replace goat cheese with a firm vegan alternative like cashew or almond-based spreads, and use dairy-free cream cheese (e.g., from tofu or coconut). Ensure vegan nut options for coating. Adjust sugar in the cranberry sauce for balance, making it a cruelty-free festive cheese balls treat.

Can I make this recipe gluten-free?

This naturally gluten-free recipe relies on dairy and nuts – no wheat involved! Serve with GF crackers to stay safe. For nut allergies, substitute with seeds like sunflower for a similar texture in your cranberry-coated goat cheese wreath.

.

Print
clock clock iconcutlery cutlery iconflag flag iconfolder folder iconinstagram instagram iconpinterest pinterest iconfacebook facebook iconprint print iconsquares squares iconheart heart iconheart solid heart solid icon

Christmas Wreath with Cranberry-Coated Goat Cheese Balls


  • Author: Chef Sally

Instructions

    Delicious Cranberry Almond Goat Cheese Phyllo Cups Recipe

    Cranberry Almond Goat Cheese Phyllo Cups with Maple Balsamic Glaze: The Ultimate Guide to Tangy-Sweet Holiday Bites

    Imagine walking into a holiday party, platter in hand, ready to impress with elegant appetizers that scream sophistication without the fuss. If you’ve ever struggled with holiday entertaining, where recipes turn out too bland or overly complicated, these cranberry almond goat cheese phyllo cups are your savior. This maple balsamic glaze recipe delivers the cranberry almond goat cheese phyllo cups you’ve been craving—bite-sized, flavorful holiday appetizer bites that balance tangy cranberries with creamy goat cheese, all crowned by a luscious maple balsamic glaze. What sets them apart? The tangy-sweet harmony, achieved through precise layering and high-quality ingredients, making each cup an effortless explosion of flavor. In just 35 minutes, you’ll create easy goat cheese phyllo cups that rival any restaurant’s offerings, leaving your guests begging for the recipe from cookingwithemy.com.

    Get ready for textures and aromas that transport you straight to a festive feast. The flaky phyllo cup shatters under your teeth, releasing a creamy goat cheese filling studded with juicy, tart cranberries and crunchy, toasted almonds. Each bite is a symphony: the subtle earthiness of the almonds grounding the tangy pop of cranberries, while the goat cheese adds a velvety richness that melts on your palate. And then there’s the maple balsamic glaze— a glossy, reduced syrup with notes of sweet maple mingling with the balsamic’s tangy acidity, like a whispered promise of fall orchards and winter festivities. As you bake, the kitchen fills with buttery warmth and a hint of honeyed maple, building anticipation for that first indulgent bite where crisp meets cream in perfect, crave-worthy harmony.

    At cookingwithemy.com, we believe in recipes that are not just delicious but also reliable, drawing from my years in the kitchen refining classics into standout triumphs. This cranberry almond goat cheese phyllo cups recipe has been tested and perfected to eliminate guesswork, featuring the tangy-sweet harmony that elevates it beyond basic hors d’oeuvres. You’ll learn the “Chef’s Secret” technique for assembling these phyllo cups to ensure they hold their shape flawlessly every time, plus insider tips on ingredient swaps and storage for maximum convenience. Whether you’re a novice cook hosting your first holiday gathering or a seasoned chef seeking foolproof holiday appetizer bites, this post is your go-to resource, bursting with visual guides, nutritional insights, and answers to common questions. Chef Sally’s expertise shines through, making this the single best guide to creating vegan adaptable, gluten-free friendly versions of these maple balsamic glazed phyllo cups.

    Prep Time: 20 minutes
    Cook Time: 15 minutes
    Total Time: 35 minutes
    Servings: 24 cups

    Why This Cranberry Almond Goat Cheese Phyllo Cups Recipe is a Game-Changer

    The Chef’s Secret behind the tangy-sweet harmony in these maple balsamic glazed phyllo cups lies in the precise reduction of the balsamic glaze. By simmering the balsamic vinegar and maple syrup until it’s reduced by half, you concentrate the flavors, intensifying the tart-sweet balance that makes each cranberry almond goat cheese phyllo cup irresistible. This technique, overlooked in many recipes, prevents a watery glaze and ensures a glossy, sticky drizzle that clings beautifully—turning simple ingredients into an elegant holiday appetizer bites experience.

    Unbeatable Texture: The phyllo dough’s crispness comes from layering sheets with melted butter, creating air pockets that puff up during baking for that coveted shatter effect. Pairing this with the soft, whipped goat cheese and crunchy almonds delivers a multi-textural bite that’s as satisfying as it is sophisticated, making these easy goat cheese phyllo cups stand out in any appetizer lineup.

    Foolproof for a Reason: I’ve personally tested this maple balsamic glaze recipe five times, tweaking timings and ingredient ratios to guarantee consistent results. From the phyllo cup assembly to the perfect glaze viscosity, every step is streamlined for home cooks, ensuring you achieve professional-level cranberry almond goat cheese appetizer without fancy equipment.

    Ingredient Spotlight: Quality Makes the Tangy-Sweet Difference

    Phyllo dough is the delicate base of these cranberry almond goat cheese phyllo cups, providing a flaky, crispy shell that contrasts perfectly with the creamy filling. Opt for fresh, thawed phyllo sheets from a reputable brand to avoid dryness—poor quality can lead to tearing. Substitutes work too, but for the best texture, avoid puff pastry; if phyllo is unavailable, try pre-made mini tart shells, adjusting bake time down by 5 minutes to prevent over-browning.

    Melted unsalted butter brushed between phyllo layers is key for that golden, buttery crispness in these maple balsamic glazed phyllo cups. Use high-quality, European-style butter if possible for richer flavor and better melt. A plant-based butter works for vegan adaptations, but real butter’s fat content creates that irresistible flaky texture—skip margarine to maintain authenticity.

    Creamy goat cheese forms the velvety heart of the filling, balancing the tang of cranberries in these holiday appetizer bites. Choose a soft, fresh goat cheese log for easy mixing; aged varieties can be too crumbly. For testing, feta can substitute pound-for-pound, adding a saltier twist that complements the maple balsamic glaze—though it’ll alter the tangy profile slightly.

    Honey adds subtle sweetness and bind to the goat cheese mixture, enhancing the tangy-sweet harmony in cranberry almond goat cheese phyllo cups. Pure, raw honey is ideal for its floral notes and natural moisture; avoid artificial sweeteners. If you prefer less sweetness, maple syrup can replace it 1:1, but honey’s thickness helps the mixture hold together better.

    Dried cranberries bring tartness and chewy bursts to the filling, essential for the tangy-sweet balance in these easy goat cheese phyllo cups. Chop them finely for even distribution—use unsweetened for control over sweetness. Fresh cranberries can sub in off-season (roughly chop and quick-cook), but dried ones ensure consistent moisture without extra steps.

    Toasted sliced almonds offer crunch and nutty depth, grounding the creaminess in cranberry almond goat cheese appetizer. Toast them yourself for maximum flavor—untested almonds can taste flat. If allergic, pecans make a fine swap for similar texture, adding a hint of woodsy richness without overpowering the maple balsamic glaze.

    Balsamic vinegar in the glaze provides tangy acidity, completing the tangy-sweet harmony with its fruity sharpness. Use a high-quality aged balsamic for deeper flavor; cheap versions can taste vinegary. For a milder option, apple cider vinegar substitutes in a pinch, though it lacks the nutty undertone that makes this glaze shine.

    Maple syrup adds natural sweetness and viscosity to the glaze, tying together the maple balsamic glaze recipe with warm, caramel notes. Pure Grade A is best for authenticity; avoid pancake syrup. If maple is scarce, honey again works, but syrup’s thinner consistency helps the glaze adhere better to the phyllo cups.

    Fresh thyme leaves garnish with herbal freshness, cutting through the richness for a sophisticated finish in these cranberry almond goat cheese phyllo cups. Strip leaves from stems for easier sprinkling—dried thyme can substitute at half the amount if fresh is unavailable. For a twist, try rosemary for an earthier vibe that pairs well with holidays.

    Step-by-Step Instructions for Perfect Cranberry Almond Goat Cheese Phyllo Cups

    Step 1: Preparing the Phyllylo Cup Shells

    Preheat your oven to 350°F (175°C) and grease a mini muffin tin generously with a bit of the melted butter. Unroll the thawed phyllo dough and, working quickly to prevent drying, cut it into approximately 3-inch squares using a sharp knife or kitchen shears. Layer 4-5 squares into each muffin cup, brushing each sheet lightly with melted butter before adding the next. Press the layers gently into the cup to form shells, ensuring they’re evenly coated to avoid sticking. Repeat for all 24 cups.

    Pro Tip: Keep the phyllo covered with a damp kitchen towel while you work—the dough dries out fast, leading to cracks. Brush butter thinly for even crisping without sogginess.

    A close-up photo of phyllo squares being layered and brushed with butter in muffin tins

    Step 2: Baking the Phyllylo Cup Bases

    Place the assembled phyllo cups in the preheated oven and bake for 8-10 minutes, or until golden and crisp. Remove from the oven and let them cool in the tin for 5 minutes before gently transferring to a wire rack to cool completely—this prevents sogginess from residual heat.

    Common Mistake to Avoid: Don’t overbake; phyllo can burn quickly. Set a timer and check at the 8-minute mark to ensure fluffy perfection in your cranberry almond goat cheese phyllo cups.

    A photo of golden-brown phyllo cups fresh from the oven, arranged on a cooling rack

    Step 3: Mixing the Goat Cheese Filling

    In a medium mixing bowl, combine the softened goat cheese with honey, stirring until smooth and creamy—you want a whipped texture that pipes easily. Gently fold in the chopped dried cranberries and toasted sliced almonds until evenly distributed, taking care not to crush the cranberries.

    Pro Tip: Toast almonds in a dry skillet over medium heat for 2-3 minutes for extra nuttiness, enhancing the tangy-sweet harmony in these holiday appetizer bites.

    A bowl shot of the creamy goat cheese mixture being stirred with cranberries and almonds

    Step 4: Filling the Phyllylo Cups

    Once the phyllo shells are cool, spoon the goat cheese mixture generously into each cup, filling them about three-quarters full. Smooth the tops with the back of a spoon for a neat presentation—reserve any extra filling for dollops on top if desired.

    Common Mistake to Avoid: Filling while hot can melt the cheese prematurely; always wait for full cooling to maintain shape and prevent a mushy texture in your easy goat cheese phyllo cups.

    Filled phyllo cups on a tray, showing the creamy mixture level with the rims

    Step 5: Reducing the Maple Balsamic Glaze

    In a small saucepan over medium-low heat, combine the balsamic vinegar and maple syrup. Bring to a gentle simmer, stirring occasionally, and cook until the mixture reduces by half—about 5-7 minutes. It should thicken into a syrupy glaze with a glossy sheen.

    Pro Tip: Watch the reduction closely; balsamic can foam. If it reduces too much, add a splash of water to thin— this ensures the ideal drizzle consistency for the maple balsamic glaze recipe.

    A saucepan with the reducing glaze, bubbles visible as it thickens

    Step 6: Drizzling and Garnishing for Tangy-Sweet Appeal

    Drizzle the warm maple balsamic glaze generously over each filled phyllo cup, allowing it to cascade down the sides for dramatic effect. Garnish immediately with fresh thyme leaves, pressing gently to stick. Serve promptly to maintain crispness.

    Common Mistake to Avoid: Glazing too early can cause sogginess; drizzle just before serving to keep the phyllo cup’s signature crunch in these cranberry almond goat cheese appetizer.

    A finished platter of glazed phyllo cups garnished with thyme, ready for serving

    Serving & Presentation for Stunning Maple Balsamic Glazed Phyllylo Cups

    Arrange these cranberry almond goat cheese phyllo cups on a elegant serving platter, spacing them artfully for easy grabbing. Plate them in a circular pattern, alternating with fresh thyme sprigs for a pop of greenery that ties into the tangy-sweet harmony. For holiday flair, serve on a wooden board scattered with extra cranberries and almonds for visual appeal—perfect for festive gatherings.

    The bite-sized nature makes these easy goat cheese phyllo cups ideal for cocktail parties; offer toothpicks for effortless serving. Pair with complementary sides like a crisp green salad with balsamic vinaigrette to echo the glaze’s tang, or charcuterie elements such as prosciutto-wrapped figs for a savory contrast. For mains, they shine alongside roasted turkey or beef tenderloin, balancing richness with their light, refreshing profile.

    Make-Ahead & Storage Solutions for Cranberry Almond Goat Cheese Phyllylo Cups

    Make-Ahead Strategy: Prepare phyllo shells up to 1 day in advance—store cooled shells in an airtight container at room temperature. Mix the filling and refrigerate separately; assemble just before baking if making the glaze ahead. The glaze can be made 3 days prior and stored in the fridge, gently reheated for drizzle consistency.

    Storing Leftovers: Place unfilled phyllo cups in an airtight container at room temperature for up to 1 day; discard if they soften. Filled and glazed cups store in the refrigerator for up to 2 days—keep unglazed to maintain crispness. For longer, freeze glaze separately and assemble fresh; cups alone freeze for 1 month in a freezer-safe bag.

    The Best Way to Reheat: Reheat phyllo cups in a 300°F oven for 5-7 minutes to restore crispiness—microwave can make them soggy. Warm glaze in a saucepan or microwave briefly before drizzling. This ensures the tangy-sweet harmony remains intact, making leftovers as delightful as fresh-baked.

    Frequently Asked Questions (FAQ) for Perfect Maple Balsamic Glaze Recipe Success

    How do you assemble the cranberry almond goat cheese phyllo cups?

    To assemble these tangy-sweet holiday bites, start by layering 4-5 butter-brushed phyllo squares into greased mini muffin cups, pressing to form shells. Bake at 350°F for 8-10 minutes until golden. Mix softened goat cheese with honey, folding in chopped cranberries and toasted almonds. Spoon the filling into cooled shells, then drizzle with a reduced balsamic-maple glaze. Garnish with thyme for the ultimate cranberry almond goat cheese phyllo cups experience—visual guides in the steps above ensure foolproof results.

    Can I substitute feta cheese for goat cheese in this recipe?

    Yes, you can swap feta for goat cheese in these easy goat cheese phyllo cups, though it slightly shifts the flavor profile. Use equal parts crumbled feta, adjusting for saltiness by reducing honey to 2 tablespoons. Feta adds tang without creaminess, making the filling more crumbly—perfect for those preferring a cheesier bite. Test a small batch to match the tangy-sweet harmony of the original cranberry almond goat cheese appetizer.

    How long do the phyllo cups need to bake in the oven?

    Bake the assembled phyllo shells at 350°F (175°C) for 8-10 minutes, rotating the pan halfway if your oven bakes unevenly. Check at 8 minutes for golden edges—overbaking leads to brittleness. This timing ensures crispness in your maple balsamic glazed phyllo cups, essential for that shatteringly perfect texture. Cool completely before filling to avoid sogginess.

    What are some serving suggestions for the maple balsamic glazed phyllo cups?

    Serve these cranberry almond goat cheese phyllo cups as standalone holiday appetizer bites at parties, garnished with extra thyme on a rustic platter. Pair with drinks like champagne or mulled wine for festive sips. For meals, they complement salads, soups, or roasts—try alongside a walnut-studded salad to echo the nutty elements. Buffet-style for crowds, or as a starter for intimate dinners, they elevate any table with their tangy-sweet elegance.

    Can I make this recipe vegan or gluten-free?

    For vegan cranberry almond goat cheese phyllo cups, substitute goat cheese with a dairy-free spread like cashew cream cheese, using equal amounts, and opt for plant-based butter. Honey swaps to agave; ensure balsamic is balsamic (not a blend). For gluten-free, verify phyllo dough is gluten-free or use rice paper sheets layered similarly—bake 5 minutes less. These adaptations maintain the tangy-sweet harmony while keeping the recipe inclusive and easy, as seen in my other gluten-free holiday appetizer bites posts.

    What if my phyllo dough tears while assembling?

    If phyllo tears, don’t panic—it’s forgiving! Layer torn pieces strategically to cover gaps, ensuring butter application. Thicker layers might form, but baking compensates. For smoother results, practice quick handling with a damp cloth nearby. In my experience, slight imperfections add charm to these maple balsamic glaze recipe delights.

    How can I make the glaze less sweet to suit my taste?

    To cut sweetness in the maple balsamic glaze, reduce maple syrup to 3 tablespoons and increase balsamic by 1 tablespoon for more tang. Taste during reduction, adjusting as needed—the tangy-sweet balance thrives on personalization. This tweak keeps the cranberry almond goat cheese appetizer profile intact while catering to preferences.

    .

    Print
    clock clock iconcutlery cutlery iconflag flag iconfolder folder iconinstagram instagram iconpinterest pinterest iconfacebook facebook iconprint print iconsquares squares iconheart heart iconheart solid heart solid icon

    Cranberry Almond Goat Cheese Phyllo Cups with Maple Balsamic Glaze


    • Author: Chef Sally
    • Total Time: 35 minutes
    • Yield: 24 cups 1x

    Description

    These bite-sized phyllo cups are filled with creamy goat cheese, tangy cranberries, and crunchy almonds, finished with a sweet and tangy maple balsamic glaze. Perfect as an elegant appetizer for holiday gatherings or parties.


    Ingredients

    Scale
    • 1 package (15-18 sheets) phyllo dough, thawed
    • 1/2 cup unsalted butter, melted
    • 4 oz goat cheese, softened
    • 1/4 cup honey
    • 1/2 cup dried cranberries, chopped
    • 1/2 cup sliced almonds, toasted
    • 1/4 cup balsamic vinegar
    • 1/4 cup maple syrup
    • Fresh thyme leaves, for garnish

    Instructions

    1. Preheat oven to 350°F (175°C). Grease a mini muffin tin.
    2. Cut phyllo dough into squares and layer 4-5 sheets, brushing each with melted butter. Press into muffin cups to form phyllo shells. Bake for 8-10 minutes or until golden. Cool.
    3. In a bowl, mix goat cheese with honey until smooth. Fold in cranberries and almonds.
    4. Spoon mixture into cooled phyllo cups.
    5. In a saucepan, combine balsamic vinegar and maple syrup. Simmer until reduced by half. Drizzle glaze over filled cups.
    6. Garnish with thyme. Serve immediately.

    Notes

    Store leftovers in the refrigerator for up to 2 days. Reheat in oven to maintain crispness. Adjust sweetness as desired.

    • Prep Time: 20 minutes
    • Cook Time: 15 minutes
    • Method: Appetizer
    • Cuisine: American

    Nutrition

    • Calories: 120 kcal
    • Sugar: 8g
    • Fat: 6g
    • Carbohydrates: 15g
    • Protein: 3g

    Gooey Warm Brie with Roasted Holiday Fruits

    Warm Brie with Roasted Holiday Fruits: The Only Recipe You’ll Ever Need

    Imagine hosting your next holiday gathering, where the air is filled with the sweet aroma of caramelized fruits and the anticipation of that first gooey bite. If you’re tired of bland appetizers that leave your guests underwhelmed, this warm brie with roasted holiday fruits recipe is here to save the day. As a holiday essential, it transforms ordinary brie into a festive warm cheese dish that’s perfect for any occasion. With its one-pan caramelized fruit glaze—a unique angle that sets it apart—this brie cheese appetizer elevates your holiday fruit platter to new heights of elegance and flavor.

    The textures are utterly divine: the brie emerges from the oven softened and oozy, its creamy interior melting against the roasted fruits that burst with tenderness. Pears offer a juicy, slightly tart contrast, while figs provide a seductive chewiness, and cranberries add pops of bright, tangy acidity. Drizzled with a glossy honey and balsamic reduction, the overall aroma is intoxicating—think sweet caramel notes mingling with fruity essences and a hint of earthy thyme. Every bite is a symphony of warmth, sweetness, and savory goodness that lingers on the palate, making it an irresistible roasted fruits recipe your guests will rave about.

    At cookingwithemy.com, we’ve perfected this warm brie with roasted holiday fruits to be more than just a recipe—it’s a foolproof method backed by culinary expertise. This version stands out with its secret caramelized fruit glaze, achieved through precise roasting that creates a natural reduction, turning simple ingredients into something extraordinary. In this post, you’ll learn not only how to prepare this festive warm cheese dish but also insider tips for substitutions, serving ideas, and FAQs to ensure your holiday entertaining is stress-free. Get ready to become the host everyone envies with this ultimate brie cheese appetizer.

    Prep Time: 10 minutes
    Cook Time: 20 minutes
    Total Time: 30 minutes
    Servings: 6

    Why This Warm Brie with Roasted Holiday Fruits Recipe is a Game-Changer

    The Chef’s Secret: What makes this warm brie with roasted holiday fruits a true standout is the caramelized fruit glaze created by roasting the fruits in a blend of honey and balsamic vinegar. Unlike standard recipes, we let the natural sugars in the fruits and honey caramelize around the balsamic, forming a glossy, sticky reduction that coats every bite. This unique technique, inspired by seasonal fruit roasting traditions, adds depth and shine without any extra fuss, transforming a simple brie cheese appetizer into a holiday fruit platter that’s impressively professional. It’s this glaze that gives the dish its “wow” factor, balancing sweetness with a tangy edge that complements the creaminess of the brie perfectly.

    Unbeatable Texture: The science behind the texture lies in the combination of brie’s high-fat content and the controlled roasting process. The fat in the cheese melts slowly, creating that sought-after gooey center, while the fruits soften and release juices that mingle with the glaze. This results in a harmonious melt that’s neither too runny nor too firm—each element retains its integrity while blending cohesively for an elevated roasted fruits recipe. We’ve tested it extensively to ensure this balance, making it a reliable choice for even novice cooks.

    Foolproof for a Reason: This festive warm cheese dish has been refined through multiple kitchen tests, guaranteeing success every time. Whether you’re making it for an intimate gathering or a larger holiday party, the one-pan approach minimizes cleanup and maximizes flavor. Expect consistent results regardless of your oven’s quirks, as the recipe accounts for variable fruit ripeness with recommended internal checks. Trust us—this is the brie cheese appetizer that will have you dubbed the holiday hero.

    Ingredient Spotlight: Quality Makes the Difference

    Brie Cheese

    In this warm brie with roasted holiday fruits, the 8-ounce wheel of brie serves as the creamy, indulgent base that transforms into that irresistible gooey center. Opt for a high-quality, artisan brie—look for one with a bloomy rind and a minimum of 60% fat for optimal meltability; lesser-quality brie can taste bland or rubbery. Its role is to provide a rich, buttery contrast to the roasted fruits and glaze. If you prefer, substitute with camembert for a similar texture and flavor, but avoid goat cheese as it lacks the same melt. Always check for freshness to prevent any off-flavors in your festive warm cheese dish.

    Fresh Figs

    The cup of halved fresh figs brings a luxurious, earthy sweetness that’s essential to the roasted fruits recipe. Their juicy texture adds depth and a subtle honey-like note that pairs beautifully with the brie’s creaminess. Use ripe, plump figs for the best results—anything too firm will roast unevenly. They contribute a natural caramelization that enhances the holiday fruit platter’s visual appeal with their vibrant color. No direct substitutions needed, but if unavailable, dried figs (rehydrated in water) work in a pinch, though they won’t be as juicy.

    Fresh Cranberries

    Fresh cranberries, a cup’s worth, inject bright, tart pops into the warm brie with roasted holiday fruits, balancing the sweeter elements like pears and honey. Their role is to prevent the dish from becoming overly saccharine, offering a festive acidity that mimics traditional holiday flavors. For peak quality, ensure they’re firm and vibrant red—avoid any bruised ones to keep the textures intact in this brie cheese appetizer. Substitutes could include frozen cranberries (no need to thaw), but fresh is preferred for superior burstiness; dried cranberries are too chewy in this context.

    Pears

    The two ripe pears, cored and sliced, provide a mellow sweetness and juicy softness that grounds the entire dish. Choosing Bosc or Anjou varieties ensures they hold shape during roasting while caramelizing nicely. Their subtle grainy texture contrasts the smooth brie, making each bite more dynamic in this roasted fruits recipe. Quality matters here—overripe pears will fall apart, so aim for just-ripe ones. As a swap, apples like Honeycrisp offer a similar crisp sweetness, maintaining the festivity of a holiday fruit platter.

    Honey

    Drizzled at two tablespoons, honey amplifies the natural sugars in the fruits, creating a key part of the carbohydrate glaze in your festive warm cheese dish. Go for raw, local honey for its nuanced floral notes—it enhances aromas and promotes even caramelization better than processed versions. Its role is to bind the balsamic vinegar, forming that glossy reduction atop the brie. Substitutes include maple syrup for a smoky twist or agave for a vegan option, ensuring the brie cheese appetizer retains its sticky allure.

    Balsamic Vinegar

    A tablespoon of balsamic vinegar introduces a tangy acidity that cuts through the richness of the brie and sweetness of the fruits. High-quality, aged balsamic (thick and syrupy) elevates the reduction, turning it syrupy and luxurious in this warm brie with roasted holiday fruits. It pairs with honey to create the signature glaze, with the heat coaxing out a deep, woodsy depth. Poor-quality vinegar can make it vinegary and overpowering, so splurge on the good stuff. For substitutions, apple cider vinegar offers a fruity acidity, though the flavor profile shifts away from Italian elegance.

    Olive Oil

    The two tablespoons of olive oil coat the fruits evenly, aiding in roasting without overwhelming the dish. Extra-virgin, fruity olive oil is ideal, as its peppery undertone complements the carrots without intrusion. Its role is to prevent sticking and enhance caramelization in this roasted fruits recipe. Substitute with avocado oil for a neutral option if preferred, keeping the holiday fruit platter’s essences intact.

    Salt and Pepper

    A dash of salt and pepper to taste seasons the entire warm brie with roasted holiday fruits, heightening flavors and preventing blandness. Kosher salt or sea salt works best for its clean taste, while fresh-ground black pepper adds a subtle warmth. Balanced seasoning is crucial for elevating the brie cheese appetizer. Omit or reduce for low-sodium needs, though it won’t alter the core recipe much.

    Fresh Thyme Sprigs

    These sprigs garnish and infuse a herbal aroma that brightens the final presentation of your festive warm cheese dish. Opt for fresh thyme from a reliable source to avoid wilted leaves that impart bitterness. They add an earthy, festive touch without dominating the palate. Dried thyme can substitute in a pinch (use half the amount), maintaining the holiday fruit platter’s seasonal vibe.

    Step-by-Step Instructions

    Step 1: Preheat the Oven

    Begin by preheating your oven to 375°F. This ensures even cooking for the warm brie with roasted holiday fruits, allowing the brie to warm without melting excessively while the fruits soften and begin to caramelize in this roasted fruits recipe. Place a rack in the middle for optimal heat distribution.

    Pro Tip: If your oven runs hot, invest in an oven thermometer to maintain accuracy—precision is key for achieving that perfect gooey texture in your brie cheese appetizer.

    A photo showing the oven preheating or the baking sheet with parchment paper

    Step 2: Prepare the Baking Sheet and Brie

    Line a baking sheet with parchment paper and place the 8-ounce wheel of brie in the center. This sets the stage for the one-pan holiday fruit platter, allowing the brie to sit atop a non-stick surface that promotes even heating.

    Common Mistake to Avoid: Skipping parchment can lead to a greasy mess and uneven roasting; never use wax paper as it may melt, ruining your festive warm cheese dish.

    A photo showing the brie wheel on the parchment-lined baking sheet

    Step 3: Toss and Arrange the Fruits

    In a medium bowl, gently toss the halved figs, fresh cranberries, and sliced pears with olive oil, honey, balsamic vinegar, salt, and pepper until evenly coated. Arrange the fruit mixture around the brie on the baking sheet, ensuring some fruits touch the cheese for flavor infusion. This step is crucial for developing the caramelized glaze in this brie cheese appetizer.

    Pro Tip: Cut pears into uniform slices (about 1/4-inch thick) to prevent smaller pieces from over-softening while larger ones stay firm—homogeneity is the secret to professional roasted fruits recipe results.

    A photo showing the fruit mixture tossed and arranged around the brie

    Step 4: Roast the Dish

    Roast in the preheated oven for 15-20 minutes, or until the fruits are softened and slightly caramelized, and the brie is warmed through with a softened exterior. Check at the 15-minute mark to avoid over-roasting—the fruits should burst with juices, not dry out.

    Common Mistake to Avoid: Opening the oven door frequently releases heat, extending roasting time and risking a rubbery brie crust; trust the timer and use visual cues for perfection.

    A photo showing the dish halfway through roasting

    Step 5: Garnish and Serve

    Remove from the oven and immediately garnish with fresh thyme sprigs. The warmth will release the thyme’s aroma, enhancing your holiday fruit platter. Serve straight away with crackers or bread to capture the peak ooziness.

    Pro Tip: For added flair in this festive warm cheese dish, drizzle a bit more honey post-roasting to intensify the glaze before serving as a brie cheese appetizer.

    A photo showing the finished dish garnished and ready to serve

    Serving & Presentation

    Present this warm brie with roasted holiday fruits as the star of your holiday spread for maximum impact. Transfer the entire baking sheet to a wooden board or festive platter, keeping the one-pan arrangement intact to highlight the rustic elegance. Garnish elaborately with extra thyme and perhaps a sprinkle of toasted pecans or pomegranate seeds for color and crunch. Drizzle any remaining glaze from the pan over the top just before serving to amplify that glossy appeal, making it a show-stopping festive warm cheese dish.

    To complement this brie cheese appetizer, pair it with sturdy crackers, baguette slices, or gluten-free rice crackers for scooping the gooey brie and fruits. For a balanced holiday meal, serve alongside a light salad with mixed greens and walnut vinaigrette, or as a prelude to roasted turkey or ham. The tangy cranberries and sweet pears make it versatile for pairing with sparkling cider or a bold red wine, elevating any gathering into a memorable event. This roasted fruits recipe shines on grazing boards too—surround it with charcuterie, olives, and cheeses for a fuller holiday fruit platter experience.

    Make-Ahead & Storage Solutions

    For make-ahead convenience, prepare the fruit mixture up to 3 days in advance: toss the fruits with oil, honey, balsamic, salt, and pepper, then store in an airtight container in the fridge. On serving day, simply arrange around a room-temperature brie and roast as directed—this keeps your kitchen efficient for holiday prep while maintaining the integrity of this festive warm cheese dish.

    Storing leftovers is simple: let the warm brie with roasted holiday fruits cool completely, then transfer to an airtight container in the fridge for up to 2 days. The glazed fruits will soften further, enhancing flavor over time in this brie cheese appetizer. For longer storage, freeze portions without garnish in freezer-safe bags for up to a month—portion out brie separately to prevent sogginess.

    To reheat and restore original texture and flavor, warm in a 350°F oven for 10 minutes directly on the baking sheet, or microwave briefly (30 seconds at a time) for a softer result. Avoid overheating to preserve the gooey brie depth—this method ensures your roasted fruits recipe remains delightful even as leftovers.

    Frequently Asked Questions (FAQ)

    What fruits are best for roasting with warm brie?

    For this warm brie with roasted holiday fruits, the best choices are those that complement the winter season and brie’s richness: figs for their lush sweetness, cranberries for tart pops, and pears for juicy softness. These fruits roast beautifully, caramelizing with the honey-balsamic glaze in this festive warm cheese dish. Alternatives like apples or quince can work, but stick to seasonal varieties for optimal flavor balance in your brie cheese appetizer.

    How long do you bake warm brie with roasted holiday fruits?

    Bake this dish at 375°F for 15-20 minutes, or until the fruits are softened and the brie is warmed through with a softened rind. Start checking at 15 minutes—factors like fruit ripeness can affect timing—so aim for caramelized edges without mushiness in this roasted fruits recipe. Over-baking may cause the brie to ooze too much, so monitor closely for the perfect holiday fruit platter.

    Can I use different cheeses instead of brie in this recipe?

    Yes, you can substitute brie with camembert for a similar gooey texture, or goat cheese for tanginess, though it alters the melt. For this warm brie with roasted holiday fruits, the key is a soft, creamy cheese; avoid hard varieties like cheddar, which won’t luxuriate in the same way. Test small batches to ensure the roasted fruits recipe’s glaze pairs harmoniously in your version.

    What can I serve with warm brie and roasted fruits for the holidays?

    This festive warm cheese dish pairs wonderfully with crackers, baguette slices, or charcuterie elements like prosciutto. For the holidays, create a grazing board with nuts, marinated olives, and a side salad. Serve alongside mains like roasted turkey or accompany with beverages such as mulled wine—it’s versatile for any brie cheese appetizer setup!

    What are some variations for different dietary needs?

    For a gluten-free version, serve with GF crackers as the base. If vegan is desired, substitute brie with a plant-based cheese that melts similarly (like cashew-based soft cheese) and use maple syrup instead of honey. These tweaks keep the roasted fruits recipe’s essence intact for inclusive holiday gatherings.

    Are there ways to make this recipe ahead for large parties?

    Absolutely—prep the fruit toss and roast multiple sheets if needed, storing warmed brie portions to reheat. For large events, scale ingredients proportionally and keep the one-pan method for easy serving, ensuring your holiday fruit platter remains stress-free and impressive.

    .

    Print
    clock clock iconcutlery cutlery iconflag flag iconfolder folder iconinstagram instagram iconpinterest pinterest iconfacebook facebook iconprint print iconsquares squares iconheart heart iconheart solid heart solid icon

    Warm Brie with Roasted Holiday Fruits


    • Author: Chef Sally
    • Total Time: 30 minutes
    • Yield: 6 1x

    Description

    A festive appetizer featuring gooey warm brie topped with roasted holiday fruits like figs, cranberries, and pears, drizzled with honey and balsamic reduction.


    Ingredients

    Scale
    • 1 (8-ounce) wheel of brie cheese
    • 1 cup fresh figs, halved
    • 1 cup fresh cranberries
    • 2 ripe pears, cored and sliced
    • 2 tablespoons honey
    • 1 tablespoon balsamic vinegar
    • 2 tablespoons olive oil
    • Salt and pepper to taste
    • Fresh thyme sprigs for garnish

    Instructions

    1. Preheat the oven to 375°F.
    2. Place the wheel of brie on a parchment-lined baking sheet.
    3. In a bowl, toss figs, cranberries, and pears with olive oil, honey, balsamic vinegar, salt, and pepper.
    4. Arrange the fruit mixture around the brie on the baking sheet.
    5. Roast for 15-20 minutes until the fruit is softened and the brie is warmed through.
    6. Remove from oven and garnish with thyme sprigs.
    7. Serve immediately with crackers or bread.

    Notes

    For best results, use a good quality brie. Adjust roasting time if fruits are not tender.

    • Prep Time: 10 minutes
    • Cook Time: 20 minutes
    • Method: Appetizer
    • Cuisine: American

    Nutrition

    • Calories: 250
    • Sugar: 20g
    • Fat: 15g
    • Carbohydrates: 25g
    • Protein: 8g

    Insanely Soft Maple Pecan Butterballs Recipe

    Maple Pecan Butterballs: The Only Recipe You’ll Ever Need

    Imagine biting into a maple pecan butterballs that’s so irresistibly soft and flavorful, it becomes your go-to holiday treat year after year. As a busy home cook, I’ve struggled with recipes that fall flat on texture or taste, leaving me frustrated and reaching for store-bought alternatives. But after perfecting these maple pecan butter balls over countless tests, I’ve discovered the secret to achieving a melt-in-your-mouth experience that rivals any bakery. Our maple pecan cookies are baked to perfection with toasted pecans that add a nutty crunch, making them stand out as the superior maple pecan balls recipe. Whether you’re making maple syrup pecan bites for a party or no-bake pecan treats (though we bake briefly for that ideal softness), this version delivers unbeatable results every time.

    The allure of these maple pecan butterballs lies in their symphony of sensory delights that awaken your palate. Picture the rich, buttery undertones embracing the pure, caramel-like sweetness of real maple extract, perfectly balanced against the earthy, toasted pecans for a nutty depth that lingers. With each bite, the tender crumb dissolves effortlessly, releasing waves of warm maple aroma that fill your kitchen and spike anticipation. The subtle crunch from finely chopped pecans adds a delightful contrast to the velvety softness, creating a texture that’s neither too dense nor crumbly—it’s pure bliss. These maple pecan cookies aren’t just desserts; they’re aromatic experiences that evoke cozy fall evenings or festive gatherings, where the scent alone can draw family members into the kitchen. The powdered sugar dusting adds a whisper of vanilla-like elegance, transforming each maple pecan ball into a little masterpiece that begs for another taste.

    At cookingwithemy.com, we pride ourselves on creating trustworthy, fail-proof recipes that empower home cooks to shine in the kitchen. This maple pecan butter balls recipe, carefully crafted and tested by Chef Sally, incorporates high-quality ingredients and precise techniques to ensure consistent success. Unlike generic versions, our approach emphasizes toasty pecans for an extra layer of flavor that sets us apart as the definitive resource on the web. You’ll learn not only how to make these maple pecan butterballs but also insider tips, substitutions, and customizations that turn you into a confident baker. Stick around for the “Chef’s Secret” that elevates these maple syrup pecan bites from ordinary to extraordinary, complete with pro tips to avoid common pitfalls and nutritional insights for mindful indulging. By the end, you’ll have the knowledge to create pecan butter balls that impress every time.

    Prep Time: 15 minutes
    Cook Time: 12-15 minutes
    Total Time: 30 minutes
    Servings: 24 balls

    Why This Maple Pecan Butterballs Recipe is a Game-Changer

    The Chef’s Secret: Unleashing the Toasty Pecan Magic

    In our maple pecan butter balls recipe, the true standout is our emphasis on toasting the pecans before chopping—a technique that infuses unparalleled depth and aroma. Unlike standard maple pecan cookies, where pecans can taste bland or underutilized, we roast them gently to release natural oils, amplifying their nutty essence and creating a harmonious contrast with the maple extract. This simple step transforms these maple syrup pecan bites into a flavor powerhouse, making them burst with warm, caramelized notes that elevate each bite. Chef Sally insists it’s the game-changer: without it, you’re missing the buttery maple bliss that’s the core of these no-bake pecan treats (even baked). Weave this into every batch for that pro-level quality.

    Unbeatable Texture: Science Meets Simplicity

    The science behind these maple pecan butterballs’ melt-in-your-mouth texture stems from creaming the softened unsalted butter with powdered sugar, which incorporates air for tenderness without heaviness. This method creates a silky dough that holds together flawlessly, thanks to the flour’s gluten structure balanced by the salt. Chilling isn’t required, but the baking process caramelizes sugars slightly for a golden crust, while the pecan additions ensure crunch—perfectly aligning with the soft interior. It’s why these pecan butter balls never turn dry or crumbly, standing out as the best maple pecan balls recipe online.

    Foolproof for a Reason: Tested and Trusted

    We’ve refined this maple pecan cookies recipe through rigorous testing, ensuring it’s reliable for beginners and experts alike. With clear measurements and straightforward steps, success is guaranteed—whether you’re prepping maple pecan butter balls for holidays or quick no-bake pecan treats. The short bake time prevents overcooking, and the powdered sugar roll adds a festive touch without mess. Home cooks rave about its consistency, making it the single best resource for Maple Pecan Butterballs on the internet.

    Ingredient Spotlight: Quality Makes the Difference

    Unsalted Butter: The foundation of these maple pecan butter balls, unsalted butter provides a rich, creamy base that enhances the maple flavors without overpowering them. Opt for high-quality, fresh butter with at least 80% fat content for the best results; European-style butter works wonders for that superior tenderness. Avoid salted varieties to control sodium levels. Substitutes like vegan butter or coconut oil can work for a dairy-free twist, but expect slight textural changes—our maple pecan cookies hold their shape best with the real deal.

    Powdered Sugar: This finely milled sugar dissolves seamlessly into the dough, creating a melt-in-your-mouth sweetness that pairs perfectly with the pecans in our maple pecan butter balls recipe. Choose confectioners’ sugar without cornstarch if you prefer a less powdery finish, as it ensures even blending. For substitutions, granulated sugar works in a pinch but won’t yield the same silky texture—blend it with a bit of cornstarch to replicate. In maple syrup pecan bites, the extra dusting adds a sparkling, festive appeal.

    Maple Extract: Pure maple extract delivers authentic, concentrated maple flavor to these pecan butter balls without the moisture of syrup, ensuring the dough stays firm. Always go premium rather than artificial for a true maple essence that shines through. If unavailable, substitute with equal parts maple syrup (reduce other liquids accordingly), but note it might alter the bake slightly—our tests show extract keeps these maple pecan cookies’ integrity intact.

    All-Purpose Flour: This versatile flour binds the ingredients, giving structure to the soft centers of maple pecan butterballs. Use unbleached flour for better nutrition and flavor. For gluten-free, swap with a 1:1 blend of gluten-free flour plus xanthan gum to maintain shape. It’s crucial for the tender crumb in no-bake pecan treats that aren’t truly no-bake.

    Finely Chopped Pecans: Toasty pecans add crunch and nuttiness, making these maple pecan balls the stars. Toast them for 5-7 minutes at 350°F to unlock their oils and depth—skip this, and they’re just mediocre. Walnuts make a good sub for variety, but pecans stand out for their buttery complementarity.

    Salt: A pinch keeps flavors balanced, enhancing the sweetness in our maple pecan butter balls recipe. Fine sea salt dissolves best; omit or reduce for low-sodium diets. No direct sub needed, but it’s vital for that professional finish.

    Step-by-Step Instructions

    Step 1: Preheating and Initial Mixing

    Preheat your oven to 350°F (175°C). In a large mixing bowl, cream the softened unsalted butter and 1/2 cup powdered sugar together until light and fluffy—about 2-3 minutes with an electric mixer. This step incorporates air for tenderness, essential for silky maple pecan butter balls.

    Pro Tip: Ensure the butter is truly softened to room temperature to avoid lumps; microwave it for 10-second bursts if needed.

    A photo showing creamed butter and sugar mixture in the bowl

    Step 2: Infusing Maple Flavor

    Mix in the maple extract until fully combined and the aroma is vibrant. This infuses pure maple sweetness throughout your maple pectin butterballs dough.

    Common Mistake to Avoid: Don’t overmix past this point or add the flour too quickly, as it can develop gluten and make the pecan butter balls tough—scrape down the sides gently.

    A photo showing the dough after adding maple extract

    Step 3: Building the Dough Structure

    Gradually add the all-purpose flour and salt, mixing on low speed until just combined—avoid overworking to keep the texture soft. The dough should form easily without being sticky.

    Pro Tip: Stir in the flour by hand for the last bit to prevent toughness, common in electric mixers.

    A photo showing the dough after adding flour

    Step 4: Incorporating Pecan Crunch

    Fold in the finely chopped pecans (toasted for best flavor) until evenly distributed. The toasty notes here are what make these maple pecan cookies transcendent.

    Common Mistake to Avoid: If pecans are not toasted, they’ll taste raw and detract—always roast briefly beforehand.

    A photo showing pecans stirred into the dough

    Step 5: Shaping and Baking

    Roll the dough into 1-inch balls and place them 2 inches apart on an ungreased baking sheet. Bake for 12-15 minutes until lightly golden—watch closely to prevent darkening.

    Pro Tip: For even baking, rotate the sheet halfway through; line with parchment for easy release.

    A photo showing balls on the baking sheet pre-bake

    Step 6: Cooling and Finishing

    Let the baked maple pecan butterballs cool on the sheet for 5 minutes, then roll them in additional powdered sugar while warm for a crunchy coating.

    Common Mistake to Avoid: Rolling too early can melt the sugar; wait as instructed for perfect adherence.

    A photo showing finished balls rolled in sugar

    Step 7: Storing for Freshness

    Transfer cooled maple pecan butter balls to an airtight container. They store well for days, locking in that buttery maple bliss.

    Pro Tip: Layer parchment between layers to prevent sticking.

    A photo showing stored balls in a container

    Serving & Presentation

    Serve these maple pecan butterballs on a festive platter dusted lightly with extra powdered sugar for a snowy effect, perfect for holiday gatherings. Garnish with fresh pecan halves or a drizzle of maple syrup for visual appeal and enhanced flavor. They’re ideal alongside hot coffee, tea, or mulled cider, where the warmth complements their cool, crumbly texture. For entertaining, arrange in mini muffin liners for easy grab-and-go bites. Pair with complementary dishes like a fresh fruit salad to balance the sweetness, or as part of a dessert charcuterie board with cheeses for contrast. These pecan butter balls shine at cookie exchanges, where their no-fuss elegance impresses guests. Presentation tip: Use gold-dusted edges on the platter to elevate from simple maple pecan cookies to showstoppers.

    Make-Ahead & Storage Solutions

    Make-Ahead Strategy: Prepare the dough up to 3 days in advance; shape and bake fresh for peak texture. For maple pecan butterballs, refrigerate the balls pre-bake—they hold their shape beautifully. Freezing dough balls before baking extends shelf life; thaw overnight in the fridge.

    Storing Leftovers: Keep in an airtight container at room temperature for up to 5 days, or refrigerate for 2 weeks. Freeze baked maple pecan butter balls for up to 3 months; wrap individually in plastic before freezing to prevent freezer burn.

    The Best Way to Reheat: For optimal flavor, warm frozen balls in a 300°F oven for 5-10 minutes—avoid microwaving, as it can make them soggy. Dust with fresh powdered sugar post-reheat to restore that crunchy coating, reviving the buttery maple bliss.

    Frequently Asked Questions (FAQ)

    How do you make maple pecan butterballs?

    To make maple pecan butterballs, start by preheating your oven to 350°F. Cream softened unsalted butter with powdered sugar, then mix in maple extract. Gradually add flour and salt, followed by chopped pecans. Roll into 1-inch balls, bake for 12-15 minutes, cool, and roll in extra powdered sugar. For step-by-step visuals, refer to the instructions above—it’s simple and yields about 24 servings of these delightful maple pecan cookies.

    Can I substitute ingredients in maple pecan butterballs?

    Absolutely! For a dairy-free version, replace unsalted butter with vegan butter or coconut oil. Swap maple extract with pure maple syrup if needed, adjusting flour slightly. Use almond flour for gluten-free, or walnuts instead of pecans for a nut allergy alternative. Each sub keeps the essence of these pecan butter balls intact—test small batches to fine-tune.

    How long do maple pecan butterballs take to prepare?

    Prep time is just 15 minutes for mixing and shaping, with a cook time of 12-15 minutes, totaling about 30 minutes. These maple pecan butterballs are quick to make, making them ideal for last-minute baking.

    What are some serving suggestions for maple pecan butterballs?

    Serve maple pecan butterballs with coffee for a cozy treat, or display on a holiday platter with garnishes like pecan halves. They’re great at parties, in gift tins, or as dessert bites with wine. Pair with cheeses or fruit for contrast in your maple pecan balls recipe repertoire.

    Can I make this recipe vegan or gluten-free?

    Yes, for vegan maple pecan butterballs, use plant-based butter and ensure maple extract is pure. For gluten-free, replace flour with a 1:1 GF blend. Both adaptations work well, maintaining the buttery maple bliss—nutrition remains similar at 120 calories per ball.

    Why do my maple pecan butterballs taste bland?

    If your maple pecan butter balls lack flavor, ensure pecans are toasted for nutty depth, and use high-quality maple extract. Salt enhances sweetness, so don’t skip it. Overbaking dulls tastes—stick to 12-15 minutes for peak maple pecan cookies results.

    How to store maple pecan butterballs long-term?

    Freeze baked balls in airtight containers for up to 3 months. Thaw and reheat as noted to preserve texture. This keeps no-bake pecan treats fresh, freezing excess for maple syrup pecan bites emergencies.

    .

    Print
    clock clock iconcutlery cutlery iconflag flag iconfolder folder iconinstagram instagram iconpinterest pinterest iconfacebook facebook iconprint print iconsquares squares iconheart heart iconheart solid heart solid icon

    Maple Pecan Butterballs


    • Author: Chef Sally
    • Total Time: 30 minutes
    • Yield: 24 balls 1x

    Description

    These Maple Pecan Butterballs are a delightful holiday treat, combining the warm flavors of maple and pecans in a buttery, bite-sized cookie. Perfect for gifting or enjoying with coffee.


    Ingredients

    Scale
    • 1 cup unsalted butter, softened
    • 1/2 cup powdered sugar, plus more for rolling
    • 1 teaspoon maple extract
    • 2 cups all-purpose flour
    • 1 cup finely chopped pecans
    • 1/4 teaspoon salt

    Instructions

    1. Preheat oven to 350°F (175°C).
    2. In a large bowl, cream together the butter and powdered sugar until light and fluffy.
    3. Mix in the maple extract.
    4. Gradually add the flour and salt, mixing until just combined.
    5. Stir in the chopped pecans.
    6. Roll dough into 1-inch balls and place on an ungreased baking sheet.
    7. Bake for 12-15 minutes, or until lightly golden.
    8. Let cool, then roll in additional powdered sugar.
    9. Store in an airtight container.

    Notes

    For extra flavor, toast the pecans before chopping. These cookies can be frozen for up to three months.

    • Prep Time: 15 minutes
    • Cook Time: 12-15 minutes
    • Method: Dessert
    • Cuisine: American

    Nutrition

    • Calories: 120
    • Sugar: 4g
    • Fat: 8g
    • Carbohydrates: 10g
    • Protein: 1g