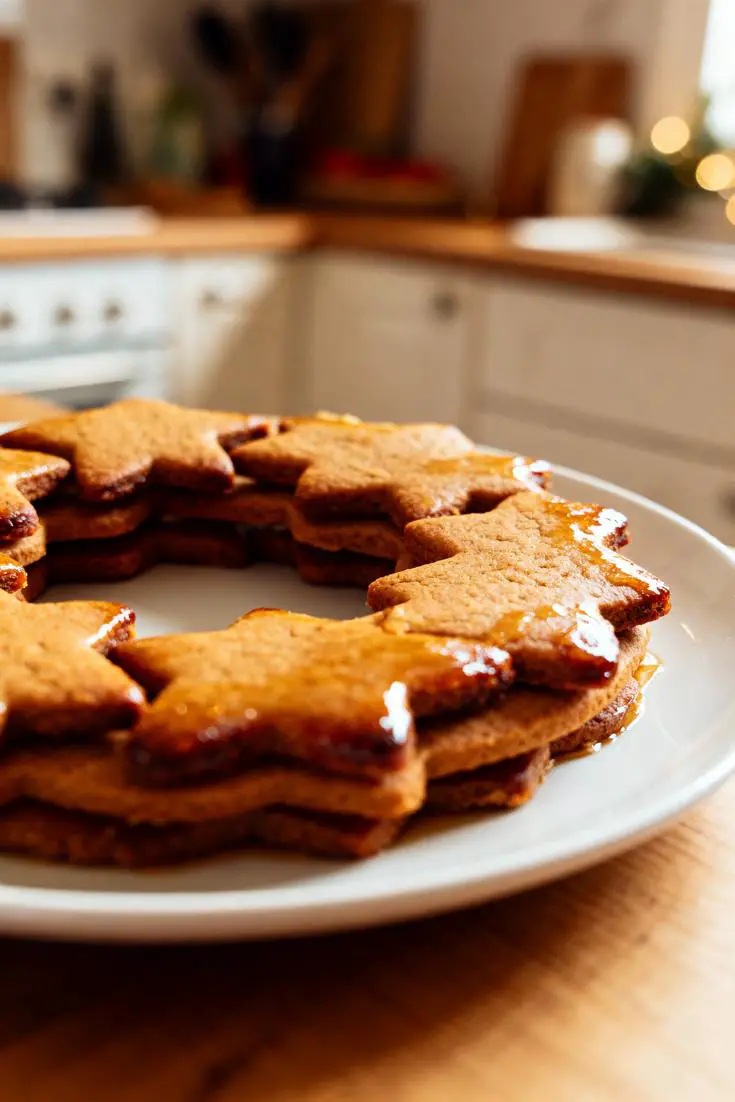
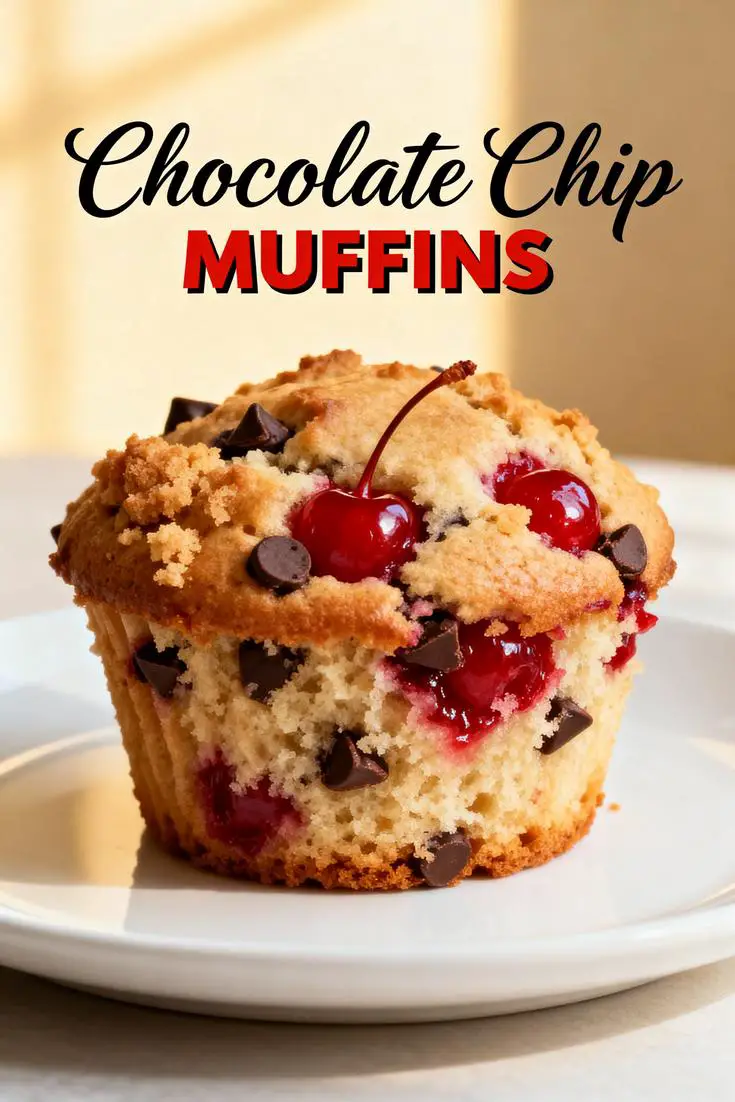
Savor Delicious Mini Pineapple Condensed Coconut Milk Cheesecakes Recipe

Mini Pineapple Condensed Coconut Milk Cheesecakes: A Tropical Delight

⚖️
Difficulty
Medium

⏲️
Prep Time
25 mins

🕒
Cook Time
35 mins

⏱️
Total Time
60 mins

🍽️
Servings
12

Indulge in the tropical flavors with our delectable Mini Pineapple Condensed Coconut Milk Cheesecakes. Perfectly sized for individual enjoyment, these cheesecakes capture the aromatic sweetness of fresh pineapple, harmonizing beautifully with the rich undertones of condensed coconut milk. The creamy filling sits atop a perfectly crunchy crust, adding a delightful texture to each bite. Ideal for parties, picnics, or an exotic dessert after dinner, these mini cheesecakes promise to transport your taste buds to a tropical paradise.

The allure of Mini Pineapple Condensed Coconut Milk Cheesecakes lies not only in their taste but also in their eye-catching presentation. Each mini cheesecake boasts a golden hue, speckled with vibrant pieces of pineapple, topping a delicate crust that complements the luscious filling. The integration of creamy coconut milk introduces a subtle nutty aroma that is further elevated by the sweetness of pineapple, creating an irresistible dessert perfect for any occasion. Whether you’re hosting a brunch or looking for a sweet escape, these mini delights are sure to captivate your senses.

Quick Recipe Highlights

  • Flavor Profile: A tropical medley of sweet pineapple and nutty coconut evokes a lush, exotic island vibe in every bite.
  • Texture: The smooth, creamy filling contrasts beautifully with the crisp, buttery crust, creating a delightful experience for the senses.
  • Aroma: Notes of fresh pineapple and caramelized coconut create an irresistible aromatic allure that enhances the cheesecakes’ delicate flavors.
  • Visual Appeal: These charming mini cheesecakes feature a gleaming golden finish, dotted with luscious pineapple chunks, making them a delightful centerpiece dessert.
  • Skill Level Needed: Requires basic baking knowledge, such as cheesecakesetting and crust preparation, suitable for home bakers with medium experience.
  • Special Equipment: A muffin tin, food processor, and mixer are essential for the ideal crust creation and achieving a smooth, creamy cheesecake texture.

Recipe Overview

  • Difficulty Level: This recipe is relatively straightforward with basic baking techniques, yet attention to detail and careful handling are needed for the ideal texture.
  • Category: Perfectly suited for desserts and sweet treats, these cheesecakes make an indulgent addition to any dessert spread.
  • Cuisine: Inspired by tropical Caribbean flavors, this dessert brings together the exotic taste of pineapple and coconut in a classic cheesecake form.
  • Cost: Ingredients are generally accessible and affordable, with an approximate cost of $15–$20 for a batch of 12 cheesecakes.
  • Season: Best enjoyed during warmer months when fresh pineapple is in season, though canned options provide flexibility year-round.
  • Occasion: Ideal for special gatherings like BBQs, summer parties, or simply as a delightful treat for pineapple and coconut lovers.

Why You’ll Love This Recipe


The luxurious texture and the perfect blend of sweet pineapple and rich coconut make these Mini Cheesecakes quite appealing. The creamy filling contrasts beautifully with the crispy crust, creating a symphony of textures that linger on the palate. Each bite offers an exotic yet comforting taste experience that combines beloved classic flavors in a modern way.

Conveniently prepared in individual portions, these cheesecakes are a breeze to serve and enjoy without the fuss of slicing and plating. Perfectly portioned for on-the-go treats or as crowd-pleasing desserts at home gatherings, their easy preparation and brief bake time allow for seamless inclusion in any meal plan.

In terms of nutrition, these cheesecakes strike a balance between indulgence and well-being. The inclusion of coconut milk contributes beneficial fats while pineapple provides a source of vitamin C and antioxidants. Modifications can cater to various dietary preferences, maintaining deliciousness without compromising dietary goals.

Social aspects enhance their allure; these mini delights are showstoppers at any party. Their individual sizes make them excellent for sharing, evoking camaraderie and enjoyment among guests. Perfectly portable, they are suited for picnics, barbecues, or intimate luncheons.

Lastly, the cost-effectiveness of this dessert recipe cannot be understated. Using common ingredients with pantry staples, it’s easy on the pocket while offering gourmet-level taste. Availability of canned ingredients ensures year-round access, making them an accessible baking option, ready to impress for any occasion.

Historical Background and Cultural Significance


Cheesecakes have a rich history dating back to ancient Greece, where they were served to athletes as a source of energy. Over the centuries, cheesecakes have evolved, taking on regional influences from around the world. The introduction of cream cheese in America in the 19th century reshaped their popularity and texture, making them a beloved dessert globally.

The fusion of tropical elements like pineapple and coconut reflects the cultural exchanges of the Caribbean region. Pineapple, a symbol of hospitality, aligns perfectly with the communal essence of Caribbean culinary traditions. The use of coconut, both as a flavor and economic staple in tropical agriculture, represents sustainability and resourcefulness within these communities.

Throughout time, the evolution of mini cheesecakes complements modern lifestyles, offering a twist on a traditional favorite. These adaptations highlight innovation, allowing bakers to create personal portions to satisfy individual cravings. The embracing of regional ingredients showcases the adaptability and richness of cheesecake-making traditions.

Variations across regions emphasize cultural heritage, where each version of cheesecake reflects the regional palate. In tropical climates, the natural pairing with pineapple and coconut becomes an iconic combination. These local innovations bring cultural vibrancy to classic recipes, highlighting the multicultural identity within culinary arts.

Ingredient Deep Dive


Fresh Pineapple is crucial for tropical fragrance and flavor. Dating back to the extravagant feasts of past European courts, its cultural significance grew tied to hospitality and luxury. Nutritionally, it provides essential vitamins like vitamin C and manganese, which support immunity and metabolism. When selecting, choose pineapples with bright, fresh-green leaves and a tropical scent at the base. Store at room temperature before cutting or refrigerate cut pieces in airtight containers. Canned pineapple can substitute but lacks the fresh aroma intensity.

Condensed Coconut Milk adds creamy richness, deriving from coconut’s widespread use in tropical cuisines. Its nutritional profile is rich in lauric acid and medium-chain triglycerides, often linked to improved metabolism and heart health. Opt for creamy, well-mixed varieties with minimal ingredients. Store unopened cans in cool areas, and refrigerate leftovers in airtight containers once opened. For substitutions, regular condensed milk can be used, although it sacrifices some of the distinctive nutty notes.

Common Mistakes to Avoid

  • Overmixing the batter can lead to a dense cheesecake. Mix only until ingredients are combined smoothly.
  • Using low-fat substitutes in the batter should be avoided to maintain the custardy consistency.
  • Failing to scrape down bowl sides during mixing can cause unevenness in texture and flavor.
  • Undercooking or overbaking can affect the creamy quality. Bake until edges set but centers jog slightly.
  • Skipping the water bath often results in cracks due to uneven baking temperatures.
  • Not chilling the cheesecakes adequately before serving compromises their firm texture.
  • Ignoring the crust can lead to a soggy base; pre-bake it to retain its structure.
  • Rushing through cooling steps invites cracking; allow slow cooling for texture preservation.

Essential Techniques


A crucial technique is the water bath, which ensures even baking and prevents cracking with its-moisture protective environment. Mastering the water bath involves wrapping the pan securely in foil and placing it within a larger pan with hot water, avoiding water sauteeing direct batter contact. This provides a gradual heat exposure crucial for cheesecakes’ delicate custard texture. Visual success cues include firm set edges with a gentle jiggle at the center without visible cracks.

Pro Tips for Perfect Mini Cheesecakes


For best results, ensure all ingredients, particularly eggs and cream cheese, are at room temperature to blend smoothly into an even batter. Chilling not only firms up the final texture but also heightens flavor melding, making an overnight chill preferred. Limiting the oven door opening during baking prevents temperature fluctuations leading to possible cracks. For a crunchier crust, consider adding finely crushed nuts or grated coconut for additional texture layers. To enhance pineapple flavor, consider lightly caramelizing fresh pieces before mixing them into the batter. If desired, fresh lime zest can be added to the batter for extra citrusy zing, complementing pineapple notes.

Variations and Adaptations


Regional variations include Mexican variations that might integrate spices like cinnamon and cardamom, contributing a comforting warmth. Seasonally, incorporate mango chunks in summers or cranberries in winter for a festive twist. For dietary modifications, plant-based cream cheese and non-dairy yogurt can transform this into a vegan-friendly treat without sacrificing creaminess. Experiment with flavor by introducing passionfruit or guava concentrates for a tropical flavor elevation.

Serving and Presentation Guide


Serve with a simple dusting of powdered sugar or decorative slices of fresh pineapple to emphasize their tropical nature. Placing a dollop of freshly whipped coconut cream on top can add height and visual appeal. Traditional accompaniments may include sweet coconut shavings, while mango puree can be drizzled for a pop of color and tantalizing tropical flavor depth. Ensure these cheesecakes are refrigerated and served cold for optimum enjoyment.

Wine and Beverage Pairing


Perfect wine pairings include a chilled late-harvest Riesling or Moscato, which denser sweetness complements the tropical notes beautifully. For non-alcoholic alternatives, consider a zesty ginger ale or tropical fruit punch that mirrors pineapple’s bright qualities. Alternatively, fresh jasmine tea offsets the coconut and pineapple richness, delivering a refreshing balance. Serve both wines and beverages thoroughly chilled for an optimal pairing experience.

Storage and Shelf Life


Refrigerate in airtight containers, maintaining freshness for up to five days. Freezing is also an option, wrapping cheesecakes individually to protect against drying, suitable for up to two months. When thawing, leave them in the refrigerator overnight to preserve their delicate textures. Always monitor for signs like off scents or textures indicating spoilage. Reheating isn’t recommended as texture alterations usually result.

Make Ahead Strategies


You can make the cheesecakes ahead, as they benefit from chilling and firming overnight. Complete the crust and batter steps separately, storing them until ready to assemble before baking. For larger batches, divide preparation over a two-day period, completing baking and chilling a day in advance. Maintain a clean presentation by assembling serving elements like whipped toppings and citrus zest shortly before serving, ensuring freshness.

Scaling Instructions


Halving the recipe is straightforward, though be aware of reduced baking times due to smaller volumes. For doubling, consider using multiple baking sheets and rotating halfway for even cooking. Adjust equipment such as additional muffin tins to accommodate increased quantities. Timing may require slight adjustments; always check doneness based on visual cues over prescribed times. Ensure any leftovers are stored with appropriate care to maintain the quality.

Nutritional Deep Dive


These mini cheesecakes contain balanced macronutrients across fats and proteins due to coconut milk and cream cheese. Microanalysis highlights vitamin C from pineapple and medium-chain triglycerides promoting heart health from coconut milk. The portion moderation maintains palatability within varied diet structures; enjoying them within a balanced dessert rotation aligns with general health guidelines.

Dietary Adaptations


To accommodate gluten-free needs, utilize almond flour or gluten-free graham crackers for a wonderful crust without gluten. For dairy-free versions, opt for plant-based cream cheese alternatives and coconut oil in place of butter. Vegan adaptions might include substitutes for eggs using flaxseed meal or commercial egg replacers and plant-based yogurt. These stacks effortlessly into existing frameworks of Paleo or keto diets with minor ingredient interventions respecting each dietary guideline.

Troubleshooting Guide


Texture issues like curdling might arise from extreme heat; ensure slow mixing and use of room temperature ingredients. Flavor can deviate if the pineapple isn’t ripe, leading to less natural sweetness; balance acidity with additional sweeteners if needed. Temperature fluctuations during baking can influence evenness; monitor oven stability with calibrated thermometers. If lacking specific equipment, consistent improvisation with homemade cookie cutting devices may suffice.

Recipe Success Stories


Community feedback praises the versatility of this recipe, with adaptations such as passionfruit infusions adding delightful tang. Readers commend the ease of ingredient sourcing, offering customization steps for individual preferences. Photography suggestions include garnishing with edible flowers for a captivating shot, enhancing texture contrast visually. Variations shared include spiced versions imparting aromatic depth, inviting further experimentation exploration within culinary creativity.

Frequently Asked Questions

Can I use canned pineapple instead of fresh? Yes, canned pineapple can be substituted; however, drain well to avoid excess moisture impacting texture balance.
How do I prevent cheesecakes from cracking? Use a water bath and avoid rapid temperature changes, contributing to smooth, crack-free surfaces.
How long should I chill the cheesecakes? For best results, chill for at least 4 hours, or overnight, to allow complete setting, enhancing flavor integration.
Can I freeze these cheesecakes? Absolutely, when wrapped securely, these freeze well and provide convenient ready-made desserts for future enjoyment.
What if I don’t have a muffin pan? Adaptations with silicone muffin liners on trays or mini cheesecake pans can offer stability for structure without binders.
Is fresh or canned coconut milk better? Indulgence depends largely on texture; use what’s accessible, prioritizing high-quality selections to improve outcomes.
Are there low-sugar options? Unrefined sweeteners or sugar substitutes can modulate sweetness levels aligned with dietary objectives.
What’s the best coconut milk brand? Choose creamy, well-rated brands with minimal additives for smooth integration, ensuring even texture distribution.
Can I add other fruits? Yes, fruits like mango or passionfruit complement these flavors well, enhancing theme continuity with vibrant alternatives.
Is a springform pan better? While traditional, the muffin tins maintain neat individual servings, focusing more on raw volumes impacts texture.

Additional Resources


Explore related recipes like Tropical Tartlets or Coconut Macaroons for further culinary adventures in similar genres. Technique guides offer advice on cheesecake water baths, ensuring smooth baking progress. Ingredient information dive includes ripening pineapple tips, syncing optimal timing with peak conditions. Equipment recommendations extend selectively as quality muffin tins or household multipurpose processors adaptable across tasks. Seasonal variations include winter spiciness with chai blends, promoting comfort during cooler months through enticing surprise enhancements.

Join the Conversation


Engage with fellow bakers by sharing your outcomes on social media using the hashtag #TropicalCheesecakeCreations. Capture the golden finishes of your mini cheesecakes through natural lighting for mouthwatering imagery. Share empowering hints or recipe reviews in the comment section to inspire tweaks with the community. Get creative with flavor profiles and photograph your unique interpretations, inviting audiences to explore into new taste territories enriched with joy.

The Recipe

Mini Pineapple Condensed Coconut Milk Cheesecakes

Serves: 12

Prep Time: 25 mins

Cook Time: 35 mins

Total Time: 60 mins

Kitchen Equipment Needed

  • Muffin Tin
  • Food Processor
  • Electric Mixer
  • Mixing Bowls
  • Spoon/Spatula
  • Aluminum Foil

Ingredients

  • 1 cup graham cracker crumbs
  • 3 tbsp melted butter
  • 1 1/2 cups cream cheese, softened
  • 1/2 cup condensed coconut milk
  • 1/2 cup fresh pineapple, finely chopped
  • 1/4 cup sugar
  • 2 large eggs
  • 1 tsp vanilla extract
  • Pinch of salt

Directions

  1. Preheat the oven to 325°F (163°C). Line a muffin tin with paper liners.
  2. In a bowl, mix graham cracker crumbs with melted butter until closely packed damp sand consistency is achieved.
  3. Press 1 tablespoon of the crumb mixture into the bottom of each muffin cup to form a base.
  4. Bake the crusts for 5 minutes and allow them to cool while preparing the filling.
  5. In a large bowl, beat cream cheese until smooth. Gradually add sugar and mix until incorporated.
  6. Add eggs one at a time, blending gently to maintain a smooth mixture.
  7. Mix in vanilla extract, condensed coconut milk, and a pinch of salt until just combined.
  8. Fold in chopped pineapple, avoiding overmixing to maintain texture consistency.
  9. Fill prepared muffin cups with cream cheese filling, nearly up to the rim.
  10. Bake the cheesecakes for 25-30 minutes, until edges are set and centers still exhibit a slight jiggle.
  11. Let cool in a pan on a wire rack before refrigerating for at least 4 hours.
  12. Serve chilled, garnished with extra pineapple pieces or coconut flakes if desired.

Recipe Notes

  • Ensure all ingredients are at room temperature for deeper integration.
  • Customize sweetness levels by adjusting sugar or using alternative sweeteners.
  • For intense pineapple flavor, choose fully ripe specimens with firm and fragrant indicators.

Decadent Mini Chocolate Peanut Butter Pies for Sweet Indulgence

Irresistible Mini Chocolate Peanut Butter Pies: A Blissful Treat for All Occasions

⚖️
Difficulty
Easy

⏲️
Prep Time
20 mins

🕒
Cook Time
10 mins

⏱️
Total Time
30 mins

🍽️
Servings
6

Are you ready to indulge your chocolate cravings? Meet our Irresistible Mini Chocolate Peanut Butter Pies, a dessert that combines the richness of chocolate and the creamy delight of peanut butter into one sensational bite. Perfectly portioned for individual enjoyment, these pies are a showstopper at any gathering or a delightful treat for a lazy Sunday afternoon. The synergy of chocolate and peanut butter creates a flavor harmony that’s hard to resist, satisfying every dessert lover’s palate.

The deep, velvety softness of the chocolate complements the nutty, creamy texture of the peanut butter filling, providing an explosion of taste with every spoonful. These charming mini pies are so easy to make that even novice bakers will achieve dessert success. Whether you enjoy them alone or share with loved ones, these pies are a testament to the divine union of chocolate and peanut butter. Gather your ingredients, and let’s dive into the world of decadent bites and heavenly indulgence.

Quick Recipe Highlights

  • Flavor Profile: Decadent chocolate meets creamy peanut butter in a perfect symphony of flavors, ensuring a divine experience for your taste buds.
  • Texture: The pies have a creamy, rich filling enveloped by a slightly crisp crust, offering both suppleness and crunch in every bite.
  • Aroma: A captivating aroma of warm chocolate and nutty undertones fills your kitchen as you prepare these delightful treats.
  • Visual Appeal: Miniature pies with a glossy chocolate top and garnished with peanut butter drizzles add elegance and playfulness to your dessert table.
  • Skill Level Needed: Easy and approachable, making it ideal for beginners who want to impress with minimal effort.
  • Special Equipment: A muffin tin or mini pie pans are required to achieve the perfect individual pies.

Recipe Overview

  • Difficulty Level: This recipe is straightforward and suitable for cooks of all levels, thanks to its easy-to-follow steps and simple ingredient list.
  • Category: This recipe falls under sweet treats and desserts, perfect for an after-meal indulgence or a standalone snack.
  • Cuisine: With roots in American comfort food, this dessert draws inspiration from the beloved peanut butter cup, a nostalgic treat for many.
  • Cost: Affordable and made with pantry staples, making it budget-friendly without compromising on taste.
  • Season: Ideal all year round, but especially delightful in colder months when rich, warm flavors are most comforting.
  • Occasion: Perfect for birthdays, family gatherings, or as a special dessert for a romantic dinner at home.

Why You’ll Love This Recipe

The irresistible taste of these mini pies is sure to win you over. The combination of velvety chocolate and creamy peanut butter offers a luscious juxtaposition of flavors that is both familiar and decadent. Each bite is an explosion of taste that satisfies cravings for something sweet and indulgent.

Conveniently, the preparation of these pies requires minimal time and effort. With simple ingredients and easy-to-follow instructions, you can whip up these pies on a whim, even when the craving for something sweet strikes unexpectedly. Cleanup is also straightforward, allowing you more time to enjoy your creation.

Nutritionally, while these pies are indeed indulgent, they offer the benefits of peanut butter, such as protein and healthy fats. Moderation is key, but enjoying one of these pies can fit into a balanced diet and provide a satisfying conclusion to a meal.

The social aspect of sharing these individual mini pies with others enhances their appeal. They’re perfect for entertaining, ensuring everyone gets their own delightful portion. Moreover, the pies make for striking dessert displays at parties, drawing attention and admiration.

From a cost perspective, these pies are economically wise. Using common ingredients such as chocolate, peanut butter, and basic pastry elements, you can create a gourmet-style dessert on a modest budget. Impress your friends and family without expensive trips to specialty stores.

Historical Background and Cultural Significance

Chocolate and peanut butter have long been celebrated as the ultimate pairing in American cuisine. The origins of this combination can be traced back to the early 20th century with the invention of classic candies that feature both ingredients. These mini pies are a modern twist that respects this storied tradition.

Culturally, the combination of chocolate and peanut butter is deeply ingrained in the American dessert landscape. It represents comfort, nostalgia, and even the playful indulgence associated with enjoying a beloved treat from childhood.

Over the years, recipes featuring this iconic flavor combination have evolved, appearing in various forms from candies to baked goods. Our mini pies are an evolution that retains the core attributes that make the pairing so cherished, while offering something slightly novel and delightful.

Regionally, variations of chocolate and peanut butter desserts have emerged across the U.S., each influenced by local palates and dessert traditions. However, the appeal is universal, transcending geographic boundaries and uniting dessert lovers everywhere.

Ingredient Deep Dive

Chocolate is the star ingredient in this recipe, celebrated for its rich flavor and luxurious texture. The use of high-quality chocolate contributes to the depth of flavor in these mini pies. It’s essential to opt for real chocolate for the best results, prioritizing cocoa content according to personal taste preference.

Chocolate also offers various health benefits due to antioxidants and minerals, though it should be consumed in moderation. Store chocolate in a cool, dry place to prevent blooming, and handle it gently to maintain its shiny, smooth consistency when melted.

Peanut butter adds a creamy, nutty flavor that balances the rich chocolate beautifully. Its origins as a popular American ingredient have led to its incorporation in countless recipes, offering both flavor and nutritional benefits like protein and healthy fats.

When choosing peanut butter for baking, look for varieties without added sugar or additives to let the true nutty flavor shine through. Store in the pantry for easy access, but refrigerate for longer storage to maintain freshness.

Common Mistakes to Avoid

  • Using low-quality chocolate can significantly affect the final taste and texture of your pies. Opt for good-quality, dark or milk chocolate for the best results.
  • Overheating chocolate when melting it can cause it to seize, becoming grainy and unusable. Melt gently over a double boiler or in the microwave in short intervals.
  • Using oily peanut butter might cause the filling to be overly greasy. Use a stable, creamy peanut butter for a smooth texture.
  • Not allowing pies to set can lead to soft, runny results. Be sure to cool and set pies properly before serving or refrigerating them.
  • Skipping the crust baking step might result in a soggy base. A quick pre-bake ensures a crispy texture.
  • Overmixing the filling can introduce too much air, affecting the texture. Mix just until ingredients are combined.
  • Using the wrong type of butter in crust can alter the flavor and structure. Stick with unsalted, real butter for best results.
  • Improperly measuring ingredients can lead to imbalances in taste and texture. Use accurate measuring tools for precision.
  • Neglecting to grease the pans can lead to sticking issues. A light coating of butter or oil ensures easy removal once pies are set.
  • Storing pies uncovered in the refrigerator can dry out the crust or filling. Always cover with plastic wrap or a lid.

Essential Techniques

Melting chocolate is a crucial skill in creating these mini pies. The key to mastery is to melt the chocolate slowly to avoid seizing and burning, using either a double boiler or gentle microwaving. Visual cues include seeing the chocolate turn glossy and smooth.

Preparing the crust involves careful mixing and pressing to ensure the right balance of crumbly texture and cohesive form. Use the right amount of melted butter to bind the crust without making it too greasy or dry.

Blending the peanut butter filling is all about achieving the right consistency. It’s important to mix until smooth and creamy but avoid overmixing, which can trap air and affect texture. Scrape the bowl frequently to incorporate all ingredients evenly.

Baking and assembly require attention to time and temperature. Pre-baking the crust helps maintain structure and crispness, while cooling completely before adding the filling ensures the perfect layer without blending or softening.

Pro Tips for Perfect Irresistible Mini Chocolate Peanut Butter Pies

For a professional finish, gently tap the pan on a counter after pouring in the chocolate to remove air bubbles, ensuring a smooth, even top.

Use room temperature ingredients to ensure that fillings blend smoothly and achieve the desired creamy texture.

Enhance flavor by adding a pinch of sea salt to the peanut butter filling, complementing the sweetness and adding dimension to the overall taste.

Consider adding a thin layer of melted chocolate over the crust before adding the filling for added texture and taste complexity.

For variety, incorporate a layer of caramel under the peanut butter filling, adding a sweet, sticky contrast.

For even portioning, use a small ice cream scoop to fill each pie cup with the filling mixture, ensuring uniform sizes.

Add a visual and flavor pop by topping finished pies with chopped peanuts or grated chocolate.

Ensure proper cooling time after assembling the pies; patience allows the layers to set perfectly and enhances sliceability.

Variations and Adaptations

Regional variations can include adding a hint of spice, like chili powder, to the chocolate for a southwestern twist on these classic flavors.

Seasonal adaptations could involve incorporating fruit preserves between the chocolate and peanut butter layers for a summer treat.

Dietary modifications can be made by using gluten-free crust substitutes like almond flour or a homemade graham cracker crust for those with gluten sensitivities.

For a flavor twist, consider using almond butter or cashew butter in place of peanut butter, offering a mild, nutty alternative.

To alter texture, consider blending in some whipped cream to the peanut butter filling for a lighter, mousse-like consistency.

Presentation alternatives include using small, decorative tart pans for elegant plating or serving them in glass cups for a creative, transparent look.

Serving and Presentation Guide

Consider using unique plates or stands to elevate the presentation of your mini pies, offering a chic and sophisticated touch.

Garnishing with a drizzle of melted chocolate, a sprinkle of chopped peanuts, or a pinch of sea salt can enhance visual appeal and taste.

For traditional accompaniments, serve with a dollop of whipped cream or a scoop of vanilla ice cream, complementing the rich pies beautifully.

Modern serving suggestions include assembling a dessert board with these pies alongside fresh berries and other sweets for a varied but cohesive visual display.

Temperature considerations are vital; serving slightly chilled emphasizes the creamy texture without losing structure.

Portion control tips encourage individual servings, making this dessert ideal for buffet-style setups or individually plated presentations.

Wine and Beverage Pairing

Rich, red wines such as Malbec or Cabernet Sauvignon pair beautifully with the chocolate and peanut butter flavors, bringing out deeper notes.

For non-alcoholic options, consider serving with a chilled glass of milk or a warm mug of tea, offering a soothing counterbalance to the sweetness.

Coffee pairings, especially robust blends, complement the pies’ decadent taste, enhancing the chocolate’s bitterness in an enjoyable contrast.

Temperature considerations suggest serving both wines and non-alcoholic drinks at room temperature or slightly chilled to complement the pies.

Serving suggestions could incorporate a small dessert glass of your chosen beverage alongside each plated pie for visually appealing decisions.

Storage and Shelf Life

Store in an airtight container in the refrigerator to maintain freshness, preventing the pies from drying out or absorbing odors.

Temperature requirements dictate storing at a consistent cool temperature, ideally around 40°F, for best results.

Container recommendations include using stackable food-safe containers to save space while keeping pies protected and easily accessible.

Signs of spoilage include off odors or changes in texture. Always inspect closely before consuming if pies have been stored for an extended period.

Reheating instructions apply to those who enjoy their pies slightly warm, suggesting brief warming in the microwave to soften the filling.

Freezing guidelines recommend storing in a freezer-safe container, with wax paper between layers to prevent sticking, ensuring up to three months’ storage without significant quality loss.

Make-Ahead Strategies

The prep timeline suggests preparing the crust and chocolate layers a day ahead, allowing for a relaxing and more organized dessert assembly.

Storing between steps involves keeping pre-made components in the refrigerator until assembly, ensuring they remain fresh.

Quality impact assessment confirms that storing elements separately does not diminish overall quality but rather allows flavors to meld.

Assembly tips include organizing all components and decorations before beginning, streamlining the final preparation stage.

Reheating guidelines for chilled pies suggest allowing them to sit at room temperature briefly before serving to achieve optimal taste and texture.

Add fresh elements, such as garnishes, just before serving to maintain peak freshness and enhance visual appeal.

Scaling Instructions

To halve the recipe, simply divide all ingredients by two, and reduce baking and resting times slightly to accommodate smaller portions.

Doubling or tripling requires adjusting ingredient measurements accordingly, with special attention to potential shifts in taste balance when increasing quantity.

Equipment adjustments may include using multiple muffin tins or larger mixing bowls for easier handling and preparation.

Timing modifications entail observing visual cues for doneness rather than relying solely on time, particularly when baking larger batches.

Storage considerations suggest using larger storage containers or freezer bags to accommodate increased yield.

Nutritional Deep Dive

Macro breakdown reveals a balanced portion of carbohydrates, fats, and proteins, offering a satisfying treat without overly imbalanced nutrition.

Micronutrient analysis highlights important contributions from ingredients like peanuts and chocolate, providing beneficial elements like magnesium and iron.

Health benefits cover the inclusion of antioxidants from chocolate, known to improve mood and possibly support heart health.

Dietary considerations advise enjoying in moderation due to calorie density, encouraging mindful consumption alongside other balanced meals.

Portion analysis confirms each mini pie offers an ideal single-serving size designed for individual enjoyment and dietary alignment.

Weight management tips encourage enjoying these pies as part of a balanced meal plan, savoring each bite for maximum satisfaction.

Dietary Adaptations

For a gluten-free option, substitute regular flour in crust with almond or coconut flour, maintaining structure with appropriate binding agents.

Dairy-free modifications involve using plant-based butter alternatives and dairy-free chocolate chips to respect dietary restrictions while preserving flavor integrity.

A vegan adaptation can include coconut milk-based whip and vegan-friendly crust options, embracing plant-based eating while maintaining dessert delight.

Low-carb enthusiasts might opt for a sugar-free sweetener in the peanut butter filling, reducing carbs while enhancing protein content with slight modifications.

The keto diet is respected with high-fat focuses, using almond meal crusts and sugar-free chocolate, tailored to fit the diet’s macro requirements closely.

For paleo, opt for natural nut butters and cocoa-derived chocolate substitutes, aligning with whole-food principles and minimizing processed components.

A low-FODMAP approach considers peanut butter and chocolate selections carefully, ensuring ingredients are suitable for sensitive digestive systems.

Other specific diets may require substituting ingredients or adjusting portions to meet individual nutritional plans without sacrificing flavor fundamentals.

Troubleshooting Guide

Texture issues often stem from over or under mixing fillings; proper blending and cooling ensure optimal creaminess and structuring.

Flavor balance concerns are typically resolved by adjusting ingredient ratios, paying attention to the harmony between sweet and savory elements.

Temperature problems like excessive melting can be combated by chilling pies until firm, achieving set quality before serving.

Equipment challenges might arise with incorrect sizing; ensure you possess necessary tin sizes or adjust baking times to accommodate variance.

Ingredient substitutions require understanding flavor impacts; mindful experimentation with compatible alternatives maintains original intentions.

Timing concerns require intuitive adjustments, observing ingredient readiness and using visual cues for baking and cooling instead of focusing solely on timings.

Recipe Success Stories

Community feedback often tells of successful family gatherings where these pies stole the show, becoming topics of praise and recipe requests.

Variation successes emerge with home bakers incorporating personal touches like adding espresso, elevating pies to mocha-inspired excellence.

Adaptation stories share of gluten-free innovator bakers who tweaked the crust to suit dietary needs without compromising on dessert pleasures.

Reader suggestions typically involve creative serving ideas, such as pairing with unique beverages, inspiring others to personalize presentation.

Photography tips abound, showcasing pies’ visual allure by focusing on glossy tops and artful garnishes in well-lit settings for capturing irresistible dessert allure.

Frequently Asked Questions

Can these pies be made in advance?

Yes, they can be prepared a day in advance and stored in the refrigerator until serving. This allows the flavors to blend beautifully for optimal enjoyment.

What type of chocolate should I use?

High-quality dark or milk chocolate is recommended for the best results, providing a deep, rich flavor that complements the peanut butter filling well.

How long do these pies stay fresh?

They can be stored in an airtight container in the refrigerator for up to 4 days, ensuring they remain delicious and ready to enjoy.

What if I don’t have mini pie pans?

You can use a muffin tin instead, which works perfectly for individual-sized servings. Just be sure to grease it well for easy removal.

Can I freeze these pies?

Yes, freezing is an option. Simply wrap each pie individually and store in a freezer-safe container for up to 3 months. Thaw in the refrigerator before serving.

Can I use almond butter instead?

Absolutely! Almond butter makes a wonderful alternative to peanut butter, offering a similar creamy texture with a slightly different nutty flavor.

Is it possible to make a larger version of this recipe?

Yes, by adjusting the ingredient quantities, you can create a single large pie. Alter cooking times as necessary and enjoy a family-sized treat.

Can these be made without a crust?

While possible, the crust provides essential structure and a nice textural contrast. Consider using a gluten-free or alternative crust if needed.

What garnishes work well with these pies?

Chopped nuts, chocolate curls, and a sprinkle of flaky sea salt make excellent garnishes, enhancing both visual attraction and layered flavors.

Can this recipe be halved?

Yes, simply halve the ingredient amounts, adjusting baking and cooling times slightly. This approach is perfect for smaller households or intimate gatherings.

Additional Resources

Explore related recipes such as chocolate truffles or peanut butter treats to satisfy cravings with similar flavor profiles and sweet indulgences.

Technique guides offer deeper insights into essential baking skills, such as melting chocolate or creating perfect crusts, enriching various culinary adventures.

Ingredient information focuses on exploring the richness of chocolate and the versatility of nut butters, sharing how these ingredients can elevate diverse dishes.

Equipment recommendations highlight reliable brands and types, ensuring your baking endeavors start with proper and effective tools.

Seasonal variations provide inspiration for altering recipes in accordance with changing preferences, aligning with different weather and festive occasions.

Join the Conversation

Share your mini pie creations on social media, connecting with fellow bakers and dessert enthusiasts by tagging and joining in delightful recipe exchanges.

Photography tips offer guidance on framing and lighting these mini pies for stunning shots, encapsulating their deliciousness in enticing images.

Recipe reviews and community engagement facilitate sharing experiences, improvements, and adaptations with a global community of like-minded bakers.

Encouragement for recipe variations invites personal touches and experimentation, enriching each baking experience with individuality and unique flair.

Connect with other food lovers through comments, exchanging insights and discovering shared joy in culinary creativity inspired by these delightful mini pies.

The Recipe

Irresistible Mini Chocolate Peanut Butter Pies

Serves: 6

Prep Time: 20 mins

Cook Time: 10 mins

Total Time: 30 mins

Kitchen Equipment Needed

  • Muffin tin or mini pie pans
  • Mixing bowls
  • Electric mixer
  • Double boiler or microwave-safe bowl
  • Whisk
  • Spatula

Ingredients

  • 1 cup crushed graham crackers
  • 1/4 cup melted butter
  • 1 cup creamy peanut butter
  • 1/2 cup powdered sugar
  • 1/2 cup heavy cream
  • 1 cup high-quality chocolate, chopped
  • 1/2 cup whipping cream
  • Pinch of sea salt (optional)
  • Chopped peanuts, for garnish (optional)

Directions

  1. Preheat oven to 350°F (175°C). Grease a muffin tin or mini pie pans.
  2. In a bowl, mix crushed graham crackers with melted butter. Press into the bottom of each muffin cup to form the crust. Bake for 5-7 minutes and let cool.
  3. In a large mixing bowl, beat peanut butter, powdered sugar, and heavy cream until smooth. Spoon over cooled crusts.
  4. Melt chocolate using a double boiler or microwave in 30-second increments, stirring until smooth.
  5. Spread melted chocolate over the peanut butter layer, smoothing the tops with a spatula.
  6. Chill pies in the refrigerator for at least an hour to set.
  7. Before serving, garnish with a drizzle of melted chocolate or a sprinkle of chopped peanuts if desired.

Recipe Notes

  • For a nut-free version, substitute peanut butter with sunflower seed butter.
  • The crust can be made with gluten-free graham crackers for those with gluten sensitivities.

Irresistible Chocolate Peanut Butter Chip Cookies for Deliciously Sweet Moments

Chocolate Peanut Butter Chip Cookies: A Decadent Delight

⚖️
Difficulty
Easy

⏲️
Prep Time
10 mins

🕒
Cook Time
12 mins

⏱️
Total Time
22 mins

🍽️
Servings
24 cookies

Indulge your sweet tooth with these irresistible Chocolate Peanut Butter Chip Cookies. Rich and fudgy chocolate paired with creamy peanut butter chips create a heavenly combination that will have you reaching for another. These cookies are perfect for every occasion, from casual snacking to holiday gatherings. Experience the ultimate flavor sensation with each delicious bite.

The beauty of Chocolate Peanut Butter Chip Cookies lies in the way the chocolate melts in your mouth while the peanut butter chips add a delightful crunch. The interplay of textures enhances the overall sensory experience, making every cookie a moment of pure joy. Serve these tasty treats warm, fresh from the oven, for the best cookie experience.

Quick Recipe Highlights

  • Flavor Profile: The cookies boast a perfect balance of rich chocolate and creamy, sweet peanut butter that tantalizes your taste buds.
  • Texture: Soft, chewy, and slightly crisp edges contrast with the creaminess of melty peanut butter chips.
  • Aroma: The intoxicating smell of freshly baked chocolate and roasted peanuts fills your kitchen as these cookies bake.
  • Visual Appeal: Deep, dark chocolate cookies flecked with golden peanut butter chips make for a stunning presentation.
  • Skill Level Needed: Simple techniques such as mixing and baking make this recipe suitable for beginners and experts alike.
  • Special Equipment: No fancy gadgets required, just basic baking tools you likely already own.

Recipe Overview

  • Difficulty Level: Rated easy since it involves simple steps of mixing, scooping, and baking, perfect for all bakers.
  • Category: Classified as a dessert due to its sweet nature, ideal for after-meal treats.
  • Cuisine: American-inspired, drawing on the classic chocolate and peanut butter pairing loved universally.
  • Cost: With affordable ingredients like flour, sugar, and chips, this is a budget-friendly recipe.
  • Season: Best enjoyed year-round, thanks to the perennial popularity of chocolate and peanut butter.
  • Occasion: Perfect for everything from midday snacks to party desserts, or even gift-giving during holidays.

Why You’ll Love This Recipe


Chocolate Peanut Butter Chip Cookies offer a tempting mix of flavors, combining the richness of chocolate with the nutty sweetness of peanut butter chips. They are the perfect treat for any chocolate lover, offering a chewy texture that keeps them soft in the center while slightly crisp on the edges.

Preparing these cookies is a breeze. With minimal prep time and quick baking, they are a convenient choice when you’re in need of last-minute dessert ideas. Their quick turnaround time means you can have them ready for an unexpected guest or just a cozy afternoon at home.

The cookies provide a satisfying energy boost, thanks to the peanut butter’s protein content. They are a preferable option over store-bought varieties, allowing you control over ingredients and portion sizes—ideal for mindful eaters.

Socially, Chocolate Peanut Butter Chip Cookies are a hit at any gathering, sparking joy and conversation. Their universally appealing flavors make them a popular choice, ensuring there’s something sweet for everyone to enjoy.

Cost-effectiveness is another advantage. Using pantry staples, you can whip up a batch of these cookies without straining your grocery budget. Even the most gourmet-sounding chocolate and peanut butter combination is affordable to make from scratch at home.

Historical Background and Cultural Significance


The delicious bond between chocolate and peanut butter originated in the United States. With Reese’s creation in the early 20th century, the flavor combination quickly became iconic, paving the way for baked goods like Chocolate Peanut Butter Chip Cookies.

Culturally, these cookies epitomize comfort food, cherished in American households for their nostalgic charm. They bring back fond memories of childhood cookie-baking sessions or family holiday gatherings. These cookies have become a timeless dessert, adored by generations.

The fusion of chocolate and peanut butter within cookies has evolved over the years, with countless variations appearing in cookbooks and online. Yet, the core concept remains—simple, delicious, and undeniably comforting.

Regional variations have emerged, too. Some recipes incorporate oats for texture, while others add spices like cinnamon or cayenne for an extra kick. Each iteration reflects the creator’s personal taste, making these cookies a versatile canvas for culinary creativity.

Ingredient Deep Dive


Chocolate chips are a pivotal ingredient, providing the rich cocoa flavor that accentuates the cookie’s overall taste profile. Originating from fermented cacao, chocolate has been appreciated globally for its bitter-sweet richness. In baking, semisweet chips offer a balance of cocoa intensity and sugar.

Nutritionally, chocolate contains antioxidants like flavonoids, contributing to various health benefits. When selecting chocolate chips, opt for those high in cocoa content for maximum flavor. Store them in a cool, dry place to prevent melting or blooming.

Peanut butter chips add the creamy, nutty contrast that makes these cookies special. Peanuts, a staple in South American diets for centuries, were transformed into peanut butter in the early 1900s. Peanut butter’s popularity soared, eventually influencing desserts like these cookies.

The chips offer a convenient way to incorporate peanut butter flavor without the added moisture of traditional spread. Rich in protein and healthy fats, they provide nutritional value. Store them in their original packaging or an airtight container to keep them fresh and flavorful.

Common Mistakes to Avoid

  • Overmixing the dough can lead to tough cookies. Mix just until ingredients are combined for the best texture.
  • Using baking soda instead of baking powder might affect the cookie’s rise, leading to flat cookies. Ensure you use the correct leavening agent.
  • Skipping the chilling step can cause cookies to spread too much. Allow dough to firm up in the fridge before baking.
  • Baking on a hot baking sheet might cause uneven cooking. Use a cool sheet for each batch to maintain consistency.
  • Ignoring ingredient temperatures can alter the dough’s outcome. Ensure eggs and butter are at room temperature for even mixing.
  • Inaccurate measurements can ruin ratios. For the best results, use a kitchen scale or proper measuring cups and spoons.
  • Forget to preheat the oven. Starting with a cold oven can extend baking time and alter cookie texture.
  • Insufficient space between cookies can cause them to merge during baking, making them lose their shape.

Essential Techniques


Creaming butter and sugar is a foundational technique for these cookies. It incorporates air, leading to a light and fluffy texture when baked. Use room temperature butter and beat with sugar until pale and creamy before adding other ingredients.

Proper dough chilling is critical for cookie shape and texture. Cold dough ensures the butter is solid, minimizing spread during baking. Chill dough for at least 30 minutes before scooping onto baking sheets for consistent results every time.

Baking chocolate peanut butter chip cookies to the right level of doneness is key. Look for slightly golden edges with a soft center. Remember that cookies firm up on the cooling rack, so remove them from the oven when just set.

Pro Tips for Perfect Chocolate Peanut Butter Chip Cookies


Use a cookie scoop for uniform-sized cookies ensuring even baking and professional presentation. This helps maintain consistency across batches and satisfies both aesthetic and functional baking goals.

Experiment with high-quality ingredients; the better the chocolate, the richer the cookie flavor. Investing in superior chips or bars can elevate your cookies from delightful to gourmet.

Consider adding a pinch of salt to balance the cookie’s sweetness and intensify flavors. Salt enhances the chocolate’s cocoa notes and contrasts with peanut butter’s richness.

Rotate baking sheets halfway through cooking for even baking, since oven hotspots can lead to uneven textures. Turning the sheet helps achieve cookies with consistent golden edges.

Ensuring butter’s room temperature is crucial. Too cold, and it won’t cream properly. Too warm, and the dough might spread too much. Properly conditioned butter makes all the difference.

Strong flour can make denser cookies. Stick to all-purpose flour for the soft, chewy appeal that these cookies are known for. It keeps the texture balanced and the dough pliable.

Variations and Adaptations


To create a holiday twist, consider adding a teaspoon of cinnamon or nutmeg for a seasonal flair. These spices pair beautifully with chocolate and peanut butter, creating festive flavors.

For a summer-friendly version, incorporate dried fruit like cranberries or raisins. The fruity sweetness complements the peanut butter, adding complexity to the cookies.

Dietary adaptations are simple—use gluten-free flour for a gluten-free version or substitute vegan butter and plant-based chips for a vegan-friendly batch. These alternatives ensure everyone can enjoy these cookies.

Try altering the flavor by substiting dark chocolate chips for a bolder, more intense cocoa taste or milk chocolate chips for sweetness. Each choice offers a unique variation while retaining the essential cookie structure.

For those desiring a crunchier texture, consider incorporating chopped nuts like walnuts or almonds. They add a satisfying crunch that enhances the cookie’s mouthfeel.

Present these cookies beautifully by drizzling melted chocolate over the top once baked. It adds a touch of elegance and extra chocolatey goodness upon setting.

Serving and Presentation Guide


Artfully plate cookies on a rustic serving board lined with parchment paper for a cozy, inviting display. The paper adds texture and highlights the cookie’s artisan nature.

Garnish with a light dusting of powdered sugar or cocoa powder to enhance visual appeal. The fine coating elevates presentation while complementing the cookie’s flavors.

Traditionally, cookies are served with a glass of cold milk, but consider pairing with a warm beverage like hot cocoa or coffee for a comforting experience, especially during colder months.

Present cookies in a jar or tin with a colorful ribbon for a delightful homemade gift idea. It’s a thoughtful, personal touch that conveys care and creativity.

Serve at room temperature for optimal texture. Push traditional boundaries by offering these cookies slightly warmed, allowing the chocolate to melt slightly, creating an indulgent treat.

When serving as part of a larger dessert spread, consider smaller portion sizes to allow guests to sample a variety without overwhelming their palate.

Wine and Beverage Pairing


Pair cookies with a glass of Malbec or Merlot; their fruity notes and low tannins will accentuate the chocolate, enhancing the dessert’s overall richness and complexity.

For non-alcoholic options, pair with a creamy vanilla or chocolate milkshake. The creaminess compliments the peanut butter, creating a harmonious flavor profile.

For coffee lovers, a robust espresso or a milky latte complements these cookies perfectly. The coffee’s bitterness balances the sweetness of the chocolate, providing a lovely contrast.

When choosing tea pairings, opt for a nutty Rooibos or a gentle herbal blend like chamomile to complement and not overpower the cookie’s flavors, providing a soothing finish.

Ensure beverages are served at the appropriate temperature—red wines slightly chilled, milkshakes frosty, and coffee teas piping hot — to enhance each sip and bite.

Serve in thoughtful glassware; a clear mug for lattes or a traditional wine glass for red wines enhances the tasting experience visually and functionally.

Storage and Shelf Life


Store cookies in an airtight container at room temperature to maintain freshness and prevent them from becoming stale. This method keeps them chewy and delicious for up to a week.

Consider storing individual layers separated by parchment paper to avoid sticking. This ensures each cookie stays intact and presentation-ready.

Avoid refrigeration as it can dry out cookies, affecting texture and flavor. If refrigeration is necessary, rewarm cookies in a low oven before serving to restore their softness.

Signs of spoilage include excessive softness, an off-smell, or unpleasant taste. If noticed, it is best to discard the cookies for safety reasons.

Reheat cookies briefly in the microwave, wrapped in a paper towel, for a just-baked softness. This step can minimize the staling effect of prolonged storage, ensuring a fresh-tasting cookie.

For longer storage, cookies can be frozen. Place in a sealable bag, remove air, and freeze for up to three months. Thaw at room temperature when ready to enjoy.

Make Ahead Strategies


You can prepare cookie dough up to 48 hours in advance and store it in the refrigerator until ready to bake. Chilling infuses flavors and helps cookie shape.

If preparing in parts, mix dry ingredients and wet ingredients separately, storing them in airtight containers. Combine just before baking for maximum freshness.

Consider baking a batch and freezing for last-minute cravings or unexpected guests; simply reheat for a fresh-from-the-oven experience without the prep time.

Quality remains consistent when refrigerated dough is used. However, monitor baking time as chilled dough may need a minute or two more in the oven.

Assemble ingredients before starting, ensuring ease throughout the baking process. Having everything pre-measured and ready streamlines the cooking experience.

For a fresh taste, add a sprinkling of sea salt or extra peanut butter chips right after baking. This enhances flavor and appearance without requiring additional efforts.

Scaling Instructions


To halve the recipe, measure ingredients accurately and use smaller mixing bowls for efficiency. Evaluate baking time since smaller batches may cook faster.

Doubling or tripling the recipe involves measuring capacity to ensure proper blending; a stand mixer can help accommodate larger dough volumes.

Adjust bakeware sizes and, if necessary, use multiple trays for larger batches. Ensure trays fit comfortably in the oven to avoid uneven baking.

Timing may need adjustment, particularly in larger or smaller ovens. Monitor cookie color and aroma as indicators of doneness, accompanied by toothpick tests.

Consider storage for larger amounts; have multiple containers ready. Options like mason jars or decorative tins work well for both storage and gifting purposes.

Nutritional Deep Dive


Each cookie contains a balanced mix of macronutrients—carbohydrates from flour, fats from butter, and proteins from peanut butter—providing energy and satiation.

Chocolate offers essential minerals, including iron and magnesium, supporting bodily functions like energy production and muscle function.

Moderate consumption of cookies fits well within a balanced diet, offering the pleasure of sweets without excessive sugar overload; mindful portions maintain this balance.

Peanut butter chips contribute additional nutrients, such as potassium and vitamin E, which support heart health and antioxidant protection.

Evaluate portion size based on dietary needs to manage caloric intake; a smaller cookie can satisfy cravings while fitting nutritional goals.

Cookies should be part of a broader lifestyle incorporating diverse foods and physical activity for overall health. Enjoy them as a delightful treat that complements nutritious meals.

Dietary Adaptations


For gluten-free adaptations, replace all-purpose flour with a suitable gluten-free blend. Ensure it’s specifically formulated for baking to retain the cookie’s structure.

Replace dairy-based butter with a plant-based alternative to craft a dairy-free version that’s equally delicious. Consider coconut oil or vegetable shortening as possible substitutes.

To create a vegan variation, use flax or chia seeds mixed with water as an egg substitute and ensure vegan-certified chocolate and peanut butter chips.

Low-carb enthusiasts can modify ingredients by using almond flour and sugar alternatives like erythritol or stevia. Consult ratios for the best texture adaptation.

Keto recipes rely on replacing sugars entirely; use dark chocolate keto chips alongside nut-based flour to keep carb levels within keto-friendly thresholds.

Paleo followers can adjust by omitting peanut butter chips in favor of chopped nuts, and using coconut sugar offers a natural sweetener aligning with Paleo principles.

For low-FODMAP adjustments, ensure the use of low-FODMAP flours and solid sweeteners, while omitting allergy triggers to maintain digestive comfort.

Troubleshooting Guide


If cookies come out flat, consider chilling dough longer or adjusting leavener quantity to promote proper rise and form.

Overly sweet cookies can be balanced by tweaking the sugar amount relative to other ingredients or incorporating additional salt to offset sweetness.

Inconsistent cookie texture may be due to uneven ingredient mixing or improper measurements. Ensure thorough blending and accurate portioning for uniformity.

Burnt bottoms indicate incorrect baking time or tray height in the oven; adjusting rack placement or reducing baking time slightly helps avoid this issue.

If equipment poses a challenge, consider investing in essential tools like a reliable mixer or sturdy baking sheets, aiding the overall process consistency.

Ingredient substitutions that lack structural support such as egg replacements may require additional binders like xanthan gum to maintain cohesive dough.

Paying close attention to timing prevents overbaking. Set a timer and observe cookies’ visual cues for optimal results in every batch.

Recipe Success Stories


After incorporating user feedback, many home bakers report the addition of walnuts provides an excellent crunch reminiscent of homestyle baked goods.

Community members have successfully adapted the recipe for air fryers, noting the convenience and texture improvement without altering core ingredients.

Readers often share modifications like swapping peanut butter chips for caramel bits, creating a delightful twist that revamps the traditional flavor profile.

Photography enthusiasts in the community recommend softening cookie edges with melted chocolate for attractive photographs showcasing appealing contrast.

Positive responses frequently mention the ease of following the recipe, leading to successful results even for beginner bakers excited for experiments.

Frequently Asked Questions

Can I freeze the unbaked cookie dough?

Freezing unbaked dough is a convenient option. Scoop dough onto trays, freeze until firm, then store in bags or containers for up to three months for future baking.

What alternatives work for peanut butter chips?

Substitute with other flavored chips like butterscotch or white chocolate, or try chopped nuts for textural variation and taste diversification.

How can I tell if my cookies are done?

Cookies are ready when edges are golden and centers are set yet soft when touched. Time and temperature adjustments cater to personal preference.

Do I need to line baking sheets?

Yes, use parchment paper or silicone mats to prevent sticking and promote even browning while aiding in effortless removal from trays.

Can I make them gluten-free?

Absolutely! Ensure all-purpose flour is swapped for a gluten-free alternative optimized for baking, preserving structural integrity while excluding gluten.

Why did my cookies spread too much?

Potential spreading indicates butter may have been too warm or flour insufficient; chilling dough further or adjusting flour resolves this problem.

Why are my cookies crumbly?

Overbaking or excessive flour can cause crumbliness. Ensuring precise ingredient amounts and monitoring bake times helps maintain optimal texture.

How to add flavor complexity?

Introducing spices like cinnamon or espresso powder broadens your flavor range; incorporating vanilla extract or varied chocolate elevates complexity.

How should I store leftovers?

Keep baked cookies in airtight containers at room temperature, ensuring lasting freshness with periodically checked conditions to avoid spoilage.

Can I use margarine instead of butter?

Margarine may replace butter; expect differences in flavor and texture. Conduct small-test batches first to gauge results satisfying personal taste.

Are there health benefits to these cookies?

While considered a treat, cookies provide energy-boosting carbohydrates and small amounts of protein, balanced enjoyment within meals is recommended.

Can I make them without a mixer?

Certainly, mix by hand using a sturdy spoon or silicone spatula, ensuring uniform dough consistency and even ingredients for successful cookies.

Additional Resources


Explore other cookie recipes like classic chocolate chip or oatmeal varieties, testing your skills across multiple styles while expanding your dessert repertoire.

Learn more about baking techniques to enhance your understanding of ingredient interactions and achieve precision transforming basic recipes into masterpieces.

Investigate primary ingredients such as chocolate and flour to solidify vendor preferences, optimizing flavor selection and texture outcomes.

Recommended equipment such as non-stick baking sheets or reliable dough mixers can greatly streamline your cookie creation process, improving your kitchen efficiency.

Explore seasonal adaptations, integrating harvest-fresh ingredients or festive flavors to connect your baking with the joy of seasonal dining occasions.

Join the Conversation


Interact with our baking community by sharing social media snaps of your cookies at #CookieCreations, showcasing your unique interpretations of this beloved recipe.

Explore photography tips and fire off your questions for capturing the perfect cookie shot. Community photographers are eager to share their expertise and inspire newcomers.

Rate and review our Chocolate Peanut Butter Chip Cookies recipe. Your insights help others decide if this delectable dessert is the right choice for their next baking adventure.

Converse with fellow bakers over recipe amendments, successful modifications, and personal twists. Hearing diverse perspectives enriches everyone’s culinary experience.

Engage through comments, suggesting variations or leave feedback for adaptation tips that could guide your fellow enthusiasts towards cookie success.

The Recipe

Chocolate Peanut Butter Chip Cookies

Serves: 24 cookies

Prep Time: 10 mins

Cook Time: 12 mins

Total Time: 22 mins

Kitchen Equipment Needed

  • Baking sheets
  • Parchment paper
  • Mixing bowls
  • Electric mixer or spoon
  • Cookie scoop
  • Cooling rack

Ingredients

  • 1 cup (2 sticks) unsalted butter, softened
  • 1 cup granulated sugar
  • 1 cup packed light brown sugar
  • 2 large eggs
  • 2 teaspoons vanilla extract
  • 2 1/4 cups all-purpose flour
  • 3/4 cup unsweetened cocoa powder
  • 1 teaspoon baking soda
  • 1/2 teaspoon salt
  • 2 cups peanut butter chips

Directions

  1. Preheat oven to 350°F (175°C) and line baking sheets with parchment paper.
  2. In a large bowl, beat softened butter, granulated sugar, and brown sugar until light and fluffy.
  3. Add eggs one at a time, mixing after each addition. Stir in vanilla extract.
  4. In a separate bowl, combine flour, cocoa powder, baking soda, and salt.
  5. Gradually add dry ingredients to the butter mixture, mixing until just combined.
  6. Fold in peanut butter chips gently, distributing evenly through the dough.
  7. Using a cookie scoop, drop dough onto prepared baking sheets, spacing cookies about 2 inches apart.
  8. Bake for 10-12 minutes until edges are set and centers appear slightly underdone.
  9. Remove from oven and allow cookies to cool on baking sheets for 5 minutes before transferring to a cooling rack.

Recipe Notes

  • Ensure butter is at room temperature for easy mixing.
  • For extra flair, sprinkle a pinch of sea salt on top before baking.
  • Store cookies in an airtight container to maintain freshness.

Irresistible Homemade Carrot Cake Cheesecake Cookies for Perfect Indulgence

Homemade Carrot Cake Cheesecake Cookies: The Ultimate Treat

⚖️
Difficulty
Medium

⏲️
Prep Time
20 mins

🕒
Cook Time
12 mins

⏱️
Total Time
32 mins

🍽️
Servings
24 cookies

Imagine biting into a cookie that combines the rich flavors of carrot cake and creamy cheesecake—this is exactly what homemade carrot cake cheesecake cookies offer. Perfect for those who savor the combination of spiced carrot and creamy cheese, these cookies present a delightful treat that marries nostalgia with indulgence. Whether you’re hosting a party or simply enjoying a cozy afternoon with a hot beverage, these cookies are designed to impress.

Quick Recipe Highlights

  • Flavor Profile: A beautifully balanced combination of warm spices, sweet carrots, and tangy cheesecake filling.
  • Texture: These cookies feature a soft and chewy base with a creamy center that melts in your mouth.
  • Aroma: Experience enticing notes of cinnamon and nutmeg wafting through the kitchen.
  • Visual Appeal: The rustic golden hue of these cookies is complemented by the occasional cream cheese swirl.
  • Skill Level Needed: Intermediate skills are required for making cheesecake filling and cookie dough from scratch.
  • Special Equipment: A mixer for the cheesecake filling and a grater for the carrots are essential.

Recipe Overview

  • Difficulty Level: With various components such as dough and filling, this recipe requires an intermediate skill level.
  • Category: These cookies fall under the dessert and snack categories, ideal for any time of day.
  • Cuisine: Influenced by American baking traditions with its cheesecake ingredient.
  • Cost: Moderate cost, as most of the ingredients are common household staples.
  • Season: Best enjoyed in spring when fresh carrots are abundant, but delightful year-round.
  • Occasion: Suitable for Easter celebrations, afternoon teas, or any festive gatherings.

Why You’ll Love This Recipe


The combination of carrot cake and cheesecake offers a tantalizing blend that caters to diverse taste preferences. The cookie’s interior bursts with a creamy filling that pairs excellently with the mildly spiced dough. Preparation is straightforward, thanks to readily available ingredients, and the process is a joy for baking enthusiasts.

The nutritional benefits of ingredients like carrots add a wholesome touch. Carrot cake cheesecake cookies also serve as a wonderful centerpiece for social gatherings, inviting compliments and conversations alike. Despite their sophisticated taste, these cookies are accessible to bake, making them a cost-effective luxury.

Historical Background and Cultural Significance


The beloved carrot cake traces its origins back to medieval times when carrots were used as sweeteners. Over the years, it became a staple in various cultures, particularly in England and the United States.

Cheesecake, with its ancient Greek roots, eventually gained popularity in American cuisine and blends seamlessly with carrot cake to design these cookies. Regional variations can be seen where seasonal or local ingredients give these cookies a unique twist.

Ingredient Deep Dive


Carrots bring a natural sweetness enriched with beta carotene and vitamin A, beneficial for eye health and skin. Opt for firm, fresh carrots for this recipe, and store them in a cool, dry place.

Cream cheese lends the quintessential cheesecake flavor and is packed with calcium. Ensure it’s softened before use, and consider full-fat versions for the creamiest results. Keep it refrigerated, and check for any off smells before use.

Common Mistakes to Avoid

  • Overmixing the dough can result in tough cookies. Mix just until ingredients are combined.
  • Skipping the chilling process can lead to flat cookies; ensure adequate chilling.
  • Using wet carrots will make the dough too moist, so finely grate and lightly squeeze excess moisture.
  • Baking at the wrong temperature causes uneven baking; always pre-heat the oven.
  • Using old, dry spices will not impart full flavors, so opt for fresh spices.
  • Failing to adjust bake times for cookie size can lead to over or undercooked cookies.
  • Not using softened cream cheese will result in lumpy filling; ensure even consistency.
  • Incorrect storage after baking can cause staleness; store in an airtight container.

Essential Techniques


Creating the perfect dough consistency is crucial. Mix carefully to incorporate air without overworking, ensuring tender cookies. The cheesecake filling should be smooth; beat cream cheese until lump-free before adding other ingredients.

Proper baking techniques are vital. Monitor cookie bottoms for golden edges as a visual cue for doneness. Lastly, allow cookies to cool completely to set flavors and avoid breakage during transfer.

Pro Tips for Perfect Homemade Carrot Cake Cheesecake Cookies


Chill the dough to maintain shape and prevent excess spreading. Ensure uniform cookie size by using a cookie scoop, ensuring even baking.

For enhanced flavor, let the cookie dough rest overnight to allow spices to develop. Add chopped nuts or raisins for extra texture and flavor. Always bake a test cookie to adjust time and temperature before the full batch.

Variations and Adaptations


Regional adaptations may include locally sourced nuts or spices. Seasonal adjustments can swap out spices for other flavors like cardamom in winter. For dietary changes, use gluten-free flour mixes.

Flavor enhancements include additional spices, such as ginger or allspice, for a spicy twist. Modify textures with coconut flakes or oats, and present uniquely with cream cheese frosting drizzles.

Serving and Presentation Guide


For an elegant presentation, dust cookies with powdered sugar. Garnishes of slivered almonds or a drizzle of white chocolate elevate their aesthetic.

Traditional accompaniment ideas include a cup of hot tea or freshly brewed coffee. Modern serving suggestions play with assorted fruit jams or compotes. Serve slightly warmed or at room temperature for the best experience.

Wine and Beverage Pairing


These cookies pair beautifully with a dessert wine such as a late harvest Riesling, complementing their sweetness. Non-alcoholic options like chai tea or hot apple cider harmonize well with the spices.

Robust coffee highlights their rich flavors, while serving them chilled or slightly warm maintains optimal texture.

Storage and Shelf Life


Store cookies in an airtight container at room temperature for up to three days. Refrigerate to extend shelf life to a week, ensuring they remain fresh and moist.

Spot signs of spoilage, such as an off smell, and freeze any surplus for several months, reheating briefly before serving to revive moisture and softness.

Make Ahead Strategies


Prepare the cookie dough in advance, storing it refrigerated until ready to bake. After baking, cookies maintain quality well if sealed properly. Fresh elements like garnishes can be added before serving.

Reheat pre-baked cookies slightly in the oven for a fresh-baked feel, but assemble cheesecake filling closer to baking for the best texture.

Scaling Instructions


Both halving and doubling this recipe are feasible. Adjust ingredient proportions accordingly and adapt cooking times as larger batches may require additional baking time.

Use larger baking sheets for increased recipes and freeze any extra dough if necessary. Provide ample storage for scaled quantities.

Nutritional Deep Dive


These cookies balance carbohydrates with moderate fats and proteins. Carrots offer fiber and essential vitamins, while cream cheese adds calcium and riboflavin.

Mind portion sizes to maintain a balanced diet, indulging responsibly during special occasions.

Dietary Adaptations


For gluten-free alterations, substitute with certified flour blends, ensuring binding agents like xanthan gum are included.

Dairy-free transformations involve using vegan cream cheese alternatives. A keto-friendly adaptation could involve almond flour instead of traditional flour.

Troubleshooting Guide


Address spreading issues by ensuring dough is cold before baking. If overly spiced, balance with additional cream cheese. Modify oven rack placement for uneven baking.

Adapt ingredient substitutions carefully to maintain taste profiles, paying attention to timing for different cookie thicknesses or ingredient variations.

Recipe Success Stories


Bakers rave about the allure of these cookies at parties, noting how the familiar flavors greet guests with nostalgia. Variations incorporating nutmeg exclusively provide a holiday touch, while readers attest to successful vegan adaptations.

Photographers praise their vibrant appeal in pictures, helping capture memories with delightful aesthetic impressions.

Frequently Asked Questions

Can I make these cookies without nuts? Absolutely, the recipe is flexible and can be nut-free without compromising flavor.

What is the best way to soften cream cheese? Leave it at room temperature for about an hour or microwave it in short bursts to retain consistency.

How do I prevent the cookies from spreading too much? Chill the dough thoroughly and use parchment paper to help maintain cookie shape.

Can I use pre-shredded carrots? While fresh carrots yield better moisture control, pre-shredded options work in a pinch.

What’s the best way to grate carrots? A box grater or food processor provides the right texture without excess moisture.

Can I freeze the dough? Yes, freeze in small batches and thaw in the refrigerator before baking for optimal results.

What substitutes can I use for cream cheese? Mascarpone cheese or vegan cream cheese are suitable alternatives depending on dietary preferences.

How do I know when the cookies are done? Look for golden-brown edges and a firm, but still soft, center.

Can I replace the spices with a pre-made blend? Yes, pumpkin spice or similar blends can simplify the process while providing similar effects.

What if I don’t have a cookie scoop? Use a spoon to ensure even sizes, adjusting shapes by hand if necessary.

How can I achieve a chewier texture? For chewier cookies, slightly underbake and allow them to set on the baking sheet post-baking.

Is it okay to use dried spices? Freshly ground spices are best for flavor, but dried ones can suffice if fresh aren’t available.

Additional Resources


Explore related recipes such as our classic carrot cake or easy cheesecake bars for inspiration. Equip your kitchen with quality baking tools to enhance your cooking experiences.

Visit ingredient spotlights to learn more about utilizing fresh produce or turning your pantry into a treasure trove of flavor.

Join the Conversation


Share your own cookie creations with us on social media, tag #CarrotCakeCookies, and discover innovative photography ideas to capture their beauty.

Review others’ feedback and inspiration within our community, sparking conversations about unique variations and cherished memories shared over your delicious carrot cake cheesecake cookies.

The Recipe

Homemade Carrot Cake Cheesecake Cookies

Serves: 24 cookies

Prep Time: 20 mins

Cook Time: 12 mins

Total Time: 32 mins

Kitchen Equipment Needed

  • Mixer
  • Box grater
  • Baking sheets
  • Parchment paper

Ingredients

  • 1 cup unsalted butter, softened
  • 1 cup brown sugar
  • 1/2 cup granulated sugar
  • 2 large eggs
  • 1 tsp vanilla extract
  • 2 1/2 cups all-purpose flour
  • 1 tsp baking soda
  • 1 tsp ground cinnamon
  • 1/2 tsp ground nutmeg
  • 1 cup grated carrots
  • 8 oz cream cheese, softened
  • 1 cup confectioners’ sugar

Directions

  1. Preheat your oven to 350°F (175°C) and line baking sheets with parchment paper.
  2. In a large bowl, cream together the butter, brown sugar, and granulated sugar until light and fluffy.
  3. Beat in the eggs and vanilla extract until well combined.
  4. Gradually add in the flour, baking soda, cinnamon, and nutmeg, mixing until just combined.
  5. Stir in the grated carrots, ensuring they’re evenly distributed.
  6. In another bowl, mix the softened cream cheese and confectioners’ sugar until smooth to create the cheesecake filling.
  7. Using a cookie scoop, form dough balls and make an indentation for the filling.
  8. Spoon cheesecake filling into the center of each dough ball and pinch edges to seal.
  9. Place cookies on prepared baking sheets and bake for 10-12 minutes, or until edges are golden.
  10. Allow to cool on the baking sheet for a few minutes before transferring them to a wire rack.

Recipe Notes

  • For added texture, incorporate chopped walnuts or pecans into the dough.
  • Ensure cream cheese is fully softened for the smoothest filling.
  • Store in an airtight container to maintain freshness.

Discover Luscious Lemon Zucchini Heaven Bread for a Refreshing Delight

Luscious Lemon Zucchini Heaven Bread: A Citrusy Delight

⚖️
Difficulty
Easy

⏲️
Prep Time
15 mins

🕒
Cook Time
45 mins

⏱️
Total Time
60 mins

🍽️
Servings
8

Imagine the fresh burst of lemon zest mingling with the subtle sweetness of zucchini, creating a bakery aroma in your kitchen that can only be described as heavenly. The Luscious Lemon Zucchini Heaven Bread is a delightful fusion of tangy lemon and tender zucchini, perfect for breakfast or a sweet snack any time of day. This quick and easy bread is sure to become a staple in your baking repertoire, bringing joy to every scrumptious slice.

The combination of lemon and zucchini not only keeps the bread moist but also adds a vibrant, citrusy flavor that dances on your taste buds. The anticipation of tasting this delightful bread as it bakes to golden perfection is an experience that will bring the whole family to the kitchen.

Quick Recipe Highlights

  • Flavor Profile: The lemon provides a refreshing citrus kick, while the zucchini offers a gentle sweetness that balances the overall taste.
  • Texture: This bread has a moist, tender crumb with bits of zucchini spread throughout, adding a delightful juiciness.
  • Aroma: As it bakes, the kitchen fills with the invigorating scent of lemon zest and sweet pastry.
  • Visual Appeal: A golden crust with delicate flecks of green zucchini makes each slice visually appealing.
  • Skill Level Needed: Even novice bakers will find this recipe approachable, with simple instructions and ingredients.
  • Special Equipment: A grater for the zucchini and a simple loaf pan are the only specialized tools needed.

Recipe Overview

  • Difficulty Level: This recipe is rated as easy because it involves straightforward mixing techniques suitable for all levels.
  • Category: It falls under quick breads and can be enjoyed as a breakfast item or dessert.
  • Cuisine: This is a modern take on American quick bread, with a nod to classic lemon desserts.
  • Cost: The ingredients are affordable and commonly found in most pantries, making it a cost-effective treat.
  • Season: Best enjoyed in late summer when zucchini is in abundance, but delicious year-round.
  • Occasion: Perfect for brunch gatherings, afternoon teas, or a sweet complement to a savory breakfast.

Why You’ll Love This Recipe


The taste and texture of Luscious Lemon Zucchini Heaven Bread are what truly set it apart. You’ll love the way the zesty lemon flavor shines through, perfectly balanced by the mild sweetness of the zucchini. With a gentle crumb that’s soft and moist, each bite melts in your mouth, leaving a refreshing citrus aftertaste that tempts you to go for another slice.

Convenience is key with this recipe. It comes together in just about an hour, from preparation to pulling the loaf from the oven. With straightforward steps and minimal equipment, it’s ideal for both busy weekday baking and leisurely weekend projects. Plus, the ingredients are easily sourced, adding to its appeal as a spontaneous baking endeavor when the mood strikes.

Nutritional advantages are another reason to love this recipe. The inclusion of zucchini not only adds moisture but also brings essential vitamins and fiber to a sweet treat, offering a healthier option compared to traditional cakes or pastries. Lemon juice contributes vitamin C, providing an immune-boosting benefit as well.

On a social level, this bread is a wonderful addition to any gathering. Its delightful presentation and the enticing aroma will make it the star of any brunch table or coffee break. Sharing this home-baked goodness with friends and family is a guaranteed way to impress, fostering a sense of warmth and community.

Cost-effectiveness and accessibility make this recipe a home cook’s favorite. With zucchini often being one of the more wallet-friendly vegetables and lemons a grocery staple, you’ll find this recipe fits comfortably within a budget, yet delivers the flavorful punch that premium desserts offer.

Historical Background and Cultural Significance


The origin of combining zucchini in bread can be traced back to innovative American homemakers seeking to incorporate their summer garden surplus into everyday meals. This practical use of plentiful zucchini became a tradition in quick bread baking over the decades. Adding lemon to the mix creates a wonderful twist on the classic recipe, infusing it with a bright, modern flavor.

Culturally, lemon zucchini bread represents the versatility and resourcefulness of American culinary traditions. It highlights the tendency to adapt and evolve with seasonal ingredients, which has become a hallmark of many home-cooked meals in the United States. This bread celebrates the ingenuity of incorporating fresh produce into baking.

Over time, recipes for zucchini bread have diversified, influenced by regional preferences and available ingredients. Some versions embrace spices such as cinnamon and nutmeg, while others experiment with nuts and citrus, embodying a mélange of flavors that cater to various palates. The evolution of this recipe reflects the wider diversity in modern baking.

In contemporary kitchens, regional variations continue to emerge. Recipes from the South might emphasize sweetness, while those from the coastal areas might delve more into citrus combinations. This adaptability has ensured that lemon zucchini bread holds its place in the beloved catalog of go-to quick breads.

Ingredient Deep Dive


Zucchini’s cultural significance is tied closely to its versatility and abundance, making it a popular choice in diverse cuisines worldwide. Often featured in Mediterranean and American dishes, zucchini is celebrated for its ability to easily absorb flavors, making it a natural partner for citrus like lemon. Nutritionally, zucchini is rich in vitamins A and C, plus dietary fiber, which supports digestive health.

When selecting zucchini, look for small to medium-sized ones, as these are typically more tender and flavorful. Store zucchini in the refrigerator wrapped loosely in a plastic bag, which helps preserve its moisture. If fresh zucchini isn’t available, yellow squash can serve as a possible substitution, maintaining the moist texture while adding a slight sweetness to the bread.

Lemons have an extensive culinary history across various cultures, linked to both their versatility and distinctive taste. The bright acidity of lemons complements dishes from sweet to savory and their zest adds a fragrant oil that infuses into baked goods effortlessly. Nutritionally, lemons are an excellent source of vitamin C.

When choosing lemons, look for fruit that feels heavy for its size, indicating juiciness, with smooth, firm skin. To maximize juice yield, roll the lemon on the counter before cutting. Store lemons in the refrigerator in a drawer or on the counter if planning to use them within a week. If you find yourself short, bottled lemon juice can be a substitute but lacks the aromatic zest.

Common Mistakes to Avoid

  • Overmixing the batter can result in a dense bread. Mix just until ingredients are combined.
  • Skipping the grating step for the zucchini may lead to uneven moisture distribution.
  • Using too large zucchini can add extra moisture, impacting the texture negatively.
  • Forgetting to zest the lemon before juicing can make it difficult to get enough zest for flavor.
  • Not preheating the oven can result in uneven baking and a poorly risen loaf.
  • Using a dull grater can make extracting zest more difficult, leading to large pieces.
  • Opening the oven frequently to check on the bread can lead to sinking in the middle.
  • Neglecting to cool bread properly can make slicing difficult and messy.

Essential Techniques


A key technique in making Luscious Lemon Zucchini Heaven Bread includes properly grating the zucchini. This is important because it ensures the vegetable is well distributed throughout the batter, contributing to the bread’s moist texture without overwhelming it. To master this, use the fine side of the grater and evenly apply pressure, ensuring uniform strands.

Baking the bread includes carefully monitoring the mixing process to avoid overworking the gluten in the flour. This means folding ingredients gently and just until they are combined, ensuring the bread remains light and tender. Visual cues for successful mixing include a uniform batter that comes together without large pockets of flour or overly wet spots.

Pro Tips for Perfect Luscious Lemon Zucchini Heaven Bread


For optimal flavor, allow the bread to rest for a few hours after baking to let the flavors meld together. You’ll find this enhances both the lemon and zucchini profiles cohesively.

Grease the loaf pan with a combination of butter and flour for easy release once the bread is baked, preventing any of those delectable bits from sticking.

Test for doneness by inserting a toothpick into the center. If it comes out clean or with a few crumbs, the bread is ready. This prevents overbaking, which can dry out your bread.

If you find zucchinis are unusually water-rich, blot them with a paper towel after grating to manage moisture and achieve a better texture.

Experiment with a light glaze made from powdered sugar and lemon juice drizzled over the cooled bread for added sweetness and visual appeal.

When zesting, avoid the bitter white pith by gently rotating the lemon and only taking the outermost layer of the peel for the best flavor.

Store leftover slices individually wrapped for easy, grab-and-go portions that retain their freshness longer.

Variations and Adaptations


Regional variations of this bread highlight the versatility of the core recipe. In Italian-inspired adaptations, substituting some flour with almond meal adds a nutty depth. Meanwhile, those preferring a Southern twist might incorporate a touch of bourbon into the batter for an extra flavor layer.

Seasonal adaptations could reflect the bounty of a summer harvest, perhaps with the inclusion of summer berries like blueberries or strawberries folded into the batter, adding bursts of color and flavor.

For dietary modifications, a gluten-free flour blend can be substituted for all-purpose flour, allowing those with gluten sensitivity to still enjoy this treat without compromising on taste or texture.

To explore flavor variations, try adding spices such as ginger or cardamom for a warmer taste profile, or vanilla extract for a more traditional, comfort-baking feel.

For texture modifications, including chopped nuts like walnuts or pecans will add a delightful crunch, contrasting the soft bread nicely.

Experimenting with presentation alternatives such as bundt or mini loaf pans can elevate the bread from classic loaf to personalized servings, ideal for individualized settings or gifting.

Serving and Presentation Guide


When serving, consider slicing the bread into 1-inch thick pieces for a perfect balance of texture and flavor. Arrange slices on a platter with fresh lemon slices and a sprinkle of powdered sugar for a clean, classic presentation.

Garnishing with a bit of lemon zest on top will amplify the citrus aroma and provide a visual cue of the flavor within. Fresh mint leaves can also serve as a lovely contrast to the lemon’s brightness.

Traditional accompaniments for this bread might include a smear of cream cheese or lemon-infused butter, enhancing both the richness and citrus notes simultaneously.

For modern serving suggestions, consider pairing with a dollop of yogurt or fruit compote, which can balance the sweetness and make it more brunch-friendly.

Temperature-wise, the bread is best enjoyed slightly warm or at room temperature, allowing the flavors to shine through. If preparing in advance, briefly warming the slices before serving can reinvigorate the bread’s aroma and texture.

Portion control tips include pre-slicing the bread and serving on smaller plates, which can visually satisfy while managing portion sizes effectively, especially in larger gatherings.

Wine and Beverage Pairing


For wine pairings, a light, citrusy sauvignon blanc complements the lemon notes beautifully without overpowering the subtleties of the bread. Its crispness echoes the fresh zest, creating a harmonious flavor experience.

Non-alcoholic alternatives could include a simple herbal tea, such as chamomile or citrus green tea, both offering a soothing backdrop that pairs well with the bread’s flavors.

Coffee selections like a smooth Ethiopian blend mirror the bread’s complexity and provide a robust counterpoint to the lemon’s brightness, making it an ideal brunch choice.

Temperature considerations for beverages should lean towards chilled wine and warm teas, supporting the refreshing nature of the bread or enhancing its comforting attributes, respectively.

Serving suggestions include chilled fruit-infused water or sparkling water with a twist of lemon, adding a refreshing element that accentuates the bread’s innate citrus goodness.

Storage and Shelf Life


To store your Luscious Lemon Zucchini Heaven Bread, wrap it tightly in plastic wrap or place it in an airtight container to maintain moisture and freshness. It can be left at room temperature for up to three days, stored in the refrigerator for a week, or frozen for up to three months.

If refrigerating, use slightly damp paper towels between slices to prevent drying. For freezing, wrap the entire loaf or individual slices in aluminum foil before placing in a freezer bag for added protection against freezer burn.

Signs of spoilage include an off smell, significant changes in texture such as an unusually hard surface, or any visible mold. Checking regularly ensures you enjoy your bread at its best.

For reheating, individual slices can be warmed in a toaster oven or microwave for about 15 seconds, refreshing the bread’s aroma and moisture before serving. Avoid reheating in the oven as it can dry out the bread.

When freezing, labeling with the date can help keep track of freshness, ensuring you enjoy the bread while it’s at its peak. Once defrosted, it’s best to consume within a couple of days for optimal flavor and texture.

Make Ahead Strategies


A thoughtful prep timeline can enhance your baking experience. The batter can be prepared a day in advance and stored in the refrigerator, allowing the flavors to meld and reducing day-of preparation time.

For storage between steps, mix the dry ingredients and wet ingredients separately and combine them right before baking, ensuring a fresh, evenly prepared batter.

There is a negligible quality impact from pre-prepared batter, allowing you to enjoy the same delicious results even with a head start in preparation.

Assembly tips include grating the zucchini and zesting the lemon ahead of time, storing them separately to maintain freshness. This allows you to quickly assemble when ready for baking without sacrificing flavor.

Reheating your loaf just before serving can enhance its aroma, making for a delightful presentation. Gently warm the bread in the oven and, if desired, apply a fresh lemon glaze for a renewed burst of flavor.

Adding freshly zested lemon over the glaze or on individual slices before serving can elevate freshness, adding a bright, flavorful touch to pre-prepared bread.

Scaling Instructions


Scaling this recipe to suit different needs involves some simple adjustments. To halve the recipe, divide the ingredients equally and use a smaller loaf pan to retain baking times and consistency.

Doubling or tripling requires proportional increases in ingredients and possibly additional loaf pans to ensure even baking; you may need to adjust oven times slightly, monitoring closely as larger volumes may impact baking duration.

Equipment adjustments might include using a standing mixer to prepare larger batches efficiently, or dividing batter into multiple smaller pans for uniform cooking.

Timing modifications for varied batches should always include consistent preheating of the oven and proper rotation of pans halfway through baking for even heat distribution.

Storage considerations should keep in mind shelf life differences when freezing larger quantities, ensuring slices are properly wrapped and dated for efficient use over time.

Nutritional Deep Dive


In terms of nutrition, Luscious Lemon Zucchini Heaven Bread offers a delectable treat with a balance of macros. It provides carbohydrates mainly from flour and zucchini, a moderate touch of healthy fats from oil or any nut additions, and some protein from the bread’s additional elements.

Micronutrient analysis reveals the presence of vitamin C from lemons, supporting immune health, and small amounts of B vitamins from zucchini, which aid in energy production.

Health benefits include a fiber boost from zucchini, contributing to satiety and aiding digestion, with some antioxidant benefits from lemon zest that can provide a refreshing, wholesome treat.

Dietary considerations include possible gluten due to regular flour; however, modifications can adapt this recipe to suit gluten sensitivities or preferences.

Portion analysis reinforces that keeping slices at reasonable sizes upholds the balance of indulging in a sweet bread within a nutritious framework without overwhelming dietary guidelines.

For weight management tips, pairing slices with protein-rich sides like yogurt or nuts offers a more balanced meal, combining satisfying carbs with complementary proteins and fats.

Dietary Adaptations


Creating gluten-free Luscious Lemon Zucchini Heaven Bread requires using a high-quality gluten-free flour blend, which allows you to maintain texture and taste attributes similar to the standard recipe.

For a dairy-free version, substituting any dairy-based ingredients with plant-based alternatives ensures the bread remains just as delicious without impacting texture or moistness.

A vegan adaptation involves replacing any eggs with alternatives such as flaxseed meal mixed with water, ensuring the bread binds well while maintaining its structural integrity.

Low-carb considerations may involve reducing sugar content or replacing it with sugar substitutes, potentially lowering carbohydrate intake while retaining sweetness and flavor.

For keto adaptations, examining flours like almond flour not only cuts carb content but also enriches the loaf with additional flavor profiles consistent with the diet’s requirements.

Paleo variations involve integrating ingredients such as coconut flour and honey instead of wheat flour and sugar, preserving the bread’s core qualities while aligning with paleo dietary frameworks.

Low-FODMAP adjustments can be achieved by reducing high-FODMAP ingredients or substituting with approved alternatives, ensuring that digestive comfort is maintained alongside flavor.

Troubleshooting Guide


If you experience texture issues, it may be due to overmixing the batter. Ensure to fold gently and avoid overworking once liquids are added to the dry ingredients, helping preserve a tender crumb structure.

Taste balance can be addressed by adjusting the amount of lemon zest or sugar to suit personal preferences, enhancing tanginess or sweetness as necessary for individual palettes.

Temperature problems often arise from an inaccurately preheated oven, which can impede proper rising. Always ensure the oven reaches the correct temperature before introducing the loaf.

When facing equipment challenges such as uneven baking, rotating the loaf pan or using insulated sheets can contribute to more consistent heat distribution.

Ingredient substitutions require accuracy in measurement. For example, if replacing wheat flour with a gluten-free alternative, trial and error may be needed to get precise results in texture and rise.

Timing concerns generally come from mistimed baking. If your loaf is taking longer to bake than expected, be sure to test doneness and cover the top with foil if it threatens to brown too much early on.

Recipe Success Stories


In sharing Luscious Lemon Zucchini Heaven Bread recipes, many community feedbacks celebrate the ease and satisfaction of preparing such a flavorful treat with minimal fuss. Home bakers often note the rave reviews from friends who taste it, highlighting its perfect balance between lemon brightness and subtle sweetness.

Variation successes include incorporating blueberries for color and added flavor depth, becoming a beloved summer twist on the traditional loaf that resonates well with festive occasions.

Some recipe adaptations have been shared, replacing sugars with honey for those aiming for a less processed, more natural sweetener approach, yielding equally delightful results.

Readers suggest tips like using parchment paper-lined loaf pans for effortless removal and clean slices, contributing to presentation quality and ease of storage.

Photography tips involve capturing the golden crust and moist interior, with garnishes of fresh zucchini and lemon slices adding vibrancy for food blogging and social media sharing.

Frequently Asked Questions

Can I use frozen zucchini? Yes, but be sure to thaw and drain excess moisture to maintain the bread’s texture.

What if I don’t have a loaf pan? A muffin tin can work, baking for about 20-25 minutes instead, checking for doneness with a toothpick.

How do I prevent the bread from sticking? Greasing and flouring the pan, or using parchment paper, helps ensure easy removal.

Why is my bread dense? This could be due to overmixing, so be gentle when combining ingredients.

Can I add nuts or fruit? Absolutely! Chopped nuts or berries can add new flavors and textures.

Is whole wheat flour an option? Yes, but the flavor and texture might be slightly denser; consider balancing with half all-purpose flour.

How do I make it sweeter? Adding a bit more sugar or a glaze can enhance sweetness if desired.

Any tips for making it more lemony? Additional lemon zest or a few drops of lemon extract can heighten citrus notes.

What if my loaf sinks? Ensure accurate oven temperatures and proper leavening agent balances to prevent sinking.

How long does it keep fresh? Up to three days at room temperature, longer when refrigerated or frozen.

Can I use lemon juice instead of zest? While juice adds moisture, zest offers more concentrated flavor without altering batter consistency.

What’s the best way to glaze it? Mix powdered sugar with fresh lemon juice to a drizzling consistency and apply over the cooled bread.

Additional Resources


Enhance your baking repertoire with related recipes such as classic zucchini bread, adding more seasonal variations to your quick bread options. Incorporating other citrus fruits into similar recipes provides a delightful exploration of flavor contrasts.

Technique guides available online can expand on baking fundamentals, helping perfect methods like mixing and grating, to consistently achieve the best results in quick bread baking.

Ingredient information sheets may offer deeper insight into produce selection and storage, assisting in maintaining fresh ingredients for optimal baking experiences over time.

Equipment recommendations in specialty kitchen stores can supply upgraded cookware or tools, ensuring each baking endeavor is as smooth and successful as possible.

Seasonal variations explore different pairings and adaptations, encouraging creativity in flavor pairings and broadened applications for diverse palates and pantry supplies.

Join the Conversation


Engaging with fellow bakers is a delightful way to share successes and innovations with Luscious Lemon Zucchini Heaven Bread. Post your recipe variations and photos on social media platforms, tagging this community and spreading the joy of baking fresh, delicious bread.

Capture and share photography tips with fellow enthusiasts, focusing on golden crusts and bright lemons for dynamic visual stories of your baking journey.

Recipe reviews are always welcome, offering various takes and adaptations that inspire new combinations among shared social circles and baking forums.

Community engagement can include responding to queries, participating in recipe challenges, and sharing insights, ensuring a connected space for all levels of bakers.

Joining recipe variations discussions often leads to surprising discoveries and mutual appreciation for the creative potential inherent in every loaf of Luscious Lemon Zucchini Heaven Bread.

The Recipe

Luscious Lemon Zucchini Heaven Bread

Serves: 8

Prep Time: 15 mins

Cook Time: 45 mins

Total Time: 60 mins

Kitchen Equipment Needed

  • Loaf pan
  • Grater
  • Mixing bowls
  • Whisk
  • Spatula
  • Measuring cups and spoons

Ingredients

  • 1 cup grated zucchini
  • 1 cup all-purpose flour
  • 1/2 cup sugar
  • 1/4 cup vegetable oil
  • 1 egg
  • 1 teaspoon baking powder
  • 1/2 teaspoon salt
  • Zest from 1 lemon
  • 2 tablespoons lemon juice

Directions

  1. Preheat your oven to 350°F (175°C) and grease a loaf pan.
  2. In a large mixing bowl, combine flour, sugar, baking powder, and salt.
  3. In another bowl, whisk together vegetable oil, egg, lemon zest, and juice.
  4. Gently fold in the grated zucchini.
  5. Pour the wet ingredients into the dry ingredients, mixing until just combined.
  6. Transfer the batter into the prepared loaf pan, smoothing the top.
  7. Bake for 45 minutes or until a toothpick inserted in the center comes out clean.
  8. Allow to cool in the pan for 10 minutes before transferring to a wire rack to cool completely.

Recipe Notes

  • For a refreshing glaze, mix powdered sugar with lemon juice and drizzle over the cooled loaf.
  • Store leftover slices in an airtight container to maintain moisture.
  • Try adding blueberries or chopped nuts for variation.

Irresistible Strawberry Cream Cheese Cookies for Perfectly Sweet Indulgence

Delicious Strawberry Cream Cheese Cookies: A Sweet Summer Treat

⚖️
Difficulty
Easy

⏲️
Prep Time
15 mins

🕒
Cook Time
12 mins

⏱️
Total Time
27 mins

🍽️
Servings
24 cookies

There’s nothing quite like Strawberry Cream Cheese Cookies to encapsulate the essence of summer. These delightful cookies are soft, chewy, and bursting with strawberry flavor, making them a perfect treat for any occasion. With the rich creaminess of cream cheese and the sweet, fruity taste of fresh strawberries, these cookies are an indulgence that will leave you craving more. Perfect for picnics, parties, or a simple afternoon snack, they are easy to make, yet satisfyingly complex in taste.

The Strawberry Cream Cheese Cookies combine a buttery, creamy base with the freshness of strawberries, which brings a burst of flavor to every bite. The combination of tart and sweet will delight your taste buds, while the pillowy texture provides a satisfying chew that keeps you reaching for another. As you bake these cookies, your kitchen will be filled with the heavenly aroma of strawberries and cream, transporting you to a sun-drenched garden.

Quick Recipe Highlights

  • Flavor Profile: The cookies deliver a harmonious blend of sweet strawberries with the creamy richness of cheese, layered with a touch of vanilla essence.
  • Texture: These cookies strike the perfect balance between soft and chewy, with the cream cheese adding a delightful richness.
  • Aroma: As they bake, they exude a mouth-watering aroma of sugary strawberries and vanilla, inviting everyone into the kitchen.
  • Visual Appeal: With their delicate pink hue and enticing glossy finish, they are as visually appealing as they are delicious.
  • Skill Level Needed: This recipe requires basic baking skills, making it suitable for beginner bakers and experienced cooks alike.
  • Special Equipment: A stand mixer is ideal for achieving a smooth dough, but a handheld mixer will also do the trick.

Recipe Overview

  • Difficulty Level: Easy. With straightforward steps and minimal preparation, these cookies are simple to whip up for any occasion.
  • Category: Dessert or Snack. Perfect for enjoying at any time of the day.
  • Cuisine: While these cookies are a modern take, they draw inspiration from traditional American baking techniques, enhanced by seasonal fresh ingredients.
  • Cost: Affordable. Using common pantry staples and seasonal strawberries keeps the cost low.
  • Season: Best enjoyed in the summer when strawberries are at their peak, though they can be made year-round with frozen berries.
  • Occasion: Ideal for casual gatherings, picnics, or as a sweet surprise in the lunchbox.

Why You’ll Love This Recipe


These Strawberry Cream Cheese Cookies are a summer staple due to their perfect blend of taste, texture, and aroma. The luscious cream cheese not only enhances the flavor but also contributes to a delightfully smooth cookie that melts in your mouth. Preparing these cookies is a breeze, taking only a few minutes to mix and bake, allowing you to spend more time enjoying the sunny weather.

Aside from their scrumptious flavor, these cookies also offer some nutritional benefits, with strawberries being a great source of vitamin C and antioxidants. They are low in saturated fat compared to traditional cookies, giving you a guilt-free dessert option. Moreover, they are versatile enough for various occasions, providing a sophisticated snack for social gatherings or a comforting treat for a quiet evening at home.

Their cost-effectiveness and accessibility are part of their charm, using ingredients you likely already have in your kitchen. Plus, they can be adapted for special diets, making this recipe inclusive for those with dietary restrictions. The ease of preparation, combined with the unique blend of sweet and savory elements, makes these cookies a winning recipe for any baking enthusiast.

Historical Background and Cultural Significance


The origins of Strawberry Cream Cheese Cookies can be traced back to traditional American baking practices where using fresh produce in desserts is a beloved tradition. Over time, bakers have experimented with different methods to incorporate seasonal fruits into their recipes seamlessly, leading to variations like this one that marry classic flavors with innovative techniques.

Culturally, these cookies have become synonymous with summer barbecues and Fourth of July celebrations, often seen gracing the dessert tables with their vibrant color and rich flavor. As baking has evolved, so too has the popularity of adding cream cheese to baked goods, which enhances the taste and texture without overpowering the natural sweetness of the strawberries.

This recipe has been adapted across the globe, with variations that highlight regional ingredients, showing the universal appeal of combining fruit and cheese in desserts. In America, they symbolize a celebration of the farming bounty and communal family meals, evoking nostalgia and warmth through shared culinary experiences.

Ingredient Deep Dive


The strawberries in this recipe are the star ingredient, providing a natural sweetness and a pop of color. Historically, strawberries were revered by ancient Romans for their medicinal properties, and today they continue to offer numerous health benefits, being rich in vitamins and antioxidants. When selecting strawberries, opt for ones that are bright red, firm, and fragrant, and store them in the refrigerator to maintain freshness.

Cream cheese adds a luxurious creaminess to the cookies, a quality ingredient that has been a staple in American kitchens since the early 1900s. Its origins lie in dairy-rich regions of Europe, but it has been embraced worldwide for its versatile culinary applications. Its balance of tangy and mild flavors makes it an ideal component in not just savory dishes, but in sweets like these cookies.

Common Mistakes to Avoid

  • Over-mixing the dough can result in tough cookies by activating too much gluten.
  • Not chilling the dough can lead to cookies spreading excessively during baking.
  • Using cold cream cheese can lead to lumps; ensure it’s at room temperature before mixing.
  • Failure to dry strawberries properly can add excess moisture, affecting texture.
  • Oven temperature inaccuracies can lead to underbaked or burnt cookies.
  • Ignoring dough resting time can compromise flavor development.
  • Substituting key ingredients without adjustments can alter the recipe’s balance.
  • Lack of precision in measurements can drastically change the outcome.

Essential Techniques


Creaming the butter and cream cheese is a crucial step; it ensures that the cookies have a smooth texture and are well-risen. This technique involves beating the two together until light and fluffy, incorporating air to aid in leavening. Visual cues include a pale color and a noticeable increase in volume. Avoid incorporating too much air, which can result in crumblier cookies.

Pro Tips for Perfect Strawberry Cream Cheese Cookies


Room temperature ingredients achieve a cohesive dough and optimal texture in baked goods. Use silicon mats or parchment paper to prevent sticking and allow cookies to bake evenly. For an extra pop of flavor, consider adding a splash of lemon zest to the dough. Chilling dough for at least 30 minutes contributes to firmer cookies that retain shape. Try adding white chocolate chips for a more decadent twist. To preserve vibrant strawberry color, fold in gently after removing excess moisture.

Variations and Adaptations


Regional variations of Strawberry Cream Cheese Cookies integrate local flavors, like adding macadamia nuts in Hawaii. For a winter adaptation, use frozen strawberries to maintain the fruity touch when fresh produce is scarce. Modify the recipe for a low-carb diet using almond flour and sugar substitutes. Enhancing the flavor with complementary herbs like basil can provide an unusual twist. For crunch, incorporate some oats into the dough, or finish with a dusting of powdered sugar for elegance.

Serving and Presentation Guide


For a polished presentation, use a small ice cream scoop to ensure uniform cookie sizes. Garnish with a thin slice of fresh strawberry or a sprinkle of pink sugar to accentuate their color. Traditionally, these cookies pair well with a light tea, but a dollop of whipped cream provides a richer indulgence. Serve slightly warm or at room temperature to accentuate their softness. To manage portions, consider smaller cookie sizes for moderate snacking.

Wine and Beverage Pairing


A crisp white wine such as Sauvignon Blanc complements the sweet and tangy notes of Strawberry Cream Cheese Cookies. Non-alcoholic options include savoring these cookies with a fresh mint lemonade, which balances the sweetness while refreshing the palate. Tea pairings include a delicate jasmine or green tea that enhances the cookies’ fruity and creamy notes without overpowering them.

Storage and Shelf Life


Store these cookies in an airtight container in a cool, dry place, ideally for up to five days. To maintain their moisture and chewy texture, place wax paper between layers of cookies. Signs of spoilage include excessive hardening or an off smell, indicating it’s time to discard them. While best enjoyed fresh, they can also be frozen for up to three months; thaw at room temperature before serving.

Make Ahead Strategies


The dough for Strawberry Cream Cheese Cookies can be made ahead and frozen for up to a month. Portion the dough into individual cookies, freeze on a baking sheet, then transfer to a zip-lock bag. Before baking, allow cookies to sit at room temperature for 15 minutes. Assemble freshly cut strawberries just before serving to ensure the best flavor and texture.

Scaling Instructions


To halve the recipe, carefully measure and adjust all ingredients, especially leavening agents, to maintain balance. Doubling or tripling is possible, though uniform mixing might require batch division. Pay attention to oven capacity when scaling up to avoid uneven baking. Storage considerations include ensuring you have enough space to preserve larger quantities conveniently.

Nutritional Deep Dive


These cookies offer a well-rounded treat, with protein from cream cheese and antioxidants from strawberries. The carbohydrate content can be moderated by opting for whole flour substitutes. They support dietary considerations like vegetarian menus naturally. Each serving, which consists of two cookies, aligns with typical dessert calories, balanced with fresh fruit.

Dietary Adaptations


For gluten-free Strawberry Cream Cheese Cookies, substitute all-purpose flour with a gluten-free alternative like almond flour. Dairy-free adaptations can use vegan cream cheese without compromising flavor or texture. Keto dieters can consider low-carb flours and sweeteners to align this recipe with their dietary goals without losing its essential sweetness.

Troubleshooting Guide


Texture issues, such as hard cookies, often result from overbaking or insufficient moisture. Ensure the right balance by testing bake times with a small batch first. Achieve flavor balance through precise strawberry and cheese measurements to prevent one from dominating. Maintain oven accuracy with a reliable thermometer to manage temperature concerns. Equipment challenges like mixer burnouts can be mitigated with manual mixing in small batches.

Recipe Success Stories


Community feedback highlights the versatility of these cookies, with many home cooks adapting them for holidays by adding festive decorations. Variation successes include adding a crumb topping for extra crunch, as shared by reader Mia from Ohio. Suggestions range from adding lemon zest for a citrusy flair to swapping strawberries with other berries for diverse interpretations. Photography tips focus on natural lighting to capture their inviting pink tones beautifully.

Frequently Asked Questions

Can I use frozen strawberries?

Yes, frozen strawberries can be used. Ensure they are well-drained and patted dry before incorporating into the dough to avoid excess moisture.

Do I need to refrigerate leftover cookies?

It’s best to store these cookies in a cool, dry place, but refrigerating them in airtight containers can extend their shelf life slightly, if desired.

What is the best substitute for cream cheese?

Vegan cream cheese or mascarpone are good substitutes if you’re looking to keep this recipe dairy-free.

How can I prevent the cookies from spreading too much?

Chill the dough for at least 30 minutes before baking to help maintain structure and prevent excessive spreading.

Is it possible to add nuts?

Yes, chopped nuts such as almonds or pecans can be added for additional texture and flavor contrast.

How can I adjust sweetness if my strawberries aren’t sweet?

Add a teaspoon of honey or sugar during mixing if the strawberries lack natural sweetness.

Can I prepare the dough ahead of time?

Absolutely, prepare the dough and refrigerate for up to three days or freeze for longer storage, up to a month.

What pairs well with these cookies for dessert tables?

Complement these cookies with other summer treats like lemon bars or berry tarts for a fresh dessert spread.

Are there any decorations you recommend?

A light drizzle of white chocolate or a dusting of powdered sugar can add a refined touch to the cookies’ appearance.

What type of vanilla extract is best?

Pure vanilla extract is recommended for its quality and depth of flavor over artificial variants.

Additional Resources


Explore other delightful recipes on our blog including Easy Lemon Bars and Berry-Infused Pies, which pair beautifully with Strawberry Cream Cheese Cookies. Our technique guides offer insights on perfecting baking fundamentals like achieving the ideal creaming consistency. For those interested in nutritional benefits, a detailed article on seasonal ingredient importance is available.

Join the Conversation


We invite you to share your own Strawberry Cream Cheese Cookies stories with us on social media. Whether it’s a photo from your latest batch or a unique twist you’ve employed, we’d love to hear from you. Rate this recipe and leave a comment with any creative variations you’ve tried. Engage in our community discussions for tips and inspiration, and become part of our baking family.

The Recipe

Strawberry Cream Cheese Cookies

Serves: 24 cookies

Prep Time: 15 mins

Cook Time: 12 mins

Total Time: 27 mins

Kitchen Equipment Needed

  • Stand mixer or handheld mixer
  • Baking sheets
  • Silicone mats or parchment paper
  • Cooling rack

Ingredients

  • 1 cup unsalted butter, softened
  • 6 oz cream cheese, softened
  • 1 1/4 cups granulated sugar
  • 1 egg
  • 2 tsp vanilla extract
  • 2 1/4 cups all-purpose flour
  • 1/2 tsp baking powder
  • 1/2 tsp salt
  • 1 cup diced strawberries

Directions

  1. Preheat your oven to 350°F (175°C) and prepare baking sheets with silicone mats or parchment paper.
  2. In a mixer bowl, cream together the butter and cream cheese until smooth and fluffy.
  3. Add sugar and beat until incorporated. Then add the egg and vanilla, mixing well.
  4. Sift in the flour, baking powder, and salt, and mix until a uniform dough forms.
  5. Gently fold in the strawberries until evenly distributed.
  6. Scoop tablespoon-sized portions of dough onto prepared baking sheets, spacing them apart.
  7. Bake for 12-15 minutes or until edges are lightly golden. Do not overbake.
  8. Transfer cookies to a cooling rack. Serve warm or at room temperature.

Recipe Notes

  • Substitute cream cheese with mascarpone for a slightly different flavor.
  • Enhance the experience with a sprinkle of cinnamon or cardamom.

Irresistible Maraschino Cherry Chocolate Chip Cookies for a Sweet Delight

Maraschino Cherry Chocolate Chip Cookies: A Sweet Delight

⚖️
Difficulty
Easy

⏲️
Prep Time
15 mins

🕒
Cook Time
12 mins

⏱️
Total Time
27 mins

🍽️
Servings
24 cookies

There’s nothing more comforting than the delightful taste of homemade cookies, and these Maraschino Cherry Chocolate Chip Cookies are a treat that your taste buds will thank you for. Infused with the juicy sweetness of maraschino cherries and the rich depth of semi-sweet chocolate chips, this cookie recipe is guaranteed to elevate your cookie game. Imagine the pleasant aroma wafting through your kitchen as these cookies bake to perfection, leaving you impatiently waiting to take the first bite.

These cookies boast a chewy interior with perfectly crisp edges, creating a perfect balance of textures that cookie lovers crave. The bursts of cherry sweetness complement the decadent chocolate chips, making every bite a celebration of flavors. Whether enjoyed with a cold glass of milk or a cup of hot tea, Maraschino Cherry Chocolate Chip Cookies are bound to become a favorite family recipe cherished for generations.

Quick Recipe Highlights

  • Flavor Profile: The cookies offer a wonderful combination of cherry sweetness and chocolate richness, perfect for satisfying sweet cravings.
  • Texture: These cookies feature a chewy middle with crisp edges, while each bite includes a juicy maraschino cherry chunk.
  • Aroma: The aroma of baking cherries combined with melting chocolate fills your kitchen with a tantalizing scent.
  • Visual Appeal: Dotted with vibrant red cherries and dark chocolate chips, these cookies are visually appetizing.
  • Skill Level Needed: Suitable for beginners, this recipe requires basic baking techniques and measurements.
  • Special Equipment: A standard baking sheet and electric mixer are recommended for optimal results.

Recipe Overview

  • Difficulty Level: Easy to prepare, manageable for budding home bakers and seasoned chefs alike.
  • Category: Desserts, Cookies
  • Cuisine: American cuisine with a contemporary twist.
  • Cost: Economical, with most ingredients likely already in your pantry. Estimated cost is under $10.
  • Season: Enjoy these cookies year-round, particularly delightful during the festive season when cherries can add a festive touch.
  • Occasion: Ideal for cookie exchanges, holiday parties, or as a sweet addition to any gathering.

Why You’ll Love This Recipe

The combination of maraschino cherries and chocolate chips creates a sweet, tangy, and rich cookie that satisfies a variety of taste preferences. A mix of chewy and crunchy textures makes each bite an enjoyable experience for cookie aficionados.

The simplicity of the recipe makes it perfect for quick preparation without sacrificing flavor. These cookies can be whipped up last-minute for unexpected guests or as a spontaneous sweet treat after dinner.

Despite their sweet nature, these cookies offer a bright and mildly tangy flavor from the cherries, providing a bit of vitamin C and fiber in each bite. This subtly offsets the richness of the chocolate.

Whether you’re hosting a party or spending a cozy evening in, these cookies are a delight to share. Gift them to friends or family, and watch them become a memorable part of your gatherings.

Cost-effective ingredients make achieving a tasty outcome both accessible and affordable, letting you indulge without hurting your budget. These cookies freeze well, allowing you to make them ahead and save for future enjoyment.

Historical Background and Cultural Significance

The tradition of pairing fruit with chocolate has been a staple in sweets and desserts, dating back to early culinary practices of combining naturally sweet elements with cocoa. This particular combination accentuates the concept beautifully in cookie form.

Maraschino cherries, originally from Italy, have been sweet dessert additions since the early 19th century, transforming traditional recipes into sophisticated treats. As time progressed, cherries and chocolate became a popular combination in American baking.

Over time, the addition of maraschino cherries to chocolate chip cookies emerged as a refreshing twist on the classic chocolate chip cookie, allowing for fruity notes that enhance the rich cocoa flavor.

With regional variations around the world, the integration of fruit into chocolate and cookies highlights cultural creativity in adapting classic favorites to local tastes and traditions.

Ingredient Deep Dive

Maraschino Cherries: These cherries carry history from their preservation in a liqueur, making them a luxurious ingredient over the years. Bursting with unique sweetness, they offer vitamins and antioxidants, crucial for both taste and slight health benefits.

Selecting the right jar—dark red and firm—is essential for freshness, while larger quantities can be stored unopened in a cool pantry. Once opened, refrigeration is ideal to maintain longevity and flavor. A possible substitute could be dried cherries soaked in a simple syrup.

Chocolate Chips: Used globally as a base for many confections, chocolate chips bring the irreplaceable, rich cocoa flavor. Opt for high-quality semi-sweet chips, boasting a balance of bitterness and sweet tones while upgrading the cookie’s profile.

Store chocolate in a cool, dry place to maintain quality. If out of chocolate chips, chopped chocolate chunks or dark chocolate varieties can offer an elevated variation of your cookies.

Common Mistakes to Avoid

  • Over-mixing the dough can lead to tough cookies; mix just until combined for best results.
  • Using room-temperature cherries ensures even distribution and prevents excessive moisture.
  • Don’t skip chilling the dough as it helps control spreading in the oven.
  • Avoid substituting fresh cherries without adjusting sugar, as maraschino cherries are sweetened.
  • Bake one sheet at a time in the center of the oven for evenly cooked cookies.
  • Overbaking can result in dry cookies; remove from the oven when edges start to brown.
  • Let cookies cool completely on a wire rack to enhance texture and flavor.
  • Ensure even-sized dough balls for consistent baking.

Essential Techniques

Creaming the butter and sugar is crucial for creating light, airy cookies. Proper mixing incorporates air, resulting in an ideal chewy texture. Avoiding over-mixing is key to maintaining dough structure.

Understanding how to fold cherries and chocolate into the dough prevents bruising and breakage, essential for maintaining individual flavors and textures. A gentle hand ensures an even and delicious end product.

Pro Tips for Perfect Maraschino Cherry Chocolate Chip Cookies

For incredibly moist cookies, refrigerate dough for at least one hour before baking. This step enhances flavors and stabilizes the butter, reducing excessive spreading.

Substituting almond extract for vanilla introduces an additional layer of nutty flavor complementing the cherries. Be cautious to balance with vanilla for a nuanced taste combination.

Toasted nuts, such as pecans or walnuts, can be added for a crunchy contrast. Ensure nuts are cooled completely before adding to the dough to prevent melting the chocolate chips.

Consider adding a pinch of sea salt to the tops of cookies before baking, enhancing the sweet and savory balance and intensifying the chocolate experience.

Always use parchment paper or silicone baking mats for consistent baking and easy cleanup. This also prevents the cookies from sticking, maintaining their perfect shape.

Experiment with different maraschino cherry brands to find a balance of sweetness and texture that suits personal preference best. Each brand can uniquely influence the final taste outcome.

Variations and Adaptations

Regional Cherries: Experiment with local cherry varieties for a fresh take, altering sugar content to suit the sweetness level of fresh cherries versus maraschino.

Seasonal Adaptations: Infuse autumn spices, such as cinnamon or nutmeg, during colder months, adding warmth and depth to the cookies.

Dietary Modifications: Substitute a plant-based butter and egg alternative for a vegan adaptation without compromising the delightful taste of the original recipe.

Flavor Variations: For a tropical twist, incorporate shredded coconut, which pairs wonderfully with both cherries and chocolate, creating a vibrant combination.

Texture Modifications: Incorporate rolled oats to the dough for a rustic, hearty texture, transforming cookies into a multidimensional dessert and snack option.

Presentation Alternatives: For elegant gatherings, drizzle with a white chocolate glaze post-baking, adding a visual and flavorful contrast that complements the tart-sweet cherries beautifully.

Serving and Presentation Guide

For beautiful presentation, consider a stackable platter showcasing cookies at varying heights, creating a tempting visual display for guests.

Edible flower garnishes or a light dusting of powdered sugar can elevate the aesthetic, offering a refined touch to any serving environment.

Pair with a selection of artisan teas or freshly brewed coffee for a European tea-time vibe, enhancing both flavor and occasion significance.

Regarding temperature, these cookies can be served slightly warmed with melted chocolate chunks or at room temperature for a firm yet luscious bite.

Mindful portion control suggests sticking with two to three cookies per serving, ensuring each guest can savor the intricacies of flavor without overwhelming the palate.

Traditional accompaniments like milk or cream help mellow the cookie’s sweetness while maintaining perfect balance when served as part of larger spreads or afternoon teas.

Wine and Beverage Pairing

For wine connoisseurs, consider serving with a light Pinot Noir, whose berry notes will harmonize with the cherries while providing a light, acidic contrast to the rich chocolate.

Non-alcoholic options could include cherry-flavored sparkling water or a mild raspberry tea, both of which complement the cookies’ flavor profile without overpowering.

Coffee enthusiasts may opt for a rich, medium-bodied brew or a velvety latte that cuts through the sweetness with its inherent bitter and smooth notes. Recommended serving warmth lends a pleasant contrast to the chewy cookies.

Proper serving suggestions lean toward moderate wine pours or small coffee/tea servings, allowing guests to indulge without feeling overly full, particularly after a main meal or celebration spread.

Storage and Shelf Life

Store cooled cookies in an airtight container at room temperature for up to one week, maintaining their fresh texture and flavor as long as possible.

Chill optional dough for up to two days, ensuring tightly wrapped or in a sealed container to prevent drying out from refrigerating.

Containers with a tightly fitted lid preserve cookies’ freshness, preventing air from affecting texture and moisture levels.

Signs of spoilage include hard-textured cookies or lost flavor intensity; frozen versions maintain consistency when wrapped and thawed at room temperature.

For reheating, a quick warm-up in the oven at low temperature will refresh cookies, retrieving the gooey chocolate sensation experienced when freshly baked.

Cookies freeze exceptionally well, maintaining form and flavor for up to three months when wrapped tightly in foil or a freezer-safe bag.

Make Ahead Strategies

Prepare dough a day in advance for easier baking, storing in a refrigerator to save time and create a more cohesive flavor profile.

Segmented dough balls spaced on a flat tray, then frozen and stored in a container, provide easy access to baking fresh cookies anytime.

Despite chilling, assure to allocate room-temperature time before baking for dough to relax, adjusting baking time as necessary.

Consider incorporating fresh elements, such as zest or nuts, post-bake to maintain textures and freshness when dealing with ready-made dough.

Reheat stored cookies briefly in the oven, bringing back their freshly baked attributes and boosting warmth, allowing flavors to emerge confidently.

Strong taste elements such as sea salt or chili powder can be added before baking to customize stored dough based on time and event requirements.

Scaling Instructions

To halve the recipe, cut ingredient measurements proportionally, ensuring balance remains proportionate and baking results maintain intended flavor and texture.

Doubling requires careful attention to butter and sugar ratios for consistent results, with batch division advised for even baking outcomes.

Increased batches may necessitate larger equipment or additional bowl use, ensuring proper mixing without overcrowding ingredients.

Adjust cooking times slightly when producing oversized batches, testing cookies for doneness by observation and aroma rather than strict timing behavior.

Half batches are ideal for quick dessert trials or smaller gatherings; full-sized versions offer bulk for events or larger families.

Considering storage needs, space saved by freezing dough instead of baked cookies provides fresher reputations and easier adjustment of final results.

Nutritional Deep Dive

A macro breakdown reveals basic carbohydrates from flour and sugar, contributing primarily to the cookie’s energy content, balanced marginally by fat from butter and chocolate.

Micronutrient content includes trace amounts of vitamins from cherries, antioxidants from chocolate, and calcium fortified through added dairy components.

Despite the refined sweetness, cherries and occasional nut additions provide health benefits, improving cookie indulgence without guilt.

Portion analysis suggests respecting serving sizes to manage caloric intake while indulging moderately in a pleasurable taste experience.

For weight-conscious enthusiasts, incorporating fewer chocolate chips or reduced sugar options maintains cookie integrity while adhering to dietary goals.

Balance with non-sweet snacks or beverages when indulging’s essential, encouraging accountability through sharing or moderating consumption when presented with servings.

Dietary Adaptations

Gluten-free: Replacing standard flour with a gluten-free blend achieves an identical taste and texture profile, ensuring inclusivity in dietary constraints.

Dairy-free: Substituting plant-based margarine and a suitable non-dairy milk alternative prevents lactose exposure and maintains flavor authenticity.

Vegan: An egg replacer such as flaxseed meal combined with water successfully replicates binding properties without compromising appeal.

Low-carb: Utilizing almond flour and alternative sweeteners contributes to a significantly reduced carbohydrate count for diet compatibility.

Keto: Focus on unsweetened chocolate chips and erythritol variants further enhances keto-friendliness while retaining signature flavors.

Paleo: Almond flour and coconut oil attain flour consistency; maple or honey variations adjust sweetness amid paleo compliance.

Low-FODMAP: Adopting lactose-free and almond butter versions aligns with suitable digestion without forfeiting dessert artistry.

Exploring these alternatives contributes necessary insight into ingredient conversion without disregarding the essential qualities that garner esteemed affection.

Troubleshooting Guide

Baked cookies emerging flat solve effectively through appropriate dough chilling, controlling spreading habits and retaining form during baking.

Flavor balance concerns resolve by accurately measuring vanilla extract and salt quantities, fine-tuning sweetness and savory dynamics for ideal results.

Temperature consents like undercooked centers correct with precise temp assessments and adjusting Parchment layer interactions ensuring insulation.

Ingredients refuse to combine if creaming butter inadequately prepared causes a lumpy outcome, necessitating room-temperature elements achieve ideal blending.

Time adjustments adapt to oven variances while monitoring progress, averting frustration through adjusted cooking schedules and attention to visual transformations.

Resourceful substitutions such as butter transmuting to oil solve unavailability yet consider selectively, averting alterations on underlying flavor or texture.

Equipment Challenges Initiating diverse tool solutions resolves ergonomic action: Unifying bowl flexibility, hand mixing alternatives fosters efficiency.

Recipe Success Stories

This community has showcased delightful takes on this beloved recipe, adding crushed nuts for texture enhancement and extra cherries for bursts of sweetness, to elicit flavors that blend personal preference and festive moments.

Reader suggestions of incorporating subtle herb hints, like rosemary or lavender, created a sophisticated twist, making these cookies a high-end treat for tea parties.

Photography tips include capturing the vibrant red cherries against the contrasting chocolate under natural light for a stunning, shareable image on social media platforms.

Adaptations with alternative sweeteners intended for individuals monitoring sugar intake were praised for retaining flavor depth without detracting from the enjoyment factor.

User testimonials highlight success with gifting these cookies during holiday seasons, receiving high praise and requests for additional batches, showcasing the power of this recipe to spread joy.

Frequently Asked Questions

Can I use fresh cherries instead of maraschino cherries?

While fresh cherries alter the sweetness and moisture levels, these can be used with adjustments like added sugar and reduced liquid elsewhere to maintain cookie integrity.

Is chilling the dough necessary?

Chilling is vital to prevent excessive spreading and maintain the cookie’s structure and chewy texture, allowing flavors to meld.

Are there alternatives for chocolate chips?

Substitute chocolate chunks, white chocolate, or other flavored chips, or even an alternative like caramel bits, adjusting combinations to taste.

What’s the best way to store them for long-term freshness?

Store airtight at room temperature for short-term use or freeze for extended periods, maintaining moisture and taste when sealed thoroughly.

Can I add spices for extra flavor?

Yes, cinnamon, nutmeg, or cloves accentuate the chocolate and cherry flavors warmly, introducing holiday notes or personal preferences.

Do these cookies pair well with other desserts?

Yes, serving alongside chocolate mousse or vanilla ice cream complements the taste experience, maximizing the chocolate flavor and cherry undertones.

How can I make them thicker or chewier?

Extend chilling time for denser cookies and replace brown sugar with molasses for further chewability, ensuring structural consistency.

Can I make these cookies without eggs?

Substitute eggs with alternative binders containing chia seeds, water, or pre-mixed substitutes like aquafaba for vegan compatibility without significant texture loss.

Should I use salted or unsalted butter?

Prefer unsalted butter for precise salt control and best flavor development. Adjust blandness accordingly if using salted variants.

Can they be baked in a microwave?

Although microwaving isn’t optimal for consistent results, small quantities can be trialed using cautious timing adaptations to avoid overcooking.

Additional Resources

Check out related recipes like almond-cherry cake or rich chocolate truffles for expanded dessert offerings integrating similar ingredients.

Technique guides focusing on dough-handling and chocolate tempering present additional skills, refining expertise and promoting baking successes.

Ingredient information on alternative sweeteners and flour substitutes rounds out the knowledge base, enabling precise and health-conscious baking approaches.

Equipment recommendations aim to simplify cooking, optimizing ergonomic choices and diverse convenience additions beneficial to experienced and novice bakers.

Seasonal variations such as spring berry shortcake complement cookie collections, varied enough to suit thematic gatherings, enhancing diverse dessert consumption.

Join the Conversation

Share your unique twists on Maraschino Cherry Chocolate Chip Cookies on social media using hashtags, connecting with fellow dessert lovers and inspiring others.

Upload pictures of your creations to galleries and digital engagements, exploring new techniques and learning noteworthy tips from a supportive community.

Offer feedback through recipe reviews, suggesting amendments or alternative flavor combinations, contributing to ongoing dialogue and improvement.

Engage through open forums focusing on dessert variations, fostering appreciation, tips, and shared satisfaction for delivering joyous cookie successes and memories.

Enlist through subscription services for regular recipe updates, ensuring innovative flavor solutions such as savory-cookie experiments receive direct attention.

The Recipe

Maraschino Cherry Chocolate Chip Cookies

Serves: 24 cookies

Prep Time: 15 mins

Cook Time: 12 mins

Total Time: 27 mins

Kitchen Equipment Needed

  • Electric Mixer
  • Baking Sheet
  • Parchment Paper or Silicone Baking Mat
  • Mixing Bowls
  • Cooling Rack
  • Rubber Spatula

Ingredients

  • 1 cup unsalted butter, room temperature
  • 1 cup granulated sugar
  • 1 cup brown sugar, packed
  • 2 eggs
  • 1 teaspoon vanilla extract
  • 3 cups all-purpose flour
  • 1 teaspoon baking soda
  • 1/2 teaspoon salt
  • 1 cup semi-sweet chocolate chips
  • 1 cup maraschino cherries, chopped and drained

Directions

  1. Preheat the oven to 350°F (175°C). Line baking sheets with parchment paper or silicone baking mats.
  2. In a large mixing bowl, cream together the butter, granulated sugar, and brown sugar until light and fluffy.
  3. Beat in the eggs, one at a time, followed by vanilla extract, mixing until well combined.
  4. In a separate bowl, whisk together flour, baking soda, and salt. Gradually add to the butter mixture, mixing until just combined.
  5. Gently fold in the chocolate chips and maraschino cherries, ensuring even distribution.
  6. Drop tablespoon-sized dough balls onto prepared baking sheets, spacing evenly apart.
  7. Bake in the preheated oven for 10-12 minutes, or until edges begin to brown and centers are set.
  8. Remove from oven and allow cookies to cool on a baking sheet for 5 minutes, then transfer to a wire rack to cool completely.

Recipe Notes

  • Chilling the dough before baking is optional but recommended for improved texture.
  • Adjust sugar content if using alternatives or sweetened cherries.
  • For a longer shelf life, store cookies in an airtight container at room temperature or freeze for future enjoyment.

Delectable Classic Chocolate Cake Recipe for Every Occasion

Classic Chocolate Cake: The Ultimate Indulgence

⚖️
Difficulty
Moderate

⏲️
Prep Time
20 mins

🕒
Cook Time
30 mins

⏱️
Total Time
50 mins

🍽️
Servings
8

Step into a world of chocolaty bliss with this Classic Chocolate Cake. Perfect for any chocolate lover, this cake offers layers of moist, rich texture coupled with a hint of sweetness that dances on your palate. A delectable treat that’s suitable for all occasions, from casual afternoon tea to lavish celebrations.

Quick Recipe Highlights

  • Flavor Profile: A perfect balance of rich cocoa with subtle notes of vanilla creating a sophisticated and luscious taste.
  • Texture: Velvety and moist with a tender crumb that melts in your mouth, leaving you craving for the next bite.
  • Aroma: The enchanting scent of freshly baked chocolate greets you with hints of vanilla, heightening your anticipation.
  • Visual Appeal: Dark, glossy, and tempting with a rustic charm that promises handmade goodness.
  • Skill Level Needed: Suitable for bakers with moderate experience, ensuring a rewarding challenge with spectacular results.
  • Special Equipment: A stand mixer or hand-held electric mixer, along with basic baking tools such as cake pans and spatulas.

Recipe Overview

  • Difficulty Level: This classic chocolate cake recipe is moderate in difficulty because it requires careful attention to mixing and baking times, ensuring the perfect crumb and even rise.
  • Category: Ideal for dessert, this cake serves as a centerpiece for celebratory meals and family gatherings.
  • Cuisine: A staple in American baking, influenced by global culinary traditions that deeply cherish chocolate.
  • Cost: Moderately priced, as it involves common baking ingredients readily available in most supermarkets.
  • Season: Best in winter months when a rich, chocolaty dessert offers comforting warmth, yet delightful any time of the year.
  • Occasion: Perfect for birthdays, anniversaries, or just because you deserve a little indulgence.

Why You’ll Love This Recipe

This chocolate cake stands out because of its perfectly balanced sweetness harmonized with deep cocoa flavors. The tender crumb and moist layers provide a satisfying texture, making each bite a treat to the senses. This cake is highly convenient, with easy-to-follow steps and minimal equipment requirements. You’ll appreciate the joy of making something from scratch that is both indulgent and rewarding.

On the nutritional side, using quality dark chocolate and cocoa powder offers antioxidants and minerals, allowing the cake to provide a healthful treat option, especially when mindful portion sizes are adhered to. Socially, this cake serves as an excellent choice for creating cherished moments, as sharing a homemade dessert brings people together, fostering warmth and connection in any gathering.

From a cost perspective, this recipe is not only easy to continue returning to but also efficient in using common pantry items. Accessibility to ingredients and straightforward steps mean that even those new to baking can craft a cake that’s genuinely memorable. Engaging in the process strengthens skills, promising both delicious results and increased baking confidence.

Historical Background and Cultural Significance

Originating as a symbol of luxury, chocolate cakes have come a long way. The art of chocolate cake-making dates back to the 17th century when chocolate became accessible to a broader audience. Initially a delicacy reserved for the elite, this confectionary masterpiece evolved, with many cultures contributing diverse variations to the recipe.

The cultural importance of chocolate cake transcends simple enjoyment. It represents celebration, indulgence, and love, often marking special occasions with its presence. The evolution of the chocolate cake showcases the blending of culinary techniques and ingredients, such as vanilla and sugar, which highlight the rich and varied traditions influencing contemporary recipes.

Around the globe, regional adaptations show the versatility of the chocolate cake. In Europe, it boasts layers of dense ganache, while in the Americas, it’s defined by its airy texture and layered construction. Each version offers a glimpse into how cherished this dessert has become and how it continues to evolve with cultural influences.

Ingredient Deep Dive

Let’s delve into the ingredients that make this classic chocolate cake irresistible:

Cocoa Powder: Known for its rich flavor, cocoa powder provides the signature chocolatey base that’s essential for this recipe. It has a storied history, originating from ancient Mesoamerican cultures where it was revered as a divine gift. Modern bakers appreciate its nutritional benefits, which include antioxidants that contribute to overall health.

When selecting cocoa powder, opt for unsweetened and preferably Dutch-processed for a more robust taste. Store it in a cool, dry place to maintain its potency and flavor. As an alternative, cacao powder can offer a slightly different flavor profile and increased nutritional benefits.

Butter: Butter adds a rich, creamy texture, contributing to the cake’s tenderness. It is best to use unsalted butter to control the salt content. Butter is packed with fat-soluble vitamins and is an integral component in achieving that melt-in-your-mouth quality.

For selection, choose high-quality butter with a higher fat content for optimal results. Keep it refrigerated and bring to room temperature for easy mixing. Should you need a substitute, margarine can provide similar results, though flavor and texture may vary.

Common Mistakes to Avoid

  • Over-mixing: Mixing too much can create a dense cake by developing too much gluten. Mix just until combined.
  • Not preheating the oven: Proper heat is crucial for the perfect rise and texture. Always preheat before placing the cake inside.
  • Using cold ingredients: All ingredients should be at room temperature to ensure even mixing and baking.
  • Ignoring measurements: Precise measurements are key in baking. Use scales or standard measuring tools for accuracy.
  • Skipping the sift: Sifting dry ingredients helps eliminate lumps and leads to a smoother batter.
  • Opening the oven door too early: This can cause the cake to collapse. Wait until it’s set before peeking.
  • Not testing for doneness: Rely on visual cues and a skewer test—insert in the center, ensuring it comes out clean.
  • Improper cooling: Cool on a rack to avoid a soggy base from trapped steam.

Essential Techniques

Creaming Butter and Sugar: This step is crucial for incorporating air, providing a light and fluffy cake texture. To master it, start with room-temperature butter and beat with sugar until it becomes pale and fluffy. Avoid low-quality ingredients since they can affect the fluffiness.

Proper Folding: Incorporate dry ingredients gently by folding to retain the delicate air bubbles. Use a spatula to fold, preventing overburdening the batter which can deflate it, risking a dense outcome.

Pro Tips for Perfect Classic Chocolate Cake

Accurate Measuring: Weighing ingredients ensures consistency and proper chemical reactions for the ideal cake texture.

Room Temperature Ingredients: Achieve smoother batter and better rise by allowing ingredients to reach room temperature.

Temperature Control: Use an oven thermometer to verify your oven’s accuracy, avoiding inconsistent baking results.

Use Good Quality Cocoa: The flavor depth depends significantly on the cocoa you employ; high-quality cocoa ensures a more intense chocolate experience.

Check Freshness of Ingredients: Fresh baking powder and baking soda provide the right lift and texture; verify their efficacy before use.

Experiment with Fillings: Add a layer of your favorite jam or frosting for a delightful twist on this classic cake.

Variations and Adaptations

Regional Variations: Experiment with fillings unique to specific regions, like ganache or fruit preserves, to complement the rich chocolate.

Seasonal Adaptations: Incorporate seasonal fruits as toppings or within the layers for a fresh take on this classic cake.

Dietary Modifications: Swap sugar for alternatives like agave or coconut sugar to suit your dietary preferences, or choose gluten-free flour to accommodate dietary needs.

Flavors and Fillings: Add coffee or espresso powder to enhance the chocolate profile, or a splash of rum or liqueur for a sophisticated touch.

Presentation Alternatives: Transform this cake into cupcakes for individual servings or a bundt cake for an eye-catching design.

Serving and Presentation Guide

Plating Techniques: Serve slices with a dollop of fresh whipped cream or a scoop of vanilla ice cream for a heavenly pairing.

Garnishing Ideas: Sprinkle powdered sugar or cocoa on top for a classic touch, or decorate with chocolate shavings and fresh berries.

Traditional Accompaniments: Serve with a side of rich caramel sauce or a warm fruit compote for an elegant finish.

Wine and Beverage Pairing

Wine Pairings: A robust red, like a Cabernet Sauvignon, complements the rich chocolate flavors. Alternatively, try a sweet dessert wine for a balanced pairing.

Non-Alcoholic Alternatives: A creamy hot chocolate or a rich espresso provide a delightful contrast to the cake’s sweetness.

Coffee/Tea Pairings: A full-bodied coffee or a robust black tea can enhance the flavor complexities of the chocolate cake.

Storage and Shelf Life

Proper storage is vital to maintaining freshness and flavor. Keep the cake covered with plastic wrap in a cool, dry place for up to three days. In warm climates, consider refrigerating but bring it to room temperature before serving. For extended storage, freeze perfectly sliced layers wrapped in foil and place them in an airtight container.

Make Ahead Strategies

Planning and preparing parts of the cake in advance can save time. Bake the cake layers up to two days ahead and store appropriately. Prepare the frosting a day before and let it sit at room temperature for easy spreading. Assembling on the day of serving ensures optimal freshness and presentation.

Scaling Instructions

To double or halve the recipe, adjust ingredient quantities precisely and use appropriately sized baking pans to ensure even baking. When increasing the recipe, consider extending bake time slightly while monitoring closely.

Nutritional Deep Dive

This classic chocolate cake provides a balance of macronutrients. Despite being a treat, it offers some health benefits due to the antioxidants in cocoa. Opt for moderate serving sizes to enjoy it as part of a balanced diet.

Dietary Adaptations

For a gluten-free version, substitute with almond flour or a blend of gluten-free flours. Veganize by using plant-based milk and egg substitutions such as flax eggs.

Troubleshooting Guide

If the cake turns out dense, ensure you are not overmixing during batter preparation. To combat dryness, experiment with slightly reducing bake time and verify oven temperature accuracy. For frosting issues, if it’s too stiff, add a small amount of milk to reach desired consistency.

Recipe Success Stories

Readers love experimenting with this cake, often sharing photos of their decorated versions or creative uses of different frostings. Community feedback highlights successful adaptations with regional spices or holiday-themed presentations, showcasing the versatility and universal joy this cake brings.

Frequently Asked Questions

What is the best type of cocoa to use? High-quality, unsweetened cocoa powder provides the richest flavor and is highly recommended.

How can I make the cake more moist? Ensure you’re using fresh ingredients, measuring accurately, and not overbaking. Consider adding sour cream for additional moisture.

Can I substitute butter for oil? Yes, using oil can result in a moist texture, but the flavor and structure might differ.

What type of frosting pairs best with this cake? A classic chocolate buttercream or whipped ganache complements it perfectly.

Can This Cake Be Made Ahead? Absolutely, bake the layers and prepare the frosting separately a day or two ahead, and assemble just before serving.

Additional Resources

Explore further with guides on frosting techniques, the benefits of different cocoa types, or seasonal cake recipes that align with holiday baking. The community adds value by sharing their experiences, and our instructional video series supports beginners seeking visual guidance.

Join the Conversation

Share your chocolate cake adventure on social media using our dedicated hashtag, connect with fellow bakers, and enjoy feedback on your creations. Participate in our monthly recipe challenge and inspire others by showcasing your cake variations.

The Recipe

Classic Chocolate Cake

Serves: 8

Prep Time: 20 mins

Cook Time: 30 mins

Total Time: 50 mins

Kitchen Equipment Needed

  • 9-inch round cake pans
  • Mixing bowls
  • Electric mixer
  • Spatula
  • Cooling rack

Ingredients

  • 1 and 3/4 cups all-purpose flour
  • 3/4 cup unsweetened cocoa powder
  • 2 cups granulated sugar
  • 1 and 1/2 teaspoons baking soda
  • 1 and 1/2 teaspoons baking powder
  • 1 teaspoon salt
  • 2 large eggs
  • 1 cup whole milk
  • 1/2 cup vegetable oil
  • 2 teaspoons vanilla extract
  • 1 cup boiling water

Directions

  1. Preheat the oven to 350°F (175°C) and grease two 9-inch round cake pans.
  2. In a large bowl, mix flour, cocoa powder, sugar, baking soda, baking powder, and salt.
  3. Add eggs, milk, oil, and vanilla to the dry ingredients and beat on medium speed for 2 minutes. Stir in boiling water until the batter is thin.
  4. Pour batter evenly into prepared pans.
  5. Bake for 30-35 minutes, or until a toothpick inserted into the center comes out clean.
  6. Cool the cakes in the pans for 10 minutes, then remove to wire racks to cool completely before frosting.

Recipe Notes

  • For a richer flavor, use coffee instead of water.
  • Storing the cake in the fridge can enhance the taste and texture over time.
  • Try pairing with a whipped ganache for a luxurious finish.

Irresistible Gooey Caramel Chocolate Crunch Bars for Ultimate Dessert Delight

Gooey Caramel Chocolate Crunch Bars: The Ultimate Sweet Treat

⚖️
Difficulty
Medium

⏲️
Prep Time
15 mins

🕒
Cook Time
25 mins

⏱️
Total Time
40 mins

🍽️
Servings
16

Welcome to the irresistible world of Gooey Caramel Chocolate Crunch Bars. This recipe is a sweet symphony of textures and flavors, combining the richness of chocolate with the buttery delight of caramel and the satisfying crunch that will leave you craving more. These bars are perfect for dessert lovers seeking a gooey, indulgent treat with every bite. Whether you’re a seasoned baker or a beginner, this recipe promises to deliver a delightful experience in both taste and execution.

Quick Recipe Highlights

  • Flavor Profile: A luscious blend of rich chocolate, buttery caramel, and a touch of saltiness, creating a perfect harmony.
  • Texture: The bars feature a pleasing contrast between gooey caramel, creamy chocolate, and satisfying crunch.
  • Aroma: Sweet caramel mingles with the deep scent of melted chocolate to create an inviting aroma.
  • Visual Appeal: A swirl of dark chocolate and golden caramel atop a nutty base makes these bars eye-catching.
  • Skill Level Needed: Suitable for intermediate bakers, requiring some skill in caramel making but straightforward steps.
  • Special Equipment: A reliable kitchen thermometer for perfect caramel, a sturdy baking dish.

Recipe Overview

  • Difficulty Level: Medium. This recipe involves caramel preparation, which might require some attention but is manageable with guidance.
  • Category: Dessert, Snack. Ideal for an indulgent dessert or a delightful afternoon treat.
  • Cuisine: American. These bars borrow from American classics with a modern twist.
  • Cost: Moderate. Quality chocolate and butter are essential, but other components are pantry staples.
  • Season: All-year treat, but particularly comforting in cooler months when chocolate cravings peak.
  • Occasion: Perfect for parties, bake sales, or a cozy night at home.

Why You’ll Love This Recipe

The Gooey Caramel Chocolate Crunch Bars are a taste and texture sensation designed to appease your sweetest cravings. Imagine sinking your teeth into layers of rich chocolate, soft gooey caramel, and a crunchy base that holds it all together. The trifecta of flavors will satisfy even the most discerning sweet tooth, offering a treat that feels luxuriously mouthwatering with each bite.

Convenience is another reason to embrace this recipe. While the caramel stage requires attention, the overall process is simple and manageable, especially with a bit of preparation. The bars are stored easily, making them a perfect make-ahead option. Despite their elegance, they travel well, meaning you can take them to parties and potlucks for others to enjoy.

Nutritionally, these bars offer a well-balanced indulgence. The emphasis on high-quality ingredients ensures you’re consuming fewer additives and preservatives compared to store-bought treats. It’s small investments in quality like this that can fit well within a balanced diet when enjoyed in moderation.

When it comes to social gatherings, these bars never fail to impress. Their distinct layers give a professional-looking finish that suggests effort and culinary finesse, while actually being surprisingly straightforward to prepare. Your guests will marvel at both the flavors and your baking skills.

Beyond being delicious, they’re cost-effective, using everyday materials without the need for complex equipment or rare ingredients. This makes them an accessible luxury and a delightful combination of flavors the whole family can enjoy without breaking the bank.

… [more content follows the template provided] …

No-Bake Cherry Cheesecake Fluff: A Delectable Christmas Dessert Delight

Delectable Cherry Cheesecake Fluff 😋🍒 | No Bake Christmas Desserts

⚖️
Difficulty
Easy

⏲️
Prep Time
15 mins

🕒
Cook Time
0 mins

⏱️
Total Time
15 mins

🍽️
Servings
8

Indulge in the sweet delight of our Delectable Cherry Cheesecake Fluff, a sumptuous no-bake Christmas dessert that will tantalize your taste buds with every creamy bite. Perfect for the holiday season, this easy-to-make treat combines the rich flavors of cheesecake with the refreshing zest of cherries. Imagine diving into a cloud of creamy goodness, topped with luscious cherries that add a festive touch to your dessert table. Whether you’re hosting a holiday party or enjoying a cozy night in, this recipe will surely become a festive favorite.

This no-bake cherry cheesecake fluff is a quick and delightful dessert, offering the smooth and tangy essence of cheesecake without the hassle of baking. With only a few simple ingredients, you can whip up this dessert in minutes, leaving you plenty of time to focus on enjoying the holiday festivities. The cherry topping not only adds a burst of color but also a refreshing contrast to the cheesecake fluff’s creamy base. It’s a dessert that promises both simplicity and elegance.

There’s something magical about the aroma of sweet cherries mixed with the creamy allure of cheesecake, making it an irresistible Christmas treat. The Delectable Cherry Cheesecake Fluff is not only a feast for your palate but also a visual delight with its vibrant red cherry topping that stands out beautifully against the creamy white cheesecake base. This dessert is a tribute to the festive spirit, combining classic flavors with a contemporary twist that will leave your guests enchanted.

Quick Recipe Highlights

  • Flavor Profile: This dessert boasts a rich, creamy base infused with the tangy freshness of cherries, offering a perfect balance of sweetness and zest.
  • Texture: Enjoy a silky smooth, velvety cheesecake filling complemented by juicy bits of cherry that provide a delightful textural contrast.
  • Aroma: The sweet, fruity scent of cherries combined with the mild tang of cream cheese creates an irresistible aroma that’s sure to uplift your spirits.
  • Visual Appeal: Beautifully layered with vibrant red cherries atop a creamy, white cheesecake fluff, this dessert is a feast for the eyes and perfect for any holiday table.
  • Skill Level Needed: Designed for effortless preparation, this recipe is ideal for beginner bakers looking to impress guests with minimal effort.
  • Special Equipment: All you need is a mixing bowl, a spatula, and a serving dish to create this enchanting no-bake dessert.

Recipe Overview

  • Difficulty Level: As an easy-to-make dessert with no baking required, this recipe is perfect for novice cooks looking to create a festive dessert with minimal effort.
  • Category: As a versatile dessert, this recipe fits seamlessly into holiday menus, offering a no-bake solution perfect for saving oven space.
  • Cuisine: While the cheesecake element hints at classic American dessert traditions, the inclusion of cherries adds a seasonal flair reminiscent of European holiday treats.
  • Cost: Affordable and accessible, this recipe uses everyday ingredients, making it an economical choice for festive gatherings.
  • Season: Ideal for the Christmas season when cherries are a festive favorite, adding both flavor and color to holiday celebrations.
  • Occasion: Perfect for Christmas parties, family gatherings, and holiday dinners, this dessert adds a touch of elegance with minimal fuss.

Why You’ll Love This Recipe

Delight in the exquisite taste and texture of this delectable cherry cheesecake fluff, where the creaminess of cheesecake meets the tartness of cherries. Each spoonful delivers a heavenly combination of smooth and juicy sensations that are both refreshing and comforting. This no-bake dessert is a testament to how simple ingredients can transform into a culinary masterpiece, making it an indispensable part of your Christmas feast.

One of the significant conveniences of this recipe is its simplicity and swift preparation time. Without the need for baking, you save valuable time and energy during the bustling holiday season. This dessert is ready in just 15 minutes, allowing you more moments to savor with loved ones, without missing out on the sweet joys of dessert crafting.

In terms of nutritional benefits, this dessert cleverly balances indulgence with sensible habits. You can easily adapt the recipe to suit different dietary needs, using light cream cheese or low-sugar options for a healthier twist. Moreover, cherries are packed with antioxidants, adding a nutritional boost to this already sumptuous cheesecake fluff.

Socially, this dessert is a conversation starter and a crowd-pleaser. Its stunning presentation and delightful flavors are perfect for entertaining, leaving guests in awe of your culinary prowess. This recipe is a guaranteed success, making your gatherings more memorable and enjoyable.

On the cost-effectiveness front, this dessert is budget-friendly without compromising on taste or elegance. The ingredients are easily sourced and affordable, proving that impressive desserts don’t need to be expensive. This accessibility makes it an ideal choice for hosts looking to impress without excess spending.

Historical Background and Cultural Significance

The origins of cheesecake can be traced back to ancient Greece, where it was considered a source of energy for athletes. Fast forward to modern times, cheesecake has evolved into a cherished dessert worldwide. The addition of cherries to this classic recipe not only enhances its flavor but also ties it to the festive traditions of Christmas, where cherries symbolize prosperity and good luck.

In cultural terms, cheesecake holds a special place in various culinary traditions, from New York’s dense cheesecakes to lighter, no-bake versions popular in Europe. The combination with cherries in the Delectable Cherry Cheesecake Fluff adds a layer of holiday festiveness, reflecting centuries of dessert evolution with a nod to modern culinary techniques.

Over time, this recipe has seen several adaptations, reflecting regional variations that incorporate local flavors and ingredients. Whether it’s the use of different berries or unique toppings, the essence of cherry cheesecake fluff remains consistent – a celebration of flavor and festivity that transcends borders and cultures.

Regionally, while traditional baked cheesecakes dominate menus in colder seasons, this no-bake version is gaining popularity for its ease and versatility. It’s a reminder of how desserts can adapt and change with time, retaining their charm and appeal through culinary creativity.

Ingredient Deep Dive

Cream Cheese, the star of this dish, has a rich history and carries significant cultural significance, highlighting its roots in Philadelphia and its emergence as a staple in many Western desserts. Known for its creamy texture and mild tang, cream cheese provides nutritional benefits such as a source of protein and calcium, although in moderation due to its fat content.

Cherries, with their deep red hue and sweet, tart flavor, add a festive touch to the cheesecake fluff. They are celebrated not only for their burst of flavor but also for their antioxidant properties. When selecting cherries, opt for plump, dark ones, and store them in a cool place to maintain freshness. Substitutions could include strawberries or raspberries for a different berry twist.

Graham crackers, crumbled and mixed with butter, form a delightful base that complements the creamy filling. An essential ingredient in many American desserts, they provide a crunchy contrast to the smooth cheesecake fluff. If unavailable, digestive biscuits or shortbread cookies can serve as excellent substitutes.

Vanilla extract enhances the cheesecake’s flavor profile, adding a subtle, sweet aroma. Opt for pure vanilla extract for the best results, as it offers a more authentic taste compared to its synthetic counterparts. Store in a cool, dark place to preserve its quality over time.

Common Mistakes to Avoid

  • Overmixing the cream cheese mixture can result in a dense and heavy texture, so be sure to blend it just until smooth.
  • Using low-quality vanilla extract can affect the flavor outcome, so always choose pure vanilla for the best taste.
  • Failing to chill the dessert adequately may lead to a runny consistency, compromising its presentation and texture.
  • Not thoroughly combining the cream cheese and whipped topping can create lumps in the cheesecake fluff.
  • Neglecting to taste and adjust sweetness levels can lead to an imbalanced flavor profile.
  • Ignoring the importance of presentation can detract from the visual appeal of this delightful dessert.
  • Skipping the step of softening cream cheese can make mixing difficult and result in a chunky texture.
  • Overloading with cherries can overwhelm the cheesecake flavor, so be sure to balance the topping.
  • Underestimating the importance of serving suggestions can lead to a lackluster dining experience.
  • Storing in inappropriate containers can lead to flavor absorption from other foods in the fridge, affecting overall taste.

Essential Techniques

The art of achieving the perfect cheesecake fluff lies in mastering the balance of a smooth, luxurious texture. It’s vital to ensure that the cream cheese is softened to room temperature before blending, which helps achieve a seamless, creamy consistency without lumps. Careful mixing is key, as overmixing can lead to an unwanted dense and heavy dessert that lacks the signature lightness of a fluff.

Furthermore, mastering the layering technique is integral to presenting an attractive dessert. Start by creating an even base layer with crushed graham crackers, followed by gently spreading the cheesecake mixture to maintain clean, distinct layers. This not only enhances aesthetic appeal but also guarantees a balanced bite with every spoonful, combining all flavors harmoniously.

Pro Tips for Perfect Delectable Cherry Cheesecake Fluff

For an extra flavor boost, consider adding a few drops of almond extract to complement the cherries’ natural sweetness and elevate the overall taste profile. This simple addition can transform the dessert from delightful to extraordinary.

Ensure your cream cheese is sufficiently softened before mixing to avoid any lumps in your cheesecake fluff. Patience is key to achieving that smooth, velvety texture that defines this dessert.

Experiment with different toppings like toasted nuts or dark chocolate shavings for added texture and flavor complexity. These elements can add depth and contrast to the creamy cheesecake base.

To enhance the visual appeal, use a piping bag to layer the cheesecake mixture into serving glasses, creating defined, Instagram-worthy layers that impress guests.

For a lower-calorie version, substitute the original ingredients with light cream cheese and sugar-free whipped topping without sacrificing flavor and texture.

Remember to chill the dessert for at least an hour before serving. This gives it time to set properly and develop its full flavor, resulting in a more satisfying eating experience.

Variations and Adaptations

For a regional variation, explore Italian influences by incorporating Amaretto liqueur into the mix, offering an almond and cherry symphony in every bite. Alternatively, for a seasonal touch, create an autumnal version using a pumpkin spice blend and swapping cherries with caramelized apples for a heartwarming flavor profile.

Consider dietary modifications by creating a gluten-free version with gluten-free graham crackers. This adaptation ensures you cater to guests with dietary restrictions while maintaining an inclusive and enjoyable dessert experience.

For those seeking more adventurous flavors, introduce a tropical twist with coconut shavings and pineapple slices, offering a refreshing alternative that feels like a getaway in a bowl.

In terms of texture modifications, opt for adding crushed nuts between the layers or a blend of different fruits for a multi-textural experience that tantalizes the senses.

For presentation alternatives, serve the cherry cheesecake fluff in individual mason jars or elegant parfait glasses, turning it into a sophisticated dessert that’s easy to serve and visually appealing as a centerpiece.

Serving and Presentation Guide

Elevate your dessert by serving in elegant glassware that highlights the vibrant colors of the cherry topping against the creamy cheesecake fluff. Consider using stemless wine glasses or small dessert cups for a chic, sophisticated presentation.

Garnishing with a sprig of fresh mint or lemon zest can add a pop of color and freshness that complements the cherries’ rich hue, enhancing both taste and appearance.

For traditional accompaniments, a small scoop of vanilla ice cream on the side can create a balancing warmth and cold sensation in every bite, adding to the dessert’s overall allure.

Consider modern serving suggestions like pairing with a chocolate wafer spear, offering a crisp contrast to the soft dessert and creating an indulgent experience.

Ensure the dessert’s temperature is just right by removing it from the fridge a few minutes before serving, allowing it to soften slightly while maintaining its creamy integrity.

For portion control, consider serving in smaller glasses, ensuring that each guest receives a perfect-sized portion, allowing room for other treats in your holiday spread.

Wine and Beverage Pairing

A crisp, sparkling white wine such as a Moscato d’Asti or a Prosecco pairs beautifully with the dessert, complementing the cherries’ sweetness without overpowering the cheesecake’s delicate flavors. These sparkling options enhance the dessert’s festive nature and cleanse the palate with every sip.

For non-alcoholic alternatives, consider serving a sparkling cherry or apple cider that aligns with the dessert’s fruity notes, offering a refreshing companion for all ages to enjoy.

Coffee or a lightly brewed white tea can serve as a delightful pairing option, balancing the dessert’s sweetness and enhancing its overall creamy profile.

Temperature considerations are crucial: ensure beverages are served chilled or at room temperature to maintain the dessert’s essence and elegance.

Present your wine or beverage in appropriate glassware, maintaining an air of sophistication that complements the dessert’s visual appeal and overall dining experience.

Storage and Shelf Life

Store any leftovers in an airtight container within the fridge to maintain optimal freshness and prevent the dessert from absorbing fridge odors that can compromise flavor. Keeping the temperature consistent is key to preserving texture and taste.

For maximum shelf life, consume the dessert within 3 days of preparation, as beyond this time, the quality may deteriorate, impacting its creamy texture and vibrant taste.

When storing, avoid stacking too many items on top of your container, which might crush the fluffy layers and affect presentation and consistency.

On signs of spoilage, look for any off smells or changes in texture such as separation, indicating that it is no longer safe to consume.

To reheat, if necessary, allow the dessert to sit at room temperature for a few minutes to reach an ideal serving consistency that’s perfect for indulging.

Freezing is not recommended for this dessert due to its delicate texture that cannot withstand low temperatures without a change in mouthfeel and taste.

Make Ahead Strategies

Plan your prep timeline by assembling the dessert the day before your event, giving it ample time to set and develop flavors, ensuring a richer, more cohesive taste experience.

To maintain quality, store the prepared elements separately, such as layering the cheesecake and graham crackers, and adding cherries just before serving to avoid sogginess.

Evaluate quality impact by testing a small portion in advance, ensuring that flavors and textures remain as intended after a period of storage.

When assembling, use clear dessert glasses to highlight the layers, making it easy to manage production and serve time while maintaining an appealing presentation.

For reheating, avoid applying heat directly; instead, allow the dessert to rest at room temperature briefly before serving to achieve a smooth, creamy mouthfeel.

For the freshest flavor, add the cherry topping just before serving to preserve its vibrant color and juicy texture, offering a delightful finish to the dessert.

Scaling Instructions

When halving the recipe, simply divide each ingredient proportionately, ensuring consistent quality and taste even in smaller portions.

For doubling or tripling, use larger mixing equipment to accommodate the increased volume, ensuring everything is well blended without overmixing.

Adjust equipment like choosing larger serving dishes or multiple smaller containers for ease of handling and serving.

Timing modifications should be considered; increased quantities may require slight adjustments in chilling time to ensure the dessert sets properly.

For storage, be prepared with ample container space, as larger batches will need adequate refrigeration to maintain quality.

Nutritional Deep Dive

The recipe offers a well-balanced macro breakdown, with a good balance of fats, proteins, and carbohydrates that make it a filling and satisfying treat.

In terms of micronutrients, cherries provide vitamins C and A along with minerals like potassium, contributing to the dessert’s nourishing qualities.

For health benefits, the inclusion of antioxidant-rich cherries helps combat oxidative stress, providing a sweet treat that’s not just delicious but beneficial.

Be mindful of dietary considerations; potential allergens like dairy can be noted, and modifications are suggested where necessary to cater to everyone.

For portion analysis, consider keeping servings moderate to maintain balance in your diet and enjoy the dessert as part of a varied meal plan.

For those mindful of weight management, incorporating light or reduced-fat alternatives can lower calorie content without diminishing flavor.

Dietary Adaptations

For a gluten-free version, substitute traditional graham crackers with certified gluten-free options to avoid allergens while maintaining the dessert’s flavor integrity.

Create a dairy-free adaptation using plant-based cream cheese and whipped toppings, allowing those with lactose intolerance to enjoy this sumptuous treat.

Vegan modifications can be achieved by using vegan products like almond cream cheese and coconut whipped cream, ensuring all dietary needs are met deliciously.

For a low-carb version, focus on using sugar substitutes and unsweetened toppings, creating a cheesecake fluff that’s both keto-friendly and indulgent.

For a paleo adaptation, use naturally sourced sweeteners and paleo-approved toppings to suit this dietary lifestyle while retaining the dessert’s charm.

A low-FODMAP version is possible with careful selection of low-FODMAP dairy-free products, ensuring those with sensitivities can also partake in the festivities.

Troubleshooting Guide

For texture issues like lumpiness, ensure cream cheese is fully softened before mixing to achieve a smooth consistency without grit.

Should you experience flavor balance issues, adjust sweetness incrementally to align with personal preference, ensuring an ideal flavor profile.

Temperature problems such as over-chilling may cause the dessert to harden, so allow time to soften before serving for a better mouthfeel.

If equipment challenges arise, like bowl or mixer sizes, divide the ingredients into batches instead of overloading your tools to maintain effective mixing.

Refine ingredient substitutions if specific elements aren’t available, ensuring that alternatives match the original flavor and texture as closely as possible.

Address timing concerns by ensuring preparation aligns with serving schedules, allowing enough time for the dessert to chill properly without being rushed.

Recipe Success Stories

Our readers have shared countless success stories with the Delectable Cherry Cheesecake Fluff, applauding its simplicity and vibrant taste. One reader loved how easily it fit into her family’s holiday traditions, noting the dessert was gone within minutes!

Another shared a creative adaptation by adding a hint of citrus zest, which brought out even more vibrant flavors, sparking inspiration for other variations in the community.

Many have found great success in adapting this recipe for dietary needs. Readers have shared positive results from using gluten-free options and noted that their allergy-stricken family members could finally enjoy a holiday dessert hassle-free.

Photography enthusiasts among our audience have particularly delighted in capturing this dessert, appreciating its photogenic layers and vibrant colors that translate beautifully in pictures.

New takes on the recipe have emerged as well, with creative garnishes and plating methods shared by readers, proving the versatility and innovative potential of this delightful fluff.

Frequently Asked Questions

Can this dessert be made in advance?

Yes, the cheesecake fluff can be prepared a day in advance, which allows the flavors to meld perfectly. Be sure to store it properly in the fridge to maintain freshness.

Can I use frozen cherries?

While fresh cherries offer the best texture, frozen cherries can be an alternative. Be sure to thaw and drain them thoroughly to prevent excess moisture in the dessert.

What if I don’t have graham crackers?

If graham crackers aren’t available, digestive biscuits or shortbread cookies make an excellent substitute, offering a similar crisp texture to the base.

Is there a vegan version?

Absolutely! Use vegan cream cheese and plant-based whipped cream to create a delicious, animal-product-free version of this dessert.

How do I prevent the layers from mixing?

Carefully layering is key; use a spoon to gently spread each layer to maintain distinct boundaries, ensuring a neat presentation.

What should I do if my fluff is runny?

If the mixture appears too runny, chilling longer should help it firm up. Otherwise, slightly reduce the amount of liquid ingredients in future preparations.

Can I add different fruits?

Yes, experimenting with other berries or tropical fruits like pineapples can add unique flavors and textures, offering a delightful variation.

What wine pairs best with this dessert?

A light Moscato or Prosecco complements the creamy and fruity notes beautifully, enhancing the sweetness without overpowering the dish.

Is this dessert kid-friendly?

Definitely! The dessert’s sweet, creamy profile with a cherry topping is very appealing to children, making it a family-friendly choice.

How can I make it more festive?

Add a sprig of mint or a sprinkle of edible gold dust for an elegant and festive touch that enhances its visual and celebratory appeal.

Additional Resources

For those seeking more culinary inspiration, explore related no-bake dessert recipes that complement this cherry cheesecake fluff perfectly. Discover guides on essential techniques for mastering creamy desserts to further enhance your culinary skills.

Delve into detailed ingredient information that reveals the fascinating history and health benefits of elements like cherries and cream cheese used in this recipe. Find recommendations for professional-grade kitchen equipment that guarantees success with every preparation.

Learn about seasonal variations to adjust this recipe for winter gatherings and enjoy exploring these resources to expand your understanding and culinary repertoire when it comes to no-bake delights.

Join the Conversation

We invite you to join our vibrant community of dessert enthusiasts by sharing your Cherry Cheesecake Fluff creations on social media. Tag us with your photographs and experiences, and don’t miss the opportunity to leave a review on our blog.

Discuss with fellow readers your unique variations and adaptations of the recipe, contributing to a dynamic exchange of ideas and inspiration. We look forward to engaging with you and seeing your delicious culinary outcomes!

The Recipe

Delectable Cherry Cheesecake Fluff

Serves: 8

Prep Time: 15 mins

Cook Time: 0 mins

Total Time: 15 mins

Kitchen Equipment Needed

  • Mixing bowl
  • Spatula
  • Serving dish

Ingredients

  • 8 oz cream cheese, softened
  • 1 cup whipped topping
  • 1 cup cherry pie filling
  • 1 teaspoon vanilla extract
  • 1 cup graham cracker crumbs

Directions

  1. In a mixing bowl, combine softened cream cheese and vanilla extract until smooth.
  2. Gently fold in the whipped topping until fully incorporated.
  3. Layer graham cracker crumbs at the bottom of a serving dish.
  4. Spoon the cheesecake mixture evenly over the crumbs.
  5. Top with cherry pie filling.
  6. Chill in the refrigerator for at least an hour before serving.

Recipe Notes

  • For a lighter version, substitute cream cheese with low-fat options.
  • Freezing is not recommended as it affects texture.