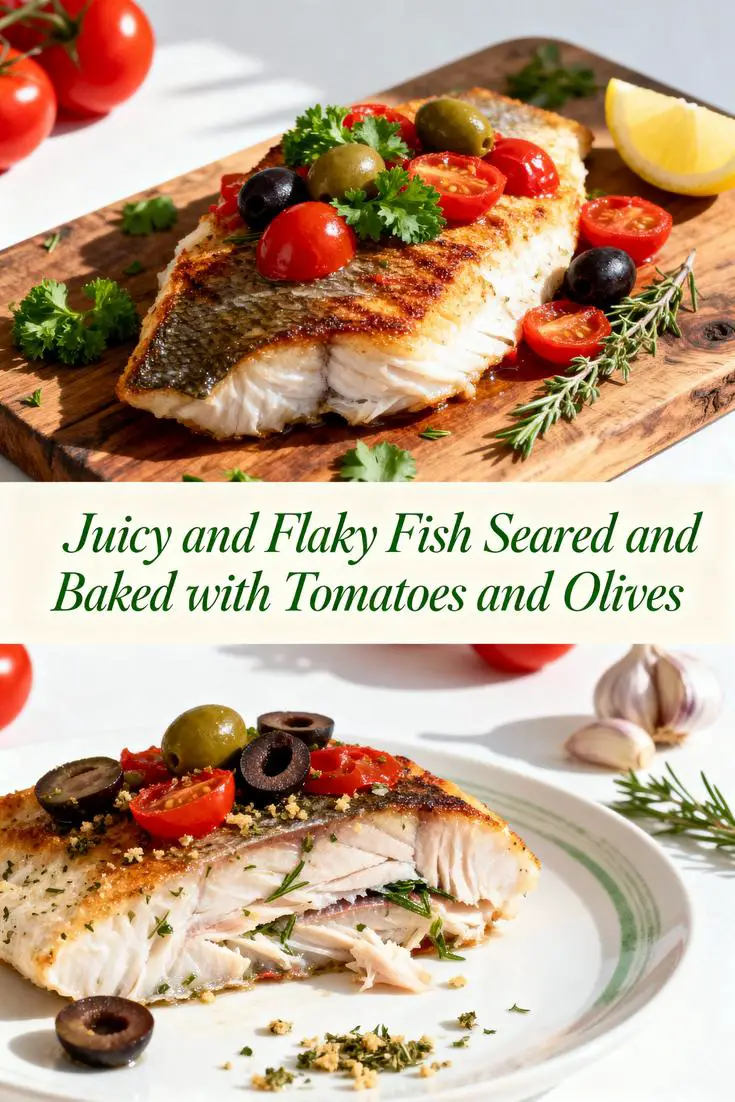
Irresistible Cherry Chocolate Ice Cream Cake Recipe for Summer Treats

Cherry Chocolate Ice Cream Cake: A Heavenly Delight for Every Occasion

⚖️
Difficulty
Medium

⏲️
Prep Time
30 mins

🕒
Cook Time
15 mins

⏱️
Total Time
45 mins

🍽️
Servings
8

Are you ready to indulge in a luscious dessert that combines the sweetness of cherries with the richness of chocolate? Our Cherry Chocolate Ice Cream Cake is the ultimate treat for any occasion! Imagine layers of velvety chocolate cake filled with creamy cherry ice cream, drizzled with chocolate sauce, and topped with fresh cherries. This dessert not only delights the palate but also makes for a stunning centerpiece that will impress your guests and loved ones alike.

This frozen delight is perfect for warm summer nights or special celebrations and it effortlessly captures the playful essence of childhood treats. As you cut through the layers, you’ll reveal a beautiful contrast between the dark chocolate and the bright red cherries, making every slice a visual feast. Prepare yourself for a symphony of flavors that balance the tartness of cherries with the decadence of chocolate!

Quick Recipe Highlights

  • Flavor Profile: This cake features a harmonious blend of tart cherries and rich chocolate, making every bite an exciting experience.
  • Texture: Expect a delightful contrast between the creamy ice cream, light cake, and smooth chocolate sauce.
  • Aroma: Enjoy the intoxicating aroma of baked chocolate mingled with the fresh smell of cherries.
  • Visual Appeal: The vibrant red cherries stand out against a dark chocolate backdrop, creating an eye-catching presentation.
  • Skill Level Needed: While the recipe requires some baking skills, it is accessible for most home cooks.
  • Special Equipment: You will need a cake pan, mixing bowls, and an ice cream scoop!

Recipe Overview

  • Difficulty Level: The recipe is categorized as medium due to the baking and layering process involved.
  • Category: This dessert fits perfectly in a celebration or special occasion dessert category.
  • Cuisine: With influences from American baking traditions, this cake offers a modern twist on classic flavors.
  • Cost: Expect reasonable costs for the ingredients, primarily cherries and chocolate.
  • Season: Enjoy this recipe especially in summer when cherries are in season and at their sweetest.
  • Occasion: A perfect choice for birthdays, anniversaries, or any festive gathering!

Why You’ll Love This Recipe

Indulging in our Cherry Chocolate Ice Cream Cake is truly an experience. The first bite reveals a creamy and dreamy texture, where the cool cherry ice cream melts seamlessly into the rich chocolate cake layers. Combined, they create an irresistible balance that caters to both the sweet tooth and the lover of bold flavors. This cake is not merely a dessert; it’s a celebration of taste that sparks joy with every slice.

Convenience plays a massive role in why this recipe shines. While it does require some time and patience, much of the preparation can be done ahead of time, allowing you to serve a show-stopping dessert without the last-minute rush. You can assemble the layers ahead of time and simply freeze until needed, making entertaining a breeze.

From a nutritional perspective, the cherries provide a burst of antioxidants and vitamins, bringing a healthy dose to an otherwise indulgent dessert. The chocolate also has its benefits, rich in flavonoids that are known for heart health. It’s a sweet way to incorporate some positive elements into your meals.

Socially, this cake is a conversation starter at any gathering. When guests see this eye-catching dessert, it draws attention and prompts compliments, creating memorable moments. Sharing slices of this delightful cake fosters connection and laughter, making it a centerpiece beyond mere taste.

Cost-effectiveness also plays a critical role. While high-end desserts might break the bank, this Cherry Chocolate Ice Cream Cake can largely be made with affordable ingredients, demonstrating that gourmet treats can be achieved on a budget.

Historical Background and Cultural Significance

The origins of the ice cream cake can be traced back to the trend of frozen desserts that gained significant popularity in the United States during the early 20th century. As refrigeration became commonplace, ice cream transitioned from a luxury to a beloved staple, leading to the innovation of combining cake and ice cream into one delightful dessert.

Culturally, ice cream cakes often mark celebrations and joyous occasions. From birthdays to anniversaries, they evoke nostalgia and happiness, often reminding individuals of joyful childhood memories. With layers that can be customized, these cakes capture not only personal tastes but also family traditions of gathering for sweet treats.

The evolution of the Cherry Chocolate Ice Cream Cake reflects broader trends, where flavors have become more adventurous and global. As food culture embraces diverse ingredients, combinations of rich chocolate and tart fruits like cherries have become universally appreciated.

Regionally, varieties of ice cream cakes can be found in different cultures, often incorporating local flavors and preferences. For instance, in Italy, you may find gelato-based cakes, while other regions lean towards richer cakes enhanced with local fruit flavors.

Ingredient Deep Dive

In exploring the star ingredients of our Cherry Chocolate Ice Cream Cake, the cherries stand out for their cultural significance. Renowned for their sweet and tart profile, cherries have been celebrated in culinary traditions across various cultures, symbolizing renewal and the sweeter things in life. Nutritionally, they boast high levels of antioxidants such as vitamin C and anthocyanins, known for reducing inflammation and promoting heart health. When selecting cherries, choose plump, firm ones with a deep color for the best flavor. Store them in the refrigerator for optimal freshness and consume them within a week for peak ripeness.

Chocolate, the star of our cake layers, is steeped in history as well. Often regarded as a treat of the gods by ancient civilizations, chocolate today is a mainstay in many desserts. Its health benefits, particularly dark chocolate, include improved heart health and antioxidant properties. When picking chocolate for baking, opt for high-quality bars with a cacao content of 70% or higher for richer flavor. Be sure to store chocolate in a cool, dry place, and if substitutions are needed, cocoa powder can often be paired with fat to create a similar texture.

Common Mistakes to Avoid

  • Not letting the cake cool completely before layering can cause the ice cream to melt and create a soggy mess.
  • Using low-quality chocolate can significantly affect the flavor profile; choose high-quality chocolate for the best results.
  • Overmixing the batter may result in a dense cake rather than a light, fluffy one.
  • Not freezing the ice cream long enough before assembly can lead to it being too soft and runny.
  • Forgetting to properly grease the cake pan may cause the cake to stick, resulting in unsightly edges.
  • Using room temperature ingredients for the cake batter can lead to inconsistencies in texture.
  • Skipping the refrigeration time after assembly can lead to a soft, unstable cake structure.
  • Not measuring the ingredients accurately can disrupt the balance and flavor of the cake.
  • Ignoring the preference for texture when picking between different types of cake and ice cream can lead to a less satisfying dessert.
  • Straying from the recommended chilling times can impact the final presentation of the ice cream layers.

Essential Techniques

To achieve the perfect layer of chocolate cake, mastering the art of mixing is key. Ensure the dry ingredients are well-combined before incorporating wet ingredients. This creates a uniform batter free of lumps. Avoiding overmixing is equally crucial; a gentle fold will maintain the cake’s airy structure, providing a light and fluffy texture. Signs of success include a smooth batter that flows easily but is not overly runny.

When it comes to layering your cake, patience is necessary. Giving time for each layer to firm up in the freezer helps create defined layers, contributing to both the aesthetic and textural experience. Use a serrated knife for astoundingly clean cuts through layers; it enables you to handle the cake with more finesse and minimizes the risk of melting during assembly.

Incorporating a ganache or chocolate sauce also elevates your cake to the next level. A simple preparation strategy involves heating equal parts cream and chocolate until melted, allowing it to cool slightly before pouring it over the layered cake. Watching for the right pouring consistency, where it flows like syrup but does not overly run, is crucial for a beautiful presentation.

Pro Tips for Perfect Cherry Chocolate Ice Cream Cake

Use high-quality ingredients, particularly for cherries and chocolate, to ensure a rich flavor profile in your cake. Consider freezing the cherries prior to use to prevent them from releasing too much moisture during assembly. Another tip is to let the ice cream soften slightly before spreading it, making it easier to layer without disrupting the cake beneath. Use a hot, dry knife to slice through the ice cream, which will help create neat portions. If you’re looking for additional flavor, consider mixing in chopped nuts or flavored extracts into the batter.

Experimenting with different cake flavors can offer delightful surprises; consider substituting vanilla or almond cake for a new dimension of flavor. To make the cake more visually appealing, you can garnish with fresh mint leaves alongside the cherries atop the cake. Lastly, allowing the finished cake to rest in the refrigerator overnight before serving intensifies the flavor fusion and gives it a firmer, sliceable texture.

Variations and Adaptations

For a regional twist, you could replace cherries with other fruits, such as raspberries or strawberries, which would provide a seasonal adaptation while maintaining a similar flavor depth. For dietary needs, experiment with gluten-free flour for the cake base to cater to gluten-intolerant guests. If you’re looking for a different texture, consider layering whipped cream atop the ice cream.

Seasonal adaptations could include adding fall spices, such as cinnamon or nutmeg, to the chocolate cake batter to give it a warm and cozy feel. Additionally, providing a chocolate-covered cherry variation with dipped cherries atop the ice cream layer can offer elegance and enhance the flavor further. Presentation choices such as serving the cake in individual portions rather than a larger slice could create a more appealing dessert at gatherings, ensuring that everyone has their unique serving.

Serving and Presentation Guide

For an impressive display, consider using a cake stand to elevate the Cherry Chocolate Ice Cream Cake, allowing for a captivating view from all angles. Drizzle additional chocolate sauce and sprinkle fresh cherries around the base of the cake for a dramatic finish. Portion control is vital; ensure to slice the cake with a clean knife, rinsed in hot water to maintain neat edges.

For garnishing, whipped cream clouds can be piped onto each slice or decorative plate, enhancing both flavor and visual appeal. Traditional accompaniments such as a scoop of vanilla ice cream or a side of fruit compote pair harmoniously with the cake and add an extra dimension to each serving. Serving cold is essential; keep the cake in the freezer until just moments before serving to maintain freshness.

Wine and Beverage Pairing

When it comes to wine pairings, a rich red wine, such as a Merlot or Cabernet Sauvignon, complements the chocolate flavors beautifully. Non-alcoholic alternatives can include cherry soda or sparkling water with a hint of lime to echo the tartness of the cherries. For coffee lovers, a robust espresso creates a delightful contrast to the sweet layers, enhancing the overall experience with its deep, bitter notes.

Temperature plays a vital role in serving beverages; serve the wine slightly chilled for optimal enjoyment, while ensuring any non-alcoholic options are refreshing and cool. For an elevated experience, consider pairing the dessert with a flavored tea, such as a vanilla or chocolate-infused option, which ties in deliciously with the cake’s profile.

Storage and Shelf Life

To store the Cherry Chocolate Ice Cream Cake, wrap it tightly in plastic wrap or aluminum foil to prevent freezer burn and maintain freshness. Storing the cake at a consistent temperature is crucial; the freezer should be set at 0°F (-18°C) or lower for optimal preservation. Signs of spoilage include ice crystals forming on the surface or an off odor.

If you have excess cake, reconsider individual servings by slicing and storing them in airtight containers, allowing easy access for later enjoyment. For reheating, defrost in the refrigerator rather than on the counter to ensure gradual temperature changes, preserving both flavor and texture. If you prefer a soft serve method, allow it to sit at room temperature for 10-15 minutes before eating.

Make Ahead Strategies

Creating the Cherry Chocolate Ice Cream Cake ahead of time can streamline your preparation process for gatherings. Consider baking the cake layers a day in advance and wrapping them tightly to maintain freshness. Ice cream can also be made from scratch or purchased a few days beforehand, giving it ample time to freeze.

Utilizing a well-planned prep timeline ensures efficiency in assembly. After the initial layers are created, store the fully assembled cake in the freezer and only frost it with chocolate ganache or toppings just before serving—this keeps it looking pristine. For any fresh elements, such as fruit garnishes, add them right before serving to ensure they maintain their vibrancy.

Scaling Instructions

Scaling the Cherry Chocolate Ice Cream Cake recipe can easily adapt to different gathering sizes. To halve the recipe, keep in mind to adjust your baking pan size to avoid spills or uneven cooking. For doubling or tripling, ensure you have larger equipment like mixing bowls and pans to accommodate the additional ingredients, while keeping an eye on baking times as they may vary.

When factoring in timing modifications for larger batches, baking times may increase slightly due to the volume. Always check doneness with a toothpick; it should come out clean from the center of the cake. Consider storing portions of the un-iced cakes if not consumed immediately; they can be layered up later for easy assembly.

Nutritional Deep Dive

Examining the macros of our Cherry Chocolate Ice Cream Cake reveals a balance of carbohydrates, fats, and proteins. Each slice typically contains around 250-350 calories, making it a moderate indulgence. The inclusion of fruit, particularly cherries, adds fiber to the cake, which aids digestion and promotes a feeling of fullness.

Micronutrient analysis showcases that while indulging in a sweet dessert, one also receives beneficial nutrients. Cherries are rich in vitamins C and K, while dark chocolate can add trace minerals like magnesium and iron. However, for those managing weight, mindful portion control is advisable; half-sized slices can fulfill sweet cravings while reducing overall calorie intake.

Dietary considerations revolve around the use of cake bases and ice creams that can cater to varying preferences; gluten-free or reduced-sugar options can be easily implemented without sacrificing flavor. It’s essential to balance sweet indulgences with mindful nutrition and tastiness despite the indulgence.

Dietary Adaptations

Catering to various dietary restrictions need not compromise on flavor in our Cherry Chocolate Ice Cream Cake. For those avoiding gluten, utilizing almond or gluten-free flour allows for a similar texture and taste while ensuring no gluten exposure. Dairy-free options are also readily available; use coconut cream or other dairy alternatives for the ice cream layer to cater to lactose-intolerant guests.

Vegan adaptations can involve using aquafaba for cake moisture instead of eggs while still achieving a moist cake. For those on low-carb or keto diets, substituting sugar with stevia or erythritol can maintain a sweet flavor without the carbs, while almond flour can replace regular flour for lower carbohydrates.

Being mindful during meal preparations ensures everyone can enjoy delicious desserts without feeling excluded; various substitutions allow for creativity and flexibility without losing the dessert’s core essence.

Troubleshooting Guide

Should you encounter texture issues, such as a dry cake, consider reducing bake time or ensuring proper measuring of flour. If the ice cream is too soft during layering, refreeze it for 10-15 minutes before using, ensuring it maintains a thick consistency. Adjusting flavor balance can be solved by enhancing the sweetness; a simple syrup poured over the layers before assembly can remedy a lack of sweetness.

If you find the cake is running too soft upon slicing, it may benefit from additional freeze time to set prior to serving. Equipment challenges may arise; a food processor can make pureeing cherries a breeze if a fork isn’t yielding results. In timing concerns, if pressed for time, assembling the cake in stages can alleviate waiting times—tackle one layer before moving onto the next.

Recipe Success Stories

The Cherry Chocolate Ice Cream Cake has seen many stars rise within the community; feedback is overwhelmingly positive, highlighting the impressive appearance and delightful balance of flavors. Many home bakers have shared their tales of adaptation, whether by infusing their favorite spirits for added kick or experimenting with different ice cream flavors—ranging from vanilla bean to mint chocolate chip.

Readers have noted successful variations using alternative fruits, ultimately leading to unique twists that uphold the cake’s essence. Many have shared tips through photography, showcasing beautiful dessert tables featuring the cake as the crown jewel, inviting others to dabble with their take on this dessert.

Frequently Asked Questions

What is the best way to store leftover Cherry Chocolate Ice Cream Cake?

Leftovers should be tightly wrapped in plastic wrap and stored in the freezer to maintain their freshness. Ensure they are airtight to prevent freezer burn and texture loss. For best quality, consume within a week if possible.

Can I use frozen cherries instead of fresh ones?

Absolutely! Frozen cherries work well in this recipe. Just ensure to thaw and drain them to minimize excess moisture before using.

How long do I need to freeze the cake before serving?

For optimal texture, you should freeze your assembled cake for at least 4-6 hours or overnight. This helps the ice cream firm up properly for easy slicing.

Can I make this recipe gluten-free?

Yes! Using gluten-free flour as a substitute for regular flour will work just fine. Ensure that all other ingredients are also gluten-free.

What can I substitute for chocolate if I want a different flavor?

You can experiment with vanilla or almond flavors instead of chocolate, adjusting the same ratios for a unique cake creation.

Is it possible to prepare the cake in advance?

Definitely! You can bake the cake up to two days in advance and assemble it a day before your event. Just be sure to keep it tightly wrapped in the freezer.

Can I use whipped cream instead of ganache for icing?

Yes, whipped cream is a lighter option for frosting this cake. However, it won’t hold its shape as well as chocolate ganache, so serve it right after assembling.

How do I get clean slices when cutting the cake?

Using a hot, dry knife will help achieve clean cuts. Wipe the knife clean after each slice to maintain uniform portions.

Is this cake suitable for kids?

Yes! The combination of flavors and textures tends to be a hit among both children and adults alike. Just monitor serving sizes due to its sweet nature.

Can I add nuts to the cake for extra texture?

Adding chopped nuts is a great idea! They add an extra crunch to the texture, and you can fold them into the cake batter or use them as a topping.

Additional Resources

If you enjoyed making the Cherry Chocolate Ice Cream Cake, you might also like our other festive dessert recipes such as the classic Tiramisu or a vibrant Red Velvet Cake. For technique guides, check out our Baking Tips for Beginners, which covers fundamental skills and best practices that will elevate your baking game.

Expand your ingredient knowledge by diving into our Ingredient Spotlight that focuses on the health benefits of cherries and chocolate. Further, if you’re looking for kitchen tools, explore our recommended Baking Essentials that include everything from silicone spatulas to cake pans ideal for all baking projects.

Join the Conversation

We invite you to share your Cherry Chocolate Ice Cream Cake creations across social media! Post your photos and variations, tagging us to create a recipe community that practices culinary joy together. Engage with fellow bakers to exchange tips, suggestions, and modifications that suit all preferences.

Your feedback is essential to our recipe development; leave comments and reviews on your experience making the cake. Feel free to share what adaptations worked best and encourage others to explore new dessert horizons.

The Recipe

Cherry Chocolate Ice Cream Cake

Serves: 8

Prep Time: 30 mins

Cook Time: 15 mins

Total Time: 45 mins

Kitchen Equipment Needed

  • Cake pans
  • Mixing bowls
  • Electric mixer
  • Serrated knife
  • Rubber spatula
  • Ice cream scoop
  • Measuring cups and spoons

Ingredients

  • 1½ cups all-purpose flour
  • 1 cup granulated sugar
  • ½ cup unsweetened cocoa powder
  • ½ cup butter, softened
  • 2 large eggs
  • 1 cup milk
  • 1 teaspoon vanilla extract
  • 2 cups cherry ice cream
  • 1 cup chocolate sauce for drizzling
  • Fresh cherries for garnish

Directions

  1. Preheat the oven to 350°F (175°C). Grease and flour two 9-inch round cake pans.
  2. In a large mixing bowl, cream together the butter and sugar until light and fluffy. Add in the eggs and vanilla extract, mixing until well combined.
  3. In a separate bowl, sift together the flour and cocoa powder. Gradually add this mixture to the wet ingredients, alternating with the milk to create a smooth batter.
  4. Pour the batter evenly into the prepared cake pans and bake for 25-30 minutes or until a toothpick inserted in the center comes out clean. Allow to cool.
  5. Once cooled, layer the bottom cake with cherry ice cream and gently spread to evenly coat the top. Place the second layer on top.
  6. Cover the cake with chocolate sauce and add fresh cherries on top. Return to the freezer for 1-2 hours to set.
  7. Slice and serve while still firm!

Recipe Notes

  • Feel free to experiment with different ice cream flavors to find your perfect combination.
  • Consider using a chocolate ganache topping for a richer chocolate experience.
  • For dietary adjustments, substitutions for gluten-free and vegan options list in previous sections apply well.

Deliciously Moist Chocolate Chip Zucchini Banana Bread Recipe

Chocolate Chip Zucchini Banana Bread: A Healthy Twist on a Classic Treat

⚖️
Difficulty
Easy

⏲️
Prep Time
15 mins

🕒
Cook Time
50 mins

⏱️
Total Time
65 mins

🍽️
Servings
12 slices

Chocolate Chip Zucchini Banana Bread is a delightful fusion of flavors that combines the sweetness of ripe bananas with the subtle earthiness of zucchini, all contrasted by the rich, melty chocolate chips that dot the loaf. This recipe not only satisfies your sweet tooth but also serves up a healthy dose of vegetables, making it perfect for breakfast, an afternoon snack, or even a guilt-free dessert. The combination of these ingredients creates a moist and tender crumb that is sure to please family and friends alike.

As you bake this Chocolate Chip Zucchini Banana Bread, your kitchen will be filled with the warm aroma of baked goods, inviting everyone to gather around as it cools. The golden-brown crust gives way to a soft, fluffy interior, accented by the deliciously sweet bursts of chocolate. With its beautiful presentation, this bread is not only tasty but adds an inviting touch to any table, making it a wonderful choice for gatherings or as a delightful gift.

Quick Recipe Highlights

  • Flavor Profile: This recipe balances the sweetness of bananas and dark chocolate with the mild flavor of zucchini, creating a harmonious taste experience.
  • Texture: The bread is incredibly moist with a soft crumb, while the chocolate adds a satisfying richness and the zucchini lends a slight slight texture.
  • Aroma: The warm, comforting scents of vanilla, banana, and chocolate meld together to create an irresistible aroma that fills your home.
  • Visual Appeal: The vibrant green flecks of zucchini contrast beautifully with the rich brown of the loaf, making it delectable to look at.
  • Skill Level Needed: The recipe is straightforward, perfect for beginner bakers, requiring just basic techniques to create a scrumptious bread.
  • Special Equipment: No special equipment is needed; just standard baking tools like a mixing bowl, whisk, and loaf pan.

Recipe Overview

  • Difficulty Level: This Chocolate Chip Zucchini Banana Bread is easy to prepare, making it suitable for bakers of all levels. With simple steps and minimal ingredients, even beginners can create this treat with confidence.
  • Category: This recipe falls under breakfast and snacks, making it versatile for any time of day. It’s also a great option for brunch or as part of a lunchbox for kids.
  • Cuisine: While this recipe showcases American baking traditions, the incorporation of zucchini reflects a growing trend towards health-conscious, vegetable-infused desserts.
  • Cost: The ingredients are affordable, often arising from staples already in your kitchen, making it a budget-friendly choice for delicious homemade bread.
  • Season: This loaf is wonderful year-round but is a great way to use up summer zucchini, making it especially popular in gardening seasons.
  • Occasion: Perfect for casual gatherings, brunches, or even holiday parties where a sweet comfort food is desired without excessive indulgence.

Why You’ll Love This Recipe

This Chocolate Chip Zucchini Banana Bread takes the traditional banana bread to another level with the inclusion of zucchini, adding not only nutrition but also enhancing the moistness of the loaf. The slices melt in your mouth, offering a deliciously sweet yet wholesome treat that you can feel good about indulging in. Paired perfectly with a pat of butter or enjoyed plain, this bread invites you to savor every bite.

Making this bread is remarkably convenient, as the preparation requires minimal effort. Grating the zucchini and browning the bananas can be done in a matter of minutes. Moreover, this recipe gives you the freedom to prepare a large batch, storing extras for future snacking or gifting. Its adaptability makes it an excellent choice for busy weekends when a quick wholesome recipe is needed.

Nutritionally, this bread packs a punch. It combines the natural sweetness of bananas with the vitamins and minerals found in zucchini. With this recipe, you not only satisfy your cravings but also incorporate essential nutrients into your diet. Additionally, the use of whole grain flour can enhance the fiber content, making this a nourishing option.

Socially, this Chocolate Chip Zucchini Banana Bread brings people together around a common love for baked treats. Whether you’re hosting friends or sharing with family, this recipe fosters connection through its inviting aroma and delicious taste. It’s a great conversation starter and a staple for gatherings.

Lastly, this recipe is incredibly cost-effective. All the ingredients are easily accessible and typically found in your pantry. Making your baked goods at home not only saves money but also allows you to enjoy a fresh, wholesome product without preservatives or artificial ingredients often found in store-bought options.

Historical Background and Cultural Significance

Chocolate Chip Zucchini Banana Bread may seem like a modern creation, but its roots can be traced through various baking traditions that allow for creativity with surplus ingredients. The classic banana bread recipe, which gained popularity in the 1930s with the advent of baking powder, makes use of overripe bananas—a common occurrence in many households. The addition of zucchini, typically seen in savory dishes, reflects a trend towards healthy baking and creative utilization of garden vegetables.

Culturally, this recipe represents a fusion of flavors and practices from American kitchens, where resourcefulness in cooking is celebrated. The zucchini’s inclusion into sweet dishes highlights the contemporary shift towards combining health with indulgence.

Over the years, banana bread has evolved, and with each adaptation, it becomes a canvas for personal expression. Families might pass down their treasured recipes, often swapping ingredients based on local crops and preferences. The chocolate adds decadence, making it a popular choice for dessert lovers.

Regional variations of zucchini banana breads are now common, with bakers across the world putting their twists on the classic recipe. In some areas, spices like cinnamon are incorporated, while others may choose different types of chocolate, nuts, or even dried fruits, adapting the loaf to their culinary styles and tastes.

Ingredient Deep Dive

Bananas

Bananas are a staple in many cultures worldwide. Their sweet flavor and creamy texture make them a beloved fruit in desserts and snacks. Rich in potassium and vitamin C, bananas have great nutritional benefits, aiding in heart health and aiding digestion. When selecting bananas for this recipe, look for ones that are overly ripe with brown spots for maximum sweetness. They should be stored at room temperature and can be frozen for future use if they become too ripe.

Zucchini

Zucchini is often viewed as a savory vegetable, but its subtle flavor makes it a fantastic addition to sweet dishes as well. High in water content, zucchini adds moisture without altering taste, enhancing the nutrient profile with vitamins A and C. Always choose firm, glossy zucchinis and avoid ones with blemishes. They should be stored in a cool, dry place and can be grated and frozen for use in baking.

Chocolate Chips

Chocolate chips are a versatile ingredient associated with indulgence, often found in desserts across cultures. Rich in antioxidants, semi-sweet or dark chocolate chips sweeten and deepen the flavor of this bread. Choosing high-quality chocolate offers a significant flavor boost. Store chocolate chips in a cool, dry place, and they can be substituted with carob chips or chopped chocolate for different flavor profiles.

Flour

Flour is the backbone of nearly all baked goods. It contributes to structure, texture, and overall taste. When selecting flour, consider using whole wheat for added nutrition and fiber. You want a flour that is finely milled for smooth-textured baked goods. Store flour in a cool, dry environment, and it can be substituted with gluten-free blends for those with dietary restrictions.

Common Mistakes to Avoid

  • Using young or under-ripe bananas: For optimal sweetness, ensure your bananas are fully ripe with plenty of brown spots.
  • Skipping the option to drain zucchini: If you don’t remove excess moisture from grated zucchini, your bread may turn out soggy.
  • Overmixing the batter: Overmixing can lead to dense and rubbery bread; mix until just combined.
  • Using too much or too little flour: Ensure accurate measurements; either can lead to inconsistent texture.
  • Baking at incorrect temperatures: Make sure your oven is preheated, as uneven heat can affect baking time.
  • Improper storage: Store your bread in an airtight container to keep it fresh and moist for longer.
  • Adding ingredients at wrong temperatures: Ensure ingredients like eggs and butter are at room temperature for better incorporation.
  • Not checking for doneness: Use a toothpick; if it comes out clean, your bread is ready. A loaf can quickly overbake if not monitored.

Essential Techniques

Properly measuring ingredients is crucial. Use dry measuring cups for dry ingredients and liquid measuring cups for liquids to ensure accuracy. Level off dry ingredients for precise quantities; this prevents dense or overly dry bread.

Mixing techniques are also important. Start by combining dry ingredients, then slowly incorporate wet. Use a folding technique for incorporating chocolate chips and zucchini gently, as over-mixing leads to a tough batter and dense bread.

Baking at the right temperature significantly impacts the end result. Use an oven thermometer to check that your oven is calibrated correctly, as precision is key to achieving a perfectly risen loaf.

Pro Tips for Perfect Chocolate Chip Zucchini Banana Bread

1. For added depth, consider browning your butter before mixing it into the batter to enhance the flavor profile.
2. If desired, add nuts or seeds for added crunch and texture; walnuts or chia seeds pair beautifully with chocolate.
3. Experiment with spices like cinnamon or nutmeg for a cozy flavor twist.
4. To boost nutrition without sacrificing taste, swap a quarter of the all-purpose flour for oats or nut flour.
5. Let your bread cool completely before slicing; this allows it to set and maintain moisture.
6. Consider drizzling with honey or maple syrup for an extra touch of sweetness before serving.
7. For a darker loaf, use dark chocolate chips in place of semi-sweet or milk chocolate.
8. If you have leftovers, wrap slices in plastic wrap and store them in the fridge for a refreshing snack.

Variations and Adaptations

Regional variations of Chocolate Chip Zucchini Banana Bread can be seen, such as adding spices based on local preferences. In some cultures, cinnamon, nutmeg, or ginger are included for additional warmth.

Seasonal adaptations allow for experimentation; in fall, consider adding pumpkin puree or substituting the bananas with applesauce for a weirder twist on flavors. In spring, fresh fruit can be incorporated for bursts of color and flavor.

Dietary modifications are also simple; swap regular flour for gluten-free or almond flour. For a vegan option, replace eggs with flax seeds or applesauce. If you prefer lower sugar, consider using light brown sugar or agave nectar for a healthier alternative.

Flavor variations can include different types of chocolate like white or even incorporating flavored chocolate chips to add a unique twist.

Presentation alternatives might involve topping with a cream cheese glaze or serving with fresh fruit, transforming your loaf into a gourmet experience.

Serving and Presentation Guide

Serving Chocolate Chip Zucchini Banana Bread is all about presentation. Slice the loaf evenly and stack on a beautiful platter. Garnish with fresh mint leaves or edible flowers for an elegant look. Consider serving alongside a dollop of cream cheese or vanilla yogurt for richness.

Temperature considerations are key; this bread is delightful when served warm, but can also make a refreshing snack when chilled. Portion control is essential; aim for thick slices for a filling breakfast or thinner slices for easy snacking.

Plating techniques can elevate the experience; drizzle a homemade glaze across the top for visual appeal or serve individual slices on elegant dessert plates.

Garnishing ideas include a dusting of powdered sugar or cocoa powder, which can add a touch of sophistication while enhancing flavors.

Wine and Beverage Pairing

When it comes to beverage pairings, a light-bodied white wine such as a Riesling complements the sweetness of the bread beautifully. The slight acidity balances the richness of the chocolate while enhancing the overall experience.

For a non-alcoholic option, try serving herbal tea, like chamomile or mint, which pairs wonderfully with the warm and comforting flavors of the bread. Cold brew coffee also brings a pleasant contrast.

If you prefer something more decadent, a hot chocolate topped with whipped cream can complement the chocolate chips, creating a cohesive dessert experience.

Be mindful of temperature when serving; beverages should be at their ideal drinking temperature to enhance enjoyment.

Storage and Shelf Life

To maintain freshness, store your Chocolate Chip Zucchini Banana Bread in an airtight container at room temperature for up to three days. For longer storage, refrigeration is recommended, where it can last up to a week.

Temperature requirements are crucial; avoid storing it in humid areas to prevent spoilage. Utilize glass or plastic containers with tight seals to keep moisture locked in while preventing it from going stale.

Signs of spoilage include changes in texture—becomes overly dry or excessively soggy—and off odors. If mold appears or if it has a bad taste, it should be discarded.

For reheating, slice the bread and warm in the microwave for a few seconds or in an oven at 350°F until warm throughout.

If you’re looking to extend your storage options, consider freezing the bread. Wrap in plastic followed by foil to protect against freezer burn, where it can last for up to three months.

Make Ahead Strategies

To streamline your baking process, consider preparing the batter ahead of time. You can refrigerate it for up to 24 hours before baking. Just ensure to let it sit out for a few minutes to return to room temperature for optimal results.

Once baked, the bread can be sliced and stored in the fridge, making it easy to grab a quick breakfast or snack throughout the week. Allow slices to cool completely before wrapping to avoid sogginess.

Quality remains a priority; cool your bread on a wire rack to prevent moisture from accumulating at the bottom. If you plan to store the bread, it’s best to wait until it has completely cooled.

Assembly tips include prepping dry and wet ingredients separately and combining them just before baking to maintain freshness. This method is particularly useful for those who want to prepare for party gatherings or unexpected guests.

When reheating, add fresh elements such as butter or fruit spreads to enhance flavor while reviving the bread’s freshness.

Scaling Instructions

Halving the recipe is effortless; simply divide each ingredient by two and follow the instructions without any changes to method or time.

Doubling or tripling the recipe requires larger mixing vessels and potentially longer baking times. Always monitor doneness using a toothpick to ensure it cooks evenly in the middle.

Equipment adjustments may include using multiple loaf pans if making larger batches, which could also recommend adjusting the oven racks for optimal heat distribution.

Timing modifications may occur; larger loaves take longer to bake, while mini loaves will bake more quickly, so timing adjustments are essential.

Storage considerations for larger batches should take into account ample airtight storage containers to maintain the quality of your freshly baked bread.

Nutritional Deep Dive

This recipe is not only delicious but also provides substantial nutritional value as well. It includes healthy fats from chocolate, vitamins from zucchini, and carbohydrates from bananas, offering a balanced profile.

A macro breakdown reveals that each slice consists of approximately 180 calories, including healthy carbohydrates, small amounts of protein, and fats derived from chocolate.

Micronutrient analysis highlights contributions from bananas and zucchini, offering potassium, vitamin C, and dietary fiber that supports digestion and overall health.

Health benefits extend beyond basic nutrition, targeting overall wellness, energy levels for everyday activities, and even aiding in weight management when consumed in moderation.

Dietary considerations are essential; those looking to account for macros can use alternative flours and sugars to increase fiber content while lowering the glycemic load.

Monitoring portion sizes is advised, as enjoying this treat in moderation maximizes pleasure while aligning with healthy eating patterns.

Dietary Adaptations

For those seeking gluten-free options, substitute regular flour with a gluten-free flour blend. Most blends will work well without altering the texture significantly.

Dairy-free adaptations can easily be achieved using plant-based butter or coconut oil, making this recipe suitable for vegan diets as well. Replace eggs with flaxseed meal or applesauce for a compassionate version.

Keto modifications ask for changes in sweeteners; consider using erythritol or stevia and almond flour for lower carbs.

If pursuing a paleo approach, use almond flour and a natural sweetener like honey while ensuring all ingredients align with paleo principles.

For those on a low-FODMAP diet, including lactose-free yogurt and omitting chocolate can tailor the recipe to personal needs.

Finally, supporting specific dietary needs while still offering deliciousness ensures everyone can enjoy a slice of this delightful Chocolate Chip Zucchini Banana Bread.

Troubleshooting Guide

Texture issues often arise from not allowing bananas to ripen sufficiently. Ensure you use overly ripe bananas for better moisture and sweetness. In case your bread turns out too dry, it may indicate overbaking or excessive flour use. next time, use a little less flour or keep an eye on the oven timer.

Flavor balance can be tricky; if your bread lacks sweetness, check if your bananas were ripe. If the bread is overly sweet, consider reducing the sugar next time or incorporating more whole-grain flour.

Temperature problems can occur if your oven runs hot; investing in an oven thermometer could help ensure accurate temperatures. If baking too hot, simply reduce the temperature by 25°F and adjust your baking time.

For equipment challenges, if you don’t have a loaf pan, consider using muffin tins to create banana bread muffins that will bake evenly and quickly.

Timing concerns are common; if you’re new to baking, keep a close watch on the timer and test for doneness earlier than specified in the recipe.

Ingredient substitutions might sometimes invite issues. If you swap flours, always control for moisture differences to maintain texture.

Recipe Success Stories

Readers have shared their success in experimenting with this Chocolate Chip Zucchini Banana Bread. Many have highlighted how they used additional spices or swapped out ingredients to make the recipe their own, contributing to a unique touch.

Community feedback emphasizes how families enjoyed this bread as a bonding experience, whether baking together or sharing stories around the breakfast table. Local variations from different family traditions have strengthened the connection between cooking and culture for many.

Photo success stories showcase artists capturing the beauty of the loaf, inviting others to create and share their renditions. Social media has played an essential role, allowing readers to inspire each other and provide tips based on shared experiences.

Adaptation stories often mention how individuals showcased this bread at gatherings and received rave reviews, reinforcing the recipe’s delicious reputation among friends and family.

Ultimately, these success stories add a personal touch to every slice of Chocolate Chip Zucchini Banana Bread, making each loaf not just a recipe but a treasured tradition and community creation.

Frequently Asked Questions

Can I make this bread without eggs?

Absolutely! To substitute eggs, consider using flaxseed meal or applesauce. One egg can be replaced with 1 tablespoon of flaxseed meal mixed with 2.5 tablespoons of water, or you can use 1/4 cup of applesauce.

How can I store leftovers?

Leftover bread can be stored in an airtight container at room temperature for up to three days. For longer storage, wrap tightly and freeze individual slices for up to three months.

Can I use frozen zucchini in this recipe?

Yes, you can use frozen grated zucchini. Just make sure to thaw it and drain any excess moisture before adding it to the batter.

What if my bread is too dense?

Dense bread can be a result of overmixing the batter. Mix until just combined and avoid over-beating the eggs as well for a lighter loaf.

Is it necessary to peel zucchini before using?

No, you do not need to peel zucchini for this recipe. The skin adds nutrients and will not impact the flavor of the bread.

What variations can I make?

You can customize this recipe by adding nuts, trying different flavored chocolate, or including spices like cinnamon or nutmeg for added warmth.

Can I make this recipe as muffins?

Definitely! To make muffins, simply pour the batter into a lined muffin tin and bake for about 20-25 minutes or until a toothpick inserted comes out clean.

What can I use instead of chocolate chips?

You can use chopped nuts, dried fruits, or alternative sweets like coconut flakes or butterscotch chips for a different flavor profile.

How can I tell when the bread is done?

Insert a toothpick or skewer into the center of the loaf. If it comes out clean or with a few moist crumbs, it’s ready to be taken out of the oven.

Can I lessen the sugar in the recipe?

Absolutely! You can reduce the sugar to your preference. Just be mindful that it might slightly alter the texture or moisture of the final product.

Additional Resources

For those looking to expand their baking horizons, we recommend exploring related recipes that incorporate seasonal vegetables and fruits, like carrot bread or apple cinnamon muffins. A technique guide on mastering banana bread variations can be exceedingly helpful too.

If you’re curious about ingredient information, look into the benefits of whole grains and their nutritional value in baking. Equipment recommendations for different kitchen tools can also enhance your baking experience.

Seasonal variations allow you to adapt recipes based on what’s fresh and available, ensuring that you are always creating with the best quality ingredients.

Join the Conversation

We encourage you to share your baking experiences with Chocolate Chip Zucchini Banana Bread on social media! Tag us with your photos to inspire others who might want to try this delightful recipe.

Connect with fellow bakers in our community, swapping tips or ideas for variations! Share your favorite ways of enjoying this loaf and lend recommendations on pairing perfect beverages to enhance the experience.

Your feedback and suggestions are invaluable, as they not only foster creativity within the community but also open up a space for sharing culinary love. We look forward to hearing your stories and seeing your delicious results!

The Recipe

Chocolate Chip Zucchini Banana Bread

Serves: 12 slices

Prep Time: 15 mins

Cook Time: 50 mins

Total Time: 65 mins

Kitchen Equipment Needed

  • Mixing bowl
  • Loaf pan
  • Whisk
  • Grater
  • Measuring cups and spoons
  • Oven

Ingredients

  • 2 ripe bananas, mashed
  • 1 cup grated zucchini (drained)
  • 1/2 cup granulated sugar
  • 1/2 cup brown sugar
  • 1/3 cup melted butter
  • 2 eggs
  • 1 teaspoon vanilla extract
  • 1 1/2 cups all-purpose flour
  • 1 teaspoon baking soda
  • 1/2 teaspoon salt
  • 1 cup chocolate chips

Directions

  1. Preheat your oven to 350°F (175°C) and grease a loaf pan.
  2. In a mixing bowl, mash the bananas and whisk in the melted butter.
  3. Add sugars, eggs, and vanilla extract. Mix well until all ingredients are combined.
  4. In another bowl, mix flour, baking soda, and salt.
  5. Gradually add the dry ingredients to the wet mixture, stirring until just combined.
  6. Fold in the grated zucchini and chocolate chips gently.
  7. Pour the batter into the prepared loaf pan.
  8. Bake for 50-60 minutes or until a toothpick comes out clean.
  9. Let it cool in the pan for 10 minutes before transferring it to a wire rack to cool completely.

Recipe Notes

  • For a richer flavor, use dark chocolate chips.
  • If you prefer less sweetness, reduce the sugar.
  • Can also be made as muffins; adjust baking time to about 20-25 minutes.
  • Store leftovers in an airtight container for up to a week.

Cranberry Pineapple Upside-Down Cake: The Ultimate Festive Delight

Cranberry Pineapple Upside-Down Cake – The Best Festive Dessert

⚖️
Difficulty
Intermediate

⏲️
Prep Time
20 mins

🕒
Cook Time
40 mins

⏱️
Total Time
60 mins

🍽️
Servings
8 servings

Welcome to the delightful world of desserts, where our Cranberry Pineapple Upside-Down Cake reigns supreme as the best festive dessert! Bursting with color and flavor, this show-stopping cake is a celebration of tropical harmony. The sweetness of ripe pineapple pairs harmoniously with the tartness of fresh cranberries, resulting in a mouthwatering combination that dances on your taste buds. This cake creates a stunning centerpiece for any festive gathering, enveloping the room in aromas of baked fruit and caramelized sugar.

This cake isn’t just a feast for the senses; it’s also a nostalgic nod to tradition. Upside-down cakes have long held a special place in dessert history, embodying comfort and the joy of sharing with loved ones. This particular rendition elevates the classic recipe, making it perfect for winter holidays, family gatherings, or simply indulging yourself. Just imagine slicing through the golden brown top to reveal the vibrant red cranberries nestled beneath, creating an impressive visual that captures the essence of festive celebration!

Quick Recipe Highlights

  • Flavor Profile: This cake features a delectable blend of sweet pineapple and tart cranberries, creating a perfect balance that excites the palate.
  • Texture: The cake has a moist crumb with a slight chewiness from the cranberries, combined with a rich caramel topping that adds contrast.
  • Aroma: The mingling scents of caramelized fruit, vanilla, and butter waft from the oven, enticing everyone in the vicinity.
  • Visual Appeal: The vibrant colors of the cranberries and golden pineapple create a stunning presentation, making it an eye-catching dessert.
  • Skill Level Needed: This cake requires intermediate baking skills, particularly in mastering the upside-down technique.
  • Special Equipment: Typically, a round cake pan is required along with basic baking utensils such as a mixer and spatula.

Recipe Overview

  • Difficulty Level: This intermediate-level recipe involves techniques such as caramelization and careful layering that may require some practice but yield impressive results.
  • Category: Perfect as a dessert, this cake can also double up as a brunch treat, making it versatile for various meal categories.
  • Cuisine: Rooted in American culinary traditions, this cake reflects seasonal ingredients, making it popular during festive times.
  • Cost: The ingredients for this Cranberry Pineapple Upside-Down Cake are relatively low-cost, making it accessible for all occasions.
  • Season: This dessert shines during winter months, particularly around holidays when both cranberries and pineapples are at their best.
  • Occasion: Whether it’s Thanksgiving, Christmas, or a seasonal picnic, this cake serves as a delightful ending to any festive meal.

Why You’ll Love This Recipe

The taste and texture of the Cranberry Pineapple Upside-Down Cake create an unforgettable experience with every bite. The moist, fluffy cake absorbs the fruity juices, while the caramelized pineapple and tart cranberries provide layers of flavor that keep you coming back for more. It impresses both family and guests, making any gathering feel special.

Convenience is a significant factor in this recipe’s appeal. The cake can be prepared ahead of time, allowing flavors to meld beautifully. With straightforward ingredients and clear steps, even novice bakers can succeed in creating this masterpiece. In addition, cleanup is minimal, so you can spend more time enjoying the festivities.

Nutritionally, this cake isn’t just indulgent; it also provides a unique mix of vitamins from cranberries and pineapples. These fruits offer antioxidants and dietary fiber that contribute to a balanced diet. Enjoying this dessert allows you to savor sweet moments without overwhelming guilt.

This cake is perfect for social gatherings, beautifully presented, and easy to share. Its vibrant colors and impressive layers naturally draw attention, making it a delightful talking point during parties and dinners. It’s a dessert that encourages conversations and memories around the table.

Cost-effectively, this recipe uses readily available ingredients that won’t break the bank. It’s an economical choice for festive occasions, allowing you to treat your guests without sacrificing quality. The satisfaction from creating such an impressive dessert on a budget is a reward in itself!

Historical Background and Cultural Significance

The origins of the upside-down cake can be traced back to the early 20th century, a time when home baking became popular in America. The use of canned fruit, common at the time, inspired bakers to create this centerpiece dessert that turned heads. This version with cranberries and pineapple reflects the seasonal consciousness of using available fruits.

Culturally, the upside-down cake stands as a symbol of resourcefulness in cooking. Traditionally, it embodies the idea of using what you have at hand, transforming simple ingredients into an impressive dish that dazzles at family gatherings. Its significance as a communal dish enhances its status during festive seasons.

Over the years, variations of this cake have emerged, incorporating different fruits and flavors, yet the essence remains rooted in its classic preparation. This includes adding spices or amending the fruits based on seasonal availability while still celebrating that delightful surprise when the cake is turned out.

Regional adaptations have resulted in numerous flavors and combinations, showcasing local produce and tastes. Today, you may find versions with peaches, cherries, or even a mix of tropical fruits that reflect the community’s preferences, but the core concept remains a beloved favorite among dessert enthusiasts.

Ingredient Deep Dive

Cranberries: These vibrant berries not only add a burst of color to the cake but also contribute to health benefits, including antioxidant properties that promote heart health. When selecting cranberries, look for firm, bright red berries. Store in the refrigerator for freshness, and if frozen, they can last several months. If fresh cranberries are unavailable, dried can serve as a suitable substitute, providing sweetness and a chewy texture.

Pineapples: Pineapples offer a tropical sweetness that perfectly complements tart cranberries. When using fresh pineapple, opt for those with a sweet aroma and a slight give when squeezed. To store, keep it at room temperature until ripe, then refrigerate. For a simplified version, canned pineapple is an excellent alternative, ensuring ease of preparation while still delivering delicious flavor.

Common Mistakes to Avoid

  • Using an incorrect pan size can lead to uneven baking; always match the pan size to the recipe.
  • Not preheating the oven causes cakes to cook unevenly; this step is crucial for a perfect rise.
  • Using fruit that is overly ripe may create a soggy texture and overly sweet cake.
  • Skipping the caramelization process can result in a less flavorful topping; take the time to caramelize thoroughly.
  • Overmixing the batter can lead to a dense cake; mix until just combined for a light and airy texture.
  • Not letting the cake cool slightly before inverting can cause the fruit to stick; a proper cooling time helps with the removal.
  • Using cold ingredients directly from the fridge can affect the batter’s consistency; bring ingredients to room temperature for best results.
  • Rushing the cooling process can compromise flavor; allow the cake to fully cool and soak up the juices for optimal taste.
  • Using imitation flavors instead of real extracts can ruin the cake’s true flavor profile; always use pure extracts.
  • Neglecting to read the entire recipe before starting can lead to missed steps; familiarity with the process ensures smoother execution.

Essential Techniques

Caramelization: Caramelization is essential for achieving that golden, sticky topping that adds depth to the cake’s flavor. To master this technique, be sure to use medium heat and constantly stir the sugar until it melts evenly. Watch for a deep amber color, as this indicates it’s ready.

Layering Fruits: Understanding how to properly layer fruits ensures an attractive presentation upon serving. Start with the firmer fruit at the bottom, allowing it to hold its shape during baking, while softer fruits like cranberries go on top to avoid disintegration.

Pro Tips for Perfect Cranberry Pineapple Upside-Down Cake

1. Use fresh cranberries when possible for the best flavor; frozen can work in a pinch but may release more liquid.

2. Allow the caramel to cool slightly before layering on the fruit to prevent steaming and maintain texture.

3. Experiment with different fruit combinations for personalization; berries, peaches, or even apples can work beautifully.

4. Once flipped, allow the cake to rest so the juices soak into the cake; this enhances flavor and moisture.

5. Serve with whipped cream or vanilla ice cream to elevate the dessert experience and balance flavors.

6. Consider adding spices like cinnamon or nutmeg into the batter for added warmth and depth.

7. Pay close attention to the baking time, as overbaking can dry out the cake; check for doneness with a toothpick.

8. Make sure to grease the pan well; a non-stick spray can help with easier cake removal.

Variations and Adaptations

Regional variations might include adding spices that reflect local traditions, such as ginger or cloves. Seasonal adaptations can be made by swapping cranberries for fresh strawberries in the spring or ripe peaches during summer. For dietary modifications, consider using whole wheat flour for a healthier twist or a gluten-free mix for dietary needs. Flavor variations can include adding orange zest for a citrus touch or even using flavored extracts like almond or coconut. Texture modifications may involve folding in chopped nuts for added crunch or substituting half the flour for ground oats. Presenting the cake in a cast-iron skillet lends a rustic look, while individual servings can be created with muffin-size portions.

Serving and Presentation Guide

Plating the Cranberry Pineapple Upside-Down Cake can be as simple as inverting onto a beautiful cake stand. Garnishing the top with mint leaves not only enhances color but offers a refreshing contrast. Traditional accompaniments include a dollop of whipped cream or a scoop of ice cream, which can also add a luscious contrast to the tangy flavors of the cake. For a modern twist, serving in slices alongside a warm berry compote provides additional flavors and visual textures. As for temperature, serving slightly warm is ideal to complement the fruits’ natural aromas, while allowing for easy portion control will keep servings consistent.

Wine and Beverage Pairing

When considering a wine to pair, opt for a sweet Riesling or a light Moscato, as both enhance the fruity notes of the cake without overpowering it. For non-alcoholic options, a sparkling cider or a refreshing iced tea can balance the sweetness of the dessert. If enjoying coffee or tea, consider a light-bodied brew, like a green tea or vanilla latte, which will add a comforting finish without clashing with the flavors. Temperature-wise, serve wines chilled and teas hot to provide a delightful contrast to the warm cake.

Storage and Shelf Life

To store, keep the Cranberry Pineapple Upside-Down Cake covered in an airtight container at room temperature for up to 3 days or in the refrigerator for up to a week. For longer storage, consider freezing individual slices wrapped in plastic wrap and stored in a freezer-friendly bag, where they can last up to 3 months. Signs of spoilage include mold formation or unusual smells. To reheat, pop slices in the microwave for about 20-30 seconds or warm gently in the oven until just heated through, ensuring it won’t dry out. Freezing the cake before icing can also be beneficial for maintaining moisture in the cake.

Make Ahead Strategies

Prep for the Cranberry Pineapple Upside-Down Cake can be done a day in advance by prepping the fruit and making the caramel ahead of time. Store the fruit in the refrigerator and the caramel in an airtight container. On the day of serving, simply assemble and bake the cake, allowing for rapid preparation and smooth execution on gathering day. If making ahead, consider underbaking slightly to prevent drying out upon reheating. Fresh elements like whipped cream can always be added right before serving for maximum freshness.

Scaling Instructions

Halving the recipe can work fine with a smaller cake pan, while doubling the quantities can turn it into a generous crowd-pleaser, using a larger pan such as a 9×13 inch. If tripling the amount, consider using multiple pans to ensure even baking or increase cooking time accordingly. Always adjust your oven temperature slightly when making larger quantities to ensure evenly baked results. Store leftovers in separate containers to maintain freshness, as larger portions tend to dry out more easily.

Nutritional Deep Dive

This cake primarily offers a balance of macronutrients; you can expect carbohydrates from the sugars and flour used, while enjoying small amounts of protein. The micronutrient profile includes vitamins C and A from the fruit, contributing to an overall healthier dessert option. Regular consumption of cranberries has shown to support heart health and immune function, further enhancing the nutritional benefits of this dessert. Portion control is essential, especially when monitoring sugar intake, but a slice of this cake can fit well into a balanced diet.

Dietary Adaptations

For gluten-free individuals, swap regular flour with a gluten-free blend to adapt this recipe accordingly. A vegan version can be created by substituting eggs with flax eggs and using plant-based butter. Dairy-free options include using coconut milk for moisture and creaminess without compromising flavor. Low-carb substitutes such as almond flour and sugar alternatives can make this dessert suitable for keto diets. Paleo enthusiasts can replace sugars with honey or maple syrup while using nut flours. For those monitoring FODMAPs, utilizing suitable fruits and gluten-free flour is recommended. Each adaptation maintains the integrity of the original recipe while ensuring dietary requirements are met.

Troubleshooting Guide

If your cake has a texture issue, it may be due to overmixing; ensure just to mix until ingredients are combined for a light and airy cake. Achieving the right flavor balance can take some adjustments; consider adding a pinch of salt to enhance sweetness without overwhelming. Temperature problems during baking often arise from incorrect oven settings; always preheat your oven to ensure consistency. If your fruit turns mushy, avoid overly ripened selections and ensure even layering. For ingredient substitutions, keep in mind that ratios might vary and always check consistency. Timing concerns can arise due to oven variances; use a toothpick to check for doneness at different intervals as needed.

Recipe Success Stories

Community feedback highlights how this cake not only tastes delicious but also serves as a memorable part of family gatherings. Many readers have shared their success stories using leftover fruit, illustrating the flexibility of this cake’s recipe. Variations abound; some have adapted it to use mixed berries or even chocolate. Readers often suggest sharing tips and tricks on how they’ve achieved flawless results, including photographic works showcasing their beautiful creations. Simple adaptations transform this cake into a family favorite, proving its versatility.

Frequently Asked Questions

Can I make this cake ahead of time? Absolutely! You can prepare the fruit and caramel in advance, allowing for a quick assembly before baking. Storing the cake overnight in the refrigerator also enhances the flavors.

What should I do if my cake sticks to the pan? If you experience sticking, ensure you’ve greased the pan well before pouring the caramel and fruit, and allow it to cool for a few minutes before inverting.

Can I use frozen cranberries? Yes, frozen cranberries work well, but be prepared for a bit more liquid after thawing. You may want to reduce some sugar if that happens.

What fruits can I substitute for pineapple? Other fruits like peaches or apples can work beautifully; just ensure they have a similar cooking time to achieve the right consistency during baking.

Is this cake suitable for freezing? Yes! This cake freezes well; simply wrap it tightly in plastic wrap and store in a freezer-safe container.

How can I check if my cake is done baking? A toothpick inserted into the center should come out clean or with a few moist crumbs for doneness.

What toppings do you recommend? Whipped cream or a scoop of vanilla ice cream enhances texture and flavor, balancing the tartness of the cranberries.

Can I reduce the sugar content? Certainly! Consider using a sugar substitute or simply cutting back while ensuring the cake remains balanced in taste.

How can I make this cake more festive? Adding holiday spices like cinnamon or nutmeg can provide a seasonal twist for winter gatherings.

Is this cake gluten-free friendly? Yes, easily replace regular flour with a gluten-free blend to suit dietary needs while maintaining delicious flavors.

Additional Resources

Explore related recipes such as classic blueberry or pineapple upside-down cakes for more fruity delights. Consider diving into technique guides for effective cake preparation, or browse ingredient information to grasp the capabilities of various fruits. Equipment recommendations can assist in selecting the right baking tools to enhance your experience in the kitchen. Embracing seasonal variations allows you to adjust the flavors to suit available produce, making your baking truly versatile.

Join the Conversation

We love hearing feedback and sharing recipes! Join our community by sharing your culinary creations on social media with the hashtag #CranberryPineappleUpsideDownCake. Post your photography tips and tricks and help others achieve picture-perfect desserts. Leave recipe reviews and let us know how your variations turned out, inspiring others to get creative in their baking. Your engagement enriches our community, making baking an even sweeter experience.

The Recipe

Cranberry Pineapple Upside-Down Cake

Serves: 8

Prep Time: 20 mins

Cook Time: 40 mins

Total Time: 60 mins

Kitchen Equipment Needed

  • 9-inch round cake pan
  • Mixing bowl
  • Electric mixer
  • Spatula
  • Measuring cups and spoons

Ingredients

  • 1 cup fresh cranberries
  • 1 cup pineapple slices (fresh or canned)
  • 1/2 cup unsalted butter
  • 1 cup sugar (divided)
  • 1 cup all-purpose flour
  • 1 tsp baking powder
  • 1/2 tsp salt
  • 2 large eggs
  • 1 tsp vanilla extract
  • 1/2 cup milk

Directions

  1. Preheat your oven to 350°F (175°C). Grease the cake pan with butter.
  2. In a small saucepan, melt butter along with 1/2 cup sugar over medium heat until bubbly, then pour into the bottom of the prepared pan.
  3. Arrange pineapple slices on top of the butter mixture, placing cranberries in between the pineapple pieces.
  4. In a mixing bowl, combine flour, baking powder, and salt; set aside.
  5. In another bowl, cream together remaining sugar and eggs until light and fluffy. Add vanilla and milk, combining well.
  6. Gradually add the flour mixture to the wet ingredients, mixing until just incorporated.
  7. Carefully pour the batter over the arranged fruit in the pan.
  8. Bake for 40 minutes, or until a toothpick comes out clean. Allow to cool in the pan for 10 minutes before inverting onto a serving plate.

Recipe Notes

  • Use a toothpick to test for doneness.
  • Feel free to adapt the fruits based on seasonality.
  • If using canned pineapple, be sure to drain well.
  • Could substitute almond flour for a gluten-free option.

Indulge in Irresistible Cream Cheese Pound Cake Today

Cream Cheese Pound Cake: A Decadent Delight

⚖️
Difficulty
Easy

⏲️
Prep Time
15 mins

🕒
Cook Time
60 mins

⏱️
Total Time
75 mins

🍽️
Servings
10 servings

If you crave a rich, buttery cake that melts in your mouth, look no further than this delightful Cream Cheese Pound Cake. Dense yet airy, this cake boasts a creamy richness that elevates traditional pound cake to a whole new level. The sweet aroma of vanilla just adds to its charm, making it perfect for any occasion, whether it’s a family gathering or a cozy afternoon tea. Each bite offers a luscious blend of flavors, leaving you craving more.

The beauty of this Cream Cheese Pound Cake lies not only in its flavor but also in its versatility. Serve it plain, dusted with powdered sugar, or slathered with a fresh fruit compote for an effortless dessert. It’s an impressive yet simple treat that highlights the indulgence of cream cheese and butter, inviting everyone to indulge in its scrumptious layers. This cake isn’t just a dessert; it’s a memory waiting to happen!

Quick Recipe Highlights

  • Flavor Profile: The cake has a luscious, buttery flavor with a hint of tanginess from the cream cheese, balanced perfectly with vanilla notes.
  • Texture: Expect a delightfully dense yet moist crumb that holds its shape beautifully while every bite feels light and airy.
  • Aroma: The comforting smell of vanilla and baked butter fills the kitchen, making it irresistible from the moment it hits the oven.
  • Visual Appeal: With its golden brown crust and soft yellow interior, this cake is as beautiful as it is delicious, making it a stunning centerpiece.
  • Skill Level Needed: This recipe is perfect for beginners, as it requires simple techniques and minimal equipment.
  • Special Equipment: You’ll need a standard loaf pan and a mixer, making this cake accessible for anyone to create.

Recipe Overview

  • Difficulty Level: This Cream Cheese Pound Cake is classified as easy, making it suitable for novice bakers. With clear steps and basic ingredients, anyone can achieve great results.
  • Category: As a dessert, this cake is perfect for serving after meals or as a sweet snack at any time of day.
  • Cuisine: While pound cake enjoys universal popularity, its origins can be traced back to European baking traditions where simple ingredients were combined for maximum flavor.
  • Cost: The ingredients are affordable and commonly found, making this recipe budget-friendly without sacrificing taste or quality.
  • Season: Enjoy this cake year-round, but it shines particularly during the fall and winter months when cozy desserts are in high demand.
  • Occasion: Perfect for celebrations, family gatherings, or simply enjoying a quiet evening at home with a good cup of tea.

Why You’ll Love This Recipe

Taste and texture appeal: Each slice of this Cream Cheese Pound Cake offers a perfect balance of sweet richness and dense satisfaction. The incorporation of cream cheese adds an unforgettable creaminess that feels indulgent yet comforting. The smooth, moist texture makes it ideal for pairing with diverse accompaniments, from fresh jams to gourmet ice creams.

Convenience and preparation benefits: The simplicity of the ingredients and preparation makes this cake a favorites for those who want to whip up something special without spending hours in the kitchen. It requires minimal hands-on time, allowing you to focus on enjoying the process rather than getting overwhelmed by complexity.

Nutritional advantages: While this cake is certainly indulgent, using cream cheese instead of more traditional oils or fats can provide a richer flavor with less overall fat. When enjoying in moderation, it can fit into a balanced diet, offering a sweet treat without the overwhelming calories of other desserts.

Social and entertaining value: This Cream Cheese Pound Cake is perfect for sharing with friends and family, making everyone feel welcome and included. It’s a go-to dessert for potlucks and gatherings and can be easily sliced for serving, making it a hit during social occasions.

Cost-effectiveness and accessibility: The recipe’s ingredients are straightforward and affordable, making it an approachable choice for everyone. There’s also a high yield, ensuring that you can serve several guests without breaking the bank.

Historical Background and Cultural Significance

Origin story: The humble beginnings of pound cake date back to the early 18th century, with its name derived from the proportions used in its original recipe – a pound each of flour, butter, sugar, and eggs. Making the transition to cream cheese added a lovely twist to this classic cake.

Cultural importance: In many cultures, pound cake has been a staple at celebrations and gatherings. Its simplicity has allowed it to adapt and flourish in various culinary traditions, preserving its cultural significance across generations.

Evolution of the recipe: Over time, bakers have experimented with flavors beyond the original recipe, incorporating ingredients such as zest, spices, or, most notably, cream cheese. This evolution reflects the flexibility and creativity of home baking, pushing traditional boundaries.

Regional variations: Around the world, you may find unique interpretations of pound cake. Southern U.S. variations often elevate the basic concept with local ingredients like citrus or pecans, truly embracing the regional palate while maintaining the essence of the classic pound cake.

Ingredient Deep Dive

Cream cheese: A crucial ingredient in this recipe, cream cheese imparts a rich, tangy flavor to the cake. Originally created in the United States in the late 19th century, it offers a creamy texture and is lower in fat compared to butter, making it a popular choice for those looking to indulge lightly. When selecting cream cheese, opt for full-fat varieties for the best flavor; ensure proper storage in an airtight container to maintain freshness. If you need a substitute, mascarpone can work but offers a different flavor profile.

Butter: The use of good quality butter in this Cream Cheese Pound Cake cannot be overstated. Butter provides the foundational flavors that enhance the overall richness of the cake. When selecting butter, aim for unsalted varieties for better control over the sweetness, and be sure to store it properly in the refrigerator. For substitutes, coconut oil can provide the necessary fat content, although it may alter the flavor slightly.

Sugar: In this recipe, granulated sugar serves to sweeten the cake while also contributing to the structure. Being a simple yet essential ingredient, it caramelizes during baking to create a beautiful golden crust. Opt for organic sugar for a more natural option; if you’re looking for alternatives, brown sugar can add more depth of flavor due to its molasses content, yielding a more moist cake.

Eggs: Providing both moisture and structural integrity, eggs are vital to this Cream Cheese Pound Cake. Fresh, high-quality eggs offer the best results, providing richness and flavor. When selecting eggs, look for those that are free-range or organic to ensure quality; for egg replacements, consider using flax eggs or unsweetened applesauce as a vegan option.

Flour: All-purpose flour is the foundation of this cake, providing the necessary structure and texture. It’s essential to measure flour correctly to avoid a dry or dense cake. For a gluten-free option, consider using almond flour or a gluten-free all-purpose blend which can yield a slightly different texture but still delicious results.

Vanilla extract: A key flavor component, vanilla extract rounds out the cake with its warm, aromatic notes. When possible, use pure vanilla extract, as artificial varieties can result in a less vibrant flavor. Store vanilla extract in a cool, dark place to maintain its potency; if you’re in a pinch, consider using vanilla bean paste or homemade vanilla options.

Common Mistakes to Avoid

  • Overmixing the batter: This can lead to denser cake as it develops gluten in the flour. Mix until just combined to maintain an airy texture.
  • Using cold ingredients: Cold cream cheese or butter can result in uneven mixing. Make sure all ingredients are at room temperature for a smoother batter.
  • Not measuring flour correctly: Scooping directly from the bag can lead to using too much flour. Use the spoon and level method for precise measurements.
  • Skipping the creaming process: This step is crucial for incorporating air, resulting in a lighter cake. Cream the butter and cheese thoroughly before adding sugar.
  • Opening the oven too early: This can cause the temperature to drop and the cake to collapse. Wait until at least the minimum bake time to check on it.
  • Not using parchment paper: This can make it challenging to remove the cake from the pan without breaking it. Use parchment for easy release.
  • Not letting the cake cool: Cooling in the pan and then on a rack helps maintain its structure; removing it too soon can lead to crumbling.
  • Frosting too soon: Allow the cake to cool completely before frosting; otherwise, the frosting will melt. Patience is key!
  • Storing incorrectly: Improper storage can result in a dry cake. Wrap the cake well or store it in an airtight container.
  • Skipping flavor adjustments: Don’t hesitate to add flavorings like citrus or spice to personalize the cake to your taste palette.

Essential Techniques

Creaming: This technique combines soft butter and sugar until light and fluffy, incorporating air for a leavened texture. To master it, ensure both ingredients are at room temperature and use a stand or hand mixer for even blending. Watch for a pale, fluffy appearance as a visual cue for doneness.

Proper folding: When incorporating dry ingredients or whipped egg whites, use a gentle folding motion to preserve air bubbles. This technique is crucial for maintaining the cake’s lightness. Avoid vigorous stirring that can deflate the batter, and ensure an even mix while retaining some air.

Temperature control: Having all ingredients at room temperature aids in even mixing and baking. This is particularly important for butter and cream cheese. Achieve this by taking ingredients out of the fridge 30 minutes before you plan to start baking

Measuring flour: The correct flour measurement is vital for texture. Always spoon flour into your measuring cup and level it off with a knife for accuracy, avoiding packing or over-measuring, which could result in a dry cake.

Cooling: Allow your Cake to cool in the pan for a certain period before transferring it to a wire rack. This step helps maintain moisture without allowing it to become soggy on the bottom. Wait until it’s completely cool before frosting or slicing to ensure clean cuts.

Timing: Understanding baking timing is essential. Every oven is different; always use a toothpick test to check for doneness, ensuring that a few moist crumbs cling to the toothpick without wet batter when it comes out.

Pro Tips for Perfect Cream Cheese Pound Cake

Use high-quality ingredients: The fresher your ingredients, the better your cake will taste. Invest in genuine butter, fresh eggs, and cream cheese for maximum flavor impact.

Experiment with flavors: Don’t hesitate to modify the cake with lemon zest, almond extract, or even chocolate chips to suit your taste or occasion.

Sift your dry ingredients: This helps to aerate the flour and can result in a lighter cake. It’s especially beneficial in avoiding clumping of the flour and baking powder.

Use a good non-stick pan: A heavy-duty, non-stick loaf pan ensures even baking and also makes it easier to remove the cake. Consider lining with parchment for extra safety.

Let the cake rest: For improved flavor, allow your cake to rest overnight. The flavors deepen and spread for an even more enjoyable experience the following day.

Frost with care: If adding frosting or glaze, wait until the cake is completely cooled. Consider a simple vanilla icing or a cream cheese frosting for a lavish finish.

Adjust baking time as needed: If your cake is browning too quickly, cover it with aluminum foil without tight sealing to allow it to continue baking without burning.

Try different shapes: While a loaf pan is traditional, using a bundt or tube pan can offer a beautiful presentation. Just adjust baking times as necessary.

Variations and Adaptations

Regional variations: Explore variations like lemon pound cake by adding lemon zest and juice, giving it an exciting citrus twist typical of Southern desserts.

Seasonal adaptations: For fall, incorporate spices like cinnamon, nutmeg, and pumpkin puree to transform the cake into a festive treat that captures the flavors of the season.

Dietary modifications: If needed, create a lower-carb version with almond flour, adjusting the baking time. There are also numerous vegan-friendly substitutes available to ensure everyone can enjoy this cake.

Flavor variations: Enhance with chocolate by adding cocoa powder or chocolate chips. For a more decadent touch, swirl in a fruit jam or caramel before baking, adding an element of surprise.

Texture modifications: Consider creating a marble effect by dividing the batter and swirling in chocolate or a berry puree. This adds visual appeal along with varied textures.

Presentation alternatives: Serve the pound cake in loaf slices for a rustic look or transform it into elegant mini-cakes. Decorative garnishes such as fresh fruit or edible flowers can elevate its visual impact dramatically.

Serving and Presentation Guide

Plating techniques: For presentation, consider serving slices on a colorful cake stand, which adds charm. Layer slices on a plate in a fan shape for an exquisite display.

Garnishing ideas: Fresh berries, powdered sugar, or a drizzle of caramel or chocolate sauce can enhance the aesthetic and add an extra flavor burst.

Traditional accompaniments: Classic accompaniments include whipped cream, a scoop of vanilla ice cream, or even a side of fresh fruit to add freshness contrasting the richness of the cake.

Modern serving suggestions: Experiment by serving individual slices with unique twist touches, like adding a dollop of infused cream or a side of gourmet coffee for a contemporary dessert experience.

Temperature considerations: This cake can be served at room temperature or slightly warmed, depending on your preference. A good rule of thumb is to warm it slightly in the microwave for a few seconds just before serving.

Portion control tips: For party servings, cut your cake into thin slices for guests. Consider creating bite-sized cubes for easy handling, particularly if you serve multiple desserts at one gathering.

Wine and Beverage Pairing

Wine pairings: A lightly sweet dessert wine, such as a Moscato, pairs beautifully with the rich flavors of the Cream Cheese Pound Cake. Alternatively, a dry Riesling can complement the cake’s texture perfectly.

Non-alcoholic alternatives: Herbal teas, particularly chamomile or mint, make wonderful companions for a slice of pound cake, balancing sweetness with soothing flavors.

Coffee/tea pairings: This cake pairs beautifully with a rich roast coffee, balancing sweetness with its depth. Try it with a cappuccino or flat white for a cafe-style experience at home.

Temperature considerations: Serve your chosen beverage at its optimal temperature; hot teas and coffees will contrast nicely against the coolness of the cake.

Serving suggestions: Offer guests a choice of beverages to enhance their dessert experience, allowing for a variety of tastes. This approach encourages conversation and experimentation when savoring the cake.

Storage and Shelf Life

Storage methods: Store the Cream Cheese Pound Cake in an airtight container at room temperature for up to three days. This will prevent it from drying out while keeping the flavors intact.

Temperature requirements: Ensure your cake remains in a cool, dry area away from direct sunlight or heat sources to maintain its delicious texture and flavor.

Container recommendations: If you’ve cut into the cake, consider wrapping individual slices in plastic wrap or foil to preserve freshness. For longer storage, opt for an airtight container.

Signs of spoilage: Check for visible mold or off smells; these are clear signs the cake has gone bad. For the best quality, consume within a week of baking.

Reheating instructions: If you prefer a warm slice, pop it in the microwave for about 15-20 seconds, ensuring you keep an eye on it to avoid overcooking.

Freezing guidelines: You can freeze the Cream Cheese Pound Cake for up to three months. Wrap it tightly in plastic wrap and place it in an airtight container for best results when thawing later.

Make Ahead Strategies

Prep timeline: To prepare ahead, you can bake the cake one day before you plan to serve it. Allow it to cool completely before storage to enhance its flavor and texture.

Storage between steps: If you freeze the cake batter, it can be stored for up to a month. When ready to bake, thaw it overnight in the fridge, and then proceed with baking for a fresh cake.

Quality impact assessment: While the cake is best enjoyed fresh, making it ahead allows the flavors to meld; just be sure to store correctly to maintain moisture.

Assembly tips: If you want to layer additional flavors such as fruit compote, prepare that ahead of time and store it separately for an easy addition before serving.

Reheating guidelines: Cakes can often be reheated successfully. To retain moisture, cover with a damp paper towel when microwaving, allowing it to steam slightly and keep it tender.

Fresh element additions: Consider adding fresh fruit or topping your cake with whipped cream last minute, rather than prepping before, to enhance freshness and flavor when served.

Scaling Instructions

Halving the recipe: If you’re looking to make a smaller batch, simply half all ingredients while keeping the same method. Baking time might reduce slightly, so keep an eye on doneness.

Doubling or tripling: To make a larger batch, double or triple the ingredients, remembering that baking time will increase proportionately when using larger or multiple pans.

Equipment adjustments: Ensure you have adequate mixing bowls and pans if scaling up. For large batch baking, consider using a stand mixer for efficiency.

Timing modifications: Keep in mind that larger batches may need additional time in the oven. Always use visual and toothpick tests to check for doneness.

Storage considerations: If baking multiple cakes, store them separately, as crowding can lead to uneven cooling and moisture retention between cakes.

Nutritional Deep Dive

Macro breakdown: Each slice of this cake typically provides a balance of carbohydrates from the flour and sugar, along with fat from the cream cheese and butter, giving you a satisfying treat.

Micronutrient analysis: While this dessert is rich, it does offer some nutritional benefits, including calcium from the cream cheese and a small amount of vitamin D from eggs, contributing to your daily nutrient intake.

Health benefits: Enjoying cakes like this can be part of a balanced lifestyle when eaten in moderation; they can also enhance social connections during gatherings or celebrations.

Dietary considerations: It’s important to keep portion sizes in check, especially for those monitoring caloric intake. Sharing it at events is a great way to enjoy cake without overindulgence.

Portion analysis: Slices can vary significantly in size; consider standardizing your servings to maintain consistency and satisfy guests while respecting dietary goals.

Weight management tips: Being mindful of how often and how much you enjoy richer desserts helps maintain a healthy lifestyle. Consider smaller portion sizes, especially during gatherings, to help manage temptations.

Dietary Adaptations

Gluten-free: To cater to gluten-sensitive individuals, substitute all-purpose flour with certified gluten-free flour blends while also ensuring other ingredients adhere to dietary needs.

Dairy-free: Utilize dairy alternatives, such as coconut cream cheese or cashew cheese, to maintain creaminess without traditional dairy products. Adjust baking times as necessary based on moisture content.

Vegan: Replace eggs with flax eggs and use coconut or vegan butter for a completely plant-based version of the Cream Cheese Pound Cake.

Low-carb: Incorporate almond flour or coconut flour along with sugar substitutes to create a lower-carb variation. Experimenting with baking time is essential to achieve the right texture.

Keto: Adjusting sugar to erythritol or other keto-friendly sweeteners will create a low-carb cake ideal for those following ketogenic diets, maintaining flavor without excess carbohydrates.

Paleo: Opt for almond flour and honey or maple syrup as sweeteners for a paleo version of this cake, delivering similar taste preferences without the processed ingredients.

Low-FODMAP: Aim for lactose-free cream cheese and sugars to create a cake that remains enjoyable for those adhering to low-FODMAP diets while not sacrificing bakers.

Other specific diets: Seek out gluten-free and vegan baking mixes to simplify the process for differing dietary needs. Many mixes work similarly to traditional ones, ensuring a delicious outcome.

Troubleshooting Guide

Texture issues: If your cake is too dense, you may have overmixed the batter or added too much flour. Review your measuring techniques of both wet and dry ingredients to maintain balance.

Flavor balance: Should the cake taste bland, consider using fresher flavor-enhancers like spices, citrus zest, or high-quality vanilla extract to add depth to the flavor.

Temperature problems: Uneven baking can occur if your oven runs hot or cool. Invest in an oven thermometer to verify accuracy and adapt as needed for perfect results.

Equipment challenges: Using the wrong type of pan can affect your cake texture. Ensure to follow recommendations on pan material, shape, and size to achieve the desired outcome.

Ingredient substitutions: While many substitutions may work, not all will yield the same results. Always experiment with proven replacements rather than random alternatives for the best success.

Timing concerns: Overbaking can lead to a dry cake while underbaking results in gooeyness. Monitor the cake as it approaches the recipe’s end time, employing toothpick tests to catch early for optimal texture.

Recipe Success Stories

Community feedback: Many bakers have raved about how the Cream Cheese Pound Cake has become a family favorite, often requesting it time and time again during gatherings and holidays.

Variation successes: Readers have enjoyed personalizing this recipe with additional flavor variations – from berries to chocolate swirls – spurring creativity in their kitchens while celebrating this classic cake.

Adaptation stories: There are numerous accounts of how people modified the recipe to fit dietary needs without compromising taste, showing the cake’s flexibility in satisfying various preferences.

Reader suggestions: Feedback from the community has inspired variations such as lemon glaze or nut toppings, showcasing how the original recipe serves as a great foundation for creativity.

Photography tips: Many food lovers enjoy capturing this cake’s beauty, and sharing tips with each other, from angles to lighting, enhances the visual presentation in their home baked creations.

Frequently Asked Questions

Can I make this cake ahead of time? Yes! You can bake the cake a day in advance. Allow it to cool completely, then store it properly to maintain its freshness overnight.

What can I substitute for cream cheese? For a creamy texture, consider using mascarpone cheese or Greek yogurt as alternatives; while flavor may vary, texture will remain similar.

How should I store the cake? To maximize freshness, store it in an airtight container at room temperature for about three days or in the fridge for longer shelf life.

What should I do if my cake is too dense? Densely textured cakes typically result from overmixing the batter or adding too much flour. Ensure accurate measuring and light mixing techniques.

Can I freeze this pound cake? Absolutely! Wrap it tightly in plastic wrap and place it in a freezer-safe container to keep it fresh for up to three months.

What should I frost this cake with? Cream cheese frosting works beautifully, but you can also use chocolate or vanilla glaze, or keep it simple with whipped cream and berries.

Is there a gluten-free version? Yes! You can replace all-purpose flour with gluten-free flour blends to create a delicious gluten-free version of this pound cake.

How can I make this cake more flavorful? Enhance your cake with additional flavors by incorporating spices, citrus zest, or a flavored extract to deepen its taste profile.

What is the best way to serve pound cake? Slice the cake and serve it at room temperature with coffee, tea, or dessert wine, and consider garnishing with fresh fruit or compote.

Can I turn this recipe into cupcakes? Yes! Pour the batter into lined muffin tins for cupcakes, but be mindful of reduced baking time; check for doneness earlier than the full-sized cake.

Additional Resources

Explore related recipes featuring variations of pound cakes or similar desserts to switch things up. You can also find guides on essential baking techniques or ingredient information for better results in your own kitchen.

Equipment recommendations can guide you on which tools enhance your baking experience. Investing in quality measuring tools and mixing bowls can streamline the process while ensuring accuracy.

Seasonal variations also inspire creativity beyond the standard recipes, allowing you to utilize fresh ingredients as they come into season or adapt to upcoming holidays and celebrations.

Join the Conversation

Engage with our community on social media to share your success stories and colorful pictures of your baking endeavors! We love seeing how various flavors and visual styles emerge within this classic recipe, fostering creativity among home bakers.

Consider leaving a review or suggesting variations that you’ve tried. Your experiences help others feel inspired to dive into the kitchen and try their hand at making this delightful Cream Cheese Pound Cake!

The Recipe

Cream Cheese Pound Cake

Serves: 10 servings

Prep Time: 15 mins

Cook Time: 60 mins

Total Time: 75 mins

Kitchen Equipment Needed

  • Loaf pan
  • Mixing bowls
  • Electric mixer
  • Measuring cups and spoons
  • Spatula

Ingredients

  • 1 cup (8 oz) cream cheese, softened
  • 1 cup (2 sticks) unsalted butter, softened
  • 2 cups granulated sugar
  • 4 large eggs
  • 3 cups all-purpose flour
  • 1 teaspoon baking powder
  • 2 teaspoons vanilla extract

Directions

  1. Preheat your oven to 325°F (160°C) and grease the loaf pan.
  2. In a large bowl, mix the cream cheese and softened butter until well blended.
  3. Gradually add the sugar, creaming until light and fluffy.
  4. Beat in the eggs one at a time, mixing well after each addition.
  5. In a separate bowl, whisk together the flour and baking powder.
  6. Slowly add the dry mixture to the creamed mixture, combining until just mixed.
  7. Stir in the vanilla extract until fully incorporated.
  8. Pour the batter into the prepared loaf pan, smoothing the top with a spatula.
  9. Bake for 60-70 minutes, or until a toothpick inserted in the center comes out clean.
  10. Allow to cool in the pan for 10 minutes before transferring to a wire rack.

Recipe Notes

  • Ensure all ingredients are at room temperature for even mixing.
  • Feel free to experiment with additional flavors like lemon or chocolate.
  • Wrap any leftovers properly to maintain moisture and freshness.

Delightful Mini Crème Brûlée Cheesecakes You Can’t Resist

Irresistible Mini Crème Brûlée Cheesecakes: A Delightful Dessert Experience

⚖️
Difficulty
Medium

⏲️
Prep Time
30 mins

🕒
Cook Time
25 mins

⏱️
Total Time
55 mins

🍽️
Servings
12 mini cheesecakes

There’s something undeniably enchanting about crème brûlée, a dessert known for its rich custard base and crisp caramelized sugar topping. Now, imagine that same decadent experience transformed into mini cheesecakes! With these Irresistible Mini Crème Brûlée Cheesecakes, you can enjoy all the creamy, velvety goodness of traditional cheesecake, enhanced with the classic flavors of crème brûlée. Each tiny treat features a perfect graham cracker crust, a smooth cheesecake filling, and a caramelized topping that cracks beautifully when you tap it with a spoon. This dessert is not only a feast for the taste buds but also a visual delight.

Perfectly portioned, these mini cheesecakes are ideal for dinner parties, celebrations, or even a cozy night in. They are sure to impress your friends and family with their elegance and taste. The balance of sweetness and rich vanilla combined with the crunch of the caramelized sugar creates a delightful contrast that makes each bite memorable. Whether you’re treating yourself or sharing with loved ones, these cheesecakes will be an unforgettable dessert experience.

Quick Recipe Highlights

  • Flavor Profile: Creamy vanilla with a hint of caramel and a touch of lemon zest.
  • Texture: Smooth and creamy filling contrasted with a crunchy caramelized top.
  • Aroma: Rich vanilla bean and caramelized sugar that lingers in the air.
  • Visual Appeal: Elegant mini desserts with a glossy top and a golden-brown finish.
  • Skill Level Needed: Requires some baking experience but is accessible for enthusiastic home bakers.
  • Special Equipment: Mini tart pans or ramekins for baking the cheesecakes.

Recipe Overview

  • Difficulty Level: This recipe is categorized as medium difficulty. While the steps are straightforward, achieving that perfect caramelized top requires attention and a bit of practice.
  • Category: This dessert belongs to the indulgent sweets category and is perfect as a finishing touch to a meal.
  • Cuisine: Drawing from French culinary tradition, this dessert captures the essence of classic crème brûlée with a cheesecake twist.
  • Cost: The overall cost of the ingredients is reasonable, making this a great option for an impressive yet affordable dessert.
  • Season: Ideal for all seasons, particularly spring and summer celebrations when fresh berries can be added as a topping.
  • Occasion: Perfect for birthdays, anniversaries, holiday gatherings, or dinner parties where you want to impress your guests.

Why You’ll Love This Recipe

The taste and texture of these Irresistible Mini Crème Brûlée Cheesecakes are nothing short of extraordinary. The creamy filling is reminiscent of classic cheesecake, but the added flavor depth from vanilla and caramel gives it a unique twist. The contrast between the rich filling and the crunchy caramel topping creates a delightful mouthfeel that keeps you coming back for more.

Convenience and preparation benefits make this dessert a great choice for both seasoned bakers and beginners. The mini size allows for easy serving, and they can be made a day in advance, saving you time on the day of your event. All you need is some patience for the caramelization step, which adds a dramatic touch to the dessert.

Nutritional advantages can also be enjoyed, as the use of cream cheese and quality ingredients creates a dessert that feels indulgent without being overly heavy. Each mini cheesecake offers a rich flavor and satisfying texture while still being a smaller portion.

When it comes to social and entertaining value, these mini cheesecakes are winners. Their elegant presentation makes them perfect for gatherings or potlucks. Serve them with fresh berries or a dollop of whipped cream for added flair, and you’ll be the star of the event.

Lastly, the cost-effectiveness of this recipe makes it accessible for all budgets. With simple ingredients readily available, you can create a restaurant-quality dessert in the comfort of your own kitchen without breaking the bank.

Historical Background and Cultural Significance

The origin of crème brûlée dates back to the 17th century, with uncertain roots in France, Spain, and England. The traditional recipe has evolved over the centuries, but the core elements of creamy custard and crisp caramel remain integral. This dessert not only represents culinary excellence but also reflects a time of exploration and refinement in French cuisine.

Culturally, crème brûlée holds a special place in French gastronomy, often associated with fine dining and celebrated occasions. Its refined nature elevates any dining experience, making it a staple on dessert menus worldwide.

As culinary techniques advanced, the recipe adapted into various forms, leading to unique regional variations. From the classic French version to delightful adaptations like chocolate or fruit-infused recipes, this dessert showcases creativity and tradition in the kitchen.

Additionally, the evolution of the mini cheesecake has made this beloved dessert more accessible. By transforming the traditional crème brûlée into an individual serving, it honors the original while making it easier to enjoy at social gatherings or as a delightful personal indulgence.

Ingredient Deep Dive

Cream Cheese: A staple in many desserts, cream cheese originated in the United States and has become synonymous with a rich and creamy texture in cheesecakes. It’s an excellent source of calcium and protein, making it a satisfying addition to any dessert.

When selecting cream cheese, look for blocks that have a smooth texture and minimal preservatives. For storage, keep it in the refrigerator, tightly sealed, and look for the expiration date. If you need a substitute, mascarpone can provide a similarly creamy texture.

Sugar: One of the primary ingredients, sugar not only sweetens but also helps create the delightful caramelized topping. Sugar has been enjoyed for centuries worldwide, with its origins tracing back to ancient India and the Mediterranean region.

To choose the best sugar for caramelization, granulated sugar is ideal due to its purity. Store it in a cool, dry place, and if you prefer a less refined option, consider using brown sugar for a richer flavor profile.

Vanilla: A flavor powerhouse, vanilla is integral to these cheesecakes, enhancing the overall taste experience. Vanilla has a long history, being used by the Totonac people of Mexico long before being popularized in Europe.

When purchasing vanilla, opt for pure vanilla extract for the best flavor. Store it in a cool, dark place to preserve its potency. For substitutions, vanilla paste or imitation vanilla can be used, with varying flavor intensity and quality.

Common Mistakes to Avoid

  • Overmixing the batter can lead to excess air incorporation, resulting in a less creamy texture. Mix until combined for best results.
  • Not chilling the cheesecakes long enough can result in a soft filling that won’t hold its shape when serving. Make sure to chill for at least 4 hours.
  • Skipping the caramelization step will leave your cheesecake lacking that signature crunchy topping. Use a kitchen torch for the best results.
  • Using softened cream cheese rather than fully room temperature may cause lumps in the batter. Beat until completely smooth.
  • Baking at too high a temperature can dry out the cheesecakes. Follow the recommended temperature for proper cooking.
  • Not using a water bath can lead to uneven baking and a dry texture in the mini cheesecakes. Ensure even cooking by using this method.
  • Not allowing the cheesecakes to cool completely before removing them from the pans can result in cracks and a ruined presentation.
  • Not letting the cooked cheesecakes rest before adding the caramel layer can lead to melting sugar. Be patient for the perfect topping.
  • Using a high-sugar topping can overpower the delicate cheesecake flavor. Balance is key for the best overall taste.
  • Forgetting to grease the pans can lead to sticking, making it difficult to remove the mini cheesecakes without damage.

Essential Techniques

Water Bath Baking: This technique is crucial for achieving creamy, well-cooked mini cheesecakes. It prevents the direct heat from the oven from drying out the edges while keeping the center moist. To master this, wrap the bottoms of your cheesecake pans in aluminum foil, ensuring no water seeps inside. Place the pans into a larger baking dish filled with hot water before baking. Look for a gently set cheesecake with a slight jiggle in the center for perfect results.

Creaming Ingredients: Properly creaming together sugar and cream cheese is vital to a smooth cheesecake texture. This process incorporates air and creates a light mixture. Use a hand mixer or stand mixer on medium speed, ensuring the sugar is fully dissolved. Watch for a creamy consistency without lumps; this is your indicator of success.

Pro Tips for Perfect Irresistible Mini Crème Brûlée Cheesecakes

1. Invest in a quality kitchen torch for caramelizing sugar. It provides precise control over the browning process and helps avoid burns.

2. For an enhanced vanilla flavor, use vanilla bean paste instead of extract. It adds both flavor and visual appeal with visible flecks of vanilla.

3. If making these cheesecakes ahead of time, add the caramelized sugar topping just before serving to maintain its crunch.

4. Customize your toppings with seasonal fruits such as raspberries or strawberries for added freshness and flavor contrast.

5. Experiment with flavored crusts by adding crushed nuts or chocolate to the graham cracker mixture for a unique twist.

6. Ensure that all your ingredients are at room temperature before mixing for a more homogenous batter.

7. Allow the baked cheesecakes to cool in the oven after baking to minimize cracks and achieve a smooth top.

8. Use mini pie pans or silicone molds for easier removal and a more polished look on the plate.

Variations and Adaptations

For a regional variation, consider using matcha powder for a unique flavor twist that adds a stunning green color. This Asian-inspired adaptation offers a fresh take on the traditional flavor while maintaining the classic structure.

Seasonally, these cheesecakes can be infused with spices like pumpkin or ginger for a fall-inspired dessert. Topping with spiced whipped cream can elevate the flavors, making it perfect for autumn gatherings.

Dietary modifications can be made by using gluten-free graham crackers or nut-based crusts, ideal for those with gluten sensitivities. Experimenting with dairy-free cream cheese creates a vegan version for those who need it.

Flavor variations are endless; consider adding chocolate to the batter for a chocolate crème brûlée cheesecake. This decadent twist will satisfy any chocolate lover while keeping the essence of the original recipe.

For texture modifications, try adding a layer of fruit preserves between the crust and the filling for a fruity surprise, or top with a layer of mousse for added creaminess.

Finally, when it comes to presentation, consider serving these mini cheesecakes in decorative jars for a chic party look. Layer the cheesecake, caramel, and fresh berries for a visual treat.

Serving and Presentation Guide

When plating your Irresistible Mini Crème Brûlée Cheesecakes, consider using decorative plates to enhance the visual appeal. A simple drizzle of chocolate or raspberry sauce underneath can elevate the presentation.

Garnishing with fresh fruits or edible flowers adds a beautiful touch while complementing the flavors. A light dusting of powdered sugar can finish the look, adding elegance to each serving.

Traditional accompaniments like coffee or tea pair beautifully, enhancing the dessert experience. For modern suggestions, serve with a scoop of vanilla ice cream for a delightful contrast in temperature.

Temperature considerations are key; serve the cheesecakes chilled after caramelizing the sugar for optimal texture and flavor balance.

For portion control, consider serving these mini desserts in small portions, allowing guests to indulge without feeling overwhelmed. This fits the trend toward smaller, shared desserts in dining culture.

Wine and Beverage Pairing

When it comes to wine pairings, a sweet dessert wine like Sauternes or Moscato complements the richness of crème brûlée perfectly. These wines bring out the creamy notes while adding their floral or fruity character.

For non-alcoholic alternatives, a sparkling apple cider offers a refreshing contrast to the dense mini cheesecakes. The bubbles cleanse the palate and balance the sweetness effectively.

For coffee lovers, a rich espresso or gourmet coffee blend pairs excellently, enhancing the dessert with a touch of bitterness that contrasts with the sweetness.

Ensure beverages are served at the appropriate temperatures; chilled wines and warm coffee will maximize the enjoyment of this decadent dessert.

Storage and Shelf Life

To store your Irresistible Mini Crème Brûlée Cheesecakes, keep them in an airtight container in the refrigerator. They will last up to five days, maintaining their flavor and texture while chilled.

For transport, ensure they are secured in a sturdy container to avoid movement damage. If you notice any signs of spoilage such as off smells or discoloration, discard them immediately to ensure food safety.

Reheating is not recommended as it may alter the texture; enjoy them cold straight from the fridge. If you want to enjoy them later, consider freezing them before caramelizing the top layer.

When freezing, wrap each mini cheesecake in plastic wrap and place it in a freezer-safe container. They can last up to three months, but be sure to allow them to thaw completely before serving.

Make Ahead Strategies

Planning ahead is simple with these mini cheesecakes. Prepare the crust and filling a day in advance, allowing them to set overnight in the refrigerator for best results. This not only saves time but enhances the flavor as it melds overnight.

If you want to caramelize the sugar topping to serve later, do it just before serving to ensure maximum crunch, preserving the textural contrasts.

Assemble the cheesecakes in individual servings, or keep the components separate for guests to customize their desserts with fresh fruits and toppings.

Quality impact should focus on keeping the balance between taste and texture, resting the cheesecakes for a while before serving to settle flavors and improve texture.

Reheating any elements before serving should be avoided, as traditional crème brûlée is best served chilled. If using fresh elements, like fruits, add them right before serving for a refreshing finish.

Scaling Instructions

If you want to halve the recipe, simply divide all ingredient quantities by two, ensuring to keep the same cooking times. This is ideal for smaller gatherings or testing flavors before a larger event.

Doubling or tripling the recipe for larger groups should consider oven space; bake them in batches if necessary, and keep an eye on the timing adjustments based on different pan sizes or quantities.

Any equipment adjustments should cater to the number of servings; using smaller pans or muffin tins can help maintain even baking. Timing modifications are minimal if the overall volume is increased, so always keep a close eye on them as they bake.

Remember to adjust storage accordingly, as larger quantities may require more refrigerator space or more extensive planning for serving and display.

Nutritional Deep Dive

Each mini cheesecake boasts a macro breakdown primarily consisting of carbohydrates from the crust and sugars, fats from cream cheese, and a moderate amount of protein. This balance provides a satisfying treat that delivers on taste without excessive calories in smaller portions.

Micronutrient analysis reveals that ingredients like cream cheese and eggs provide calcium, vitamins A and D, while the addition of fruit toppings can enhance fiber content and add more vitamins.

Health benefits of enjoying these mini desserts include the enjoyment of creamy textures without guilt. Portion control allows for indulging without straying too far from dietary goals.

Dietary considerations should keep an eye on ingredients for allergies as well as balancing indulgence with moderation. Keeping desserts as occasional treats can help in a balanced diet.

Portion analysis shows these mini cheesecakes are concrete in achieving satisfaction without leading to overindulgence, making them an excellent choice for both health-conscious individuals and dessert lovers alike.

Dietary Adaptations

For a gluten-free version, simply use alternative flours for the crust, or consider using ground nuts for a granola-type base that doesn’t require baking. This caters to those with gluten intolerances while still providing a delicious crust.

To create a dairy-free variant, substitute cream cheese with cashew cream or a dairy-free cream cheese alternative, ensuring similar flavor and texture characteristics while accommodating those with dairy allergies.

If vegan adaptations are needed, eggs can be replaced with flaxseed meal or chia seeds mixed with water, allowing the structure to hold while catering to plant-based diets.

For a low-carb or keto version, use almond flour for the crust and sugar alternatives for sweetness. This satisfies cravings without breaking dietary restrictions.

Paleo adaptations can remove refined sugar entirely, relying on natural sweeteners like honey or pure maple syrup for a more wholesome treat.

For low-FODMAP options, ensure that the crust ingredients are safe and use lactose-free cream cheese to cater to sensitive digestive systems.

Troubleshooting Guide

Texture issues can arise if the filling is overbaked or underbaked; always aim for a slight jiggle in the center while cooling to ensure a creamy result.

To correct flavor balance, consider adjusting the sugar content or adding a touch of salt to enhance sweetness without overpowering. A hint of citrus can also brighten flavors effectively.

Temperature problems often arise during caramelization; if sugar burns, reduce the flame and mix with a splash of water, allowing it to dissolve more gradually.

If equipment challenges occur, such as using a torch, practice on a small area before caramelizing the full top, ensuring even and controlled melting of sugar.

For ingredient substitutions, like using a different type of cheese or sweetener, shading flavor might require trials to find the right balance and consistency.

If timing concerns arise, ensure that chilling times are strictly followed to allow flavors to meld and creating a nice structural hold before serving.

Recipe Success Stories

Community feedback has shown that these mini cheesecakes are a hit at all types of gatherings, with many praising their elegant appearance and rich taste. Readers consistently report back with great success stories, sharing how they’ve incorporated different flavors and toppings to make the dessert their own.

Variation successes abound, as bakers experiment with various seasonal fruits or spices, leading to unique twists on the classic recipe while maintaining its core elements.

Some readers report adaptation stories where dietary restrictions were taken into consideration, using products like gluten-free graham crackers or non-dairy cheese successfully.

For those interested in photography, tips from the community suggest using natural light and interesting garnishes to capture the beauty of these desserts effectively.

Frequently Asked Questions

1. Can I use other flavors besides vanilla? Absolutely! You can experiment with different extracts or citrus zest. Almond or orange can complement the flavors nicely. Just ensure they are used in moderation, as they can be potent!

2. How do I store leftover cheesecakes? Keep them in an airtight container in the refrigerator for up to five days. Ensure the caramelized sugar does not stay on top too long to maintain its crunch. For longer storage, freeze before caramelizing.

3. Can I make these gluten-free? Yes, simply substitute the graham crackers for gluten-free varieties or nut-based crusts, which can still provide a delicious result.

4. Is it necessary to use a water bath? While not strictly necessary, using a water bath prevents uneven cooking and helps retain moisture, leading to a creamier texture.

5. What if my sugar doesn’t caramelize correctly? If sugar clumps or burns, it might be too dry. Keep the temperature low and keep stirring to achieve a consistent caramelization.

6. Can I use a store-bought crust? Indeed! Pre-made graham cracker crusts are a convenient option; use them to save time. Just ensure the size fits your mini cheesecake pans.

7. How long should I chill the cheesecakes? Chill for a minimum of 4 hours or preferably overnight for best flavor and texture.

8. What’s the best way to reheat these mini cheesecakes? Reheating is not recommended as it alters the texture. Enjoy them chilled or at room temperature for the best experience.

9. Can I add toppings to these cheesecakes? Absolutely! Fresh fruit, chocolate shavings, or whipped cream make excellent accompaniments.

10. How do I know when they’re done baking? The cheesecakes are done when the edges are set but the center is still slightly jiggly. They will firm up as they cool.

Additional Resources

For related recipes, consider exploring other mini desserts or unique cheesecakes in our collection. Technique guides can help you master caramelization and baking methods for all types of cheesecakes. Ingredient information is available to provide insight into the best quality components to use.

Equipment recommendations focus on useful tools for baking cheesecakes, including high-quality pans and mixers, ensuring ease in preparation and cleanup. Seasonal variations encourage the incorporation of fresh ingredients that enhance flavor and keep this dessert fresh throughout the year.

Join the Conversation

We invite you to share your mini cheesecake experiences on social media! Whether it’s photos of your creations or suggestions for variations, the community loves to see how others enjoy these recipes.

Photography tips shared by followers stress the importance of natural light; unique garnishing plays a significant role in presentation that delights viewers. Recipe reviews help us refine our content and connect with readers more effectively, ensuring we continue to provide the best possible culinary experiences.

Engagement encourages creativity, and we welcome your input on recipe adaptations and improvements. You are an important part of our kitchen community!

The Recipe

Irresistible Mini Crème Brûlée Cheesecakes

Serves: 12 mini cheesecakes

Prep Time: 30 mins

Cook Time: 25 mins

Total Time: 55 mins

Kitchen Equipment Needed

  • Mini tart pans or ramekins
  • Mixing bowls
  • Electric mixer
  • Kitchen torch
  • Measuring cups and spoons
  • Aluminum foil (for water bath)

Ingredients

  • 1 cup graham cracker crumbs
  • 1/4 cup unsalted butter, melted
  • 2 cups cream cheese, softened
  • 2/3 cup granulated sugar
  • 2 large eggs
  • 1 tablespoon vanilla extract
  • 1/4 teaspoon salt
  • 3 tablespoons granulated sugar (for topping)

Directions

  1. Preheat your oven to 325°F (160°C). Prepare a water bath by placing a larger baking dish in the oven filled with hot water.
  2. In a mixing bowl, combine graham cracker crumbs and melted butter. Press mixture into the bottom of each mini tart pan to form the crust.
  3. In another bowl, beat the cream cheese and sugar until smooth and creamy. Add eggs, vanilla, and salt, mixing until fully combined.
  4. Pour the cheesecake filling over the prepared crust in each mini tart pan, filling them about 3/4 full.
  5. Place the mini cheesecakes into the water bath and bake for about 25 minutes, or until set around the edges but still jiggly in the center.
  6. Remove from the oven and let them cool completely before chilling in the refrigerator for at least 4 hours or overnight.
  7. Before serving, sprinkle a thin layer of granulated sugar on top of each cheesecake and use a kitchen torch to caramelize the sugar until golden brown. Let it sit for a few minutes before serving.

Recipe Notes

  • Ensure the sugar is evenly spread on top for a uniform caramel layer. Avoid using too much, as it can lead to bitterness.
  • If you don’t have a kitchen torch, you can place the sugar-topped cheesecakes under the broiler for a few seconds – just watch carefully to avoid burning.
  • For additional flavor, consider integrating citrus zest or flavored extracts into the filling.

Irresistible Butterfinger Balls Recipe You Can’t Afford to Miss

Ultimate Butterfinger Balls Recipe – Don’t Lose This One!

⚖️
Difficulty
Easy

⏲️
Prep Time
15 mins

🕒
Cook Time
0 mins

⏱️
Total Time
15 mins

🍽️
Servings
24 balls

Butterfinger Balls are a delightful and indulgent treat that will have your taste buds dancing with joy. Combining the sweet, crumbly texture of Butterfinger candy with a rich, creamy coating, these delicious bites are a perfect blend of flavors that are sure to satisfy any sweet tooth. They’re not only quick to prepare, but they also bring back nostalgic memories, making them a delightful treat for both kids and adults alike.

In just 15 minutes, you can whip up these tasty delights, making them perfect for parties, potlucks, or simply satisfying your sweet cravings. Imagine biting into this sweet confection, where the rich peanut butter mingles with the chocolate, creating a sensational explosion of flavor. Plus, you can easily customize them with your favorite toppings or serve them plain for a traditional take. Trust me, once you make Butterfinger Balls, you won’t want to lose this recipe!

Quick Recipe Highlights

  • Flavor Profile: The luscious taste of peanut butter combined with the sweet crunch of Butterfinger creates an irresistible flavor experience that will please all palates.
  • Texture: Each bite offers a satisfying crunch from the crushed candy, enveloped in a smooth, creamy exterior that melts in your mouth.
  • Aroma: The warm, inviting aroma of chocolate and peanut butter makes these treats incredibly tempting and enhances their overall appeal.
  • Visual Appeal: These delectable balls can be garnished with chocolate drizzle or colorful sprinkles, making them visually stunning on any dessert table.
  • Skill Level Needed: Easy enough for beginner cooks, Butterfinger Balls are a fun and simple project that can be done in no time.
  • Special Equipment: No special equipment is required, just basic kitchen tools and your hands for rolling the balls!

Recipe Overview

  • Difficulty Level: This recipe is rated easy, making it ideal for novice cooks who want to impress with a homemade treat.
  • Category: Butterfinger Balls fit perfectly in the dessert category, making them a fantastic addition to any sweet portfolio.
  • Cuisine: While rooted in American tradition, Butterfinger Balls have become a favorite in many households, reflecting a unique mix of comfort food and candy culture.
  • Cost: With budget-friendly ingredients, these delightful treats are also easy on the wallet, typically costing less than $10 to make.
  • Season: Butterfinger Balls are great year-round, but they make special appearances at holidays and gatherings, adding joy to festive occasions.
  • Occasion: Perfect for birthdays, holidays, or casual get-togethers, these bites are sure to be a hit on any dessert table.

Why You’ll Love This Recipe

Butterfinger Balls deliver an amazing taste with their perfect blend of sweetness and crunchy texture. The combination of peanut butter and chocolate not only satisfies dessert cravings but also creates a comforting experience reminiscent of childhood. In addition, the recipe requires minimal effort, making it a convenient choice for busy individuals who still want to indulge in homemade delights.

These treats also come with nutritional advantages. The peanut butter provides protein and healthy fats, while the crushed Butterfinger adds a touch of sugary sweetness that can be enjoyed in moderation. This balance makes Butterfinger Balls a more mindful choice for those looking to satisfy their sweet tooth without compromising on flavor.

Socially, Butterfinger Balls are great for entertaining. They can be easily shared among friends and family, creating a lively atmosphere during gatherings. Whether set out on a dessert platter or given as homemade gifts, these balls invite moments of togetherness and delightful conversations.

Moreover, Butterfinger Balls are cost-effective. With just a few simple ingredients, you can make a large batch that rivals more expensive store-bought treats. This value, combined with their delicious taste, makes them an excellent addition to your repertoire of desserts.

Finally, the simplicity of the recipe ensures accessibility for everyone. Whether you’re an experienced baker or a novice in the kitchen, these Butterfinger Balls are a treat that can be made with minimal fuss, making them a must-try.

Historical Background and Cultural Significance

Butterfinger itself is a candy bar that dates back to the 1920s, originally manufactured by the Curtiss Candy Company. The unique combination of chocolate, peanut butter, and crispy butter toffee made it a favorite among candy lovers. Over the years, Butterfinger’s popularity grew, leading to various recipes and adaptations incorporating its iconic flavor, including the beloved Butterfinger Balls.

In popular culture, Butterfinger gained fame through its playful advertising campaigns, appealing to both children and adults. The catchy slogan “Nobody’s gonna lay a finger on my Butterfinger” showcased the candy’s appeal as a treat worth protecting. This cultural significance has led to numerous recipes featuring Butterfinger, enabling it to maintain its popularity over the decades as part of American culinary tradition.

As new generations discover the joy of Butterfinger, adaptations like Butterfinger Balls have emerged. This evolution demonstrates how classic sweets can be reimagined and enjoyed in different forms. Connecting to various occasions, such as parties and potlucks, these adaptations ensure that the flavor of Butterfinger continues to spread joy and delight.

Regional variations of Butterfinger recipes have also surfaced, showcasing the adaptability of this treat. Some places incorporate additional flavors like banana or coconut, while others may use different chocolate coatings or drizzles. This evolution reflects the creative spirit of home bakers everywhere who want to innovate and personalize their treats.

Ingredient Deep Dive

Butterfinger Candy
Butterfinger is a beloved candy bar that’s famous for its distinct crunchy texture and nutty flavor. With its combination of chocolate and rich peanut butter layered with crisped layers of toffee, Butterfinger has become a staple in American candy culture since its introduction. Nutritionally, while Butterfinger provides a quick energy boost from sugar, it is important to consume it in moderation due to its high-calorie content.

When selecting Butterfinger for this recipe, look for bars that are fresh and free from damage. Store them in a cool, dry place to maintain their crunchy texture. If you’re unable to find Butterfinger candy bars, you can substitute them with similar crunchy peanut butter candies, keeping in mind that this may slightly alter the overall flavor of the Butterfinger Balls.

Peanut Butter
Peanut butter serves as the base for this decadent recipe, contributing creaminess and flavor. Rich in protein and healthy fats, peanut butter not only adds taste but also offers nutritional benefits, including heart-healthy fats, vitamins, and minerals. When choosing peanut butter for Butterfinger Balls, opt for a brand that’s made with minimal ingredients—preferably just peanuts and salt for a cleaner taste.

Storing peanut butter is simple; it can be kept in the pantry, and natural varieties may require stirring before use. If you have nut allergies, alternatives such as sunflower seed butter or tahini can be used, although they will slightly change the flavor profile of the final product.

Chocolate Coating
The chocolate coating provides a glossy finish and adds a rich sweetness that complements the peanut butter and candy flavors. Dark chocolate, milk chocolate, or even white chocolate can be used, depending on your preference. Chocolate is a source of antioxidants and can offer benefits when consumed in moderation.

When selecting chocolate for coating, consider using high-quality brands that melt well. Store chocolate in a cool, dry place, away from strong odors. If you want to customize the flavor, consider flavored chocolate melts that offer unique twists, or you can even sprinkle crushed candy or nuts on top for extra texture.

Common Mistakes to Avoid

  • Using stale Butterfinger: Make sure your Butterfinger is fresh to ensure the best taste and texture in the final product.
  • Not allowing the balls to chill: Chilling the balls helps them firm up and maintain their shape when coated in chocolate.
  • Overheating chocolate: Gently melt the chocolate to avoid burning it. Opt for a microwave or double boiler for more control.
  • Using too much or too little peanut butter: Measure your ingredients carefully to achieve the right consistency for rolling into balls.
  • Skipping the sprinkles: It may seem optional, but garnishing with chocolate chips or sprinkles enhances both flavor and visual appeal.
  • Coating while the chocolate is too hot: Let the chocolate cool slightly after melting before dipping to avoid melting the balls.
  • Not refrigerating before serving: Allow the Butterfinger Balls to set in the refrigerator before serving for the best texture.
  • Neglecting portion control: While tempting, avoid overindulging; these treats are rich and should be enjoyed in moderation.

Essential Techniques

Coating with chocolate
Coating your Butterfinger Balls in chocolate is a key technique that adds a delicious finish and enhances the presentation. To master this, melt your chocolate carefully and ensure it’s not too hot before dipping the balls. Use a fork to lift them out, allowing excess chocolate to drip off. This helps create an even coat and prevents pooling on your plate. Visual cues for success include a glossy appearance and complete coverage of the ball.

Rolling into balls
Rolling the mixture into uniform balls ensures consistent cooking and presentation. It’s important to keep your hands slightly damp to prevent sticking. Aim for uniform size to promote even chocolate coating and to achieve aesthetically pleasing treats. The final product should be about 1-inch in diameter, allowing for the perfect bite-sized indulgence.

Pro Tips for Perfect Butterfinger Balls

1. Use a food processor to crush the Butterfinger bars evenly. This ensures a fine crumb texture that’s easy to incorporate into the peanut butter.
2. Experiment with different types of chocolate for the coating—dark, milk, or even a mix of both—for diverse flavors and a fun twist.
3. If using natural peanut butter, stir well before measuring, as natural peanut butter tends to separate.
4. Allow the Butterfinger Balls to cool completely before serving to help maintain their shape.
5. If you want to add a crunch, consider mixing in crushed nuts before rolling into balls.
6. For a delightful presentation, sprinkle extra crushed Butterfinger on top of the coated balls before the chocolate sets.
7. Store your Butterfinger Balls in an airtight container in the refrigerator to keep them fresh and firm.
8. Consider making mini versions for bite-sized indulgence—just adjust the rolling size for smaller treats!

Variations and Adaptations

For a festive twist, consider adding seasonal flavorings like cinnamon or nutmeg during preparation. Another popular adaptation is to use white chocolate for coating, which provides a sweet contrast to the rich flavor profile of the original recipe. You can also swap out the Butterfinger for your favorite candy bars, like Reese’s or Snickers, to create unique flavor variations.

If you want to cater to dietary restrictions, opt for gluten-free alternatives by using certified gluten-free ingredients. For a vegan adaptation, utilize plant-based chocolate and nut butter. Seasonal ingredients can also be introduced to align with holidays, such as adding peppermint extract during the winter months.

Finally, experiment with presentation. Try serving the butterfinger balls on a showcase platter with a variety of toppings or in decorative boxes as thoughtful edible gifts. Each adaptation allows for personal expression and can elevate your Butterfinger Balls experience.

Serving and Presentation Guide

Plating is essential for enhancing the visual appeal of Butterfinger Balls. Use a decorative plate or tiered stand for an impressive display. Consider drizzling melted chocolate over the top or around the balls for added flair. For garnishing, top each ball with crushed Butterfinger or sprinkle some sea salt for a touch of sophistication.

Traditional accompaniments include coffee or milk, which provides a delightful beverage pairing balancing the sweetness of these treats. Modern serving suggestions can include fun-shaped paper liners or themed serving utensils for special occasions. Ensure the balls are served at a cool temperature for optimal flavor and texture.

Consider portion control: present individually wrapped balls for guests to enjoy on-the-go or set a few on each plate, inviting sharing. Additionally, if serving at a gathering, consider providing small takeaway containers to let guests bring home leftovers!

Wine and Beverage Pairing

When pairing wines with Butterfinger Balls, opt for sweet, dessert-style wines, such as a late-harvest Riesling or a rich port. These wine selections complement the sweetness of the chocolate and peanut butter while adding layers of flavor. Serve chilled to enhance the overall experience.

For non-alcoholic alternatives, a rich hot chocolate or a cold glass of almond milk work wonderfully, echoing the chocolate and peanut notes beautifully. Additionally, a flavored iced coffee can elevate the dessert experience, creating an enjoyable balance between creamy richness and light caffeine.

If you enjoy tea, consider pairing with a sweet chai or cinnamon-infused option. The warmth and spices in the tea complement the flavors of the Butterfinger Balls, bringing a comforting finish to your indulgent treat.

Storage and Shelf Life

To ensure longevity, store Butterfinger Balls in an airtight container in the refrigerator. This helps maintain their freshness and prevents the chocolate from becoming too soft. Under proper storage methods, they can last up to two weeks.

For best results, ensure that the balls are completely cooled before placing them in the container, as residual heat may lead to condensation, causing spoilage. If you notice any signs of spoilage, such as discoloration or an off smell, discard them immediately.

Butterfinger Balls can also be frozen! For freezing, arrange them in a single layer on a baking sheet until firm, then transfer to a freezer-safe container. They can last up to three months when frozen. To enjoy, simply thaw in the refrigerator overnight before serving.

Reheating is not typically required, but if you prefer a warm treat, allow them to sit at room temperature for a few minutes until slightly softened. This enhances the flavor for those who enjoy them fresh.

Make Ahead Strategies

Preparing Butterfinger Balls ahead of time is a great way to save effort on the day of your event. You can crush the Butterfinger and mix the oher ingredients a day in advance, storing them in the fridge until you’re ready to roll the balls.

For even more convenience, roll the balls and coat them in chocolate the day before. This allows the flavors to meld beautifully, enhancing the overall taste. After assembling, let them chill in the refrigerator to firm up overnight.

When planning for serving later, store the butterfinger balls in an airtight container with parchment paper between layers to prevent sticking. Be sure to follow the recommended refrigeration guidelines to preserve freshness until the day of serving. Adding fresh elements, such as a sprinkle of sea salt or extra candy bits, can elevate the flavor just before serving.

Scaling Instructions

For scaling your Butterfinger Balls recipe, determine how many servings you need. Halving the recipe is simple; adjust the ingredient amounts accordingly, keeping the same ratios for smooth execution. Doubling or tripling may require larger mixing bowls and thorough mixing, particularly for sticky mixtures like peanut butter.

Be mindful that as the size of the batch increases, so does the time required for chilling and setting. For large gatherings, consider spreading out the rolling process over a few hours or even a day—this minimizes last-minute rushing.

In terms of storage for larger batches, ensure that your container is spacious enough to accommodate the Butterfinger Balls without overcrowding. Remember to add extra parchment paper layers to keep them from sticking together!

Nutritional Deep Dive

Butterfinger Balls are decadent but can fit into a balanced diet when consumed in moderation. With a macro breakdown primarily consisting of carbohydrates from the crushed candy, fat from peanut butter, and protein component, they provide a sweet treat that fuels your energy needs.

The micronutrient analysis shows essential vitamins provided by peanut butter, including vitamin E and niacin, which are beneficial for skin health and metabolism. However, it’s vital to consider the high sugar content of the candy and chocolate coating when planning portions.

Health benefits include the protein and healthy fats from peanut butter, which contribute to satiety and sustained energy. Additionally, when enjoyed as part of a balanced diet, Butterfinger Balls can be a joyous way to indulge without overwhelming one’s nutrition.

For those looking to manage their weight, consider portion sizes carefully, as the rich mixture is calorie-dense. Planning for treats like Butterfinger Balls with an eye toward active lifestyles ensures you can enjoy them without guilt!

Dietary Adaptations

To make Butterfinger Balls gluten-free, confirm that all ingredients used, especially the Butterfinger, are certified gluten-free. This allows you to cater to guests with dietary restrictions without sacrificing flavor one bit.

For a dairy-free option, choose dairy-free chocolate and ensure the peanut butter used is free from any added dairy ingredients. This way, everyone can enjoy the treats, regardless of dietary preferences.

For a vegan-friendly adaptation, you can opt for plant-based chocolate, natural peanut butter, and any no-sugar addition like maple syrup for sweetness—these adjustments do not detract from the flavor everyone loves.

If you are looking for low-carb alternatives, try using sugar-free chocolate and substituting peanut butter with almond flour or a similar nut butter that suits your dietary requirements. Though it will alter taste, it will maintain the essence of the treat.

Troubleshooting Guide

If your Butterfinger Balls are excessively crumbly, you may have not added enough peanut butter. Ensure you use the correct ratios as listed. If they turn out too sticky, chilling the mixture for a bit longer can help mold them.

Common flavor balance issues can arise if the Butterfinger is too old or stale. Always check freshness, as older candies may lose their crunch and flavor, affecting the overall taste.

Temperature problems can occur if the chocolate cools too quickly when coating. Allow it to sit a minute after melting to ensure it’s workable while still maintaining a smooth coating technique.

Equipment challenges may arise when rolling the balls; using your hands can be messy. Try lightly greasing your palms with oil to prevent sticking, or use food-safe gloves for a cleaner approach.

Timed tasks such as setting chocolate too early can prevent the proper adhesion to the balls. Always allow plenty of chilling time before dipping to ensure those treats stay intact.

Recipe Success Stories

Many readers have shared their enthusiasm after trying Butterfinger Balls. One user reported that the sweet treats disappeared within minutes at a family gathering—testament to their irresistible charm! Guest feedback often highlights the delightful blend of textures and flavors, making them a family favorite.

Another reader shared a success story of adapting the recipe with a dark chocolate coating for a rich flavor enhancement, which received rave reviews. Some have even offered tips on innovative flavor variations, such as using crushed pretzels for added crunch.

Additionally, photographic submissions from the community have showcased the creativity in presentation, inspiring others to explore decorative options when serving. Each success story contributes to a growing community appreciation for these delectable Butterfinger Balls!

Frequently Asked Questions

Can I make Butterfinger Balls in advance?

Absolutely! You can prepare the mixture a day in advance and roll the balls when you’re ready. They store well and can easily be frozen as well!

How long do these last?

When stored properly in an airtight container in the refrigerator, Butterfinger Balls can last for up to two weeks. If frozen, they can keep for several months.

What can I use instead of Butterfinger?

Feel free to substitute with other crunchy candy bars, such as Reese’s, Snickers, or M&Ms for various flavors!

Is this a gluten-free recipe?

Yes, just make sure to use gluten-free ingredients. Some brands of Butterfinger are gluten-free, but it’s always good to check the packaging.

Can I use natural peanut butter?

Yes, natural peanut butter can be used. Just make sure to stir it well to combine the oil before measuring it for the recipe.

What chocolate works best for coating?

Both milk chocolate and dark chocolate work well, but you can also experiment with white chocolate or flavored chocolate melts for unique twists!

How do I store the leftovers?

Store them in a sealed container in the fridge. Use parchment paper between layers to keep them from sticking together.

Can I customize the ingredients?

Certainly! Feel free to add nuts, swap the candy, or incorporate spices to align with your flavor preferences.

Are these healthy?

While delicious, they are a treat and should be enjoyed in moderation. However, they do offer some protein and healthy fats from peanut butter!

What’s the best way to present these for parties?

Use a beautiful platter and consider adding colorful sprinkles or chocolate drizzle. They’re perfect for any social gathering!

Additional Resources

If you enjoyed making Butterfinger Balls, you might also like these related recipes: chocolate truffles, no-bake cheesecake bites, or peanut butter cookie bars. Each offers delightful flavor profiles that mirror the enjoyable aspects of Butterfinger Balls.

For technique guides, consult resources about melting chocolate or rolling dough, as these foundational skills enhance your dessert-making ability. Ingredient information about different types of chocolates and nut butters can also help you customize future recipes.

Lastly, be sure to explore equipment recommendations for excellent mixing bowls, measuring tools, or even fun silicone molds to add a creative touch to your treats!

Join the Conversation

We encourage you to share your creations on social media using our hashtag! Sharing your Butterfinger Balls experience helps spread the joy of this delightful treat. For tips on photography, lightening your dessert setup can enhance your reels or snaps.

Leave feedback or suggestions for this recipe in the comments. We love hearing about your variations and how you enjoy these treats with family and friends. Join the community and inspire others with your unique approaches to Butterfinger Balls!

The Recipe

Butterfinger Balls

Serves: 24 balls

Prep Time: 15 mins

Cook Time: 0 mins

Total Time: 15 mins

Kitchen Equipment Needed

  • Food processor (or a rolling pin and a ziplock bag)
  • Microwave-safe bowl
  • Parchment paper
  • Mixing bowl
  • Measuring cups and spoons

Ingredients

  • 2 Butterfinger bars, crushed
  • 1 cup creamy peanut butter
  • 2 cups chocolate chips (milk or dark)
  • Optional sprinkles or crushed candies for garnish

Directions

  1. In a mixing bowl, combine the crushed Butterfinger with peanut butter until fully incorporated.
  2. Form the mixture into 1-inch balls and place them on parchment paper.
  3. Refrigerate for about 15 minutes to firm up the balls.
  4. Melt the chocolate chips in a microwave-safe bowl in 30-second increments, stirring until smooth.
  5. Dip each ball into the melted chocolate, using a fork to remove excess chocolate.
  6. Place the chocolate-covered balls back on the parchment paper and sprinkle with additional crushed Butterfinger, if desired.
  7. Refrigerate again until the chocolate is fully set, about 30 minutes.
  8. Enjoy or store in an airtight container in the refrigerator!

Recipe Notes

  • For a twist, experiment with using different types of chocolate for coating.
  • If you want, add a dash of sea salt on top before the chocolate sets.
  • Store in an airtight container to maintain freshness for longer periods.

Delicious White Chocolate Cranberry Cookies Recipe for Any Occasion

White Chocolate Cranberry Cookies: A Delightful Treat for Every Occasion

⚖️
Difficulty
Easy

⏲️
Prep Time
15 mins

🕒
Cook Time
10 mins

⏱️
Total Time
25 mins

🍽️
Servings
24 cookies

Indulge in the luxurious combination of creamy white chocolate and tart cranberries with these delightful White Chocolate Cranberry Cookies. This recipe brings together the sweetness of white chocolate and the chewy texture of dried cranberries, creating an irresistible treat that’s perfect for any occasion. Whether you’re celebrating a holiday, hosting a gathering, or simply satisfying your sweet tooth, these cookies are a crowd-pleaser that everyone will love.

The warm, inviting aroma of these cookies baking in your oven fills the kitchen with a sense of warmth and nostalgia. Each bite offers a delicious balance of flavors—sweet, tangy, and rich. The soft, buttery texture of the cookies pairs beautifully with the chewy cranberries, making them an enjoyable treat for both kids and adults alike. Bake a batch today and experience the delight they bring!

Quick Recipe Highlights

  • Flavor Profile: The cookies feature a delightful mix of sweet white chocolate and tart cranberries, complemented by a hint of vanilla.
  • Texture: Each cookie strikes a perfect balance between soft and chewy, with the white chocolate adding a smooth creaminess.
  • Aroma: The smell of melted white chocolate combined with baking cookies creates an irresistible scent that fills the air.
  • Visual Appeal: The contrast of bright red cranberries against the pale white chocolate results in a visually stunning cookie.
  • Skill Level Needed: This recipe is perfect for bakers of all levels, making it suitable for beginners and seasoned pros alike.
  • Special Equipment: All you need is a mixing bowl, baking sheet, and parchment paper to get started.

Recipe Overview

  • Difficulty Level: This White Chocolate Cranberry Cookies recipe is categorized as easy, making it accessible for anyone who wants to create delicious treats in no time.
  • Category: Perfect as a dessert or snack, these cookies make a sweet addition to your afternoon tea or holiday party spread.
  • Cuisine: This recipe blends traditional American baking with a modern twist through the introduction of white chocolate and dried fruit.
  • Cost: The ingredients are affordable, generally costing under $10 for a batch that yields 24 cookies, making it a budget-friendly choice.
  • Season: These cookies are delightful year-round, though especially popular during the fall and winter months for their festive colors and flavors.
  • Occasion: Ideal for holiday parties, cookie exchanges, or even as a thoughtful homemade gift for friends and family.

Why You’ll Love This Recipe

The allure of White Chocolate Cranberry Cookies lies not just in their flavor but also in their texture. Each bite delivers a heavenly combination of chewy cranberries and creamy white chocolate, creating a satisfying taste experience. The sweetness of the cookies is perfectly balanced by the tartness of the cranberries, making this treat a delightful indulgence. Whether enjoyed with a glass of milk or served at a celebratory occasion, these cookies are sure to impress.

Convenience and preparation benefits make this recipe a winner. With just a handful of easy-to-follow steps, you can whip up a batch in under 30 minutes. Perfect for last-minute gatherings or a quick family dessert, the uncomplicated process makes baking accessible for everyone, even those who may not have much experience in the kitchen.

Not only delicious, but these cookies also offer nutritional advantages. Dried cranberries are known for their antioxidant properties, contributing a bit of health benefits to your sweet treat. While best enjoyed in moderation, they do offer a slight nutritional boost, making it easier to justify indulging.

Social and entertaining value is another great reason to love these cookies. They are perfect for sharing at parties, family gatherings, or even around the holiday table. Their vibrant appearance and delectable taste inspire conversation and compliments, making them a favorite among guests.

Cost-effectiveness and accessibility further enhance the appeal of this recipe. With simple ingredients that you can find at any grocery store, baking these cookies won’t break the bank. You can share them generously, ensuring no one leaves the table without enjoying a sweet bite.

Historical Background and Cultural Significance

White chocolate cranberries represent a modern twist on traditional cookie recipes that have been enjoyed for generations. The origins of cookies can be traced back to the 7th century in Persia, where sugar was used in baked goods. As culinary techniques evolved, different cultures began incorporating their local ingredients, resulting in the vast array of cookies we enjoy today.

Culturally, cookies symbolize comfort and joy. They often hold special memories—from baking with a loved one to sharing them during family gatherings. In many households, making cookies together is a cherished family tradition that brings generations together.

Over the years, the recipe for cookies has adapted to include various flavors and textures, reflecting regional tastes and preferences. The introduction of additives like white chocolate and fruit showcases a successful evolution that maintains the cookie’s beloved essence while allowing for creative expression.

In terms of regional variations, while cranberry adds a unique flair to American baking, differents cultures utilize local ingredients for their own versions of cookies. From Italian biscotti to French madeleines, cookies around the world are transforming traditional baking into delightful experiences.

Ingredient Deep Dive

Dried Cranberries
Dried cranberries carry a rich history as a staple in North American diets, particularly among Indigenous peoples who utilized them for their nutritional benefits. Loaded with antioxidants, they have been noted for their potential to support heart health and urinary tract function. When selecting dried cranberries, look for those that are unsweetened or minimally processed to retain their natural benefits. Store them in a cool, dry place, ideally in a sealed container to ensure freshness. If you find yourself out of cranberries, raisins or cherries can be substituted without losing the cookie’s appeal.

White Chocolate
White chocolate is made from cocoa butter, sugar, and milk solids, providing a creamy base that contrasts beautifully with tart cranberries. Though some debate its classification as “chocolate,” it has become a beloved baking ingredient. Nutritionally, white chocolate contains less caffeine than dark chocolate but still offers a rich source of energy and sweetness, perfect for baked goods. When choosing white chocolate, look for high-quality brands with a higher cocoa butter content for the best flavor. Store it in a cool place and avoid exposure to moisture. If you prefer to experiment, dark chocolate or even butterscotch chips can serve as alternative options in the recipe.

Common Mistakes to Avoid

  • Not measuring ingredients properly: Precision is key in baking, and inaccurate measurements can lead to cookies that don’t turn out right. Always use the correct measuring tools.
  • Baking at the wrong temperature: Make sure your oven is preheated to the correct temperature before baking. An oven thermometer can help verify its accuracy.
  • Overmixing the dough: Overmixing can lead to tough cookies. Mix just until the ingredients are combined to maintain a tender texture.
  • Underbaking the cookies: While cookies may appear soft when you take them out, they will continue to cook on the baking sheet. Follow the recommended baking time closely.
  • Ignoring the cooling time: Allow cookies to cool properly on a wire rack to reach their optimal texture and flavor.
  • Using stale ingredients: Always check the expiration dates on ingredients, especially baking powder and soda, to ensure they are fresh.
  • Not chilling the dough if required: If the recipe suggests chilling the dough, it’s important to follow this step to prevent the cookies from spreading too much while baking.
  • Not lining the baking sheet: Using parchment paper or silicone mats keeps cookies from sticking and allows for easier cleanup.
  • Substituting ingredients without knowing the impact: Not all ingredients are interchangeable. Research before substituting to ensure the taste and texture aren’t compromised.
  • Neglecting to rotate the baking sheets: For even baking, consider rotating the baking sheet halfway through the baking time, especially if your oven has hot spots.

Essential Techniques

Measuring Ingredients
Accurate measuring is crucial for successful baking. Always use the right tools—dry measuring cups for solids and liquid measuring cups for liquids. Spoon ingredients into measuring cups without packing them down to avoid over-measuring. Learning to scale your recipes accurately ensures consistent results, allowing for adoration of your cookie-making prowess.

Mixing Techniques
Understanding when and how to mix your ingredients makes a significant difference in texture. For your cookie dough, cream the butter and sugar until light and fluffy before adding eggs and dry ingredients. This technique incorporates air into the mixture, giving your cookies a tender crumb. Keep an eye on the mixture’s appearance for desired consistency without overmixing.

Pro Tips for Perfect White Chocolate Cranberry Cookies

1. Use room-temperature butter for easy creaming with sugar, which results in better consistency.
2. For a more complex flavor, consider adding a teaspoon of vanilla extract or almond extract to the dough.
3. If you enjoy a touch of spice, try incorporating a pinch of cinnamon to enhance the overall flavor profile of your cookies.
4. When cooling cookies, transfer them to a wire rack to prevent sogginess on the baking sheet.
5. Experiment with chilling the cookie dough for 30 minutes to an hour before baking, which can enhance the flavor and texture.
6. Incorporate chopped nuts, like pecans or walnuts, for added crunch and a richer flavor.
7. If you prefer a sweeter cookie, roll the balls of dough in sugar before baking for a delightful sugary crust.
8. Keep a close eye on baking times, as ovens can vary; start checking for doneness a few minutes earlier than the suggested time.

Variations and Adaptations

For a seasonal twist, try adding spiced pumpkin to the dough for a fall-inspired version of these cookies. During the summer months, swap cranberries for dried cherries or blueberries to give the cookies a burst of fruity freshness. Gluten-free flour can substitute traditional all-purpose flour for those needing wheat alternatives, ensuring everyone can enjoy this delightful treat.

Dairy-free options are becoming increasingly popular; opt for coconut oil instead of butter and dairy-free chocolate chips for a deliciously inclusive treat. If you’d like more added texture, consider experimenting with oats to create a chewy oatmeal cookie version.

Presentation alternatives can also elevate the experience—consider drizzling melted white chocolate over finished cookies or garnishing with additional dried cranberries to enhance their aesthetic appeal.

Serving and Presentation Guide

When serving your White Chocolate Cranberry Cookies, presentation plays a key role. Arrange cookies on a decorative platter, and consider adding fresh cranberries or greens as garnishes for a festive touch. You can also serve cookies with a side of whipped cream or ice cream for an indulgent dessert that satisfies cravings.

To enhance the experience, warm the cookies slightly before serving—they’ll be at their best with a gooey center. Pay attention to portion control by serving 2-3 cookies per person to keep your treat enjoyable without overindulgence.

Wine and Beverage Pairing

Pairing these delightful cookies with beverages can enhance the overall experience. A glass of late harvest Riesling complements the sweet and tart flavors beautifully, providing a refreshing balance. For those preferring something non-alcoholic, a sparkling apple cider or a cup of chai tea rounds out the flavor profile nicely.

Should you enjoy coffee, a light roast with hints of caramel complements the cookies’ sweetness. For a comforting pairing, consider a warm cup of cocoa or latte to enjoy with your fresh-baked cookies during the colder months.

Storage and Shelf Life

For optimal freshness, store your White Chocolate Cranberry Cookies in an airtight container at room temperature. They will stay delicious for up to one week. If you need to store them longer, consider freezing them. Wrap each cookie in plastic wrap and place them in a freezer-safe container or bag, where they can last up to three months.

Be mindful of signs of spoilage; if your cookies appear dry or hard, they may need to be discarded. To reheat frozen cookies, simply pop them in the oven at 350°F (175°C) for about 5-7 minutes until warmed through or enjoy them straight from the freezer for a delightful chilled treat.

Make Ahead Strategies

Planning to make these cookies ahead of time? Prepare the dough in advance, cover it well, and refrigerate for up to three days. When ready to bake, simply remove the dough from the fridge, shape the cookies, and bake as directed. This preparation strategy not only saves time but also enhances the flavor as the dough rests.

If you prefer to bake ahead, underbake the cookies slightly, allowing them to stay soft. Once cooled, store them in an airtight container, and they will taste as fresh as the day you baked them. To maintain the taste and quality, consider adding a slice of bread to the container, which helps retain moisture.

Scaling Instructions

Scaling your White Chocolate Cranberry Cookies recipe is simplified with a little math. For half the recipe, simply reduce each ingredient by 50%. For doubling or tripling the recipe, retain the same ratios to maintain the final flavor and texture.

Be aware of your baking equipment when scaling; using multiple baking sheets may be necessary if a larger batch is made. Adjust baking times by checking the cookies earlier to prevent overbaking, especially since larger batches often require more attention to ensure even cooking.

Nutritional Deep Dive

Analyzing the macros of a typical White Chocolate Cranberry cookie, you can expect approximately 120 calories per cookie. The primary contributors are carbohydrates from the sugar and flour, fats from the butter and white chocolate, and minimal proteins.

Micronutrient-wise, cranberries stand out with Vitamin C and fiber, while the white chocolate offers a small dose of calcium. While these cookies can be sweet, consuming them in moderation makes it easier to enjoy without compromising dietary goals. Including them as a part of a balanced diet is key to maintaining wellness and satisfaction.

Dietary Adaptations

For those following a gluten-free diet, opt for gluten-free all-purpose flour in place of regular flour. This simple substitution allows anyone to indulge without worry. For dairy-free versions, substitute butter with coconut oil and ensure the white chocolate is dairy-free.

If you want to cater to vegan diets, use a vegan butter alternative and replace the white chocolate with equivalent vegan options. Low-carb and keto-friendly adaptations could involve using almond flour and sugar alternatives to reduce carbohydrate content significantly.

For those on a strict Paleo or other specialized diets, research and source ingredients that fall within your dietary restrictions, ensuring an inclusive experience for everyone involved in your cookie enjoyment.

Troubleshooting Guide

If your cookies turn out harder than you expected, it may be due to overbaking. Next time, reduce the baking time and monitor closely for a perfect texture. Should you find the dough too sticky, chilling it for 30 minutes helps in easily forming cookie shapes.

Lack of flavor can be resolved by checking the freshness of your baking ingredients, particularly the baking powder or soda. Adjust quantities of flavorings such as vanilla to increase richness. For spread-out cookies, try chilling your dough before baking to retain shape.

If you’re facing any ingredient substitutions, research the best alternatives that maintain consistency in texture and taste, such as using applesauce for fats or coconut sugar for sweetness. Problem-solving will ensure fantastic results.

Recipe Success Stories

Community feedback often highlights how these cookies became a hit during cookie swaps and family gatherings. Many fans advocate for the seasonal variations, particularly how the addition of cinnamon makes them festive. Adaptation success stories abound, especially for those experimenting with gluten-free substitutes resulting in their friends requesting the recipe.

Readers share photography tips emphasizing the importance of good lighting and presentation techniques, showcasing their unique spins on the recipe. With each success story comes an opportunity for others to adapt and create their own cookie masterpieces!

Frequently Asked Questions

Can I use fresh cranberries instead of dried?
No, fresh cranberries are too tart and have high moisture content that could affect the texture. Dried cranberries are perfect for this cookie to provide the right flavor balance.

How do I store leftover cookies?
Store cookies in an airtight container at room temperature for up to a week. For longer storage, wrap them individually and freeze them.

Can I add nuts to the recipe?
Yes! Chopped pecans or walnuts work beautifully with the white chocolate and cranberries. Just keep the total dry ingredients in balance.

What can I substitute if I don’t have white chocolate?
You can replace the white chocolate with dark chocolate or butterscotch chips for a different flavor profile.

How do I know when the cookies are done?
Cookies should be lightly golden at the edges. Remember, they will continue to cook once removed from the oven, so avoid overbaking.

Can I make the dough in advance?
Yes, the dough can be made ahead of time and refrigerated for up to three days before baking.

What’s the best way to freeze these cookies?
Allow cookies to cool completely, then wrap each individually in plastic wrap and place in a freezer bag. They can last up to three months.

How can I make these cookies vegan?
Use plant-based butter and substitute the white chocolate with vegan chocolate chips to create a delicious vegan version.

Can I use oatmeal in this recipe?
Yes, adding rolled oats for an oatmeal twist can create a hearty texture while maintaining the cookie’s delightful flavor.

How many cookies does this yield?
This recipe yields approximately 24 cookies, depending on the size of the dough balls you form.

Additional Resources

For those interested in further expanding their baking repertoire, check out related recipes like Oatmeal Raisin Cookies, Chocolate Chip Cookie Bars, and Pumpkin Snickerdoodles. Understanding foundational techniques like creaming butter and sugar or mastering dough consistency can aid in producing excellent baked goods across the board.

Insight into ingredient information, particularly regarding varieties of chocolate, offers foundation knowledge that elevates your baking skills. Invest in quality equipment that enhances your baking experience, such as silicone baking mats and high-quality mixing bowls to streamline the process.

Seasonal variations can inspire new baking adventures; try incorporating gingerbread spices for winter treats or fresh citrus zest in summer delights to keep your cookies exceptional throughout the year.

Join the Conversation

We encourage you to share your baking experiences and variations of this White Chocolate Cranberry Cookies recipe with us! Post your photos on social media using our specific hashtags, ensuring to engage with our community. Share your personal touches or adaptations, inspiring others to try new twists on this beloved treat.

Your feedback and suggestions could help others achieve their cookie-making dreams. Don’t shy away from sharing your successes—or even failures. Each experience contributes to our collective culinary journey, enhancing our love for baking together!

The Recipe

White Chocolate Cranberry Cookies

Serves: 24 cookies

Prep Time: 15 mins

Cook Time: 10 mins

Total Time: 25 mins

Kitchen Equipment Needed

  • Mixing bowl
  • Baking sheet
  • Parchment paper
  • Whisk
  • Rubber spatula
  • Measuring cups and spoons

Ingredients

  • 1 cup unsalted butter, softened
  • 1 cup granulated sugar
  • 1 cup brown sugar, packed
  • 2 large eggs
  • 2 teaspoons vanilla extract
  • 2 ¾ cups all-purpose flour
  • ¾ teaspoon baking soda
  • ½ teaspoon salt
  • 2 cups dried cranberries
  • 1 cup white chocolate chips

Directions

  1. Preheat your oven to 350°F (175°C) and line a baking sheet with parchment paper.
  2. In a mixing bowl, cream together the softened butter, granulated sugar, and brown sugar until light and fluffy.
  3. Add in the eggs one at a time, mixing well after each addition. Incorporate the vanilla extract.
  4. In a separate bowl, whisk together the flour, baking soda, and salt.
  5. Gradually add the dry ingredients to the wet ingredients, mixing until just combined.
  6. Fold in the dried cranberries and white chocolate chips until evenly distributed throughout the dough.
  7. Drop tablespoon-sized balls of dough onto the prepared baking sheet, spacing them about 2 inches apart.
  8. Bake for 10-12 minutes, or until the edges are lightly golden.
  9. Remove from the oven and let cool on the baking sheet for a few minutes before transferring to a wire rack to cool completely.

Recipe Notes

  • For a deeper flavor, consider chilling the dough for an hour before baking.
  • Feel free to add cinnamon or nuts for extra flavor and texture.
  • Store cooled cookies in an airtight container for optimal freshness.

Deliciously Fluffy Pumpkin Cream Cheese Swirl Muffins Recipe

Fluffy Pumpkin Cream Cheese Swirl Muffins: A Delicious Fall Treat

⚖️
Difficulty
Easy

⏲️
Prep Time
15 mins

🕒
Cook Time
20 mins

⏱️
Total Time
35 mins

🍽️
Servings
12 muffins

Get ready to embrace the true essence of fall with these Fluffy Pumpkin Cream Cheese Swirl Muffins! Bursting with the rich flavors of pumpkin spice and the creamy tang of cream cheese, these muffins are a delightful treat that perfectly resonates with the cozy vibes of autumn. Picture this: a warm muffin fresh from the oven, its aromatic scent enveloping your kitchen, promising a tender, moist interior complemented by a luscious cream cheese swirl. It’s not just a muffin; it’s an experience that captures the heart of the season!

These muffins are not only delicious but incredibly easy to make. They’re perfect for breakfast, a snack, or even dessert! You can enjoy them while sipping on your morning coffee or as an afternoon pick-me-up. With their beautiful golden hue and enticing swirl, these muffins make for a delightful centerpiece at your fall gatherings. You’ll find them so irresistible that they will have you reaching for seconds—each bite is an explosion of flavor that beckons you back to the table!

Quick Recipe Highlights

  • Flavor Profile: A harmonious blend of pumpkin, cinnamon, and cream cheese, creating a rich, comforting flavor.
  • Texture: Light and fluffy with a delightful creamy swirl, offering a perfect balance of softness and bite.
  • Aroma: Fills your kitchen with the warm scent of pumpkin spice, invoking the essence of fall.
  • Visual Appeal: Beautifully golden muffins adorned with a swirled cream cheese topping, making them as pleasing to the eye as they are to the palate.
  • Skill Level Needed: Suitable for all skill levels, these muffins can be whipped up quickly by both novice and experienced bakers.
  • Special Equipment: A muffin tin and an electric mixer are handy but optional for mixing by hand.

Recipe Overview

  • Difficulty Level: These muffins are easy to prepare, making them an ideal baking project for beginners.
  • Category: Perfect for breakfast or as a snack, these muffins fit seamlessly into any meal plan.
  • Cuisine: This recipe embraces traditional American flavors associated with fall, spotlighting pumpkin as a seasonal staple.
  • Cost: Ingredients are relatively inexpensive, typically costing less than $10 for a full batch.
  • Season: Best enjoyed in the fall, these muffins bring the warmth of autumn into your home.
  • Occasion: They make an excellent addition to brunches, holiday gatherings, or just a cozy family afternoon.

Why You’ll Love This Recipe

These Fluffy Pumpkin Cream Cheese Swirl Muffins are a delightful combination of flavors and textures that are sure to please any palate. The tender crumb infused with pumpkin pie spices creates a warm, comforting taste, while the cream cheese swirl adds a rich, luscious touch. Together, they make for an indulgent treat that feels like a hug in muffin form.

Convenience is key when it comes to baking these muffins. With minimal prep time and simple ingredients, you can have a batch fresh out of the oven in just 35 minutes. This recipe also allows room for creativity—feel free to experiment with variations like adding nuts or chocolate chips, ensuring that each batch is uniquely yours.

Nutritionally, pumpkin is a powerhouse ingredient filled with vitamins A and C, antioxidants, and dietary fiber. Using cream cheese in moderation lends a creamy texture without overwhelming your muffin with excess sugar. Plus, these muffins can easily be modified for various dietary needs, making them accessible to everyone.

Socially, these muffins are perfect for sharing! Whether you bring them to a potluck, serve them at a family gathering, or enjoy them while chatting with friends, they create a warm, inviting atmosphere. It’s hard not to smile when delicious, homemade pastries grace the table.

Lastly, their cost-effectiveness cannot be overlooked. Pumpkin is often affordable during the fall, and being able to make a dozen muffins for a minimal investment means having a treat that won’t break the bank.

Historical Background and Cultural Significance

Pumpkin has a rich history in American cuisine, with its origins tracing back to Native American tribes, who cherished this versatile gourd long before European settlers arrived. Pumpkins were a vital source of nutrition, providing sustenance through harsh winters.

As culinary traditions evolved, pumpkin became synonymous with autumn and harvest festivals. Recipes utilizing pumpkin in various forms began surfacing, notably in pies and bread, as home bakers explored its sweetness and adaptability. These Fluffy Pumpkin Cream Cheese Swirl Muffins continue this cherished tradition, showcasing the beloved squash.

Over time, the recipe for pumpkin muffins has evolved with countless adaptations, including the addition of spices and various fillings. Today, pumpkin-based baked goods are popular in the fall, symbolizing comfort and nostalgia, often associated with holiday celebrations and cozy gatherings.

Regional variations of pumpkin recipes highlight how communities celebrate their local flavors, incorporating spices or ingredients that reflect local farms and traditions. This muffin recipe pays homage to that rich tapestry of American food culture, merging flavors that make it suitable for all tables.

Ingredient Deep Dive

Pumpkin: Pumpkins are not just decorations in the fall; they offer a wealth of nutritional benefits, being high in vitamins, minerals, and fiber. When selecting pumpkins for baking, opt for sugar pumpkins or those labeled for cooking. Store in a cool, dark area, and once opened, keep refrigerated.

All-Purpose Flour: This pantry staple is essential for achieving the desired muffin texture. It provides structure while maintaining a light and fluffy consistency. To select the best flour, look for a finely milled option and store it in a cool, dry place. It can be substituted with whole wheat flour for a healthier option.

Cream Cheese: This ingredient gives the muffins their signature swirl and creamy texture. High-quality cream cheese enhances the overall flavor. Store unopen packages in the refrigerator, and once opened, use within a couple of weeks. For a lighter option, consider using neufchâtel cheese.

Cinnamon: A key spice in this recipe, cinnamon not only adds warmth but also boasts several health benefits, including anti-inflammatory properties. When purchasing, choose a fresh product, and store it in a cool, dry environment for maximum flavor.

Common Mistakes to Avoid

  • Overmixing the batter can result in tough muffins. Aim to mix just until combined.
  • Using canned pumpkin pie filling instead of pure pumpkin puree can alter the flavor profile significantly.
  • Not preheating your oven can lead to uneven baking. Always preheat to the desired temperature.
  • Baking for too long can dry out your muffins. Keep a close watch during the last few minutes.
  • Skipping the cream cheese swirl may lead to an incomplete flavor experience—don’t skip it!
  • Using expired baking powder or soda can affect rise; always check freshness before baking.
  • Storing muffins improperly can make them stale quickly; opt for airtight containers.
  • Ignoring the cooling time can lead to soggy tops; let them cool before storing.

Essential Techniques

Mixing: The key to fluffy muffins lies in proper mixing techniques. Use the muffin method—combine wet and dry ingredients separately, then mix just until incorporated. This prevents gluten overdevelopment, which can make muffins dense.

Swirling: When adding the cream cheese, use a knife or a skewer to create distinct swirls without fully incorporating it into the batter. This gives the muffins their signature look and buttery flavor.

Pro Tips for Perfect Fluffy Pumpkin Cream Cheese Swirl Muffins

1. Use room temperature ingredients for easier mixing and a better texture.
2. Lightly flour your cream cheese to prevent it from sinking in the batter.
3. For extra flavor, add in chocolate chips or nuts to the batter.
4. Experiment with different spices like nutmeg or ginger for a unique flavor twist.
5. Use a cookie scoop for evenly sized muffins, ensuring they bake evenly.
6. Don’t forget to test the muffins with a toothpick; they should come out clean when done.
7. Allow muffins to cool completely before glazing or storing to retain texture.
8. Serve them warm with a dollop of extra cream cheese frosting for an indulgent treat!

Variations and Adaptations

Regional variations often call for local spices or nuts to enhance the flavor profile. For example, adding pecans can give a delightful crunch reminiscent of Southern baking traditions.

Seasonal adaptations like incorporating apple or pear in the batter can freshen the flavors, bringing a new twist to the classic recipe, while still keeping that cozy fall feeling.

For those with dietary restrictions, substitutions like gluten-free flour can be used without sacrificing flavor or texture. Plant-based cream cheese allows everyone to enjoy these muffins, making them versatile for different diets.

Flavor variations can incorporate cocoa powder for chocolate pumpkin muffins or chai spices for a unique infusion. Adding a splash of vanilla or maple syrup can elevate the taste even further.

Texture modifications, like using oats instead of some flour, introduce a chewy element. Lastly, consider presentation alternatives like dusting muffins with powdered sugar or serving with a drizzle of caramel for a gourmet touch.

Serving and Presentation Guide

For plating your Fluffy Pumpkin Cream Cheese Swirl Muffins, consider using a decorative muffin stand or a vibrant platter to showcase their beautiful appearance. Garnishing with a sprinkle of cinnamon or a light glaze of icing adds a delightful touch.

Traditional accompaniments such as cream cheese frosting elevate these muffins to bakery status. For a modern twist, consider pairing with fresh seasonal fruits or a scoop of vanilla ice cream for dessert.

When serving, consider the temperature; these muffins are best served warm or at room temperature. For portion control, slice a muffin in half to expose its lovely swirl, making it perfect for sharing.

Wine and Beverage Pairing

Pairing suggestions for these aromatic muffins include a glass of sweet white wine, such as Riesling, which complements the pumpkin flavors without overpowering them.

For non-alcoholic options, consider a spiced apple cider served warm, enhancing the overall cozy experience.

If coffee is your preference, a freshly brewed cup of strong coffee or a spiced chai latte pairs beautifully, enhancing the muffins’ warm spices.

Temperature considerations are essential; ensure your beverages serve alongside warm muffins for the ultimate cozy treat.

Storage and Shelf Life

To maintain freshness, store your Fluffy Pumpkin Cream Cheese Swirl Muffins in an airtight container at room temperature for up to 3 days.

For extended shelf life, consider freezing muffins; they last for up to 3 months frozen. Use resealable bags, removing as much air as possible to prevent freezer burn.

When thawing, allow muffins to sit at room temperature or pop them in the microwave for a quick warm-up. Signs of spoilage include a change in smell or mold; always inspect before consuming.

Make Ahead Strategies

To make ahead, prepare the muffin batter a day in advance and refrigerate. Just remember to allow it to come to room temperature before baking.

You can also prepare swirls of cream cheese in advance, keeping them refrigerated until ready to use.

When planning for events, muffins can be baked, cooled, and stored. Then, add any garnishing just prior to serving for freshness.

If you want to add a fresh element before serving, consider placing fresh whipped cream or a dusting of powdered sugar right before plating.

Scaling Instructions

To halve the recipe, simply divide all the ingredient quantities by two and adjust baking times slightly, as smaller batches may bake quicker.

When doubling or tripling the recipe, make sure you have a larger mixing bowl and more muffin tins ready.

Equipment adjustments may include using multiple pans or batch-baking if you don’t have enough muffin tins.

Timing modifications will depend on the oven; check for doneness a couple of minutes earlier than the standard recipe calls for, as larger quantities can change baking dynamics.

Store extra muffins in an airtight container as instructed to keep them fresh.

Nutritional Deep Dive

In terms of macros, each muffin is surprisingly balanced, offering complex carbohydrates from the pumpkin and flour.

Micronutrient analysis indicates that pumpkins provide Vitamin A, essential for immune function, and iron, which supports healthy blood circulation.

Health benefits include high fiber content, supporting digestive health while also promoting a sense of fullness.

For those being mindful of dietary considerations, pumpkin is naturally low-calorie and nutrient-dense, ideal for those managing their weight.

Portion analysis recommends enjoying one muffin as a satisfying treat, ensuring it fits into a balanced diet.

Dietary Adaptations

These muffins can easily cater to various dietary needs. Using gluten-free flour allows gluten-sensitive individuals to enjoy them, maintaining similar texture and flavor.

For dairy-free options, substitute dairy milk for almond or oat milk and use vegan cream cheese. This ensures no one feels left out during fall festivities!

To cater to a vegan audience, use flaxseed meal as an egg substitute and soy yogurt in place of cream cheese for the swirl.

Low-carb and keto adaptations may involve substituting traditional flour with almond flour or coconut flour to reduce carbohydrate content while maintaining moisture and flavor.

Paleo enthusiasts can also find joy by using almond meal and replacing sweeteners with honey or maple syrup.

Troubleshooting Guide

For texture issues, like denser muffins, check that you’re not overmixing the batter; mixing just until combined is key.

Flavor balance can be adjusted by experimenting with spice levels; adding more cinnamon can enhance warmth, while a pinch of salt can elevate sweetness.

Temperature problems might arise if the oven isn’t calibrated; using an oven thermometer ensures accuracy.

If you encounter equipment challenges, like sticking muffins, ensure your muffin tins are appropriately greased or lined.

For ingredient substitutions, try applesauce instead of vegetable oil for moistness or buttermilk for tanginess without compromising flavor.

Timing concerns can be addressed by checking for doneness earlier, especially when scaling up or down, as oven times may vary based on edition or size differences.

Recipe Success Stories

Community feedback on these Fluffy Pumpkin Cream Cheese Swirl Muffins reflects how they’ve quickly become a favorite among bakers of all skill levels. Many readers rave about their light texture and warm flavors.

Variation successes highlight incorporating unique ingredients, with some sharing tips for successful adaptations, like adding chopped pecans or cranberries for an extra burst of flavor.

Readers offer suggestions ranging from lowering sugar content to experimenting with the cream cheese blend, prompting interesting discussions and exchanges in the comments section.

For photography tips, several bakers include beautiful images of their muffins, encouraging others to showcase their creations and making this recipe a true community favorite.

Frequently Asked Questions

1. Can I use fresh pumpkin instead of canned?
Yes! Fresh pumpkin can be cooked and pureed, but for convenience, canned puree is often recommended. Make sure it’s pure pumpkin, not pie filling.

2. How do I store leftover muffins?
Store them in an airtight container at room temperature for up to 3 days, or freeze for longer storage.

3. Can I make these muffins vegan?
Absolutely! Substitute the eggs with flaxseed meal and the cream cheese with a dairy-free alternative.

4. What can I do if my muffins come out too dense?
Overmixing can lead to dense muffins. Mix just until combined for the best texture.

5. Can I substitute the flour with a gluten-free alternative?
Yes! Use a gluten-free all-purpose flour blend, ensuring the texture remains light and fluffy.

6. How long should I cool the muffins before serving?
It’s best to cool them in the pan for 5-10 minutes, then transfer to a wire rack to cool completely for optimal texture.

7. Can I add other spices to the muffins?
Definitely! Feel free to add nutmeg, ginger, or allspice for a more complex flavor profile.

8. How do I know when the muffins are done baking?
Insert a toothpick in the center of a muffin; it should come out clean or with a few moist crumbs.

9. Is it necessary to use an electric mixer?
No, you can mix by hand. An electric mixer makes it easier, but the recipe can be done without one.

10. Can I use a different filling instead of cream cheese?
Yes! You can substitute with chocolate ganache or fruit preserves if you want to switch it up.

Additional Resources

For those interested in expanding their baking repertoire, explore related recipes like pecan pie muffins or apple cinnamon muffins—both perfect for autumn gatherings.

Technique guides on muffin-making detail the best practices for achieving airy, fluffy results.

Ingredient information can enhance your knowledge about pumpkin’s versatility across cuisines and dishes, making you a well-versed home cook.

Equipment recommendations can help ensure you have the right tools, from high-quality muffin tins to mixing bowls that make the process smoother.

Finally, seasonal variations often inspire new collaborations among bakers eager to incorporate the freshest local ingredients.

Join the Conversation

We invite you to share your thoughts and experiences with Fluffy Pumpkin Cream Cheese Swirl Muffins! Comment below with your variations or photos to inspire others.

Connect with us on social media to share your creations, and don’t forget to use the hashtag #PumpkinCreamCheeseMuffins for a chance to feature in our community spotlight!

Your feedback helps us refine our recipes and create an engaging foodie community. Together, let’s celebrate flavors, share tips, and keep the love for baking alive!

The Recipe

Fluffy Pumpkin Cream Cheese Swirl Muffins

Serves: 12 muffins

Prep Time: 15 mins

Cook Time: 20 mins

Total Time: 35 mins

Kitchen Equipment Needed

  • Muffin tin
  • Mixing bowls
  • Electric mixer or whisk
  • Rubber spatula
  • Measuring cups and spoons

Ingredients

  • 1 cup pumpkin puree
  • 1/2 cup vegetable oil
  • 1 cup sugar
  • 2 large eggs
  • 1 teaspoon vanilla extract
  • 1 and 1/2 cups all-purpose flour
  • 1 teaspoon baking powder
  • 1/2 teaspoon baking soda
  • 1 teaspoon cinnamon
  • 1/2 teaspoon salt
  • 8 oz cream cheese, softened
  • 1/4 cup powdered sugar

Directions

  1. Preheat your oven to 350°F (175°C) and grease a muffin tin or line with muffin liners.
  2. In a large bowl, combine pumpkin puree, vegetable oil, sugar, eggs, and vanilla extract. Mix well.
  3. In another bowl, whisk together flour, baking powder, baking soda, cinnamon, and salt.
  4. Gradually add the dry ingredients to the wet mixture, stirring until just combined.
  5. In a small bowl, mix softened cream cheese and powdered sugar until smooth.
  6. Fill each muffin cup halfway with batter, add a teaspoon of cream cheese mixture on top, and cover with more batter.
  7. Using a toothpick or knife, swirl the cream cheese mixture into the batter lightly.
  8. Bake in the preheated oven for 20-25 minutes or until a toothpick inserted in the center comes out clean.
  9. Allow muffins to cool in the tin for 5 minutes before transferring to a wire rack to cool completely.

Recipe Notes

  • Feel free to substitute with gluten-free flour if needed.
  • Add chocolate chips or nuts for extra flavor.
  • Muffins can be frozen for up to 3 months—thaw before serving.
  • Enhance the cream cheese mixture with a splash of vanilla for added flavor.

Delicious Chocolate-Covered Ice Cream Bars for a Sweet Treat

Delicious Chocolate-Covered Ice Cream Bars: The Ultimate Treat for Any Occasion

⚖️
Difficulty
Easy

⏲️
Prep Time
30 mins

🕒
Cook Time
0 mins

⏱️
Total Time
30 mins

🍽️
Servings
6 bars

Indulging in a creamy Chocolate-Covered Ice Cream Bar is a delightful experience that evokes a sense of nostalgia and joy. Picture biting into a smooth, chilled treat, where the rich, velvety chocolate coating gives way to a luscious ice cream center. This classic dessert is perfect for hot summer days or as a sweet treat any time of the year. Whether you’re celebrating a special occasion or simply craving a refreshing snack, these ice cream bars can bring smiles to faces young and old.

The combination of creamy ice cream and a crunchy chocolate shell creates a harmonious balance of textures and flavors that tantalizes your taste buds. The sweetness of the chocolate complements the coolness of the ice cream perfectly, while a hint of vanilla or any flavor you choose elevates this treat into a delicious experience. You can customize the flavors to suit your preferences or to impress your guests with something truly special.

Quick Recipe Highlights

  • Flavor Profile: Rich dark chocolate pairs beautifully with creamy vanilla ice cream.
  • Texture: The bars feature a crunchy chocolate shell and a soft, creamy ice cream interior.
  • Aroma: The enticing aroma of melting chocolate hints at the delightful flavors within.
  • Visual Appeal: The glossy finish of the chocolate coating makes these bars a feast for the eyes.
  • Skill Level Needed: Even beginner cooks can master this easy and fun recipe!
  • Special Equipment: A cookie sheet, parchment paper, and a heatproof bowl for melting chocolate are all you need.

Recipe Overview

  • Difficulty Level: This Chocolate-Covered Ice Cream Bars recipe is easy to follow, requiring no baking skills, making it suitable for home chefs of any level.
  • Category: These bars fall under the dessert category, specifically a frozen dessert offering satisfaction and sweetness.
  • Cuisine: Ice cream bars are popular in various cuisines worldwide, often representing summer and festive occasions.
  • Cost: Making these delicious bars at home is cost-effective, generally costing much less than store-bought varieties.
  • Season: Enjoy these Ice Cream Bars any time of the year, but they are especially refreshing during the warm summer months.
  • Occasion: Perfect for birthdays, barbecues, or simply as a treat to cool off after a long day.

Why You’ll Love This Recipe

The appeal of Chocolate-Covered Ice Cream Bars is undeniable. The delightful taste of rich chocolate combined with cold, creamy ice cream creates a perfect balance, providing a satisfying treat. Each bite offers a refreshing experience, making them an excellent choice for summer indulgence. You can experiment with different flavors of ice cream – from classic vanilla to exotic mango, every variation delights with its unique taste.

The convenience of making Chocolate-Covered Ice Cream Bars at home also adds to their charm. With easy preparation and straightforward steps, you can whip up a batch in under thirty minutes, which means spontaneous treats are always an option. Not only do they allow for customization, but they also encourage quality family time in the kitchen, making them a great addition to family gatherings.

Nutritionally, while indulgent, these bars can be made with healthier ingredients, including dairy-free or low-sugar alternatives. This flexibility gives you the power to treat yourself healthily. You can also introduce homemade variations that can sneak in nutritious elements, creating a sweet experience without a hefty guilt factor.

Socially, Chocolate-Covered Ice Cream Bars are a hit at gatherings and parties. Everyone loves homemade treats, and these bars tend to stir up fond memories and create new ones. Sharing these with friends and family makes for delightful moments in building connections. They also serve as excellent conversation starters, allowing for the exchange of personal recipes and favorite ice cream combinations.

Lastly, making these bars can be incredibly cost-effective. Purchasing commercial ice cream bars can add up, whereas creating your own at home can save you money. The ingredients are easy to source, and with minimal preparation, you can stock up these delicious treats, prepared fresh and tailored to your taste preferences.

Historical Background and Cultural Significance

Ice cream bars have become a beloved dessert, with origins tracing back to the early methods of freezing sweetened cream or flavored concoctions. The rise of chocolate as a popular coating in the 20th century transformed ice cream into a portable and shareable treat, paving the way for modern variations.

Culturally, chocolate-covered ice cream bars symbolize celebration and joy in many communities, often associated with summer festivals, birthday parties, and family gatherings. Their popularity can be attributed to their ability to bring people together, sharing a moment of delight and indulgence in a world of fast-paced living.

Over the decades, as refrigeration technology improved, the evolution of this dessert began to flourish with the introduction of new flavors and fillings. From standard chocolate and vanilla to innovative combinations involving nuts, fruit, and even gourmet chocolates, the recipe has been redefined for various palates.

Regional variations of ice cream bars showcase local flavors and preferences around the globe. For instance, in some countries, there are bars filled with traditional desserts or even spices that reflect cultural heritage, offering rich and diverse experiences.

Ingredient Deep Dive

  • Chocolate: Chocolate’s rich history dates back to ancient Mesoamerica, where it was consumed as a bitter beverage. Today, it is celebrated for its versatility in sweet recipes, providing both flavor and a satisfying crunch in desserts. It’s crucial to select high-quality chocolate to ensure a delicious coating for your ice cream bars, choosing between dark, milk, or white chocolate based on personal preference. Store untempered chocolate in a cool, dry place and consider using it within a year for the best flavor. If out of chocolate, you can substitute with carob or a blend of cocoa and coconut oil.
  • Ice Cream: This beloved frozen treat has roots that date back centuries, originating from the blending of cream and flavorings. Ice cream provides a creamy contrast to the crunchy chocolate coating and can be made from milk, cream, or even nut-based alternatives for a dairy-free option. When selecting ice cream for your bars, consider aspects like flavor intensity and base ingredients. Store homemade ice cream in an airtight container at a consistent temperature, and substitute with sorbet or yogurt for lighter variations.

Common Mistakes to Avoid

  • Not letting the chocolate cool properly before dipping, resulting in a soft coating that won’t set.
  • Using regular chocolate chips instead of high-quality chocolate bars, which may not melt smoothly.
  • Not freezing the ice cream bars long enough, causing them to melt quickly when coated.
  • Leaving the bars out too long before serving, leading to messy, drippy desserts.
  • Skipping parchment paper, resulting in difficult clean-up and potential damage to your bars.
  • Overdipping in chocolate, making it difficult to get the coating to adhere properly.
  • Using unflavored ice cream that lacks the rich taste needed for balance with the chocolate.
  • Not varying the ice cream flavors, which can lead to uniformity and lackluster results.
  • Forgetting to check for the right temperature when melting chocolate, resulting in burnt chocolate.
  • Neglecting to let the bars set properly after coating, causing chocolate to smudge or chip off.

Essential Techniques

To achieve the ideal chocolate coating on your ice cream bars, tempering is a crucial technique. Tempering chocolate stabilizes cocoa butter crystals, ensuring a shiny finish and snap when bitten into. To master this, slowly melt your chocolate in a bowl over simmering water, and monitor the temperature for accuracy, pulling it off the heat once it reaches the right point. Common pitfalls include overheating the chocolate; keep it under 120°F for best results.

Properly freezing your ice cream bars is vital for a successful coating. Ensure that your bars are well-frozen for at least 4 hours before dipping to avoid melting and destruction. Use a good quality ice cream that can hold its form. Look for ice cream with a higher fat content for excellent structural integrity, and keep an eye out for loose protein or emulsifiers that might affect the final outcome.

Pro Tips for Perfect Chocolate-Covered Ice Cream Bars

1. Choose the right chocolate based on your desired flavor—milk for sweetness, dark for richness, or white for a creamy touch.
2. Melt your chocolate using a double boiler to ensure precise temperature control and prevent scorching.
3. Freeze the ice cream bars for several hours ahead of coating to maintain their form when dipped.
4. Dip the bars quickly into the chocolate for even coverage, using a gentle swirl to allow excess chocolate to fall away.
5. Sprinkle toppings, like crushed nuts or sprinkles, immediately after coating while the chocolate is still wet for optimal adhesion.
6. Use a fork or skewer to easily dip the bars, avoiding messy hands and ensuring perfect chocolate coverage.
7. Store any leftover bars in an airtight container in the freezer to maintain quality and extend shelf life.
8. Experiment with different ice cream flavors and chocolate combinations for unique and exciting results.

Variations and Adaptations

There are many exciting ways to mix things up with Chocolate-Covered Ice Cream Bars. Try incorporating local and seasonal ingredients, such as adding a layer of berry jam or a splash of caramel sauce in the center for a fruity or caramel twist. During holidays, think of swapping chocolate for seasonal candies like crushed peppermint or festive-themed sprinkles.

For those with dietary restrictions, plenty of adaptations can be made. Substituting regular ice cream with dairy-free or vegan options can cater to a broader audience without sacrificing taste. Consider using gluten-free cookies or alternative sweeteners to make the bars suitable for gluten-free or sugar-free diets.

Culinary modifications can also be endlessly creative! With a variety of toppings, consider rolling your bars in toasted coconut, crushed pistachios, or cookie crumbs before the chocolate solidifies. Each variation not only adds a different flavor and texture but can create a visually stunning dessert.

For presentation, sample different serving styles, such as serving your bars in a decorated cup or alongside fresh fruit. Transform your traditional dessert into an artistic plate, creating a feast for the eyes as well as the palate.

Serving and Presentation Guide

The presentation of your Chocolate-Covered Ice Cream Bars can elevate any gathering. Begin with a clean, crisp white plate to make the colors pop. Consider placing the bars upright in a small vase or decorative cup, making them visually striking. Alternatively, meticulously arrange them on a platter with fresh fruit or drizzles of chocolate sauce for an elegant effect.

Garnishing is key; consider adding fresh mint leaves or a dusting of cocoa powder for appeal. If you have time, creating a homemade chocolate sauce and drizzling it across the plate offers the finishing touch, enhancing flavor and drawing the eye.

Depending on the occasion, choosing appropriate accompaniments enhances the experience. A scoop of sorbet or a dollop of whipped cream may be refreshing complements, while a side of fruit, such as strawberries or raspberries, offers a fresh burst of flavor. Pay attention to serving temperatures, ensuring the ice cream remains cold while the chocolate is not too hard—just the right texture for savoring.

Finally, portion control can be a consideration. If serving guests, cut the bars into smaller segments for easy consumption or pair them with mini cones for a fun sharing experience.

Wine and Beverage Pairing

Finding the right beverage to pair with your Chocolate-Covered Ice Cream Bars can enhance the overall experience. For wine lovers, a rich Cabernet Sauvignon or a Malbec pairs beautifully with chocolate due to its deep, fruity notes bridging the sweetness. If self-judging, opt for sweeter dessert wines like Port or Ice Wine to complement the dessert’s richness.

For non-alcoholic options, consider pairing your ice cream bars with a classic milkshake or a rich hot chocolate. The textures of cold and hot drinks together create an enjoyable contrast, enhancing each component.

If you’re a coffee drinker, a dark roast cappuccino or a mocha can serve as a perfect accompaniment, as the deep coffee flavor balances the sweetness of the dessert. Ensure the drinks are served at a comfortable temperature to prevent any inconsistency in enjoyment.

While serving, think about layering flavors; consider using flavored teas, such as chai or hibiscus, boasting aromatic properties that could help cleanse the palate between bites, keeping things light and refreshing.

Storage and Shelf Life

Storing Chocolate-Covered Ice Cream Bars properly is essential for maintaining their taste and quality. Keep your bars in an airtight container in the freezer to prevent freezer burn and ice crystals from forming. They can typically last in the freezer for up to two months but are best enjoyed within two weeks for optimal flavor.

To ensure freshness, avoid repeatedly removing the bars from the freezer—as this can expose them to temperature fluctuations. When you do remove them, serve immediately or return to storage as soon as possible.

If packaged correctly, signs of spoilage may include freezer burn on the chocolate coating or an off-taste from the ice cream. In such cases, it’s better to discard rather than risk any unpleasant flavors when serving.

In cases of leftovers after serving, store completed ice cream bars back in their container promptly. To reheat for revived flavor, simply allow the bars to thaw in the fridge for a couple of minutes.

Make Ahead Strategies

To maximize efficiency, these Chocolate-Covered Ice Cream Bars can easily be made ahead of time. Start by preparing the ice cream base—a homemade option may be prepared days in advance and stored in the freezer. Once your ice cream has been frozen solid, remove it and cut it into bars before you coat them in chocolate.

After the chocolate has been added, allow the bars to set completely in the freezer before wrapping or storing. This technique ensures fresh bars on hand for last-minute gatherings or casual weeknight treats.

Take stock of the timeline; make the bars a day or two in advance, allowing flavors to mature. It’s also a good practice to plan the assembly so you can enjoy the finishing touches. If interested, consider adding fresh garnishes just before serving to enhance appeal!

Remember, you can always add final touches, such as temperatures—serving in chilled bowls enhances texture and taste upon presentation.

Scaling Instructions

Scaling the Chocolate-Covered Ice Cream Bars recipe is quite straightforward. To make fewer servings, simply halve the ingredient quantities and prepare as directed. This approach allows you to customize the number of bars based on your needs.

Should you decide to double or triple the recipe for gatherings, ensure you have ample freezer space to accommodate the additional bars. Consider using larger baking sheets for melting and setting the ice cream bars, allowing them to freeze efficiently.

Time adjustments may be required when scaling; keep a close watch during the freezing phase, as larger batches might need extra time to reach the ideal firmness. When preparing, be mindful of your workspace—ensuring you have enough room to move around will help streamline the process.

Afterward, follow proper storage considerations, ensuring you label and date containers to keep track of freshness.

Nutritional Deep Dive

Understanding the nutritional breakdown of your Chocolate-Covered Ice Cream Bars can refine your dessert experience. The macro breakdown typically includes carbohydrates from the ice cream, sugars from both chocolate and sweetened bases, and fats, primarily from cream or nuts used in the ice cream.

Micronutrient analyses show that chocolate can deliver valuable antioxidants, while certain ice creams provide calcium along with essential vitamins depending on the base ingredients. Low-sugar and low-fat options are available for those who may still want to indulge without overdoing it.

Health benefits can be significant with moderation in mind, particularly when ingredients like dark chocolate provide heart-healthy properties when consumed in reasonable portions.

Portion control can help with weight management, and by monitoring serving sizes, you can maintain the balance between enjoying desserts and maintaining a healthy lifestyle.

Dietary Adaptations

For those following specific dietary needs, adapting the Chocolate-Covered Ice Cream Bars is truly feasible. Gluten-free options can be crafted using certified gluten-free products, ensuring everyone can enjoy a delicious treat without worry.

Dairy-free individuals can substitute recipes using coconut milk or almond milk to create softer, creamier ice creams. The flavor profiles remain delightful while meeting dietary restrictions.

Vegan adaptation can follow suit, offering a complete plant-based approach. Utilizing alternative sweeteners and ensuring all ingredients are sourced without animal products provides conscientious consumption while ensuring a delicious experience.

Incorporating low-carb options can transform the ice cream using coconut cream, hidden sweeteners, and sugar-free chocolate, producing an enjoyable experience for those on keto diets.

Paleo-friendly adaptations allow for caveman-inspired elements—utilizing honey or maple syrup to sweeten, while precluding refined sugars can push these bars into more ancient flavor profiles.

Troubleshooting Guide

If you encounter texture issues, such as graininess in your chocolate, review your melting technique. Ensure your chocolate is tempered and melted gently—high heat leads to burned chocolate and unusual textures.

Flavor balances may need adjusting if the chocolate tastes bitter; add a touch of sugar or opt for milk chocolate for sweetness. Always taste your chocolate before using, ensuring the selected recipe aligns with your preferences.

Temperature problems are common when melting chocolate or freezing ice cream bars too quickly. Make adjustments to your method, and remember to allow ample time for chilling, particularly when layered lasagna-style.

Equipment challenges arise unexpectedly; if your freezer isn’t freezing efficiently, double-check temperature settings and consider relocating to a space where airflow is optimal.

Ingredient substitutions may impact end taste; adjust future recipes based on what flavors shine through. In case of timing concerns while battering and freezing, remember that preparation ahead of schedule helps ease any pressure.

Recipe Success Stories

Many home cooks have shared feedback about their experience preparing Chocolate-Covered Ice Cream Bars. Numerous individuals appreciate the ease of creating these bars, allowing customization alongside family and friends each summer.

Variations have flourished; one individual successfully replaced traditional chocolate with a vibrant matcha coating, enthralling audiences with unique flavors. Others have enjoyed integrating local honey into the ice cream base, enhancing sweetness while supporting local farmers.

Adaptation stories resonate where dietary restrictions intersected with creativity, enabling those with lactose intolerance or gluten allergies to indulge alongside others, creating a more inclusive atmosphere during gatherings.

Readers frequently suggest photography tips, sharing insights to capture the glossy sheen of chocolate-covered bars against bright fruits or rustic wooden backgrounds, showcasing the inviting nature of this beloved dessert.

Frequently Asked Questions

1. Can I use store-bought ice cream for this recipe?

Absolutely! Store-bought ice cream works perfectly for these Chocolate-Covered Ice Cream Bars. Choose your favorite flavor for easy preparation, but feel free to experiment with homemade ice cream for a custom twist.

2. How long do the bars take to freeze?

Typically, the ice cream bars need about 4 hours to freeze solid. Ensure they are adequately frozen before dipping to maintain their shape while coating them with chocolate.

3. What is the best type of chocolate to use?

The best chocolate to use depends on your preferences. Dark chocolate delivers a rich experience, while milk chocolate offers sweetness. For a lighter option, consider using white chocolate or compounds made for easy melting.

4. Can I make these bars ahead of time?

Yes! You can prepare ice cream bars ahead of time and store them in the freezer for up to two months. Enjoying them fresh is best, but they’ll maintain quality if sealed properly.

5. What’s the best way to store leftover bars?

Store leftover Chocolate-Covered Ice Cream Bars in an airtight container in the freezer. They can last for up to two months, but it’s best to consume them within two weeks for optimal taste.

6. Can I use different toppings?

Yes! Feel free to experiment with various toppings such as nuts, sprinkles, coconut flakes, or crushed cookies for added flavor and texture before the chocolate sets.

7. What can I substitute for chocolate?

If you’re looking for an alternative to chocolate, caramel sauce or yogurt could be possible substitutes, but note that the texture and flavor profile will differ from the original recipe.

8. Can these bars be made vegan?

Certainly! Substitute dairy-free ice cream and use vegan chocolate chips for a delicious plant-based treat without compromising the delightful taste.

9. Is it possible to add flavorings to the chocolate?

Yes, you can add flavorings such as vanilla extract, peppermint extract, or sea salt to enhance the chocolate’s flavor before coating the bars for added depth.

10. What should I do if the chocolate isn’t coating evenly?

If your chocolate isn’t coating evenly, check its consistency. It may need to be melted again or thinned with a bit of coconut oil for a smoother application.

Additional Resources

If you loved creating these Chocolate-Covered Ice Cream Bars, explore related dessert recipes to continue your culinary journey. Try out different frozen desserts such as fruit sorbets or homemade popsicles for refreshing concepts. You can dive deeper into technique guides and learn how to master the art of tempering chocolate to enhance various recipes.

Discover ingredient information that crosses over into different desserts for useful kitchen knowledge. Additionally, identify equipment recommendations for perfect bar-making to ensure you have all necessary tools on hand. Finally, seasonal variations like pumpkin spice or peppermint-infused bars can be perfect for holiday celebrations.

Join the Conversation

We encourage you to share your experiences with Chocolate-Covered Ice Cream Bars on social media and engage with our community! Use hashtags to showcase your culinary creations along with photos that capture the essence of this delightful treat. Review your take on this recipe and provide your unique twists to inspire others.

Don’t hesitate to comment on variations you’ve tried or suggestions that stood out to you during the process. Let’s cultivate a vibrant, interactive community that celebrates the joy of cooking and creativity in the kitchen!

The Recipe

Chocolate-Covered Ice Cream Bars

Serves: 6 bars

Prep Time: 30 mins

Cook Time: 0 mins

Total Time: 30 mins

Kitchen Equipment Needed

  • Cookie sheet
  • Parchment paper
  • Heatproof bowl
  • Spatula
  • Ice cream scoop

Ingredients

  • 2 cups of your favorite ice cream
  • 1 1/2 cups semi-sweet chocolate chips
  • 1 tablespoon coconut oil (optional, for smoother chocolate)
  • Toppings: chopped nuts, sprinkles, or crushed cookies (optional)

Directions

  1. Line a cookie sheet with parchment paper. Scoop ice cream onto the parchment, forming bars.
  2. Freeze the bars for at least 4 hours until solid.
  3. Melt the chocolate chips in a heatproof bowl over simmering water, stirring until smooth. Add coconut oil for a thinner consistency if desired.
  4. Dip each ice cream bar into the melted chocolate, allowing excess to drip off.
  5. For added flavor, roll the bars in your choice of toppings immediately after dipping.
  6. Return the coated bars to the cookie sheet and freeze again until the chocolate is hard, about 15 minutes.
  7. Serve and enjoy your delightful chocolate-covered ice cream bars!

Recipe Notes

  • Feel free to substitute different flavors of ice cream or toppings based on your preferences.
  • Use a double boiler for melting chocolate to prevent scorching.
  • If you want a dark chocolate flavor, opt for high-quality dark chocolate bars.

Indulge in This Easy Butterfinger Caramel Crunch Fudge Recipe

Butterfinger Caramel Crunch Fudge Recipe: Easy Holiday Dessert Idea

⚖️
Difficulty
Easy

⏲️
Prep Time
15 mins

🕒
Cook Time
30 mins

⏱️
Total Time
45 mins

🍽️
Servings
24 pieces

Indulge your senses this holiday season with our delightful Butterfinger Caramel Crunch Fudge Recipe. This easy holiday dessert combines the rich, creamy sweetness of fudge with the irresistible crunch of Butterfinger candy bars and smooth caramel. Each bite is a symphony of flavors that brings smiles and warmth to any gathering. The combination is not only delicious but also visually appealing, making this fudge a perfect centerpiece for your holiday dessert table.

Imagine a soft, velvety fudge that melts in your mouth, offering the crunch you crave. The sweet, nutty flavor of the Butterfinger pairs perfectly with the buttery, sweet notes of caramel, creating a flavor explosion that is simply irresistible. This fudge can be prepared quickly and is a fantastic way to share the joy of the season with friends and family. Whether you’re hosting a festive party or searching for the ideal homemade gift, this fudge is sure to impress everyone.

Quick Recipe Highlights

  • Flavor Profile: This fudge offers a delectable mix of chocolate, caramel, and buttery toffee notes from Butterfinger that will tantalize your taste buds.
  • Texture: Experience the smooth creaminess of fudge layered with the crunchy bits of Butterfinger, providing an exciting contrast.
  • Aroma: The sweet smell of melted chocolate and caramel fills your kitchen, promising a treat that is as fragrant as it is delicious.
  • Visual Appeal: The gorgeous swirls of chocolate and caramel create an eye-catching display, perfect for any festive occasion.
  • Skill Level Needed: Even novice bakers can successfully make this fudge, making it an accessible treat for all.
  • Special Equipment: A saucepan and a baking dish are all you need—no fancy tools required!

Recipe Overview

  • Difficulty Level: The simplicity of this Butterfinger Caramel Crunch Fudge makes it suitable for beginner cooks, while still delighting seasoned bakers looking for a quick treat.
  • Category: This recipe falls under the dessert category, perfect for celebrations, holidays, or as a sweet snack.
  • Cuisine: Although it pulls inspiration from classic American desserts, the rich flavors give it a gourmet twist beloved by many.
  • Cost: This recipe is budget-friendly, using common ingredients that won’t break the bank, making it an economic choice for holiday treat-making.
  • Season: Although ideal for the holiday season, its delicious flavor makes it a year-round favorite.
  • Occasion: Perfect for holiday gatherings, parties, or as a thoughtful gift for friends and family.

Why You’ll Love This Recipe

The incredible taste and texture of Butterfinger Caramel Crunch Fudge are sure to win over your palate. Each bite blends the creaminess of classic fudge with the delightful crunch of Butterfinger, making for an addictively delicious treat. It’s not just about the flavor; the smooth caramel complements the sweet chocolate, creating a luscious mouthfeel. The balance of flavors is so perfect that you might find yourself going back for seconds— or thirds!

Convenience is another reason you’ll adore this recipe. With only a handful of ingredients and minimal preparation time, you can whip up this fudge in no time. It requires no baking, and with careful attention, anyone can achieve perfect results. The ability to prepare this treat ahead of time also makes it an excellent choice for busy holiday schedules.

Not only is this fudge delicious, but it also has some nutritional benefits. The chocolate provides a burst of antioxidants, and the Butterfinger adds a hint of protein due to its nut content, striking a balance between indulgence and nourishment. While you wouldn’t exactly call this a health food, it does offer a touch of sweetness without sacrificing too much in the way of nutrition.

Social gatherings become more vibrant with homemade treats like this fudge. Sharing food strengthens bonds, and this Butterfinger Caramel Crunch Fudge provides a fantastic conversation starter and a joyful experience. Guests will be thrilled to enjoy a homemade dessert, creating lasting memories together.

Lastly, this fudge is incredibly cost-effective. The ingredients are readily available and inexpensive, allowing you to bake a large batch without overspending. Plus, its delightful packaging makes it a great gift, adding a personal touch to your holiday celebrations.

Historical Background and Cultural Significance

The history of fudge as a dessert dates back to the late 19th century, originating in United States culinary traditions. Fudge quickly became popular for its creamy texture and rich flavor and has been a beloved treat during the holidays ever since. This recipe takes inspiration from these roots while incorporating beloved components like Butterfinger candy bars for an unexpected twist.

Culturally, desserts like fudge have significant importance in American households, often homemade and shared during family gatherings and celebrations. These treats foster connection and nostalgia, bringing loved ones together during festive seasons. As the holidays approach, families often share favorite recipes, and this Butterfinger Caramel Crunch Fudge is a splendid modern addition to any tradition.

Over the years, the evolution of fudge recipes has seen various adaptations and flavors, reflecting the diverse palates of those who enjoy it. From classic chocolate fudge to creative variations incorporating caramel and crunchy elements, fudge now boasts numerous takes that cater to different tastes and preferences.

Regional variations of fudge exist across the nation, some experimenting with local ingredients that add a unique twist, while others stay true to the original chocolate flavor. No matter the version, fudge remains a cherished dessert among Americans, symbolizing warm hospitality and festive spirit.

Ingredient Deep Dive

Chocolate

Chocolate is a staple ingredient in countless desserts and carries a rich cultural significance, being enjoyed worldwide for over three thousand years. Not only is chocolate beloved for its decadent taste, but it’s also packed with antioxidants that may provide various health benefits. When selecting chocolate for fudge, opt for high-quality baking chocolate for optimal melting and flavor. Store chocolate in a cool, dry place, and be aware that it can last for several months when stored properly.

Butterfinger

Butterfinger bars are a classic candy that brings a nostalgic taste to many. These bars feature a unique combination of chocolate coating and a distinctively crunchy peanut butter core. Nutritionally, Butterfinger offers a small amount of protein due to the peanuts, adding a crunchy texture to fudge that elevates the taste experience. When purchasing Butterfinger bars, look for fresh items free of damage. They can be stored in their original wrappers at room temperature but are ideally kept in a cool spot.

Caramel

Caramel, made by heating sugar, has its roots deep in various culinary traditions worldwide. Its rich, sweet profile adds depth to desserts like fudge. In terms of nutrition, caramel is primarily sugar, so it’s essential to enjoy it in moderation. Look for high-quality caramel sauces that contain real ingredients over those with artificial additives. Store left-over caramel in airtight containers in the fridge, but be sure to use it within a week for the best quality.

Common Mistakes to Avoid

  • Skipping Ingredient Measurement: Accurate measuring is crucial in baking; using too much or too little can affect your fudge’s outcome.
  • Overheating the Chocolate: Chocolate can seize or become grainy if overheated. Melt slowly and gently over low heat for the best results.
  • Ignoring Temperature: Ensure the fudge cools completely before cutting to maintain its structure and prevent it from crumbling.
  • Using Subpar Ingredients: Always choose high-quality chocolate and caramel; less expensive varieties can negatively impact the taste.
  • Not Greasing the Pan: Always grease the baking dish well; otherwise, your fudge may stick and be difficult to cut.
  • Rushing the Cooling Process: Patience is key in allowing the fudge to set properly—don’t rush this step.
  • Forgetting to Mix Ingredients: Combine well while melting to avoid uneven textures in your fudge.
  • Storing Incorrectly: Once set, store fudge in a cool, dry place away from direct sunlight to maintain freshness.

Essential Techniques

The key technique for making Butterfinger Caramel Crunch Fudge is the melting of chocolate. It’s important because evenly melted chocolate ensures a smooth texture for your fudge. To master this technique, use a double boiler or a microwave, melting in short intervals and stirring frequently. Visual cues for success include a shiny, smooth consistency without any lumps. Always start at a lower power to prevent overheating.

Another essential technique is folding in the Butterfinger and caramel gently. This process allows you to create a beautiful mixture without breaking apart the candies. To avoid common pitfalls, don’t mix too vigorously; otherwise, you risk turning everything into a mushy mess. The result should be a beautiful blend of fudge, caramel, and crunchy bits peeking throughout.

Pro Tips for Perfect Butterfinger Caramel Crunch Fudge

Use the highest quality chocolate to ensure rich flavor and creamy texture.
Plan ahead: Allow plenty of time for the fudge to cool completely before cutting.
Try mixing mini marshmallows into the fudge for added chewiness.
Top the fudge with extra Butterfinger pieces for a decorative touch.
Experiment with different chocolate types, like dark or white chocolate, to create a unique flavor.
Store leftovers in an airtight container to prolong freshness and flavor.
Gently heat any hard leftover fudge in the microwave for a few seconds before serving to soften it slightly.
Consider adding a pinch of sea salt on top to enhance the sweetness of the fudge.

Variations and Adaptations

For regional variations of this fudge, you might consider incorporating nuts such as pecans or walnuts, which add a delightful crunch and flavor contrast. Seasonal adaptations may include adding peppermint extract around the holidays, making it a festive treat for winter gatherings. If dietary restrictions arise, this fudge can be modified into gluten-free and dairy-free versions using appropriate substitutes, like coconut cream or dairy-free chocolate.

Flavor variations are endless; try adding a hint of espresso powder for an alluring coffee twist that complements the chocolate beautifully. For texture modifications, consider blending in marshmallows or adding a base of rice cereal for an extra crunch. Finally, presentation alternatives can include cutting the fudge into different shapes, such as squares or festive holiday shapes, and adding garnishes like colorful sprinkles.

Serving and Presentation Guide

When plating Butterfinger Caramel Crunch Fudge, consider using a decorative serving platter or tiered stand to showcase its beauty. Garnishing with additional crushed Butterfinger on top adds a finished touch and entices guests. Traditional accompaniments, such as coffee or milk, enhance the flavor experience and cater to guest preferences. Serving the fudge at room temperature allows all flavors to shine.

Temperature considerations matter, as serving slightly warm fudge offers a delightful melt-in-your-mouth experience. Portion control plays a role in serving sizes; cutting the fudge into small squares ensures everyone enjoys this rich dessert without overindulging.

Wine and Beverage Pairing

Pairing wine with Butterfinger Caramel Crunch Fudge can enhance your dessert experience. A rich dessert wine, like a Port or a late harvest Riesling, complements the sweetness of the fudge beautifully. For non-alcoholic alternatives, consider hot chocolate or a spiced chai latte, both of which will echo the luscious chocolate tones.

Additionally, coffee or espresso offers a bold flavor that balances the sweetness of the fudge nicely. Be sure to serve these beverages warm, enhancing the overall cozy and inviting atmosphere this dessert promotes.

Storage and Shelf Life

To properly store Butterfinger Caramel Crunch Fudge, place it in an airtight container in a cool, dry location away from sunlight. This helps maintain the fudge’s freshness for up to two weeks. For optimal flavor, refrigerating the fudge is a great option, although it may become firmer.

When checking for signs of spoilage, look for an off smell or changes in texture. Should you need to reheat the fudge, a brief time in the microwave will soften it back to its original state. For longer storage, consider freezing the fudge in individual portions wrapped in plastic wrap. Allow it to thaw in the refrigerator before enjoying.

Make Ahead Strategies

If you’re looking to make your Butterfinger Caramel Crunch Fudge ahead of time, consider preparing it a week in advance. Store it in an airtight container to maintain freshness. When planning, a prep timeline of a couple of hours before serving is ideal; this allows sufficient time for cooling and cutting while also keeping the fudge fresh.

If baking in stages, consider melting the chocolate and preparing the rest of the ingredients first. Once cooled, the fudge can be cut, and individual pieces wrapped for gifting or saved for future enjoyment. Allow the fudge time to reach room temperature before serving, ensuring that the flavors are vibrant.

Scaling Instructions

To halve the Butterfinger Caramel Crunch Fudge recipe, simply cut all ingredient measurements in half. This is an easy way to test the recipe or make a smaller batch for an intimate gathering. Conversely, when doubling or tripling the recipe, ensure you use a larger baking dish to allow for even cooking and setting.

Adjust baking times slightly if using multiple pans; you may need to rotate the dishes halfway through. Be mindful of storage considerations; you will need more space for larger batches, especially if you plan to freeze portions.

Nutritional Deep Dive

Analyzing the macros in Butterfinger Caramel Crunch Fudge shows that it is high in carbohydrates, mainly from sugar and chocolate components. While enjoying this treat, being mindful of calorie intake and portion sizes is essential. The fudge does not provide significant protein, but the inclusion of Butterfinger offers some nutritional balance.

Micronutrient analysis reveals some trace minerals from the peanuts in Butterfinger, as well as antioxidants from the chocolate. Enjoying this dessert in moderation is key for those mindful of their dietary habits. For those aiming for weight management, consider cutting the fudge into smaller pieces to enjoy without excessive indulgence.

Dietary Adaptations

For gluten-free adaptations of Butterfinger Caramel Crunch Fudge, simply ensure the chocolate and other ingredients used are certified gluten-free. For those seeking a dairy-free option, plant-based chocolate and coconut cream can create a similar delicious result without dairy.

Vegan adaptations are achievable by using egg-free chocolate and substitutes for heavy cream. For low-carb and keto-friendly variations, consider sugar-free chocolate and a substitute for traditional sweeteners. Paleo aficionados can adapt the fudge using raw or natural sweeteners like honey, drastically altering the end flavor profile.

This versatility allows any dietary restrictions to be met without sacrificing flavor or enjoyment—a real win for inclusive dessert options.

Troubleshooting Guide

If your Butterfinger Caramel Crunch Fudge comes out gritty, it may be due to overheating the sugar or chocolate. Ensure gentle, slow heating to achieve a smooth consistency. If the fudge doesn’t set, try refrigerating for a longer period; you can also add a dusting of confectioners’ sugar to help bind the mixture if it remains too soft.

For flavor balance issues, adding a pinch of salt can enhance sweetness and round out the overall flavor. If using substitutions, be cautious; certain ingredients may behave differently when melted or cooled.

If you encounter issues with the fudge sticking to the pan, ensuring proper greasing before adding the mixture will help. Lastly, for those experiencing challenges with cutting clean pieces, try warming your knife slightly before slicing through the chilled fudge.

Recipe Success Stories

Feedback from the community on Butterfinger Caramel Crunch Fudge has been overwhelmingly positive. Home bakers appreciate how simple it is to make, noting it as a go-to holiday recipe. One reader shared their variation by swapping the Butterfinger for a mix of their favorite candies, resulting in a delightful and colorful fudge.

Others have shared photos showcasing creative ways to gift the fudge. From elegant boxes to festive wrapping, this fudge has become a crowd-pleaser among friends and family. This underscores the versatility and charm of sharing homemade treats during the holidays, making memory-making even sweeter.

Tips from the community on photography highlight the aesthetic beauty of this fudge, with plenty of suggestions for garnishing options that enhance the visual appeal and taste experience. Overall, Butterfinger Caramel Crunch Fudge has garnered a reputation for being as rewarding to share as it is to indulge in.

Frequently Asked Questions

Can I use other candy bars instead of Butterfinger?
Yes! Feel free to experiment with other candy bars like Snickers or Milky Way for different flavor experiences.

How long will the fudge last?
The fudge can last up to two weeks when stored in an airtight container, though it’s best fresh.

Can this fudge be frozen?
Yes, you can freeze it for up to two months. Just ensure it’s wrapped well to avoid freezer burn.

Do I have to use sweetened condensed milk?
While it adds a creamy sweetness, you can substitute with homemade caramel or other sweeteners if desired.

What can I do if my fudge is too soft?
If the fudge is too soft, try refrigerating it longer or re-melting, then re-setting it again in the pan.

Is there a vegan version of this fudge?
Yes! Use dairy-free chocolate and coconut cream as substitutes for traditional ingredients.

How do I know when the fudge is set?
The fudge will be firm to the touch and will have a matte finish on top once completely set.

Can I use microwave instead of stovetop for melting?
Yes, microwave melting is perfectly acceptable; just ensure to do it in increments to avoid burning.

What type of chocolate is best to use?
Opt for high-quality semi-sweet or dark chocolate for the richest flavor.

Can I add nuts to the fudge?
Absolutely! Chopped nuts can add a wonderful crunch and enhance the texture of your fudge.

Additional Resources

If you loved making Butterfinger Caramel Crunch Fudge, you might want to try related recipes such as classic chocolate fudge, rocky road, or peanut butter fudge. Consider exploring technique guides that focus on melting chocolate or making candy, which can be beneficial for any home baker.

Ingredient information is readily available to help you choose the best products, and equipment recommendations can make your baking experience more enjoyable. Seasonal variations can inspire other holiday treats that you can share alongside this delicious fudge, celebrating the flavors of the season in every bite.

Join the Conversation

We encourage our readers to share their experiences making Butterfinger Caramel Crunch Fudge! Engage with us on social media by sharing your photos, tips, or recipe variations. Your feedback is invaluable, and photography tips can inspire others to showcase this delightful recipe.

Recipe reviews help create a sense of community, allowing other home bakers to see the magic possible with Butterfinger Caramel Crunch Fudge. Share your stories and celebrate the joy of homemade treats this holiday season!

The Recipe

Butterfinger Caramel Crunch Fudge

Serves: 24 pieces

Prep Time: 15 mins

Cook Time: 30 mins

Total Time: 45 mins

Kitchen Equipment Needed

  • Medium saucepan
  • Wooden spoon
  • 9×9 inch baking dish
  • Parchment paper (optional for easy removal)

Ingredients

  • 2 cups semi-sweet chocolate chips
  • 1 cup sweetened condensed milk
  • 1 cup Butterfinger candy bars, crushed
  • 1/2 cup caramel sauce
  • 1 teaspoon vanilla extract

Directions

  1. In a medium saucepan, melt the chocolate chips and sweetened condensed milk over low heat, stirring frequently until smooth.
  2. Remove from heat and stir in vanilla extract and crushed Butterfinger bars until well combined.
  3. Pour half of the mixture into the prepared baking dish and spread evenly.
  4. Drizzle caramel sauce over the fudge layer and swirl gently with a knife.
  5. Top with remaining fudge mixture and smooth the top.
  6. Refrigerate for at least 2 hours or until set. Once set, cut into squares and serve.

Recipe Notes

  • Store fudge in an airtight container in a cool place for up to 2 weeks.
  • Feel free to substitute with your favorite candy bars for added variety.