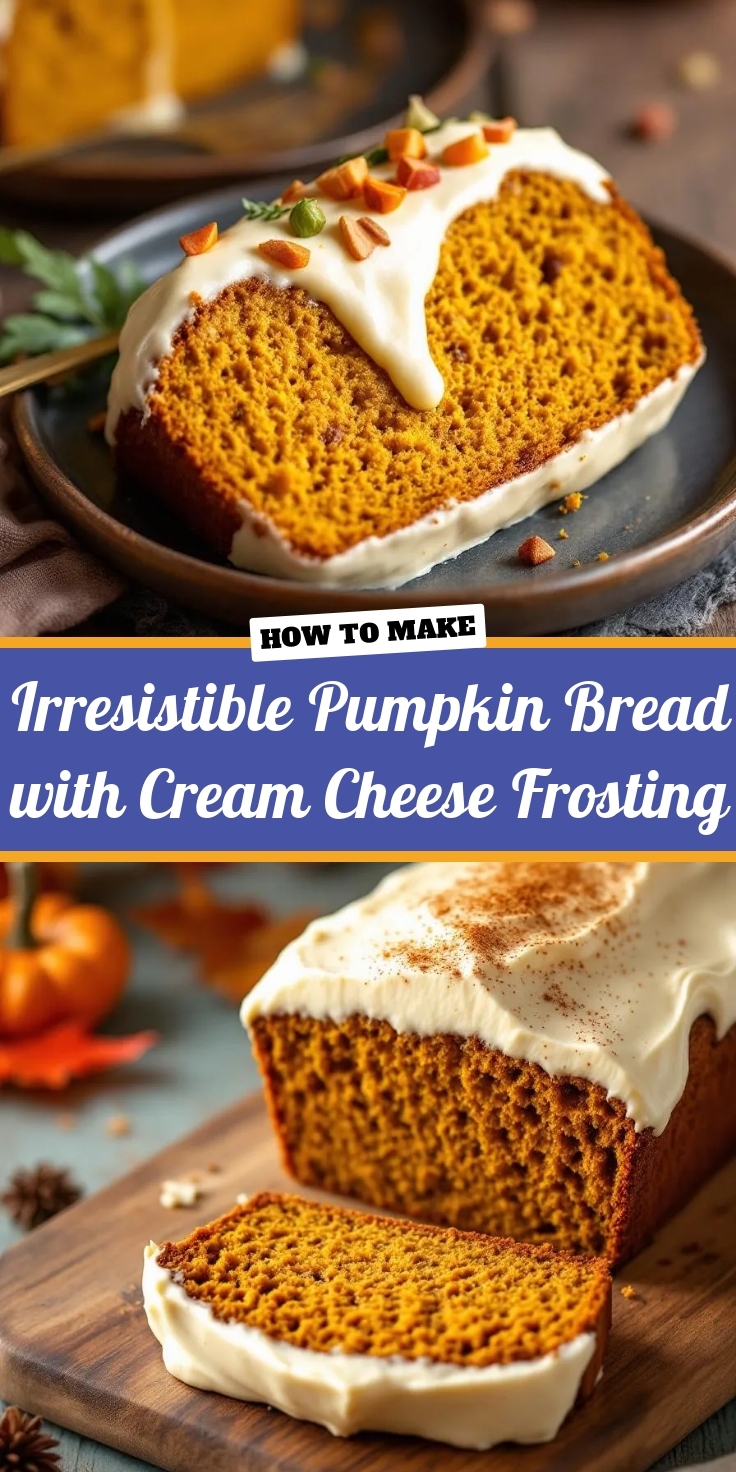
“`html
Introduction
There’s something magical about the combination of sweet, salty, and crunchy—especially when it comes to no-bake treats. If you’re craving a dessert that’s effortless yet unforgettable, this Irresistible Peanut Butter Fritos Candy Recipe will steal the show. Whether you need a quick party snack or a late-night indulgence, this recipe delivers big flavor with minimal effort. Plus, it’s the kind of nostalgic comfort food that brings back memories of childhood while satisfying your grown-up sweet tooth. Trust me, one bite and you’ll wonder how you ever lived without it.
About This Recipe
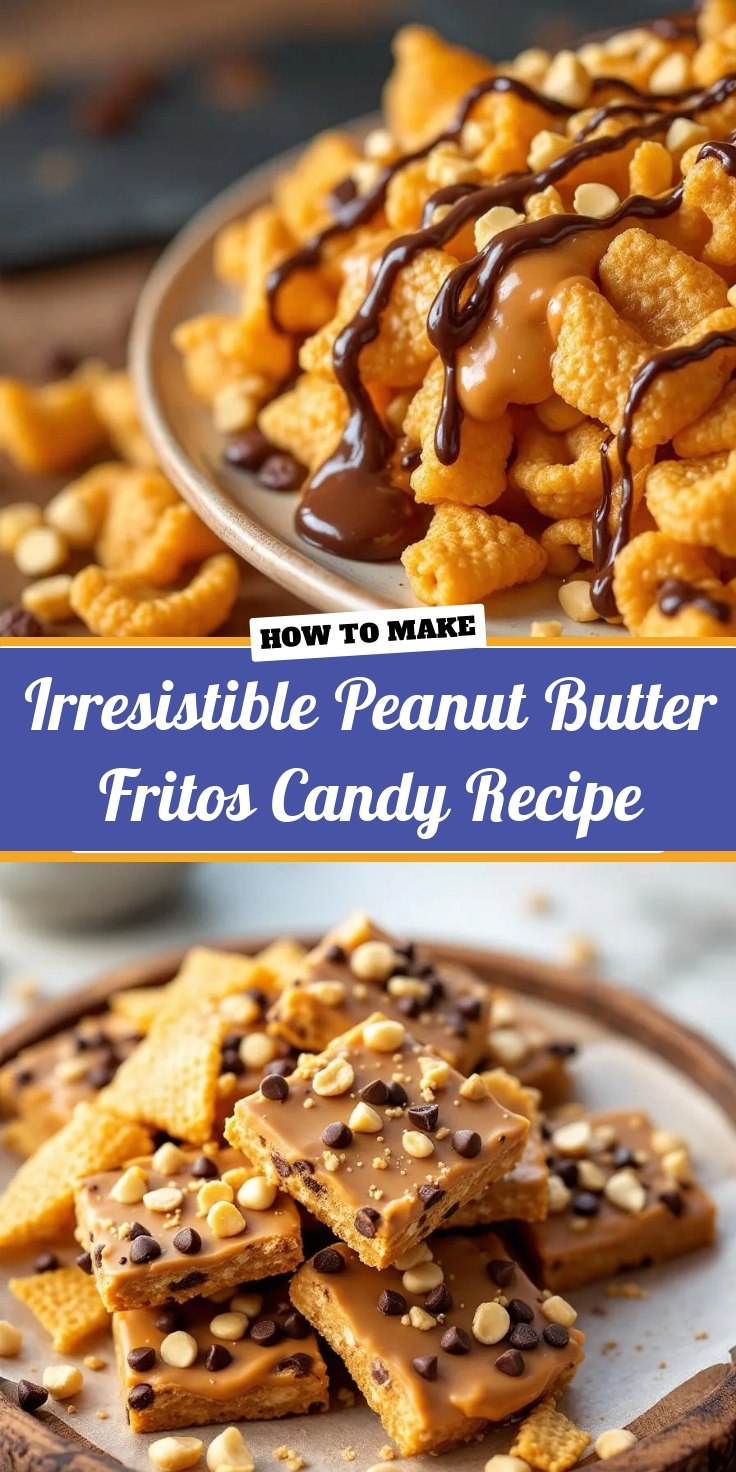
Irresistible Peanut Butter Fritos Candy Recipe is a simple yet genius dessert that transforms humble ingredients into something extraordinary. By layering Fritos corn chips with a creamy peanut butter mixture and topping it with melted chocolate, you create a treat that balances salty, sweet, and crunchy in every bite. What makes this recipe special is its versatility. You can customize it with dark, milk, or white chocolate, or even drizzle caramel for extra decadence. Moreover, it requires no baking, making it perfect for busy days or last-minute cravings.
This recipe fits perfectly with the playful, approachable tone of Brek Cakes, where we celebrate easy yet impressive desserts. If you love no-fuss recipes with big flavor, you’ll also adore our 3-Ingredient Peanut Butter Cups or our Salted Caramel Pretzel Bark. These treats prove that sometimes the simplest recipes bring the most joy. Whether you’re a seasoned baker or a kitchen newbie, Irresistible Peanut Butter Fritos Candy Recipe guarantees delicious results every time.
Why I Love This Recipe
This recipe holds a special place in my heart because it reminds me of my grandma’s kitchen. She always had a knack for turning everyday ingredients into something extraordinary, and this candy captures that same spirit. I love how the salty Fritos contrast with the rich peanut butter and chocolate, creating a flavor explosion that’s impossible to resist. Even better, it’s a recipe I can whip up with my kids, making it a fun family activity. Every time I make it, I’m reminded that the best desserts don’t need to be complicated—just packed with love and a little bit of crunch.
“`
Health and Nutrition
Why it’s good for your body
Irresistible Peanut Butter Fritos Candy Recipe packs a surprising mix of nutrients while satisfying your sweet tooth. First, peanut butter delivers plant-based protein and healthy fats, which keep you full longer and support muscle repair. Additionally, the natural sweetness from honey or maple syrup offers a better alternative to refined sugar, giving you energy without a harsh crash. Moreover, Fritos add a satisfying crunch while keeping the recipe gluten-free, making it a great option for those with sensitivities.
Furthermore, dark chocolate chips—if you use them—bring antioxidants that fight inflammation and support heart health. The combination of ingredients in Irresistible Peanut Butter Fritos Candy Recipe creates a balanced treat that fuels your body and mind. Finally, because it’s easy to portion, you can enjoy it mindfully without overindulging. Whether as a post-workout snack or a midday pick-me-up, this recipe delivers both flavor and nourishment.
How it fits in a healthy lifestyle
Irresistible Peanut Butter Fritos Candy Recipe fits perfectly into a balanced diet when enjoyed in moderation. Its protein and healthy fats make it a smart choice for curbing cravings, especially if you’re managing a high-protein or gluten-free diet. For those focused on heart health, swapping in dark chocolate boosts flavonoid intake, which supports circulation. Pair it with a piece of fruit or a handful of nuts for a more rounded snack.
If you’re meal prepping, this recipe stores well, so you can avoid less nutritious impulse buys. For more gluten-free ideas, check out our gluten-free dessert roundup. And if you love peanut butter’s benefits, our peanut butter recipe collection offers even more ways to enjoy it. With simple ingredients and quick prep, Irresistible Peanut Butter Fritos Candy Recipe makes healthy eating deliciously effortless.
PrintIrresistible Peanut Butter Fritos Candy
Description
A sweet and salty treat combining crunchy Fritos with rich peanut butter and chocolate.
Ingredients
For the Crust:
- 4 cups Fritos corn chips
- 1 cup creamy peanut butter
- 1/2 cup honey
- 1/2 cup brown sugar
- 1 cup semi-sweet chocolate chips
- 1/2 cup chopped peanuts (optional)
Instructions
1. Prepare the Crust:
- Line a baking sheet with parchment paper and spread Fritos evenly on it.
- In a saucepan over medium heat, combine peanut butter, honey, and brown sugar. Stir until smooth and well blended.
- Pour the peanut butter mixture over the Fritos, spreading evenly to coat.
- Sprinkle chocolate chips over the top while the mixture is still warm. Let sit for 2 minutes to melt, then spread evenly.
- If desired, sprinkle chopped peanuts over the melted chocolate.
- Allow to cool completely, then break into pieces and serve.
Notes
You can customize the seasonings to taste.

How to Prepare This Dish
Steps and time-saving tips
Start by lining a baking sheet with parchment paper for easy cleanup. Next, spread a generous layer of Fritos evenly across the sheet, making sure they don’t overlap. In a microwave-safe bowl, combine peanut butter, honey, and a pinch of salt, then microwave for 30 seconds to soften the mixture. Stir everything until smooth, then drizzle the warm peanut butter blend over the Fritos, using a spatula to coat them evenly. For extra richness, sprinkle mini chocolate chips on top while the peanut butter is still warm so they melt slightly. Transfer the tray to the fridge and let it chill for at least 30 minutes—this helps the candy set perfectly. Once firm, break it into clusters and serve. To save time, prep the peanut butter mixture while the Fritos layer on the tray, and use a squeeze bottle for mess-free drizzling. If you’re doubling the batch, work in layers to ensure even coverage.
Mistakes I’ve made and learned from
I once rushed the chilling step and ended up with crumbly pieces that wouldn’t hold together. Now, I always set a timer and resist the urge to cut corners—patience is key for that perfect snap. Another time, I overheated the peanut butter mixture, which made it too runny to stick to the Fritos. A quick fix? Microwave in shorter bursts and stir frequently, just like I do with my no-bake energy bites. Also, skipping the parchment paper led to a sticky disaster (trust me, it’s worth the extra second). For more foolproof tips, check out my guide to homemade candy troubleshooting, where I share hard-earned lessons for avoiding common pitfalls.

Cultural Connection and Variations
Where this recipe comes from
The Irresistible Peanut Butter Fritos Candy Recipe feels like a love letter to American snack culture. It blends the salty crunch of Fritos with the creamy sweetness of peanut butter and chocolate, creating a treat that’s both nostalgic and wildly addictive. Many trace its roots to Southern potlucks and holiday gatherings, where home cooks loved turning pantry staples into crowd-pleasers. Some families even swear it originated as a Depression-era hack, stretching simple ingredients into something special.
Around the world, similar treats take different forms. In Mexico, you might find a version with dulce de leche drizzled over corn chips. Meanwhile, in parts of Asia, sesame or rice crisps often replace Fritos for a nutty twist. Even within the U.S., regional tweaks pop up. Some bakers add a sprinkle of sea salt for gourmet flair, while others mix in mini marshmallows for extra gooeyness. No matter the variation, the Irresistible Peanut Butter Fritos Candy Recipe always delivers that perfect sweet-salty balance.
How it fits in today’s cooking
Today, this recipe thrives as a no-fuss favorite for busy cooks and nostalgic snackers alike. It’s a star at holiday cookie swaps, but also fits seamlessly into weeknight dessert rotations. Modern twists include using almond butter for a nut-free version or swapping in dark chocolate for a richer finish. Some even layer it into easy dessert parfaits for a playful upgrade.
Its simplicity keeps it relevant. Unlike fussy pastries, the Irresistible Peanut Butter Fritos Candy Recipe requires zero baking—just melt, mix, and chill. That’s why it’s a go-to for last-minute parties or quick snack fixes. Whether you’re a seasoned chef or a first-time cook, this recipe proves that the best flavors often come from the humblest ingredients.
Taste and Texture
What makes it delicious
The Irresistible Peanut Butter Fritos Candy Recipe delivers a knockout combo of sweet, salty, and crunchy bliss. First, creamy peanut butter melts into the crispy Fritos, creating a rich, nutty depth that lingers on your tongue. Meanwhile, the buttery toffee layer adds a caramelized sweetness, while a drizzle of chocolate ties everything together with smooth, velvety contrast. Every bite crackles with texture—crunchy, chewy, and utterly addictive. Plus, the warm aroma of toasted peanuts and melted chocolate makes this treat as fragrant as it is delicious. Whether you savor it slowly or devour it in seconds, the Irresistible Peanut Butter Fritos Candy Recipe never fails to delight.
Boosting the flavor
Want to take your Irresistible Peanut Butter Fritos Candy Recipe to the next level? Try swapping dark chocolate for milk chocolate to add a bold, bittersweet twist. For extra crunch, sprinkle crushed pretzels or toasted coconut on top before the chocolate sets. If you love a hint of spice, a pinch of flaky sea salt or a dash of cinnamon enhances the sweet-and-salty balance perfectly. Craving more inspiration? Check out our homemade candy recipes for creative variations, or explore peanut butter desserts to keep the nutty goodness going. With these easy tweaks, your candy will shine even brighter!

Tips for Success
Best practices for results
Always use fresh Fritos for the best crunch in your Irresistible Peanut Butter Fritos Candy Recipe. Meanwhile, warm the peanut butter slightly to make it easier to drizzle. For even layers, press the mixture firmly into the pan before chilling. Additionally, let the candy set completely in the fridge for at least two hours to ensure clean slices. Finally, store leftovers in an airtight container to maintain texture.
Mistakes to avoid
Avoid overheating the chocolate, as it can seize and ruin the smooth texture. Instead, melt it gently in short bursts, stirring frequently. Many people also skip lining the pan, but parchment paper prevents sticking and makes removal effortless. If your peanut butter mixture feels too thick, thin it with a teaspoon of coconut oil for better drizzling. For more chocolate tips, check out our chocolate melting guide. Also, if you love peanut butter desserts, try our peanut butter cups recipe for another easy treat.
Serving and Pairing Suggestions
How to serve this dish
For a fun twist, arrange your Irresistible Peanut Butter Fritos Candy Recipe on a rustic wooden board or colorful platter to make it pop. Meanwhile, drizzle extra melted chocolate over the top and sprinkle crushed peanuts for added texture. Serve these sweet-and-salty treats at holiday gatherings, game nights, or even as a unique dessert for potlucks. Additionally, package them in clear cellophane bags tied with ribbon for adorable edible gifts.
What goes well with it
Pair your Irresistible Peanut Butter Fritos Candy Recipe with a cold glass of milk or a creamy vanilla milkshake to balance the rich flavors. Alternatively, try it alongside a scoop of homemade vanilla ice cream for an indulgent dessert combo. If you prefer something lighter, serve it with fresh berries or a drizzle of salted caramel sauce to enhance the sweet and salty contrast.
You only need 4 simple ingredients for this recipe: Fritos corn chips, creamy peanut butter, chocolate chips, and butter. The Irresistible Peanut Butter Fritos Candy Recipe combines these for a sweet-salty treat that’s easy to make in minutes.
Yes, crunchy peanut butter works well if you prefer extra texture, but creamy peanut butter blends smoother for the Irresistible Peanut Butter Fritos Candy Recipe. The choice depends on whether you want a chunkier or more uniform consistency in your candy.
Store the Irresistible Peanut Butter Fritos Candy Recipe in an airtight container at room temperature for up to 5 days. For longer freshness, refrigerate it for up to 2 weeks—just let it sit at room temperature for 10 minutes before serving.
Absolutely! Use gluten-free Fritos and dairy-free chocolate chips to adapt the Irresistible Peanut Butter Fritos Candy Recipe. For a vegan version, ensure your peanut butter and chocolate chips are plant-based and skip any butter substitutes unless needed.