Nutella Cream-filled Crepes Recipe

“`html

Nutella Cream-filled Crepes Recipe

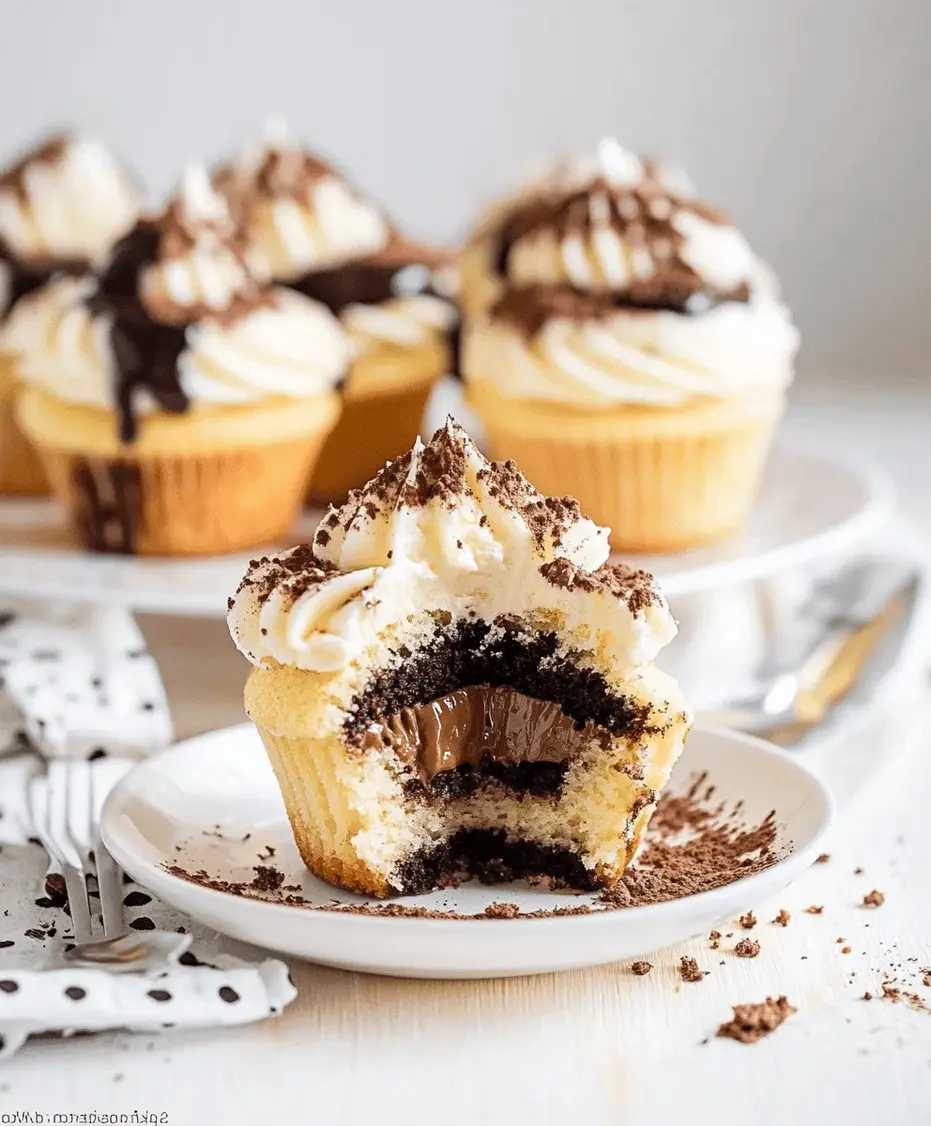
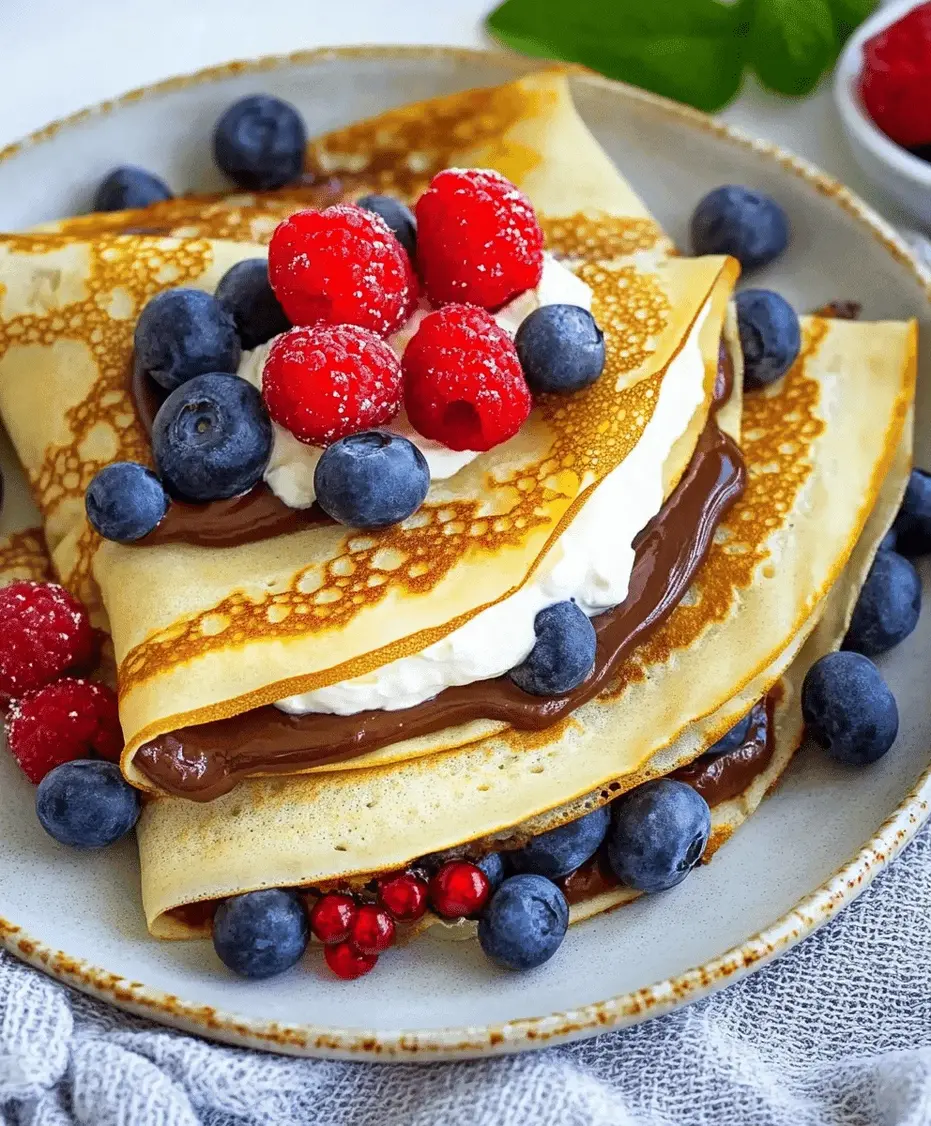
Are you looking for a breakfast or dessert that’s both decadent and surprisingly simple to make? If the irresistible allure of warm, buttery crepes embracing a luscious chocolate-hazelnut filling makes your heart flutter, then you’re in the right place! This Nutella cream-filled crepes recipe is designed to transport your taste buds to a realm of pure bliss. Forget complicated techniques; we’re talking about creating light, delicate crepes that are the perfect vehicle for the smooth, rich, and utterly addictive Nutella cream. Whether you’re wowing guests at brunch, treating yourself to a weekend indulgence, or simply craving a sweet escape, these crepes are your ticket to culinary happiness. Get ready to swirl, fill, and devour!

Craving a Luxurious Treat? Discover the Magic of Nutella Cream-Filled Crepes!

Did you know that crepes are one of the most versatile breakfast and dessert items globally, with origin dating back to 13th century France? And what better way to elevate this classic than by filling it with the universally beloved chocolate-hazelnut spread, Nutella? This Nutella cream-filled crepes recipe isn’t just about taste; it’s about creating an experience. Imagine tender, golden-brown crepes, so thin they practically melt in your mouth, generously filled with a velvety smooth, dreamy Nutella cream. It’s the perfect harmony of textures and flavors that appeals to both adults and children alike. This recipe demystifies crepe-making, making it accessible for even beginner cooks. We’ll guide you through creating the perfect crepe batter, achieving that ideal thinness, and whipping up a filling that’s a step above your average Nutella spread. Get ready to impress yourself and your loved ones with this elegant yet easy dessert.

Irresistible Ingredients for Perfect Nutella Cream-Filled Crepes

The beauty of these Nutella cream-filled crepes lies in their simple yet high-quality ingredients. For the crepes, we’re aiming for a light, delicate batter that fries up beautifully without being rubbery. The filling is where the magic of Nutella truly shines, enhanced with a touch of cream for ultimate smoothness.

For the Crepes

  • 1 ½ cups All-Purpose Flour: The foundation of our crepes, providing structure. Sifted flour ensures a lighter batter.
  • 3 large Eggs: They bind the ingredients and contribute to the richness and tender texture.
  • 1 ¼ cups Milk: Whole milk offers the best flavor and richness, but 2% can be used. For a dairy-free option, unsweetened almond or oat milk works well.
  • ½ cup Water: This helps create thinner, more delicate crepes by lightening the batter.
  • 2 tablespoons Unsalted Butter, melted, plus more for greasing the pan: Butter adds that quintessential rich, savory flavor and helps prevent sticking. Ensure it’s fully melted and slightly cooled.
  • 2 tablespoons Granulated Sugar: Just a touch of sweetness to enhance the crepe’s flavor.
  • ½ teaspoon Salt: Balances the sweetness and brings out the other flavors.

For the Nutella Cream Filling

  • 1 cup Nutella: The star of the show! Use your favorite brand of classic chocolate-hazelnut spread.
  • ½ cup Heavy Cream (or Whipping Cream): This transforms the thick Nutella into a smoother, lighter, more spreadable cream. For a less rich option, half-and-half can be substituted, though the texture will be slightly thinner.
  • Optional: 1 tablespoon Powdered Sugar: If you prefer a sweeter filling, a touch of powdered sugar can be added, but taste first as Nutella is already sweet.

Culinary Timing: Prep, Cook, and Savour

Prep Time:
15 minutes
Cook Time:
20 minutes
Total Time:
35 minutes
Rest Time:
30 minutes (highly recommended)

Compared to the average crepe recipe which might take 20-25 minutes of prep and 25-30 minutes of cooking, our recipe streamlines the process by having a slightly quicker cook time per crepe due to the thinner batter. The addition of a rest time is crucial for achieving the best texture, bringing our total active time to about 35 minutes, plus that essential resting period.

A stack of Nutella cream-filled crepes drizzled with chocolate sauce and sprinkled with hazelnuts.

Crafting Your Dream Nutella Cream-Filled Crepes: Step-by-Step

Step 1: Create the Perfect Crepe Batter Bliss

In a large bowl, whisk together the sifted all-purpose flour, granulated sugar, and salt. Make a well in the center. Crack the three large eggs into the well. Gradually start whisking the eggs into the dry ingredients from the center outwards, until you have a thick, smooth paste. This initial step helps prevent lumps.

Step 2: The Crucial Rest for Silky Crepes

Slowly begin to incorporate the milk and water, whisking constantly until the batter is smooth and thin, resembling the consistency of heavy cream. Stir in the melted butter. For the silkiest crepes, cover the bowl with plastic wrap and refrigerate for at least 30 minutes (or even up to 2 hours). This resting period allows the gluten to relax, resulting in more tender crepes and preventing them from tearing.

Step 3: Heat and Lightly Oil Your Pan

Place an 8-inch non-stick skillet or crepe pan over medium heat. Once the pan is hot, lightly grease it with a little butter or cooking spray. You want it hot enough that a drop of batter sizzles, but not so hot that it burns instantly. Add just enough butter to coat the bottom thinly; excessive butter can make crepes greasy and brown too quickly.

Step 4: Pour and Swirl for Delicate Crepes

Give your rested batter a quick whisk. Ladle about ¼ cup of batter into the hot, greased pan. Immediately tilt and swirl the pan in a circular motion to spread the batter thinly and evenly across the entire bottom surface. You’re aiming for a thin, lace-like layer.

Step 5: Repeat Until All Delicious Batter is Used

Cook for about 1-2 minutes, or until the edges start to lift and the surface looks set and slightly dry. Carefully flip the crepe using a thin spatula or your fingers (if you’re brave!). Cook the other side for another 30-60 seconds. Slide the finished crepe onto a plate. You can place parchment paper between crepes if you’re stacking them to prevent sticking, though they usually cool down quickly enough.

Step 6: Whip Up the Luscious Nutella Cream Filling

While the crepes are cooking or cooling, prepare the filling. In a medium bowl, combine the Nutella and heavy cream. Using a whisk or an electric mixer on low speed, whip the mixture until it’s smooth, creamy, and spreadable. Be careful not to overmix, as this can cause the cream to break. If using, whisk in the powdered sugar for extra sweetness. The consistency should be like a thick frosting, easy to spread but not runny.

Step 7: Assemble Your Masterpieces

Lay a crepe flat on a clean surface or plate. Spread a generous spoonful (about 2-3 tablespoons) of the Nutella cream filling evenly over one half or all of the crepe, depending on your preference. Fold the crepe in half, then in half again to form a triangle, or simply roll it up like a cigar. Repeat with the remaining crepes and filling.

Nutritional Snapshot: Guilt-Free Indulgence?

While precise nutritional values can vary based on exact ingredients and portion sizes, here’s an approximate breakdown per serving (assuming 8 crepes, filled and folded):

  • Calories: Approximately 300-350 kcal
  • Protein: 7-9g
  • Fat: 15-20g (Saturated Fat: 5-7g)
  • Carbohydrates: 30-40g (Sugars: 15-20g)
  • Fiber: 2-3g

Note: These are estimates and can vary significantly.

Healthier Twists on Nutella Cream-Filled Crepes

Want to enjoy these delightful crepes with a slightly lighter touch? Here are some flavor-preserving swaps:

  • Whole Wheat Crepes: Substitute half of the all-purpose flour with whole wheat flour for added fiber and a nuttier flavor.
  • Reduced-Sugar Nutella: If available, opt for a version with less added sugar. Alternatively, use a natural hazelnut spread made with fewer ingredients.
  • Lighter Cream Filling: Replace heavy cream with Greek yogurt (full-fat or 2%) for a tangier, protein-rich filling. Blend it well with Nutella until smooth. This will change the texture slightly, making it more like a thick dip.
  • Fruit Garnish: Load up on fresh berries like strawberries or raspberries. Their natural sweetness and tartness complement the chocolate and add nutrients without extra sugar.
  • Oat Flour Crepes: For a gluten-free option, blend rolled oats into a fine flour and use that in place of all-purpose flour.

Elevate Your Serving Game

These Nutella cream-filled crepes are fantastic on their own, but here are a few ideas to make them even more special:

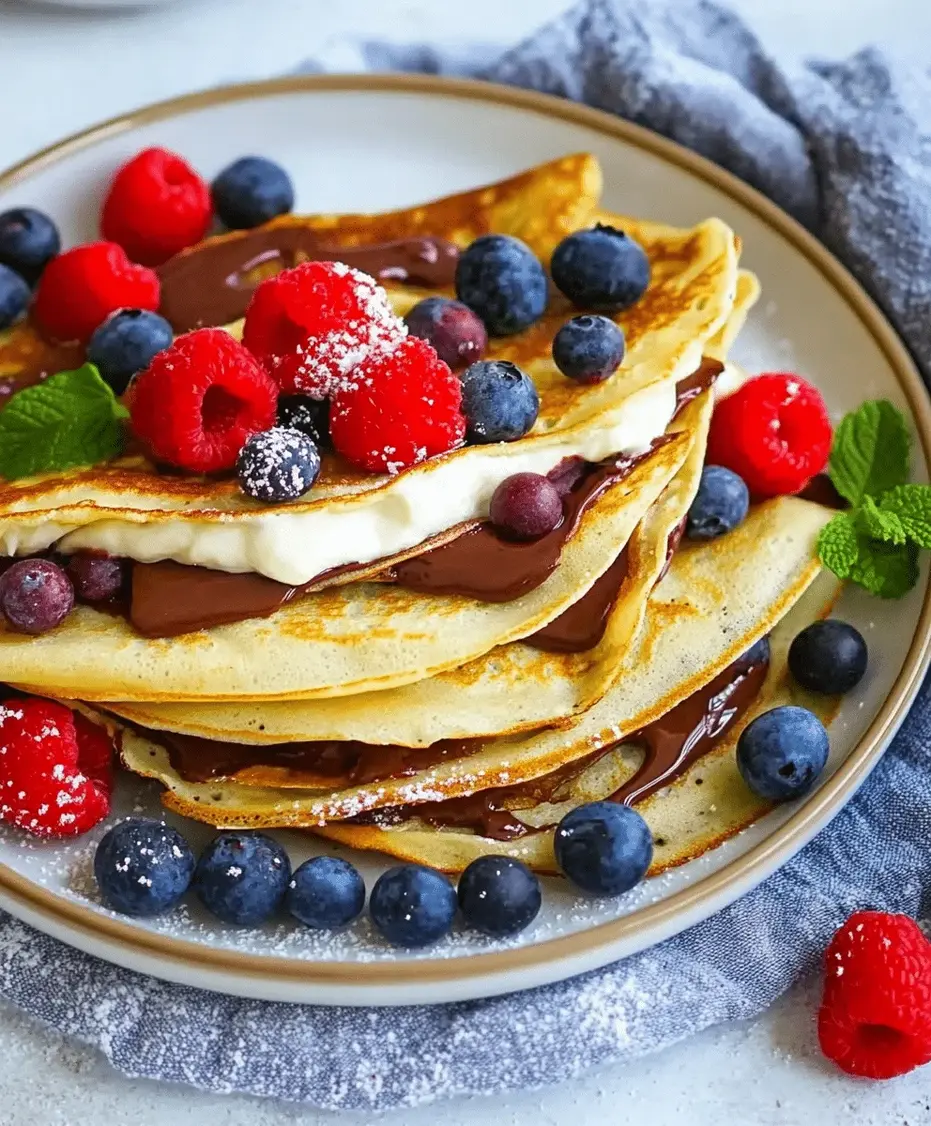
  • Fresh Berries: A classic pairing. Strawberries, raspberries, blueberries, or sliced bananas add freshness and color.
  • Whipped Cream: A dollop of lightly sweetened whipped cream adds extra indulgence.
  • Chocolate Drizzle: Melted dark chocolate or chocolate syrup takes the chocolatey goodness to the next level.
  • Powdered Sugar Dusting: A simple sift of powdered sugar over the finished crepes adds an elegant touch.
  • Toasted Hazelnuts: Chopped, toasted hazelnuts provide a delightful crunch and echo the hazelnut flavor in the Nutella.
  • Caramel Sauce: A drizzle of salted caramel sauce offers a sophisticated contrast to the chocolate.

Avoid These Common Crepe Catastrophes!

  • Lumpy Batter: Always sift your flour, and whisk gradually to prevent lumps. If you do end up with lumps, run the batter through a sieve.
  • Pan Too Hot or Too Cold: A medium-hot pan is key. Too hot, and the crepes burn before cooking through. Too cold, and they become tough and pale. Test with a small amount of batter.
  • Batter Too Thick or Too Thin: The ideal crepe batter should be the consistency of light cream. Adjust with a tablespoon of milk or water if too thick, or a tablespoon of flour if too thin.
  • Overcrowding the Pan: Use only about ¼ cup of batter per crepe to ensure they spread thinly.
  • Not Letting the Batter Rest: While you *can* skip this, resting the batter significantly improves crepe texture and makes them less likely to tear.
  • Using Too Much Butter: A lightly greased pan is sufficient. Excess butter can make crepes greasy and unevenly browned.

Keep the Crepe Magic Alive: Storage Solutions

Storing Unfilled Crepes: Once cooled, uncooked crepes can be stored in an airtight container or freezer bag in the refrigerator for 2-3 days, or frozen for up to 2 months. Place parchment paper between each crepe to prevent sticking. Reheat gently in a skillet or microwave.

Storing Filled Crepes: Filled crepes are best enjoyed fresh. If you must store them, place them in an airtight container in the refrigerator for up to 24 hours. The filling may become a bit firmer. Reheat gently in a warm skillet or a low-temperature oven.

Storing Leftover Filling: Any extra Nutella cream filling can be stored in an airtight container in the refrigerator for up to 3 days. It may thicken considerably; you can gently warm it or whisk in a tiny bit of milk or cream to make it spreadable again.

Close-up of a folded Nutella cream-filled crepe with a dusting of powdered sugar.

Frequently Asked Questions

What is the best pan for making crepes?

A non-stick crepe pan or an 8-inch non-stick skillet is ideal. The key is a flat bottom and sloped sides that make it easy to swirl the batter and remove the crepes.

Why are my crepes tearing when I try to flip them?

This usually happens when the crepes are too thin, the batter isn’t properly rested, or the pan isn’t hot enough. Ensure your batter has rested, the pan is at medium heat, and the crepe is cooked enough on the first side before attempting to flip.

Can I use a different filling instead of Nutella?

Absolutely! While this recipe is specifically for Nutella cream, crepes are incredibly versatile. Consider fruit compotes, lemon curd, pastry cream, or even savory fillings like cheese and ham.

My Nutella cream filling is too stiff. What can I do?

Add a tablespoon of heavy cream or milk at a time and whisk until you reach a smooth, spreadable consistency. Gently warming the mixture can also help loosen it.

How do I make the crepes perfectly round?

The swirling technique is crucial. Pour the batter into the center of the hot pan and immediately tilt and rotate the pan in a circular motion to evenly distribute the batter. Practice makes perfect!

A Sweet Conclusion to Your Culinary Adventure

There you have it – a step-by-step guide to creating heavenly Nutella cream-filled crepes that are sure to impress. These delicate, buttery crepes combined with the rich, smooth chocolate-hazelnut filling are a match made in dessert heaven. From their simple preparation to their decadent finish, these crepes are perfect for any occasion, making breakfast extraordinary or dessert unforgettable. So, gather your ingredients, embrace the simple joy of crepe-making, and indulge in this delightful treat. We encourage you to try this recipe and experience the magic for yourself!

Print

clock clock iconcutlery cutlery iconflag flag iconfolder folder iconinstagram instagram iconpinterest pinterest iconfacebook facebook iconprint print iconsquares squares iconheart heart iconheart solid heart solid icon

Nutella Cream-filled Crepes Recipe


  • Author: Chef Emy

Description

This Nutella cream-filled crepes recipe creates light, buttery crepes filled with smooth, chocolate-hazelnut Nutella. Perfect for breakfast, brunch, or dessert, these delicious crepes are easy to make and irresistibly good!


Ingredients

Scale
  • 1 cupall-purpose flour
  • 2eggs
  • 1 cupmilk
  • ½ cupwater
  • 2 tbspmelted butter
  • 1 tbspsugar
  • 1 tspvanilla extract
  • ¼ tspsalt
  • ½ cupNutella
  • Whipped cream (optional)
  • Powdered sugar (for dusting)
  • Fresh berries (for garnish)

Instructions

    Notes

    Ensure the batter is smooth for thin crepes.
    Let the batter rest for 15-30 minutes for best results.
    Serve warm for the best texture and flavor.

    Nutrition

    • Calories: 210
    • Sugar: 14g

    “`

    Strawberry Icebox Pie Recipe

    “`html

    Strawberry Icebox Pie Recipe

    Craving a No-Bake Dessert That’s Bursting with Fresh Strawberry Flavor?

    Did you know that the average person searches for “easy no-bake desserts” over 50,000 times a month? If you’re one of them, then get ready to rejoice! This delicious strawberry icebox pie is your answer to those warm-weather cravings. It’s a no-bake wonder, featuring a buttery graham cracker crust, a luscious strawberry filling, and a light, creamy texture that’s simply irresistible. Made with fresh strawberries and simple ingredients, this easy recipe is perfect for your next gathering or just a delightful treat for yourself. Forget the oven; we’re going cool and creamy!

    Ingredients for Your Perfect Strawberry Icebox Pie

    Gather these simple ingredients to create this heavenly dessert. We’ve added a few notes to help you get the best results!

    Prep Time: 20 minutes
    Chill Time: 4 hours
    Total Time: 4 hours 20 minutes

    For the Graham Cracker Crust:

    • 2 cups graham cracker crumbs (about 12-14 full crackers) – *For a finer crumb, pulse in a food processor. For a more rustic texture, crush them in a bag with a rolling pin.*
    • 1/2 cup unsalted butter, melted – *Ensures a rich, buttery flavor and helps the crust hold its shape.*
    • 1/4 cup granulated sugar – *Adds a touch of sweetness and helps with browning (though this is no-bake, it contributes to texture).*

    For the Luscious Strawberry Filling:

    • 4 cups fresh strawberries, hulled and sliced – *The star of the show! Choose ripe, fragrant berries for the best flavor.*
    • 1 (14 ounce) can sweetened condensed milk – *This provides the creamy base and sweetness, creating that signature smooth texture.*
    • 1/2 cup lemon juice, freshly squeezed – *Crucial for balancing sweetness and activating the thickening properties of the condensed milk. Fresh is best!*
    • 1 teaspoon vanilla extract – *Enhances the fruity notes and adds depth of flavor.*
    • 1/4 teaspoon salt – *A pinch of salt awakens all the other flavors.*

    Optional Toppings:

    • Whipped cream
    • Fresh strawberry slices
    • Mint sprigs

    Timing is Everything

    This recipe is designed for maximum flavor with minimum fuss. Unlike traditional baked pies that require oven time and cooling, this icebox pie is a dream for busy cooks. The active preparation time is a brisk 20 minutes, with the longest part being the essential chilling period of at least 4 hours. This is significantly less than many baked fruit pies which can take over an hour of active time and then extensive cooling. The total time of 4 hours and 20 minutes is mostly hands-off, making it perfect for making ahead.

    A freshly made strawberry icebox pie with a graham cracker crust and creamy filling.

    Step-by-Step Guide to Your Dreamy Strawberry Icebox Pie

    Step 1: Prepare the Crust

    Let’s get this pie started! In a medium bowl, combine your graham cracker crumbs, melted butter, and granulated sugar. Stir until all the crumbs are nicely moistened, resembling wet sand. This ensures your crust will be firm and hold together beautifully. Press this mixture evenly into the bottom and up the sides of a 9-inch pie plate. You can use the bottom of a glass or a flat measuring cup to help pack it down firmly. Pop this crust into the freezer while you prepare the filling – this quick chill will help it set up nicely.

    Step 2: Make the Strawberry Filling

    Now for the creamy, dreamy heart of our pie. In a large bowl, gently combine the sliced fresh strawberries with the sweetened condensed milk, freshly squeezed lemon juice, vanilla extract, and salt. Stir until everything is just incorporated and the strawberries are coated in the creamy mixture. The lemon juice will start to work its magic, thickening the filling slightly. Don’t overmix it; we want to keep those strawberry slices intact for a lovely texture.

    Step 3: Assemble the Pie

    Retrieve your chilled graham cracker crust from the freezer. Carefully pour the luscious strawberry filling into the prepared crust, spreading it evenly with a spatula. Make sure to get all that deliciousness in there! Gently arrange any extra strawberry slices on top if you like, for an extra burst of freshness and visual appeal.

    Step 4: Chill to Perfection

    This is where the magic happens! Cover the pie loosely with plastic wrap or foil. Refrigerate for at least 4 hours, or until the filling is firm and set. For the best results, chill it overnight. This allows the flavors to meld and the filling to reach its perfect, sliceable consistency. Patience is key here – the anticipation will be worth it!

    Nutritional Snapshot (Per Serving – estimated)

    • Calories: Approximately 350-400 kcal
    • Carbohydrates: 50-60g
    • Fat: 15-20g
    • Protein: 5-7g
    • Sugar: 35-45g

    (Note: Nutritional values are estimates and can vary based on specific ingredients and portion sizes.)

    Healthier Alternatives & Flavor-Preserving Swaps

    Looking to lighten things up without sacrificing flavor? Try these simple swaps:

    • Crust: Use whole wheat graham crackers or even crushed pecans/almonds mixed with a little coconut oil for a gluten-free, lower-refined-carb option.
    • Sweetener: While sweetened condensed milk is key to the texture, you can reduce the sugar in the crust slightly. For the filling, be mindful that the strawberries themselves add natural sweetness.
    • Creaminess: For a dairy-free version, explore full-fat coconut milk or a dairy-free sweetened condensed milk alternative, though the texture might vary slightly.
    • Sugar Reduction: If you’re sensitive to sweetness, a bit less sugar in the crust will still yield a delicious result. The tartness of the strawberries and lemon juice helps balance it.

    Serving Suggestions

    This strawberry icebox pie is a showstopper on its own, but here are a few ways to elevate the experience:

    • Serve chilled, straight from the refrigerator.
    • Top with a dollop of freshly whipped cream or a swirl of stabilized whipped cream.
    • Garnish with a few extra fresh strawberry slices and a sprig of mint for a pop of color and freshness.
    • A light dusting of powdered sugar can add a touch of elegance.

    Common Mistakes to Avoid

    To ensure your icebox pie is perfect every time, keep these common pitfalls in mind:

    • Not chilling the crust: Freezing the crust before filling helps prevent a soggy bottom.
    • Using bottled lemon juice: Freshly squeezed lemon juice is essential for the right acidity and flavor.
    • Under-chilling: Don’t rush the chilling process! It needs ample time to set properly.
    • Overmixing the filling: Gently combine ingredients to maintain the strawberry’s texture.

    Storing Your Strawberry Icebox Pie

    This pie is best enjoyed within 2-3 days of making it. Keep it covered tightly with plastic wrap or foil and store it in the refrigerator. Due to its creamy, no-bake nature, it’s not ideal for freezing, as the texture can become compromised upon thawing.

    A close-up shot of a slice of strawberry icebox pie showing the creamy filling and graham cracker crust.

    Frequently Asked Questions (FAQs)

    **Can I use frozen strawberries?**

    While fresh is recommended for the best texture and flavor, you can use frozen strawberries. Thaw them completely and drain off any excess liquid before slicing and mixing into the filling. This is crucial to avoid a watery pie.

    **How long does it take for the pie to set?**

    The pie needs at least 4 hours in the refrigerator to set properly. For the best, firmest consistency, chilling overnight is ideal.

    **Can I make this pie ahead of time?**

    Absolutely! In fact, it’s highly recommended. Making it the day before you plan to serve it allows the flavors to meld beautifully and ensures the filling is perfectly set.

    **What kind of pan should I use?**

    A standard 9-inch pie plate is perfect. A glass pie plate is great because you can see the crust setting.

    Print
    clock clock iconcutlery cutlery iconflag flag iconfolder folder iconinstagram instagram iconpinterest pinterest iconfacebook facebook iconprint print iconsquares squares iconheart heart iconheart solid heart solid icon

    Strawberry Icebox Pie Recipe


    • Author: Chef Emy

    Description

    This delicious strawberry icebox pie is a no-bake dessert featuring a buttery graham cracker crust, a luscious strawberry filling, and a light, creamy texture. Made with fresh strawberries and simple ingredients, this easy recipe is perfect for warm-weather gatherings.


    Ingredients

    Scale
    • 1 ½ cupsgraham cracker crumbs
    • ¼ cupgranulated sugar
    • 6 tbspunsalted butter, melted
    • 2 cupsfresh strawberries, mashed
    • 1(14 oz) can sweetened condensed milk
    • 1(8 oz) package cream cheese, softened
    • 1 tspvanilla extract
    • 1 cupheavy whipping cream
    • ¼ cuppowdered sugar

    Instructions

      Notes

      Use frozen strawberries if fresh ones aren’t available.
      For a firmer texture, freeze for an ice cream-like consistency.
      Graham cracker crust can be substituted with a cookie crust.

      Nutrition

      • Calories: 320
      • Sugar: 28g

      “`

      Homemade Strawberry Vanilla Bean Ice Cream Recipe

      “`html

      Homemade Strawberry Vanilla Bean Ice Cream Recipe

      Introducing the Perfect Summer Treat

      Did you know that homemade ice cream can be up to 30% richer and more flavorful than store-bought versions, thanks to the control you have over ingredients? If you’re craving a truly decadent and refreshing dessert this summer, look no further! This Homemade Strawberry Vanilla Bean Ice Cream recipe is a celebration of fresh, vibrant flavors and creamy, luxurious texture. Forget those artificial tasting frozen desserts; we’re diving into a world where ripe strawberries meet the warm, aromatic embrace of real vanilla bean. This is more than just ice cream; it’s a delightful experience, a nostalgic journey, and the ultimate way to beat the heat. Prepare to impress your friends and family, or simply treat yourself to the best homemade ice cream you’ve ever tasted!

      Fresh Ingredients for Sublime Flavor

      The magic of this ice cream lies in its simplicity and the quality of its ingredients. We’re focusing on fresh, natural flavors that sing. Here’s what you’ll need:

      • Fresh Strawberries: About 2 cups, hulled and sliced. Opt for ripe, sweet strawberries for the best flavor. They should smell fragrantly sweet and have a deep red hue. If out of season, frozen strawberries can work in a pinch, though the fresh flavor is unparalleled.
      • Heavy Cream: 2 cups. This is the backbone of our creamy texture. Look for cream with at least 36% milk fat. It provides richness and that irresistible silky mouthfeel.
      • Whole Milk: 1 cup. While heavy cream brings richness, whole milk balances it out, preventing the ice cream from being too heavy.
      • Granulated Sugar: ¾ cup (adjust to taste). The sweetness is key, but we don’t want it overpoweringly sweet. The sugar also helps with the ice cream’s texture, keeping it scoopable.
      • Egg Yolks: 5 large. These are crucial for creating a rich, smooth, and stable custard base. They emulsify the fats and liquids, giving the ice cream its luxurious density.
      • Vanilla Bean: 1 whole bean. This is where the true vanilla flavor comes from. A good vanilla bean will have a moist, pliable texture and a rich, intoxicating aroma. Scrape out the tiny, fragrant seeds.
      • Lemon Juice (Optional): 1 tablespoon. A little acidity can brighten the strawberry flavor and balance the sweetness. It’s a subtle touch that makes a big difference.

      Substitutions:

      • Strawberries: Mixed berries or even pureed raspberries can be used.
      • Vanilla Bean: If you absolutely can’t find a vanilla bean, use 2 teaspoons of pure vanilla extract, added at the end of the custard cooking process. However, the specks and nuanced flavor of a real bean are worth seeking out!
      • Heavy Cream/Milk: A combination of half-and-half and heavy cream can be a good substitute if you want slightly less richness than pure heavy cream. For a dairy-free option, experiment with full-fat coconut milk and a neutral-flavored plant-based milk, though the texture will differ.

      Timing Your Ice Cream Adventure

      Making homemade ice cream requires a little patience, but the payoff is immense. Here’s a breakdown of the time commitment:

      Prep time: 25 minutes
      (Includes hulling and slicing strawberries, separating eggs, prepping vanilla bean)
      Cook time: 15 minutes
      (For making the custard base)
      Chill time: Minimum 4 hours, ideally overnight
      (Critical for a smooth ice cream texture)
      Churn time: 20-30 minutes
      (Depending on your ice cream maker)
      Freeze time: Minimum 4 hours
      (To firm up the churned ice cream)
      Total time: Approx. 5-6 hours (active time ~40 mins) + chilling/freezing
      (Significantly longer than average store-bought, but far superior in taste and quality!)

      Bowl of homemade strawberry vanilla bean ice cream

      Crafting Your Masterpiece: Step-by-Step

      Step 1: Prepare the Strawberries

      Start by tossing your hulled and sliced strawberries with 1 tablespoon of sugar (optional, from the total measured) and the lemon juice, if using. Let them macerate at room temperature for about 15-30 minutes. This draws out their juices and intensifies their flavor. You can mash them slightly with a fork if you prefer smaller fruit pieces in your ice cream, or leave them in larger chunks for a more rustic feel. Set aside.

      Step 2: Make the Custard Base

      In a medium, heavy-bottomed saucepan, whisk together the heavy cream and whole milk. Heat this mixture over medium heat until it just begins to simmer around the edges. Do not let it boil! While the cream mixture heats, in a separate bowl, whisk the egg yolks and the remaining sugar until pale yellow and slightly thickened. This process is called tempering, and it’s crucial for preventing scrambled eggs.

      Slowly ladle about ½ cup of the hot cream mixture into the egg yolk mixture, whisking constantly. Repeat this process with another ½ cup of the hot cream. This gradually warms the yolks. Now, pour the tempered yolk mixture back into the saucepan with the rest of the cream mixture, whisking continuously.

      Step 3: Infuse with Vanilla

      Cut the vanilla bean in half lengthwise. Using the back of a paring knife, scrape out the tiny, black seeds from both halves. Add both the scraped seeds and the bean pods to the saucepan with the custard base. Stir well to distribute the vanilla specks throughout.

      Step 4: Chill the Base

      Cook the custard over low to medium-low heat, stirring constantly with a wooden spoon or heatproof spatula, until it thickens enough to coat the back of the spoon. This usually takes about 5-8 minutes. Do not let it boil, or it will curdle. Once thickened, immediately remove the vanilla bean pods. Pour the custard through a fine-mesh sieve into a clean bowl. This catches any bits of cooked egg and ensures a silky smooth texture. Stir in your macerated strawberries. Cover the bowl tightly with plastic wrap, pressing it directly onto the surface of the custard to prevent a skin from forming. Refrigerate for at least 4 hours, but overnight is best to allow the flavors to meld and the base to get thoroughly chilled. A very cold base churns into a smoother ice cream.

      Step 5: Churn the Ice Cream

      Once your base is completely chilled, remove the vanilla bean pod pieces from the strawberries (if you left them in). Pour the chilled mixture into your ice cream maker and churn according to the manufacturer’s instructions. This typically takes 20-30 minutes, at which point the ice cream will be the consistency of soft-serve.

      Step 6: Freeze to Harden

      Transfer the churned ice cream to an airtight container. Press a piece of parchment paper or plastic wrap directly onto the surface to prevent ice crystals from forming. Cover and freeze for at least 4 hours, or until firm enough to scoop. For the best texture, let it ripen in the freezer for at least 24 hours.

      Nutritional Snapshot

      While homemade ice cream is a treat best enjoyed in moderation, understanding its nutritional profile can be helpful. The exact values will vary based on specific ingredient brands and portion sizes, but a typical serving (about ½ cup) of this Homemade Strawberry Vanilla Bean Ice Cream contains approximately:

      • Calories: 300-400 kcal
      • Fat: 20-30g
      • Saturated Fat: 12-18g
      • Carbohydrates: 25-35g
      • Sugar: 20-30g
      • Protein: 4-6g
      • Cholesterol: 100-150mg

      Please note: This is an estimated nutritional value and should not be considered a precise calculation.

      Healthier Alternatives for a Lighter Indulgence

      Craving this delightful flavor but looking for a lighter version? Here are a few swaps that maintain great taste:

      • Reduce Sugar: Decrease the sugar by a quarter or a third. The strawberries will still provide natural sweetness. You can also use a sugar substitute like erythritol or xylitol, adjusting the amount as per the product’s instructions, though this can affect texture slightly.
      • Lighter Dairy: Replace some of the heavy cream with half-and-half or even whole milk. Be aware this will result in a slightly less creamy, more icy texture, but it is still delicious.
      • No-Cook Method (for a less rich result): Skip the egg yolks and the cooking. Blend strawberries, a lighter dairy base (like yogurt mixed with milk), and sweetener, then churn. This will be more like a sorbet or frozen yogurt.
      • Dairy-Free: Use full-fat coconut milk and a neutral-flavored plant-based milk. The coconut flavor will be present, so consider that when pairing.

      Serving Suggestions

      This beautiful ice cream is wonderful on its own, but here are a few ideas to elevate your serving:

      • Classic Cone: Serve in a waffle cone or sugar cone.
      • Garnishes: Top with a fresh strawberry, a dollop of whipped cream, or a sprig of mint.
      • Dessert Pairings: It’s excellent alongside a warm chocolate cake, brownies, or a slice of pound cake.
      • Ice Cream Sundae: Drizzle with chocolate or strawberry sauce, add sprinkles, and a cherry on top.

      Common Mistakes to Avoid

      Even seasoned cooks can make a few missteps with ice cream. Here’s how to avoid them:

      • Not Chilling the Base Enough: A warm base will melt your ice cream maker’s frozen bowl too quickly, resulting in a grainy texture. Chill thoroughly for at least 4 hours, ideally overnight.
      • Overcooking the Custard: Boiling the custard will curdle the eggs, leading to an unpleasant texture and flavor. Cook gently until it coats the back of a spoon.
      • Not Freezing the Ice Cream Maker Bowl: Ensure your ice cream maker’s bowl is completely frozen (usually 24 hours in advance) for optimal churning.
      • Not Freezing Long Enough: The churned ice cream is soft-serve consistency. It needs additional freezing time to become firm and scoopable.

      Storing Your Homemade Ice Cream

      Homemade ice cream is best enjoyed fresh, but if you have leftovers, store them in an airtight container in the coldest part of your freezer. Pressing parchment paper or plastic wrap directly onto the surface before sealing the lid helps prevent ice crystals from forming, which can lead to a freezer-burned, icy texture over time. It will keep well for about 1-2 weeks, though its quality is best within the first week.

      Scooping homemade strawberry vanilla bean ice cream

      Frequently Asked Questions

      Do I need an ice cream maker?

      While an ice cream maker makes the process significantly easier and produces the best texture, you can make ice cream without one using a “no-churn” method. This typically involves whipping cream and condensed milk or making a base that you periodically whisk and freeze.

      Why is my homemade ice cream icy?

      Icy ice cream is usually due to too much water, not enough fat, or improper freezing. Ensure your base is well-chilled, and that your ice cream maker bowl is fully frozen. Using egg yolks and a good ratio of cream to milk helps add fat for smoothness. Freezing the churned ice cream properly in an airtight container also prevents ice crystals.

      Can I make this without eggs?

      Yes, you can omit the egg yolks. However, the texture will be less rich and creamy, as the yolks act as emulsifiers and add fat. You might want to increase the heavy cream slightly to compensate for the lost richness.

      How long does homemade ice cream last?

      Homemade ice cream is best consumed within 1-2 weeks. After that, the texture can start to degrade due to ice crystal formation, even with proper storage.

      Print
      clock clock iconcutlery cutlery iconflag flag iconfolder folder iconinstagram instagram iconpinterest pinterest iconfacebook facebook iconprint print iconsquares squares iconheart heart iconheart solid heart solid icon

      Homemade Strawberry Vanilla Bean Ice Cream Recipe


      • Author: Chef Emy

      Description

      This homemade strawberry vanilla bean ice cream is rich, creamy, and packed with fresh strawberries and real vanilla bean flavor. Made with simple ingredients, it’s the perfect summer treat that’s both refreshing and indulgent.


      Ingredients

      Scale
      • 2 cupsheavy cream
      • 1 cupwhole milk
      • ¾ cupgranulated sugar
      • 1vanilla bean (or2 tspvanilla extract)
      • 1 ½ cupsfresh strawberries, chopped
      • 3large egg yolks

      Instructions

        Notes

        For a smoother texture, strain the custard before chilling.
        Use ripe, sweet strawberries for the best flavor.
        Store in an airtight container in the freezer for up to 2 weeks.

        Nutrition

        • Calories: 280
        • Sugar: 24g

        “`

        Key Lime Pie Cheesecake Piña Colada Recipe

        “`html

        Key Lime Pie Cheesecake Piña Colada Recipe

        Introduction: A Tropical Infusion of Flavor

        Are you on the hunt for a dessert that’s as vibrant as a summer sunset and as decadent as a celebratory toast? In the vast universe of desserts, how many truly manage to capture the essence of three beloved classics in one harmonious bite? We’re talking about the electrifying zest of key lime pie, the silken, luxurious creaminess of cheesecake, and the sun-kissed, tropical embrace of a piña colada. Introducing the Key Lime Pie Cheesecake Piña Colada – a dessert that’s not just a treat, but an experience. Imagine the bright, tangy notes of fresh key limes dancing with the rich, velvety texture of cheesecake, all swirled with the sweet, creamy allure of pineapple and coconut. This isn’t your average dessert; it’s a vacation on a plate, a sophisticated yet utterly craveable indulgence perfect for any occasion, especially when the weather calls for something cool, refreshing, and utterly delightful. Get ready to embark on a culinary adventure that brings the tropics to your kitchen and redefines dessert perfection.

        The Heart of the Matter: Luscious Ingredients

        Crafting this masterpiece requires a symphony of flavors that play beautifully together. We’ve noted some potential substitutions to keep your creativity flowing, but the core ingredients are key to unlocking that perfect tropical-cheesecake-key lime fusion. Each component is chosen for its unique contribution to the overall sensory experience, from the satisfying crunch of the crust to the sublime creaminess of the filling and the exotically sweet topping.

        For the Graham Cracker Crust

        • 2 cups graham cracker crumbs (about 14-16 full sheets): The foundation of our dessert, providing a sweet, slightly salty, and sandy texture. Substitution: Digestive biscuits or vanilla wafer crumbs work wonderfully, offering a slightly different, perhaps more delicate, sweetness.
        • 1/4 cup granulated sugar: Enhances the sweetness and helps with browning and crispness.
        • 6 tablespoons unsalted butter, melted: Binds the crumbs together, giving the crust its structure and rich mouthfeel. Use salted butter if unsalted is unavailable, but adjust sugar slightly if you’re sensitive to salt.

        For the Key Lime Cheesecake Filling

        • 3 (8-ounce) packages cream cheese, softened to room temperature: The absolute star of cheesecake, providing unparalleled creaminess and a tangy base. Ensure it’s truly soft to avoid lumps!
        • 1 1/4 cups granulated sugar: Balances the tanginess of the lime and cream cheese, contributing to the smooth, sweet flavor.
        • 4 large eggs, room temperature: The binders that give the cheesecake its structure and richness.
        • 1/2 cup key lime juice, fresh or bottled: The signature zesty, floral tang that defines this pie. Fresh is always best for peak flavor!
        • 1/4 cup sour cream: Adds moisture, a subtle tang, and a richer, creamier texture.
        • 1 tablespoon key lime zest (from about 4-5 key limes): For an intensified, aromatic lime punch that brightens every bite.

        For the Piña Colada Topping

        • 1 cup crushed pineapple, drained very well: The tropical sweetness and slightly fibrous texture core of our piña colada element. Use canned or fresh, but draining is crucial to prevent a watery topping.
        • 1/2 cup coconut cream (the thick part from a can of full-fat coconut milk, chilled): For that unmistakable, luscious coconut richness.
        • 2 tablespoons granulated sugar (optional, adjust to taste): Sweetens the topping, balancing the tartness of the pineapple and lime.
        • 1 teaspoon rum extract (optional): For that authentic piña colada spirit without the alcohol. Regular rum is also an option if you prefer.
        • Maraschino cherries and pineapple wedges for garnish (optional): The classic, visually appealing finishing touches.

        Timing is Everything

        Prep time: 30 minutes
        Cook time: 60-70 minutes
        Chill time: 4 hours (minimum)
        Total time: 5 hours 30 minutes

        Compared to a standard cheesecake recipe, our Key Lime Pie Cheesecake Piña Colada has a slightly longer chilling time due to the added moisture from the pineapple and the desire for the flavors to fully meld. The prep and cook times are fairly comparable to traditional cheesecakes, making this an achievable yet impressive endeavor.

        Key Lime Pie Cheesecake Piña Colada ready to be served

        Crafting Your Masterpiece: Step-by-Step

        Step 1: Prepare the Luscious Crust

        Begin by preheating your oven to 350°F (175°C). In a medium bowl, combine the graham cracker crumbs and granulated sugar. Pour in the melted unsalted butter and stir until all the crumbs are evenly moistened. The mixture should resemble wet sand. Press this mixture evenly into the bottom and about an inch up the sides of a 9-inch springform pan. Use the bottom of a glass or a measuring cup to get a firm, even layer. This sturdy base is crucial for supporting the rich filling.

        Step 2: Prep the Pan for Perfection

        To ensure your cheesecake bakes evenly and without cracks, it’s time to prepare for a water bath. Wrap the outside of the springform pan tightly with a couple of layers of heavy-duty aluminum foil. This will prevent water from seeping into the pan during baking. Make sure the foil comes up high enough to cover the sides of the pan.

        Step 3: Whip Up the Creamy Cheesecake Filling

        In a large bowl, beat the softened cream cheese with an electric mixer on medium speed until it is completely smooth and creamy, with absolutely no lumps. This is the most critical step for a silky texture. Gradually add the granulated sugar and continue beating until well combined and fluffy. Don’t rush this process – smoothness is key!

        Step 4: Incorporate Key Lime & Piña Colada Magic

        Beat in the eggs one at a time, mixing on low speed just until each is incorporated. Be careful not to overmix once the eggs are added, as this can introduce too much air, leading to cracks. Stir in the key lime juice, sour cream, and key lime zest until just combined. The batter should be thick, smooth, and fragrant with lime. If you’d like a swirl effect, you could reserve a tablespoon of the lime mixture to swirl into the piña colada topping later, or even marble a bit into the cheesecake batter itself before baking.

        Step 5: Bake to Golden Perfection

        Pour the cheesecake filling over the prepared crust in the springform pan. Place the foiled pan into a larger roasting pan. Carefully pour hot water into the roasting pan, making sure it comes about halfway up the sides of the springform pan. This water bath (bain-marie) ensures gentle, even baking and prevents the cheesecake from drying out or cracking. Bake for 60-70 minutes, or until the edges are set and the center is still slightly jiggly. It should look like a slightly wobbly custard.

        Step 6: Cool & Chill – Patience is a Virtue

        Once baked, turn off the oven and let the cheesecake cool inside the oven with the door slightly ajar for about an hour. This gradual cooling helps prevent cracking. Remove the cheesecake from the water bath and the oven, remove the foil, and let it cool completely on a wire rack. Once at room temperature, cover the cheesecake with plastic wrap and refrigerate for at least 4 hours, preferably overnight. This chilling period is essential for the cheesecake to fully set and for the flavors to deepen.

        Step 7: Crown with Tropical Topping

        While the cheesecake is chilling or just before serving, prepare the piña colada topping. In a small bowl, gently combine the well-drained crushed pineapple, coconut cream, sugar (if using), and rum extract (if using). Stir until just combined and creamy. Once the cheesecake is thoroughly chilled and set, carefully remove the sides of the springform pan. Spoon the piña colada topping generously over the top of the cheesecake. Garnish with maraschino cherries and pineapple wedges for a festive, tropical flair.

        Close-up of Key Lime Pie Cheesecake Piña Colada with tropical garnishes

        Nutritional Highlights

        While this dessert is an indulgence, understanding its nutritional composition can be helpful. (Note: These are approximate values and can vary based on specific ingredients and portion sizes.)

        • Calories: Approximately 500-650 per slice
        • Fat: High, primarily from cream cheese and butter, essential for cheesecake’s rich texture.
        • Carbohydrates: Moderate, from sugar and graham crackers.
        • Protein: Moderate, from cream cheese and eggs.
        • Sugar: Significant, which can be moderated (see healthier alternatives).

        Healthier Hacks Without Sacrificing Flavor

        Looking for ways to lighten this delightful dessert? Here are some delicious swaps:

        • Crust: Use whole wheat graham crackers or make a crust with almond flour and a touch of honey or maple syrup. Reduce the butter by using applesauce or a lighter margarine.
        • Cream Cheese: Substitute half of the cream cheese with Neufchatel cheese or a Greek yogurt based cream cheese blend for a tangier, lower-fat option.
        • Sugar: Reduce the overall sugar by 1/4 cup in both the filling and topping. Consider using a sugar substitute like erythritol or stevia blends, adjusting to taste.
        • Topping: Opt for a topping made primarily of Greek yogurt or whipped coconut cream with less added sugar. Fresh fruit like mango or passionfruit can also add natural sweetness and tropical flair.

        Serving Suggestions for Maximum Delight

        This Key Lime Pie Cheesecake Piña Colada is a showstopper on its own, but a few thoughtful additions can elevate the experience:

        • Serve chilled, ensuring the topping has had time to set slightly.
        • A dusting of toasted shredded coconut over the topping adds a delightful crunch and visual appeal.
        • A dollop of lightly sweetened whipped cream or, for an extra tropical touch, coconut whipped cream, on the side.
        • For those who love an extra zing, a very thin slice of fresh lime with a maraschino cherry perched on top looks elegant.

        Common Pitfalls to Avoid

        Cheesecake can be finicky, but with a few tips, you can avoid common mistakes:

        • Overmixing the Batter: This can incorporate too much air, leading to cracks during baking. Mix in eggs on low speed and only until just combined.
        • Not Softening Cream Cheese Enough: Lumps are the enemy of smooth cheesecake. Ensure your cream cheese is truly at room temperature.
        • Sudden Temperature Changes: Gradual cooling (in the oven, then on the counter) is crucial to prevent cracking.
        • Water Bath Issues: Ensure the foil is secure to prevent water from entering the pan, ruining your cheesecake.
        • Improper Chilling: A cheesecake needs ample time to set properly in the refrigerator. Don’t skimp on this step!

        Storing Your Sweet Creation

        Once completely chilled, this cheesecake is best stored in the refrigerator. Cover it tightly with plastic wrap or place it in an airtight container. It will keep well for 3-4 days. For longer storage, you can freeze individual slices wrapped tightly in plastic wrap and then in foil or a freezer-safe bag. Thaw overnight in the refrigerator before serving. However, the topping might change texture slightly upon thawing, so it’s often best to add the topping fresh when serving from frozen.

        Frequently Asked Questions

        What exactly are “key limes” and why are they special?

        Key limes (Citrus aurantiifolia) are smaller, more tart, and more aromatic than Persian limes. They have a distinctive floral, slightly bitter flavor that gives key lime pie its iconic taste. While they can be harder to find fresh, bottled key lime juice is a readily available and excellent substitute that still delivers fantastic flavor.

        Can I make this cheesecake without a water bath?

        While a water bath is highly recommended for the most consistent and crack-free results, you can try baking it without one. To minimize cracking, ensure all ingredients are at room temperature, avoid overmixing, and let the cheesecake cool gradually in the oven. However, a water bath provides the best insurance against cracks and ensures a wonderfully smooth texture.

        How do I drain crushed pineapple effectively?

        Place the crushed pineapple in a fine-mesh sieve set over a bowl and let it drain for at least 15-20 minutes. You can gently press down on the pineapple with the back of a spoon to extract as much liquid as possible. Draining is crucial to avoid a watery topping that can seep into the cheesecake.

        Can I make this ahead of time?

        Absolutely! Cheesecakes are ideal make-ahead desserts. In fact, they taste even better after chilling overnight, allowing the flavors to meld and the texture to firm up perfectly. You can prepare the entire cheesecake, including the topping (though adding it fresh just before serving is recommended for optimal texture), and keep it refrigerated until ready to serve.

        Print
        clock clock iconcutlery cutlery iconflag flag iconfolder folder iconinstagram instagram iconpinterest pinterest iconfacebook facebook iconprint print iconsquares squares iconheart heart iconheart solid heart solid icon

        Key Lime Pie Cheesecake Piña Colada Recipe


        • Author: Chef Emy

        Description

        This Key Lime Pie Cheesecake Piña Colada combines the zesty tang of key lime pie with the creamy richness of cheesecake and the tropical flavors of piña colada. A refreshing, indulgent dessert featuring pineapple, coconut, and lime for the perfect summer treat.


        Ingredients

        Scale
        • 1 ½ cupsgraham cracker crumbs
        • ¼ cupsugar
        • ½ cupmelted butter
        • 16 ozcream cheese, softened
        • ¾ cupsugar
        • 2 tbspcornstarch
        • ½ cupsour cream
        • ¼ cupkey lime juice
        • 1 tsplime zest
        • 2eggs
        • ½ cupcrushed pineapple, drained
        • ½ cupshredded coconut
        • ½ tspcoconut extract
        • Whipped cream, for garnish
        • Toasted coconut and lime slices, for garnish

        Instructions

          Notes

          For a stronger piña colada flavor, add a splash of rum extract.
          Use fresh key lime juice for the best taste.
          Chill overnight for the best texture.

          Nutrition

          • Calories: 380
          • Sugar: 28g

          “`

          Summer Fruit Platter Recipe

          “`html

          Summer Fruit Platter Recipe

          Are you wondering how to create a show-stopping, healthy, and incredibly refreshing centerpiece for your next summer gathering? This Summer Fruit Platter recipe is your answer! With the average person consuming an extra 100-400 calories from snacks during warmer months, a vibrant fruit platter provides a delicious and nutrient-dense alternative. It’s not just a dish; it’s a celebration of nature’s candy, bursting with color, flavor, and essential vitamins. Perfect for brunches, picnics, barbecues, or simply a light afternoon treat, this platter is as easy to assemble as it is beautiful to behold. Let’s dive into creating a masterpiece that will have your guests raving and feeling good!

          Ingredients for a Stunning Summer Fruit Platter

          The beauty of a fruit platter lies in its versatility. The key is to select a variety of colorful, ripe, and in-season fruits. Aim for a mix of textures and flavors – sweet, tart, juicy, and creamy. Here’s a guide to what you might include:

          • Berries: Think vibrant red strawberries (sweet and slightly tart), plump blueberries (mildly sweet with a hint of earthiness), and juicy raspberries (delicately sweet and tangy).

            • Substitution: Blackberries for a deeper, murkier sweetness.
          • Melons: Cubes or balls of watermelon (refreshingly sweet and hydrating), cantaloupe (musky sweet), and honeydew (mildly sweet and subtly floral).

            • Substitution: Galia melon for a more intense sweetness.
          • Stone Fruits: Sliced peaches (sweet, fuzzy, and fragrant), nectarines (similar to peaches but smooth-skinned), and plums (ranging from sweet to tart).

            • Substitution: Cherries for small bursts of deep, sweet-tart flavor.
          • Tropical Fruits: Sliced mango (sweet, creamy, and tropical aroma), pineapple chunks (tangy and sweet with a distinct tropical zest), and kiwi slices (bright green, sweet-tart, with tiny, edible seeds).

            • Substitution: Star fruit for a beautiful visual and a mild, refreshing taste.
          • Citrus: Orange segments or grapefruit segments (bright, juicy, and slightly bitter to balance sweetness).

            • Substitution: Tangerine segments for easier peeling and a sweeter profile.
          • Grapes: Clusters of green or red seedless grapes (sweet and crisp).

            • Substitution: Black grapes for a richer color contrast.
          • Optional Enhancements: Fresh mint leaves for garnish (aromatic and cooling), a honey-lime drizzle (sweet and zesty), or a sprinkle of toasted coconut flakes (crunchy and tropical).

          Timing: Quick Assembly for Instant Gratification

          Prep Time:
          15-20 minutes
          Cook Time:
          0 minutes
          Total Time:
          15-20 minutes
          Compared to Average:
          This recipe is significantly faster than many cooked dishes, requiring minimal to no cooking, making it ideal for busy hosts.

          A beautifully arranged summer fruit platter with a variety of colorful fruits.

          Step-by-Step Instructions

          Step 1: Prep the Fruits

          Wash all your fruits thoroughly under cool running water. For berries, gently pat them dry with a paper towel. Hull and slice strawberries if they are large. Cut melons, pineapple, and mango into bite-sized cubes or use a melon baller for perfectly spherical shapes. Peel and slice kiwi. Segment citrus fruits, removing any seeds and pith. Halve or pit stone fruits and slice them. Leave grapes on small clusters for easy handling.

          Step 2: Arrange Creatively

          Select a large, attractive platter or board. Start by arranging larger fruits like melon slices or pineapple chunks to create a base. Then, fill in the gaps with smaller fruits like berries and grapes. Think about color placement – group similar colors or create a rainbow effect. Alternating colors and textures will make your platter visually stunning. Don’t be afraid to overlap slightly to create a lush, abundant look.

          Step 3: Add Optional Enhancements

          If you’re using them, tuck fresh mint leaves here and there amongst the fruit for a pop of green and a refreshing aroma. If you’ve opted for a drizzle, prepare a simple honey-lime dressing by whisking together 2 tablespoons of honey with 1 tablespoon of fresh lime juice. You can lightly drizzle this over the platter just before serving, or serve it on the side in a small bowl. Sprinkle toasted coconut flakes over sections of the platter for added texture and flavor.

          Step 4: Chill and Serve

          Once assembled, cover the platter loosely with plastic wrap or a large dome and refrigerate for at least 15-30 minutes before serving. This allows the flavors to meld slightly and ensures the fruit is cool and refreshing. Remove from the refrigerator a few minutes before guests arrive for optimal enjoyment.

          Nutritional Information (Approximate Per Serving, Varies by Fruit Selection)

          A fresh fruit platter is naturally low in calories and packed with vitamins, minerals, and fiber. While exact nutritional values depend heavily on the specific fruits chosen and their quantities, a typical serving (about 1 cup of mixed fruit) often provides:

          • Calories: 60-100 kcal
          • Carbohydrates: 15-25g (primarily natural sugars and fiber)
          • Fiber: 2-5g
          • Vitamins: Excellent source of Vitamin C, Vitamin A, and various B vitamins.
          • Minerals: Good source of potassium, manganese, and antioxidants.
          • Fat & Protein: Negligible.

          Healthier Alternatives & Flavor Swaps

          This platter is already a healthy choice, but here are ways to keep it that way or add subtle flavor enhancements:

          • For a Sugar-Free Option: Rely solely on naturally sweet fruits like berries, melon, and kiwi. Omit any honey drizzle.
          • For a Creamy Element: Instead of rich dips, offer a small bowl of Greek yogurt (plain or with a touch of vanilla extract) or a light coconut yogurt for a dairy-free alternative.
          • Herbaceous Infusion: Incorporate other fresh herbs like basil or mint for a sophisticated, fresh flavor that complements many fruits.
          • Spicy Kick: For the adventurous, a very light dusting of chili powder or Tajín on certain fruits like mango or pineapple can add an unexpected and delightful zing.

          Serving Suggestions

          This Summer Fruit Platter is incredibly versatile. Serve it chilled as:

          • A refreshing appetizer before a main meal.
          • A light and healthy dessert.
          • A brunch centerpiece alongside pastries and coffee.
          • A colorful addition to a picnic or barbecue spread.
          • A healthy snack option for kids and adults alike.

          Common Mistakes to Avoid

          • Using Unripe Fruit: This leads to bland, hard-to-eat fruit. Always choose ripe, fragrant options.
          • Overcrowding: While abundance is good, ensure there’s enough space to easily pick up individual pieces of fruit.
          • Cutting Fruit Too Far in Advance: Some fruits, like apples or bananas (if you choose to include them), tend to brown quickly. Prepare these fruits just before serving or toss them with a little lemon juice.
          • Not Considering Texture: A mix of soft, crisp, and juicy fruits makes the platter more interesting.
          • Forgetting a Dazzling Presentation: A beautiful platter enhances the eating experience. Use your creativity!

          Storing Tips

          Leftover fruit platters are best enjoyed fresh. However, if you have a small amount leftover:

          • Loosely cover any remaining fruit with plastic wrap and store in the refrigerator.
          • Berries and cut melon tend to hold up reasonably well for 1-2 days.
          • Fruits that have been sliced or exposed to air may become softer or slightly discolored.
          • For best results, it’s ideal to assemble only what you anticipate serving.

          Close-up of a summer fruit platter showcasing vibrant colors and textures.

          Conclusion

          Creating this Summer Fruit Platter recipe is a simple yet incredibly rewarding way to bring freshness, color, and vibrant flavor to your table. It’s a healthy, customizable, and visually appealing dish that’s perfect for any occasion. Whether you’re a seasoned entertainer or a beginner cook, this fruit platter is sure to be a hit. So, gather your favorite seasonal fruits, get creative with your arrangement, and enjoy the sweet taste of summer!

          Frequently Asked Questions

          What are the best fruits to use for a summer fruit platter?

          The best fruits are those that are ripe, in season, and offer a variety of colors and textures. Think berries, melons, stone fruits, tropical fruits, and grapes. Aim for a mix of sweet and slightly tart options.

          How do I prevent fruit from browning?

          For fruits that brown easily like apples or pears (though less common on summer platters), toss them with a little lemon juice or lime juice immediately after cutting. This helps to slow down oxidation. For platters prepared slightly ahead, consider adding these fruits last or just before serving.

          Can I make the fruit platter ahead of time?

          You can prepare some elements ahead. Wash and cut firmer fruits (melon, pineapple) a few hours in advance and store them in airtight containers in the refrigerator. Berries and delicate fruits are best washed and added just before assembly to maintain their texture and appearance.

          What can I serve with a fruit platter?

          Consider serving with a light yogurt dip (Greek or coconut), a small bowl of honey or maple syrup for drizzling (use sparingly for a healthier option), or perhaps some fresh whipped cream for a decadent touch.

          How much fruit should I prepare per person?

          A good rule of thumb is about 1 cup of prepared fruit per person. This ensures everyone gets a generous serving without too much waste.

          Print

          clock clock iconcutlery cutlery iconflag flag iconfolder folder iconinstagram instagram iconpinterest pinterest iconfacebook facebook iconprint print iconsquares squares iconheart heart iconheart solid heart solid icon

          Summer Fruit Platter Recipe


          • Author: Chef Emy

          Description

          This Summer Fruit Platter is a delightful and colorful mix of seasonal fruits, making it the perfect refreshing treat for warm days.


          Ingredients

          Scale
          • 1 cupstrawberries, hulled and halved
          • 1 cupblueberries
          • 1 cupraspberries
          • 1 cupgreen grapes, halved
          • 1 cupred grapes, halved
          • 1 cuppineapple chunks
          • 1 cupwatermelon cubes
          • 1 cupmango slices
          • 1 cupkiwi slices
          • 1 cuporange segments
          • Fresh mint leaves for garnish
          • Optional: Honey or yogurt for dipping

          Instructions

            Notes

            Use any seasonal fruits available for variety.
            To prevent browning, toss apples or bananas with lemon juice.
            Serve chilled for the best taste.

            Nutrition

            • Calories: 150
            • Sugar: 25g

            “`

            Tiramisu Cupcakes Recipe

            “`html

            Tiramisu Cupcakes Recipe

            Introduction: Tiramisu Cupcakes, A Modern Classic

            Did you know that over 60% of dessert lovers seek out familiar flavors in new formats? If you’re among them, get ready to swoon! Tiramisu Cupcakes are a delightful reinvention of Italy’s beloved coffee-kissed dessert, transforming the layered classic into perfectly portioned, portable treats. Imagine moist, tender vanilla cupcakes infused with a rich espresso syrup, crowned with a cloud-like mascarpone frosting, and finished with a dusting of cocoa. These aren’t just cupcakes; they’re an experience. They capture the essence of traditional tiramisu – the bold coffee, the creamy mascarpone, the hint of cocoa – in an elegant, easy-to-share format. Perfect for your next coffee break, a sophisticated brunch, or simply as a way to elevate any occasion, these Tiramisu Cupcakes promise a taste of la dolce vita, one bite at a time.

            Deconstructed Deliciousness: The Ingredients

            The magic of Tiramisu Cupcakes lies in the quality of its components. We’ve broken down the ingredients to ensure you have everything you need for a truly authentic and delicious result.

            For the Vanilla Cupcakes

            • All-Purpose Flour (2 ½ cups): The foundation of our tender cake. Look for a good quality, unbleached flour for best results.
            • Granulated Sugar (1 ¾ cups): For sweetness and structure.
            • Baking Powder (2 teaspoons): Our leavening agent, ensuring a light and airy crumb.
            • Salt (½ teaspoon): Balances the sweetness and enhances flavors.
            • Unsalted Butter (1 cup, softened): Crucial for richness and moisture. Softened butter incorporates better, preventing a greasy texture. Consider using European-style butter for a richer flavor profile.
            • Eggs (4 large): Bind everything together and contribute to the cake’s structure and richness. Room temperature eggs emulsify more easily.
            • Vanilla Extract (2 teaspoons): The heart of our vanilla cake. Use pure vanilla extract for the most authentic, aromatic flavor.
            • Milk (1 cup): Adds moisture and helps create a tender crumb. Whole milk will provide the creamiest texture. Buttermilk is also a great substitute for extra tang and tenderness.

            For the Espresso Soak

            • Strong Brewed Coffee or Espresso (1 cup, cooled): The soul of tiramisu! Use freshly brewed, strong coffee or espresso for an intense flavor. Instant espresso powder dissolved in hot water also works in a pinch.
            • Dark Rum or Coffee Liqueur (2-3 tablespoons, optional): Adds a sophisticated boozy warmth. Marsala wine or Kahlua are excellent alternatives. For an alcohol-free version, simply omit.
            • Powdered Sugar (1 tablespoon): A touch of sweetness to round out the coffee flavor.

            For the Mascarpone Frosting

            • Mascarpone Cheese (16 ounces, softened): The star! Use full-fat, good quality mascarpone cheese. Ensure it’s softened at room temperature for smooth blending.
            • Heavy Cream (1 ½ cups): For that luscious, whipped texture. Chilled heavy cream whips best.
            • Powdered Sugar (1 cup, or to taste): Sweetens the frosting and helps it stabilize. Sift it to avoid lumps.
            • Vanilla Extract (1 teaspoon): Enhances the creamy flavor.

            The Art of Timing: Prep, Bake, and Enjoy

            Prep Time: 30 minutes
            Cook Time: 20-25 minutes
            Total Time: 50 minutes (+ cooling and soaking time)

            Compared to traditional tiramisu which can take longer to assemble with layers, these Tiramisu Cupcakes are remarkably efficient. The active prep time is about 30 minutes, with the baking taking a mere 20-25 minutes. The total hands-on time is around 50 minutes. However, true tiramisu flavor develops with time, so allow at least 1-2 hours for cooling and soaking, and ideally, several hours or overnight chilling for the flavors to meld beautifully. This is significantly quicker than making a full-sized tiramisu, especially when you factor in chilling time for setting layers.

            Tiramisu Cupcakes with creamy mascarpone frosting and cocoa powder dusting

            Crafting Your Tiramisu Cupcakes: Step-by-Step

            Step 1: Preheat Your Oven and Prepare the Pans

            Begin by preheating your oven to 350°F (175°C). Line a standard 12-cup muffin tin with paper liners, or grease and flour each cup thoroughly. This ensures your beautiful cupcakes won’t stick.

            Step 2: Mix the Dry Ingredients

            In a large mixing bowl, whisk together the all-purpose flour, granulated sugar, baking powder, and salt until well combined. This ensures your leavening is evenly distributed for a consistent rise.

            Step 3: Combine the Wet Ingredients

            In a separate medium bowl, cream together the softened unsalted butter until light and fluffy. Beat in the eggs one at a time, ensuring each is fully incorporated before adding the next. Stir in the vanilla extract.

            Step 4: Form the Vanilla Cupcake Batter

            Gradually add the dry ingredients to the wet ingredients, alternating with the milk. Begin and end with the dry ingredients, mixing on low speed until just combined. Be careful not to overmix; a few small lumps are perfectly fine. Overmixing develops gluten, leading to tough cupcakes.

            Step 5: Bake the Cupcakes to Golden Perfection

            Divide the batter evenly among the prepared muffin cups, filling each about two-thirds full. Bake for 20-25 minutes, or until a wooden skewer inserted into the center comes out clean. Let the cupcakes cool in the tin for a few minutes before transferring them to a wire rack to cool completely.

            Step 6: Prepare the Luscious Espresso Soak

            While the cupcakes are cooling, whisk together the cooled strong brewed coffee (or espresso), optional rum or coffee liqueur, and powdered sugar in a small bowl until the sugar is dissolved. This syrup is the key to infusing that signature tiramisu flavor.

            Step 7: Soak the Warm Cupcakes

            Once the cupcakes are slightly warm (not hot!), use a skewer or toothpick to poke several holes all over the tops. Gently spoon or brush the espresso soak over the tops of the cupcakes, allowing it to seep in. This step is crucial for that authentic tiramisu taste!

            Step 8: Whip Up the Creamy Mascarpone Frosting

            In a large, chilled bowl, whip the cold heavy cream until soft peaks form. In a separate bowl, beat the softened mascarpone cheese with the sifted powdered sugar and vanilla extract until smooth and creamy. Gently fold the whipped cream into the mascarpone mixture until just combined. Be careful not to overmix, as mascarpone can curdle.

            Step 9: Frost and Decorate Your Masterpieces

            Once the cupcakes have cooled completely and absorbed the espresso soak, generously frost them with the mascarpone frosting. You can use a piping bag for a decorative swirl or simply spread it on with a spatula. For the final touch, dust generously with unsweetened cocoa powder using a fine-mesh sieve. This mirrors the classic tiramisu finish.

            Nutritional Snapshot

            While exact nutritional values can vary based on ingredient brands and portion sizes, here’s a general estimate per Tiramisu Cupcake:

            • Calories: ~350-450 kcal
            • Protein: ~5-7g
            • Fat: ~20-30g (primarily from butter, eggs, and mascarpone)
            • Carbohydrates: ~40-50g
            • Sugar: ~25-35g

            Healthier Twists on Tradition

            Embracing a healthier lifestyle doesn’t mean foregoing delicious treats! Here are some swaps that keep the spirit of Tiramisu alive:

            • Flour Swap: Substitute half of the all-purpose flour with whole wheat pastry flour or almond flour for added fiber and nutrients.
            • Reduced Sugar: Decrease the granulated sugar in the cake and powdered sugar in the frosting by ¼ to ⅓, or use a natural sweetener like maple syrup (adjust liquid accordingly). Be mindful that sugar also plays a role in moisture and texture.
            • Lighter Frosting: For a lighter frosting, whisk Greek yogurt (full-fat recommended for thickness) with a smaller amount of mascarpone and sweetener. The tang of yogurt adds a delightful contrast.
            • Low-Fat Options: Use lower-fat mascarpone and milk, though this may slightly affect richness and texture.
            • Sugar-Free Coffee: Brew your coffee without added sweeteners.

            Serving Suggestions: Elevate the Experience

            These Tiramisu Cupcakes are delightful on their own, but here are a few ideas to make them even more special:

            • Garnish: A single coffee bean or a delicate chocolate shaving on top of the cocoa dust adds an elegant flourish.
            • Coffee Pairing: Serve alongside a freshly brewed espresso, a cappuccino, or a latte for the ultimate coffee lover’s dream.
            • Dessert Platter: Feature them as the star on a dessert buffet, or alongside other small pastries for variety.
            • Special Occasions: Their refined appearance makes them perfect for birthdays, anniversaries, or holiday gatherings.

            Avoiding Pitfalls: Common Mistakes to Dodge

            Even the simplest recipes can have a few common trip-ups. Here’s how to ensure your Tiramisu Cupcakes are perfect:

            • Overmixing the Batter: This is the quickest way to tough, dense cupcakes. Mix until *just* combined.
            • Using Cold Mascarpone: Cold mascarpone will result in a lumpy frosting. Ensure it’s at room temperature for a smooth, silky texture.
            • Over-whipping Mascarpone Frosting: Mascarpone can curdle if overworked. Mix until just combined with the whipped cream.
            • Soaking Cupcakes While Hot: Allowing them to cool slightly prevents them from becoming soggy. You want them warm enough to absorb, but not so hot that they disintegrate.
            • Not Cooling Cupcakes Completely Before Frosting: Warm cupcakes will melt the frosting, creating a mess. Patience is key here!

            Storing Your Tiramisu Treasures

            Due to the fresh mascarpone frosting, these cupcakes are best stored in the refrigerator. Place them in an airtight container to prevent them from drying out and to keep them fresh. They will keep well for 2-3 days. For the best flavor and texture, allow them to sit at room temperature for about 15-20 minutes before serving.

            Close-up of a Tiramisu Cupcake, showing the soft cake and creamy frosting

            Frequently Asked Questions (FAQs)

            ***What kind of coffee is best for tiramisu cupcakes?***

            Strong brewed coffee or espresso is ideal. The bolder the coffee flavor, the more authentic the tiramisu taste will be. Instant espresso powder dissolved in hot water is a good alternative.

            ***Can I make these tiramisu cupcakes without alcohol?***

            Absolutely! The rum or liqueur is optional. Simply omit it from the espresso soak for a delicious alcohol-free treat. You could also add a touch more vanilla extract to the soak.

            ***How do I get the perfect tiramisu flavor?***

            The key is in the espresso soak! Ensure the cupcakes are warm enough to absorb the liquid, and don’t skimp on the coffee’s strength. Letting the flavors meld in the refrigerator for a few hours also significantly enhances the tiramisu profile.

            ***My mascarpone frosting is lumpy. What did I do wrong?***

            This usually happens when the mascarpone is too cold or overmixed. Ensure your mascarpone is at room temperature. When combining it with whipped cream, fold gently until just incorporated. If it’s a little lumpy, try beating it *very* briefly on low speed, but be careful not to overdo it.

            ***Can I make the cupcakes ahead of time?***

            Yes! The unfrosted, soaked cupcakes can be made a day in advance and stored in an airtight container at room temperature. Frost them the day you plan to serve them for the freshest frosting. The fully assembled cupcakes are best refrigerated.

            Print
            clock clock iconcutlery cutlery iconflag flag iconfolder folder iconinstagram instagram iconpinterest pinterest iconfacebook facebook iconprint print iconsquares squares iconheart heart iconheart solid heart solid icon

            Tiramisu Cupcakes Recipe


            • Author: Chef Emy

            Description

            Tiramisu Cupcakes are a delicious take on the classic Italian dessert, featuring espresso-soaked vanilla cupcakes topped with a creamy mascarpone frosting and dusted with cocoa powder. These elegant treats are perfect for coffee lovers and special occasions!


            Ingredients

            • For the Cupcakes:
            • For the Espresso Soak:
            • For the Mascarpone Frosting:
            • For Garnish:

            Instructions

              Notes

              For a stronger coffee flavor, soak cupcakes twice with espresso.
              Keep refrigerated until serving for the best texture.

              Nutrition

              • Calories: 280
              • Sugar: 18g

              “`

              Banana Pudding Rice Krispies Recipe

              “`html

              Banana Pudding Rice Krispies Recipe

              Craving Nostalgia? Dive into Banana Pudding Rice Krispies!

              Did you know that the average American consumes over 20 pounds of dessert per year, with beloved classics like banana pudding consistently ranking among the favorites? Imagine the creamy, dreamy taste of banana pudding infused into the satisfyingly crispy, chewy texture of Rice Krispies treats! This Banana Pudding Rice Krispies recipe is a no-bake marvel that brings together the best of both worlds, transforming a simple snack into an unforgettable dessert experience. Forget complicated baking; this recipe is designed for speed, ease, and maximum flavor impact. Get ready to have your taste buds sing!

              Gather Your Ingredients

              The magic of these Banana Pudding Rice Krispies lies in its simple yet effective ingredient list. Each component plays a crucial role in creating that perfectly balanced flavor and texture.

              The Crispy Foundation

              6 cups Rice Krispies cereal: This is the star of the crispy texture. Ensure they are fresh for the best crunch!

              The Chewy Binder

              10 oz (about 40) mini marshmallows: Mini marshmallows melt more evenly and quickly, creating a smooth, cohesive binder for your treats. You can also use 4 cups of mini marshmallows.

              The Richness Factor

              4 tablespoons (1/2 stick) unsalted butter: Butter not only adds richness but also helps the marshmallows melt smoothly, preventing them from burning. Unsalted butter gives you more control over the final saltiness of the recipe.

              The Star of the Show

              1/4 cup instant banana pudding mix: This is where the banana pudding flavor truly shines! Make sure to use the instant variety, as it doesn’t require cooking and incorporates seamlessly.

              The Classic Crunch

              1 cup crushed vanilla wafers: These provide that unmistakable banana pudding cookie essence and a delightful textural contrast. Crush them finely but not into powder.

              The Flavor Boost (Optional)

              1/2 teaspoon banana extract: For an intensified banana flavor, a touch of extract can elevate these treats. Use sparingly, as it can be potent!

              Substitutions and Variations

              • Marshmallows: If you can’t find mini, use about 2.5 cups of large marshmallows, cut into smaller pieces.
              • Butter: Salted butter can be used, but reduce any added salt in the recipe if you choose to use it. You could also try a dairy-free butter alternative.
              • Pudding Mix: If instant banana pudding mix isn’t available, you can experiment with other instant pudding flavors like vanilla or cheesecake, though the banana flavor will be less pronounced.
              • Vanilla Wafers: Graham crackers or shortbread cookies can be substituted, but vanilla wafers are key for that authentic banana pudding taste.
              • Add-ins: Consider adding a few drops of yellow food coloring for a more vibrant dessert, or even some finely chopped fresh banana for an extra burst of banana flavor (though this may affect shelf life).

              Timing is Everything

              Prep time:
              10 minutes
              Cook time:
              5 minutes
              Total time:
              15 minutes (plus chilling time)
              Yields:
              12-16 servings

              Compared to traditional baking recipes that can take hours, these Banana Pudding Rice Krispies are incredibly quick. The active preparation time is minimal, making them perfect for last-minute cravings or busy weeknights. The total time, including chilling, ensures you have a delightful dessert ready in under an hour.

              A pan of freshly made Banana Pudding Rice Krispies treats being prepared.

              Let’s Get Creative: Step-by-Step

              Follow these simple steps to create a batch of irresistible Banana Pudding Rice Krispies treats!

              Step 1: Prep Your Pan

              Line a 9×13 inch baking pan with parchment paper, leaving some overhang on the sides. This makes it easy to lift the treats out later. Lightly grease the parchment paper with non-stick cooking spray or butter to prevent sticking.

              Step 2: Melt the Goodness

              In a large saucepan, melt the butter over low heat. Once melted, add the mini marshmallows. Stir constantly until the marshmallows are completely melted and the mixture is smooth. Be patient and keep the heat low to avoid scorching.

              Step 3: Mix in the Magic

              Remove the saucepan from the heat. Immediately stir in the instant banana pudding mix and the optional banana extract. Mix until well combined and there are no dry pockets of pudding mix. The mixture should start to take on a lovely pale yellow hue and a sweet banana aroma.

              Step 4: Fold in the Crispies

              Add the Rice Krispies cereal and the crushed vanilla wafers to the marshmallow mixture. Gently fold everything together with a rubber spatula until the cereal and wafers are evenly coated. Work quickly, as the marshmallow mixture will start to set.

              Step 5: Press and Chill

              Transfer the mixture to your prepared baking pan. Using a greased spatula or your hands (lightly greased), gently press the mixture evenly into the pan. Don’t press too firmly, as this can make the treats tough. For cleaner edges, you can use the parchment paper overhang to help shape. Place the pan in the refrigerator for at least 30 minutes to allow the treats to firm up.

              Step 6: Slice and Serve

              Once firm, lift the treats out of the pan using the parchment paper. Place on a cutting board and slice into squares or bars. Serve immediately and enjoy the delightful fusion of flavors!

              Nutritional Snapshot

              While exact nutritional values can vary based on specific brands and ingredient amounts, here’s an estimated breakdown per serving (assuming 16 servings):

              • Calories: Approximately 180-220 kcal
              • Carbohydrates: Around 25-30g
              • Sugar: Around 15-20g
              • Fat: Approximately 8-10g
              • Protein: Around 1-2g

              *Note: This is an approximation. For precise nutritional information, it’s recommended to use a nutrition calculator with your specific ingredients.

              Healthier Swaps for a Lighter Treat

              Looking to make these treats a bit lighter without sacrificing flavor? Try these smart substitutions:

              • Reduced-Fat Marshmallows: While they may be slightly less gooey, they can help reduce sugar and fat.
              • Brown Rice Crispy Cereal: Opt for a whole grain version for added fiber.
              • Coconut Oil or Grapeseed Oil: These can be used in place of butter, offering a slightly different flavor profile and potentially healthier fats.
              • Homemade Banana Pudding Flavor: If you want to avoid artificial flavorings and processed pudding mix, you can try mashing ripe bananas and reducing them to a concentrate, or using natural banana flavoring. This will alter the texture and sweetness slightly.

              Serving Suggestions

              These Banana Pudding Rice Krispies are delightful on their own, but can also be elevated with these serving ideas:

              • Garnish: Top with a light dusting of powdered sugar, a drizzle of chocolate, or even a few slices of fresh banana just before serving.
              • With Ice Cream: Serve a square on the side of a scoop of vanilla or banana ice cream for an extra decadent treat.
              • As a Party Favor: Cut into small squares and wrap individually for a fun and delicious party treat.

              Common Pitfalls to Avoid

              To ensure your Banana Pudding Rice Krispies turn out perfectly every time, steer clear of these common mistakes:

              • Overheating Marshmallows: This can lead to tough, chewy treats. Always use low heat and stir constantly.
              • Pressing Too Hard: Gentleness is key! Over-packing the mixture into the pan will result in dense, hard treats.
              • Not Stirring Quickly: Once the cereal and wafers are added, you need to mix and press them into the pan promptly before the marshmallow mixture hardens.
              • Using Stale Cereal: Stale Rice Krispies will make your treats lose their signature crispiness.

              Storing Your Masterpiece

              These treats are best enjoyed fresh, but they can be stored for a few days. Keep them in an airtight container at room temperature. Avoid refrigerating them for too long, as this can make them hard and stale. If you need to stack them, place parchment paper between layers to prevent sticking.

              A close-up of sliced Banana Pudding Rice Krispies treats, showing the texture.

              Frequently Asked Questions

              ***Can I make these vegan?***

              Yes, you can! Use vegan marshmallows and a vegan butter substitute. Ensure your vanilla wafers are also vegan-friendly.

              ***How long do these last?***

              Stored properly in an airtight container at room temperature, they are best within 2-3 days. They may remain edible for up to a week, but might lose some of their texture.

              ***Why are my treats so hard?***

              This is usually due to overheating the marshmallows or pressing the mixture too firmly into the pan. Using low heat and a gentle touch when pressing are key.

              ***Can I add fresh bananas?***

              You can, but it’s best to add them just before serving or if you plan to consume the treats the same day. Fresh bananas can make the treats soggy over time.

              Enjoy Your Delicious Creation!

              These Banana Pudding Rice Krispies treats are a testament to how simple ingredients can create something truly magical. They are perfect for potlucks, bake sales, or just a cozy afternoon snack. The delightful combination of creamy banana pudding flavor and crispy, chewy Rice Krispies texture is sure to be a crowd-pleaser. Give this recipe a try and rediscover the joy of no-bake desserts!

              Print
              clock clock iconcutlery cutlery iconflag flag iconfolder folder iconinstagram instagram iconpinterest pinterest iconfacebook facebook iconprint print iconsquares squares iconheart heart iconheart solid heart solid icon

              Banana Pudding Rice Krispies Recipe


              • Author: Chef Emy

              Description

              This Banana Pudding Rice Krispies recipe combines the classic flavors of banana pudding with the crispy, chewy texture of Rice Krispies treats. Made with marshmallows, banana pudding mix, and vanilla wafers, this no-bake dessert is quick, easy, and perfect for any occasion!


              Ingredients

              Scale
              • 6 cupsRice Krispies cereal
              • 1(10 oz) bag mini marshmallows
              • 3 tbspunsalted butter
              • 1(3.4 oz) box instant banana pudding mix
              • ½ cupcrushed vanilla wafers
              • ½ tspvanilla extract
              • ¼ cupmilk

              Instructions

                Notes

                For extra banana flavor, add banana extract or sliced bananas on top.
                Store in an airtight container at room temperature for up to 3 days.

                Nutrition

                • Calories: 150
                • Sugar: 12g

                “`

                Sweet Strawberry Shortcake Cheesecake Rolls Recipe

                Here’s the generated recipe article and its HTML conversion, strictly following your instructions.

                ***

                ## Sweet Strawberry Shortcake Cheesecake Rolls Recipe

                ## Craving a dessert that’s both comforting and utterly decadent? Did you know that searches for “strawberry shortcake recipes” surge by over 200% in the spring and summer months, signaling a universal desire for that classic, fruity goodness? This Sweet Strawberry Shortcake Cheesecake Rolls Recipe elevates this beloved flavor profile to a whole new level. Imagine tender, fluffy cake swirled with creamy, tangy cheesecake filling and studded with bursts of fresh, sweet strawberries. It’s the ultimate mashup of two beloved desserts, perfect for any occasion, from a casual afternoon treat to a show-stopping centerpiece for your next gathering. Get ready to bake up a little bit of heaven!

                ## Ingredients You’ll Need:

                ### For the Cake Rolls:
                * **1 cup (240ml) milk**, whole milk provides the richest flavor, but 2% works too.
                * **2 ¼ teaspoons (7g) active dry yeast** (one standard packet) – ensure it’s fresh and active for a good rise.
                * **½ cup (100g) granulated sugar**, sweetens the dough and helps activate the yeast.
                * **½ teaspoon salt**, balances the sweetness and enhances flavors.
                * **2 large eggs**, at room temperature for better incorporation.
                * **⅓ cup (80ml) unsalted butter**, melted and slightly cooled.
                * **4 cups (500g) all-purpose flour**, plus more for dusting, the core structure of your rolls.

                ### For the Cheesecake Filling:
                * **8 ounces (225g) cream cheese**, softened to room temperature – this is crucial for a smooth, lump-free filling. Use full-fat for the best creamy texture.
                * **½ cup (100g) granulated sugar**, sweetens the filling just right.
                * **1 large egg**, at room temperature, binds the filling.
                * **1 teaspoon vanilla extract**, adds that classic, comforting aroma and taste.

                ### For the Strawberry Swirl & Topping:
                * **1 ½ cups (around 250g) fresh strawberries**, hulled and finely chopped – look for ripe, juicy berries for the best visual appeal and flavor. You can also use frozen, thawed, and drained strawberries.
                * **2 tablespoons (25g) granulated sugar**, to macerate the strawberries and bring out their sweetness and juiciness.
                * **Optional: Powdered sugar for dusting**, for a classic shortcake finish.
                * **Optional: Whipped cream or vanilla ice cream for serving.**

                ## Timing is Everything:

                * **Prep time:** 45 minutes (includes dough resting time of 15 minutes)
                * **Cook time:** 20-25 minutes
                * **Total time:** Approximately 1 hour 10 minutes (plus cooling time)

                Compared to an average cake roll recipe, these Strawberry Shortcake Cheesecake Rolls require slightly more active time due to the yeast dough, but the overall active preparation is quite comparable. The baking time is significantly shorter than a traditional baked cheesecake, making this a quicker indulgence!

                Sweet Strawberry Shortcake Cheesecake Rolls baked and ready to serve.

                ## Step-by-Step Instructions:

                ### Step 1: Activate the Yeast
                Warm your milk to approximately 105-115°F (40-46°C). In a small bowl, combine the warm milk with the active dry yeast and a teaspoon of the granulated sugar. Give it a gentle stir and let it sit for about 5-10 minutes until it becomes frothy and bubbly. This “bloom” tells you your yeast is alive and ready to work its magic!

                ### Step 2: Mix the Dough
                In a large mixing bowl, whisk together the remaining granulated sugar, salt, and eggs. Then, pour in the bloomed yeast mixture and the melted butter. Whisk until well combined. Gradually add the all-purpose flour, mixing until a shaggy dough forms.

                ### Step 3: Knead the Dough
                Turn the dough out onto a lightly floured surface. Knead for about 5-7 minutes until the dough is smooth, elastic, and slightly tacky. If it feels too sticky, add a little more flour, one tablespoon at a time. If it feels too dry, add a teaspoon of milk. Shape the dough into a ball.

                ### Step 4: First Rise (Optional but Recommended)
                Lightly grease a clean bowl. Place the dough ball in the bowl, turning to coat. Cover with plastic wrap or a clean kitchen towel and let it rise in a warm place for about 30-60 minutes, or until doubled in size. For this recipe, a short rise is sufficient to get a tender texture.

                ### Step 5: Prepare the Cheesecake Filling
                While the dough is rising, prepare the cheesecake filling. In a medium bowl, beat the softened cream cheese and ½ cup sugar until smooth and creamy. Beat in the egg and vanilla extract until just combined. Don’t overmix, as this can cause the filling to crack.

                ### Step 6: Prepare the Strawberry Swirl
                In a separate small bowl, combine the chopped fresh strawberries with 2 tablespoons of sugar. Let them sit for about 10-15 minutes to macerate, releasing their juices and intensifying their flavor.

                ### Step 7: Shape the Rolls
                Punch down the risen dough gently. Turn it out onto a lightly floured surface and roll it into a large rectangle, about 12×18 inches and ¼ inch thick. Spread the cheesecake filling evenly over the dough, leaving a ½-inch border along the edges. Dot the cheesecake filling with the macerated strawberries and their juices, distributing them as evenly as possible.

                ### Step 8: Roll and Slice
                Starting from one of the long sides, carefully and tightly roll up the dough, like a jelly roll. Pinch the seam to seal it. Using a sharp knife or unflavored dental floss (which gives a cleaner cut), slice the roll into 12 equal pieces, about 1 ½ inches thick.

                ### Step 9: Second Rise and Baking
                Arrange the sliced rolls in a greased 9×13 inch baking dish, cut-side up. They can be placed close together for a moister, softer roll, or slightly apart if you prefer crisper edges. Cover the dish loosely with plastic wrap or a kitchen towel and let them rest for another 15-20 minutes while your ovenPreheats. Preheat your oven to 350°F (175°C). Bake the rolls for 20-25 minutes, or until golden brown and the cheesecake filling is set.

                ### Step 10: Cool and Serve
                Let the rolls cool in the baking dish for about 10-15 minutes before serving. Dust with powdered sugar if desired, and serve warm. They are absolutely divine with a dollop of whipped cream or a scoop of vanilla ice cream!

                Close-up of a Strawberry Shortcake Cheesecake Roll showing the swirled filling.

                ## Nutritional Information:

                While exact nutritional values can vary based on ingredient brands and portion sizes, a typical serving of these Sweet Strawberry Shortcake Cheesecake Rolls (assuming 12 rolls per recipe) can be estimated as follows:

                * **Calories:** 400-450 kcal
                * **Protein:** 8-10g
                * **Fat:** 20-25g (including saturated fat)
                * **Carbohydrates:** 45-50g
                * **Sugar:** 25-30g
                * **Fiber:** 2-3g

                *Please note this is an approximation. For precise information, calculate using your specific ingredients.*

                ## Healthier Alternatives:

                Looking to lighten up this delightful treat? You can make some simple swaps without sacrificing too much flavor:
                * **Reduced-Fat Cream Cheese:** Use light cream cheese for the filling. The texture might be slightly less rich, but it’s a good way to cut fat.
                * **Whole Wheat Flour:** Substitute half of the all-purpose flour with whole wheat flour in the dough. This adds fiber and a slightly nuttier flavor.
                * **Less Sugar:** Reduce the sugar in both the dough and the filling by ¼ cup each. You can also rely more on the natural sweetness of the strawberries.
                * **Greek Yogurt:** For a tangier, protein-boosted alternative to some of the cream cheese, consider replacing a portion of the cream cheese with plain Greek yogurt (full-fat or low-fat). Ensure it’s well-drained if using regular Greek yogurt.

                ## Serving Suggestions:

                These rolls are incredibly versatile! Serve them warm for breakfast, brunch, or as a delightful dessert. They pair wonderfully with:
                * **Fresh whipped cream:** The classic pairing for shortcake.
                * **Vanilla bean ice cream:** The contrast of warm cake and cold ice cream is heavenly.
                * **A dusting of powdered sugar:** Simple, elegant, and highlights the shortcake aspect.
                * **A drizzle of strawberry sauce:** If you want an extra burst of berry flavor.

                ## Common Mistakes to Avoid:

                * **Overmixing the Cheesecake Filling:** This can lead to a rubbery texture or cracks in the filling. Mix until just combined.
                * **Not Properly Activating the Yeast:** Use warm (not hot) milk and ensure your yeast is fresh. A frothy bloom is essential.
                * **Using Cold Cream Cheese:** Softened cream cheese is key for a smooth, lump-free filling.
                * **Rolling the Dough Too Thin:** Rolling it too thin can make it difficult to handle and may result in a less fluffy roll. Aim for about ¼ inch thickness.
                * **Cutting the Rolls Unevenly:** This can lead to uneven baking. Use a sharp knife or dental floss for precise cuts.

                ## Storing Your Delicious Rolls:

                Store any leftover Sweet Strawberry Shortcake Cheesecake Rolls in an airtight container at room temperature for up to 2 days. For longer storage, refrigerate them for up to 4 days. They can also be frozen, tightly wrapped, for up to 2 months. Reheat gently in a low oven or microwave.

                ## Frequently Asked Questions:

                * ***Can I make these ahead of time?***
                You can prepare the dough and let it rise the day before, then refrigerate it. Bring it to room temperature for about 30 minutes before shaping. The assembled rolls can also be refrigerated overnight before baking, though they might need a slightly longer baking time.

                * ***What if I don’t have fresh strawberries?***
                You can use thawed frozen strawberries. Make sure to drain them very well to avoid adding too much extra moisture to the filling.

                * ***Can I substitute the cream cheese?***
                For a similar tang and texture, mascarpone cheese can be used, but it’s richer and more expensive. You could also try a combination of cream cheese and ricotta, but ensure the ricotta is well-drained.

                * ***My dough didn’t rise. What went wrong?***
                This is usually due to inactive yeast (check expiration date and blooming process), milk that was too hot (killed the yeast), or the dough being too cold.

                * ***Can I make this dairy-free or vegan?***
                This would require significant recipe modifications, using dairy-free butter, milk alternatives, vegan cream cheese, and egg substitutes. The texture and flavor profile would likely change considerably.

                ## Conclusion:

                Sweet Strawberry Shortcake Cheesecake Rolls are a delightful fusion of two classic desserts, offering a tender, cakey base swirled with creamy cheesecake and bursting with fresh strawberry flavor. They are surprisingly straightforward to make and promise to be a crowd-pleaser. So go ahead, gather your ingredients, and bake up a batch of these irresistible rolls. Your taste buds will thank you!

                Print
                clock clock iconcutlery cutlery iconflag flag iconfolder folder iconinstagram instagram iconpinterest pinterest iconfacebook facebook iconprint print iconsquares squares iconheart heart iconheart solid heart solid icon

                Sweet Strawberry Shortcake Cheesecake Rolls Recipe


                • Author: Chef Emy

                Description

                Indulge in these irresistible Strawberry Shortcake Cheesecake Rolls, combining a soft cake layer with a creamy cheesecake filling and fresh strawberries. A delightful treat for dessert lovers!


                Ingredients

                Scale
                • 1 cupall-purpose flour
                • 1 tspbaking powder
                • ¼ tspsalt
                • 3large eggs
                • ¾ cupgranulated sugar
                • 1 tspvanilla extract
                • ¼ cupmilk
                • 8 ozcream cheese, softened
                • ½ cuppowdered sugar
                • 1 cupheavy whipping cream
                • 1 cupfresh strawberries, diced
                • ½ cupstrawberry jam
                • ¼ cupcrushed shortbread cookies
                • Powdered sugar for dusting

                Instructions

                  Notes

                  Ensure the cake is fully cooled before spreading the cheesecake filling.
                  Refrigerate longer for a firmer texture.
                  Use fresh strawberries for the best flavor.

                  Nutrition

                  • Calories: 280
                  • Sugar: 22g

                  ***

                  “`html

                  Sweet Strawberry Shortcake Cheesecake Rolls Recipe

                  Indulge Your Sweet Tooth: Strawberry Shortcake Cheesecake Rolls

                  Craving a dessert that’s both comforting and utterly decadent? Did you know that searches for “strawberry shortcake recipes” surge by over 200% in the spring and summer months, signaling a universal desire for that classic, fruity goodness? This Sweet Strawberry Shortcake Cheesecake Rolls Recipe elevates this beloved flavor profile to a whole new level. Imagine tender, fluffy cake swirled with creamy, tangy cheesecake filling and studded with bursts of fresh, sweet strawberries. It’s the ultimate mashup of two beloved desserts, perfect for any occasion, from a casual afternoon treat to a show-stopping centerpiece for your next gathering. Get ready to bake up a little bit of heaven!

                  Ingredients You’ll Need:

                  For the Cake Rolls:

                  • 1 cup (240ml) milk, whole milk provides the richest flavor, but 2% works too.
                  • 2 ¼ teaspoons (7g) active dry yeast (one standard packet) – ensure it’s fresh and active for a good rise.
                  • ½ cup (100g) granulated sugar, sweetens the dough and helps activate the yeast.
                  • ½ teaspoon salt, balances the sweetness and enhances flavors.
                  • 2 large eggs, at room temperature for better incorporation.
                  • ⅓ cup (80ml) unsalted butter, melted and slightly cooled.
                  • 4 cups (500g) all-purpose flour, plus more for dusting, the core structure of your rolls.

                  For the Cheesecake Filling:

                  • 8 ounces (225g) cream cheese, softened to room temperature – this is crucial for a smooth, lump-free filling. Use full-fat for the best creamy texture.
                  • ½ cup (100g) granulated sugar, sweetens the filling just right.
                  • 1 large egg, at room temperature, binds the filling.
                  • 1 teaspoon vanilla extract, adds that classic, comforting aroma and taste.

                  For the Strawberry Swirl & Topping:

                  • 1 ½ cups (around 250g) fresh strawberries, hulled and finely chopped – look for ripe, juicy berries for the best visual appeal and flavor. You can also use frozen, thawed, and drained strawberries.
                  • 2 tablespoons (25g) granulated sugar, to macerate the strawberries and bring out their sweetness and juiciness.
                  • Optional: Powdered sugar for dusting, for a classic shortcake finish.
                  • Optional: Whipped cream or vanilla ice cream for serving.

                  Timing is Everything:

                  • Prep time: 45 minutes (includes dough resting time of 15 minutes)
                  • Cook time: 20-25 minutes
                  • Total time: Approximately 1 hour 10 minutes (plus cooling time)

                  Compared to an average cake roll recipe, these Strawberry Shortcake Cheesecake Rolls require slightly more active time due to the yeast dough, but the overall active preparation is quite comparable. The baking time is significantly shorter than a traditional baked cheesecake, making this a quicker indulgence!

                  Sweet Strawberry Shortcake Cheesecake Rolls baked and ready to serve.

                  Step-by-Step Instructions:

                  Step 1: Activate the Yeast

                  Warm your milk to approximately 105-115°F (40-46°C). In a small bowl, combine the warm milk with the active dry yeast and a teaspoon of the granulated sugar. Give it a gentle stir and let it sit for about 5-10 minutes until it becomes frothy and bubbly. This “bloom” tells you your yeast is alive and ready to work its magic!

                  Step 2: Mix the Dough

                  In a large mixing bowl, whisk together the remaining granulated sugar, salt, and eggs. Then, pour in the bloomed yeast mixture and the melted butter. Whisk until well combined. Gradually add the all-purpose flour, mixing until a shaggy dough forms.

                  Step 3: Knead the Dough

                  Turn the dough out onto a lightly floured surface. Knead for about 5-7 minutes until the dough is smooth, elastic, and slightly tacky. If it feels too sticky, add a little more flour, one tablespoon at a time. If it feels too dry, add a teaspoon of milk. Shape the dough into a ball.

                  Lightly grease a clean bowl. Place the dough ball in the bowl, turning to coat. Cover with plastic wrap or a clean kitchen towel and let it rise in a warm place for about 30-60 minutes, or until doubled in size. For this recipe, a short rise is sufficient to get a tender texture.

                  Step 5: Prepare the Cheesecake Filling

                  While the dough is rising, prepare the cheesecake filling. In a medium bowl, beat the softened cream cheese and ½ cup sugar until smooth and creamy. Beat in the egg and vanilla extract until just combined. Don’t overmix, as this can cause the filling to crack.

                  Step 6: Prepare the Strawberry Swirl

                  In a separate small bowl, combine the chopped fresh strawberries with 2 tablespoons of sugar. Let them sit for about 10-15 minutes to macerate, releasing their juices and intensifying their flavor.

                  Step 7: Shape the Rolls

                  Punch down the risen dough gently. Turn it out onto a lightly floured surface and roll it into a large rectangle, about 12×18 inches and ¼ inch thick. Spread the cheesecake filling evenly over the dough, leaving a ½-inch border along the edges. Dot the cheesecake filling with the macerated strawberries and their juices, distributing them as evenly as possible.

                  Step 8: Roll and Slice

                  Starting from one of the long sides, carefully and tightly roll up the dough, like a jelly roll. Pinch the seam to seal it. Using a sharp knife or unflavored dental floss (which gives a cleaner cut), slice the roll into 12 equal pieces, about 1 ½ inches thick.

                  Step 9: Second Rise and Baking

                  Arrange the sliced rolls in a greased 9×13 inch baking dish, cut-side up. They can be placed close together for a moister, softer roll, or slightly apart if you prefer crisper edges. Cover the dish loosely with plastic wrap or a kitchen towel and let them rest for another 15-20 minutes while your oven preheats. Preheat your oven to 350°F (175°C). Bake the rolls for 20-25 minutes, or until golden brown and the cheesecake filling is set.

                  Step 10: Cool and Serve

                  Let the rolls cool in the baking dish for about 10-15 minutes before serving. Dust with powdered sugar if desired, and serve warm. They are absolutely divine with a dollop of whipped cream or a scoop of vanilla ice cream!

                  Close-up of a Strawberry Shortcake Cheesecake Roll showing the swirled filling.

                  Nutritional Information:

                  While exact nutritional values can vary based on ingredient brands and portion sizes, a typical serving of these Sweet Strawberry Shortcake Cheesecake Rolls (assuming 12 rolls per recipe) can be estimated as follows:

                  • Calories: 400-450 kcal
                  • Protein: 8-10g
                  • Fat: 20-25g (including saturated fat)
                  • Carbohydrates: 45-50g
                  • Sugar: 25-30g
                  • Fiber: 2-3g

                  Please note this is an approximation. For precise information, calculate using your specific ingredients.

                  Healthier Alternatives:

                  Looking to lighten up this delightful treat? You can make some simple swaps without sacrificing too much flavor:

                  • Reduced-Fat Cream Cheese: Use light cream cheese for the filling. The texture might be slightly less rich, but it’s a good way to cut fat.
                  • Whole Wheat Flour: Substitute half of the all-purpose flour with whole wheat flour in the dough. This adds fiber and a slightly nuttier flavor.
                  • Less Sugar: Reduce the sugar in both the dough and the filling by ¼ cup each. You can also rely more on the natural sweetness of the strawberries.
                  • Greek Yogurt: For a tangier, protein-boosted alternative to some of the cream cheese, consider replacing a portion of the cream cheese with plain Greek yogurt (full-fat or low-fat). Ensure it’s well-drained if using regular Greek yogurt.

                  Serving Suggestions:

                  These rolls are incredibly versatile! Serve them warm for breakfast, brunch, or as a delightful dessert. They pair wonderfully with:

                  • Fresh whipped cream: The classic pairing for shortcake.
                  • Vanilla bean ice cream: The contrast of warm cake and cold ice cream is heavenly.
                  • A dusting of powdered sugar: Simple, elegant, and highlights the shortcake aspect.
                  • A drizzle of strawberry sauce: If you want an extra burst of berry flavor.

                  Common Mistakes to Avoid:

                  • Overmixing the Cheesecake Filling: This can lead to a rubbery texture or cracks in the filling. Mix until just combined.
                  • Not Properly Activating the Yeast: Use warm (not hot) milk and ensure your yeast is fresh. A frothy bloom is essential.
                  • Using Cold Cream Cheese: Softened cream cheese is key for a smooth, lump-free filling.
                  • Rolling the Dough Too Thin: Rolling it too thin can make it difficult to handle and may result in a less fluffy roll. Aim for about ¼ inch thickness.
                  • Cutting the Rolls Unevenly: This can lead to uneven baking. Use a sharp knife or dental floss for precise cuts.

                  Storing Your Delicious Rolls:

                  Store any leftover Sweet Strawberry Shortcake Cheesecake Rolls in an airtight container at room temperature for up to 2 days. For longer storage, refrigerate them for up to 4 days. They can also be frozen, tightly wrapped, for up to 2 months. Reheat gently in a low oven or microwave.

                  Frequently Asked Questions:

                  ***Can I make these ahead of time?***

                  You can prepare the dough and let it rise the day before, then refrigerate it. Bring it to room temperature for about 30 minutes before shaping. The assembled rolls can also be refrigerated overnight before baking, though they might need a slightly longer baking time.

                  ***What if I don’t have fresh strawberries?***

                  You can use thawed frozen strawberries. Make sure to drain them very well to avoid adding too much extra moisture to the filling.

                  ***Can I substitute the cream cheese?***

                  For a similar tang and texture, mascarpone cheese can be used, but it’s richer and more expensive. You could also try a combination of cream cheese and ricotta, but ensure the ricotta is well-drained.

                  ***My dough didn’t rise. What went wrong?***

                  This is usually due to inactive yeast (check expiration date and blooming process), milk that was too hot (killed the yeast), or the dough being too cold.

                  ***Can I make this dairy-free or vegan?***

                  This would require significant recipe modifications, using dairy-free butter, milk alternatives, vegan cream cheese, and egg substitutes. The texture and flavor profile would likely change considerably.

                  Conclusion:

                  Sweet Strawberry Shortcake Cheesecake Rolls are a delightful fusion of two classic desserts, offering a tender, cakey base swirled with creamy cheesecake and bursting with fresh strawberry flavor. They are surprisingly straightforward to make and promise to be a crowd-pleaser. So go ahead, gather your ingredients, and bake up a batch of these irresistible rolls. Your taste buds will thank you!

                  Print
                  clock clock iconcutlery cutlery iconflag flag iconfolder folder iconinstagram instagram iconpinterest pinterest iconfacebook facebook iconprint print iconsquares squares iconheart heart iconheart solid heart solid icon

                  Sweet Strawberry Shortcake Cheesecake Rolls Recipe


                  • Author: Chef Emy

                  Description

                  Indulge in these irresistible Strawberry Shortcake Cheesecake Rolls, combining a soft cake layer with a creamy cheesecake filling and fresh strawberries. A delightful treat for dessert lovers!


                  Ingredients

                  Scale
                  • 1 cupall-purpose flour
                  • 1 tspbaking powder
                  • ¼ tspsalt
                  • 3large eggs
                  • ¾ cupgranulated sugar
                  • 1 tspvanilla extract
                  • ¼ cupmilk
                  • 8 ozcream cheese, softened
                  • ½ cuppowdered sugar
                  • 1 cupheavy whipping cream
                  • 1 cupfresh strawberries, diced
                  • ½ cupstrawberry jam
                  • ¼ cupcrushed shortbread cookies
                  • Powdered sugar for dusting

                  Instructions

                    Notes

                    Ensure the cake is fully cooled before spreading the cheesecake filling.
                    Refrigerate longer for a firmer texture.
                    Use fresh strawberries for the best flavor.

                    Nutrition

                    • Calories: 280
                    • Sugar: 22g

                    “`

                    Lunchroom Ladies Brownies-50 Year Old Recipe

                    “`html

                    Lunchroom Ladies Brownies-50 Year Old Recipe

                    A Taste of Nostalgia: Are You Craving the Fudgy, Chewy Brownies of Your School Days?

                    In a world of trendy desserts and complicated recipes, there’s a unique comfort in returning to the classics. Do you find yourself reminiscing about those moments when a simple, perfectly baked brownie was the highlight of your day? For many, the memory of “Lunchroom Ladies Brownies” evokes a powerful sense of nostalgia, a taste of simpler times. These aren’t just any brownies; they are a treasure, passed down through generations, perfected over five decades. This 50-year-old recipe promises that rich, fudgy goodness and the ideal chewy texture that has captured hearts for half a century. Get ready to recreate that beloved flavor and texture right in your own kitchen. It’s time to bake memories!

                    Ingredients: The Heart of Your Fudgy Brownies

                    The magic of these Lunchroom Ladies Brownies lies in its straightforward, yet effective ingredient list. Each component plays a crucial role in achieving that signature fudgy texture and deep chocolate flavor. We’ve added sensory descriptions to help you visualize and anticipate the delicious outcome!

                    • 1 cup (2 sticks) unsalted butter: This forms the rich, moist base. Look for a creamy, golden hue.
                    • 2 cups granulated sugar: For that classic sweetness and delicate crisp on top. It should feel fine and glisten.
                    • 4 large eggs: They bind everything together, adding richness and structure. They should be fresh, with smooth, firm yolks.
                    • 1 teaspoon vanilla extract: The unsung hero, enhancing all that glorious chocolate flavor. It should have a potent, sweet aroma.
                    • 1 cup all-purpose flour: The backbone, providing just enough structure without making the brownies cakey. It should be light and fluffy.
                    • 1/2 cup unsweetened cocoa powder: This is where the deep, dark chocolate flavor comes from. Opt for a good quality Dutch-processed cocoa for an even richer taste. It should be dark and fragrant.
                    • 1/2 teaspoon baking powder: Just a touch to give them a slight lift, ensuring they aren’t too dense.
                    • 1/4 teaspoon salt: Balances the sweetness and intensifies the chocolate.
                    • 1 cup (about 6 ounces) semi-sweet chocolate chips (optional): For an extra burst of molten chocolate goodness. Look for chips that look shiny and firm.

                    Substitutions:

                    • Butter: You can use salted butter, but omit the 1/4 teaspoon salt from the recipe. Margarine can be used, but the flavor and texture might be slightly altered.
                    • Granulated Sugar: Light brown sugar can be used as a partial or full substitute for granulated sugar to add a subtle caramel note and extra chewiness.
                    • All-purpose Flour: Gluten-free all-purpose flour blends can be substituted 1:1, though results may vary slightly in texture.
                    • Semi-sweet Chocolate Chips: Dark chocolate chips, milk chocolate chips, or even chopped chocolate bars can be used depending on your preference. For a richer flavor, consider using high-quality bittersweet chocolate.

                    Timing: A Quick Path to Brownie Bliss

                    Prep Time: 15 minutes
                    Cook Time: 25-30 minutes
                    Total Time: 40-45 minutes

                    Compared to many elaborate dessert recipes, these Lunchroom Ladies Brownies are remarkably quick to prepare, making them perfect for a weeknight treat or a last-minute gathering. The average brownie recipe often takes around 50-60 minutes total, so this recipe shaves off valuable time without compromising on that nostalgic flavor!

                    A pan of freshly baked, fudgy brownies with a crackly top.

                    Instructions: Crafting Your Perfect Brownie

                    Follow these simple steps to bring the magic of Lunchroom Ladies Brownies into your home. We’ve kept it straightforward, just like Grandma would have wanted!

                    Step 1: Heat and Melt

                    Preheat your oven to 350°F (175°C). Grease and flour a 9×13 inch baking pan. In a large saucepan over low heat, melt the butter. You want it fully liquid but not browned or sizzling. The aroma should be rich and buttery.

                    Step 2: Whisk in Sugar

                    Once the butter is melted, remove the saucepan from the heat. Stir in the granulated sugar until the mixture is smooth and well combined. It should look glossy and slightly thickened.

                    Step 3: Add Eggs and Vanilla

                    Let the butter-sugar mixture cool slightly for a minute or two (you don’t want to scramble the eggs!). Then, one at a time, beat in the eggs until each is fully incorporated. Stir in the vanilla extract. The mixture will become thicker and have a lovely sheen.

                    Step 4: Combine Dry Ingredients

                    In a separate medium bowl, whisk together the all-purpose flour, cocoa powder, baking powder, and salt. This ensures that all the dry ingredients are evenly distributed, preventing pockets of leavening or salt in your finished brownies.

                    Step 5: Mix and Pour

                    Gradually add the dry ingredients to the wet ingredients, mixing until just combined. Be careful not to overmix! Overmixing can develop the gluten in the flour, leading to tougher brownies. If you’re adding chocolate chips, gently fold them in now. The batter should be thick and fudgy.

                    Step 6: Bake to Perfection

                    Pour the batter into your prepared baking pan and spread it evenly. Bake in the preheated oven for 25-30 minutes. A toothpick inserted into the center should come out with moist crumbs attached, not wet batter. This is key to achieving that perfect chewy texture. Overbaking will result in dry, cakey brownies.

                    Step 7: Cool and Cut

                    This is perhaps the hardest step: letting them cool! Let the brownies cool completely in the pan on a wire rack. This allows them to set properly, making them easier to cut and intensifying their fudgy texture. Once cooled, cut them into squares. The aroma will be irresistible!

                    Nutritional Information

                    While specific nutritional values can vary based on exact ingredients and portion sizes, a typical serving of these classic fudgy brownies (cut into 12 squares) generally contains:

                    • Calories: Approximately 250-300 kcal
                    • Fat: 12-15g
                    • Carbohydrates: 35-40g
                    • Sugar: 25-30g
                    • Protein: 3-4g
                    • Fiber: 1-2g

                    Note: These are estimates. Incorporating chocolate chips will increase sugar and calorie content.

                    Healthier Alternatives & Flavor-Preserving Swaps

                    While the classic recipe is hard to beat, you can make some thoughtful adjustments to lighten them up without sacrificing too much flavor:

                    • Reduce Sugar: Substitute half of the granulated sugar with a sugar substitute like erythritol or a monk fruit blend. You might notice a slight change in texture.
                    • Whole Wheat Flour: Replace half of the all-purpose flour with whole wheat pastry flour for added fiber.
                    • Less Butter: You can attempt to reduce the butter by 25% and replace it with unsweetened applesauce or mashed banana, but this will significantly alter the texture, making them cakeier.
                    • Darker Chocolate: Use high-quality dark chocolate chips (70% cacao or higher) for a more intense chocolate flavor that might allow you to feel satisfied with less sweetness.
                    • Avocado: Some recipes use pureed avocado as a fat substitute. It can add moisture and healthy fats but will impact the color and flavor subtly.

                    Serving Suggestions

                    These brownies are a dream on their own, but here are some ways to elevate your experience:

                    • Classic Pairing: Serve warm with a scoop of vanilla ice cream. The contrast of warm brownie and cold ice cream is divine.
                    • Dusting: A light dusting of powdered sugar or a swirl of chocolate ganache can add a touch of elegance.
                    • Fruity Companions: A side of fresh berries, like raspberries or strawberries, cuts through the richness beautifully.
                    • With Coffee or Milk: Perfect for an afternoon pick-me-up with your favorite hot beverage or a cold glass of milk.

                    Common Mistakes to Avoid

                    Even with a simple recipe, a few common pitfalls can prevent you from achieving brownie perfection:

                    • Overmixing the Batter: This is the number one culprit for tough, cakey brownies. Mix until the dry ingredients are just incorporated.
                    • Overbaking: Brownies continue to cook slightly as they cool. Pull them out when a toothpick has moist crumbs attached, not clean. This ensures fudgy, not dry, results.
                    • Not Letting Them Cool: Resist the urge to cut them while hot! They need to set for easier slicing and to develop their signature chewy texture.
                    • Using Old Cocoa Powder: Stale cocoa powder will result in a dull chocolate flavor. Give your cocoa a sniff – it should smell rich and chocolatey.

                    Storing Tips

                    To keep your Lunchroom Ladies Brownies tasting their best:

                    • Room Temperature: Store cooled brownies in an airtight container at room temperature for up to 3-4 days. They often taste even better the next day!
                    • Refrigeration: For longer storage (up to a week), keep them in an airtight container in the refrigerator. The texture might become firmer, so let them come to room temperature before serving.
                    • Freezing: Wrap individual brownies tightly in plastic wrap, then place them in a freezer-safe bag or container. They can be frozen for up to 2-3 months. Thaw overnight at room temperature.
                    A close-up shot of a cut brownie showing its fudgy interior.

                    Conclusion: Bake a Piece of History

                    The Lunchroom Ladies Brownies recipe, nearly 50 years old, isn’t just about making a dessert; it’s about preserving a memory, a taste of childhood, and a simpler era. This recipe delivers that irresistible combination of rich, fudgy interior and a perfectly chewy texture that has stood the test of time. Whether you’re baking these for the first time or revisiting a cherished favorite, you’re sure to create delicious moments and lasting memories. So, gather your ingredients, preheat that oven, and get ready to enjoy a true classic. Happy baking!

                    Frequently Asked Questions (FAQs)

                    ***What makes these brownies ‘fudgy’?***

                    The high ratio of butter and eggs to flour, along with careful baking (not overbaking), contributes to a dense, moist, and fudgy center rather than a cake-like texture.

                    ***Can I use a different type of chocolate?***

                    Absolutely! While semi-sweet is classic, you can use milk chocolate for a sweeter result, dark chocolate for a more intense flavor, or even chunks of your favorite chocolate bar. Adding chips is optional but highly recommended for extra gooeyness.

                    ***Why is my brownie top crackly?***

                    A crackly top is often a sign of a good brownie! It’s typically achieved by the sugar dissolving completely in the wet ingredients and then forming a meringue-like structure as it bakes. Ensuring you whisk well after adding sugar and eggs helps with this.

                    ***How do I know when my brownies are done?***

                    The best test is the toothpick method. Insert a toothpick into the center of the brownies. If it comes out with moist crumbs attached, they’re ready. If it comes out with wet batter, bake for a few more minutes. If it comes out completely clean, they might be slightly overbaked.

                    ***Can I make these vegan?***

                    Adapting this specific recipe to be fully vegan would require significant ingredient changes (e.g., egg replacers, plant-based butter, dairy-free chocolate chips), and the texture would likely differ. It might be easier to find a recipe specifically designed to be vegan.

                    ***Why are my brownies too cakey?***

                    This is usually due to overmixing the batter once the flour is added, or overbaking the brownies. Be gentle when mixing the dry ingredients, and pull them out of the oven when a toothpick has moist crumbs.

                    Print
                    clock clock iconcutlery cutlery iconflag flag iconfolder folder iconinstagram instagram iconpinterest pinterest iconfacebook facebook iconprint print iconsquares squares iconheart heart iconheart solid heart solid icon

                    Lunchroom Ladies Brownies-50 Year Old Recipe


                    • Author: Chef Emy

                    Description

                    Enjoy the rich, fudgy goodness of Lunchroom Ladies Brownies, a 50-year-old recipe that delivers the perfect chewy texture and chocolate flavor.


                    Ingredients

                    • For the Frosting:

                    Instructions

                      Notes

                      For extra fudgy brownies, slightly underbake them.
                      Add chopped nuts for texture.
                      Store in an airtight container for up to 4 days.

                      Nutrition

                      • Calories: 320
                      • Sugar: 35g

                      “`

                      Caramel Frosting Recipe

                      “`html

                      Caramel Frosting Recipe

                      Introduction: Perfect Caramel Frosting – Your Sweet Dreams Come True

                      Have you ever wondered how to achieve that swoon-worthy, velvety smooth caramel frosting on your cakes and cupcakes? Many home bakers dream of replicating the decadent, rich flavor and luscious texture found in professional bakeries. The good news is, achieving this sweet perfection is entirely within your reach! This homemade caramel frosting recipe is designed to be your guiding light, leading you to a creamy, dreamy topping that boasts a deep, authentic caramel flavor without any fuss.

                      Imagine a frosting so smooth it glides onto your spatula, so rich it melts in your mouth, and so deliciously caramel-infused that every bite is a celebration. This isn’t just frosting; it’s an experience. Whether you’re a seasoned baker or just starting your culinary adventure, this recipe uses simple, readily available pantry staples to create a topping that’s both incredibly satisfying and surprisingly easy to make. Get ready to elevate your cakes, cupcakes, cookies, and any dessert daring enough to wear this golden crown of deliciousness.

                      A swirl of golden caramel frosting on a spatula

                      Ingredients for the Most Divine Caramel Frosting

                      The magic of this caramel frosting lies in its simple yet effective ingredients. We’re aiming for depth of flavor and a luxuriously smooth texture. Here’s what you’ll need:

                      Sweet Caramel Base

                      • 1 cup (200g) Granulated Sugar: The foundation of our caramel. Choose fine granulated sugar for a smoother melt.
                      • 1/4 cup (60ml) Water: Helps the sugar dissolve evenly, preventing crystallization and ensuring a smooth caramel.
                      • 1/2 cup (120ml) Heavy Cream (or Whipping Cream), warmed: Adds richness and creaminess. Warming it prevents seizing when added to hot sugar. Substitution: For a slightly lighter version, you can use half-and-half, but the frosting will be less rich.
                      • 6 tablespoons (85g) Unsalted Butter, softened: Essential for that decadent, smooth texture and a touch of salty-sweet balance. Substitution: Salted butter can be used, but you might want to reduce or omit any added salt in the frosting.

                      Creamy Dreamy Frosting Magic

                      • 1/2 cup (113g) Unsalted Butter, softened: This is separate from the butter in the caramel sauce; it forms the creamy base of the frosting. Ensure it’s at room temperature for optimal creaming.
                      • 3-4 cups (360-480g) Powdered Sugar (Confectioners’ Sugar), sifted: For sweetness and structure. Sifting is crucial to avoid lumps. Start with 3 cups and add more for a thicker consistency. Substitution: You can use pure cane powdered sugar for a less refined option.
                      • 1-2 tablespoons Milk or Cream (as needed): To achieve the perfect, spreadable consistency.
                      • 1 teaspoon Vanilla Extract: Enhances all the sweet and caramel notes.
                      • 1/4 teaspoon Salt: Balances the sweetness and deepens the caramel flavor. Adjust to taste.

                      Timing: Crafted with Precision

                      Prep time: 15 minutes
                      Cook time: 10 minutes
                      Chill time (for caramel): 30-60 minutes
                      Total time: Approximately 1 hour 15 minutes to 1 hour 45 minutes

                      While many caramel frosting recipes might take longer or involve more complex steps, this method streamlines the process. The initial caramel making is quick, but allowing it to cool properly is key to a luscious, stable frosting. This timing is moderately longer than a simple buttercream but significantly shorter than recipes requiring cooling baked goods, making it an efficient way to achieve a gourmet frosting.

                      How to Make Perfect Caramel Frosting

                      Step 1: Crafting the Caramel Sauce

                      In a medium, heavy-bottomed saucepan, combine the granulated sugar and water. Stir gently just to combine. Place the pan over medium heat. Do NOT stir the sugar mixture once it begins to simmer; instead, swirl the pan occasionally to ensure even cooking. Watch carefully as the sugar dissolves, then bubbles and starts to turn a beautiful amber color. This process typically takes 5-8 minutes. Aim for a deep amber, the color of a shiny penny.

                      Step 2: Cooling and Thickening

                      Once your caramel reaches the desired deep amber color, immediately remove the saucepan from the heat. Now, CAREFULLY and SLOWLY pour in the warmed heavy cream while whisking constantly. The mixture will bubble up aggressively – this is normal, but be cautious! Continue whisking until smooth. Then, whisk in the 6 tablespoons of softened butter, one tablespoon at a time, until fully incorporated and the caramel is glossy. Pour this caramel sauce into a heatproof bowl and let it cool completely at room temperature for at least 30-60 minutes, or until it’s no longer hot to the touch and has thickened slightly.

                      Step 3: Whipping Up the Frosting

                      While the caramel sauce cools, take your 1/2 cup of softened butter and beat it in a large bowl with an electric mixer (handheld or stand mixer) on medium speed until it’s light and fluffy, about 2-3 minutes. This aeration is crucial for a light frosting texture.

                      Step 4: Combining for Perfection

                      Once the caramel sauce has cooled and thickened to a consistency similar to pudding, add about 1 cup of the sifted powdered sugar to the butter and beat on low speed until incorporated. Then, gradually add the cooled caramel sauce to the butter and sugar mixture. Beat on low speed until just combined.

                      Step 5: Achieving Ideal Consistency

                      Now, it’s time to bring it all together. Add the remaining powdered sugar (start with 2 cups, adding more gradually) and the vanilla extract and salt. Beat on low speed until the sugar is mostly incorporated, then increase to medium-high speed and beat for 2-3 minutes until the frosting is smooth, fluffy, and spreadable. If the frosting is too thick, add milk or cream, one teaspoon at a time, until you reach your desired consistency. If it’s too thin, add a little more sifted powdered sugar.

                      A piping bag filling a cupcake with caramel frosting

                      Nutritional Information: A Sweet Indulgence

                      The nutritional content of frosting will vary based on portion size and the exact ingredients used. However, a general estimate per tablespoon might be:

                      • Calories: Approximately 100-150 kcal
                      • Fat: 7-10g
                      • Carbohydrates: 10-15g
                      • Sugar: 9-14g
                      • Protein: Less than 1g

                      This frosting is a decadent treat meant to be enjoyed in moderation as part of a balanced diet.

                      Healthier Alternatives for a Lighter Treat

                      While this recipe is indulgent, you can make lighter versions without sacrificing all the caramel charm:

                      • Reduced Fat/Sugar: Use a sugar substitute for some or all of the powdered sugar. Replace part of the heavy cream with milk or a plant-based milk, and use light butter or coconut oil sparingly.
                      • Caramel Extract: Instead of making a full caramel sauce, use caramel extract in a traditional cream cheese or buttercream frosting base for a caramel flavor hit with fewer calories and fat.
                      • Date-Sweetened Caramel: Blend soaked dates with a little plant-based milk, a pinch of salt, and vanilla for a naturally sweet caramel-like spread. This won’t have the exact texture but offers a delicious caramel-esque flavor.

                      Serving Suggestions: Elevate Your Desserts

                      This caramel frosting is incredibly versatile. Here are some ideas:

                      • Classic Cakes: Perfect for vanilla, chocolate, or spice cakes. A caramel-frosted chocolate cake is an absolute showstopper!
                      • Cupcakes: Pipe generously onto your favorite vanilla or chocolate cupcakes.
                      • Cookies: Sandwich two sugar cookies or graham crackers with this frosting.
                      • Brownies & Blondies: A layer of this frosting over warm brownies or blondie bars is pure bliss.
                      • As a Dip: Thin it slightly with a touch more cream for a delicious dip for fruit or pretzels.
                      • Drizzle: For an extra touch, warm a little extra caramel sauce (or use store-bought) and drizzle it over the frosted desserts.

                      Common Mistakes to Avoid

                      • Stirring the Sugar: Resist the urge to stir the sugar and water mixture while it’s cooking. Stirring can cause sugar crystals to form, leading to a grainy caramel. Swirl the pan instead.
                      • Adding Cold Cream: Adding cold cream to hot caramel can cause it to seize and harden. Always warm your cream first.
                      • Overcooking the Caramel: Overcooking will result in a bitter, burnt flavor. Watch the color closely and remove it from heat as soon as it reaches a deep amber.
                      • Adding Warm Caramel to Butter: Ensure the caramel has cooled sufficiently before adding it to the butter and powdered sugar. Hot caramel can melt the butter and make the frosting runny.
                      • Not Sifting Powdered Sugar: Lumps are the enemy of smooth frosting! Always sift your powdered sugar.

                      Storing Your Caramel Frosting

                      Store leftover caramel frosting in an airtight container in the refrigerator for up to 5 days. The frosting will firm up considerably when chilled. Before using, allow it to come to room temperature for about 30-60 minutes, then re-whip it with a mixer for a few minutes to restore its creamy, fluffy texture. If it’s too stiff, you can add a tiny splash of milk or cream to achieve the desired consistency.

                      FAQs: Your Caramel Questions Answered

                      ***Why is my caramel grainy?***

                      This usually happens if you stir the sugar while it’s cooking, which encourages crystallization. Using a clean pan and avoiding stirring (swirling instead) are key. You can also try an acid like a teaspoon of lemon juice or corn syrup, which inhibits crystallization, but that’s not traditional for this frosting base.

                      ***Can I make this frosting dairy-free?***

                      Yes, you can! For the caramel base, use a dairy-free heavy cream alternative (like coconut cream or a soy-based creamer) and dairy-free butter. For the frosting, use softened vegan butter and a plant-based milk (like almond or oat milk) to adjust consistency. The flavor will be slightly different but still delicious!

                      ***How do I make a darker caramel flavor?***

                      To achieve a deeper caramel flavor, cook the sugar mixture a bit longer until it reaches a darker amber hue. Be extremely careful, as it can quickly go from dark amber to burnt. A darker caramel will have a more complex, slightly bitter note, which can be very satisfying.

                      ***Can I freeze caramel frosting?***

                      It’s generally not recommended to freeze this type of buttercream-style frosting. The butter and cream can separate upon thawing, resulting in a greasy or curdled texture. It’s best to make it fresh or store it in the refrigerator.

                      ***What is the difference between caramel sauce and this caramel frosting?***

                      Caramel sauce is typically thinner and designed to be poured. While this frosting starts with a caramel sauce base, it’s then combined with significantly more butter and powdered sugar, and sometimes a little milk, to create a thick, creamy, and pipeable frosting consistency.

                      Conclusion: Bake Your Way to Sweet Nirvana

                      This caramel frosting recipe is a testament to how simple ingredients can transform into something truly spectacular. Its luscious texture and deep, comforting caramel flavor make it an absolute triumph for any dessert. Whether you’re celebrating a special occasion or simply indulging in a sweet craving, this frosting is sure to impress. So, gather your ingredients, follow these steps, and prepare to experience baking bliss. Happy baking!

                      Print

                      clock clock iconcutlery cutlery iconflag flag iconfolder folder iconinstagram instagram iconpinterest pinterest iconfacebook facebook iconprint print iconsquares squares iconheart heart iconheart solid heart solid icon

                      Caramel Frosting Recipe


                      • Author: Chef Emy

                      Description

                      This homemade caramel frosting is smooth, creamy, and packed with deep caramel flavor. Perfect for frosting cakes, cupcakes, and desserts, this recipe uses simple pantry staples to create a luscious topping that’s both rich and delicious.


                      Ingredients

                      Scale
                      • 1 cup(2sticks) unsalted butter
                      • 1 cuppacked brown sugar
                      • ¼ cupwhole milk
                      • ½ teaspoonvanilla extract
                      • 3to4cups powdered sugar

                      Instructions

                        Notes

                        For a thinner consistency, add a little more milk.
                        Let the frosting cool slightly before spreading to avoid melting the cake.
                        Store leftovers in an airtight container and reheat slightly before use.

                        Nutrition

                        • Calories: 150
                        • Sugar: 18g

                        “`