“`html
Table of Contents
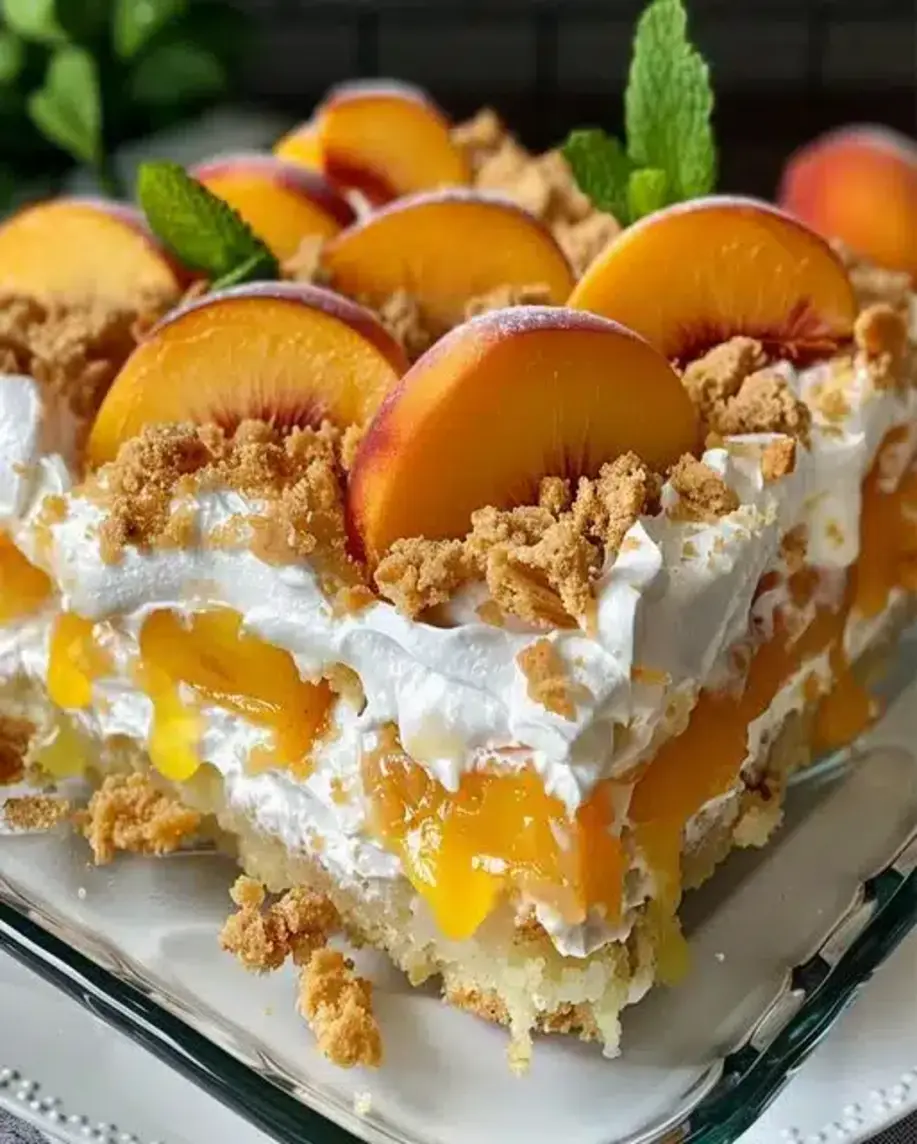
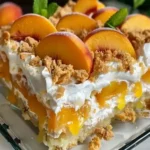
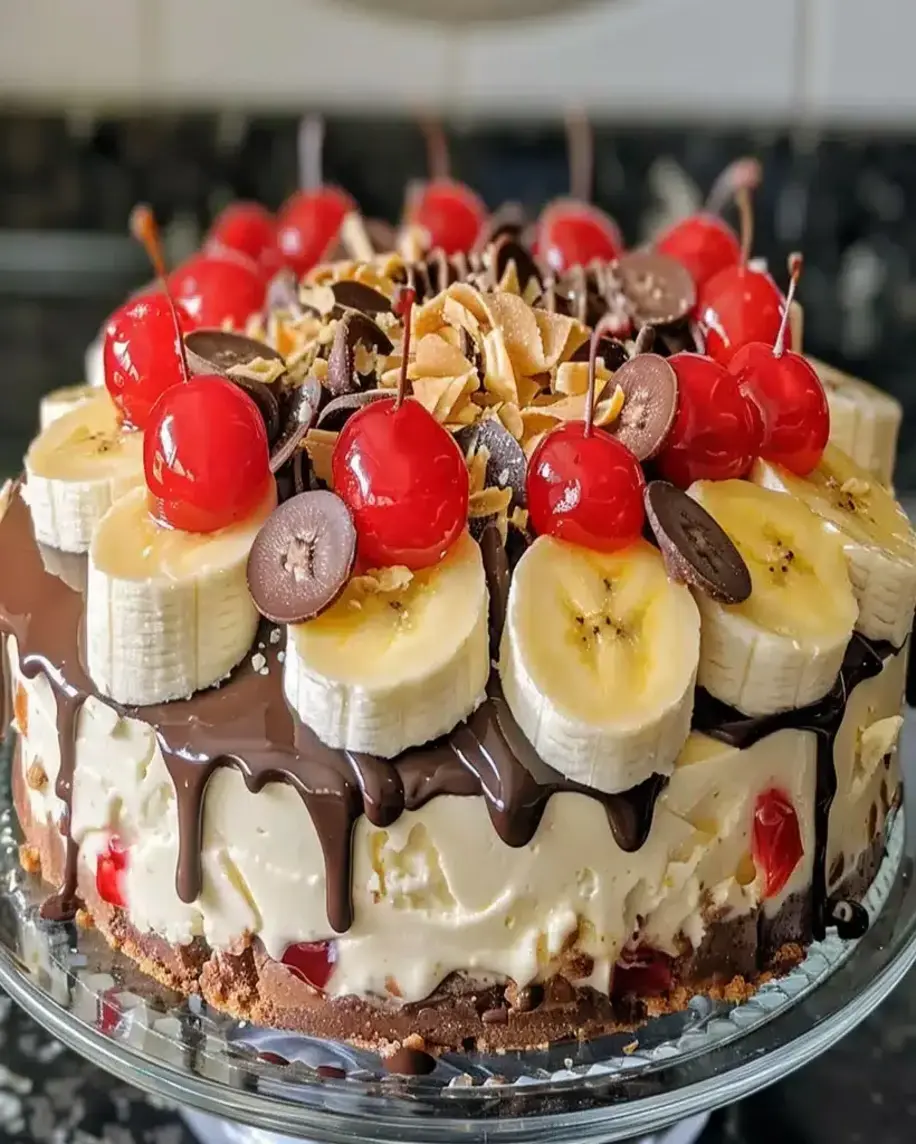
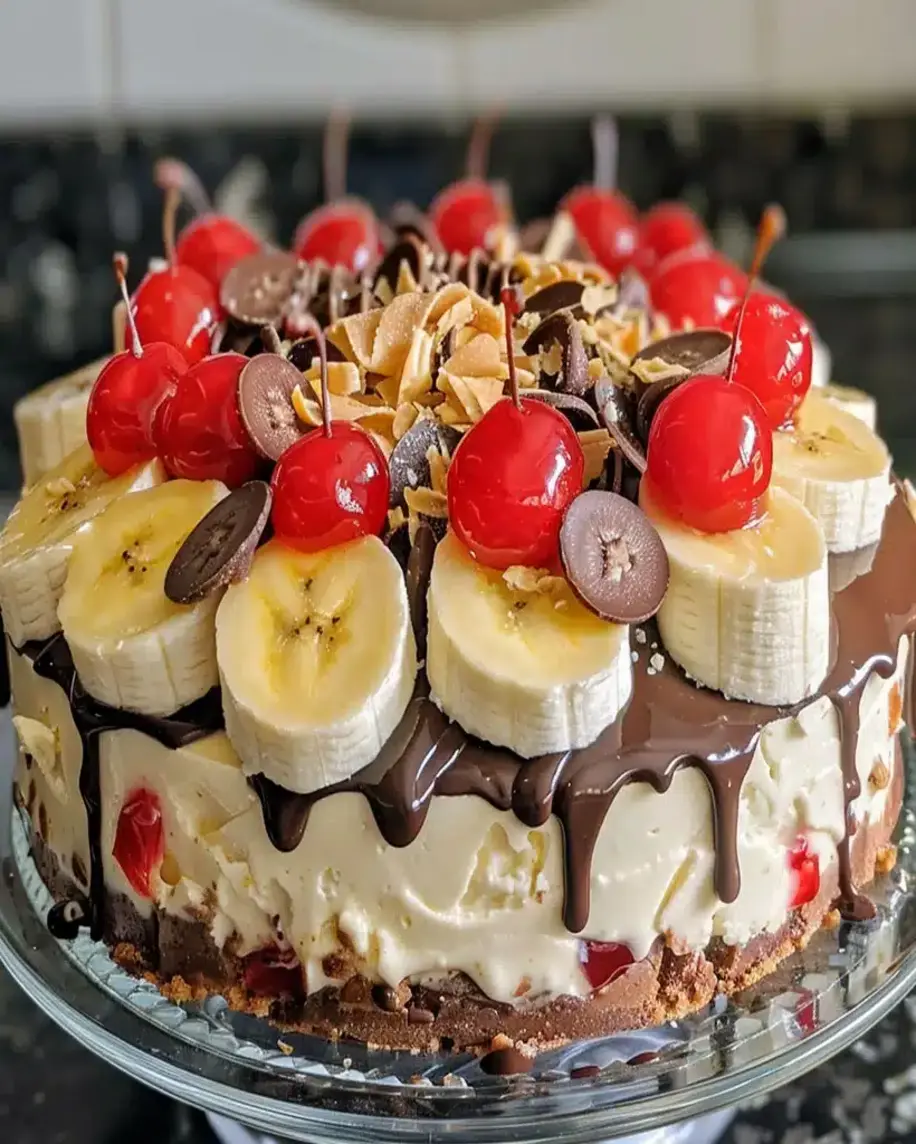
Easy Banana Split Ice Cream Cake!
Sweet Summertime Dreams: Your Easy Banana Split Ice Cream Cake Awaits!
Hello, dessert lovers! If you’re craving a treat that’s both luxurious and delightful, look no further. Today, we’re diving into the world of indulgence with this Luxurious Banana Split Cake – a frozen dessert that captures the best elements of a classic banana split, with the added bonus of being an easy-to-make cake. Did you know that ice cream cakes are among the most searched-for desserts during warmer months, with a significant spike in “easy no-bake desserts” and “banana desserts” queries? If you love banana splits or banana cake desserts, this recipe is going to become your new go-to. Let’s dive in and explore how to make this decadent dessert!
Deconstructed Deliciousness: Gather Your Ingredients
Creating this Banana Split Ice Cream Cake is like assembling your favorite sundae, but in cake form! The beauty of this recipe lies in its adaptability. Feel free to swap out ingredients based on your preferences and what you have on hand. The key is to capture those classic banana split flavors: sweet banana, creamy vanilla, rich chocolate, and a hint of fruity tang.
For the Cake Base (Or “Crust” of Dreams):
- 2 cups crushed vanilla wafers or graham crackers: These provide a delightful sandy texture and a subtly sweet foundation. (Graham crackers offer a slightly more robust, honeyed flavor.)
- 1/2 cup unsalted butter, melted: This acts as the binder, ensuring your base holds together like a dream.
- 2 tablespoons granulated sugar: A touch of sweetness to complement the cookie crumbs.
For the Banana Layer (The Fruity Heart):
- 3-4 ripe bananas, mashed until smooth: The riper, the sweeter and more intensely flavored your banana layer will be. Aim for bananas with plenty of brown spots!
- 2 tablespoons lemon juice: This adds a bright, zesty counterpoint to the banana’s sweetness and helps prevent browning.
- 1/4 cup powdered sugar: For a smooth, sweet banana puree without any grainy texture.
For the Ice Cream Layers (The Core Indulgence):
- 1.5 quarts Vanilla Ice Cream, softened: The classic choice, offering pure sweetness. Ensure it’s softened to a spreadable consistency, not melted.
- 1/2 pint Strawberry Ice Cream, softened: For that essential fruity burst of a banana split. (Alternatively, use raspberry or cherry ice cream.)
- 1/2 pint Chocolate Ice Cream, softened: To satisfy your chocolate cravings. (Dark chocolate or chocolate fudge would be divine!)
For the Toppings & Garnish (The Grand Finale):
- 1/2 cup Hot Fudge Sauce, warmed: A luscious, flowing river of chocolate.
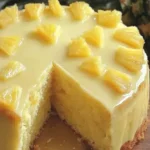
- 1/4 cup Pineapple Topping or crushed pineapple (well-drained): For a tropical tang.
- 1/4 cup Strawberry Topping or finely chopped fresh strawberries: To echo the strawberry ice cream.
- Whipped Cream: Generous dollops of airy sweetness.
- Maraschino Cherries: The iconic red crown on top!
- Chopped Nuts (optional): For a delightful crunch.
Deliciously Planned: The Time Commitment
30 minutes
4-6 hours (minimum)
(Plus additional time for individual layer freezing, if preferred)
Approx. 4.5 – 6.5 hours (active + inactive freezing)
Compared to your average standard cake recipe which might involve hours of baking and cooling, this no-bake ice cream cake is a breeze! While the active prep time is quite short, the freezing time is crucial for the cake to set properly. This “active” preparation time is significantly less than the average 1-hour prep and 2-hour bake time for a traditional cake.
Crafting Your Masterpiece: Step-by-Step Instructions
Step 1: Prepare Your Pan
Grab a 9-inch springform pan. This is your best friend for easy cake removal. To make life even easier, line the bottom of the pan with parchment paper. This prevents sticking and makes sliding the cake out a seamless operation.
Step 2: Build the Base Layer
In a medium bowl, combine your crushed vanilla wafers (or graham crackers), melted butter, and granulated sugar. Mix until the crumbs are evenly moistened, resembling wet sand. Press this mixture firmly and evenly into the bottom of your prepared springform pan. Use the base of a glass or your fingers to create a compact, even layer. Pop this into the freezer for about 15-20 minutes to firm up while you prepare the next layer.
Step 3: Add the Ice Cream
Now for the fun part! Ensure your ice cream is softened – spreadable but not melted. Start with the vanilla ice cream. Spread it evenly over the chilled cookie crust. If you have time and want super distinct layers, you can freeze this vanilla layer for about 30-60 minutes before adding the next. Next, carefully spread the softened strawberry ice cream over the vanilla layer. Again, a brief freeze (another 30-60 minutes) can help keep layers distinct and prevent colors from bleeding together. Finally, add the softened chocolate ice cream as the top ice cream layer. Smooth it out as best you can.
Step 4: Create the Topping Layer
This is where the magic truly happens! Gently warm your hot fudge sauce (just enough to make it pourable). Drizzle it generously over the top layer of chocolate ice cream. Then, spoon the pineapple topping and strawberry topping in dollops or streaks across the fudge. Don’t stress about perfection here; a slightly rustic look is part of its charm!
Step 5: Freeze and Decorate
Cover the springform pan tightly with plastic wrap (or foil) and place it in the freezer. Let it freeze for at least 4-6 hours, or preferably overnight, until it’s completely firm. Once frozen solid, you can begin the final decorating. Carefully release the sides of the springform pan. Pipe or spoon generous swirls of whipped cream around the top edges or in dollops. Crown each swirl with a maraschino cherry. Add chopped nuts if desired. For an extra touch, you can drizzle a little more warm hot fudge sauce over the whipped cream.
A Slice of Sweetness: Nutritional Snapshot
While this is a decadent treat, knowing what you’re enjoying is always good! Please note that nutritional information can vary greatly based on specific brands of ingredients used and portion sizes.
- Calories: Approximately 350-500 calories per serving (this is a rich dessert, so serving size is key!)
- Fat: 20-35g (Saturated fat will be significant due to ice cream and butter)
- Carbohydrates: 40-60g (Primarily from cookies, sugar, and ice cream)
- Sugar: 30-50g (Naturally occurring and added sugars)
- Protein: 3-7g (From the dairy in the ice cream)
This is an estimated range. For precise values, calculate using your specific ingredients.
Lighter Indulgence: Healthier Alternatives
Looking for ways to make this treat a little less indulgent without sacrificing flavor? Here are a few swaps:
- Crust: Try a base of crushed whole-wheat graham crackers or even a granola that’s lower in added sugar. You can also reduce the butter slightly or use melted coconut oil.
- Ice Cream: Opt for “light” or “low-fat” vanilla ice cream. Alternatively, consider using a good-quality Greek yogurt blended with a touch of sweetener and vanilla extract as a lighter, protein-rich substitute for some of the ice cream layers.
- Sweeteners: Reduce the amount of sugar used in the crust and banana layer. You could also experiment with maple syrup or honey, though they will add moisture and a different flavor profile.
- Toppings: Use fresh fruit for topping instead of sugary sauces. A drizzle of dark chocolate (70% cacao or higher) can offer antioxidants and less sugar than traditional hot fudge.
Serving Up the Smiles: Suggestions
This cake is a showstopper on its own. For individual servings, allow the cake to sit at room temperature for about 10-15 minutes before slicing with a sharp knife dipped in hot water. This ensures clean cuts. Serve each slice with an extra dollop of whipped cream, a cherry, and perhaps a drizzle of extra hot fudge. It pairs wonderfully with a tall glass of cold milk, iced coffee, or even a sweet dessert wine.
Common Pitfalls: Mistakes to Avoid
To ensure your Banana Split Ice Cream Cake is a triumph, keep these common mistakes in mind:
- Using unmelted or over-melted ice cream: Ice cream that’s too hard to spread will result in uneven layers. Ice cream that’s too liquid will melt into a soupy mess and won’t set properly. Aim for a thick, frosting-like consistency.
- Not freezing long enough: Impatience is the enemy of no-bake desserts! Ensure each layer (or the whole cake) is thoroughly frozen to achieve a firm texture that slices cleanly.
- Not lining the pan: A springform pan is essential, but lining the bottom with parchment paper is a game-changer for seamless removal without tearing the crust.
- Not draining fruit toppings: Excess liquid from fruit toppings can create ice crystals and make the cake watery. Drain them well before using.
Keep it Cool: Storing Your Cake
Once your Banana Split Ice Cream Cake is fully frozen and decorated, wrap it tightly in plastic wrap and then in aluminum foil to prevent freezer burn. Store it in the coldest part of your freezer. It’s best enjoyed within 2-3 weeks for optimal flavor and texture, though it will remain safe to eat for longer if properly wrapped.
Your Sweet Finale: Dive In!
And there you have it – a stunning and incredibly satisfying Easy Banana Split Ice Cream Cake that brings all the joy of a classic sundae into a cool, layered dessert. It’s perfect for birthdays, summer gatherings, or simply when that craving for something special hits. This no-bake wonder is sure to be a crowd-pleaser, and the smiles it brings are truly the best topping. So gather your ingredients, embrace the chill, and get ready to create a dessert that’s as fun to make as it is to devour!
Frequently Asked Questions
***Can I use a different kind of ice cream?***
Absolutely! The beauty of this recipe is its versatility. Feel free to substitute the vanilla, strawberry, or chocolate ice cream with your favorite flavors. Cookies and cream, mint chocolate chip, or even butter pecan would be delicious additions or replacements.
***How do I prevent ice crystals from forming?***
To minimize ice crystals, ensure your freezer is at a consistent, cold temperature. Pressing plastic wrap directly onto the surface of each ice cream layer before freezing can also help. Double-wrapping the entire cake with plastic wrap and then foil before storing is also crucial.
***Can I make this cake ahead of time?***
Yes, this cake is designed to be made ahead! In fact, it needs to freeze for several hours to set properly. You can make it a day or two in advance and keep it frozen until you’re ready to serve.
***What if I don’t have a springform pan?***
If you don’t have a springform pan, you can use a regular 9-inch round cake pan or an 8×8 inch square pan. However, you’ll need to line it very well with plastic wrap, leaving plenty of overhang to help you lift the cake out easily once frozen. It might be a bit trickier to unmold perfectly.
***Can I add fresh bananas to the layers?***
While we use mashed banana in a puree for the flavor layer, adding slices of fresh banana directly into the ice cream layers is not recommended. The high water content in fresh bananas can contribute to ice crystal formation and a mushy texture as the cake freezes.
Print
Banana Split Cake Recipe – Easy Ice Cream Dessert
Description
Hello, dessert lovers! If you’re craving a treat that’s both luxurious and delightful, look no further. Today, we’re diving into the world of indulgence with thisLuxurious Banana Split Cake– a frozen dessert that captures the best elements of a classic banana split, with the added bonus of being an easy-to-make cake. If you love banana splits or banana cake desserts, this recipe is going to become your new go-to. Let’s dive in and explore how to make this decadent dessert!
Ingredients
- Substitutions: If you’re looking to make this dish more allergen-friendly, consider using gluten-free graham crackers and dairy-free ice cream.
Instructions
- In a medium bowl, combine the graham cracker crumbs, melted butter, and granulated sugar. Press the mixture firmly into the bottom of a 9-inch springform pan to form the crust. Chill for 30 minutes.
- Once the crust has set, spread half of the softened vanilla ice cream evenly over the crust. Top with a layer of sliced bananas, crushed pineapple, and halved maraschino cherries.
- Spread the remaining vanilla ice cream on top of the banana and pineapple layer. Smooth it out evenly.
- Cover the springform pan with plastic wrap and place it in the freezer for at least 4 hours or until the cake is firm and solid.
- Before serving, remove the cake from the springform pan. Drizzle the top with chocolate fudge sauce. Add whipped cream, chocolate chips, and chopped nuts as a garnish. Decorate with extra maraschino cherries and sliced bananas if desired.
Notes
Ice Cream Texture: Ensure the vanilla ice cream is softened before spreading it. This helps to create a smooth, even layer without any lumps or uneven spots.
Banana Freshness: For the best texture, use bananas that are slightly ripe. They should be firm, not overripe or mushy, to hold their shape when layered.
Freezing: If you want a firmer, more solid dessert, let it freeze longer than the recommended 4 hours. The cake can be frozen overnight if needed.
“`