Indulge your sweet tooth with our delicious and irresistible dessert recipes! Whether you’re craving decadent chocolate treats, fruity delights, or creamy, dreamy confections, we have something for every occasion.
From classic cakes and homemade cookies to no-bake desserts, rich cheesecakes, and festive holiday treats, our recipes are perfect for special celebrations or everyday sweet cravings.
Need something quick? Try our easy, fuss-free desserts that come together in no time. Whether you love warm baked goods, refreshing frozen sweets, or nostalgic comfort desserts, these recipes are sure to bring a little extra joy to your day! 🍰🍫🍪
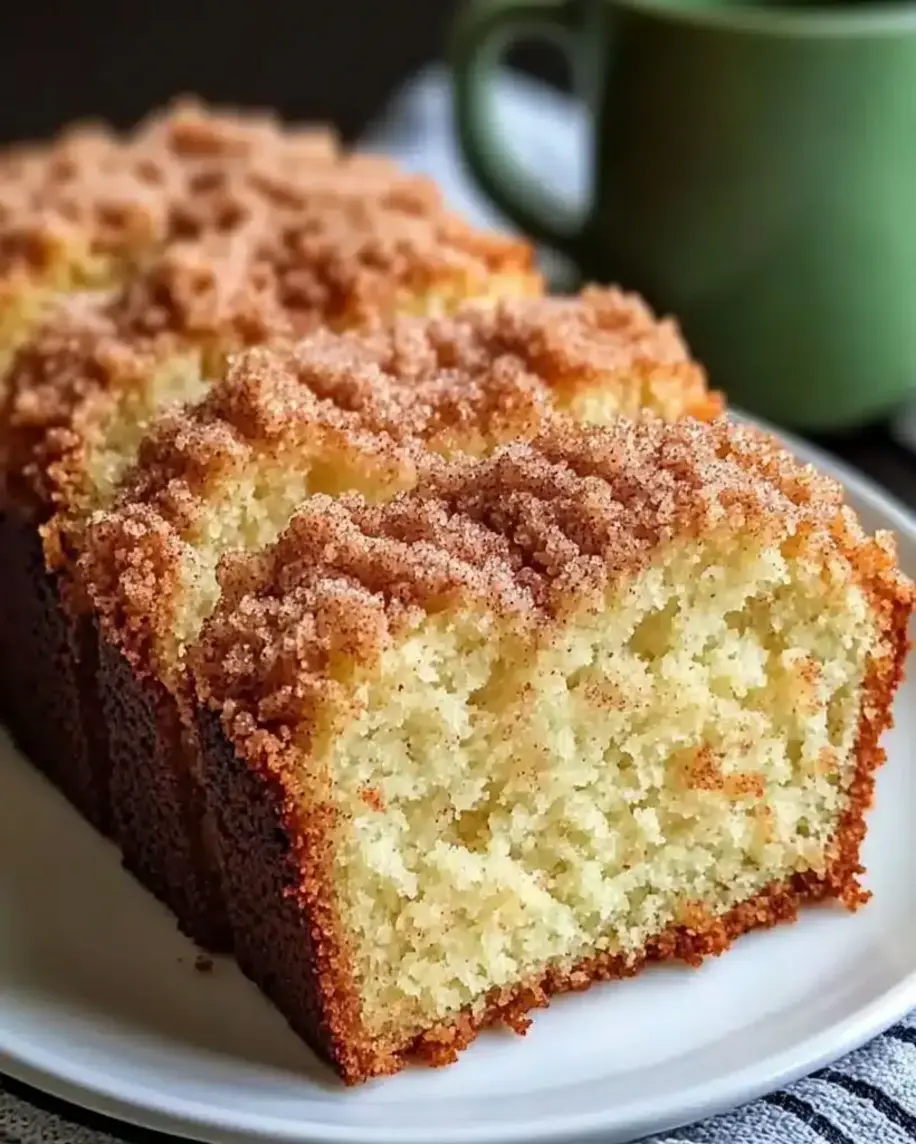
Cinnamon Donut Bread: Your New Favorite Sweet Breakfast!
Cinnamon Donut Bread: Your New Favorite Sweet Breakfast!
Introduction: Welcome to Cinnamon Donut Bread!
Do you ever find yourself craving the comforting, irresistible flavor of a freshly made cinnamon donut, only to realize it’s not quite the right time for a deep-fried treat? If the answer is a resounding ‘yes!’, then you’re not alone! In fact, according to recent food trends, the search for nostalgic and comforting baked goods like cinnamon-infused creations has seen a significant surge. Welcome to your next favorite recipe adventure! If you love the cozy, sweet flavor of cinnamon donuts, this Cinnamon Donut Bread is about to become your go-to treat. Whether you’re enjoying it as a breakfast delight or a comforting snack, this recipe is perfect for satisfying your cravings without the fuss of frying. Let’s dive in!
Ingredients for Your Sweet Creation
Gathering your ingredients is the first delicious step. This recipe balances classic baking elements with that irresistible cinnamon-sugar punch. We’ve included notes on why certain ingredients are chosen and potential substitutions to make this recipe your own!
Prep time: 15 minutes
Cook time: 50-60 minutes
Total time: 1 hour 5 minutes – 1 hour 15 minutes
For the Bread:
Flour: 2 ½ cups all-purpose flour. The foundation for a tender crumb. (Allergy-friendly: use a 1:1 gluten-free baking blend).
Sugar: 1 cup granulated sugar. For sweetness and moisture. (Swap: coconut sugar for a slightly deeper, caramel note).
Baking Powder: 2 teaspoons. Our leavening agent, ensuring a good rise.
Salt: ½ teaspoon. Enhances all the flavors.
Cinnamon: 1 tablespoon ground cinnamon, plus more for topping. The star spice! Use fragrant, fresh cinnamon for the best aroma and taste.
Eggs: 2 large eggs, at room temperature. Bind everything together and add richness.
Butter: ½ cup unsalted butter, melted and slightly cooled. For moisture and a rich, buttery flavor.
Milk: 1 cup whole milk, at room temperature. To hydrate the batter and create a tender texture.
Vanilla Extract: 1 teaspoon. Adds a warm, sweet aroma.
For the Cinnamon-Sugar Topping:
Butter: ¼ cup unsalted butter, melted. For coating the bread and helping the sugar adhere.
Sugar: ½ cup granulated sugar. For that classic sweet crunch.
Cinnamon: 2 teaspoons ground cinnamon. More of that beloved spice!
Timing is Everything
This recipe is designed for busy mornings or spontaneous treat-making sessions. Precision in timing ensures optimal texture and flavor.
Prep time: 15 minutes
Cook time: 50-60 minutes
Total time: Approximately 1 hour 5 minutes – 1 hour 15 minutes (plus cooling time)
Compared to traditional donut recipes that can involve multiple steps like proofing dough and frying, this Cinnamon Donut Bread significantly cuts down on both active time and overall complexity, making it more accessible for everyday baking.
Step-by-Step Instructions
Let’s get baking! Follow these simple steps for a loaf that’s as beautiful as it is delicious.
Step 1: Preheat and Prepare
First things first, get your oven warmed up to 350°F (175°C). Grease and flour a standard 9×5 inch loaf pan. If you want to ensure your loaf slides out effortlessly, you can also line the pan with parchment paper, leaving some overhang on the sides to act as handles.
Step 2: Mix the Wet Ingredients
In a large bowl, whisk together the melted butter, granulated sugar, eggs, milk, and vanilla extract until everything is well combined and the mixture looks smooth and creamy. Don’t worry if it looks a little thin; that’s perfectly normal.
Step 3: Combine Dry Ingredients
In a separate medium bowl, whisk together the all-purpose flour, baking powder, salt, and the 1 tablespoon of ground cinnamon. Whisking them together ensures the leavening agent and spices are evenly distributed throughout the batter, preventing any surprise pockets of flavor or dense spots.
Step 4: Bring It All Together
Gradually add the dry ingredients to the wet ingredients. Mix with a spatula or wooden spoon until just combined. Be careful not to overmix! A few small lumps are acceptable. Overmixing can develop the gluten too much, resulting in a tougher bread.
Step 5: Bake to Perfection
Pour the batter into your prepared loaf pan and spread it evenly. Bake for 50-60 minutes, or until a wooden skewer or toothpick inserted into the center of the loaf comes out clean. The top should be golden brown and firm to the touch.
Step 6: Prepare the Cinnamon-Sugar Topping
While the bread is baking, or cooling, prepare your topping. In a small bowl, whisk together the ½ cup granulated sugar and 2 teaspoons of ground cinnamon. In a separate small bowl, melt the ¼ cup of butter.
Step 7: Glaze or Top Your Bread
Once the bread is out of the oven, let it cool in the pan for about 10-15 minutes before carefully inverting it onto a wire rack to cool completely. Once mostly cooled, you have two delicious options: you can either brush the melted butter generously over the top of the warm loaf and then liberally sprinkle the cinnamon-sugar mixture, OR, for a more intense donut-like glaze, let the bread cool completely, then brush with melted butter and dip the top into the cinnamon-sugar mixture. For an even more decadent touch, you can even drizzle a simple confectioners’ sugar glaze over the top!
Nutritional Information
While this bread is a delightful treat, it’s good to be mindful of its nutritional profile. Exact values can vary based on ingredients used. This is an estimated average per serving (assuming 12 servings).
Calories: Approximately 300-350 kcal
Carbohydrates: 45-55g
Sugar: 25-30g
Fat: 12-15g
Protein: 4-6g
Healthier Alternatives
Craving that cinnamon donut flavor but looking for lighter options? You’re in luck! Here are some swaps that can make this bread a bit lighter without sacrificing taste:
Sweetener: Reduce the granulated sugar slightly in the bread batter and opt for a natural sweetener like mashed banana or unsweetened applesauce in place of some of the sugar and a portion of the fat (butter/oil).
Flour: Opt for whole wheat flour or a blend of whole wheat and all-purpose flour for added fiber. Ensure you use a good quality 1:1 gluten-free blend if required.
Topping: Instead of a heavy sugar coating, consider a light dusting of powdered sugar mixed with a touch of cinnamon, or a drizzle of a glaze made with Greek yogurt and a little sweetener.
Dairy: Use low-fat milk or unsweetened almond milk if you’re looking to reduce dairy intake.
Serving Suggestions
This Cinnamon Donut Bread is wonderfully versatile!
Breakfast Delight: Enjoy it warm with a cup of coffee or tea for a comforting start to your day. A smear of butter or cream cheese is also divine.
Afternoon Snack: Perfect for a mid-afternoon pick-me-up. Pair it with a glass of milk or a dollop of yogurt.
Dessert: Serve a slice warm with a scoop of vanilla ice cream or a drizzle of caramel sauce for an easy, comforting dessert.
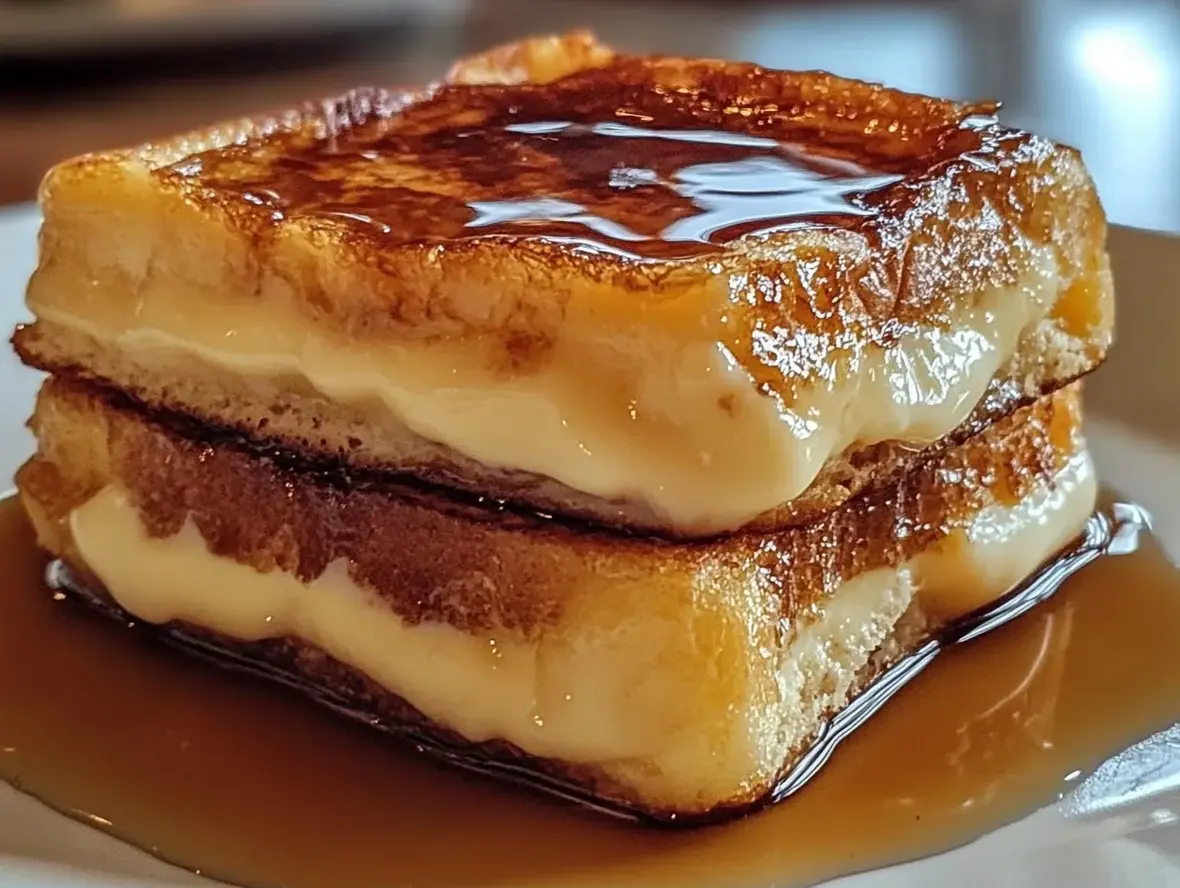
French Toast Casserole: Cube leftover bread and use it to make a fantastic French toast casserole for brunch!
Common Mistakes to Avoid
Here are a few common pitfalls to watch out for to ensure your Cinnamon Donut Bread turns out perfect every time:
Overmixing the Batter: This is a big one! Overmixing develops gluten, leading to a tough, dense bread. Mix only until the dry ingredients are just incorporated.
Not Measuring Flour Correctly: Too much flour can make the bread dry. Spoon flour into your measuring cup and level it off with a straight edge, rather than scooping directly from the bag.
Oven Temperature Inaccuracies: Ensure your oven is properly preheated. An oven thermometer can be a lifesaver.
Underbaking or Overbaking: Use the toothpick test consistently. Underbaking leaves a gooey center, while overbaking results in a dry loaf.
Forgetting a Cooling Period: While tempting to slice immediately, allowing the bread to cool slightly prevents it from crumbling and makes for cleaner slices.
Storing Tips
Keep your delicious Cinnamon Donut Bread fresh and flavorful with these storage tips:
Room Temperature: Once completely cooled, store the bread in an airtight container or wrap it tightly in plastic wrap and then aluminum foil at room temperature for up to 3 days.
Refrigeration: For longer storage (up to a week), refrigerate the bread in an airtight container. It may become slightly firmer, so you can warm it gently before serving.
Freezing: Wrap the cooled loaf tightly in plastic wrap, then in foil, or place it in a freezer-safe bag. It can be frozen for up to 3 months. Thaw overnight at room temperature or gently warm in a low oven.
Frequently Asked Questions
What is Cinnamon Donut Bread?
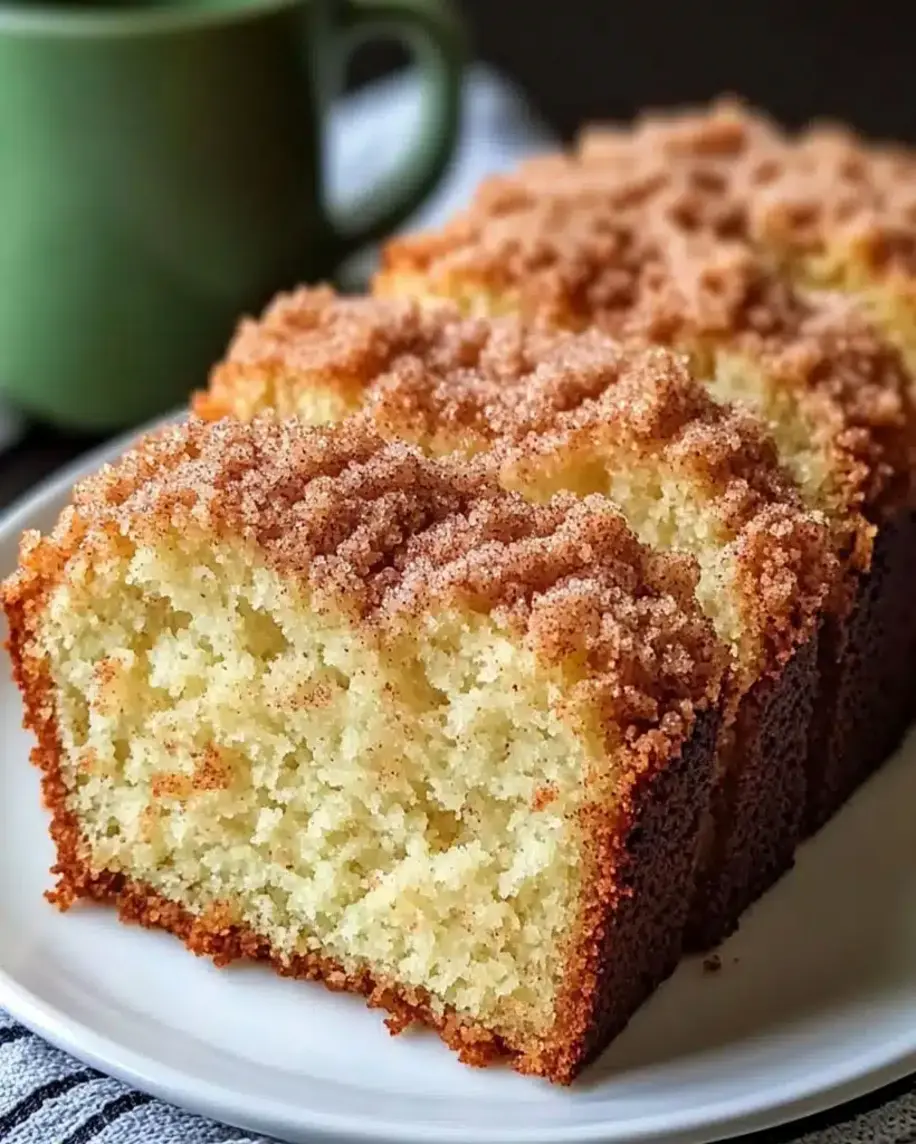
Cinnamon Donut Bread is a quick bread loaf that mimics the beloved flavors and textures of a cinnamon donut. It’s typically spiced with cinnamon, sweetened, and often finished with a cinnamon-sugar topping or glaze, offering a comforting and sweet baked treat without the frying process of traditional donuts.
Can I make this recipe gluten-free?
Yes, you can! Substitute the all-purpose flour with a good quality 1:1 gluten-free baking blend. Ensure the blend contains xanthan gum for proper structure.
Why is my bread dense?
A dense loaf is often the result of overmixing the batter, which develops the gluten. Try to mix only until the ingredients are just combined, and be very gentle once the dry ingredients are added.
How can I get a really good cinnamon-sugar crust?
For a crispy, well-adhered crust, ensure the bread is still warm (but not hot) when you brush it with melted butter and coat it with the cinnamon-sugar mixture. The warmth helps the butter melt and the sugar to stick, creating that irresistible crunchy layer.
Can I add anything to the batter?
Absolutely! Consider adding ½ cup of chopped pecans or walnuts for added texture, or a handful of chocolate chips for a decadent twist. A little orange zest can also add a delightful brightness.
This Cinnamon Donut Bread is more than just a recipe; it’s an experience! It’s the cozy hug you need on a chilly morning, the sweet whisper of comfort on a busy afternoon, and a surefire way to bring smiles to your table. Give it a try, and let us know how much you love it in the comments below! Don’t forget to share your creations with us on social media!
Welcome to your next favorite recipe adventure! If you love the cozy, sweet flavor of cinnamon donuts, thisCinnamon Donut Breadis about to become your go-to treat. Whether you’re enjoying it as a breakfast delight or a comforting snack, this recipe is perfect for satisfying your cravings. Let’s dive in!
Ingredients
Optional Substitutions:
Instructions
Preheat your oven to 350°F (175°C). Grease an 8×4-inch loaf pan or line it with parchment paper.
In a large bowl, whisk together the flour, granulated sugar, cinnamon, baking powder, and salt.
In another bowl, whisk the eggs, milk, melted butter, vanilla extract, and almond extract (if using).
Pour the wet ingredients into the dry mixture and stir until just combined. Avoid overmixing.
In a small bowl, mix the brown sugar and ground cinnamon.
Pour the batter into the prepared loaf pan, spreading it evenly. Sprinkle the topping mixture over the batter.
Bake for 50-60 minutes, or until a toothpick inserted into the center comes out clean. Let the bread cool in the pan for 10 minutes before transferring it to a wire rack.
Notes
Use fresh, high-quality cinnamon for the best flavor.
Avoid overmixing the batter to ensure a light and tender crumb.
For an extra crunch, add chopped nuts to the batter.
“`
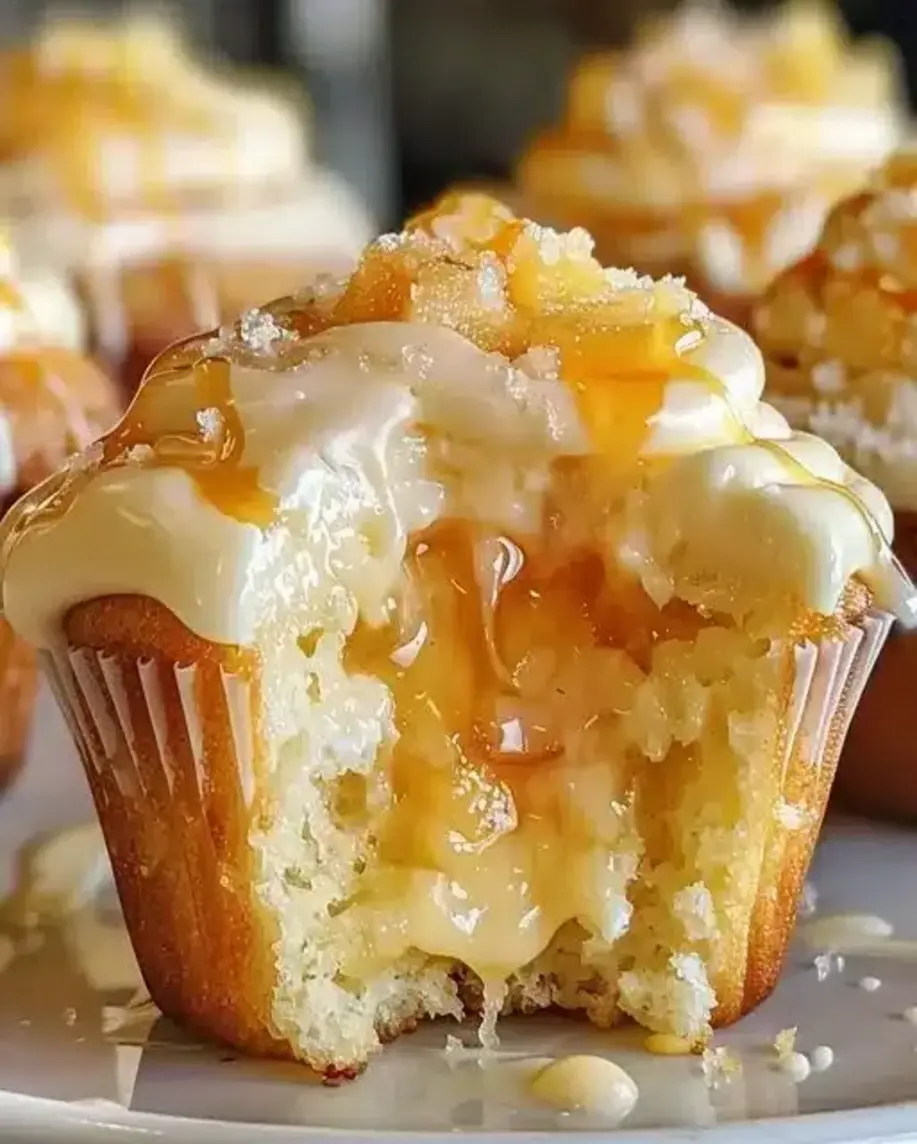
Easy Honey Peach Cream Cheese Cupcakes – Perfect Sweet Treat for Any Occasion! 🧁
Easy Honey Peach Cream Cheese Cupcakes – Perfect Sweet Treat for Any Occasion! 🧁
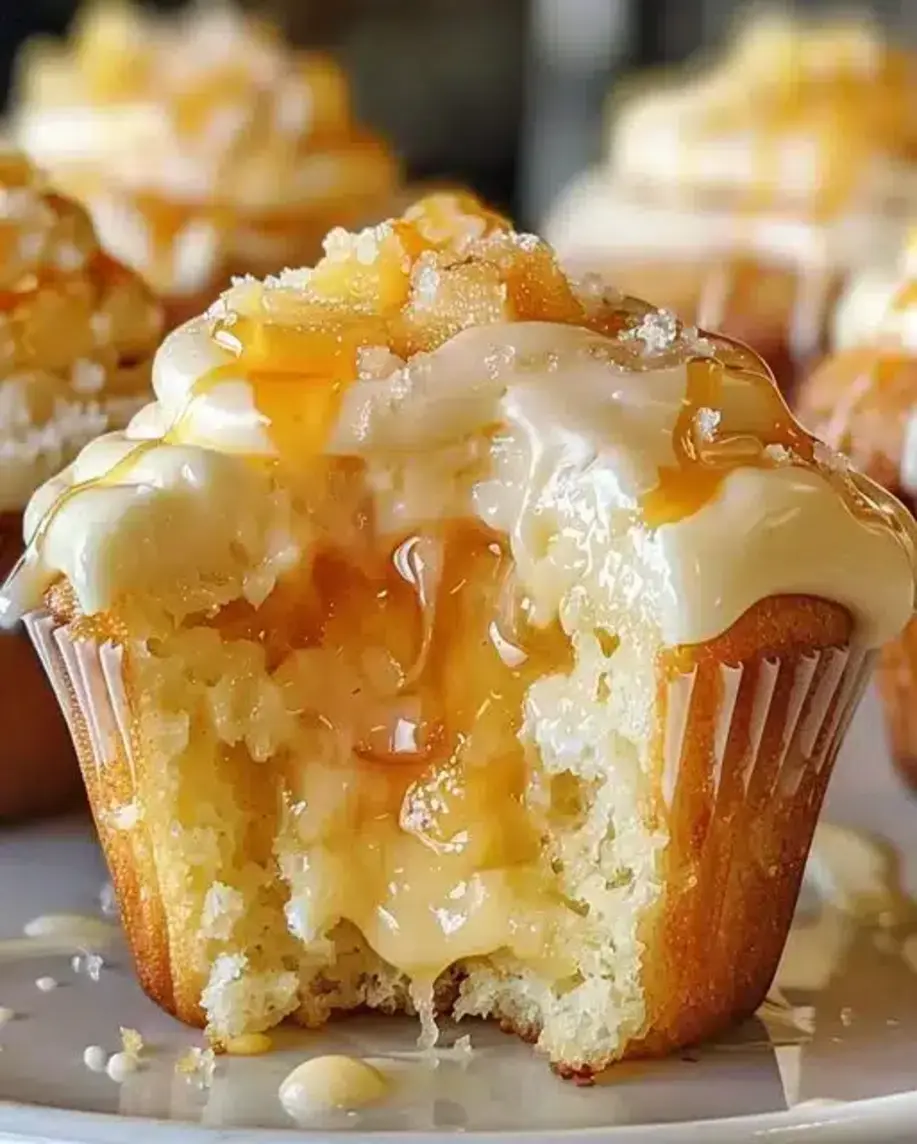
Indulge in the Sweetness of Summer: Easy Honey Peach Cream Cheese Cupcakes
Are you searching for a delightful dessert that captures the essence of summer’s bounty? Look no further than these Easy Honey Peach Cream Cheese Cupcakes! In a world where desserts often lean towards the overwhelmingly sweet or the elaborately complex, finding a treat that’s both simple and satisfying can feel like striking gold. Recent culinary trends show a growing interest in recipes that are both comforting and highlight seasonal produce. These cupcakes, inspired by the juicy, sun-ripened peaches of summer, bring a burst of fruity sweetness to every bite. Imagine the joy of biting into a soft, fluffy cupcake filled with luscious peach preserves, topped with a creamy, dreamy cream cheese frosting. Whether you’re hosting a special gathering, celebrating a birthday, or simply seeking a moment of personal bliss with your afternoon tea, these cupcakes are sure to impress with their balanced flavors and delightful textures. They’re the perfect way to bring a touch of sunshine to any occasion, offering a sophisticated yet approachable dessert experience.
Delectable Ingredients for Your Honey Peach Dream
Crafting these heavenly cupcakes involves a thoughtful selection of ingredients that work in harmony to create a symphony of flavors and textures. From the moist cake base to the luscious peach filling and the tangy cream cheese frosting, each component plays a vital role.
For the Peach Cupcake Base:
All-Purpose Flour: 2 ¼ cups, sifted – provides the tender structure for our cupcakes. Look for a brand with a fine, consistent milling.
Granulated Sugar: 1 ½ cups – for that essential sweetness that complements the peaches.
Baking Powder: 2 ½ teaspoons – our leavening agent, ensuring a light and airy crumb.
Salt: ½ teaspoon – balances the sweetness and enhances overall flavor.
Unsalted Butter: ½ cup (1 stick), softened to room temperature – for richness and a tender crumb. It should yield slightly to the touch.
Eggs: 2 large, room temperature – bind the ingredients and add richness. Ensure they aren’t straight from the fridge.
Vanilla Extract: 1 teaspoon – amplifies the sweet and fruity notes.
Milk: 1 cup, room temperature – adds moisture and creates a smooth batter. Whole milk offers the creamiest result.
Honey: ¼ cup – adds a subtle floral sweetness and moisture. Use a good quality liquid honey.
Peach Preserves/Jam: ½ cup – this is our fruity star! Choose a good-quality preserve with real peach chunks for the best texture and flavor.
For the Cream Cheese Frosting:
Cream Cheese: 8 ounces, softened – the tangy backbone of our frosting. Full-fat offers the best texture and flavor.
Unsalted Butter: ½ cup (1 stick), softened – adds structure and creaminess.
Powdered Sugar (Confectioners’ Sugar): 3 cups, sifted – for sweetness and a smooth, pipeable consistency. Sifting prevents lumps.
Milk or Heavy Cream: 1-2 tablespoons, for achieving desired consistency.
Optional Garnishes:
Fresh peach slices
A drizzle of honey
Chopped toasted almonds
Time to Bake: A Sweet Commitment
Prep time: 30 minutes
Cook time: 20-24 minutes
Total time: 50-54 minutes (plus cooling and frosting)
Compared to the average cupcake recipe, these Honey Peach Cream Cheese Cupcakes involve a similar prep time, with the additional step of preparing the peach filling and assembling. The baking time is standard for most cupcakes, but the total time, including frosting and decorating, makes it a delightful weekend project or a well-planned dessert for a special occasion.
Step-by-Step to Cupcake Bliss
Let’s embark on this sweet journey! Follow these steps carefully, and you’ll be rewarded with cupcakes that are as beautiful as they are delicious.
Step 1: Preheat and Prepare
First things first, let’s get your oven and baking pans ready. Preheat your oven to 350°F (175°C). Line a standard 12-cup muffin tin with cupcake liners. If you don’t have liners, generously grease and flour each cup. Having everything prepped beforehand makes the baking process so much smoother!
Step 2: Cream Butter and Sugar
In a large mixing bowl, cream together the softened unsalted butter and granulated sugar using an electric mixer on medium-high speed. Beat until the mixture is light, fluffy, and pale yellow, which usually takes about 3-5 minutes. This process incorporates air, which is key to a tender cupcake texture.
Step 3: Add Wet Ingredients
Beat in the room temperature eggs one at a time, ensuring each is fully incorporated before adding the next. Stir in the vanilla extract and the honey until just combined. The honey will add a lovely subtle sweetness and a slightly sticky texture.
Step 4: Combine Dry Ingredients
In a separate medium bowl, whisk together the sifted all-purpose flour, baking powder, and salt. Whisking ensures that the leavening agent and salt are evenly distributed throughout the flour, preventing pockets of bitterness or uneven rising.
Step 5: Gently Fold in Dry Ingredients
Now, it’s time to combine the wet and dry ingredients. Add about half of the dry ingredients to the wet ingredients and mix on low speed until just combined. Pour in the milk and mix until just combined. Finally, add the remaining dry ingredients and mix until *just* combined. Be careful not to overmix; overmixing can develop the gluten in the flour, leading to tough cupcakes. A few streaks of flour are okay; they’ll disappear.
Step 6: Prepare the Peach Filling
This is where our peach magic happens! Gently fold the peach preserves into the cupcake batter. The goal is to create swirls of peach throughout the batter, not to fully incorporate it. This will give you delightful pockets of intense peach flavor in every bite. If your preserves are very stiff, you can slightly warm them for easier folding.
Step 7: Assemble the Cupcakes
Spoon the batter evenly into the prepared muffin cups, filling each about two-thirds full. This allows room for the cupcakes to rise beautifully without overflowing. Use an ice cream scoop for consistent portioning.
Step 8: Bake to Perfection
Bake for 20-24 minutes, or until a wooden skewer or toothpick inserted into the center of a cupcake comes out clean. The tops should be golden brown and spring back lightly when touched. Avoid opening the oven door too early, as this can cause the cupcakes to sink.
Step 9: Make the Cream Cheese Frosting
While the cupcakes cool, prepare the star of the show: the cream cheese frosting. In a large bowl, beat together the softened cream cheese and softened unsalted butter with an electric mixer until smooth and creamy. Gradually add the sifted powdered sugar, about a cup at a time, mixing on low speed until incorporated. Add the vanilla extract and 1 tablespoon of milk or cream. Beat on medium-high speed until light and fluffy. If the frosting is too thick, add more milk or cream, one teaspoon at a time, until you reach your desired consistency. Be careful not to over-beat once the sugar is added.
Step 10: Frost and Decorate
Once the cupcakes have cooled completely on a wire rack (this is crucial – frosting warm cupcakes is a recipe for disaster!), it’s time to frost them. You can use a piping bag with your favorite tip for a decorative swirl, or simply spread the frosting generously with an offset spatula. For an extra touch of summer sweetness, garnish with fresh peach slices, a delicate drizzle of honey, or some toasted chopped almonds for a delightful crunch.
Taste the Goodness: Nutritional Snapshot
While exact nutritional values can vary based on specific ingredients and portion sizes, a typical Honey Peach Cream Cheese Cupcake (per cupcake, assuming 12 servings) offers approximately:
Calories: ~350-400 kcal
Fat: ~18-22g
Carbohydrates: ~40-45g
Protein: ~4-6g
Sugar: ~25-30g
Disclaimer: This is an estimated nutritional breakdown and should be considered a guideline.
Healthier Twists on a Classic
Looking for ways to make these delicious cupcakes a bit lighter without sacrificing flavor? Here are some smart swaps:
Flour Substitution: Swap half of the all-purpose flour with whole wheat pastry flour for added fiber, or use a gluten-free all-purpose baking blend.
Sugar Reduction: Reduce the granulated sugar in the cake base by ¼ cup and rely more on the natural sweetness of the honey and peaches. You might also consider using a sugar substitute like erythritol or xylitol (ensure it’s safe for baking and for your dietary needs).
Fat Swap: For the cake, you can try replacing some of the butter with unsweetened applesauce or Greek yogurt for added moisture and reduced fat. For the frosting, consider using light cream cheese or reducing the butter slightly, acknowledging this may affect texture.
Peach Power: Use fresh, pureed peaches (drained well) instead of preserves for a more natural sweetness and less added sugar, though this may alter the moisture content.
Elevate Your Occasion: Serving Ideas
These versatile cupcakes are perfect for a variety of settings:
Afternoon Tea: Pair with a light, floral tea or a delicate herbal infusion.
Potlucks and Picnics: Their delightful flavor and portable nature make them a crowd-pleaser.
Celebrations: Perfect for birthdays, baby showers, or simple get-togethers.
Dessert Platter: Serve alongside other small treats for a delightful dessert buffet.
Avoiding Cupcake Catastrophes
While this recipe is straightforward, here are a few pitfalls to watch out for:
Overmixing: This is the most common mistake, leading to tough, dense cupcakes. Mix wet and dry ingredients only until just combined.
Incorrect Ingredient Temperatures: Using cold butter, eggs, or milk can result in a lumpy batter and uneven baking. Ensure they are at room temperature.
Opening the Oven Door Too Soon: This can cause your cupcakes to collapse. Wait until they are nearly done baking before checking.
Frosting Warm Cupcakes: Melted frosting is a mess! Always ensure cupcakes are completely cool before decorating.
Keeping Them Fresh and Delicious
Proper storage ensures your cupcakes stay as delightful as the day you made them:
Room Temperature: Unfrosted cupcakes can be stored in an airtight container at room temperature for up to 3 days. Frosted cupcakes with cream cheese frosting are best refrigerated due to the dairy content.
Refrigeration: Store frosted cupcakes in an airtight container in the refrigerator for up to 5 days. Bring them to room temperature for about 30 minutes before serving for the best texture and flavor.
Freezing: You can freeze unfrosted cupcakes. Wrap them tightly in plastic wrap, then in a layer of foil, and store in a freezer-safe bag for up to 3 months. Thaw overnight in the refrigerator.
Frequently Asked Questions
***Can I use fresh peaches instead of preserves?***
Yes, you can! If using fresh peaches, dice them finely and lightly sauté them with a little honey and a pinch of cinnamon until softened. Drain off any excess liquid before folding them into the batter. Keep in mind that fresh peaches may release more moisture while baking, so monitor the baking time.
***How do I make my cupcakes fluffier?***
The keys to fluffy cupcakes are creaming the butter and sugar properly to incorporate air, not overmixing the batter, and ensuring your baking powder is fresh. Room temperature ingredients also contribute to a lighter texture.
***Can I make these into a cake instead of cupcakes?***
Absolutely! You can adapt this recipe for a 2-layer 8-inch or 9-inch cake. You may need to adjust the baking time slightly (likely longer than cupcakes). The frosting amount should be sufficient for a layer cake.
***My cream cheese frosting is too runny. What should I do?***
If your frosting is too soft, it’s often due to ingredients not being cold enough or over-beating. Try chilling the frosting in the refrigerator for about 15-20 minutes. You can also gradually add a little more sifted powdered sugar (a tablespoon at a time) until it thickens. Ensure your cream cheese and butter were properly softened but not melted.
***Do I need to add honey to the frosting?***
The recipe calls for honey in the cupcake base to complement the peaches. The frosting relies on powdered sugar for sweetness and texture. While you could experiment with a small amount of honey in the frosting, it might make it softer and less stable for piping.
A Sweet Ending to Your Culinary Adventure
These Easy Honey Peach Cream Cheese Cupcakes are more than just a dessert; they’re a celebration of simple, natural flavors. The tender, honey-kissed cake, bursting with sweet peach goodness and crowned with creamy, tangy frosting, offers a delightful balance that’s truly irresistible. Gather your ingredients, follow these steps, and prepare to bring a little bit of sunshine into your kitchen and onto your plate. They’re the perfect way to sweeten any day and are guaranteed to become a favorite \”go-to\” recipe. Don’t wait – bake these beauties and share the joy!
Love this recipe? Share your creations with us! Tag us on social media or leave a comment below. We can’t wait to see your delicious Honey Peach Cream Cheese Cupcakes!
Welcome to another delightful recipe adventure! TheseHoney Peach Cream Cheese Cupcakesare inspired by the juicy, sun-ripened peaches of summer, bringing a burst of fruity sweetness to every bite. Imagine the joy of biting into a soft, fluffy cupcake filled with peach preserves, topped with a creamy, dreamy frosting. Whether you’re looking for a special dessert for a gathering or simply a treat to enjoy with your afternoon tea, these cupcakes are sure to impress.
Ingredients
Scale
1 1/2 cupsall-purpose flour
1 teaspoonbaking powder
1/2 teaspoonbaking soda
1/4 teaspoonsalt
1/2 cupunsalted butter, softened
1 cupgranulated sugar
2large eggs
1 teaspoonvanilla extract
1/2 cupbuttermilk
1 cuppeach preserves
1/2 cupcream cheese, softened
1/4 cuppowdered sugar
1 tablespoonmilk
1/2 cupdiced fresh peaches
2 tablespoonshoney for drizzle
Sugar crystals for garnish
Instructions
Preheat the oven:Set your oven to 350°F (175°C) and line a muffin tin with cupcake liners.
Prepare dry ingredients:In a medium bowl, whisk together the flour, baking powder, baking soda, and salt.
Cream butter and sugar:In a large bowl, beat the butter and granulated sugar until light and fluffy.
Add eggs and vanilla:Add the eggs, one at a time, beating well after each addition. Stir in the vanilla extract.
Combine wet and dry ingredients:Alternately add the flour mixture and buttermilk to the butter mixture, beginning and ending with the flour mixture. Mix until just combined.
Fill cupcake liners:Fill each cupcake liner halfway with batter, add a spoonful of peach preserves, and then cover with more batter until the liners are three-quarters full.
Bake:Bake for 18-20 minutes or until a toothpick inserted into the center comes out clean. Let the cupcakes cool completely.
Prepare frosting:In a small bowl, beat the cream cheese, powdered sugar, and milk until smooth and creamy.
Frost and garnish:Frost the cooled cupcakes with the cream cheese mixture. Top with diced fresh peaches. Drizzle the honey over the top and sprinkle with sugar crystals.
Notes
Room Temperature Ingredients:Make sure your butter, eggs, and cream cheese are at room temperature to ensure smooth mixing and a better texture.
Don’t Overmix:Mix the batter until just combined to avoid dense cupcakes.
Fresh Peaches:Use ripe, fresh peaches for the best flavor. If peaches are out of season, canned or frozen peaches work as well.
“`
Easy Raspberry Swirl Shortbread Cookies – Perfect Dessert Recipe for Parties!
Easy Raspberry Swirl Shortbread Cookies – Perfect Dessert Recipe for Parties!
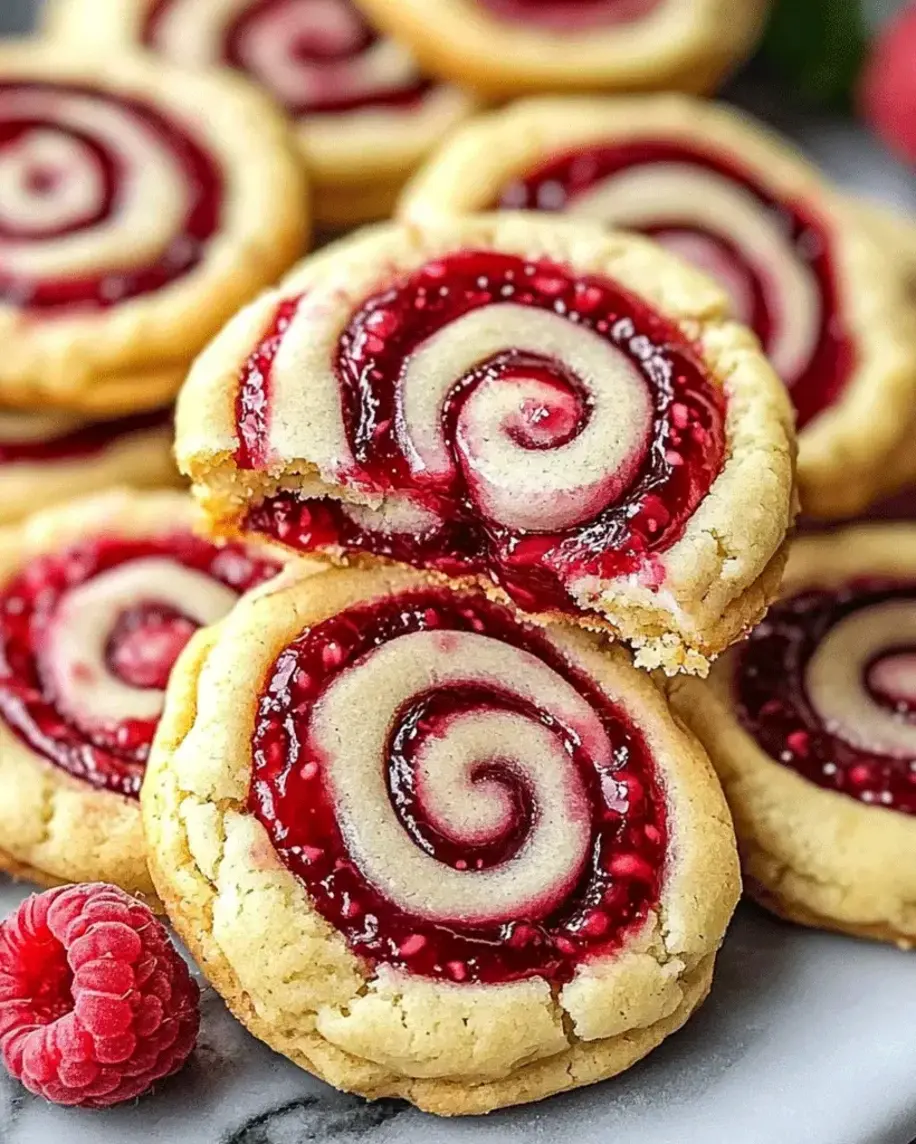
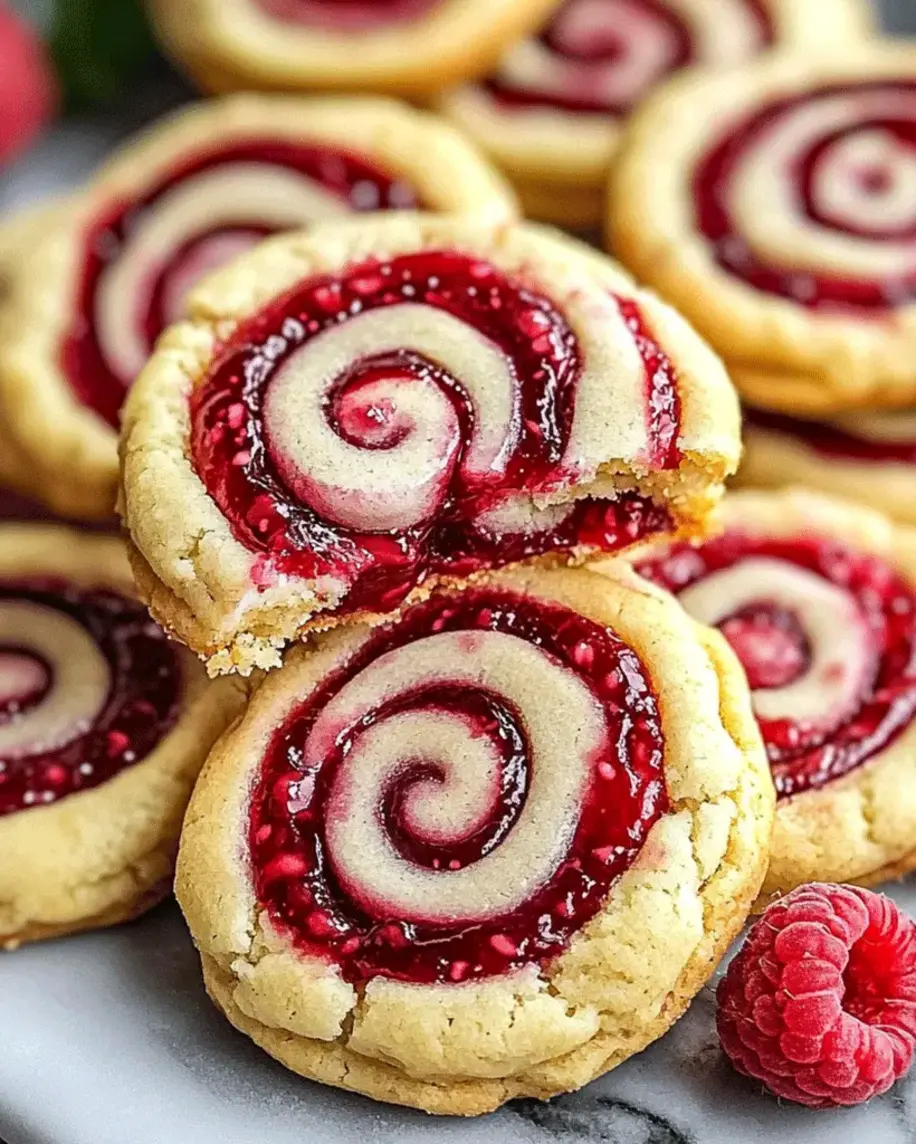
Welcome to the world of baking elegance! These Raspberry Swirl Shortbread Cookies are perfect for dessert lovers seeking a blend of buttery richness and fruity sweetness. Let’s get started!
Why You’ll Love These Raspberry Swirl Shortbread Cookies
Are you looking for a dessert that’s both sophisticated and surprisingly easy to make? If so, you’re in the right place! These Easy Raspberry Swirl Shortbread Cookies are a showstopper without requiring complex techniques. They’re the perfect edible gift or a delightful addition to any tea party, brunch, or festive gathering. The classic buttery shortbread base offers a tender, melt-in-your-mouth texture, beautifully complemented by the vibrant, slightly tart raspberry swirl. Many home bakers shy away from decorated cookies, fearing they’re too complicated. However, this recipe proves that you can achieve stunning visual appeal and incredible flavor with minimal fuss. With a crisp exterior and a crumbly, rich interior, these cookies are a testament to simple ingredients yielding extraordinary results. They stand out from the crowd, offering a unique twist on a beloved classic that guests will rave about. Imagine the delicate crunch, the sweet-tart burst of raspberry, and the sheer buttery goodness – it’s a symphony of flavors and textures that makes any occasion feel special.
Ingredients You’ll Need
Gathering your ingredients is the first step to cookie success. For these delightful Raspberry Swirl Shortbread Cookies, you’ll need:
For the Shortbread Dough:
1 cup (2 sticks or 227g) Unsalted Butter, softened: This is the heart of shortbread, providing richness and that signature crumbly texture. Make sure it’s truly softened, not melted.
1/2 cup (65g) Powdered Sugar: For a delicate sweetness and smooth texture. Caster sugar can be substituted, but powdered sugar dissolves better.
2 teaspoons Vanilla Extract: Enhances the buttery flavor and adds a warm aroma.
2 cups (250g) All-Purpose Flour: The foundation of our shortbread. Spooned and leveled for accuracy.
1/4 teaspoon Salt: Balances the sweetness and deepens the flavors.
For the Raspberry Swirl:
1/2 cup (85g) Fresh or Frozen Raspberries: These will be mashed to create a vibrant, fruity swirl.
2 tablespoons Granulated Sugar: To sweeten the raspberry sauce slightly and help it thicken.
1 teaspoon Lemon Juice (optional): Brightens the raspberry flavor and adds a touch of tartness.
Timing is Everything
Let’s talk timing, because knowing how long things take can make all the difference in your baking flow. Compared to average cookie recipes which might take 30-40 minutes total, these shortbread cookies require a bit more patience due to the chilling steps, but the results are well worth it!
Prep time: 25 minutes
Chill time: 60 minutes
Cook time: 12-15 minutes per batch
Total time: Approximately 1 hour 40 minutes (including chilling)
Step-by-Step Baking Bliss
Follow these simple steps and you’ll be enjoying these delightful cookies in no time!
Step 1: Prepare the Dough
In a large bowl, cream together the softened unsalted butter and powdered sugar until light and fluffy. This is crucial for a tender cookie. Beat in the vanilla extract. In a separate, smaller bowl, whisk together the all-purpose flour and salt. Gradually add the dry ingredients to the butter mixture, mixing on low speed until just combined. Be careful not to overmix, as this can develop the gluten and make your shortbread tough. You should have a soft, slightly crumbly dough.
Step 2: Create the Swirl
This is where the magic happens! In a small saucepan, combine the raspberries, granulated sugar, and lemon juice (if using). Cook over medium heat, stirring occasionally, until the raspberries break down and the mixture thickens into a jam-like consistency, about 5-7 minutes. If using frozen raspberries, they may release more liquid, so cook a bit longer until it evaporates. Remove from heat and let it cool down slightly. You can mash the berries with a fork or potato masher for a smoother sauce, or leave them a little chunky for texture.
Step 3: Chill and Slice
Divide the shortbread dough into two equal portions. On a clean surface or between two sheets of parchment paper, lightly dust one portion of dough with flour and roll it out into a rectangle, about 1/4-inch thick. Spread half of the cooled raspberry mixture evenly over the dough, leaving a small border around the edges. Gently roll out the second portion of dough to the same size and carefully place it on top of the raspberry layer. Press down gently to adhere. Roll the layered dough into a log, about 1.5 to 2 inches in diameter. Wrap the log tightly in plastic wrap and refrigerate for at least 60 minutes (or up to 2 days) until firm. This chilling step is vital for clean slices and to prevent spreading during baking.
Step 4: Bake to Perfection
Preheat your oven to 350°F (175°C). Line baking sheets with parchment paper. Once the dough log is firm, unwrap it and carefully slice it into 1/4-inch thick rounds. Arrange the cookies on the prepared baking sheets, leaving about an inch between them. Bake for 12-15 minutes, or until the edges are lightly golden brown. The centers should still look pale. Allow the cookies to cool on the baking sheets for 5 minutes before transferring them to a wire rack to cool completely. This helps them firm up without over-baking.
Nutritional Insights
While these cookies are a treat, here’s a general idea of what you can expect per cookie (values are approximate and can vary based on exact ingredients and portion sizes):
Calories: 150-180 kcal
Fat: 9-12g
Carbohydrates: 15-20g
Sugar: 8-10g
Protein: 1-2g
Healthier Alternatives
Want to make these guilt-free? You can try a few swaps without sacrificing too much flavor or texture:
Whole Wheat Pastry Flour: Substitute half of the all-purpose flour with whole wheat pastry flour for added fiber.
Reduced Fat Butter: Use a good quality reduced-fat butter; however, this may slightly alter the texture.
Sugar Alternatives: Use a sugar substitute like erythritol or stevia in both the dough and the raspberry filling, adjusting to taste.
Natural Sweeteners: For the raspberry swirl, consider using a touch of maple syrup or honey instead of granulated sugar, though this will add moisture and may require a slight reduction in other liquids.
Reduced Sweetness: Simply reduce the amount of sugar in both the dough and the raspberry filling.
Serving Suggestions
These Raspberry Swirl Shortbread Cookies are wonderfully versatile! They are perfect:
With a cup of tea or coffee.
As part of a dessert platter for parties.
Dipped in chocolate for an extra touch of decadence.
Paired with fresh fruit salad.
As a sweet ending to a special meal.
Common Mistakes to Avoid
To ensure your shortbread turns out perfectly:
Overmixing the Dough: This develops gluten, leading to tough cookies. Mix until *just* combined.
Butter Not Softened Enough: If your butter is too cold, it won’t cream properly, affecting the texture. If too warm, the dough can become greasy.
Not Chilling the Dough: Skipping the chill time can result in cookies that spread too much and lose their shape during baking.
Overbaking: Shortbread should be pale with just golden edges. Overbaking makes them hard and dry. Keep a close eye on them!
Raspberry Filling Too Runny: A too-wet filling can make the shortbread soggy and difficult to slice. Ensure it’s nicely thickened.
Storing Your Delicious Cookies
Proper storage ensures maximum freshness and enjoyment! Once completely cooled, store your Raspberry Swirl Shortbread Cookies in an airtight container at room temperature. They will stay delicious for up to a week. If you plan to keep them longer, you can freeze them, ideally in a single layer on a baking sheet until firm, then transfer to a freezer-safe bag or container for up to 3 months. Thaw at room temperature before serving.
Frequently Asked Questions
***Can I use a different fruit for the swirl?***
Absolutely! Other berries like strawberries or a mixed berry blend work beautifully. You might need to adjust the cooking time slightly depending on the fruit’s water content.
***My dough is too sticky, what should I do?***
If the dough is too sticky to handle before chilling, lightly dust your hands and work surface with flour. However, remember that shortbread dough is meant to be a bit softer than typical cookie dough. Ensure you don’t add too much extra flour, as this can make the cookies dry.
***How do I get clean slices for the cookies?***
A very sharp knife is key. Ensure the dough log is thoroughly chilled and firm. You can also run a thin knife under hot water and dry it before each slice for extra clean cuts.
***Can I make the raspberry filling ahead of time?***
Yes, you can prepare the raspberry filling up to 2 days in advance and store it in an airtight container in the refrigerator. Let it come to room temperature before spreading it on the dough.
***My cookies aren’t spreading at all. Is that normal?***
Shortbread is designed to hold its shape and not spread significantly. If they aren’t spreading at all, it’s usually a good sign! They should retain their disc shape. Some minimal spreading is normal and indicates proper baking.
Enjoy Your Beautifully Swirled Cookies!
There you have it – a stunning and delicious batch of Easy Raspberry Swirl Shortbread Cookies! These cookies are more than just a dessert; they’re a delightful experience for your senses, perfect for impressing guests or simply treating yourself. The combination of buttery bliss and bright raspberry is truly irresistible. So, preheat your ovens, get your ingredients ready, and prepare to bake up a storm. We’d love to hear how your cookies turned out! Share your baking adventures in the comments below, or tag us on social media with your creations. Happy baking!
Welcome to the world of baking elegance! TheseRaspberry Swirl Shortbread Cookiesare perfect for dessert lovers seeking a blend of buttery richness and fruity sweetness. Let’s get started!
Ingredients
Optional substitutions:
Instructions
Preheat your oven to 350°F (175°C). Line a baking sheet with parchment paper.
In a mixing bowl, cream the softened butter and sugar until light and fluffy. Add vanilla extract and gradually incorporate the flour to form a dough.
On a floured surface, roll out the dough to a ¼-inch thickness.
Spread raspberry jam evenly over the dough.
Carefully roll the dough into a log and wrap it in plastic wrap. Refrigerate for 30 minutes.
Slice the chilled dough into ¼-inch thick rounds and arrange them on the prepared baking sheet. Bake for 12-15 minutes or until the edges are lightly golden.
Let the cookies cool completely on a wire rack. Once cooled, drizzle melted white chocolate for a decorative finish.
Notes
Even Swirl:Spread jam evenly to achieve a professional-looking swirl.
Chill Time:Ensure the dough is chilled for clean slicing and shape retention.
Customization:Swap raspberry jam with other fruit jams like apricot or cherry.
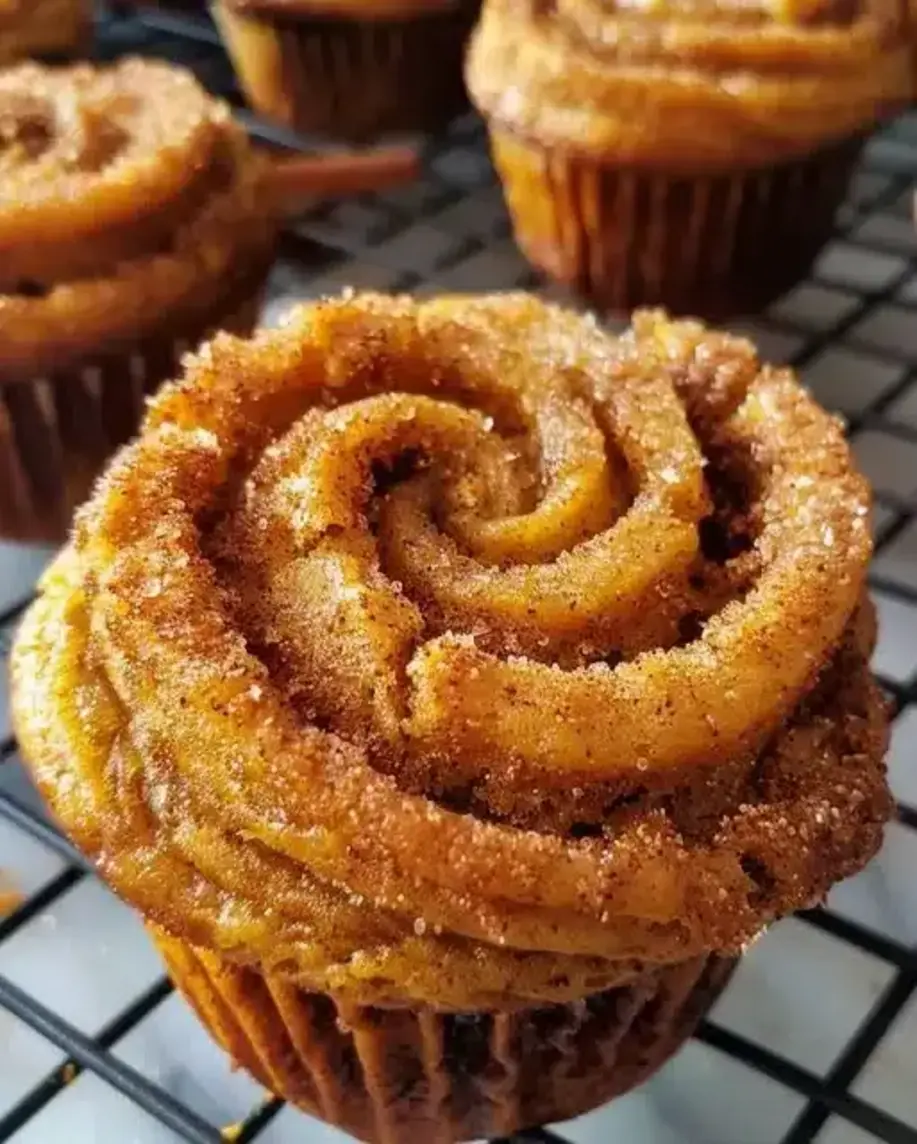
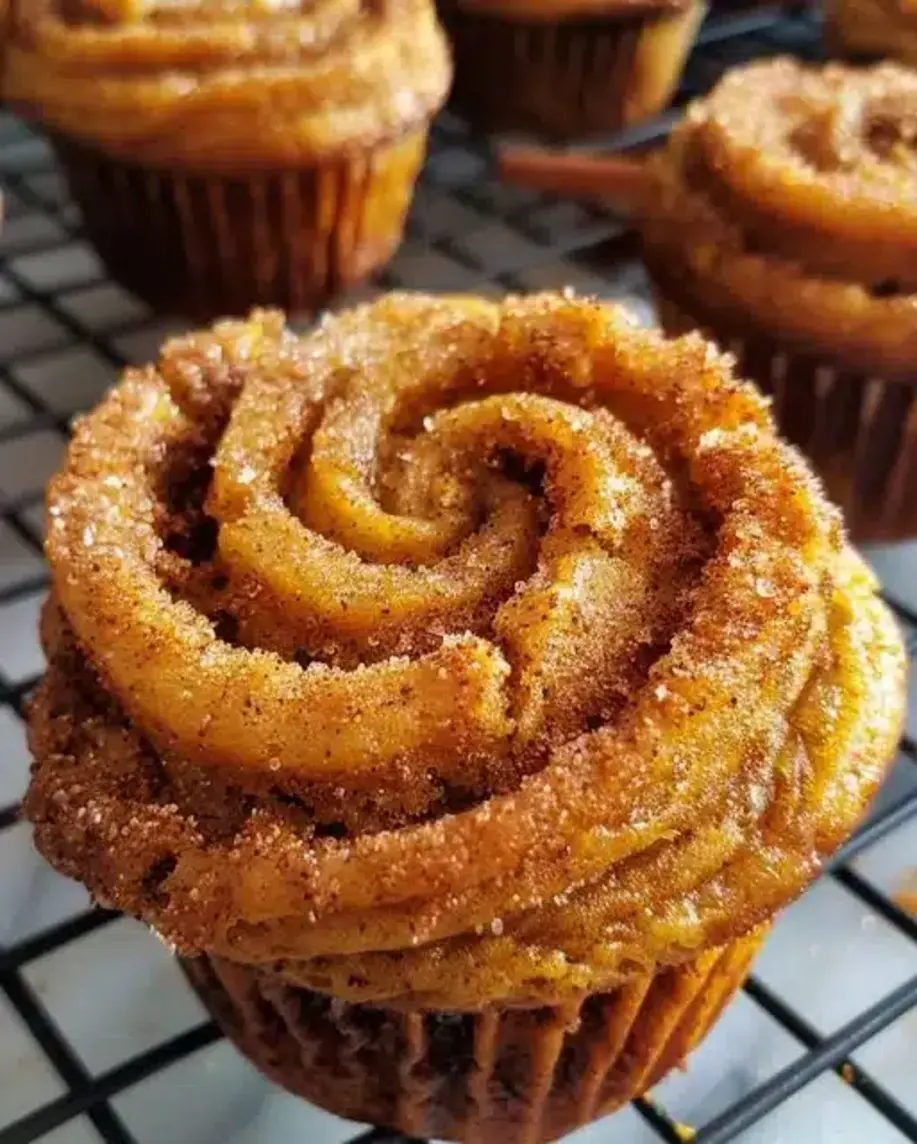
Are you on the hunt for a breakfast treat that’s both incredibly easy to make and wonderfully delicious, perhaps something that can elevate your morning routine from ordinary to extraordinary? If you’re nodding along, you’re in for an absolute treat! These Cinnamon Sugar Swirl Muffins are not just muffins; they’re little pockets of joy, bursting with the comforting aroma of cinnamon and the satisfying sweetness of sugar, all thanks to that delightful swirl. They’re the perfect blend of sweet and spice, guaranteed to bring a smile to your face with every bite. Whether you’re a seasoned baker or just starting, these muffins are forgiving and rewarding, making them a top contender for your new favorite breakfast or snack. Imagine pulling a batch of these golden-brown beauties from your oven, the scent filling your home – it’s pure bliss!
Ingredients You’ll Need
Gathering your ingredients is the first step to muffin magic. We’ve kept it simple, using pantry staples you likely have on hand. The key to that irresistible cinnamon sugar swirl lies in a few simple components.
For the Muffins:
2 cups All-Purpose Flour: The sturdy foundation of our muffins, providing that classic tender crumb.
1 teaspoon Baking Soda: Our leavening agent, ensuring a good rise and fluffy texture.
½ teaspoon Baking Powder: Works with baking soda for an extra lift and a lighter feel.
½ teaspoon Salt: Enhances all the other flavors and balances the sweetness.
1 teaspoon Ground Cinnamon: The warm, aromatic star of our muffin base.
1 cup Granulated Sugar: For sweetness and a tender texture. Feel free to adjust slightly based on preference.
1 large Egg: Binds everything together and adds richness.
½ cup Milk (whole or 2% recommended): Adds moisture and helps create a smooth batter. You can substitute with buttermilk for extra tenderness.
¼ cup Vegetable Oil or Melted Butter: Lends moisture and a tender crumb. Melted coconut oil or even unsalted butter works beautifully.
1 teaspoon Vanilla Extract: A classic flavor enhancer that complements the cinnamon perfectly.
For the Cinnamon Sugar Swirl:
½ cup Light Brown Sugar: Offers a deeper, caramelly sweetness and a lovely moist texture to the swirl.
1 tablespoon Ground Cinnamon: Generous amount for that distinct, warm cinnamon flavor.
2 tablespoons Unsalted Butter, melted: Helps the sugar mixture bind and creates soft pockets of flavor within the muffin.
Timing is Everything
One of the best things about these Cinnamon Sugar Swirl Muffins is how quickly they come together. Perfect for a busy morning!
Prep time:
15 minutes
Cook time:
20-22 minutes
Total time:
35-37 minutes
Compared to many muffin recipes that can take closer to 45-50 minutes of active time and baking, these are wonderfully efficient!
Let’s Get Baking!
Follow these simple steps, and you’ll be enjoying warm, fragrant muffins in no time!
Step 1: Preheat Your Oven and Prepare Muffin Tins
Begin by preheating your oven to 375°F (190°C). Line a standard 12-cup muffin tin with paper liners or generously grease each cup with non-stick cooking spray or butter. This preparation ensures your beautiful muffins won’t stick and will pop out easily once baked.
Step 2: Whisk Together the Dry Ingredients
In a large mixing bowl, whisk together the all-purpose flour, baking soda, baking powder, salt, cinnamon, and granulated sugar. Whisking ensures that all the dry ingredients are evenly distributed, which is crucial for consistent leavening and flavor throughout your muffins.
Step 3: Combine the Wet Ingredients
In a separate, medium-sized bowl, whisk together the egg, milk, vegetable oil (or melted butter), and vanilla extract until well combined. Make sure the egg is fully incorporated to avoid any eggy pockets in your finished muffins.
Step 4: Gently Combine Wet and Dry Ingredients
Pour the wet ingredients into the bowl with the dry ingredients. Using a spatula or wooden spoon, stir *just until combined*. A few lumps are perfectly fine. Overmixing the batter at this stage can develop the gluten too much, resulting in tough, dense muffins rather than light and tender ones. We want a happy medium!
Step 5: Prepare the Cinnamon Sugar Swirl
In a small bowl, mix together the light brown sugar and the tablespoon of cinnamon. Pour in the melted butter and stir until it forms a crumbly, moist mixture. This is your glorious swirl filling!
Step 6: Assemble the Swirl Muffins
Divide about half of the muffin batter evenly among the prepared muffin cups, filling each about halfway. Then, spoon about a teaspoon of the cinnamon sugar swirl mixture over the batter in each cup. Top with the remaining muffin batter, filling each cup about two-thirds to three-quarters full. You can optionally sprinkle a little extra cinnamon sugar mixture on top of each muffin for an extra crunchy finish.
Step 7: Bake to Golden Perfection
Bake for 20-22 minutes, or until a toothpick inserted into the center of a muffin comes out clean, and the tops are golden brown and spring back lightly when touched. Keep an eye on them, as oven temperatures can vary.
Step 8: Cool and Enjoy!
Once baked, let the muffins cool in the muffin tin for about 5-10 minutes before transferring them to a wire rack to cool completely. This prevents them from getting soggy bottoms. Enjoy them warm with a cup of coffee or tea, or let them cool fully for a perfect grab-and-go breakfast.
Nutritional Snapshot
While every kitchen and ingredient can vary slightly, here’s a general idea of the nutritional profile per muffin (based on 12 muffins):
Calories: Approximately 200-250 kcal
Carbohydrates: 30-35g
Sugar: 18-23g
Fat: 8-12g
Protein: 3-4g
Healthier Twists for Your Swirl Muffins
Looking to make these even healthier without sacrificing flavor? Try these swaps:
Whole Wheat Flour: Substitute half of the all-purpose flour with whole wheat flour for added fiber.
Reduced Sugar: Lower the granulated sugar in the batter and brown sugar in the swirl by ¼ cup. You can also explore natural sweeteners like maple syrup or honey (adjust liquid content if using liquid sweeteners).
Greek Yogurt or Applesauce: Replace some of the oil/butter with plain Greek yogurt or unsweetened applesauce for added moisture and protein while reducing fat.
Nut or Seed Butter: Stir a tablespoon or two of unsweetened nut or seed butter into the swirl for healthy fats and added flavor.
Serving Suggestions
These muffins are fantastic on their own, but here are a few ideas to elevate your experience:
Warm & Buttery: Serve them warm, split open, and spread with a thin layer of butter.
With a Creamy Dip: A dollop of Greek yogurt or a light cream cheese frosting pairs wonderfully.
With Coffee or Tea: The classic pairing for a reason! The spices in the muffin complement both beverages beautifully.
With Fruit: Enjoy alongside fresh berries or sliced apple for a balanced meal.
Avoiding Common Muffin Mishaps
To ensure muffin perfection every time, be mindful of these common pitfalls:
Overmixing: This is the most common culprit for tough muffins. Mix ONLY until just combined. Lumps are good!
Opening the Oven Door Too Soon: Resist the urge! Opening the oven door too early can cause muffins to collapse. Wait until they are mostly set.
Incorrect Oven Temperature: An oven that’s too hot can lead to burnt bottoms and undercooked insides, while too cool can result in flat muffins. Use an oven thermometer if you suspect your oven’s accuracy.
Not Greasing Muffin Tins Properly: Ensured your tins are well-greased or lined to prevent sticking.
Storing Your Delicious Muffins
These muffins are best enjoyed fresh, but they store well for a few days:
Room Temperature: Store cooled muffins in an airtight container or zip-top bag at room temperature for up to 3 days.
Freezing: For longer storage, wrap cooled muffins individually in plastic wrap, then place them in a freezer-safe bag or container. They can be frozen for up to 3 months. Thaw at room temperature or gently reheat in a low oven or microwave.
Frequently Asked Questions
***Can I make these muffins vegan?***
Yes! You can typically substitute the egg with a flax egg (1 tbsp flaxseed meal + 3 tbsp water, let sit for 5 minutes) and use plant-based milk and vegan butter for the swirl and oil. Ensure your sugar is also vegan-friendly.
***Why are my muffins sinking in the middle?***
This is often due to opening the oven door too early, an oven temperature that is too high, or too much leavening agent. Ensure your oven is preheated properly and avoid opening the door until the last few minutes of baking.
***How do I get a nice swirl?***
The key is layering. Ensure you have a distinct layer of the cinnamon sugar mixture between the batter layers and don’t overmix the batter, which can cause the swirl to disappear. A light sprinkle on top can also enhance the visual appeal.
***Can I add nuts or chocolate chips?***
Absolutely! Feel free to add about ½ cup of chopped nuts (like pecans or walnuts) or mini chocolate chips to the batter. Stir them in gently after combining the wet and dry ingredients.
There you have it – a fantastic recipe for Cinnamon Sugar Swirl Muffins that’s as delightful to make as it is to eat. These are perfect for making ahead for busy mornings, packing in lunchboxes, or simply enjoying as a sweet treat with your afternoon coffee. Give them a try and let us know how you loved them in the comments below! Happy Baking!
Hello muffin lovers! If you’re looking for a delightful treat to brighten up your day, you’re in for a treat. TheseCinnamon Sugar Swirl Muffinsare the perfect blend of sweet and spice, guaranteed to bring a smile to your face with every bite.
Ingredients
For Frosting:
Instructions
Preheat the ovento 375°F (190°C) and line a muffin tin with paper liners.
In a large bowl, whisk together the flour, granulated sugar, brown sugar, baking powder, and salt.
In another bowl, combine the melted butter, milk, egg, and vanilla extract.
Pour the wet ingredientsinto the dry ingredients and mix until just combined.
Divide the batterevenly among the muffin cups.
Generously sprinklethe cinnamon sugar over the tops of the muffins.
Bake for 18-20 minutes, or until a toothpick inserted into the center comes out clean.
Allow the muffins to coolin the tin for 5 minutes before transferring them to a wire rack to cool completely.
Notes
Ensure your ingredients are at room temperature before mixing to create a smoother batter.
Don’t overmix the batter; mix just until the ingredients are combined to keep the muffins light and fluffy.
Are you craving a dessert that’s both elegantly simple and bursting with flavor?
In the vast world of sweet treats, have you ever searched for a recipe that delivers
that perfect balance between bright, zesty citrus and sweet, tart berries, all nestled
within a creamy, dreamy cheesecake base? Today, we’re diving into a mouth-watering
treat that perfectly balances tangy and sweet flavors. Let’s get ready to create
something truly special! These Luscious Lemon Raspberry Swirl Cheesecake Cups are
designed to impress without overwhelming your kitchen with complex steps. They’re
ideal for parties, a special dessert, or just a delightful pick-me-up. Get ready
to elevate your dessert game with this delightful recipe!
Ingredients You’ll Need
Gathering your ingredients is the first step to cheesecake cup success! We’ve focused
on creating a vibrant flavor profile that shines through.
For the Graham Cracker Crust:
1 ½ cups (about 150g) graham cracker crumbs (from about 10-12 full graham crackers) – Think of the comforting, slightly sweet crunch, like a warm hug for your cheesecake.
3 tablespoons (45g) unsalted butter, melted – This is the binder that holds our delightful crust together, adding a subtle richness.
2 tablespoons (25g) granulated sugar – Just a touch to enhance the graham cracker’s natural sweetness.
Pinch of salt – To balance the sweetness and bring out the other flavors.
For the Lemon Raspberry Cheesecake Filling:
2 (8-ounce / 225g) packages cream cheese, softened to room temperature – The velvety heart of our cheesecake. So important for a smooth, creamy texture!
⅔ cup (135g) granulated sugar – To sweeten the filling and provide that classic cheesecake richness.
1 large egg, at room temperature – This binds everything together, giving our cheesecake the perfect structure.
1 teaspoon pure vanilla extract – A classic for a reason, vanilla adds depth and warmth to the overall flavor.
2 tablespoons (30ml) fresh lemon juice – Our star! This is where the bright, zesty, tangy notes come from. Fresh is best for that vibrant citrus punch!
1 tablespoon lemon zest (from about 1-2 lemons) – Doubling down on lemon! The zest offers an even more intense, aromatic lemon essence.
½ cup (120ml) heavy cream (optional, for extra richness) – If you want an even more decadent, luscious texture, a touch of cream works wonders.
For the Raspberry Swirl:
½ cup (about 75g) fresh or frozen raspberries – These little jewels provide bursts of sweet-tart flavor and a beautiful görsel flair.
1 tablespoon granulated sugar – To help them break down and create a lovely, slightly thickened sauce.
1 teaspoon lemon juice (optional) – A tiny splash to brighten the raspberry flavor even more.
Substitutions & Additions:
Crust: If you don’t have graham crackers, digestive biscuits or shortbread cookies work wonderfully as a substitute. A sprinkle of cinnamon in the crust adds a lovely warmth.
Raspberries: Frozen raspberries are perfectly fine here and often easier to work with for making a quick sauce. Other berries like blueberries or a mixed berry blend can also be used for a different swirl flavor.
Lemon: While fresh is ideal, 1 teaspoon of good quality lemon extract can be used in a pinch for the filling, though the zest is irreplaceable for that aromatic punch.
Cream Cheese: For a slightly lighter texture, you can use light cream cheese, but full-fat will yield the creamiest result.
Timing is Everything
Prep time: 25 minutes
Cook time: 20-25 minutes
Chill time: 4 hours (minimum)
Total time: ~5 hours
Compared to a full-sized cheesecake, these cups are a breeze! While a traditional cheesecake
might take 60-90 minutes to bake and then require a long, slow cool-down, our
cheesecake cups bake up quickly in about 20-25 minutes. The “total time” largely
includes the essential chilling period, which is crucial for the cheesecake to set
properly. This makes them a fantastic option when you’re short on time but still
want an impressive homemade dessert.
Crafting Your Cups
Step 1: Creating the Perfect Crust
First things first, let’s get our foundation ready! In a medium bowl, combine the graham cracker
crumbs, melted butter, sugar, and salt. Give it a good stir until the crumbs are evenly
moistened. It should resemble wet sand. Now, divide this mixture among 12 standard muffin
cups lined with paper liners. Press the crumbs firmly and evenly into the bottom of each
liner. This step is key for a sturdy base that won’t crumble apart effortlessly. You can use
the bottom of a small glass or a measuring cup to get a nice compact layer!
Step 2: Whipping Up the Cheesy Magic
In a large bowl, beat the softened cream cheese with an electric mixer until it’s completely
smooth and creamy, with no lumps. This is crucial for a silky-smooth cheesecake texture.
Gradually add the granulated sugar and continue beating until well combined and fluffy.
Next, add the egg, vanilla extract, fresh lemon juice, and lemon zest. Mix on low speed
just until everything is incorporated. Be careful not to overmix at this stage, as too much
air can cause cracks in your cheesecake. If you’re using heavy cream for extra richness,
gently fold it in now.
Step 3: The Swirl of Flavor
Let’s get that beautiful raspberry swirl going! In a small saucepan or microwave-safe bowl,
combine the raspberries, sugar, and optional lemon juice. If using fresh raspberries, gently
mash them with a fork. If using frozen, they will break down as they heat. Cook over low
heat (or microwave on high in 30-second intervals), stirring occasionally, until the
raspberries have broken down and the mixture has slightly thickened into a sauce. This should
only take a few minutes. Remove from heat and let it cool slightly. You can strain it through
a fine-mesh sieve if you prefer a smoother sauce without seeds, but I personally love the
little pops of texture.
Step 4: Bake and Chill to Perfection
Preheat your oven to 325°F (160°C). Now, it’s time to assemble! Spoon the cream cheese filling
evenly over the crusts in the muffin cups, filling them about ¾ full. Now for the fun part:
drop spoonfuls of the cooled raspberry sauce onto the top of the cheesecake mixture in each
cup. Using a toothpick or a small knife, gently swirl the raspberry sauce into the cheesecake
filling. Aim for pretty, marbled patterns rather than over-mixing, which can make the color muddy.
Bake for 20-25 minutes, or until the edges are set and the centers are still slightly soft.
They will continue to firm up as they cool. Once baked, let them cool completely on a wire rack.
Then, cover the muffin tin and refrigerate for at least 4 hours, or preferably overnight, until
firm and thoroughly chilled. This chilling time is ESSENTIAL for the perfect cheesecake texture!
Step 5: The Final Flourish
Once your cheesecake cups are perfectly chilled and set, it’s time to admire your handiwork!
Carefully remove them from the muffin tin using the paper liners. You can serve them as is,
or for an extra touch of elegance, garnish them with a fresh raspberry, a sprinkle of lemon
zest, or a dollop of whipped cream. These little details truly transform them into a show-stopping
dessert.
Nutritional Snapshot
While exact nutritional values can vary based on specific ingredients and portion sizes,
a typical Luscious Lemon Raspberry Swirl Cheesecake Cup contains approximate:
Calories: 250-350 kcal
Fat: 15-25g (saturated fat will be higher due to cream cheese and butter)
Carbohydrates: 25-35g (mostly from sugar and graham crackers)
Protein: 5-8g
Sugar: 15-25g
These are estimates and can be adjusted based on your ingredient choices.
Smart Swaps for Lighter Indulgence
We all love a decadent treat, but sometimes we want to lighten things up without sacrificing flavor.
Here are a few swaps that can help:
Crust: Swap graham crackers for crushed whole wheat crackers or even a blend of almond flour and a touch of sweetener for a lower-carb, higher-fiber base. Reduce butter by using a lighter spray or a smaller amount.
Sweetener: Reduce the amount of sugar in both the crust and filling. You can also experiment with natural sweeteners like maple syrup or stevia, keeping in mind that they can affect texture and cooking times.
Cream Cheese: Use Neufchâtel cheese or a light cream cheese. While this might slightly alter the richness, it can significantly cut down on fat and calories.
Topping: Instead of whipped cream, opt for a light Greek yogurt dollop or fresh berries for a tart contrast.
Serving Suggestions
These lemon raspberry swirl cheesecake cups are incredibly versatile! Serve them chilled straight
from the refrigerator for a delightful dessert after any meal. They are perfect for:
Baby showers, bridal showers, or birthday parties – their individual portions make them easy to serve.
A sweet addition to a brunch spread.
A make-ahead treat for when unexpected guests arrive.
Enjoyed with a cup of tea or coffee for an afternoon indulgence.
Garnish with a tiny mint leaf, a thin slice of lemon, or edible flowers for an extra special presentation.
Navigating Common Pitfalls
Even with simple recipes, a few common mistakes can happen. Here’s how to avoid them:
Lumpy Cream Cheese: Always ensure your cream cheese is fully softened to room temperature. Cold cream cheese is notoriously difficult to smooth out.
Overmixing the Filling: Overbeating the filling, especially after adding the egg, can incorporate too much air, leading to cracks or a spongy texture. Mix on low speed until just combined.
Not Chilling Long Enough: Cheesecake needs time to set. Rushing the chilling process will result in a soft, un-set dessert. Be patient; it’s worth it!
Soggy Crust: Making sure the crust is pressed firmly into the liners and baking it for the suggested time (even if just briefly with the filling) helps to set it before chilling.
Keeping Your Creations Fresh
These cheesecake cups store beautifully in the refrigerator!
Refrigeration: Once cooled and set, store them in an airtight container in the refrigerator for up to 3-4 days.
Freezing: You can freeze them for longer storage. Place them in a single layer on a baking sheet to freeze solid, then transfer to a freezer-safe container or bag. Thaw overnight in the refrigerator before serving. The crust might soften slightly upon thawing.
Taste the Sunshine and Berry Bliss
There you have it – a simple yet spectacular way to enjoy the classic combination of lemon and
raspberry in an irresistible cheesecake form. These Luscious Lemon Raspberry Swirl Cheesecake
Cups are a testament to how easy it can be to create something truly delightful and impressive
in your own kitchen. The bright zestiness of the lemon perfectly complements the sweet tang of
the raspberries, all embraced by a rich, creamy cheesecake base atop a buttery graham cracker
crust. Whether you’re a seasoned baker or just starting out, this recipe is designed to bring
you joy with every bite.
Give these cheerful cheesecake cups a try and let us know how they turned out in the comments below!
We’d love to see your creations and hear your thoughts. Don’t forget to share this recipe with
friends and family who adore a good dessert! Happy baking!
Frequently Asked Questions
***Can I make these without a muffin tin?***
Yes, you can! You could adapt this recipe for mini cheesecake pans or even bake it as a crustless cheesecake and top it with a lemon-raspberry compote. For individual servings without special pans, you could potentially use sturdy ramekins, but be mindful of baking times.
***My swirl didn’t show up well. What went wrong?***
Ensure your raspberry sauce isn’t too thin or too thick. If it’s too liquid, it might sink or blend too much. If it’s too thick, it can be hard to swirl. Also, a gentle swirl with a toothpick rather than vigorous mixing is key for visible patterns.
***Can I use artificial sweeteners?***
You can, but be aware that artificial sweeteners can sometimes alter the texture and set of cheesecake, and they often have a different sweetness profile. You might need to adjust the amount based on the specific sweetener you use, and the final texture might be slightly different.
***How long does the lemon flavor last?***
The lemon flavor is most pronounced when freshly made. As it sits in the refrigerator, the flavors meld. However, the zest and juice provide a lasting bright note. Topping with a bit of fresh lemon zest just before serving can boost the aroma and flavor.
Hello, lovely readers! Welcome back to our cozy corner of culinary delights. Today, we’re diving into a mouth-watering treat that perfectly balances tangy and sweet flavors. Let’s get ready to create something truly special!
Ingredients
Scale
1 cupgraham cracker crumbs
2 tablespoonssugar
4 tablespoonsmelted butter
16 ozcream cheese, softened
1/2 cupsugar
2eggs
1 teaspoonvanilla extract
1/4 cuplemon juice
1 tablespoonlemon zest
1/4 cupraspberry preserves
Fresh raspberries, for garnish
Lemon slices, for garnish
Whipped cream, for garnish
Instructions
Preheat and Prepare:Preheat your oven to 325°F (163°C). Line a muffin tin with cupcake liners to ensure easy removal of your cheesecakes.
Create the Crust:In a medium bowl, combine the graham cracker crumbs, 2 tablespoons of sugar, and melted butter. Mix until well combined. Press about 1 tablespoon of the mixture into the bottom of each cupcake liner to form the crust.
Mix the Cheesecake Batter:In a large bowl, beat the softened cream cheese and 1/2 cup of sugar until smooth and creamy. Add the eggs one at a time, beating well after each addition. Stir in the vanilla extract, lemon juice, and lemon zest.
Assemble the Cheesecakes:Pour the cream cheese mixture over the crust in each cupcake liner, filling about 2/3 full. Drop small dollops of raspberry preserves on top of each cheesecake and swirl gently with a toothpick to create a beautiful marbled effect.
Bake:Bake the cheesecakes for 18-20 minutes, or until the centers are set. Allow them to cool completely at room temperature, then refrigerate for at least 2 hours before serving.
Garnish and Serve:Before serving, garnish each cheesecake cup with fresh raspberries, lemon slices, and a dollop of whipped cream for an extra touch of elegance.
Notes
Ensure your cream cheese is fully softened to avoid lumps in your cheesecake batter.
For a stronger lemon flavor, add a bit more lemon zest or a touch of lemon extract.
Are you searching for a show-stopping, holiday-themed dessert that’s surprisingly simple to make? In a world overflowing with complex baking projects, wouldn’t it be wonderful to have a festive treat that captivates both the eyes and the taste buds, without requiring hours in the kitchen? Grinch Fudge, with its vibrant green hue and unmistakable holiday charm, is precisely that. This delightful confection is a celebrated part of many holiday traditions, often appearing at Christmas parties, cookie exchanges, and as a cherished homemade gift. Its popularity stems from its whimsical Grinch-inspired colors and its incredibly creamy, melt-in-your-mouth texture, making it a universally loved treat. This recipe is designed for maximum festive impact with minimal kitchen stress.
Prep time: 15 minutes
Cook time: 5 minutes
Total time: 20 minutes + chilling
Yield: Approximately 24-36 squares
Ingredients & Equipment
The Star Ingredients for Your Grinch Fudge
The magic of Grinch Fudge lies in its simple yet effective combination of ingredients. We’re aiming for that classic creamy fudge texture with a vibrant, festive finish.
White Chocolate Chips: 24 ounces (about 4 cups). Opt for good quality white chocolate chips or a chopped white chocolate bar for the smoothest melt. They provide the sweet, creamy base.
Sweetened Condensed Milk: 1 can (14 ounces). This is crucial for that signature fudge texture; it adds richness and helps the fudge set without becoming too hard. Its thick, syrupy consistency is key.
Butter: 2 tablespoons, unsalted. This adds a subtle richness and helps in achieving a smooth, glossy finish.
Green Food Coloring: Gel food coloring is highly recommended for the most vibrant, concentrated Grinch-green hue without diluting the fudge mixture. Start with a few drops and add more until your desired shade is achieved.
White Nonpareils or Sprinkles: 1/4 cup, plus more for topping. These little white dots are the perfect contrast to the green and mimic the Grinch’s iconic look.
Optional: A Pinch of Peppermint Extract: 1/4 teaspoon, for a subtle hint of festive flavor. This is not traditional but adds a lovely warmth.
Essential Equipment
To make this Grinch Fudge a breeze, ensure you have the following on hand:
An 8×8 inch or 9×9 inch baking pan, lined with parchment paper, with overhang for easy lifting.
A medium-sized, heavy-bottomed saucepan.
A heatproof spatula or wooden spoon.
Measuring cups and spoons.
Timing is Everything
One of the best things about this Grinch Fudge is how quickly it comes together. While many fudge recipes require careful candy-making temperatures, this one relies on melting and mixing. The primary time investment comes after the mixing, during the chilling phase.
Prep Time: 15 minutes
Cook Time: 5 minutes (active melting)
Total Active Time: 20 minutes
Chilling Time: Minimum 2-3 hours, or until firm
Compared to traditional fudge recipes that might involve precise temperature monitoring and longer cooking times, this simplified version is a holiday lifesaver. You’ll be amazed at how little time it takes to create such a festive treat!
Step-by-Step Instructions
Get ready for some serious holiday cheer! Creating this Grinch Fudge is as easy as following these simple steps. We’re going to focus on a smooth melt and vibrant color!
Step 1: Prep Your Pan
First things first, let’s get your pan ready. Take your 8×8 or 9×9 inch baking pan and line it with parchment paper. Make sure the parchment paper goes up the sides, creating ‘handles.’ This will make lifting the fudge out super easy later. You can lightly grease the pan before lining it for extra insurance against sticking, though the parchment should do most of the work.
Step 2: Melt the Base
In a medium, heavy-bottomed saucepan, combine the white chocolate chips, the can of sweetened condensed milk, and the unsalted butter. Place this over low to medium-low heat. Stir constantly with your spatula. You want to melt everything gently; avoid high heat, which can cause the white chocolate to seize or scorch. Keep stirring until the mixture is completely smooth and glossy. This usually takes about 3-5 minutes. Be patient – this smooth base is key!
Step 3: Add the Magic
Once your white chocolate mixture is perfectly smooth and melted, remove the saucepan from the heat. Now it’s time for the Grinchy transformation! Add your green gel food coloring. Start with a few drops – gel colors are potent! Stir thoroughly until the color is uniform and you have that iconic vibrant Grinch green. If you desire a deeper shade, add a tiny bit more food coloring at a time, stirring well after each addition. If you’re using peppermint extract, stir it in now as well. Finally, gently fold in the white nonpareils or sprinkles. Don’t overmix; we want them distributed, not dissolved.
Step 4: Set and Chill
Pour the still-warm fudge mixture into your prepared pan. Use your spatula to spread it evenly into the corners. If you want extra sprinkles on top for more festive flair, sprinkle them over the surface now while the fudge is still wet, so they adhere. Gently press them in if necessary. Now, cover the pan (plastic wrap works well) and place it in the refrigerator to chill and set. This will take at least 2-3 hours, but overnight is even better for a perfectly firm fudge.
Step 5: The Grinchy Reveal
Once the fudge is completely firm, it’s time for the grand unveiling! Lift the parchment paper ‘handles’ to carefully remove the entire slab of fudge from the pan. Place it on a cutting board. Using a sharp knife, cut the fudge into small, bite-sized squares. Wipe the knife clean between cuts if it gets sticky. Arrange your festive Grinch Fudge on a platter and get ready to enjoy the holiday cheer!
Nutritional Highlights
This Grinch Fudge is a delightful treat, and while it’s rich and decadent, understanding its nutritional profile can help you enjoy it mindfully. Exact nutritional values can vary based on specific brands and ingredient amounts, but here’s a general idea per square (assuming 36 squares):
Calories: Approximately 150-200 kcal
Total Fat: 8-12g (largely from white chocolate and butter)
Saturated Fat: 5-8g
Cholesterol: 5-10mg
Sodium: 10-30mg
Total Carbohydrates: 18-25g (primarily from sugar)
Added Sugars: 15-20g
Protein: 2-4g
Note: These are estimates. For precise information, you would need to calculate based on the specific ingredients used.
Healthier Holiday Swaps
Want to lighten up this festive favorite without sacrificing too much flavor or that Grinchy look? Here are some ideas:
Reduced Sugar White Chocolate: Look for white chocolate alternatives with less sugar, though the flavor profile might change slightly.
Coconut Milk or Almond Milk: While sweetened condensed milk is key for texture, you could experiment by reducing the amount of sweetened condensed milk and adding a splash of full-fat coconut milk or almond milk (unsweetened) to maintain moisture. This might alter the final texture.
Natural Green Coloring: For a truly natural approach, try using a few drops of spirulina powder (though this can impart a slight flavor) or spinach puree for color. The vibrancy might be less intense.
Portion Control: The simplest “healthier” option is often just cutting the fudge into smaller squares. These rich treats pack a punch!
Serving Suggestions
Grinch Fudge is as versatile as it is festive! Here are a few ways to enjoy and serve it:
Holiday Platters: Arrange it alongside traditional Christmas cookies for a colorful and delightful dessert spread.
Gifting: Package small batches in festive tins or cellophane bags tied with ribbons. It’s a thoughtful, homemade gift that’s always appreciated.
Party Favors: Individual squares, wrapped in festive cellophane, make great take-home favors for holiday parties.
Hot Cocoa Topper: A small square can be a decadent addition to a mug of hot cocoa, melting slightly into a rich, chocolatey swirl.
Common Pitfalls to Avoid
Even simple recipes can have a few tricky spots. Here’s how to steer clear of common mistakes:
Seized White Chocolate: White chocolate can be sensitive. Avoid overheating it, and ensure no water droplets get into the mixture, as this can cause it to become grainy or seize up.
Not Stirring Constantly: When melting the base, continuous stirring is crucial to prevent scorching and ensure an even melt.
Food Coloring Issues: Using liquid food coloring can sometimes dilute the fudge. Gel or powder food colors are best for vibrant, concentrated color without affecting texture.
Cutting Too Soon: Be patient! Cutting the fudge before it’s fully set will result in a messy, soft blob rather than clean squares.
Storing Your Festive Treats
Proper storage ensures your Grinch Fudge stays delicious for your holiday celebrations.
Room Temperature: Once fully set, Grinch Fudge can be stored in an airtight container at cool room temperature for up to 1 week. Placing parchment paper between layers can prevent sticking.
Refrigeration: For longer storage or in warmer climates, it can be kept in the refrigerator in an airtight container for up to 2 weeks. The texture will be firmer when cold. Bring to room temperature for a softer bite.
Freezing: Yes, you can freeze Grinch Fudge! Wrap individual pieces or the whole slab tightly in plastic wrap, then in foil. Freeze for up to 2-3 months. Thaw overnight in the refrigerator before serving.
Frequently Asked Questions
***Is Grinch Fudge difficult to make?*** Nope! This recipe is famously easy, relying on melting and mixing rather than complex candy-making techniques. It’s perfect for beginners and kids to help with.
***Can I use milk chocolate or dark chocolate instead of white chocolate?*** While you could technically melt other chocolates, the base of traditional Grinch Fudge is white chocolate. Switching would fundamentally change the flavor and color, and it might not set the same way.
***My fudge is too soft. What happened?*** This usually means it wasn’t chilled long enough, or the ratio of ingredients was slightly off. Ensure it’s completely firm before cutting. Refrigeration for longer periods can sometimes help firm it up.
***Can I make this dairy-free?*** Yes, if you use a good quality dairy-free white chocolate and a dairy-free sweetened condensed milk alternative (like coconut or oat-based). Ensure your butter substitute is also dairy-free.
***How do I get the Grinch-like green color?*** Gel food coloring is your best friend here. Start with a bright green gel color and add more until you achieve your desired shade that screams Grinch!
Ready to add some Whoville magic to your holidays? This Grinch Fudge is a foolproof, fun, and incredibly delicious way to celebrate the season. Don’t let the opportunity for festive cheer pass you by! Print this recipe, gather your ingredients, and get ready to create a treat that will have everyone smiling. Happy baking, and Merry Grinch-mas!
A festive and easy holiday treat, Grinch Fudge features creamy white chocolate, vibrant green coloring, and red heart sprinkles. It’s a perfect dessert for gifting, parties, or simply enjoying with loved ones. Ready in just minutes with no baking required!
Ingredients
Scale
3 cupshigh-quality white chocolate chips
1(14 oz) can condensed milk
Green food coloring
25red heart sprinkles
Instructions
Line the bottom and sides of an 8×8-inch baking pan withparchment paper.
Combine white chocolate chips and condensed milk in a mediumsaucepan. Stir slowly over medium to low heat until melted and smooth. Avoid vigorous stirring to prevent air pockets.
Add a few drops of green food coloring and mix until the color is evenly incorporated. Adjust the intensity by adding more drops if desired.
Pour the mixture into the prepared pan, smoothing the surface evenly.
Decorate with red heart sprinkles, placing them approximately 1½ inches apart.
Chill in the refrigerator for at least 2 hours until set.
Once firm, remove from the pan, cut into squares, and serve
Notes
Store in an airtight container for up to two weeks in the refrigerator or freeze for up to three months. Thaw frozen fudge in the refrigerator before serving.
For amicrowavemethod, melt the white chocolate chips and condensed milk in amicrowave-safe bowl. Heat on high for 90 seconds, stirring every 30 seconds.
Stir gently to avoid air pockets, which can affect the texture of the finished fudge.
Are you searching for the ultimate mini dessert that will wow your guests without any fuss? If you’re looking for small, sweet treats that pack a flavor punch, you’re in the right place! These Lemon Raspberry Swirl Cheesecake Cups are the answer to your dessert dreams. Each bite-sized cup delivers a creamy, tangy lemon cheesecake perfectly complemented by a vibrant, sweet raspberry swirl. They are unbelievably easy to make, making them ideal for parties, special occasions, or simply when you need a delightful pick-me-up. Seriously, they’re so good, you’ll want to save this recipe and keep it handy for any dessert craving. Get ready to fall in love with these little swirls of happiness! 🍰💛😍✨🍴🍋
Ingredients That Sing
The magic of these miniature cheesecakes lies in the harmony of simple, high-quality ingredients. Here’s what you’ll need:
For the Graham Cracker Crust:
1 ½ cups graham cracker crumbs (about 10-12 full sheets) – the sandy texture is key for our base!
¼ cup granulated sugar – just enough to sweeten the crumbly foundation.
6 tablespoons unsalted butter, melted – binds everything together into a delightful, pressable crust.
For the Lemon Cheesecake Filling:
16 oz cream cheese, softened to room temperature – the heart of our creamy delight. Make sure it’s truly soft for a smooth batter!
⅔ cup granulated sugar – balances the tang of lemon and cream cheese beautifully.
2 large eggs, at room temperature – they provide structure and richness.
1 teaspoon vanilla extract – a classic flavor enhancer that rounds out the cheesecake.
2 tablespoons fresh lemon juice – for that zesty, vibrant lemon flavor that defines this cheesecake.
1 tablespoon lemon zest (from about 1-2 lemons) – intensifies the citrusy aroma and taste.
For the Raspberry Swirl:
1 cup fresh or frozen raspberries – their sweet-tart burst creates mesmerizing swirls.
1 tablespoon granulated sugar (optional, depending on raspberry sweetness) – to help them break down and create a beautiful sauce.
1 teaspoon lemon juice (optional) – brightens the raspberry flavor.
Substitutions & Notes:
Crust: If you don’t have graham crackers, digestive biscuits or even vanilla wafers can work. For a gluten-free option, use gluten-free graham crackers or a nut-based crust.
Butter: A dairy-free butter substitute can be used for the crust.
Raspberries: If fresh raspberries aren’t available, frozen ones are perfectly fine and often more budget-friendly.
Sweetness: Adjust sugar in both the crust and filling to your personal preference.
Timing is Everything
These delightful cheesecake cups are designed for ease, but require a little patience for chilling. Here’s a breakdown:
Prep time: 25 minutes
Cook time: 20-25 minutes
Chill time: Minimum 2 hours
Total time: Approximately 2 hours 45 minutes (plus chilling)
Compared to a full-sized cheesecake which can take 1.5 hours to bake and often requires a water bath, these mini versions bake much faster and are much simpler to manage. The chilling time is crucial for that perfect, firm texture.
Step-by-Step Instructions
Let’s get baking! Follow these simple steps to create your own batch of Lemon Raspberry Swirl Cheesecake Cups.
Step 1: Prep the Crust
First things first, let’s get those delightful bases ready. Preheat your oven to 325°F (160°C). Line a standard muffin tin with paper liners or silicone muffin cups. In a medium bowl, combine the graham cracker crumbs and ¼ cup of sugar. Pour in the melted butter and stir until the crumbs are evenly moistened, like wet sand. Spoon about 1.5 tablespoons of this mixture into each muffin cup and press down firmly with the bottom of a glass or your fingers to create an even, compact crust. You want a solid base that won’t crumble when you bite into it!
Step 2: Make the Cheesecake Base
Now for the creamy, dreamy filling! In a large bowl, beat the softened cream cheese with the ⅔ cup of sugar using an electric mixer on medium speed until it’s completely smooth and free of lumps. Scrape down the sides of the bowl as needed. Beat in the eggs one at a time, mixing just until each is incorporated. Don’t overmix at this stage! Stir in the vanilla extract, fresh lemon juice, and lemon zest until just combined. The batter should be smooth, creamy, and fragrant with lemon. Again, avoid overmixing, as this can lead to cracks.
Step 3: Prepare the Raspberry Swirl
Time to add that beautiful, fruity contrast! In a small saucepan or microwave-safe bowl, combine the raspberries, 1 tablespoon of sugar (if using), and 1 teaspoon of lemon juice (if using). Cook over medium-low heat or microwave in short bursts, stirring occasionally, until the raspberries have broken down and the mixture has thickened slightly into a sauce-like consistency. You can also lightly mash the raspberries with a fork as they cook. Let this raspberry mixture cool slightly while you move on to the next step.
Step 4: Assemble and Swirl
Let’s bring it all together! Spoon the lemon cheesecake batter evenly over the crusts in the muffin tin, filling each cup about two-thirds full. Now for the fun part! Dollop about 1-2 teaspoons of the slightly cooled raspberry mixture onto the top of each cheesecake cup. Using a toothpick or a skewer, gently swirl the raspberry sauce into the cheesecake batter. Don’t over-swirl; you want distinct ribbons of raspberry, not a fully blended pink mixture. A few elegant swirls are all you need for that beautiful marbled effect.
Step 5: Bake to Perfection
Pop your muffin tin into the preheated oven. Bake for 20-25 minutes, or until the edges are set and the centers are almost set but still have a slight wobble. They shouldn’t be liquidy, but they shouldn’t be completely firm either – they will continue to set as they cool. Be careful not to overbake, as this can result in a dry texture. Keep an eye on them, especially towards the end of the baking time.
Step 6: Chill and Enjoy
Patience is a virtue, especially when it comes to cheesecake! Once baked, let the cheesecake cups cool in the muffin tin on a wire rack for about 15-20 minutes. Then, carefully remove them from the tin and place them on the wire rack to cool completely to room temperature. Once at room temperature, cover the muffin tin or transfer the cups to an airtight container and refrigerate for at least 2 hours, or until fully chilled and firm. This chilling time is crucial for achieving the perfect cheesecake texture. Once chilled, they are ready to be served and devoured!
Nutritional Snapshot
Please note that nutritional information is an estimate and can vary based on specific ingredients and portion sizes. This is a general guide per cheesecake cup, assuming 12 cups per recipe:
Calories: Approx. 250-300 kcal
Fat: Approx. 15-20g
Saturated Fat: Approx. 8-10g
Carbohydrates: Approx. 25-30g
Sugar: Approx. 18-22g
Protein: Approx. 4-5g
Sodium: Approx. 100-150mg
Healthier Swaps Without Sacrificing Flavor
Looking for ways to lighten up these decadent treats? You can make some smart substitutions:
Crust: Use whole wheat graham crackers or even a base made from crushed almonds or oats for added fiber. Reduce the sugar in the crust slightly.
Cream Cheese: Use a reduced-fat cream cheese or a blend of cream cheese and Greek yogurt for a protein boost and lower fat content.
Sweeteners: Opt for natural sweeteners like maple syrup or honey in moderation, adjusting the liquid content accordingly, or use a sugar substitute suitable for baking.
Raspberry Swirl: Use unsweetened raspberry puree for a naturally lower sugar option.
Serving Suggestions
These mini cheesecakes are incredibly versatile! Serve them chilled straight from the fridge. For an extra touch of elegance, you can garnish them with:
A fresh raspberry or two
A dollop of whipped cream or coconut cream
A sprinkle of lemon zest
A small mint leaf
They are perfect as individual desserts, party favors, or part of a dessert buffet. Their small size makes them ideal for mindful indulgence!
Common Mistakes to Avoid
To ensure your cheesecake cups turn out perfectly every time, be mindful of these common pitfalls:
Overmixing the Batter: This can incorporate too much air, leading to cracking or a spongy texture. Mix until just combined.
Using Cold Cream Cheese: Ensure your cream cheese is properly softened for a silky smooth, lump-free batter.
Overbaking: Overbaked cheesecake becomes dry and rubbery. Remove when the center still has a slight wobble.
Skipping the Chill Time: Cheesecake needs time to set properly. Don’t rush the chilling process!
Aggressive Swirling: Too much swirling can muddy the beautiful contrast between the lemon and raspberry. Keep it light and artistic.
Storing Your Cheesecake Cups
These cheesecake cups are best enjoyed fresh, but they store well in the refrigerator. Keep them in an airtight container to prevent them from drying out or absorbing other odors from the fridge. They will stay delicious for up to 3-4 days.
For longer storage, you can freeze them. Place them in a single layer on a baking sheet until frozen, then transfer to a freezer-safe container or bag. They can be frozen for up to 1-2 months. Thaw them in the refrigerator overnight before serving.
Frequently Asked Questions
***Can I make these in ramekins instead of a muffin tin?***
Yes, absolutely! If you prefer using small ramekins (about 4-6 oz size), prepare them the same way with the crust. You might need to adjust the baking time slightly, so watch for doneness.
***How do I get really neat swirls?***
The key is not to over-swirl. Use a toothpick or skewer and only drag it through the raspberry sauce and cheesecake batter once or twice in a swirling motion. Less is more for distinct patterns.
***Can I use other fruits for the swirl?***
Definitely! Strawberry, blueberry, or even a mixed berry swirl would be delicious. Adjust sweetness as needed based on the fruit.
***My cheesecake cups cracked. What went wrong?***
Cracking is usually caused by overmixing the batter, overbaking, or rapid temperature changes. Ensure cream cheese is soft, eggs are room temperature, mix gently, and let the cheesecakes cool gradually before refrigerating.
Loved this recipe? Share your creations with us on social media using #LemonRaspberryCheesecake and tag us! Your feedback helps us create more delicious content for you!
Conclusion
These Luscious Lemon Raspberry Swirl Cheesecake Cups are a testament to how simple ingredients can create extraordinary desserts. They offer that perfect balance of creamy, tangy, and sweet that cheesecake lovers crave, all in a delightful, bite-sized package. Easy enough for a weeknight treat yet impressive enough for any celebration, this recipe is sure to become a favorite. So, go ahead, whip up a batch and let the vibrant flavors brighten your day!
Hello, lovely readers! Welcome back to our cozy corner of culinary delights. Today, we’re diving into a mouth-watering treat that perfectly balances tangy and sweet flavors. Let’s get ready to create something truly special!
Ingredients
Scale
1 cupgraham cracker crumbs
2 tablespoonssugar
4 tablespoonsmelted butter
16 ozcream cheese, softened
1/2 cupsugar
2eggs
1 teaspoonvanilla extract
1/4 cuplemon juice
1 tablespoonlemon zest
1/4 cupraspberry preserves
Fresh raspberries, for garnish
Lemon slices, for garnish
Whipped cream, for garnish
Instructions
Preheat and Prepare:Preheat your oven to 325°F (163°C). Line a muffin tin with cupcake liners to ensure easy removal of your cheesecakes.
Create the Crust:In a medium bowl, combine the graham cracker crumbs, 2 tablespoons of sugar, and melted butter. Mix until well combined. Press about 1 tablespoon of the mixture into the bottom of each cupcake liner to form the crust.
Mix the Cheesecake Batter:In a large bowl, beat the softened cream cheese and 1/2 cup of sugar until smooth and creamy. Add the eggs one at a time, beating well after each addition. Stir in the vanilla extract, lemon juice, and lemon zest.
Assemble the Cheesecakes:Pour the cream cheese mixture over the crust in each cupcake liner, filling about 2/3 full. Drop small dollops of raspberry preserves on top of each cheesecake and swirl gently with a toothpick to create a beautiful marbled effect.
Bake:Bake the cheesecakes for 18-20 minutes, or until the centers are set. Allow them to cool completely at room temperature, then refrigerate for at least 2 hours before serving.
Garnish and Serve:Before serving, garnish each cheesecake cup with fresh raspberries, lemon slices, and a dollop of whipped cream for an extra touch of elegance.
Notes
Ensure your cream cheese is fully softened to avoid lumps in your cheesecake batter.
For a stronger lemon flavor, add a bit more lemon zest or a touch of lemon extract.
Are you tired of your meals tasting… meh? With an average of 70% of home cooks using pre-made spice blends, it might be time to ask: what if you could effortlessly elevate every dish from ordinary to extraordinary? Discover the power of custom spice blends to transform your cooking from simple sustenance to a flavorful adventure!
Elevate Your Culinary Creations with Homemade Spice Blends
In the world of gastronomy, spices are the unsung heroes. They possess the magical ability to transform bland ingredients into mouthwatering masterpieces. While store-bought spice blends offer convenience, crafting your own unlocks a universe of personalized flavors, fresher aromas, and a deeper understanding of culinary artistry. This guide is your passport to creating incredible spice blends that will redefine your home cooking. We’ll walk you through the process, offer essential tips, and inspire you with ideas for every taste and occasion. Get ready to infuse your kitchen with an intoxicating symphony of aromas and tastes!
The Building Blocks: Understanding Your Spice Arsenal
The beauty of making your own spice blends lies in their versatility and the ability to tailor them to your palate. Here are some common spices that form the foundation of countless delicious blends:
Cumin: Earthy and warm, with a slightly smoky aroma. Essential for many Indian, Mexican, and Middle Eastern dishes. (Substitution: Coriander for a milder, citrusy note, but it won’t replicate the depth.)
Coriander: Citrusy, floral, and slightly sweet. A perfect partner to cumin or a star on its own in lighter dishes. (Substitution: A tiny pinch of lemon zest can offer a hint of its bright profile.)
Paprika (Sweet, Smoked, Hot): Offers color and a range of flavors from sweet and mild to deeply smoky or sp spicy. Crucial for Hungarian and Spanish cuisines, and rubs. (Substitution: A mix of chili powder and a pinch of smoked salt can mimic smoked paprika.)
Turmeric: Vibrant yellow, with a slightly bitter, peppery taste. Known for its health benefits and its role in curries and marinades. (Substitution: Saffron for color, though the flavor profile is entirely different.)
Garlic Powder/Granules: A concentrated, pungent flavor of garlic without the fresh bite. Versatile in rubs, marinades, and seasoning. (Substitution: Finely ground dehydrated garlic for a closer match.)
Onion Powder/Granules: Offers a sweet, savory depth of onion. Bridges flavors in many savory applications. (Substitution: Finely ground dehydrated onion.)
Black Peppercorns: Pungent, spicy, and warming. The backbone of numerous savory dishes globally. (Substitution: White peppercorns for a sharper heat, or pink peppercorns for a milder, fruitier note.)
Chili Powder (various types): The heat and flavor of chili peppers. Use ancho, cayenne, chipotle, or a blend depending on desired heat and smokiness. (Substitution: Flakes of a specific chili for direct heat, or a pinch of cayenne for general warmth.)
Ginger (Ground): Warm, spicy, and slightly sweet. Adds a zesty kick to both sweet and savory dishes. (Substitution: A tiny bit of fresh grated ginger, but it will alter the texture and shelf-life.)
Cinnamon: Warm, sweet, and aromatic. Beyond baking, it adds depth to savory stews, chili, and rubs. (Substitution: A pinch of allspice for a similar warm, sweet profile.)
Oregano: Pungent, slightly bitter, and earthy. Classic in Mediterranean and Mexican cooking. (Substitution: Marjoram for a softer, sweeter herbal note.)
Thyme: Earthy, minty, and slightly floral. Wonderful in roasts, soups, and stews. (Substitution: Rosemary, used sparingly, as it’s more potent.)
Timing and Efficiency: Mastering Your Spice Blends
The beauty of spice blends is their efficiency. Once made, they save you precious time during meal preparation. While the initial “cook” time is zero (as these are not cooked blends), the preparation involves sourcing and mixing, which typically takes around 15-20 minutes. This is significantly faster than measuring out individual spices for each dish. Compared to the average meal preparation time, which can range from 30 to 90 minutes, having spice blends ready is a game-changer. Your total “active” time for making a batch will be around 15-20 minutes, with a shelf life of several months, making it a highly efficient culinary shortcut.
Crafting Your Signature Spice Blends: Step-by-Step
Step 1: Gather Your Spices
Decide on the blend you want to create. For beginners, start with popular combinations like Taco Seasoning, Italian Herb Blend, or a simple All-Purpose Seasoning. Ensure you have all the necessary whole or ground spices, and any salt or sugar if your recipe calls for it. Freshness is key – check expiration dates and opt for whole spices whenever possible, as they retain their flavor longer.
Step 2: Toast Whole Spices (Optional but Recommended)
If you’re using whole spices (like cumin seeds, coriander seeds, peppercorns), toasting them awakens their aromatic oils and deepens their flavor profile. Spread them in a single layer on a dry skillet over medium-low heat. Gently toast, stirring frequently, until fragrant – this usually takes 2-5 minutes. Be careful not to burn them, as this will make them bitter. Let them cool completely before grinding.
Step 3: Grind Spices (If Using Whole)
Once cooled, grind your toasted whole spices using a spice grinder, mortar and pestle, or a clean coffee grinder. Aim for a consistency that suits your preference – some blends are fine, while others can be coarser. If your recipe calls for specific ground spices, skip this step for those ingredients and use them as is. It’s often best to grind spices in small batches for maximum freshness.
Step 4: Combine and Mix
In a clean bowl, combine all your ground and pre-ground spices according to the recipe’s proportions. If your blend includes salt, sugar, or other finely ground ingredients, add them now. Whisk everything together thoroughly to ensure an even distribution of flavors and colors. Gently break up any clumps.
Step 5: Store Your Blends
Transfer your freshly made spice blend into an airtight container, such as a glass jar or a tin. Store it in a cool, dark place, like a pantry or spice cabinet. Avoid storing it near the stove, as heat and moisture can degrade its quality. Label the container clearly with the blend’s name and the date it was made.
Nutritional Snapshot: What’s in Your Blend?
Spice blends are fantastic for adding flavor without significantly increasing calorie count or macronutrients, especially when salt and sugar are used in moderation. The nutritional profile will vary greatly depending on the specific spices and their proportions. For example, a blend heavy in turmeric and cumin will differ from one dominated by cinnamon and cloves.
General Breakdown (per teaspoon, approximate):
Calories: 5-15 kcal
Carbohydrates: 1-3g
Fiber: 0.5-1.5g
Protein: 0-0.5g
Fat: 0-0.5g
Sodium: Varies greatly based on added salt.
Always consider the quantity you use in a dish. While a teaspoon might seem small, it can impact the overall nutritional content if used liberally.
Healthier Alternatives & Flavor-Preserving Swaps
Making your own spice blends gives you complete control over ingredients, making it easy to create healthier versions. Here are some ideas:
Reduce Salt: Significantly cut down on added salt or omit it entirely. You can always add salt to your dish later. Embrace natural saltiness from ingredients like onion and garlic powder.
Limit Sugar: Many store-bought blends contain sugar for balance. For homemade versions, use sweeteners sparingly or opt for naturally sweet spices like cinnamon or a touch of dried orange peel.
Boost Herbs: Incorporate more dried herbs like parsley, basil, or rosemary. They add flavor and beneficial compounds without adding calories.
Embrace Heat: If you enjoy a kick, use chili powders or flakes instead of salt for a flavor boost.
Nutritional Yeast: For a cheesy, umami flavor without dairy or salt, consider adding a teaspoon or two of nutritional yeast to savory blends.
Serving Suggestions to Spark Your Imagination
The possibilities are endless! Here’s how to integrate your custom spice blends:
Rubs: Coat meats (chicken, pork, beef, lamb) before grilling, roasting, or pan-searing.
Marinades: Whisk into olive oil, yogurt, or citrus juice for marinating vegetables or proteins.
Soups & Stews: Stir into broths and simmering dishes for added depth.
Dips & Spreads: Mix into sour cream, yogurt, hummus, or cream cheese for flavorful appetizers.
Roasted Vegetables: Toss with chopped vegetables before roasting for an irresistible aroma and taste.
Seasoning Grains: Sprinkle over cooked rice, quinoa, or pasta.
Egg Dishes: A pinch in scrambled eggs, omelets, or frittatas can transform breakfast.
Common Mistakes to Avoid
To ensure your spice blends reach their full potential, steer clear of these common pitfalls:
Using Stale Spices: Old spices lose their potency and aroma. Always check freshness and replace them every 1-3 years.
Over-Toasting or Burning: This can happen quickly. Toast whole spices over low heat with constant attention.
Uneven Mixing: Ensure all ingredients are thoroughly combined for consistent flavor in every pinch.
Improper Storage: Exposing blends to heat, light, or air will drastically shorten their lifespan and diminish flavor.
Not Tasting and Adjusting: Don’t be afraid to taste your blend (a tiny pinch on your finger) and adjust proportions as needed before storing.
Using Too Much, Too Soon: Start with a smaller amount of your homemade blend and add more if needed. Its flavor might be more intense than you’re used to!
Storing Tips for Maximum Freshness
Proper storage is crucial for maintaining the vibrant flavor and aroma of your homemade spice blends. Follow these tips:
Airtight Containers: Always use sealed jars or tins. Glass is preferred as it doesn’t absorb odors.
Cool, Dark Place: Store away from heat sources like ovens and direct sunlight. A pantry or cabinet is ideal.
Avoid Moisture: Keep spices away from steam and humidity, which can cause clumping and spoilage.
Label Clearly: Include the blend name and date of creation so you know what it is and when it was made.
Consider Whole Form: If you make large batches, consider storing some components whole and grinding them as needed for maximum freshness.
Shelf Life: Ground spice blends typically last 6 months to 2 years, depending on their ingredients and storage. Whole spices last longer.
Frequently Asked Questions (FAQs)
***How long do homemade spice blends last?***
Generally, ground spice blends can last from 6 months to 2 years when stored properly in an airtight container in a cool, dark place. Factors like the specific spices used and their freshness at the time of blending can influence their shelf life. Always check for aroma – if it’s faded, the flavor will be too.
***Can I use pre-ground spices instead of whole spices?***
Yes, you can! However, toasting and grinding whole spices just before making your blend will result in a more vibrant and complex flavor profile. If you’re using pre-ground spices, you can skip the toasting and grinding steps.
***How do I create a balanced spice blend?***
Balance is achieved by combining spices with different flavor profiles: warm, pungent, sweet, herbaceous, and spicy. Start with a base (like cumin or coriander), add aromatics (garlic, onion), then layer in complementary flavors and heat. Taste and adjust as you go. Think about the cuisine you’re aiming for – Mexican blends differ greatly from Indian ones.
***What are some basic spice blends everyone should know?***
Great starter blends include:
All-Purpose Seasoning: A mix of salt, pepper, garlic powder, onion powder, and paprika.
Taco Seasoning: Chili powder, cumin, paprika, garlic powder, onion powder, oregano, and salt.
Italian Herb Blend: Oregano, basil, thyme, rosemary, and marjoram.
Curry Powder: A complex blend, often including coriander, cumin, turmeric, fenugreek, ginger, and chili.
***Where can I find recipes for specific spice blends?***
Countless websites, cookbooks, and blogs offer detailed recipes for specific spice blends. Sites like Spiceology, The Kitchn, and various culinary blogs are excellent resources. You can also experiment by searching for the flavor profiles of cuisines you enjoy.
Unlock a World of Flavor: Wrap Up and Get Blending!
Creating your own spice blends is a rewarding culinary journey that promises a significant upgrade to your cooking. It’s a simple yet powerful way to infuse your dishes with personalized flavor, explore global tastes, and impress your friends and family. No longer will you be limited by what’s on the shelf. With a few basic spices and a little inspiration, you can craft a pantry full of aromatic, flavorful blends that will make every meal an adventure. So, gather your spices, get creative, and start blending!
This bold and fiery seasoning blend is perfect for adding a kick of heat and flavor to meats, veggies, soups, and more. Customize the spice level to suit your taste, and keep a jar on hand to spice up your favorite dishes anytime!
Ingredients
Scale
2 tablespoonssmoked paprika1 tablespooncayenne pepper (adjust to your spice preference)1 tablespoongarlic powder1 tablespoononion powder1 teaspoonground cumin1 teaspoonground black pepper1 teaspoonchili powder1 teaspoonred pepper flakes1 teaspoondried oregano1 teaspoonsalt (optional, adjust to taste)1 teaspoonbrown sugar (optional, for balance)
1 tablespooncayenne pepper (adjust to your spice preference)1 tablespoongarlic powder1 tablespoononion powder1 teaspoonground cumin1 teaspoonground black pepper1 teaspoonchili powder1 teaspoonred pepper flakes1 teaspoondried oregano1 teaspoonsalt (optional, adjust to taste)1 teaspoonbrown sugar (optional, for balance)
1 tablespoongarlic powder1 tablespoononion powder1 teaspoonground cumin1 teaspoonground black pepper1 teaspoonchili powder1 teaspoonred pepper flakes1 teaspoondried oregano1 teaspoonsalt (optional, adjust to taste)1 teaspoonbrown sugar (optional, for balance)
1 tablespoononion powder1 teaspoonground cumin1 teaspoonground black pepper1 teaspoonchili powder1 teaspoonred pepper flakes1 teaspoondried oregano1 teaspoonsalt (optional, adjust to taste)1 teaspoonbrown sugar (optional, for balance)
1 teaspoonground cumin1 teaspoonground black pepper1 teaspoonchili powder1 teaspoonred pepper flakes1 teaspoondried oregano1 teaspoonsalt (optional, adjust to taste)1 teaspoonbrown sugar (optional, for balance)
1 teaspoonground black pepper1 teaspoonchili powder1 teaspoonred pepper flakes1 teaspoondried oregano1 teaspoonsalt (optional, adjust to taste)1 teaspoonbrown sugar (optional, for balance)
1 teaspoonchili powder1 teaspoonred pepper flakes1 teaspoondried oregano1 teaspoonsalt (optional, adjust to taste)1 teaspoonbrown sugar (optional, for balance)
1 teaspoonred pepper flakes1 teaspoondried oregano1 teaspoonsalt (optional, adjust to taste)1 teaspoonbrown sugar (optional, for balance)
1 teaspoondried oregano1 teaspoonsalt (optional, adjust to taste)1 teaspoonbrown sugar (optional, for balance)
1 teaspoonsalt (optional, adjust to taste)1 teaspoonbrown sugar (optional, for balance)
1 teaspoonbrown sugar (optional, for balance)
Instructions
1️⃣Mix the Seasoning:Combine all the ingredients in a small mixing bowl. Stir thoroughly to ensure the spices are evenly distributed.2️⃣Store the Seasoning:Transfer the seasoning blend into an airtight container, such as a spice jar or small mason jar. Seal tightly to preserve freshness.3️⃣Store Properly:Keep the seasoning in a cool, dark place (like a pantry or spice cabinet) for up to 6 months. Shake the jar before each use to redistribute the spices.
2️⃣Store the Seasoning:Transfer the seasoning blend into an airtight container, such as a spice jar or small mason jar. Seal tightly to preserve freshness.3️⃣Store Properly:Keep the seasoning in a cool, dark place (like a pantry or spice cabinet) for up to 6 months. Shake the jar before each use to redistribute the spices.
3️⃣Store Properly:Keep the seasoning in a cool, dark place (like a pantry or spice cabinet) for up to 6 months. Shake the jar before each use to redistribute the spices.
Notes
Adjustable Heat:Reduce the cayenne or omit red pepper flakes for a milder blend.Uses:Sprinkle on grilled meats, roasted veggies, popcorn, or use as a rub for BBQ and smoked dishes.Make It Smokier:Add a touch of chipotle powder for an extra smoky heat.No Sugar Option:Skip the brown sugar for a pure savory spice mix.
Uses:Sprinkle on grilled meats, roasted veggies, popcorn, or use as a rub for BBQ and smoked dishes.Make It Smokier:Add a touch of chipotle powder for an extra smoky heat.No Sugar Option:Skip the brown sugar for a pure savory spice mix.
Make It Smokier:Add a touch of chipotle powder for an extra smoky heat.No Sugar Option:Skip the brown sugar for a pure savory spice mix.
No Sugar Option:Skip the brown sugar for a pure savory spice mix.
Are you looking for a delightful way to start your day or a perfect treat to accompany your afternoon tea? In a world where quick breakfasts are the norm, did you know that up to 65% of people still enjoy a good baked good in the morning? Fruit breads offer a fantastic balance, bringing natural sweetness and wholesome goodness to your table. Whether you crave the zesty tang of citrus, the deep sweetness of berries, or the comforting warmth of dried fruits, there’s a fruit bread recipe out there to suit every palate and every season. Forget complicated pastries; these recipes are designed for ease and incredible flavor, making them perfect for beginner bakers and seasoned pros alike.
Essential Ingredients for Baking Delicious Fruit Bread
The magic of fruit bread lies in the harmonious blend of simple, yet crucial, ingredients. Each component plays a vital role in creating that perfect texture, moisture, and burst of flavor. Let’s explore what makes a fruit bread truly exceptional:
Flour: The Foundation
All-purpose flour is the standard for most fruit bread recipes, providing the structure. Its balanced protein content creates a tender crumb without being too dense. For a slightly nuttier flavor and added fiber, you can substitute up to half of the all-purpose flour with whole wheat flour. For gluten-free options, a good quality gluten-free all-purpose blend that includes xanthan gum will work wonders.
Sweeteners for That Perfect Bite
While granulated sugar is common, honey, maple syrup, or brown sugar add depth and moisture. Honey offers a floral sweetness, maple syrup a rich, earthy tone, and brown sugar a caramel-like note. A common substitution is to replace half the granulated sugar with one of these liquid sweeteners, slightly reducing the other liquids in the recipe to compensate.
Leavening Agents for a Light Texture
Baking powder and baking soda are your allies in achieving a light, airy crumb. Baking soda requires an acidic ingredient (like buttermilk, yogurt, or fruit juice) to activate, while baking powder is a complete leavening system. Ensure both are fresh for optimal rise. There isn’t a direct substitute for leavening agents, as they are critical for texture.
Fats for Moisture and Richness
Butter provides a rich flavor and tender crumb, while vegetable oil (like canola or sunflower) offers superior moisture and a softer texture. For a dairy-free option, coconut oil (melted) or a neutral-flavored vegetable oil works perfectly. You can often substitute melted butter for oil or vice-versa, 1:1.
Fruits: The Stars of the Show
This is where the fun truly begins! Fresh berries (blueberries, raspberries, strawberries), chopped apples or pears, mashed bananas, or vibrant citrus zest (lemon, orange, lime) are fantastic choices. Dried fruits like cranberries, raisins, apricots, or dates also lend a chewy texture and concentrated sweetness. Aim for about 1 to 1.5 cups of fruit per loaf. For fresh fruit, avoid overmixing to prevent it from bleeding into the batter. For dried fruits, a quick soak in warm water or juice can plump them up beautifully.
Liquids to Bring It All Together
Milk, buttermilk, yogurt, sour cream, or fruit juice provide the necessary moisture. Buttermilk and yogurt add a delightful tang and contribute to a tender crumb. Water or plant-based milks (almond, soy, oat) are also suitable options.
Flavor Enhancers (Optional but Recommended)
A pinch of salt balances sweetness. Spices like cinnamon, nutmeg, or cardamom add warmth. Vanilla extract is a classic enhancer. Nuts like walnuts or pecans add a delightful crunch, and a hint of citrus zest brightens up the overall flavor profile.
Timing is Everything for Perfect Fruit Bread
Prep Time: 15 minutes
Cook Time: 45-60 minutes
Total Time: 60-75 minutes
Compared to an average quick bread recipe which typically takes around 50-65 minutes total, these fruit breads are right in line for a simple, yet rewarding bake. The key is not to rush the baking process, ensuring the center is fully cooked through.
Step-by-Step Guide to Baking Your Masterpiece
Let’s get baking! Follow these simple steps to create a loaf of fruit bread that will have everyone asking for seconds.
Step 1: Preheat and Prepare
Preheat your oven to 350°F (175°C). Grease and flour a standard loaf pan (9×5 inches), or line it with parchment paper for easy removal. This step prevents sticking and ensures a beautiful, evenly baked loaf.
Step 2: Mix the Dry Ingredients
In a large mixing bowl, whisk together your flour, sugar (or other sweetener), baking powder/soda, salt, and any spices like cinnamon or nutmeg. Whisking ensures these dry ingredients are evenly distributed, preventing pockets of leavening agents or salt.
Step 3: Combine Wet Ingredients
In a separate medium bowl, whisk together your eggs, melted butter or oil, milk (or other liquid), vanilla extract, and any citrus zest. Ensure everything is well combined.
Step 4: Gently Combine Wet and Dry
Pour the wet ingredients into the bowl with the dry ingredients. Using a spatula or wooden spoon, mix *just until combined*. Overmixing develops the gluten in the flour, which can lead to a tough, dense bread. A few streaks of flour are okay; they will disappear as you fold in the fruit.
Step 5: Fold in Your Fruits
Gently fold in your chosen fruits (fresh or dried), and any nuts. Toss fresh berries with a tablespoon of the flour mixture before adding to prevent them from sinking to the bottom. Mix just enough to distribute them evenly throughout the batter.
Step 6: Bake to Golden Perfection
Pour the batter into the prepared loaf pan and spread it evenly. Bake for 45-60 minutes, or until a wooden skewer or toothpick inserted into the center comes out clean. If the top starts to brown too quickly, you can loosely tent it with aluminum foil during the last 15-20 minutes of baking.
Step 7: Cool and Enjoy
Let the bread cool in the pan for about 10 minutes, then carefully remove it and place it on a wire rack to cool completely before slicing. This prevents the bottom from becoming soggy and makes for easier slicing.
Nutritional Highlights of Fruit Bread
Calories: Varies significantly based on ingredients, but typically ranges from 150-250 calories per slice.
Carbohydrates: Provides energy, with natural sugars from fruits and starches from flour.
Fiber: Especially when using whole wheat flour or fruits like apples and berries, it contributes valuable dietary fiber.
Vitamins & Minerals: Fruits bring antioxidants, Vitamin C, potassium, and other essential nutrients.
Healthier Alternatives for a Guilt-Free Treat
Making fruit bread healthier doesn’t mean sacrificing flavor. Try these simple swaps:
Flour: Substitute half the all-purpose flour with whole wheat flour or oat flour for increased fiber.
Sweetener: Reduce the overall sugar quantity by 25% and use unsweetened applesauce or mashed banana to provide moisture and natural sweetness.
Fat: Replace half the butter or oil with plain Greek yogurt or unsweetened applesauce (about a 1/4 cup replacement per 1/2 cup fat).
Add-ins: Load up on fresh or dried fruits and consider adding a handful of nuts or seeds for extra fiber and healthy fats.
Serving Creations: Elevate Your Fruit Bread Experience
While delicious on its own, fruit bread can be elevated:
Toasted with Butter: A timeless classic that brings out the aroma.
With Cream Cheese: A delightful contrast, especially with berry or citrus breads.
As French Toast: Thicker slices make for an amazing breakfast or brunch treat.
With a dollop of yogurt or a drizzle of honey.
Common Mistakes to Avoid
Overmixing the batter: This is the most common culprit for dense, tough bread. Mix until just combined.
Not preheating the oven: An oven that isn’t hot enough will result in a pale, flat loaf.
Opening the oven door too early: This can cause the bread to sink in the middle. Wait until at least two-thirds of the baking time has passed before checking.
Cutting while too hot: Allowing the bread to cool properly ensures the internal structure has set, preventing a gummy texture.
Storing Your Delicious Fruit Bread
Once completely cooled, fruit bread can be stored at room temperature in an airtight container or wrapped tightly in plastic wrap for 2-3 days. For longer storage, it freezes beautifully. Wrap slices or the whole loaf tightly in plastic wrap, then in aluminum foil, and freeze for up to 3 months. Thaw at room temperature or gently reheat.
Frequently Asked Questions About Fruit Bread
***What is the best fruit to use in fruit bread?***
The “best” fruit is subjective and depends on your preference! Berries, apples, bananas, and citrus fruits are popular choices for fresh fruit. For dried fruits, cranberries, raisins, and dates are excellent. Consider balancing tart and sweet fruits. Tossing fresh berries with a little flour helps prevent them from sinking.
***My fruit bread is too dense. What did I do wrong?***
The most common reason for dense fruit bread is overmixing the batter. Mix the wet and dry ingredients only until they are just combined. A few streaks of flour remaining are perfectly fine.
***Can I make fruit bread gluten-free?***
Yes! Use a good quality gluten-free all-purpose flour blend that contains xanthan gum. You may need to adjust the liquid slightly, as gluten-free flours can absorb moisture differently.
***How long does fruit bread last?***
Stored properly at room temperature in an airtight container, fruit bread typically lasts for 2-3 days. For longer storage, freeze it.
Ready to bake up a storm? We’ve shared some fantastic fruit bread recipes and tips to get you started. Which fruit combination will you try first? Let us know in the comments below!
Thisfruit breadis soft, slightly spiced, and packed with a mix of delicious dried fruits. It’s a perfect treat for breakfast, snacks, or even as a base for decadent French toast. The recipe is simple, no-knead, and full of warm spices that complement the sweetness of the dried fruits.
In a large bowl, mix warm water, sugar, salt, and yeast until dissolved.Stir in melted butter.Gradually add flour to the liquid mixture, stirring until combined into a shaggy dough with no dry patches.2️⃣First Proofing:Cover the bowl with plastic wrap and let the dough rise in a warm environment for 1 hour, or until doubled in size. If the room is cooler, allow up to 1 1/2 hours.3️⃣Incorporate the Fruit Mix:Mix the dried fruits and spices in a separate bowl.Gently fold the fruit mix into the risen dough, deflating it slightly in the process. Avoid overworking to prevent the dough from becoming too elastic.4️⃣Shape the Dough:Lightly press the dough into a rectangle. The width should match the length of your loaf pan.Roll the rectangle into a log and place it seam-side down in a greased loaf pan. Cover with plastic wrap.5️⃣Final Rising:Let the dough rise again in a warm place for 90 minutes, until it has risen significantly.6️⃣Egg Wash and Bake:Preheat the oven to 350°F (175°C). Brush the dough with a lightly beaten egg for a glossy finish.Bake for 34-35 minutes. Reduce the temperature to 325°F (160°C) and bake for an additional 4-5 minutes.If the top browns too quickly, tent it with foil after 25 minutes.7️⃣Cool the Bread:Remove the bread from the oven and let it sit in the pan for 2-3 minutes. Then demold it to prevent sogginess.Cool completely for 2-3 hours to allow the residual baking to finish.8️⃣Serve and Enjoy:Slice the bread once fully cooled. It’s delicious as-is, toasted, or turned into French toast
Stir in melted butter.Gradually add flour to the liquid mixture, stirring until combined into a shaggy dough with no dry patches.2️⃣First Proofing:Cover the bowl with plastic wrap and let the dough rise in a warm environment for 1 hour, or until doubled in size. If the room is cooler, allow up to 1 1/2 hours.3️⃣Incorporate the Fruit Mix:Mix the dried fruits and spices in a separate bowl.Gently fold the fruit mix into the risen dough, deflating it slightly in the process. Avoid overworking to prevent the dough from becoming too elastic.4️⃣Shape the Dough:Lightly press the dough into a rectangle. The width should match the length of your loaf pan.Roll the rectangle into a log and place it seam-side down in a greased loaf pan. Cover with plastic wrap.5️⃣Final Rising:Let the dough rise again in a warm place for 90 minutes, until it has risen significantly.6️⃣Egg Wash and Bake:Preheat the oven to 350°F (175°C). Brush the dough with a lightly beaten egg for a glossy finish.Bake for 34-35 minutes. Reduce the temperature to 325°F (160°C) and bake for an additional 4-5 minutes.If the top browns too quickly, tent it with foil after 25 minutes.7️⃣Cool the Bread:Remove the bread from the oven and let it sit in the pan for 2-3 minutes. Then demold it to prevent sogginess.Cool completely for 2-3 hours to allow the residual baking to finish.8️⃣Serve and Enjoy:Slice the bread once fully cooled. It’s delicious as-is, toasted, or turned into French toast
Gradually add flour to the liquid mixture, stirring until combined into a shaggy dough with no dry patches.
2️⃣First Proofing:Cover the bowl with plastic wrap and let the dough rise in a warm environment for 1 hour, or until doubled in size. If the room is cooler, allow up to 1 1/2 hours.3️⃣Incorporate the Fruit Mix:Mix the dried fruits and spices in a separate bowl.Gently fold the fruit mix into the risen dough, deflating it slightly in the process. Avoid overworking to prevent the dough from becoming too elastic.4️⃣Shape the Dough:Lightly press the dough into a rectangle. The width should match the length of your loaf pan.Roll the rectangle into a log and place it seam-side down in a greased loaf pan. Cover with plastic wrap.5️⃣Final Rising:Let the dough rise again in a warm place for 90 minutes, until it has risen significantly.6️⃣Egg Wash and Bake:Preheat the oven to 350°F (175°C). Brush the dough with a lightly beaten egg for a glossy finish.Bake for 34-35 minutes. Reduce the temperature to 325°F (160°C) and bake for an additional 4-5 minutes.If the top browns too quickly, tent it with foil after 25 minutes.7️⃣Cool the Bread:Remove the bread from the oven and let it sit in the pan for 2-3 minutes. Then demold it to prevent sogginess.Cool completely for 2-3 hours to allow the residual baking to finish.8️⃣Serve and Enjoy:Slice the bread once fully cooled. It’s delicious as-is, toasted, or turned into French toast
Cover the bowl with plastic wrap and let the dough rise in a warm environment for 1 hour, or until doubled in size. If the room is cooler, allow up to 1 1/2 hours.3️⃣Incorporate the Fruit Mix:Mix the dried fruits and spices in a separate bowl.Gently fold the fruit mix into the risen dough, deflating it slightly in the process. Avoid overworking to prevent the dough from becoming too elastic.4️⃣Shape the Dough:Lightly press the dough into a rectangle. The width should match the length of your loaf pan.Roll the rectangle into a log and place it seam-side down in a greased loaf pan. Cover with plastic wrap.5️⃣Final Rising:Let the dough rise again in a warm place for 90 minutes, until it has risen significantly.6️⃣Egg Wash and Bake:Preheat the oven to 350°F (175°C). Brush the dough with a lightly beaten egg for a glossy finish.Bake for 34-35 minutes. Reduce the temperature to 325°F (160°C) and bake for an additional 4-5 minutes.If the top browns too quickly, tent it with foil after 25 minutes.7️⃣Cool the Bread:Remove the bread from the oven and let it sit in the pan for 2-3 minutes. Then demold it to prevent sogginess.Cool completely for 2-3 hours to allow the residual baking to finish.8️⃣Serve and Enjoy:Slice the bread once fully cooled. It’s delicious as-is, toasted, or turned into French toast
3️⃣Incorporate the Fruit Mix:
Mix the dried fruits and spices in a separate bowl.Gently fold the fruit mix into the risen dough, deflating it slightly in the process. Avoid overworking to prevent the dough from becoming too elastic.4️⃣Shape the Dough:Lightly press the dough into a rectangle. The width should match the length of your loaf pan.Roll the rectangle into a log and place it seam-side down in a greased loaf pan. Cover with plastic wrap.5️⃣Final Rising:Let the dough rise again in a warm place for 90 minutes, until it has risen significantly.6️⃣Egg Wash and Bake:Preheat the oven to 350°F (175°C). Brush the dough with a lightly beaten egg for a glossy finish.Bake for 34-35 minutes. Reduce the temperature to 325°F (160°C) and bake for an additional 4-5 minutes.If the top browns too quickly, tent it with foil after 25 minutes.7️⃣Cool the Bread:Remove the bread from the oven and let it sit in the pan for 2-3 minutes. Then demold it to prevent sogginess.Cool completely for 2-3 hours to allow the residual baking to finish.8️⃣Serve and Enjoy:Slice the bread once fully cooled. It’s delicious as-is, toasted, or turned into French toast
Gently fold the fruit mix into the risen dough, deflating it slightly in the process. Avoid overworking to prevent the dough from becoming too elastic.4️⃣Shape the Dough:Lightly press the dough into a rectangle. The width should match the length of your loaf pan.Roll the rectangle into a log and place it seam-side down in a greased loaf pan. Cover with plastic wrap.5️⃣Final Rising:Let the dough rise again in a warm place for 90 minutes, until it has risen significantly.6️⃣Egg Wash and Bake:Preheat the oven to 350°F (175°C). Brush the dough with a lightly beaten egg for a glossy finish.Bake for 34-35 minutes. Reduce the temperature to 325°F (160°C) and bake for an additional 4-5 minutes.If the top browns too quickly, tent it with foil after 25 minutes.7️⃣Cool the Bread:Remove the bread from the oven and let it sit in the pan for 2-3 minutes. Then demold it to prevent sogginess.Cool completely for 2-3 hours to allow the residual baking to finish.8️⃣Serve and Enjoy:Slice the bread once fully cooled. It’s delicious as-is, toasted, or turned into French toast
4️⃣Shape the Dough:
Lightly press the dough into a rectangle. The width should match the length of your loaf pan.Roll the rectangle into a log and place it seam-side down in a greased loaf pan. Cover with plastic wrap.5️⃣Final Rising:Let the dough rise again in a warm place for 90 minutes, until it has risen significantly.6️⃣Egg Wash and Bake:Preheat the oven to 350°F (175°C). Brush the dough with a lightly beaten egg for a glossy finish.Bake for 34-35 minutes. Reduce the temperature to 325°F (160°C) and bake for an additional 4-5 minutes.If the top browns too quickly, tent it with foil after 25 minutes.7️⃣Cool the Bread:Remove the bread from the oven and let it sit in the pan for 2-3 minutes. Then demold it to prevent sogginess.Cool completely for 2-3 hours to allow the residual baking to finish.8️⃣Serve and Enjoy:Slice the bread once fully cooled. It’s delicious as-is, toasted, or turned into French toast
Roll the rectangle into a log and place it seam-side down in a greased loaf pan. Cover with plastic wrap.5️⃣Final Rising:Let the dough rise again in a warm place for 90 minutes, until it has risen significantly.6️⃣Egg Wash and Bake:Preheat the oven to 350°F (175°C). Brush the dough with a lightly beaten egg for a glossy finish.Bake for 34-35 minutes. Reduce the temperature to 325°F (160°C) and bake for an additional 4-5 minutes.If the top browns too quickly, tent it with foil after 25 minutes.7️⃣Cool the Bread:Remove the bread from the oven and let it sit in the pan for 2-3 minutes. Then demold it to prevent sogginess.Cool completely for 2-3 hours to allow the residual baking to finish.8️⃣Serve and Enjoy:Slice the bread once fully cooled. It’s delicious as-is, toasted, or turned into French toast
5️⃣Final Rising:
Let the dough rise again in a warm place for 90 minutes, until it has risen significantly.6️⃣Egg Wash and Bake:Preheat the oven to 350°F (175°C). Brush the dough with a lightly beaten egg for a glossy finish.Bake for 34-35 minutes. Reduce the temperature to 325°F (160°C) and bake for an additional 4-5 minutes.If the top browns too quickly, tent it with foil after 25 minutes.7️⃣Cool the Bread:Remove the bread from the oven and let it sit in the pan for 2-3 minutes. Then demold it to prevent sogginess.Cool completely for 2-3 hours to allow the residual baking to finish.8️⃣Serve and Enjoy:Slice the bread once fully cooled. It’s delicious as-is, toasted, or turned into French toast
6️⃣Egg Wash and Bake:Preheat the oven to 350°F (175°C). Brush the dough with a lightly beaten egg for a glossy finish.Bake for 34-35 minutes. Reduce the temperature to 325°F (160°C) and bake for an additional 4-5 minutes.If the top browns too quickly, tent it with foil after 25 minutes.7️⃣Cool the Bread:Remove the bread from the oven and let it sit in the pan for 2-3 minutes. Then demold it to prevent sogginess.Cool completely for 2-3 hours to allow the residual baking to finish.8️⃣Serve and Enjoy:Slice the bread once fully cooled. It’s delicious as-is, toasted, or turned into French toast
Preheat the oven to 350°F (175°C). Brush the dough with a lightly beaten egg for a glossy finish.
Bake for 34-35 minutes. Reduce the temperature to 325°F (160°C) and bake for an additional 4-5 minutes.If the top browns too quickly, tent it with foil after 25 minutes.7️⃣Cool the Bread:Remove the bread from the oven and let it sit in the pan for 2-3 minutes. Then demold it to prevent sogginess.Cool completely for 2-3 hours to allow the residual baking to finish.8️⃣Serve and Enjoy:Slice the bread once fully cooled. It’s delicious as-is, toasted, or turned into French toast
If the top browns too quickly, tent it with foil after 25 minutes.7️⃣Cool the Bread:Remove the bread from the oven and let it sit in the pan for 2-3 minutes. Then demold it to prevent sogginess.Cool completely for 2-3 hours to allow the residual baking to finish.8️⃣Serve and Enjoy:Slice the bread once fully cooled. It’s delicious as-is, toasted, or turned into French toast
7️⃣Cool the Bread:
Remove the bread from the oven and let it sit in the pan for 2-3 minutes. Then demold it to prevent sogginess.Cool completely for 2-3 hours to allow the residual baking to finish.8️⃣Serve and Enjoy:Slice the bread once fully cooled. It’s delicious as-is, toasted, or turned into French toast
Cool completely for 2-3 hours to allow the residual baking to finish.8️⃣Serve and Enjoy:Slice the bread once fully cooled. It’s delicious as-is, toasted, or turned into French toast
8️⃣Serve and Enjoy:
Slice the bread once fully cooled. It’s delicious as-is, toasted, or turned into French toast
Notes
Adjust the fruit mix to your liking—swap in dried apricots, figs, or dates.Smearing the top with butter after baking will soften the crust.Store in an airtight container for up to 4 days or freeze for longer shelf life.
Smearing the top with butter after baking will soften the crust.Store in an airtight container for up to 4 days or freeze for longer shelf life.
Store in an airtight container for up to 4 days or freeze for longer shelf life.
Are you searching for a breakfast or brunch dish that screams luxury and decadent flavor? Did you know that over 70% of home cooks aspire to recreate restaurant-quality desserts at home, and a dish like Crème Brûlée French Toast is the perfect starting point? If you’re dreaming of a breakfast that melds the beloved crackly, caramelized sugar top of crème brûlée with the comforting, pillowy texture of French toast, you’ve landed in the right place. This recipe transforms ordinary bread into an extraordinary indulgence, featuring a rich, creamy custard soak and a glorious, caramelized sugar crust that shatters with every bite. It’s perfect for weekend mornings, special occasions, or simply when you want to treat yourself to something truly unforgettable.
Ingredients You’ll Need
The magic of Crème Brûlée French Toast lies in the quality of its ingredients. Think rich, eggy, and a touch of sweetness, all coming together to create a symphony of textures and flavors.
Brioche Loaf or Challah: 1 large loaf (about 1 pound), sliced about 1-inch thick. The richness and slight sweetness of brioche are ideal, but challah offers a similar eggy, soft crumb that soaks up the custard beautifully. For a slightly less sweet option, a sturdy day-old French baguette can work, though it will absorb less custard.
Eggs: 6 large. These are the backbone of our custard, providing richness and binding everything together.
Heavy Cream: 2 cups. The key to a luscious, decadent custard. It’s what gives French toast its signature creamy mouthfeel. You can substitute with half-and-half for a lighter version, but the richness will be slightly diminished.
Granulated Sugar: 1/2 cup, plus more for topping. This sweetness is essential for the custard and the ultimate caramelization. The topping sugar needs to be coarse enough to form a beautiful, crackly crust.
Vanilla Extract: 2 teaspoons. Pure vanilla extract is crucial for that classic, comforting flavor that complements the richness perfectly.
Ground Cinnamon: 1 teaspoon. A whisper of warm spice enhances the overall flavor profile without overpowering the custardy sweetness. Nutmeg or a pinch of cardamom are interesting alternatives.
Salt: A pinch. Balances the sweetness and enhances all the other flavors.
Butter: For greasing the pan and for cooking. Unsalted butter is preferred to control the saltiness.
Mastering the Timing
Achieving the perfect Crème Brûlée French Toast is all about patience and precise timing. Unlike a quick weeknight meal, this recipe rewards a little foresight.
Prep Time: 15 minutes
Soaking Time: 30 minutes to 2 hours (or overnight)
Cook Time: 10-15 minutes per batch
Total Time: Approximately 1 hour 25 minutes to 3 hours+ (including soaking)
Compared to average French toast recipes that might take 20-30 minutes total, this Crème Brûlée version requires additional soaking time to ensure the bread becomes tender and infused with flavor. The caramelization step also adds a bit more time, but the payoff is well worth it!
Crafting the Perfect Crème Brûlée French Toast
Let’s get cooking! Follow these simple steps to create a breakfast masterpiece.
Step 1: Prepare the Brioche for Perfection
Start by slicing your brioche loaf into thick, 1-inch pieces. If your loaf is very fresh and soft, it’s best to let the slices sit out for about an hour or even toast them lightly to give them a bit more structure. This prevents them from becoming too soggy when they soak in the custard.
Step 2: Whisk the Custard Magic
In a wide, shallow dish (large enough to fit a slice of bread without overcrowding), whisk together the eggs, heavy cream, 1/2 cup granulated sugar, vanilla extract, cinnamon, and salt. Whisk vigorously until the mixture is smooth and well combined. You want an even consistency with no streaks of egg white.
Step 3: Soak and Infuse
Carefully place the brioche slices into the custard mixture. Let them soak for at least 30 minutes on each side, or up to 2 hours at room temperature. For the best results, cover the dish and refrigerate overnight. The longer soak allows the bread to fully absorb the luxurious custard, resulting in a tender interior.
Step 4: The Golden Sear
Heat a lightly buttered griddle or non-stick skillet over medium heat. Carefully lift a soaked brioche slice from the custard, letting any excess drip back into the dish. Place it on the hot griddle and cook for about 3-4 minutes per side, until golden brown and cooked through. Don’t overcrowd the pan; cook in batches if necessary. Remove the cooked French toast to a plate.
Step 5: The Caramel Kiss
This is where the magic happens! Once your French toast is cooked and arranged on a baking sheet (or individual oven-safe plates if you prefer), generously sprinkle the tops with additional granulated sugar. Using a kitchen torch, carefully melt and caramelize the sugar until it forms a beautiful, glassy, golden-brown crust. Move the torch around to ensure even caramelization and avoid burning. If you don’t have a torch, you can *carefully* place them under a hot broiler for a minute or two, watching VERY closely to prevent burning.
Nutritional Highlights
While this is a decadent treat, here’s a general idea of its nutritional profile. Specific values can vary based on exact ingredients and portion sizes.
Calories: Approximately 400-550 per serving (depending on bread, amount of cream/sugar).
Fat: Rich in healthy fats from cream and eggs.
Carbohydrates: Primarily from the bread and sugar.
Protein: Good source from eggs and dairy.
Healthier Alternatives Without Compromising Flavor
You can make this beloved dish a little lighter without sacrificing its deliciousness. The key is smart swaps:
Bread Choice: Opt for whole wheat brioche or even thick-sliced whole grain bread for added fiber.
Dairy: Substitute half of the heavy cream with whole milk or unsweetened almond milk. For an even lighter touch, use half-and-half.
Sweetener: Reduce the sugar in the custard slightly, or use a natural sweetener like maple syrup (though this will alter the caramelization). For the topping, a sugar-free caramel syrup drizzle can offer a similar effect.
Portion Control: Serve with a generous side of fresh berries to add natural sweetness and volume.
Serving Suggestions to Elevate Your Meal
Elevate your Crème Brûlée French Toast with these delightful accompaniments:
Fresh Berries: A classic pairing that adds a burst of freshness and color. Strawberries, blueberries, raspberries, and blackberries are delightful.
Maple Syrup: A drizzle of pure maple syrup enhances the sweetness.
Whipped Cream: A dollop of lightly sweetened whipped cream adds extra indulgence.
Powdered Sugar: A light dusting of powdered sugar can add an elegant finish.
Aromatic Coffee or Tea: Pair with your favorite hot beverage for a complete breakfast experience.
Common Mistakes to Avoid
Steer clear of these pitfalls to ensure Crème Brûlée French Toast success:
Using Stale Bread: While day-old bread is good, bread that is too stale won’t absorb the custard properly. Use a relatively fresh, but not overly soft, loaf.
Over-Soaking: Soggy bread is unappealing. While a good soak is important, too long can make the bread fall apart.
Pan Too Hot: Cooking the French toast on a skillet that’s too hot will burn the outside before the inside is cooked through. Medium heat is key.
Burning the Caramel: Be vigilant when caramelizing the sugar. It can go from perfectly golden to burnt in seconds!
Storing Your Crème Brûlée French Toast
Leftovers are rare, but if you do have any:
Before Caramelizing: Store un-caramelized French toast in an airtight container in the refrigerator for up to 2 days. Reheat gently in a skillet or oven before caramelizing.
After Caramelizing: The caramelized sugar topping does not store well and will likely become soft and sticky. It’s best to caramelize just before serving.
Why You’ll Adore This Crème Brûlée French Toast
This Best Crème Brûlée French Toast recipe is more than just a meal; it’s an experience. It delivers the satisfying crunch of caramelized sugar followed by a tender, custardy interior. It’s the perfect way to elevate your breakfast or brunch, turning any morning into a special occasion. Ready to impress yourself and your loved ones with this divine creation? Give this recipe a try, and prepare to fall in love with French toast all over again.
Frequently Asked Questions
***What kind of bread is best for Crème Brûlée French Toast?***
Brioche or Challah are highly recommended due to their rich, eggy, and slightly sweet nature, which allows them to absorb the custard beautifully and become incredibly tender. Day-old French baguette can also work if you prefer a slightly less rich option.
***Can I make the custard mixture ahead of time?***
Yes, you can whisk together the custard mixture and store it in an airtight container in the refrigerator for up to 24 hours. Just be sure to bring it closer to room temperature before soaking the bread.
***How do I get a perfect caramel crust without a kitchen torch?***
If you don’t have a kitchen torch, you can carefully place the sprinkled French toast under a hot broiler. Keep a very close eye on it, as it can burn quickly, and rotate the baking sheet for even caramelization.
***Can I freeze Crème Brûlée French Toast?***
It’s best to avoid freezing after the caramelization step, as the sugar crust won’t hold up well. You can freeze the un-caramelized French toast. Place individual slices on a baking sheet to freeze, then transfer them to a freezer-safe bag. Reheat thoroughly before caramelizing.
***What if my brioche is too soft?***
If your brioche is very fresh and soft, you can lightly toast the slices in a toaster or oven for a few minutes before soaking. This will give them a bit more structure to prevent them from falling apart in the custard.
Indulge in this rich and custardy overnight French toast, finished with a caramelized sugar topping that gives it a crème brûlée flair. Perfect for a decadent breakfast or brunch!
Ingredients
Scale
1loaf French bread, sliced 1-inch thick5large eggs1 cuphalf-and-half1 cupwhole milk1 teaspoonvanilla extract2/3 cupgranulated sugar (plus extra for topping)1/4 teaspoonground cinnamon1/4 teaspoonground nutmeg1/4 cupunsalted butter, cut into small piecesMaple syrup, for serving
5large eggs1 cuphalf-and-half1 cupwhole milk1 teaspoonvanilla extract2/3 cupgranulated sugar (plus extra for topping)1/4 teaspoonground cinnamon1/4 teaspoonground nutmeg1/4 cupunsalted butter, cut into small piecesMaple syrup, for serving
1 cuphalf-and-half1 cupwhole milk1 teaspoonvanilla extract2/3 cupgranulated sugar (plus extra for topping)1/4 teaspoonground cinnamon1/4 teaspoonground nutmeg1/4 cupunsalted butter, cut into small piecesMaple syrup, for serving
1 cupwhole milk1 teaspoonvanilla extract2/3 cupgranulated sugar (plus extra for topping)1/4 teaspoonground cinnamon1/4 teaspoonground nutmeg1/4 cupunsalted butter, cut into small piecesMaple syrup, for serving
1 teaspoonvanilla extract2/3 cupgranulated sugar (plus extra for topping)1/4 teaspoonground cinnamon1/4 teaspoonground nutmeg1/4 cupunsalted butter, cut into small piecesMaple syrup, for serving
2/3 cupgranulated sugar (plus extra for topping)1/4 teaspoonground cinnamon1/4 teaspoonground nutmeg1/4 cupunsalted butter, cut into small piecesMaple syrup, for serving
1/4 teaspoonground cinnamon1/4 teaspoonground nutmeg1/4 cupunsalted butter, cut into small piecesMaple syrup, for serving
1/4 teaspoonground nutmeg1/4 cupunsalted butter, cut into small piecesMaple syrup, for serving
1/4 cupunsalted butter, cut into small piecesMaple syrup, for serving
Maple syrup, for serving
Instructions
1️⃣Prepare the baking dish:Generously butter a 9×13-inch baking dish. Arrange the French bread slices in a single layer, slightly overlapping if necessary.
2️⃣Make the custard:In a large mixing bowl, whisk together the eggs, half-and-half, milk, vanilla extract, sugar, cinnamon, and nutmeg until smooth and well-combined.3️⃣Soak the bread:Pour the custard mixture evenly over the bread slices, ensuring every slice is thoroughly coated. Use a spatula or your hands to gently press the bread into the custard.4️⃣Refrigerate overnight:Cover the dish tightly with plastic wrap and refrigerate overnight to allow the bread to absorb the custard.5️⃣Bake the French toast:Preheat your oven to 350°F (175°C). Remove the baking dish from the refrigerator and discard the plastic wrap. Dot the bread with small pieces of butter and sprinkle a light layer of sugar over the top. Bake for 35-40 minutes, or until the French toast is puffed and golden.6️⃣Caramelize the sugar topping:Remove the dish from the oven and let it cool slightly. Sprinkle an even layer of granulated sugar on top of the bread. Use a kitchen torch or the broiler setting on your oven to caramelize the sugar until it is golden and crisp.7️⃣Serve:Allow the French toast to cool for a few minutes before serving. Drizzle with maple syrup and enjoy!
3️⃣Soak the bread:Pour the custard mixture evenly over the bread slices, ensuring every slice is thoroughly coated. Use a spatula or your hands to gently press the bread into the custard.4️⃣Refrigerate overnight:Cover the dish tightly with plastic wrap and refrigerate overnight to allow the bread to absorb the custard.5️⃣Bake the French toast:Preheat your oven to 350°F (175°C). Remove the baking dish from the refrigerator and discard the plastic wrap. Dot the bread with small pieces of butter and sprinkle a light layer of sugar over the top. Bake for 35-40 minutes, or until the French toast is puffed and golden.6️⃣Caramelize the sugar topping:Remove the dish from the oven and let it cool slightly. Sprinkle an even layer of granulated sugar on top of the bread. Use a kitchen torch or the broiler setting on your oven to caramelize the sugar until it is golden and crisp.7️⃣Serve:Allow the French toast to cool for a few minutes before serving. Drizzle with maple syrup and enjoy!
4️⃣Refrigerate overnight:Cover the dish tightly with plastic wrap and refrigerate overnight to allow the bread to absorb the custard.
5️⃣Bake the French toast:Preheat your oven to 350°F (175°C). Remove the baking dish from the refrigerator and discard the plastic wrap. Dot the bread with small pieces of butter and sprinkle a light layer of sugar over the top. Bake for 35-40 minutes, or until the French toast is puffed and golden.6️⃣Caramelize the sugar topping:Remove the dish from the oven and let it cool slightly. Sprinkle an even layer of granulated sugar on top of the bread. Use a kitchen torch or the broiler setting on your oven to caramelize the sugar until it is golden and crisp.7️⃣Serve:Allow the French toast to cool for a few minutes before serving. Drizzle with maple syrup and enjoy!
6️⃣Caramelize the sugar topping:Remove the dish from the oven and let it cool slightly. Sprinkle an even layer of granulated sugar on top of the bread. Use a kitchen torch or the broiler setting on your oven to caramelize the sugar until it is golden and crisp.7️⃣Serve:Allow the French toast to cool for a few minutes before serving. Drizzle with maple syrup and enjoy!
7️⃣Serve:Allow the French toast to cool for a few minutes before serving. Drizzle with maple syrup and enjoy!
Notes
For a deeper flavor, substitute brown sugar for some or all of the granulated sugar in the custard.Leftovers can be stored in the refrigerator for up to 2 days and reheated in the oven.Customize the dish with fresh fruit or a dollop of whipped cream when serving.
Leftovers can be stored in the refrigerator for up to 2 days and reheated in the oven.Customize the dish with fresh fruit or a dollop of whipped cream when serving.
Customize the dish with fresh fruit or a dollop of whipped cream when serving.
“`
Hi I'm Emy
I’m passionate about sharing a diverse collection of sweet and savory recipes that I’ve meticulously tested and perfected in my own kitchen.