Best Coconut Flour Cookies – Easy Gluten-Free Recipe

best-coconut-flour-cookies-gluten-free

“`html

Introduction

There’s something magical about biting into a warm, chewy cookie that melts in your mouth—especially when it’s gluten-free and packed with wholesome ingredients. If you’ve been searching for a treat that satisfies your sweet tooth without the guilt, this Irresistible Coconut Flour Cookies Recipe is your answer. Whether you’re baking for a cozy night in or surprising your family with a healthier dessert, these cookies deliver rich flavor and a tender texture that everyone will love. Plus, they’re incredibly easy to make, so you can whip up a batch anytime cravings strike.

About This Recipe

The Irresistible Coconut Flour Cookies Recipe is a game-changer for anyone who adores desserts but wants to keep them nourishing. Unlike traditional cookies, these use coconut flour as the star ingredient, which not only adds a subtle tropical sweetness but also keeps them grain-free and low-carb. Moreover, they’re perfect for those with dietary restrictions, as they naturally cater to gluten-free and paleo lifestyles. If you’ve ever tried our Almond Flour Pancakes, you’ll appreciate how simple ingredient swaps can transform classic favorites into healthier alternatives.

What makes this recipe stand out is its versatility. You can customize it with dark chocolate chips, shredded coconut, or even a drizzle of nut butter for extra indulgence. Additionally, the cookies bake quickly, so you won’t spend hours in the kitchen. For more inspiration on gluten-free baking, check out our guide to Gluten-Free Baking Tips. Whether you’re a seasoned baker or a beginner, this recipe fits seamlessly into Brek Cakes’ mission of making wholesome eating delicious and accessible.

Why I Love This Recipe

I’ll never forget the first time I made these Irresistible Coconut Flour Cookies. My niece, who has celiac disease, visited and couldn’t believe she could enjoy cookies again without feeling sick. Seeing her light up with every bite reminded me why I love creating recipes that bring joy without compromise. These cookies have since become a staple in my kitchen—whether I’m sharing them with friends or savoring one with my afternoon coffee. They’re proof that eating well doesn’t mean sacrificing flavor, and that’s a win in my book.

“`

Health and Nutrition

Why it’s good for your body

Irresistible Coconut Flour Cookies Recipe packs a nutritious punch while satisfying your sweet tooth. First, coconut flour delivers a hefty dose of fiber, which supports digestion and keeps you feeling full longer. Additionally, this gluten-free alternative helps reduce bloating and inflammation for those with sensitivities. Moreover, the recipe includes healthy fats from coconut oil, which promote heart health and steady energy levels.

Unlike traditional cookies, Irresistible Coconut Flour Cookies Recipe skips refined sugars. Instead, natural sweeteners like honey or maple syrup add just enough sweetness without spiking blood sugar. Furthermore, coconut flour provides plant-based protein, making these treats a smarter choice for sustained energy. Whether you need a midday pick-me-up or a post-workout snack, these cookies fuel your body the right way.

Finally, Irresistible Coconut Flour Cookies Recipe boasts antioxidants from coconut and optional add-ins like dark chocolate. These compounds fight oxidative stress and support overall wellness. With every bite, you indulge guilt-free while nourishing your body. Truly, these cookies prove that healthy eating can still be delicious.

How it fits in a healthy lifestyle

Irresistible Coconut Flour Cookies Recipe fits seamlessly into a balanced diet. If you follow a gluten-free lifestyle, these cookies offer a safe and tasty option without sacrificing flavor. They also align with heart-healthy eating, thanks to coconut oil’s beneficial fats. For those watching sugar intake, the natural sweeteners keep cravings in check.

Pair these cookies with a protein-rich snack like our almond flour pancakes for a satisfying breakfast or enjoy them alongside a cup of herbal tea for a mindful afternoon break. If you’re meal prepping, bake a batch and store them for quick, wholesome snacks throughout the week. For more gluten-free inspiration, check out our gluten-free baking guide to explore other nutrient-packed recipes. With Irresistible Coconut Flour Cookies Recipe, you can enjoy treats that truly support your health goals.
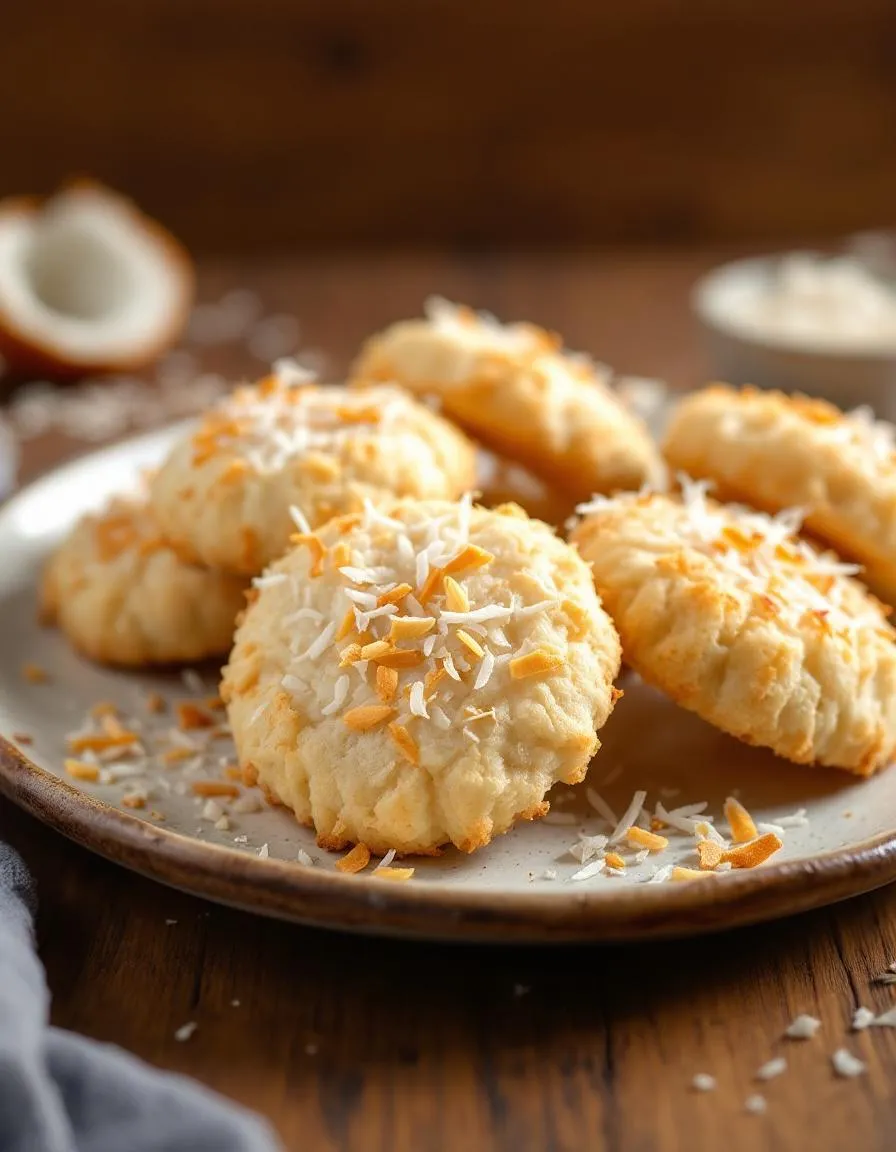
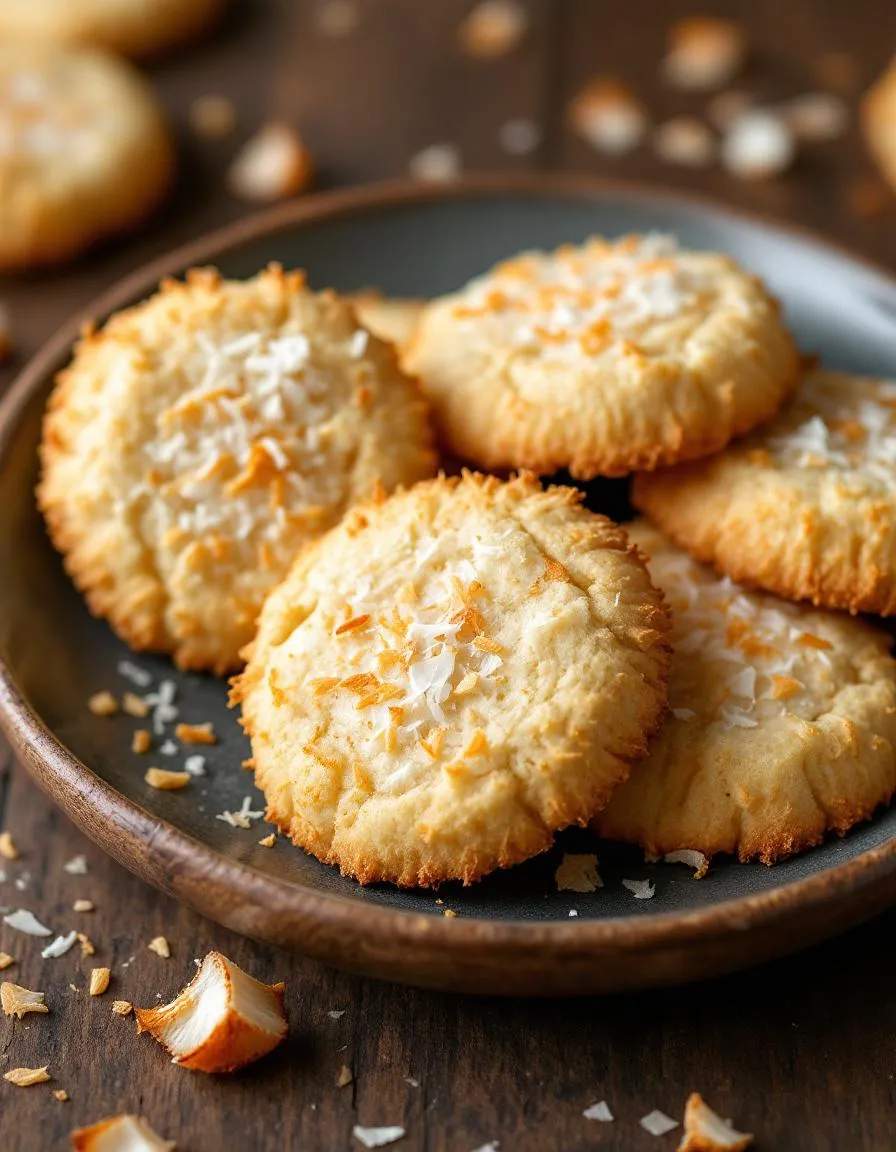
Print
clock clock iconcutlery cutlery iconflag flag iconfolder folder iconinstagram instagram iconpinterest pinterest iconfacebook facebook iconprint print iconsquares squares iconheart heart iconheart solid heart solid icon

Irresistible Coconut Flour Cookies


  • Author: Chef Emy

Description

Soft, chewy coconut flour cookies with a hint of vanilla and a touch of sweetness.
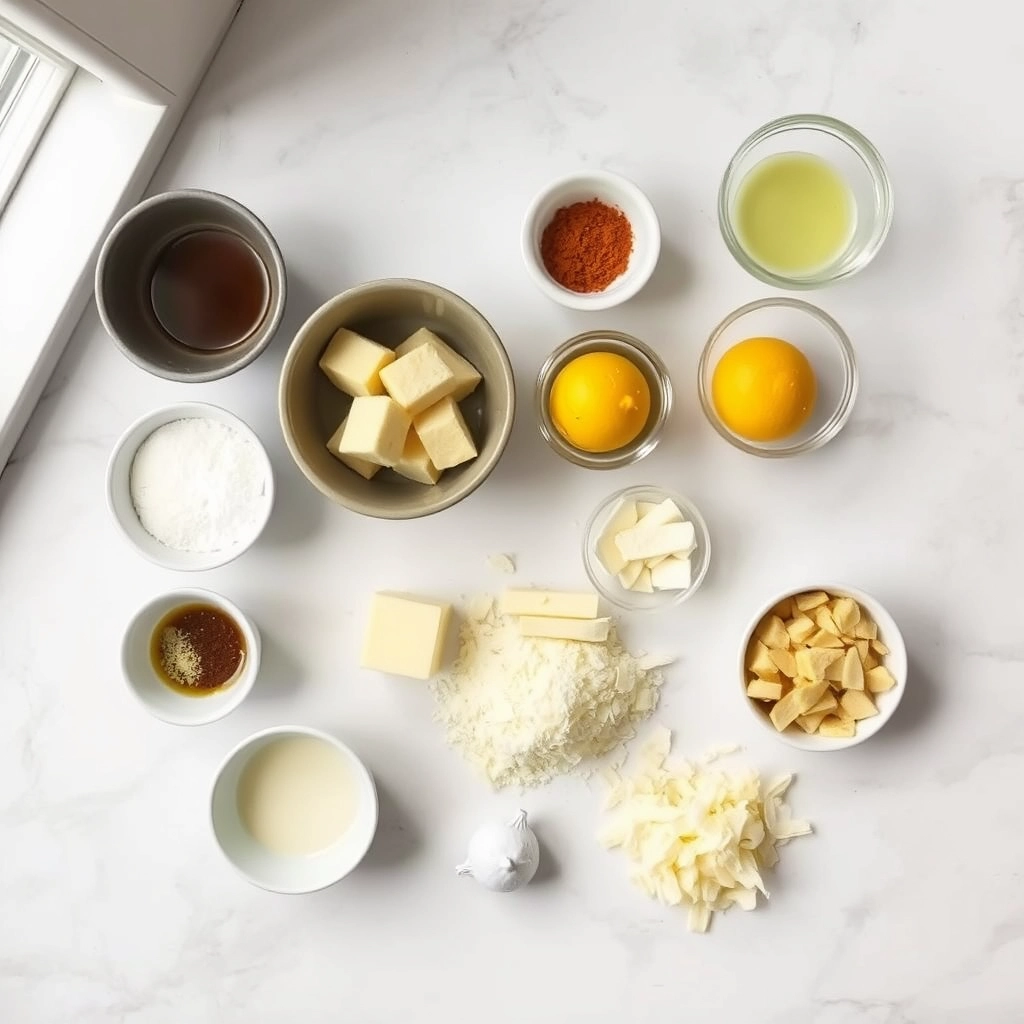
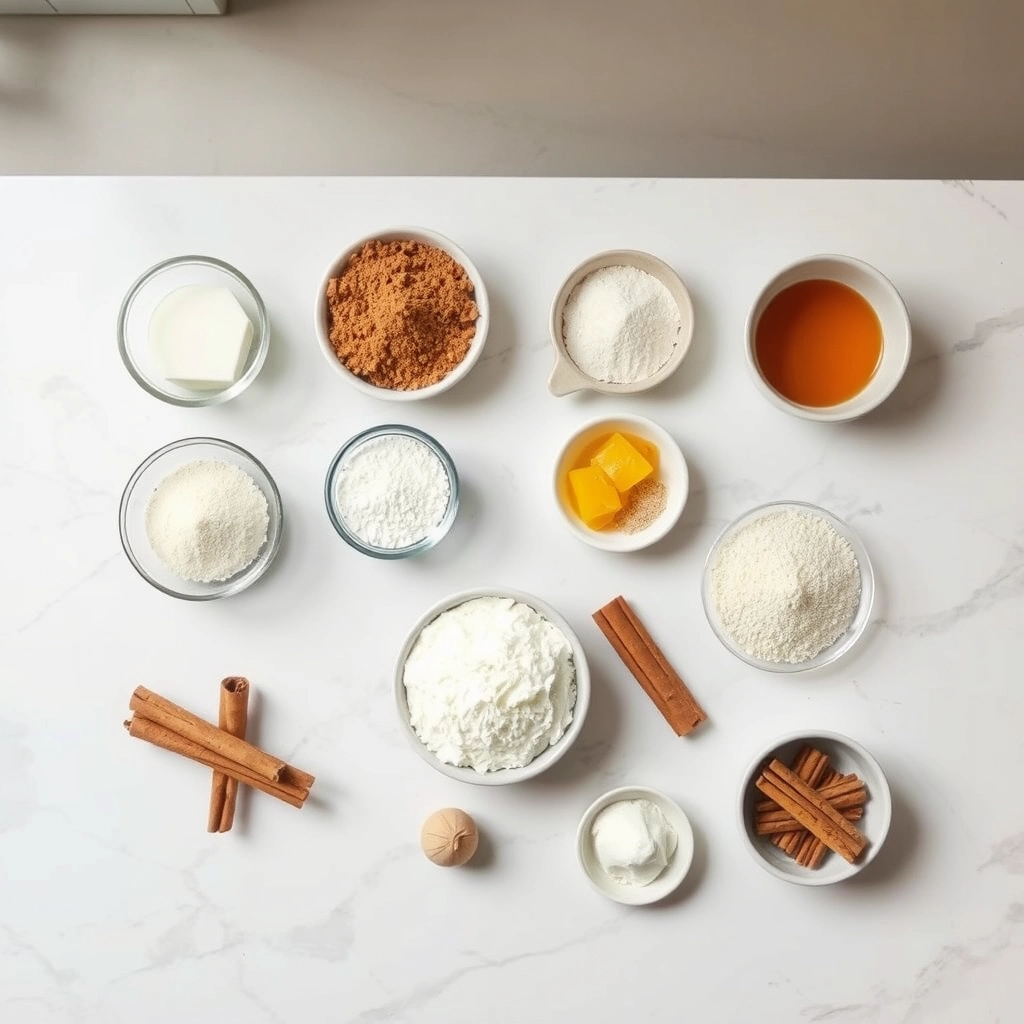
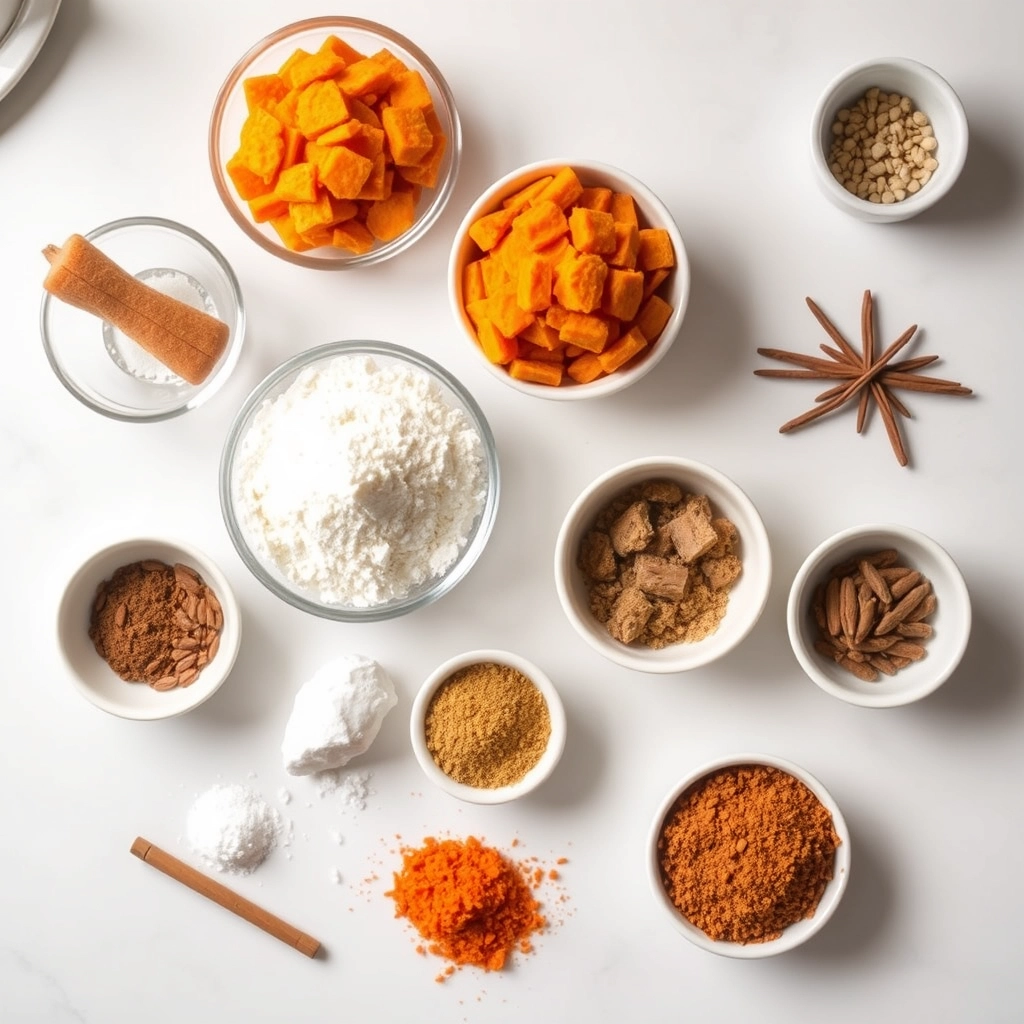
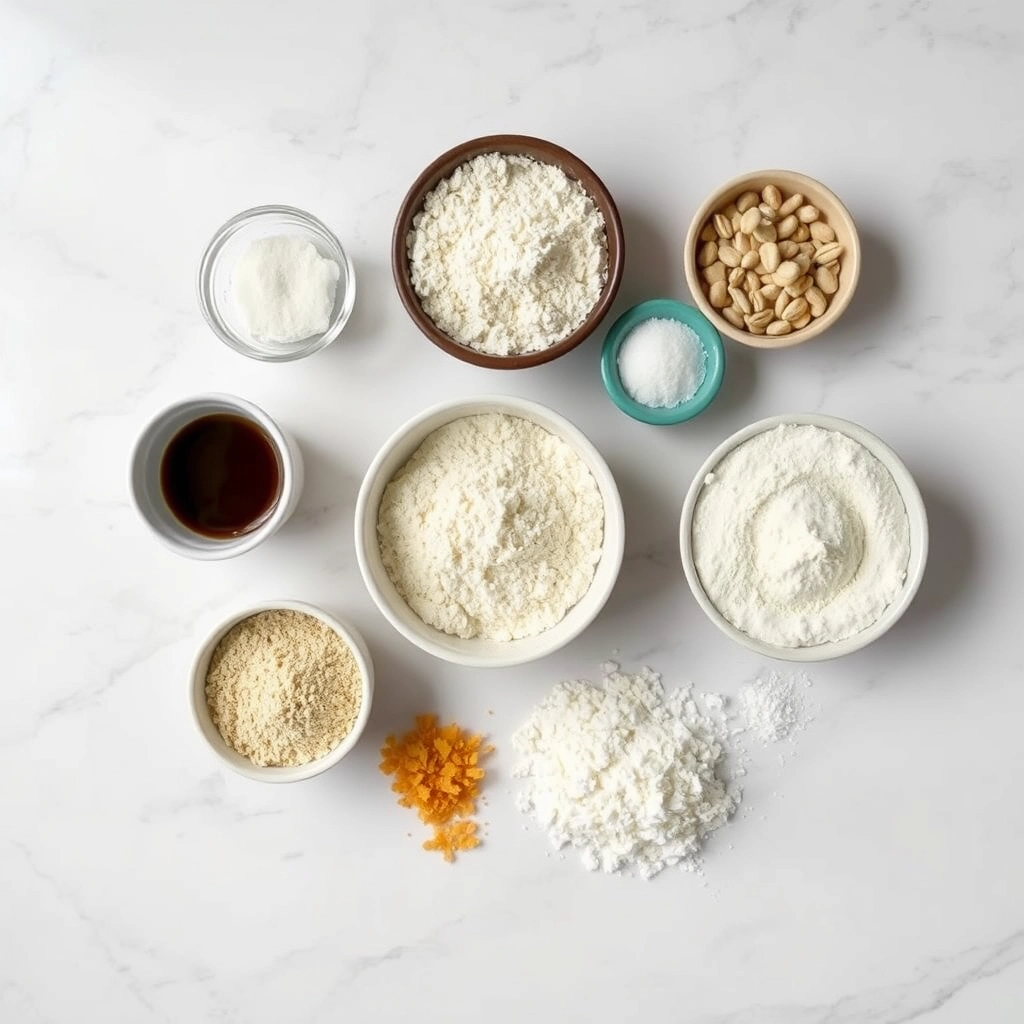

Ingredients

Scale

For the Crust:

  • 1/2 cup coconut flour
  • 1/4 cup coconut oil, melted
  • 1/4 cup honey or maple syrup
  • 2 large eggs
  • 1 tsp vanilla extract
  • 1/4 tsp baking soda
  • 1/4 tsp salt
  • 1/2 cup shredded coconut (optional)

Instructions

1. Prepare the Crust:

  1. Preheat oven to 350°F (175°C) and line a baking sheet with parchment paper.
  2. In a bowl, whisk together coconut flour, baking soda, and salt.
  3. In another bowl, mix melted coconut oil, honey, eggs, and vanilla extract until smooth.
  4. Combine wet and dry ingredients, stirring until a thick dough forms. Fold in shredded coconut if using.
  5. Scoop tablespoon-sized portions of dough onto the baking sheet and flatten slightly.
  6. Bake for 12-15 minutes or until edges are golden. Let cool before serving.

Notes

You can customize the seasonings to taste.

How to Prepare This Dish

Steps and time-saving tips

Start by preheating your oven to 350°F and lining a baking sheet with parchment paper. While the oven heats, whisk together the coconut flour, baking soda, and salt in a medium bowl. In a separate bowl, cream the softened butter with sweetener until fluffy, then beat in the eggs and vanilla. Gradually fold the dry ingredients into the wet mixture until just combined—overmixing can make the cookies dense. If the dough feels too sticky, chill it for 10 minutes for easier handling. Scoop tablespoon-sized portions onto the baking sheet, spacing them about two inches apart. Flatten each slightly with your palm or a fork since coconut flour cookies don’t spread much. Bake for 10-12 minutes until the edges turn golden. Let them cool on the sheet for five minutes before transferring to a wire rack. For a time-saving hack, double the batch and freeze half the dough for later. Just thaw it in the fridge overnight before baking.

Mistakes I’ve made and learned from

My first attempt at these Irresistible Coconut Flour Cookies Recipe turned into crumbly disasters because I didn’t measure the flour correctly. Coconut flour absorbs liquid like a sponge, so packing it into the measuring cup leads to dry dough. Now, I lightly spoon it into the cup and level it off—just like I do with my almond flour pancakes. Another lesson? Don’t skip the chilling step if the dough feels wet. Once, I rushed baking sticky dough, and the cookies spread into thin, brittle wafers. Patience pays off, as I learned from perfecting my keto chocolate chip cookies. Now, I always keep extra coconut flour on hand to adjust consistency, and I set a timer to avoid overbaking.

Cultural Connection and Variations

Where this recipe comes from

Irresistible Coconut Flour Cookies Recipe traces its roots to tropical regions where coconut flour has been a staple for centuries. In places like the Caribbean and Southeast Asia, locals grind dried coconut meat into flour, creating a naturally gluten-free and nutrient-rich ingredient. Families often pass down their own versions of these cookies, adding spices like cardamom or nutmeg for extra warmth. Meanwhile, in Latin America, bakers might mix in dulce de leche or guava paste for a sweet twist.

My grandmother, who grew up in the Philippines, made her Irresistible Coconut Flour Cookies Recipe with a hint of pandan extract, giving them a vibrant green hue and floral aroma. Over time, I adapted her recipe to include dark chocolate chips, blending tradition with my own cravings. Whether you enjoy them crispy or chewy, these cookies carry stories from kitchens around the world.

How it fits in today’s cooking

Today, Irresistible Coconut Flour Cookies Recipe shines as a go-to treat for health-conscious bakers and gluten-free eaters. Many modern cooks swap traditional sugars for alternatives like maple syrup or coconut sugar, keeping the sweetness without the guilt. Others pair these cookies with a cup of homemade chai tea latte for a cozy afternoon pick-me-up.

During the holidays, families often bake batches of these cookies, decorating them with festive drizzles or edible flowers. They also fit perfectly into meal prep routines, offering a quick snack between busy weekdays. For more inspiration, check out our guide to gluten-free baking tips. No matter how you enjoy them, these cookies bridge the gap between tradition and modern tastes.

Taste and Texture

What makes it delicious

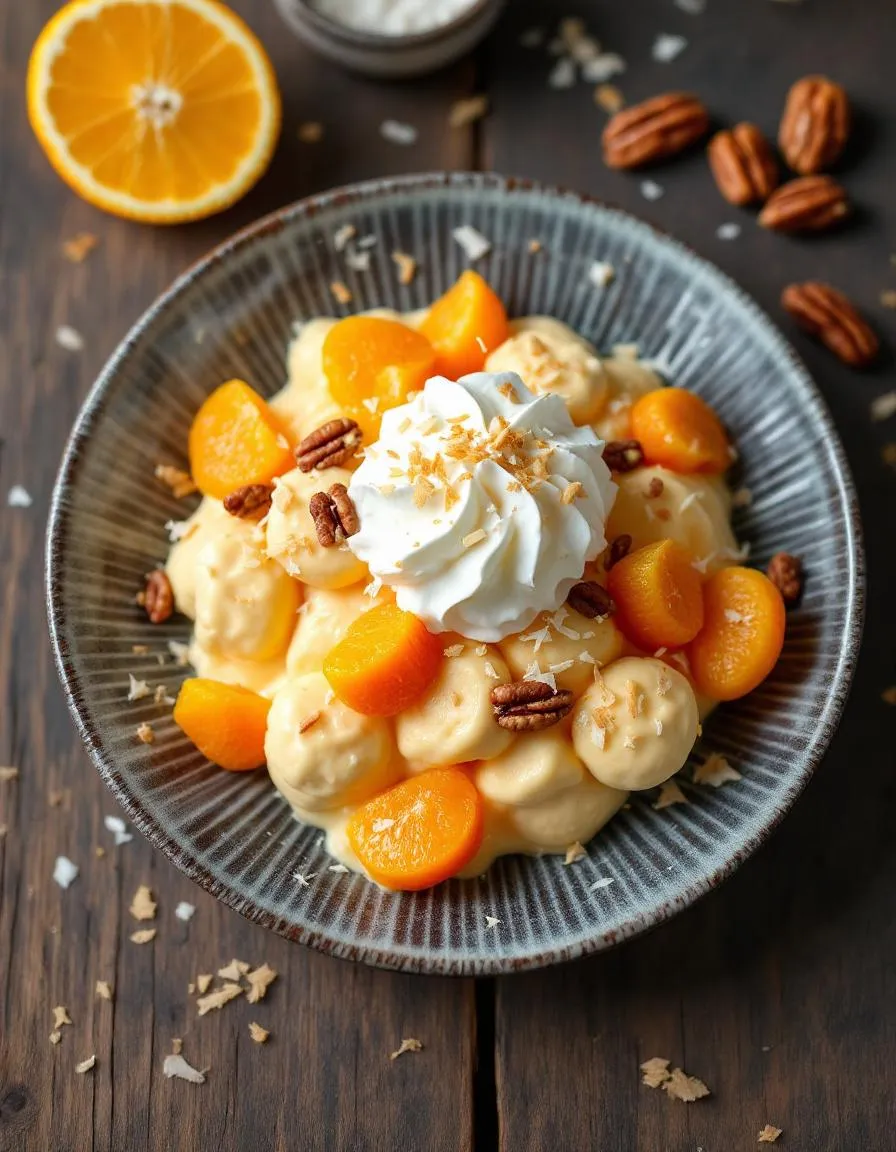
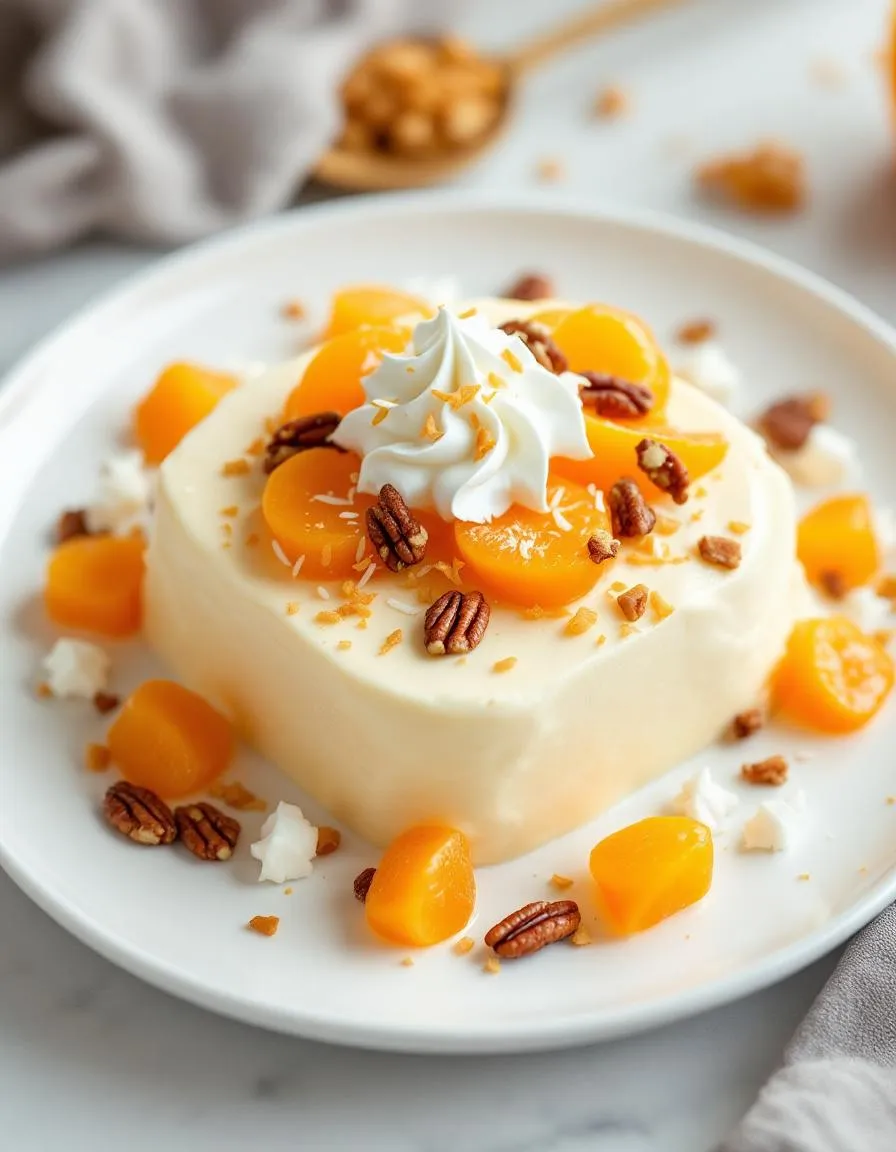
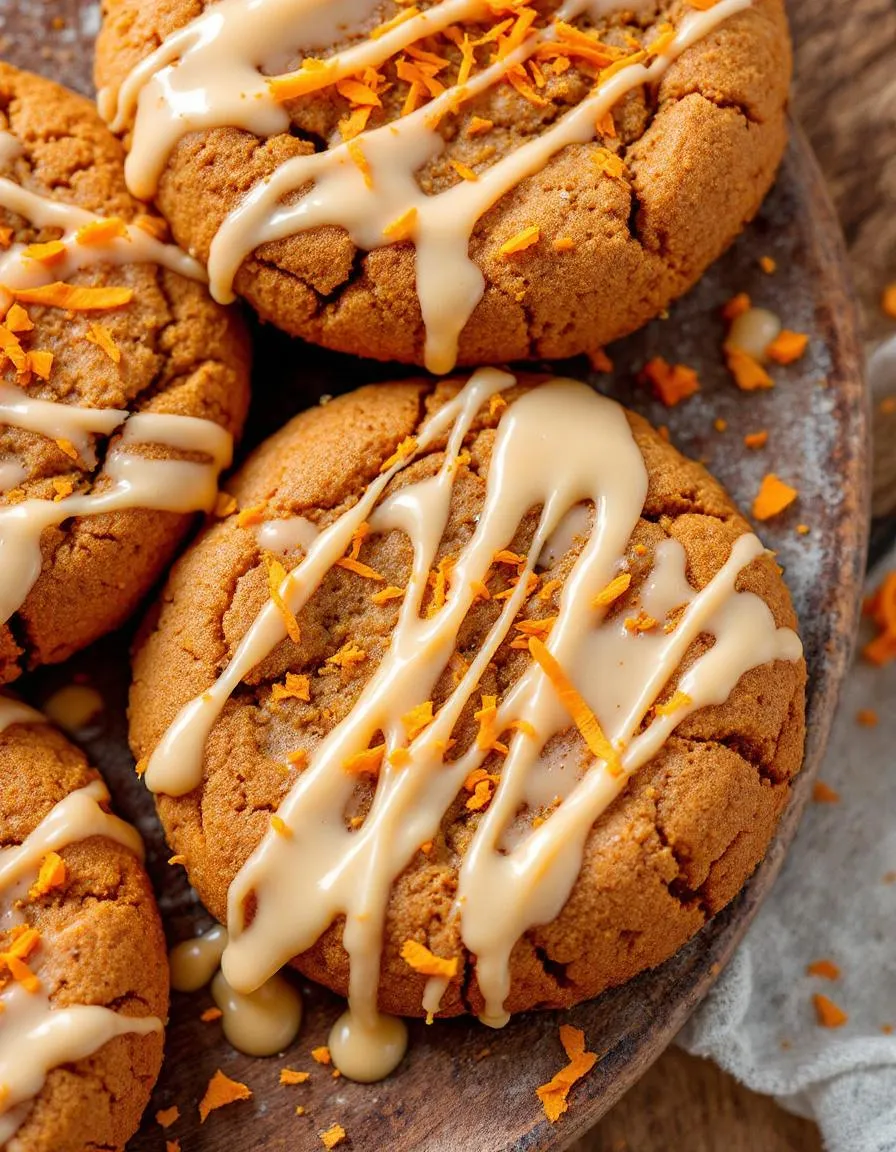
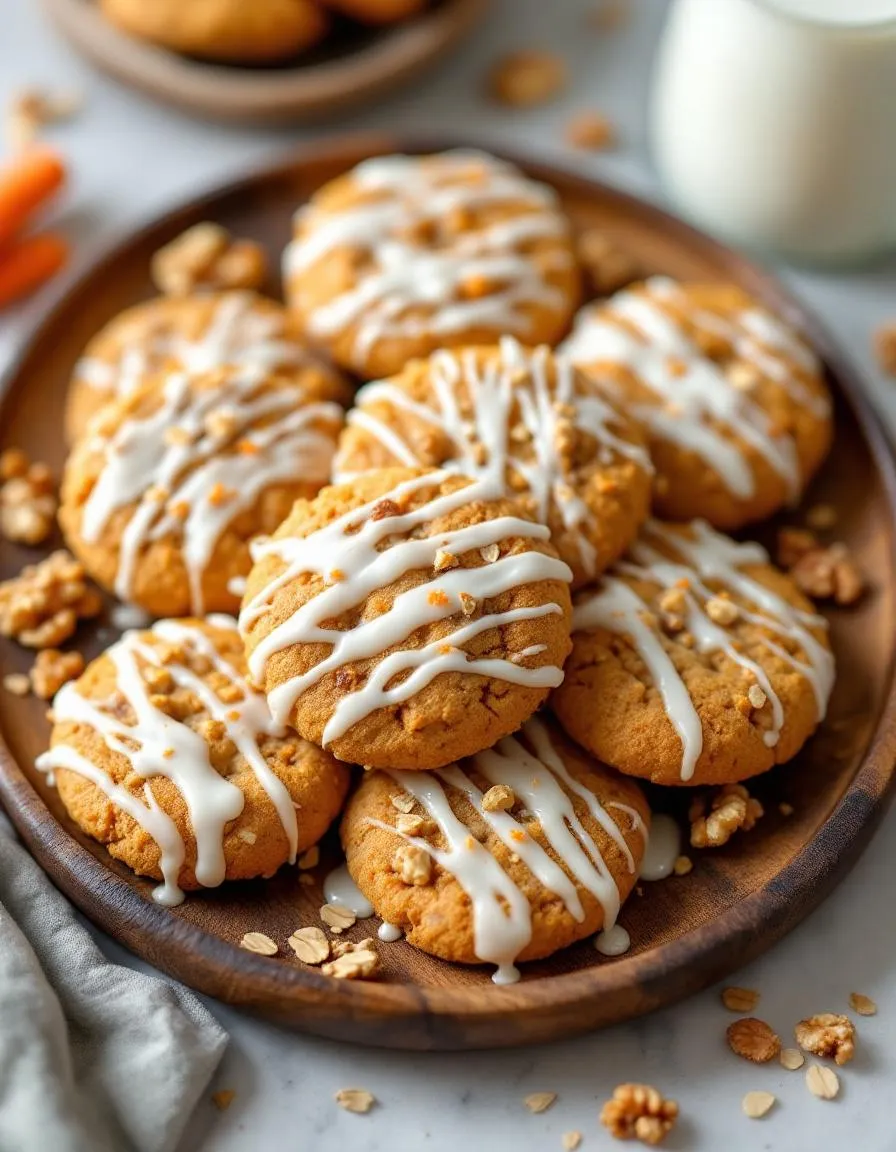
Biting into these Irresistible Coconut Flour Cookies Recipe delivers a symphony of flavors and textures. The cookies boast a delicate crispness on the outside while staying tender and chewy inside. Naturally sweet with a hint of caramelized richness, the coconut flour adds a subtle nuttiness that pairs perfectly with the buttery undertones. Meanwhile, a touch of vanilla or cinnamon enhances the warm, fragrant aroma that fills your kitchen as they bake. Every bite of these Irresistible Coconut Flour Cookies Recipe melts in your mouth, leaving a satisfyingly soft crumb and a lingering coconut essence that keeps you reaching for more.

Boosting the flavor

For an extra flavor kick, try folding in dark chocolate chunks or toasted nuts to add contrasting crunch and depth. A sprinkle of flaky sea salt right after baking elevates the sweetness while balancing the coconut’s natural richness. If you love tropical twists, swirl in shredded coconut or a drizzle of homemade coconut whipped cream for serving. Craving warmth? A dash of cardamom or nutmeg complements the cookies beautifully, much like the cozy spices in this vegan pumpkin bread. Experiment freely—these cookies welcome creativity!

Tips for Success

Best practices for results

Always chill the dough for at least 30 minutes before baking your Irresistible Coconut Flour Cookies Recipe to prevent spreading. Use parchment paper for easy removal and the best texture. Additionally, measure your coconut flour precisely, as even a little extra can make the cookies dry. For extra flavor, lightly toast the coconut flour before mixing it into the dough. Finally, let the cookies cool completely on the baking sheet to firm up.

Mistakes to avoid

Avoid overmixing the dough, as this can make your Irresistible Coconut Flour Cookies Recipe dense instead of tender. Instead, gently fold the ingredients until just combined. Many bakers also skip the resting time, but chilling the dough ensures the right consistency. If your cookies turn out crumbly, check out our guide on baking with coconut flour for moisture-balancing tips. Also, resist the urge to overbake—pull them out when the edges are golden but the centers are still soft. For more troubleshooting, see our cookie baking tips to perfect your batch.

Serving and Pairing Suggestions

How to serve this dish

Make your Irresistible Coconut Flour Cookies Recipe shine by arranging them on a rustic wooden board or a pastel-colored dessert plate for a charming touch. For special occasions, drizzle melted dark chocolate over the cookies and sprinkle toasted coconut flakes on top. Meanwhile, these cookies also make a delightful addition to holiday cookie boxes or a cozy afternoon tea spread. If you want to elevate the presentation further, serve them warm with a dusting of powdered sugar for a bakery-worthy finish.

What goes well with it

Pair your Irresistible Coconut Flour Cookies Recipe with a creamy cup of homemade almond milk latte to balance their subtle sweetness with rich, nutty flavors. Alternatively, enjoy them alongside a scoop of dairy-free vanilla ice cream for a simple yet satisfying dessert. For a refreshing contrast, try serving them with a glass of chilled iced matcha green tea, which highlights the cookies’ tropical coconut notes perfectly.

Can I substitute coconut flour for all-purpose flour in cookies?

No, coconut flour behaves differently than all-purpose flour. For Irresistible Coconut Flour Cookies Recipe, you’ll need to adjust the liquid content since coconut flour absorbs more moisture. Stick to the recipe ratios for best results.

Why are my coconut flour cookies crumbly?

Coconut flour cookies often turn crumbly if the dough lacks enough binding agents. For perfect Irresistible Coconut Flour Cookies Recipe, ensure you’re using enough eggs or a suitable egg substitute to hold the cookies together.

How do you make coconut flour cookies less dense?

To lighten Irresistible Coconut Flour Cookies Recipe, try adding a leavening agent like baking powder, or fold in whipped egg whites. The natural density of coconut flour benefits from these adjustments for a better texture.

Can I freeze coconut flour cookie dough?

Yes! The dough for Irresistible Coconut Flour Cookies Recipe freezes well for up to 3 months. Portion it into balls before freezing, then bake directly from frozen—just add 1-2 extra minutes to the baking time.

Easy Tangy Lemon Cheesecake Crescent Rolls Recipe

easy-tangy-lemon-cheesecake-crescent

“`html

Introduction

There’s something magical about the combination of tangy lemon and creamy cheesecake, especially when wrapped in a flaky crescent roll. If you’ve ever craved a dessert that’s both refreshing and indulgent, these Tangy Lemon Cheesecake Crescent Rolls will hit the spot. Perfect for brunch, potlucks, or just treating yourself, they bring a burst of citrusy joy to every bite. Plus, they’re surprisingly easy to make, even if you’re not a baking pro. Whether you’re a lemon lover or just looking for a twist on classic cheesecake, this recipe promises to deliver flavor and fun in every golden-brown roll.

About This Recipe

Tangy Lemon Cheesecake Crescent Rolls are a delightful fusion of buttery crescent dough, zesty lemon filling, and smooth cheesecake. Unlike traditional cheesecakes, which require hours of chilling, these rolls bake in minutes and offer the same rich flavor with half the effort. The tanginess of the lemon balances the sweetness of the cream cheese, creating a dessert that’s bright yet decadent. For anyone who adores easy yet impressive treats, this recipe fits perfectly into your baking repertoire. It’s also a great way to use leftover crescent dough, turning a pantry staple into something extraordinary.

This recipe aligns with the Brekcakes blog’s mission to share approachable, crowd-pleasing desserts. Whether you’re hosting a gathering or simply satisfying a sweet tooth, these rolls deliver. If you love citrus-infused desserts, you might also enjoy our Lemon Blueberry Pound Cake or our Creamy Orange Cheesecake Bars. Both recipes celebrate the vibrant flavors of fruit and cheesecake, just like these crescent rolls. With minimal ingredients and maximum flavor, Tangy Lemon Cheesecake Crescent Rolls prove that great desserts don’t have to be complicated.

Why I Love This Recipe

I first made Tangy Lemon Cheesecake Crescent Rolls for a spring brunch, and they disappeared within minutes. The way the lemon brightens the rich cheesecake filling reminds me of sunny mornings and family gatherings. What I adore most is how versatile they are—you can serve them warm with a dusting of powdered sugar or drizzle them with glaze for extra sweetness. Every time I bake them, they bring smiles, and that’s the real magic of this recipe. It’s not just dessert; it’s a little moment of joy wrapped in flaky, golden layers.

“`

Health and Nutrition

Why it’s good for your body

Tangy Lemon Cheesecake Crescent Rolls pack a surprising nutritional punch while satisfying your sweet tooth. First, the lemon zest delivers a dose of vitamin C, which supports immune health and brightens your skin. Additionally, the creamy cheesecake filling provides calcium for strong bones and protein to keep you full longer.

Moreover, the crescent roll base offers a lighter alternative to traditional pie crusts, reducing unnecessary fats. The tangy lemon flavor also helps curb sugar cravings naturally, so you enjoy a balanced treat without overindulging. Plus, the combination of citrus and dairy creates a refreshing yet comforting dessert that energizes your taste buds.

Finally, Tangy Lemon Cheesecake Crescent Rolls make portion control effortless. Because each roll is individually sized, you can savor one without guilt. Whether you need a midday pick-me-up or a dessert that won’t weigh you down, this recipe delivers flavor and nutrition in every bite.

How it fits in a healthy lifestyle

Tangy Lemon Cheesecake Crescent Rolls fit seamlessly into a balanced diet when enjoyed mindfully. For a heart-healthy twist, swap in whole-wheat crescent rolls or a gluten-free alternative if needed. Pair one with a protein-rich snack like Greek yogurt to stabilize blood sugar and keep energy levels steady.

If you’re watching your sugar intake, reduce the added sweetener slightly—the natural tartness of lemon still shines through. For more guilt-free dessert ideas, explore our healthy dessert swaps to satisfy cravings without compromise. And if you love citrus flavors, try our lemon-infused recipes for more bright, nutrient-packed options.

Remember, balance is key. Enjoy Tangy Lemon Cheesecake Crescent Rolls as part of a varied diet, and savor every tangy, creamy bite without overthinking it.

Print
clock clock iconcutlery cutlery iconflag flag iconfolder folder iconinstagram instagram iconpinterest pinterest iconfacebook facebook iconprint print iconsquares squares iconheart heart iconheart solid heart solid icon

Tangy Lemon Cheesecake Crescent Rolls


  • Author: Chef Emy

Description

A delightful twist on classic crescent rolls with a creamy lemon cheesecake filling and a tangy glaze.


Ingredients

Scale

For the Crust:

  • 1 can (8 oz) refrigerated crescent rolls
  • 4 oz cream cheese, softened
  • 1/4 cup granulated sugar
  • 1 tbsp lemon zest
  • 1 tbsp fresh lemon juice
  • 1/2 tsp vanilla extract
  • 1/4 cup powdered sugar
  • 1 tbsp milk
  • 1/2 tsp lemon juice

Instructions

1. Prepare the Crust:

  1. Preheat oven to 375°F (190°C). Line a baking sheet with parchment paper.
  2. In a bowl, mix cream cheese, granulated sugar, lemon zest, lemon juice, and vanilla until smooth.
  3. Unroll crescent dough and separate into triangles. Spread a spoonful of the cream cheese mixture onto each triangle, then roll up from the wide end.
  4. Place rolls on the baking sheet and bake for 10-12 minutes or until golden brown.
  5. Whisk powdered sugar, milk, and lemon juice to make the glaze. Drizzle over warm rolls before serving.

Notes

You can customize the seasonings to taste.

“`html

How to Prepare This Dish

Steps and time-saving tips

Start by preheating your oven to 375°F and lining a baking sheet with parchment paper. Unroll the crescent dough and separate it into triangles. In a bowl, whisk together softened cream cheese, sugar, lemon zest, and a splash of vanilla until smooth. Spread a generous tablespoon of this tangy lemon cheesecake filling onto each triangle, leaving a small border at the edges. Carefully roll each crescent from the wide end to the point, then place them seam-side down on the baking sheet. Bake for 12-15 minutes until golden brown. Meanwhile, whisk powdered sugar with fresh lemon juice for a quick glaze. Once the rolls cool slightly, drizzle the glaze over the top. For a time-saving twist, use store-bought lemon curd instead of making the filling from scratch. If you prefer a stronger lemon flavor, add an extra teaspoon of zest to the filling. Chill the rolls for 10 minutes before serving to let the glaze set.

Mistakes I’ve made and learned from

Early on, I overfilled the crescents, causing the filling to ooze out during baking. Now I stick to one tablespoon per triangle and leave that crucial border. Another time, I rushed the glaze and poured it on piping-hot rolls, which melted into a sticky mess. Letting them cool for 5-10 minutes makes all the difference. If your dough tears while rolling, don’t panic—just pinch it back together. For more dessert troubleshooting, check out my guide on fixing common baking mistakes. And if you love lemon desserts, you’ll want to try my lemon blueberry tart, which taught me the importance of balancing tart and sweet flavors.

“`

Cultural Connection and Variations

Where this recipe comes from

Tangy Lemon Cheesecake Crescent Rolls blend the comfort of American baking with the bright flavors of European desserts. Originally, cheesecake traces its roots back to ancient Greece, but the addition of lemon and crescent dough gives this recipe a modern twist. Many families, including mine, love serving it during spring gatherings when citrus shines. Meanwhile, in Italy, a similar dessert might use ricotta instead of cream cheese, while in France, bakers often opt for buttery puff pastry over crescent rolls.

Interestingly, Tangy Lemon Cheesecake Crescent Rolls also carry a nostalgic charm. Some home cooks remember their grandmothers folding lemon curd into dough for special occasions. Others add a dash of lavender or thyme for a floral twist. No matter the variation, the tangy-sweet balance keeps it universally loved. Whether you enjoy it as a brunch showstopper or a late-night treat, this recipe adapts effortlessly to any table.

How it fits in today’s cooking

Today, Tangy Lemon Cheesecake Crescent Rolls fit perfectly into our fast-paced lives. Busy bakers appreciate how store-bought crescent dough cuts prep time without sacrificing flavor. Meanwhile, food bloggers and home chefs experiment with gluten-free or keto-friendly versions, proving its versatility. For inspiration, check out our guide to easy dessert hacks to streamline your baking process.

Seasonally, this dish shines at Easter brunches or summer picnics. Yet, its creamy filling and zesty kick make it a year-round favorite. Some even serve it as a playful alternative to classic cheesecake at holidays. If you’re hosting a crowd, pair it with our crowd-pleasing brunch ideas for a memorable spread. No matter how you slice it, Tangy Lemon Cheesecake Crescent Rolls bring joy to every bite.

Taste and Texture

What makes it delicious

Tangy Lemon Cheesecake Crescent Rolls deliver a burst of bright, citrusy flavor balanced by rich, creamy cheesecake filling. The tangy lemon zest cuts through the sweetness, while the velvety cream cheese adds a luscious, melt-in-your-mouth texture. Each bite starts with a flaky, buttery crescent roll crust that shatters delicately, giving way to the smooth, slightly tangy filling. The aroma alone—a mix of warm pastry, zesty lemon, and vanilla—will have everyone gathering in the kitchen. Whether served warm or chilled, Tangy Lemon Cheesecake Crescent Rolls offer a refreshing yet indulgent treat that’s impossible to resist.

Boosting the flavor

For an extra layer of flavor, try drizzling warm berry compote over the rolls before serving. The tart berries complement the lemon beautifully. Alternatively, sprinkle a pinch of cardamom or nutmeg into the filling for a subtle warmth. If you love a crunchy contrast, top the rolls with toasted almond slivers or a dusting of powdered sugar. For more inspiration, check out these easy dessert sauces to elevate your Tangy Lemon Cheesecake Crescent Rolls even further.

Tips for Success

Best practices for results

Always chill the dough for at least 30 minutes before rolling it out to prevent sticking and ensure flaky layers. Meanwhile, use full-fat cream cheese for the filling to achieve the richest texture in your Tangy Lemon Cheesecake Crescent Rolls. Additionally, zest your lemons finely to distribute the citrus flavor evenly without overpowering the cheesecake filling. For best results, brush the rolls with melted butter right after baking to enhance their golden color and softness.

Mistakes to avoid

Avoid overfilling the crescents, as too much cheesecake mixture can leak out during baking. Instead, stick to a tablespoon per roll for neat, mess-free Tangy Lemon Cheesecake Crescent Rolls. Also, don’t skip the egg wash—it gives the rolls their signature shine. If you struggle with dough consistency, check out our guide on perfect dough consistency for foolproof tips. Finally, never bake these rolls on an unlined tray, or they might stick. For more baking tray solutions, explore our non-stick baking essentials.

Serving and Pairing Suggestions

How to serve this dish

For a stunning presentation, arrange your Tangy Lemon Cheesecake Crescent Rolls on a tiered dessert stand with fresh lemon slices and mint sprigs. Alternatively, drizzle them with a light glaze and dust powdered sugar over the top for an elegant touch. These rolls shine at brunch gatherings, holiday breakfasts, or even as a sweet afternoon treat. To make them extra special, serve them warm with a side of whipped cream or vanilla ice cream for a delightful contrast.

What goes well with it

Pair your Tangy Lemon Cheesecake Crescent Rolls with a hot cup of Earl Grey tea, as the bergamot notes beautifully complement the citrusy tang. If you prefer something cooler, try a glass of homemade lavender lemonade for a refreshing twist. For a heartier spread, serve them alongside our Berry Stuffed French Toast or a light fruit salad. The creamy cheesecake filling also pairs wonderfully with our Honey Whipped Ricotta, adding a touch of sweetness and texture.

Can I use store-bought crescent dough for Tangy Lemon Cheesecake Crescent Rolls?

Yes, store-bought crescent dough works perfectly for Tangy Lemon Cheesecake Crescent Rolls. It saves time and ensures a flaky, buttery texture. Just unroll the dough, add your lemon cheesecake filling, and bake as directed.

How do I prevent the lemon cheesecake filling from leaking out?

To prevent leaks, avoid overfilling the Tangy Lemon Cheesecake Crescent Rolls and seal the edges tightly. Chilling the filled rolls for 10-15 minutes before baking also helps the filling set slightly, reducing spillage.

What’s the best glaze for Tangy Lemon Cheesecake Crescent Rolls?

A simple lemon cream cheese glaze pairs beautifully with Tangy Lemon Cheesecake Crescent Rolls. Mix powdered sugar, cream cheese, lemon juice, and zest for a sweet-tart finish that enhances the citrus flavor.

Can I make Tangy Lemon Cheesecake Crescent Rolls ahead of time?

Yes! Assemble the rolls and refrigerate them overnight, then bake fresh in the morning. For longer storage, freeze unbaked rolls and thaw before baking. This makes Tangy Lemon Cheesecake Crescent Rolls perfect for brunch or holidays.

Easy Pumpkin Pie Energy Balls – No-Bake Recipe

easy-pumpkin-pie-energy-balls

“`html

Introduction

Craving the cozy flavors of pumpkin pie but short on time? These Pumpkin Pie Energy Balls – No-Bake Recipe deliver all the warmth and spice of your favorite dessert in a bite-sized, guilt-free snack. Whether you need a quick breakfast boost, a post-workout refuel, or just a sweet pick-me-up, these little powerhouses pack flavor and nutrition into every bite. Best of all, they come together in minutes with no oven required. Trust me, once you try them, you’ll wonder how you ever lived without this easy, wholesome treat.

About This Recipe

Pumpkin Pie Energy Balls – No-Bake Recipe combines the nostalgic taste of pumpkin pie with the convenience of a no-fuss, energy-boosting snack. Unlike traditional desserts, these bites skip the refined sugar and flour, relying instead on natural ingredients like dates, oats, and real pumpkin puree. They’re perfect for busy mornings, afternoon slumps, or even as a pre-workout snack. Plus, they’re gluten-free, vegan-friendly, and customizable to suit your taste.

This recipe aligns perfectly with our blog’s mission to make healthy eating simple and delicious. If you love easy, no-bake treats, you’ll adore our Peanut Butter Energy Bites or our Chocolate Avocado Mousse. What sets these Pumpkin Pie Energy Balls apart is their seasonal twist. They capture the essence of fall in a portable, nutrient-dense form. Whether you’re meal prepping for the week or need a last-minute snack, this recipe delivers every time.

Why I Love This Recipe

Pumpkin Pie Energy Balls – No-Bake Recipe holds a special place in my heart because it reminds me of family gatherings during the holidays. My grandmother always made pumpkin pie from scratch, and while I loved the tradition, I wanted a quicker way to enjoy those flavors year-round. These energy balls became my solution. They’re not just convenient; they’re a little taste of nostalgia in every bite. I love how they bring people together, whether I’m sharing them with friends after a hike or packing them in my kids’ lunchboxes. Simple, wholesome, and full of love—that’s what cooking should be.

“`

Health and Nutrition

Why it’s good for your body

Pumpkin Pie Energy Balls – No-Bake Recipe packs a nutritious punch while satisfying your sweet tooth. First, pumpkin puree delivers a hefty dose of vitamin A, which supports vision and immune health. Additionally, oats provide slow-digesting fiber to keep you full and energized for hours. Meanwhile, natural sweeteners like dates or maple syrup offer a healthier alternative to refined sugar.

Moreover, these energy balls include healthy fats from nuts or seeds, which promote heart health and brain function. Unlike processed snacks, Pumpkin Pie Energy Balls – No-Bake Recipe skips artificial additives, making them a cleaner choice. The warming spices like cinnamon and nutmeg not only enhance flavor but also provide antioxidants. As a result, you get a treat that fuels your body without the crash.

Finally, Pumpkin Pie Energy Balls – No-Bake Recipe is rich in plant-based ingredients, making it a great option for vegans or those reducing dairy. Whether you need a post-workout snack or a midday pick-me-up, these bites deliver steady energy. With every ingredient serving a purpose, you can enjoy them guilt-free.

How it fits in a healthy lifestyle

Pumpkin Pie Energy Balls – No-Bake Recipe fits seamlessly into a balanced diet. For gluten-free eaters, simply use certified gluten-free oats to keep them celiac-friendly. If you follow a heart-healthy plan, the nuts and seeds provide unsaturated fats that support cardiovascular wellness. Even better, they’re portion-controlled, so you avoid overindulging.

Busy mornings? Keep a batch in the fridge for a grab-and-go breakfast alongside a smoothie bowl. They also pair perfectly with afternoon tea or coffee for a mindful break. For fitness enthusiasts, these energy balls work as a pre- or post-workout snack to replenish glycogen stores naturally.

Looking for more wholesome treats? Try our healthy dessert swaps to satisfy cravings without derailing your goals. With Pumpkin Pie Energy Balls – No-Bake Recipe, you get convenience, nutrition, and flavor in one bite.

Print
clock clock iconcutlery cutlery iconflag flag iconfolder folder iconinstagram instagram iconpinterest pinterest iconfacebook facebook iconprint print iconsquares squares iconheart heart iconheart solid heart solid icon

Pumpkin Pie Energy Balls – No-Bake Recipe


  • Author: Chef Emy

Description

Healthy, no-bake energy balls with the flavors of pumpkin pie—perfect for a quick snack or dessert.


Ingredients

Scale

For the Crust:

  • 1 cup rolled oats
  • 1/2 cup pumpkin puree
  • 1/4 cup almond butter
  • 2 tbsp maple syrup
  • 1 tsp pumpkin pie spice
  • 1/4 tsp vanilla extract
  • 2 tbsp chia seeds
  • 1/4 cup chopped pecans

Instructions

1. Prepare the Crust:

  1. In a large bowl, mix all ingredients until well combined.
  2. Roll the mixture into 1-inch balls using your hands.
  3. Place the balls on a baking sheet lined with parchment paper and refrigerate for at least 30 minutes to firm up.
  4. Store in an airtight container in the fridge for up to a week.

Notes

You can customize the seasonings to taste.

How to Prepare This Dish

Steps and time-saving tips

Start by gathering all your ingredients for the Pumpkin Pie Energy Balls – No-Bake Recipe to streamline the process. Combine rolled oats, pumpkin puree, almond butter, maple syrup, and pumpkin pie spice in a large mixing bowl. Stir everything until the mixture becomes thick and sticky. If the dough feels too wet, add a tablespoon of oat flour to balance the texture. For a smoother blend, use a food processor to pulse the ingredients briefly. Roll the mixture into small, even balls using your hands, then place them on a parchment-lined tray. Chill the energy balls in the fridge for at least 30 minutes to firm up. Meanwhile, clean your workspace to save time later. If you’re in a hurry, pop the tray into the freezer for 15 minutes instead. Once set, store the Pumpkin Pie Energy Balls in an airtight container for up to a week. For extra flavor, drizzle them with melted dark chocolate or dust with cinnamon before serving.

Mistakes I’ve made and learned from

When I first tried making Pumpkin Pie Energy Balls – No-Bake Recipe, I skipped chilling them and ended up with a sticky mess. Now I always let them set properly—patience pays off! Another time, I used watery pumpkin puree, which made the mixture too soft. After that, I started making my own pumpkin puree for better consistency. If your dough is too wet, don’t panic. Just add more oats or a spoonful of coconut flour to thicken it. I also learned that over-processing the mixture in the food processor turns it gummy, so I pulse lightly now. For more tips on avoiding kitchen mishaps, check out my guide on common no-bake recipe mistakes. Trust me, these small tweaks make all the difference!

Cultural Connection and Variations

Where this recipe comes from

Pumpkin Pie Energy Balls – No-Bake Recipe might feel like a modern snack, but its roots stretch back to cozy autumn traditions. Many cultures celebrate pumpkin as a symbol of harvest and warmth. In the U.S., pumpkin pie dominates Thanksgiving tables, but this no-bake twist offers a portable, energy-packed alternative. Families in the South might add pecans for crunch, while others blend in warm spices like cardamom or nutmeg for extra depth.

Around the world, similar treats take different forms. In the Middle East, dates and nuts often replace pumpkin, creating sticky-sweet energy bites. Meanwhile, in Mexico, pumpkin seeds (pepitas) star in candied snacks. Even within households, recipes evolve. Some swap maple syrup for honey or toss in chocolate chips for fun. No matter the variation, Pumpkin Pie Energy Balls – No-Bake Recipe keeps the spirit of seasonal comfort alive.

How it fits in today’s cooking

Today, busy cooks love Pumpkin Pie Energy Balls – No-Bake Recipe for its simplicity and nostalgia. It fits perfectly into meal prep routines, offering a healthy alternative to store-bought snacks. Many pair it with a morning smoothie bowl or pack it for hikes. During fall, it becomes a staple at potlucks alongside classics like apple crisp.

Modern twists keep it fresh. Some add protein powder for gym-goers, while others use gluten-free oats for dietary needs. Whether as a post-workout bite or a holiday party treat, this recipe bridges tradition and convenience. After all, who can resist a taste of pumpkin spice without turning on the oven?

Taste and Texture

What makes it delicious

Pumpkin Pie Energy Balls – No-Bake Recipe delivers a cozy, spiced sweetness that feels like a hug in every bite. The creamy texture melts in your mouth, thanks to the rich blend of dates and nut butter, while the oats add a subtle chewiness. Warm notes of cinnamon, nutmeg, and pumpkin puree create a fragrant aroma that instantly reminds you of autumn. Each bite bursts with earthy pumpkin flavor, balanced by a hint of maple syrup for just the right touch of sweetness. Plus, the crunch of chopped pecans or walnuts adds a satisfying contrast, making Pumpkin Pie Energy Balls – No-Bake Recipe irresistibly wholesome and indulgent.

Boosting the flavor

For an extra flavor boost, try rolling the Pumpkin Pie Energy Balls – No-Bake Recipe in crushed gingersnap crumbs or a dusting of cocoa powder. Alternatively, swap the pecans for toasted coconut flakes to add a tropical twist. If you love bold spices, a pinch of cardamom or clove will deepen the warmth. For a drizzle-worthy finish, pair them with a creamy healthy caramel sauce or serve alongside a glass of spiced almond milk. These small tweaks elevate the recipe while keeping it effortlessly delicious.

Tips for Success

Best practices for results

Always chill the dough for at least 30 minutes before rolling your Pumpkin Pie Energy Balls – No-Bake Recipe. This step ensures they hold their shape perfectly. Additionally, use a cookie scoop for uniform sizes, which helps them set evenly. For the best texture, press the mixture firmly into the scoop before releasing it. If the dough feels too sticky, lightly wet your hands to prevent sticking while shaping. Finally, store them in an airtight container to keep them fresh for up to a week.

Mistakes to avoid

Avoid over-processing the dates in your Pumpkin Pie Energy Balls – No-Bake Recipe, or the mixture may become too wet. Instead, pulse them just until they break down. Similarly, don’t skip toasting the pecans if your recipe includes them—this step enhances their flavor. For more tips on working with sticky dough, check out our guide on no-bake treats. If your energy balls crumble, you likely need more binder; our healthy snack hacks explain how to adjust the recipe easily.

Serving and Pairing Suggestions

How to serve this dish

For a festive touch, arrange your Pumpkin Pie Energy Balls – No-Bake Recipe on a rustic wooden board or a small ceramic platter. Meanwhile, sprinkle them with a light dusting of cinnamon or crushed pecans to highlight their seasonal flavors. These energy balls shine at holiday gatherings, but they also make a delightful addition to brunch spreads or afternoon snack platters. If you’re packing them for on-the-go fuel, tuck a few into reusable containers with parchment paper for easy grabbing.

What goes well with it

Pair your Pumpkin Pie Energy Balls – No-Bake Recipe with a steaming cup of chai tea for a cozy flavor combination. The warm spices in both create a harmonious balance. Alternatively, serve them alongside a creamy pumpkin smoothie for a double dose of autumn goodness. If you’re hosting a dessert spread, try adding our Healthy Cinnamon Roll Bites or Almond Flour Chocolate Chip Cookies for a variety of textures and tastes.

How long do Pumpkin Pie Energy Balls last in the fridge?

Pumpkin Pie Energy Balls – No-Bake Recipe stays fresh in the fridge for up to 2 weeks when stored in an airtight container. For longer storage, you can freeze them for up to 3 months. Just thaw in the fridge before enjoying!

Can I substitute almond flour in Pumpkin Pie Energy Balls?

Yes, you can use oat flour or coconut flour as alternatives to almond flour in Pumpkin Pie Energy Balls – No-Bake Recipe. Keep in mind the texture may vary slightly, so adjust liquid ingredients if needed. Always taste-test before rolling the mixture into balls.

Are Pumpkin Pie Energy Balls healthy?

Pumpkin Pie Energy Balls – No-Bake Recipe is packed with wholesome ingredients like pumpkin puree, nuts, and natural sweeteners. They provide fiber, healthy fats, and energy without refined sugars. However, portion control is key since they’re calorie-dense.

Can I make Pumpkin Pie Energy Balls without dates?

Absolutely! For Pumpkin Pie Energy Balls – No-Bake Recipe, you can substitute dates with raisins, dried figs, or even maple syrup as binders. The texture might be slightly different, but you’ll still get delicious energy balls with pumpkin pie flavor.

Best Sweet Potato Pie Bars – Easy Dessert Recipe

best-sweet-potato-pie-bars

“`html

Introduction

There’s something magical about the warm, spiced aroma of sweet potato pie filling the kitchen, especially when it transforms into bite-sized perfection. If you’ve ever craved the cozy flavors of fall but wanted a simpler, more shareable treat, this Irresistible Sweet Potato Pie Bars Recipe is your answer. Imagine a buttery shortbread crust, a velvety spiced sweet potato filling, and a crumbly streusel topping—all in one handheld delight. Whether you’re hosting a holiday gathering or just treating yourself, these bars deliver nostalgia and comfort in every bite. Plus, they’re easier to make than a traditional pie, so you can enjoy the flavors without the fuss.

About This Recipe

These Irresistible Sweet Potato Pie Bars Recipe combine the best parts of classic sweet potato pie with the convenience of a bar dessert. The recipe starts with a tender shortbread crust that bakes into a sturdy yet melt-in-your-mouth base. Next comes the star: a smooth, spiced sweet potato filling that’s rich but not overly sweet. Finally, a buttery streusel topping adds the perfect crunch. Unlike traditional pies, these bars are portable, easy to slice, and ideal for potlucks or gifting. They also freeze well, so you can prep them ahead for busy seasons.

What makes this recipe stand out is its balance of flavors and textures. The cinnamon, nutmeg, and vanilla enhance the natural sweetness of the sweet potatoes without overpowering them. Meanwhile, the streusel topping ensures every bite has a satisfying contrast. If you love our Pumpkin Spice Cupcakes, you’ll adore these bars—they share that same warm, autumnal vibe. And if you’re new to baking with sweet potatoes, don’t worry. This recipe walks you through each step, from roasting the potatoes to achieving the perfect bake. For more tips on working with seasonal ingredients, check out our guide to Fall Baking Essentials.

Why I Love This Recipe

This Irresistible Sweet Potato Pie Bars Recipe holds a special place in my heart because it reminds me of my grandmother’s kitchen. She always made sweet potato pie for Thanksgiving, but the process felt intimidating when I tried to recreate it. These bars capture her recipe’s soul—the same caramelized sweetness, the same hint of spice—but in a format that feels approachable. Now, I bake them yearly for friends who claim they’re even better than pie. There’s joy in sharing something that feels both familiar and new, and that’s exactly what these bars deliver.

“`

Health and Nutrition

Why it’s good for your body

Irresistible Sweet Potato Pie Bars Recipe packs a nutritious punch while satisfying your sweet tooth. First, sweet potatoes deliver a hefty dose of vitamin A, which supports vision and immune health. Additionally, they provide fiber to keep digestion smooth and steady energy levels. Unlike many desserts, these bars use natural sweetness from sweet potatoes and just enough maple syrup or honey to enhance flavor without spiking blood sugar too drastically.

Moreover, Irresistible Sweet Potato Pie Bars Recipe includes warming spices like cinnamon and nutmeg. These spices not only add depth but also offer anti-inflammatory benefits. For instance, cinnamon may help regulate blood sugar, making these bars a smarter choice for occasional indulgence. Meanwhile, the oats or almond flour in the crust contribute healthy fats and protein, keeping you fuller longer.

Finally, this recipe skips processed ingredients in favor of whole foods. As a result, you avoid artificial additives while enjoying a treat that fuels your body. Whether you need a post-workout snack or a dessert that won’t derail your goals, Irresistible Sweet Potato Pie Bars Recipe delivers both flavor and nourishment.

How it fits in a healthy lifestyle

Irresistible Sweet Potato Pie Bars Recipe fits seamlessly into balanced eating habits. For gluten-free diets, simply swap regular flour for almond or oat flour. The recipe also aligns with heart-healthy choices thanks to its minimal added sugars and reliance on wholesome ingredients. If you’re meal prepping, these bars store well, making them a convenient grab-and-go option.

Pair them with a protein-rich snack like Greek yogurt for a satisfying breakfast or afternoon pick-me-up. For those watching sugar intake, enjoy a smaller portion alongside a low-sugar smoothie to balance flavors and nutrients. With simple swaps and mindful pairing, these bars become a versatile part of your wellness routine.

Print
clock clock iconcutlery cutlery iconflag flag iconfolder folder iconinstagram instagram iconpinterest pinterest iconfacebook facebook iconprint print iconsquares squares iconheart heart iconheart solid heart solid icon

Irresistible Sweet Potato Pie Bars


  • Author: Chef Emy

Description

A delicious twist on classic sweet potato pie, these bars are perfect for any occasion.


Ingredients

Scale

For the Crust:

  • 2 cups mashed sweet potatoes
  • 1 cup granulated sugar
  • 1/2 cup brown sugar
  • 2 large eggs
  • 1/2 cup evaporated milk
  • 1/4 cup melted butter
  • 1 tsp vanilla extract
  • 1 tsp ground cinnamon
  • 1/2 tsp ground nutmeg
  • 1/4 tsp ground cloves
  • 1 1/2 cups all-purpose flour
  • 1/2 cup rolled oats
  • 1/2 cup cold butter, cubed
  • 1/2 cup chopped pecans

Instructions

1. Prepare the Crust:

  1. Preheat oven to 350°F (175°C). Grease a 9×13-inch baking pan.
  2. In a large bowl, mix mashed sweet potatoes, granulated sugar, brown sugar, eggs, evaporated milk, melted butter, vanilla, cinnamon, nutmeg, and cloves until smooth.
  3. In another bowl, combine flour, oats, and cold butter. Use a pastry cutter or fingers to mix until crumbly. Stir in pecans.
  4. Press two-thirds of the crumb mixture into the prepared pan. Spread sweet potato filling evenly over the crust.
  5. Sprinkle remaining crumb mixture over the filling.
  6. Bake for 30-35 minutes or until golden brown and set. Cool completely before cutting into bars.

Notes

You can customize the seasonings to taste.

How to Prepare This Dish

Steps and time-saving tips

Start by preheating your oven to 350°F and lining a baking pan with parchment paper for easy removal later. In a large bowl, mix the crust ingredients—flour, sugar, and cold butter—until crumbly, then press the mixture firmly into the pan. Bake the crust for 15 minutes until golden. Meanwhile, whisk together the sweet potato puree, eggs, and spices in another bowl until smooth. Pour this filling over the pre-baked crust and return it to the oven for 30 minutes. While the bars cool, whip up the topping by blending cream cheese, powdered sugar, and vanilla. Spread it evenly over the cooled bars, then chill for at least an hour before slicing. To save time, use canned sweet potato puree or bake the sweet potatoes a day ahead. For cleaner cuts, dip your knife in hot water between slices.

Mistakes I’ve made and learned from

I once rushed the cooling process and ended up with a gooey mess—patience is key for clean layers! Another time, I overmixed the crust, making it tough instead of tender. Now, I stop as soon as the butter blends in. If your filling cracks, don’t panic; the topping will cover it. For more troubleshooting tips, check out my guide on fixing common baking mistakes. And if you love these bars, you’ll adore my decadent pumpkin bars, which use a similar technique for a fall-inspired treat.

Cultural Connection and Variations

Where this recipe comes from

Irresistible Sweet Potato Pie Bars Recipe carries deep roots in Southern American cuisine, where sweet potatoes have long been a staple crop. Families traditionally baked them into pies for holidays, but over time, creative cooks transformed the classic into handheld bars for easier sharing. My grandmother, for instance, always added a dash of nutmeg to her version, claiming it brought out the earthiness of the potatoes. Meanwhile, in the Caribbean, you might find similar treats with coconut milk or ginger for a tropical twist.

Across the globe, cultures embrace sweet potatoes in desserts differently. In Japan, they star in candied street snacks, while Korean bakeries fold them into fluffy pastries. The Irresistible Sweet Potato Pie Bars Recipe, however, stays true to its comforting, spiced essence—whether served at a Thanksgiving potluck or a cozy winter gathering. Some Southern chefs even swap the crust for a pecan streusel, proving how versatile this dish can be.

How it fits in today’s cooking

Today, Irresistible Sweet Potato Pie Bars Recipe bridges nostalgia and modern convenience. Busy home cooks love them for meal prep, slicing them into squares for lunchboxes or afternoon pick-me-ups. They also shine during fall and winter, pairing perfectly with a cup of spiced chai or hot chocolate. For a healthier twist, some bakers use almond flour or reduce the sugar, as seen in our guide to healthy baking swaps.

Social media has given the recipe new life too, with food bloggers adding toppings like marshmallow fluff or drizzles of salted caramel. Whether you stick to tradition or experiment, these bars fit seamlessly into today’s kitchens. They’re even a hit at holiday cookie exchanges, alongside classics like our peppermint brownie bites. After all, some flavors never go out of style.

Taste and Texture

What makes it delicious

Irresistible Sweet Potato Pie Bars Recipe delivers a symphony of cozy, comforting flavors in every bite. The velvety sweet potato filling melts on your tongue with rich, caramelized sweetness, while warm spices like cinnamon and nutmeg add a fragrant depth. Meanwhile, the buttery shortbread crust crumbles just right, offering a crisp contrast to the creamy center. Each bar smells like a holiday dessert table—earthy, spiced, and inviting. Whether you serve it chilled or slightly warmed, Irresistible Sweet Potato Pie Bars Recipe keeps its luscious texture, making it impossible to resist a second slice.

Boosting the flavor

For an extra flavor kick, try swirling a spoonful of salted caramel sauce into the sweet potato filling before baking. The salty-sweet combo elevates the bars to dessert heaven. Alternatively, sprinkle toasted pecans or walnuts on top for a crunchy contrast. If you love bold spices, a pinch of cardamom or a dash of vanilla bean paste deepens the aromatic profile. A dollop of whipped cream or a drizzle of maple glaze right before serving adds a luxurious finish.

Tips for Success

Best practices for results

Always roast your sweet potatoes for the Irresistible Sweet Potato Pie Bars Recipe to deepen their natural sweetness. Meanwhile, use room-temperature butter for the crust to ensure a flaky texture. For best results, chill the dough for at least 30 minutes before baking to prevent shrinkage. Additionally, line your baking pan with parchment paper for easy removal and clean edges. Finally, let the bars cool completely before slicing to maintain perfect layers.

Mistakes to avoid

Avoid overmixing the crust dough, as this can make it tough instead of tender. Instead, mix just until the ingredients come together. Also, don’t skip the step of pricking the crust with a fork before baking, or it may puff up unevenly. For more crust tips, check out our guide on perfect pie crust techniques. Another common mistake is underbaking the filling, which can leave it too soft. To test doneness, gently shake the pan—the center should jiggle slightly but not ripple. For more baking insights, explore our baking troubleshooting tips.

Serving and Pairing Suggestions

How to serve this dish

For a stunning presentation, slice your Irresistible Sweet Potato Pie Bars into neat squares and dust them lightly with powdered sugar. Alternatively, add a dollop of whipped cream or a sprinkle of toasted pecans for extra texture. These bars shine at holiday gatherings, but they also make a delightful treat for weekend brunches or afternoon tea. If you want to elevate the experience, serve them warm with a scoop of vanilla ice cream for a cozy dessert.

What goes well with it

Pair your Irresistible Sweet Potato Pie Bars with a steaming cup of spiced chai tea to highlight the warm cinnamon notes. For a refreshing contrast, try a cold glass of homemade vanilla almond milk, which balances the sweetness perfectly. If you’re serving these bars as part of a larger spread, consider adding a plate of cinnamon roll bites for a festive flavor combination.

Can I use canned sweet potatoes for Irresistible Sweet Potato Pie Bars?

Yes, canned sweet potatoes work well for Irresistible Sweet Potato Pie Bars if you’re short on time. Drain and mash them thoroughly to match the texture of fresh sweet potatoes. Just ensure they’re plain (not pre-sweetened) to control the sugar level in your recipe.

How do I store leftover Irresistible Sweet Potato Pie Bars?

Store leftover Irresistible Sweet Potato Pie Bars in an airtight container in the refrigerator for up to 5 days. For longer storage, freeze them in layers separated by parchment paper for up to 3 months. Thaw overnight in the fridge before serving.

What’s the best crust for Sweet Potato Pie Bars?

A buttery shortbread or graham cracker crust pairs perfectly with Irresistible Sweet Potato Pie Bars. The crisp texture contrasts beautifully with the creamy filling. For a twist, try adding cinnamon or pecans to the crust mixture.

Can I make Irresistible Sweet Potato Pie Bars dairy-free?

Absolutely! Substitute butter with coconut oil and use full-fat coconut milk instead of evaporated milk in your Irresistible Sweet Potato Pie Bars. The result will still be rich and flavorful while being dairy-free.

Best Almond Flour Apple Cake – Easy Gluten-Free Recipe

best-almond-flour-apple-cake

“`html

Introduction

There’s something magical about the aroma of warm apples and cinnamon wafting through the kitchen, especially when it leads to a slice of Irresistible Almond Flour Apple Cake. Whether you’re craving a cozy dessert for fall or a gluten-free treat that doesn’t skimp on flavor, this cake delivers. Picture tender chunks of apple nestled in a moist, nutty crumb—each bite feels like a hug. Plus, it’s easy enough for beginners yet impressive enough for special occasions. Trust me, once you try it, you’ll understand why this recipe earns its name.

About This Recipe

Irresistible Almond Flour Apple Cake is a gluten-free twist on a classic dessert, swapping traditional flour for almond flour to create a richer, denser texture. Unlike dry or crumbly alternatives, this cake stays incredibly moist thanks to the natural oils in almonds and the juiciness of fresh apples. What makes it stand out? First, it’s naturally sweetened with maple syrup or honey, avoiding refined sugars. Second, it’s packed with protein and healthy fats, making it a smarter indulgence. If you’ve tried our almond flour baking guide, you’ll recognize the techniques here—simple, foolproof, and adaptable.

This recipe fits perfectly with our blog’s mission: approachable, wholesome baking without compromise. Whether you’re gluten-free by necessity or just exploring healthier desserts, this cake proves you don’t need sacrifice flavor. The warm spices—cinnamon, nutmeg, and a hint of vanilla—evoke nostalgia, while the almond flour adds a modern, nutrient-dense twist. For more inspiration, check out our gluten-free dessert roundup, where this cake shines as a crowd favorite. Serve it warm with a dollop of whipped cream, and watch it disappear.

Why I Love This Recipe

This Irresistible Almond Flour Apple Cake holds a special place in my kitchen—and my heart. It’s the recipe I turn to when friends with dietary restrictions come over, because no one feels left out. I love how the apples caramelize slightly at the edges, adding pockets of sweetness, while the almond flour keeps every slice satisfyingly dense. Most importantly, it reminds me of my grandmother’s apple cake, but with a twist that aligns with how I bake today: intentionally, thoughtfully, and always with joy. Every time I make it, I’m reminded that the best recipes are the ones that bring people together.

“`

Health and Nutrition

Why it’s good for your body

Irresistible Almond Flour Apple Cake packs a nutritious punch while satisfying your sweet tooth. First, almond flour replaces traditional wheat flour, offering a gluten-free alternative rich in healthy fats and protein. Additionally, it provides vitamin E, which supports skin health and immunity. Meanwhile, the apples add natural sweetness and fiber, keeping digestion smooth and blood sugar stable.

Moreover, this cake contains no refined sugars when made with wholesome ingredients like honey or maple syrup. These natural sweeteners offer antioxidants and minerals, unlike processed sugars. Furthermore, almond flour’s low glycemic index helps prevent energy crashes, making Irresistible Almond Flour Apple Cake a smarter choice for sustained vitality.

Finally, the spices in this recipe, like cinnamon, bring their own benefits. Cinnamon may help regulate blood sugar and reduce inflammation. Together, these ingredients create a dessert that nourishes as much as it delights. Whether you enjoy a slice for breakfast or dessert, Irresistible Almond Flour Apple Cake fuels your body with goodness.

How it fits in a healthy lifestyle

Irresistible Almond Flour Apple Cake fits seamlessly into balanced eating habits. For gluten-free diets, it’s a delicious way to enjoy dessert without compromise. The almond flour base also makes it a great option for those focusing on heart health, as it contains monounsaturated fats that support cholesterol levels.

If you’re meal prepping, this cake stays moist for days, making it a convenient grab-and-go snack. Pair it with a protein source like Greek yogurt for a satisfying breakfast. For more gluten-free inspiration, check out our gluten-free baking guide or explore healthy dessert swaps to keep treats nutritious. With simple ingredients and flexible serving options, this cake helps you stay on track without sacrificing flavor.

Print
clock clock iconcutlery cutlery iconflag flag iconfolder folder iconinstagram instagram iconpinterest pinterest iconfacebook facebook iconprint print iconsquares squares iconheart heart iconheart solid heart solid icon

Irresistible Almond Flour Apple Cake


  • Author: Chef Emy

Description

A moist and flavorful gluten-free cake made with almond flour and fresh apples, perfect for any occasion.


Ingredients

Scale

For the Crust:

  • 2 cups almond flour
  • 1/2 cup coconut sugar
  • 3 large eggs
  • 1/4 cup melted coconut oil
  • 1 tsp vanilla extract
  • 1 tsp cinnamon
  • 1/2 tsp baking soda
  • 1/4 tsp salt
  • 2 medium apples, peeled and diced
  • 1 tbsp lemon juice

Instructions

1. Prepare the Crust:

  1. Preheat oven to 350°F (175°C) and grease a 9-inch round cake pan.
  2. In a large bowl, whisk together almond flour, coconut sugar, cinnamon, baking soda, and salt.
  3. In another bowl, beat eggs, then mix in melted coconut oil and vanilla extract.
  4. Combine wet and dry ingredients, then fold in diced apples and lemon juice.
  5. Pour batter into the prepared pan and bake for 30 minutes or until a toothpick comes out clean.
  6. Let cool before slicing and serving.

Notes

You can customize the seasonings to taste.

How to Prepare This Dish

Steps and time-saving tips

Start by preheating your oven to 350°F and greasing a 9-inch cake pan. While the oven heats, whisk together the almond flour, baking powder, and cinnamon in a large bowl. In a separate bowl, beat the eggs until frothy, then mix in the honey, melted butter, and vanilla. Gradually fold the wet ingredients into the dry mixture until just combined—overmixing can make the Irresistible Almond Flour Apple Cake dense. Next, gently stir in the diced apples, saving a few slices for the top. Pour the batter into the pan and arrange the remaining apple slices in a decorative pattern. Bake for 35-40 minutes until golden and a toothpick comes out clean. For a time-saving trick, prep the dry ingredients the night before and store them airtight. Let the cake cool slightly before slicing to avoid crumbly edges, but serve warm for the best texture.

Mistakes I’ve made and learned from

Early on, I rushed the mixing process and ended up with a gummy center—turns out, almond flour needs gentle handling. Now, I fold the batter just until blended, and the Irresistible Almond Flour Apple Cake bakes evenly every time. Another blunder? Skipping the toothpick test. Once, I pulled the cake out too soon, only to find a gooey middle after slicing. Lesson learned: patience pays off. If you’re new to gluten-free baking, check out my almond flour guide for more troubleshooting. And if your apples release too much juice, try my apple prep hacks to keep the batter perfectly balanced.

Cultural Connection and Variations

Where this recipe comes from

The Irresistible Almond Flour Apple Cake carries a cozy charm that feels like autumn in every bite. Its roots trace back to European baking traditions, where almond flour became a staple for gluten-free desserts long before modern dietary trends. Families in France and Italy often baked similar cakes during apple season, layering thin slices of fruit over a nutty batter for a rustic finish. Meanwhile, in the Middle East, cooks might add cardamom or orange blossom water for a fragrant twist.

In my own kitchen, this cake became a yearly ritual when local orchards overflowed with crisp apples. My grandmother insisted on using honey instead of sugar, giving it a deeper, almost caramel-like sweetness. Some bakers today fold in walnuts or drizzle salted caramel on top, but the Irresistible Almond Flour Apple Cake always shines brightest when it keeps things simple. Across cultures, one thing stays the same: it’s a celebration of harvests and home.

How it fits in today’s cooking

Today, the Irresistible Almond Flour Apple Cake fits perfectly into both gluten-free and seasonal cooking. Health-conscious bakers love it because almond flour packs protein without refined grains, and apples add natural sweetness. During holidays, it’s a star at potlucks—pair it with spiced chai latte for a crowd-pleasing combo. Weeknight bakers? They’ll appreciate how quickly it comes together, especially with 5-minute cinnamon frosting for an extra treat.

Modern twists keep it fresh, too. Some add grated ginger or swap apples for pears when the mood strikes. Whether you’re baking it for a cozy night in or a festive gathering, this cake bridges tradition and today’s tastes effortlessly. After all, good food never goes out of style.

Taste and Texture

What makes it delicious

The Irresistible Almond Flour Apple Cake wraps you in warmth the moment it leaves the oven. Its golden-brown crust gives way to a moist, tender crumb, while grated apples melt into the batter for a subtly sweet, juicy bite. Almond flour adds a nutty richness, and cinnamon weaves through every slice with cozy, aromatic depth. Meanwhile, a hint of vanilla rounds out the flavors, making each forkful fragrant and comforting. The texture strikes the perfect balance—lightly dense yet airy, with soft pockets of apple that contrast the cake’s delicate crumb. Whether served warm or at room temperature, the Irresistible Almond Flour Apple Cake delivers a rustic, homestyle charm that keeps you reaching for another piece.

Boosting the flavor

For an extra layer of indulgence, drizzle the cake with a simple homemade caramel sauce or a dusting of powdered sugar. If you love bold spices, try adding a pinch of cardamom or nutmeg to the batter for a fragrant twist. A scoop of vanilla bean ice cream turns this dessert into a showstopper, melting into the warm cake for a creamy contrast. You can also fold in toasted walnuts or pecans for a satisfying crunch. No matter how you customize it, the Irresistible Almond Flour Apple Cake adapts beautifully to your taste.

Tips for Success

Best practices for results

First, always measure your almond flour correctly by spooning it into the measuring cup and leveling it off. This ensures your Irresistible Almond Flour Apple Cake has the perfect texture. Next, use room-temperature eggs for better batter consistency, as cold eggs can make the cake dense. Additionally, slice your apples thinly and evenly so they bake uniformly. Finally, let the cake cool completely before slicing to prevent crumbling. These simple steps guarantee a moist, flavorful result every time.

Mistakes to avoid

Avoid overmixing the batter, as this can make your Irresistible Almond Flour Apple Cake tough instead of tender. Instead, gently fold the ingredients until just combined. Also, don’t skip lining your pan with parchment paper—it prevents sticking and ensures easy removal. If you’re new to gluten-free baking, check out our guide on almond flour baking tips for more insights. Lastly, remember that almond flour burns faster than wheat flour, so keep an eye on baking times. For extra help, our perfect cake texture article explains how to test doneness without overbaking.

Serving and Pairing Suggestions

How to serve this dish

For a stunning presentation, dust your Irresistible Almond Flour Apple Cake with powdered sugar just before serving. Alternatively, top each slice with a dollop of whipped cream or a scoop of vanilla ice cream for extra indulgence. This cake shines at brunch gatherings, holiday desserts, or cozy afternoon tea. To make it even more inviting, arrange thin apple slices or a sprinkle of cinnamon on top. Since Irresistible Almond Flour Apple Cake stays moist for days, you can also pack slices for picnics or lunchboxes.

What goes well with it

Pair Irresistible Almond Flour Apple Cake with a warm cup of chai tea for a spiced contrast that highlights the cake’s natural sweetness. If you prefer something cooler, try our Homemade Vanilla Almond Milk—its creamy texture balances the cake’s hearty crumb. For a festive twist, serve it alongside our Spiced Pear Compote, which adds a tangy, aromatic layer to every bite. Whether you choose a drink or a fruity accompaniment, each pairing elevates the flavors of this irresistible dessert.

Can I substitute almond flour for regular flour in apple cake?

Yes, almond flour works beautifully in this Irresistible Almond Flour Apple Cake, giving it a moist, tender crumb and nutty flavor. Unlike regular flour, almond flour is gluten-free and adds extra protein, making it a healthier choice. Just note that the texture will be denser than traditional cakes.

How do I keep my almond flour apple cake from being too dry?

The secret to a moist Irresistible Almond Flour Apple Cake is using plenty of grated apples and a touch of honey or maple syrup. Almond flour absorbs more moisture, so adding an extra egg or a splash of apple cider can also help. Avoid overbaking—check for doneness at the 25-minute mark.

What type of apples work best for almond flour apple cake?

Firmer, slightly tart apples like Granny Smith or Honeycrisp are ideal for Irresistible Almond Flour Apple Cake because they hold their shape and balance the sweetness. Softer apples like McIntosh can work but may make the cake too moist. Always peel and finely grate the apples for even distribution.

Can I make this cake dairy-free or vegan?

Absolutely! For a dairy-free version of Irresistible Almond Flour Apple Cake, use coconut oil instead of butter and almond milk. To make it vegan, replace eggs with flax eggs (1 tbsp ground flax + 3 tbsp water per egg). The cake will still be deliciously moist and flavorful.

Best Italian Almond-Orange Cake Recipe

best-italian-almond-orange-cake

“`html

Introduction

There’s something magical about a dessert that feels like a warm hug—comforting, familiar, yet excitingly new. That’s exactly what you’ll experience with this Irresistible Italian Almond-Orange Cake. Imagine biting into a tender, moist crumb infused with the bright zest of oranges and the rich nuttiness of almonds. Whether you’re celebrating a special occasion or simply craving a slice of sunshine, this cake delivers. Plus, it’s naturally gluten-free, making it a crowd-pleaser for everyone at the table. Trust me, once you try it, you’ll understand why this recipe deserves a permanent spot in your baking rotation.

About This Recipe

The Irresistible Italian Almond-Orange Cake is a classic Italian dessert known for its simplicity and bold flavors. Unlike traditional cakes, it skips flour entirely, relying on finely ground almonds for a delicate texture. Fresh orange zest and juice add a citrusy punch, while a hint of vanilla rounds out the taste. What makes this cake special? For starters, it’s effortlessly elegant yet easy to make. Whether you’re a baking novice or a seasoned pro, you’ll appreciate how straightforward the process is. Moreover, it’s versatile—serve it with a dusting of powdered sugar, a dollop of whipped cream, or even a drizzle of dark chocolate for extra indulgence.

This recipe fits perfectly with the warm, approachable tone of our blog, where we celebrate homemade goodness without the fuss. If you love Italian-inspired treats, you’ll adore our Authentic Italian Tiramisu or the lighter Lemon Ricotta Cookies. Like those favorites, the Irresistible Italian Almond-Orange Cake brings a taste of Italy to your kitchen with minimal effort. It’s also a fantastic make-ahead dessert, as the flavors deepen overnight. Whether you’re hosting a dinner party or treating yourself, this cake promises to impress.

Why I Love This Recipe

This cake holds a special place in my heart because it reminds me of my grandmother’s kitchen. She used to bake it every Sunday, filling the house with the aroma of citrus and toasted almonds. Even now, one bite transports me back to those cozy afternoons. Beyond nostalgia, I love how forgiving the recipe is—no fancy techniques, just honest ingredients shining through. It’s the kind of dessert that feels like a labor of love without actually requiring hours of labor. Every time I make it, I’m reminded that the best recipes are the ones that bring people together, and this one never fails to do just that.

“`

Health and Nutrition

Why it’s good for your body

Irresistible Italian Almond-Orange Cake packs a nutritious punch while satisfying your sweet tooth. First, almond flour serves as the base, offering a gluten-free alternative rich in healthy fats, protein, and vitamin E. These nutrients support heart health and keep your skin glowing. Additionally, the citrusy zest of fresh oranges delivers a burst of vitamin C, which boosts immunity and aids collagen production.

Moreover, this cake skips refined sugars in favor of natural sweetness from honey or maple syrup, depending on the recipe. Unlike traditional desserts, Irresistible Italian Almond-Orange Cake avoids blood sugar spikes thanks to its balanced macronutrients. The almonds also provide fiber, promoting digestive health and helping you feel full longer.

Finally, the combination of almond flour and eggs creates a protein-rich treat, making it a smarter choice for sustained energy. Whether you enjoy a slice with afternoon tea or as a post-dinner delight, Irresistible Italian Almond-Orange Cake nourishes your body without compromise. Its wholesome ingredients prove that indulgence and nutrition can go hand in hand.

How it fits in a healthy lifestyle

Irresistible Italian Almond-Orange Cake fits seamlessly into balanced eating habits. For gluten-free diets, almond flour replaces wheat flour entirely, making it a safe and delicious option. If you follow a heart-healthy plan, the monounsaturated fats from almonds support cholesterol levels while satisfying cravings.

This cake also works well for mindful portion control. Pair a small slice with a protein-packed snack, like Greek yogurt, for a balanced treat. For more gluten-free dessert ideas, explore our guide to gluten-free desserts. If you love baking with nutrient-dense ingredients, check out our almond flour recipe collection for more inspiration.

Whether you prioritize clean eating or simply want a healthier dessert alternative, Irresistible Italian Almond-Orange Cake aligns with your goals. Enjoy it guilt-free as part of a varied, wholesome diet.

Print
clock clock iconcutlery cutlery iconflag flag iconfolder folder iconinstagram instagram iconpinterest pinterest iconfacebook facebook iconprint print iconsquares squares iconheart heart iconheart solid heart solid icon

Irresistible Italian Almond-Orange Cake


  • Author: Chef Emy

Description

A moist and fragrant almond cake infused with fresh orange zest and juice, perfect for any occasion.


Ingredients

Scale

For the Crust:

  • 2 cups almond flour
  • 1 cup granulated sugar
  • 3 large eggs
  • 1/2 cup unsalted butter, melted
  • Zest of 1 large orange
  • 1/4 cup fresh orange juice
  • 1 tsp vanilla extract
  • 1/2 tsp baking powder
  • Pinch of salt
  • Powdered sugar for dusting (optional)

Instructions

1. Prepare the Crust:

  1. Preheat oven to 350°F (175°C). Grease and line an 8-inch round cake pan with parchment paper.
  2. In a large bowl, whisk together almond flour, sugar, baking powder, and salt.
  3. In another bowl, beat eggs, then mix in melted butter, orange zest, orange juice, and vanilla extract.
  4. Combine wet and dry ingredients, stirring until smooth. Pour batter into the prepared pan.
  5. Bake for 30 minutes or until a toothpick inserted in the center comes out clean.
  6. Let cool in the pan for 10 minutes, then transfer to a wire rack. Dust with powdered sugar before serving if desired.

Notes

You can customize the seasonings to taste.

How to Prepare This Dish

Steps and time-saving tips

Start by preheating your oven to 350°F and greasing a 9-inch cake pan. Meanwhile, zest two large oranges and squeeze their juice into a small bowl. In a large mixing bowl, whisk together almond flour, sugar, and baking powder until well combined. Crack in the eggs one at a time, stirring gently after each addition. Next, drizzle in the orange zest and juice, then fold everything together until the batter feels smooth. Pour the batter into your prepared pan and smooth the top with a spatula. Slide it into the oven and bake for 30-35 minutes, or until a toothpick comes out clean. Let the cake cool completely before dusting it with powdered sugar. For a time-saving hack, zest and juice your oranges the night before and store them in the fridge. Also, consider using a food processor to blend the dry ingredients faster. The result? An Irresistible Italian Almond-Orange Cake that’s moist, fragrant, and ready to impress.

Mistakes I’ve made and learned from

I once rushed the cooling process and tried to frost my Irresistible Italian Almond-Orange Cake too soon—big mistake. The layers crumbled, and I ended up with a messy dessert. Now, I always let it cool for at least an hour, or even pop it in the fridge to speed things up safely. Another blunder? Overmixing the batter, which made the cake dense instead of light. I learned to fold the ingredients just until combined, like I do with my Perfect Fluffy Pancakes. If you’re new to almond flour, check out my Almond Flour Baking Guide for tips on avoiding dry textures. Trust me, a little patience goes a long way with this recipe.

Cultural Connection and Variations

Where this recipe comes from

The Irresistible Italian Almond-Orange Cake carries the warmth of Mediterranean kitchens, where citrus and almonds grow in abundance. Originating in Sicily, this dessert reflects the island’s love for bright flavors and simple, rustic ingredients. Families often bake it for celebrations, especially during Easter or Christmas, when the aroma of orange zest fills the air. Some versions even soak the cake in orange syrup for extra moisture, while others keep it light and crumbly.

Interestingly, variations of this cake pop up across Europe. In Spain, they might add a splash of sherry, while in France, a touch of lavender elevates the citrus notes. My grandmother, however, swore by a secret ingredient—a pinch of cinnamon—to give her Irresistible Italian Almond-Orange Cake a cozy twist. Whether served with a dollop of whipped cream or a dusting of powdered sugar, this cake always feels like a hug from the past.

How it fits in today’s cooking

Today, the Irresistible Italian Almond-Orange Cake fits perfectly into modern kitchens, especially for those who crave gluten-free or dairy-free desserts. Almond flour keeps it naturally rich and moist, while the citrus cuts through the sweetness. Many home cooks now pair it with a vegan chocolate ganache for a decadent twist or serve it alongside a berry chia pudding for a balanced brunch.

Beyond dietary trends, this cake remains a staple for holiday gatherings and cozy weekend baking. Some even simplify the recipe by using store-bought almond flour or blending whole oranges for extra convenience. No matter how you adapt it, the Irresistible Italian Almond-Orange Cake continues to bridge tradition and innovation, one slice at a time.

Taste and Texture

What makes it delicious

The Irresistible Italian Almond-Orange Cake delivers a symphony of flavors and textures with every bite. Its moist, tender crumb melts in your mouth, while the finely ground almonds add a delicate nuttiness and subtle crunch. Bright citrus notes from fresh orange zest and juice dance on your tongue, balanced by the warm, buttery richness of the cake. The aroma alone is intoxicating—fragrant orange blossoms mingling with toasted almonds. Whether served warm or at room temperature, the Irresistible Italian Almond-Orange Cake feels luxuriously soft yet satisfyingly dense, making it a dessert you’ll crave again and again.

Boosting the flavor

Elevate your Irresistible Italian Almond-Orange Cake with a few easy tweaks. For a deeper citrus kick, drizzle it with a glossy honey-orange glaze that seeps into the cake’s pores. Alternatively, fold dark chocolate chunks into the batter for a bittersweet contrast to the bright orange flavor. A dusting of powdered sugar or a dollop of whipped vanilla cream adds elegance, while a sprinkle of toasted almond slices reinforces its nutty charm. Experiment with a pinch of cardamom or cinnamon in the batter for a warm, spiced twist that complements the citrus perfectly.

Tips for Success

Best practices for results

For the perfect Irresistible Italian Almond-Orange Cake, always measure your almond flour precisely to avoid a dense texture. Meanwhile, zest your oranges finely to distribute the citrus flavor evenly. Additionally, use room-temperature eggs for a lighter, fluffier crumb. Finally, let the cake cool completely before slicing to ensure clean cuts and ideal presentation.

Mistakes to avoid

Overmixing the batter can make your Irresistible Italian Almond-Orange Cake tough, so fold ingredients gently until just combined. Similarly, avoid overbaking by checking for doneness a few minutes early—the cake should spring back lightly when touched. For more baking timing tips, check out our guide on perfect baking times. Also, skip artificial orange extracts; fresh zest delivers the best flavor. If you’re unsure about ingredient substitutions, our baking substitutions article can help.

Serving and Pairing Suggestions

How to serve this dish

For a stunning presentation, dust the Irresistible Italian Almond-Orange Cake with powdered sugar and top it with fresh orange zest or edible flowers. Alternatively, serve it with a dollop of lightly sweetened whipped cream or a scoop of vanilla gelato for extra indulgence. This cake shines at brunch gatherings, holiday desserts, or afternoon tea parties. To make it even more inviting, slice it into elegant wedges and arrange them on a vintage cake stand.

What goes well with it

Pair the Irresistible Italian Almond-Orange Cake with a cup of freshly brewed espresso for a classic Italian experience—the bold coffee balances the cake’s citrusy sweetness. If you prefer something cooler, try it with a glass of chilled Prosecco or a fruity herbal tea like our homemade hibiscus tea. For a dessert spread, serve it alongside our lemon ricotta cookies, which share a bright, tangy flavor profile that complements the almond-orange notes perfectly.

What makes Irresistible Italian Almond-Orange Cake so moist?

The Irresistible Italian Almond-Orange Cake gets its moisture from a combination of finely ground almonds, fresh orange juice, and olive oil. The almonds retain moisture while the citrus adds natural freshness, creating a tender crumb that stays delicious for days.

Can I make Irresistible Italian Almond-Orange Cake gluten-free?

Yes! This cake is naturally gluten-free since it uses almond flour instead of wheat flour. Just ensure all other ingredients (like baking powder) are certified gluten-free to keep the Irresistible Italian Almond-Orange Cake safe for gluten-sensitive diets.

How long does Irresistible Italian Almond-Orange Cake stay fresh?

Stored in an airtight container, the cake stays fresh for 3-4 days at room temperature or up to a week refrigerated. The almond-oil base helps the Irresistible Italian Almond-Orange Cake maintain its texture better than traditional butter cakes.

What’s the best way to serve Irresistible Italian Almond-Orange Cake?

Serve slightly warmed with a dusting of powdered sugar or fresh whipped cream. For an authentic Italian touch, pair the Irresistible Italian Almond-Orange Cake with espresso or a sweet dessert wine like Moscato.

Best Cinnamon Toast Delight – Easy Homemade Recipe

best-cinnamon-toast-delight-recipe

“`html

Introduction

There’s something magical about the aroma of warm cinnamon and butter wafting through the kitchen on a lazy morning. Whether you’re craving a cozy breakfast or a sweet afternoon pick-me-up, this Irresistible Cinnamon Toast Delight hits all the right notes. It’s crispy, buttery, and just the right amount of sweet—a nostalgic treat that feels like a hug in every bite. Best of all, you only need a handful of pantry staples to whip it up. If you love simple yet unforgettable recipes, this one will quickly become your go-to comfort food.

About This Recipe

Irresistible Cinnamon Toast Delight is more than just toast—it’s a celebration of simplicity and flavor. Unlike store-bought versions, this homemade twist lets you control the quality of ingredients, ensuring every slice is perfectly balanced. The combination of cinnamon, sugar, and butter creates a caramelized crust that’s downright addictive. Plus, it’s versatile enough to pair with your morning coffee or serve as a quick dessert. If you’re a fan of easy yet impressive recipes like our Classic French Toast, you’ll adore this fuss-free alternative.

What makes this recipe stand out is its universal appeal. Whether you’re cooking for kids, hosting brunch, or treating yourself, Irresistible Cinnamon Toast Delight delivers every time. It’s also a fantastic way to use up leftover bread, reducing food waste while satisfying cravings. For more inspiration on transforming simple ingredients into something special, check out our Homemade Pancake Mix guide. Ultimately, this recipe embodies what we love about home cooking: joy, comfort, and a little bit of indulgence.

Why I Love This Recipe

This recipe holds a special place in my heart because it reminds me of weekend mornings with my grandmother. She’d make her version of Irresistible Cinnamon Toast Delight, always adding a pinch of nutmeg for extra warmth. Now, whenever I make it, the scent alone transports me back to her sunny kitchen. It’s incredible how such a simple dish can carry so much love and memory. Whether you’re creating new traditions or revisiting old ones, this recipe is a delicious way to connect with the people and moments that matter most.

“`

Health and Nutrition

Why it’s good for your body

Irresistible Cinnamon Toast Delight packs a surprising nutritional punch while satisfying your sweet cravings. First, cinnamon, the star ingredient, boasts powerful anti-inflammatory properties that may help regulate blood sugar levels. Additionally, whole-grain bread in this recipe provides fiber, which supports digestion and keeps you full longer. Unlike sugary pastries, Irresistible Cinnamon Toast Delight uses balanced sweetness, so you avoid energy crashes.

Moreover, this treat delivers antioxidants from cinnamon, which combat oxidative stress in the body. If you opt for a protein-rich spread like almond butter, you’ll also fuel your muscles and stay energized. Finally, Irresistible Cinnamon Toast Delight skips artificial additives, making it a cleaner choice than processed desserts. Whether you enjoy it for breakfast or a snack, it’s a flavorful way to nourish your body.

How it fits in a healthy lifestyle

Irresistible Cinnamon Toast Delight fits seamlessly into a balanced diet when enjoyed mindfully. Pair it with a protein source like Greek yogurt or eggs to create a well-rounded meal. For gluten-free diets, simply swap in your favorite gluten-free bread—this recipe adapts easily. If you’re watching sugar intake, reduce the sweetener slightly or try a natural alternative like honey.

This dish also works well for meal prep, so you can enjoy a wholesome snack without last-minute decisions. For more heart-healthy breakfast ideas, explore our overnight oats recipes. And if you love balancing indulgence with nutrition, check out our healthy dessert swaps for more smart treats. With simple tweaks, Irresistible Cinnamon Toast Delight becomes a guilt-free part of your routine.

Print
clock clock iconcutlery cutlery iconflag flag iconfolder folder iconinstagram instagram iconpinterest pinterest iconfacebook facebook iconprint print iconsquares squares iconheart heart iconheart solid heart solid icon

Irresistible Cinnamon Toast Delight


  • Author: Chef Emy

Description

A sweet and crunchy breakfast treat with warm cinnamon and sugar flavors.


Ingredients

Scale

For the Crust:

  • 4 slices of bread
  • 4 tablespoons butter, softened
  • 1/4 cup granulated sugar
  • 1 tablespoon ground cinnamon

Instructions

1. Prepare the Crust:

  1. Preheat oven to 350°F (175°C).
  2. Mix sugar and cinnamon in a small bowl.
  3. Spread butter evenly on each slice of bread, then sprinkle generously with the cinnamon-sugar mixture.
  4. Place slices on a baking sheet and bake for 10-12 minutes until crispy and golden.

Notes

You can customize the seasonings to taste.

How to Prepare This Dish

Steps and time-saving tips

Start by preheating your oven to 350°F so it’s ready when you finish mixing the Irresistible Cinnamon Toast Delight. While the oven heats, grab a large bowl and whisk together softened butter, sugar, and cinnamon until creamy. Next, spread this mixture evenly over thick slices of bread, making sure to cover every corner for maximum flavor. For a time-saving hack, use a pastry brush to speed up the spreading process. Then, arrange the slices on a baking sheet and pop them into the oven for about 10 minutes, or until the edges turn golden and crisp. Meanwhile, whip up a quick glaze by mixing powdered sugar with a splash of milk and vanilla extract. Once the toast comes out of the oven, drizzle the glaze generously over the top while it’s still warm. Let it cool slightly before serving, but don’t wait too long—this dish tastes best when the glaze is still gooey. If you’re short on time, prep the cinnamon butter mix the night before and store it in the fridge. That way, you can assemble and bake in minutes the next morning.

Mistakes I’ve made and learned from

I’ve definitely learned a few lessons the hard way with Irresistible Cinnamon Toast Delight. One time, I rushed and didn’t let the butter soften enough, which made spreading the cinnamon mix a lumpy mess. Now, I take the butter out at least 30 minutes ahead or use the quick softening trick I picked up from another recipe. Another mistake? Overbaking the toast because I got distracted. The difference between perfect and burnt is just a minute or two, so I set a timer religiously now. If you’re new to baking, check out my beginner’s guide to baking for more avoidable pitfalls. Trust me, a little patience goes a long way with this recipe!

Cultural Connection and Variations

Where this recipe comes from

Irresistible Cinnamon Toast Delight feels like a warm hug from childhood, but its roots stretch far beyond any single kitchen. Many cultures have their own spin on cinnamon-sugar toast, from Mexico’s tostadas de canela to Sweden’s kanelbröd. However, this version—with its crispy edges and melt-in-your-mouth center—borrows inspiration from American diner classics and home bakers who craved something extra special.

In my family, we made Irresistible Cinnamon Toast Delight for snowy mornings and sleepover breakfasts. My grandma swore by a dash of nutmeg, while my aunt baked hers under the broiler for extra crunch. Across the South, cooks might add pecans or a drizzle of bourbon glaze. Meanwhile, in France, they layer theirs with almond cream, proving how one simple dish can twist into countless variations.

How it fits in today’s cooking

Today, Irresistible Cinnamon Toast Delight bridges nostalgia and modern convenience. Busy parents stack it into meal-prep breakfasts, while food bloggers reinvent it with gluten-free bread or coconut sugar. It’s a star during holidays—think Christmas morning or cozy fall weekends—but also shines as an anytime treat.

Health-conscious cooks lighten it up with Greek yogurt dips, while others lean into indulgence with salted caramel swirls. Whether you pair it with cold brew coffee or serve it as dessert, this recipe adapts without losing its soul. After all, some comforts never go out of style.

Taste and Texture

What makes it delicious

Irresistible Cinnamon Toast Delight wraps you in warmth the moment it hits your tongue. The buttery, golden toast crunches lightly under your teeth before melting into a soft, chewy center. A fragrant blend of cinnamon and sugar dances on your taste buds, offering just the right balance of sweet and spice. Meanwhile, the caramelized edges add a subtle smokiness that makes every bite unforgettable. Whether you enjoy it fresh from the oven or slightly cooled, Irresistible Cinnamon Toast Delight delivers comfort in every mouthful.

Boosting the flavor

For an extra layer of indulgence, drizzle warm honey or a dollop of whipped cream over your Irresistible Cinnamon Toast Delight. If you love texture, sprinkle chopped pecans or toasted coconut for a satisfying crunch. Pair it with a creamy vanilla glaze or a dusting of cocoa powder for a deeper flavor profile. Craving more inspiration? Try our homemade caramel sauce for a rich twist, or explore our spiced nut mix to elevate the toast’s cozy aroma. Small tweaks make a big difference!

Tips for Success

Best practices for results

Always use fresh cinnamon for the best flavor in your Irresistible Cinnamon Toast Delight. Meanwhile, lightly toast the bread before adding toppings to ensure a crisp texture. Additionally, spread the butter evenly to prevent dry spots, and generously sprinkle the cinnamon-sugar mixture for balanced sweetness. Finally, broil just until bubbly to avoid burning the edges.

Mistakes to avoid

Avoid overloading the bread with toppings, as this can make your Irresistible Cinnamon Toast Delight soggy. Instead, layer ingredients thinly for even cooking. Also, never skip preheating the broiler, or the toast won’t crisp properly. For more on perfecting toast textures, check out our guide on toast perfection. If your sugar mixture clumps, sift it first—this trick works for other desserts too, like our cinnamon sugar secrets.

Serving and Pairing Suggestions

How to serve this dish

Serve Irresistible Cinnamon Toast Delight warm for the best flavor and texture. For a cozy breakfast, stack the slices high on a rustic wooden board and drizzle extra cinnamon sugar on top. Alternatively, arrange them neatly on a vintage platter for a charming brunch spread. During the holidays, sprinkle edible gold dust or festive sprinkles to make it extra special. Whether you’re hosting friends or treating yourself, this dish always feels like a celebration.

What goes well with it

Pair Irresistible Cinnamon Toast Delight with a creamy vanilla latte for a comforting morning combo. The coffee’s richness balances the sweet spice perfectly. For a refreshing contrast, try it alongside our Berry Blast Smoothie, which adds a tangy twist. If you’re serving it as dessert, warm caramel sauce or a scoop of Homemade Vanilla Ice Cream takes it to the next level. Each pairing enhances the dish’s cozy, indulgent vibe.

What makes Irresistible Cinnamon Toast Delight so special?

Irresistible Cinnamon Toast Delight stands out with its perfect blend of warm cinnamon, buttery crispness, and a hint of sweetness. The recipe balances texture and flavor, making it a comforting treat for breakfast or dessert. Unlike basic cinnamon toast, this version adds a delightful crunch and extra richness.

Can I make Irresistible Cinnamon Toast Delight ahead of time?

Yes! You can prepare Irresistible Cinnamon Toast Delight in advance by toasting the bread and storing it in an airtight container for up to 2 days. For the best results, add the cinnamon-sugar topping just before serving to maintain its signature crunch.

What type of bread works best for Irresistible Cinnamon Toast Delight?

Thick-cut brioche or challah bread is ideal for Irresistible Cinnamon Toast Delight because they soak up butter and cinnamon sugar without becoming soggy. For a healthier twist, whole-grain or sourdough bread also works well, though the texture will be slightly denser.

How do I prevent Irresistible Cinnamon Toast Delight from getting soggy?

To avoid sogginess, toast the bread lightly before adding butter and cinnamon sugar. Spread the butter evenly and bake or broil Irresistible Cinnamon Toast Delight until the topping caramelizes slightly. This creates a crisp, golden finish that stays delicious.

Easy Tangy Orange Dreamsicle Salad Delight Recipe

easy-tangy-orange-dreamsicle-salad

“`html

Introduction

There’s something magical about a dessert that brings back childhood memories while still feeling fresh and exciting. Tangy Orange Dreamsicle Salad Delight does exactly that—combining the nostalgic creaminess of a classic dreamsicle with a bright, citrusy twist. Whether you’re prepping for a summer potluck or just craving a sweet yet refreshing treat, this recipe delivers. Plus, it’s incredibly easy to whip up, making it perfect for busy days when you want something special without the fuss. Trust me, one bite and you’ll understand why this dish steals the spotlight at every gathering.

About This Recipe

Tangy Orange Dreamsicle Salad Delight is a creamy, fluffy dessert salad that blends the zesty punch of oranges with the smooth richness of whipped topping. Unlike heavier desserts, it feels light yet satisfying, making it ideal for warm weather or anytime you want a burst of flavor. The secret lies in the balance of tangy citrus and sweet vanilla, creating a harmony that keeps you coming back for more. Moreover, it’s versatile—serve it as a side dish, a dessert, or even a fun breakfast option for special occasions.

This recipe fits perfectly with the playful yet practical vibe of our blog, where we celebrate easy-to-make dishes that don’t skimp on taste. If you love no-bake desserts, you’ll adore how quickly this comes together. For more inspiration, check out our no-bake dessert collection or explore our summer recipe roundup for other crowd-pleasing ideas. Tangy Orange Dreamsicle Salad Delight isn’t just a recipe—it’s a little bowl of joy that brings people together.

Why I Love This Recipe

This recipe holds a special place in my heart because it reminds me of lazy summer afternoons at my grandma’s house. She used to make a similar version, and the first time I tried it, I fell in love with the way the citrus cut through the creaminess. Now, whenever I whip up Tangy Orange Dreamsicle Salad Delight, it feels like carrying on a sweet tradition. It’s also the dish my friends request most often, which tells me I’m not the only one obsessed. Simple, nostalgic, and utterly delicious—what’s not to love?

“`

Health and Nutrition

Why it’s good for your body

Tangy Orange Dreamsicle Salad Delight packs a vibrant mix of nutrients that boost your health in delicious ways. First, the citrusy oranges deliver a hefty dose of vitamin C, which strengthens your immune system and promotes glowing skin. Meanwhile, the creamy yogurt or dairy-free alternative adds probiotics for gut health and calcium for strong bones. Together, these ingredients create a refreshing treat that fuels your body without weighing you down.

Additionally, Tangy Orange Dreamsicle Salad Delight contains natural sugars from fresh fruit, offering a healthier alternative to processed desserts. The fiber in oranges aids digestion and helps maintain steady energy levels. Furthermore, the dish often includes nuts or seeds for a satisfying crunch, contributing healthy fats and plant-based protein. Whether you enjoy it as a snack or dessert, this salad keeps you satisfied while nourishing your body.

Finally, the bright flavors of Tangy Orange Dreamsicle Salad Delight make it an easy way to incorporate more fruit into your diet. Unlike sugary treats, it satisfies cravings without spiking blood sugar. With every bite, you get a balance of vitamins, minerals, and antioxidants. It’s a guilt-free indulgence that tastes as good as it makes you feel.

How it fits in a healthy lifestyle

Tangy Orange Dreamsicle Salad Delight fits seamlessly into a balanced diet, whether you’re focusing on weight management, heart health, or simply eating cleaner. The combination of fruit, protein, and healthy fats makes it a versatile option for breakfast, a snack, or a light dessert. If you’re following a gluten-free lifestyle, this recipe naturally aligns with your needs while still feeling indulgent.

For those tracking macros, Tangy Orange Dreamsicle Salad Delight can easily adapt to your preferences. Swap ingredients like Greek yogurt for extra protein or almond butter for added healthy fats. If you’re looking for more wholesome dessert ideas, check out our guide to healthy dessert swaps. You’ll find plenty of inspiration to keep your meals exciting and nutritious.

Pair this dish with a protein-packed main or enjoy it solo for a refreshing pick-me-up. It’s also a great way to introduce kids to healthier sweets. For more tips on balancing treats with nutrition, explore our meal prep strategies. Tangy Orange Dreamsicle Salad Delight proves that eating well doesn’t mean sacrificing flavor or fun.

Print
clock clock iconcutlery cutlery iconflag flag iconfolder folder iconinstagram instagram iconpinterest pinterest iconfacebook facebook iconprint print iconsquares squares iconheart heart iconheart solid heart solid icon

Tangy Orange Dreamsicle Salad Delight


  • Author: Chef Emy

Description

A refreshing and creamy citrus salad with a hint of vanilla, reminiscent of the classic dreamsicle treat.


Ingredients

Scale

For the Crust:

  • 2 cups mandarin oranges, drained
  • 1 (3.4 oz) package instant vanilla pudding mix
  • 1 (8 oz) container whipped topping
  • 1 cup mini marshmallows
  • 1/2 cup shredded coconut
  • 1/4 cup chopped pecans

Instructions

1. Prepare the Crust:

  1. In a large bowl, whisk together the vanilla pudding mix and whipped topping until smooth.
  2. Gently fold in the mandarin oranges, mini marshmallows, shredded coconut, and chopped pecans.
  3. Cover and refrigerate for at least 30 minutes before serving to allow flavors to meld.

Notes

You can customize the seasonings to taste.

How to Prepare This Dish

Steps and time-saving tips

Start by gathering all your ingredients for Tangy Orange Dreamsicle Salad Delight so everything is within reach. First, whisk together the orange zest, fresh orange juice, and a touch of honey in a large bowl until smooth. Then, gently fold in the whipped topping to keep the mixture light and fluffy. Meanwhile, stir the mini marshmallows and drained mandarin oranges into the blend for a burst of sweetness and texture. If you’re short on time, use pre-whipped topping and canned mandarin oranges to skip extra steps. Next, layer the mixture into a serving dish and drizzle with a swirl of orange marmalade for extra tang. Finally, chill the Tangy Orange Dreamsicle Salad Delight for at least two hours to let the flavors meld. For a quicker set, pop it in the freezer for 30 minutes instead. Serve cold with a sprinkle of toasted coconut or crushed graham crackers for crunch.

Mistakes I’ve made and learned from

I once rushed the chilling step for Tangy Orange Dreamsicle Salad Delight, and it turned out too soft—almost soupy. Now I always plan ahead and let it set overnight if possible. Another time, I overmixed the whipped topping, which deflated the fluffiness. A light fold is key! If you’re new to balancing citrus flavors, check out my guide on citrus dessert tips to avoid overpowering the dish. Also, don’t skip the zest—it’s what gives the salad its bright, dreamy aroma. For more tricks on working with whipped toppings, my whipped cream hacks post saves the day every time.

Cultural Connection and Variations

Where this recipe comes from

Tangy Orange Dreamsicle Salad Delight feels like a nostalgic trip to sunny afternoons and family picnics. Originally inspired by retro American desserts, this dish blends the creamy sweetness of vanilla pudding with the bright zest of oranges. Many Southern cooks add mini marshmallows for extra texture, while others fold in whipped topping for a fluffier finish. Meanwhile, in some Midwestern kitchens, you might find a version with crushed pineapple for a tropical twist.

Around the world, similar fruit salads take on local flavors. In Mexico, for instance, cooks often drizzle citrus salads with chili powder for a spicy kick. In contrast, some European versions skip the dairy entirely and focus on fresh citrus segments with honey. My grandmother, however, always made Tangy Orange Dreamsicle Salad Delight with a splash of orange juice concentrate—her secret for an extra tangy punch. Whether served at potlucks or as a light dessert, this recipe carries a cheerful versatility.

How it fits in today’s cooking

Today, Tangy Orange Dreamsicle Salad Delight still shines as a crowd-pleaser, especially during summer barbecues or holiday spreads. Modern cooks love how easily it adapts to dietary needs—swap in coconut milk for a dairy-free version or use sugar-free pudding for a lighter take. Some even layer it into parfaits for a brunch-ready treat, proving its flexibility.

You’ll often spot this dish alongside other nostalgic favorites, like Classic Ambrosia Salad, at family gatherings. It also pairs perfectly with Easy Lemon Bars for a citrus-themed dessert table. Whether you’re craving a taste of childhood or a refreshing side dish, this recipe keeps earning its place in today’s kitchens. After all, who can resist that creamy, citrusy magic?

Taste and Texture

What makes it delicious

Tangy Orange Dreamsicle Salad Delight bursts with bright, citrusy sweetness balanced by a creamy, velvety texture. The fresh orange zest and juice deliver a vibrant tang, while the whipped topping folds into a cloud-like lightness that melts on your tongue. Every bite offers a playful contrast—juicy mandarin segments pop against the smooth base, and mini marshmallows add a soft, pillowy chew. The aroma alone is irresistible, with fragrant vanilla and citrus notes that make your mouth water before the first spoonful. Whether served chilled or at room temperature, Tangy Orange Dreamsicle Salad Delight feels like a sunny, nostalgic treat with every indulgent bite.

Boosting the flavor

For an extra flavor boost, try swapping vanilla extract with homemade vanilla paste to deepen the richness. A sprinkle of toasted coconut flakes adds a nutty crunch, while a drizzle of salted caramel sauce introduces a buttery contrast to the citrus. If you love texture, fold in crushed graham crackers or a dash of cinnamon for warmth. Tangy Orange Dreamsicle Salad Delight also pairs beautifully with a hint of fresh mint or a splash of citrus liqueur for grown-up flair. Experiment with these twists to make each bite even more memorable.

Tips for Success

Best practices for results

Always chill your mixing bowl before whipping the cream for Tangy Orange Dreamsicle Salad Delight, as this helps it hold its shape better. Meanwhile, gently fold the orange zest into the yogurt mixture to distribute the flavor evenly without overmixing. For the best texture, use fresh mandarin oranges rather than canned ones, and drain them well to prevent excess moisture. Finally, let the salad set in the fridge for at least two hours before serving so the flavors meld perfectly.

Mistakes to avoid

Avoid overwhipping the cream, as it can turn grainy and ruin the fluffy texture of your Tangy Orange Dreamsicle Salad Delight. Instead, stop mixing as soon as stiff peaks form. Another common mistake is skipping the citrus zest, which adds a bright, tangy depth—don’t leave it out! If you’re unsure about balancing sweetness, check out our guide on adjusting recipe sweetness for foolproof tips. Also, resist the urge to skip the chilling step; for more on why resting times matter, explore our importance of chilling desserts post.

Serving and Pairing Suggestions

How to serve this dish

For a stunning presentation, serve Tangy Orange Dreamsicle Salad Delight in a clear glass bowl to showcase its vibrant colors. Alternatively, layer it in individual dessert cups for an elegant touch at brunches or holiday gatherings. Top with a sprinkle of toasted coconut or fresh mint leaves to add texture and contrast. Since this dish balances creamy and citrusy flavors, it works beautifully as a light dessert after a summer barbecue or a refreshing side at potlucks. If you want to impress guests, pair it with edible flowers for a photo-worthy finish.

What goes well with it

Tangy Orange Dreamsicle Salad Delight pairs wonderfully with a crisp sparkling lemonade, which enhances its citrus notes without overpowering the creamy texture. For a heartier meal, try serving it alongside our Fluffy Buttermilk Pancakes—the light sweetness complements the tangy orange flavor perfectly. If you prefer a savory contrast, our Herb-Roasted Chicken balances the salad’s brightness with rich, aromatic herbs. Either way, these pairings turn a simple dish into a memorable meal.

What ingredients are in Tangy Orange Dreamsicle Salad Delight?

Tangy Orange Dreamsicle Salad Delight typically includes mandarin oranges, vanilla pudding mix, whipped topping, cottage cheese or yogurt, and mini marshmallows. Some variations add crushed pineapple or orange gelatin for extra flavor. This refreshing dish balances creamy and citrusy flavors perfectly.

How do you make Tangy Orange Dreamsicle Salad Delight ahead of time?

You can prepare Tangy Orange Dreamsicle Salad Delight 1-2 days in advance by mixing all ingredients except the mandarin oranges, then refrigerating. Add the oranges just before serving to maintain their texture. This make-ahead tip ensures the flavors blend while keeping the salad fresh.

Can you freeze Tangy Orange Dreamsicle Salad Delight?

Freezing isn’t recommended for Tangy Orange Dreamsicle Salad Delight because the dairy and citrus components may separate when thawed. For best results, store it covered in the refrigerator for up to 3 days. The creamy texture and bright flavors are best enjoyed fresh.

Is Tangy Orange Dreamsicle Salad Delight healthy?

While Tangy Orange Dreamsicle Salad Delight contains vitamin C from oranges, it’s generally a dessert-like treat due to the sugar content. For a healthier version, use sugar-free pudding mix, Greek yogurt instead of whipped topping, and fresh fruit. Enjoy it in moderation as a sweet side dish.

Best Carrot Cake Cookies – Soft & Spiced Recipe

best-carrot-cake-cookies-recipe

“`html

Introduction

There’s something magical about the warm, spiced aroma of carrot cake wafting through the kitchen, especially when it comes in the form of bite-sized, chewy cookies. If you love the cozy flavors of classic carrot cake but crave the convenience of a handheld treat, this Irresistible Carrot Cake Cookies Recipe is your answer. Perfect for busy mornings, afternoon pick-me-ups, or even dessert, these cookies pack all the nostalgia and comfort of the beloved cake—without the fuss. Whether you’re a seasoned baker or a newbie, this recipe promises to delight your taste buds and fill your home with irresistible warmth.

About This Recipe

The Irresistible Carrot Cake Cookies Recipe combines the best of both worlds: the tender, spiced crumb of carrot cake and the portable joy of cookies. These treats feature grated carrots, warm cinnamon, and a hint of nutmeg, all folded into a soft, chewy dough. Topped with a creamy glaze or a sprinkle of walnuts, they’re a crowd-pleaser for any occasion. What makes this recipe stand out? It’s quick, adaptable, and delivers that familiar carrot cake flavor in every bite. Plus, it’s a fantastic way to sneak in a veggie boost for picky eaters.

At Brek Cakes, we specialize in recipes that balance simplicity and indulgence, and these cookies fit right in. They’re ideal for those who adore our easy baking hacks but still want something special. Whether you’re prepping for a bake sale or just craving a sweet treat, this recipe aligns perfectly with our mission to make baking accessible and fun. And if you’re a fan of creative twists on classics, you’ll love our decadent dessert ideas, too.

Why I Love This Recipe

This Irresistible Carrot Cake Cookies Recipe holds a special place in my heart because it reminds me of baking with my grandmother. She always added extra cinnamon and let me sneak bites of dough while we worked. Now, whenever I make these cookies, the scent alone transports me back to her sunny kitchen. They’re not just delicious—they’re a little piece of home. Plus, seeing my own kids gobble them up (carrots and all) makes me smile every time. It’s a recipe that bridges generations, and I hope it becomes a favorite in your kitchen, too.

“`

Health and Nutrition

Why it’s good for your body

Irresistible Carrot Cake Cookies Recipe packs a nutritious punch while satisfying your sweet tooth. First, carrots provide a hefty dose of beta-carotene, which your body converts into vitamin A for healthy vision and immunity. Additionally, the recipe often includes whole grains or oats, offering fiber to support digestion and keep you full longer. Moreover, spices like cinnamon and nutmeg add antioxidants that fight inflammation.

Unlike traditional desserts, Irresistible Carrot Cake Cookies Recipe skips excessive refined sugar. Instead, natural sweeteners like honey or maple syrup often make an appearance, reducing blood sugar spikes. Furthermore, nuts or seeds in the mix deliver healthy fats and protein, which help stabilize energy levels. Even better, these cookies can easily adapt to dietary needs, such as using almond flour for a gluten-free version.

Finally, Irresistible Carrot Cake Cookies Recipe balances indulgence with nourishment. The combination of wholesome ingredients means you can enjoy a treat without guilt. Whether you need a midday pick-me-up or a post-workout snack, these cookies deliver flavor and nutrition in every bite.

How it fits in a healthy lifestyle

Irresistible Carrot Cake Cookies Recipe fits seamlessly into a balanced diet. For those watching sugar intake, swapping refined sugar for natural alternatives keeps these cookies heart-healthy. If you follow a gluten-free lifestyle, simply use almond or oat flour to maintain the same delicious texture. Even better, the fiber-rich ingredients help you stay satisfied, preventing unnecessary snacking.

Pair these cookies with a protein-packed snack, like Greek yogurt, for a well-rounded treat. They also make a great addition to meal prep, especially when you need a quick energy boost. For more gluten-free dessert ideas, check out our gluten-free desserts guide. If you’re looking for other ways to incorporate healthy sweets into your routine, explore our balanced baking tips for smarter ingredient swaps. With Irresistible Carrot Cake Cookies Recipe, you can enjoy a tasty treat while staying on track with your wellness goals.

Print
clock clock iconcutlery cutlery iconflag flag iconfolder folder iconinstagram instagram iconpinterest pinterest iconfacebook facebook iconprint print iconsquares squares iconheart heart iconheart solid heart solid icon

Irresistible Carrot Cake Cookies


  • Author: Chef Emy

Description

Soft, chewy cookies packed with carrot cake flavors and topped with a creamy glaze.


Ingredients

Scale

For the Crust:

  • 1 cup all-purpose flour
  • 1/2 teaspoon baking soda
  • 1/4 teaspoon salt
  • 1 teaspoon ground cinnamon
  • 1/4 teaspoon ground nutmeg
  • 1/2 cup unsalted butter, softened
  • 1/2 cup brown sugar
  • 1/4 cup granulated sugar
  • 1 large egg
  • 1 teaspoon vanilla extract
  • 1 cup grated carrots
  • 1/2 cup rolled oats
  • 1/4 cup raisins
  • 1/4 cup chopped walnuts

Instructions

1. Prepare the Crust:

  1. Preheat oven to 350°F (175°C) and line a baking sheet with parchment paper.
  2. In a bowl, whisk together flour, baking soda, salt, cinnamon, and nutmeg.
  3. In another bowl, cream butter and sugars until light and fluffy. Beat in egg and vanilla.
  4. Gradually mix in the dry ingredients, then fold in carrots, oats, raisins, and walnuts.
  5. Drop tablespoon-sized dough onto the baking sheet, spacing them 2 inches apart.
  6. Bake for 12-14 minutes until edges are golden. Cool on the sheet for 5 minutes, then transfer to a wire rack.

Notes

You can customize the seasonings to taste.

How to Prepare This Dish

Steps and time-saving tips

Start by preheating your oven to 350°F and lining a baking sheet with parchment paper. Meanwhile, whisk together the flour, baking soda, cinnamon, and salt in a medium bowl. In a separate large bowl, cream the butter and sugars until fluffy, then beat in the egg and vanilla. Gradually fold the dry ingredients into the wet mixture, but don’t overmix. Stir in the shredded carrots, oats, and raisins for that signature Irresistible Carrot Cake Cookies Recipe texture. Scoop tablespoon-sized dough balls onto the sheet, spacing them two inches apart. Bake for 10-12 minutes until the edges turn golden. Let them cool slightly before transferring to a wire rack. For a quicker cleanup, use a cookie scoop to portion the dough evenly. If you’re short on time, chill the dough for just 15 minutes—it helps prevent spreading and boosts flavor.

Mistakes I’ve made and learned from

I once rushed the creaming step, and my Irresistible Carrot Cake Cookies Recipe turned out dense instead of chewy. Now I beat the butter and sugars for a full three minutes until light and airy. Another time, I skipped draining the shredded carrots, which made the dough too wet. A quick squeeze in a clean towel fixes this—just like I learned from my moist carrot cake tips. Overbaking is easy to do, so I set a timer two minutes early to check. For more troubleshooting, my cookie texture guide breaks down how ingredients affect softness versus crunch. Trust me, these small adjustments make all the difference.

Cultural Connection and Variations

Where this recipe comes from

The Irresistible Carrot Cake Cookies Recipe blends the cozy nostalgia of classic carrot cake with the convenience of handheld treats. Carrot cake itself has roots in medieval Europe, where people sweetened desserts with carrots during sugar shortages. Over time, bakers in America added spices like cinnamon and nutmeg, turning it into a beloved staple. Today, the Irresistible Carrot Cake Cookies Recipe captures that same warmth but in a bite-sized form perfect for modern snacking.

Around the world, variations of carrot-based sweets pop up in surprising ways. In Germany, you might find carrot muffins with a hint of marzipan, while in India, grated carrots star in moist gajar halwa. Some families add pineapple or coconut to their Irresistible Carrot Cake Cookies Recipe for extra tropical flair. Others swap walnuts for pecans or drizzle cream cheese glaze instead of frosting. No matter the twist, these cookies always carry that unmistakable spiced sweetness.

How it fits in today’s cooking

The Irresistible Carrot Cake Cookies Recipe fits seamlessly into today’s kitchens because it balances indulgence with a touch of wholesome ingredients. Busy bakers love how quickly they come together compared to layered cakes, making them ideal for last-minute dessert cravings. Meanwhile, health-conscious tweaks—like using almond flour or reducing sugar—keep them relevant for modern diets.

These cookies also shine during holidays like Easter or Thanksgiving, bridging tradition and convenience. Many home cooks pair them with afternoon coffee breaks, turning an ordinary moment into something special. Whether you stick to the classic recipe or experiment with add-ins, the Irresistible Carrot Cake Cookies Recipe proves that comfort food can adapt without losing its soul.

Taste and Texture

What makes it delicious

Irresistible Carrot Cake Cookies Recipe delivers a cozy, spiced sweetness with every bite. The cookies taste like a warm hug—think cinnamon-kissed carrots, brown sugar richness, and a hint of nutty walnuts. Freshly grated carrots keep them moist and tender, while a creamy frosting drizzle adds a velvety contrast. As you chew, you’ll notice the soft yet slightly chewy texture, punctuated by crunchy pecans or raisins if you add them. Best of all, the aroma of toasted spices and vanilla fills the kitchen, making Irresistible Carrot Cake Cookies Recipe impossible to resist straight from the oven.

Boosting the flavor

Elevate your Irresistible Carrot Cake Cookies Recipe with a few easy tweaks. For extra warmth, try a pinch of cardamom or a splash of orange zest in the batter. Drizzle with a tangy cream cheese glaze or dip half of each cookie in melted white chocolate for a pretty finish. Crushed pineapple or shredded coconut can also add tropical depth. Craving more spice inspiration? Explore our favorite cinnamon tricks or pair these cookies with a homemade chai latte for the ultimate fall treat.

Tips for Success

Best practices for results

Always measure your ingredients precisely for the Irresistible Carrot Cake Cookies Recipe, especially the shredded carrots and spices. Additionally, chill the dough for at least 30 minutes before baking to prevent spreading. For the best texture, use parchment paper on your baking sheets, and rotate the trays halfway through baking. Finally, let the cookies cool completely on a wire rack to ensure they set properly.

Mistakes to avoid

Avoid overmixing the dough, as this can make the Irresistible Carrot Cake Cookies Recipe turn out tough instead of tender. Instead, gently fold the dry ingredients into the wet ones just until combined. Also, don’t skip toasting the walnuts if your recipe includes them—this step enhances their flavor and crunch. For more baking tips, check out our guide on perfect cookie texture. Another common mistake is underbaking the cookies, which leaves them too soft. To fix this, bake them until the edges are golden but the centers are still slightly soft. Learn more about ideal baking times in our baking time tips post.

Serving and Pairing Suggestions

How to serve this dish

Serve these Irresistible Carrot Cake Cookies warm for a cozy treat or at room temperature for a grab-and-go snack. For special occasions, stack them on a rustic wooden tray with a dusting of powdered sugar and a few edible flowers. Meanwhile, during holiday gatherings, arrange them alongside other desserts like our Classic Cinnamon Rolls for a festive spread. If you want to impress guests, drizzle them with cream cheese glaze and add a sprinkle of chopped walnuts for extra texture.

What goes well with it

Pair these Irresistible Carrot Cake Cookies with a steaming cup of chai tea for a spiced, comforting combination. Alternatively, enjoy them with a cold glass of vanilla almond milk to balance the warm cinnamon notes. For a brunch-friendly twist, serve them with our Honey Glazed Bacon to contrast sweet and savory flavors. Finally, a scoop of vanilla bean ice cream turns them into an indulgent dessert.

What makes carrot cake cookies irresistible?

These Irresistible Carrot Cake Cookies Recipe combines the warm spices of carrot cake with a soft, chewy texture, making them hard to resist. The addition of cream cheese frosting or a drizzle of glaze elevates them to a dessert-level treat.

Can I make carrot cake cookies without nuts?

Absolutely! The Irresistible Carrot Cake Cookies Recipe works perfectly without nuts. Simply omit them or replace them with raisins, shredded coconut, or chocolate chips for a different twist.

How do I store carrot cake cookies to keep them fresh?

Store these Irresistible Carrot Cake Cookies Recipe in an airtight container at room temperature for up to 3 days. For longer freshness, refrigerate them for up to a week or freeze for up to 3 months.

Can I use gluten-free flour for carrot cake cookies?

Yes, you can substitute all-purpose flour with a 1:1 gluten-free blend in this Irresistible Carrot Cake Cookies Recipe. Just ensure the blend contains xanthan gum for the best texture, or add ¼ teaspoon per cup of flour.

Best Cranberry Cream Cheese Dip – Easy Holiday Appetizer

best-cranberry-cream-cheese-dip

“`html

Introduction

There’s something magical about a dish that brings people together, and Cranberry Cream Cheese Dip does exactly that. Whether you’re hosting a holiday gathering or just craving a sweet-and-tangy treat, this creamy, vibrant dip never fails to impress. Picture velvety cream cheese topped with a luscious layer of cranberry sauce, perfectly balanced with a hint of citrus and spice. It’s the kind of recipe that sparks conversation, disappears fast, and leaves everyone asking for more. Best of all, it takes minutes to prepare, making it a lifesaver for busy hosts. If you love easy yet show-stopping appetizers, this Cranberry Cream Cheese Dip belongs on your table.

About This Recipe

Cranberry Cream Cheese Dip is a no-fuss, crowd-pleasing appetizer that combines rich cream cheese with a sweet-tart cranberry topping. The contrast of textures and flavors makes it irresistible, while the festive red hue adds a pop of color to any spread. Unlike complicated holiday dishes, this dip comes together with minimal effort, yet it delivers maximum flavor. Simply spread softened cream cheese on a platter, spoon over homemade or store-bought cranberry sauce, and garnish with orange zest or fresh herbs. Serve it with crackers, toasted bread, or even apple slices for a refreshing twist.

What makes this recipe special is its versatility. You can customize it with different add-ins like chopped nuts, a drizzle of honey, or a sprinkle of cinnamon. Plus, it pairs beautifully with other holiday favorites, such as charcuterie boards or baked brie. The blog’s tone celebrates approachable, flavorful cooking, and this dip fits right in. It’s a reminder that great food doesn’t have to be complicated—just delicious. Whether you’re a seasoned cook or a beginner, Cranberry Cream Cheese Dip guarantees smiles and empty plates.

Why I Love This Recipe

This Cranberry Cream Cheese Dip holds a special place in my heart because it’s the appetizer my mom always made during the holidays. I remember watching her spread the cream cheese with such care, then artfully swirling the cranberry sauce on top. The first bite instantly transports me back to those cozy family gatherings, where laughter and good food filled the room. Now, I make it every year for my own friends and family, and it’s become a beloved tradition. It’s more than just a recipe—it’s a little piece of nostalgia that brings people together, and that’s why I’ll never stop making it.

“`

Health and Nutrition

Why it’s good for your body

Cranberry Cream Cheese Dip packs a nutritious punch while delighting your taste buds. First, cranberries bring a wealth of antioxidants, which help combat inflammation and support immune health. Additionally, they provide a tangy sweetness without excessive sugar, especially if you opt for fresh or unsweetened varieties. Meanwhile, cream cheese offers a creamy texture and a dose of calcium for strong bones.

Moreover, this dip balances indulgence with smart nutrition. The combination of cranberries and cream cheese creates a satisfying contrast of flavors while keeping portions in check. Furthermore, you can easily pair Cranberry Cream Cheese Dip with whole-grain crackers or fresh veggies for added fiber. The result? A snack that fuels your body without weighing you down.

Finally, Cranberry Cream Cheese Dip fits into various dietary preferences. For instance, you can use low-fat cream cheese to reduce calories or swap in a plant-based alternative for a dairy-free version. Either way, you still enjoy the same vibrant taste and health perks. Whether you serve it at parties or enjoy it as a midday treat, this dip proves that tasty and nutritious can go hand in hand.

How it fits in a healthy lifestyle

Cranberry Cream Cheese Dip effortlessly complements a balanced diet. If you’re watching your gluten intake, pair it with gluten-free crackers or apple slices for a crunchy, wholesome snack. The dip also works well as part of a heart-healthy spread, especially when you choose reduced-fat cream cheese and fresh cranberries.

For those focused on mindful eating, Cranberry Cream Cheese Dip encourages portion control. Its rich flavor satisfies cravings quickly, so you’re less likely to overindulge. Plus, it’s versatile enough to fit into meal prep—try it as a sandwich spread or a yogurt bowl topper. If you love exploring nutritious dips, check out our guide to healthy dips for more inspiration.

Planning a gathering? This dip shines as a crowd-pleaser that won’t derail health goals. Serve it alongside veggie platters or whole-grain options for a well-rounded appetizer. And if you’re curious about other nutrient-packed recipes, our balanced snack ideas offer plenty of tasty solutions. With Cranberry Cream Cheese Dip, you get flavor and nourishment in every bite.

Print
clock clock iconcutlery cutlery iconflag flag iconfolder folder iconinstagram instagram iconpinterest pinterest iconfacebook facebook iconprint print iconsquares squares iconheart heart iconheart solid heart solid icon

Cranberry Cream Cheese Dip


  • Author: Chef Emy

Description

A creamy and tangy dip with sweet cranberry flavors, perfect for holiday gatherings or snacks.


Ingredients

Scale

For the Crust:

  • 8 oz cream cheese, softened
  • 1/2 cup sour cream
  • 1/4 cup powdered sugar
  • 1 tsp vanilla extract
  • 1 cup whole-berry cranberry sauce
  • 1/4 cup chopped pecans
  • 1/2 tsp orange zest

Instructions

1. Prepare the Crust:

  1. In a mixing bowl, beat the cream cheese until smooth.
  2. Add sour cream, powdered sugar, and vanilla extract. Mix until well combined.
  3. Spread the cream cheese mixture evenly onto a serving plate or shallow dish.
  4. Top with cranberry sauce, spreading it gently over the cream cheese layer.
  5. Sprinkle chopped pecans and orange zest on top.
  6. Chill for at least 30 minutes before serving with crackers or sliced bread.

Notes

You can customize the seasonings to taste.

How to Prepare This Dish

Steps and time-saving tips

Start by softening the cream cheese at room temperature for about 30 minutes to make blending easier. Meanwhile, finely chop the cranberries and toast the pecans for extra crunch. In a large bowl, whip the cream cheese until smooth, then gradually fold in the powdered sugar and vanilla extract. Next, gently stir in the cranberries and half the pecans, reserving the rest for garnish. For a smoother texture, pulse the cranberries in a food processor first. Spread the mixture evenly into a serving dish, then drizzle with honey and sprinkle the remaining pecans on top. Chill the Cranberry Cream Cheese Dip for at least an hour to let the flavors meld. If you’re short on time, pop it in the freezer for 20 minutes instead. Serve with crackers, apple slices, or toasted baguette rounds for a crowd-pleasing appetizer.

Mistakes I’ve made and learned from

I once rushed the softening step and ended up with lumpy cream cheese—now I set it out early or microwave it in 5-second bursts if needed. Another time, I overmixed the cranberries, turning the dip pink instead of leaving vibrant red flecks. Lesson learned: fold them in gently at the end. If your dip feels too thick, a splash of orange juice loosens it perfectly. For more tips on balancing sweet and tart flavors, check out my guide to holiday dips. And if you’re new to working with cream cheese, my cream cheese basics post covers all the tricks to avoid clumps and cracks.

Cultural Connection and Variations

Where this recipe comes from

Cranberry Cream Cheese Dip has roots in American holiday traditions, especially around Thanksgiving and Christmas. Families often serve it as a festive appetizer, pairing the tangy sweetness of cranberries with the smooth richness of cream cheese. Interestingly, some versions of this dish trace back to Midwestern potlucks, where cooks would layer canned cranberry sauce over softened cream cheese for a quick, crowd-pleasing treat.

Over time, the recipe evolved. In the South, you might find a spicier twist with jalapeños or a dash of hot sauce mixed in. Meanwhile, coastal regions sometimes add citrus zest for a brighter flavor. Outside the U.S., similar dips take inspiration from local ingredients. For example, in parts of Europe, lingonberries or red currants might replace cranberries, while in Australia, macadamia nuts could add crunch to the creamy base. No matter the variation, Cranberry Cream Cheese Dip always brings people together.

In my family, we make it with homemade cranberry relish instead of canned sauce, stirring in orange juice and a pinch of cinnamon. It’s a small touch, but it makes the dish feel special. Whether you stick to the classic or experiment with global flavors, Cranberry Cream Cheese Dip adapts beautifully to any table.

How it fits in today’s cooking

Today, Cranberry Cream Cheese Dip remains a holiday staple, but it’s also breaking into everyday entertaining. Busy hosts love how quickly it comes together, and modern cooks often lighten it up with Greek yogurt or dairy-free alternatives. Some even swap in flavored cream cheeses, like honey walnut or chive, for extra depth.

Seasonal eating trends keep this dip relevant, too. When cranberries hit their peak in fall, food bloggers and home chefs alike reinvent the recipe. For instance, you might see it paired with spiced crackers or served alongside a holiday charcuterie board. And let’s not forget its role in game-day spreads—sports fans adore the sweet-and-savory combo with crispy pretzels or wings.

Even beyond parties, Cranberry Cream Cheese Dip fits into cozy nights in. Try spreading it on toast or swirling it into oatmeal for a decadent breakfast. If you’re craving more sweet-and-tangy inspiration, check out these easy dessert recipes to round out your menu. No matter how you serve it, this dip proves that simple ingredients can create unforgettable moments.

Taste and Texture

What makes it delicious

Cranberry Cream Cheese Dip delivers a luscious balance of sweet, tangy, and creamy flavors that instantly excite the palate. The velvety smooth cream cheese base melts in your mouth, while the cranberry sauce adds a vibrant pop of fruity tartness. A hint of orange zest brightens every bite, and a touch of brown sugar deepens the richness. Meanwhile, the texture contrasts beautifully—silky from the cheese, slightly chunky from the cranberries, and with a subtle crunch if you sprinkle nuts on top. Every spoonful of Cranberry Cream Cheese Dip feels indulgent yet refreshing, making it impossible to resist.

Boosting the flavor

Elevate your Cranberry Cream Cheese Dip by stirring in a dash of cinnamon or a splash of vanilla extract for warm, aromatic notes. For a zesty twist, fold in finely chopped jalapeños or a drizzle of honey lime dressing to balance the sweetness. If you love extra texture, top it with toasted pecans or crumbled bacon for a savory crunch. Pair it with cinnamon sugar chips or crisp apple slices to complement the creamy dip perfectly. With these tweaks, you’ll create a showstopping appetizer every time.

Tips for Success

Best practices for results

Always soften the cream cheese fully before mixing to ensure a smooth, lump-free Cranberry Cream Cheese Dip. Additionally, use fresh cranberries for the best tart-sweet balance, and finely chop them for even distribution. For optimal flavor, chill the dip for at least an hour before serving so the ingredients meld together. Meanwhile, toast the pecans lightly to enhance their crunch and nutty taste. Finally, serve with sturdy crackers or apple slices to complement the creamy texture.

Mistakes to avoid

Avoid overmixing the cream cheese, as this can make the Cranberry Cream Cheese Dip too runny. Instead, blend just until combined for the perfect consistency. Also, don’t skip toasting the nuts—raw pecans lack depth and can taste bland. If you’re short on time, check out our quick kitchen hacks for speedy toasting methods. Another common mistake is using canned cranberry sauce, which often overpowers the dip. For a fresher alternative, try our homemade cranberry sauce recipe instead.

Serving and Pairing Suggestions

How to serve this dish

For a stunning presentation, spread the Cranberry Cream Cheese Dip in a shallow bowl or on a festive platter. Then, swirl the top with a spoon to create elegant ridges that catch the light. Sprinkle fresh rosemary or thyme over the dip for a pop of color and aroma. Alternatively, arrange whole cranberries or toasted pecans around the edges for a holiday-ready look. Serve it chilled with crackers or bread for easy scooping. This dip shines at brunches, potlucks, or as a festive appetizer during Thanksgiving and Christmas gatherings.

What goes well with it

Pair Cranberry Cream Cheese Dip with crisp, buttery crackers or toasted baguette slices for a satisfying crunch. The creamy tang of the dip balances perfectly with the mild sweetness of our Honey Glazed Carrots, making them a delightful duo for holiday spreads. For drinks, try a chilled glass of sparkling rosé or apple cider—their bright acidity cuts through the richness. If you love sweet-and-savory combos, serve it alongside our Balsamic Fig Bruschetta for a flavor-packed appetizer spread.

What ingredients are in Cranberry Cream Cheese Dip?

Cranberry Cream Cheese Dip typically includes cream cheese, dried cranberries, orange zest, and a touch of sugar or honey for sweetness. Some recipes add chopped nuts or a splash of vanilla extract for extra flavor. This creamy and tangy dip pairs perfectly with crackers or sliced baguettes.

Can I make Cranberry Cream Cheese Dip ahead of time?

Yes! Cranberry Cream Cheese Dip can be prepared 1-2 days in advance and stored in the refrigerator. Let it sit at room temperature for 15-20 minutes before serving to soften the cream cheese for easier dipping.

What do you serve with Cranberry Cream Cheese Dip?

Cranberry Cream Cheese Dip pairs well with crackers, pretzels, sliced apples, or toasted baguette slices. For a festive touch, try serving it with cinnamon sugar pita chips or ginger snaps to complement the sweet-tart flavor.

How long does Cranberry Cream Cheese Dip last in the fridge?

Cranberry Cream Cheese Dip stays fresh for up to 5 days when stored in an airtight container in the refrigerator. Stir well before serving if any separation occurs. For best texture, avoid freezing this dip as it can alter the cream cheese consistency.