Delicious Funnel Cake Bites: A Sweet Carnival Treat
Funnel Cake Bites are an irresistible carnival-inspired treat that brings the joy of fairs right into your home kitchen. These delightful bites are light, airy, and have a satisfying crunch, offering a sweet experience that is perfect for sharing with family and friends. Coated in powdered sugar and dipped in chocolate sauce or fresh fruits, these funnel cake bites are not only a feast for the taste buds but also an eye-catching dessert that adds excitement to any gathering.
With a quick prep time and simple ingredients, making Funnel Cake Bites is a breeze. The process involves mixing a classic batter that transforms into crispy, golden morsels. Each bite delivers the nostalgic flavors reminiscent of summer fairs, creating an enjoyable and memorable experience. Whether enjoyed at a backyard barbecue or served as a fun dessert for game night, these sweet treats are sure to impress all ages.
Quick Recipe Highlights
- Flavor Profile: The sweet and slightly nutty flavor of fried dough, perfectly complemented by a light dusting of powdered sugar and delicious dipping sauces.
- Texture: Crispy on the outside while remaining soft and fluffy on the inside, these bites provide a delightful contrast.
- Aroma: The warm, sweet aroma fills the kitchen, drawing anticipation with notes reminiscent of childhood fairs.
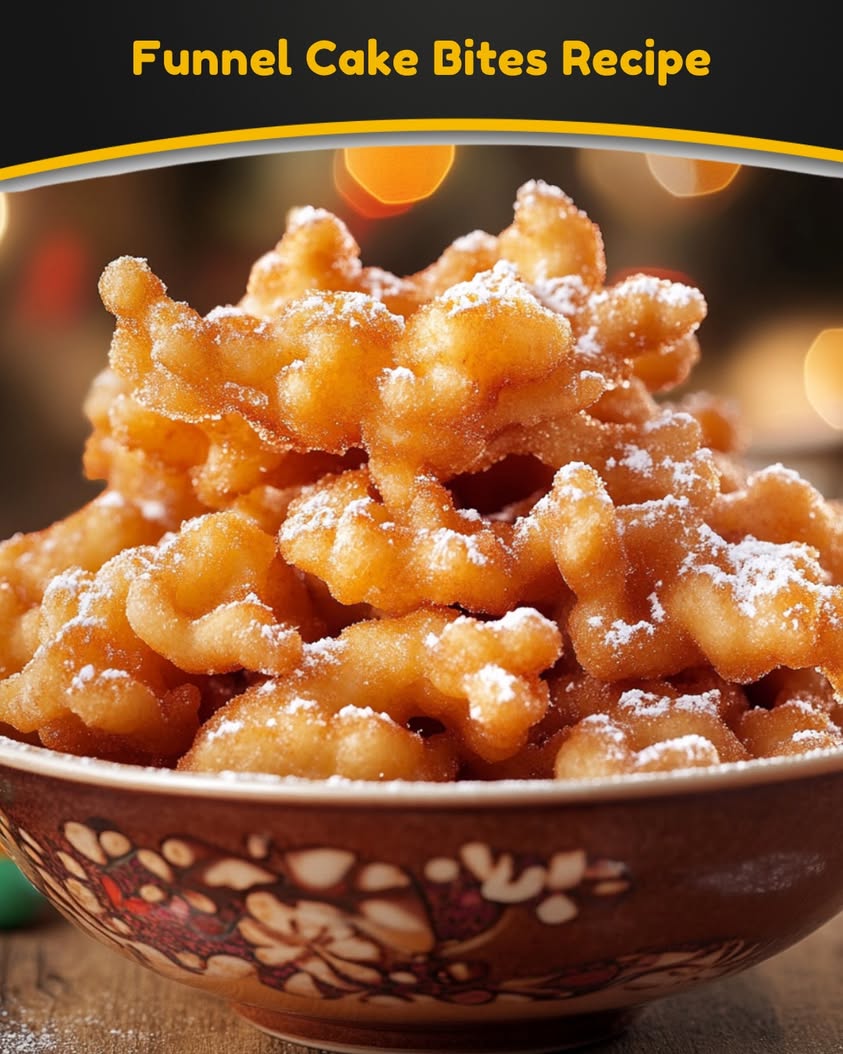
- Visual Appeal: Golden brown bites sprinkled with powdered sugar offer a tempting look that is hard to resist.
- Skill Level Needed: Even novice cooks can master these funnel cake bites with ease; no specialized techniques are required.
- Special Equipment: A deep frying pot or skillet is essential for achieving the perfect crispy texture.
Recipe Overview
- Difficulty Level: This recipe is easy, making it suitable for cooks of all skill levels, from beginner to advanced.
- Category: Perfectly fits into the dessert category, ideal for satisfying sweet cravings.
- Cuisine: Inspired by American carnival cuisine, these bites are a beloved fairground snack.
- Cost: Inexpensive to make, with most ingredients being pantry staples, making it budget-friendly.
- Season: Best enjoyed during warmer months or at outdoor gatherings, though they are delightful year-round.
- Occasion: Great for parties, celebrations, or simply as a fun treat for movie nights or game days.
Why You’ll Love This Recipe
Funnel Cake Bites provide a sweet and crunchy explosion of flavor with each bite. The airy dough, deep-fried to perfection, captivates with its contrasting textures that create a satisfying munch. Served warm, these treats are delightful when topped with powdered sugar, chocolate, or even fresh berries, satisfying any sweet tooth.
The simplicity of the recipe makes it a go-to for both casual and festive occasions. Coming together in a short amount of time, these bites allow for immediate gratification and effortless enjoyment, ideal for spontaneous gatherings or planned events. Plus, as they come together quickly, you can easily make larger batches to ensure everyone has enough to enjoy.
Beyond deliciousness, Funnel Cake Bites offer some nutritional advantages, particularly when prepared at home. You have control over the ingredients, allowing you to minimize unhealthy additives often found in store-bought versions. Utilizing high-quality oil for frying enhances the flavor while deep-frying also results in fewer carbs compared to other heavy desserts.
These treats shine in social settings, creating an inviting and festive atmosphere. It’s common to see a plate of these bites passed around at parties, sparking conversation and laughter as everyone enjoys the sweet, nostalgic flavors together. Their fun size makes them perfect for sharing, ensuring that everyone can join in on the deliciousness without feeling overly indulgent.
Cost-effectiveness is another perk, making this recipe accessible to all. Most of the ingredients, like flour, sugar, and eggs, are budget-friendly staples that can be easily found in any grocery store. Additionally, serving homemade funnel cake bites guarantees freshness and quality, making them a worthwhile investment of your time and resources.
Historical Background and Cultural Significance
Funnel cakes trace their origins back to ancient times, resembling an old-world tradition of frying dough. This cuisine has roots spanning across many cultures, including the medieval times in Europe, where the concept of fried cakes flourished. Over the years, funnel cakes morphed into the fluffy and sweet carnival food we adore today, capturing the essence of fairground festivities.
The cultural significance of funnel cakes lies in their role in celebrations and gatherings. At fairs and carnivals across America, they have become iconic snacks, symbolizing summer fun and nostalgic childhood memories. For many, these treats remind them of joyful experiences spent at amusement parks or county fairs, bonding with friends and family over sweet indulgences.
Throughout history, the evolution of the funnel cake recipe has led to variations based on regional preferences. While the classic version features powdered sugar, some cultures have embraced additional flavors, such as cinnamon or fruit toppings, creating a unique twist on the traditional funnel cake.
Different regions celebrate their own renditions of funnel cakes. For instance, in Pennsylvania Dutch country, the funnel cake is often thicker and denser, indicating adaptations according to local tastes. This versatility has cemented funnel cakes as a beloved comfort food across the nation.
Ingredient Deep Dive
Flour: As the primary ingredient, flour provides the structure and texture of the funnel cake. It’s essential to use all-purpose flour for best results, as it contributes to a light and airy consistency. Additionally, whole wheat flour can offer a healthier alternative with a nuttier flavor. When selecting flour, ensure it has no additives or preservatives for a pure baking experience. Store flour in a cool, dry place, and it can last for several months when sealed properly.
Sugar: Sugar not only sweetens the batter but also contributes to the caramelization during frying, enhancing the golden color and flavor. Granulated sugar is commonly used in funnel cake recipes, while powdered sugar serves as a classic topping after frying. Liquid sugar alternatives, like honey or maple syrup, can provide different flavor profiles if you’re looking for healthier options. Store sugar in an airtight container to maintain freshness and avoid clumping.
Common Mistakes to Avoid
- Using Too Much Flour: Over-measuring flour can lead to dense funnel cakes. Always use a scale for accuracy or use the spoon-and-level method.
- Incorrect Oil Temperature: Frying in oil that’s too hot can burn the exterior before the inside cooks; use a thermometer to ensure the oil is at 350°F (175°C).
- Not Letting the Oil Heat Enough: If the oil isn’t hot enough, the batter will absorb too much and result in greasy bites.
- Pouring Thick Batter: Thin the batter slightly for a better flow when pouring; otherwise, they might not puff up properly.
- Overcrowding the Fryer: Fry in small batches to maintain the oil temperature and ensure even cooking; overcrowding can lower the temperature significantly.
- Skipping Powdered Sugar: Not finishing with a dusting of powdered sugar can result in a less appealing presentation; sugar enhances visual appeal and taste.
- Not Draining Properly: Allow the bites to drain on paper towels after frying to remove excess oil, ensuring a less greasy texture.
- Storing Leftover Batter: Funnel cake batter is best used fresh; it may not produce the same texture if stored for later.
- Not Flavoring the Batter: Don’t miss out on adding vanilla, cinnamon, or nutmeg to the batter for an enhanced flavor profile.
- Overcooking: Keep a close eye during frying to avoid overcooking, which can lead to bitterness. Aim for a light golden brown color.
Essential Techniques
Frying: Frying is critical for achieving that perfect crispy exterior. It’s important to monitor the temperature closely, ensuring consistent, high heat. If you can’t maintain the temperature, you’ll end up with undercooked or overly greasy results. Use a deep-frying thermometer to check the oil regularly, and add a few test bites to check for proper frying time. The right visual cue is a golden brown color, about 2-3 minutes per side.
Pouring Technique: The way you pour the batter into the hot oil can influence how the funnel cakes puff and form. To create interesting shapes, hold the funnel (or piping bag) above the oil and move it in circular motions while releasing the batter. Mastering this technique can help achieve the signature funnel cake look, with those delightful, irregular shapes that invite curiosity and indulgence.
Pro Tips for Perfect Funnel Cake Bites
1. **Maintain Oil Temperature:** Use a thermometer to ensure oil stays between 350-375°F while frying. This prevents sogginess and achieves the ideal crunch.
2. **Experiment with Flavors:** Add different extracts or spices like almond extract or cinnamon to the batter for unique flavor profiles that elevate the overall taste.
3. **Non-stick Spray:** Lightly spray the oil with non-stick spray before pouring in the batter to prevent sticking, and make cleanup easier.
4. **Serving Ideas:** Pair with a variety of dipping sauces, including chocolate, caramel, or fruit purees to cater to individual preferences.
5. **Use a Sifter:** For a more refined presentation, use a sifter to dust powdered sugar, creating an even and delicate finish.
6. **Keep ‘Em Warm:** If making in batches, keep finished bites in a warm oven set to low to maintain their crispiness without overcooking.
7. **Sift Dry Ingredients:** Sifting flour and powdered sugar can eliminate lumps and help achieve a lighter batter and topping.
8. **Creative Toppings:** Try drizzling melted chocolate or adding sprinkles for a festive touch – perfect for parties or celebrations.
Variations and Adaptations
Funnel Cake Bites can be catered to various palates and dietary needs, offering a wide range of delectable variations. For instance, you can incorporate seasonal flavors by adding pumpkin spice in the fall or peppermint during the winter holidays, transforming the simple treat into a festive delight.
For a healthier spin, consider using alternative flours, such as almond or coconut flour, to make them gluten-free while keeping the same decadent flavor. You can also experiment with different spices like cardamom, nutmeg, or even matcha for unique flavor profiles that suit your culinary creativity.
Dietary modifications can also include crafting vegan versions by substituting eggs with flaxseed meal or applesauce, ensuring those with dietary restrictions can indulge in these delightful bites. Presentation can evolve too; try serving funnel cake bites in waffle cones with various toppings to enhance your serving appeal, turning the experience into a fun fairground-style treat.
Serving and Presentation Guide
When serving Funnel Cake Bites, presentation matters! Opt for a clean white plate to keep the focus on the golden-brown treats, adding a generous dusting of powdered sugar on top. You can elevate your display by serving the bites in individual paper cups or mini cones, enhancing the carnival spirit and making them easy for guests to grab.
Consider garnishing with fresh berries, whipped cream, or drizzles of chocolate and caramel sauce for an extra flair. A scattering of edible flowers can also add a beautiful touch for special occasions, while serving the cakes warm ensures a delightful experience. Offer a variety of dipping sauces in small bowls for guests to mix and match their flavors, keeping the fun interactive and delicious!
Wine and Beverage Pairing
For an adventurous twist, pair your Funnel Cake Bites with dessert wines like Riesling or Moscato, which complement the sweetness without overpowering the flavors. These wines’ fruity and floral notes can harmonize with the fried dough, enhancing the overall tasting experience.
If you’re looking for non-alcoholic alternatives, consider serving fresh fruit sodas or sweet iced teas to balance the sweetness of the treats while keeping things light and refreshing. For coffee enthusiasts, a small cappuccino or latte can bring an elegant touch to the dessert table, providing a perfect contrast to the sugary bites.
Remember to serve beverages chilled or warm, depending on your choices; a chilled beverage will provide a refreshing contrast to the warm, fried deliciousness of the funnel cake bites, while a warm beverage can add a cozy touch.
Storage and Shelf Life
Proper storage of Funnel Cake Bites is crucial for maintaining their freshness. Store any leftover bites in an airtight container at room temperature for up to 2 days. For longer storage, wrap them in plastic and keep them in the freezer, where they can last up to one month.
Reheating is easy! Simply pop them back in a preheated oven at 350°F for about 5-10 minutes until crispy again. Avoid using the microwave, as it can make the bites soggy. When checking for spoilage, look for any off smells or unusual textures, and discard if necessary to ensure the best taste experience.
Make Ahead Strategies
To save time, consider preparing the batter a few hours ahead and chilling it in the refrigerator, which can enhance the flavors and overall texture of the bites. This way, when you’re ready to fry, just pour the batter directly into the hot oil.
Another strategy is to premeasure all the dry ingredients and store them in a labeled container, reducing prep time significantly when you’re ready to cook. Prepare your frying station in advance, ensuring your oil is heated before you begin for quick assembly. Remember to keep an eye on freshness when preparing items in advance and store them properly to maintain their delightful taste.
Scaling Instructions
If you’re cooking for a crowd or scaling down for a smaller gathering, adjusting the number of servings is straightforward. For halving the recipe, simply divide all the ingredients by two while ensuring to maintain cooking times, monitoring the bites to avoid overcooking.
To double or triple the recipe, ensure you have adequate frying space, especially in larger pots or multiple skillets. Adjust your cooking batches to maintain oil temperature and consistent results. If using larger quantities, consider timing slightly; larger batches may require added cooking time due to the temperature recovery of the oil.
Always keep an eye on portion sizes and presentation, especially if preparing for a crowd, to ensure the Funnel Cake Bites remain recognizable and delightful.
Nutritional Deep Dive
When considering the nutrition behind Funnel Cake Bites, it’s essential to look into the macronutrients. A standard serving may contain high carbohydrates due to flour and sugar; however, they typically offer low protein and fat content. Adjusting portion sizes and ingredient types can modify these nutritional values significantly.
Micronutrients may vary depending on the frying oil used and any additional toppings. Regular consumption of homemade funnel cake bites can provide occasional treats while focusing on balance, using fresh fruits and whipped cream to increase the overall nutritional profile. For those interested in weight management, keeping track of portion sizes and frequency of consumption is key to indulging without overindulgence.
Dietary Adaptations
For guests with gluten sensitivities, consider creating gluten-free Funnel Cake Bites using gluten-free flour blends, which can replicate similar textures and flavors. For those who are dairy-free or vegan, swap regular milk for almond or oat milk and use applesauce in place of eggs for maximum flavor without the dairy.
Keto and low-carb enthusiasts can enjoy a modified version made with almond flour or coconut flour, reducing carbs without compromising taste. Ensure that each adjustment is carefully considered to achieve the desired results without losing the treasured funnel cake taste.
Troubleshooting Guide
If you encounter texture issues such as sogginess in your Funnel Cake Bites, check the oil temperature and ensure adequate draining after frying; excess moisture can lead to unwanted softness. For flavor balance, always taste the batter before frying, adjusting sugar or salt as needed to achieve your desired sweetness.
Temperature problems can arise if the oil is not hot enough, causing the bites to absorb too much oil. Maintain that critical frying temperature throughout the process. If you face challenges with ingredient substitutions, seek out similar textures and flavors to prevent altering the overall outcome dramatically.
Timing concerns during preparation can be managed by setting your workstation efficiently and prepping as much as you can before cooking, allowing you to focus on frying without distractions.
Recipe Success Stories
Community feedback on Funnel Cake Bites highlights how these treats elicit joyous memories and experiences. Readers often share success stories regarding family gatherings where homemade funnel cakes took center stage, creating an atmosphere of nostalgia and delight.
Variation successes have emerged, with many sharing how they adapted the recipe for special occasions, experimenting with flavors and textures, leading to rave reviews from friends and family. Additionally, readers have provided tips and feedback on enhancing presentations, proving to be great sources of inspiration for future versions.
Photography tips also feature prominently, with commenters emphasizing how plating and lighting can elevate the visual narrative of Funnel Cake Bites, encouraging everyone to share their delightful creations on social media.
Frequently Asked Questions
Can I use a different type of oil for frying?
Yes, while vegetable oil is commonly used, you can also use canola or peanut oil. Each oil will impart a slightly different flavor, so feel free to experiment based on your preferences.
How do I prevent my funnel cake bites from sticking to the pan?
Ensure your oil is at the proper temperature before adding the batter and avoid overcrowding the frying pan. Using a non-stick spray on the frying surface can also help minimize sticking.
What can I do with leftover batter?
It’s best to use the batter fresh, but if you have any leftover, you can store it in the fridge for up to a couple of hours. Beyond that, the batter may not rise as well once heated.
Are Funnel Cake Bites easy to make with kids?
Absolutely! Funnel Cake Bites are relatively simple to make and can be a fun cooking project with kids. Just be sure to supervise around hot oil for safety.
Can I bake these instead of frying?
While frying gives the best texture and flavor, baking can yield a lighter version. Preheat your oven to 400°F (200°C) and spoon the batter onto a lined baking sheet, but expect a different texture
Do these freeze well?
Yes! You can freeze cooked funnel cake bites for up to a month. Just make sure to store them in an airtight container, and when you’re ready, reheat them in the oven for best results.
How do I know when they are done frying?
Funnel Cake Bites are done when they are golden brown and float on top of the oil. Use a slotted spoon to remove them and allow them to drain on paper towels.
What toppings do you recommend?
For the classic approach, dust with powdered sugar, but you can also drizzle melted chocolate, caramel sauce, or even serve with fresh berry compote for a delicious twist.
Can I make them ahead of time?
While funnel cake bites are best served fresh, you can pre-make the batter and keep it chilled until you’re ready to fry, ensuring you can whip them up quickly.
How do I achieve a crispy texture?
Maintaining the right oil temperature is key; ensure your oil is hot enough before adding the batter, and don’t overcrowd the frying surface to keep the temperature steady.
Additional Resources
If you’re interested in exploring more scrumptious desserts that harness the carnival spirit, try our delightful recipes for fried Oreos or churros! Delve deeper into frying techniques with our comprehensive guides that offer tips for achieving perfectly golden results every time. Seasonal variations like pumpkin spice batter for autumn or berry-infused versions for summer parties can keep your funnel cake bites exciting.
Looking for the perfect tools? Check our recommendations for the best frying pans and thermometers designed for home use. Connect with the community to find seasonal variations that suit special occasions; you’ll discover a treasure trove of inspiration to accompany your next batch of Funnel Cake Bites!
Join the Conversation
We’d love to hear about your experiences with this recipe! Share your Funnel Cake Bites photos on social media and join our community. Don’t forget to leave a review and share any personal tips or adaptation stories, as we firmly believe in learning from one another’s culinary adventures. Recipe reviews help others discover the joy of making Funnel Cake Bites and encourage creativity in the kitchen.
Let’s continue to share, adapt, and enjoy this delightful treat together! Your feedback could inspire our next creation!
The Recipe
Funnel Cake Bites
Serves: 4-6 servings
Prep Time: 15 mins
Cook Time: 10 mins
Total Time: 25 mins
Kitchen Equipment Needed
- Deep frying pot or skillet
- Cooking thermometer
- Slotted spoon
- Piping bag or funnel
- Large bowl for mixing
Ingredients
- 2 cups all-purpose flour
- 1/4 cup granulated sugar
- 1 teaspoon baking powder
- 1/2 teaspoon salt
- 1 teaspoon vanilla extract
- 2 cups milk
- Vegetable oil for frying
- Powdered sugar for dusting
Directions
- In a large bowl, mix together the flour, sugar, baking powder, and salt.
- In another bowl, whisk together the milk and vanilla extract.
- Combine the wet and dry ingredients, stirring until just blended.
- Heat the oil in a deep-fryer or large pot to 350°F.
- Using a piping bag or funnel, drizzle the batter into the hot oil in a spiral shape.
- Fry until golden brown, about 2-3 minutes per side.
- Remove from the oil and drain on paper towels.
- Dust with powdered sugar before serving.
Recipe Notes
- For flavor variations, consider adding spices such as cinnamon or nutmeg to the batter.
- Make sure the oil temperature is consistent for optimal frying results.
- These bites are best served warm; reheat in the oven for a few minutes if necessary.