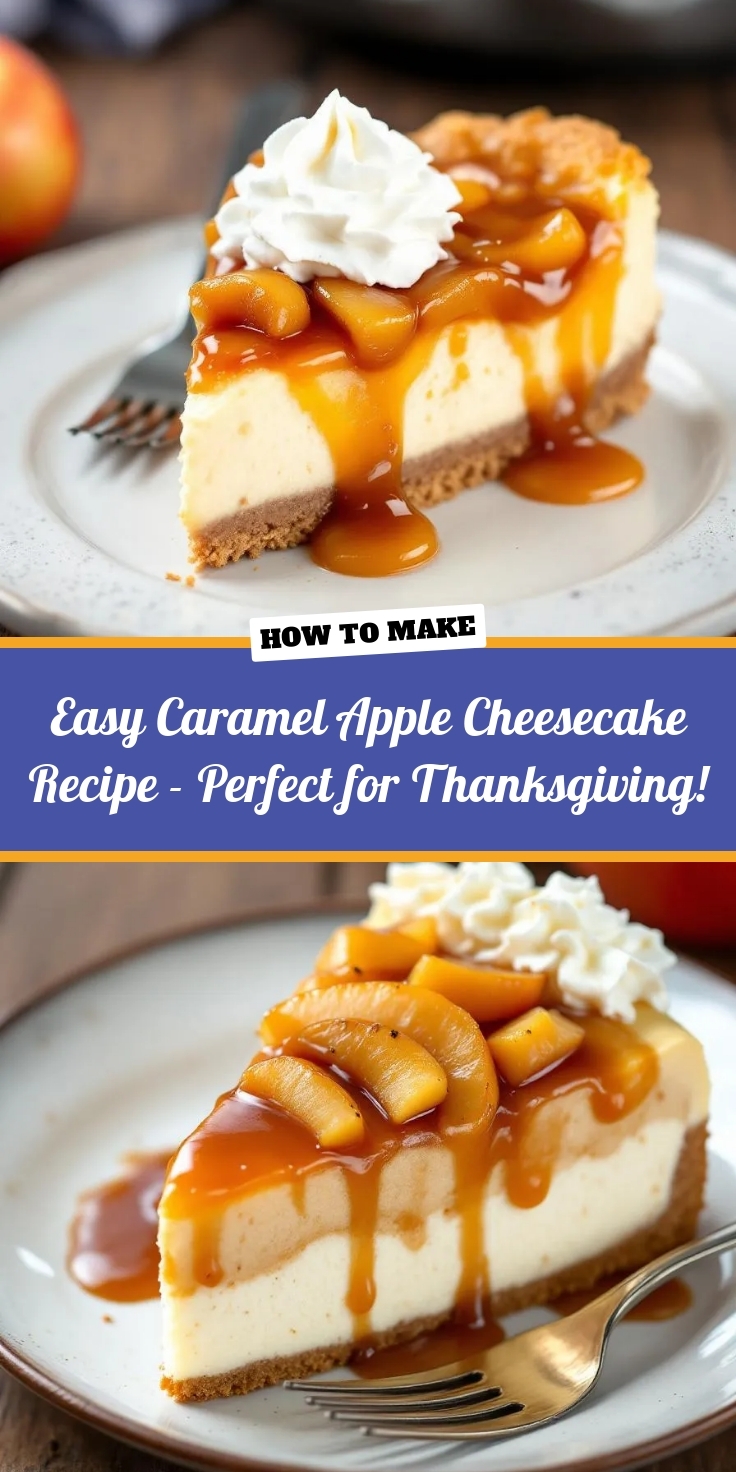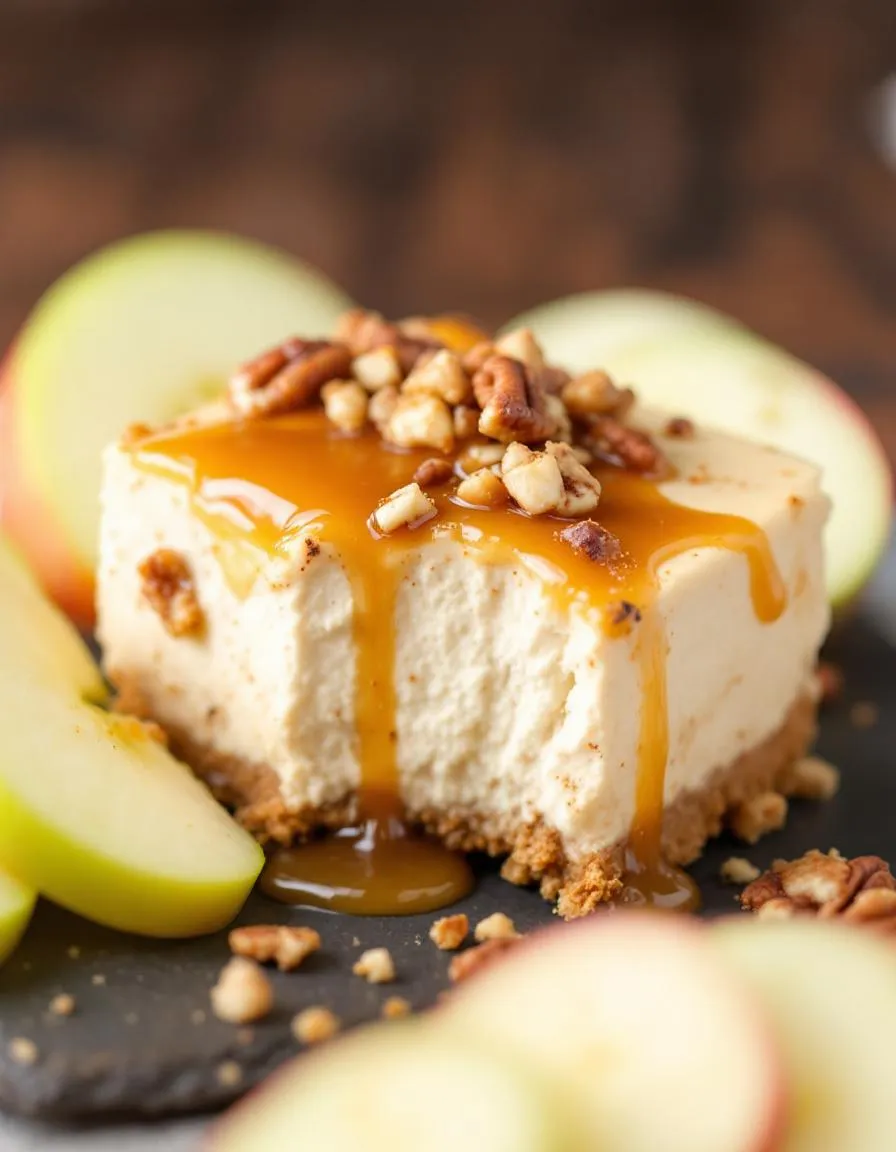
Easy Caramel Apple Cheesecake Dip Recipe

easy-caramel-apple-cheesecake-dip

Imagine the crisp air of fall, the cozy sweaters, and the unmistakable scent of cinnamon and apples wafting through your kitchen. Now, picture capturing all that magic in a bowl without spending hours baking. This dream becomes your delicious reality with our irresistible Easy caramel apple cheesecake dip. It perfectly combines the creamy, tangy flavor of cheesecake with the sweet, spiced comfort of caramel apples, creating a dessert that feels both nostalgic and excitingly new. Best of all, you can whip it up in mere minutes, leaving you more time to enjoy the season with loved ones.

About This Recipe

This Easy caramel apple cheesecake dip is a no-bake dessert that masterfully blends smooth, whipped cream cheese with brown sugar and warm spices. Furthermore, we fold in generous swirls of rich caramel sauce and tender, diced apples for the ultimate textural experience. Consequently, this treat delivers the iconic flavor profile of a classic caramel apple or a slice of decadent cheesecake in a simple, scoopable form. It matters because it solves the perennial problem of wanting an impressive, crowd-pleasing dessert without the complexity. Ultimately, it fits our blog’s tone perfectly as we champion approachable recipes that deliver maximum flavor and joy, just like our popular no bake cheesecake.

You simply mix a few core ingredients until they are light and fluffy, then gently stir in your toppings. The entire process takes about ten minutes, making it an ideal last-minute solution for unexpected guests or sudden sweet cravings. Moreover, its versatility is a huge win. You can serve it with graham crackers, apple slices, pretzels, or even spoon it directly over ice cream. This flexibility makes the Easy caramel apple cheesecake dip a superstar for everything from Halloween parties to Thanksgiving feasts. It embodies the same spirit of easy elegance as our chocolate dipped strawberries, turning simple ingredients into something truly special.

Why I Love This Recipe

I truly love this Easy caramel apple cheesecake dip because it became an instant tradition in our home. One autumn evening, I needed a quick dessert for a family gathering and threw this together with ingredients I had on hand. The moment my nieces dipped their first apple slice into the creamy mixture, their faces lit up with pure joy. Now, they request it every time they visit, and we always make a big batch together. It represents more than just a recipe to me. It symbolizes those spontaneous, happy moments of connection that happen over truly great food.

Health and Nutrition

Why it’s good for your body

This Easy caramel apple cheesecake dip offers more than just incredible flavor. For instance, the primary ingredient, apples, provides a solid dose of dietary fiber. Consequently, this fiber supports healthy digestion and helps you feel fuller longer. Moreover, apples bring essential vitamins like vitamin C to the mix, which actively boosts your immune system.

Additionally, the dairy components contribute significant nutritional value. Cream cheese and Greek yogurt, for example, deliver a satisfying amount of protein and calcium. Therefore, these nutrients are vital for maintaining strong bones and supporting muscle repair. Furthermore, when you choose this dip, you are selecting a treat that balances indulgence with beneficial ingredients.

Ultimately, this Easy caramel apple cheesecake dip smartly combines fruit and dairy. As a result, you receive a dessert that provides both quick energy and more sustained nutritional benefits. Finally, enjoying this creation means you are treating your body to a snack with multiple health advantages wrapped in a delicious package.

How it fits in a healthy lifestyle

You can absolutely enjoy this Easy caramel apple cheesecake dip as part of a balanced diet. Think of it as a perfect example of mindful indulgence. Pair a sensible portion with fresh apple slices for a snack that satisfies your sweet tooth while also providing fruit servings. This approach makes it easy to enjoy dessert without overdoing it.

This recipe naturally fits into several dietary patterns. For anyone following a gluten-free lifestyle, this dip is a fantastic safe option. If you are looking for more delicious gluten-free ideas, explore our guide to gluten-free baking for inspiration. The protein from the dairy can also help make this treat more satisfying, curbing the urge to overindulge.

Remember, a healthy lifestyle is all about balance and enjoyment. Incorporating treats you love, like this dip, prevents feelings of deprivation. For more strategies on finding that perfect balance with your favorite foods, check out our tips for healthy dessert swaps. So go ahead, savor this delicious dip and celebrate a balanced approach to eating.

Print
clock clock iconcutlery cutlery iconflag flag iconfolder folder iconinstagram instagram iconpinterest pinterest iconfacebook facebook iconprint print iconsquares squares iconheart heart iconheart solid heart solid icon

Easy Caramel Apple Cheesecake Dip


  • Author: Chef Emy

Description

A creamy, no-bake cheesecake dip swirled with caramel and perfect for dipping apple slices.


Ingredients

Scale

For the Crust:

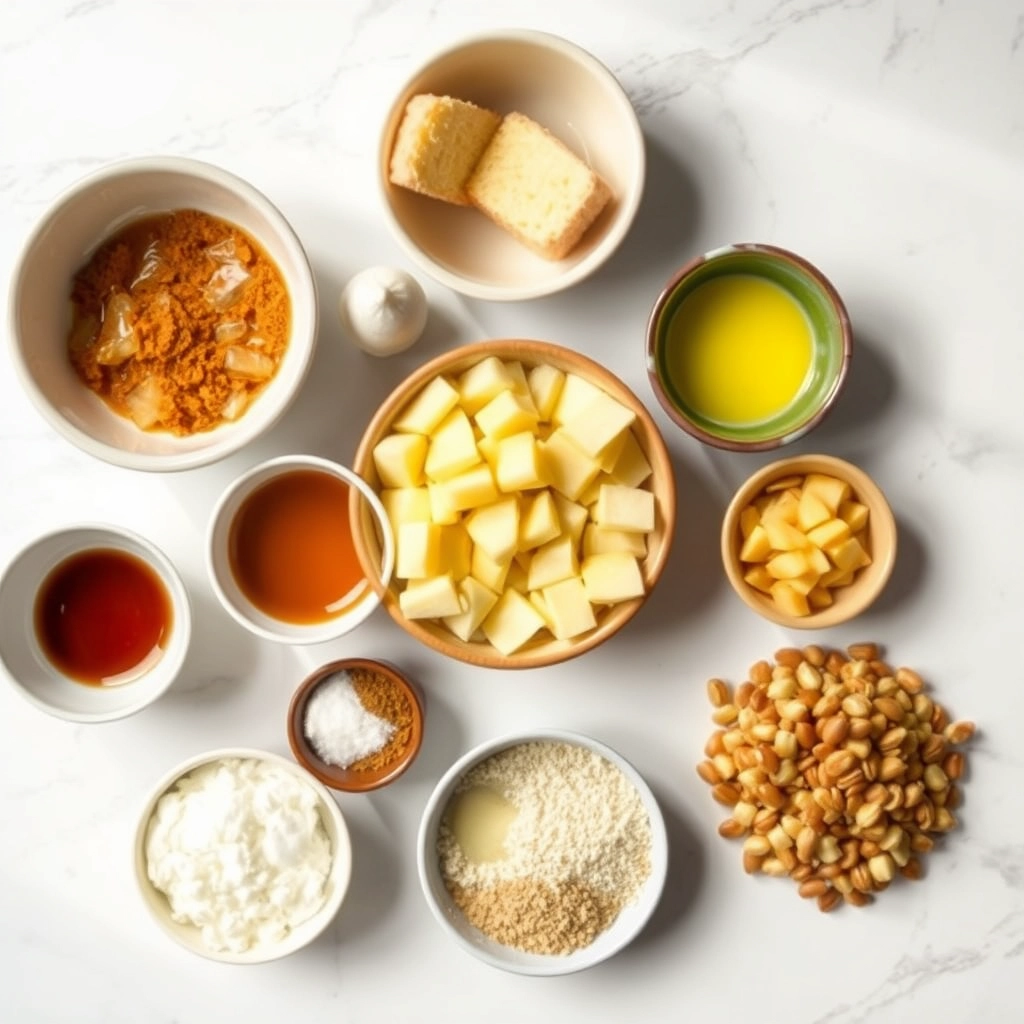
  • 8 oz cream cheese, softened
  • 1/2 cup powdered sugar
  • 1 tsp vanilla extract
  • 1/2 cup caramel sauce, plus extra for drizzling
  • 1/2 tsp ground cinnamon
  • 1/4 cup chopped pecans (optional)
  • Apple slices, for serving

Instructions

1. Prepare the Crust:

  1. In a medium bowl, beat the cream cheese until smooth and creamy.
  2. Add powdered sugar, vanilla extract, and cinnamon. Beat until well combined and fluffy.
  3. Fold in half of the caramel sauce gently to create swirls.
  4. Transfer to a serving bowl and drizzle with remaining caramel sauce. Sprinkle with chopped pecans if desired.
  5. Chill for at least 30 minutes before serving with apple slices.

Notes

You can customize the seasonings to taste.

How to Prepare This Dish

Steps and time-saving tips

First, grab a large mixing bowl and your hand mixer. Beat the softened cream cheese until it becomes completely smooth and fluffy; this crucial step prevents any unappetizing lumps in your final dip. Gradually add the brown sugar and vanilla extract, then continue mixing for another two minutes until everything is well combined and creamy. Next, gently fold in the whipped topping until you see no more white streaks. Meanwhile, chop your apple into very fine, bite-sized pieces to ensure a perfect scoop every single time. Stir most of the chopped apple directly into the creamy base, reserving just a small handful for a pretty garnish on top. Finally, drizzle a generous amount of caramel sauce over everything and give it one last gentle swirl. For the best flavor and texture, you must chill the dip for at least thirty minutes before serving. This brief rest in the refrigerator allows the flavors to meld together beautifully. Serve your masterpiece with graham crackers, sliced apples, or even pretzels for a delightful sweet and salty contrast.

Mistakes I’ve made and learned from

I once made the classic mistake of using cream cheese straight from the fridge for my Easy caramel apple cheesecake dip. The result was a lumpy, gritty mess that no amount of mixing could fix! Now I always plan ahead and let my ingredients properly come to room temperature, which creates that dreamily smooth texture we all love. Another lesson learned the hard way was using the wrong apples. I initially chose a variety that turned mushy and brown far too quickly, which made the dip look unappealing. After some trial and error, I discovered that crisper, tart apples like Granny Smith hold up much better. For more insights on selecting the perfect fruit, check out my guide on choosing fruit for baking. And if you’re worried about presentation, my tips for make ahead desserts will ensure your dip stays fresh and gorgeous until you’re ready to serve.

Cultural Connection and Variations

Where this recipe comes from

This dip weaves a delicious tale of two classic American traditions. Fundamentally, it pulls the creamy, tangy joy of New York-style cheesecake straight from its deli case and places it right next to the sticky-sweet fun of a county fair caramel apple. Consequently, we get a dessert that feels both nostalgic and brilliantly new. My own family always prepares a big bowl for our annual Halloween party. The kids dunk their apple slices with gusto, while the adults find sophisticated ways to enjoy it, perhaps with a shortbread cookie or even a spoon.

Around the world, people put their own spin on creamy fruit dips. For instance, in some European countries, a similar concept might feature quark or fromage blanc instead of cream cheese, offering a slightly tangier profile. Furthermore, some families add a handful of toffee bits for extra crunch, while others might stir in a pinch of warm cinnamon or nutmeg to enhance the autumnal feeling. No matter the variation, the goal remains the same: sharing a communal, dippable delight. Ultimately, this easy caramel apple cheesecake dip captures that universal spirit of gathering around good food.

How it fits in today’s cooking

This recipe absolutely thrives in modern cooking because it champions ease and adaptability. Today’s home cooks constantly seek impressive yet simple recipes for hectic schedules and last-minute gatherings. Thankfully, this easy caramel apple cheesecake dip delivers immense flavor without any fuss. It fits perfectly into autumn entertaining, becoming a staple at tailgates, Thanksgiving potlucks, and cozy movie nights alike.

Moreover, many modern adaptations make it even more versatile. For example, health-conscious folks might use a Greek yogurt base or sugar-free caramel, while others might prepare a gluten-free apple crisp as a dippable companion. It also seamlessly transitions from a party snack to a clever component of a larger dessert spread. Personally, I often serve it alongside a slice of chocolate pumpkin cake for the ultimate fall flavor combination. Ultimately, its enduring relevance proves that some combinations are simply timeless.

Taste and Texture

What makes it delicious

This Easy caramel apple cheesecake dip delivers a spectacular creamy texture that feels luxuriously smooth on your tongue. Each bite bursts with the sweet, buttery flavor of caramel, perfectly balanced by the rich, tangy cream cheese base. Consequently, the fragrant notes of vanilla and warm cinnamon weave through the dip, creating an aroma that is simply irresistible. Crisp, tart apple slices provide a refreshing crunch, making the overall experience both decadent and playful. Ultimately, this Easy caramel apple cheesecake dip masterfully combines the best parts of a cheesecake and a caramel apple into one irresistible, scoopable treat.

Boosting the flavor

For an even more decadent experience, consider folding in chunks of your favorite candy bar. Alternatively, a sprinkle of flaky sea salt on top beautifully intensifies the sweet caramel notes. You can also explore a different fruit profile by serving it with our cinnamon sugar pita chips for a warm, spiced crunch. Furthermore, a drizzle of homemade salted caramel sauce adds a professional, gourmet finish that will impress any guest. Finally, a pinch of nutmeg or a splash of bourbon can introduce a wonderfully warm and complex flavor dimension.

Tips for Success

Best practices for results

First, always use full-fat cream cheese for the richest and creamiest texture in your Easy caramel apple cheesecake dip. Additionally, ensure your cream cheese sits at room temperature for at least 30 minutes before you begin mixing. Consequently, this step prevents a lumpy consistency and allows for a perfectly smooth blend with the other ingredients. For the best flavor, use a high-quality caramel sauce and fold it in gently to create beautiful swirls throughout the dip.

Mistakes to avoid

One common mistake is over-mixing the dip, which unfortunately incorporates too much air and makes the texture thin and foamy. Instead, mix the ingredients on low speed just until they become fully combined. Furthermore, do not skip the chilling step; this Easy caramel apple cheesecake dip needs time for the flavors to meld and the texture to firm up properly. For more guidance on achieving the perfect creamy base, read our guide on how to make no bake cheesecake. Also, if your dip seems too thick, avoid adding milk, as this can dilute the flavor; instead, a tablespoon of sour cream will loosen it perfectly. For tips on selecting the best apples to serve alongside, check out our best apples for baking article.

Serving and Pairing Suggestions

How to serve this dish

First, present your Easy caramel apple cheesecake dip in a beautiful, wide-rimmed bowl. This style makes dipping a breeze for everyone. For a truly stunning look, create a swirl on the surface with the back of a spoon. Then, generously sprinkle extra graham cracker crumbs and tiny apple dice on top for a gorgeous finish.

Serve this dip chilled at your next holiday gathering or game day party. Alternatively, it makes a fantastic centerpiece for a brunch dessert table. You can even set out small individual cups for a fun, grab-and-go treat. Ultimately, your guests will adore this simple yet impressive dessert.

What goes well with it

Offer an array of dippers for a fantastic textural experience. Crisp apple slices and salty pretzel rods provide a wonderful sweet-and-salty contrast. Furthermore, graham cracker sticks and soft ginger cookies beautifully complement the creamy cheesecake flavor.

Pair this dessert dip with a warm mug of spiced chai tea for a cozy evening. The spices in the tea will highlight the warm notes in the Easy caramel apple cheesecake dip. For a true crowd-pleaser, consider serving it alongside a batch of our popular pumpkin chocolate chip cookies.

Finally, a drizzle of our homemade salted caramel sauce takes this dish to another level. The extra caramel adds a deep, rich flavor that makes each bite even more special. This combination is absolutely irresistible.
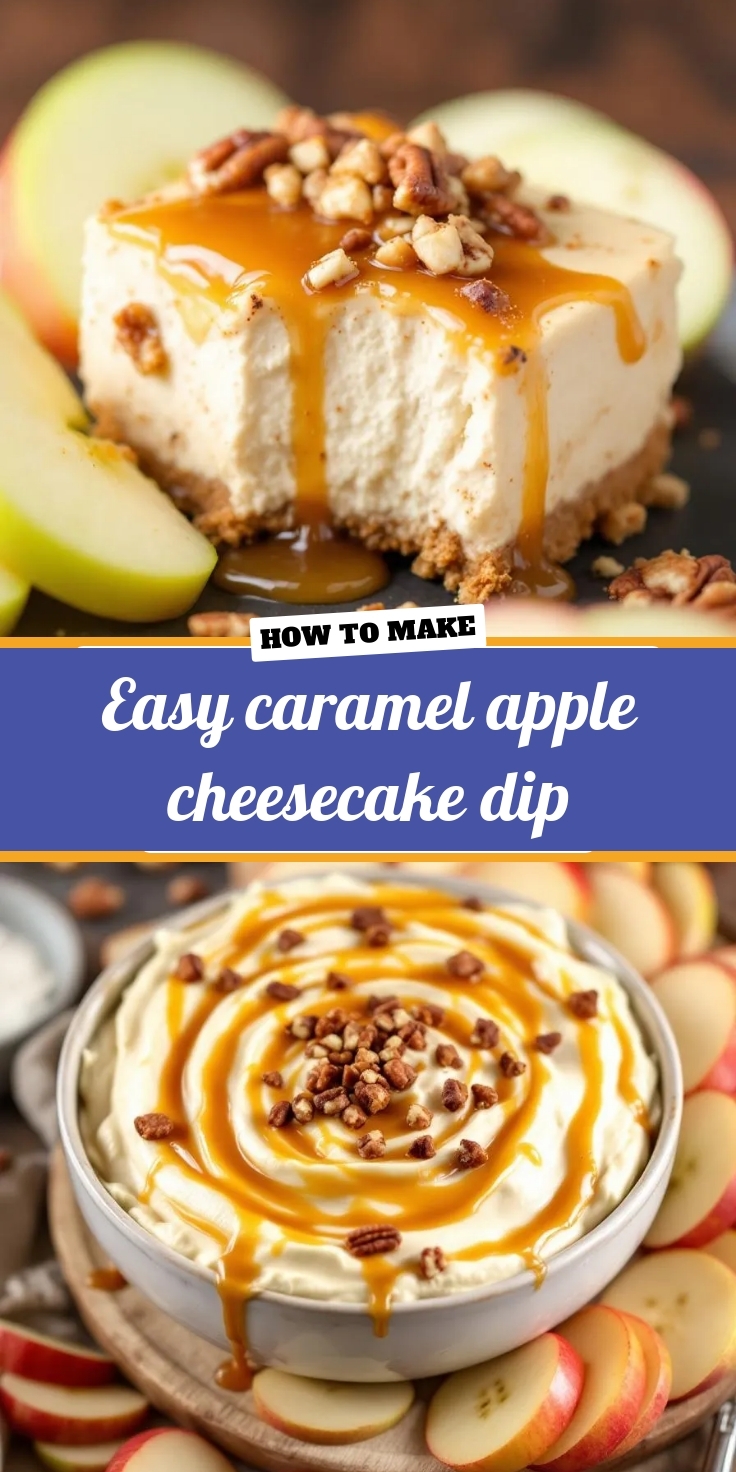
What do you serve with caramel apple cheesecake dip?

This easy caramel apple cheesecake dip pairs perfectly with sliced tart apples like Granny Smith for a classic combination. You can also serve it with graham crackers, vanilla wafers, pretzels for a sweet and salty twist, or even spread it on toast.

How long does cheesecake dip last in the fridge?

When stored in an airtight container, this easy caramel apple cheesecake dip will stay fresh in the refrigerator for 3 to 4 days. For the best texture and flavor, give it a quick stir before serving it again.

Can you make caramel apple dip ahead of time?

Absolutely! Making this dip ahead is a great time-saver for parties. Prepare the easy caramel apple cheesecake dip, cover it tightly, and refrigerate for up to 24 hours. Add any crunchy toppings right before serving to keep them from getting soggy.

What kind of apples are best for cheesecake dip?

Crisp, firm apples that hold their shape are ideal. Granny Smith apples are a top choice because their tartness balances the sweetness of the dip. Other great options include Honeycrisp, Fuji, or Pink Lady apples for dipping into your easy caramel apple cheesecake dip.
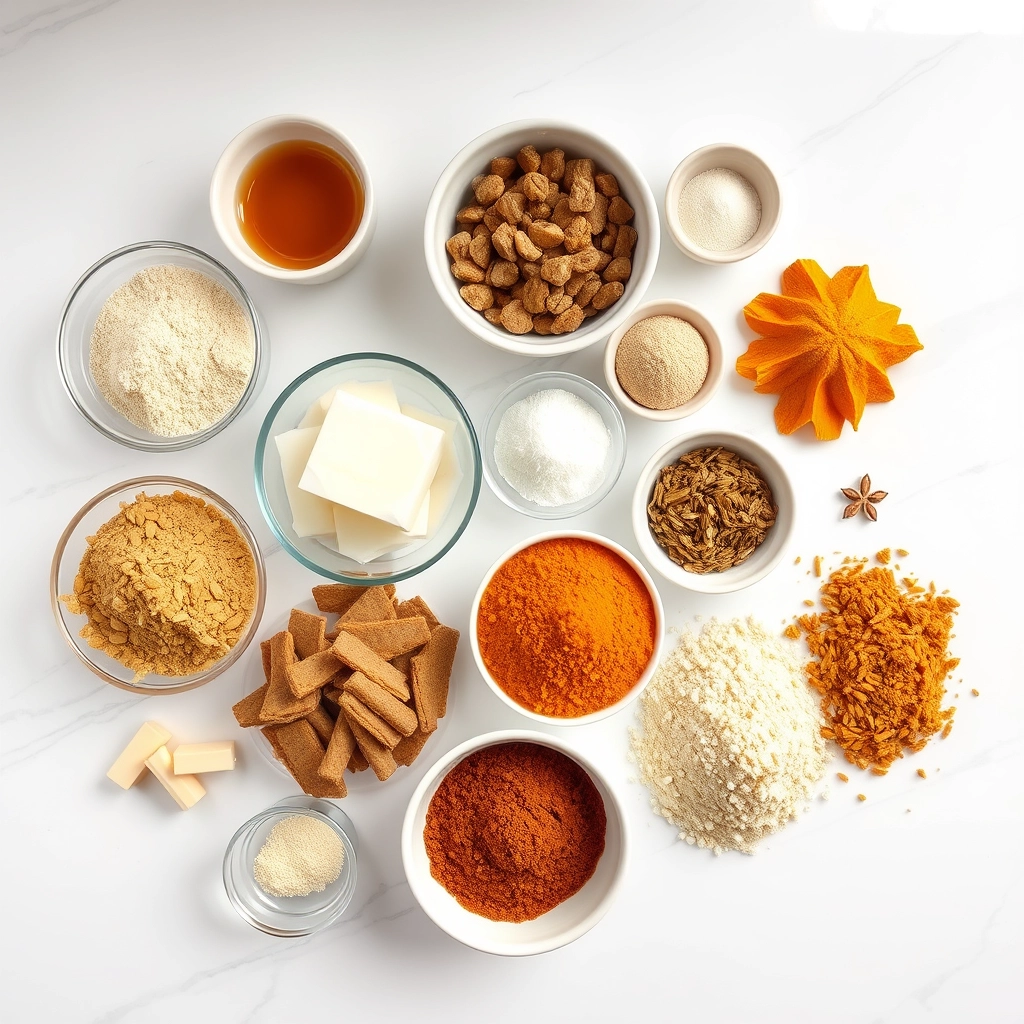
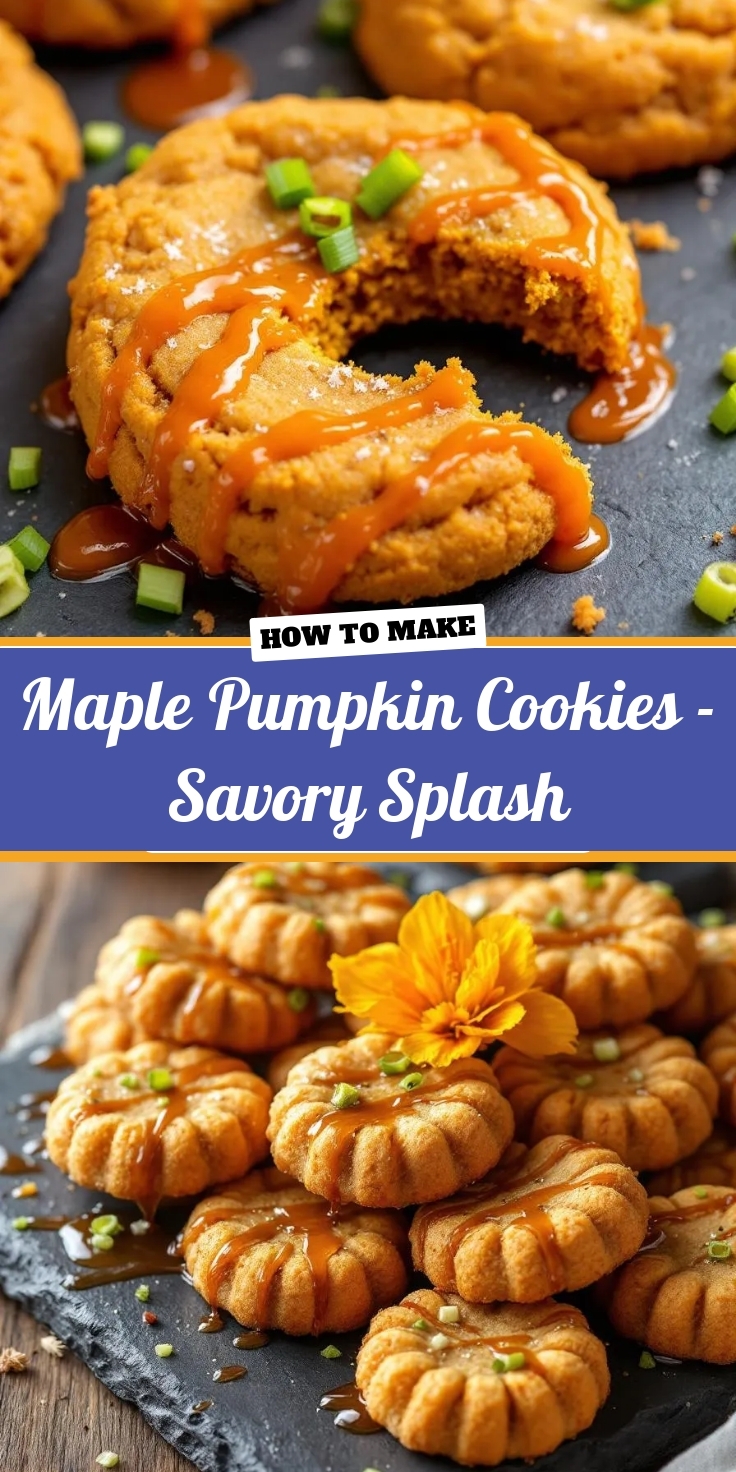
Easy Maple Pumpkin Cookies – Savory Splash Recipe

easy-maple-pumpkin-cookies

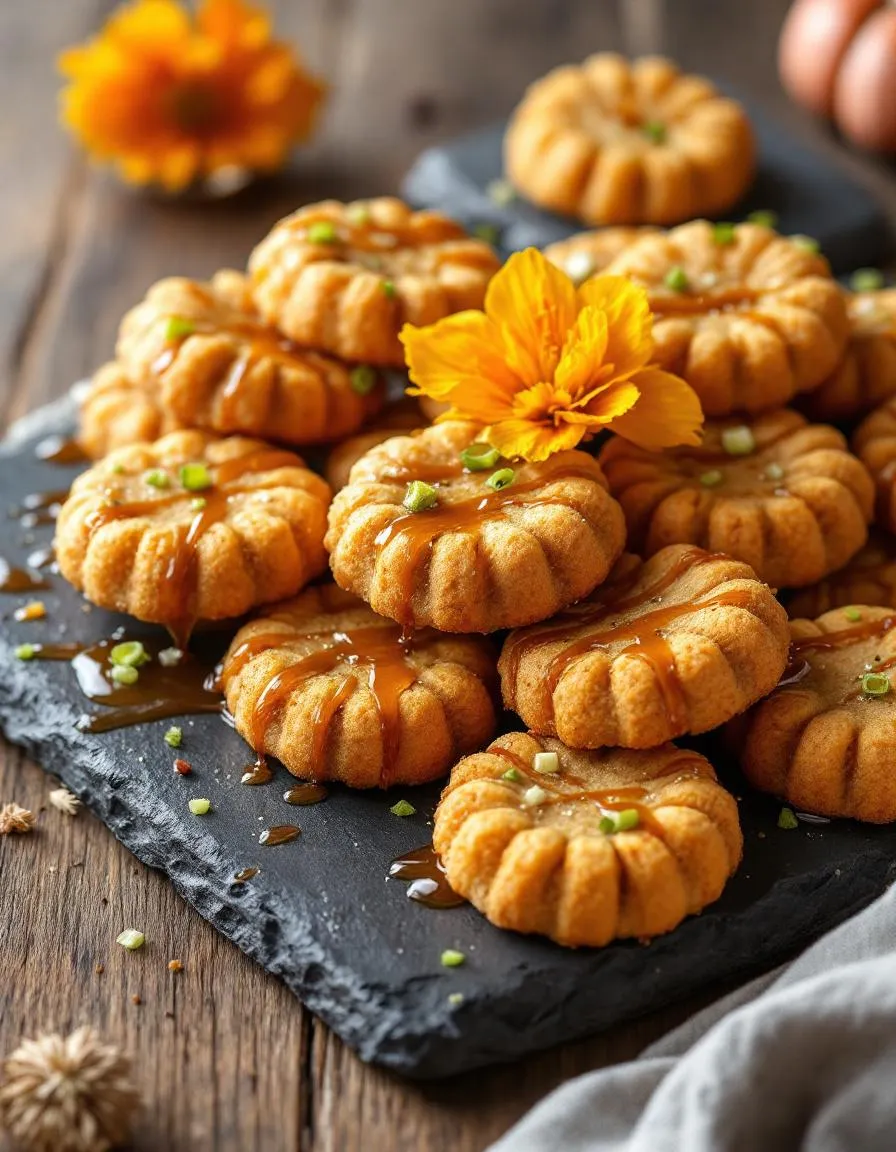
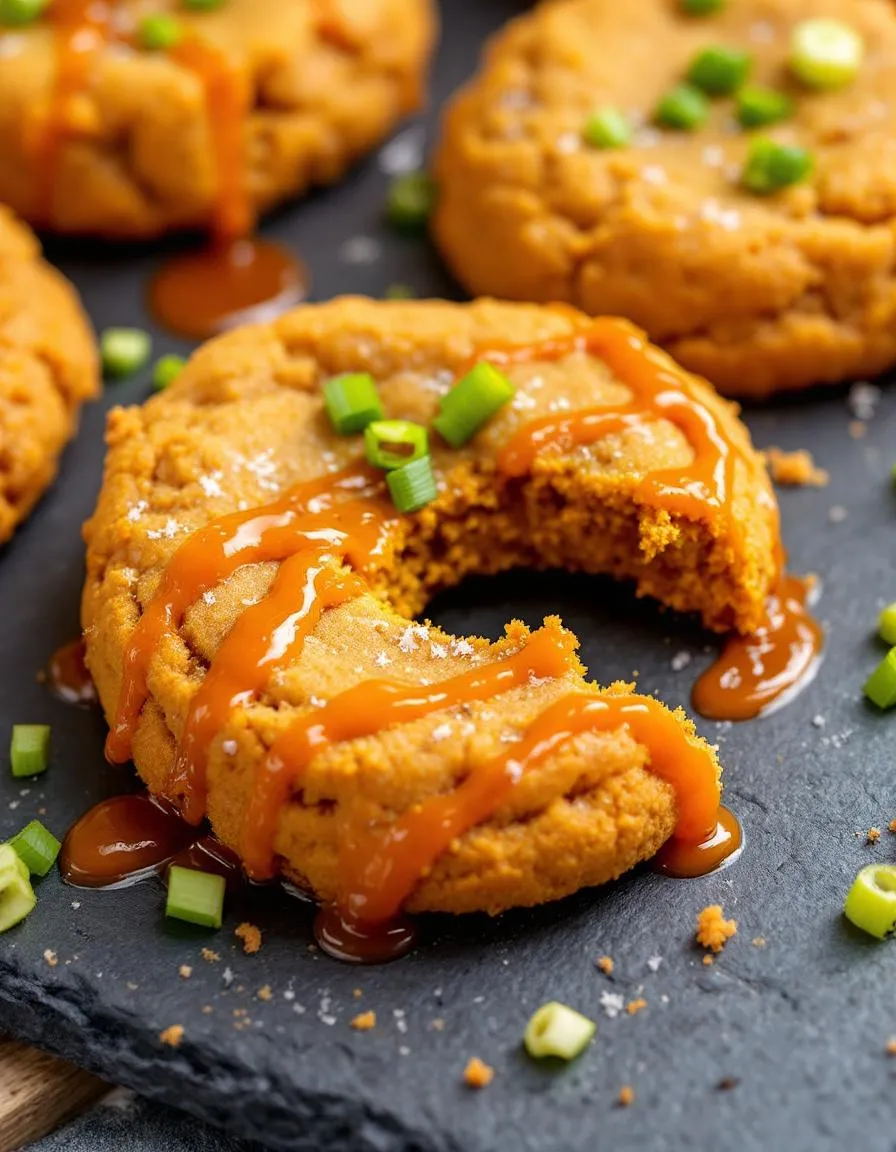
Is there anything more comforting than the smell of warm spices and maple wafting through your kitchen on a crisp autumn day? That feeling of cozy contentment is exactly what we chase every fall, and it’s the heart and soul of these incredible Maple Pumpkin Cookies – Savory Splash. This recipe masterfully blends the sweet, earthy notes of pumpkin and maple with a surprising, savory twist that makes them utterly irresistible. They are the perfect treat to enjoy with a hot cup of coffee on a chilly afternoon, and they fill your home with an aroma that feels like a warm hug. Ultimately, these cookies are more than just a dessert; they are a delicious experience that celebrates the very best flavors of the season.

About This Recipe

So, what exactly are Maple Pumpkin Cookies – Savory Splash? Fundamentally, they are a soft, cake-like cookie bursting with real pumpkin puree and rich maple flavor. However, the “Savory Splash” comes from a unique addition that sets them apart: a hint of black pepper and a generous pinch of sea salt. This combination creates a complex flavor profile where the sweetness doesn’t overwhelm your palate. Instead, the savory notes enhance the warm spices and maple, making each bite deeply satisfying and far more sophisticated than your average cookie. This matters because it elevates a simple seasonal treat into something truly special and conversation-worthy, perfect for impressing guests at a fall gathering or simply treating yourself to a gourmet experience at home.

This approach to baking, where we play with unexpected contrasts, perfectly fits the tone of our blog. We believe that the best recipes are the ones that bring both comfort and a little excitement to your table. For instance, if you enjoy these flavor adventures, you might also love our unique take on a classic, like these Savory Chocolate Truffles. The Maple Pumpkin Cookies – Savory Splash recipe uses simple, wholesome ingredients you likely already have in your pantry, making it an accessible yet impressive bake. Moreover, the process is straightforward and forgiving, so even novice bakers can achieve perfect results. Furthermore, the dough comes together quickly, and you can have a batch of these incredible cookies ready in well under an hour. For more easy and delicious ideas that celebrate simple ingredients, explore our collection of Easy Pantry Recipes.

Why I Love This Recipe

I have a profound personal connection to this Maple Pumpkin Cookies – Savory Splash recipe. Every time I bake them, the scent instantly transports me back to my grandmother’s kitchen, where she always encouraged me to be bold and add a “pinch of this and that.” She taught me that the most memorable dishes often break the rules, and these cookies are a direct tribute to her spirit of culinary adventure. I love how the savory element surprises people in the best way possible, sparking joy and curiosity with every single bite. Ultimately, this recipe represents more than just a cookie; it embodies a sense of playful creativity and warm, nostalgic comfort that I absolutely love sharing with you.

Health and Nutrition

Why it’s good for your body

Maple Pumpkin Cookies – Savory Splash offer a delicious way to fuel your body with wholesome ingredients. For instance, pumpkin puree provides a powerful dose of vitamin A, which actively supports healthy vision and a strong immune system. Furthermore, the natural sweetness from real maple syrup delivers a more stable energy release compared to refined sugars. Consequently, you avoid those sharp energy spikes and crashes.

Additionally, these cookies incorporate warming spices like cinnamon and ginger. These spices not only create a cozy flavor but also bring their own anti-inflammatory properties to the table. Therefore, every bite of Maple Pumpkin Cookies – Savory Splash does more than just satisfy your sweet tooth. Moreover, the fiber content from the pumpkin and oats promotes good digestive health and helps you feel fuller longer. Ultimately, this makes them a smart and satisfying treat you can genuinely feel good about enjoying.

How it fits in a healthy lifestyle

These cookies fit beautifully into a balanced eating plan. You can confidently enjoy Maple Pumpkin Cookies – Savory Splash as a mindful afternoon snack that provides lasting energy. They also make a perfect pre-workout bite or a healthy dessert option that doesn’t derail your wellness goals.

If you follow a specific dietary style, you will love how easy it is to adapt this recipe. For example, you can use a 1:1 gluten-free flour blend to make them perfectly celiac-friendly. For more inspiration on tailoring recipes to your needs, explore our guide on gluten-free baking tips and tricks. We also believe that healthy eating should be simple and enjoyable. Finding ways to incorporate nutritious, homemade treats like these cookies is a key part of that philosophy. Discover more strategies for your routine in our post about easy healthy meal prep for busy weekdays.

Print
clock clock iconcutlery cutlery iconflag flag iconfolder folder iconinstagram instagram iconpinterest pinterest iconfacebook facebook iconprint print iconsquares squares iconheart heart iconheart solid heart solid icon

Mapo Pumpkin Cookies – Savory Splash


  • Author: Chef Emy

Description

A unique fusion of sweet pumpkin and spicy Sichuan flavors in a soft, savory cookie.


Ingredients

Scale

For the Crust:

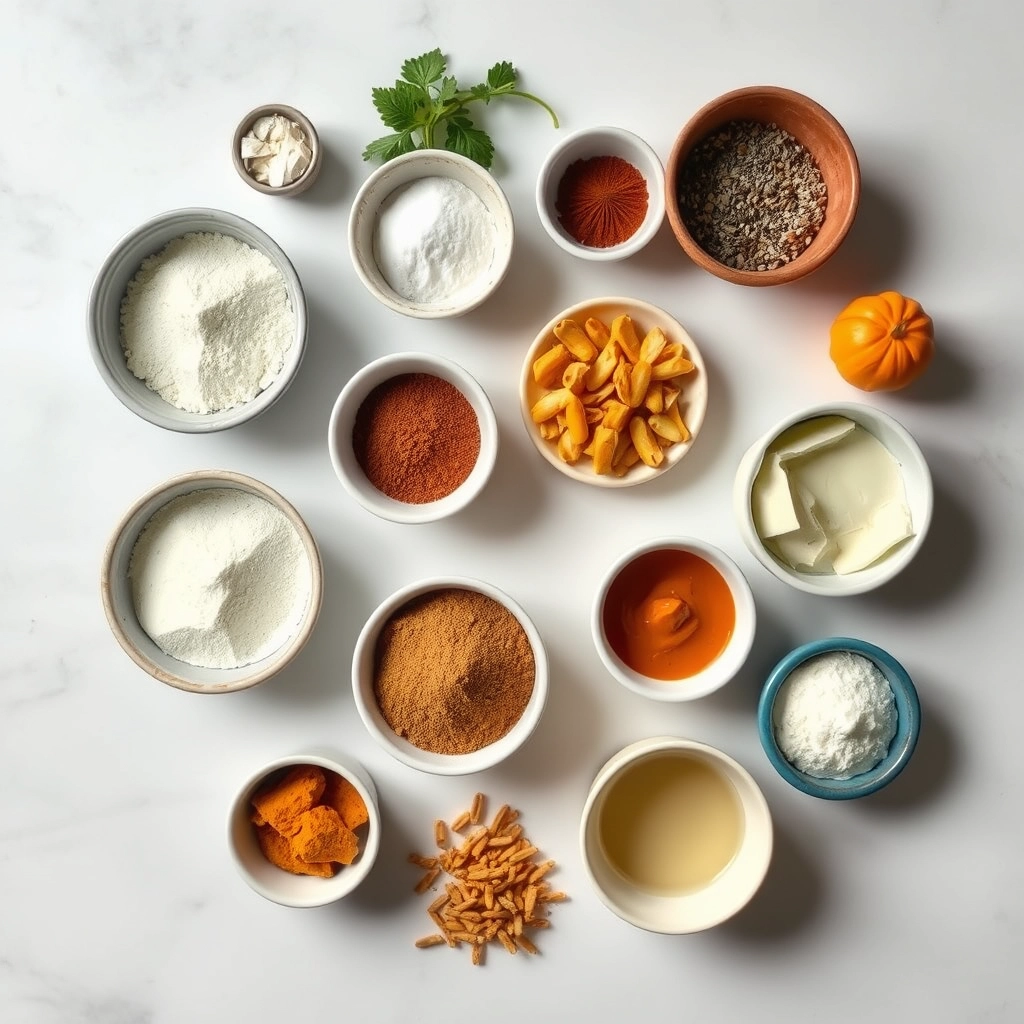
  • 1 cup pumpkin puree
  • 2 cups all-purpose flour
  • 1/2 cup unsalted butter, softened
  • 1/4 cup maple syrup
  • 1 egg
  • 2 tbsp doubanjiang (fermented chili bean paste)
  • 1 tsp Sichuan peppercorns, ground
  • 1/2 tsp baking soda
  • 1/4 tsp salt
  • 2 green onions, finely chopped
  • 1 tbsp soy sauce

Instructions

1. Prepare the Crust:

  1. Preheat oven to 350°F (175°C). Line a baking sheet with parchment paper.
  2. In a large bowl, cream together butter, maple syrup, and doubanjiang until smooth. Beat in egg and pumpkin puree.
  3. In another bowl, whisk together flour, ground Sichuan peppercorns, baking soda, and salt. Gradually mix into wet ingredients until combined. Fold in green onions.
  4. Drop tablespoon-sized portions of dough onto the prepared baking sheet, spacing them 2 inches apart.
  5. Bake for 12-15 minutes, or until edges are lightly golden. Let cool on the baking sheet for 5 minutes before transferring to a wire rack.

Notes

You can customize the seasonings to taste.

How to Prepare This Dish

Steps and time-saving tips

First, preheat your oven to 350°F and line your baking sheets with parchment paper. Meanwhile, whisk together your flour, baking soda, salt, and warm spices in a medium bowl. In a separate, larger bowl, vigorously cream the softened butter with both sugars until the mixture becomes light and fluffy. Next, beat in the pumpkin puree, maple syrup, a splash of vanilla, and one large egg. Gradually incorporate your dry ingredients into this wet mixture, but take care not to overmix the dough. For a major time-saving tip, use a medium cookie scoop to portion the dough onto your sheets; this ensures every Maple Pumpkin Cookies – Savory Splash bakes evenly and saves you from messy hands. Finally, bake them for 10 to 12 minutes until the edges look set. Let the cookies cool on the pan for five minutes before you transfer them to a wire rack. This patience prevents them from breaking and gives you the perfect, soft texture.

Mistakes I’ve made and learned from

I have definitely learned a few lessons the hard way with these Maple Pumpkin Cookies – Savory Splash. My biggest mistake was using cold, hard butter straight from the fridge, which resulted in a dense, greasy cookie that didn’t spread properly. Now, I always make sure my butter is properly softened to room temperature for the ideal creaming process. Another common error I made was overmeasuring the pumpkin puree. A soggy, wet dough leads to a cakey texture instead of that desired soft, chewy finish. For perfectly measured ingredients every time, my guide on accurate baking measurements is a lifesaver. Finally, I used to pull the cookies out based purely on time, but ovens can vary. I now rely on visual cues, a practice I honed after reading about oven thermometer importance, to get that perfect bake.

Cultural Connection and Variations

Where this recipe comes from

This recipe for Maple Pumpkin Cookies – Savory Splash pulls from a deep well of North American harvest traditions. For centuries, Indigenous communities cultivated the “three sisters”: corn, beans, and squash. They understood pumpkin’s incredible versatility long before it became a seasonal latte flavor. Meanwhile, maple syrup harvesting is a sacred spring ritual, a true gift from the forest. Our recipe marries these two native ingredients into one delightful, spiced cookie.

Families often put their own spin on this treat. Some bakers add a handful of toasted pecans for a satisfying crunch. Others might stir in a generous portion of rolled oats, creating a heartier, almost breakfast-worthy bite. In different regions, the spice blend tells a story. A touch of cardamom might hint at Scandinavian roots, while a pinch of black pepper adds a surprising, modern kick. Ultimately, every kitchen seems to have its own secret for perfecting Maple Pumpkin Cookies – Savory Splash.

How it fits in today’s cooking

Today, this recipe fits perfectly into our love for seasonal, whole-food cooking. People crave authentic flavors that connect them to the time of year. These cookies deliver that cozy, autumn feeling in every single bite. Furthermore, modern home cooks brilliantly adapt the base recipe to suit various dietary needs. They might use a flax egg for a vegan version or swap in gluten-free flour without sacrificing an ounce of flavor.

You can easily incorporate these cookies into your holiday cookie platters or pack them as a wholesome snack. They also pair wonderfully with a hot coffee for a morning treat. If you enjoy baking with seasonal produce, explore our guide for creating the perfect pumpkin puree to use in this recipe. For another fantastic way to use autumn’s bounty, try our popular apple cinnamon muffin recipe next. This makes Maple Pumpkin Cookies – Savory Splash a timeless and adaptable classic for today’s table.

Taste and Texture

What makes it delicious

These Maple Pumpkin Cookies – Savory Splash deliver a wonderfully soft and cake-like texture that simply melts in your mouth. Each bite bursts with the warm, earthy sweetness of pumpkin and pure maple syrup, creating a deeply comforting flavor profile. Aromatic spices like cinnamon and nutmeg weave through the cookie, offering a fragrant and cozy aroma that fills your kitchen. Furthermore, the subtle savory splash, perhaps from a hint of sea salt or thyme, perfectly balances the sweetness and adds a sophisticated depth. Ultimately, the experience of eating Maple Pumpkin Cookies – Savory Splash is both nostalgic and excitingly new.

Boosting the flavor

For an even more decadent treat, consider drizzling a simple maple glaze over your warm cookies. Alternatively, a sprinkle of flaky sea salt right before serving will amplify the sweet and savory contrast beautifully. If you adore that warm spice profile, a pinch of cardamom or a dash of black pepper can introduce a wonderful new layer of complexity. For a textural twist, fold in some toasted pecans or walnuts to add a satisfying crunch. Explore more ways to enhance your baking with our guide on creating your own signature spice blends. Moreover, serving these cookies alongside a scoop of homemade vanilla bean ice cream creates a truly unforgettable dessert experience.

Tips for Success

Best practices for results

Always chill your dough for at least one hour before baking, as this step prevents the cookies from spreading too much. Furthermore, use a cookie scoop for uniformly sized portions that bake evenly. For the best texture, line your baking sheets with parchment paper. Additionally, make sure you use pure pumpkin puree, not pumpkin pie filling, for your Maple Pumpkin Cookies – Savory Splash.

Mistakes to avoid

Avoid overmixing your cookie dough once you add the dry ingredients, as this can develop too much gluten and lead to a tough cookie. Instead, mix just until you see no more flour streaks for a perfectly tender bite. Moreover, do not skip properly measuring your flour, since too much is a common reason for dry, crumbly cookies. For accurate results, always fluff your flour with a spoon before gently scooping it into your measuring cup; then level it off with a knife. If you find your baked goods are often too dense, our guide on common baking mistakes offers more insight. Also, remember that your cookies will continue to firm up on the hot baking sheet after removal from the oven, so pull them out when the edges look just set. This technique prevents over-baking, ensuring your Maple Pumpkin Cookies – Savory Splash stay wonderfully soft. For more tips on achieving the ideal chewy texture, explore our perfect cookie texture resource.

Serving and Pairing Suggestions

How to serve this dish

Present your Maple Pumpkin Cookies – Savory Splash on a rustic wooden board for a charming, autumnal feel. Alternatively, arrange them on a elegant cake stand to elevate them into a sophisticated appetizer. For a special touch, garnish the platter with fresh rosemary sprigs and a small bowl of extra maple glaze for dipping. These cookies truly shine at holiday gatherings, making them a perfect savory bite alongside cocktails. You can also serve them warm at a cozy brunch for a surprising and delightful twist.

What goes well with it

A creamy, tangy dip beautifully complements the warm spices in Maple Pumpkin Cookies – Savory Splash. For instance, try a simple whipped feta or herbed goat cheese spread. Furthermore, a bold, savory soup makes an excellent pairing partner. We love serving these cookies with a cup of our hearty Savory Pumpkin Soup for a full flavor experience. Finally, balance the savory notes with a sweet and spicy drink. A chilled glass of our Apple Cider Margarita creates a fantastic contrast that your guests will adore.

What makes these Maple Pumpkin Cookies savory?

The savory element in Maple Pumpkin Cookies – Savory Splash comes from a pinch of high-quality sea salt and a hint of black pepper or rosemary, which perfectly balances the natural sweetness of the maple syrup and pumpkin. This unexpected twist elevates the flavor profile, making them a sophisticated treat that stands out from traditional sweet pumpkin cookies. It’s this unique savory splash that defines the recipe.

Can I use canned pumpkin puree for this recipe?

Yes, canned pumpkin puree works perfectly for Maple Pumpkin Cookies – Savory Splash and is the most convenient option. Just ensure you are using 100% pure pumpkin puree, not pumpkin pie filling, which has added sugars and spices. The consistency of canned puree helps achieve the ideal soft and cake-like texture for these cookies.

How should I store Maple Pumpkin Cookies to keep them fresh?

To maintain their soft texture, store your Maple Pumpkin Cookies – Savory Splash in an airtight container at room temperature for up to 3 days. For longer storage, you can freeze the baked cookies for up to 2 months; simply thaw them at room temperature before serving. This ensures every cookie tastes as fresh as the day you baked them.

What is a good glaze or icing for savory pumpkin cookies?

A simple maple glaze made with powdered sugar, a touch of maple extract, and milk complements the Maple Pumpkin Cookies – Savory Splash beautifully. For an even more savory-forward option, a light drizzle of cream cheese frosting with a pinch of the same herbs used in the cookie creates a harmonious flavor. Either choice enhances the unique profile of this recipe without overpowering it.

Easy Mini Pumpkin Swirled Cheesecakes Recipe

easy-mini-pumpkin-cheesecakes

As the air turns crisp and the leaves begin their fiery transformation, we all crave those quintessential autumn flavors that warm the soul. There is something truly magical about the combination of rich, creamy cheesecake and the warm, spiced essence of pumpkin. This season, we invite you to create a dessert that captures that very magic in a perfectly personal portion. These Mini Pumpkin Swirled Cheesecakes are not just a treat; they are a celebration of fall, designed to bring joy to your table and simplify your holiday entertaining without sacrificing an ounce of decadent flavor.

About This Recipe

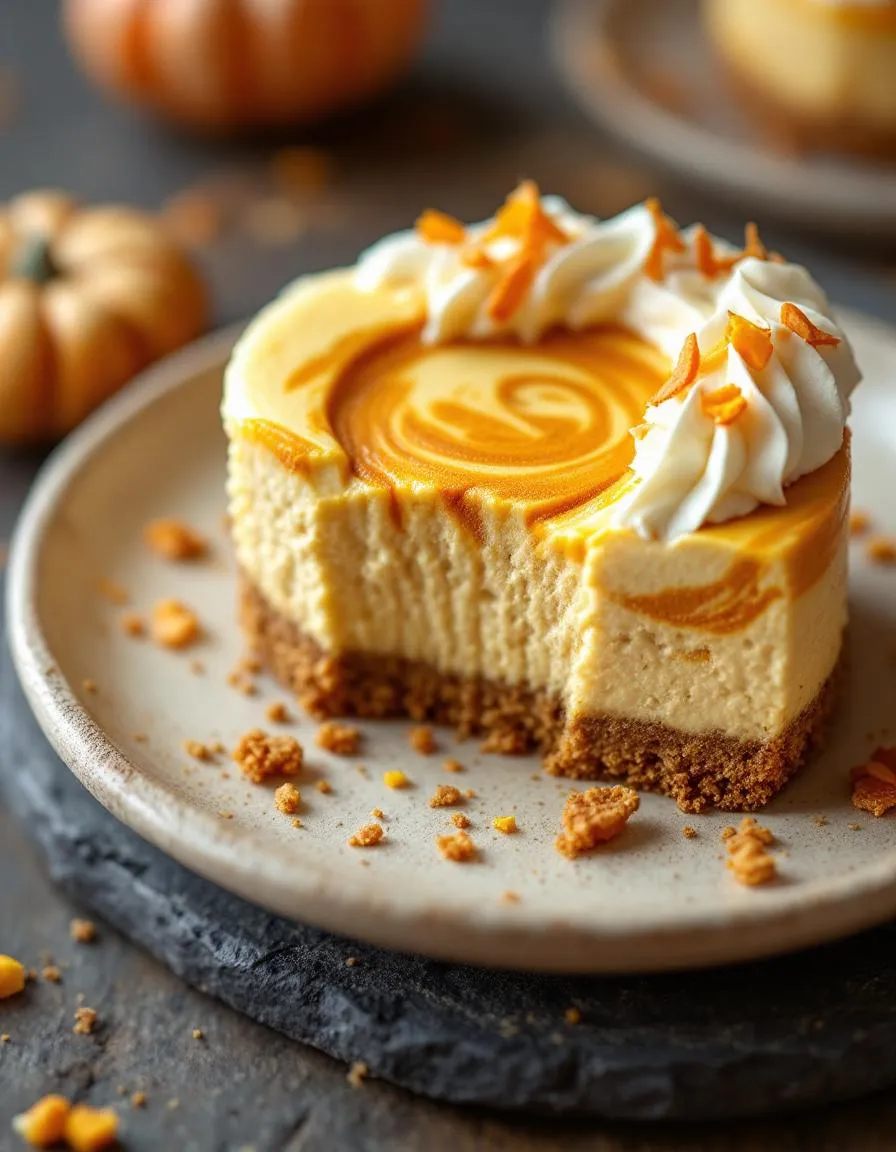
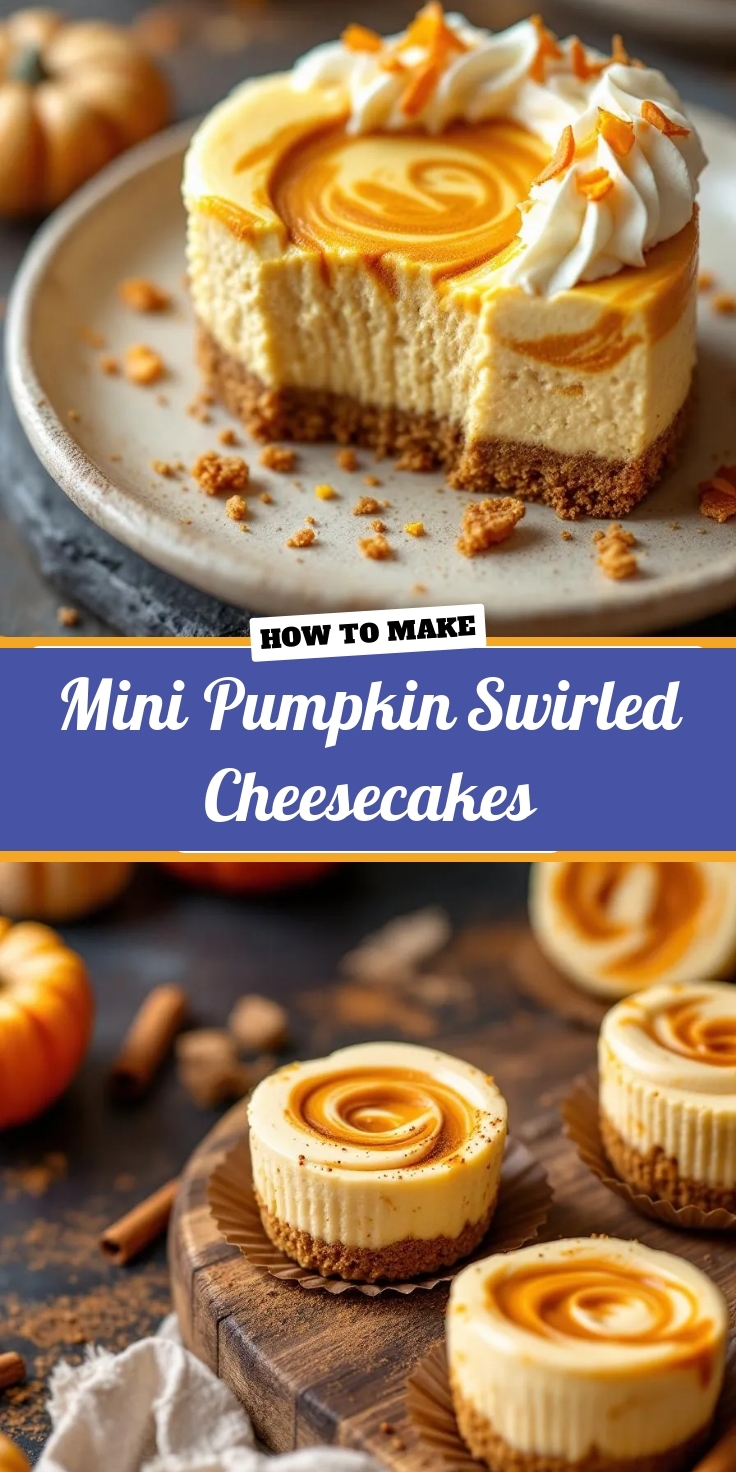
Essentially, these Mini Pumpkin Swirled Cheesecakes are a delightful twist on the classic New York-style dessert. They feature a buttery graham cracker crust that cradles a velvety smooth cream cheese filling. Furthermore, we expertly swirl a spiced pumpkin puree mixture throughout, creating a beautiful marbled effect in every single bite. This recipe matters because it solves a common problem: the desire for an impressive, make-ahead dessert that doesn’t require the stress of slicing a large cake. Consequently, these individual servings are ideal for parties, as they eliminate any mess and guarantee a stunning presentation for every guest. Moreover, this approachable recipe perfectly fits the Brek Cakes tone, which champions from-scratch baking that feels both achievable and special. We believe that everyone deserves to create beautiful pastries, and these mini cheesecakes truly deliver restaurant-quality results right in your own kitchen. For another fantastic make-ahead dessert option, consider our classic No Bake Cheesecake, which is always a crowd-pleaser. Ultimately, the beauty of these Mini Pumpkin Swirled Cheesecakes lies in their elegant simplicity and their powerful seasonal punch, making them an unforgettable addition to your fall and winter recipe repertoire.

Why I Love This Recipe

I have a deep personal connection to these Mini Pumpkin Swirled Cheesecakes because they became a happy accident during a particularly hectic Thanksgiving years ago. I initially aimed to make a full-sized pumpkin cheesecake but realized too late that I lacked a proper springform pan. Instead of panicking, I pivoted to using a muffin tin, and the result was even better than I could have imagined. These personal desserts now remind me that some of the best creations come from adaptable and joyful baking. They embody the cozy, sharing spirit of the season, and I love how their miniature size brings a smile to everyone’s face, especially when paired with a dollop of Homemade Whipped Cream. For me, they are the taste of family, gratitude, and perfectly portioned happiness.

Health and Nutrition

Why it’s good for your body

These Mini Pumpkin Swirled Cheesecakes pack a surprising nutritional punch. First and foremost, pumpkin puree delivers a powerful dose of vitamin A, which actively supports healthy vision and a strong immune system. Additionally, this key ingredient provides a solid amount of fiber, thereby promoting good digestive health and helping you feel satisfied.

Furthermore, the spices like cinnamon and nutmeg do more than just add warmth and flavor. In fact, they bring their own anti-inflammatory and antioxidant properties to each delightful bite. Consequently, enjoying these mini desserts means you are treating your body to beneficial compounds that fight oxidative stress.

Moreover, by choosing a mini portion size, you naturally practice mindful eating. This approach allows you to enjoy a rich, decadent experience without overindulging. Ultimately, these Mini Pumpkin Swirled Cheesecakes offer a delicious way to incorporate more whole food ingredients into your day while satisfying your sweet tooth intelligently.

How it fits in a healthy lifestyle

These mini cheesecakes fit beautifully into a balanced lifestyle. You can easily enjoy them as a mindful dessert after a nutritious meal or as a special afternoon treat alongside a cup of tea. Their individual portion size is your best friend for practicing moderation, allowing you to savor every bite without derailing your wellness goals.

If you follow a gluten-free diet, you will love that this recipe naturally fits your needs when you use a gluten-free graham cracker crust. For those focused on heart-healthier choices, the pumpkin element is a fantastic start. You can explore more delicious and wholesome dessert ideas in our guide to healthy dessert alternatives that never sacrifice flavor.

Remember, a healthy lifestyle is all about balance and enjoyment. Making room for treats you love, like these Mini Pumpkin Swirled Cheesecakes, is a key part of that journey. For more inspiration on creating a balanced approach to eating, check out our tips for building mindful eating habits every day.

Print
clock clock iconcutlery cutlery iconflag flag iconfolder folder iconinstagram instagram iconpinterest pinterest iconfacebook facebook iconprint print iconsquares squares iconheart heart iconheart solid heart solid icon

Mini Pumpkin Swirled Cheesecakes


  • Author: Chef Emy

Description

Delightful individual cheesecakes with a creamy pumpkin swirl, perfect for fall gatherings.


Ingredients

Scale

For the Crust:

  • 1 cup graham cracker crumbs
  • 3 tbsp unsalted butter, melted
  • 16 oz cream cheese, softened
  • 1/2 cup granulated sugar
  • 2 large eggs
  • 1 tsp vanilla extract
  • 1/2 cup canned pumpkin puree
  • 1/2 tsp pumpkin pie spice
  • 1/4 tsp ground cinnamon

Instructions

1. Prepare the Crust:

  1. Preheat oven to 325°F. Line a muffin tin with 12 liners.
  2. Mix graham cracker crumbs and melted butter. Press 1 tbsp into each liner to form crust.
  3. Beat cream cheese and sugar until smooth. Add eggs one at a time, then vanilla.
  4. Divide batter in half. Mix pumpkin puree and spices into one half.
  5. Spoon plain and pumpkin batters alternately into liners. Swirl with a toothpick.
  6. Bake for 20-25 minutes until set. Cool completely before refrigerating for 2 hours.

Notes

You can customize the seasonings to taste.

How to Prepare This Dish

Steps and time-saving tips

First, preheat your oven and line a muffin tin with festive liners. Meanwhile, quickly pulse the graham crackers into fine crumbs for your base. Combine these crumbs with melted butter and a touch of sugar, then firmly press a spoonful into each liner. Next, beat the cream cheese until it is perfectly smooth and creamy; this crucial step prevents a lumpy filling. Gradually add the sugar and beat it again until the mixture is light and fluffy. Then, incorporate the eggs one at a time, followed by the vanilla and sour cream. Remember to scrape the bowl’s sides often for a uniform batter. Now, transfer one cup of this plain batter to a separate bowl and gently fold in your spiced pumpkin puree. Alternately spoon the two batters into your prepared crusts. Finally, use a toothpick to swirl the batters together for a beautiful marbled effect. Bake until the centers are just set, then let them cool completely before chilling. For a major time-saver, you can make these Mini Pumpkin Swirled Cheesecakes a full day ahead.

Mistakes I’ve made and learned from

I have definitely learned a few lessons the hard way with these Mini Pumpkin Swirl Cheesecakes. My first major mistake was overmixing the batter after adding the eggs, which incorporated too much air and caused the centers to crack dramatically in the oven. Now, I mix on the lowest setting just until everything is combined. Another common error I made was using cold cream cheese straight from the fridge. This resulted in a lumpy batter no matter how long I mixed, teaching me that room temperature ingredients matter immensely for a silky smooth filling. Most importantly, I used to be impatient and would skip the gradual cooling process, leading to cheesecakes that sunk in the middle. Letting them rest in the turned-off oven with the door slightly ajar prevents this every time. If you are new to baking, my guide on common baking mistakes and fixes can help you avoid these pitfalls altogether.

Cultural Connection and Variations

Where this recipe comes from

We can trace the roots of this dessert straight back to the classic New York cheesecake, a dense and creamy icon. However, someone brilliantly decided to swirl in the flavors of a beloved fall tradition: pumpkin pie. This fusion created something entirely new and special. Families often bake these mini treats for Thanksgiving, turning a grand, sometimes intimidating pie into personal, shareable delights. Consequently, they carry the warmth and nostalgia of autumn gatherings.

Different regions put their own spin on this concept. For example, in the South, you might find a generous pinch of bourbon or pecans in the crust. Meanwhile, a Midwestern version could feature a dollop of tart apple butter swirled right in with the pumpkin. My own family always adds a tiny extra sprinkle of nutmeg to the filling, a trick my grandmother swore by. Ultimately, these Mini Pumpkin Swirled Cheesecakes are a beautiful blend of tradition and personal touch.

How it fits in today’s cooking

This recipe absolutely thrives in modern kitchens. Firstly, its miniaturized form fits perfectly with today’s love for portion control and individualized desserts. They are a superstar at holiday potlucks and a showstopping finale for a festive dinner party. Moreover, contemporary bakers constantly adapt the base recipe to suit various dietary needs, easily creating gluten-free or keto-friendly versions.

You can seamlessly incorporate these cheesecakes into your seasonal baking lineup. They pair wonderfully with other autumn favorites, like a slice of moist apple cake. Furthermore, their make-ahead nature is a huge win for busy hosts. You can prepare them days before an event, allowing the flavors to meld perfectly in the fridge. For another fantastic make-ahead dessert option that captures the essence of the season, explore our popular pumpkin roll. Ultimately, these mini cheesecakes remain a timeless and adaptable treat for any autumn celebration.
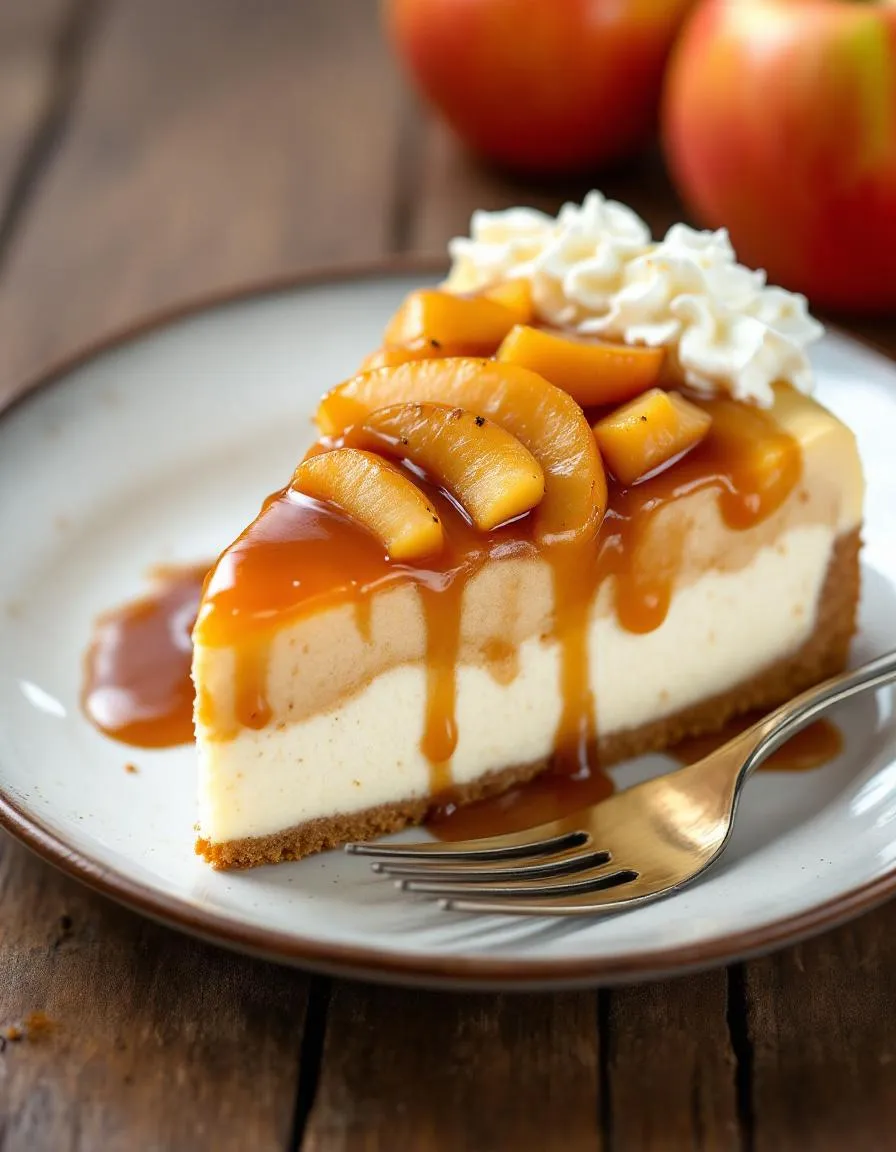
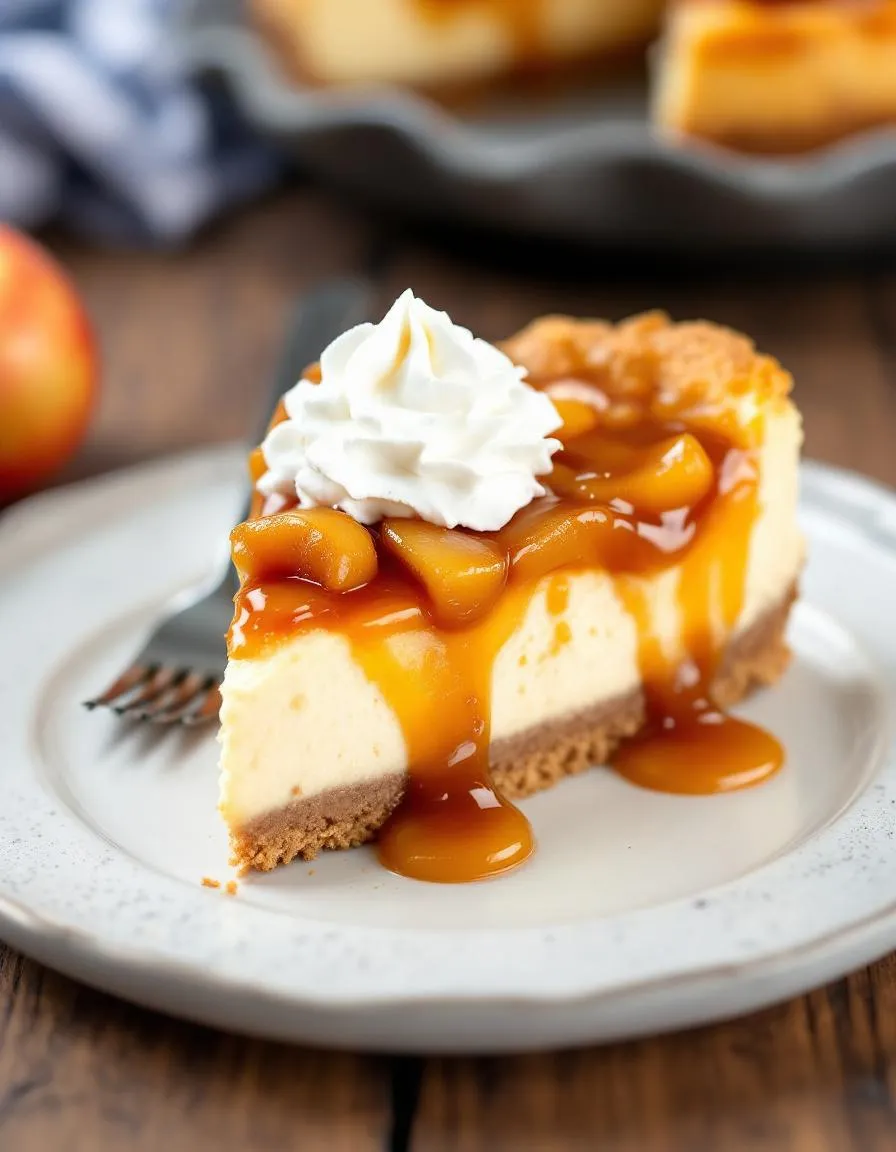
Taste and Texture

What makes it delicious

Each bite of these Mini Pumpkin Swirled Cheesecakes delivers a luxurious contrast. The filling feels incredibly smooth and creamy against the crunchy, spiced graham cracker crust. Warm baking spices like cinnamon and nutmeg create a fragrant aroma that fills your kitchen. Meanwhile, the rich, tangy cream cheese perfectly balances the sweet, earthy pumpkin puree. Ultimately, the marbled swirls not only look beautiful but also ensure every spoonful combines both flavors. You will love the velvety texture and cozy, spiced flavor of these Mini Pumpkin Swirled Cheesecakes.

Boosting the flavor

For an extra flavor boost, consider a simple ingredient swap or addition. First, a dollop of homemade whipped cream adds a light, cool contrast to the dense cheesecake. Alternatively, a drizzle of salted caramel sauce introduces a wonderful sweet and salty complexity. You can also amplify the warm spice notes by adding a pinch of extra cinnamon or even a dash of cardamom to the pumpkin swirl. Furthermore, serving these mini desserts slightly chilled makes the creamy texture even more refreshing. For more inspiration, explore our favorite fall dessert recipes. Finally, a sprinkle of toasted pecans provides a delightful crunch, much like the topping on our classic pumpkin cheesecake bars.

Tips for Success

Best practices for results

First, always ensure your cream cheese is at room temperature for a perfectly smooth and lump-free filling. Furthermore, use a gentle hand when swirling the pumpkin mixture into the cheesecake batter to create beautiful marbling without overmixing. For the best texture and flavor, chill your Mini Pumpkin Swirled Cheesecakes for the full recommended time before serving.

Mistakes to avoid

A common mistake is overbaking the cheesecakes, which causes cracking and a dry texture. Instead, pull them from the oven when the edges are set but the center still has a slight jiggle. Additionally, avoid using cold ingredients as they can make your batter lumpy; for a silky result, always take the time to properly soften your dairy. For more guidance on achieving the perfect bake, explore our tips on how to prevent cracks in cheesecake. Moreover, if you are new to working with cream cheese, our guide on getting the right cream cheese consistency will ensure your Mini Pumpkin Swirled Cheesecakes turn out perfectly every single time.

Serving and Pairing Suggestions

How to serve this dish

First, let these Mini Pumpkin Swirled Cheesecakes chill completely for the perfect firm yet creamy texture. For a beautiful presentation, arrange them on a elegant cake stand or a rustic wooden board. Additionally, a simple dusting of cinnamon or a dollop of freshly whipped cream makes a gorgeous garnish. These mini desserts are perfect for holiday parties, as they offer individual portions that feel special. Ultimately, you can elevate them with a tiny sprig of mint or a drizzle of caramel sauce for extra visual appeal.

What goes well with it

A hot cup of spiced chai tea wonderfully complements the warm pumpkin spices in these cheesecakes. Furthermore, a glass of our homemade Creamy Vanilla Bean Hot Chocolate creates a decadent and cozy pairing for chilly evenings. For a contrasting flavor, consider serving these mini treats with a tart berry compote. Moreover, a light and fizzy hard cider can cut through the richness beautifully. Finally, if you are planning a larger dessert spread, pair them with our popular Salted Caramel Apple Bars for a fantastic fall-themed assortment.

Can you make mini pumpkin cheesecakes ahead of time?

Absolutely! Mini Pumpkin Swirled Cheesecakes are an excellent make-ahead dessert. You can store them in an airtight container in the refrigerator for up to 3 days, which allows the flavors to meld and develop even more.

How do you keep mini cheesecakes from sticking to the pan?

Using paper liners is the easiest way to prevent sticking. For a cleaner look without liners, generously grease the muffin tin with butter or non-stick spray and consider a light dusting of graham cracker crumbs before adding the crust mixture.

Why did my pumpkin cheesecake crack?

Cracking usually occurs from overmixing the batter, which incorporates too much air, or from a sudden temperature change. To prevent cracks in your Mini Pumpkin Swirled Cheesecakes, avoid overbeating after adding eggs and let them cool gradually in the turned-off oven with the door slightly ajar.

Do mini cheesecakes need to be refrigerated?

Yes, due to the dairy and egg content, Mini Pumpkin Swirled Cheesecakes must be refrigerated. Keep them chilled until you are ready to serve to ensure food safety and maintain their perfect, firm texture.

Best Pecan Pie Baked Oatmeal (Gluten-Free)

best-pecan-pie-baked-oatmeal

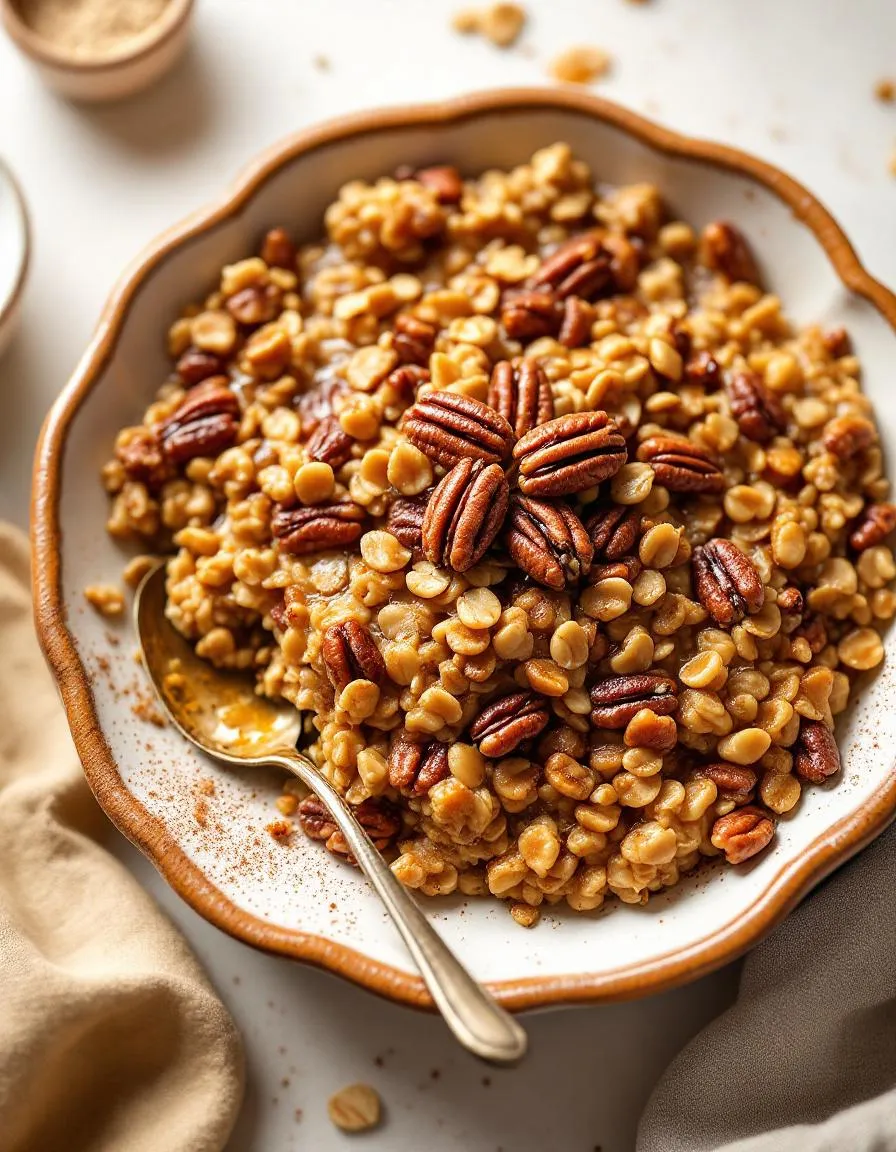
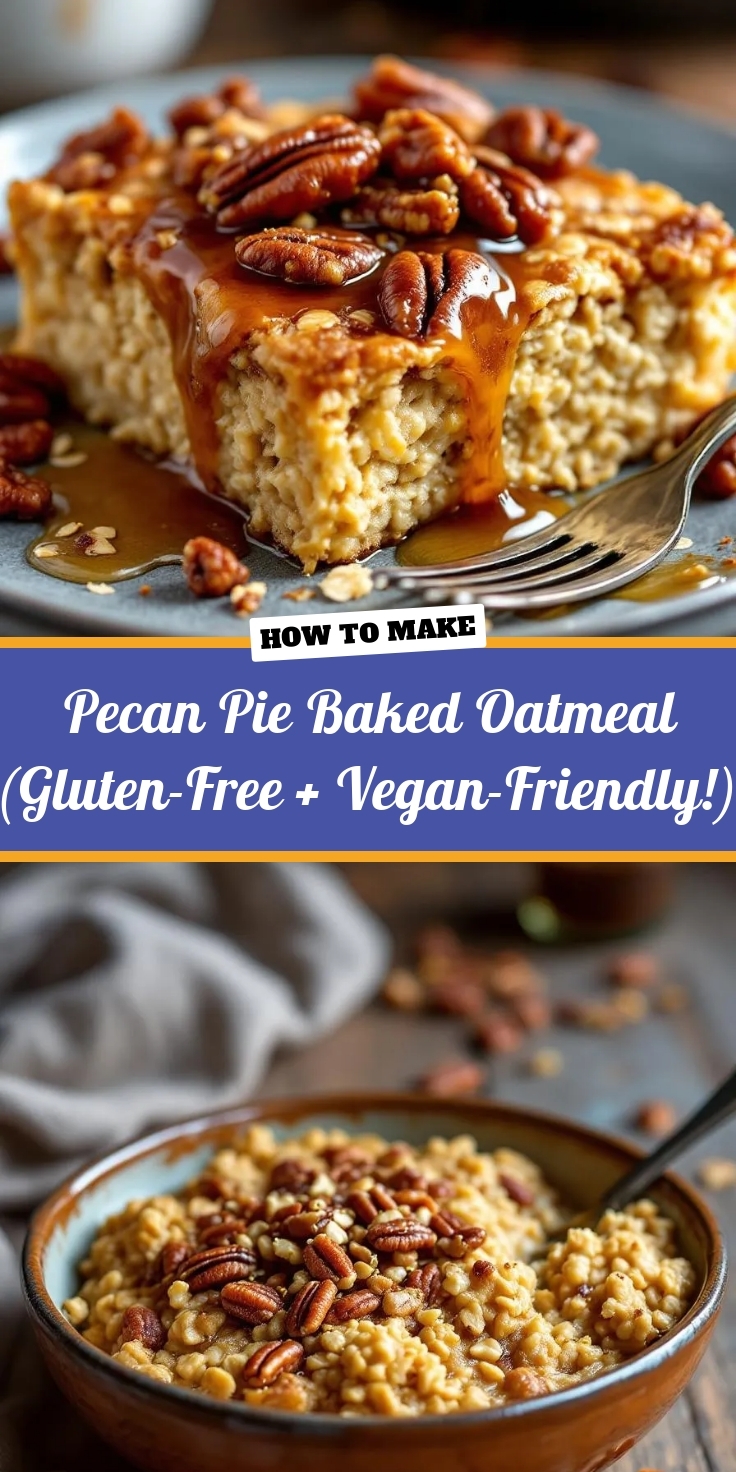
Imagine waking up to the warm, comforting aroma of pecan pie, but instead of a decadent dessert, it is a wholesome breakfast that nourishes your body and soul. This is the magic of starting your day with a cozy bowl of this Pecan Pie Baked Oatmeal (Gluten-Free + Vegan-Friendly!). It captures every nostalgic note of the classic holiday pie, from the rich, buttery pecans to the sweet, caramel-like glaze, and transforms it into a meal you can feel genuinely good about eating. Furthermore, it fills your kitchen with an incredible fragrance that promises a truly special morning ahead.

About This Recipe

This Pecan Pie Baked Oatmeal (Gluten-Free + Vegan-Friendly!) is a hearty, satisfying breakfast casserole that bakes to perfection. Essentially, it combines simple rolled oats with a flax egg, plant-based milk, and a blend of warming spices to create a firm yet tender base. Meanwhile, a generous topping of pecans and a sticky-sweet maple syrup mixture creates that iconic pie flavor and texture. Consequently, every single bite delivers the familiar comfort of dessert in a completely guilt-free format.

This recipe matters because it proves that you do not have to sacrifice flavor for health. It is naturally gluten-free, dairy-free, and egg-free, making it a fantastic inclusive option for gatherings. Moreover, it fits perfectly with a lifestyle that values both indulgence and wellness. It prepares easily in one bowl, and you can even make it ahead for a stress-free morning. If you enjoy simple, make-ahead breakfasts, you will absolutely love my popular Overnight Oats Four Ways for another quick option.

The tone here at my blog always focuses on approachable, delicious recipes that everyone can make and enjoy. This Pecan Pie Baked Oatmeal (Gluten-Free + Vegan-Friendly!) embodies that mission perfectly. It uses common pantry staples to create something extraordinary without any complicated steps. Additionally, it is a fantastic recipe for meal prepping, ensuring a healthy and exciting breakfast waits for you all week long. For another baked treat that is equally simple and crowd-pleasing, try my classic Vegan Banana Bread.

Why I Love This Recipe

I truly love this Pecan Pie Baked Oatmeal because it solves my eternal weekend breakfast dilemma. I constantly crave something that feels like a treat but still powers me through a busy day. This dish achieves that balance beautifully. The process of mixing the simple ingredients and smelling it bake brings me so much joy and reminds me of family holidays. Ultimately, sharing a warm square straight from the oven with my loved ones, seeing their faces light up, is my favorite part of the entire experience.

Health and Nutrition

Why it’s good for your body

This Pecan Pie Baked Oatmeal (Gluten-Free + Vegan-Friendly!) delivers a powerful nutritional punch to start your day. First and foremost, it provides a fantastic source of sustained energy. Consequently, the whole grain oats release their carbohydrates slowly into your bloodstream, which helps you avoid a mid-morning energy crash. Moreover, these same oats are packed with soluble fiber, specifically beta-glucan. As a result, this fiber actively works to support healthy cholesterol levels and promote excellent digestive health.

Additionally, the star of the show, pecans, contributes significantly to its health profile. These nuts are rich in monounsaturated fats, which are heart-healthy fats that support good cholesterol. Furthermore, pecans deliver a healthy dose of antioxidants and essential minerals like manganese. Therefore, enjoying a serving of this Pecan Pie Baked Oatmeal (Gluten-Free + Vegan-Friendly!) means you are nourishing your body with beneficial fats and vital nutrients. Finally, by using natural sweeteners like maple syrup, this dish offers a more wholesome sweetness compared to refined sugars, making it a genuinely beneficial choice.

How it fits in a healthy lifestyle

This baked oatmeal seamlessly fits into a balanced and mindful eating plan. It makes for a perfect make-ahead breakfast that supports your wellness goals without sacrificing flavor. Whether you follow a gluten-free or vegan diet, this recipe ensures you never have to miss out on a decadent-tasting meal. The combination of complex carbs, healthy fats, and plant-based protein provides lasting satiety, helping you feel full and focused all morning long.

For those exploring more gluten-free morning options, our guide to gluten-free baking tips can help you master the basics. You can also easily incorporate a scoop of your favorite plant-based protein powder into the batter for an extra protein boost to support muscle recovery. Think of it as a nourishing cornerstone for your day that proves healthy eating can be incredibly delicious and satisfying. For another wholesome and energizing breakfast idea, try our popular Blueberry Almond Baked Oatmeal.

Print
clock clock iconcutlery cutlery iconflag flag iconfolder folder iconinstagram instagram iconpinterest pinterest iconfacebook facebook iconprint print iconsquares squares iconheart heart iconheart solid heart solid icon

Pecan Pie Baked Oatmeal (Gluten-Free + Vegan-Friendly!)


  • Author: Chef Emy

Description

A warm and comforting baked oatmeal that tastes just like pecan pie, made with gluten-free oats and natural sweeteners.


Ingredients

Scale

For the Crust:

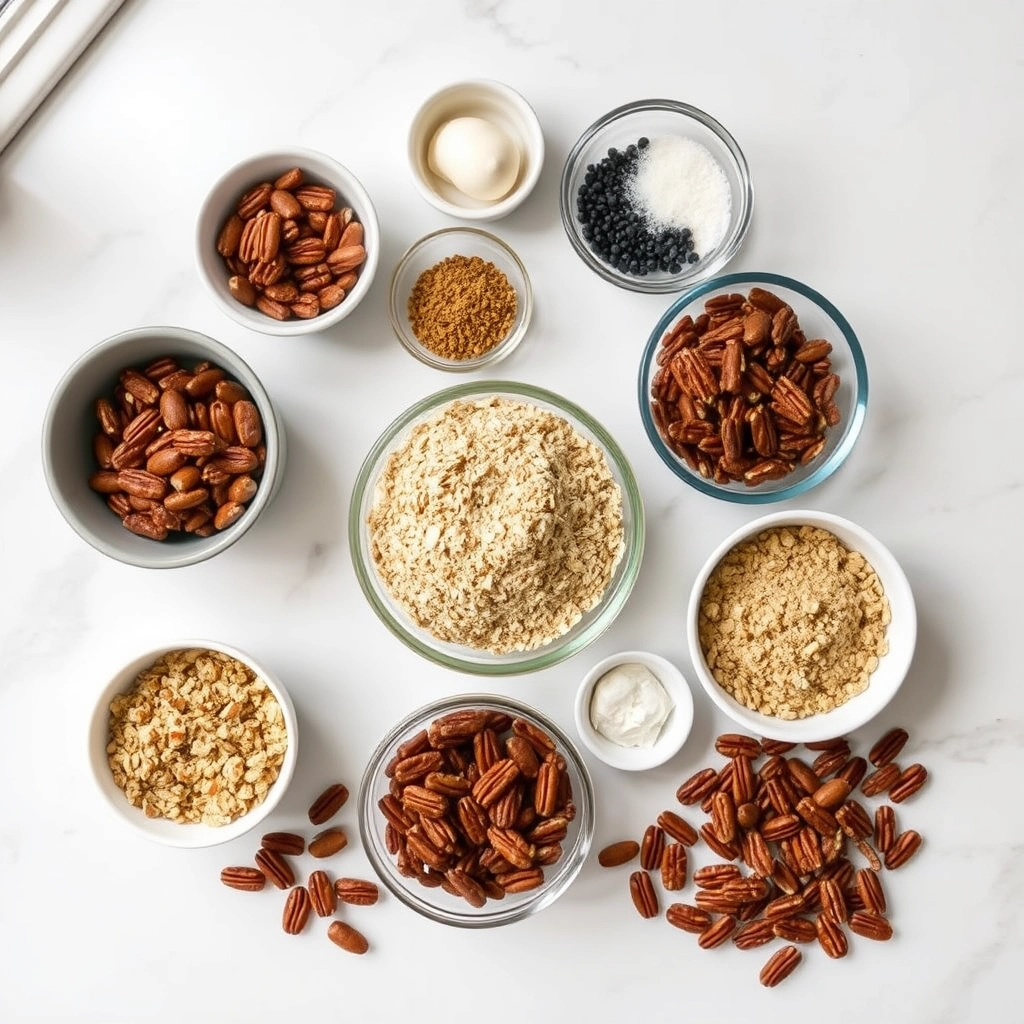
  • 2 cups gluten-free rolled oats
  • 1/2 cup chopped pecans
  • 1/4 cup maple syrup
  • 1/4 cup coconut sugar
  • 1 tsp cinnamon
  • 1/2 tsp nutmeg
  • 1/4 tsp salt
  • 2 cups unsweetened almond milk
  • 1 flax egg (1 tbsp ground flax + 3 tbsp water)
  • 1 tsp vanilla extract
  • 2 tbsp coconut oil, melted

Instructions

1. Prepare the Crust:

  1. Preheat oven to 375°F and grease an 8×8 baking dish.
  2. In a large bowl, mix oats, pecans, coconut sugar, cinnamon, nutmeg, and salt.
  3. In another bowl, whisk together almond milk, maple syrup, flax egg, vanilla, and melted coconut oil.
  4. Pour wet ingredients into dry and stir until combined. Transfer to baking dish.
  5. Bake for 30-35 minutes until set and golden. Let cool 10 minutes before serving.

Notes

You can customize the seasonings to taste.

How to Prepare This Dish

Steps and time-saving tips

First, preheat your oven to 375°F and generously grease an 8×8 baking dish. This simple step prevents sticking and makes cleanup a breeze. Meanwhile, whisk the flaxseed meal with water in a small bowl to create your “flax egg” and set it aside to thicken for about five minutes. Next, grab a large mixing bowl and combine the rolled oats, baking powder, cinnamon, and a pinch of salt. In a separate medium bowl, vigorously whisk together the plant-based milk, maple syrup, melted coconut oil, and vanilla extract until the mixture is perfectly smooth and emulsified. Pour these wet ingredients into the dry oat mixture, then add the prepared flax egg. Gently fold everything together until you have a uniform, cohesive batter. Finally, stir in the majority of your chopped pecans, saving a handful for the topping. Pour this delicious Pecan Pie Baked Oatmeal batter into your prepared dish, smooth the top with a spatula, and scatter the remaining pecans over it. Bake for 30-35 minutes, or until the edges are golden brown and the center is beautifully set. Let it cool for a few minutes before slicing. For a true pecan pie experience, drizzle each warm serving with a little extra maple syrup.

Mistakes I’ve made and learned from

I have definitely learned a few lessons the hard way with this Pecan Pie Baked Oatmeal. My biggest mistake was using quick oats instead of old-fashioned rolled oats, which resulted in a mushy, less textured final product that lacked the hearty feel I love. Now, I always double-check my pantry before starting. Another common error I made was impatience; I would pull the dish out the second the top looked done, only to find a soggy, underbaked center. I learned that letting it bake until the edges pull away from the pan is the true sign of doneness. This experience taught me the importance of baking with the right type of oats for structural integrity. Furthermore, if your baked goods are often too dry, you might be overmixing or measuring flour incorrectly, a topic I cover in my guide on fixing common baking mistakes. Trust me, a little patience and the right ingredients make all the difference for the perfect gluten-free and vegan-friendly breakfast.

Cultural Connection and Variations

Where this recipe comes from

This recipe pulls its cozy, comforting soul straight from the heart of Southern tradition. Picture a classic pecan pie, its gooey, caramelized filling cradling buttery nuts in a flaky crust. Now, we reimagine that iconic dessert as a nourishing breakfast. My grandmother always made a huge pecan pie for Thanksgiving, and the smell alone signaled the start of the holidays. However, our modern twist on her classic embraces a different kind of warmth. We swap the pastry for hearty oats and use natural sweeteners, making it a morning treat you can feel good about.

Around the world, people prepare oats in wonderfully diverse ways. In Scotland, they might toast them for a savory porridge. Meanwhile, across Scandinavia, they often serve oatmeal cold and paired with fresh fruit. Our Pecan Pie Baked Oatmeal (Gluten-Free + Vegan-Friendly!) finds its own unique place in this global tapestry. It captures that beloved pie flavor but delivers it in a completely new, wholesome format. This dish beautifully bridges the gap between nostalgic indulgence and mindful eating, creating a new tradition for everyone at the table.

How it fits in today’s cooking

This dish fits perfectly into our modern approach to food, where we crave both comfort and wellness. It shines as a spectacular centerpiece for a holiday brunch, effortlessly carrying on that festive pie tradition. Furthermore, it works just as well for a simple weekday meal prep, giving you a ready-to-go breakfast that feels like a treat. Busy home cooks love how it simplifies their morning routine while delivering incredible flavor.

Many people now adapt it to their personal preferences, perhaps stirring in a handful of dark chocolate chips or a swirl of almond butter after baking. Its flexible nature makes it a fantastic choice for families with diverse dietary needs. For another fantastic make-ahead breakfast option that everyone will love, you must try our popular Vegan Banana Bread. Ultimately, this recipe proves that you do not have to sacrifice tradition for health. It is a celebration of how classic flavors can evolve, much like the delightful variations you will find in our collection of Gluten Free Pancakes.

Taste and Texture

What makes it delicious

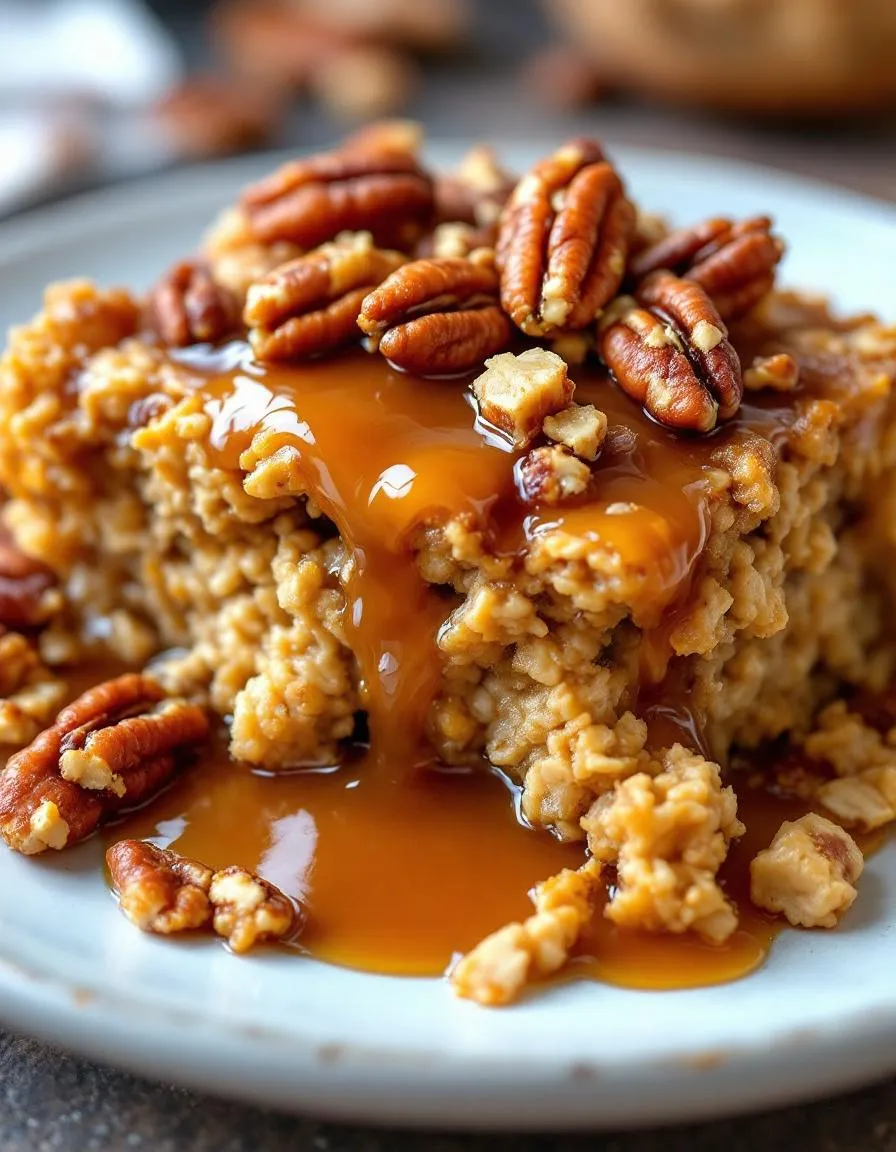
This Pecan Pie Baked Oatmeal (Gluten-Free + Vegan-Friendly!) warmly greets you with the rich, toasty aroma of pecans and cinnamon. Each spoonful delivers a wonderfully chewy and creamy texture, creating a comforting contrast. Furthermore, the sweet, buttery date caramel sauce soaks into the oats, while the pecans provide a satisfying, crisp crunch. Ultimately, this dish perfectly captures the nostalgic, decadent essence of a classic dessert in a wholesome breakfast form.

Boosting the flavor

For an even more decadent experience, consider serving a warm slice with a generous drizzle of our Vegan Salted Caramel Sauce. Alternatively, a dollop of creamy, cool coconut yogurt beautifully balances the warm spices. Moreover, a sprinkle of flaky sea salt right before serving intensifies all the sweet, buttery notes. If you adore that cozy spice flavor, you can also experiment with our favorite Vegan Pumpkin Pancakes spice blend by adding a pinch of ginger or nutmeg to the batter.

Tips for Success

Best practices for results

Always use certified gluten-free rolled oats to ensure your final dish is safe. Furthermore, press the topping down gently into the wet mixture before baking for the best texture. Use a light-colored metal pan for even heating and to prevent the bottom from over-browning. Additionally, let your Pecan Pie Baked Oatmeal (Gluten-Free + Vegan-Friendly!) rest for at least ten minutes before serving so it sets perfectly.

Mistakes to avoid

Avoid overmixing the batter, as this can lead to a dense and gummy texture instead of a light one. Instead, gently fold the ingredients until they are just combined. Moreover, do not skip toasting your pecans, because this crucial step unlocks their rich, nutty flavor. For more guidance on plant-based swaps, check out our guide to vegan baking substitutions. Finally, ensure your baking powder is fresh; otherwise, your oatmeal bake might not rise properly. If you are new to gluten-free baking, our gluten-free baking tips will help you avoid common pitfalls.

Serving and Pairing Suggestions

How to serve this dish

Serve your Pecan Pie Baked Oatmeal (Gluten-Free + Vegan-Friendly!) warm for the ultimate cozy experience. Furthermore, scoop it into individual bowls for a casual family breakfast. For a beautiful brunch or holiday table, however, bake it in a decorative ceramic dish. Immediately top each portion with an extra drizzle of maple syrup and a sprinkle of toasted pecans. This final touch not only adds crunch but also makes it look incredibly inviting. Ultimately, this dish shines as a centerpiece for special mornings and festive gatherings.

What goes well with it

Pair a slice of this cozy Pecan Pie Baked Oatmeal (Gluten-Free + Vegan-Friendly!) with a hot drink for a perfect morning. Specifically, a creamy oat milk latte beautifully complements the warm spices and sweet maple notes. Alternatively, a cool glass of almond milk also makes a wonderfully simple and refreshing partner. For a more substantial brunch spread, consider serving it alongside some savory options. For instance, our popular Vegan Breakfast Sausage Patties create a fantastic sweet and savory balance. Similarly, a side of our Classic Vegan Scrambled “Eggs” adds a protein-packed element that completes the meal.

Can I make pecan pie baked oatmeal ahead of time?

Absolutely! This Pecan Pie Baked Oatmeal is an excellent make-ahead breakfast. You can prepare it the night before, store it covered in the refrigerator, and simply bake it in the morning for a warm, hassle-free meal.

What can I use instead of maple syrup in vegan baked oatmeal?

For a similar liquid sweetener, you can substitute agave nectar or date syrup in equal amounts. If you’re not strictly vegan, you could also use honey, though that would change the classification of this Pecan Pie Baked Oatmeal (Gluten-Free + Vegan-Friendly!) recipe.

How do I store and reheat leftover baked oatmeal?

Allow the baked oatmeal to cool completely, then store it in an airtight container in the refrigerator for up to 4 days. For best results, reheat individual portions in the microwave for 60-90 seconds or in a 350°F oven until warm throughout.

Is this pecan pie baked oatmeal recipe healthy?

Yes, this version is a healthier take on classic pecan pie! It’s made with whole grain oats, healthy fats from pecans, and natural sweeteners like maple syrup. This gluten-free and vegan-friendly Pecan Pie Baked Oatmeal provides a nutritious and satisfying start to your day.

Best Pumpkin Cream Cheese Bread Recipe

best-pumpkin-cream-cheese-bread

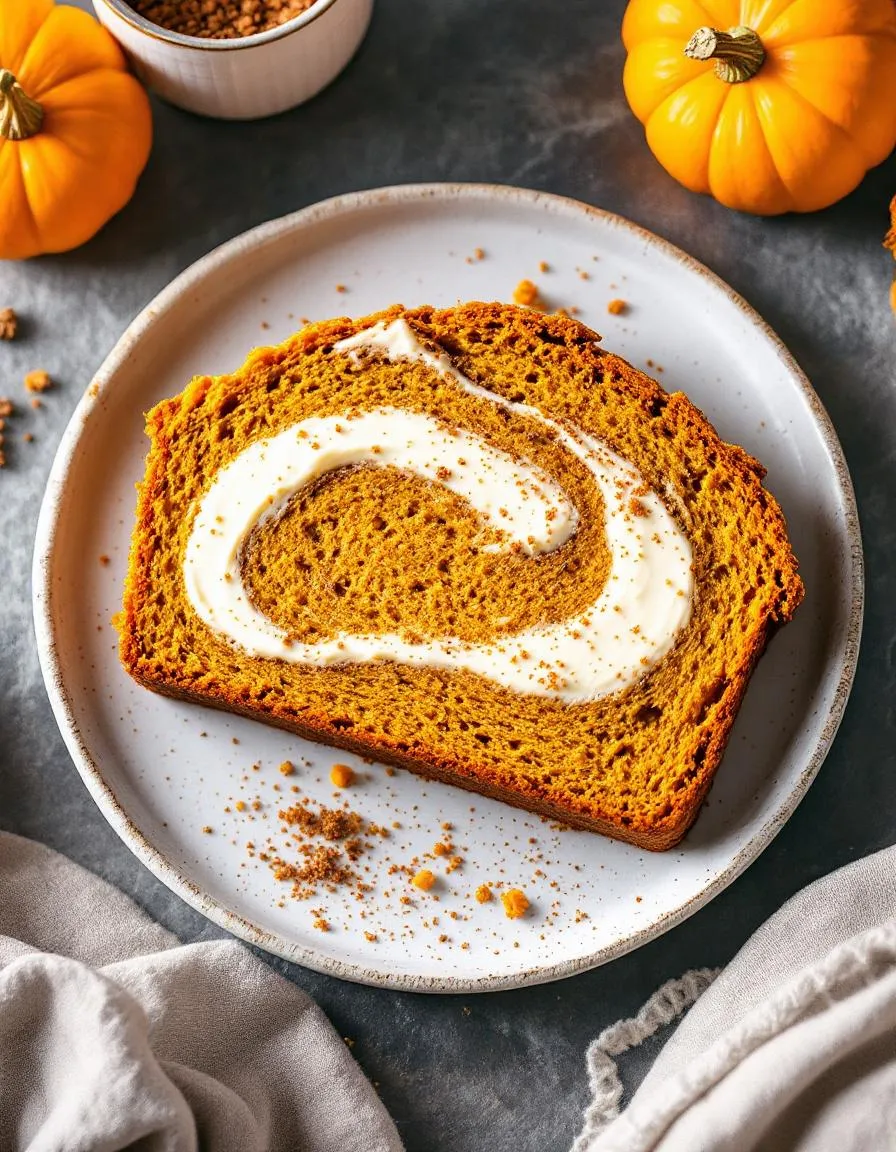
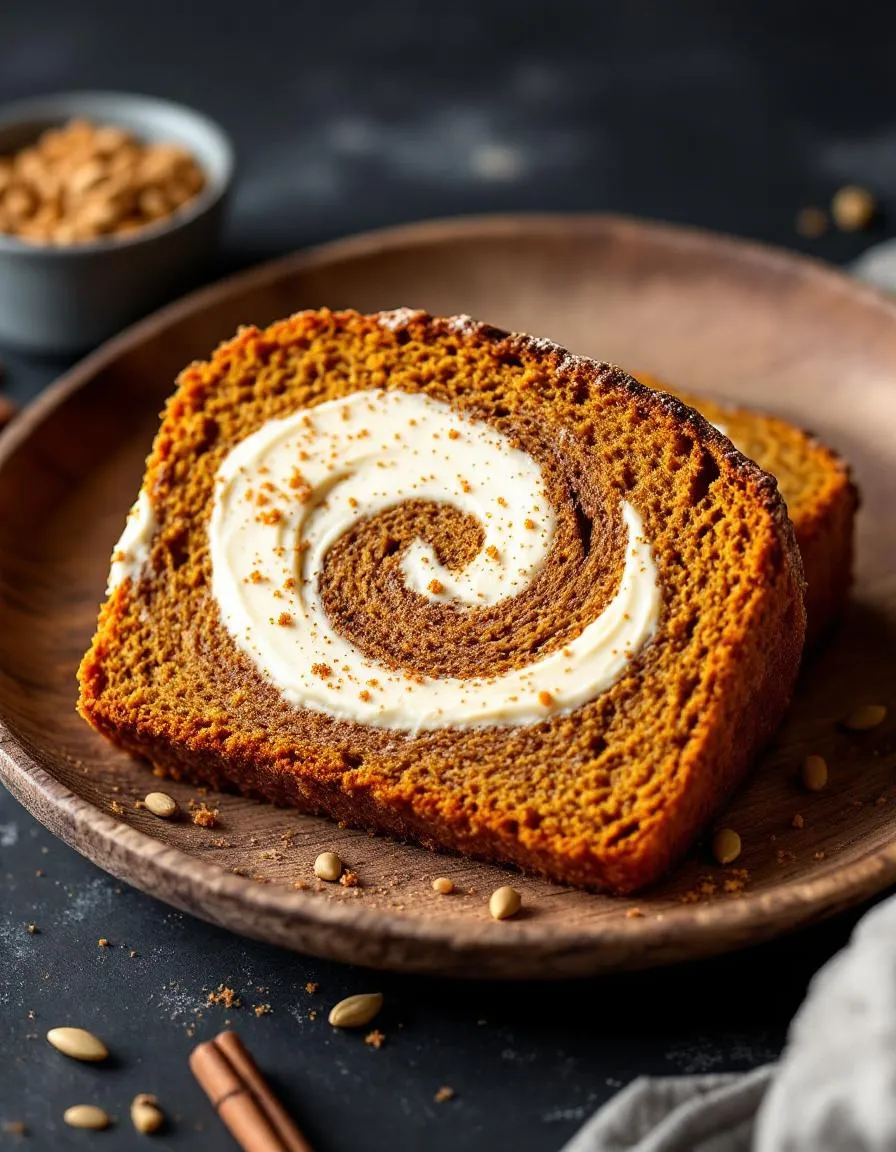
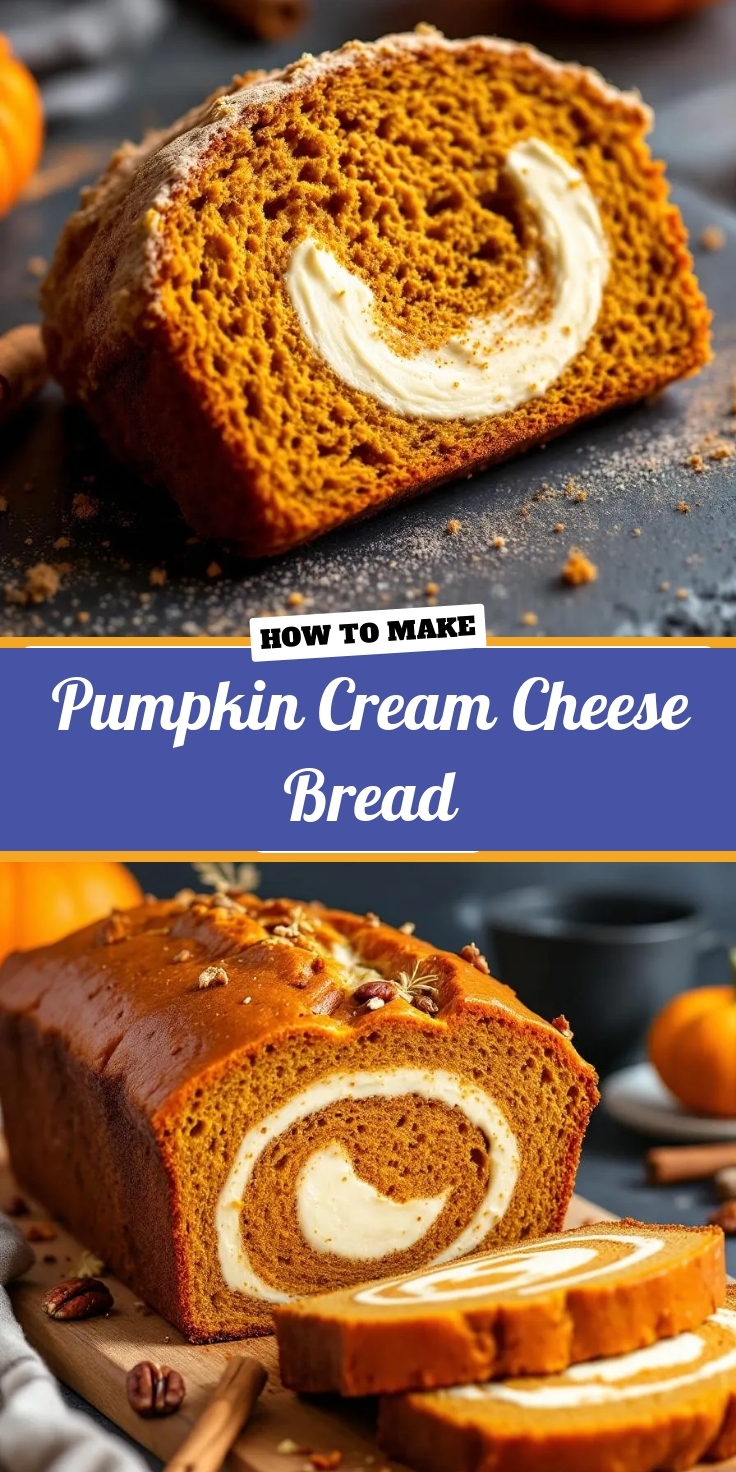
Is there anything more comforting than the warm, spiced aroma of pumpkin baking in the oven? It truly signals the heart of cozy season. Now, imagine that classic fall flavor swirled with a rich, tangy ribbon of sweet cream cheese. That is the magic of this Pumpkin Cream Cheese Bread. This recipe creates the ultimate autumnal treat, a moist and tender loaf that feels like a hug in every single slice. It is perfect for your morning coffee, an afternoon pick-me-up, or as a stunning dessert that will absolutely wow your friends and family.

About This Recipe

Pumpkin Cream Cheese Bread masterfully combines two beloved elements into one incredible baked good. Fundamentally, it features a spiced pumpkin bread batter that is incredibly moist and fluffy. Meanwhile, a sweetened cream cheese filling creates a decadent, tangy swirl throughout the loaf. This combination matters because it elevates a simple quick bread into a truly special occasion-worthy bake. The contrast between the spicy, earthy pumpkin and the cool, creamy cheese is simply irresistible. Furthermore, this recipe fits our blog’s tone perfectly as we always strive to share reliable, crowd-pleasing recipes that deliver spectacular results without unnecessary complexity. You can trust that this bread will become a seasonal staple, much like our favorite Classic Banana Bread. For those who adore the pumpkin and cream cheese pairing, this loaf is a must-try, especially if you enjoy the flavors in our popular Pumpkin Cheesecake Muffins. Ultimately, this Pumpkin Cream Cheese Bread is a celebration of fall’s finest flavors in one beautifully marbled package.

Why I Love This Recipe

This Pumpkin Cream Cheese Bread holds a special place in my heart because it reminds me of baking with my grandmother. She always believed that the best recipes were the ones that brought people together, and this loaf does exactly that. I love how the marbled pattern looks so impressive straight out of the pan, yet the recipe itself is straightforward and forgiving. The joy I see on someone’s face when they take that first bite and discover the creamy center is why I keep coming back to this recipe year after year. It is my go-to bake for welcoming new neighbors, comforting a friend, or simply treating my family to a little slice of seasonal happiness.

Health and Nutrition

Why it’s good for your body

Pumpkin Cream Cheese Bread offers a surprisingly wholesome treat. First, pumpkin puree provides a powerful dose of vitamin A, which actively supports healthy vision and a strong immune system. Additionally, this essential ingredient delivers a healthy amount of fiber to support your digestive health.

Furthermore, the warming spices like cinnamon and nutmeg do more than just add flavor. In fact, they bring their own set of antioxidant and anti-inflammatory properties to every slice. Consequently, you get a delicious baked good that also helps combat oxidative stress in your body.

Moreover, the eggs and dairy in this recipe contribute high-quality protein and calcium. These nutrients are vital for building strong muscles and maintaining bone density. Ultimately, enjoying a slice of Pumpkin Cream Cheese Bread means you are treating yourself to a snack with genuine nutritional value. Finally, remember that this bread uses natural sweetness from the pumpkin itself, which helps reduce the need for excessive refined sugars.

How it fits in a healthy lifestyle

This Pumpkin Cream Cheese Bread fits beautifully into a balanced eating plan. Think of it as a satisfying snack or a special weekend breakfast rather than an everyday indulgence. You can easily pair a slice with a source of protein, like a handful of almonds or a Greek yogurt, to create a more complete and sustaining meal that keeps you energized.

For those mindful of specific dietary needs, you can easily adapt this recipe. Simply use a 1:1 gluten-free flour blend to make it celiac-friendly. If you are exploring other ways to enjoy wholesome baked goods, our guide to gluten-free baking offers fantastic tips and ingredient swaps. You can also experiment with reducing the sugar slightly, as the pumpkin and spices provide so much natural flavor.

Remember, a healthy lifestyle is all about balance and enjoyment. This bread allows you to savor a decadent-tasting treat while still nourishing your body with good ingredients. For more inspiration on incorporating wholesome foods into your day, check out our thoughts on healthy meal prep that doesn’t sacrifice flavor.

Print
clock clock iconcutlery cutlery iconflag flag iconfolder folder iconinstagram instagram iconpinterest pinterest iconfacebook facebook iconprint print iconsquares squares iconheart heart iconheart solid heart solid icon

Pumpkin Cream Cheese Bread


  • Author: Chef Emy

Description

A moist and flavorful pumpkin bread swirled with a rich cream cheese filling, perfect for autumn baking.


Ingredients

Scale

For the Crust:

  • 2 cups all-purpose flour
  • 1 tsp baking soda
  • 1/2 tsp salt
  • 1 tsp ground cinnamon
  • 1/2 tsp ground nutmeg
  • 1/4 tsp ground cloves
  • 1 cup canned pumpkin puree
  • 1/2 cup vegetable oil
  • 1 cup granulated sugar
  • 1/2 cup brown sugar
  • 2 large eggs
  • 1/4 cup milk
  • 8 oz cream cheese, softened
  • 1/4 cup granulated sugar
  • 1 large egg yolk
  • 1 tsp vanilla extract

Instructions

1. Prepare the Crust:

  1. Preheat oven to 350°F (175°C). Grease a 9×5 inch loaf pan.
  2. In a medium bowl, whisk together flour, baking soda, salt, cinnamon, nutmeg, and cloves. Set aside.
  3. In a large bowl, mix pumpkin puree, oil, sugars, eggs, and milk until well combined. Gradually stir in dry ingredients until just incorporated.
  4. In a separate bowl, beat cream cheese, sugar, egg yolk, and vanilla until smooth.
  5. Pour half of the pumpkin batter into the prepared pan. Spoon cream cheese mixture over batter, then top with remaining pumpkin batter. Use a knife to swirl layers together.
  6. Bake for 55-65 minutes, or until a toothpick inserted comes out clean. Cool in pan for 15 minutes, then transfer to a wire rack to cool completely.

Notes

You can customize the seasonings to taste.

How to Prepare This Dish

Steps and time-saving tips

First, preheat your oven and generously grease a 9×5 loaf pan. Meanwhile, whisk your dry ingredients like flour, baking soda, and warming spices in one bowl. In a larger separate bowl, vigorously cream the butter and sugars until they become light and fluffy. Next, beat in the eggs one at a time, followed by the vanilla and the entire can of pumpkin puree. Gradually fold the dry mixture into the wet ingredients, but be careful not to overmix the batter. For the creamy cheesecake layer, simply beat the softened cream cheese with sugar, an egg, and a touch of flour until it is perfectly smooth. Pour half of your pumpkin batter into the prepared pan, then gently spread the cream cheese filling on top. Finally, cover it all with the remaining pumpkin batter. Bake until a toothpick inserted into the cake part comes out clean. Let the loaf cool completely in the pan, as this step is crucial for a clean slice. For a faster process, use room temperature ingredients to ensure everything blends together quickly and evenly.

Mistakes I’ve made and learned from

I have definitely learned a few lessons the hard way with this Pumpkin Cream Cheese Bread. My biggest mistake was using cold cream cheese straight from the fridge, which resulted in a lumpy, uneven swirl that simply would not incorporate smoothly. Now, I always make sure my dairy is perfectly softened before I begin, which creates that beautiful marbled effect we all want. Another common error I made was underbaking the loaf, leading to a gummy, sunken center that just would not set. I finally invested in an inexpensive oven thermometer and discovered my oven runs cool, a fix that made all the difference. For more on avoiding baking pitfalls, my guide on common baking mistakes is a great resource. Remember, allowing the bread to cool completely is non-negotiable for neat slices, a tip I cover in depth in my post about how to store quick bread properly.

Cultural Connection and Variations

Where this recipe comes from

Pumpkin Cream Cheese Bread feels like a warm hug from autumn itself. Its story, however, weaves together two distinct traditions. Firstly, colonists in North America embraced the native pumpkin, often sweetening it for breads. Meanwhile, cream cheese fillings have roots in old-world European baking techniques, particularly from Germany and Eastern Europe. Eventually, someone brilliantly married these two concepts, creating the marbled masterpiece we adore today.

Families across the American South and Midwest often put their own spin on this treat. Some bakers add a handful of toasted pecans or walnuts for a satisfying crunch. Others might stir warm spices like ginger or cardamom into the cream cheese swirl. My grandmother, for instance, always used a dash of orange zest in her filling, which created a wonderfully bright contrast to the earthy pumpkin. No matter the variation, a perfect slice of Pumpkin Cream Cheese Bread always delivers that iconic swirl.

How it fits in today’s cooking

This loaf absolutely thrives in modern kitchens. It seamlessly bridges the gap between casual snacking and festive celebration. For many, baking it signals the official start of fall, filling the house with an irresistible aroma that rivals any scented candle. Furthermore, it remains a superstar at holiday potlucks and Thanksgiving brunches, often sitting proudly beside other seasonal favorites.

Today’s home cooks also find brilliant ways to adapt it. Many health-conscious bakers successfully swap in whole wheat flour or reduce the sugar without sacrificing flavor. Others love making miniature loaves to give as heartfelt edible gifts. If you are searching for more autumn inspiration, our collection of fall baking ideas offers plenty of creative twists. Ultimately, a warm slice of this bread with a cup of coffee defines comfort. For the perfect pairing, explore our guide on choosing coffee for your desserts to elevate your entire experience.

Taste and Texture

What makes it delicious

This Pumpkin Cream Cheese Bread delivers a wonderfully moist and tender crumb that simply melts in your mouth. Each slice bursts with warm, fragrant spices like cinnamon and nutmeg, which perfectly complement the earthy sweetness of the pumpkin puree. Furthermore, the rich, tangy swirl of cream cheese creates a luxurious ribbon of flavor. Ultimately, the experience is a harmonious blend of sweet and spiced, all wrapped up in a supremely soft and satisfying loaf.

Boosting the flavor

You can easily amplify your Pumpkin Cream Cheese Bread with a few creative tweaks. For instance, try folding a handful of dark chocolate chips or toasted pecans into the batter for extra richness and crunch. Alternatively, a simple vanilla glaze drizzled on top adds a sweet, professional finish. If you love the cream cheese element, consider trying our perfect cream cheese frosting as a decadent spread. Moreover, a scoop of our homemade cinnamon ice cream turns a simple slice into a spectacular dessert.

Tips for Success

Best practices for results

Always use room temperature cream cheese and eggs for a perfectly smooth swirl in your Pumpkin Cream Cheese Bread. Furthermore, thoroughly grease your loaf pan to guarantee an easy release after baking. For the best flavor, use pure pumpkin puree instead of pumpkin pie filling. Additionally, allow the bread to cool completely in the pan before slicing it to get clean, beautiful pieces.

Mistakes to avoid

Avoid overmixing the batter after you add the dry ingredients, as this overdevelops the gluten and creates a tough, dense crumb. Consequently, mix the batter only until you no longer see streaks of flour. Moreover, do not skip the step of tasting your cream cheese mixture for sweetness; otherwise, your swirl might lack flavor. For more guidance on achieving the perfect texture, read our guide on how to tell when bread is done. Also, ensure your baking soda is fresh for proper rise; if yours is old, your Pumpkin Cream Cheese Bread might not dome correctly. You can check out our tips for baking powder vs baking soda to understand their roles better.

Serving and Pairing Suggestions

How to serve this dish

Present your Pumpkin Cream Cheese Bread as the star of any table. For a beautiful brunch spread, slice it thickly and arrange it on a rustic wooden board. Moreover, a light dusting of powdered sugar or a drizzle of vanilla glaze right before serving adds a touch of elegance. This bread truly shines during holiday gatherings; simply warm each slice slightly to make the cream cheese swirl extra luxurious. Finally, garnish each plate with a few toasted pecans or a dollop of whipped cream for a visually appealing and utterly delicious experience.

What goes well with it

A hot cup of coffee perfectly cuts through the rich sweetness of Pumpkin Cream Cheese Bread. Alternatively, a cold glass of milk provides a classic, comforting pairing that everyone loves. For a more decadent brunch, serve it alongside a savory option like our hearty Breakfast Casserole to balance the meal. Furthermore, a simple side of fresh fruit salad offers a bright, refreshing contrast. If you want to continue the cozy baking theme, this bread also pairs wonderfully with our popular Cinnamon Rolls for an unforgettable dessert spread.

Can you freeze pumpkin cream cheese bread?

Yes, you can absolutely freeze pumpkin cream cheese bread. Wrap the cooled loaf tightly in plastic wrap and then aluminum foil before placing it in a freezer-safe bag. It will keep well for up to 3 months, making it a perfect make-ahead treat.

How do you know when pumpkin bread is done baking?

The best way to test for doneness is to insert a toothpick or a thin skewer into the center of the pumpkin cream cheese bread. If it comes out with a few moist crumbs attached but no wet batter, the bread is ready. The edges should also be pulling slightly away from the sides of the pan.

Why did my cream cheese filling sink into the bread?

A cream cheese filling can sink if the batter is too thin or if the filling is too heavy and liquid. To prevent this, ensure your cream cheese mixture is thick and chilled, and avoid overmixing the pumpkin batter. Properly layering the batter and filling also helps the Pumpkin Cream Cheese Bread maintain distinct layers.

Can I use fresh pumpkin instead of canned for pumpkin bread?

You can use fresh pumpkin puree, but it often contains more water than canned pumpkin. To use fresh pumpkin, first roast and puree it, then strain it in a cheesecloth to remove excess moisture. This step is crucial to achieve the perfect dense, moist texture for your Pumpkin Cream Cheese Bread.

Best Butter Cookies Recipe – Easy & Homemade

best-butter-cookies-recipe

There is something truly magical about the simple joy of baking a batch of butter cookies. That moment you pull a golden tray from the oven, your kitchen fills with a rich, comforting aroma that feels like a warm hug. These classic treats, with their melt-in-your-mouth texture and pure, buttery flavor, have a special way of creating moments of happiness. Whether you are decorating them for the holidays with your family or enjoying a quiet afternoon with a cup of tea, these butter cookies promise a little slice of homemade bliss that everyone will adore.

About This Recipe

Butter cookies represent the heart of simple, elegant baking. Fundamentally, these cookies rely on a few quality ingredients, with butter playing the starring role to create a tender crumb and rich flavor that simply melts on your tongue. Consequently, this recipe matters because it delivers a foolproof classic. It provides a perfect base for creativity, whether you choose to pipe them into beautiful shapes, press them with a cookie stamp, or simply drop them for a rustic look. Furthermore, mastering this butter cookie recipe gives you a foundational skill that you can adapt for countless occasions, from holiday tins to elegant afternoon tea parties. This approach fits our blog’s tone perfectly because we celebrate recipes that are both accessible and exceptional. We believe that everyone deserves to create beautiful, delicious food without stress, and these butter cookies absolutely deliver on that promise. They are the kind of treat that feels fancy but are surprisingly simple to make, much like our popular vanilla cupcakes. Ultimately, a perfect butter cookie is about more than just taste. It is about the experience of baking something wonderful and sharing it with people you love. For more tips on achieving baking success, explore our guide on essential baking ingredients.

Why I Love This Recipe

This particular butter cookie recipe holds a very special place in my heart because it was my grandmother’s signature treat. She always had a tin of these cookies tucked away in her pantry, ready for any visitor who stopped by. I vividly remember standing on a stool next to her, carefully helping her press the dough with a fork, feeling so proud of our creation. Now, every time I bake them, that same wonderful scent fills my own kitchen and instantly transports me back to those cherished afternoons. This recipe connects me to my past while allowing me to create new, sweet memories with my own family, and that is a feeling I truly treasure.

Health and Nutrition

Why it’s good for your body

Butter Cookies offer more than just a delicious taste. For starters, they provide a quick source of energy from their carbohydrates, which is perfect for a midday pick-me-up. Furthermore, the butter in these cookies delivers essential fats that your body needs to absorb vitamins and support cell function.

Additionally, many recipes for Butter Cookies include important micronutrients. For example, eggs often contribute protein and vitamin D, while flour can offer iron and B vitamins. Consequently, enjoying a Butter Cookie means you are giving your body a small dose of these supportive nutrients. Moderation is key, of course, but these treats can certainly be part of a mindful eating plan. Ultimately, the simple joy of eating a Butter Cookie also supports mental well-being by satisfying a craving and providing comfort.

How it fits in a healthy lifestyle

Butter Cookies can absolutely fit into a balanced diet when you enjoy them mindfully. Think of them as a occasional treat rather than an everyday staple. Pairing one with a piece of fruit or a cup of tea can make for a satisfying snack that prevents overindulgence later.

You can also easily adapt the recipe to meet specific dietary needs. For instance, using a gluten-free flour blend makes them perfect for anyone avoiding gluten. If you are watching your sugar intake, consider exploring our guide to natural sugar alternatives for a healthier swap. The key is finding a balance that allows you to enjoy the foods you love while still nourishing your body properly.

Print
clock clock iconcutlery cutlery iconflag flag iconfolder folder iconinstagram instagram iconpinterest pinterest iconfacebook facebook iconprint print iconsquares squares iconheart heart iconheart solid heart solid icon

Butter Cookies


  • Author: Chef Emy

Description

Classic, melt-in-your-mouth butter cookies with a rich, buttery flavor and delicate texture.


Ingredients

Scale

For the Crust:

  • 1 cup unsalted butter, softened
  • 2/3 cup granulated sugar
  • 1 large egg yolk
  • 1 teaspoon vanilla extract
  • 2 cups all-purpose flour
  • 1/4 teaspoon salt

Instructions

1. Prepare the Crust:

  1. Preheat oven to 350°F (175°C). Line baking sheets with parchment paper.
  2. In a large bowl, cream together butter and sugar until light and fluffy. Beat in egg yolk and vanilla extract.
  3. Gradually mix in flour and salt until just combined. Do not overmix.
  4. Drop by teaspoonfuls onto prepared baking sheets or pipe through a cookie press for shaped cookies.
  5. Bake for 10-12 minutes or until edges are lightly golden. Cool on wire racks before serving.

Notes

You can customize the seasonings to taste.

How to Prepare This Dish

Steps and time-saving tips

First, gather all your ingredients and let your butter soften completely at room temperature. This is the single most important step for achieving that perfect, melt-in-your-mouth texture for your Butter Cookies. Meanwhile, preheat your oven to 350°F and line your baking sheets with parchment paper. Next, cream the softened butter and sugar together in a large bowl until the mixture is light, fluffy, and pale yellow. Beat in the vanilla extract and a pinch of salt. Gradually add the flour, mixing on low speed just until the dough comes together. Be careful not to overmix! For a quick cleanup, consider using a stand mixer with a paddle attachment. Furthermore, you can scoop the dough directly onto the baking sheets with a small cookie scoop. This ensures uniform size and helps every Butter Cookie bake evenly. Finally, bake for 10-12 minutes until the edges are just lightly golden. Let the cookies cool on the sheet for five minutes before transferring them to a wire rack.

Mistakes I’ve made and learned from

I have definitely learned a few lessons the hard way with this Butter Cookies recipe. My biggest mistake was using cold, hard butter straight from the fridge. I thought I could just beat it longer, but it never incorporated properly and my cookies turned out dense and greasy. Now, I always plan ahead to let my butter soften, which makes the creaming process so much easier and gives the cookies a lovely crumb. Another issue I faced was overbaking. I used to wait for the tops to brown, but by then the bottoms were often burnt. I learned that these cookies continue to set as they cool on the hot baking sheet. Pulling them out when the edges are just set is the secret to perfect Butter Cookies every time. For more on getting textures right, my guide on common baking mistakes dives deeper. Also, if your dough feels too soft, my tips on chilling cookie dough can be a real lifesaver.

Cultural Connection and Variations

Where this recipe comes from

My grandmother’s tins of Butter Cookies always signaled the holidays. However, this simple treat actually wears many hats around the world. In Denmark, they call them “småkager” and often press them into intricate shapes like hearts and swirls. Meanwhile, the French version, sablés, uses a technique called “sabler” to create a delightfully sandy, crumbly texture. My own family recipe, for instance, always includes a tiny sprinkle of sea salt on top. This creates a perfect sweet and salty bite that makes our version unique.

Furthermore, many cultures feature their own iconic takes. In Mexico, you might find polvorones, a type of wedding cookie that’s heavy on the nuts and rolled in powdered sugar. Conversely, Scottish shortbread relies on a classic ratio of one part sugar, two parts butter, and three parts flour for its famous crumb. Each variation tells a story of place and tradition. Ultimately, a simple Butter Cookies recipe provides a delicious blank canvas for bakers everywhere to express their heritage.

How it fits in today’s cooking

Butter Cookies absolutely remain a cornerstone of holiday baking. Their timeless appeal lies in their simplicity and rich, comforting flavor. Modern cooks, however, love to put their own creative spin on the classic. For example, many now add matcha powder for a vibrant green hue or dip the cooled cookies in dark chocolate for extra decadence. They also fit perfectly into our faster-paced lives. You can easily make the dough ahead and freeze it, then simply slice and bake whenever a sweet craving strikes.

Consequently, this recipe is a fantastic starting point for new bakers. It teaches essential skills like creaming butter and sugar. Moreover, these cookies are a wonderful addition to any dessert table. They pair beautifully with a cup of coffee or a glass of cold milk. For another classic treat that uses similar skills, consider trying our Easy Vanilla Cupcakes. If you are looking for more baking inspiration for a special occasion, our Celebrations Cake Designs offer plenty of beautiful ideas. Therefore, this humble cookie continues to earn its place in our kitchens and our hearts.

Taste and Texture

What makes it delicious

These Butter Cookies deliver a perfect symphony of simplicity and richness. First, your kitchen fills with the warm, comforting fragrance of sweet butter and vanilla as they bake. Then, you experience a satisfyingly crisp snap that instantly gives way to a tender, melt-in-your-mouth crumb. The flavor is profoundly buttery and sweet, yet not overpowering, creating a classic treat that feels both elegant and nostalgic. Ultimately, the magic of these Butter Cookies lies in their perfect balance of a delicate texture and a deeply comforting, rich taste.

Boosting the flavor

Fortunately, you can easily elevate these delightful cookies with a few creative twists. For instance, a sprinkle of flaky sea salt on top just before baking creates a wonderful sweet-and-salty contrast. Alternatively, try rolling the dough in coarse sugar for an extra crunch. Furthermore, consider folding in a handful of lemon zest or a teaspoon of cinnamon to the dough for a warm, aromatic depth. For a truly decadent finish, you can even dip the cooled cookies halfway into a simple homemade chocolate ganache. If you love the combination of flavors, consider pairing your batch with a glass of our recommended perfect coffee pairing for a complete experience.

Tips for Success

Best practices for results

Always chill your dough thoroughly before baking, as this step prevents your Butter Cookies from spreading too thin. Furthermore, use parchment paper on your baking sheets for the best texture and easy cleanup. For uniform results, consider using a cookie scoop to portion the dough. Additionally, rotate your baking sheets halfway through the bake time to ensure even browning on every single Butter Cookie.

Mistakes to avoid

Avoid overmixing your dough once you add the flour, as this can develop gluten and lead to tough cookies. Instead, mix just until the flour disappears for a tender texture. Similarly, do not skip the step of creaming your butter and sugar properly; otherwise, your cookies might not have the ideal crumb. For more on this essential technique, see our guide on how to cream butter and sugar. Moreover, resist the urge to overbake them. Finally, always let your baking sheets cool completely between batches for consistent results, a topic we cover in our cookie baking tips.

Serving and Pairing Suggestions

How to serve this dish

For a beautiful presentation, arrange your Butter Cookies on a vintage cake stand or a simple wooden board. Additionally, dust them with a light snowfall of powdered sugar just before your guests arrive. These cookies truly shine during holiday cookie exchanges or as a sweet finale to a dinner party. Ultimately, a sprig of fresh mint or a few vibrant berries beside them creates a lovely, inviting contrast.

Serve these Butter Cookies with a warm cup of tea for a classic afternoon treat. They also make a wonderful homemade gift; simply stack them in a clear cellophane bag tied with a festive ribbon. Consequently, you will create a heartfelt present that everyone will adore.

What goes well with it

A rich, dark roast coffee provides the perfect bitter counterpoint to the sweet, crumbly texture of Butter Cookies. Alternatively, a glass of cold milk remains a timeless pairing that delights both kids and adults. For a truly decadent experience, consider serving them alongside a scoop of our creamy No Churn Vanilla Bean Ice Cream.

If you want to create a larger dessert spread, these cookies pair wonderfully with other classics. For instance, a slice of our popular Ultimate Chocolate Fudge Cake offers a fantastic chocolatey contrast. Therefore, you can build a stunning dessert table that satisfies every craving.

What is the best flour for butter cookies?

All-purpose flour is the best choice for classic butter cookies because it provides the ideal structure, creating a cookie that is tender yet sturdy enough to hold its shape. Using cake flour can make them too delicate, while bread flour will make them overly chewy. The moderate protein content in all-purpose flour lets the rich, buttery flavor shine through in every bite.

Why are my butter cookies flat and spreading?

Butter cookies spread too much if your dough is too warm when it goes into the oven. To prevent flat cookies, always chill your dough for at least 30 minutes to solidify the butter. Using a baking sheet that is too warm or creaming the butter and sugar for too long can also contribute to this common issue.

Can you freeze butter cookie dough?

Absolutely, freezing butter cookie dough is a great way to have ready-to-bake treats on hand. Simply form the dough into a log, wrap it tightly in plastic wrap, and freeze for up to 3 months. You can slice and bake the frozen dough directly, adding just a minute or two to the baking time for perfect butter cookies.

What is the difference between butter cookies and shortbread?

The main difference lies in the sugar content and texture; butter cookies contain more sugar and often include eggs, resulting in a sweeter, crisper cookie. Traditional shortbread typically uses a simpler 1-2-3 ratio of sugar, butter, and flour, yielding a more crumbly and rich, less-sweet treat. Both are delicious, but butter cookies often hold intricate shapes from piping or molding better.

Best Pumpkin Pecan Coffee Cake Recipe

best-pumpkin-pecan-coffee-cake

Is there anything more comforting than the smell of warm spices wafting from your kitchen on a crisp autumn morning? Honestly, I think not. That first slice of something sweet and tender, paired perfectly with a steaming cup of coffee, feels like a warm hug for your soul. This particular recipe for Pumpkin Pecan Coffee Cake captures that exact feeling. It combines the cozy essence of fall with a delightful crunch, creating a treat that will have everyone gathering around the table. Ultimately, it is the centerpiece of any leisurely weekend brunch or a sweet ending to a busy day.

About This Recipe

Pumpkin Pecan Coffee Cake is a moist, spiced pumpkin cake layered with a cinnamon-pecan streusel and often finished with a simple glaze. This dessert, or rather brunch superstar, masterfully blends the familiar, comforting flavor of pumpkin pie with the irresistible texture of a classic crumb cake. Importantly, the addition of pecans provides a buttery and satisfying crunch in every single bite. This cake matters because it transforms simple, seasonal ingredients into a show-stopping baked good that feels both special and familiar. Furthermore, it fills your home with an incredible aroma that simply screams fall.

This recipe fits our blog’s tone perfectly because we specialize in approachable baking that delivers impressive results. We believe that creating beautiful food should be a joy, not a chore. For instance, if you adore the pumpkin flavor in this cake, you must explore our ultimate collection of favorite pumpkin recipes for more inspiration. This Pumpkin Pecan Coffee Cake is ideal for everything from holiday mornings to casual potlucks. Moreover, it keeps wonderfully, meaning you can enjoy a slice with your afternoon coffee for days. For those new to baking with pumpkin, understanding the different types of canned pumpkin can be helpful, so check out our guide on how to use canned pumpkin for all the tips you need.

Why I Love This Recipe

I have a deep personal connection to this Pumpkin Pecan Coffee Cake because it reminds me of baking with my grandmother. She always had a cake tucked away for unexpected guests, and the warmth of her kitchen is a feeling I try to recreate in my own home. This recipe, with its generous layer of streusel and moist pumpkin base, always brings me right back to those Saturday mornings at her house. I love how the simple act of making it fills my kitchen with the same comforting scents and creates new memories for my own family around our table.

Health and Nutrition

Why it’s good for your body

This Pumpkin Pecan Coffee Cake offers more than just incredible flavor; it also provides some genuine nutritional perks. For instance, pumpkin puree serves as the star ingredient, delivering a powerful dose of vitamin A which actively supports healthy vision and a strong immune system. Furthermore, the warming spices like cinnamon and nutmeg do more than create a cozy aroma; they also possess anti-inflammatory properties.

Additionally, the pecans in this recipe contribute healthy monounsaturated fats and plant-based protein. Consequently, these nuts help promote heart health and can keep you feeling satisfied for longer. Moreover, using pumpkin means the cake naturally contains fiber, which actively aids digestion and helps maintain steady blood sugar levels. Therefore, enjoying a slice of this Pumpkin Pecan Coffee Cake means you are treating yourself to a dessert that thoughtfully combines taste and wellness.

Ultimately, this bake proves that mindful indulgence is entirely possible. So the next time you savor a piece, you can appreciate both its delicious flavor and its wholesome benefits.

How it fits in a healthy lifestyle

This Pumpkin Pecan Coffee Cake fits beautifully into a balanced approach to eating. Think of it as a satisfying treat that complements your wellness goals rather than derails them. You can easily enjoy a slice with your morning coffee for a comforting start to the day, or you can serve it as a thoughtful dessert after a nutritious meal.

For those following specific dietary paths, you can adapt this recipe to meet your needs. If you are exploring gluten-free options, consider using a 1:1 gluten-free flour blend to create a version everyone can enjoy. Similarly, you can find more inspiration for healthy baking in our guide to healthy baking substitutes that boost nutrition without sacrificing flavor. Remember, a healthy lifestyle is all about balance and finding joy in your food. This cake, with its wholesome ingredients, allows you to do just that. For more ideas on creating a nourishing routine, explore our tips on building a balanced meal prep plan that includes room for delightful moments like this.

Print
clock clock iconcutlery cutlery iconflag flag iconfolder folder iconinstagram instagram iconpinterest pinterest iconfacebook facebook iconprint print iconsquares squares iconheart heart iconheart solid heart solid icon

Pumpkin Pecan Coffee Cake


  • Author: Chef Emy

Description

A moist and spiced pumpkin coffee cake topped with a crunchy pecan streusel, perfect for autumn mornings.


Ingredients

Scale

For the Crust:

  • 2 cups all-purpose flour
  • 1 cup granulated sugar
  • 1 cup canned pumpkin puree
  • 1/2 cup vegetable oil
  • 2 large eggs
  • 1 tsp vanilla extract
  • 1 tsp baking soda
  • 1/2 tsp baking powder
  • 1/2 tsp salt
  • 1 tsp ground cinnamon
  • 1/2 tsp ground nutmeg
  • 1/4 tsp ground cloves
  • 1/2 cup chopped pecans
  • 1/4 cup brown sugar
  • 2 tbsp cold butter

Instructions

1. Prepare the Crust:

  1. Preheat oven to 350°F (175°C) and grease a 9-inch square baking pan.
  2. In a large bowl, whisk together flour, granulated sugar, baking soda, baking powder, salt, cinnamon, nutmeg, and cloves.
  3. In another bowl, mix pumpkin puree, oil, eggs, and vanilla until smooth. Combine wet and dry ingredients, stirring until just incorporated.
  4. For the streusel, mix chopped pecans, brown sugar, and cold butter with a fork until crumbly.
  5. Pour half the batter into the pan, sprinkle with half the streusel, then top with remaining batter and streusel.
  6. Bake for 30-35 minutes or until a toothpick inserted comes out clean. Cool before serving.

Notes

You can customize the seasonings to taste.

How to Prepare This Dish

Steps and time-saving tips

First, preheat your oven and generously grease your baking pan. This simple step ensures your Pumpkin Pecan Coffee Cake releases perfectly later. Meanwhile, whisk your dry ingredients together in a large bowl. In a separate bowl, vigorously mix the pumpkin puree, eggs, oil, and sugars until the mixture is completely smooth and beautifully combined. Consequently, you will create a flawless base for your batter. Gradually fold the dry ingredients into the wet ones. Remember, stir just until the flour disappears; overmixing is the enemy of a tender crumb. Next, swiftly pour half of this lovely batter into your prepared pan. Now, for the magic! Sprinkle a generous amount of your cinnamon-pecan streusel over this first layer. Carefully spread the remaining batter on top, and then finish with one more glorious layer of streusel. Finally, pop it in the oven and let the amazing aroma fill your kitchen. Meanwhile, you can whip up the simple glaze. Once the cake tests done, let it cool slightly before you drizzle that sweet icing over the warm top. Indeed, serving this Pumpkin Pecan Coffee Cake warm is an absolute delight.

Mistakes I’ve made and learned from

I have absolutely overmixed this batter in a rush, and sadly, it resulted in a tough, dense cake instead of the soft, tender crumb we all love. Now, I mix by hand and stop the second the flour incorporates. Another classic blunder of mine was using stale baking soda; my cake simply did not rise properly, which was a total disappointment. I finally learned to test my leaveners for freshness, a tip I picked up from my baking soda vs baking powder experimentation. Also, I once impatiently dumped the glaze on a piping hot cake, and it just melted into a sad, transparent puddle instead of that beautiful white drizzle. Letting the cake cool for at least fifteen minutes makes all the difference for that perfect finish, a lesson I learned the hard way but now swear by, much like getting the perfect cake consistency every time.

Cultural Connection and Variations

Where this recipe comes from

This Pumpkin Pecan Coffee Cake feels like a warm hug from autumn itself. My grandmother always baked it when the first crisp chill hit the air. She would pull out her old ceramic mixing bowl, and the scent of cinnamon and nutmeg would fill her entire house. Importantly, her version was a humble affair, often using canned pumpkin and whatever nuts she had on hand. Conversely, my aunt in the South makes a much richer, more decadent version. She soaks her pecans in a bourbon glaze, adding a distinctly adult twist to the family classic.

Globally, bakers interpret the concept of a spiced cake quite differently. For instance, German bakers might incorporate more ginger and clove, creating a flavor profile closer to their beloved Lebkuchen. Meanwhile, Australian cooks might pair the pumpkin with macadamia nuts for a local twist. Ultimately, every culture that enjoys winter squash and nuts has its own version of a comforting baked good. This particular Pumpkin Pecan Coffee Cake recipe represents a beautiful American melting pot of flavors, blending native pecans with the warming spices of global trade routes.

How it fits in today’s cooking

Today, this cake perfectly bridges the gap between nostalgic tradition and modern convenience. Busy home cooks now adapt it for their hectic schedules. For example, many prepare the streusel topping in advance or use a food processor to quickly blend the dry ingredients. Furthermore, it has become a star of holiday brunches and Thanksgiving morning gatherings, offering a cozy start to a day of feasting.

Its versatility also makes it a year-round favorite for many. You can easily find a fantastic gluten-free coffee cake adaptation that lets everyone enjoy a slice. Moreover, bakers often experiment with different add-ins, creating new family traditions with each variation. This cake pairs wonderfully with a morning cup of coffee, but it also shines as a simple dessert. For another delicious pairing idea, consider serving it with a scoop of our recommended best ice cream for coffee cake. Ultimately, this humble cake continues to earn its place in our kitchens and our hearts.

Taste and Texture

What makes it delicious

This Pumpkin Pecan Coffee Cake greets you with the warm, fragrant aroma of cinnamon and nutmeg. Each bite delivers a supremely moist and tender crumb, thanks to the rich pumpkin puree. Furthermore, the buttery streusel topping provides a delightful crunch, contrasting beautifully with the soft cake. Toasted pecans add a nutty depth and another layer of satisfying texture. Ultimately, the flavor is a perfect harmony of sweet, spiced pumpkin and toasty, savory nuts. You will love the comforting, cozy experience of this Pumpkin Pecan Coffee Cake.

Boosting the flavor

For an extra flavor boost, consider warming each slice slightly before serving. A simple drizzle of vanilla glaze or a dollop of whipped cream can elevate this treat into a decadent dessert. Alternatively, a sprinkle of flaky sea salt on top will intensify all the sweet and savory notes. If you adore the warm spices in this bake, explore our guide to the best pumpkin spice blend for your pantry. Moreover, for another fantastic way to enjoy seasonal flavors, try pairing it with our popular salted caramel apple cider.

Tips for Success

Best practices for results

First, always use room temperature ingredients for your Pumpkin Pecan Coffee Cake because they combine much more smoothly. Furthermore, thoroughly toast your pecans beforehand to unlock their deepest, richest flavor. For the best texture, avoid overmixing the batter once you add the dry ingredients. Finally, always perform a toothpick test in the center to guarantee perfect doneness.

Mistakes to avoid

A common error involves using pumpkin puree that is too watery, which can make the cake soggy. Consequently, always blot excess moisture from your puree with a paper towel for a perfect crumb. Moreover, do not overbake the cake, as this will dry it out. For more guidance on achieving the ideal bake, check out our guide on how to tell when a cake is done. Additionally, properly measure your flour by spooning it into the cup instead of scooping to prevent a dense result. For best practices on this crucial step, our resource on how to measure flour offers a simple solution.

Serving and Pairing Suggestions

How to serve this dish

Present your Pumpkin Pecan Coffee Cake warm for the ultimate cozy experience. For a beautiful brunch spread, simply place the whole cake on a rustic wooden board. Alternatively, dust individual slices with a final flourish of powdered sugar just before serving. This Pumpkin Pecan Coffee Cake truly shines during holiday gatherings, so let it be the centerpiece of your autumn table. Finally, garnish each plate with a few extra toasted pecans for a delightful crunch and visual appeal.

What goes well with it

A hot cup of coffee perfectly complements the warm spices in this Pumpkin Pecan Coffee Cake. For a truly decadent treat, however, pair a slice with a creamy latte. Moreover, a scoop of vanilla bean ice cream transforms it into an unforgettable dessert. If you enjoy hosting a full brunch, consider serving it alongside our popular Easy Breakfast Casserole for a savory balance. Ultimately, a simple glass of cold milk or a pumpkin spice latte also makes a fantastic pairing, especially with our other seasonal favorite, Apple Cinnamon Muffins.

Can I make Pumpkin Pecan Coffee Cake ahead of time?

Absolutely! This Pumpkin Pecan Coffee Cake is an excellent make-ahead option. You can bake it a day in advance, let it cool completely, and store it covered at room temperature. The flavors often meld and improve overnight, making it even more delicious the next day.

How do you store leftover coffee cake?

Store any leftover Pumpkin Pecan Coffee Cake in an airtight container at room temperature for up to 2 days. For longer storage, wrap it tightly and keep it in the refrigerator for up to 5 days, or freeze individual slices for up to 3 months.

Can I use fresh pumpkin instead of canned?

Yes, you can substitute one cup of homemade pumpkin puree for the canned pumpkin. Ensure your fresh puree is thick and has been strained of excess liquid to maintain the proper moisture level in your Pumpkin Pecan Coffee Cake batter.

What makes a coffee cake different from regular cake?

Unlike frosted layer cakes, coffee cakes are typically single-layer cakes with a streusel or crumb topping and are designed to be less sweet, pairing perfectly with coffee. This Pumpkin Pecan Coffee Cake fits the category with its spiced pumpkin base and crunchy pecan streusel topping.

Best Pumpkin Chocolate Chip Cupcakes Recipe

best-pumpkin-chocolate-chip-cupcakes

Is there anything more comforting than the smell of warm pumpkin and spices wafting through your kitchen? Honestly, I think not. These Pumpkin Chocolate Chip Cupcakes perfectly capture that cozy, autumnal feeling we all crave. They combine the soft, spiced warmth of your favorite pumpkin bread with the undeniable joy of melty chocolate chips, all in a perfectly portable, frosting-topped package. Whether you are baking for a fall festival, a school bake sale, or simply to satisfy a serious sweet tooth, this recipe promises to deliver pure, unadulterated joy in every single bite.

About This Recipe

So, what exactly makes these Pumpkin Chocolate Chip Cupcakes so special? Fundamentally, they are a beautifully moist and tender spiced pumpkin cupcake, generously studded with semi-sweet chocolate chips and crowned with a luxurious cream cheese frosting. This combination might seem simple, but the result is truly magical. The earthy sweetness of the pumpkin and warm spices like cinnamon and nutmeg create a fantastic flavor base. Subsequently, the pockets of rich chocolate provide a delightful, gooey contrast that takes the entire experience to another level. Moreover, this recipe matters because it delivers bakery-quality results without any fuss. You can easily whip up these crowd-pleasing treats with simple pantry staples and a single bowl, making them a fantastic project for bakers of any skill level.

This recipe fits the tone of our blog perfectly because we always strive to share reliable, tested recipes that bring people together through the simple joy of baking. We focus on approachable methods that guarantee success, much like our guide on how to make a cake from scratch. Furthermore, these cupcakes are incredibly versatile. They are an undeniable hit at Halloween parties and Thanksgiving dinners alike, but their appeal lasts all the way through winter. For another seasonal favorite that uses similar warming spices, you must try our popular pumpkin cinnamon rolls. Ultimately, baking these Pumpkin Chocolate Chip Cupcakes fills your home with an incredible aroma and creates a dessert that everyone will absolutely adore.

Why I Love This Recipe

I have a deeply personal connection to these Pumpkin Chocolate Chip Cupcakes because they are the treat I bake every year when the air turns crisp and the leaves begin to change. They remind me of my childhood, helping my grandmother in her kitchen and sneaking chocolate chips when she wasn’t looking. Now, I love making them with my own kids, creating those same warm memories and filling our home with that unmistakable scent of fall. This recipe feels like a hug in dessert form, and sharing them with friends and family always brings so much happiness. That is why these cupcakes will forever hold a special place in my heart and my recipe box.

Health and Nutrition

Why it’s good for your body

These Pumpkin Chocolate Chip Cupcakes offer a surprisingly nutritious twist on a classic treat. For starters, pumpkin puree packs a powerful punch of vitamins and minerals. It delivers a hefty dose of vitamin A, which actively supports healthy vision and a strong immune system. Furthermore, pumpkin provides a good amount of fiber. This fiber promotes digestive health and also helps you feel fuller for longer after enjoying a cupcake.

Additionally, the warm spices like cinnamon and nutmeg do more than just add flavor. In fact, they bring their own set of antioxidant properties to the table. These antioxidants actively combat oxidative stress in your body. Moreover, using dark chocolate chips introduces flavonoids. Consequently, these compounds can support heart health when enjoyed in moderation. Ultimately, each bite of these Pumpkin Chocolate Chip Cupcakes delivers more than just incredible taste.

How it fits in a healthy lifestyle

You can absolutely enjoy these Pumpkin Chocolate Chip Cupcakes as part of a balanced diet. Think of them as a satisfying treat that contributes valuable nutrients, not just empty calories. For a mindful approach, pair one with a source of protein like a handful of almonds or a glass of milk to create a more complete snack that stabilizes your energy levels.

If you follow a specific dietary pattern, you can easily adapt this recipe. For those exploring gluten-free options, simply swap the all-purpose flour for a quality gluten-free flour blend. You can also adjust the sugar content to align with your goals without sacrificing moisture, thanks to the natural sweetness of the pumpkin. Remember, healthy eating is about overall patterns. Enjoying a delicious cupcake fits perfectly into a lifestyle that also includes nutrient-dense meals and regular movement.

Print
clock clock iconcutlery cutlery iconflag flag iconfolder folder iconinstagram instagram iconpinterest pinterest iconfacebook facebook iconprint print iconsquares squares iconheart heart iconheart solid heart solid icon

Pumpkin Chocolate Chip Cupcakes


  • Author: Chef Emy

Description

Moist and flavorful pumpkin cupcakes studded with chocolate chips, perfect for fall baking.


Ingredients

Scale

For the Crust:

  • 1 3/4 cups all-purpose flour
  • 1 teaspoon baking soda
  • 1/2 teaspoon salt
  • 1 1/2 teaspoons pumpkin pie spice
  • 1 cup canned pumpkin puree
  • 1/2 cup granulated sugar
  • 1/2 cup brown sugar
  • 2 large eggs
  • 1/2 cup vegetable oil
  • 1 teaspoon vanilla extract
  • 3/4 cup semi-sweet chocolate chips

Instructions

1. Prepare the Crust:

  1. Preheat oven to 350°F (175°C) and line a muffin tin with cupcake liners.
  2. In a medium bowl, whisk together flour, baking soda, salt, and pumpkin pie spice.
  3. In a large bowl, mix pumpkin puree, granulated sugar, brown sugar, eggs, oil, and vanilla until smooth.
  4. Gradually add dry ingredients to wet ingredients, mixing until just combined. Fold in chocolate chips.
  5. Divide batter evenly among cupcake liners, filling each about 2/3 full. Bake for 20-25 minutes or until a toothpick comes out clean.

Notes

You can customize the seasonings to taste.

How to Prepare This Dish

Steps and time-saving tips

First, preheat your oven to 350°F and line a muffin tin with cupcake liners. Meanwhile, whisk together your dry ingredients—flour, baking soda, baking powder, and warm spices—in a medium bowl. In a separate, larger bowl, vigorously whisk the canned pumpkin puree, eggs, oil, and both sugars until the mixture is completely smooth and well-blended. Gradually add the dry ingredients to the wet ingredients, stirring gently until just combined. Importantly, avoid overmixing the batter to ensure your Pumpkin Chocolate Chip Cupcakes turn out tender and fluffy. Next, gently fold in the chocolate chips, saving a handful to sprinkle on top for a beautiful finish. Using a cookie scoop, divide the batter evenly among the prepared liners, filling each about two-thirds full. Bake for 18-22 minutes, or until a toothpick inserted into the center comes out clean. Finally, let the cupcakes cool completely on a wire rack before frosting.

Mistakes I’ve made and learned from

I have definitely learned a few lessons the hard way with these Pumpkin Chocolate Chip Cupcakes. My biggest mistake was using an old can of baking powder, which resulted in cupcakes that were frustratingly dense and didn’t rise at all. Now, I always test my leavening agents to make sure they’re still active before I start. Another common error is overmixing the batter; I used to stir it until it was completely smooth, which developed too much gluten and made the texture tough. I’ve since learned that a few streaks of flour are perfectly fine. For more detailed troubleshooting, my guide on common baking mistakes covers these pitfalls. Also, if your chocolate chips always sink to the bottom, a quick toss in flour before folding them in makes a world of difference, a tip I picked up from my post on achieving perfect muffins every time.

Cultural Connection and Variations

Where this recipe comes from

Pumpkin Chocolate Chip Cupcakes feel like a hug from autumn itself. They weave together two classic American comfort flavors. Many families, including mine, see them as the unofficial start of the holiday baking season. My grandmother always made her version with a hefty dose of cinnamon and a secret splash of coffee to deepen the chocolate. Conversely, other bakers might fold in nutmeg or allspice for a more complex warmth. Around the world, people adapt the concept to local tastes. For instance, some bakers in Australia might use a native spice like wattleseed for a unique twist. Others in Europe could swap the chocolate chips for chunks of a high-cacao dark chocolate bar. Ultimately, every kitchen tells its own story through these spiced treats. The beauty of these Pumpkin Chocolate Chip Cupcakes lies in their delicious flexibility.

How it fits in today’s cooking

This recipe absolutely thrives in modern kitchens. Today, bakers love it for its cozy, nostalgic vibe and its incredible versatility. Many people now make them for Thanksgiving dessert instead of, or alongside, traditional pie. Furthermore, they are a fantastic make-ahead option for busy hosts. Modern adaptations are also incredibly popular. For example, health-conscious cooks might use whole wheat flour or a sugar alternative. Others might explore different add-ins, creating a version with cream cheese frosting for a next-level experience. You can find more inspiration for festive baking in our guide to the best holiday baking tools. Consequently, these cupcakes fit seamlessly into everything from a lunchbox treat to an elegant dinner party finale. They truly are a year-round favorite. For another seasonal twist on a classic, consider our popular apple cinnamon muffins recipe.

Taste and Texture

What makes it delicious

These Pumpkin Chocolate Chip Cupcakes deliver a wonderfully moist and tender crumb that simply melts in your mouth. Warm baking spices like cinnamon and nutmeg create a fragrant, cozy aroma that fills your kitchen. Furthermore, the rich, semi-sweet chocolate chips provide delightful pockets of creamy, melted goodness that contrast perfectly with the soft pumpkin cake. Ultimately, each bite offers a harmonious blend of earthy sweetness and decadent chocolate, making these cupcakes an irresistible autumnal treat.

Boosting the flavor

For an extra flavor boost, consider folding in a handful of toasted walnuts or pecans to add a satisfying crunch. Alternatively, a simple dusting of cinnamon sugar right after baking creates a delightful, sparkly crust. You can also enhance the spice profile by adding a pinch of cardamom or a dash of freshly ground black pepper to the batter, which will wonderfully complement the pumpkin. For a truly decadent finish, top your Pumpkin Chocolate Chip Cupcakes with a swirl of cream cheese frosting; the tangy creaminess pairs perfectly with the warm spices. If you want to explore another fantastic pumpkin dessert, our soft pumpkin cookies offer a similarly spiced and chewy experience.

Tips for Success

Best practices for results

First, always bring your cold ingredients to room temperature so they emulsify smoothly into the batter for a perfectly even crumb. Furthermore, use a trigger-release scoop to portion the batter; this guarantees uniformly sized Pumpkin Chocolate Chip Cupcakes that bake at the same rate. Then, resist the urge to overmix the batter after adding the flour, as this prevents a tough texture. Finally, tap the pan firmly on the counter before baking to release any large air bubbles.

Mistakes to avoid

A common error involves using stale baking soda, which fails to provide enough lift and results in dense cupcakes. Therefore, always test your leavening agents for freshness to ensure your Pumpkin Chocolate Chip Cupcakes rise properly. Additionally, avoid overfilling the cupcake liners, which causes batter to spill over and creates messy, uneven baking. For more guidance on this, our article on how to fill cupcake liners has all the details. Another mistake is judging doneness solely by time; ovens vary, so always use a toothpick test for accuracy. If you find your treats are baking unevenly, you might need to calibrate your oven temperature for reliable results every time.

Serving and Pairing Suggestions

How to serve this dish

Present your Pumpkin Chocolate Chip Cupcakes on a beautiful cake stand for a truly inviting display. For a special touch, dust them lightly with cinnamon or cocoa powder just before serving. These festive cupcakes absolutely shine at holiday gatherings, particularly during Thanksgiving and Halloween parties. Furthermore, they make a wonderful addition to any brunch spread or a delightful after-school treat. Always serve them at room temperature to ensure the flavors are at their peak.

What goes well with it

A hot mug of coffee beautifully cuts through the sweetness of Pumpkin Chocolate Chip Cupcakes, creating a perfect balance. Alternatively, a cold glass of milk remains a classic pairing that everyone loves. For an extra decadent experience, consider serving them with a scoop of our Homemade Vanilla Ice Cream. Moreover, a side of fresh fruit, such as berries or orange slices, provides a refreshing contrast. If you are planning a full dessert table, these cupcakes pair wonderfully with our popular Classic Cheesecake for a delightful variety.

Can I use fresh pumpkin instead of canned for pumpkin chocolate chip cupcakes?

Yes, you can use homemade pumpkin puree. Simply roast a sugar pumpkin, remove the flesh, and puree it until smooth. Ensure it has a similar thick consistency to canned pumpkin so your Pumpkin Chocolate Chip Cupcakes don’t become too wet.

How do you keep chocolate chips from sinking to the bottom of cupcakes?

Toss the chocolate chips in a light coating of flour or the dry cake mix before folding them into the batter. This simple trick helps suspend them in the batter, ensuring every bite of your Pumpkin Chocolate Chip Cupcakes has a perfect distribution of chocolate.

What is a good frosting for pumpkin chocolate chip cupcakes?

Cream cheese frosting is a classic pairing that complements the warm spices and chocolate. For a lighter option, a cinnamon-spiced buttercream or a simple dusting of powdered sugar also works beautifully with these moist Pumpkin Chocolate Chip Cupcakes.

How should I store pumpkin chocolate chip cupcakes and how long do they last?

Store them in an airtight container at room temperature for up to 2 days or in the refrigerator for up to 5 days. If frosted with cream cheese, refrigeration is necessary. For longer storage, these cupcakes freeze exceptionally well for up to 3 months.

Easy Caramel Apple Cheesecake Recipe for Thanksgiving

easy-caramel-apple-cheesecake-thanksgiving

There is a moment every Thanksgiving when the chaos of the day suddenly stills. The dinner plates are cleared, and a collective, happy sigh fills the room. It is in this perfect, expectant pause that you want to present a dessert that feels both spectacular and deeply comforting. This year, let’s create that magic together with an Easy Caramel Apple Cheesecake Recipe – Perfect for Thanksgiving! It masterfully combines the cozy, spiced flavor of baked apples with the rich, creamy luxury of cheesecake, all draped in a sweet, buttery caramel sauce. Best of all, it delivers incredible elegance without any of the stress, ensuring you spend less time in the kitchen and more time making memories.

About This Recipe

This Easy Caramel Apple Cheesecake Recipe – Perfect for Thanksgiving! is not just another dessert. Essentially, it is a celebration of classic fall flavors in a stunning, no bake format. The recipe features a buttery graham cracker crust that provides a delightful crunch. Subsequently, a velvety smooth, no bake cheesecake filling layers on incredible richness without requiring a water bath or oven time. Furthermore, a spiced apple compote, simmered with cinnamon and nutmeg, adds a warm, fruity dimension that tastes like autumn in every bite. Finally, a generous drizzle of homemade or quality store bought caramel sauce ties everything together with its signature sweetness and decadent finish.

This dessert matters because it solves a key holiday dilemma. Often, you want to serve a show stopping finale but lack the time or confidence for complex baking. This Easy Caramel Apple Cheesecake Recipe – Perfect for Thanksgiving! eliminates that problem entirely. It is incredibly approachable for bakers of any skill level. Moreover, you can prepare every component ahead of time, making your Thanksgiving Day timeline completely stress free. This approachable elegance perfectly matches our blog’s tone, which focuses on delivering reliable, crowd pleasing recipes that truly work. For instance, if you adore no bake desserts, you will definitely want to explore our famous No Bake Cheesecake recipe for more inspiration. This particular recipe builds on that same simple, dependable foundation but introduces seasonal flavors that make it a holiday superstar.

Ultimately, this cheesecake fits the Thanksgiving menu beautifully. It offers a fantastic alternative to traditional pumpkin or pecan pie, while still honoring the familiar and beloved flavors of the season. The combination of creamy cheesecake, tender apples, and gooey caramel feels both indulgent and nostalgic. Additionally, its stunning visual appeal makes it a centerpiece worthy of your holiday spread. For another fantastic make ahead dessert option that wows a crowd, consider our Classic Tiramisu. However, for a truly iconic Thanksgiving experience, this Easy Caramel Apple Cheesecake Recipe – Perfect for Thanksgiving! is absolutely unbeatable.

Why I Love This Recipe

This recipe holds a special place in my heart because it finally gave me the confidence to bring a gorgeous cheesecake to my family’s Thanksgiving. I always admired my aunt’s elaborate baked versions but felt too intimidated to try one myself. This easy, no bake method was my gateway. The first time I made it, the look of pure delight on my family’s faces was everything. Now, it is my non negotiable contribution to the feast. It represents how a simple recipe can create a lasting tradition and make you feel like a baking hero, even if you are just starting out.

Health and Nutrition

Why it’s good for your body

This Easy Caramel Apple Cheesecake Recipe – Perfect for Thanksgiving! offers more than just incredible flavor. For instance, the apples provide a solid foundation of essential nutrients. They deliver a healthy dose of dietary fiber, which actively supports digestive health and helps you feel satisfied. Furthermore, apples bring natural sweetness and valuable antioxidants like quercetin to your dessert.

Additionally, the dairy components contribute important macronutrients. Cream cheese and Greek yogurt, if used, supply your body with calcium for strong bones and protein for muscle maintenance. Consequently, enjoying a slice means you are treating yourself to more than empty calories. Moreover, the warm spices like cinnamon do more than just taste amazing; they also possess anti-inflammatory properties. Therefore, this dessert cleverly combines indulgence with genuine nutritional value. Ultimately, the Easy Caramel Apple Cheesecake Recipe – Perfect for Thanksgiving! is a smarter choice for a celebratory treat.

How it fits in a healthy lifestyle

This Easy Caramel Apple Cheesecake Recipe – Perfect for Thanksgiving! fits beautifully into a balanced approach to eating. You can absolutely enjoy decadent desserts while maintaining your wellness goals. Think of it as a celebratory part of your overall diet, not something that derails it. Savoring a reasonable portion allows you to partake in the joy of the occasion without overindulgence.

For those mindful of specific dietary needs, this recipe is wonderfully adaptable. You can easily explore gluten-free dessert options by using a nut or oat-based crust. If you are watching your sugar intake, consider reducing the caramel drizzle or opting for a natural alternative. Remember, balance is key. Pairing a rich dessert with lighter, nutrient-dense meals throughout the day is a fantastic strategy. For more inspiration on creating satisfying and wholesome meals, check out our guide to healthy weeknight dinners. This way, you can have your cheesecake and feel great about it too.

Print
clock clock iconcutlery cutlery iconflag flag iconfolder folder iconinstagram instagram iconpinterest pinterest iconfacebook facebook iconprint print iconsquares squares iconheart heart iconheart solid heart solid icon

Easy Caramel Apple Cheesecake


  • Author: Chef Emy

Description

A delicious no-bake cheesecake with spiced apples and caramel topping, perfect for Thanksgiving gatherings.


Ingredients

Scale

For the Crust:

  • 1 1/2 cups graham cracker crumbs
  • 1/3 cup melted butter
  • 2 (8 oz) packages cream cheese, softened
  • 1/2 cup granulated sugar
  • 1 tsp vanilla extract
  • 1 cup heavy whipping cream
  • 2 medium apples, peeled and diced
  • 2 tbsp butter
  • 1/4 cup brown sugar
  • 1/2 tsp cinnamon
  • 1/4 tsp nutmeg
  • 1/2 cup caramel sauce
  • Whipped cream for serving

Instructions

1. Prepare the Crust:

  1. Combine graham cracker crumbs and melted butter, press into 9-inch springform pan. Chill for 30 minutes.
  2. Beat cream cheese, sugar, and vanilla until smooth. Whip heavy cream to stiff peaks, then fold into cream cheese mixture. Spread over crust.
  3. Sauté apples in butter until tender. Add brown sugar, cinnamon, and nutmeg. Cook 2-3 minutes until caramelized. Cool completely.
  4. Spoon apple mixture over cheesecake layer. Drizzle with caramel sauce. Refrigerate at least 4 hours or overnight.
  5. Serve chilled with additional caramel drizzle and whipped cream if desired.

Notes

You can customize the seasonings to taste.

How to Prepare This Dish

Steps and time-saving tips

First, gather all your ingredients for this Easy Caramel Apple Cheesecake Recipe. Consequently, you can move through the steps without any frustrating pauses. Start by pressing your graham cracker crust firmly into the pan; a flat-bottomed glass helps create an even, compact layer. Meanwhile, preheat your oven to the specified temperature. Next, beat the cream cheese until it is completely smooth and lump-free; this crucial step guarantees a velvety filling. Gradually add the sugar and then the eggs, one at a time, mixing just until each ingredient blends in. Overmixing incorporates too much air and can cause cracks later. For the spiced apple layer, simply sauté sliced apples with cinnamon and a pinch of nutmeg until they just begin to soften. Finally, swirl this mixture along with generous drizzles of caramel sauce into the cheesecake batter. Bake until the edges are set but the center still has a slight jiggle. Remember, the residual heat will continue to cook the cheesecake as it cools slowly in the turned-off oven. This method is the ultimate time-saving tip for a perfect texture every time. Chill your masterpiece for at least four hours, or ideally overnight, before serving. This Easy Caramel Apple Cheesecake Recipe truly is the perfect dessert for Thanksgiving!

Mistakes I’ve made and learned from

I once learned the hard way that using cold cream cheese is the biggest mistake you can make with this Easy Caramel Apple Cheesecake Recipe. I ended up with a lumpy batter that no amount of mixing could fix, which sadly baked into a grainy texture. Now, I always take the time to let my dairy ingredients fully reach room temperature, which makes for an incredibly smooth and luxurious filling. Another lesson came from a watery apple topping that made my crust soggy. I solved this by thoroughly cooking the apples first to release their excess moisture, a technique I picked up from my favorite guide on how to prevent a soggy cheesecake crust. Furthermore, I used to skip the slow cooling process in the oven because I was impatient. However, the rapid temperature change always caused a giant crack right down the middle. Now I understand that patience is key for that perfect, crack-free finish, just like the pros recommend in their tips for the perfect baked cheesecake. Trust me, learning from these errors will make your Thanksgiving dessert absolutely flawless.

Cultural Connection and Variations

Where this recipe comes from

This Easy Caramel Apple Cheesecake Recipe – Perfect for Thanksgiving! beautifully marries two classic American dessert traditions. On one hand, we honor the deep-dish, creamy cheesecakes that New York delis made famous. Conversely, we celebrate the all-American apple pie, a symbol of harvest and home. My own family always made a similar dessert, but we used a graham cracker crust and layered the apples on top. Ultimately, this version feels more decadent and special for a holiday table.

Different regions put their own spin on this concept. In the South, you might find a splash of bourbon in the caramel or pecans sprinkled throughout for a Derby Pie twist. Meanwhile, in Europe, especially Germany, bakers often incorporate quark, a fresh dairy product, for a lighter filling. Some families even prepare it as a no-bake dessert, which is a fantastic time-saver during the busy holiday season. No matter the variation, the core flavors of sweet apple, rich caramel, and tangy cream cheese create a universal language of comfort.

This particular Easy Caramel Apple Cheesecake Recipe – Perfect for Thanksgiving! captures that spirit of fusion and celebration. It turns two beloved classics into one show-stopping centerpiece that always earns its place next to the pumpkin pie.

How it fits in today’s cooking

This dessert absolutely holds its place in modern cooking, especially as a cherished holiday staple. Its relevance comes from its perfect blend of familiar flavors and make-ahead convenience. Today’s home cooks enthusiastically adapt the recipe to fit dietary needs, for instance, using gluten-free graham crackers or a sugar substitute. Furthermore, its stunning visual appeal makes it a star on social media feeds and a guaranteed crowd-pleaser at potlucks.

While it shines brightest on Thanksgiving, this cheesecake also fits beautifully into autumn weeknights or seasonal gatherings. Many bakers now use innovative tools like an Instant Pot to achieve a incredibly smooth texture without the risk of cracking. For a simpler, equally delicious experience, you can also explore making mini cheesecakes that are perfect for portion control and parties. Ultimately, this recipe continues to evolve while still delivering the timeless taste of fall that everyone loves.

Taste and Texture

What makes it delicious

This Easy Caramel Apple Cheesecake Recipe – Perfect for Thanksgiving! delivers a symphony of textures and tastes in every single bite. Firstly, you experience the creamy, impossibly smooth filling that melts luxuriously on your tongue. Then, the spiced apple topping provides a soft, warm, and slightly chewy contrast. Meanwhile, the buttery graham cracker crust offers a essential crunchy foundation that holds everything together. Each element complements the next, creating a perfect balance between sweet, tangy, and spiced flavors. Ultimately, the rich caramel drizzle adds a deep, buttery sweetness that ties this incredible dessert together beautifully.

Boosting the flavor

For an even more decadent experience, consider a few simple upgrades. For instance, swap the traditional graham cracker crust for a ginger snap base to introduce a warm, spicy kick that pairs wonderfully with the apples. Additionally, a generous pinch of flaky sea salt sprinkled over the caramel at the end enhances all the other flavors by cutting through the sweetness. You can also explore different apple varieties for a more complex taste; our guide on selecting the best apples for baking offers fantastic advice. Furthermore, a dollop of freshly whipped cream or a scoop of vanilla bean ice cream makes the perfect finishing touch, much like the pairing suggestions in our ultimate cheesecake toppings article. Therefore, get creative and make this dessert uniquely yours.

Tips for Success

Best practices for results

Always bring your cream cheese to room temperature before you begin; this simple step ensures a perfectly smooth and lump-free filling for your Easy Caramel Apple Cheesecake Recipe – Perfect for Thanksgiving!. Furthermore, use a sharp knife to slice your apples uniformly so they cook evenly and create a beautiful, consistent layer. For the best structural integrity, make sure you let the cheesecake chill in the refrigerator for the full recommended time before adding your toppings.

Mistakes to avoid

Avoid overmixing your cheesecake batter after you add the eggs, as this can incorporate too much air and cause the surface to crack while baking. Instead, mix on low speed just until the ingredients combine. Additionally, do not skip the step of cooling your apple topping completely before spreading it on the cheesecake, otherwise the heat can make the creamy filling too soft. For more guidance on achieving the perfect creamy texture, read our essential cheesecake water bath guide. Moreover, always use a high-quality caramel sauce that is thick enough to hold its shape; a runny sauce will make your beautiful dessert soggy. If you are looking for a great homemade option, our salted caramel sauce recipe is a fantastic and reliable choice.

Serving and Pairing Suggestions

How to serve this dish

Present your Easy Caramel Apple Cheesecake Recipe – Perfect for Thanksgiving! on a beautiful cake stand for a truly stunning centerpiece. For an elegant finish, drizzle extra caramel sauce over each slice just before serving. Furthermore, a simple garnish of thinly sliced apple fans or a sprinkle of toasted pecans adds wonderful texture and visual appeal. This dessert truly shines during the holidays, so be sure to make it the grand finale of your festive meal.

Serve each portion slightly chilled for the perfect creamy yet firm texture that holds its shape. Alternatively, let it sit at room temperature for about fifteen minutes to allow the rich flavors to fully blossom. Consequently, your guests will adore this show-stopping treat.

What goes well with it

A hot cup of coffee makes an exceptional partner for this rich dessert. The robust, slightly bitter notes perfectly cut through the sweetness of the Easy Caramel Apple Cheesecake Recipe – Perfect for Thanksgiving!. For a decadent brunch option, however, consider pairing a slice with a glass of cold apple cider.

If you want to offer another dessert choice, this cheesecake pairs wonderfully with our simple Vanilla Bean Ice Cream. The cool, creamy vanilla provides a lovely contrast to the spiced apple topping. Moreover, for those who enjoy a contrasting texture, a side of our crunchy Cinnamon Sugar Walnuts adds a delightful salty-sweet crunch that elevates every single bite.

Can I make this caramel apple cheesecake ahead of time for Thanksgiving?

Absolutely! This Easy Caramel Apple Cheesecake Recipe – Perfect for Thanksgiving! is an excellent make-ahead dessert. You can prepare it up to two days in advance; just keep it covered in the refrigerator until you’re ready to serve, which allows the flavors to meld together beautifully.

What’s the best way to prevent a cheesecake from cracking?

The key is to avoid overmixing the batter, which incorporates too much air, and to bake it in a water bath for even, gentle heat. For this particular Easy Caramel Apple Cheesecake Recipe – Perfect for Thanksgiving!, also make sure your cream cheese and eggs are at room temperature to ensure a smooth, crack-free filling.

Do I have to use a springform pan for this recipe?

Yes, a springform pan is highly recommended for any cheesecake, including this one. Its removable sides make it incredibly easy to release the cheesecake cleanly without damaging the crust or the beautiful caramel apple topping, ensuring a perfect presentation for your Thanksgiving table.

Can I use a store-bought caramel sauce instead of making my own?

Certainly! Using a high-quality store-bought caramel sauce is a great time-saver and will still yield a delicious dessert. For the best results in this Easy Caramel Apple Cheesecake Recipe – Perfect for Thanksgiving!, look for a thick caramel sauce or dessert topping rather than a thin ice cream syrup.

Easy Amish Apple Fritter Bread Recipe

easy-amish-apple-fritter-bread

Is there anything more comforting than the smell of warm cinnamon and baked apples wafting through your kitchen? Honestly, I think not. That incredible aroma instantly transports me to a simpler time, promising a slice of pure, homestyle joy. This magical scent is exactly what you will experience when you bake this incredibly Easy Amish Apple Fritter Bread. It perfectly captures the cozy, deep-fried goodness of a classic fairground treat but in a simple, no-fuss loaf that comes together in minutes. Ultimately, it is the ultimate breakfast, dessert, or anytime snack that feels like a warm hug.

What Is Amish Apple Fritter Bread

This Easy Amish Apple Fritter Bread is a moist, tender quick bread bursting with juicy apple chunks and swirled with a generous ribbon of cinnamon sugar. Furthermore, it boasts a sweet, crackly glaze that melts into the top, creating an irresistible texture in every single bite. Essentially, it takes all the beloved flavors of a traditional apple fritter and bakes them into a convenient loaf form. This method eliminates the mess of frying while delivering even more flavor. Consequently, this recipe matters because it delivers spectacular, bakery-quality results with minimal effort, making it a perfect project for bakers of any skill level.

This recipe fits our blog’s tone perfectly because we specialize in approachable, crowd-pleasing recipes that create real connections. For instance, just like our classic Banana Bread, this loaf is a timeless favorite that everyone adores. Moreover, it uses simple, pantry-staple ingredients to create something extraordinary. We believe the best baking should be both delicious and accessible, and this Easy Amish Apple Fritter Bread absolutely delivers on that promise. It is the kind of recipe you will make again and again, perhaps even sharing a loaf with a neighbor, much like you would with a batch of our favorite Chocolate Chip Cookies.

Why I Love This Recipe

I have a deep personal connection to this Easy Amish Apple Fritter Bread because it reminds me of autumn mornings at my grandmother’s house. She always had something sweet baking in the oven, and the combination of apple and cinnamon was her signature. This recipe, however, is my modern, simplified tribute to her memory. I love how the simple act of making it fills my home with that same nostalgic scent and how one bite immediately brings me comfort. It is my go-to recipe for potlucks and holiday mornings because it never fails to impress and always makes people feel cared for.

Health and Nutrition

Why it’s good for your body

Easy Amish Apple Fritter Bread offers more than just incredible taste. For instance, its main ingredient, apples, provides a solid dose of soluble fiber. This fiber actively supports your digestive health and helps you feel full and satisfied. Furthermore, apples bring essential vitamins like Vitamin C to the table, which boosts your immune system.

Additionally, cinnamon, a key spice in this bread, delivers powerful antioxidants. These compounds fight oxidative stress in your body. Moreover, this recipe uses simple, whole ingredients you can recognize, avoiding overly processed additives. Consequently, you enjoy a treat that feels indulgent but still honors your body’s needs.

Ultimately, enjoying a slice of Easy Amish Apple Fritter Bread means you are treating yourself to real food energy. Therefore, it stands as a delightful way to incorporate fruit and warmth into your day. Finally, remember that this comforting bread makes any morning or afternoon snack a bit more special and nutritious.

How it fits in a healthy lifestyle

You can absolutely enjoy Easy Amish Apple Fritter Bread as part of a balanced diet. Think of it as a satisfying treat that complements your healthy eating habits rather than derails them. Pair a slice with a source of protein, like a glass of milk or a handful of nuts, for a more complete and sustaining snack. This helps manage energy levels and keeps you full longer.

For those mornings when you need a quick yet thoughtful start, this bread is a perfect solution. It fits right into a routine of mindful indulgence. If you are exploring other ways to enjoy sweet treats healthfully, consider our guide to easy healthy baking substitutions for your next kitchen adventure. Remember, balance is key, and allowing yourself to enjoy homemade favorites like this bread is part of a sustainable, happy approach to food. For another fantastic recipe that uses wholesome ingredients, try our popular banana oatmeal muffins.

Print
clock clock iconcutlery cutlery iconflag flag iconfolder folder iconinstagram instagram iconpinterest pinterest iconfacebook facebook iconprint print iconsquares squares iconheart heart iconheart solid heart solid icon

Easy Amish Apple Fritter Bread


  • Author: Chef Emy

Description

A moist, cinnamon-spiced quick bread loaded with tender apple chunks and a sweet glaze, inspired by classic Amish baking.


Ingredients

Scale

For the Crust:

  • 2 cups all-purpose flour
  • 1/2 cup granulated sugar
  • 1/4 cup brown sugar
  • 2 tsp baking powder
  • 1/2 tsp salt
  • 2 tsp ground cinnamon
  • 2 large eggs
  • 1 cup milk
  • 1/4 cup melted butter
  • 2 tsp vanilla extract
  • 2 cups peeled and diced apples
  • 1/2 cup powdered sugar
  • 2 tbsp milk

Instructions

1. Prepare the Crust:

  1. Preheat oven to 350°F (175°C). Grease a 9×5 inch loaf pan.
  2. In a large bowl, whisk together flour, granulated sugar, brown sugar, baking powder, salt, and cinnamon.
  3. In another bowl, beat eggs, then stir in milk, melted butter, and vanilla. Pour wet ingredients into dry and mix until just combined. Fold in diced apples.
  4. Pour batter into prepared pan. Bake for 50-60 minutes, or until a toothpick inserted comes out clean. Let cool in pan for 10 minutes, then transfer to a wire rack.
  5. Whisk powdered sugar and 2 tbsp milk to make a glaze. Drizzle over cooled bread before slicing.

Notes

You can customize the seasonings to taste.

How to Prepare This Dish

Steps and time-saving tips

First, preheat your oven and generously grease a standard loaf pan. Meanwhile, whisk together all your dry ingredients in one large bowl. In a separate bowl, combine the wet ingredients like milk, eggs, and melted butter. Next, pour the wet mixture into the dry ingredients and gently fold everything together. Importantly, do not overmix the batter; a few lumps are perfectly fine. Then, in a small bowl, toss your diced apple pieces with cinnamon and sugar. Now, pour half of your batter into the prepared loaf pan. Sprinkle a generous layer of the cinnamon-apple mixture over this first batter layer. After that, carefully spoon the remaining batter on top. Finally, swirl a knife through the layers and sprinkle the top with the last of your cinnamon sugar. Bake until a toothpick inserted comes out clean. For a quick cleanup, immediately soak your mixing bowls. Additionally, use a cookie scoop to easily distribute the second layer of batter without a mess.

Mistakes I’ve made and learned from

I have definitely learned a few lessons the hard way with this Easy Amish Apple Fritter Bread. Initially, I would overmix the batter in a rush, which resulted in a tough, dense loaf instead of the tender, cake-like crumb it should have. Now, I mix by hand just until the flour disappears. Another common error was slicing the bread while it was still too warm; this caused it to crumble apart into a mess. Letting it cool completely in the pan on a wire rack is absolutely crucial for perfect slices. I also found that properly creaming the butter and sugar, a technique I mastered from my perfect pound cake experiments, makes a world of difference for the texture. Furthermore, choosing the right apple variety is key; a tart, firm apple like Granny Smith holds its shape during baking, unlike softer varieties I’ve tried. For more on selecting the best fruit, my guide on baking with apples covers everything you need to know.

Cultural Connection and Variations

Where this recipe comes from

This recipe pulls its cozy charm straight from the heart of Amish country kitchens. Consequently, these communities master the art of creating deeply satisfying dishes from simple, pantry-ready ingredients. They never waste a thing. For instance, this Easy Amish Apple Fritter Bread transforms humble apples and a basic sweet dough into something truly magical. Meanwhile, different cultures have their own spin on sweet fried or baked dough. In Germany, you might find similar apples tucked into a streusel-topped apfelkuchen. Similarly, Dutch bakers prepare appelflappen, a delightful fried apple pastry. My own family, however, always adds a extra dash of nutmeg to the batter. This small touch makes our version uniquely ours and fills the kitchen with the most incredible aroma. Ultimately, every baker adds their own signature, making each loaf of Easy Amish Apple Fritter Bread a special treat.

How it fits in today’s cooking

This bread fits perfectly into our modern love for comfort food and easy baking. It brings the warmth of a slow-rising dough into our fast-paced lives without any fuss. Furthermore, it’s a fantastic way to use a bounty of autumn apples, making it a seasonal superstar. Many contemporary bakers are now adapting the recipe for their dietary needs. For example, they might use a gluten-free flour blend to make it accessible to everyone. You can easily enjoy a slice with your morning coffee or even as a special dessert. In fact, it pairs wonderfully with a scoop of homemade vanilla ice cream for a truly decadent experience. Ultimately, this humble bread continues to create new memories in kitchens today, proving some traditions only get better with time.

Taste and Texture

What makes it delicious

This Easy Amish Apple Fritter Bread delivers a truly decadent experience. Firstly, you encounter a wonderfully crisp, cinnamon-sugar crust that gives way to an incredibly soft and tender crumb. Each bite bursts with juicy, tender apples and warm swirls of brown sugar and cinnamon. Consequently, your kitchen fills with an absolutely irresistible aroma that is both sweet and spiced. Ultimately, the texture is a perfect harmony of soft bread, melting apple pieces, and that signature sugary crunch.

Boosting the flavor

For an even more luxurious treat, consider a simple cream cheese glaze drizzle. Alternatively, a scoop of vanilla bean ice cream melting over a warm slice creates a spectacular dessert. Furthermore, toasting a slice the next day revitalizes the cinnamon swirl and adds a delightful crispness. If you adore the combination of apple and cinnamon, you will love our classic Apple Cinnamon Loaf as well. For another fantastic way to enjoy baked apples, try pairing this bread with our easy Apple Pie Cupcakes for a full dessert spread.

Tips for Success

Best practices for results

First, always use room temperature ingredients for your Easy Amish Apple Fritter Bread because they combine more smoothly. Furthermore, do not overmix the batter after adding the flour; simply stir until the last streaks disappear. For the best texture and to prevent a soggy bottom, let the loaf cool in the pan for at least 20 minutes before transferring it to a wire rack. Consequently, you will achieve a perfectly moist crumb with a delightfully crisp top on your Easy Amish Apple Fritter Bread.

Mistakes to avoid

Avoid packing your flour into the measuring cup, as this adds too much and creates a dense bread. Instead, spoon the flour into the cup and level it off for accuracy. Additionally, do not skip the crumb topping, since it provides essential texture and sweetness. If your baked goods often turn out dry, consider checking your oven’s actual temperature with a thermometer; meanwhile, you can learn more about this common issue in our guide on why cakes turn out dry. Finally, ensure your baking powder is fresh for proper rise; otherwise, your loaf might not achieve its full height. For more insights on ensuring your ingredients are working perfectly, explore our tips for checking if your baking powder is still good.

Serving and Pairing Suggestions

How to serve this dish

Present your Easy Amish Apple Fritter Bread warm for the ultimate experience. Consequently, the aroma will captivate everyone at the table. For a beautiful brunch centerpiece, dust the loaf with a final snowy shower of powdered sugar. Alternatively, drizzle a simple vanilla glaze over the top for extra sweetness. Moreover, a dollop of freshly whipped cream turns each slice into a decadent dessert. Serve this cozy bread on a rustic wooden board during holiday gatherings for a truly inviting feel. Ultimately, this Easy Amish Apple Fritter Bread promises to be the star of any occasion.

What goes well with it

A hot cup of coffee perfectly cuts through the sweetness of this spiced bread. Furthermore, a cold glass of milk provides a classic, comforting pairing that everyone loves. For a truly special brunch, serve it alongside a savory option like our Easy Breakfast Casserole to balance the meal. If you want to lean into the indulgence, a scoop of vanilla bean ice cream melts beautifully over a warm slice. Similarly, a side of our Homemade Apple Butter doubles down on the warm, autumnal apple flavor. Each pairing wonderfully complements the rich cinnamon and soft apple chunks in every bite.

What is the best type of apple to use for Amish Apple Fritter Bread?

For the best flavor and texture in your Easy Amish Apple Fritter Bread, use firm, tart apples like Granny Smith or Honeycrisp. These varieties hold their shape during baking and provide a nice contrast to the sweet glaze and cinnamon sugar swirl. Avoid very soft apples like Red Delicious, as they can become mushy.

Can I make Amish Apple Fritter Bread ahead of time?

Absolutely! This Easy Amish Apple Fritter Bread actually tastes even better the next day as the flavors have more time to meld. Simply let it cool completely, then store it tightly wrapped in plastic wrap or in an airtight container at room temperature for up to 3 days.

Why is my apple fritter bread soggy in the middle?

A soggy center usually means the bread needed more baking time. Oven temperatures can vary, so always test for doneness with a toothpick inserted into the center—it should come out clean or with a few moist crumbs. Also, ensure you are using the recommended apple types and not adding excess moisture from the filling.

Can you freeze Amish Apple Fritter Bread?

Yes, you can freeze this delicious bread for up to 3 months. For best results, freeze the Easy Amish Apple Fritter Bread without the glaze, wrapping the cooled loaf tightly in plastic wrap and then aluminum foil. Thaw overnight at room temperature and add the fresh glaze just before serving.