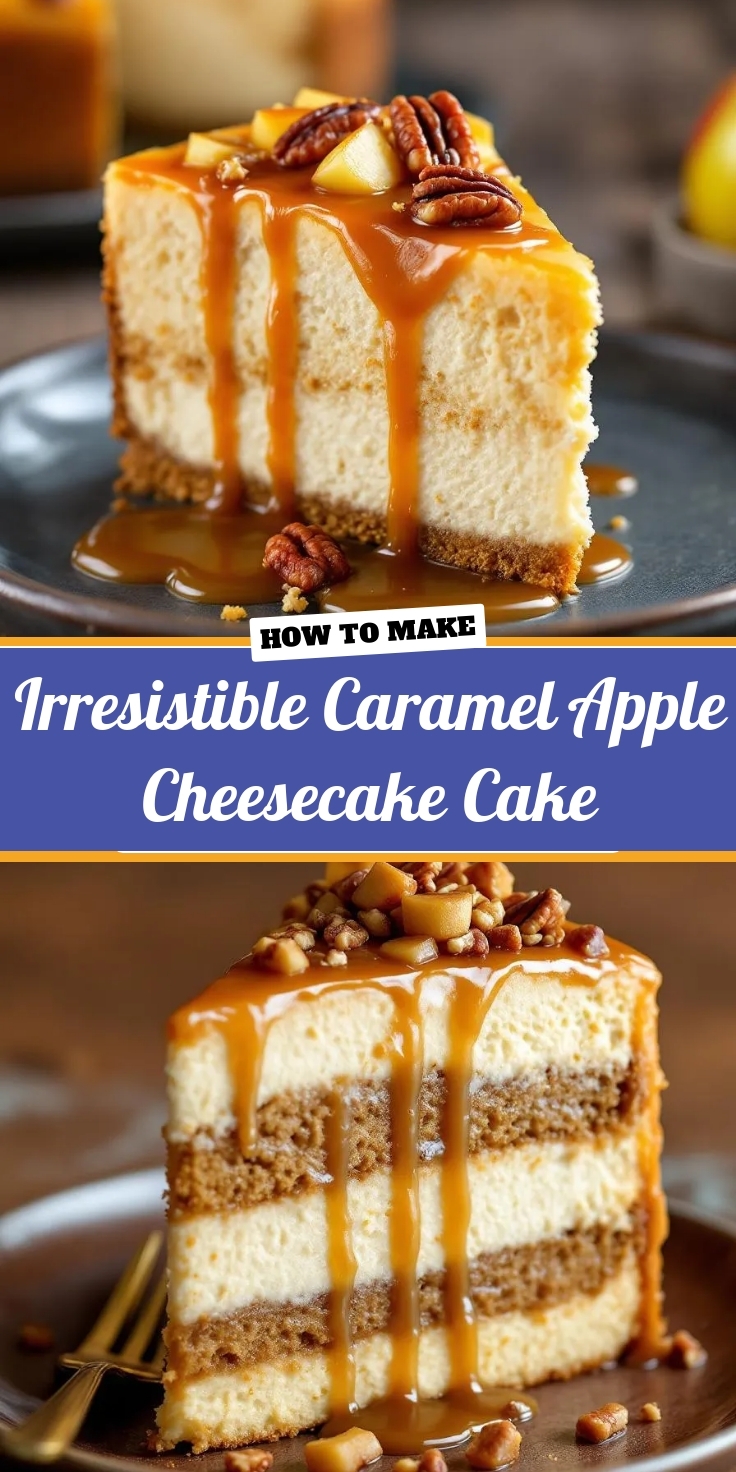
Best Peanut Butter Butterfinger Cookies – Easy Recipe

best-peanut-butter-butterfinger-cookies

“`html

Introduction

There’s something magical about biting into a warm, chewy cookie that melts in your mouth—especially when it’s packed with rich peanut butter and crunchy Butterfinger pieces. If you’ve ever craved a dessert that balances sweet, salty, and utterly addictive flavors, these Irresistible Peanut Butter Butterfinger Cookies will hit the spot. Whether you’re baking for a crowd, treating yourself after a long day, or surprising someone special, this recipe delivers comfort and joy in every bite. Trust me, once you try them, you’ll understand why they disappear faster than you can say “more please!”

About This Recipe

Irresistible Peanut Butter Butterfinger Cookies combine the creamy depth of peanut butter with the crispy, caramelized crunch of Butterfinger candy bars. This recipe matters because it takes classic peanut butter cookies to the next level, transforming them into a treat that feels indulgent yet approachable. Perfect for holidays, bake sales, or casual snacking, these cookies fit seamlessly into any occasion. Moreover, they align perfectly with Brek Cakes’ philosophy of creating desserts that are both nostalgic and exciting. If you love easy yet impressive recipes, you’ll appreciate how these cookies come together with minimal effort but deliver maximum flavor.

What sets these cookies apart is their texture. The peanut butter base stays soft and chewy, while the Butterfinger pieces add a satisfying contrast. Additionally, the recipe avoids complicated steps, making it ideal for bakers of all levels. For more inspiration, check out our guide to perfect cookie textures or explore our peanut butter dessert collection. Whether you’re a longtime peanut butter fan or new to the Butterfinger craze, this recipe promises a crowd-pleasing result every time.

Why I Love This Recipe

These cookies hold a special place in my heart because they remind me of childhood baking sessions with my mom. She always added crushed candy bars to her peanut butter cookies, turning an ordinary treat into something extraordinary. Now, whenever I make Irresistible Peanut Butter Butterfinger Cookies, I feel that same warmth and creativity. They’re not just delicious—they’re a little reminder of love, shared moments, and the joy of simple pleasures. Every batch feels like a tribute to those sweet memories, and I hope they’ll become a favorite in your home too.

“`

Health and Nutrition

Why it’s good for your body

Irresistible Peanut Butter Butterfinger Cookies pack a surprising nutritional punch alongside their delicious flavor. First, peanut butter delivers a hearty dose of protein and healthy fats, which keep you full and energized. Additionally, the natural sweetness from Butterfinger pieces means you can satisfy cravings without excessive refined sugar.

Moreover, these cookies contain fiber from peanut butter and whole-grain flour if you choose that option. Fiber supports digestion and helps maintain steady blood sugar levels. Meanwhile, peanut butter provides essential nutrients like magnesium, vitamin E, and potassium, which promote heart health and muscle function.

Furthermore, Irresistible Peanut Butter Butterfinger Cookies offer a balanced treat when enjoyed in moderation. The combination of protein, fats, and carbs makes them a satisfying snack that curbs overeating. Finally, homemade versions let you control ingredients, avoiding unnecessary additives found in store-bought alternatives.

How it fits in a healthy lifestyle

Irresistible Peanut Butter Butterfinger Cookies can easily fit into a balanced diet when paired with mindful eating habits. For a protein boost, enjoy one alongside a glass of milk or a handful of nuts. If you prefer gluten-free options, simply swap regular flour for almond or oat flour.

These cookies also work well as a post-workout snack, thanks to their mix of carbs and healthy fats. For more ideas on balancing treats with nutrition, check out our guide on healthy dessert swaps. And if you love peanut butter recipes, explore our peanut butter treats collection for more wholesome ideas.

Remember, moderation is key. Enjoy Irresistible Peanut Butter Butterfinger Cookies as part of a varied diet rich in whole foods, and you’ll never feel guilty about indulging.
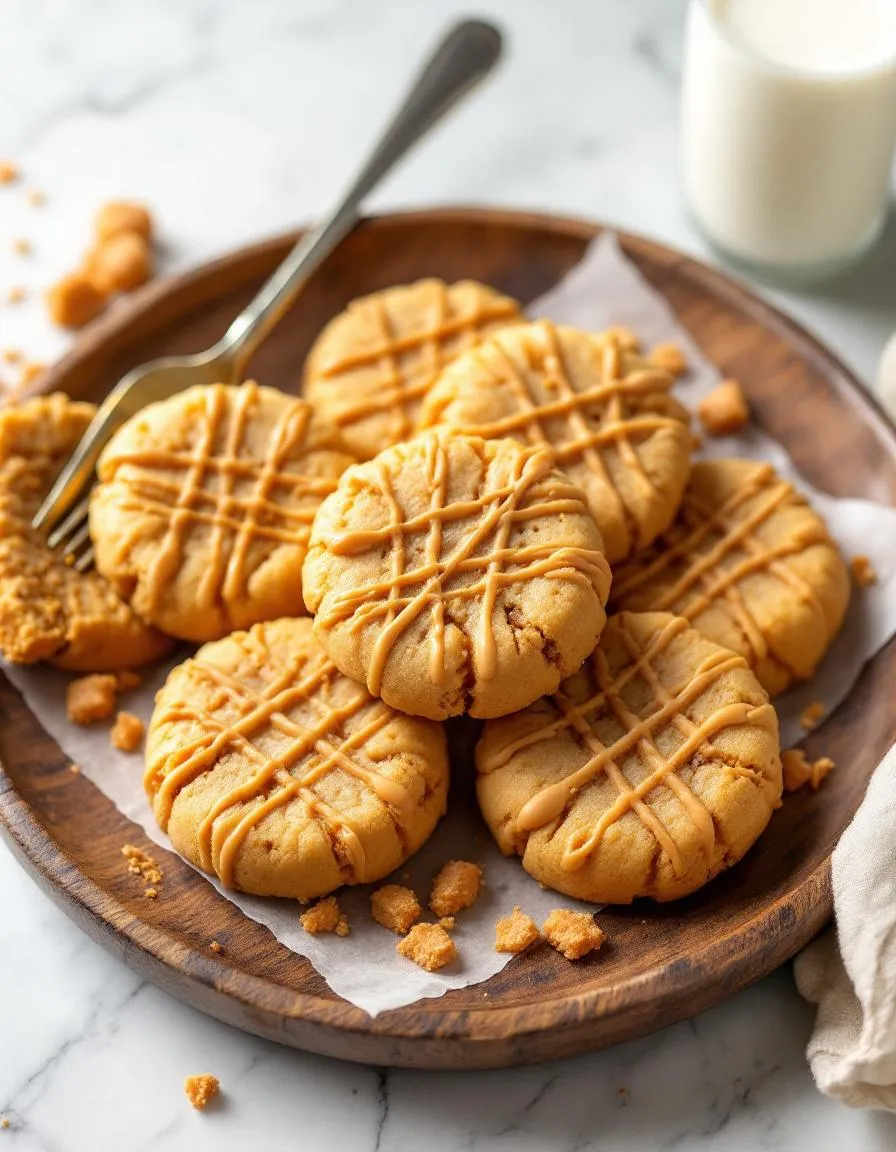
Print
clock clock iconcutlery cutlery iconflag flag iconfolder folder iconinstagram instagram iconpinterest pinterest iconfacebook facebook iconprint print iconsquares squares iconheart heart iconheart solid heart solid icon

Irresistible Peanut Butter Butterfinger Cookies


  • Author: Chef Emy

Description

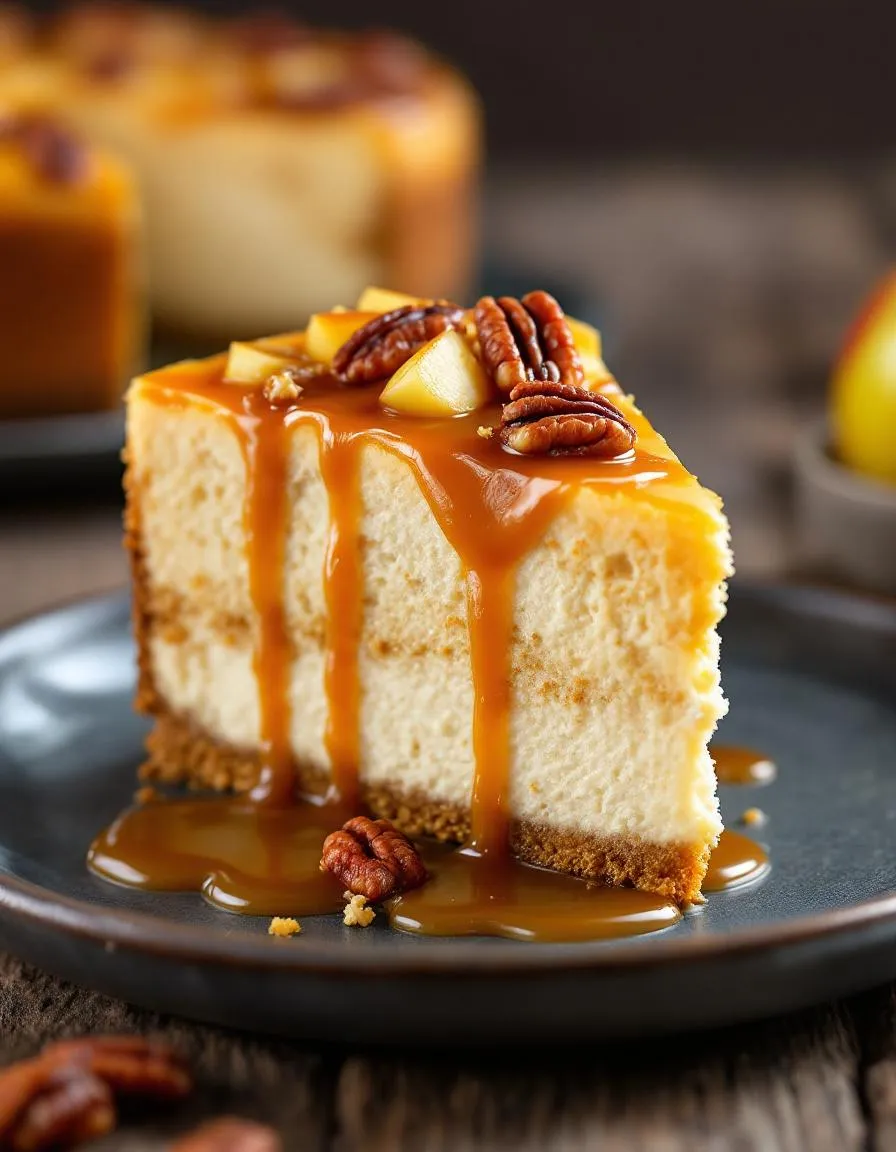
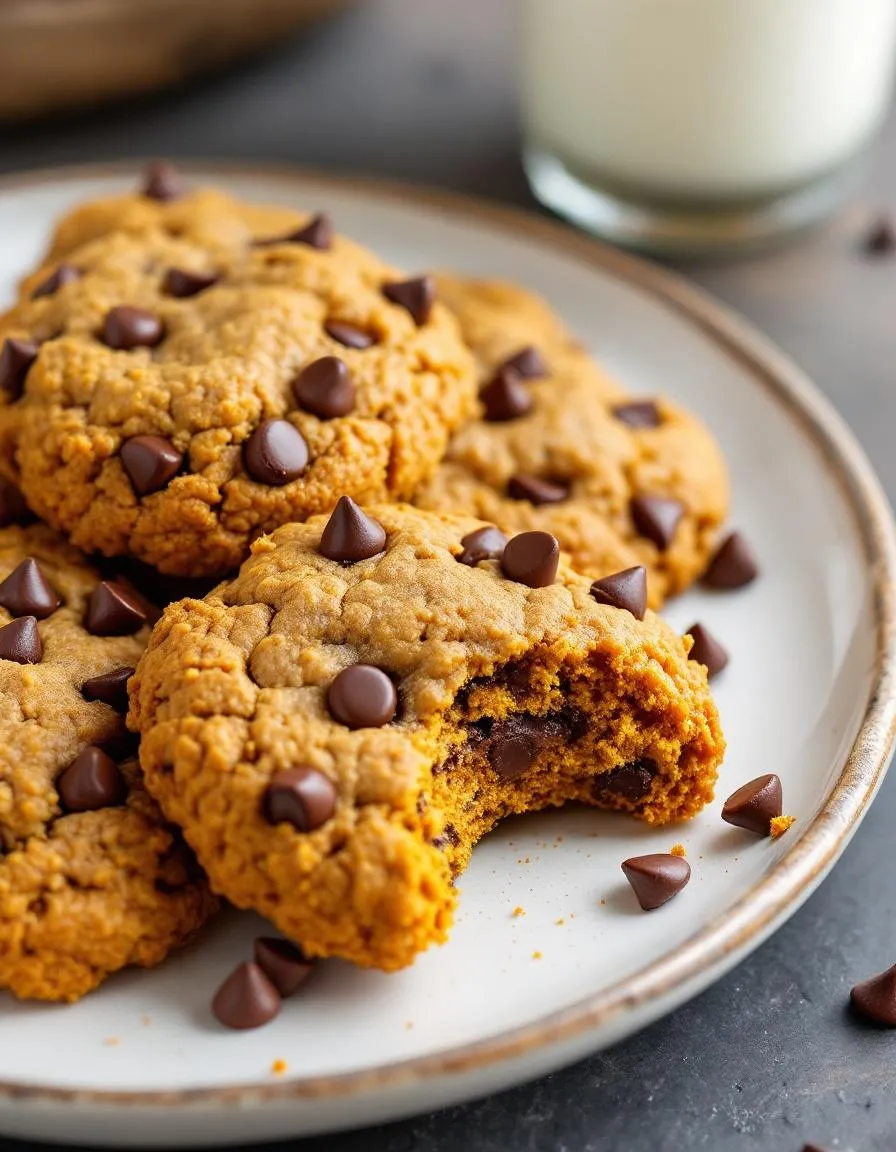
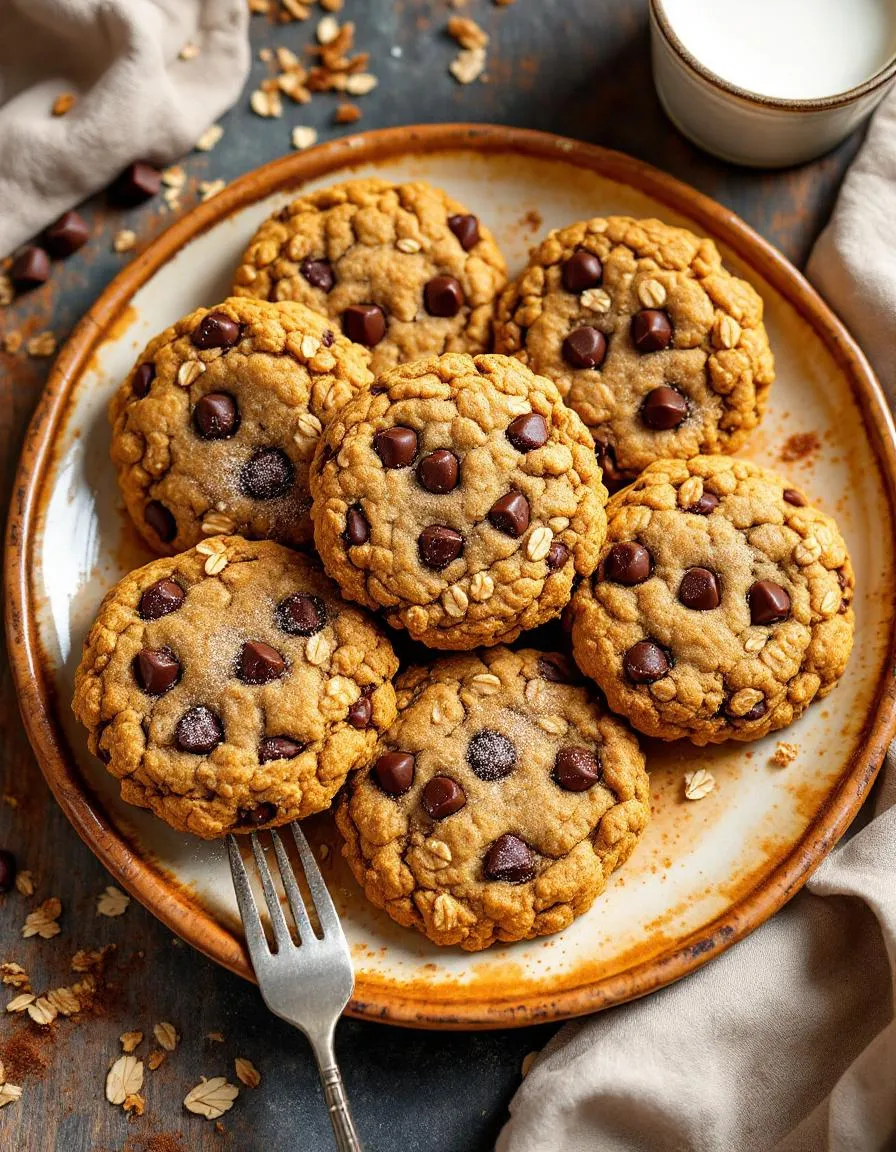
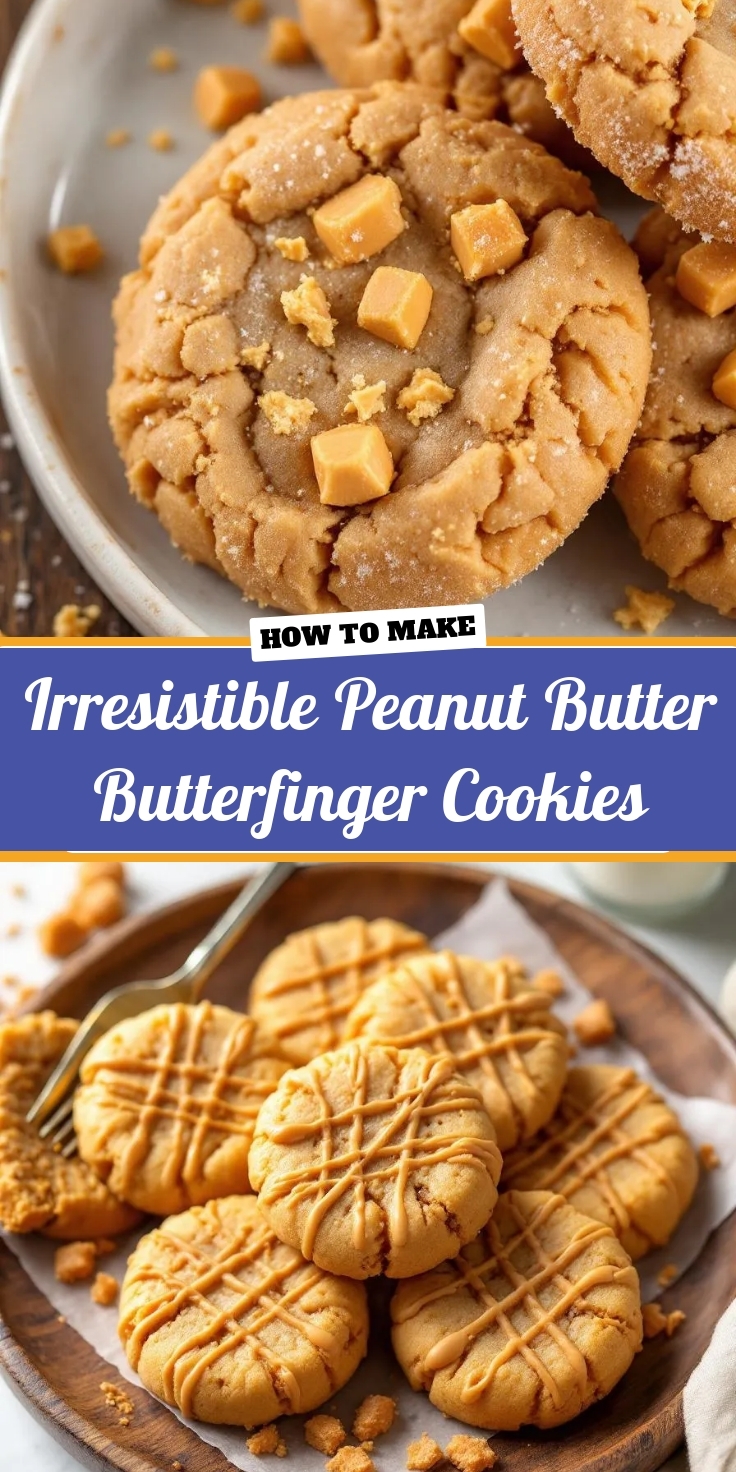
Soft and chewy peanut butter cookies packed with crushed Butterfinger candy bars for a delightful crunch.
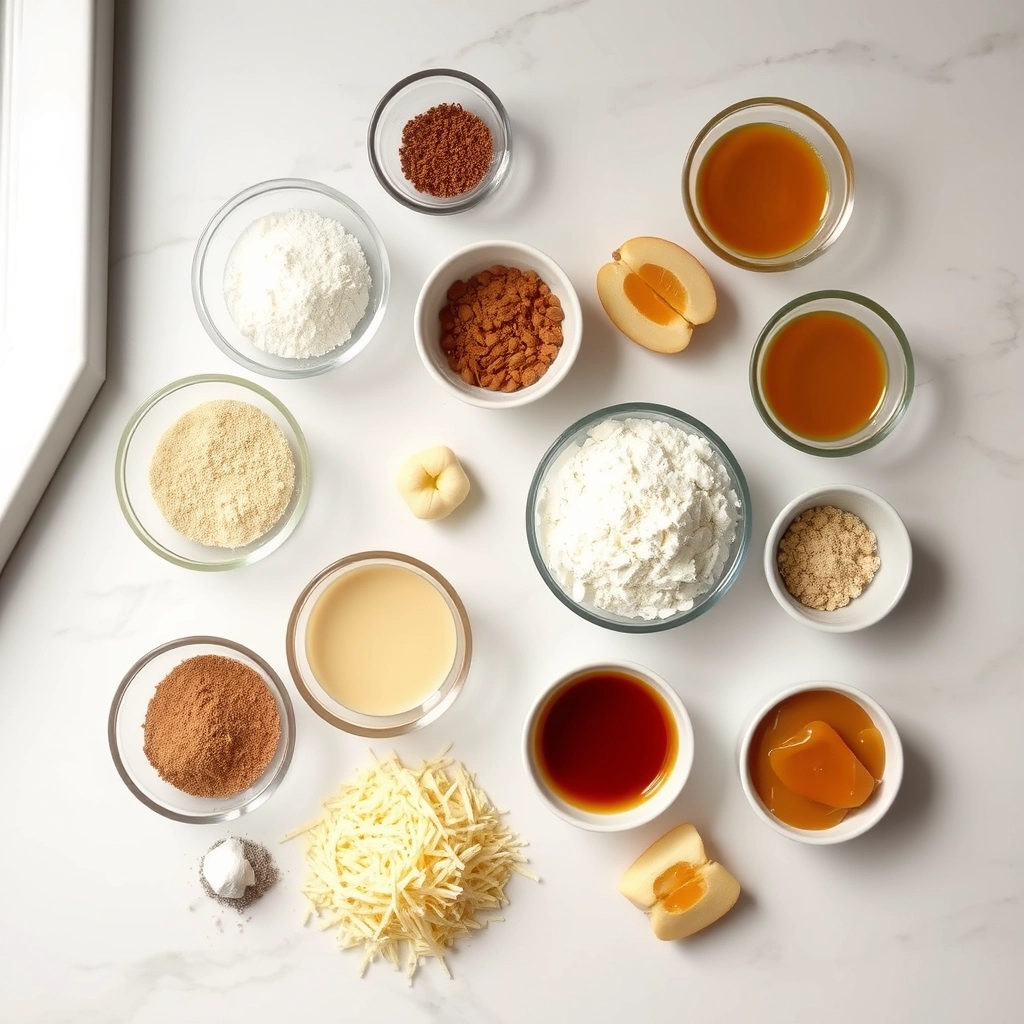
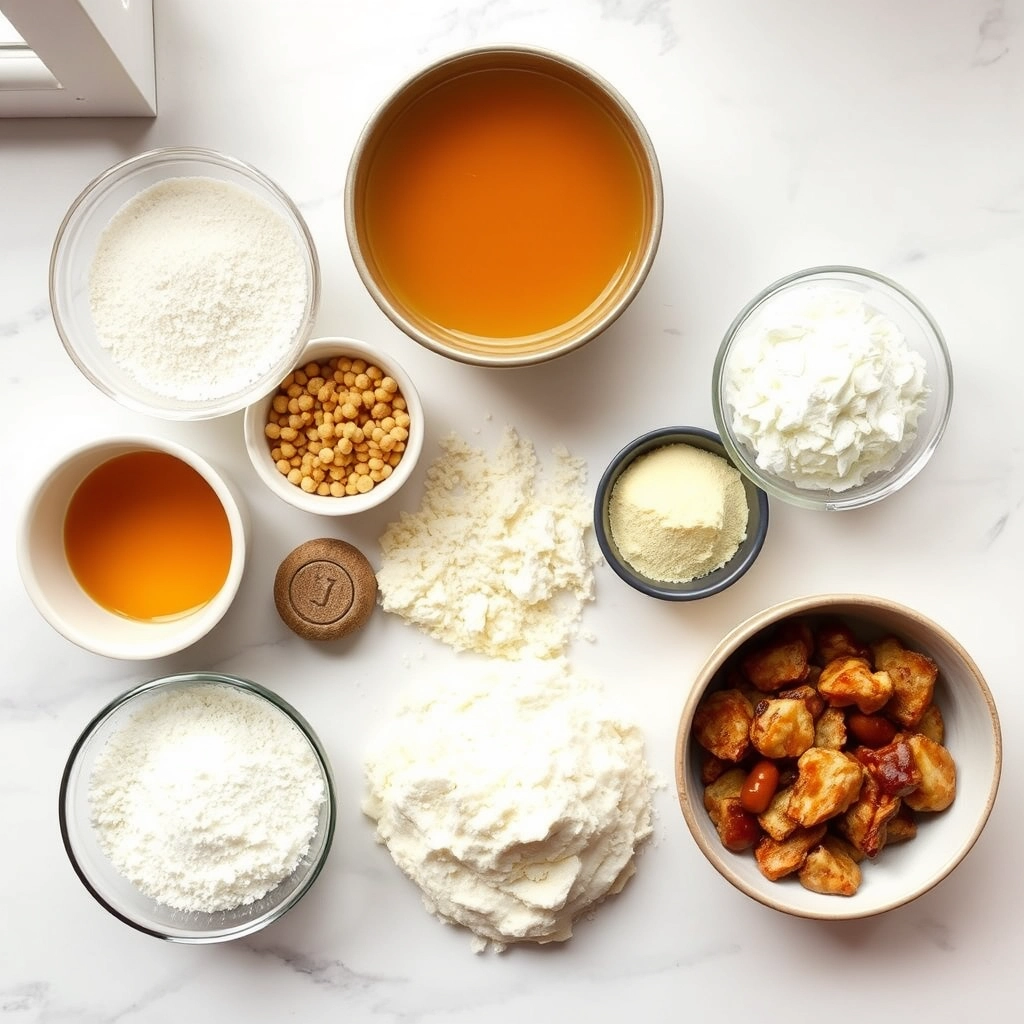
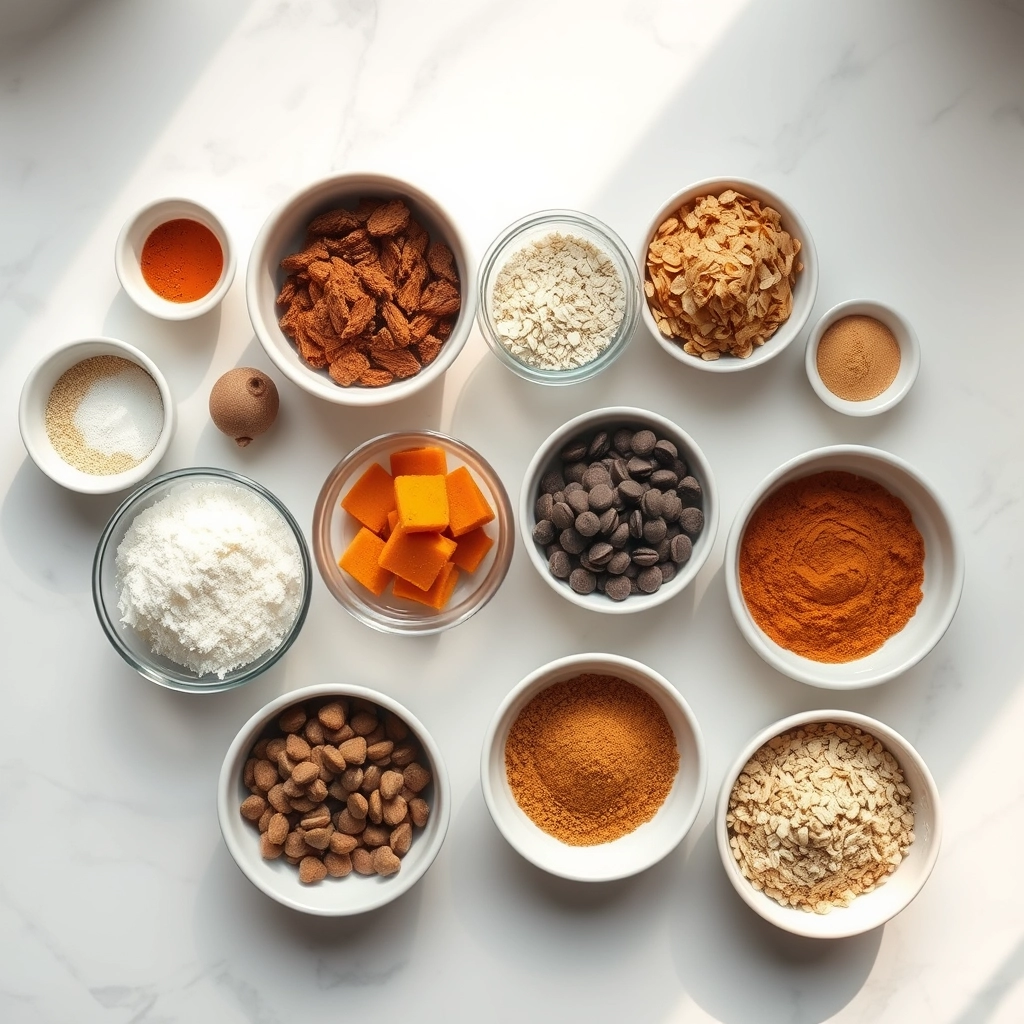
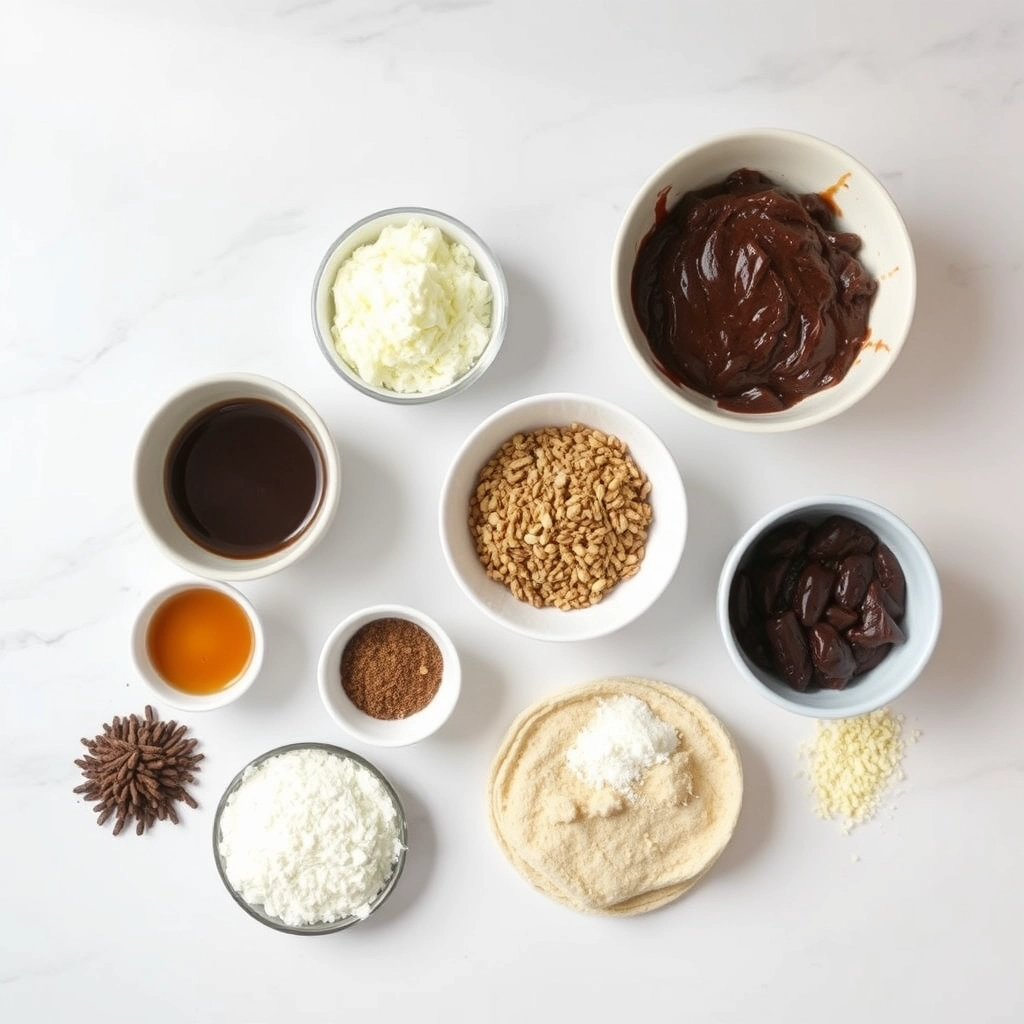
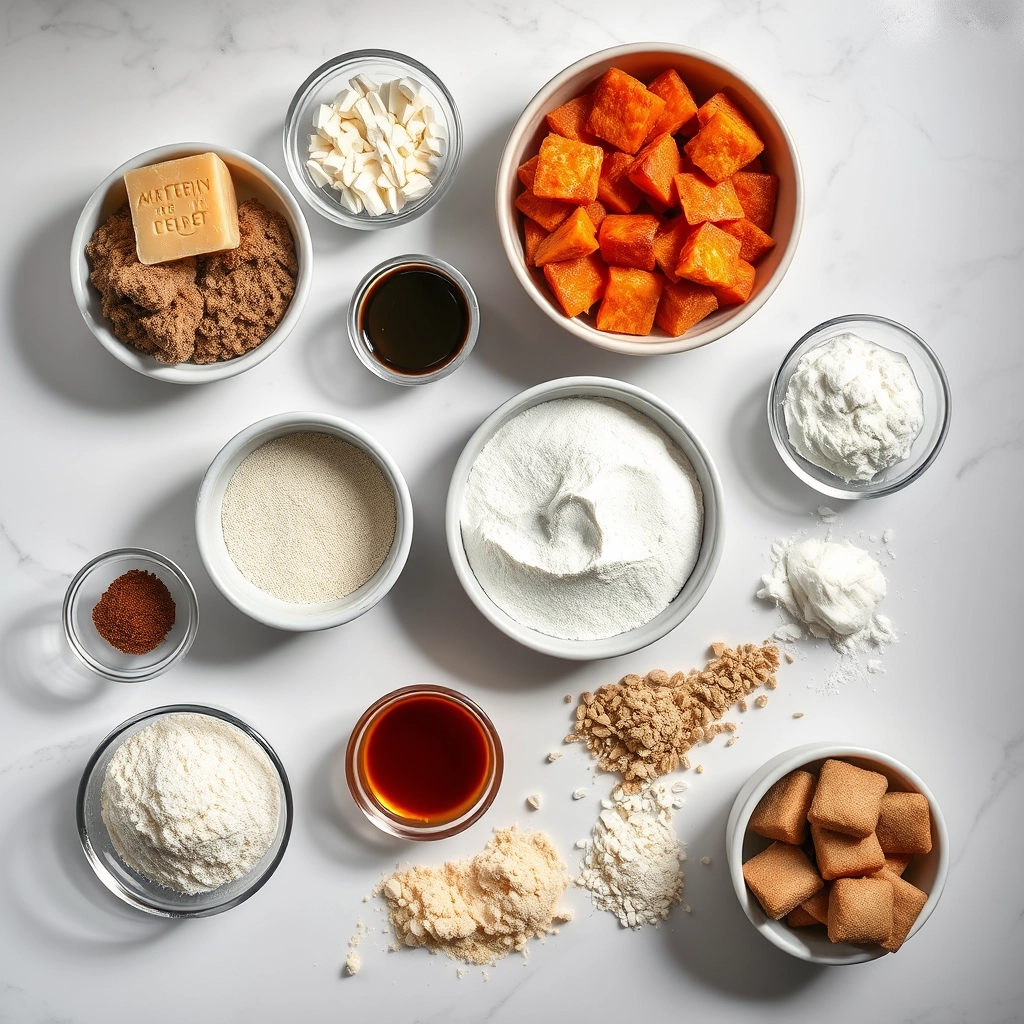
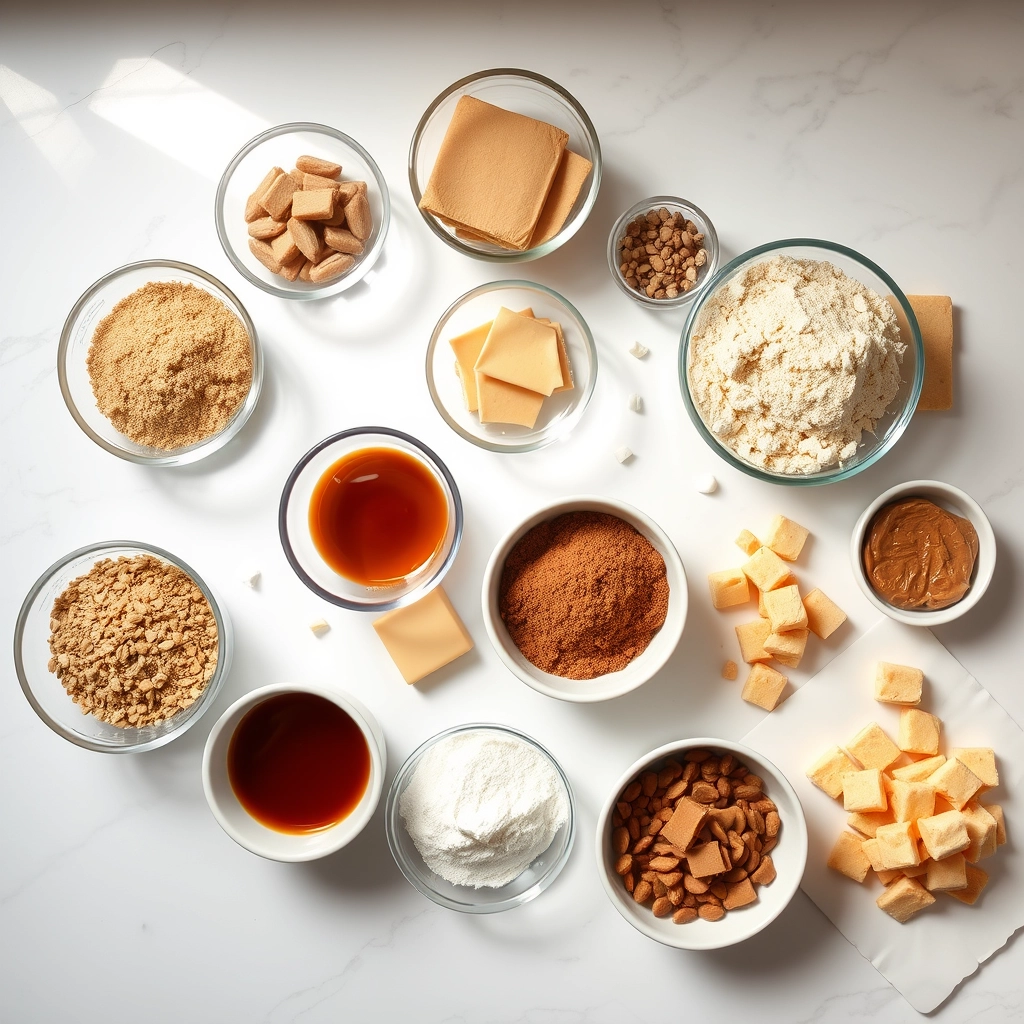

Ingredients

Scale

For the Crust:

  • 1 cup creamy peanut butter
  • 1 cup granulated sugar
  • 1 large egg
  • 1 tsp vanilla extract
  • 1/2 tsp baking soda
  • 1/4 tsp salt
  • 1 cup crushed Butterfinger candy bars
  • 1/4 cup additional sugar for rolling

Instructions

1. Prepare the Crust:

  1. Preheat oven to 350°F (175°C) and line baking sheets with parchment paper.
  2. In a large bowl, mix peanut butter, sugar, egg, vanilla, baking soda, and salt until well combined.
  3. Fold in crushed Butterfinger pieces until evenly distributed.
  4. Roll dough into 1-inch balls, then roll each ball in additional sugar to coat.
  5. Place cookies 2 inches apart on baking sheets and flatten slightly with a fork in a crisscross pattern.
  6. Bake for 10-12 minutes until edges are lightly golden. Let cool on baking sheets for 5 minutes before transferring to wire racks.

Notes

You can customize the seasonings to taste.

How to Prepare This Dish

Steps and time-saving tips

Start by preheating your oven to 350°F and lining your baking sheets with parchment paper. This simple step prevents sticking and makes cleanup a breeze. Next, cream together softened butter, peanut butter, and sugars in a large bowl until the mixture turns light and fluffy. Use an electric mixer for speed, but a sturdy spoon works too if you prefer. Crack in the eggs one at a time, blending well after each addition, then stir in vanilla for extra depth. In a separate bowl, whisk together flour, baking soda, and salt before gradually folding it into the wet ingredients. The dough will thicken, so don’t overmix—just combine until no dry streaks remain. Now, gently fold in crushed Butterfinger pieces for that irresistible crunch. Scoop tablespoon-sized portions onto your prepared sheets, spacing them about two inches apart. Bake for 10-12 minutes until the edges turn golden but the centers stay soft. Let the cookies cool slightly before transferring them to a wire rack. For a time-saving trick, freeze extra dough in pre-portioned balls for fresh-baked treats anytime.

Mistakes I’ve made and learned from

I once rushed the creaming process, leaving my Irresistible Peanut Butter Butterfinger Cookies dense instead of chewy. Now, I patiently beat the butter and sugars for a full three minutes—trust me, it’s worth the wait. Another blunder? Overbaking. I learned the hard way that these cookies firm up as they cool, so pulling them out when they look slightly underdone ensures perfect texture. If you’ve struggled with dry dough, check out my guide on baking moist cookies for foolproof adjustments. And if Butterfinger chunks sink to the bottom, toss them in a bit of flour first—a trick I picked up from my mix-in mastery post. Every mistake taught me something, so don’t stress if your first batch isn’t flawless!

Cultural Connection and Variations

Where this recipe comes from

Irresistible Peanut Butter Butterfinger Cookies blend two beloved American flavors into one unforgettable treat. The recipe draws inspiration from classic peanut butter cookies, a staple in U.S. households since the early 1900s, and the crunchy, caramel-kissed Butterfinger bars that became iconic in the 1920s. Together, they create a cookie that feels nostalgic yet excitingly indulgent.

Families often tweak the recipe to make it their own. Some add extra Butterfinger chunks for a bolder crunch, while others drizzle melted chocolate on top for a bakery-style finish. In the South, bakers might swap in honey-roasted peanuts for a deeper sweetness, while Midwest home cooks sometimes fold in oats for a heartier texture. No matter the variation, Irresistible Peanut Butter Butterfinger Cookies always deliver that perfect balance of creamy and crispy.

Globally, similar treats take different forms. In Australia, they might use Violet Crumble bars instead of Butterfingers, while in the UK, crushed Cadbury Crunchie bars offer a honeycomb twist. Yet the core idea remains: a peanut butter base loaded with candy-coated crunch. Whether served at bake sales, holiday gatherings, or just as a midnight snack, these cookies bridge generations and cultures through sheer deliciousness.

How it fits in today’s cooking

Irresistible Peanut Butter Butterfinger Cookies still shine in modern kitchens because they’re versatile and crowd-pleasing. Busy parents love them for after-school treats, while food bloggers spotlight them as easy yet impressive desserts. They’ve also found a place in holiday cookie swaps, often paired with classics like chewy ginger molasses cookies for a festive spread.

Today’s cooks adapt the recipe to fit dietary preferences, too. Some use almond butter or gluten-free flour, while others bake them as bars for quicker serving. For a fun twist, try crumbling them over salted caramel ice cream—a hack that turns leftovers into a next-level dessert. Whether you stick to tradition or experiment, Irresistible Peanut Butter Butterfinger Cookies prove that some flavors never go out of style.

Taste and Texture

What makes it delicious

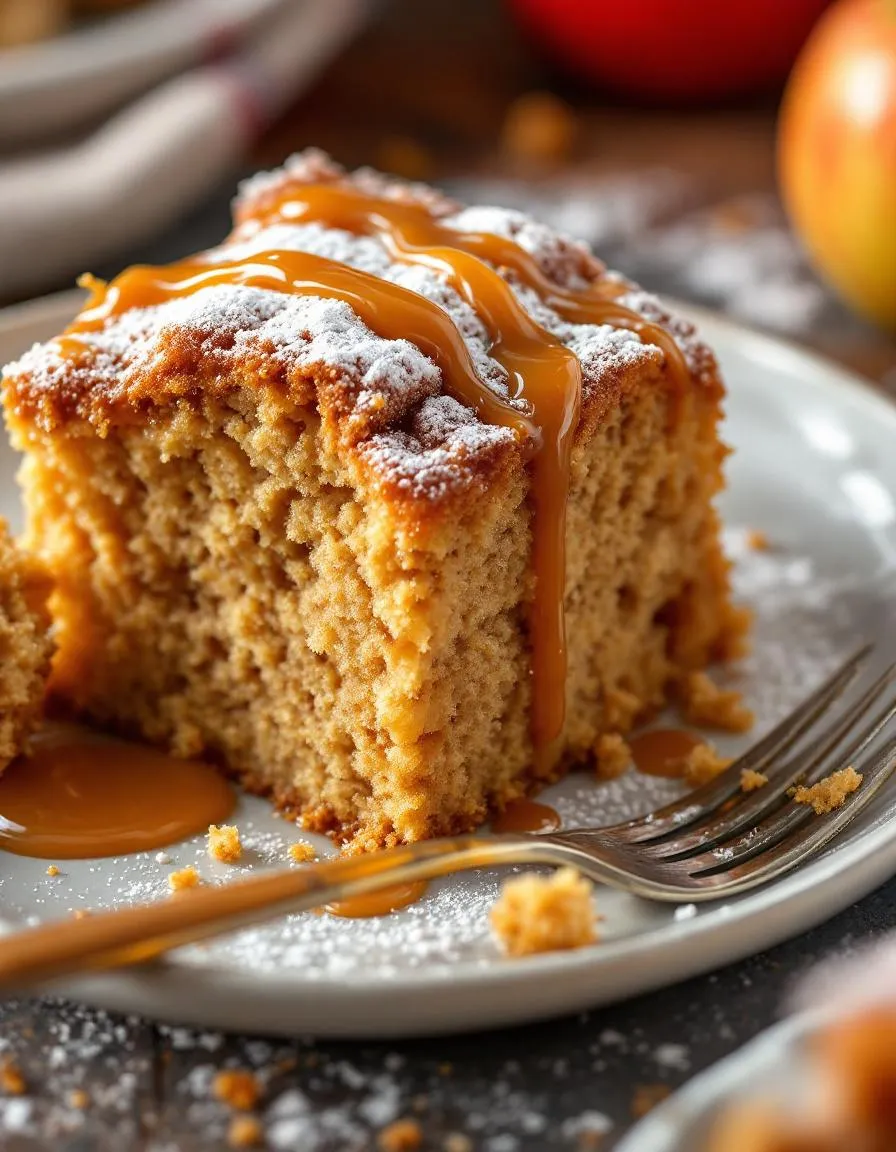
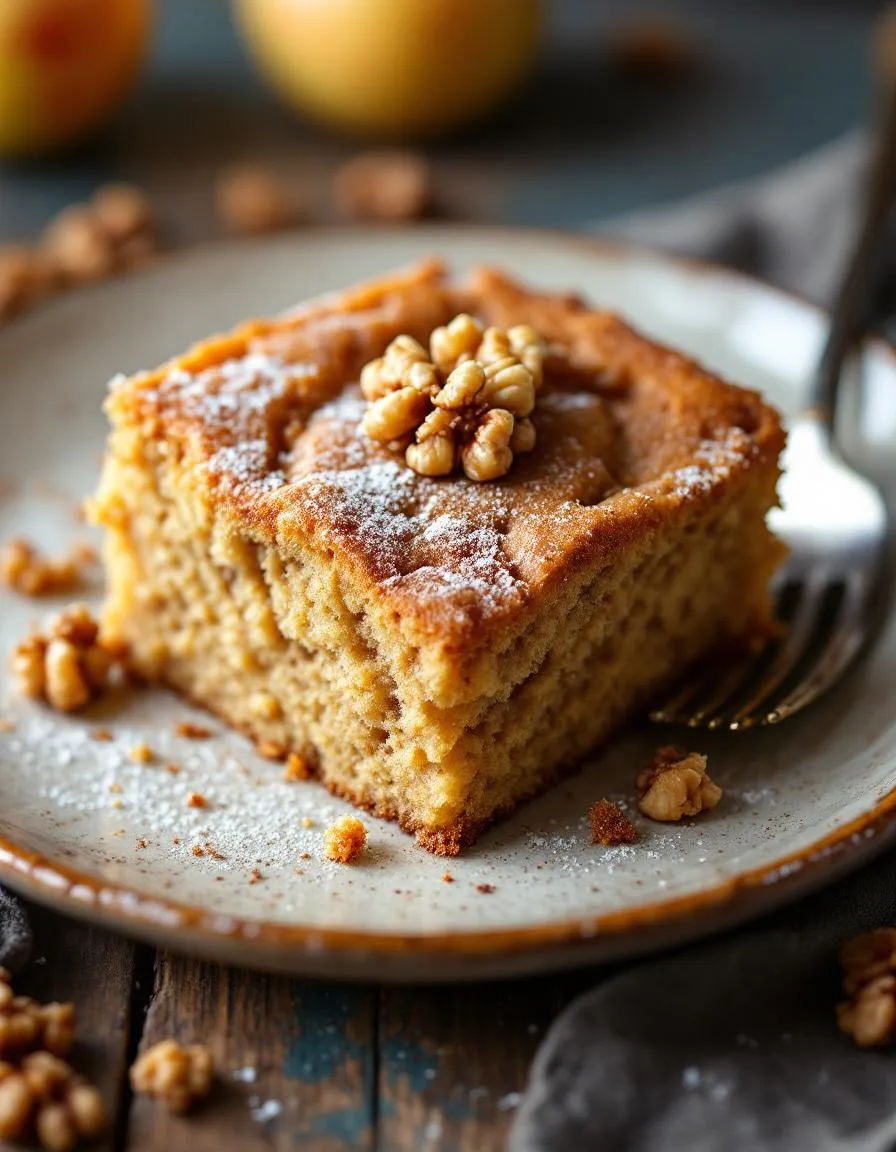
Irresistible Peanut Butter Butterfinger Cookies deliver a symphony of flavors and textures in every bite. The rich, nutty peanut butter base melts on your tongue, while chunks of crushed Butterfinger bars add a satisfying crunch and caramel-like sweetness. As you take a bite, the edges crisp slightly, giving way to a soft, chewy center that feels indulgent yet balanced. Warm from the oven, the cookies release a fragrant aroma of toasted peanuts and buttery toffee, making them impossible to resist. Whether enjoyed fresh or cooled, Irresistible Peanut Butter Butterfinger Cookies strike the perfect harmony between creamy, crunchy, and irresistibly sweet.

Boosting the flavor

For an extra layer of decadence, try drizzling melted chocolate over the cooled cookies or folding in mini chocolate chips for a double-dose of richness. If you love a salty-sweet contrast, sprinkle flaky sea salt on top before baking. For a deeper peanut flavor, swap regular peanut butter for a homemade roasted peanut butter—its bold taste elevates every bite. Craving more crunch? Roll the dough balls in crushed pretzels or toffee bits before baking. These small tweaks keep the cookies exciting while letting their signature flavors shine.

Tips for Success

Best practices for results

Always chill the dough for at least 30 minutes before baking to prevent spreading and ensure thick, chewy Irresistible Peanut Butter Butterfinger Cookies. Use parchment paper for even baking and easy removal, and measure your flour correctly by spooning it into the cup instead of scooping. For extra crunch, lightly chop the Butterfinger pieces rather than crushing them completely. Additionally, rotate your baking sheet halfway through cooking for consistent browning.

Mistakes to avoid

Avoid overmixing the dough, as this can make your Irresistible Peanut Butter Butterfinger Cookies tough instead of tender. If your cookies spread too much, check your butter temperature—it should be softened but not melted. For perfectly golden edges, follow our guide on baking temperatures to avoid underbaking or overbaking. Also, don’t skip the salt—it balances the sweetness, just like in our favorite peanut butter cookie variations.

Serving and Pairing Suggestions

How to serve this dish

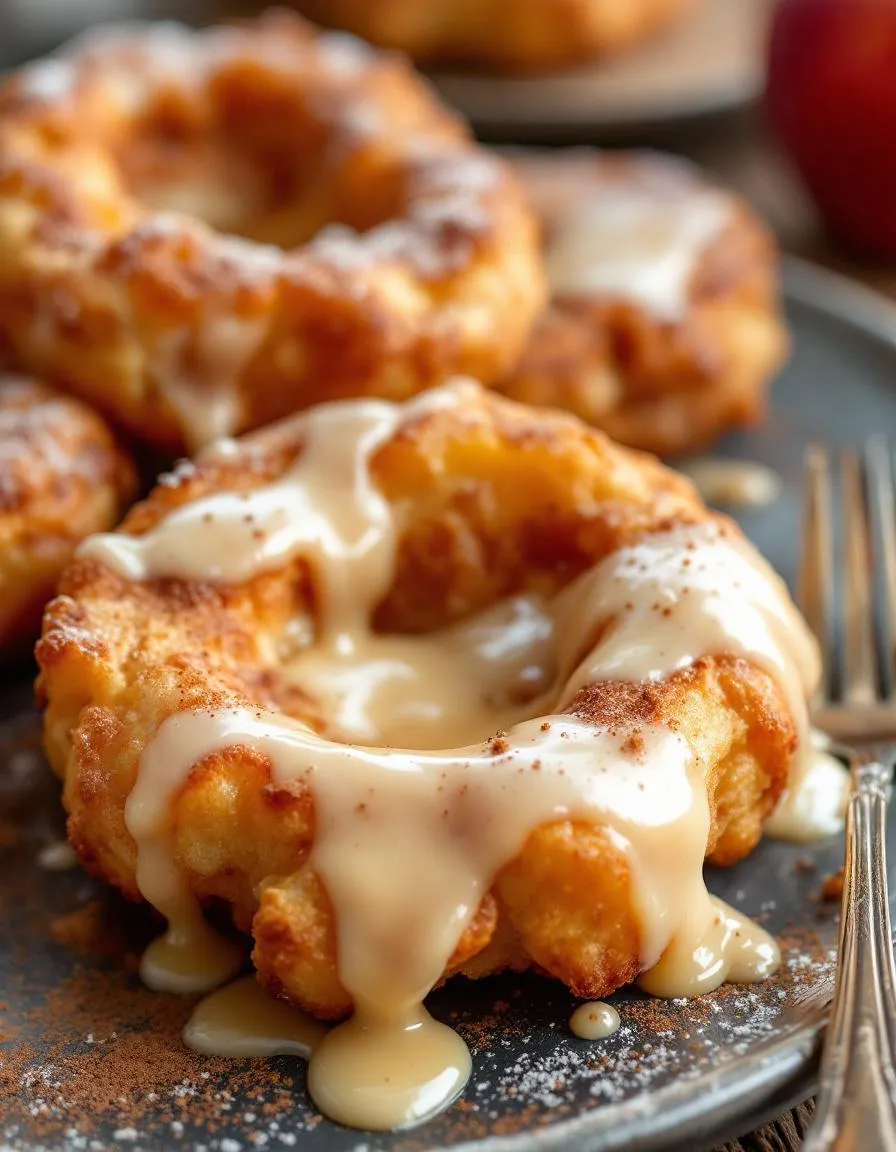
For a picture-perfect presentation, stack Irresistible Peanut Butter Butterfinger Cookies on a rustic wooden board or a vintage cake stand. Meanwhile, drizzle melted chocolate over the top for an extra indulgent touch. These cookies shine at holiday cookie swaps, but they also make a delightful after-school treat when served warm with a glass of cold milk. If you’re hosting a party, arrange them alongside mini dessert plates for easy grabbing.

What goes well with it

A tall glass of creamy vanilla milkshake balances the rich peanut butter and crunchy Butterfinger bits in these cookies. Alternatively, try pairing them with a cup of spiced chai tea for a cozy afternoon snack. For a fun dessert spread, serve them with salted caramel brownies to satisfy every chocolate lover’s craving.

What makes Irresistible Peanut Butter Butterfinger Cookies so special?

Irresistible Peanut Butter Butterfinger Cookies stand out because they combine creamy peanut butter with crunchy Butterfinger pieces, creating a perfect balance of textures and flavors. The cookies are soft, chewy, and packed with rich peanut butter taste, making them a crowd-pleasing treat for any occasion.

Can I use natural peanut butter for Irresistible Peanut Butter Butterfinger Cookies?

Yes, you can use natural peanut butter, but it may alter the texture slightly. For the best results with Irresistible Peanut Butter Butterfinger Cookies, opt for creamy commercial peanut butter, as it has a consistent texture and added stabilizers that help the cookies hold their shape.

How do I store Irresistible Peanut Butter Butterfinger Cookies to keep them fresh?

Store Irresistible Peanut Butter Butterfinger Cookies in an airtight container at room temperature for up to 5 days. For longer freshness, you can freeze them for up to 3 months—just thaw at room temperature before serving.

Can I substitute Butterfinger with other candy in this recipe?

While Butterfinger adds a unique crunch and flavor, you can substitute it with chopped Reese’s Pieces or peanut butter cups for a different twist. However, Irresistible Peanut Butter Butterfinger Cookies truly shine with the original Butterfinger candy for that classic taste.

Best Decadent Choco Swiss Roll Delight Recipe

best-choco-swiss-roll-delight

“`html

Introduction

There’s something magical about the first bite of a perfectly baked Decadent Choco Swiss Roll Delight—the way the rich chocolate sponge melts in your mouth, the velvety cream filling that balances every note, and the sheer joy of sharing it with loved ones. Whether you’re celebrating a special occasion or simply treating yourself after a long day, this dessert delivers comfort and indulgence in every slice. If you’ve ever hesitated to try making a Swiss roll at home, let this recipe change your mind. With a few simple steps, you’ll create a showstopper that rivals any bakery treat.

About This Recipe

The Decadent Choco Swiss Roll Delight is more than just a dessert—it’s a masterpiece of texture and flavor. Imagine a light, airy chocolate sponge rolled around a luscious whipped cream or ganache filling, dusted with cocoa powder for an extra touch of elegance. Unlike fussy pastries that demand hours of work, this recipe keeps things approachable without sacrificing wow factor. It’s perfect for holiday gatherings, birthdays, or even as a weekend baking project to impress your family. Plus, it pairs beautifully with coffee or a glass of cold milk, making it a versatile crowd-pleaser.

What sets this recipe apart is its balance of simplicity and decadence. While Swiss rolls might seem intimidating, the key lies in mastering the roll while the cake is still warm—a trick you’ll learn here. For more baking inspiration, check out our guide to perfect sponge cakes, or explore creative twists like our berry-filled desserts for seasonal variations. Whether you’re a beginner or a seasoned baker, this Decadent Choco Swiss Roll Delight will become a staple in your repertoire.

Why I Love This Recipe

This Decadent Choco Swiss Roll Delight holds a special place in my heart because it reminds me of my grandmother’s kitchen. She used to make a similar version every Christmas, and the smell of chocolate wafting through the house signaled warmth and togetherness. Now, whenever I bake it, I feel that same connection—to her, to family, and to the simple joy of creating something beautiful. It’s a recipe that never fails to bring smiles, and I hope it does the same for you.

“`

Health and Nutrition

Why it’s good for your body

Decadent Choco Swiss Roll Delight offers more than just irresistible flavor. First, it provides a satisfying energy boost thanks to its balanced mix of carbohydrates and healthy fats. Additionally, dark chocolate, a key ingredient, delivers antioxidants that support heart health and reduce inflammation. Meanwhile, the eggs in the sponge cake contribute high-quality protein, helping you stay full longer.

Moreover, Decadent Choco Swiss Roll Delight contains moderate sugar levels compared to many desserts, making it a smarter indulgence. The cocoa powder also supplies magnesium, which aids muscle function and relaxation. Furthermore, when enjoyed mindfully, this treat can curb cravings, preventing overeating later. Finally, the light yet rich texture ensures you savor every bite without feeling overly heavy.

Because Decadent Choco Swiss Roll Delight uses simple, wholesome ingredients, it avoids unnecessary additives. As a result, you can relish its decadence while still nourishing your body. Whether as an occasional dessert or a celebratory treat, it blends pleasure with purposeful nutrition.

How it fits in a healthy lifestyle

Decadent Choco Swiss Roll Delight fits seamlessly into a balanced diet when enjoyed in moderation. For those managing gluten sensitivities, swapping traditional flour for almond or coconut flour creates a delicious gluten-free version. If you prioritize heart health, the dark chocolate’s flavonoids support circulation, especially when paired with active habits like those in our healthy dessert swaps guide.

Protein seekers can amplify nutrition by adding a dollop of Greek yogurt or nut butter. This pairs perfectly with our high-protein baking tips for an extra boost. Since portion control matters, slicing the roll into thinner servings helps maintain balance without sacrificing enjoyment. Ultimately, Decadent Choco Swiss Roll Delight proves that mindful eating and indulgence can coexist.

Print
clock clock iconcutlery cutlery iconflag flag iconfolder folder iconinstagram instagram iconpinterest pinterest iconfacebook facebook iconprint print iconsquares squares iconheart heart iconheart solid heart solid icon

Decadent Choco Swiss Roll Delight


  • Author: Chef Emy

Description

A rich and fluffy chocolate Swiss roll filled with creamy whipped cream and dusted with cocoa powder.


Ingredients

Scale

For the Crust:

  • 4 large eggs
  • 3/4 cup granulated sugar
  • 1 tsp vanilla extract
  • 1/2 cup all-purpose flour
  • 1/4 cup cocoa powder
  • 1 tsp baking powder
  • 1/4 tsp salt
  • 1 cup heavy whipping cream
  • 2 tbsp powdered sugar
  • 1 tsp vanilla extract (for filling)
  • Cocoa powder for dusting

Instructions

1. Prepare the Crust:

  1. Preheat oven to 350°F (175°C). Line a 10×15-inch jelly roll pan with parchment paper.
  2. In a large bowl, beat eggs and granulated sugar until light and fluffy. Add vanilla extract and mix well.
  3. Sift together flour, cocoa powder, baking powder, and salt. Gently fold into the egg mixture until just combined.
  4. Spread the batter evenly into the prepared pan. Bake for 12-15 minutes or until the cake springs back when touched.
  5. While still warm, carefully roll the cake (with parchment paper) into a log shape. Let cool completely.
  6. Whip heavy cream, powdered sugar, and vanilla until stiff peaks form. Unroll the cake, spread the whipped cream evenly, then roll it back up without the parchment.
  7. Dust with cocoa powder before serving. Slice and enjoy!

Notes

You can customize the seasonings to taste.

How to Prepare This Dish

Steps and time-saving tips

Start by preheating your oven to 350°F and lining a 10×15-inch jelly roll pan with parchment paper. Lightly grease the paper to prevent sticking. In a large bowl, whisk together the eggs and sugar until pale and fluffy, about 3-4 minutes. This step ensures your Decadent Choco Swiss Roll Delight has that perfect airy texture. Gradually sift in the flour, cocoa powder, and baking powder, then gently fold the dry ingredients into the egg mixture. Be careful not to overmix—just combine until no streaks remain.

Pour the batter into the prepared pan, spreading it evenly with a spatula. Bake for 10-12 minutes until the cake springs back when touched. Meanwhile, lay a clean kitchen towel on the counter and dust it lightly with powdered sugar. As soon as the cake comes out of the oven, flip it onto the towel, peel off the parchment, and roll it up gently while warm. Let it cool completely this way to avoid cracks later.

For the filling, whip the heavy cream with powdered sugar and vanilla until stiff peaks form. Unroll the cooled cake, spread the cream evenly, then roll it back up without the towel. Chill for at least an hour before slicing. To save time, you can bake the cake a day ahead and fill it the next morning. For extra flair, drizzle melted chocolate over the top just before serving.

Mistakes I’ve made and learned from

I’ll admit, my first attempt at this Decadent Choco Swiss Roll Delight was a disaster. I overbaked the cake, which made it dry and prone to cracking when rolling. Now, I set a timer for 10 minutes and check early—it’s better to underbake slightly than overdo it. Another rookie mistake? Skipping the towel step. Without it, the cake stuck to itself and tore. If you’re new to rolling cakes, check out my guide to perfect roll techniques for foolproof tips. Oh, and don’t skimp on chilling time! I once rushed the process, and the filling oozed everywhere. For more troubleshooting, my common baking fixes post covers how to salvage cracks or uneven layers.

Cultural Connection and Variations

Where this recipe comes from

The Decadent Choco Swiss Roll Delight traces its roots to European pastry traditions, where Swiss rolls became a staple in bakeries and home kitchens alike. Originally, these rolled cakes showcased simple fillings like jam or cream, but over time, chocolate lovers transformed them into the rich, indulgent treat we know today. In Switzerland, bakers often pair it with a dusting of powdered sugar, while in Austria, they might add a layer of apricot jam for a tangy twist. Meanwhile, in Japan, the Decadent Choco Swiss Roll Delight gets an airy, lighter texture thanks to whipped cream and a meticulous rolling technique.

In my family, this dessert became a holiday favorite, with my grandmother adding a splash of espresso to the batter for depth. Some bakers even infuse the filling with orange zest or swap the chocolate for matcha, proving how versatile this recipe can be. Whether served at celebrations or as an afternoon pick-me-up, the Decadent Choco Swiss Roll Delight always brings people together with its irresistible charm.

How it fits in today’s cooking

Today, the Decadent Choco Swiss Roll Delight remains a beloved classic, especially during festive seasons. Modern bakers experiment with gluten-free flours or dairy-free fillings, making it accessible to more diets. Some even turn it into a showstopper for birthdays, like these creative birthday cake ideas, where it stands out as a centerpiece.

Beyond special occasions, this dessert fits perfectly into everyday baking routines. Busy home cooks appreciate its make-ahead potential, and kids adore its playful swirls. For those looking to master the technique, our guide on perfect sponges offers foolproof tips. Whether you stick to tradition or put your own spin on it, the Decadent Choco Swiss Roll Delight continues to win hearts, one slice at a time.

Taste and Texture

What makes it delicious

The Decadent Choco Swiss Roll Delight is a symphony of rich, velvety flavors and irresistible textures. First, the airy sponge cake melts in your mouth, its delicate crumb infused with deep cocoa notes. Next, the luscious chocolate ganache filling adds a creamy contrast, while a hint of vanilla elevates the sweetness. Every bite releases a fragrant aroma of premium chocolate, mingling with the subtle warmth of butter. The Decadent Choco Swiss Roll Delight strikes the perfect balance—lightly sweet, indulgent, and impossibly smooth. A dusting of powdered sugar on top adds a whisper of elegance and a delicate finish.

Boosting the flavor

For an extra layer of decadence, try swirling raspberry jam into the ganache before rolling—it adds a tangy brightness that complements the chocolate. Alternatively, sprinkle crushed toasted hazelnuts over the top for a nutty crunch. If you love bold flavors, a pinch of espresso powder in the batter deepens the cocoa richness. For more inspiration, explore our guide to chocolate pairings or discover how to perfect your ganache techniques. With these tweaks, the Decadent Choco Swiss Roll Delight becomes even more unforgettable.

Tips for Success

Best practices for results

To ensure your Decadent Choco Swiss Roll Delight turns out perfectly, always preheat your oven before baking for even cooking. Additionally, use room-temperature eggs for a lighter, fluffier sponge. Roll the cake gently while it’s still warm to prevent cracks, and don’t skip the parchment paper—it guarantees a smooth release. Finally, chill the filled roll for at least an hour before slicing for clean, professional layers.

Mistakes to avoid

Avoid overbaking the sponge, as it can dry out and crack when rolling. Instead, check for doneness a few minutes early by lightly touching the center—it should spring back. Another common mistake is spreading the filling too thick, which can ooze out when rolling. For more troubleshooting tips, check out our guide on fixing cracked cakes. Also, never skip sifting the cocoa powder, as lumps can ruin the texture. Learn how to perfect your sponge technique for flawless results every time.

Serving and Pairing Suggestions

How to serve this dish

Slice the Decadent Choco Swiss Roll Delight into elegant spirals for a stunning presentation. For special occasions, dust each piece with cocoa powder or add a dollop of whipped cream and fresh berries on the side. Meanwhile, during holiday gatherings, arrange the slices on a tiered stand to create a showstopping centerpiece. If you’re serving it at brunch, pair it with a light fruit salad to balance the richness. No matter how you plate it, this dessert always impresses.

What goes well with it

Elevate your Decadent Choco Swiss Roll Delight by serving it with a steaming cup of spiced chai latte. The warm spices beautifully contrast the chocolate’s sweetness. Alternatively, try a scoop of vanilla bean ice cream for a classic combo—the cool creaminess melts perfectly into each bite. For a festive twist, pair it with our Peppermint Mocha, which adds a refreshing minty kick. If you love contrasting textures, our Crispy Hazelnut Brittle makes a delightful crunchy garnish.

What makes a Decadent Choco Swiss Roll Delight so moist and fluffy?

The secret to a moist and fluffy Decadent Choco Swiss Roll Delight lies in properly whipped eggs and the right balance of wet and dry ingredients. Using high-quality cocoa powder and folding the batter gently ensures a light texture. A touch of buttermilk or oil can also enhance the moisture without compromising the roll’s structure.

How do you prevent a Decadent Choco Swiss Roll Delight from cracking when rolling?

To avoid cracks in your Decadent Choco Swiss Roll Delight, roll the cake while it’s still warm using a clean kitchen towel dusted with powdered sugar. This helps the cake “remember” its shape. Also, avoid overbaking—the cake should spring back lightly when touched.

Can I make a Decadent Choco Swiss Roll Delight ahead of time?

Yes! A Decadent Choco Swiss Roll Delight actually tastes better when made a day ahead, as the flavors meld. Store it tightly wrapped in plastic in the refrigerator. Let it sit at room temperature for 20 minutes before serving for the best texture.

What’s the best filling for a Decadent Choco Swiss Roll Delight?

Classic whipped cream or chocolate ganache work perfectly with a Decadent Choco Swiss Roll Delight. For extra richness, try a mascarpone-chocolate hybrid filling. The key is keeping the filling light enough to roll but flavorful enough to complement the cocoa sponge.

Ultimate Caramel Apple Cheesecake Cake Recipe

ultimate-caramel-apple-cheesecake-cake

“`html

Introduction

There’s something magical about the way warm caramel drips over spiced apples, especially when they crown a creamy cheesecake nestled inside a moist cake. If your heart skips a beat just thinking about it, you’re not alone. This Irresistible Caramel Apple Cheesecake Cake is the ultimate fall dessert, blending cozy flavors with showstopping elegance. Whether you’re hosting a holiday gathering or simply treating yourself, every bite feels like a hug from the inside. Trust me, once you try it, you’ll understand why this dessert deserves a permanent spot in your recipe collection.

About This Recipe

Imagine biting into layers of tender cinnamon-spiced cake, velvety cheesecake, and tart apples swirled with rich caramel. That’s exactly what this Irresistible Caramel Apple Cheesecake Cake delivers. Unlike traditional cakes or cheesecakes, this hybrid masterpiece combines the best of both worlds. The cake base stays moist thanks to a touch of brown sugar, while the cheesecake layer adds a luxurious contrast. Meanwhile, the caramel-apple topping brings a sticky-sweet finish that’s impossible to resist.

This recipe matters because it solves a common dilemma: choosing between cake and cheesecake. Here, you don’t have to. It’s perfect for special occasions, but honestly, it’s so approachable you’ll want to make it just because. If you love decadent desserts like our Pumpkin Spice Cheesecake, you’ll adore this twist. The flavors scream autumn, yet it’s versatile enough to enjoy year-round. Plus, the presentation—tall, layered, and drizzled with caramel—makes it a guaranteed crowd-pleaser.

At its core, this Irresistible Caramel Apple Cheesecake Cake fits our blog’s philosophy: baking should be joyful, not intimidating. While it looks impressive, the steps are straightforward. For example, if you’ve mastered our Easy Caramel Sauce, you’re already halfway there. We prioritize recipes that balance indulgence with practicality, and this one nails it. Whether you’re a seasoned baker or a newbie, the result will taste like you spent hours—even if shortcuts are secretly involved.

Why I Love This Recipe

This cake holds a special place in my heart because it reminds me of my grandmother’s kitchen. She used to bake apple cakes every fall, and the scent of cinnamon would fill the entire house. When I first created this Irresistible Caramel Apple Cheesecake Cake, it felt like honoring her tradition while adding my own twist. The cheesecake layer makes it feel indulgent, yet the apples keep it nostalgic. Every time I serve it, friends ask for the recipe, and that’s the best compliment. It’s more than dessert—it’s a memory maker.

“`

Health and Nutrition

Why it’s good for your body

Irresistible Caramel Apple Cheesecake Cake packs more than just incredible flavor—it also offers surprising nutritional perks. First, apples bring natural sweetness and fiber, which supports digestion and keeps you feeling satisfied. Additionally, the creamy cheesecake layer provides a protein boost, helping to balance blood sugar levels. Meanwhile, the caramel drizzle adds just enough indulgence to satisfy cravings without overdoing it.

Moreover, this dessert delivers antioxidants from the apples, which help combat oxidative stress. The combination of whole ingredients like eggs and dairy also contributes essential nutrients like calcium and vitamin D. Of course, Irresistible Caramel Apple Cheesecake Cake is still a treat, but its ingredients work together to create a more balanced dessert. Finally, the rich textures and flavors mean you’ll savor every bite, reducing the urge to overindulge.

How it fits in a healthy lifestyle

Enjoying Irresistible Caramel Apple Cheesecake Cake as part of a balanced diet is easier than you think. For example, pairing a small slice with a protein-rich snack like Greek yogurt can help stabilize energy levels. If you’re mindful of gluten, you can easily adapt the recipe using gluten-free flour blends—just like our guide on gluten-free baking tips suggests.

For those focused on heart health, opting for reduced-fat cream cheese or a lighter caramel sauce keeps the dessert enjoyable without excess saturated fat. And if you’re looking for more ways to enjoy treats guilt-free, check out our tips for healthy dessert swaps. Remember, moderation is key, and Irresistible Caramel Apple Cheesecake Cake fits perfectly into an occasional sweet treat routine.

Print
clock clock iconcutlery cutlery iconflag flag iconfolder folder iconinstagram instagram iconpinterest pinterest iconfacebook facebook iconprint print iconsquares squares iconheart heart iconheart solid heart solid icon

Irresistible Caramel Apple Cheesecake Cake


  • Author: Chef Emy

Description

A decadent layered cake combining the flavors of caramel, apples, and cheesecake for a show-stopping dessert.


Ingredients

Scale

For the Crust:

  • 2 cups all-purpose flour
  • 1 1/2 cups granulated sugar
  • 1 tsp baking powder
  • 1/2 tsp salt
  • 3 large eggs
  • 1 cup sour cream
  • 1/2 cup vegetable oil
  • 2 tsp vanilla extract
  • 2 cups diced apples
  • 16 oz cream cheese, softened
  • 1/2 cup caramel sauce
  • 1/2 cup chopped pecans

Instructions

1. Prepare the Crust:

  1. Preheat oven to 350°F (175°C). Grease and flour two 9-inch round cake pans.
  2. In a large bowl, whisk together flour, sugar, baking powder, and salt. Add eggs, sour cream, oil, and vanilla. Mix until smooth.
  3. Fold in diced apples. Divide batter evenly between prepared pans. Bake for 25-30 minutes or until a toothpick comes out clean.
  4. While cakes cool, beat cream cheese until fluffy. Spread between cake layers. Drizzle with caramel sauce and sprinkle with pecans.
  5. Chill for at least 2 hours before serving to allow flavors to meld.

Notes

You can customize the seasonings to taste.

“`html

How to Prepare This Dish

Steps and time-saving tips

Start by preheating your oven to 350°F and greasing three 8-inch cake pans. Next, whisk together the dry ingredients for the cake layers in a large bowl. In a separate bowl, cream the butter and sugar until fluffy, then mix in the eggs one at a time. Gradually fold the dry ingredients into the wet mixture, alternating with buttermilk, until just combined. Divide the batter evenly among the pans and bake for 25 minutes. Meanwhile, prepare the cheesecake layer by beating cream cheese, sugar, and vanilla until smooth. Gently fold in whipped cream, then spread the mixture over a parchment-lined baking sheet and freeze for 30 minutes. For the caramel apple filling, sauté diced apples in butter until tender, then stir in brown sugar and cinnamon. Let it cool slightly before layering. Once the cake layers have cooled, assemble the Irresistible Caramel Apple Cheesecake Cake by stacking them with cheesecake and apple filling between each tier. Drizzle caramel sauce over the top and refrigerate for at least 2 hours before serving. To save time, bake the cake layers a day ahead or use store-bought caramel sauce.

Mistakes I’ve made and learned from

One of my biggest blunders was overmixing the cake batter, which made the layers dense instead of light. Now, I stop stirring as soon as the flour disappears. Another hiccup? Not letting the cheesecake layer freeze long enough—it oozed everywhere when I tried to stack it. Lesson learned: patience pays off. If you’re new to layered desserts, check out my guide to even cake layers for foolproof assembly. Also, I once burned the caramel sauce by multitasking. Now, I use a heavy-bottomed pot and never walk away, as I detail in my caramel troubleshooting post. Trust me, these small adjustments make all the difference for your Irresistible Caramel Apple Cheesecake Cake.

“`

Cultural Connection and Variations

Where this recipe comes from

Irresistible Caramel Apple Cheesecake Cake feels like a love letter to autumn. It blends the cozy flavors of caramel and spiced apples with the creamy richness of cheesecake, creating a dessert that’s both nostalgic and indulgent. The recipe likely draws inspiration from classic American apple desserts, like apple pie and caramel apples, but elevates them with layers of moist cake and velvety cheesecake. In some regions, bakers might swap the caramel for a butterscotch drizzle or add a crunchy streusel topping for extra texture.

Families often put their own spin on it too. Some might use tart Granny Smith apples for a tangy contrast, while others prefer sweeter varieties like Honeycrisp. My grandmother always added a pinch of nutmeg to the batter, claiming it made the flavors “sing.” Across Europe, you might find similar desserts, like German apple kuchen or French tarte tatin, but none quite capture the decadence of Irresistible Caramel Apple Cheesecake Cake. Whether served at Thanksgiving or a casual weekend gathering, this dessert bridges tradition and innovation.

How it fits in today’s cooking

Today, Irresistible Caramel Apple Cheesecake Cake remains a star of fall baking. It’s perfect for holidays, but also fits into everyday cravings—especially when paired with a scoop of homemade vanilla ice cream. Modern cooks often adapt it for convenience, using pre-made caramel sauce or even a slow cooker for the apple filling. Others lighten it up with Greek yogurt in the cheesecake layer, proving this dessert can evolve without losing its charm.

Social media has also given it new life. Food bloggers love showcasing its layers, and it’s a frequent guest at potlucks and bake sales. For those who crave more apple-inspired treats, try pairing it with apple cider donuts for a full seasonal spread. Whether you stick to tradition or experiment, Irresistible Caramel Apple Cheesecake Cake always feels like a celebration.

Taste and Texture

What makes it delicious

Irresistible Caramel Apple Cheesecake Cake delivers a symphony of flavors and textures in every bite. First, the tender spiced apple cake layer offers a warm, fragrant sweetness, while the creamy cheesecake filling melts luxuriously on your tongue. Next, the caramel drizzle adds a buttery richness that contrasts perfectly with the crisp apple chunks. Meanwhile, the velvety frosting ties everything together with a smooth, decadent finish. Every forkful of Irresistible Caramel Apple Cheesecake Cake balances sweet, tangy, and spiced notes for a dessert that’s impossible to resist.

Boosting the flavor

Elevate your Irresistible Caramel Apple Cheesecake Cake with a few easy tweaks. For extra warmth, fold a pinch of nutmeg or cardamom into the cake batter. Alternatively, swap the caramel sauce for a salted caramel ganache to deepen the flavor profile. If you love texture, sprinkle toasted pecans or walnuts between the layers for a satisfying crunch. Finally, serve each slice with a scoop of cinnamon ice cream to amplify the cozy autumn vibes. With these small changes, your dessert will shine even brighter.

Tips for Success

Best practices for results

Always use room-temperature cream cheese for a smooth, lump-free filling in your Irresistible Caramel Apple Cheesecake Cake. Additionally, chill the cake layers before assembling to prevent sliding. For the best texture, bake the cheesecake layer in a water bath, and let it cool gradually to avoid cracks. Meanwhile, slice the apples thinly and evenly so they cook uniformly. Finally, drizzle the caramel sauce just before serving to keep the layers crisp.

Mistakes to avoid

Avoid overmixing the cheesecake batter, as this can introduce air bubbles and cause cracks. Instead, mix just until the ingredients combine. Also, don’t skip the water bath—it ensures gentle, even baking for the cheesecake layer. For perfectly caramelized apples, cook them until tender but not mushy, as overcooking can make them watery. If you need more guidance on baking cheesecakes, check out our cheesecake troubleshooting guide. And if your caramel sauce seizes up, warm it gently with a splash of cream, as explained in our caramel sauce fixes post.

Serving and Pairing Suggestions

How to serve this dish

For a stunning presentation, slice your Irresistible Caramel Apple Cheesecake Cake into generous wedges and drizzle extra caramel sauce on top just before serving. Meanwhile, garnish each plate with a sprinkle of cinnamon or a few thin apple slices for a fresh touch. Since this dessert shines at gatherings, consider serving it as the centerpiece at holiday dinners or autumn brunches. Alternatively, elevate casual get-togethers by pairing it with cozy coffee for a relaxed yet indulgent experience.

What goes well with it

A warm cup of spiced chai latte perfectly balances the rich flavors of Irresistible Caramel Apple Cheesecake Cake, enhancing its cozy autumn vibes. If you prefer something cooler, try a scoop of vanilla bean ice cream for a delightful contrast of temperatures and textures. For a full dessert spread, serve it alongside our Pumpkin Spice Cupcakes or Cinnamon Roll Cheesecake to create a memorable fall-themed menu. Each pairing highlights the cake’s creamy cheesecake layer and sweet caramel notes.

What makes Irresistible Caramel Apple Cheesecake Cake so special?

Irresistible Caramel Apple Cheesecake Cake combines the creamy richness of cheesecake with the warm flavors of caramel and spiced apples. The layered texture and perfect balance of sweet and tart make it a standout dessert for any occasion.

Can I make Irresistible Caramel Apple Cheesecake Cake ahead of time?

Yes! This cake actually tastes better when made a day ahead, as the flavors meld together. Just store it in the fridge and add fresh caramel drizzle before serving for the best Irresistible Caramel Apple Cheesecake Cake experience.

What apples work best for Irresistible Caramel Apple Cheesecake Cake?

Firm, tart apples like Granny Smith or Honeycrisp hold up best in baking and provide a nice contrast to the sweet caramel. Their texture and flavor make them ideal for Irresistible Caramel Apple Cheesecake Cake.

How do I prevent my cheesecake layer from cracking in this cake?

To avoid cracks, bake the cheesecake layer in a water bath and let it cool gradually in the oven. This gentle cooking method helps create the perfect smooth texture for your Irresistible Caramel Apple Cheesecake Cake.

Best Amish Applesauce Cake – Moist & Flavorful Recipe

best-amish-applesauce-cake-recipe

“`html

Introduction

There’s something undeniably comforting about the warm, spiced aroma of a homemade cake filling the kitchen. If you’ve ever craved a dessert that feels like a hug from grandma, this Irresistible Amish Applesauce Cake Recipe delivers exactly that. Moist, rich, and packed with cozy flavors, it’s the kind of treat that brings people together. Whether you’re baking for a holiday gathering or simply treating yourself, this cake promises to delight with every bite. Plus, it’s surprisingly easy to make, even if you’re not a seasoned baker. Let’s dive into why this timeless recipe deserves a spot in your baking repertoire.

About This Recipe

The Irresistible Amish Applesauce Cake Recipe is a classic dessert rooted in tradition, blending simplicity with deep, satisfying flavors. Unlike overly sweet modern cakes, this one relies on natural sweetness from applesauce and warm spices like cinnamon and nutmeg. The result? A tender, moist crumb that pairs perfectly with a cup of coffee or a scoop of vanilla ice cream. What makes it truly special is its versatility. You can serve it as a rustic snack cake, dress it up with a caramel glaze, or even turn it into a stunning layered dessert. For more inspiration on elevating simple cakes, check out our guide to easy cake decorating ideas.

Beyond its delicious taste, this recipe matters because it keeps heritage alive. Amish baking emphasizes wholesome ingredients and time-tested techniques, making it a wonderful introduction to from-scratch baking. If you’re new to working with spices, our baking spices 101 post will help you master the basics. The blog’s tone celebrates approachable yet meaningful cooking, and this cake fits right in. It’s unfussy but deeply rewarding, just like the meals and desserts that bring us joy without demanding perfection. Whether you’re a beginner or a pro, this recipe invites you to slow down and savor the process.

Why I Love This Recipe

This Irresistible Amish Applesauce Cake Recipe holds a special place in my heart because it reminds me of my aunt’s kitchen. She baked it every fall, and the scent alone could pull our entire family to the table. What I adore most is how forgiving it is. Even when I’ve tweaked the spices or swapped in different types of applesauce, the cake always turns out wonderfully. It’s a reminder that baking doesn’t have to be intimidating. Instead, it’s about creating moments of warmth and connection. Every time I make this cake, I’m not just following a recipe. I’m carrying forward a tradition that feels like home.

“`

Health and Nutrition

Why it’s good for your body

The Irresistible Amish Applesauce Cake Recipe packs a nutritious punch while satisfying your sweet tooth. First, applesauce replaces much of the fat, cutting calories without sacrificing moisture. Additionally, cinnamon and nutmeg add antioxidants that fight inflammation. These spices also support digestion, making the cake a smarter indulgence.

Moreover, the Irresistible Amish Applesauce Cake Recipe includes whole ingredients like eggs and flour, which provide protein and fiber. These nutrients keep you full longer, preventing unnecessary snacking. Meanwhile, the natural sweetness from applesauce means you can reduce added sugar without losing flavor. As a result, you enjoy a dessert that feels decadent but aligns with healthier choices.

Finally, this cake offers comfort without guilt. Unlike overly processed treats, the Irresistible Amish Applesauce Cake Recipe relies on simple, wholesome components. Whether you serve it warm or at room temperature, each bite delivers both nostalgia and nourishment. In short, it’s a dessert that loves you back.

How it fits in a healthy lifestyle

The Irresistible Amish Applesauce Cake Recipe fits seamlessly into balanced eating habits. For gluten-free diets, simply swap regular flour for a gluten-free alternative to enjoy the same tender texture. If you’re watching your heart health, the reduced fat content makes it a smarter choice than traditional cakes.

You can also pair a slice with a protein-rich snack, like Greek yogurt, for a satisfying treat. For more ideas on balancing desserts with nutrition, explore our guide to healthy dessert swaps. Whether you’re baking for a family gathering or a solo treat, this cake proves that delicious and nutritious can go hand in hand.

Print
clock clock iconcutlery cutlery iconflag flag iconfolder folder iconinstagram instagram iconpinterest pinterest iconfacebook facebook iconprint print iconsquares squares iconheart heart iconheart solid heart solid icon

Irresistible Amish Applesauce Cake


  • Author: Chef Emy

Description

A moist and flavorful cake made with applesauce, warm spices, and a hint of sweetness, perfect for any occasion.


Ingredients

Scale

For the Crust:

  • 2 cups all-purpose flour
  • 1 1/2 cups unsweetened applesauce
  • 1 cup granulated sugar
  • 1/2 cup vegetable oil
  • 2 large eggs
  • 1 tsp baking soda
  • 1 tsp ground cinnamon
  • 1/2 tsp ground nutmeg
  • 1/2 tsp ground cloves
  • 1/2 tsp salt
  • 1/2 cup chopped walnuts (optional)

Instructions

1. Prepare the Crust:

  1. Preheat oven to 350°F (175°C). Grease and flour a 9×13-inch baking pan.
  2. In a large bowl, whisk together flour, baking soda, cinnamon, nutmeg, cloves, and salt.
  3. In another bowl, mix applesauce, sugar, oil, and eggs until well combined.
  4. Gradually add the dry ingredients to the wet ingredients, stirring until just combined. Fold in walnuts if using.
  5. Pour batter into the prepared pan and bake for 30-35 minutes, or until a toothpick inserted in the center comes out clean.
  6. Let cool in the pan for 10 minutes before transferring to a wire rack to cool completely.

Notes

You can customize the seasonings to taste.

How to Prepare This Dish

Steps and time-saving tips

Start by preheating your oven to 350°F and greasing a 9×13-inch baking pan to ensure your Irresistible Amish Applesauce Cake Recipe comes out perfectly. In a large bowl, whisk together the flour, baking soda, cinnamon, and salt until evenly combined. Next, beat the softened butter and sugar in a separate bowl until fluffy, then mix in the eggs one at a time. Stir in the applesauce—this keeps the cake moist and adds natural sweetness. Gradually fold the dry ingredients into the wet mixture, but don’t overmix; a few lumps are fine. For extra flavor, toss in chopped walnuts or raisins if you like. Pour the batter into the prepared pan and smooth the top with a spatula. Bake for 35-40 minutes, or until a toothpick inserted in the center comes out clean. Let the cake cool before slicing. To save time, measure all your ingredients ahead and use a stand mixer for effortless blending. If you’re short on applesauce, try my homemade applesauce recipe—it’s quicker than you think!

Mistakes I’ve made and learned from

I once rushed the mixing process for my Irresistible Amish Applesauce Cake Recipe, and the result was a dense, uneven texture. Now, I take my time creaming the butter and sugar properly—it makes all the difference. Another lesson? Don’t skip the cooling step. I’ve impatiently sliced into a warm cake only to watch it crumble. Letting it rest ensures clean cuts and better flavor. If your cake ever turns out too dry, brush it with a simple syrup or serve it with a scoop of vanilla bean ice cream to revive it. Trust me, these small tweaks save the day!

Cultural Connection and Variations

Where this recipe comes from

The Irresistible Amish Applesauce Cake Recipe carries the warmth of tradition, rooted in the simple yet rich culinary heritage of Amish communities. Known for their resourcefulness, the Amish crafted this cake to make the most of pantry staples like applesauce, which adds moisture and natural sweetness. Over time, families passed down their own twists, whether swapping spices or folding in nuts for extra texture. Meanwhile, in other cultures, similar cakes take shape—think British apple tea cakes or German apfelkuchen—each with its own regional flair.

In my own kitchen, the Irresistible Amish Applesauce Cake Recipe became a fall favorite, often baked with cinnamon-heavy Appalachian influences. Some Southern versions even drizzle caramel glaze, while New Englanders might serve it with a dollop of whipped cream. No matter the variation, the cake’s humble charm connects generations. After all, nothing says comfort like the scent of spiced apples wafting through the house.

How it fits in today’s cooking

Today, the Irresistible Amish Applesauce Cake Recipe still shines as a versatile treat. Busy home cooks love how easily it comes together, and health-conscious bakers appreciate substitutions like whole wheat flour or coconut sugar. It’s a star at holiday gatherings, but just as welcome on a weekday with a cup of coffee. For those craving more rustic desserts, our homemade oatmeal bread pairs perfectly with this cake’s cozy vibes.

Modern adaptations keep it fresh, too. Some add chocolate chips or swap applesauce for pumpkin puree in autumn. Others turn it into cupcakes for easy sharing. Whether you stick to tradition or experiment, this cake fits seamlessly into today’s cooking rhythms. And if you’re exploring other timeless recipes, our classic vanilla pound cake offers another slice of nostalgia worth trying.

Taste and Texture

What makes it delicious

The Irresistible Amish Applesauce Cake Recipe delivers a warm, spiced aroma that fills your kitchen as it bakes. Each bite offers a moist, tender crumb, thanks to the natural sweetness and moisture from the applesauce. Cinnamon and nutmeg add a cozy depth, while a hint of brown sugar caramelizes slightly for a delicate, chewy edge. The cake feels rich yet light, with bursts of plump raisins or walnuts if you include them. Whether served warm or at room temperature, the Irresistible Amish Applesauce Cake Recipe wraps you in comforting, homemade flavor—like a hug in dessert form.

Boosting the flavor

For an extra layer of indulgence, drizzle the cake with a simple vanilla caramel sauce or serve it with a dollop of fresh whipped cream. Alternatively, swap the raisins for diced apples or toasted pecans to amplify the autumn-inspired flavors. A pinch of cardamom or a splash of bourbon in the batter can also elevate the warmth. No matter how you customize it, this cake stays irresistibly tender and fragrant.

Tips for Success

Best practices for results

Always measure your ingredients precisely for the Irresistible Amish Applesauce Cake Recipe, especially the applesauce and spices, to maintain the perfect balance of flavors. Additionally, use room-temperature eggs and butter since they blend more smoothly into the batter. For the best texture, line your baking pan with parchment paper to prevent sticking and ensure even baking. Finally, let the cake cool completely before slicing so it holds its shape beautifully.

Mistakes to avoid

Avoid overmixing the batter once you add the dry ingredients, as this can make the Irresistible Amish Applesauce Cake Recipe dense instead of tender. Instead, gently fold the flour mixture just until combined. Also, don’t skip the step of greasing the pan properly—otherwise, your cake might stick. For more baking tips, check out our guide on how to prevent cakes from sticking. Another common mistake is baking at the wrong temperature; always preheat your oven and use an oven thermometer for accuracy. Learn more about perfect baking temperature to avoid under or overbaking.

Serving and Pairing Suggestions

How to serve this dish

Serve the Irresistible Amish Applesauce Cake Recipe warm for a cozy dessert or at room temperature for a simple yet satisfying treat. For a festive touch, dust the top with powdered sugar or drizzle with a vanilla glaze. Meanwhile, a scoop of vanilla ice cream or a dollop of whipped cream adds a creamy contrast. This cake shines at holiday gatherings, potlucks, or even as a sweet ending to a weeknight dinner. Finally, slice it into thick squares and arrange them on a rustic wooden board for a charming presentation.

What goes well with it

Pair the Irresistible Amish Applesauce Cake Recipe with a hot cup of spiced chai or coffee to highlight its warm cinnamon notes. Alternatively, try it alongside a glass of cold milk for a classic combination. If you love fruity desserts, serve it with our Homemade Berry Compote for a burst of freshness. For a heartier spread, offer it with our Cinnamon Whipped Cream to enhance the cake’s rich flavors. Each pairing brings out the best in this comforting dessert.

What makes Amish applesauce cake so moist?

The Irresistible Amish Applesauce Cake Recipe gets its moisture from the combination of applesauce and oil, which keeps the cake tender. The natural sugars in the applesauce also help retain moisture while adding a subtle sweetness.

Can I substitute oil with butter in Amish applesauce cake?

Yes, you can use melted butter instead of oil in the Irresistible Amish Applesauce Cake Recipe for a richer flavor. However, oil tends to keep the cake moister, so adjust baking time slightly if using butter.

How long does Amish applesauce cake stay fresh?

The Irresistible Amish Applesauce Cake Recipe stays fresh for 3-4 days when stored in an airtight container at room temperature. For longer storage, wrap it tightly and freeze for up to 3 months.

What’s the best way to serve Amish applesauce cake?

This Irresistible Amish Applesauce Cake Recipe tastes great warm or at room temperature, either plain or with a dusting of powdered sugar. For extra indulgence, serve it with whipped cream or a scoop of vanilla ice cream.

Best Soft Cinnamon Apple Fritters – Easy Homemade Recipe

best-soft-cinnamon-apple-fritters

“`html

Introduction

There’s something magical about the smell of warm cinnamon and sweet apples filling your kitchen, especially when it means a batch of Irresistible Soft Cinnamon Apple Fritters is on the way. Whether you’re craving a cozy weekend treat or a nostalgic bite that reminds you of fall fairs and family gatherings, these fritters deliver every time. Crispy on the outside, tender on the inside, and packed with juicy apple chunks, they’re the kind of dessert that disappears fast. Plus, they’re easier to make than you might think—no deep-fryer required. Let’s dive into what makes these fritters so special and why they deserve a spot in your recipe rotation.

About This Recipe

Irresistible Soft Cinnamon Apple Fritters are a delightful twist on classic fried dough, combining the warmth of cinnamon, the sweetness of fresh apples, and a fluffy, cake-like texture. Unlike traditional fritters, this version skips the heavy grease while still delivering that crave-worthy crunch. What sets them apart is their balance of flavors and textures—each bite offers a hint of spice, a burst of fruit, and a melt-in-your-mouth softness. These fritters fit perfectly with the Brekcakes blog’s focus on approachable, crowd-pleasing recipes that feel both indulgent and achievable. Whether you’re a seasoned baker or a beginner, you’ll find the process straightforward and rewarding.

Beyond taste, these fritters bring people together. They’re ideal for brunch spreads, holiday mornings, or even as a sweet surprise after dinner. If you love apple desserts, you’ll appreciate how this recipe lets the fruit shine without overpowering the dish. For more inspiration, check out our Perfect Apple Crisp or explore other ways to bake with seasonal produce in our Fall Baking Essentials guide. No matter the occasion, these fritters promise to impress.

Why I Love This Recipe

These Irresistible Soft Cinnamon Apple Fritters hold a special place in my heart because they remind me of my grandmother’s kitchen. She used to make a similar version every autumn, and the scent alone would bring the whole family running. I’ve tweaked her recipe over the years to make it a bit lighter, but the soul of it—the cozy spices, the tender apples—stays the same. Every time I make them, I’m transported back to those crisp mornings, laughing over plates of warm fritters. It’s more than just a recipe; it’s a little piece of home.

“`

Health and Nutrition

Why it’s good for your body

Irresistible Soft Cinnamon Apple Fritters pack more than just delicious flavor—they also offer surprising health perks. First, apples bring natural sweetness along with fiber, which supports digestion and keeps you full longer. Additionally, cinnamon adds more than warmth to every bite. Studies suggest it may help regulate blood sugar levels, making these fritters a smarter indulgence. Meanwhile, the dough’s whole-grain or alternative flour options can boost nutrient density without sacrificing texture.

Moreover, Irresistible Soft Cinnamon Apple Fritters often include healthier fats like those from coconut oil or Greek yogurt, which provide sustained energy. Unlike heavily processed desserts, these fritters rely on real ingredients that your body recognizes. For instance, apples deliver antioxidants like quercetin, which may support immunity. Finally, because they’re baked or lightly fried, they avoid the excess oil of traditional fried treats. Whether you enjoy them for breakfast or dessert, you’re choosing a snack with balance in mind.

How it fits in a healthy lifestyle

Irresistible Soft Cinnamon Apple Fritters fit seamlessly into a balanced diet when enjoyed mindfully. Pair them with protein-rich foods like Greek yogurt or nuts to stabilize blood sugar and extend satisfaction. If you’re watching gluten intake, try our gluten-free baking guide to adapt the recipe effortlessly. For heart-healthy swaps, consider using almond flour or reducing sugar slightly—the apples’ natural sweetness still shines through.

These fritters also work well as part of meal prep or portion-controlled treats. Freeze extras and reheat for a quick, wholesome snack. Craving more smart dessert ideas? Explore our healthy dessert swaps to keep your nutrition goals on track without missing out on flavor. With simple tweaks and mindful eating, Irresistible Soft Cinnamon Apple Fritters can be a delightful part of your routine.

Print
clock clock iconcutlery cutlery iconflag flag iconfolder folder iconinstagram instagram iconpinterest pinterest iconfacebook facebook iconprint print iconsquares squares iconheart heart iconheart solid heart solid icon

Irresistible Soft Cinnamon Apple Fritters


  • Author: Chef Emy

Description

Deliciously soft and fluffy apple fritters with a hint of cinnamon, perfect for breakfast or dessert.


Ingredients

Scale

For the Crust:

  • 2 cups all-purpose flour
  • 1/4 cup granulated sugar
  • 1 tbsp baking powder
  • 1 tsp ground cinnamon
  • 1/2 tsp salt
  • 2 large eggs
  • 1/2 cup milk
  • 2 tbsp melted butter
  • 1 tsp vanilla extract
  • 2 cups diced apples
  • Vegetable oil for frying

Instructions

1. Prepare the Crust:

  1. In a large bowl, whisk together flour, sugar, baking powder, cinnamon, and salt.
  2. In another bowl, beat eggs, milk, melted butter, and vanilla extract until smooth.
  3. Pour the wet ingredients into the dry ingredients and stir until just combined. Fold in diced apples.
  4. Heat vegetable oil in a deep pan to 350°F (175°C).
  5. Drop spoonfuls of batter into the hot oil and fry for 2-3 minutes per side until golden brown.
  6. Remove fritters with a slotted spoon and drain on paper towels.

Notes

You can customize the seasonings to taste.

How to Prepare This Dish

Steps and time-saving tips

Start by peeling and finely dicing two medium apples for your Irresistible Soft Cinnamon Apple Fritters. Toss them with a teaspoon of lemon juice to prevent browning. In a large bowl, whisk together the dry ingredients—flour, sugar, baking powder, and a generous pinch of cinnamon. In another bowl, beat the eggs lightly before adding milk and melted butter. Pour the wet mixture into the dry ingredients and stir just until combined. Overmixing will make the fritters tough, so fold in the diced apples gently. Meanwhile, heat oil in a deep skillet to 350°F. Drop spoonfuls of batter into the hot oil, frying in batches to avoid crowding. Flip them once they turn golden brown, about 2 minutes per side. Drain on paper towels and dust with cinnamon sugar while warm. For a quicker cleanup, measure all your ingredients before starting and reuse the same bowls for wet and dry mixes. If you prefer baking, try my oven-baked apple fritters for a lighter option.

Mistakes I’ve made and learned from

My first batch of Irresistible Soft Cinnamon Apple Fritters turned out soggy because I didn’t pat the apples dry. Excess moisture made the batter too loose, and the fritters fell apart in the oil. Now, I always blot the diced apples with a paper towel before folding them in. Another time, I overfilled the skillet, causing the oil temperature to drop and the fritters to absorb too much grease. Lesson learned: fry in small batches for crispier results. If you’re new to frying, check out my guide to perfect frying for more troubleshooting tips. Trust me, a little patience goes a long way with these fritters!

Cultural Connection and Variations

Where this recipe comes from

Irresistible Soft Cinnamon Apple Fritters have roots that stretch across continents, blending comfort and tradition. Many cultures fry dough with fruit, but this version leans into the cozy flavors of American autumn. In Germany, similar treats called “Apfelküchle” slice apples into rings before frying, while Dutch “appelbeignets” often feature a lighter batter. Meanwhile, in the American South, cooks might add a splash of bourbon or serve them with a cream cheese drizzle.

My grandmother made her own spin on Irresistible Soft Cinnamon Apple Fritters every fall, using tart Granny Smith apples and a hint of nutmeg. She’d fry them in a cast-iron skillet, filling the kitchen with a scent that still reminds me of harvest festivals. Today, some families bake them for a lighter version, but the crispy edges and soft centers remain irresistible. Whether dusted with powdered sugar or dipped in caramel, these fritters bridge generations and geographies.

How it fits in today’s cooking

Modern cooks love Irresistible Soft Cinnamon Apple Fritters because they’re versatile. They fit into Sunday brunches, holiday spreads, or even as a sweet snack after school. Some bakers swap all-purpose flour for gluten-free blends, while others air-fry them for a quicker fix. Since apples peak in fall, this recipe naturally pairs with seasonal gatherings—think pumpkin carving parties or Thanksgiving morning.

You can also repurpose leftover fritters by crumbling them over vanilla bean ice cream or layering them into a spiced trifle. For a fun twist, try adding them to a caramel apple charcuterie board. No matter how you serve them, these fritters keep comfort food alive in the busiest of kitchens. They’re proof that some traditions only get better with time.

Taste and Texture

What makes it delicious

Irresistible Soft Cinnamon Apple Fritters deliver a warm, cozy bite that feels like a hug in dessert form. The outside boasts a delicate crispness, while the inside stays pillowy-soft, thanks to the perfect balance of flour and buttermilk. Juicy apple chunks add a sweet-tart burst, and the cinnamon swirls through every bite with its warm, fragrant spice. Meanwhile, the vanilla glaze melts into the fritter, creating a luscious contrast between the tender crumb and the silky topping. Every mouthful of Irresistible Soft Cinnamon Apple Fritters is a harmony of textures—crispy, fluffy, and gooey all at once.

Boosting the flavor

For an extra flavor kick, try tossing the apple pieces in brown sugar before folding them into the batter—it deepens their caramelized sweetness. A pinch of nutmeg or cardamom alongside the cinnamon adds complexity without overpowering the dish. Drizzling warm homemade caramel sauce over the fritters elevates them into a decadent treat, or serve them with a scoop of vanilla bean ice cream for a cool contrast. Experimenting with different apple varieties, like Honeycrisp or Granny Smith, can also tweak the tartness to suit your taste.

Tips for Success

Best practices for results

Always use fresh, crisp apples for your Irresistible Soft Cinnamon Apple Fritters, as they hold their shape better during frying. Meanwhile, make sure your oil stays at a steady 350°F to achieve that perfect golden-brown crust. Additionally, let the dough rest for at least 10 minutes before shaping to ensure a lighter texture. For extra flavor, toss the apple pieces in cinnamon sugar right before folding them into the batter. Finally, drain the fritters on a wire rack instead of paper towels to keep them crisp.

Mistakes to avoid

Avoid overcrowding the pan when frying your Irresistible Soft Cinnamon Apple Fritters, as this lowers the oil temperature and leads to greasy results. Instead, fry in small batches for even cooking. Also, resist the urge to flip the fritters too soon—wait until the edges turn golden for the best texture. If your batter feels too thin, check out our guide on fixing runny batter for quick solutions. Lastly, skip using overly ripe apples, which can make the fritters mushy. For more apple prep tips, explore our guide to choosing apples for baking.

Serving and Pairing Suggestions

How to serve this dish

For a picture-perfect presentation, stack Irresistible Soft Cinnamon Apple Fritters on a rustic wooden board or a vintage cake stand. Meanwhile, drizzle them with warm caramel or dust them lightly with powdered sugar for extra charm. These fritters shine at weekend brunches, especially when paired with a cozy coffee setup. Alternatively, serve them as a sweet finale to holiday dinners, garnished with fresh apple slices or a sprig of mint for a festive touch.

What goes well with it

Start your morning right by pairing Irresistible Soft Cinnamon Apple Fritters with a creamy vanilla latte or spiced chai tea. The warmth of the spices in the fritters beautifully complements these drinks. For a heartier option, try them alongside our Fluffy Buttermilk Pancakes to create a decadent breakfast spread. Finally, if you love dipping sauces, our Salted Caramel Dip adds a rich, buttery contrast to the fritters’ tender texture.

What makes Irresistible Soft Cinnamon Apple Fritters so fluffy?

The secret to fluffy Irresistible Soft Cinnamon Apple Fritters lies in the batter. Using buttermilk or yogurt creates a tender texture, while baking powder adds lift. Fresh grated apples keep them moist without weighing them down.

Can I make Irresistible Soft Cinnamon Apple Fritters ahead of time?

Yes! These fritters taste best fresh but stay soft for 2 days stored airtight. Reheat them briefly in the oven or toaster to restore their irresistible texture. Avoid refrigeration, as it can dry them out.

What type of apples work best for Irresistible Soft Cinnamon Apple Fritters?

Firm, tart apples like Granny Smith or Honeycrisp hold their shape when cooked. Their natural acidity balances the sweetness in Irresistible Soft Cinnamon Apple Fritters. Avoid mealy varieties like Red Delicious.

How do I prevent my apple fritters from absorbing too much oil?

Maintain oil at 350-375°F and fry in small batches to avoid temperature drops. Drain Irresistible Soft Cinnamon Apple Fritters on a wire rack instead of paper towels—this keeps them crisp yet light.

Best Gooey Cinnamon Cream Cheese Muffins – Breakfast Treat

best-gooey-cinnamon-cream-cheese-muffins

“`html

Introduction

There’s something magical about waking up to the warm, comforting aroma of freshly baked muffins. Imagine biting into a soft, fluffy muffin with a gooey cinnamon swirl and a creamy surprise in every bite. That’s exactly what you get with these Gooey Cinnamon Cream Cheese Muffins – Irresistible Breakfast Treat. Whether you’re craving a cozy weekend brunch or need a quick weekday pick-me-up, these muffins deliver joy in every mouthful. Plus, they’re surprisingly easy to make, even if you’re not a baking pro. Let’s dive into why these muffins deserve a spot in your recipe rotation.

About This Recipe

Gooey Cinnamon Cream Cheese Muffins – Irresistible Breakfast Treat combines the rich flavors of cinnamon and cream cheese with a tender, cake-like texture. The muffins feature a sweet cinnamon swirl and a luscious cream cheese filling that melts perfectly as they bake. Not only do they taste incredible, but they also fill your kitchen with an inviting scent that’ll have everyone gathering around the table. These muffins fit perfectly with our blog’s mission to share simple, delicious recipes that bring people together. If you love easy yet impressive baked goods, you’ll adore these muffins as much as we do.

What makes these muffins special is their versatility. You can enjoy them warm out of the oven or pack them for an on-the-go snack. They also pair wonderfully with a cup of coffee or tea, making them ideal for breakfast or an afternoon treat. If you’re looking for more muffin inspiration, check out our Classic Blueberry Muffins or our Spiced Pumpkin Muffins for seasonal variations. No matter which recipe you choose, you’re in for a delicious experience.

Why I Love This Recipe

I’ll never forget the first time I made Gooey Cinnamon Cream Cheese Muffins – Irresistible Breakfast Treat. It was a chilly Sunday morning, and I wanted something special to share with my family. The moment I pulled them out of the oven, the irresistible aroma filled the house, and my kids couldn’t wait to dig in. Seeing their faces light up after that first bite made me realize how much joy baking can bring. Now, these muffins are a staple in our home, and I love how they turn an ordinary morning into something extraordinary. Trust me, once you try them, you’ll understand why they hold a special place in my heart.

“`

Health and Nutrition

Why it’s good for your body

Gooey Cinnamon Cream Cheese Muffins – Irresistible Breakfast Treat pack more than just delicious flavor. First, cinnamon delivers powerful antioxidants that help reduce inflammation and support heart health. Additionally, the cream cheese provides a dose of protein and healthy fats, keeping you fuller for longer. Meanwhile, the warm spices in these muffins may even help regulate blood sugar levels.

Moreover, Gooey Cinnamon Cream Cheese Muffins – Irresistible Breakfast Treat offer a balanced indulgence. Unlike overly sugary pastries, these muffins combine sweetness with wholesome ingredients. For example, whole wheat flour or oat flour alternatives can boost fiber content. As a result, you get sustained energy without a mid-morning crash.

Finally, these muffins make breakfast enjoyable while still being mindful of nutrition. Because they include natural ingredients, you avoid artificial additives. Whether you pair them with fresh fruit or a protein-rich smoothie, Gooey Cinnamon Cream Cheese Muffins – Irresistible Breakfast Treat help you start the day right.

How it fits in a healthy lifestyle

You can easily fit Gooey Cinnamon Cream Cheese Muffins – Irresistible Breakfast Treat into a balanced diet. For instance, enjoy one alongside a Greek yogurt parfait for extra protein and probiotics. Alternatively, pair it with a handful of nuts to add healthy fats and crunch.

If you follow specific dietary needs, simple swaps can make these muffins work for you. Use almond flour for a gluten-free version or reduce sugar for a lower-carb option. For more ideas on balancing treats with nutrition, check out our guide to healthy baking swaps.

Ultimately, moderation is key. These muffins taste indulgent but fit into an active lifestyle when enjoyed mindfully. Whether as a weekend treat or a quick weekday breakfast, they bring joy without derailing your health goals.

Print
clock clock iconcutlery cutlery iconflag flag iconfolder folder iconinstagram instagram iconpinterest pinterest iconfacebook facebook iconprint print iconsquares squares iconheart heart iconheart solid heart solid icon

Gooey Cinnamon Cream Cheese Muffins – Irresistible Breakfast Treat


  • Author: Chef Emy

Description

Deliciously moist muffins with a gooey cinnamon cream cheese center, perfect for breakfast or brunch.


Ingredients

Scale

For the Crust:

  • 2 cups all-purpose flour
  • 1 cup granulated sugar
  • 1 tsp baking powder
  • 1/2 tsp baking soda
  • 1/2 tsp salt
  • 1/2 cup unsalted butter, melted
  • 1 cup buttermilk
  • 2 large eggs
  • 1 tsp vanilla extract
  • 8 oz cream cheese, softened
  • 1/4 cup brown sugar
  • 1 tbsp ground cinnamon

Instructions

1. Prepare the Crust:

  1. Preheat oven to 375°F (190°C) and line a muffin tin with paper liners.
  2. In a large bowl, whisk together flour, granulated sugar, baking powder, baking soda, and salt.
  3. In another bowl, mix melted butter, buttermilk, eggs, and vanilla extract. Pour wet ingredients into dry ingredients and stir until just combined.
  4. In a separate bowl, beat cream cheese, brown sugar, and cinnamon until smooth.
  5. Fill muffin cups halfway with batter, then add a spoonful of cream cheese mixture. Top with remaining batter.
  6. Bake for 20-25 minutes or until a toothpick inserted comes out clean. Let cool slightly before serving.

Notes

You can customize the seasonings to taste.

How to Prepare This Dish

Steps and time-saving tips

Start by preheating your oven to 375°F and lining a muffin tin with paper liners for easy cleanup. In a large bowl, whisk together the dry ingredients—flour, sugar, baking powder, and a pinch of salt—until well combined. Next, mix the wet ingredients in another bowl, including melted butter, eggs, milk, and vanilla extract. Gradually fold the wet mixture into the dry ingredients, stirring just until the batter comes together. Overmixing can make your Gooey Cinnamon Cream Cheese Muffins – Irresistible Breakfast Treat dense, so stop as soon as you see no dry streaks. For the cream cheese filling, beat softened cream cheese with sugar and a splash of vanilla until smooth. Spoon half the muffin batter into the liners, then add a dollop of the cream cheese mixture before topping with the remaining batter. Finally, sprinkle a generous layer of cinnamon sugar on top for that irresistible crunch. Bake for 18-20 minutes until golden and slightly springy. Let them cool for 5 minutes before serving—trust me, the gooey center is worth the wait!

Mistakes I’ve made and learned from

When I first made Gooey Cinnamon Cream Cheese Muffins – Irresistible Breakfast Treat, I overfilled the muffin liners, causing them to spill over and bake unevenly. Now, I fill them only two-thirds full, which gives them room to rise perfectly. Another blunder? Using cold cream cheese straight from the fridge—it clumped instead of blending smoothly. Lesson learned: always soften it first! If you’re new to baking with cream cheese, check out my cream cheese baking tips for more tricks. Also, I once skipped the cooling step and ended up with muffins that fell apart. Patience pays off, just like with my guide to perfect muffin texture. These small tweaks made all the difference!

Cultural Connection and Variations

Where this recipe comes from

Gooey Cinnamon Cream Cheese Muffins – Irresistible Breakfast Treat traces its roots to the cozy kitchens of Eastern Europe, where bakers often paired sweet spices with rich dairy. Imagine chilly mornings in Poland or Hungary, where families tucked into warm pastries layered with cinnamon and farmer’s cheese. Over time, immigrants brought these flavors to America, swapping local cream cheese for traditional quark and turning handheld treats into the indulgent muffins we love today.

Meanwhile, in Sweden, they bake similar goodies called “kanelbullar,” focusing on swirls of cinnamon sugar. Down in Mexico, “conchas” borrow that same spice but crown their sweet breads with crumbly streusel. Even my grandma put her spin on Gooey Cinnamon Cream Cheese Muffins – Irresistible Breakfast Treat by adding orange zest to the batter, claiming citrus brightened winter mornings. Whether served at European coffee houses or Midwestern potlucks, this recipe always carries a hint of nostalgia.

How it fits in today’s cooking

Today, Gooey Cinnamon Cream Cheese Muffins – Irresistible Breakfast Treat bridges old-world charm and modern convenience. Busy home cooks whip them up for Sunday brunches or freeze batches for quick school-day snacks. Some bakers even sneak in whole wheat flour or swap sugar for maple syrup, proving this treat adapts to contemporary tastes. During holidays, they star on breakfast tables alongside fluffy pancakes, merging tradition with today’s leisurely weekend spreads.

Food bloggers spotlight these muffins as meal-prep heroes, while cafes reinvent them as gluten-free delights. Their gooey center and spice-kissed aroma make them a year-round favorite, whether paired with summer berries or autumn apple cider. For more twists on classic recipes, explore our guide to easy baking hacks. No matter how you tweak it, this recipe keeps comfort cooking alive, one irresistible bite at a time.

Taste and Texture

What makes it delicious

Gooey Cinnamon Cream Cheese Muffins – Irresistible Breakfast Treat delivers a symphony of flavors and textures that make every bite unforgettable. The warm, fragrant cinnamon swirls through the tender muffin crumb, while the rich cream cheese center melts luxuriously in your mouth. Each bite contrasts the slightly crisp edges with a soft, pillowy interior, creating a perfect balance. The sweet, buttery aroma fills the kitchen as they bake, promising a cozy, indulgent experience. Plus, the gooey cream cheese adds a tangy richness that cuts through the sweetness, making Gooey Cinnamon Cream Cheese Muffins – Irresistible Breakfast Treat impossible to resist.

Boosting the flavor

Elevate your Gooey Cinnamon Cream Cheese Muffins – Irresistible Breakfast Treat with a few creative tweaks. For extra depth, swap the cinnamon with chai spice blend, adding warmth and complexity. Drizzle a simple vanilla glaze or sprinkle toasted pecans on top for crunch. If you love fruity twists, fold in diced apples or swirl in homemade berry compote before baking. These small changes transform an already delicious treat into something even more special.

Tips for Success

Best practices for results

Always use room-temperature cream cheese for a smooth, lump-free filling in your Gooey Cinnamon Cream Cheese Muffins. Meanwhile, lightly grease the muffin tin or use liners to prevent sticking. For the best texture, avoid overmixing the batter—just fold until combined. Additionally, let the muffins cool for 10 minutes before serving so the filling sets perfectly. Finally, store leftovers in an airtight container to keep them fresh for days.

Mistakes to avoid

One common mistake is overbaking, which dries out the muffins. Instead, check for doneness with a toothpick at the minimum bake time. Another error is skipping the cinnamon swirl layer, which adds essential flavor. For more baking tips, check out our guide on achieving the perfect muffin texture. Also, if your cream cheese filling sinks, try chilling it slightly before adding it to the batter. Learn more about troubleshooting fillings in our cream cheese filling tips post.

Serving and Pairing Suggestions

How to serve this dish

Serve Gooey Cinnamon Cream Cheese Muffins warm to highlight their irresistible melt-in-your-mouth texture. For a stunning presentation, dust them lightly with powdered sugar or drizzle them with a simple vanilla glaze. Arrange them on a rustic wooden board or a tiered stand for brunch gatherings, making them the star of your spread. These muffins also shine during holiday breakfasts, especially when paired with seasonal decor like cinnamon sticks or fresh berries. If you’re hosting a cozy morning get-together, slice one open to reveal the gooey center and let the aroma tempt your guests.

What goes well with it

Pair Gooey Cinnamon Cream Cheese Muffins with a steaming cup of spiced chai latte for a comforting flavor harmony. The warm spices in the drink mirror the cinnamon in the muffins, creating a perfect balance. Alternatively, try them with a cold glass of vanilla almond milk for a lighter, refreshing contrast. For a heartier breakfast spread, serve these muffins alongside our fluffy scrambled eggs or crispy maple bacon. The savory notes of these dishes offset the sweetness of the muffins, making every bite more satisfying.

How do you keep Gooey Cinnamon Cream Cheese Muffins moist?

The key to keeping Gooey Cinnamon Cream Cheese Muffins – Irresistible Breakfast Treat moist is using ingredients like sour cream or Greek yogurt in the batter. These add richness and retain moisture while baking. Additionally, avoid overmixing the batter and store leftovers in an airtight container.

Can I freeze Gooey Cinnamon Cream Cheese Muffins?

Yes! Gooey Cinnamon Cream Cheese Muffins – Irresistible Breakfast Treat freeze beautifully for up to 3 months. Let them cool completely, wrap individually in plastic, then place in a freezer bag. Thaw at room temperature or microwave for 15-20 seconds when ready to enjoy.

What’s the best cream cheese filling for cinnamon muffins?

For Gooey Cinnamon Cream Cheese Muffins – Irresistible Breakfast Treat, blend softened cream cheese with powdered sugar and vanilla for a smooth, sweet filling. Some recipes add a touch of cinnamon to complement the muffin’s spiced flavor. The filling should be thick enough to hold its shape when piped.

Why did my cinnamon cream cheese muffins sink in the middle?

Sinking often occurs when Gooey Cinnamon Cream Cheese Muffins – Irresistible Breakfast Treat are underbaked or the oven temperature is too low. Ensure your leavening agents are fresh and don’t open the oven door too early. The muffins are done when a toothpick comes out with just a few moist crumbs.

Best Apple Cinnamon Rolls – Homemade and Irresistible

best-apple-cinnamon-rolls

“`html

Introduction

There’s something magical about the aroma of warm cinnamon and sweet apples filling your kitchen. Whether you’re craving a cozy weekend treat or a showstopping dessert for guests, these Irresistible Apple Cinnamon Rolls deliver every time. Soft, gooey, and packed with tender apple chunks, they strike the perfect balance between comfort and indulgence. Plus, they’re easier to make than you might think. If you’ve ever hesitated about baking from scratch, let this recipe change your mind. After all, everyone deserves a bite of something truly special.

About This Recipe

Irresistible Apple Cinnamon Rolls combine the best of two worlds: the classic warmth of cinnamon rolls and the fresh, fruity sweetness of apples. Unlike traditional versions, this recipe folds in diced apples for extra moisture and flavor, making each bite unforgettable. These rolls matter because they transform a familiar favorite into something extraordinary. Whether you’re baking for a holiday brunch or just treating yourself, they always feel like a celebration. Moreover, they fit perfectly with the cozy, approachable vibe of this blog, where we believe baking should be joyful and accessible to all.

What sets these Irresistible Apple Cinnamon Rolls apart is their versatility. You can serve them as a decadent breakfast, an afternoon snack, or even dessert with a scoop of vanilla ice cream. The dough stays soft thanks to a simple buttermilk base, while the apple-cinnamon filling adds just the right amount of gooey goodness. If you love experimenting with flavors, try pairing them with a drizzle of caramel or a sprinkle of toasted nuts. For more inspiration, check out our guide to perfect fall baking recipes or our tips for mastering homemade dough. Either way, you’ll find plenty of ways to make this recipe your own.

Why I Love This Recipe

These Irresistible Apple Cinnamon Rolls hold a special place in my heart because they remind me of Sunday mornings growing up. My mom used to bake them whenever family visited, and the whole house would smell like heaven. Now, whenever I make them, I’m instantly transported back to those lazy, laughter-filled days. Beyond nostalgia, I love how forgiving the recipe is. Even if you’re new to baking, the detailed steps ensure success. Most importantly, sharing these rolls with loved ones always creates new memories—and that’s what makes them truly irresistible.

“`

Health and Nutrition

Why it’s good for your body

Irresistible Apple Cinnamon Rolls pack more than just delicious flavor. They also offer surprising health benefits. First, apples bring natural sweetness and fiber, which supports digestion and keeps you fuller longer. Additionally, cinnamon adds antioxidants that may help reduce inflammation and balance blood sugar levels. Together, these ingredients make Irresistible Apple Cinnamon Rolls a smarter indulgence.

Moreover, the recipe includes whole grains or alternative flours for extra nutrients. Whole grains provide B vitamins and fiber, which boost energy and gut health. Meanwhile, the warm spices in Irresistible Apple Cinnamon Rolls, like cinnamon and nutmeg, add flavor without extra sugar. As a result, you satisfy cravings while nourishing your body.

Finally, these rolls can be customized for added nutrition. For example, you can use Greek yogurt in the dough for protein or swap in honey for refined sugar. Whether enjoyed as a breakfast treat or afternoon snack, Irresistible Apple Cinnamon Rolls deliver comfort and goodness in every bite.

How it fits in a healthy lifestyle

Irresistible Apple Cinnamon Rolls fit perfectly into a balanced diet when enjoyed mindfully. Pair them with protein-rich foods like Greek yogurt or nuts to create a satisfying meal. This combo helps stabilize energy levels and prevents sugar crashes. For those watching sugar intake, reducing the glaze or opting for a drizzle of nut butter keeps the sweetness in check.

If you follow specific dietary needs, small tweaks make these rolls work for you. Try gluten-free flour for a celiac-friendly version or almond flour for extra protein. Heart-healthy bakers can use olive oil instead of butter. For more ideas on adapting recipes, check out our guide to healthy baking swaps. You can also explore our tips for enjoying desserts without guilt to keep your lifestyle on track.

Ultimately, Irresistible Apple Cinnamon Rolls prove that treats can be both wholesome and decadent. By savoring them in moderation, you nourish your body and delight your taste buds.

Print
clock clock iconcutlery cutlery iconflag flag iconfolder folder iconinstagram instagram iconpinterest pinterest iconfacebook facebook iconprint print iconsquares squares iconheart heart iconheart solid heart solid icon

Irresistible Apple Cinnamon Rolls


  • Author: Chef Emy

Description

Warm, gooey cinnamon rolls filled with sweet apples and topped with a creamy glaze.


Ingredients

Scale

For the Crust:

  • 2 cups all-purpose flour
  • 1/4 cup granulated sugar
  • 1 packet active dry yeast
  • 1/2 cup warm milk
  • 1/4 cup unsalted butter, melted
  • 1 egg
  • 1/2 tsp salt
  • 2 medium apples, peeled and diced
  • 1/3 cup brown sugar
  • 2 tsp ground cinnamon
  • 1/4 cup chopped walnuts (optional)
  • 1 cup powdered sugar
  • 2 tbsp milk
  • 1/2 tsp vanilla extract

Instructions

1. Prepare the Crust:

  1. In a bowl, mix warm milk, yeast, and 1 tsp sugar. Let sit for 5 minutes until frothy.
  2. Add melted butter, egg, salt, and remaining sugar. Gradually mix in flour to form a dough. Knead for 5 minutes.
  3. Cover dough and let rise in a warm place for 1 hour or until doubled in size.
  4. Roll dough into a rectangle. Sprinkle with brown sugar, cinnamon, diced apples, and walnuts (if using). Roll tightly and slice into 8 pieces.
  5. Place rolls in a greased baking dish. Cover and let rise for 30 minutes.
  6. Bake at 375°F (190°C) for 25-30 minutes until golden brown.
  7. Whisk powdered sugar, milk, and vanilla to make glaze. Drizzle over warm rolls before serving.

Notes

You can customize the seasonings to taste.

How to Prepare This Dish

Steps and time-saving tips

Start by preheating your oven to 375°F so it’s ready when your Irresistible Apple Cinnamon Rolls are prepped. While it heats, whisk together the flour, sugar, and a pinch of salt in a large bowl. Next, cut in cold butter until the mixture resembles coarse crumbs. Pour in warm milk and stir until a soft dough forms. Meanwhile, toss diced apples with cinnamon and brown sugar in a separate bowl—this sweet filling will make your rolls irresistible. Roll out the dough into a rectangle, then evenly spread the apple mixture over it. Tightly roll the dough into a log and slice it into even rounds. Arrange them in a greased baking dish, leaving room to rise. For a time-saving trick, cover the dish and let the rolls rest in the fridge overnight. In the morning, simply bake them for 20-25 minutes until golden. While they cool slightly, whisk powdered sugar with milk for a quick glaze. Drizzle it over the warm rolls, and watch them disappear!

Mistakes I’ve made and learned from

My first batch of Irresistible Apple Cinnamon Rolls turned out dense because I overworked the dough—lesson learned! Now, I mix just until combined, and the texture stays light. Another hiccup? Skipping the resting step, which led to uneven baking. Letting the rolls sit for 10 minutes before slicing ensures clean cuts. I also once burned the glaze by rushing—now I follow my own glaze perfection guide and let the rolls cool slightly first. Trust me, patience pays off with these!

Cultural Connection and Variations

Where this recipe comes from

Irresistible Apple Cinnamon Rolls weave together the cozy flavors of autumn and the warmth of homemade baking. While cinnamon rolls trace their roots to Sweden, where they’re known as “kanelbullar,” adding apples gives this version a distinctly American twist. Many families, especially in the Midwest, fold tart apples into the dough or layer them between swirls of cinnamon sugar, turning a classic treat into a seasonal delight.

Around the world, bakers put their own spin on similar recipes. In Germany, “apfelzimtschnecken” often feature a yeasted dough with spiced apple filling, while Danish versions might use puff pastry for extra flakiness. Some bakers in New England even drizzle their Irresistible Apple Cinnamon Rolls with maple glaze for a local touch. Whether served at breakfast or as an afternoon snack, these rolls carry the comforting aroma of home—no matter where that home might be.

How it fits in today’s cooking

Today, Irresistible Apple Cinnamon Rolls bridge nostalgia and modern convenience. They’re a staple at fall gatherings, from pumpkin-carving parties to Thanksgiving brunch. Busy bakers now streamline the process with overnight rises or quick-rise yeast, proving that tradition can adapt to hectic schedules. For those craving a healthier twist, whole wheat flour or coconut sugar swaps keep the spirit of the recipe alive.

Food bloggers and home cooks also love pairing these rolls with other seasonal favorites, like a steaming mug of homemade pumpkin spice latte or a slice of easy cinnamon apple cake. Whether baked from scratch or enjoyed as a weekend project with kids, Irresistible Apple Cinnamon Rolls remind us that some flavors never go out of style.

Taste and Texture

What makes it delicious

Irresistible Apple Cinnamon Rolls deliver a warm, gooey bite with layers of soft, pillowy dough wrapped around tender apple chunks. The cinnamon swirls melt into a caramel-like sweetness, while the apples add a subtle tartness and juicy texture. Every bite releases a fragrant aroma of buttery pastry and spiced warmth, making it impossible to resist. The cream cheese glaze on top adds a smooth, velvety finish that balances the rich flavors. Whether fresh from the oven or slightly cooled, Irresistible Apple Cinnamon Rolls offer a comforting blend of cozy spices and luscious textures.

Boosting the flavor

For an extra flavor boost, try swapping the glaze with a drizzle of salted caramel sauce to deepen the sweetness. You can also fold toasted pecans into the filling for a crunchy contrast. If you love bold spices, a pinch of nutmeg or cardamom will elevate the cinnamon’s warmth. Pair your rolls with a scoop of homemade vanilla ice cream for a decadent twist. Experimenting with these small tweaks keeps the recipe exciting while preserving its irresistible charm.

Tips for Success

Best practices for results

Always measure your flour correctly by spooning it into the cup and leveling it off—this prevents dense Irresistible Apple Cinnamon Rolls. Meanwhile, make sure your butter stays cold for flaky layers, and don’t skip resting the dough to let the gluten relax. For the best texture, roll the dough evenly so your cinnamon rolls bake uniformly. Finally, warm your cream slightly before drizzling it over the rolls—this helps the glaze soak in perfectly.

Mistakes to avoid

Avoid overmixing the dough, as this can make your Irresistible Apple Cinnamon Rolls tough instead of tender. If your filling leaks out during baking, try sealing the edges tighter or checking out our guide to perfect dough consistency. Also, resist the urge to overbake—pull the rolls from the oven when they’re golden, not dark brown. For more troubleshooting, our post on fixing soggy bottoms covers how to keep your bakes crisp.

Serving and Pairing Suggestions

How to serve this dish

Serve Irresistible Apple Cinnamon Rolls warm to highlight their gooey texture and aromatic spices. For a stunning presentation, arrange them on a rustic wooden board or a vintage cake stand. Drizzle extra caramel sauce over the top and sprinkle chopped walnuts for crunch. Meanwhile, these rolls shine at holiday brunches or cozy weekend gatherings. If you want to impress guests, pair them with a scoop of vanilla ice cream for an indulgent twist.

What goes well with it

A hot cup of spiced chai latte beautifully complements Irresistible Apple Cinnamon Rolls, enhancing their warm flavors. Alternatively, try a cold glass of homemade almond milk for a lighter contrast. For a heartier spread, serve them alongside our Fluffy Scrambled Eggs or a fresh Mixed Berry Salad. The savory eggs balance the sweetness, while the tart berries add a refreshing touch.

What makes Irresistible Apple Cinnamon Rolls so soft and fluffy?

The secret to soft, fluffy Irresistible Apple Cinnamon Rolls lies in the dough. Using warm milk, fresh yeast, and letting the dough rise properly creates a light texture. Adding a touch of butter and kneading well ensures the rolls stay tender and irresistible.

Can I make Irresistible Apple Cinnamon Rolls ahead of time?

Yes! Prepare the rolls up to the shaping stage, then cover and refrigerate overnight. The next morning, let them rise at room temperature before baking. This makes Irresistible Apple Cinnamon Rolls a perfect make-ahead breakfast treat.

What type of apples work best for Irresistible Apple Cinnamon Rolls?

Firm, slightly tart apples like Granny Smith or Honeycrisp work best for Irresistible Apple Cinnamon Rolls. They hold their shape during baking and balance the sweetness. Avoid overly soft varieties that turn mushy in the filling.

How do I store leftover Irresistible Apple Cinnamon Rolls?

Store cooled Irresistible Apple Cinnamon Rolls in an airtight container at room temperature for 2 days or refrigerate for up to 5 days. Reheat briefly in the microwave or oven to restore their fresh-baked texture and aroma.

Best Pumpkin Oatmeal Chocolate Chip Cookies Recipe

best-pumpkin-oatmeal-chocolate-cookies

“`html

Introduction

There’s something magical about the smell of warm spices and pumpkin wafting through the kitchen, especially when it leads to a batch of freshly baked Irresistible Pumpkin Oatmeal Chocolate Chip Cookies. Whether you’re craving a cozy fall treat or a nostalgic bite that reminds you of home, these cookies deliver. Soft, chewy, and packed with rich chocolate chips, they strike the perfect balance between wholesome and indulgent. Plus, they’re easy enough to whip up on a lazy afternoon yet impressive enough to share at gatherings. Trust me, one bite and you’ll understand why these cookies deserve a permanent spot in your recipe rotation.

About This Recipe

Irresistible Pumpkin Oatmeal Chocolate Chip Cookies combine the best of three worlds: the warmth of pumpkin spice, the heartiness of oats, and the decadence of melted chocolate. Unlike traditional pumpkin cookies, this recipe adds rolled oats for texture and depth, making each bite satisfyingly chewy. The pumpkin puree not only infuses moisture but also gives the cookies a subtle earthy sweetness that pairs perfectly with the chocolate. Moreover, these cookies fit seamlessly into any occasion, whether you’re baking for a holiday potluck or simply treating yourself after a long day.

What sets this recipe apart is its versatility. You can customize it with nuts, dried fruit, or even a drizzle of caramel for extra flair. Meanwhile, the blog’s tone celebrates approachable yet elevated baking, so you’ll find tips for perfecting your cookies every time. For example, if you love pumpkin desserts, you might enjoy our pumpkin spice cupcakes for another seasonal favorite. And if you’re new to baking with oats, our oatmeal raisin cookies guide offers helpful techniques you can apply here too.

Why I Love This Recipe

These cookies hold a special place in my heart because they remind me of my grandmother’s kitchen. She always believed the best recipes were the ones that brought people together, and Irresistible Pumpkin Oatmeal Chocolate Chip Cookies do just that. I love how the pumpkin adds a touch of nostalgia while the chocolate chips keep things fun and modern. Every time I bake them, friends and family ask for the recipe, and now I’m thrilled to share it with you. Whether you’re baking for loved ones or just treating yourself, these cookies are a little reminder that the simplest moments can be the sweetest.

“`

Health and Nutrition

Why it’s good for your body

Irresistible Pumpkin Oatmeal Chocolate Chip Cookies pack a nutritious punch while satisfying your sweet tooth. First, pumpkin puree delivers a hefty dose of vitamin A, which supports vision and immune health. Additionally, oats provide soluble fiber to keep you full longer and promote digestive wellness. Moreover, dark chocolate chips add antioxidants that combat inflammation and boost heart health.

Unlike traditional cookies, Irresistible Pumpkin Oatmeal Chocolate Chip Cookies use wholesome ingredients for sustained energy. For instance, pumpkin spices like cinnamon and nutmeg not only enhance flavor but also offer anti-inflammatory benefits. Furthermore, the combination of oats and pumpkin creates a lower glycemic impact, helping to stabilize blood sugar levels. As a result, you can enjoy these cookies without the usual energy crash.

Finally, these cookies balance indulgence with nourishment. While they taste decadent, they also provide protein from oats and healthy fats from ingredients like coconut oil. Therefore, Irresistible Pumpkin Oatmeal Chocolate Chip Cookies make a smarter treat for both kids and adults. Whether you need a midday pick-me-up or a post-workout snack, they deliver flavor and nutrition in every bite.

How it fits in a healthy lifestyle

Irresistible Pumpkin Oatmeal Chocolate Chip Cookies fit seamlessly into a balanced diet. For gluten-free eaters, simply swap regular oats for certified gluten-free varieties. If you follow a heart-healthy plan, the fiber from oats and antioxidants from dark chocolate support cardiovascular wellness. Even better, these cookies pair perfectly with a cup of herbal tea for a mindful afternoon break.

For those tracking macros, Irresistible Pumpkin Oatmeal Chocolate Chip Cookies offer a satisfying blend of carbs, protein, and fats. You can also enjoy them as part of a meal prep routine by freezing batches for quick snacks. Meanwhile, busy parents will love how these cookies sneak veggies into kids’ diets without a fight. Check out our healthy snack swaps for more ways to upgrade your treats guilt-free.

Ultimately, these cookies prove that healthy eating doesn’t mean sacrificing flavor. By choosing nutrient-dense ingredients, you can enjoy Irresistible Pumpkin Oatmeal Chocolate Chip Cookies as part of an active, balanced lifestyle.

Print
clock clock iconcutlery cutlery iconflag flag iconfolder folder iconinstagram instagram iconpinterest pinterest iconfacebook facebook iconprint print iconsquares squares iconheart heart iconheart solid heart solid icon

Irresistible Pumpkin Oatmeal Chocolate Chip Cookies


  • Author: Chef Emy

Description

Soft, chewy cookies packed with pumpkin flavor, oats, and melty chocolate chips.


Ingredients

Scale

For the Crust:

  • 1 cup canned pumpkin puree
  • 1 cup brown sugar
  • 1/2 cup unsalted butter, softened
  • 1 large egg
  • 1 tsp vanilla extract
  • 1 1/2 cups all-purpose flour
  • 1 1/2 cups rolled oats
  • 1 tsp baking soda
  • 1 tsp cinnamon
  • 1/2 tsp nutmeg
  • 1/4 tsp salt
  • 1 cup semi-sweet chocolate chips

Instructions

1. Prepare the Crust:

  1. Preheat oven to 350°F (175°C) and line baking sheets with parchment paper.
  2. In a large bowl, cream together pumpkin puree, brown sugar, butter, egg, and vanilla until smooth.
  3. In a separate bowl, whisk together flour, oats, baking soda, cinnamon, nutmeg, and salt.
  4. Gradually mix dry ingredients into wet ingredients until just combined. Fold in chocolate chips.
  5. Drop tablespoon-sized dough portions onto prepared baking sheets, spacing 2 inches apart.
  6. Bake for 12-14 minutes or until edges are lightly golden. Cool on wire racks before serving.

Notes

You can customize the seasonings to taste.

“`html

How to Prepare This Dish

Steps and time-saving tips

Start by preheating your oven to 350°F and lining two baking sheets with parchment paper. In a large bowl, whisk together the flour, oats, baking soda, cinnamon, and salt until well combined. Next, grab another bowl and beat the softened butter with both sugars until light and fluffy. Add the pumpkin puree, egg, and vanilla, then mix until smooth. Gradually fold the dry ingredients into the wet mixture, stirring just until no streaks of flour remain. Finally, gently fold in the chocolate chips—don’t overmix, or your Irresistible Pumpkin Oatmeal Chocolate Chip Cookies might turn out dense.

Use a cookie scoop or tablespoon to drop dough onto the prepared sheets, spacing them about two inches apart. Lightly flatten each mound with the back of a spoon for even baking. Pop them in the oven for 12-14 minutes, or until the edges turn golden but the centers stay soft. Let the cookies cool on the sheets for five minutes before transferring them to a wire rack. For a time-saving hack, chill the dough for 30 minutes beforehand to prevent spreading. If you’re short on time, bake one tray while prepping the next—this keeps the workflow smooth.

Mistakes I’ve made and learned from

I once rushed the butter step, not letting it soften fully, and ended up with lumpy dough that baked unevenly. Now I pull butter out an hour ahead or gently microwave it in 5-second bursts. Another blunder? Overmeasuring pumpkin puree, which made the cookies cakey instead of chewy. I’ve since learned to spoon the puree into measuring cups and level it off—just like I do with my Perfect Banana Bread. And if your cookies spread too thin, try my trick from this Cookie Baking Tips guide: a pinch more oats absorbs excess moisture. Trust me, these small fixes make all the difference.

“`

Cultural Connection and Variations

Where this recipe comes from

Irresistible Pumpkin Oatmeal Chocolate Chip Cookies blend the cozy flavors of fall with the timeless appeal of a classic cookie. Pumpkin, a staple in Native American cuisine, found its way into early colonial cooking, often appearing in pies and breads. Meanwhile, oatmeal cookies gained popularity in the 1800s as a hearty, affordable treat. Combining these elements with chocolate chips—a mid-20th-century innovation—creates a dessert that feels both nostalgic and fresh.

Around the world, bakers put their own spin on similar recipes. In Australia, they might add macadamia nuts for crunch. In Mexico, a sprinkle of cinnamon and cayenne could bring warmth and spice. Even within the U.S., families tweak Irresistible Pumpkin Oatmeal Chocolate Chip Cookies to suit their tastes—some swap raisins for chocolate chips, while others drizzle them with maple glaze for extra sweetness.

In my kitchen, these cookies signal the start of sweater weather. My grandmother always added a pinch of nutmeg, claiming it “woke up” the pumpkin. Whether you stick to tradition or experiment, these cookies carry stories in every bite.

How it fits in today’s cooking

Today, Irresistible Pumpkin Oatmeal Chocolate Chip Cookies bridge the gap between holiday baking and everyday indulgence. They’re a hit at Halloween parties, Thanksgiving gatherings, or even as a lunchbox surprise. Modern cooks love them for their versatility—you can easily make them gluten-free or vegan without losing their signature warmth.

Busy bakers appreciate how quickly these cookies come together, especially when using pre-made pumpkin puree. For those who love seasonal twists, pairing them with a homemade pumpkin spice latte turns snack time into a ritual. Others fold them into dessert charcuterie boards alongside apple cider donuts for a fall-themed spread.

Whether you’re baking for a crowd or just craving comfort, these cookies fit seamlessly into modern life. They remind us that some flavors never go out of style.

Taste and Texture

What makes it delicious

Irresistible Pumpkin Oatmeal Chocolate Chip Cookies deliver a cozy, spiced warmth with every bite. The pumpkin puree adds a velvety richness, while cinnamon and nutmeg infuse the cookies with a fragrant, autumnal aroma. Chewy oats create a hearty texture, and melty chocolate chips offer pockets of sweet, creamy contrast. Meanwhile, a hint of brown sugar caramelizes the edges for a subtle crispness. Together, these elements make Irresistible Pumpkin Oatmeal Chocolate Chip Cookies a comforting treat that balances softness, chew, and just the right amount of sweetness.

Boosting the flavor

For an extra flavor boost, try folding in toasted pecans or walnuts for a nutty crunch. A sprinkle of flaky sea salt right after baking heightens the chocolate’s richness. If you love warm spices, add a pinch of cardamom or ginger to the dough for deeper complexity. Pair these cookies with a drizzle of homemade caramel sauce or a glass of spiced chai latte to elevate the cozy experience. Small tweaks can transform an already delicious cookie into something unforgettable.

Tips for Success

Best practices for results

Always chill the dough for at least 30 minutes before baking to prevent spreading and ensure thick, chewy Irresistible Pumpkin Oatmeal Chocolate Chip Cookies. Meanwhile, use parchment paper for even baking and easy cleanup. For the best texture, measure your flour correctly by spooning it into the measuring cup and leveling it off. Additionally, slightly underbake the cookies by 1-2 minutes since they continue to firm up as they cool. Finally, let them rest on the baking sheet for 5 minutes before transferring to a wire rack.

Mistakes to avoid

Avoid overmixing the dough, as this can make your Irresistible Pumpkin Oatmeal Chocolate Chip Cookies tough instead of tender. Instead, mix just until the ingredients combine. Also, don’t skip the oats—they add essential chewiness, so opt for old-fashioned rolled oats rather than quick oats. If your cookies spread too much, check out our guide on cookie baking tips for troubleshooting. Lastly, resist using cold butter straight from the fridge; softened butter blends better, as explained in our baking ingredient guide.

Serving and Pairing Suggestions

How to serve this dish

Serve Irresistible Pumpkin Oatmeal Chocolate Chip Cookies warm for a cozy, melt-in-your-mouth experience. Arrange them on a rustic wooden board or a vintage platter to enhance their homemade charm. For special occasions, drizzle them with caramel or dust them lightly with cinnamon for an extra festive touch. These cookies shine at holiday gatherings, fall brunches, or as a sweet afternoon pick-me-up. Meanwhile, stack them in a glass jar with a ribbon for a delightful edible gift.

What goes well with it

Pair Irresistible Pumpkin Oatmeal Chocolate Chip Cookies with a steaming mug of spiced chai latte for a perfect balance of warmth and sweetness. Alternatively, try them alongside a scoop of vanilla bean ice cream for an indulgent dessert twist. If you love contrasting flavors, serve them with our Salted Caramel Mocha to highlight the cookies’ rich pumpkin notes. For a lighter option, enjoy them with our Creamy Pumpkin Soup as part of a seasonal meal.

Can I make Irresistible Pumpkin Oatmeal Chocolate Chip Cookies gluten-free?

Yes! Substitute the all-purpose flour with a gluten-free 1:1 baking blend to make these Irresistible Pumpkin Oatmeal Chocolate Chip Cookies gluten-free. Ensure your oats are certified gluten-free, as cross-contamination is common. The cookies will still have the same soft, chewy texture.

How do I store Irresistible Pumpkin Oatmeal Chocolate Chip Cookies to keep them fresh?

Store these cookies in an airtight container at room temperature for up to 5 days. For longer freshness, freeze the baked Irresistible Pumpkin Oatmeal Chocolate Chip Cookies in a sealed bag for up to 3 months—just thaw at room temperature before enjoying.

Can I use quick oats instead of old-fashioned oats in this recipe?

Old-fashioned oats work best for Irresistible Pumpkin Oatmeal Chocolate Chip Cookies because they provide a heartier texture. Quick oats will soften more during baking, resulting in a less chewy cookie. If you only have quick oats, reduce the baking time by 1-2 minutes.

Why are my pumpkin oatmeal chocolate chip cookies too cakey?

Too much pumpkin puree or overmixing the dough can make these cookies cakey. For the perfect texture, measure pumpkin puree accurately and mix just until combined. Irresistible Pumpkin Oatmeal Chocolate Chip Cookies should be soft but slightly dense, not fluffy like cake.

Best Crockpot Chocolate Lava Cake – Rich & Decadent

best-crockpot-chocolate-lava-cake

“`html

Introduction

There’s something undeniably magical about a warm, gooey chocolate dessert that melts in your mouth. Whether you’re craving comfort after a long day or planning a cozy gathering, this Decadent Crockpot Chocolate Lava Cake delivers pure indulgence with minimal effort. Imagine rich, fudgy cake with a molten center, slowly simmering in your slow cooker while filling your kitchen with an irresistible aroma. Best of all, it’s nearly impossible to mess up—just set it and forget it. If you love effortless desserts that wow everyone, this recipe is about to become your new favorite.

About This Recipe

Decadent Crockpot Chocolate Lava Cake is exactly what it sounds like: a luscious, chocolatey dessert with a velvety molten core, cooked right in your slow cooker. Unlike traditional oven-baked lava cakes, this version requires no fussing over water baths or precise baking times. Simply mix the batter, let the crockpot work its magic, and scoop out perfection. This recipe matters because it solves two big problems: it’s forgiving for beginner bakers, and it frees up oven space for busy cooks. Plus, it fits our blog’s mission to share approachable, crowd-pleasing recipes—like our Easy Fudge Brownies—that make life sweeter without the stress.

What sets this dessert apart is its versatility. Serve it straight from the crockpot for a rustic family-style treat, or dress it up with fresh berries and whipped cream for a dinner party. The slow cooker ensures even heat distribution, so every bite stays moist and decadent. If you’re a fan of set-and-forget desserts, you’ll also adore our Cinnamon Roll Casserole, another hands-off favorite. Whether you’re a chocolate enthusiast or just need a guaranteed hit for potlucks, this cake checks all the boxes.

Why I Love This Recipe

This Decadent Crockpot Chocolate Lava Cake holds a special place in my heart because it’s the dessert that saved my first dinner party disaster. Years ago, I overcooked the main course and needed a foolproof backup—cue this recipe. Not only did it come together in minutes, but my guests raved about it so much that they ignored the charred chicken entirely. Now, I make it whenever I need a guaranteed smile, whether for weeknight cravings or last-minute guests. It’s the kind of dessert that feels fancy but never fails, and that’s exactly what I love about it.

“`

Health and Nutrition

Why it’s good for your body

Decadent Crockpot Chocolate Lava Cake might seem indulgent, but it actually offers some surprising health perks. First, dark chocolate, a key ingredient, packs antioxidants that fight inflammation and support heart health. Additionally, cocoa improves blood flow and may even boost mood by releasing endorphins. Meanwhile, the slow-cooking process preserves nutrients better than high-heat methods, ensuring you get the most from each bite.

Moreover, Decadent Crockpot Chocolate Lava Cake contains eggs, which provide high-quality protein and essential amino acids. These nutrients help repair muscles and keep you full longer. Furthermore, when you use natural sweeteners like honey or maple syrup, you avoid refined sugars, making this dessert a smarter choice. Finally, because it’s made in a crockpot, you skip the need for excessive oils or butter, cutting down on unnecessary fats without sacrificing flavor.

Of course, moderation is key, but Decadent Crockpot Chocolate Lava Cake can be part of a balanced diet. Whether you enjoy it as an occasional treat or a post-workout reward, its wholesome ingredients make it a guilt-free pleasure. Plus, the rich, molten center satisfies cravings, so you’re less likely to overindulge later.

How it fits in a healthy lifestyle

Decadent Crockpot Chocolate Lava Cake fits seamlessly into a mindful eating plan. If you’re gluten-free, simply swap regular flour for almond or oat flour—it’s just as delicious. For those focused on heart health, dark chocolate’s flavonoids support circulation, while the absence of processed sugars keeps blood sugar stable. Even fitness enthusiasts can enjoy this dessert, as the protein from eggs aids recovery after a tough workout.

Planning ahead helps too. Pair a small portion with fresh berries for added fiber, or serve it alongside a scoop of Greek yogurt for extra protein. If you love baking but want to keep things balanced, check out our guide to healthy dessert swaps for more inspiration. And if you’re curious about other slow-cooker treats, our collection of crockpot desserts offers plenty of nutritious options. With smart choices, you can savor every bite without derailing your goals.

Print
clock clock iconcutlery cutlery iconflag flag iconfolder folder iconinstagram instagram iconpinterest pinterest iconfacebook facebook iconprint print iconsquares squares iconheart heart iconheart solid heart solid icon

Decadent Crockpot Chocolate Lava Cake


  • Author: Chef Emy

Description

A rich and gooey chocolate lava cake made effortlessly in a crockpot.


Ingredients

Scale

For the Crust:

  • 1 box chocolate cake mix
  • 1 3.9 oz package instant chocolate pudding mix
  • 2 cups milk
  • 1 cup semi-sweet chocolate chips
  • 1/2 cup unsalted butter, melted
  • 1/4 cup granulated sugar
  • 1 tsp vanilla extract
  • Whipped cream or ice cream for serving

Instructions

1. Prepare the Crust:

  1. Grease the inside of your crockpot with butter or non-stick spray.
  2. In a large bowl, whisk together the cake mix, pudding mix, milk, melted butter, sugar, and vanilla extract until smooth.
  3. Fold in the chocolate chips.
  4. Pour the batter into the greased crockpot and spread evenly.
  5. Cover and cook on LOW for 2.5 to 3 hours, or until the edges are set but the center is still slightly gooey.
  6. Serve warm with whipped cream or ice cream.

Notes

You can customize the seasonings to taste.

How to Prepare This Dish

Steps and time-saving tips

Start by greasing your crockpot lightly with butter or non-stick spray to ensure your Decadent Crockpot Chocolate Lava Cake slides out effortlessly later. In a large bowl, whisk together the dry ingredients—flour, cocoa powder, sugar, and a pinch of salt—until fully combined. Next, melt the butter and chocolate together in a microwave-safe bowl, stirring every 30 seconds to avoid burning. Once smooth, let it cool slightly before adding eggs and vanilla, whisking vigorously to create a glossy batter. Gradually fold the dry mixture into the wet ingredients, stirring just until no streaks remain. Pour the batter into the crockpot, then cover and cook on low for about 2 hours. Meanwhile, resist the urge to peek, as lifting the lid can disrupt the cooking process. To save time, prep your toppings—like whipped cream or berries—while the cake bakes. When the edges are set but the center still jiggles slightly, your Decadent Crockpot Chocolate Lava Cake is ready. Let it rest for 10 minutes before serving to allow the molten center to thicken perfectly.

Mistakes I’ve made and learned from

Early on, I learned the hard way that overmixing the batter leads to a dense, rubbery texture instead of the rich, gooey center we all crave. Now, I stop stirring as soon as the ingredients are incorporated. Another blunder? Skipping the cooling step for the melted chocolate. Once, I added eggs directly to hot chocolate, which scrambled them slightly—yikes! Letting the mixture cool for 5 minutes fixes this. For more crockpot dessert tips, check out my guide on crockpot dessert hacks. And if you’ve ever wondered why your cake sticks despite greasing, my post on non-stick crockpot tricks covers the best ways to prevent it. Trust me, these small adjustments make all the difference!

Cultural Connection and Variations

Where this recipe comes from

Decadent Crockpot Chocolate Lava Cake feels like a warm hug from your grandmother’s kitchen, but its roots stretch far beyond any single tradition. While molten chocolate cakes gained fame in upscale French restaurants during the 1980s, home cooks quickly embraced the idea of a gooey, rich dessert with humble ingredients. Interestingly, many cultures have their own spin on this indulgent treat. In Mexico, for instance, bakers often infuse the batter with cinnamon or chili for a subtle kick. Meanwhile, in Japan, matcha powder sometimes replaces cocoa for a vibrant twist.

My family’s version of Decadent Crockpot Chocolate Lava Cake leans into simplicity. We toss everything into the slow cooker and let it work its magic while we focus on holiday gatherings or weeknight chaos. Some friends swear by adding espresso powder to deepen the chocolate flavor, while others layer in peanut butter or caramel swirls. No matter the variation, the result is always a crowd-pleaser—proof that comfort food transcends borders.

How it fits in today’s cooking

Today, this dessert thrives as a versatile star for busy home cooks. Since it requires minimal hands-on time, Decadent Crockpot Chocolate Lava Cake fits seamlessly into modern routines, whether you’re hosting a last-minute dinner party or craving a cozy treat after a long day. Many families now include it in their holiday rotations, pairing it with easy holiday desserts for stress-free celebrations.

Adaptations keep it fresh, too. Health-conscious bakers might swap in almond flour or coconut sugar, while others experiment with dairy-free chocolate for dietary needs. For those who love shortcuts, prepping the dry mix ahead of time saves even more effort. And if you’re curious about other slow cooker wonders, check out our guide to slow cooker baking for more inspiration. One thing’s certain: this recipe isn’t going anywhere.

Taste and Texture

What makes it delicious

Decadent Crockpot Chocolate Lava Cake delivers an irresistible sensory experience. The moment you lift the lid, rich cocoa aromas flood the air, promising deep, fudgy indulgence. Each spoonful reveals a velvety molten center that oozes luxuriously, contrasting with the cake’s tender outer edges. High-quality dark chocolate and a touch of espresso powder intensify the bittersweet depth, while vanilla extract adds a warm, fragrant note. Meanwhile, the slow-cooked method ensures every bite stays impossibly moist—almost pudding-like—yet structured enough to hold its shape. Whether served warm or slightly cooled, Decadent Crockpot Chocolate Lava Cake feels like a hug in dessert form.

Boosting the flavor

Elevate your Decadent Crockpot Chocolate Lava Cake with a few easy tweaks. First, swirl in a spoonful of peanut butter or salted caramel sauce before cooking for a salty-sweet twist. Alternatively, top each serving with fresh raspberries or a dusting of chili powder to play up the chocolate’s complexity. For extra richness, serve it alongside homemade vanilla ice cream, letting the cold cream melt into the warm lava cake. A sprinkle of flaky sea salt or toasted nuts adds crunch, balancing the dessert’s lush texture. With these small upgrades, every bite becomes even more memorable.

Tips for Success

Best practices for results

Always grease your crockpot thoroughly to prevent the Decadent Crockpot Chocolate Lava Cake from sticking. Meanwhile, use high-quality cocoa powder for a richer flavor, and avoid overmixing the batter to keep the texture light. For even cooking, spread the batter smoothly before turning on the slow cooker. Additionally, check the cake at the minimum cook time to prevent overbaking—the center should stay slightly gooey. Finally, let the cake rest for 10 minutes before serving so the lava center sets perfectly.

Mistakes to avoid

One common mistake is skipping the greasing step, which can make the cake difficult to remove. Instead, lightly coat the crockpot with butter or nonstick spray. Another error is overcooking the cake, resulting in a dry texture rather than a molten center. To fix this, follow the recommended cook time and test with a toothpick for doneness. If you need more slow cooker dessert tips, check out our guide on crockpot desserts. Also, ensure your ingredients are at room temperature for even mixing—cold eggs or butter can affect the batter. For more troubleshooting advice, explore our baking mistakes article.

Serving and Pairing Suggestions

How to serve this dish

Serve Decadent Crockpot Chocolate Lava Cake warm for the ultimate gooey experience. Scoop it directly into individual bowls or ramekins for a cozy, rustic presentation. Meanwhile, drizzle extra chocolate sauce on top and add a sprinkle of powdered sugar for elegance. For special occasions, garnish with fresh berries or a dollop of whipped cream to balance the richness. Whether you’re hosting a holiday gathering or a casual weeknight treat, this dessert instantly elevates any table.

What goes well with it

Pair Decadent Crockpot Chocolate Lava Cake with a scoop of vanilla ice cream for a classic contrast of warm and cold textures. Alternatively, try it alongside a cup of freshly brewed coffee, as the bold flavor cuts through the sweetness perfectly. For a fruity twist, serve it with our Homemade Berry Compote, which adds a tangy brightness. If you love rich desserts, our Salted Caramel Sauce also makes a decadent topping, enhancing the chocolate with a hint of saltiness.

Can you make Decadent Crockpot Chocolate Lava Cake with a boxed cake mix?

Yes, you can simplify the recipe by using a boxed chocolate cake mix. Just prepare the mix as directed, pour it into your crockpot, and add a layer of chocolate chips or ganache in the middle to create the lava effect. The Decadent Crockpot Chocolate Lava Cake will still turn out rich and gooey with minimal effort.

How long does it take to cook Decadent Crockpot Chocolate Lava Cake?

Decadent Crockpot Chocolate Lava Cake typically takes 2–3 hours on high or 4–5 hours on low, depending on your slow cooker. Check the cake’s edges for doneness while ensuring the center stays molten. Overcooking can reduce the lava effect, so monitor it closely.

What toppings go best with Decadent Crockpot Chocolate Lava Cake?

Classic toppings like vanilla ice cream, whipped cream, or fresh berries pair perfectly with Decadent Crockpot Chocolate Lava Cake. For extra indulgence, drizzle caramel or raspberry sauce over the warm cake. The contrast of cool toppings with the rich, molten chocolate creates a heavenly dessert.

Can you make Decadent Crockpot Chocolate Lava Cake ahead of time?

While it’s best served fresh, you can prepare the batter ahead and refrigerate it for up to 24 hours before cooking. Just pour it into the crockpot and adjust the cooking time slightly since cold batter may take longer. Decadent Crockpot Chocolate Lava Cake tastes best warm, so reheat leftovers gently if needed.

Best Decadent Protein Lava Cake Recipe

best-decadent-protein-lava-cake

“`html

Introduction

There’s something magical about cutting into a warm, gooey lava cake and watching rich chocolate spill out—especially when it’s guilt-free. If you’ve ever craved dessert but hesitated because of macros, this Decadent Protein Lava Cake Recipe is your answer. Imagine indulging in a velvety, molten center packed with protein, all while staying on track with your health goals. Whether you’re a fitness enthusiast, a busy parent, or just someone who loves dessert, this recipe delivers satisfaction without compromise. Plus, it’s ready in under 15 minutes, making it the perfect treat for any sweet tooth emergency.

About This Recipe

The Decadent Protein Lava Cake Recipe redefines healthy dessert by combining the luxury of a classic lava cake with the benefits of high-quality protein. Unlike traditional versions loaded with sugar and empty calories, this recipe uses clean ingredients like almond flour, cocoa powder, and protein powder to create a nutrient-dense yet irresistible treat. It’s perfect for post-workout recovery, late-night cravings, or even impressing guests who wouldn’t guess it’s packed with protein. Moreover, it aligns perfectly with our blog’s mission to prove that healthy eating never means sacrificing flavor. For more protein-packed desserts, check out our fluffy protein pancakes or our fudgy healthy brownies.

What sets this recipe apart is its simplicity. You don’t need fancy equipment or hard-to-find ingredients—just a microwave or oven and a craving for chocolate. The result? A dessert that feels decadent but fuels your body. Whether you follow a high-protein diet or simply want a smarter way to enjoy sweets, this lava cake bridges the gap between indulgence and nutrition. It’s also versatile: swap the protein flavor, add a drizzle of nut butter, or top with fresh berries for endless variations. Ultimately, this recipe proves that healthy desserts can—and should—be just as satisfying as the classics.

Why I Love This Recipe

This Decadent Protein Lava Cake Recipe holds a special place in my heart because it saved countless evenings when my sweet tooth threatened to derail my goals. As someone who balances a love for baking with an active lifestyle, I struggled to find desserts that felt indulgent without the guilt. Then, I discovered this recipe. The first time I made it, I couldn’t believe how rich and satisfying it tasted—like a dessert straight from a restaurant, yet packed with protein. Now, it’s my go-to for cozy nights in, post-gym rewards, and even quick meal prep. It’s proof that eating well doesn’t mean missing out on life’s little joys.

“`

Health and Nutrition

Why it’s good for your body

The Decadent Protein Lava Cake Recipe packs a powerful nutritional punch while satisfying your sweet tooth. First, it delivers high-quality protein to support muscle recovery and keep you full longer. Unlike traditional desserts, this recipe uses clean ingredients like almond flour and whey protein, so you avoid unnecessary sugars and refined carbs. Additionally, the healthy fats from ingredients like dark chocolate promote heart health and steady energy levels.

Moreover, the Decadent Protein Lava Cake Recipe includes antioxidants from cocoa, which combat inflammation and boost brain function. Transitioning to healthier dessert options like this one can help curb cravings without derailing your goals. Furthermore, the balanced macronutrient profile makes it a smart choice for post-workout recovery or a guilt-free treat. Finally, the fiber-rich almond flour aids digestion, ensuring you enjoy every bite without discomfort.

Whether you need a protein boost or a mindful indulgence, the Decadent Protein Lava Cake Recipe offers both. Its nutrient-dense ingredients provide lasting energy, making it a standout choice for health-conscious dessert lovers.

How it fits in a healthy lifestyle

The Decadent Protein Lava Cake Recipe fits seamlessly into a balanced diet, especially if you prioritize high-protein or gluten-free eating. It’s perfect for fitness enthusiasts who want a post-workout treat that supports muscle repair. For those following a gluten-free lifestyle, almond flour replaces traditional wheat flour, making it a safe and delicious option.

If you’re meal prepping or need quick healthy snacks, this recipe pairs well with other high-protein staples like protein pancakes or energy bites. You can enjoy it as an occasional dessert or even a post-dinner protein boost. Because it’s lower in sugar than conventional cakes, it aligns with heart-healthy and weight management goals too. The Decadent Protein Lava Cake Recipe proves that eating well doesn’t mean sacrificing flavor.

Print
clock clock iconcutlery cutlery iconflag flag iconfolder folder iconinstagram instagram iconpinterest pinterest iconfacebook facebook iconprint print iconsquares squares iconheart heart iconheart solid heart solid icon

Decadent Protein Lava Cake


  • Author: Chef Emy

Description

A rich and gooey protein-packed lava cake that satisfies your sweet tooth while keeping it healthy.


Ingredients

Scale

For the Crust:

  • 1 scoop chocolate protein powder
  • 2 tbsp cocoa powder
  • 1/4 cup almond flour
  • 1/2 tsp baking powder
  • 1 large egg
  • 2 tbsp almond milk
  • 1 tbsp maple syrup
  • 1 tbsp dark chocolate chips
  • 1 tsp coconut oil

Instructions

1. Prepare the Crust:

  1. Preheat oven to 350°F (175°C) and grease a ramekin with coconut oil.
  2. In a bowl, mix protein powder, cocoa powder, almond flour, and baking powder.
  3. Add egg, almond milk, and maple syrup to the dry ingredients. Stir until smooth.
  4. Pour half the batter into the ramekin, place chocolate chips in the center, then cover with remaining batter.
  5. Bake for 12-15 minutes until edges are set but center is still soft.
  6. Let cool for 2 minutes, then invert onto a plate and serve warm.

Notes

You can customize the seasonings to taste.

How to Prepare This Dish

Steps and time-saving tips

Start by preheating your oven to 350°F and lightly greasing two ramekins with cooking spray. Next, whisk together the dry ingredients—protein powder, cocoa powder, and a pinch of salt—in a medium bowl. In a separate bowl, mix the wet ingredients: almond milk, melted coconut oil, and a splash of vanilla extract. Gradually fold the dry mixture into the wet ingredients until just combined, being careful not to overmix. For a richer texture, gently stir in dark chocolate chips. Divide the batter evenly between the ramekins and bake for 12-14 minutes until the edges set but the center stays slightly gooey. Meanwhile, whip up a quick protein frosting by blending Greek yogurt with a scoop of vanilla protein powder. Once the cakes cool for a minute, drizzle the frosting on top or serve with a dollop of peanut butter. To save time, prep the dry mix ahead and store it in an airtight container. If you’re short on ramekins, a muffin tin works in a pinch—just adjust the baking time down by 2-3 minutes.

Mistakes I’ve made and learned from

My first attempt at this Decadent Protein Lava Cake Recipe turned into a dry, crumbly mess because I overbaked it. I learned to pull the cakes out when the centers still jiggle slightly—they’ll firm up as they cool. Another blunder? Using cold ingredients straight from the fridge, which made the batter lumpy. Now I let everything sit at room temperature for 10 minutes first, just like I do with my Protein Pancakes. And if your lava cake sticks to the ramekin, don’t panic. Run a knife around the edges and invert it onto a plate—or embrace the mess and call it a deconstructed dessert. For more troubleshooting, my guide on Baking with Protein Powder covers how to adjust for different brands. Trust me, even the flops taste good with extra drizzle!

Cultural Connection and Variations

Where this recipe comes from

The Decadent Protein Lava Cake Recipe takes inspiration from the classic French molten chocolate cake, but with a modern, health-conscious twist. Chefs first popularized the original version in the 1980s, and it quickly became a symbol of indulgence. However, today’s fitness-focused world craves that same rich experience without the guilt. That’s where this protein-packed adaptation shines.

Around the globe, bakers put their own spin on lava cakes. In Japan, matcha or red bean paste often replaces chocolate for a earthy-sweet center. Meanwhile, Mexican cooks might infuse the batter with cinnamon or chili for a warm kick. Even in my own kitchen, I’ve tweaked the Decadent Protein Lava Cake Recipe by swapping whey protein for plant-based alternatives, proving how versatile this dessert can be.

What makes this recipe special is its balance of nostalgia and innovation. Whether you grew up savoring gooey chocolate desserts or you’re new to protein baking, it bridges tradition and modern tastes effortlessly. Plus, it’s a crowd-pleaser at gatherings, from birthday parties to post-workout treats.

How it fits in today’s cooking

The Decadent Protein Lava Cake Recipe fits perfectly into today’s cooking trends, where flavor and nutrition go hand in hand. Busy home cooks love how quickly it comes together, making it ideal for weeknight desserts or impromptu celebrations. Fitness enthusiasts also appreciate it as a high-protein reward after a tough workout, proving that indulgence doesn’t have to derail goals.

Modern adaptations keep this recipe fresh. Some bakers layer it with peanut butter fudge for extra richness, while others top it with fresh berries for a lighter touch. It’s also a star during holidays—imagine serving mini lava cakes at a Valentine’s Day dinner or alongside pumpkin muffins for a festive fall spread.

Ultimately, this recipe thrives because it adapts to our changing lifestyles. Whether you’re meal prepping or hosting friends, the Decadent Protein Lava Cake Recipe delivers comfort without compromise.

Taste and Texture

What makes it delicious

One bite of this Decadent Protein Lava Cake Recipe reveals a rich, molten center that oozes with velvety chocolate goodness. The outer layer bakes into a tender, slightly crisp crust, while the inside stays luxuriously gooey—almost like a warm pudding. High-quality cocoa powder and a touch of vanilla extract deepen the chocolate flavor, making it intensely fragrant and irresistible. Meanwhile, the protein blend keeps the texture perfectly balanced, neither too dense nor too light. Every spoonful of this Decadent Protein Lava Cake Recipe melts on your tongue, leaving behind a satisfying, slightly sweet finish that feels indulgent yet wholesome.

Boosting the flavor

For an extra flavor boost, try swirling a spoonful of almond butter into the batter before baking—it adds a nutty richness that pairs beautifully with chocolate. Alternatively, top your warm lava cake with a scoop of protein ice cream for a cool, creamy contrast. A sprinkle of sea salt or a drizzle of sugar-free chocolate sauce can also elevate the dessert, balancing sweetness with depth. Experiment with espresso powder for a mocha twist or fold in dark chocolate chunks for extra bursts of decadence. The possibilities are endless!

Tips for Success

Best practices for results

Always preheat your oven before baking the Decadent Protein Lava Cake Recipe to ensure even cooking. Meanwhile, lightly grease your ramekins with coconut oil for easy release later. For the perfect lava center, stick to the exact baking time—overbaking will firm up the gooey middle. Additionally, let the cakes rest for 2 minutes after baking so they set slightly but stay molten inside. Finally, dust with cocoa powder right before serving for a professional touch.

Mistakes to avoid

Avoid overmixing the batter, as this can make your Decadent Protein Lava Cake Recipe dense instead of fluffy. Instead, gently fold ingredients until just combined. Many bakers also skip sifting the protein powder, which leads to clumps—always sift dry ingredients first for smoother texture. If your cakes stick, check out our non-stick baking guide for foolproof solutions. Lastly, don’t substitute liquid sweeteners without adjusting other liquids; our sweetener swap tips explain how to balance wet and dry ingredients properly.

Serving and Pairing Suggestions

How to serve this dish

Make your Decadent Protein Lava Cake Recipe shine by serving it warm for that irresistible molten center. For a stunning presentation, dust the top with cocoa powder or a light sprinkle of powdered sugar. Meanwhile, a scoop of vanilla protein ice cream or fresh berries adds both color and texture. Perfect for date nights or post-workout treats, this dish also wows at holiday gatherings when plated on elegant dessert stands. Finally, drizzle melted dark chocolate or a dollop of Greek yogurt for extra flair.

What goes well with it

Pair your Decadent Protein Lava Cake Recipe with a creamy peanut butter protein shake to balance the rich chocolate flavors. Alternatively, try it alongside our Healthy Chocolate Covered Strawberries for a fruity contrast. If you prefer warm drinks, a spiced chai latte enhances the cozy vibe. For more pairing inspiration, explore our High-Protein Dessert Ideas to create a guilt-free indulgence spread.

Can you make a Decadent Protein Lava Cake without protein powder?

Yes, you can substitute protein powder with almond flour or oat flour in a Decadent Protein Lava Cake Recipe. However, the texture and protein content will differ slightly. For best results, use a high-quality protein powder to maintain the rich, gooey center.

How do you store leftover Decadent Protein Lava Cake?

Store leftover Decadent Protein Lava Cake in an airtight container in the refrigerator for up to 3 days. Reheat in the microwave for 15-20 seconds to restore the molten center. For longer storage, freeze individual portions and thaw before reheating.

What’s the best protein powder for a Decadent Protein Lava Cake?

Whey-casein blends or plant-based proteins like pea protein work best for a Decadent Protein Lava Cake Recipe. Choose unflavored or chocolate varieties to enhance the rich taste. Avoid gritty textures by sifting the powder before mixing.

Can you make Decadent Protein Lava Cake in the microwave?

Absolutely! A microwave Decadent Protein Lava Cake takes just 60-90 seconds. Use a microwave-safe ramekin and check frequently to avoid overcooking. The result will be slightly less crispy than oven-baked but equally delicious with a molten center.