Easy Homemade Sweetened Condensed Milk Recipe

easy-homemade-sweetened-condensed-milk

“`html

Introduction

There’s something magical about the rich, velvety sweetness of homemade condensed milk—it transforms ordinary desserts into unforgettable treats. Whether you’re drizzling it over warm pancakes, stirring it into your morning coffee, or using it as the secret ingredient in your favorite cake, this Creamy Homemade Sweetened Condensed Milk Recipe delivers perfection every time. Unlike store-bought versions, making it yourself lets you control the ingredients, avoid preservatives, and customize the flavor to your liking. Plus, it’s surprisingly simple to whip up with just a few pantry staples. Trust me, once you try this method, you’ll never go back to the canned stuff.

About This Recipe

Creamy Homemade Sweetened Condensed Milk Recipe is exactly what it sounds like—a luscious, thick, and sweet milk reduction that’s perfect for baking, desserts, or even as a coffee creamer. Unlike traditional methods that require hours of simmering, this version speeds up the process without sacrificing flavor or texture. By combining milk, sugar, and a touch of butter, you create a silky-smooth concoction that rivals anything from a can. What makes this recipe special is its versatility. Whether you’re making fluffy vanilla cupcakes or a decadent tres leches cake, this condensed milk elevates every dish.

Why does this matter? For starters, homemade means no artificial additives or high-fructose corn syrup—just pure, wholesome ingredients. Additionally, if you’ve ever found yourself mid-recipe without a can of condensed milk, this recipe saves the day. It’s also a game-changer for those with dietary preferences, as you can easily swap regular milk for plant-based alternatives. If you love experimenting in the kitchen, you’ll appreciate how this recipe aligns with our blog’s philosophy of simple, high-quality ingredients. Speaking of kitchen experiments, our perfect fudgy brownies pair wonderfully with this condensed milk for an extra-indulgent twist.

Why I Love This Recipe

This Creamy Homemade Sweetened Condensed Milk Recipe holds a special place in my heart because it reminds me of my grandmother’s kitchen. She always had a jar of homemade condensed milk tucked away, ready to sweeten our afternoon teas or elevate a simple bowl of fruit. Making it myself brings back those warm memories while allowing me to put my own spin on it. I love how forgiving the recipe is—whether I’m in a hurry or taking my time, it turns out perfectly every time. Most of all, I adore the way it makes even the simplest desserts feel luxurious, proving that a little effort goes a long way in creating something truly special.

“`

Health and Nutrition

Why it’s good for your body

Creamy Homemade Sweetened Condensed Milk Recipe offers several health benefits when enjoyed in moderation. First, it provides a quick energy boost thanks to its natural sugars, which can fuel your body during busy days. Additionally, because you control the ingredients, you can avoid unnecessary additives found in store-bought versions. For instance, using high-quality dairy or plant-based milk ensures you get essential nutrients like calcium and vitamin D.

Moreover, Creamy Homemade Sweetened Condensed Milk Recipe contains healthy fats that support brain function and keep you satisfied. Unlike processed alternatives, this homemade version lets you adjust sweetness levels, reducing excess sugar intake. Transitioning to a cleaner ingredient list also means fewer preservatives, which benefits digestion and overall wellness. Finally, the recipe’s simplicity means you avoid hidden chemicals, making it a smarter choice for long-term health.

How it fits in a healthy lifestyle

Creamy Homemade Sweetened Condensed Milk Recipe fits seamlessly into balanced eating habits. For those managing gluten sensitivities, this recipe naturally avoids gluten-containing ingredients. If you prefer plant-based options, simply swap dairy milk for almond or coconut milk to align with a vegan diet. Pair it with nutritious dessert recipes for a guilt-free treat.

Including this recipe in moderation supports heart health by allowing you to skip processed sugars. You can also use it in protein-packed breakfasts like oatmeal or smoothies for sustained energy. By making it at home, you prioritize quality ingredients that complement an active, health-conscious lifestyle without sacrificing flavor.
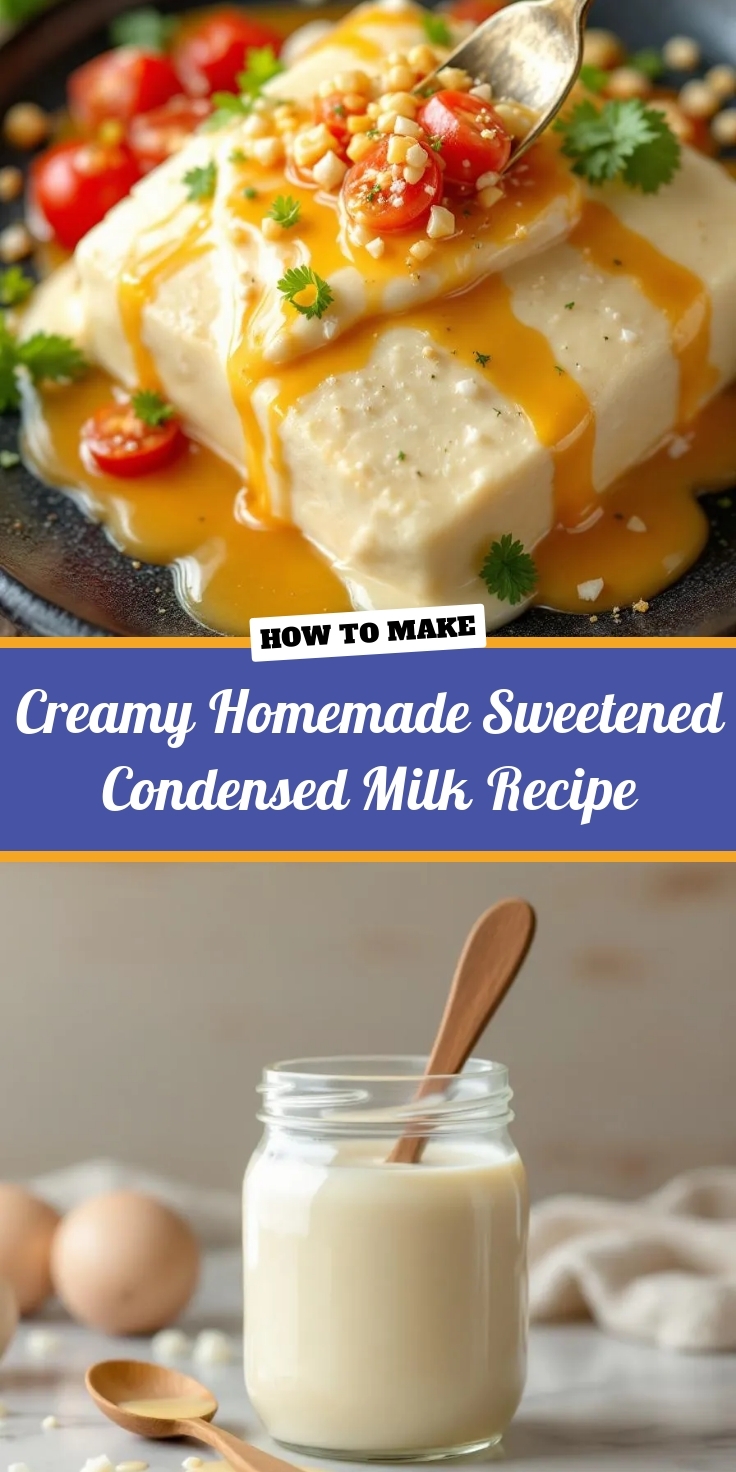
Print
clock clock iconcutlery cutlery iconflag flag iconfolder folder iconinstagram instagram iconpinterest pinterest iconfacebook facebook iconprint print iconsquares squares iconheart heart iconheart solid heart solid icon

Creamy Homemade Sweetened Condensed Milk


  • Author: Chef Emy

Description

A rich and creamy homemade version of sweetened condensed milk, perfect for desserts and coffee.
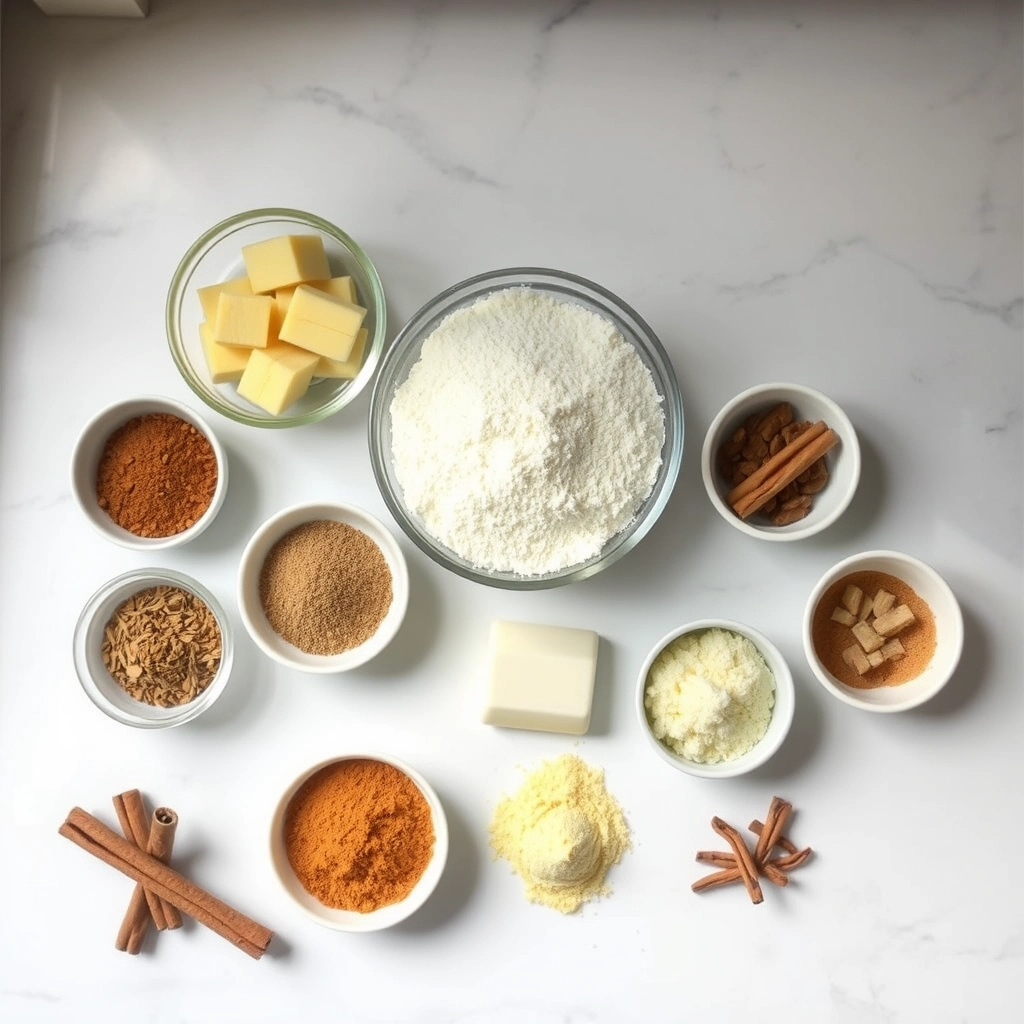
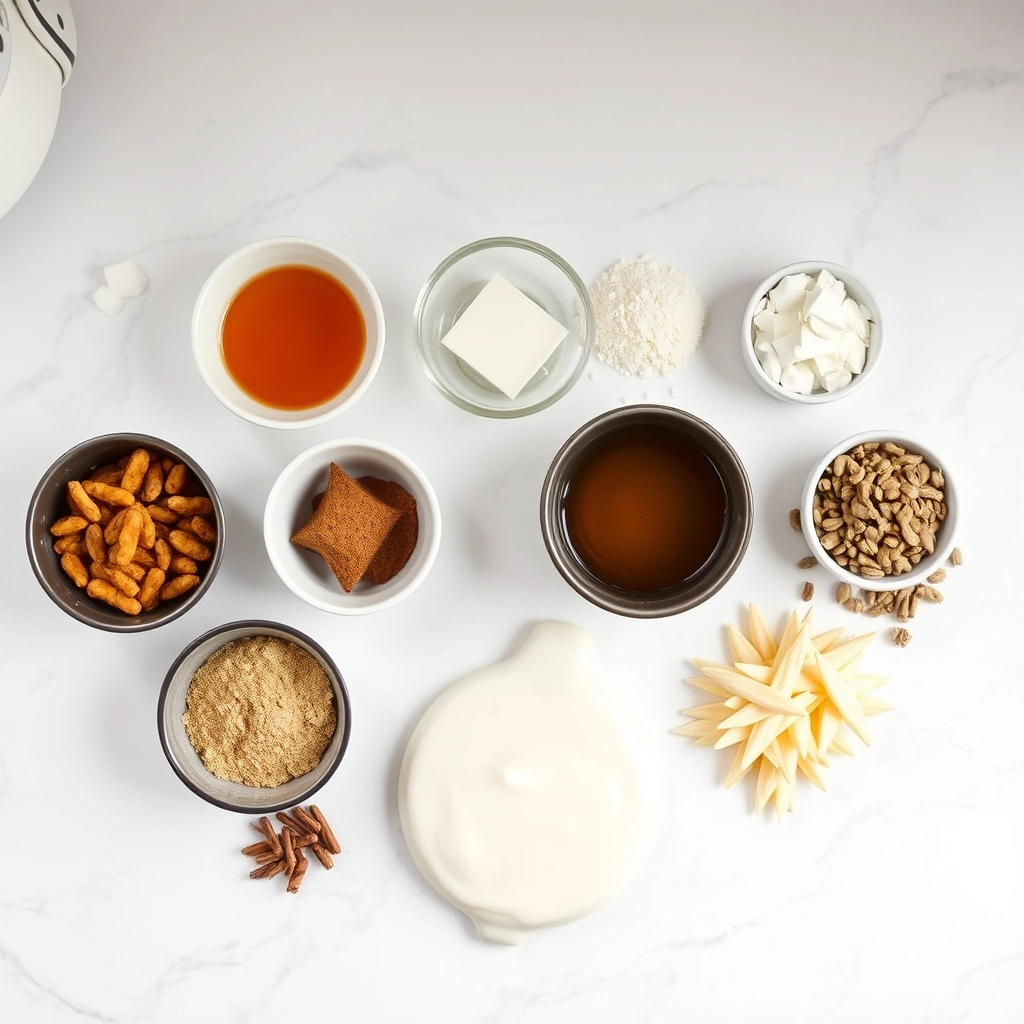

Ingredients

Scale

For the Crust:

  • 4 cups whole milk
  • 1 1/2 cups granulated sugar
  • 4 tablespoons unsalted butter
  • 1 teaspoon vanilla extract

Instructions

1. Prepare the Crust:

  1. In a medium saucepan, combine the milk and sugar. Heat over medium heat, stirring constantly until the sugar dissolves.
  2. Bring the mixture to a gentle simmer, then reduce the heat to low. Continue to simmer, stirring occasionally, for about 45-60 minutes or until the mixture thickens and reduces by half.
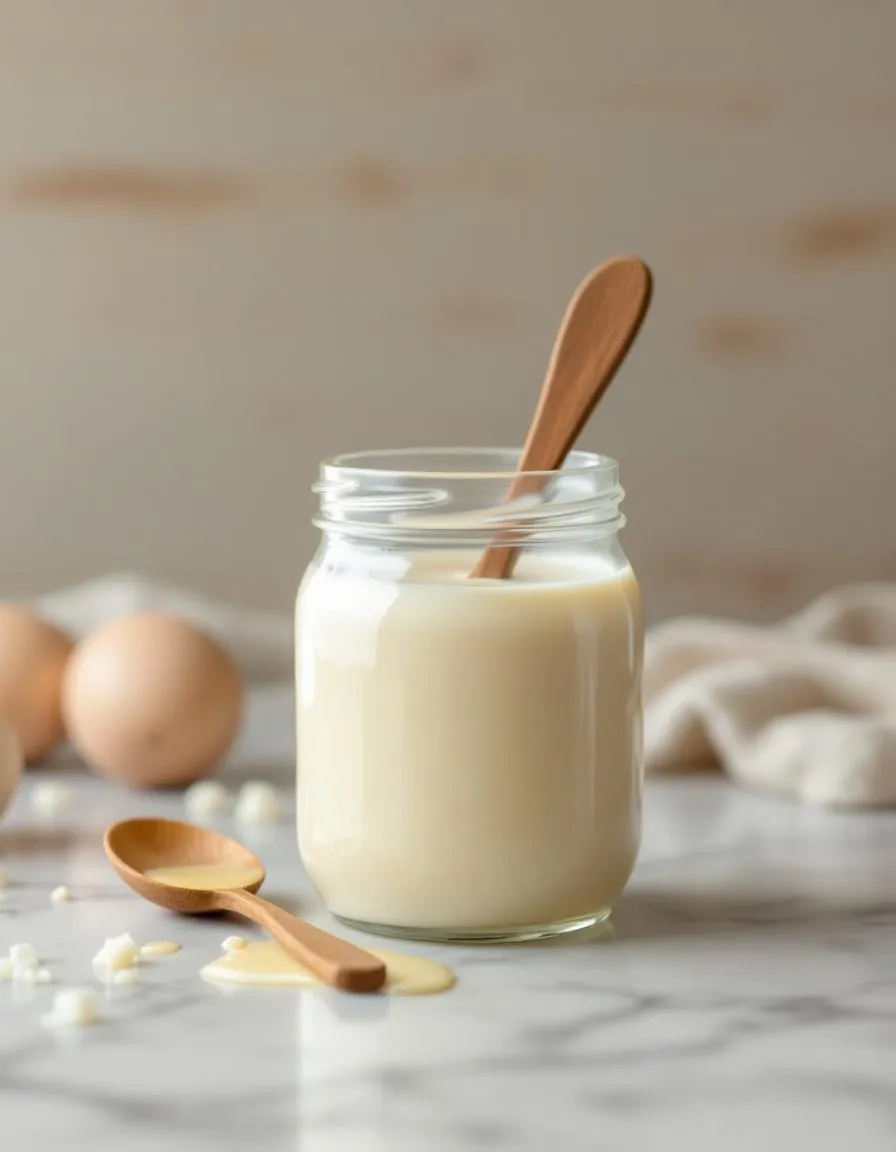
  3. Remove from heat and stir in the butter and vanilla extract until fully incorporated. Let cool before transferring to an airtight container.

Notes

You can customize the seasonings to taste.

How to Prepare This Dish

Steps and time-saving tips

Start by gathering all your ingredients for the Creamy Homemade Sweetened Condensed Milk Recipe—whole milk, sugar, butter, and vanilla extract. Pour the milk into a heavy-bottomed saucepan and heat it over medium-low, stirring occasionally to prevent scorching. Meanwhile, whisk the sugar into the milk gradually, ensuring it dissolves completely. Keep the heat steady to avoid boiling, which can alter the texture. Once the mixture thickens slightly after about 30 minutes, add the butter and vanilla, stirring until fully incorporated. For a smoother consistency, strain the mixture through a fine-mesh sieve. Let it cool before transferring to a jar—this Creamy Homemade Sweetened Condensed Milk Recipe stores beautifully in the fridge for up to two weeks. To save time, use a double boiler for gentler heating, or multitask by prepping other recipe components while the milk simmers.

Mistakes I’ve made and learned from

Early on, I rushed the process and cranked up the heat, which curdled the milk and left grainy sugar crystals. Now I know low and slow is key for the Creamy Homemade Sweetened Condensed Milk Recipe to turn out silky. Another blunder? Skipping the sieve—tiny undissolved sugar bits ruined the texture. If you’re new to dairy-based recipes, my guide on avoiding curdled milk breaks down the science behind gentle heating. And if you’re doubling the batch, check out my tips for scaling recipes to adjust cook times and avoid overcrowding the pan. Trust me, patience pays off with this one!

Cultural Connection and Variations

Where this recipe comes from

Sweetened condensed milk has a rich history, tracing back to 19th-century Europe as a way to preserve milk without refrigeration. However, the Creamy Homemade Sweetened Condensed Milk Recipe we know today carries a warmer, more personal touch. Many cultures, from Latin America to Southeast Asia, have embraced it as a staple for desserts like flan, tres leches cake, or Thai iced coffee. In my family, we always whipped up a batch during the holidays, turning simple ingredients into something magical.

Around the world, variations abound. In Brazil, they might infuse it with cinnamon for brigadeiros, while in India, cardamom elevates it for traditional sweets. Some cooks even swap regular sugar for coconut sugar or honey, adding unique twists. The beauty of the Creamy Homemade Sweetened Condensed Milk Recipe lies in its adaptability—whether you’re making it for a nostalgic treat or experimenting with global flavors.

How it fits in today’s cooking

Today, the Creamy Homemade Sweetened Condensed Milk Recipe remains a kitchen hero. Busy home cooks love it for its versatility, using it in everything from no-churn ice cream to dairy-free alternatives. For instance, pairing it with a decadent chocolate cake creates an irresistible combo, while a drizzle over vanilla cupcakes adds a luscious finish.

Modern adaptations also keep it relevant. Health-conscious bakers might opt for almond milk or maple syrup, proving this recipe evolves with dietary trends. Whether you’re reviving family traditions or crafting new ones, this creamy staple bridges the past and present—one spoonful at a time.

Taste and Texture

What makes it delicious

This Creamy Homemade Sweetened Condensed Milk Recipe delivers a luxuriously smooth and velvety texture that melts on your tongue. The rich, buttery sweetness of the milk and sugar blend harmoniously, creating a decadent caramel-like flavor with a hint of vanilla warmth. Meanwhile, the slow simmering process deepens the aroma, filling your kitchen with a comforting, sugary fragrance. Every spoonful of this Creamy Homemade Sweetened Condensed Milk Recipe feels indulgent yet balanced, making it perfect for drizzling over desserts or stirring into coffee.

Boosting the flavor

For an extra layer of depth, try stirring in a pinch of sea salt or a splash of pure vanilla extract. Alternatively, infuse the milk with warming spices like cinnamon or cardamom during simmering for a cozy twist. If you love experimenting, pair this creamy delight with a drizzle of homemade chocolate sauce or a sprinkle of toasted coconut. For more inspiration, check out these dessert sauce recipes to elevate your creations. The possibilities are endless, so don’t hesitate to get creative!

Tips for Success

Best practices for results

Always use full-fat milk for the creamiest texture in your Creamy Homemade Sweetened Condensed Milk Recipe. Additionally, stir the mixture constantly to prevent scorching, especially as it thickens. For the best consistency, simmer on low heat rather than rushing the process. Meanwhile, let the condensed milk cool completely before storing it, as this helps it thicken further. Finally, use a heavy-bottomed pot to distribute heat evenly and avoid burning.

Mistakes to avoid

One common mistake is overcooking the mixture, which can make it too thick or grainy. To prevent this, remove it from heat once it coats the back of a spoon. Another error is skipping the constant stirring, which may cause uneven cooking or clumping. If you notice lumps, simply whisk vigorously or blend briefly to smooth it out. For more troubleshooting tips, check out our guide on fixing lumpy sauces. Also, avoid substituting low-fat milk, as it won’t yield the same rich texture—learn why in our milk fat in baking article.

Serving and Pairing Suggestions

How to serve this dish

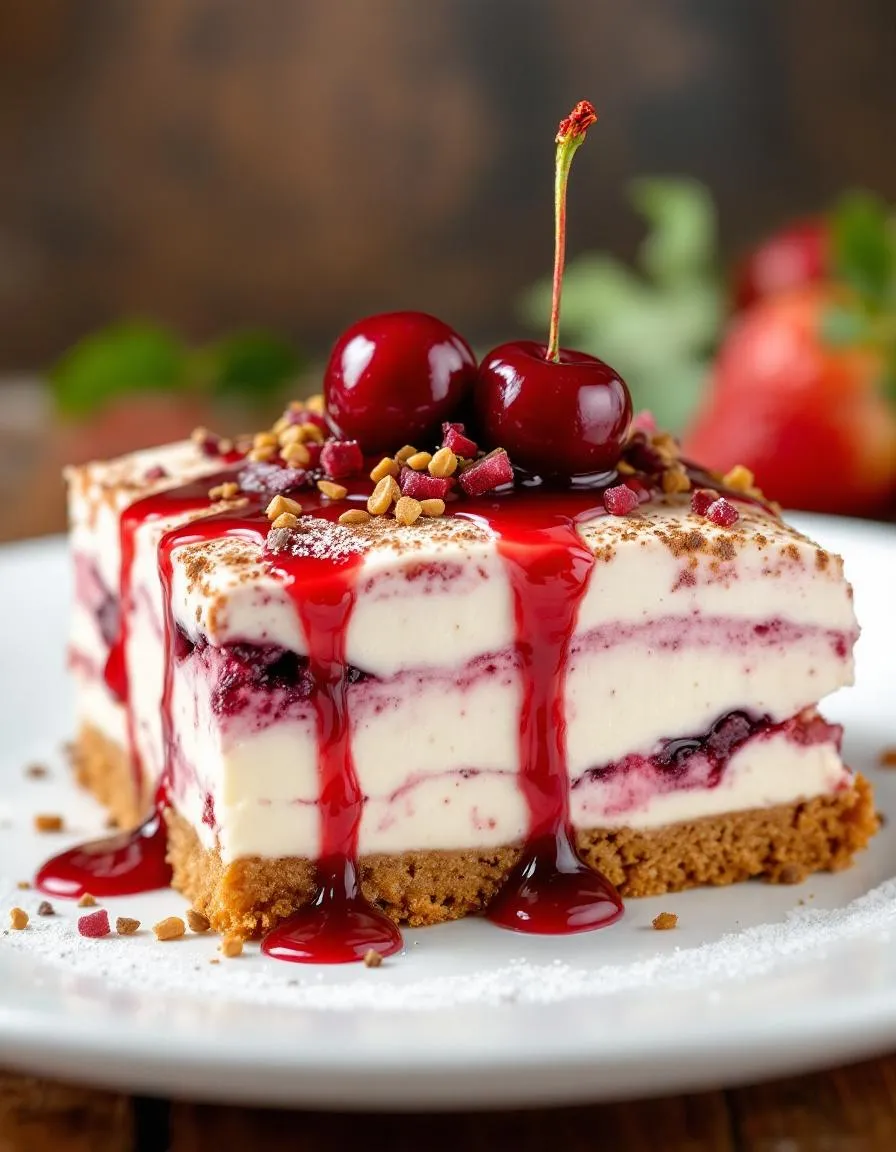
Turn your Creamy Homemade Sweetened Condensed Milk Recipe into a showstopper by drizzling it warm over fresh fruit or pancakes for a decadent breakfast. Alternatively, layer it in a parfait glass with granola and berries for a stunning dessert. During the holidays, use it as a dip for gingerbread cookies or drizzle it over pumpkin pie for extra richness. For a cozy touch, serve it in small mason jars with a sprinkle of cinnamon or cocoa powder on top.

What goes well with it

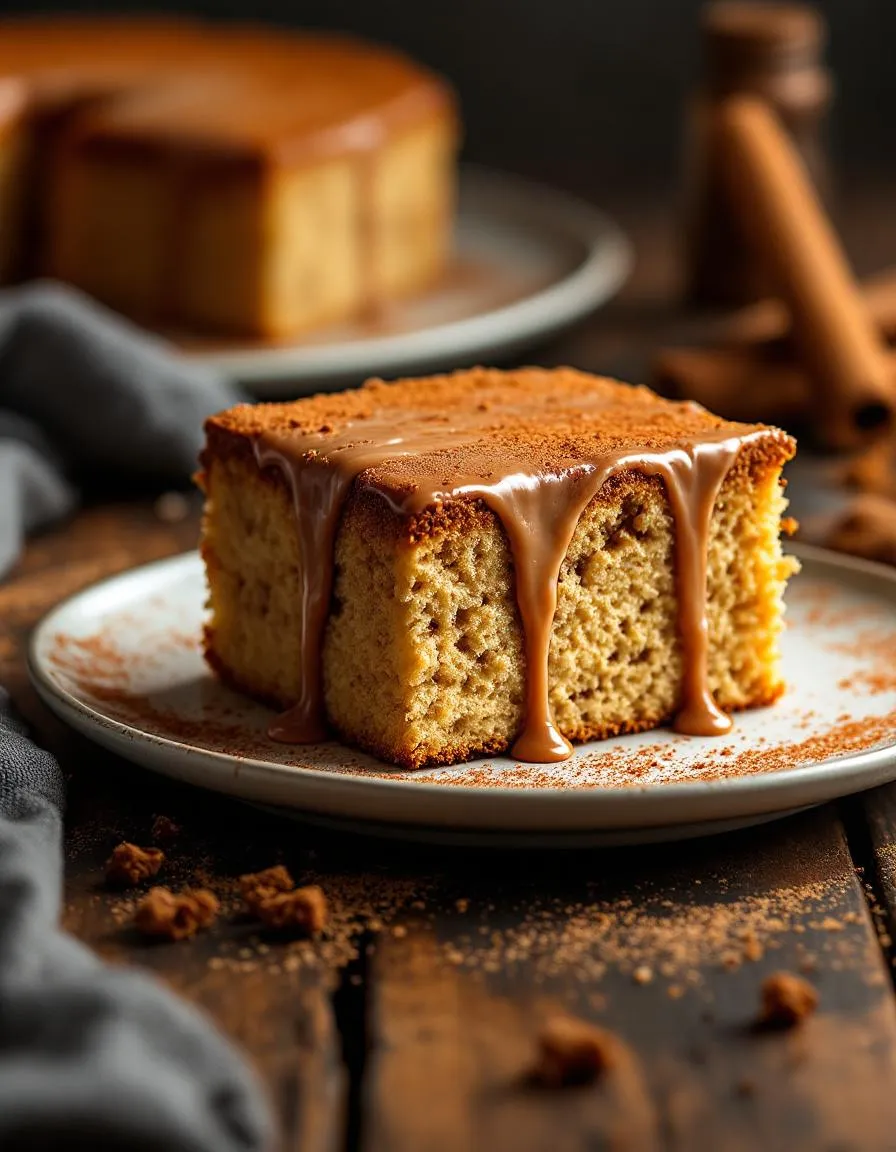
Pair your Creamy Homemade Sweetened Condensed Milk Recipe with strong coffee or chai tea to balance its sweetness perfectly. If you love baking, try it as a glaze for our Classic Cinnamon Rolls or swirl it into our Fluffy Vanilla Cupcakes for added moisture. For a refreshing contrast, serve it alongside tart fruits like strawberries or passionfruit to create a delightful flavor harmony.

How long does homemade sweetened condensed milk last?

Your Creamy Homemade Sweetened Condensed Milk Recipe will stay fresh for up to 2 weeks when stored in an airtight container in the refrigerator. For longer storage, freeze it for up to 3 months—just thaw and stir before using.

Can I use evaporated milk instead of sweetened condensed milk?

Evaporated milk lacks the sugar content needed for a true substitute. For best results, follow a Creamy Homemade Sweetened Condensed Milk Recipe that combines evaporated milk with sugar and butter to replicate the texture and sweetness.

Why is my homemade sweetened condensed milk grainy?

Graininess usually occurs when sugar doesn’t fully dissolve. To fix this, gently reheat your Creamy Homemade Sweetened Condensed Milk Recipe while whisking continuously until smooth. Straining through a fine mesh sieve can also help.

What can I make with homemade sweetened condensed milk?

Use your Creamy Homemade Sweetened Condensed Milk Recipe in desserts like fudge, key lime pie, or tres leches cake. It also works beautifully in coffee drinks or as a drizzle over pancakes and fruit.

Best Buttery Cinnamon Cake – Irresistible Recipe

best-buttery-cinnamon-cake-recipe

Introduction

There’s something magical about the warm, comforting aroma of cinnamon and butter wafting through the kitchen. Whether you’re craving a cozy weekend treat or a show-stopping dessert to impress guests, this Irresistible Buttery Cinnamon Cake Recipe delivers every time. With its tender crumb, rich buttery flavor, and just the right amount of spice, it’s the kind of cake that feels like a hug in every bite. Plus, it’s surprisingly simple to make, even if you’re not a baking pro. Trust me, once you try it, you’ll understand why this recipe deserves a permanent spot in your dessert rotation.

About This Recipe

This Irresistible Buttery Cinnamon Cake Recipe combines classic baking techniques with bold, comforting flavors. The cake gets its melt-in-your-mouth texture from high-quality butter and a touch of sour cream, while cinnamon adds warmth and depth. Unlike overly complicated desserts, this recipe keeps things straightforward, so you can focus on enjoying the process—and the results. Whether you’re baking for a special occasion or just treating yourself, this cake fits perfectly into any moment that calls for a little indulgence.

What makes this recipe stand out is its versatility. You can serve it as a simple snacking cake, dress it up with a glaze, or even pair it with a scoop of vanilla ice cream for an extra-decadent dessert. If you love easy yet impressive bakes, you’ll also appreciate our Classic Vanilla Pound Cake, which shares the same foolproof approach. Meanwhile, cinnamon lovers won’t want to miss our Cinnamon Roll Cookies, another crowd-pleasing favorite.

Beyond the flavors, this recipe aligns with what we believe in at BrekCakes: desserts should be delicious, approachable, and worth every bite. The Irresistible Buttery Cinnamon Cake Recipe checks all those boxes, making it a must-try for both novice bakers and seasoned pros. With clear instructions and pantry-friendly ingredients, it’s designed to minimize stress and maximize satisfaction.

Why I Love This Recipe

This cake holds a special place in my heart because it reminds me of Sunday mornings at my grandma’s house. She always had a knack for turning simple ingredients into something extraordinary, and this Irresistible Buttery Cinnamon Cake Recipe captures that same magic. Every time I bake it, the scent takes me back to her kitchen, where patience and love were the secret ingredients in every dish. Now, I love sharing it with my own family, creating new memories while honoring the old ones. It’s more than just a recipe—it’s a little piece of home.

Health and Nutrition

Why it’s good for your body

First, the Irresistible Buttery Cinnamon Cake Recipe packs a flavorful punch while offering surprising health perks. Cinnamon, a star ingredient, boasts anti-inflammatory properties and may help regulate blood sugar levels. Additionally, this spice adds warmth and depth to every bite without extra calories.

Moreover, the recipe balances indulgence with wholesome ingredients. For instance, butter provides healthy fats that support brain function and energy. When enjoyed in moderation, the Irresistible Buttery Cinnamon Cake Recipe can satisfy cravings without derailing your nutrition goals.

Furthermore, the cake’s simple ingredient list avoids processed additives. Instead, it relies on pantry staples like eggs, which deliver protein and essential vitamins. Whether you serve it as a dessert or a sweet snack, the Irresistible Buttery Cinnamon Cake Recipe brings comfort and nourishment together.

Finally, cinnamon’s antioxidants may boost immunity and digestion. Paired with the cake’s rich texture, these benefits make each slice a guilt-free pleasure. So go ahead and savor the flavors while knowing you’re treating your body right.

How it fits in a healthy lifestyle

The Irresistible Buttery Cinnamon Cake Recipe fits perfectly into a balanced diet when enjoyed mindfully. For example, pairing a small slice with protein-rich Greek yogurt creates a satisfying snack that stabilizes energy levels. It also works well as an occasional treat in a heart-healthy eating plan, especially when you prioritize portion control.

If you follow gluten-free diets, simply swap regular flour for a gluten-free blend to adapt the recipe. The cake’s warm spices and buttery richness will still shine through. For those tracking macros, the recipe’s flexibility allows adjustments like reducing sugar or using alternative sweeteners.

Planning ahead helps integrate this dessert into your routine without overindulging. Bake it for special occasions or slice and freeze portions for controlled enjoyment. Explore our guide to balanced desserts for more ways to enjoy sweets responsibly. With smart choices, the Irresistible Buttery Cinnamon Cake Recipe becomes a delightful part of your healthy lifestyle.

Print
clock clock iconcutlery cutlery iconflag flag iconfolder folder iconinstagram instagram iconpinterest pinterest iconfacebook facebook iconprint print iconsquares squares iconheart heart iconheart solid heart solid icon

Irresistible Buttery Cinnamon Cake


  • Author: Chef Emy

Description

A moist and flavorful cinnamon cake with a rich buttery taste, perfect for any occasion.


Ingredients

Scale

For the Crust:

  • 1 1/2 cups all-purpose flour
  • 1 cup granulated sugar
  • 1/2 cup unsalted butter, softened
  • 2 large eggs
  • 1/2 cup milk
  • 1 tbsp ground cinnamon
  • 1 tsp vanilla extract
  • 1 1/2 tsp baking powder
  • 1/4 tsp salt

Instructions

1. Prepare the Crust:

  1. Preheat oven to 350°F (175°C) and grease a 9-inch round cake pan.
  2. In a large bowl, cream together the butter and sugar until light and fluffy.
  3. Beat in the eggs one at a time, then stir in the vanilla extract.
  4. In a separate bowl, whisk together the flour, baking powder, cinnamon, and salt.
  5. Gradually add the dry ingredients to the wet mixture, alternating with the milk, until just combined.
  6. Pour the batter into the prepared pan and bake for 30-35 minutes, or until a toothpick inserted comes out clean.
  7. Allow the cake to cool in the pan for 10 minutes before transferring to a wire rack.

Notes

You can customize the seasonings to taste.

How to Prepare This Dish

Steps and time-saving tips

Start by preheating your oven to 350°F and greasing a 9-inch cake pan to ensure your Irresistible Buttery Cinnamon Cake Recipe releases easily after baking. Next, whisk together the flour, baking powder, and salt in a medium bowl while your butter softens on the counter. Cream the butter and sugar until fluffy, then beat in the eggs one at a time for a smooth batter. Gradually fold in the dry ingredients, alternating with milk, to avoid overmixing. For an extra flavor boost, swirl a mix of cinnamon and brown sugar into the batter before pouring it into the pan. Bake for 30-35 minutes until a toothpick comes out clean. Meanwhile, whip up a quick glaze by mixing powdered sugar with a splash of vanilla and milk. Once the cake cools slightly, drizzle the glaze over the top for a sweet finish. To save time, measure all your ingredients ahead and use room-temperature eggs for quicker blending. If you’re short on time, skip the glaze and dust with powdered sugar instead—it’s just as delicious.

Mistakes I’ve made and learned from

I’ve learned the hard way that overmixing the batter for this Irresistible Buttery Cinnamon Cake Recipe leads to a dense texture. Now, I gently fold the dry ingredients just until combined, and the results are consistently lighter. Another lesson? Always check your baking powder’s freshness—my first attempt turned out flat because mine had expired. If you’re unsure, test it with hot water before starting. I also used to rush the cooling step, causing the glaze to melt right off. Patience pays off! For more troubleshooting tips, check out my guides on common baking mistakes and achieving the perfect cake texture. These resources saved me from repeating the same errors, and they’ll help you nail this recipe every time.

Cultural Connection and Variations

Where this recipe comes from

The Irresistible Buttery Cinnamon Cake Recipe carries the cozy warmth of home kitchens across generations. Originally inspired by European coffee cakes, this dessert blends rich butter and fragrant cinnamon—a pairing that traveled from medieval spice routes to modern-day bakeries. In Sweden, they might add cardamom for a floral twist, while in Mexico, a dash of cayenne pepper turns it into a sweet-spicy treat. My grandmother, however, always swore by extra vanilla and a thick crumb topping, making her version the star of every family gathering.

Seasonally, the Irresistible Buttery Cinnamon Cake Recipe shines in fall and winter, when cinnamon’s aroma feels like a hug. Yet, in the Caribbean, bakers often serve it with tropical fruit compotes year-round. Whether you layer it with apples like the Germans or drizzle it with honey like the Greeks, this cake adapts beautifully. No matter where it’s made, one thing stays the same: that first bite feels like coming home.

How it fits in today’s cooking

Today, the Irresistible Buttery Cinnamon Cake Recipe holds its own as a versatile crowd-pleaser. Busy bakers love it for its simple ingredients, while food bloggers rave about its Instagram-worthy swirls. It’s a staple for holiday brunches, but also fits perfectly into weekday baking routines—especially when paired with a cup of coffee from our perfect coffee pairings guide.

Modern twists keep it fresh, like swapping butter for coconut oil or adding a crunchy streusel topping. Some even turn it into muffins for on-the-go sweetness. For those exploring gluten-free options, our gluten-free baking tips make adaptation a breeze. Whether you’re baking it for nostalgia or innovation, this cake bridges tradition and today’s tastes effortlessly.

Taste and Texture

What makes it delicious

The Irresistible Buttery Cinnamon Cake Recipe delivers a melt-in-your-mouth experience with every bite. Rich, buttery notes blend perfectly with warm cinnamon, creating a fragrant aroma that fills your kitchen as it bakes. The cake’s crumb stays tender and moist, while a subtle crispness forms on the edges for a delightful contrast. Each slice bursts with cozy sweetness, thanks to the caramelized cinnamon swirls woven throughout. Plus, the velvety texture of the Irresistible Buttery Cinnamon Cake Recipe makes it impossible to resist a second piece.

Boosting the flavor

For an extra flavor boost, try drizzling warm vanilla glaze over the cake—it enhances the cinnamon’s warmth while adding a silky finish. Alternatively, fold in toasted walnuts or pecans for a nutty crunch that pairs beautifully with the buttery base. If you love bold spices, a pinch of cardamom or nutmeg deepens the aromatic profile. For more pairing ideas, explore our favorite spice blends to elevate this cake even further. Whether you keep it simple or experiment, the Irresistible Buttery Cinnamon Cake Recipe adapts effortlessly to your taste.

Tips for Success

Best practices for results

For the best Irresistible Buttery Cinnamon Cake Recipe, always bring your butter and eggs to room temperature before mixing. This ensures a smooth, even batter. Additionally, measure your flour correctly by spooning it into the measuring cup and leveling it off—never pack it down. Finally, preheat your oven at least 20 minutes before baking to guarantee consistent heat. These small steps make a big difference in texture and flavor.

Mistakes to avoid

Avoid overmixing the batter, as this can make your Irresistible Buttery Cinnamon Cake Recipe dense instead of light and fluffy. Instead, gently fold ingredients until just combined. Also, don’t skip the parchment paper lining—it prevents sticking and helps with even baking. For more baking essentials, check out our guide on must-have baking tools. Another common mistake is opening the oven door too soon; wait until the cake sets to avoid sinking. If you’re unsure about doneness, our cake doneness test can help.

Serving and Pairing Suggestions

How to serve this dish

For a stunning presentation, slice the Irresistible Buttery Cinnamon Cake Recipe into thick wedges and dust them lightly with powdered sugar. Alternatively, drizzle a simple vanilla glaze over the top for extra sweetness and shine. Serve it warm to highlight the rich, buttery aroma, or at room temperature for a softer texture. This cake shines at brunch gatherings, holiday celebrations, or even as a comforting afternoon treat with coffee. To make it extra special, garnish each plate with a sprinkle of cinnamon or a dollop of freshly whipped cream.

What goes well with it

Pair the Irresistible Buttery Cinnamon Cake Recipe with a steaming cup of spiced chai latte for a cozy flavor combination. The warm spices in the chai enhance the cinnamon notes in the cake perfectly. If you prefer something cold, try it with a scoop of vanilla bean ice cream for a delightful contrast of temperatures and textures. For a brunch spread, serve it alongside our Classic Blueberry Muffins or a refreshing Mixed Berry Smoothie to balance the richness with fruity freshness.

What makes this Irresistible Buttery Cinnamon Cake Recipe so moist?

The secret to the moist texture in this Irresistible Buttery Cinnamon Cake Recipe lies in the combination of butter, sour cream, and a touch of oil. These ingredients create a tender crumb while the cinnamon swirl adds extra richness. The cake stays fresh for days thanks to its perfect balance of wet and dry ingredients.

Can I substitute margarine for butter in the Irresistible Buttery Cinnamon Cake Recipe?

While margarine can technically be used, we strongly recommend real butter for the Irresistible Buttery Cinnamon Cake Recipe to achieve its signature rich flavor and texture. Margarine contains more water and less fat, which may affect the cake’s density and buttery taste. For best results, stick with high-quality unsalted butter.

How do I prevent the cinnamon swirl from sinking in my Irresistible Buttery Cinnamon Cake?

To keep the cinnamon swirl perfectly layered in your Irresistible Buttery Cinnamon Cake Recipe, make sure your batter is thick enough to support the swirl. Avoid overmixing after adding the cinnamon layer, and bake the cake immediately after assembly. A properly preheated oven also helps set the structure quickly.

What’s the best way to store leftover Irresistible Buttery Cinnamon Cake?

Store your Irresistible Buttery Cinnamon Cake Recipe in an airtight container at room temperature for up to 3 days. For longer storage, wrap individual slices tightly in plastic wrap and freeze for up to 2 months. The cake tastes amazing slightly warmed with a cup of coffee or tea.

Best Tangy Lemon Lavender Cookies Delight Recipe

best-tangy-lemon-lavender-cookies

“`html

Introduction

There’s something magical about the first bite of a cookie that balances bright citrus with floral sweetness. If you’ve ever craved a treat that feels both refreshing and indulgent, these Tangy Lemon Lavender Cookies Delight will steal your heart. Picture this: a buttery, melt-in-your-mouth cookie with a zesty lemon punch and a whisper of lavender, leaving you with a smile after every bite. Whether you’re baking for a cozy afternoon or impressing guests, this recipe promises a delightful twist on classic cookies. Trust me, once you try them, you’ll understand why they’re a standout favorite.

About This Recipe

Tangy Lemon Lavender Cookies Delight combines the vibrant tang of fresh lemon with the subtle, aromatic notes of culinary lavender. These cookies aren’t just delicious—they’re a sensory experience. The lemon zest and juice bring a lively kick, while the lavender adds a sophisticated floral touch, making them perfect for tea parties, spring gatherings, or even as a unique homemade gift. Moreover, this recipe aligns perfectly with Brek Cakes’ philosophy of blending creativity with approachable baking. If you love experimenting with flavors, you’ll adore how these cookies elevate simple ingredients into something extraordinary.

What sets this recipe apart is its versatility. You can enjoy these cookies as a light dessert or pair them with your favorite herbal tea for a relaxing treat. Additionally, the dough comes together quickly, so you won’t spend hours in the kitchen. For more baking inspiration, check out our guide to perfect cookie textures or explore our tips for balancing bold flavors. Whether you’re a seasoned baker or a beginner, these Tangy Lemon Lavender Cookies Delight will quickly become a staple in your recipe collection.

Why I Love This Recipe

I’ll never forget the first time I baked these cookies. A friend gifted me a bag of culinary lavender, and I wanted to create something that captured its delicate charm. The moment I tasted the finished batch, I knew I’d stumbled onto something special. The way the lemon and lavender play off each other reminds me of sunny afternoons and garden picnics. Now, every time I make these Tangy Lemon Lavender Cookies Delight, they bring back that same joy—and I love sharing that feeling with others. It’s more than a recipe; it’s a little jar of happiness.

“`

Health and Nutrition

Why it’s good for your body

Tangy Lemon Lavender Cookies Delight packs a flavorful punch while offering surprising health perks. First, the lemon zest delivers a dose of vitamin C, which supports immune function and brightens your skin. Additionally, lavender adds a calming touch, helping to reduce stress and promote relaxation with every bite.

Moreover, these cookies balance indulgence with wholesome ingredients. For instance, almond flour often serves as the base, providing healthy fats and protein to keep you satisfied. Meanwhile, the natural sweetness from honey or maple syrup avoids refined sugars, making Tangy Lemon Lavender Cookies Delight a smarter treat.

Finally, the antioxidants in lavender and lemon work together to fight inflammation. Whether you enjoy them as an afternoon pick-me-up or a post-dinner dessert, these cookies nourish your body and delight your taste buds. After all, a treat that tastes this good shouldn’t leave you feeling guilty.

How it fits in a healthy lifestyle

Tangy Lemon Lavender Cookies Delight fits seamlessly into a balanced diet. If you’re mindful of gluten, almond flour makes these cookies naturally gluten-free without sacrificing texture. They also pair well with a cup of herbal tea for a relaxing, low-caffeine snack.

For those tracking macros, these cookies offer a satisfying balance of healthy fats and protein. You can even crumble them over yogurt for a protein-packed breakfast. If you love baking with wholesome ingredients, explore our gluten-free baking guide for more inspiration.

Moderation is key, but Tangy Lemon Lavender Cookies Delight makes it easy. Their bright flavors satisfy cravings without derailing your goals. For more ways to enjoy treats mindfully, check out our guide to balanced desserts.

Print
clock clock iconcutlery cutlery iconflag flag iconfolder folder iconinstagram instagram iconpinterest pinterest iconfacebook facebook iconprint print iconsquares squares iconheart heart iconheart solid heart solid icon

Tangy Lemon Lavender Cookies Delight


  • Author: Chef Emy

Description

A delightful cookie with a perfect balance of tangy lemon and floral lavender notes.


Ingredients

Scale

For the Crust:

  • 1 cup all-purpose flour
  • 1/2 cup unsalted butter, softened
  • 1/2 cup granulated sugar
  • 1 large egg
  • 1 tbsp lemon zest
  • 1 tbsp fresh lemon juice
  • 1 tsp dried culinary lavender
  • 1/4 tsp salt
  • 1/2 tsp baking powder

Instructions

1. Prepare the Crust:

  1. Preheat oven to 350°F (175°C) and line a baking sheet with parchment paper.
  2. In a bowl, cream together butter and sugar until light and fluffy. Add egg, lemon zest, and lemon juice, mixing well.
  3. In a separate bowl, whisk together flour, salt, baking powder, and lavender. Gradually add dry ingredients to the wet mixture, mixing until combined.
  4. Drop tablespoon-sized portions of dough onto the prepared baking sheet, spacing them 2 inches apart.
  5. Bake for 10-12 minutes or until edges are lightly golden. Let cool on the baking sheet for 5 minutes before transferring to a wire rack.

Notes

You can customize the seasonings to taste.

How to Prepare This Dish

Steps and time-saving tips

Start by preheating your oven to 350°F and lining a baking sheet with parchment paper. Meanwhile, whisk together the flour, baking powder, and a pinch of salt in a medium bowl. In a separate large bowl, cream the butter and sugar until light and fluffy, then beat in the egg, lemon zest, and lavender extract. Gradually fold the dry ingredients into the wet mixture, but avoid overmixing to keep the Tangy Lemon Lavender Cookies Delight tender. For a time-saving hack, use a cookie scoop to portion the dough evenly onto the baking sheet. Bake for 10-12 minutes until the edges turn golden, then let them cool slightly before drizzling with a simple lemon glaze. If you’re short on time, skip the glaze and dust with powdered sugar instead. The cookies still taste amazing, and you’ll save a step. Store them in an airtight container to keep them fresh for days—if they last that long!

Mistakes I’ve made and learned from

Early on, I learned the hard way that overbaking these Tangy Lemon Lavender Cookies Delight turns them dry and crumbly. Now, I set a timer for 10 minutes and check early, since ovens vary. Another blunder? Skipping the lavender extract and thinking dried lavender alone would suffice—it didn’t. The flavor was too subtle, and the texture felt gritty. For balanced floral notes, I stick with quality extracts and finely ground lavender. Also, once I rushed the creaming step, and my cookies spread too thin. Patience pays off! For more troubleshooting tips, check out my guide on perfect cookie textures. Trust me, these small adjustments make all the difference.

Cultural Connection and Variations

Where this recipe comes from

Tangy Lemon Lavender Cookies Delight whispers of sun-drenched Mediterranean hillsides, where lavender fields stretch for miles and citrus trees heavy with fruit. Originally inspired by French Provençal baking traditions, this recipe blends the bright zing of lemon with the floral elegance of lavender. Many bakers in southern France still grind fresh lavender buds into their sugar, creating a fragrant base for delicate shortbread. Meanwhile, in Italy, cooks might swap lavender for rosemary, adding an earthy twist to the same citrusy dough.

My grandmother first introduced me to Tangy Lemon Lavender Cookies Delight during summer visits, when her garden overflowed with both ingredients. She insisted on hand-zesting lemons and steeping dried lavender in warm milk overnight. Across the Atlantic, modern American bakers often simplify the process with lavender extract, though some purists argue it lacks depth. In Middle Eastern variations, cardamom sometimes joins the party, while Scandinavian versions might feature a vanilla glaze instead of lemon.

How it fits in today’s cooking

Today, Tangy Lemon Lavender Cookies Delight bridges nostalgia and contemporary trends effortlessly. Brunch hosts love pairing these cookies with floral teas or sparkling spring brunch cocktails, while meal preppers stash them in freezer-friendly batches. The recipe’s adaptability shines through modern twists, like vegan butter substitutes or gluten-free flour blends. Some bakers even layer the crumbled cookies into no-bake dessert parfaits for instant elegance.

Seasonal bakers treasure this recipe most during spring and summer, when edible flowers and citrus peak in freshness. Yet its bright flavors also combat winter blues, making it a year-round contender. Whether served at bridal showers, packed in lunchboxes, or enjoyed with midnight tea, Tangy Lemon Lavender Cookies Delight proves some traditions only grow sweeter with time.

Taste and Texture

What makes it delicious

Tangy Lemon Lavender Cookies Delight bursts with bright, zesty lemon and delicate floral notes, creating a refreshing yet sophisticated flavor profile. The cookies strike a perfect balance between crisp edges and a tender, chewy center, making each bite irresistibly satisfying. Fresh lemon zest infuses every crumb with a tangy punch, while culinary lavender adds a subtle, aromatic sweetness. Meanwhile, a hint of vanilla rounds out the flavors, ensuring Tangy Lemon Lavender Cookies Delight never tastes overpowering. The buttery dough melts in your mouth, leaving behind a lingering citrusy fragrance that invites you to reach for another.

Boosting the flavor

For an extra flavor boost, try drizzling Tangy Lemon Lavender Cookies Delight with a light honey glaze to amplify the floral undertones. Alternatively, fold in white chocolate chips for a creamy contrast to the tangy lemon. If you love bold pairings, sprinkle a pinch of finely ground black pepper over the dough before baking—it surprisingly enhances the citrus notes. For more inspiration, explore our guide to herb-infused desserts, which pairs beautifully with lavender’s earthy charm. A dusting of powdered sugar or a dollop of lemon curd also elevates these cookies into a showstopping treat.

Tips for Success

Best practices for results

Always chill the dough for at least 30 minutes before baking to prevent spreading and ensure the perfect texture for your Tangy Lemon Lavender Cookies Delight. Meanwhile, use fresh lemon zest for the brightest flavor and culinary lavender for the best aromatic results. Additionally, measure your flour correctly by spooning it into the cup and leveling it off—this avoids dense cookies. Finally, bake one test cookie first to adjust timing if needed, since oven temperatures can vary.

Mistakes to avoid

Avoid overmixing the dough once you add the dry ingredients, as this can make your Tangy Lemon Lavender Cookies Delight tough instead of tender. For more on perfect mixing, check out our guide to cookie texture secrets. Also, don’t skip the parchment paper—it ensures even baking and easy removal. If your lavender flavor tastes bitter, you might be using too much; learn the right ratios in our lavender baking tips. Remember, small adjustments lead to big improvements!

Serving and Pairing Suggestions

How to serve this dish

For a stunning presentation, arrange Tangy Lemon Lavender Cookies Delight on a vintage cake stand or a pastel-colored platter. Meanwhile, sprinkle edible lavender buds or lemon zest on top for an elegant touch. These cookies shine at afternoon tea parties, bridal showers, or spring celebrations. Alternatively, package them in decorative boxes for a thoughtful homemade gift. If you want to elevate the experience, serve them warm with a light dusting of powdered sugar.

What goes well with it

Pair Tangy Lemon Lavender Cookies Delight with a floral Earl Grey tea to enhance its delicate lavender notes. The citrusy undertones also complement a chilled glass of homemade lavender lemonade, which you can find in our refreshing summer drinks collection. For a richer pairing, try them alongside a scoop of vanilla bean ice cream or a dollop of honey mascarpone. If you love balancing flavors, our tea time treats guide offers more inspiration for perfect accompaniments.

What makes Tangy Lemon Lavender Cookies Delight unique?

Tangy Lemon Lavender Cookies Delight stands out with its perfect balance of zesty lemon and floral lavender, creating a refreshing yet sophisticated flavor. The cookies are soft, chewy, and lightly sweetened, making them a delightful treat for any occasion. This unique combination elevates a classic cookie into something special.

Can I use dried lavender for Tangy Lemon Lavender Cookies Delight?

Yes, dried culinary lavender works perfectly for Tangy Lemon Lavender Cookies Delight. Just make sure it’s food-grade and finely ground to avoid a gritty texture. Fresh lavender can be too strong, so dried is preferred for consistent flavor.

How do I store Tangy Lemon Lavender Cookies Delight to keep them fresh?

Store Tangy Lemon Lavender Cookies Delight in an airtight container at room temperature for up to 5 days. For longer freshness, freeze them in a sealed bag for up to 3 months. The lemon and lavender flavors will remain vibrant if stored properly.

Can I substitute lemon zest in Tangy Lemon Lavender Cookies Delight?

Lemon zest is key for the tangy flavor in Tangy Lemon Lavender Cookies Delight, but in a pinch, you can use 1-2 teaspoons of lemon extract instead. Avoid lemon juice, as it alters the dough’s consistency. For best results, stick with fresh zest.

Best Cherry Delight Dessert – Easy & Irresistible Recipe

best-cherry-delight-dessert-recipe

“`html

Introduction

There’s something magical about a dessert that brings people together, and the Irresistible Cherry Delight Dessert does exactly that. Whether you’re hosting a summer barbecue, celebrating a special occasion, or simply craving a sweet treat, this dessert delivers layers of creamy texture and vibrant cherry flavor that will have everyone asking for seconds. It’s the kind of recipe that feels nostalgic yet exciting, and best of all, it’s surprisingly easy to make. If you’ve ever wanted to impress your guests without spending hours in the kitchen, this is the dessert for you.

About This Recipe

The Irresistible Cherry Delight Dessert is a no-bake layered masterpiece featuring a buttery graham cracker crust, a velvety cream cheese filling, and a luscious cherry topping. Unlike complicated pastries or fussy cakes, this dessert comes together with minimal effort but delivers maximum flavor. What makes it special is its versatility—you can serve it chilled on a hot day or enjoy it as a comforting sweet bite year-round. Plus, it’s perfect for potlucks, family gatherings, or even as a sweet ending to a weeknight meal.

This recipe fits perfectly with the warm, approachable tone of Brek Cakes, where we believe baking (or no-baking!) should be fun and stress-free. If you love easy yet impressive desserts, you’ll also adore our Decadent Chocolate Mousse or the crowd-pleasing Classic Lemon Bars. The Irresistible Cherry Delight Dessert is a timeless favorite because it balances simplicity with indulgence, making it a must-try for both beginners and seasoned bakers.

Why I Love This Recipe

This dessert holds a special place in my heart because it reminds me of my grandmother’s kitchen. She used to make a similar version for family gatherings, and the moment I take a bite, I’m transported back to those warm summer evenings. What I love most is how effortlessly it brings joy to others—whether it’s my kids begging for an extra slice or friends requesting the recipe after their first taste. The Irresistible Cherry Delight Dessert isn’t just a recipe; it’s a little piece of happiness on a plate.

“`

Health and Nutrition

Why it’s good for your body

Irresistible Cherry Delight Dessert packs a nutritious punch while satisfying your sweet tooth. First, cherries bring powerful antioxidants that fight inflammation and support heart health. Additionally, they provide vitamin C, which boosts immunity and keeps your skin glowing. Meanwhile, the natural sweetness of cherries means you can enjoy Irresistible Cherry Delight Dessert without relying on excessive added sugars.

Moreover, this dessert often includes wholesome ingredients like Greek yogurt or almond flour, adding protein and healthy fats. These nutrients help stabilize blood sugar and keep you full longer. Furthermore, the fiber from cherries aids digestion and promotes gut health. Whether you choose a dairy or dairy-free version, Irresistible Cherry Delight Dessert offers a lighter alternative to heavy, processed treats.

Finally, the vibrant red hue of cherries signals their high anthocyanin content, which may improve brain function. So, when you indulge in Irresistible Cherry Delight Dessert, you’re not just treating your taste buds—you’re nourishing your body too.

How it fits in a healthy lifestyle

Irresistible Cherry Delight Dessert fits seamlessly into balanced eating habits. For gluten-free diets, swapping traditional crusts with almond or oat flour keeps it celiac-friendly. If you’re watching your heart health, the dessert’s low saturated fat content aligns with heart-healthy dessert options.

You can also enjoy it as a post-worktonight snack since the natural sugars and protein help replenish energy. Pair it with a handful of nuts for extra staying power. For those managing sugar intake, portion control is easy—serve it in small ramekins or alongside balanced meal ideas to keep cravings in check. Whether as an occasional treat or a smart dessert choice, Irresistible Cherry Delight Dessert supports your wellness goals without compromise.

Print
clock clock iconcutlery cutlery iconflag flag iconfolder folder iconinstagram instagram iconpinterest pinterest iconfacebook facebook iconprint print iconsquares squares iconheart heart iconheart solid heart solid icon

Irresistible Cherry Delight Dessert


  • Author: Chef Emy

Description

A creamy, dreamy dessert with layers of graham cracker crust, sweet cream cheese filling, and luscious cherry topping.


Ingredients

Scale

For the Crust:

  • 2 cups graham cracker crumbs
  • 1/2 cup melted butter
  • 1/4 cup granulated sugar
  • 16 oz cream cheese, softened
  • 1 cup powdered sugar
  • 1 tsp vanilla extract
  • 8 oz whipped topping
  • 21 oz cherry pie filling

Instructions

1. Prepare the Crust:

  1. Mix graham cracker crumbs, melted butter, and granulated sugar in a bowl. Press firmly into the bottom of a 9×13-inch dish to form the crust.
  2. In a separate bowl, beat cream cheese, powdered sugar, and vanilla until smooth. Fold in whipped topping until well combined.
  3. Spread the cream cheese mixture evenly over the crust. Chill in the refrigerator for at least 2 hours.
  4. Top with cherry pie filling before serving. Slice and enjoy!

Notes

You can customize the seasonings to taste.

How to Prepare This Dish

Steps and time-saving tips

Start by gathering all your ingredients for the Irresistible Cherry Delight Dessert so everything is within reach. First, mix the cream cheese and powdered sugar in a large bowl until smooth. Then, gently fold in the whipped topping to create a light, fluffy filling. Meanwhile, press the graham cracker crumbs into the bottom of a baking dish to form the crust. Drizzle melted butter over the crumbs and press firmly to set the base. Next, spread the cream cheese mixture evenly over the crust. For the cherry layer, spoon pie filling on top and smooth it out with a spatula. Finally, chill the dessert for at least two hours to let the flavors meld. If you’re short on time, pop it in the freezer for 30 minutes instead. Just remember to let it sit at room temperature for 10 minutes before serving. A quick tip: use a hand mixer for the cream cheese to avoid lumps and save effort. Also, pre-crush the graham crackers if you want to skip the food processor step.

Mistakes I’ve made and learned from

When I first made the Irresistible Cherry Delight Dessert, I rushed the chilling step and ended up with a runny mess. Now, I always plan ahead and give it the full two hours in the fridge. Another time, I overmixed the cream cheese filling, which made it dense instead of light. A gentle fold with a spatula works best, as I learned from my common baking mistakes post. I also once used cold cream cheese straight from the fridge, which left tiny lumps in the filling. Letting it soften at room temperature for 30 minutes solves this issue. If you’re new to no-bake desserts, check out my no-bake dessert tips for more troubleshooting advice. Trust me, these small adjustments make all the difference between a good dessert and an unforgettable one.

Cultural Connection and Variations

Where this recipe comes from

Irresistible Cherry Delight Dessert carries a sweet nostalgia that spans generations. Many trace its roots to mid-20th-century American potlucks, where home cooks combined pantry staples like graham crackers, cream cheese, and cherry pie filling for a crowd-pleasing treat. However, some families swear their grandmothers brought the recipe from Europe, adapting it with local cherries or swapping in sour cream for a tangier twist.

In the South, you might find Irresistible Cherry Delight Dessert layered with pecans or drizzled with bourbon caramel. Meanwhile, Midwest versions often lean into simplicity, letting the cherries shine. Across the Atlantic, German bakers sometimes use quark instead of cream cheese, while British bakers might top it with clotted cream. No matter the variation, this dessert always brings people together—whether at summer picnics or holiday gatherings.

In my own kitchen, making Irresistible Cherry Delight Dessert signals the start of cherry season. We pick fresh fruit from local orchards, but when time is tight, a quality canned filling works just as well. The beauty of this recipe lies in its flexibility, inviting everyone to make it their own.

How it fits in today’s cooking

Today, Irresistible Cherry Delight Dessert remains a go-to for busy cooks who crave nostalgia without the fuss. Modern twists include gluten-free graham crackers, coconut whipped cream, or even a no-bake version for sweltering summer days. Food bloggers love reinventing it, but the classic preparation still stars at bake sales and family reunions.

Its versatility keeps it relevant year-round. In winter, some add dark chocolate shavings for a festive touch, while spring versions might feature rhubarb-cherry compote. For those exploring easy entertaining ideas, this dessert delivers big flavor with minimal effort. Whether you stick to tradition or experiment, Irresistible Cherry Delight Dessert proves some recipes never go out of style.

Taste and Texture

What makes it delicious

Irresistible Cherry Delight Dessert bursts with sweet-tart cherry flavor, balanced by a velvety cream cheese layer and buttery graham cracker crust. Each bite delivers a luscious contrast—juicy cherries pop against the smooth, rich filling, while the crisp crust adds a satisfying crunch. Fragrant vanilla and a hint of almond extract deepen the aroma, making every forkful irresistible. Whether served chilled or slightly warmed, Irresistible Cherry Delight Dessert melts in your mouth, leaving behind a bright, fruity finish that keeps you reaching for more.

Boosting the flavor

Elevate your Irresistible Cherry Delight Dessert by swapping canned cherries for fresh or frozen ones during peak season—their natural sweetness shines. For extra depth, drizzle a homemade chocolate sauce over the top or sprinkle toasted almond slivers for nutty crunch. A dash of cinnamon or a splash of pure vanilla extract in the filling amps up the warmth. Serve with a scoop of vanilla ice cream to let the cherry flavors sing even brighter.

Tips for Success

Best practices for results

Always chill the crust for at least 30 minutes before baking to prevent shrinking. Use fresh cherries when possible, but if you opt for canned, drain them well to avoid excess liquid in your Irresistible Cherry Delight Dessert. For a smoother filling, whisk the cream cheese thoroughly before adding other ingredients. Additionally, line your pan with parchment paper to ensure easy removal and clean slices every time.

Mistakes to avoid

Avoid overmixing the crust dough, as this can make it tough instead of tender. Similarly, don’t skip the step of blind-baking the crust, or it may turn soggy under the filling. If your cherries release too much juice, thicken them with a bit of cornstarch to prevent a runny dessert. For more baking tips, check out our guide on perfect pie crusts. Also, if you’re new to no-bake desserts, our no-bake basics will help you master the technique for Irresistible Cherry Delight Dessert.

Serving and Pairing Suggestions

How to serve this dish

For a stunning presentation, layer Irresistible Cherry Delight Dessert in clear glass trifle bowls to showcase its vibrant colors. Alternatively, serve individual portions in elegant dessert cups topped with a dollop of whipped cream and fresh mint leaves. This dessert shines at holiday gatherings, but it also makes a delightful treat for summer picnics or brunch buffets. To elevate the visual appeal, drizzle a zigzag of chocolate sauce over each serving or sprinkle crushed pistachios for a pop of contrast.

What goes well with it

Pair Irresistible Cherry Delight Dessert with a steaming cup of vanilla chai tea for a cozy contrast to its fruity sweetness. If you prefer something cooler, try it alongside a scoop of our homemade vanilla ice cream, which balances the tart cherries perfectly. For a brunch-friendly combo, serve it with our fluffy buttermilk pancakes—the light texture complements the rich dessert without overwhelming it. Each pairing enhances the flavors while keeping the spotlight on this irresistible treat.

What are the main ingredients in Irresistible Cherry Delight Dessert?

Irresistible Cherry Delight Dessert typically includes cream cheese, whipped topping, graham cracker crust, cherry pie filling, and powdered sugar. The combination creates a creamy, tangy, and sweet treat with a delightful cherry topping. You can also add vanilla extract or almond extract for extra flavor.

Can I make Irresistible Cherry Delight Dessert ahead of time?

Yes! Irresistible Cherry Delight Dessert is perfect for making ahead. Assemble it up to 24 hours in advance and refrigerate until serving. The flavors meld together, making it even more delicious.

How do I store leftover Irresistible Cherry Delight Dessert?

Store leftover Irresistible Cherry Delight Dessert covered in the refrigerator for up to 3 days. For best texture, avoid freezing it, as the whipped topping may separate when thawed.

Can I use fresh cherries instead of pie filling for Irresistible Cherry Delight Dessert?

While you can use fresh cherries, pie filling works best for Irresistible Cherry Delight Dessert because it has a thicker, syrupy consistency. If using fresh cherries, cook them down with sugar and cornstarch to mimic the texture of canned filling.

Easy No-Bake Mini Banana Cream Pies Recipe

easy-no-bake-banana-cream-pies

“`html

Introduction

Craving a dessert that feels indulgent but won’t keep you slaving away in the kitchen? Imagine biting into creamy, dreamy layers of banana pudding and whipped cream, all nestled in a buttery graham cracker crust—no oven required. These Irresistible No-Bake Mini Banana Cream Pies deliver all the nostalgia of a classic diner dessert, minus the fuss. Whether you’re hosting a last-minute gathering or just treating yourself, these mini pies promise to be the star of the table. Plus, they’re so easy, even beginners can whip them up in minutes. Ready to fall in love with the easiest dessert you’ll make all summer?

About This Recipe

Irresistible No-Bake Mini Banana Cream Pies combine the best parts of a traditional banana cream pie with the convenience of a no-bake treat. Instead of wrestling with pie dough, you’ll layer a simple graham cracker crust with velvety banana pudding, fresh banana slices, and fluffy whipped cream. The result? Individual desserts that look as charming as they taste. Perfect for picnics, potlucks, or weeknight cravings, these mini pies solve the eternal dilemma: how to impress without stress.

What makes this recipe special is its versatility. You can customize it with toasted coconut, a drizzle of caramel, or even a sprinkle of cinnamon. Meanwhile, the no-bake approach keeps the kitchen cool—a lifesaver during sweltering months. If you love effortless desserts, you’ll adore our No-Bake Cheesecake Jars for another fuss-free favorite. And if you’re bananas for banana treats, our Banana Bread Muffins offer a cozy twist on the classic.

This recipe fits our blog’s mission: delicious food that fits real life. No obscure ingredients, no complicated techniques—just reliable, crowd-pleasing results. Whether you’re a busy parent or a dessert enthusiast short on time, these mini pies prove that simplicity and flavor can go hand in hand.

Why I Love This Recipe

These Irresistible No-Bake Mini Banana Cream Pies hold a special place in my heart because they remind me of my grandmother’s kitchen. She always had a knack for turning humble ingredients into something magical, and this recipe captures that spirit. I love how the creamy filling contrasts with the crunchy crust, and how the fresh bananas add just the right touch of sweetness. Most of all, I appreciate how forgiving it is—no stress over perfect pastry, just pure enjoyment. Every time I make them, I’m transported back to those lazy afternoons at her table, where dessert was always served with a side of love.

“`

Health and Nutrition

Why it’s good for your body

Irresistible No-Bake Mini Banana Cream Pies pack a nutritious punch while satisfying your sweet tooth. First, bananas provide potassium, which helps regulate blood pressure and supports muscle function. Additionally, the natural sweetness of bananas means you can cut back on added sugars without sacrificing flavor. Moreover, the creamy filling often includes dairy or plant-based alternatives, offering a dose of calcium or healthy fats for sustained energy.

These mini pies also deliver fiber, thanks to the banana and crust ingredients like oats or nuts. Fiber keeps digestion smooth and helps you feel full longer. Furthermore, Irresistible No-Bake Mini Banana Cream Pies skip the oven, preserving more nutrients that heat can sometimes diminish. Finally, portion-controlled servings make it easier to enjoy dessert mindfully, so you never overindulge.

Whether you need a quick energy boost or a post-workout treat, Irresistible No-Bake Mini Banana Cream Pies deliver both nutrition and satisfaction. They’re a smart choice for anyone looking to enjoy dessert without derailing their health goals.

How it fits in a healthy lifestyle

Irresistible No-Bake Mini Banana Cream Pies fit seamlessly into a balanced diet. For gluten-free eaters, simply swap the crust for a nut or oat base. If you’re watching your heart health, the potassium in bananas supports cardiovascular function, while healthy fats from ingredients like almond butter or coconut milk promote good cholesterol levels.

These mini pies also work well for meal preppers. Whip up a batch ahead of time for guilt-free snacks throughout the week. Pair them with a protein-rich breakfast or enjoy one as an afternoon pick-me-up. For more gluten-free dessert ideas, check out our guide to gluten-free treats. If you’re focused on heart-healthy eating, explore our top heart-smart snacks for additional inspiration. With simple ingredients and no baking required, these mini pies make healthy eating deliciously effortless.

Print
clock clock iconcutlery cutlery iconflag flag iconfolder folder iconinstagram instagram iconpinterest pinterest iconfacebook facebook iconprint print iconsquares squares iconheart heart iconheart solid heart solid icon

Irresistible No-Bake Mini Banana Cream Pies


  • Author: Chef Emy

Description

Delicious mini banana cream pies with a graham cracker crust and creamy filling, perfect for a quick dessert.


Ingredients

Scale

For the Crust:

  • 1 1/2 cups graham cracker crumbs
  • 1/4 cup melted butter
  • 2 tablespoons granulated sugar
  • 1 package (3.4 oz) instant banana pudding mix
  • 1 1/2 cups cold milk
  • 1 cup whipped topping
  • 2 ripe bananas, sliced
  • Extra whipped topping for garnish

Instructions

1. Prepare the Crust:

  1. In a bowl, mix graham cracker crumbs, melted butter, and sugar until combined.
  2. Press the mixture into the bottom of a muffin tin or small dessert cups to form the crust.
  3. In another bowl, whisk the banana pudding mix with cold milk until thickened.
  4. Fold in the whipped topping until smooth.
  5. Layer the pudding mixture over the crust, then top with banana slices.
  6. Chill in the refrigerator for at least 2 hours before serving.
  7. Garnish with extra whipped topping before serving.

Notes

You can customize the seasonings to taste.

“`html

How to Prepare This Dish

Steps and time-saving tips

Start by crushing graham crackers into fine crumbs for the crust. Mix them with melted butter and a pinch of salt until the texture resembles wet sand. Press the mixture firmly into mini pie tins or muffin cups, then chill for 10 minutes to set. Meanwhile, whisk together instant vanilla pudding mix, cold milk, and a splash of vanilla extract until smooth and thick. Fold in freshly whipped cream for extra lightness. Slice ripe bananas thinly and layer them over the chilled crusts. Spoon the creamy pudding mixture on top, spreading it evenly. For a finishing touch, drizzle with caramel or chocolate sauce and add a dollop of whipped cream. Refrigerate the Irresistible No-Bake Mini Banana Cream Pies for at least two hours before serving. To save time, use pre-made graham cracker crusts or a food processor to crush the crackers. If you’re in a hurry, freeze the pies for 30 minutes instead of chilling.

Mistakes I’ve made and learned from

One mistake I made early on was using overripe bananas, which turned mushy and made the pies soggy. Now, I stick to firm, just-ripe bananas for the perfect texture. Another issue was rushing the chilling time, causing the filling to slump when sliced. Patience pays off—always refrigerate for the full two hours. If you’re new to no-bake desserts, check out my guide to no-bake desserts for more troubleshooting advice. I also learned the hard way that over-whipping the cream can make it grainy. For a smoother result, follow my tips for whipping cream perfectly. These small adjustments transformed my Irresistible No-Bake Mini Banana Cream Pies from messy to flawless.

“`

Cultural Connection and Variations

Where this recipe comes from

Irresistible No-Bake Mini Banana Cream Pies have roots in classic American desserts, but their charm stretches far beyond borders. Originally inspired by Southern banana pudding and cream pies, this no-bake version offers a modern twist that keeps the nostalgia alive. Families in the South often layer bananas with vanilla wafers and custard, while others might fold in whipped cream for extra lightness. Meanwhile, in tropical regions like the Caribbean, cooks might swap vanilla for coconut cream or add a sprinkle of toasted coconut for a local flair. Even in my own kitchen, I’ve seen generations tweak the recipe—some prefer a graham cracker crust, while others add a drizzle of caramel for extra indulgence.

Around the world, similar desserts take on unique personalities. In Brazil, banana desserts often feature condensed milk and cinnamon, while in the Philippines, they might include crushed peanuts for crunch. The beauty of Irresistible No-Bake Mini Banana Cream Pies lies in their adaptability. Whether served at summer picnics or holiday gatherings, they bridge cultures with every creamy bite. No matter where you enjoy them, these mini pies carry a universal appeal—simple, sweet, and endlessly customizable.

How it fits in today’s cooking

Today, Irresistible No-Bake Mini Banana Cream Pies fit perfectly into our fast-paced lives. With no oven required, they’re a lifesaver for busy home cooks who crave homemade desserts without the fuss. They shine at potlucks, birthday parties, or even as a quick treat after a weeknight dinner. Modern twists, like using Greek yogurt in the filling or gluten-free crusts, make them inclusive for diverse diets. Plus, their individual servings align with today’s love for portion-controlled indulgence.

Seasonally, these mini pies transition effortlessly. In summer, they’re a refreshing chilled dessert, while in winter, a sprinkle of nutmeg ties them to cozy traditions. For those who love experimenting, pairing them with a scoop of homemade vanilla ice cream elevates the experience. And if you’re hosting a brunch, they pair beautifully with easy berry parfaits for a balanced spread. No matter the occasion, Irresistible No-Bake Mini Banana Cream Pies remain a timeless favorite—proof that some classics only get better with age.

Taste and Texture

What makes it delicious

Irresistible No-Bake Mini Banana Cream Pies deliver a dreamy combination of flavors and textures that melt in your mouth. The velvety banana cream filling tastes rich and sweet, with a hint of vanilla that lingers on your tongue. Meanwhile, the buttery graham cracker crust adds a satisfying crunch, creating the perfect contrast. Fresh banana slices tucked inside bring a natural, fruity brightness, while the whipped topping feels light as air. Every bite of these Irresistible No-Bake Mini Banana Cream Pies is a harmony of creamy, crisp, and fragrant goodness—no oven required.

Boosting the flavor

Elevate your Irresistible No-Bake Mini Banana Cream Pies with a few easy tweaks. First, try swapping the graham cracker crust for a toasted oatmeal cookie crust to add warm, nutty notes. For extra decadence, drizzle melted dark chocolate or a spoonful of salted caramel sauce over the whipped cream. A pinch of cinnamon or a sprinkle of toasted coconut flakes also enhances the tropical vibe. With these simple upgrades, your mini pies will taste even more unforgettable.

Tips for Success

Best practices for results

Always use ripe bananas for the best natural sweetness in your Irresistible No-Bake Mini Banana Cream Pies. Meanwhile, chill the crust for at least 20 minutes before filling to prevent sogginess. For a smoother texture, whip the cream cheese until fluffy before adding other ingredients. Additionally, layer the banana slices evenly to ensure every bite has perfect flavor balance. Finally, refrigerate the pies for at least two hours so they set properly.

Mistakes to avoid

Avoid overmixing the filling, as this can make it too dense instead of light and creamy. Instead, gently fold the whipped cream into the mixture for the ideal texture. Also, don’t skip lining your pans with parchment paper, or the pies may stick. For more no-bake dessert tips, check out our guide to perfect no-bake desserts. Another common mistake is using underripe bananas, which lack sweetness. If you’re unsure about banana ripeness, our banana recipe tips can help you pick the best ones.

Serving and Pairing Suggestions

How to serve this dish

For a stunning presentation, arrange your Irresistible No-Bake Mini Banana Cream Pies on a tiered dessert stand or a rustic wooden board. Meanwhile, drizzle extra whipped cream over the top and sprinkle crushed graham crackers for texture. Alternatively, add fresh banana slices or a dusting of cinnamon to enhance the visual appeal. These mini pies shine at brunch gatherings, potlucks, or even as a sweet finale to holiday dinners. Since they’re no-bake, you can quickly assemble them ahead of time and refrigerate until serving.

What goes well with it

Pair your Irresistible No-Bake Mini Banana Cream Pies with a steaming cup of spiced chai tea for a cozy contrast. The warm spices in the tea balance the creamy sweetness of the dessert perfectly. If you prefer something cold, try blending our Vanilla Bean Milkshake for a rich, indulgent combo. For a lighter option, serve them alongside fresh berries or a scoop of our Coconut Ice Cream to add a tropical twist. Either way, these pairings will elevate your dessert experience effortlessly.

Can I make Irresistible No-Bake Mini Banana Cream Pies ahead of time?

Yes! These Irresistible No-Bake Mini Banana Cream Pies are perfect for prepping in advance. Store them in an airtight container in the fridge for up to 2 days, but add fresh banana slices just before serving to prevent browning.

What’s the best crust for no-bake mini banana cream pies?

A graham cracker or vanilla wafer crust works best for Irresistible No-Bake Mini Banana Cream Pies. The crisp texture contrasts perfectly with the creamy filling. For a gluten-free option, try crushed gluten-free cookies or nuts.

How do I keep my banana cream pies from getting soggy?

To prevent sogginess in your Irresistible No-Bake Mini Banana Cream Pies, make sure the crust is firmly packed and chilled before adding filling. You can also brush melted chocolate on the crust first to create a moisture barrier.

Can I use frozen bananas for mini banana cream pies?

Fresh bananas are recommended for Irresistible No-Bake Mini Banana Cream Pies as frozen bananas release too much liquid when thawed. If you must use frozen, thaw and drain them thoroughly, then pat dry before assembling.

Best King’s Hawaiian Cheesecake Danish Recipe

best-kings-hawaiian-cheesecake-danish

“`html

Introduction

There’s something magical about the smell of warm pastries fresh from the oven—especially when they combine buttery flakiness with creamy cheesecake filling. If you’ve ever craved a dessert that feels indulgent yet effortless, the Irresistible King’s Hawaiian Cheesecake Danish is your answer. Picture this: sweet King’s Hawaiian rolls transformed into a golden, pull-apart masterpiece, layered with rich cheesecake and a hint of vanilla. Whether you’re hosting brunch or treating yourself on a lazy weekend, this recipe delivers comfort and joy in every bite. Trust me, one taste and you’ll understand why it’s impossible to resist.

About This Recipe

The Irresistible King’s Hawaiian Cheesecake Danish reimagines classic flavors in a way that’s both nostalgic and exciting. Instead of starting from scratch, we use King’s Hawaiian rolls as the base, which saves time while adding a unique sweetness. The creamy cheesecake filling, made with just a handful of ingredients, balances the rolls’ lightness perfectly. Moreover, this recipe fits any occasion, from holiday gatherings to casual breakfasts. If you love easy yet impressive desserts, you’ll appreciate how this dish bridges simplicity and decadence.

What makes this recipe stand out is its versatility. You can customize it with fruit toppings, a drizzle of glaze, or even a sprinkle of cinnamon. Additionally, it aligns perfectly with our blog’s mission to share approachable recipes that feel special. For more inspiration, check out our quick dessert ideas or explore our guide to brunch perfection. Whether you’re a beginner or a seasoned baker, the Irresistible King’s Hawaiian Cheesecake Danish promises delicious results every time.

Why I Love This Recipe

This recipe holds a special place in my heart because it reminds me of Sunday mornings with my family. My grandmother used to make something similar, and the scent of warm rolls baking always brings me back to those cozy moments. The Irresistible King’s Hawaiian Cheesecake Danish captures that same warmth but with a modern twist. It’s the kind of dish that makes people gather around the table, eager for a taste. Every time I bake it, I’m reminded how food can create memories—and that’s why I keep coming back to this recipe.

“`

Health and Nutrition

Why it’s good for your body

Irresistible King’s Hawaiian Cheesecake Danish packs a surprising mix of nutrients while satisfying your sweet tooth. First, the Hawaiian rolls provide a light, fluffy base with a touch of natural sweetness, making them a better alternative to heavy pastry dough. Additionally, the cream cheese filling delivers a dose of protein and calcium, which support muscle health and strong bones. Meanwhile, the buttery streusel topping adds just enough crunch without overwhelming the dish.

Because Irresistible King’s Hawaiian Cheesecake Danish balances indulgence with wholesome ingredients, you can enjoy it guilt-free in moderation. For example, the recipe uses simple, recognizable components instead of artificial additives. Furthermore, the portion-controlled nature of danishes helps prevent overeating. Whether you serve it for breakfast or dessert, this treat keeps you energized without the sugar crash of overly processed sweets.

Finally, the versatility of Irresistible King’s Hawaiian Cheesecake Danish means you can tweak it for extra nutrition. Top it with fresh berries for antioxidants or swap in whole-grain Hawaiian rolls for added fiber. Either way, you get a delicious dish that fuels your body and delights your taste buds.

How it fits in a healthy lifestyle

Irresistible King’s Hawaiian Cheesecake Danish fits perfectly into a balanced diet when enjoyed mindfully. Pair it with a protein-rich breakfast like Greek yogurt or scrambled eggs to create a satisfying meal that keeps you full longer. If you’re watching your sugar intake, simply reduce the streusel topping or opt for a sugar-free cream cheese alternative.

For those following flexible diet plans, this danish works well as an occasional treat. It’s lighter than traditional cheesecake but just as flavorful, making it a smart choice for portion-conscious eaters. Craving more wholesome dessert ideas? Explore our healthy dessert swaps for inspiration. You can also check out our guide to balanced brunch ideas to round out your menu with nutritious options.

Remember, balance is key. Enjoy Irresistible King’s Hawaiian Cheesecake Danish as part of a varied diet, and savor every bite without compromise.

Print
clock clock iconcutlery cutlery iconflag flag iconfolder folder iconinstagram instagram iconpinterest pinterest iconfacebook facebook iconprint print iconsquares squares iconheart heart iconheart solid heart solid icon

Irresistible King’s Hawaiian Cheesecake Danish


  • Author: Chef Emy

Description

A delightful fusion of King’s Hawaiian rolls, creamy cheesecake filling, and sweet glaze for a perfect breakfast or dessert treat.


Ingredients

Scale

For the Crust:

  • 1 package King’s Hawaiian Sweet Rolls (12 count)
  • 8 oz cream cheese, softened
  • 1/4 cup granulated sugar
  • 1 tsp vanilla extract
  • 1 egg yolk
  • 1/4 cup powdered sugar
  • 1 tbsp milk
  • 1/2 tsp vanilla extract (for glaze)

Instructions

1. Prepare the Crust:

  1. Preheat oven to 350°F (175°C). Slice the King’s Hawaiian rolls in half horizontally, keeping them connected.
  2. In a bowl, mix cream cheese, granulated sugar, vanilla extract, and egg yolk until smooth.
  3. Spread the cream cheese mixture evenly over the bottom half of the rolls. Place the top half back on.
  4. Bake for 20-25 minutes until golden and the filling is set.
  5. Whisk powdered sugar, milk, and vanilla extract to make the glaze. Drizzle over the warm danish before serving.

Notes

You can customize the seasonings to taste.

“`html

How to Prepare This Dish

Steps and time-saving tips

Start by preheating your oven to 350°F and lining a baking sheet with parchment paper. Then, grab your King’s Hawaiian rolls and carefully slice them in half horizontally, keeping the layers intact. Next, whisk together the cream cheese, sugar, and vanilla in a bowl until smooth. Spread this creamy mixture evenly over the bottom half of the rolls, leaving a small border around the edges. After that, place the top half back on and press gently to seal. Now, transfer the whole thing to the baking sheet and bake for 15-18 minutes until golden. While it bakes, whisk the powdered sugar and milk for the glaze. Once the Danish is out of the oven, drizzle the glaze generously over the top. Let it cool slightly before slicing into individual portions. For a time-saving tip, prep the cream cheese filling the night before and store it in the fridge. Also, use a serrated knife to slice the rolls cleanly without squishing them. The result? An Irresistible King’s Hawaiian Cheesecake Danish that’s as easy as it is delicious.

Mistakes I’ve made and learned from

I’ll admit, my first attempt at this Irresistible King’s Hawaiian Cheesecake Danish was a mess. I overfilled the rolls, causing the cream cheese to ooze out and burn in the oven. Lesson learned: leave that border! Another time, I skipped the parchment paper, and the glaze glued the Danish to the pan. Now I never bake without it. If you’re new to working with cream cheese, check out my guide to perfect cream cheese consistency to avoid lumps. Also, if your glaze is too thick, add milk a teaspoon at a time—trust me, it’s easier than fixing a runny mess. For more troubleshooting, my common baking mistakes post covers these pitfalls in detail. These small adjustments make all the difference between a good Danish and an unforgettable one.

“`

Cultural Connection and Variations

Where this recipe comes from

The Irresistible King’s Hawaiian Cheesecake Danish blends the sweetness of Hawaiian rolls with the creamy richness of cheesecake, creating a treat that feels both nostalgic and exciting. While Hawaiian rolls trace their roots to Portuguese sweet bread brought to Hawaii by immigrants, this recipe gives them a modern twist by transforming them into a decadent pastry. Families across the U.S. often put their own spin on it, swapping cream cheese for mascarpone or adding fruit preserves for extra tang.

In some regions, bakers layer the danish with cinnamon or drizzle it with caramel, while others keep it simple to let the buttery rolls shine. The Irresistible King’s Hawaiian Cheesecake Danish also holds a special place in potlucks and brunch gatherings, where its easy preparation and crowd-pleasing flavors make it a star. Whether served warm or at room temperature, it bridges comfort food and creativity.

How it fits in today’s cooking

Today, the Irresistible King’s Hawaiian Cheesecake Danish fits perfectly into fast-paced lifestyles and cozy weekend baking alike. Busy home cooks love it because it turns pantry staples into something extraordinary, while food bloggers often feature it as a holiday baking idea or brunch centerpiece. Its versatility also makes it a hit for seasonal celebrations, from Easter brunches to Christmas morning spreads.

Modern adaptations include gluten-free versions or swapping in dairy-free cream cheese for dietary needs. Some even repurpose it as a quick dessert for unexpected guests. No matter how you slice it, this danish proves that simple ingredients can deliver big flavor—and that’s why it’s here to stay.

Taste and Texture

What makes it delicious

Irresistible King’s Hawaiian Cheesecake Danish delights the senses with its perfect balance of sweet and tangy flavors. The buttery, golden layers of King’s Hawaiian roll dough bake into a crisp, flaky shell that shatters with each bite. Meanwhile, the rich cream cheese filling melts luxuriously on your tongue, offering a velvety contrast to the delicate crunch. A hint of vanilla and a touch of citrus zest brighten the decadent cheesecake center, while the warm, caramelized edges add a subtle toasty aroma. Every forkful of Irresistible King’s Hawaiian Cheesecake Danish feels like a cozy hug, thanks to its pillowy-soft interior and irresistible sweetness.

Boosting the flavor

Elevate your Irresistible King’s Hawaiian Cheesecake Danish with a drizzle of homemade salted caramel sauce for a buttery depth that complements the creamy filling. Alternatively, sprinkle a pinch of cinnamon or nutmeg into the cheesecake mixture for a warm, spiced twist. For a fruity contrast, top each slice with fresh berries or a spoonful of berry compote to cut through the richness. A dusting of powdered sugar or a dollop of whipped cream adds a final touch of indulgence without overpowering the dessert’s delicate flavors.

Tips for Success

Best practices for results

Always let your Irresistible King’s Hawaiian Cheesecake Danish cool slightly before serving, as this helps the filling set perfectly. Meanwhile, use room-temperature cream cheese for a smoother texture, and avoid overmixing the batter to prevent cracks. For even baking, rotate the tray halfway through, and check doneness with a toothpick—it should come out clean. Finally, store leftovers in an airtight container to maintain freshness.

Mistakes to avoid

One common error is overbaking the Irresistible King’s Hawaiian Cheesecake Danish, which dries it out. Instead, pull it from the oven when the edges are just golden. Another mistake is skipping the parchment paper, which can cause sticking—always line your pan for easy removal. If your filling sinks, try pre-baking the crust for a few minutes first, as detailed in our perfect cheesecake crust guide. For more troubleshooting, check our tips to avoid cracks.

Serving and Pairing Suggestions

How to serve this dish

For a stunning presentation, arrange your Irresistible King’s Hawaiian Cheesecake Danish on a rustic wooden board or elegant cake stand. Meanwhile, dust them lightly with powdered sugar or drizzle with honey for a touch of sweetness. These danishes shine at brunch gatherings, holiday breakfasts, or even as an afternoon treat with coffee. To make them extra special, add fresh berries or a dollop of whipped cream on the side. Since they’re already irresistible, you’ll want to serve them warm to highlight the gooey cheesecake filling and buttery layers.

What goes well with it

Pair your Irresistible King’s Hawaiian Cheesecake Danish with a creamy latte or a fruity iced tea for a balanced flavor experience. The richness of the cheesecake filling contrasts perfectly with the brightness of citrus-infused drinks. If you’re hosting a brunch, try serving them alongside our Berry Stuffed French Toast for a decadent spread. Alternatively, a scoop of vanilla ice cream turns these danishes into an unforgettable dessert. For more pairing inspiration, explore our Cinnamon Roll Bites, which share the same comforting warmth.

How do you make King’s Hawaiian Cheesecake Danish?

To make Irresistible King’s Hawaiian Cheesecake Danish, start by slicing King’s Hawaiian rolls in half and pressing them into a baking dish. Spread a cream cheese mixture over the rolls, then bake until golden. Finish with a drizzle of icing for the perfect sweet treat.

Can you use King’s Hawaiian rolls for dessert?

Absolutely! King’s Hawaiian rolls work wonderfully for desserts like the Irresistible King’s Hawaiian Cheesecake Danish. Their soft, slightly sweet texture pairs perfectly with creamy cheesecake filling and icing, making them a versatile base for easy and delicious treats.

What ingredients are in King’s Hawaiian Cheesecake Danish?

The Irresistible King’s Hawaiian Cheesecake Danish typically includes King’s Hawaiian rolls, cream cheese, sugar, vanilla extract, and butter. A simple powdered sugar glaze adds the finishing touch, creating a decadent yet easy-to-make dessert.

Is King’s Hawaiian Cheesecake Danish served warm or cold?

Irresistible King’s Hawaiian Cheesecake Danish is best served warm, right out of the oven, when the rolls are soft and the cheesecake filling is gooey. However, you can also enjoy it at room temperature if preferred.

Best Southern Pecan Pralines – Easy Homemade Recipe

best-southern-pecan-pralines

“`html

Introduction

There’s something magical about the first bite of a warm, buttery pecan praline—its crisp shell giving way to a melt-in-your-mouth center that’s rich, sweet, and just a little salty. Whether you grew up with these Southern treasures or are discovering them for the first time, Irresistible Southern Pecan Pralines have a way of making any moment feel special. Maybe it’s the nostalgia of family gatherings or the simple joy of homemade candy, but one thing’s certain: these pralines are more than a treat. They’re a little piece of love you can hold in your hand.

About This Recipe

Irresistible Southern Pecan Pralines are a classic confection with deep roots in Southern cuisine. Unlike other candies, they strike the perfect balance between crunchy and creamy, thanks to a careful mix of pecans, brown sugar, butter, and cream. What makes them truly stand out, however, is their simplicity. With just a handful of ingredients and a bit of patience, you can recreate this beloved dessert at home. Plus, they’re incredibly versatile. Serve them as holiday gifts, party favors, or a sweet ending to a comforting meal like our Southern-Style Buttermilk Biscuits.

This recipe fits perfectly with our blog’s mission: celebrating timeless flavors with a modern twist. We focus on dishes that bring people together, and Irresistible Southern Pecan Pralines do exactly that. They’re a conversation starter, a memory-maker, and a guaranteed crowd-pleaser. If you’re new to candy-making, don’t worry—this recipe breaks down each step so you can nail the texture every time. And if you love pecan desserts, you’ll adore pairing these pralines with our Classic Pecan Pie for the ultimate Southern spread.

Why I Love This Recipe

My grandmother first taught me how to make Irresistible Southern Pecan Pralines when I was barely tall enough to see over the stove. She’d let me stir the pot, warning me not to let the sugar burn, and we’d laugh when the first batch always came out a little misshapen. Even now, the smell of caramelizing sugar takes me back to her kitchen—warm, messy, and full of love. That’s why this recipe means so much to me. It’s not just about the candy; it’s about the stories, the traditions, and the simple joy of sharing something sweet with the people you love.

“`

Health and Nutrition

Why it’s good for your body

Irresistible Southern Pecan Pralines pack more than just indulgent flavor. First, pecans deliver a powerhouse of nutrients. They provide healthy fats, which support brain function and heart health. Additionally, these nuts offer plant-based protein and fiber, keeping you satisfied longer. Moreover, Irresistible Southern Pecan Pralines contain natural sweetness from ingredients like brown sugar and vanilla, reducing the need for artificial additives.

Furthermore, pecans boast antioxidants that combat inflammation. Studies show they may even help lower bad cholesterol levels. While pralines are a treat, their key ingredients offer real benefits. For instance, the magnesium in pecans promotes muscle and nerve function. Meanwhile, the iron content helps maintain energy levels. Of course, moderation matters, but Irresistible Southern Pecan Pralines make it easy to enjoy a nutrient-rich dessert.

Finally, these pralines bring joy, which is its own kind of wellness. Sharing them creates connections, and savoring them mindfully enhances the experience. Whether as an occasional treat or a festive gift, Irresistible Southern Pecan Pralines blend taste and nourishment effortlessly.

How it fits in a healthy lifestyle

Irresistible Southern Pecan Pralines fit seamlessly into balanced eating when enjoyed thoughtfully. Since they’re naturally gluten-free, they’re a great option for those avoiding wheat. Pair them with a protein-rich snack, like Greek yogurt, to balance blood sugar. For heart-healthy choices, enjoy them alongside foods like avocado or salmon, which boost good fats.

Planning ahead helps too. Include Irresistible Southern Pecan Pralines in your weekly meal prep as a portion-controlled treat. If you’re mindful of sugar, savor one praline slowly instead of reaching for processed sweets. For more ideas on balancing indulgences, explore our guide to healthy dessert swaps. Life’s too short to skip the sweets—just make them count!

Print
clock clock iconcutlery cutlery iconflag flag iconfolder folder iconinstagram instagram iconpinterest pinterest iconfacebook facebook iconprint print iconsquares squares iconheart heart iconheart solid heart solid icon

Irresistible Southern Pecan Pralines


  • Author: Chef Emy

Description

A classic Southern candy with a rich, buttery flavor and crunchy pecans.


Ingredients

Scale

For the Crust:

  • 1 cup granulated sugar
  • 1 cup packed brown sugar
  • 1/2 cup heavy cream
  • 4 tablespoons unsalted butter
  • 1 teaspoon vanilla extract
  • 1 1/2 cups pecan halves

Instructions

1. Prepare the Crust:

  1. In a medium saucepan, combine granulated sugar, brown sugar, and heavy cream. Cook over medium heat, stirring constantly, until sugars dissolve.
  2. Bring mixture to a boil and cook until it reaches 240°F (soft-ball stage) on a candy thermometer, about 5-7 minutes.
  3. Remove from heat and stir in butter, vanilla, and pecans. Stir vigorously until mixture thickens and becomes creamy.
  4. Drop by tablespoonfuls onto parchment paper. Let cool completely before serving.

Notes

You can customize the seasonings to taste.

How to Prepare This Dish

Steps and time-saving tips

Start by gathering all your ingredients for Irresistible Southern Pecan Pralines—this ensures you won’t miss a thing mid-process. First, toast the pecans in a dry skillet over medium heat for about 5 minutes, stirring often, until fragrant. This step deepens their flavor, so don’t skip it. Next, combine sugar, butter, and heavy cream in a heavy-bottomed saucepan. Stir constantly over medium heat until the sugar dissolves completely. Then, attach a candy thermometer and let the mixture boil without stirring until it reaches 238°F (soft-ball stage). Meanwhile, line a baking sheet with parchment paper for easy cleanup. Once the syrup hits the right temperature, remove it from the heat and stir in vanilla extract, baking soda, and the toasted pecans. Keep stirring until the mixture thickens slightly and loses its gloss. Quickly drop spoonfuls onto the prepared sheet, working fast before the pralines set. If they harden too much in the pan, gently reheat the mixture while stirring. Let them cool completely before serving—they’ll firm up as they sit. For a time-saving twist, use pre-chopped pecans, but toast them anyway for the best taste.

Mistakes I’ve made and learned from

I’ve learned the hard way that timing is everything with Irresistible Southern Pecan Pralines. Once, I walked away while the syrup was boiling, and it scorched—ruining the entire batch. Now, I stay glued to the stove, stirring as needed and watching the thermometer like a hawk. Another lesson? Don’t skip the parchment paper. I thought a greased sheet would suffice, but the pralines stuck stubbornly, crumbling when I tried to lift them. For more candy-making wisdom, check out my guide on common candy mistakes. Also, if your pralines turn out grainy, you might have stirred too much after adding the pecans. I fixed this by gently folding just until combined, as explained in my perfect praline texture post. Trust me, a little patience saves a lot of frustration!

Cultural Connection and Variations

Where this recipe comes from

Irresistible Southern Pecan Pralines carry the sweet soul of the American South, where sugar, butter, and pecans blend into a melt-in-your-mouth tradition. Born in Louisiana, these candies reflect Creole and French influences, with early recipes dating back to the 19th century. Families often passed down their versions, tweaking the ratio of brown sugar to cream or adding a splash of vanilla for extra warmth. Meanwhile, in Texas, some cooks prefer a firmer texture, while coastal regions might fold in coconut for a tropical twist.

Beyond the U.S., similar treats pop up worldwide. In France, they call them “pralines,” but almonds often replace pecans. Mexican cooks might infuse cinnamon, and in the Caribbean, you’ll find them spiked with rum. My grandma’s Irresistible Southern Pecan Pralines, however, stayed classic—just sticky, buttery, and loaded with Georgia pecans. She’d wrap them in wax paper during holidays, a ritual that turned every bite into nostalgia.

How it fits in today’s cooking

Today, Irresistible Southern Pecan Pralines still shine as holiday staples, but they’ve also found a place in modern dessert boards and gourmet gift boxes. Home cooks now experiment with vegan butter or maple syrup swaps, proving this treat adapts without losing its charm. Some even crumble pralines over Southern-style biscuits for a sweet-savory brunch twist.

Seasonal or not, these candies bridge generations. Food bloggers pair them with classic iced tea, while busy parents stash them in lunchboxes for a homemade surprise. Whether you keep it traditional or play with flavors, Irresistible Southern Pecan Pralines remind us that some recipes never go out of style.

Taste and Texture

What makes it delicious

Irresistible Southern Pecan Pralines deliver a symphony of rich, buttery sweetness with a satisfying crunch in every bite. The caramelized sugar base melts into a velvety smooth texture, while toasted pecans add a nutty depth and irresistible crispness. Warm vanilla and a hint of brown sugar create a fragrant aroma that lingers, making each piece feel like a cozy, indulgent treat. Whether you savor them slowly or enjoy them in one go, Irresistible Southern Pecan Pralines strike the perfect balance between creamy and crunchy.

Boosting the flavor

For an extra layer of warmth, try stirring a pinch of cinnamon or nutmeg into the sugar mixture before cooking. If you love a touch of saltiness, a light sprinkle of flaky sea salt on top enhances the pralines’ sweetness beautifully. For a bolder twist, swap half the pecans with chopped salted caramel brownies for a decadent hybrid treat. Pairing these pralines with a drizzle of homemade chocolate sauce or a side of vanilla ice cream takes them to the next level. Experiment with these ideas to make your Irresistible Southern Pecan Pralines even more memorable.

Tips for Success

Best practices for results

Always use a candy thermometer when making Irresistible Southern Pecan Pralines, as precise temperature ensures the perfect texture. Stir the mixture constantly to prevent scorching, and work quickly once it reaches the soft-ball stage. For extra richness, toast the pecans lightly before adding them to the syrup. Additionally, let the pralines cool completely on parchment paper to avoid sticking and maintain their signature glossy finish.

Mistakes to avoid

Avoid rushing the cooking process, as undercooked syrup will leave your Irresistible Southern Pecan Pralines too soft. If the mixture crystallizes, gently reheat it with a splash of water while stirring. For more troubleshooting tips, check out our guide on fixing candy failures. Also, resist the urge to overmix after removing the pot from heat, which can cause graininess. For perfect consistency every time, review our candy temperature guide before starting.

Serving and Pairing Suggestions

How to serve this dish

Serve Irresistible Southern Pecan Pralines as a sweet finale to a cozy dinner or as a standout treat at holiday gatherings. For a festive touch, arrange them on a vintage cake stand with a sprinkle of edible gold dust. Alternatively, package them in decorative boxes tied with ribbon for heartfelt gifts. During brunch, pair them with coffee for a delightful mid-morning indulgence. No matter the occasion, their rich caramel flavor and crunchy pecans always steal the spotlight.

What goes well with it

Elevate your Irresistible Southern Pecan Pralines by serving them with a steaming cup of spiced chai tea. The warm spices in the tea highlight the pralines’ buttery sweetness. For a decadent twist, try pairing them with a scoop of vanilla bean ice cream—the creamy texture balances the pralines’ crunch. If you love dessert pairings, explore our Southern Bourbon Bread Pudding for another Southern-inspired delight. Alternatively, serve them alongside our Classic Pecan Pie for a pecan-lover’s dream dessert spread.

What makes Southern pecan pralines so irresistible?

Irresistible Southern Pecan Pralines get their addictive quality from the perfect balance of creamy, buttery caramel and crunchy pecans. The slow-cooked sugar mixture creates a melt-in-your-mouth texture that’s distinctly Southern.

How do you keep pecan pralines from crystallizing?

The key to smooth Irresistible Southern Pecan Pralines is controlling the sugar temperature and stirring gently. Adding a tablespoon of corn syrup or cream of tartar helps prevent sugar crystals from forming during cooking.

Can I use other nuts instead of pecans in pralines?

While you can substitute walnuts or almonds, authentic Irresistible Southern Pecan Pralines rely on pecans for their signature flavor and texture. Pecans have a buttery richness that pairs perfectly with the caramelized sugar.

Why are my homemade pecan pralines too soft?

If your Irresistible Southern Pecan Pralines don’t set properly, you likely didn’t cook the sugar mixture to the correct hard-ball stage (248-250°F). Humidity can also affect setting—try making them on a dry day or add 1-2 minutes to your cooking time.

Easy Peanut Butter Fritos Candy – Irresistible Recipe

easy-peanut-butter-fritos-candy

“`html

Introduction

There’s something magical about the combination of sweet, salty, and crunchy—especially when it comes to no-bake treats. If you’re craving a dessert that’s effortless yet unforgettable, this Irresistible Peanut Butter Fritos Candy Recipe will steal the show. Whether you need a quick party snack or a late-night indulgence, this recipe delivers big flavor with minimal effort. Plus, it’s the kind of nostalgic comfort food that brings back memories of childhood while satisfying your grown-up sweet tooth. Trust me, one bite and you’ll wonder how you ever lived without it.

About This Recipe

Irresistible Peanut Butter Fritos Candy Recipe is a simple yet genius dessert that transforms humble ingredients into something extraordinary. By layering Fritos corn chips with a creamy peanut butter mixture and topping it with melted chocolate, you create a treat that balances salty, sweet, and crunchy in every bite. What makes this recipe special is its versatility. You can customize it with dark, milk, or white chocolate, or even drizzle caramel for extra decadence. Moreover, it requires no baking, making it perfect for busy days or last-minute cravings.

This recipe fits perfectly with the playful, approachable tone of Brek Cakes, where we celebrate easy yet impressive desserts. If you love no-fuss recipes with big flavor, you’ll also adore our 3-Ingredient Peanut Butter Cups or our Salted Caramel Pretzel Bark. These treats prove that sometimes the simplest recipes bring the most joy. Whether you’re a seasoned baker or a kitchen newbie, Irresistible Peanut Butter Fritos Candy Recipe guarantees delicious results every time.

Why I Love This Recipe

This recipe holds a special place in my heart because it reminds me of my grandma’s kitchen. She always had a knack for turning everyday ingredients into something extraordinary, and this candy captures that same spirit. I love how the salty Fritos contrast with the rich peanut butter and chocolate, creating a flavor explosion that’s impossible to resist. Even better, it’s a recipe I can whip up with my kids, making it a fun family activity. Every time I make it, I’m reminded that the best desserts don’t need to be complicated—just packed with love and a little bit of crunch.

“`

Health and Nutrition

Why it’s good for your body

Irresistible Peanut Butter Fritos Candy Recipe packs a surprising mix of nutrients while satisfying your sweet tooth. First, peanut butter delivers plant-based protein and healthy fats, which keep you full longer and support muscle repair. Additionally, the natural sweetness from honey or maple syrup offers a better alternative to refined sugar, giving you energy without a harsh crash. Moreover, Fritos add a satisfying crunch while keeping the recipe gluten-free, making it a great option for those with sensitivities.

Furthermore, dark chocolate chips—if you use them—bring antioxidants that fight inflammation and support heart health. The combination of ingredients in Irresistible Peanut Butter Fritos Candy Recipe creates a balanced treat that fuels your body and mind. Finally, because it’s easy to portion, you can enjoy it mindfully without overindulging. Whether as a post-workout snack or a midday pick-me-up, this recipe delivers both flavor and nourishment.

How it fits in a healthy lifestyle

Irresistible Peanut Butter Fritos Candy Recipe fits perfectly into a balanced diet when enjoyed in moderation. Its protein and healthy fats make it a smart choice for curbing cravings, especially if you’re managing a high-protein or gluten-free diet. For those focused on heart health, swapping in dark chocolate boosts flavonoid intake, which supports circulation. Pair it with a piece of fruit or a handful of nuts for a more rounded snack.

If you’re meal prepping, this recipe stores well, so you can avoid less nutritious impulse buys. For more gluten-free ideas, check out our gluten-free dessert roundup. And if you love peanut butter’s benefits, our peanut butter recipe collection offers even more ways to enjoy it. With simple ingredients and quick prep, Irresistible Peanut Butter Fritos Candy Recipe makes healthy eating deliciously effortless.

Print
clock clock iconcutlery cutlery iconflag flag iconfolder folder iconinstagram instagram iconpinterest pinterest iconfacebook facebook iconprint print iconsquares squares iconheart heart iconheart solid heart solid icon

Irresistible Peanut Butter Fritos Candy


  • Author: Chef Emy

Description

A sweet and salty treat combining crunchy Fritos with rich peanut butter and chocolate.


Ingredients

Scale

For the Crust:

  • 4 cups Fritos corn chips
  • 1 cup creamy peanut butter
  • 1/2 cup honey
  • 1/2 cup brown sugar
  • 1 cup semi-sweet chocolate chips
  • 1/2 cup chopped peanuts (optional)

Instructions

1. Prepare the Crust:

  1. Line a baking sheet with parchment paper and spread Fritos evenly on it.
  2. In a saucepan over medium heat, combine peanut butter, honey, and brown sugar. Stir until smooth and well blended.
  3. Pour the peanut butter mixture over the Fritos, spreading evenly to coat.
  4. Sprinkle chocolate chips over the top while the mixture is still warm. Let sit for 2 minutes to melt, then spread evenly.
  5. If desired, sprinkle chopped peanuts over the melted chocolate.
  6. Allow to cool completely, then break into pieces and serve.

Notes

You can customize the seasonings to taste.

How to Prepare This Dish

Steps and time-saving tips

Start by lining a baking sheet with parchment paper for easy cleanup. Next, spread a generous layer of Fritos evenly across the sheet, making sure they don’t overlap. In a microwave-safe bowl, combine peanut butter, honey, and a pinch of salt, then microwave for 30 seconds to soften the mixture. Stir everything until smooth, then drizzle the warm peanut butter blend over the Fritos, using a spatula to coat them evenly. For extra richness, sprinkle mini chocolate chips on top while the peanut butter is still warm so they melt slightly. Transfer the tray to the fridge and let it chill for at least 30 minutes—this helps the candy set perfectly. Once firm, break it into clusters and serve. To save time, prep the peanut butter mixture while the Fritos layer on the tray, and use a squeeze bottle for mess-free drizzling. If you’re doubling the batch, work in layers to ensure even coverage.

Mistakes I’ve made and learned from

I once rushed the chilling step and ended up with crumbly pieces that wouldn’t hold together. Now, I always set a timer and resist the urge to cut corners—patience is key for that perfect snap. Another time, I overheated the peanut butter mixture, which made it too runny to stick to the Fritos. A quick fix? Microwave in shorter bursts and stir frequently, just like I do with my no-bake energy bites. Also, skipping the parchment paper led to a sticky disaster (trust me, it’s worth the extra second). For more foolproof tips, check out my guide to homemade candy troubleshooting, where I share hard-earned lessons for avoiding common pitfalls.

Cultural Connection and Variations

Where this recipe comes from

The Irresistible Peanut Butter Fritos Candy Recipe feels like a love letter to American snack culture. It blends the salty crunch of Fritos with the creamy sweetness of peanut butter and chocolate, creating a treat that’s both nostalgic and wildly addictive. Many trace its roots to Southern potlucks and holiday gatherings, where home cooks loved turning pantry staples into crowd-pleasers. Some families even swear it originated as a Depression-era hack, stretching simple ingredients into something special.

Around the world, similar treats take different forms. In Mexico, you might find a version with dulce de leche drizzled over corn chips. Meanwhile, in parts of Asia, sesame or rice crisps often replace Fritos for a nutty twist. Even within the U.S., regional tweaks pop up. Some bakers add a sprinkle of sea salt for gourmet flair, while others mix in mini marshmallows for extra gooeyness. No matter the variation, the Irresistible Peanut Butter Fritos Candy Recipe always delivers that perfect sweet-salty balance.

How it fits in today’s cooking

Today, this recipe thrives as a no-fuss favorite for busy cooks and nostalgic snackers alike. It’s a star at holiday cookie swaps, but also fits seamlessly into weeknight dessert rotations. Modern twists include using almond butter for a nut-free version or swapping in dark chocolate for a richer finish. Some even layer it into easy dessert parfaits for a playful upgrade.

Its simplicity keeps it relevant. Unlike fussy pastries, the Irresistible Peanut Butter Fritos Candy Recipe requires zero baking—just melt, mix, and chill. That’s why it’s a go-to for last-minute parties or quick snack fixes. Whether you’re a seasoned chef or a first-time cook, this recipe proves that the best flavors often come from the humblest ingredients.

Taste and Texture

What makes it delicious

The Irresistible Peanut Butter Fritos Candy Recipe delivers a knockout combo of sweet, salty, and crunchy bliss. First, creamy peanut butter melts into the crispy Fritos, creating a rich, nutty depth that lingers on your tongue. Meanwhile, the buttery toffee layer adds a caramelized sweetness, while a drizzle of chocolate ties everything together with smooth, velvety contrast. Every bite crackles with texture—crunchy, chewy, and utterly addictive. Plus, the warm aroma of toasted peanuts and melted chocolate makes this treat as fragrant as it is delicious. Whether you savor it slowly or devour it in seconds, the Irresistible Peanut Butter Fritos Candy Recipe never fails to delight.

Boosting the flavor

Want to take your Irresistible Peanut Butter Fritos Candy Recipe to the next level? Try swapping dark chocolate for milk chocolate to add a bold, bittersweet twist. For extra crunch, sprinkle crushed pretzels or toasted coconut on top before the chocolate sets. If you love a hint of spice, a pinch of flaky sea salt or a dash of cinnamon enhances the sweet-and-salty balance perfectly. Craving more inspiration? Check out our homemade candy recipes for creative variations, or explore peanut butter desserts to keep the nutty goodness going. With these easy tweaks, your candy will shine even brighter!

Tips for Success

Best practices for results

Always use fresh Fritos for the best crunch in your Irresistible Peanut Butter Fritos Candy Recipe. Meanwhile, warm the peanut butter slightly to make it easier to drizzle. For even layers, press the mixture firmly into the pan before chilling. Additionally, let the candy set completely in the fridge for at least two hours to ensure clean slices. Finally, store leftovers in an airtight container to maintain texture.

Mistakes to avoid

Avoid overheating the chocolate, as it can seize and ruin the smooth texture. Instead, melt it gently in short bursts, stirring frequently. Many people also skip lining the pan, but parchment paper prevents sticking and makes removal effortless. If your peanut butter mixture feels too thick, thin it with a teaspoon of coconut oil for better drizzling. For more chocolate tips, check out our chocolate melting guide. Also, if you love peanut butter desserts, try our peanut butter cups recipe for another easy treat.

Serving and Pairing Suggestions

How to serve this dish

For a fun twist, arrange your Irresistible Peanut Butter Fritos Candy Recipe on a rustic wooden board or colorful platter to make it pop. Meanwhile, drizzle extra melted chocolate over the top and sprinkle crushed peanuts for added texture. Serve these sweet-and-salty treats at holiday gatherings, game nights, or even as a unique dessert for potlucks. Additionally, package them in clear cellophane bags tied with ribbon for adorable edible gifts.

What goes well with it

Pair your Irresistible Peanut Butter Fritos Candy Recipe with a cold glass of milk or a creamy vanilla milkshake to balance the rich flavors. Alternatively, try it alongside a scoop of homemade vanilla ice cream for an indulgent dessert combo. If you prefer something lighter, serve it with fresh berries or a drizzle of salted caramel sauce to enhance the sweet and salty contrast.

What ingredients do I need for Irresistible Peanut Butter Fritos Candy Recipe?

You only need 4 simple ingredients for this recipe: Fritos corn chips, creamy peanut butter, chocolate chips, and butter. The Irresistible Peanut Butter Fritos Candy Recipe combines these for a sweet-salty treat that’s easy to make in minutes.

Can I use crunchy peanut butter instead of creamy in this Fritos candy?

Yes, crunchy peanut butter works well if you prefer extra texture, but creamy peanut butter blends smoother for the Irresistible Peanut Butter Fritos Candy Recipe. The choice depends on whether you want a chunkier or more uniform consistency in your candy.

How do I store Peanut Butter Fritos Candy to keep it fresh?

Store the Irresistible Peanut Butter Fritos Candy Recipe in an airtight container at room temperature for up to 5 days. For longer freshness, refrigerate it for up to 2 weeks—just let it sit at room temperature for 10 minutes before serving.

Can I make this recipe gluten-free or vegan?

Absolutely! Use gluten-free Fritos and dairy-free chocolate chips to adapt the Irresistible Peanut Butter Fritos Candy Recipe. For a vegan version, ensure your peanut butter and chocolate chips are plant-based and skip any butter substitutes unless needed.

Best Creamy Egg Custard Delight Recipe

best-creamy-egg-custard-delight

“`html

Introduction

There’s something undeniably comforting about a rich, velvety dessert that melts in your mouth. If you’ve ever craved a treat that feels like a warm hug, then Creamy Egg Custard Delight is your answer. This classic dessert combines simplicity with luxury, offering a smooth texture and delicate sweetness that satisfies every craving. Whether you’re reminiscing about childhood desserts or looking for a foolproof recipe to impress guests, this dish delivers. Plus, it’s surprisingly easy to make with just a handful of pantry staples. Let’s dive into why this timeless recipe deserves a spot in your repertoire.

About Creamy Egg Custard Delight

Creamy Egg Custard Delight is a luscious, silky dessert made with eggs, milk, sugar, and a touch of vanilla. Unlike complicated pastries, this recipe relies on basic ingredients to create something extraordinary. The magic happens when these simple components bake into a velvety custard with a delicate wobble. Moreover, it’s versatile—serve it warm for cozy nights or chilled for a refreshing summer treat. If you love desserts that balance sweetness without overwhelming richness, this one hits the mark.

This recipe fits perfectly with our blog’s mission to celebrate approachable yet impressive dishes. Whether you’re a beginner or a seasoned baker, Creamy Egg Custard Delight welcomes everyone. For more inspiration, check out our guide to easy dessert recipes or explore our tips for baking for beginners. After all, great food should feel achievable, not intimidating.

Beyond its simplicity, this custard carries nostalgia. Many cultures have their own version, from French crème brûlée to Spanish flan. Yet, the humble Creamy Egg Custard Delight stands out because it requires no fancy techniques. Just whisk, pour, and bake. The result? A dessert that feels both familiar and special. So, whether you’re hosting a dinner party or treating yourself after a long day, this recipe never disappoints.

Why I Love This Recipe

I’ll never forget the first time I tried Creamy Egg Custard Delight. My grandmother made it for family gatherings, and the first spoonful transported me to pure comfort. Now, whenever I bake it, the aroma fills my kitchen with warmth, just like her home. What I adore most is how effortlessly it brings people together. It’s the dessert I turn to when I want to share love without saying a word. Simple, heartfelt, and utterly delicious—that’s the magic of this recipe.

“`

Health and Nutrition

Why it’s good for your body

Creamy Egg Custard Delight packs a nutritious punch while satisfying your sweet cravings. First, eggs provide high-quality protein, which helps repair muscles and keeps you full longer. Additionally, the dish contains calcium from milk or cream, supporting strong bones and teeth. Since it’s lightly sweetened, you won’t experience the energy crashes that come with sugar-heavy desserts.

Moreover, Creamy Egg Custard Delight offers a dose of essential vitamins like B12 and D, which boost energy and immune function. The simplicity of its ingredients means fewer additives, making it a cleaner choice compared to processed treats. For those watching their carb intake, this dessert delivers rich flavor without excessive sugars, especially if you opt for natural sweeteners.

Finally, the smooth texture of Creamy Egg Custard Delight makes it easy to digest, perfect for sensitive stomachs. Whether you enjoy it warm or chilled, each spoonful provides comfort and nourishment. With its balanced macros and micronutrients, this dessert proves indulgence and wellness can go hand in hand.

How it fits in a healthy lifestyle

Creamy Egg Custard Delight fits seamlessly into balanced eating habits. If you follow a gluten-free diet, this dessert naturally avoids wheat-based ingredients, making it a safe choice. For protein-focused meal plans, the eggs in the recipe help meet daily requirements without heavy fats. You can even pair it with fresh berries for extra fiber and antioxidants.

Planning a heart-healthy menu? Substitute whole milk with almond or oat milk to reduce saturated fat. Creamy Egg Custard Delight also works well as a post-workout treat, replenishing energy without derailing fitness goals. For more gluten-free ideas, explore our gluten-free baking guide or discover other high-protein snacks in our protein-packed desserts collection. Enjoy it mindfully, and it becomes a delicious part of your wellness journey.

Print
clock clock iconcutlery cutlery iconflag flag iconfolder folder iconinstagram instagram iconpinterest pinterest iconfacebook facebook iconprint print iconsquares squares iconheart heart iconheart solid heart solid icon

Creamy Egg Custard Delight


  • Author: Chef Emy

Description

A smooth and velvety egg custard with a hint of vanilla, perfect for dessert.


Ingredients

Scale

For the Crust:

  • 4 large eggs
  • 2 cups whole milk
  • 1/2 cup granulated sugar
  • 1 tsp vanilla extract
  • 1/4 tsp salt

Instructions

1. Prepare the Crust:

  1. Preheat oven to 325°F (165°C).
  2. In a bowl, whisk together eggs, sugar, vanilla, and salt until smooth.
  3. Gradually add milk while whisking continuously.
  4. Pour the mixture into ramekins and place them in a baking dish filled with hot water (water bath).
  5. Bake for 30 minutes or until set but still slightly jiggly in the center.
  6. Remove from oven and let cool before serving.

Notes

You can customize the seasonings to taste.

How to Prepare This Dish

Steps and time-saving tips

Start by preheating your oven to 325°F to ensure even baking for your Creamy Egg Custard Delight. Meanwhile, lightly grease six ramekins with butter to prevent sticking. In a large mixing bowl, whisk together the eggs, sugar, and vanilla extract until smooth and slightly frothy. Gradually pour in the warm milk while continuously whisking to avoid curdling. For a silky texture, strain the mixture through a fine-mesh sieve into a pitcher. This step removes any lumps and guarantees a velvety custard. Next, evenly divide the mixture among the prepared ramekins. To save time, place them all on a baking tray before filling. Carefully transfer the tray to the oven and pour hot water into it until it reaches halfway up the sides of the ramekins. This water bath ensures gentle, even cooking. Bake for 35-40 minutes until the edges are set but the center still jiggles slightly. Finally, let the custards cool at room temperature before chilling them for at least two hours. For a quicker chill, pop them in the freezer for 30 minutes first. Top with fresh berries or a caramel drizzle just before serving.

Mistakes I’ve made and learned from

I once rushed the straining step and ended up with a grainy Creamy Egg Custard Delight—lesson learned! Now I never skip sieving the mixture, and the results are consistently smooth. Another blunder? Overbaking. I used to pull the custards out only when fully firm, but they’d turn rubbery. A slight jiggle in the center means they’re perfect, as they’ll set further while cooling. If you’re new to water baths, check out my water bath baking guide for foolproof tips. Also, if your custards crack, don’t panic. A quick fix is topping them with whipped cream or fruit, like in this easy custard toppings post. Trust me, every mistake makes the next batch better!

Cultural Connection and Variations

Where this recipe comes from

Creamy Egg Custard Delight traces its roots back to European kitchens, where simple ingredients like eggs, milk, and sugar transformed into velvety comfort food. Originally, families baked it in wood-fired ovens, often serving it during holidays or as a humble yet satisfying dessert. Over time, the dish traveled across continents, adapting to local tastes. In Asia, for instance, cooks might infuse it with pandan or matcha, while Latin American versions sometimes feature a caramelized sugar layer, similar to flan.

In my family, Creamy Egg Custard Delight became a Sunday tradition, passed down from my grandmother, who insisted on using farm-fresh eggs and a pinch of nutmeg. Meanwhile, British cooks might call it “custard tart,” and the French version, “crème renversée,” often skips the crust entirely. No matter the variation, the essence remains—a silky, comforting treat that feels like home. Whether you enjoy it warm or chilled, this dish carries stories in every spoonful.

How it fits in today’s cooking

Today, Creamy Egg Custard Delight still shines as a versatile favorite. Busy home cooks love it because it requires just a handful of pantry staples, yet feels special enough for celebrations. Some bakers even tweak it for modern diets, swapping dairy for coconut milk or reducing sugar without losing its signature richness. During the holidays, it pairs perfectly with spiced desserts, like our pumpkin spice cupcakes, adding a creamy contrast to bold flavors.

Beyond desserts, this custard fits into everyday routines—think breakfast parfaits or a cozy afternoon snack. Meal preppers appreciate its make-ahead convenience, and kids adore its smooth texture. For a fun twist, try layering it with fresh berries or a drizzle of salted caramel sauce. Whether you stick to tradition or experiment, Creamy Egg Custard Delight proves that some classics never go out of style.

Taste and Texture

What makes it delicious

Creamy Egg Custard Delight melts on your tongue with a velvety smoothness, thanks to its rich custard base. The first bite delivers a delicate sweetness, balanced by the warm, comforting notes of vanilla and nutmeg. Meanwhile, the top layer forms a lightly caramelized skin that adds a subtle contrast to the silky interior. Every spoonful feels indulgent yet light, with a fragrant aroma that fills the room as it bakes. Creamy Egg Custard Delight is a dessert that satisfies both your sweet tooth and your love for luxurious textures.

Boosting the flavor

For an extra layer of decadence, drizzle warm caramel or a dusting of cinnamon over your Creamy Egg Custard Delight. If you prefer a citrusy twist, a splash of orange zest brightens the custard beautifully. Alternatively, swap regular sugar for brown sugar to deepen the flavor with molasses notes. Pair it with fresh berries or a dollop of whipped cream for a refreshing contrast. For more dessert inspiration, check out our homemade caramel sauce or explore creative vanilla dessert pairings to elevate your treat.

Tips for Success

Best practices for results

Always preheat your oven before baking Creamy Egg Custard Delight to ensure even cooking. Use room-temperature eggs and dairy for a smoother, lump-free texture. Additionally, stir the custard mixture gently to avoid incorporating too much air, which can cause bubbles. For the creamiest results, bake the custard in a water bath and let it cool gradually. Finally, refrigerate Creamy Egg Custard Delight for at least two hours before serving to enhance its rich flavor.

Mistakes to avoid

Overbaking the custard is a common mistake that leads to a rubbery texture. To prevent this, remove Creamy Egg Custard Delight from the oven when the edges are set but the center still jiggles slightly. Another error is skipping the water bath, which can cause uneven cooking. For more tips on perfecting custards, check out our guide on avoiding custard failures. Also, avoid rushing the chilling process—letting the custard cool properly ensures the ideal consistency. Learn more about achieving the perfect custard texture with our expert advice.

Serving and Pairing Suggestions

How to serve this dish

For a stunning presentation, serve Creamy Egg Custard Delight in elegant ramekins or small glass jars. Meanwhile, top each portion with a sprinkle of cinnamon or fresh berries for a pop of color. Alternatively, drizzle a touch of caramel sauce over the custard to elevate its richness. Since this dish shines at brunch or holiday gatherings, consider pairing it with a light salad or fresh fruit platter. Finally, garnish with mint leaves for a refreshing finish that delights both the eyes and the palate.

What goes well with it

A warm cup of chai tea complements Creamy Egg Custard Delight beautifully, as the spices enhance its creamy texture. For a brunch spread, try serving it alongside our Fluffy Buttermilk Pancakes to balance sweetness with a touch of indulgence. If you prefer a savory contrast, our Herbed Garlic Bread adds a delightful crunch that offsets the custard’s smoothness. Either way, these pairings ensure every bite feels perfectly balanced.

What is the secret to making Creamy Egg Custard Delight smooth and lump-free?

The key to a perfectly smooth Creamy Egg Custard Delight is tempering the eggs slowly with warm milk and straining the mixture before baking. Avoid high heat, which can cause curdling, and whisk constantly for a silky texture. A water bath during baking also ensures even cooking.

Can I make Creamy Egg Custard Delight without an oven?

Yes! Creamy Egg Custard Delight can be prepared stovetop by gently cooking the mixture in a double boiler until thickened. Stir continuously to prevent scorching, and chill thoroughly for the same rich texture. This method works great for no-bake versions.

How long does homemade Creamy Egg Custard Delight last in the fridge?

Freshly made Creamy Egg Custard Delight keeps for 3-4 days when stored airtight in the refrigerator. For best quality, press plastic wrap directly onto the surface to prevent a skin from forming. Always check for off smells before serving leftovers.

What’s the difference between Creamy Egg Custard Delight and flan?

While both are custards, Creamy Egg Custard Delight typically has a simpler ingredient list (eggs, milk, sugar) and a softer set, whereas flan includes caramelized sugar and often condensed milk for a denser texture. Both make delicious desserts with distinct cultural roots.

Easy Cinnamon-Sugar Crescent Roll Pizza Recipe

easy-cinnamon-sugar-crescent-pizza

“`html

Introduction

There’s something magical about the smell of warm cinnamon and sugar wafting through the kitchen, especially when it’s coming from a freshly baked Irresistible Cinnamon-Sugar Crescent Roll Pizza. Whether you’re craving a cozy weekend treat or a quick dessert to impress guests, this recipe delivers pure comfort in every bite. With its flaky crescent roll crust, buttery cinnamon-sugar topping, and irresistible gooeyness, it’s the kind of dish that brings people together. Plus, it’s so easy to make that even beginners can pull it off like a pro. Trust me, once you try it, you’ll want to make it again and again.

About This Recipe

Irresistible Cinnamon-Sugar Crescent Roll Pizza is a playful twist on classic cinnamon rolls, combining the simplicity of crescent dough with the nostalgic flavors of a cinnamon-sugar dessert. Instead of rolling and slicing, you’ll press the dough into a pizza shape, creating a crispy yet tender base that’s perfect for sharing. The buttery cinnamon-sugar mixture caramelizes as it bakes, forming a sweet, crackly topping that’s impossible to resist. Drizzled with a simple glaze, it’s a dessert that feels indulgent but comes together in minutes.

This recipe matters because it solves the eternal dilemma of wanting something delicious without spending hours in the kitchen. Whether you’re hosting a brunch, need a last-minute party dish, or simply want to treat yourself, this crescent roll pizza delivers. It fits perfectly with Brek Cakes’ mission to share approachable, crowd-pleasing recipes that make everyday moments special. If you love easy desserts with big flavor, you’ll also adore our 5-Minute Chocolate Mug Cake or our Classic Berry Crumble—both are just as simple and satisfying.

What makes this recipe stand out is its versatility. You can customize it with nuts, drizzle it with caramel, or even add a scoop of vanilla ice cream for an extra-decadent touch. The crescent roll base ensures a light, flaky texture, while the cinnamon-sugar topping packs a nostalgic punch. Best of all, it’s a recipe that works for any occasion, from lazy Sunday mornings to impromptu gatherings. No one will guess how effortless it really is.

Why I Love This Recipe

I’ll never forget the first time I made Irresistible Cinnamon-Sugar Crescent Roll Pizza. It was a snowy afternoon, and my kids were begging for something sweet. With barely any ingredients on hand, I threw this together, and it instantly became a family favorite. There’s something so comforting about the way the cinnamon-sugar bubbles and the dough turns golden—it’s like a hug in dessert form. Now, it’s my go-to recipe when I want to create a little joy without the fuss. Every time I make it, I’m reminded that the best memories often come from the simplest recipes.

“`

Health and Nutrition

Why it’s good for your body

Irresistible Cinnamon-Sugar Crescent Roll Pizza delivers more than just delicious flavor. First, cinnamon packs a powerful punch of antioxidants, which help fight inflammation in your body. Additionally, this sweet treat offers a quick energy boost, thanks to the natural sugars in the dough and topping. Meanwhile, the crescent roll base provides a light, flaky texture that satisfies cravings without feeling overly heavy.

Moreover, Irresistible Cinnamon-Sugar Crescent Roll Pizza can be a fun way to enjoy dessert in moderation. Since cinnamon may help regulate blood sugar levels, this recipe strikes a balance between indulgence and mindful eating. Furthermore, you can easily customize it with whole-grain dough or a sprinkle of nuts for extra fiber and protein. Ultimately, this dish proves that tasty treats can still offer some nutritional perks.

How it fits in a healthy lifestyle

Irresistible Cinnamon-Sugar Crescent Roll Pizza fits perfectly into a balanced diet when enjoyed thoughtfully. Pair it with protein-rich foods like Greek yogurt or a handful of almonds to create a satisfying snack. For those watching their sugar intake, try reducing the cinnamon-sugar mix slightly or opting for a sugar substitute.

If you’re exploring gluten-free options, swap the crescent rolls for a gluten-free dough alternative. You can also check out our guide on gluten-free baking tips for more ideas. For heart-healthy choices, consider using a light butter spread or coconut oil. And if you’re looking for other ways to enjoy sweets mindfully, our healthy dessert swaps offer plenty of inspiration. With a few tweaks, this recipe can align with almost any dietary goal.

Print
clock clock iconcutlery cutlery iconflag flag iconfolder folder iconinstagram instagram iconpinterest pinterest iconfacebook facebook iconprint print iconsquares squares iconheart heart iconheart solid heart solid icon

Irresistible Cinnamon-Sugar Crescent Roll Pizza


  • Author: Chef Emy

Description

A sweet and easy dessert pizza made with crescent roll dough, cinnamon, sugar, and a simple glaze.


Ingredients

Scale

For the Crust:

  • 1 can (8 oz) refrigerated crescent roll dough
  • 1/4 cup unsalted butter, melted
  • 1/4 cup granulated sugar
  • 1 tbsp ground cinnamon
  • 1/2 cup powdered sugar
  • 12 tbsp milk
  • 1/2 tsp vanilla extract

Instructions

1. Prepare the Crust:

  1. Preheat oven to 375°F (190°C). Unroll crescent dough and press into a greased pizza pan or baking sheet, sealing perforations.
  2. Brush melted butter evenly over the dough. Mix granulated sugar and cinnamon, then sprinkle over the buttered dough.
  3. Bake for 12-15 minutes until golden brown. Let cool slightly.
  4. Whisk powdered sugar, milk, and vanilla to make a glaze. Drizzle over the warm pizza.
  5. Slice and serve warm.

Notes

You can customize the seasonings to taste.

How to Prepare This Dish

Steps and time-saving tips

First, preheat your oven to 375°F and line a baking sheet with parchment paper. Unroll the crescent dough and press the seams together to form a single sheet. Next, spread a thin layer of softened butter over the dough, leaving a small border around the edges. Sprinkle a generous mix of cinnamon and sugar evenly across the surface. For extra flavor, add a pinch of nutmeg or a drizzle of vanilla extract. Carefully roll the dough into a log, starting from the long side, and slice it into even rounds. Arrange the rounds on the baking sheet, slightly overlapping them in a spiral pattern to create a pizza shape. Bake for 12-15 minutes until golden brown. While the Irresistible Cinnamon-Sugar Crescent Roll Pizza cools, whisk together powdered sugar and milk for a simple glaze. Drizzle it over the warm pizza just before serving. To save time, prep the cinnamon-sugar mix ahead or use store-bought crescent dough.

Mistakes I’ve made and learned from

I once rushed the rolling process and ended up with uneven slices that baked inconsistently. Now, I chill the dough for 10 minutes before slicing—it holds its shape better. Another time, I over-glazed the Irresistible Cinnamon-Sugar Crescent Roll Pizza, making it too sweet. A light drizzle is all you need, as I learned from my perfecting glazes experiment. If your edges brown too quickly, tent the pizza with foil, a trick I picked up while adjusting baking temperatures. These small tweaks make a big difference!

Cultural Connection and Variations

Where this recipe comes from

The Irresistible Cinnamon-Sugar Crescent Roll Pizza feels like a love letter to cozy mornings and family gatherings. While its exact origins are hazy, the dish borrows from European pastry traditions, where buttery dough and warm spices like cinnamon have long been staples. Think of it as a cross between a German streusel and an American quick dessert—easy to make but impossible to resist.

In some households, bakers swap crescent rolls for puff pastry or even homemade dough for a richer texture. Others add a drizzle of caramel or a sprinkle of chopped nuts for extra crunch. My grandma used to make a version with apple slices tucked between the layers, turning it into a makeshift apple pie. No matter how you tweak it, the Irresistible Cinnamon-Sugar Crescent Roll Pizza always brings people together, whether it’s for brunch, a potluck, or a late-night treat.

Around the world, similar treats pop up with local twists. In Mexico, you might find it with a touch of cayenne for heat. In Scandinavia, cardamom often joins the cinnamon. The beauty of this recipe lies in its flexibility—it adapts to whatever flavors feel like home.

How it fits in today’s cooking

Today, the Irresistible Cinnamon-Sugar Crescent Roll Pizza fits perfectly into our fast-paced lives. Busy parents love it because it’s a shortcut dessert that feels special, while food bloggers rave about its viral potential. It’s a star at holiday brunches, especially when paired with a cozy drink like spiced hot chocolate or a creamy latte.

Modern cooks also experiment with dietary swaps, like using vegan butter or gluten-free dough. Some even turn it into a breakfast pizza by adding a smear of cream cheese or a dollop of berry compote. Whether you’re craving nostalgia or a quick sweet fix, this recipe stays relevant because it’s simple, shareable, and endlessly customizable. After all, who can say no to warm, gooey cinnamon sugar?

Taste and Texture

What makes it delicious

Irresistible Cinnamon-Sugar Crescent Roll Pizza delivers a heavenly mix of warm, buttery sweetness with a hint of cozy spice. The crescent roll base bakes up golden and flaky, offering a crisp outer layer that gives way to a soft, pillowy center. Each bite bursts with fragrant cinnamon and caramelized sugar, while melted butter adds a rich, velvety finish. The aroma alone—a blend of toasted dough and spiced sweetness—will have everyone gathering in the kitchen. Whether you serve it warm or at room temperature, Irresistible Cinnamon-Sugar Crescent Roll Pizza keeps its irresistible charm with every gooey, satisfying slice.

Boosting the flavor

For an extra flavor boost, try drizzling your Irresistible Cinnamon-Sugar Crescent Roll Pizza with a simple vanilla glaze or a dollop of whipped cream cheese frosting. If you love nuts, sprinkle chopped pecans or walnuts over the top before baking for a crunchy contrast. Alternatively, a pinch of nutmeg or cardamom alongside the cinnamon deepens the warmth. Pair it with a scoop of homemade vanilla ice cream for a decadent dessert, or serve it with spiced apple cider to highlight the cozy fall flavors. Small tweaks make this treat even more memorable!

Tips for Success

Best practices for results

Always unroll the crescent dough on a lightly floured surface to prevent sticking. Meanwhile, evenly spread the cinnamon-sugar mixture so every bite of your Irresistible Cinnamon-Sugar Crescent Roll Pizza tastes perfectly balanced. For extra crispiness, bake on the middle rack and rotate the tray halfway through. Additionally, let the pizza cool slightly before slicing to keep the layers intact.

Mistakes to avoid

Avoid overloading the dough with toppings, as this can make the Irresistible Cinnamon-Sugar Crescent Roll Pizza soggy. Instead, stick to a light, even layer for the best texture. Also, never skip greasing the baking sheet or using parchment paper—otherwise, the rolls may stick. For more baking tips, check out our guide on perfect dough consistency. Finally, don’t overbake; pull the pizza out as soon as the edges turn golden. If you’re unsure about timing, our baking time conversions can help adjust for your oven.

Serving and Pairing Suggestions

How to serve this dish

Serve Irresistible Cinnamon-Sugar Crescent Roll Pizza warm for the best gooey texture and aromatic cinnamon flavor. For a stunning presentation, arrange the slices on a wooden board or a decorative platter, then dust them lightly with powdered sugar. Meanwhile, drizzle melted caramel or chocolate sauce in zigzag patterns for extra visual appeal. This dish shines at brunch gatherings, holiday breakfasts, or as a sweet treat during cozy weekend mornings. To elevate the experience, add fresh berries or a scoop of vanilla ice cream on the side for a delightful contrast.

What goes well with it

Pair Irresistible Cinnamon-Sugar Crescent Roll Pizza with a creamy vanilla latte for a comforting breakfast combo—the coffee’s warmth balances the sweetness perfectly. Alternatively, try it with a chilled glass of cold brew or our refreshing Iced Mocha for a cool contrast. For a heartier spread, serve it alongside fluffy scrambled eggs or crispy bacon to balance the richness. If you love dipping sauces, our Salted Caramel Dip adds a luxurious touch that enhances every bite.

Can I use store-bought crescent roll dough for Irresistible Cinnamon-Sugar Crescent Roll Pizza?

Yes! Store-bought crescent roll dough works perfectly for Irresistible Cinnamon-Sugar Crescent Roll Pizza. It saves time and still delivers that flaky, buttery texture. Just unroll the dough, add your toppings, and bake for a quick dessert.

What toppings go well with Irresistible Cinnamon-Sugar Crescent Roll Pizza?

Classic toppings include cinnamon-sugar, melted butter, and a cream cheese glaze. For extra flair, try adding chopped nuts, apple slices, or drizzled caramel. Irresistible Cinnamon-Sugar Crescent Roll Pizza is versatile, so feel free to get creative!

How do I prevent my Irresistible Cinnamon-Sugar Crescent Roll Pizza from getting soggy?

To avoid sogginess, bake the crescent roll crust for 5-7 minutes before adding toppings. This creates a crisp base for your Irresistible Cinnamon-Sugar Crescent Roll Pizza. Also, let it cool slightly before serving to maintain texture.

Can I make Irresistible Cinnamon-Sugar Crescent Roll Pizza ahead of time?

You can prep the dough and toppings separately, but assemble just before baking for best results. Irresistible Cinnamon-Sugar Crescent Roll Pizza tastes freshest when served warm. Leftovers reheat well in the oven for 5 minutes at 350°F.