Delicious Homemade Apple Turnovers: A Perfect Fall Treat

Delicious Apple Turnovers: A Sweet and Flaky Delight

⚖️
Difficulty
Medium

⏲️
Prep Time
30 mins

🕒
Cook Time
25 mins

⏱️
Total Time
55 mins

🍽️
Servings
8 turnovers

Apple turnovers are the perfect dessert to satisfy your sweet cravings while offering a delightful homemade touch. These flaky pastries, enveloping a luscious apple filling, evoke feelings of warmth and nostalgia with every bite. As you take your first bite, you’ll experience the crispiness of the golden pastry dance with the tender, cinnamon-spiked apples—a combination that is simply irresistible. This recipe is not only easy to follow but also allows for creativity in using various types of apples and spices, ensuring each turnover reflects your personal touch.

The best part about making apple turnovers at home is the ability to savor their aroma as they bake in the oven— the wafting scent of butter, sugar, and cinnamon filling your kitchen is a promise of the sweet rewards to come. These apple turnovers can be enjoyed warm with a scoop of vanilla ice cream on the side or cooled with a light glaze drizzled over the top, making them a versatile treat for gatherings or quiet family afternoons.

Quick Recipe Highlights

  • Flavor Profile: Enjoy the balance of sweet and tart apples, enhanced by warm spices like cinnamon and nutmeg.
  • Texture: The contrast between the flaky, crispy outer layer and the soft, juicy apple filling adds an exciting mouthfeel.
  • Aroma: The delightful fragrance of baking apples and warm spices fills the air, creating an inviting atmosphere.
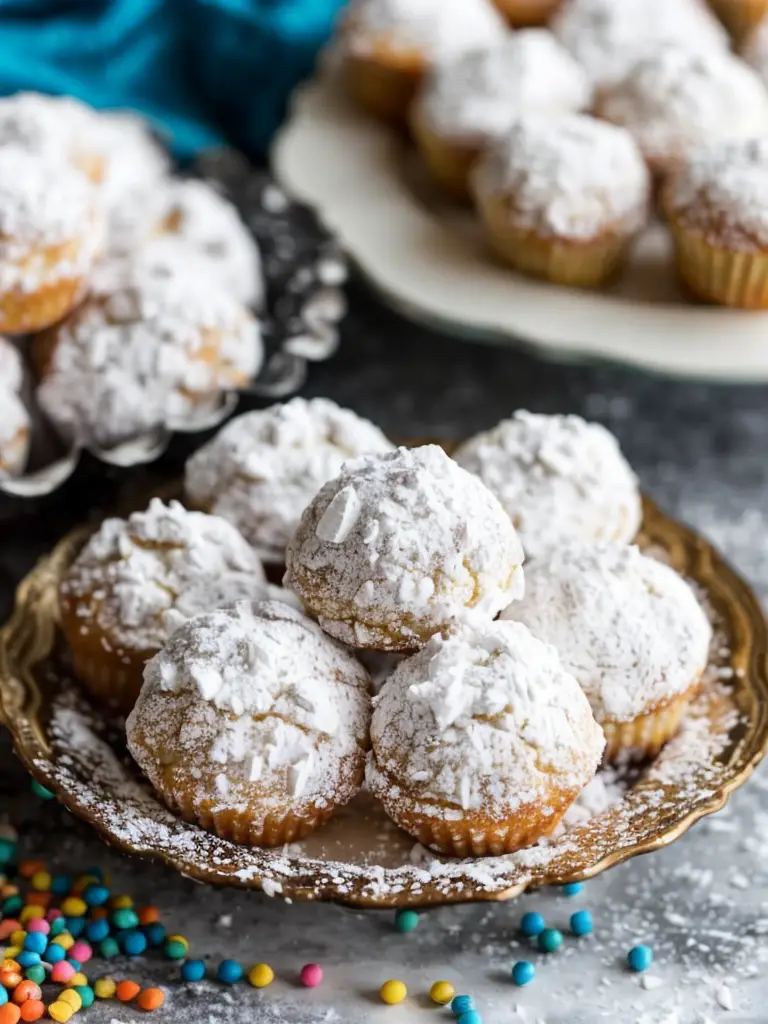
  • Visual Appeal: Golden brown pastries with visible apple chunks, dusted with powdery sugar, look as good as they taste.
  • Skill Level Needed: This recipe is achievable for beginners while offering enough depth to challenge more experienced bakers.
  • Special Equipment: You’ll need basic baking tools, including a baking sheet, rolling pin, and parchment paper.

Recipe Overview

  • Difficulty Level: Apple turnovers present a medium difficulty, making them perfect for those looking to improve their pastry skills without the need for advanced techniques.
  • Category: These delightful pastries fall under dessert and can easily be served as a sweet breakfast option or afternoon snack.
  • Cuisine: While often associated with American baking traditions, apple turnovers have roots in various cultures, showcasing unique ways to celebrate apple harvests.
  • Cost: Ingredients are readily available and budget-friendly, making batches of apple turnovers a cost-effective choice for satisfying a crowd.
  • Season: Autumn is the perfect season for baking apple turnovers as it showcases the best apples at their peak flavor.
  • Occasion: Whether it’s a family gathering, holiday celebration, or simply a cozy night in, apple turnovers are always a welcomed treat.

Why You’ll Love This Recipe

Apple turnovers are an ideal blend of flavor and texture that delights the palate. The sweetness of the baked apples, coupled with the buttery, flaky pastry, creates a satisfying combination that is hard to resist. Not only are they delicious, but they also allow for versatility in flavor by experimenting with different types of apples or adding other ingredients like nuts or raisins.

Preparing apple turnovers is a convenient option for busy bakers. They can be made ahead of time and stored, making them an excellent choice for impromptu gatherings or occasions where time is limited. The simplicity of assembling turnovers allows you to enjoy the baking process without feeling overwhelmed by the intricacies of pastry-making.

Nutritionally, apple turnovers can offer benefits from the fruit itself, providing fiber and essential vitamins, especially when made with fresh, wholesome ingredients. You can even opt for lower-sugar designs or use whole-wheat pastry for a healthier twist without compromising taste.

For social gatherings, these pastries are a hit. Their glossy appearance and inviting aroma create an inviting atmosphere, encouraging conversation and a sense of community among friends and family as they enjoy warm apple turnovers.

Moreover, this recipe showcases cost-effectiveness. With minimal ingredients needed, you can easily make a batch that feeds a crowd without stressing about your budget, making apple turnovers a popular choice for many occasions.

Historical Background and Cultural Significance

The origin of apple turnovers can be traced back to various European traditions of wrapping fruits in dough. Many countries have similar pastry dishes that showcase local produce, particularly seasonal fruits, thus varying the filling based on regional availability.

These pastries are significant culturally, as they often celebrate the harvest season. Many recipes have evolved over generations, incorporating different fruits and spices, and showcasing the creativity of families during festive periods.

Over time, the recipe for apple turnovers has evolved from its basic form into numerous variations, with people incorporating different spices like cardamom or even incorporating caramel in the filling for a decadent twist. Each adaptation tells a unique story of the baker’s influence and the local culture.

Regional variations also abound, with some cultures adding distinctive touches—like a sugar glaze or fresh cream—showcasing how similar recipes can be beautifully unique across the world.

Ingredient Deep Dive

Apple turnovers primarily revolve around the star ingredient—apples. Apples have been cultivated for thousands of years, with documented cultivation as early as 6500 B.C. They hold significant cultural importance in many societies, symbolizing knowledge and temptation in biblical tales. Nutritionally, apples are rich in dietary fiber, vitamin C, and antioxidants. When selecting apples for your turnover, look for firm varieties like Granny Smith or Honeycrisp, which hold their shape well during baking. Store apples in a cool, dry place for maximum freshness, and consider keeping them in the fridge for extended shelf life.

Pastry dough is another essential ingredient. The evolution of pastry recipes dates back centuries, with various cultures contributing to the development of flaky crusts. The beauty of homemade pastry lies in its versatility and the ability to customize it for different fillings, from savory to sweet. The nutritional benefits include complex carbohydrates and fats, contributing to energy levels. When selecting pastry dough, choose one that feels pliable and smooth without cracks. For storage, keep it wrapped in plastic and refrigerated—this will preserve freshness and maintain its texture.

Common Mistakes to Avoid

  • Overworking the dough: This leads to tough turnovers instead of flaky layers. Handle the dough delicately, mixing just until combined.
  • Not chilling the dough: Chilling the pastry before baking helps create a flakier texture. Always allow it to rest in the fridge.
  • Filling too much: While generous filling is tempting, overstuffing can lead to leaks during baking. Follow recommended amounts for best results.
  • Ignoring egg wash: An egg wash provides a golden sheen to your pastry. Skipping this step can lead to lackluster color.
  • Using watery fillings: Ensure the apple mix isn’t too moist. Strain excess liquid or cook the filling slightly to prevent soggy turnovers.
  • Baking on an ungreased tray: Always use parchment paper or oil the baking sheet to avoid sticking.
  • Not preheating the oven: Always preheat your oven before placing in the turnovers to ensure they bake evenly.
  • Using stale ingredients: Always ensure your ingredients, especially spices and flour, are fresh for the best flavor.
  • Skipping cooling: Allow the turnovers to cool slightly before serving—this enhances flavor and texture.
  • Choosing the wrong apple variety: Use apples that hold their shape well when baking; avoid mushy varieties.

Essential Techniques

To master rolling out pastry dough is crucial for creating the ideal base for your apple turnovers. The dough should be rolled out to an even thickness to ensure uniform baking. When rolling, make sure to gently flour your workspace and rolling pin to prevent sticking. It’s important to maintain the dough’s chill, as warmer dough can lead to a tough texture after baking.

Mastering the art of assembling the turnovers is another essential technique. Once you’ve cut the pastry into squares, place the filling in the center, ensuring there’s enough space around the edges for sealing. Be sure to press down the edges firmly and crimp with a fork or fingers to prevent the filling from leaking while they bake.

Additionally, knowing how to glaze your pastries can elevate their presentation and flavor. The egg wash achieves a beautiful gloss and encourages even browning—apply it gently using a pastry brush for a professional finish.

Pro Tips for Perfect Apple Turnovers

Start with chilled ingredients to keep the pastry flaky. When the butter is cold and the dough is well chilled, it creates steam during baking, leading to a delightful rise and flaky texture.

Use a mix of apples for a more complex flavor profile. Combining tart and sweet varieties can significantly enhance the taste, providing a well-rounded filling that pleases all palates.

Cut uniform apple pieces for even cooking. Uniformity ensures that all pieces cook at the same rate, preventing some from being mushy while others remain crunchy.

Test your filling’s sweetness before sealing. Taste your apple mixture, adding sugar or spices as desired to achieve the right flavor before sealing the turnovers.

Experiment with spices for a personalized touch. Beyond the usual cinnamon, consider adding nutmeg or cloves for a creative variation that can really uplift your turnovers.

Create a double batch and freeze the extras. Assemble turnovers and freeze before baking for a quick dessert option that can be ready to go at a moment’s notice.

Dust with powdered sugar or drizzle with caramel for a stunning visual effect. Presentation can elevate the perceived value of homemade desserts, making them suitable for any occasion.

Keep an eye on the baking time. Each oven is different, so monitor your turnovers as they bake to avoid burning or undercooking.

Variations and Adaptations

Regional variations of apple turnovers can include local fruits or integrate specific spices that characterize a cultural cuisine. For instance, a southern twist might incorporate peaches along with apples for a unique summer flavor.

Seasonal adaptations keep the recipe fresh. Substituting apples with seasonal fruit like pears or berries can make delightful hybrid turnovers perfect for various times of the year.

For those with dietary needs, explore gluten-free or dairy-free dough recipes that suit specific lifestyles. This adaptability allows everyone to enjoy a delicious turnover regardless of dietary restrictions.

Flavor variations create exciting twists. Adding ingredients like caramel, chocolate, or even a hint of bourbon can elevate the turnover filling, offering an indulgent dessert experience.

Texture modifications can also be explored by mixing in nuts like walnuts or pecans, adding a crunch that complements the soft apple filling.

Presentation alternatives, like serving in a mini tart form, can give a refreshing giveaway for gatherings and parties, transforming your beloved apple turnovers into trendy finger foods.

Serving and Presentation Guide

Crafting the perfect plating is essential when serving apple turnovers. Place turnovers on a beautiful platter or wooden board, allowing their warm, golden exterior to shine.

Garnishing with fresh mint or a sprinkle of powdered sugar offers a nice visual contrast, making your dessert appealing to guests.

Pair with ice cream, whipped cream, or a dollop of crème fraîche beside each turnover for a delightful combination that balances flavors and textures.

Serve warm for optimal enjoyment, as it enhances the flavor of the filling and keeps the pastry crispy.

Consider portion control by slicing larger turnovers in half and serving with a small scoop of ice cream, ensuring everyone can enjoy a taste without overindulgence.

Temperature plays a role too. Always allow turnovers to cool slightly before serving, creating a delightful contrast between hot filling and a warm pastry shell.

Wine and Beverage Pairing

Selecting the right wine can enhance your apple turnover experience significantly. A sweet Riesling or a light Moscato can complement the sweetness of the baked apple filling, allowing for a harmonious balance of flavors.

For non-alcoholic options, consider homemade apple cider or iced tea, both of which bring refreshing acidity to complement the richness of the turnovers.

Should you prefer a coffee or tea pairing, a medium roast coffee or an herbal tea like chamomile can create a lovely interplay with the spices in the pastry, enhancing the overall experience.

Temperature considerations are important as well. Serve the selected drinks chilled or warm to match the pastries and encourage people to enjoy them in various ways.

Lastly, create a versatile serving suggestion by offering a selection of drinks, allowing your guests to choose their favorite pairing with the apple turnovers.

Storage and Shelf Life

To store apple turnovers, keep them in an airtight container at room temperature for up to 2 days. For longer storage, they can be refrigerated, although this may affect their flakiness.

Reheating in an oven rather than the microwave will help retain the pastry’s crispiness. Set your oven to 350°F (175°C) and heat for about 10 minutes or until warmed through.

For freezing, place fully assembled turnovers in a single layer on a baking sheet to freeze, then transfer them into freezer bags for up to 3 months. Do not bake them first to maintain fresh flavors upon reheating.

When it comes to signs of spoilage, be vigilant for changes in texture or an increase in moisture inside the container. If the turnover feels soggy or has a strange smell, it’s best to err on the side of caution and discard them.

Make Ahead Strategies

Preparing components ahead of time can significantly ease the cooking process. You can chop and prepare the apple filling in advance, storing it in the refrigerator for up to 3 days before using it.

Consider making the pastry dough in advance, allowing it to chill. This can help the flavors meld and saves time on baking day.

When ready to bake, assemble the turnovers and freeze them uncooked. Bake directly from the freezer, adding a few extra minutes to the baking time for perfectly cooked pastries.

Think about quality impact after refrigerating or freezing. Refrigerated turnovers may lose some crispness, so reheating properly is crucial to ensuring the quality remains high.

Incorporate finishing touches just before serving. Dust with powdered sugar or drizzle with a simple icing to elevate the turnovers right before they hit the table.

Scaling Instructions

Scaling your recipe can easily accommodate larger gatherings or small family needs. When halving the recipe, simply divide all ingredients accordingly while maintaining the same cooking times.

Doubling or tripling the quantities works well, but always ensure enough space for the baking sheets. A larger oven might be necessary to bake more batches simultaneously.

Adjust equipment as needed—large-batch baking might require larger trays or pans to ensure even cooking without crowding.

Maintain similar timing modifications even when scaling. Keep an eye on each turnover during baking, as ovens may behave differently when full of pastries.

Consider storage implications as you scale up. Ensure that you have enough containers or freezer space if preparing in advance.

Nutritional Deep Dive

Understanding the nutritional profile of your apple turnovers is vital for healthier living. Each turnover contains an array of macronutrients, with carbohydrates stemming from both the pastry and the fruit filling.

In terms of micronutrient analysis, apples bring vitamin C and potassium. Choosing whole-wheat flour for the dough can enhance fiber content, offering additional health benefits.

Health benefits of apples include digestive support due to their high fiber content, while apples are linked to heart health through their antioxidant properties.

Dietary considerations should account for missing nutrients if modifying the recipe. Aim for balanced filling by ensuring an adequate amount of apples to keep benefits high.

Pay attention to portion analysis. Limiting to one turnover per serving allows enjoyment without excessive calorie intake, supporting weight management efforts.

Savoring apple turnovers in moderation allows a delightful treat while contributing nutritional value to your diet.

Dietary Adaptations

To cater to gluten-free needs, consider almond or coconut flour as a replacement for traditional flour in pastry-making. This not only accommodates gluten-sensitive individuals but also offers a unique flavor experience.

For dairy-free versions, swap butter for coconut oil or vegan margarine. Ensure all other ingredients suit dairy-free diets, such as considering non-dairy milk for any glaze.

Vegan adaptations can also be embraced by using egg replacements like flaxseed meal or chia seeds to wash the pastry without losing structure.

Low-carb options can focus on almond flour, creating a pastry that aligns with keto diets while enhancing the nutty flavor profile of turnovers.

Individuals following a paleo diet can utilize almond or coconut flour while ensuring all ingredients remain unprocessed. These minor adjustments can yield delicious results without compromising values.

Low-FODMAP diets can consider low-fructose apple varieties and controlled serving sizes to enjoy apple turnovers without distress.

Troubleshooting Guide

Common texture issues often arise when the dough is overworked or too warm. Remedy this by ensuring proper chilling times and gentle handling to maintain crispness.

Flavor balance can feel off if the spices are uneven. Consider taste-testing your apple mixture before sealing to adjust sweetness or spice levels where needed.

Temperature problems in the oven can affect baking results. Ensure that the oven is preheated properly, and rotate trays halfway through baking for even cooking.

Equipment challenges like insufficient space can lead to a crowded baking sheet. Baking in batches might be necessary to maintain airflow around pastries, allowing for optimal results.

Ingredient substitutions must be carefully accounted for when altering recipes. Aim to recreate textures of original ingredients in your replacements.

Timing concerns, particularly with larger batches, may result in uneven baking. Monitoring the pastries closely while using a baking thermometer can help prevent mishaps.

Recipe Success Stories

Our community has shared wonderful feedback about personal adaptations made to the apple turnover recipe, many highlighting their unique twist on spices or filling options.

Readers have reported successful variations involving seasonal fruits, showcasing how versatile the recipe can be, turning simple apple turnovers into exciting culinary experiences.

Photography tips from amateur bakers have highlighted appealing ways to capture the turnover’s golden exterior and inviting fillings, encouraging others to appreciate their baking endeavors.

Success stories from family gatherings spotlight this recipe as a crowd favorite, with many sharing how easy it was to outsell store-bought pastries, leaving guests raving about the homemade touch.

Engagement from the community has been fantastic, with discussions circling around the best apple varieties and country-specific adaptations, showcasing the pride of collective baking adventures.

Frequently Asked Questions

Can I freeze apple turnovers before baking?

Yes! Freeze assembled, uncooked turnovers on a baking sheet until firm, then transfer to a freezer bag and bake straight from frozen. Adjust time slightly for baking.

What type of apples are best for baking?

Firm varieties like Granny Smith and Honeycrisp are recommended for their balance of sweetness and tartness, which holds well during cooking.

How do I reheat apple turnovers to keep them flaky?

Reheat in the oven at 350°F for about 10 minutes. This method ensures the pastry remains crisp rather than soggy.

Can I make turnovers without sugar?

Absolutely! Consider using unsweetened apples or natural sweeteners like maple syrup, adjusting the amount to taste.

How long do baked turnovers last?

Baked turnovers can be stored in an airtight container at room temperature for 2 days or in the refrigerator for up to a week.

Can I use store-bought pastry dough?

Yes, using store-bought dough is a great time-saver! Just roll it out before use and follow the assembly instructions as usual.

What’s the best way to serve apple turnovers?

Warm is best, served with a scoop of ice cream, whipped cream, or a dusting of powdered sugar, elevating their presentation.

Can I add nuts to the filling?

Definitely, adding chopped nuts like walnuts or pecans can provide a lovely crunch alongside the soft apple filling!

What can I serve with apple turnovers?

Consider pairing your turnovers with drinks like coffee, tea, or sweet cider, which enhances the overall serving experience.

Are they suitable for kids?

Yes! With their sweet apple filling and flaky pastry, these turnovers are a hit with kids – just be wary of serving them hot.

Additional Resources

If you’re interested in exploring more recipes, check out our comprehensive dessert section that features similar pastries, showcasing other fruit fillings and flavor profiles.

Technique guides to perfect pastry-making can be found throughout our blog, detailing essential skills like dough handling and basic baking science.

Understanding the ingredients used can boost your confidence in cooking. Our ingredient information spotlight delves deeper into using fresh produce and pantry staples more efficiently.

Moreover, consider our equipment recommendations for the best tools to assist you in creating beautifully baked goodies, ensuring quality in your results.

During seasonal variations, we offer recommendations on using fresh, seasonal fruits in your desserts, promoting a sustainable and delicious cooking approach.

Join the Conversation

We encourage you to share your apple turnover creations on social media! Using dedicated hashtags helps others to discover your baking success while allowing us to connect with our amazing community.

Our photography tips also provide insight on capturing the beauty of your homemade treats, encouraging others with similar baking interests in elevating their food photography.

We invite you to leave reviews of these turnovers or share your inventive variations. Engage with others by discussing your experiences, challenges, and successes with this delightful recipe.

Consider starting a conversation about your favorite fillings and flavors—what twists have you tried, and how have they turned out?

Your recipes can inspire others to explore the simple yet satisfying pleasure of homemade apple turnovers, affirming the essence of baking as a shared joy.

The Recipe

Apple Turnovers

Serves: 8 turnovers

Prep Time: 30 mins

Cook Time: 25 mins

Total Time: 55 mins

Kitchen Equipment Needed

  • Rolling pin
  • Baking sheet
  • Parchment paper
  • Mixing bowls
  • Pastry brush
  • Knife or pastry cutter
  • Measuring cups and spoons

Ingredients

  • 2 cups all-purpose flour
  • 1 teaspoon salt
  • 1 cup unsalted butter, chilled and diced
  • 6-8 tablespoons ice water
  • 4-5 medium apples, peeled, cored, and chopped
  • ¾ cup sugar
  • 1 teaspoon cinnamon
  • 1 tablespoon lemon juice
  • 1 egg, beaten (for egg wash)

Directions

  1. In a large bowl, mix flour and salt. Cut in butter until mixture resembles coarse crumbs. Stir in ice water, a tablespoon at a time, until dough forms.
  2. Wrap dough in plastic wrap and refrigerate for at least 30 minutes.
  3. In another bowl, combine apples, sugar, cinnamon, and lemon juice. Set aside.
  4. Preheat oven to 375°F (190°C). Roll out chilled dough on a floured surface to ⅛-inch thick. Cut into squares or circles.
  5. Place a spoonful of apple mixture in the center of each piece of dough.
  6. Fold dough over filling to create a triangle or crescent shape. Seal edges tightly with a fork.
  7. Brush the top of each turnover with the beaten egg.
  8. Bake for 25 minutes or until golden brown. Allow to cool slightly before serving.

Recipe Notes

  • Feel free to spice up your filling with nutmeg or cloves.
  • For extra sweetness, consider adding caramel pieces with the apple filling.
  • These turnovers freeze well, so consider making a double batch!

Deliciously Rich Old-Fashioned Penuche Fudge Recipe to Try!

Old-Fashioned Penuche Fudge: A Sweet Delight

⚖️
Difficulty
Medium

⏲️
Prep Time
15 mins

🕒
Cook Time
20 mins

⏱️
Total Time
35 mins

🍽️
Servings
24 pieces

Penuche fudge is a delightful treat that brings back memories of simpler times and family gatherings. This old-fashioned candy resonates with nostalgia, tantalizing your taste buds with its rich, caramel-like flavor and creamy texture. Made with brown sugar, butter, and whole milk, this fudge melts in your mouth, transporting you to grandma’s kitchen with every heavenly bite.

The allure of this old-fashioned penuche fudge lies not only in its taste but in its charming simplicity. This recipe is straightforward, making it accessible even to novice cooks. The process yields an irresistible fudge that can turn any occasion into a celebration, whether it’s a holiday gathering or a quiet evening at home. There is something magical about enjoying homemade fudge that enhances the flavors of life, inviting you to savor the sweet moments.

Quick Recipe Highlights

  • Flavor Profile: The heavenly blend of caramel and vanilla in penuche fudge offers an exquisite taste that is both rich and creamy.
  • Texture: This fudge boasts a smooth, melt-in-your-mouth consistency that is perfectly satisfying.
  • Aroma: As it cooks, the warm scent of brown sugar and buttery goodness fills your kitchen, drawing everyone in.
  • Visual Appeal: Penuche fudge is typically light tan, invitingly contrasted with darker, rich toppings for a delightful presentation.
  • Skill Level Needed: While this recipe requires some basic cooking techniques, it remains beginner-friendly with clear instructions.
  • Special Equipment: A candy thermometer and a sturdy saucepan are essential for crafting the perfect fudge.

Recipe Overview

  • Difficulty Level: Creating old-fashioned penuche fudge requires a balance of patience and attention. While it’s moderately challenging, with practice, anyone can master it.
  • Category: This recipe falls under desserts, specifically candy-making, making it a perfect ending to any meal.
  • Cuisine: Penuche fudge is rooted in traditional American baking, reflecting the culinary influences of the Northeastern United States.
  • Cost: This recipe is economical, utilizing common pantry staples such as sugar, butter, and milk, which are budget-friendly ingredients.
  • Season: Penuche fudge shines particularly during the fall and winter seasons, complementing holiday celebrations wonderfully.
  • Occasion: It’s a classic treat perfect for gifting during holidays or serving at family gatherings.

Why You’ll Love This Recipe

The taste and texture of old-fashioned penuche fudge make it truly irresistible. Rich and buttery flavors meld seamlessly with the sweetness of brown sugar, providing a comforting dessert experience. The creamy, melt-in-your-mouth consistency adds to its appeal, making each bite a delightful indulgence. It’s a treat that transcends generations, reminding us of lazy afternoons spent enjoying simple pleasures.

In terms of convenience, this recipe is as straightforward as they come. With just a few ingredients, you can whip up a rich and indulgent fudge that is ready to share with friends and family. The preparation time is quick, allowing you to produce a batch in under an hour. This makes it an excellent option for those last-minute dessert needs or festive celebrations.

Nutritionally, while fudge is a treat meant to be enjoyed in moderation, it offers some benefits due to the inclusion of real butter and whole milk, which provide fat-soluble vitamins. When made at home, you have control over the ingredients and can avoid any preservatives found in store-bought varieties, making it a healthier choice.

Socially, penuche fudge plays a significant role in gatherings, serving as a delicious conversation starter and an inviting gift during holidays. The act of sharing homemade treats strengthens bonds and creates lasting memories, making this fudge a perfect addition to any occasion.

From a cost-effectiveness standpoint, old-fashioned penuche fudge is a great value. It allows you to create a gourmet experience at home without breaking the bank. The simple ingredients are readily available year-round, making this recipe both accessible and economical.

Historical Background and Cultural Significance

The origin of penuche fudge can be traced back to New England, where the rich tradition of candy-making flourished in the 19th century. Penuche, derived from the Spanish word for “brown sugar,” symbolizes the utilization of locally sourced ingredients during early American settlements. Its simple preparation reflects the resourcefulness of home cooks who sought to create delicious treats with available pantry items.

Culturally, penuche fudge holds a special place in American culinary heritage. It is often associated with family gatherings, particularly during the holidays, where it serves as a sweet reminder of cherished traditions. Many families pass down their unique recipes through generations, making this fudge a symbol of both culinary creativity and familial love.

Over the years, the recipe has evolved, with various adaptations emerging that incorporate different flavors such as chocolate, nuts, and spices. These regional variations demonstrate the versatility of penuche fudge while maintaining its classic foundation. As home bakers experiment, the essence of this sweet treat continues to resonate, appealing to both old and new generations.

In contemporary culture, penuche has retained its status as a beloved confection. Its allure is found in its nostalgic flavors and homemade touch, making it a staple at potlucks and gatherings. Whether enjoyed plain or dressed up with toppings, old-fashioned penuche fudge remains a celebrated dessert that resonates with sweet memories.

Ingredient Deep Dive

Brown Sugar: Brown sugar is the quintessential element that defines penuche’s flavor. It contains molasses, which contributes to the fudge’s characteristic caramel tones. Nutritionally, it retains some minerals and has a lower glycemic index compared to white sugar. Look for a soft, moist variety, and store it in an airtight container to prevent hardening. For substitutes, you can use white sugar with a splash of molasses.

Butter: In this fudge recipe, real butter provides richness and flavor, serving as the base for the creamy texture. It also enhances the mouthfeel and plays a critical role in achieving the correct consistency. Consider using unsalted butter for better control over flavor, and store it in a cool, dry place. Should you need a dairy-free alternative, coconut oil or vegan butter can be used instead.

Whole Milk: Whole milk adds moisture and a creamy texture to the fudge, creating a rich base that binds the ingredients together. It’s a good source of calcium and vitamin D, contributing to overall dietary health. When selecting milk, opt for fresh, high-quality products, and keep it refrigerated. As a substitute, you can use heavy cream for a richer taste or a plant-based milk for dairy-free options.

Common Mistakes to Avoid

  • Not Using a Candy Thermometer: Without a thermometer, it’s challenging to reach the correct temperature, leading to inconsistent results.
  • Overcooking the Fudge: Cooking the fudge too long can result in a grainy texture, so watch the temperature carefully.
  • Under-Whipping: Insufficient whipping can cause the fudge to lose its creamy texture, so be sure to incorporate air during cooling.
  • Inadequate Cooling Time: Cutting into warm fudge can lead to a crumbly mess, so allow it to set properly before slicing.
  • Not Greasing the Pan: Fudge can stick to pans, so be sure to lightly grease your dish or line it with parchment paper.
  • Using Cold Ingredients: Cold ingredients can impact the melting process, resulting in a lumpy texture, so ensure all items are at room temperature.
  • Poor Storage: Improper storage can lead to fudge drying out or absorbing odors, so wrap it tightly in plastic wrap.
  • Ignoring Ingredients: Always follow the measurements precisely; small variances can seriously affect the outcome of your fudge.

Essential Techniques

Temperature Control: Mastering temperature control is crucial when making penuche fudge. Proper temperature ensures that the sugar dissolves fully, creating a smooth texture. To master this, always use a reliable candy thermometer and regularly check on the cooking process. Look for signs that indicate readiness, such as a grainy texture dissolving into a shiny surface.

Whipping the Fudge: Once removed from the heat, whipping the fudge allows it to aerate and obtain its creamy consistency. Aim for a vigorous stirring motion; this introduces air that helps the fudge maintain its structure as it cools. Beware of common pitfalls like over-whipping, which can lead to a too-stiff consistency; aim for a spreadable texture with a slight sheen.

Pro Tips for Perfect Old-Fashioned Penuche Fudge

1. Use fresh ingredients for the best flavor; stale sugar or butter can negatively impact the taste.
2. Opt for a heavy-bottomed saucepan to distribute heat evenly and prevent burning.
3. Allow the fudge to cool slightly before pouring to prevent it from sticking to the sides of the pan.
4. Experiment with flavor variations by adding vanilla extract or chopped nuts for a unique twist.
5. Taste your fudge mixture before allowing it to set; tweak sweetness if necessary.
6. For a more indulgent treat, top with chocolate ganache or sprinkle sea salt on top.
7. Keep it cool and stored properly to maintain its creamy texture.
8. Remember that practice makes perfect; don’t be discouraged by the first attempt, as techniques improve over time.

Variations and Adaptations

Penuche fudge can be tailored to suit various tastes and preferences. Consider adding regional flavors, such as maple syrup or whiskey for a unique twist on the traditional taste. Seasonal adaptations can include spices like cinnamon or nutmeg during the cold months for a warm, cozy flavor profile.

Dietary modifications are also possible; for a gluten-free version, simply ensure no additives are included in your sugar and other ingredients. For a more health-conscious approach, try using alternatives like coconut oil instead of butter or agave syrup in place of traditional sugar.

Flavor variations can expand beyond the classic caramel-like taste by incorporating ingredients like espresso or citrus zest. For those who enjoy added texture, consider mixing in mini marshmallows or dried fruits for delightful surprises in each bite.

Finally, presentation alternatives can elevate your old-fashioned fudge into a gourmet treat. Slice the fudge into different shapes or layer it within a gift box arranged with toppings, making it visually appealing for any occasion.

Serving and Presentation Guide

When serving old-fashioned penuche fudge, presentation matters. Cut the fudge into neat squares or rectangles for a polished appearance. Consider stacking the pieces or arranging them on a decorative platter surrounded by nuts or fruit for a stylish touch.

Garnish the fudge with a light dusting of powdered sugar or drizzle with melted chocolate for an enhanced visual allure. Temperature-wise, serve fudge at room temperature to maintain its creamy texture, allowing guests to savor each bite fully.

Pair your fudge serving with coffee or tea, offer it as part of a dessert platter at gatherings, or include it in a homemade gift basket. Portion control is also essential; aim for bite-sized pieces that satisfy without overwhelming your guests’ palates.

Wine and Beverage Pairing

Pairing wines with old-fashioned penuche fudge can elevate your dessert experience. A sweet dessert wine like Sauternes or Port harmonizes beautifully with the fudge’s buttery notes. For a more adventurous option, consider a spiced mead that complements the caramel flavors.

For non-alcoholic alternatives, rich hot chocolate or spiced chai lattes provide a comforting backdrop to the fudge. If you desire a refreshing accompaniment, iced herbal teas can cleanse the palate between bites.

When serving these beverages, consider their temperatures; warm drinks should be paired with warm fudge for a cozy experience. Offering a variety of options ensures that all guests can find their perfect match for indulging in this classic treat.

Storage and Shelf Life

Storing old-fashioned penuche fudge properly can significantly extend its shelf life. Store it in an airtight container at room temperature to maintain its texture and flavor. If your home is particularly warm, refrigerating the fudge can help it stay fresh longer.

Each piece should be wrapped individually in plastic wrap or wax paper to prevent sticking and maintain freshness. Be sure to check for signs of spoilage, such as an off smell or dry texture, which can indicate it’s time to toss the fudge.

If you wish to freeze your fudge, cut it into pieces and store it in a freezer-friendly bag. Thaw pieces overnight in the refrigerator before serving for the best texture. Reheating isn’t necessary; simply allow it to return to room temperature for a delightful, soft bite.

Make Ahead Strategies

Preparing old-fashioned penuche fudge ahead of time not only saves time but also enhances the beauty of your gatherings. Aim to make the fudge at least a day in advance; this allows the flavors to deepen and the texture to set perfectly.

You can store the fudge in an airtight container while leaving it at room temperature between steps. The quality remains intact when stored properly, so you can focus on other preparations leading up to your event.

When you’re almost ready to serve, consider adding fresh elements like sprinkle toppings or a drizzle of chocolate for a last-minute, eye-catching enhancement. Reheating isn’t necessary but ensure you allow the fudge to reach room temperature before serving for optimal flavor and texture.

Scaling Instructions

If you want to enjoy more or less fudge than the original recipe offers, scaling is straightforward. For halving the recipe, reduce all ingredients accordingly, ensuring measurement precision is maintained for the best results.

When doubling or tripling the recipe, be mindful of your saucepan size; a larger pot may be necessary to accommodate increased volume without overflowing. Adjust cooking times slightly, as larger batches may require extra simmering.

Additionally, consider storage adjustments. More fudge translates to additional containers or bags to store your treats properly. Always monitor the texture and temperature to match the original recipe regardless of your final quantity.

Nutritional Deep Dive

Understanding the nutritional value of old-fashioned penuche fudge can inform your enjoyment of this decadent treat. Each serving primarily comprises sugars and fats, typical for desserts, making moderation key.

The macronutrient breakdown typically reveals a significant carbohydrate content, primarily from sugars, while the fats from butter play a crucial role in flavor and texture. Additionally, one can glean micronutrient insights, such as vitamins and minerals, derived from whole milk and brown sugar.

As with all treats, portion analysis is vital, especially if you’re managing calorie intake. Enjoying one or two pieces at a time can satisfy cravings without derailing dietary goals, allowing you to relish the rich flavors without guilt.

Dietary Adaptations

Old-fashioned penuche fudge can be modified to cater to various dietary needs. For a gluten-free version, simply ensure all your ingredients are free from gluten additives; this fudge naturally meets that criterion.

Dairy-free adaptations can be made by substituting cow’s milk with almond or coconut milk and using dairy-free butter alternatives in place of traditional butter. For a vegan twist, consider opting for a plant-based cream for the same creamy texture.

If you’re looking for low-carb or keto adaptations, consider using sugar substitutes like erythritol or monk fruit, creating a similarly rich flavor without the carbs. Each of these modifications allows penuche fudge to accommodate different dietary preferences while maintaining its delightful charm.

Troubleshooting Guide

If you encounter texture issues with your fudge, note that this often results from either overcooking or undercooking. If it’s too runny, a return to the heat for a brief period can help it set better. Conversely, boiling it for too long leads to a dry outcome; balancing temperature and timing is crucial.

Flavor balance is another common issue. If your fudge is too sweet, consider adjusting the recipe next time by reducing sugar slightly or adding a pinch of salt to enhance flavor depth. For too much butter flavor, cutting back on the butter can yield a more balanced taste.

Challenges with equipment may arise, particularly with candy thermometers. If you find readings inconsistent, ensure that your thermometer is calibrated properly. Invest in a quality tool to guarantee accurate temperature readings for fudge-making.

Timing concerns can affect how fudge sets. Make sure you allow adequate cooling time before cutting into pieces; patience is vital for achieving the best texture and presentation.

Recipe Success Stories

Our community is filled with success stories featuring old-fashioned penuche fudge. Family traditions often share the joy of creating and perfecting this recipe, with many posting adaptations and variations that highlight their creativity.

Some readers have embraced flavor ideas from local culinary customs, exploring new possibilities that blend heritage with innovation, resulting in unique twists on the classic fudge. These personalized tales add to the richness of the recipe and inspire others to experiment with their versions.

Photography and presentation tips from our community have showcased indulgent servings of penuche fudge, often paired with complementary items that enhance both appearance and taste. Sharing these moments fosters connection and encourages dialogue around beloved traditions.

Frequently Asked Questions

Q: Why is my fudge grainy?

A: Graininess often occurs when sugar crystallizes, possibly due to undercooking or stirring too vigorously. Ensure to maintain proper cooking temperature and avoid excessive agitation after removing it from heat.

Q: Can I use light brown sugar instead of dark?

A: Yes, light brown sugar can be used, but it will result in a milder flavor. The darker sugar will impart more complexity, so choose according to your taste preference.

Q: How do I know when my fudge is ready?

A: When the fudge reaches the soft-ball stage at around 234°F (112°C) on a candy thermometer, it is ready. The mixture should hold its shape when dropped into cold water.

Q: Can I add nuts to my fudge?

A: Absolutely! Chopped nuts such as walnuts or pecans can be added just before pouring the mixture into a pan. This introduces a delightful crunch and adds flavor complexity.

Q: How long does penuche fudge last?

A: When stored properly in an airtight container, penuche fudge can last up to two weeks at room temperature and even longer if refrigerated or frozen.

Q: Can I freeze penuche fudge?

A: Yes, penuche fudge freezes well. Wrap it securely in plastic wrap or aluminum foil, place it in a freezer bag, and it can be kept for up to three months. Thaw in the fridge before serving.

Q: Is penuche fudge suitable for gifting?

A: Definitely! Penuche fudge makes a wonderful homemade gift. Package it neatly in a box or jar, and it’s perfect for sharing with family and friends during the holidays.

Q: How can I make my fudge softer?

A: If your fudge turns out too hard, try adding a little extra butter or cream when reheating it gently on the stove. This will help to soften the texture.

Q: Can I reduce the sugar in the recipe?

A: While you can reduce sugar, it may alter both flavor and texture. Consider using sugar substitutes if you aim for lower sweetness while retaining the fudge-like qualities.

Q: Do I need a special pan for making fudge?

A: A heavy-bottomed saucepan is recommended to avoid burning. Additionally, a square baking pan lined with parchment paper makes for easy cutting and cleanup.

Additional Resources

If you loved making old-fashioned penuche fudge, exploring related recipes can inspire new culinary adventures. Check out similar confections like chocolate fudge, peanut butter fudge, or caramel candies to broaden your dessert repertoire.

Deepen your knowledge with technique guides on candy-making, including tips on tempering chocolate or mastering various types of syrups. For ingredient information, understand the varieties of sugars and their impacts on flavor and texture.

Investing in quality kitchen equipment will enhance your cooking experience, and exploring seasonal variations can introduce fresh, delightful elements that spark creativity in the kitchen.

Join the Conversation

We invite you to join our vibrant community of dessert enthusiasts! Share your own experience with old-fashioned penuche fudge or post pictures of your beautifully crafted pieces on social media. Engage with other bakers to exchange tips and variations you’ve tried.

Your feedback on this recipe can help others as they embark on their own fudge-making adventures. We encourage you to leave a review or comment about how you personalized your fudge to inspire creativity in our kitchen community!

The Recipe

Old-Fashioned Penuche Fudge

Serves: 24 pieces

Prep Time: 15 mins

Cook Time: 20 mins

Total Time: 35 mins

Kitchen Equipment Needed

  • Candy thermometer
  • Heavy-bottomed saucepan
  • Wooden spoon or spatula
  • Square baking pan (8-inch)
  • Parchment paper

Ingredients

  • 2 cups brown sugar
  • 1/2 cup whole milk
  • 1/2 cup unsalted butter
  • 2 teaspoons vanilla extract
  • 1/4 teaspoon salt

Directions

  1. In a heavy-bottomed saucepan, combine the brown sugar, whole milk, and butter. Cook over medium heat, stirring frequently until the mixture comes to a boil.
  2. Attach a candy thermometer to the side of the pan and continue to cook the mixture, without stirring, until it reaches 234°F (soft ball stage).
  3. Remove the pan from heat and let it cool for a few minutes until it cools to about 200°F.
  4. Stir in the vanilla extract and salt until well combined, then beat the fudge mixture with a wooden spoon or spatula until it thickens and loses its gloss.
  5. Quickly pour the fudge into a greased or parchment-lined baking pan, spreading evenly.
  6. Let the fudge cool completely at room temperature before cutting into squares.

Recipe Notes

  • For added flavor, you can mix in chopped nuts or top the cooled fudge with sea salt.
  • Store fudge in an airtight container at room temperature or refrigerate for extended freshness.
  • Fudge can be frozen for up to three months. Just make sure it’s well wrapped to prevent freezer burn.

Irresistible Strawberry Cheesecake Cookie Cups: Easy Christmas Dessert Delight

Irresistible Strawberry Cheesecake Cookie Cups: The Perfect Easy Christmas Dessert

⚖️
Difficulty
Easy

⏲️
Prep Time
20 mins

🕒
Cook Time
15 mins

⏱️
Total Time
35 mins

🍽️
Servings
12 Cookie Cups

Strawberry Cheesecake Cookie Cups are the quintessential festive dessert that can brighten up any gathering. As you bite into these delightful cookie cups, the sweet and creamy cheesecake filling perfectly complements the tangy burst of fresh strawberries, creating a harmonious flavor profile that is irresistible. Perfectly sized as single servings, these cookie cups not only satisfy your sweet cravings but also provide a visual treat with their vibrant colors and delightful textures.

There’s something undeniably comforting about homemade desserts, especially during the holiday season. With their buttery cookie base and luscious cheesecake filling, these cookie cups are remarkably simple to prepare yet yield impressive results. Whether you’re entertaining guests or simply seeking a cozy treat at home, these cookies will undoubtedly bring joy and festivity to your table.

Quick Recipe Highlights

  • Flavor Profile: Sweet, creamy cheesecake paired with fresh strawberries makes each bite a delightful experience.
  • Texture: A perfect balance of soft cookie and creamy filling gives a delightful mouthfeel.
  • Aroma: The scent of baked sugar cookies mingled with fresh strawberries creates a warm and inviting aroma.
  • Visual Appeal: The red strawberries atop the creamy white filling make for an eye-catching presentation.
  • Skill Level Needed: This recipe requires basic baking skills, making it perfect for beginners and seasoned bakers alike.
  • Special Equipment: You will need a muffin tin and mixing bowls to create these delicious treats.

Recipe Overview

  • Difficulty Level: These Irresistible Strawberry Cheesecake Cookie Cups are classified as easy to make, making them accessible for all levels of bakers.
  • Category: They fit perfectly into the dessert category, ideal for serving at parties, family gatherings, or as a holiday treat.
  • Cuisine: This dessert draws inspiration from classic cheesecake recipes, blending traditional techniques with modern flair.
  • Cost: Approximately $15 to make 12 cookie cups, depending on ingredient quality and local prices.
  • Season: The best time to enjoy these delicious cookie cups is during holidays and summer, when strawberries are at their peak.
  • Occasion: Perfect for Christmas gatherings, birthday celebrations, or any festive occasion that calls for delightful sweets.

Why You’ll Love This Recipe

The combination of taste and texture in these Strawberry Cheesecake Cookie Cups is simply enchanting. Each bite presents a wonderful mix of the soft cookie base and the smooth, rich cheesecake filling, contrasted by the freshness of the strawberries. This layered experience not only captivates the palate but also leaves a lasting impression on dessert lovers.

Convenience is another great aspect of this recipe. It can be prepared in under an hour, allowing you to whip up a beautiful dessert even on a busy day. The simplicity of the preparation means you can enjoy more time with your loved ones during festive gatherings, rather than being stuck in the kitchen.

Nutritionally, these cookie cups can be enjoyed in moderation as part of a balanced diet. Strawberry Cheesecake Cookie Cups contain a source of calcium from the cream cheese and fresh vitamin C from strawberries, making them a delightful treat with some health benefits.

Socially and entertaining-wise, these cookie cups serve as a fantastic conversation starter at any gathering. Guests will be thrilled by the vibrant colors and elegant presentation, making them eager to taste these adorable desserts.

Finally, the cost-effectiveness of this dessert is hard to beat. With simple, accessible ingredients, you can create an attractive and delicious treat that’s sure to impress without breaking the bank. These cookie cups prove that great desserts don’t have to be complicated or expensive.

Historical Background and Cultural Significance

The cookie cup concept merges the beloved traditional cheesecake with a modern twist, making it a fun and portable version of the classic dessert. Cheesecake itself has a rich history dating back to Ancient Greece, where it was served to athletes during the first Olympic Games. Over centuries, various cultures have put their spin on cheesecake, leading us to the many variations we enjoy today.

Culturally, desserts often bring people together, celebrating both everyday moments and special occasions. The Strawberry Cheesecake Cookie Cup is no exception—it has become a favorite among families during holiday celebrations, particularly in American culture, where both strawberries and cream cheese are widely embraced.

As for the recipe’s evolution, it has transformed from classic cheesecake slices into creative forms like these cookie cups. This innovative approach allows for easier serving and enjoyment at events, reinforcing that desserts can be both practical and delightful.

Regional variations often appear with this dessert, incorporating different fruits such as blueberries or raspberries, depending on local preferences and seasonal availability. These variations allow bakers to personalize their creations and engage with their local heritage.

Ingredient Deep Dive

Strawberries: Strawberries are a symbol of summer and celebration, often featured in various global cuisines. They offer numerous health benefits, including high levels of vitamin C, antioxidants, and dietary fiber. When selecting strawberries, look for bright red, firm fruit without blemishes. Store them in the refrigerator and consume them within a few days for the best flavor—frozen strawberries can also be used as a substitute.

Cream Cheese: Cream cheese serves as the heart of the cheesecake filling, bringing a rich, velvety texture. Originating in the United States in the late 19th century, cream cheese has since become a staple in many desserts. Nutritionally, it provides essential fats and calcium. Choose full-fat cream cheese for the best results, and keep it refrigerated until needed. If you’re looking for a lighter alternative, consider using Greek yogurt, though the texture will differ slightly.

Granulated Sugar: As a foundational sweetener, granulated sugar enhances the flavors of every ingredient in the cookie cups while promoting a lovely caramelization. Use sugar with caution, balancing sweetness with other flavors. Store sugar in a cool, dry place, and consider alternatives like honey or maple syrup in moderation if you’re experimenting with different flavors.

Unsalted Butter: Butter is vital for creating a flaky cookie base. It brings richness and moisture, making every bite satisfying. Unsalted butter is preferred to control salt levels in baking. Look for high-quality butter for the best taste. Store butter in the fridge and allow it to soften before use. Coconut oil can be an interesting dairy-free substitute in some recipes.

Common Mistakes to Avoid

  • Overmixing the Dough: Overworking the batter can lead to tough cookie cups. Mix just until combined to keep the texture soft.
  • Underbaking: If you remove the cookie cups too early, they may collapse. Look for a golden edge to ensure proper baking.
  • Skipping Chilling Time: Not chilling the dough can make it difficult to shape. Chill for proper consistency and easier handling.
  • Using Cold Ingredients: Cold cream cheese can create lumps in the filling. Let it sit at room temperature to soften before mixing.
  • Overfilling the Cups: Filling too much can lead to overflowing during baking. Stick to the recommended amount for perfect results.
  • Using Old Ingredients: Ensure everything, especially baking powder and dairy, is fresh; expired ingredients can ruin the taste.
  • Neglecting To Adjust Oven Temperatures: Each oven behaves differently; using an oven thermometer can help get the right temperature.
  • Rushing the Cooling Process: Allowing the cookie cups to cool properly before serving will ensure they hold their shape and flavor.
  • Inconsistent Sizing: Use a cookie scoop for even sizing; this will help ensure all cookie cups bake uniformly.
  • Ignoring Flavorings: Adding vanilla extract or lemon zest can enhance the flavor—don’t skip on flavor enhancers!

Essential Techniques

Preparing Cookie Cups: Creating the perfect cookie cup shape is essential for holding the filling. Start by greasing the muffin tin well, then press the dough evenly into the bottom and sides of the cups. This technique ensures even baking and easy release from the pan. Watch for a golden brown color to indicate doneness.

Making the Cheesecake Filling: Combine cream cheese, sugar, and flavorings gently. It’s important to cream these ingredients until smooth, but don’t overmix as it can incorporate too much air, causing cracks during baking. Look for a creamy consistency without lumps for the best texture.

Pro Tips for Perfect Irresistible Strawberry Cheesecake Cookie Cups

1. Use fresh strawberries for the best flavor, or consider macerating them in a little sugar to enhance their sweetness.
2. Let the cream cheese sit out before mixing; a softer texture will help prevent lumps in the filling.
3. For an added twist, consider using a graham cracker crust base instead of a cookie dough for a true cheesecake effect.
4. Refrigerate the cookie cups after baking to help them set properly and enhance their texture before serving.
5. Top the assembled cups with whipped cream for an elegant finishing touch that adds extra flavor and visual appeal.
6. Experiment with flavored extracts—like almond or lemon— for unique takes on the classic filling.
7. Store any leftovers in an airtight container in the refrigerator for freshness.
8. Consider adding a touch of vanilla extract to the cookie dough for enhanced flavor throughout.

Variations and Adaptations

One popular regional variation of the Strawberry Cheesecake Cookie Cups is to incorporate different seasonal fruits—like blueberries, raspberries, or even peaches—creating a delightful medley of flavors. Alternatively, adding chocolate chips to the cookie base brings a rich and decadent twist.

For seasonal adaptations, try spicing up the filling during the fall with pumpkin puree or ginger spices for a seasonal flavor enhancement. Those with dietary restrictions can also modify the cookie base to be gluten-free using almond flour or coconut flour while ensuring all ingredients align with their dietary needs.

If you’re looking for creative presentation alternatives, consider placing individual cookie cups in decorative cupcake liners or serving them on a tiered cake stand for visually stunning arrangements at gatherings.

Serving and Presentation Guide

Plating techniques for these cookie cups can be simple yet elegant. Consider arranging the cookie cups on a beautiful platter garnished with fresh strawberries and mint leaves to contrast with the vibrant colors of the dessert.

To elevate the experience, you might garnish the tops with a dollop of whipped cream or a drizzle of chocolate sauce. Simple decorations like powdered sugar or crushed nuts can also add an attractive touch.

Traditionally, these cookie cups are perfect as standalone desserts; however, pairing them with a side of vanilla ice cream or a fruit coulis can add a delightful twist. For temperature considerations, serve the cups chilled, allowing the cheesecake filling to hold its shape while indulging in every heavenly bite.

Wine and Beverage Pairing

Pairing these Strawberry Cheesecake Cookie Cups with a sweet dessert wine like Moscato can enhance the overall experience, bringing out the fruity notes in the strawberries while balancing the creamy texture of the cheesecake. Alternatively, a light sparkling rosé can provide refreshing contrasts.

For non-alcoholic options, consider serving with iced tea garnished with lemon. A strawberry lemonade can also complement the flavors beautifully, providing a refreshing balance to the richness of the cookie cups.

If you enjoy coffee or tea, a cup of smooth cappuccino or a chai latte can enhance the dessert experience, providing warmth and depth to the sweet and tangy flavors.

Storage and Shelf Life

These Strawberry Cheesecake Cookie Cups are best stored in an airtight container in the refrigerator, where they will stay fresh for up to 3-4 days. To prevent the cookie base from getting soggy, place parchment paper between layers if stacking.

When reheating them, use a microwave in short intervals to avoid melting the cheesecake filling completely. The cookie cups can also be frozen for up to a month; wrap them tightly in plastic wrap or use freezer-safe containers for longer storage.

Be mindful of signs of spoilage, such as off-odors or changes in texture. If there are any uncertainties around freshness, it’s better to err on the side of caution and discard them.

Make Ahead Strategies

To make these Strawberry Cheesecake Cookie Cups ahead of time, prepare the cookie dough and store it in the refrigerator for up to 24 hours before baking. The cheesecake filling can also be made a day in advance and stored separately.

For optimal freshness, consider freezing the assembled cookie cups, placing them in the freezer right after baking. Allow them to thaw in the refrigerator before serving. This method will help maintain texture while providing convenience on the day of your event.

When assembling, add fresh strawberries just before serving to retain their color and freshness, enhancing the overall presentation and flavor.

Scaling Instructions

Scaling these Strawberry Cheesecake Cookie Cups is easy; simply double or triple the ingredient amounts according to your desired servings. Keep in mind that batch sizes should fit within your available mixing and baking equipment.

For halving the recipe, keep an eye on the baking time as smaller batches may require less time in the oven. Additionally, if you choose to utilize multiple pans, make sure to rotate them during cooking for consistent results.

When adjusting portions, be sure to calculate any necessary changes in baking times while ensuring the proper working temperature for ingredients. Extra care should be taken if you’re using a larger pan to accommodate more cookie cups.

Nutritional Deep Dive

The nutritional breakdown of each Strawberry Cheesecake Cookie Cup offers a delightful treat that still contains essential nutrients. Each cookie cup typically includes carbohydrates from the cookie base, fats from the cream cheese, and proteins that lend themselves to a balanced dessert in moderation.

A serving provides a good source of calcium and vitamins, particularly if you incorporate fresh strawberries, which contribute antioxidants that fight inflammation and boost the immune system. Balancing dessert intake with a nutrient-rich diet is key for maintaining health and wellness.

While enjoying these delicious treats, keep portion sizes in mind to manage calorie intake effectively. Remember, desserts can fit into a healthy lifestyle when enjoyed in moderation and balanced with nutritious foods.

Dietary Adaptations

Accommodating various dietary needs is possible with Strawberry Cheesecake Cookie Cups. For a gluten-free version, substitute all-purpose flour with almond flour or gluten-free flour blends, keeping consistency in mind.

Dairy-free options can be achieved using vegan cream cheese and dairy-free butter, offering a similar flavor and texture. For those on vegan diets, ensure all ingredients align, including the sugar used.

For low-carb or keto adaptations, switching to almond flour and using a sugar substitute like erythritol will allow compliance without sacrificing flavor. Each adaptation ensures that everyone can enjoy these delightful cookie cups.

Troubleshooting Guide

Should texture issues arise, check the cookie base for overmixing, which can create a dense product. Incorporate just enough until the ingredients are combined to maintain softness.

If flavor balance seems off, ensure to sample during preparation—adding more vanilla or sugar can often help achieve a delightful equilibrium.

Temperature problems can typically be solved with an accurate oven thermometer to ensure the right baking temperature. If ingredients aren’t at room temperature when combining, this could affect the cookie and filling’s consistency.

If facing equipment challenges, like sticky cookie dough, lightly flour your hands or work surface to help manage it better. Prepare for any adjustments that your specific tools may require.

Timing concerns can be managed with a well-prepared baking timeline, checking cookies regularly to ensure they aren’t under or overbaked.

Recipe Success Stories

Bakers from across our community have shared their success with these delightful Strawberry Cheesecake Cookie Cups. Many reported impressing guests at holiday celebrations, where the cookie cups not only tasted delicious but also added vibrant color to dessert tables.

Readers have enjoyed adapting the recipe, substituting strawberries with alternatives like peaches or blueberries, yielding incredible results and rave reviews from family members. The versatility of this recipe proves that small changes can lead to delightful discoveries in flavor combinations.

Photographers capturing these cookie cups have highlighted the visual aspect, noting how the red strawberries pop against the creamy filling, inspiring others to share their own creations online. Positive feedback reinforces that these cookie cups are a household favorite.

Frequently Asked Questions

Can I freeze the cookie cups?

Absolutely! These cookie cups can be frozen for up to a month. Just ensure they are wrapped tightly and stored in an airtight container. Allow them to thaw in the refrigerator when you’re ready to enjoy them.

How do I know when the cookie cups are done?

Look for a golden brown color on the edges of the cups. The centers might still look slightly soft, but they will firm up as they cool.

Can I use other fruits?

Yes, this recipe is quite adaptable! You can replace strawberries with your choice of fruits like blueberries, raspberries, or even seasonal fruits like peaches. Adjust the sweetness as needed.

What do I do if my cheesecake filling is lumpy?

If your filling is lumpy, it may be due to cold cream cheese. Ensure your cream cheese is at room temperature before mixing. If lumps persist, you can blend it briefly until smooth.

Is there a way to make them gluten-free?

Absolutely! Simply substitute all-purpose flour with a gluten-free blend, almond flour, or oat flour to keep the recipe gluten-free and still delicious.

Can I make these cookie cups ahead of time?

Yes! You can prepare the cookie dough and filling a day ahead. Store them separately until you’re ready to assemble and bake.

What other toppings can I use?

Consider topping them with whipped cream, chocolate drizzle, or sprinkle crushed nuts for an added crunch. You can even use a berry compote for a berry-rich experience!

How should I store leftover cookie cups?

Keep the cookie cups in an airtight container in the refrigerator for 3-4 days. Consider layering parchment paper if stacking to avoid sogginess.

Can I substitute sugar with a sugar alternative?

Yes, feel free to use sugar replacements like stevia or erythritol in equal portions according to your preference for reduced sugar options.

Will these cookie cups hold their shape when baked?

Yes! If the dough is well-made and pressed evenly in the muffin tin, they will hold their shape wonderfully during baking.

Additional Resources

For more delightful dessert recipes that complement these Strawberry Cheesecake Cookie Cups, check out our guides on making classic cheesecakes, exploring seasonal fruit-infused desserts, or crafting simple cookie bases. You may also find tips on the best kitchen tools to streamline your baking process, alongside insights into seasonal dessert trends.

Join the Conversation

We encourage you to share your experiences and variations of the Strawberry Cheesecake Cookie Cups on social media. Tag us in your baking photos, share tips, or leave feedback on how your cookie cups turned out. Engaging with our community allows everyone to learn new ideas and celebrate their creative efforts!

The Recipe

Irresistible Strawberry Cheesecake Cookie Cups

Serves: 12 Cookie Cups

Prep Time: 20 mins

Cook Time: 15 mins

Total Time: 35 mins

Kitchen Equipment Needed

  • Muffin tin
  • Mixing bowls
  • Electric mixer
  • Spoon or cookie scoop
  • Parchment paper (optional)

Ingredients

  • 1 cup all-purpose flour
  • 1/2 cup granulated sugar
  • 1/2 cup unsalted butter, softened
  • 1 cream cheese (8 oz), softened
  • 1/4 cup granulated sugar for filling
  • 1 egg
  • 1 teaspoon vanilla extract
  • 12 fresh strawberries, cut in half
  • Pinch of salt

Directions

  1. Preheat the oven to 350°F (175°C) and grease the muffin tin.
  2. In a mixing bowl, cream together the butter and sugar until light and fluffy.
  3. Add the flour and salt, mixing until just combined.
  4. Press the cookie dough evenly into the muffin cups to form a base.
  5. Bake for 10-12 minutes, or until golden brown.
  6. In another bowl, beat together cream cheese, sugar, egg, and vanilla until smooth.
  7. Once cookie cups are baked, pour the cheesecake filling into each cup.
  8. Top each with a half strawberry, pressing lightly into the filling.
  9. Bake for an additional 10-12 minutes until the filling is set.
  10. Let cool completely before removing from the tin; serve chilled or at room temperature.

Recipe Notes

  • Feel free to use different fruits for topping based on your seasonal preferences.
  • These cookie cups can be made ahead of time and stored in an airtight container for freshness.
  • Substitute sugar with a sweetener of your choice for a healthier alternative.

Deliciously Moist Chocolate Chip Zucchini Banana Bread Recipe

Decadent Chocolate Chip Zucchini Banana Bread: A Deliciously Unique Treat

⚖️
Difficulty
Easy

⏲️
Prep Time
15 mins

🕒
Cook Time
50 mins

⏱️
Total Time
65 mins

🍽️
Servings
8 slices

Chocolate Chip Zucchini Banana Bread is a wonderfully moist and rich treat that amalgamates the sweetness of ripe bananas with the subtle earthiness of zucchini, all intertwined with luxurious chocolate chips. This scrumptious quick bread is not just a fantastic way to use up those overripe bananas and an abundance of summer zucchinis; it also provides a delightful flavor profile that pleases both kids and adults alike. Imagine a warm slice fresh from the oven, the decadent chocolate melding perfectly with the soft, tender crumb—this is the epitome of comfort food.

The joy of baking this Chocolate Chip Zucchini Banana Bread goes beyond the taste. Your kitchen will be filled with an inviting aroma that beckons anyone nearby. The combination of cinnamon and vanilla adds depth to the smell, making it irresistible. Plus, the vibrant flecks of zucchini peeking through the sweet, golden-brown crust provide a visually appealing touch that will entice friends and family to grab a slice. It’s perfect for breakfast, an afternoon snack, or even as a delicious dessert after dinner.

Quick Recipe Highlights

  • Flavor Profile: This bread has a delightful sweetness from the ripe bananas and a subtle earthiness from the zucchini, all balanced beautifully by rich chocolatey notes.
  • Texture: Moist and fluffy with a tender crumb, the bread offers a satisfying contrast to the semi-melted chocolate chips throughout.
  • Aroma: Inviting scents of baked banana, cinnamon, and chocolate fill the air, creating a warm and homey atmosphere.
  • Visual Appeal: The dark chocolate chips glisten against the golden-brown crust, while the flecks of green from the zucchini add color.
  • Skill Level Needed: An easy recipe, perfect for beginner bakers, requiring basic mixing and baking techniques.
  • Special Equipment: A mixing bowl, loaf pan, and a simple whisk are all you need to create this delicious loaf.

Recipe Overview

  • Difficulty Level: This Chocolate Chip Zucchini Banana Bread is an easy recipe that is great for novice bakers. The steps are straightforward, making it accessible for anyone keen to whip up a delightful loaf.
  • Category: Ideal for breakfast or snacks, this recipe falls into the quick bread category, which is versatile and perfect for any time of day.
  • Cuisine: This bread is a beautiful fusion of American baking traditions, leveraging common ingredients found in many households, particularly in the summer when zucchinis are abundant.
  • Cost: Estimated at a budget-friendly price, this recipe includes staple ingredients like flour, sugar, and zucchini, making it easy to enjoy without breaking the bank.
  • Season: Best enjoyed during summer and fall when zucchinis are fresh, it’s a great way to celebrate seasonal produce.
  • Occasion: This delightful bread works wonderfully for brunch, picnics, or casual gatherings, and it’s a perfect homemade gift.

Why You’ll Love This Recipe

The appeal of Chocolate Chip Zucchini Banana Bread lies in its incredible taste and deceptive health benefits. By integrating zucchini, this bread adds an extra layer of moisture without overwhelming sweetness, making each slice not only indulgent but deceptively nutritious. The chocolate offers a delightful contrast of richness, ensuring that every bite is both satisfying and enjoyable.

In terms of convenience, this recipe can be made in just over an hour, allowing busy individuals or families to prepare a wholesome snack quickly. The ease of mixing and baking means you can involve kids in the kitchen, making it a fun family activity that results in a delicious reward for everyone.

From a nutritional standpoint, this recipe packs in the benefits of bananas and zucchini, rich in potassium, vitamins, and fiber. This loaf is an excellent option for breakfast or a snack, providing not just energy but also vital nutrients to fuel your day.

Socially, nothing beats sharing a freshly baked loaf with friends and family. This Chocolate Chip Zucchini Banana Bread is perfect for sharing at gatherings, bringing people together over a slice of homemade joy and creating memorable experiences.

Lastly, it’s a cost-effective recipe that utilizes pantry staples and leftover produce. This not only minimizes food waste but offers a delectable treat without needing specialty ingredients that can often be costly.

Historical Background and Cultural Significance

Bread has been an essential part of cuisines worldwide, but the specific history of quick breads, like this Chocolate Chip Zucchini Banana Bread, is particularly fascinating. Quick breads emerged around the time baking powder and baking soda became commonly used in the late 19th century. These leavening agents allowed home bakers to create light and airy breads without the lengthy fermentation processes associated with traditional yeast bread.

Zucchini bread traces its origin back to the times when gardeners sought to use up their abundant summer harvests. Combining this vegetable with bananas not only enhanced the flavor but also contributed moisture to the dough, allowing it to remain tender and delicious. The integration of sweet and savory ingredients Create an unexpected but delightful flavor profile that has endured over the years.

As this recipe evolved, various iterations have appeared worldwide, reflecting local preferences and available ingredients. For instance, in some cultures, spices such as nutmeg or cardamom might be added, highlighting regional variations in flavor profiles.

In contemporary communities, the adaptation of this recipe to include chocolate has made it a favorite for dessert lovers, linking generations through the joy of sweet treats. The cultural importance of sharing homemade goods with family remains strong, emphasizing connection and nurturing through food.

Ingredient Deep Dive

Bananas

Bananas are a staple fruit known for their rich flavor and versatility. Originating from Southeast Asia and now popular worldwide, they are celebrated for their creamy texture and natural sweetness. In baking, particularly for this Chocolate Chip Zucchini Banana Bread, ripe bananas lend moisture and sweetness, reducing the need for additional sugar.

Nutritionally, bananas are an excellent source of potassium, vitamin C, and dietary fiber, which contribute to heart health and digestion. When selecting bananas, look for ones that are heavily speckled with brown for optimal sweetness. They can be stored at room temperature until ripe, after which refrigeration can prolong their life, though the skin may darken. If you need a substitute, unsweetened applesauce works well to maintain moisture.

Zucchini

Zucchini, a summer squash, is famed for its mild flavor and versatility in both savory and sweet dishes. It has its origins in Central America and has morphed into favorites across various cuisines. Its inclusion in baked goods, such as this Chocolate Chip Zucchini Banana Bread, provides moisture without adding calories, making it an excellent addition for healthier recipes.

Nutritional benefits of zucchini include vitamins A and C, as well as numerous antioxidants. When selecting zucchini, choose firm ones with shiny skin and a vibrant color. They can be stored in the refrigerator for a week or so. For substitutes, you can utilize shredded yellow squash or pureed pumpkin, though the latter will yield a different taste.

Chocolate Chips

Chocolate chips are a delightful addition to many baked goods, adding an indulgent touch that elevates the recipe. Originating in the United States in the 1930s, chocolate chips quickly became a pantry staple, especially for cookies and sweet bread.

Beyond flavor, chocolate adds antioxidants and can elevate mood thanks to its chemical components. When choosing chocolate chips, opt for semi-sweet or dark varieties, which tend to have richer flavors. Store them in a cool, dry place, and they can last for months. For substitutions, feel free to use chopped chocolate bars or even white chocolate for a different flavor.

Common Mistakes to Avoid

  • Overmixing the batter: Mixing too much can result in tough bread. Stir until just combined for the best texture.
  • Using unripe bananas: Ensure bananas are fully ripe to maximize sweetness and moisture in the bread.
  • Not draining excess moisture from zucchini: Squeeze out excess liquid before adding to the batter; otherwise, the bread may become soggy.
  • Incorrect oven temperature: Always preheat your oven for consistent baking results, as an unheated oven may affect the rise.
  • Not testing for doneness: Use a toothpick inserted in the center to check if it comes out clean; underbaking could lead to a gooey center.
  • Skipping parchment paper: Even if greasing, parchment paper ensures easy removal and avoids sticking.
  • Not letting it cool completely: Allow the bread to cool in the pan before transferring to a wire rack to prevent a wet or gummy texture.
  • Ignoring ingredient temperature: Room-temperature ingredients mix better and contribute to the bread’s overall rise and texture.
  • Cutting into the bread too soon: Allow the loaf to cool to set the texture perfectly; cutting too early can result in crumbling.
  • Replacing ingredients randomly: Make sure to use substitutes that match the properties of the original ingredients to achieve desired results.

Essential Techniques

Mixing the Batter

Proper mixing ensures a tender loaf. Mix wet ingredients separately from dry ingredients to prevent overmixing. Combine both gently until just incorporated; this method minimizes gluten development, yielding a soft texture. Look for visual cues, like a slightly lumpy batter, indicating it’s ready for the oven.

Measuring Ingredients

Accurate ingredient measurements are crucial for success. Use a kitchen scale or proper measuring cups to ensure precision, especially with flour. Spoon flour into the cup and level it off gently. Improper measurements can cause alterations in texture and flavor.

Squeezing Zucchini

To prevent overly moist batter, squeezing excess liquid from shredded zucchini is essential. Use a clean dish towel or cheesecloth, and press until mostly dry. This step helps maintain the right moisture balance in your bread.

Oven Thermometer Use

Using an oven thermometer can help ensure your oven heats accurately. Many ovens can be off by significant degrees, leading to under- or over-cooked bread. Use this tool for the best baking results; your baked goods will always come out perfect.

Pro Tips for Perfect Chocolate Chip Zucchini Banana Bread

1. For extra flavor, add a teaspoon of vanilla extract or a sprinkle of cinnamon to the batter.
2. Experiment with different types of chocolate chips, such as dark, milk, or even white chocolate, for varied flavor profiles.
3. Add nuts, such as walnuts or pecans, for added texture and nutty flavors.
4. Use a combination of whole wheat flour and all-purpose flour for a healthier twist.
5. If the zucchinis are abundant, double the recipe and freeze one loaf for later!
6. To enhance moisture, try adding a few tablespoons of yogurt or sour cream to the batter.
7. If you like crunch, sprinkle some oats or granola on top before baking.
8. Top your warm loaf with a dusting of powdered sugar for a beautiful finish!

Variations and Adaptations

For a seasonal summer twist, consider adding fresh blueberries to your Chocolate Chip Zucchini Banana Bread. The burst of juicy fruit pairs beautifully with the rich chocolate and complements the banana flavor. During fall, a touch of nutmeg and chopped pecans could give it a delightful autumn feel.

For health-conscious eaters, make it gluten-free by substituting all-purpose flour with gluten-free blends tailored for baking. Dairy-free options exist as well—using coconut oil in place of butter creates a delightful flavor and moist texture without dairy.

If someone prefers a lower-sugar option, opt for dark chocolate chips or even sugar alternatives for a lighter take. For a unique texture upgrade, consider swirling in cream cheese batter before baking for a deliciously decadent marble effect.

Presentation is key! Serve in muffin tins for perfect individual portions or slice and package as gifts for friends and family, topped with homemade fruit preserves.

Serving and Presentation Guide

When serving Chocolate Chip Zucchini Banana Bread, consider slicing it into thick pieces for a rustic look, or opt for slender slices for a more refined presentation. A dusting of powdered sugar on top adds charm and brightness, enhancing its visual appeal.

Garnishing with fresh mint leaves can bring a splash of color and freshness, while a dollop of whipped cream or a scoop of vanilla ice cream elevates it to a decadent dessert. For an elegant touch, serve it on a wooden board with a selection of gourmet jams and butter, inviting guests to create their combinations.

Temperature matters! Serve this bread warm or at room temperature. Storing it in a beautifully wrapped cloth can keep it fresh and inviting, and ensure guests can easily help themselves.

Wine and Beverage Pairing

Pairing wines with chocolate desserts can be delightful. A fruity Pinot Noir nicely complements the rich flavors of chocolate while balancing the sweetness of bananas. Alternatively, a sparkling wine like Prosecco could add a refreshing contrast.

For non-alcoholic options, consider pairing with a spiced chai tea or a rich dark hot chocolate to enhance the chocolatey experience. Fresh fruit juices or mocktails can also serve as fantastic refreshers.

When serving iced beverages, ensure they are chilled but not overly cold to avoid overpowering the bread’s warm, comforting flavors. For coffee aficionados, a warm mug of fresh brewed coffee, particularly a smooth latte, harmonizes exceptionally well with the dessert-like qualities of the bread.

Storage and Shelf Life

To maximize freshness, store Chocolate Chip Zucchini Banana Bread in an airtight container at room temperature. It can last up to four days; however, for longer shelf life, refrigeration is an option, extending it to about a week.

For freezing, wrap slices individually in plastic or aluminum foil and place them in a zip-lock freezer bag. This method retains moisture and flavor for up to three months. To thaw, simply let them sit at room temperature or microwave briefly for warmth.

Signs of spoilage include an off smell or mold growth. If you notice any, it is best to discard the loaf. Proper reheating methods involve using an oven at low temperatures or the microwave to gently warm without drying it out.

Make Ahead Strategies

You can easily prepare the ingredients for Chocolate Chip Zucchini Banana Bread in advance. Pre-grate zucchini and store it in the refrigerator for up to two days before use. Likewise, you can mash bananas and combine with other wet ingredients ahead of time.

Make batter the night before and refrigerate it, covering the bowl tightly. Just remember to bring it back to room temperature before baking, as cold batter may affect the rise. This way, you can enjoy freshly baked bread in the morning with minimal effort.

For added convenience, consider prepping and storing dry ingredients in a mason jar. It makes the process even faster the day you decide to bake. Just pour the contents into a bowl, mix in your wet ingredients, and you’re ready to bake!

Scaling Instructions

If you need to halve the recipe, simply divide all the ingredient quantities in two. It’s that simple! Be careful when adjusting baking times; check for doneness a few minutes earlier than indicated.

Doubling or tripling the recipe is entirely feasible, especially for gatherings. Use larger mixing bowls and ensure you have ample baking space. Be wary, as larger batches may require a more extended baking time, so watch carefully and do the toothpick test for doneness.

When scaling up, consider the size and type of your baking dish; a larger loaf pan will require a longer baking time compared to smaller ones. Adjust accordingly, and be patient as your delicious creation bakes to perfection.

Nutritional Deep Dive

A piece of Chocolate Chip Zucchini Banana Bread is a delicious way to gather essential nutrients. Each slice typically contains a healthy balance of macro and micronutrients, primarily due to bananas and zucchini, which provide vitamins A and C, potassium and fiber essential for digestion.

On the macro level, this bread offers carbohydrates for energy, while the fats from chocolate chips provide a small dose of healthy fats when made with higher cocoa content chocolate. Additionally, using whole wheat flour adds dietary fiber, which assists with digestion and maintaining a healthy diet.

When considering portion sizes, one slice is satisfying enough due to its rich flavors. For those managing weight, enjoying this bread in moderation is key; enjoying a slice can fit perfectly into an otherwise balanced diet without compromising indulgence.

Dietary Adaptations

Chocolate Chip Zucchini Banana Bread can easily be tailored to fit various dietary needs. For a gluten-free option, opt for gluten-free flour blends that closely mimic traditional all-purpose flour to ensure the right texture in your bread.

Dairy-free diets can benefit from using coconut oil instead of butter, providing a delightful coconut flavor while maintaining moisture. Substituting the chocolate for dairy-free varieties is another essential step for those avoiding dairy.

For a vegan version, replace eggs with flaxseed meal mixed with water, or opt for ripe bananas, as they act as a binder, adding flavor and moisture. Maple syrup can replace sugar to increase sweetness while keeping the recipe vegan-friendly.

Low-carb or keto adaptations can be made by substituting all-purpose flour with almond flour and reducing or replacing sugars with low-carb sweeteners. Each modification can be achieved while still enjoying a delectable bread.

Troubleshooting Guide

If your Chocolate Chip Zucchini Banana Bread doesn’t rise as expected, check to ensure your baking powder is fresh, as expired leavening agents can hinder the rising process. Overmixing can also create dense bread; use gentle folding techniques instead of vigorous mixing.

Flavor balance issues can arise from using unripe bananas; always ensure bananas are adequately ripened for optimal sweetness. For overly sweet bread, consider cutting sugar next time or adding a pinch of salt.

Temperature problems often result from inconsistent oven heat. An oven thermometer can help ensure proper baking temperature. If your bread is browning too quickly, use aluminum foil to tent over the top.

Ingredient substitutions require the right adjustments. For example, if using whole wheat flour, a bit more moisture may be necessary. Adjusting wet ingredients accordingly can prevent drying or dense textures.

Recipe Success Stories

Readers consistently rave about their experiences making Chocolate Chip Zucchini Banana Bread, sharing joy in its easy preparation and delicious results. Many report incorporating various mix-ins, such as nuts or fruits, leading to delightful variations that their families adore.

Some bakers discover that using overripe bananas lends their loaves an even more pronounced sweetness, enhancing the overall flavor profile. Others have shared success stories about turning the recipe into muffins, achieving perfect portions for kids’ snacks or school lunches.

Feedback from readers also highlights the wonderful aroma that fills their kitchens, creating warm memories of baking and family gatherings. Photographers have shared stunning images showcasing their beautifully baked loaves, proving that this recipe is not only tasty but visually appealing.

Finally, countless adaptation stories show how creative bakers have put their twist on the original recipe, enhancing its versatility and making it their own in the process. Many find joy in the sharing nature of this recipe, fostering connection and conversation over a simple yet delightful loaf.

Frequently Asked Questions

Can I freeze Chocolate Chip Zucchini Banana Bread?

Yes! You can freeze the bread. Wrap it well in plastic wrap and foil or place slices in an airtight container. It can be stored for up to three months. Thaw overnight in the fridge or at room temperature before consuming.

How can I ripen bananas quickly?

If you’re short on time, place bananas in a preheated oven at 300°F (149°C) for about 15-20 minutes, until the skin turns dark. Let them cool before using them in your recipe.

What can I use if I don’t have chocolate chips?

You can substitute with chopped chocolate bars or even dried fruits like raisins or cranberries for a twist. Adjust depending on your desired flavor profile.

Is it necessary to peel the zucchini?

No, it’s not necessary! The skin of zucchini is quite tender and will blend seamlessly in the final product. Just wash the zucchini thoroughly before shredding.

Can I use whole wheat flour instead of all-purpose flour?

Yes, you can use whole wheat flour. Keep in mind that it may create a denser texture, so consider mixing it with all-purpose flour for a lighter loaf.

How can I make my bread moister?

Ensuring you properly drain the zucchini and using ripe bananas will contribute to moisture. Adding yogurt or sour cream to your batter can also help.

What can I add to enhance the flavor?

Spices like cinnamon, nutmeg, or vanilla extract enrich the bread’s flavor. You can also consider adding chopped nuts or a swirl of cream cheese for an added taste dimension.

How do I store the bread properly?

Store the bread in an airtight container at room temperature for about four days. If refrigerating, it can last up to a week or freeze for longer storage.

Can I make mini loaves or muffins instead?

Yes, this recipe works great for mini loaves or muffins! Adjust the baking time accordingly; muffins generally take 15-20 minutes while mini loaves may take around 35-40 minutes.

What should I do if my bread is too dry?

If your bread turns out dry, it could be due to overbaking. Next time, reduce the baking time slightly and check for doneness with a toothpick earlier.

Additional Resources

If you enjoyed this Chocolate Chip Zucchini Banana Bread, check out related recipes such as classic banana bread, zucchini muffins, or other delightful quick breads. Technique guides on baking tips and ingredient handling can enhance your skills, while ingredient information ensures you’re well-equipped for your next baking adventure.

Investing in quality kitchen equipment can also elevate your baking game, including reliable loaf pans, measuring tools, and mixing bowls to ensure consistency in your results. Seasonal variations highlight how to adapt dishes based on what ingredients are in season.

Join the Conversation

Engaging with others in the kitchen can lead to a wealth of ideas and inspiration. Share your photos of your completed Chocolate Chip Zucchini Banana Bread on social media platforms using hashtags for community interaction.

Encourage others to review the recipe and share their experiences, variations, and creative adaptations. Building a vibrant community around cooking allows everyone to learn and embrace unique flavors rooted in shared traditions.

Don’t miss out on trying this delightful recipe! Whether you’re a novice or a pro, and whether you enjoy baking for yourself or sharing with loved ones, this Chocolate Chip Zucchini Banana Bread is sure to become a favorite in your collection.

The Recipe

Chocolate Chip Zucchini Banana Bread

Serves: 8 slices

Prep Time: 15 mins

Cook Time: 50 mins

Total Time: 65 mins

Kitchen Equipment Needed

  • Mixing bowls
  • Loaf pan
  • Whisk
  • Grater for zucchini
  • Measuring cups and spoons
  • Oven mitts

Ingredients

  • 1 cup mashed ripe bananas (about 2-3 bananas)
  • 1 cup grated zucchini (drained)
  • 1/3 cup melted coconut oil or butter
  • 1/2 cup brown sugar
  • 1/4 cup granulated sugar
  • 2 large eggs
  • 1 teaspoon vanilla extract
  • 2 cups all-purpose flour
  • 1 teaspoon baking soda
  • 1/2 teaspoon baking powder
  • 1/2 teaspoon cinnamon
  • 1/4 teaspoon salt
  • 1 cup semi-sweet chocolate chips

Directions

  1. Preheat your oven to 350°F (175°C) and grease a 9×5 loaf pan or line it with parchment paper.
  2. In a mixing bowl, combine the mashed bananas, grated zucchini, melted coconut oil or butter, brown sugar, granulated sugar, eggs, and vanilla extract. Mix until well blended.
  3. In another bowl, whisk together the flour, baking soda, baking powder, cinnamon, and salt.
  4. Gradually add the dry ingredients to the wet ingredients, gently combining until just mixed. Do not overmix.
  5. Fold in chocolate chips carefully, ensuring they are evenly distributed in the batter.
  6. Pour the batter into the prepared loaf pan and smooth the top with a spatula.
  7. Bake for 50-60 minutes or until a toothpick inserted into the center comes out clean.
  8. Allow the bread to cool in the pan for about 10 minutes before transferring it to a wire rack to cool completely.

Recipe Notes

  • Store leftovers in an airtight container at room temperature for up to 4 days.
  • Freeze leftovers for up to 3 months for a delicious treat later.
  • Feel free to swap in nuts or different types of chocolate for variety!

Easy Christmas Fudge Recipe: Perfect Holiday Treats to Gift

Christmas Fudge Recipe – Easy Holiday Treats to Gift

⚖️
Difficulty
Easy

⏲️
Prep Time
15 mins

🕒
Cook Time
5 mins

⏱️
Total Time
20 mins

🍽️
Servings
16 pieces

Christmas fudge is a delightful and luxurious holiday treat that embodies the spirit of giving. This Christmas Fudge Recipe is a festive gem that is not only simple to prepare but also makes the perfect gift for friends and family. Imagine unwrapping a beautifully packaged square of rich, creamy fudge that melts in your mouth, offering a burst of sweet flavor with every bite. The combination of chocolate, sweetness, and the joy of sharing makes this fudge a cherished holiday tradition.

The fudge has a lovely texture that balances smoothness and a bit of chewiness, giving you that comforting sensation with each indulgent piece. Made with flavorful ingredients, the sweetness is perfectly complemented by the deep richness of chocolate. Notably, the aroma of freshly made fudge wafts enticingly through your kitchen, creating a warm, cozy atmosphere that sets the stage for a delightful holiday gathering. Whether you’re enjoying it yourself or gifting it to loved ones, this easy recipe promises happiness and joy this Christmas season.

Quick Recipe Highlights

  • Flavor Profile: This fudge boasts a decadent chocolate flavor with a touch of sweetness, making it irresistibly good. Adding nuts or peppermint further enhances its festive taste.
  • Texture: The fudge is incredibly smooth with a creamy consistency, creating a delightful melt-in-your-mouth experience perfect for the holiday season.
  • Aroma: The warm scent of vanilla and chocolate fills the air while you make this fudge, immediately drawing everyone to the kitchen.
  • Visual Appeal: Rich, dark fudge decorated with colorful sprinkles or nuts adds a festive touch, perfect for holiday presentations.
  • Skill Level Needed: This Christmas Fudge Recipe is easy enough for beginners, requiring no specialized skills beyond basic cooking techniques.
  • Special Equipment: A microwave-safe bowl and a loaf pan are all you’ll need to create this delicious treat.

Recipe Overview

  • Difficulty Level: This recipe is considered easy, making it accessible for beginners while still being satisfying for more experienced cooks. The straightforward steps ensure success on the first attempt.
  • Category: This Christmas Fudge falls under holiday treats and desserts, making it an ideal choice for Christmas celebrations, potlucks, or gifting.
  • Cuisine: Rooted in Western culinary traditions, fudge making has transformed into a favorite dessert worldwide, especially during festive occasions.
  • Cost: The ingredients are relatively inexpensive, typically costing less than $10 while making a batch that can serve many.
  • Season: Fudge is particularly popular during the winter months, especially around the holidays, making it a seasonal staple.
  • Occasion: Perfect for Christmas parties, cookie exchanges, or even as a thoughtful handmade gift during the holidays.

Why You’ll Love This Recipe

Christmas fudge appeals to the taste buds with its rich, sweet flavor profile that embodies the essence of festive treats. The luxurious, creamy texture adds another layer of indulgence, making every bite a treat to savor. Preparing this fudge is a breeze, allowing you to whip up a delicious dessert in just 20 minutes. You’ll find yourself enjoying the process of making it as much as you enjoy eating it.

Another significant advantage is the nutritional appeal, as this fudge can be easily made with variations including nuts and dried fruits, which add texture and nutrients. Sharing homemade fudge during the holiday season evokes a sense of community and warmth, making it a beloved choice for gatherings. Furthermore, the cost-effectiveness of this recipe means you can treat many friends and family without breaking the bank, ensuring you share love and joy in delicious form.

Fudge is not just about hunger; it’s about creating moments. It’s a perfect conversation starter for gatherings; its rich taste leads to delightful discussions. Its versatility allows you to tailor it to personal preferences, making it an endlessly adaptable recipe. Christmas fudge has the potential to become a cherished tradition that enhances the spirit of giving during this wonderful season.

Historical Background and Cultural Significance

The history of fudge can be traced back to the late 19th century in the United States, initially created by accident when sugar was combined with butter and chocolate. Over the years, this simple confectionery transformed into a beloved treat across the nation, especially during Christmas. Its adaptability led to numerous variations, making it a classic holiday offering.

Culturally, fudge holds a significant place in American culinary evolution, representing the home baking tradition that has been passed down through generations. During festive seasons, sharing fudge has become synonymous with the spirit of gift-giving and hospitality. Families often create their own recipes, which become cherished heirlooms, reminding them of holiday gatherings and joyful times.

The evolution of the fudge recipe has seen the addition of various flavors such as peppermint, nuts, and more, reflecting regional preferences and available ingredients. These variations showcase the creativity of home bakers and their desire to make their confections unique and special for the holidays.

Regional variations of fudge have emerged, each with distinctive twists and local ingredients, reflecting the diverse culinary tapestry across the United States. From the salted varieties of New England to the decadent chocolate-infused iterations found in the South, every area has its unique take on this quintessential holiday treat.

Ingredient Deep Dive

Chocolate

Chocolate is the heart of any fudge recipe. Rich in antioxidants, it can provide a sumptuous depth of flavor while offering potential health benefits when consumed in moderation. When selecting chocolate for fudge, look for high-quality dark or semi-sweet options to achieve the best flavor. For storage, keep chocolate in a cool, dry place to maintain its freshness. If unavailable, you can substitute with cocoa powder, adjusting the sugar accordingly.

Condensed Milk

Condensed milk brings sweetness and a creamy dimension to fudge. It is a staple ingredient in many dessert recipes due to its ability to create a rich texture. When purchasing condensed milk, choose brands that contain minimal additives for the best results. Store unopened cans in a cool pantry, and once opened, transfer any leftovers to an airtight container in the fridge. If you’re looking for a dairy-free alternative, coconut milk can work well in fudge recipes, providing a unique flavor twist.

Common Mistakes to Avoid

  • Overheating the chocolate can cause it to seize, preventing a smooth fudge texture. Always melt it gently and avoid boiling.
  • Not using a candy thermometer can lead to under or overcooking the fudge, which affects its firmness and consistency.
  • Skipping the greasing or lining of the pan will result in sticky fudge that is difficult to remove.
  • Mixing in ingredients like nuts or candy too soon can cause them to sink instead of staying evenly distributed throughout the fudge.
  • Allowing fudge to cool too quickly can lead to a grainy texture. Let it set at room temperature for best results.
  • Using subpar ingredients compromises flavor and texture. Always invest in good-quality chocolate and vanilla.
  • Failing to let the fudge chill completely before cutting can ruin its shape, leading to messy servings.
  • Not adjusting for high humidity can affect the fudge. If conditions are particularly humid, consider reducing the liquid ingredients slightly.
  • Skipping taste tests while making can lead to imbalance; always check for sweetness and flavor during preparation.
  • Not having all ingredients prepped and measured can lead to a chaotic cooking environment, increasing the chance of mishaps.

Essential Techniques

Melting chocolate: This step is crucial to the fudge-making process. Always melt chocolate in a microwave or over a double boiler, stirring frequently to avoid scorching. The ideal texture should be smooth and glossy. Common pitfalls include overheating and burning, which can ruin your fudge, so watch it closely.

Cooling and setting: Allow your fudge to cool at room temperature before cutting it. This process is key to ensuring the fudge retains its shape and doesn’t become too soft. Look for it to firm up without remaining too sticky at the surface – this is a sign of successful cooling.

Pro Tips for Perfect Christmas Fudge

1. Use a good quality chocolate for a richer taste and smooth texture, as the chocolate’s quality can significantly impact the fudge’s flavor.
2. Consider adding a pinch of salt to enhance the chocolate flavor and balance the sweetness.
3. Allow the fudge to set in the refrigerator after cooling at room temperature for a firmer texture and easier cutting.
4. Experiment with festive add-ins like crushed peppermint candies or seasonal spices like cinnamon for a unique twist.
5. To create a beautiful presentation, use a sharp knife for cutting and clean the knife between cuts for neater edges.
6. Label your fudge gifts with ingredient information, especially if you include nuts or allergens.
7. Soften hard edges by carefully warming them with your hands before cutting, making the process easier and preventing crumbling.
8. Store any leftover fudge in an airtight container at room temperature for up to two weeks, or freeze for longer storage.

Variations and Adaptations

There are countless ways to personalize your Christmas fudge. Add-ins can vary widely; think of seasonal favorites like white chocolate, toffee bits, or even dried fruit for a chewy texture. For a festive twist, a dash of peppermint extract can elevate the flavor and pair beautifully with chocolate.

Seasonal adaptations can include evoke autumn flavors by introducing pumpkin spice for fall or marshmallows during winter. For dietary needs, consider gluten-free or dairy-free versions by substituting traditional ingredients with suitable alternatives like coconut cream or nut milks.

Flavor variations can be endless. Incorporate can make fudge creamy and decadent. Leverage weekend baking events with friends to try new flavors while swapping gifts and enjoying seasonal cheer. Presentation alternatives can also be adjusted; for instance, shaping fudge into festive shapes using cookie cutters can be a fun surprise for all ages.

Serving and Presentation Guide

To serve your Christmas fudge elegantly, cut it into bite-sized squares and arrange them on a festive platter. Enhance the visual appeal by garnishing with chocolate shavings, sprinkles, or edible glitter that adds sparkle. Traditional accompaniments like peppermint sticks or candy canes can make the sweet treat stand out even more.

For a modern twist, serve fudge in small mason jars tied with festive ribbons, making lovely gift snapshots that guests can take home. Ensure that fudge is stored in a cool place to maintain its consistency and flavor. Consider portion control by offering individual servings, which help guests not to overindulge while enjoying this sweet treat.

Wine and Beverage Pairing

Pairing your Christmas fudge with beverages can enhance the tasting experience. A rich, dark red wine, such as Merlot or Cabernet Sauvignon, complements the deep chocolate flavors beautifully. For something lighter, sparkling wine like Prosecco adds a refreshing contrast.

If wine isn’t your style, consider non-alcoholic alternatives such as a creamy hot chocolate or spiced cider that know how to bring warmth and a festive vibe. A dash of nutmeg or cinnamon can elevate classic flavors, making any drink exciting.

For coffee lovers, opt for a smooth espresso or a velvety cappuccino to contrast the sweetness of the fudge. Brewing a warm cup of chai tea also brings delicious warmth while enhancing those buttery undertones in the dessert.

Storage and Shelf Life

When storing your Christmas fudge, keep it in an airtight container at room temperature away from humidity. This ensures that it stays fresh and maintains its texture. If refrigerated, it can last up to two weeks, but allow it to come to room temperature before serving for the best texture.

Freezing fudge is possible; wrap it tightly in plastic wrap and then place it in an airtight container. This can extend its shelf life for several months. Always label the container with the date to help track its freshness.

For any signs of spoilage, watch for changes in color or an off smell, which indicates that it should be discarded. When reheating, remember that fudge is not meant to be heated too much, especially if frozen; simply let it sit out until softened rather than using heat.

Make Ahead Strategies

Making Christmas fudge ahead of time is a convenient strategy for busy holiday schedules. Prepare the fudge up to two weeks ahead of your planned events to alleviate last-minute stress. To maintain freshness, ensure that it is properly stored.

Consider setting a prep timeline for making larger batches in one day, allowing half to cool before making additional flavors. If you’re making different types, label them clearly to avoid mix-ups.

As for quality impact, allowing the fudge to rest for a day enhances flavor as ingredients meld, making it even tastier. If you’re unsure about serving the fudge, make it a day or two in advance for optimal taste.

Scaling Instructions

Scaling your Christmas fudge recipe can be easily achieved. If you prefer to make smaller quantities, simply halve the recipe while keeping the ingredient ratios consistent. Conversely, when doubling or tripling the recipe, ensure that your mixing bowl and equipment can accommodate larger volumes.

Timing adjustments may be required during cooking, particularly if the batches are larger. Always monitor the fudge closely to avoid over or undercooking. When scaling, plan for additional storage containers to hold the fudge, as larger batches yield more treats.

Make sure to factor storage considerations for larger quantities, since longer shelf lives can apply if you’re making fudge for gifting, so re-evaluation of the number of pans used may assist in optimal organization.

Nutritional Deep Dive

Understanding the nutritional components of Christmas fudge can help in mindful indulgence. Each serving typically provides a unique macro breakdown, including carbohydrates mostly from sugar. It’s essential to consider the fat content from chocolate, which can vary based on the type used.

Fudge can offer beneficial micronutrients from added ingredients such as nuts, which contribute protein and healthy fats. Substitutions like using dark chocolate can enhance antioxidant intake, making the dessert a little more favorable. Awareness of portion size will also affect overall caloric intake, especially during the holiday season.

Dietary considerations are paramount, especially for special dietary requirements like gluten-free or dairy-free, where specific substitutions can round out the nutritional profile without compromising the indulgence.

Dietary Adaptations

For those needing gluten-free options, using specific brands of chocolate or ensuring that all add-ins are gluten-free will keep the holiday fudge accessible. Similarly, for dairy-free recipes, substituting regular condensed milk with coconut or other nut-based alternatives provides the same creaminess without dairy.

Vegan adaptations can use plant-based fats and sugars to create creamy and richly flavored fudge that suits various diets. Low-carb and keto adaptations can leverage sugar substitutes to create a dessert that satisfies sweet cravings without high glycemic impact.

As dietary trends evolve, being aware of paleo or low-FODMAP adjustments can also help provide festive options to suit different guest preferences while gathering, ensuring everyone can enjoy a piece of the delicious fudge.

Troubleshooting Guide

If your fudge turns out too soft, it likely didn’t set correctly. Make sure to let it cool at room temperature before chilling. Conversely, if it’s too hard, reducing cooking time next batch can help achieve the perfect consistency.

A grainy texture may surface from sugar crystals forming. To avoid this, stir consistently while heating and maintain the correct temperature. If the flavor is too sweet, consider adding a touch of salt or cocoa powder during the next preparation for balance.

For ingredient substitutions, ensure the proportions remain accurate, as a lack of balance can lead to unwanted results. Timing concerns can also influence the outcome; always pre-measure ingredients to help keep track of cooking times accurately.

Recipe Success Stories

Community feedback often highlights excitement and joy surrounding this Christmas Fudge Recipe. Many users have shared their personal variations, such as adding caramel swirls or including different festive toppings that resonate with their family traditions.

Readers have suggested fun adaptations like using seasonal flavored chocolate, which brings new life into a classic dish, proving that this fudge recipe easily becomes a blank canvas for creativity. Successful execution often leads to photography tips for presenting fudge, showcasing its vibrant colors and texture that tempt anyone during tastings.

Adaptation stories further emphasize how this simple fudge has transformed into unique holiday creations shared among friends, each sparking joyful memories. The act of making it not only creates delicious treats but also builds connections, with many eager to share their experiences.

Frequently Asked Questions

How do I store Christmas fudge?

To store Christmas fudge, keep it in an airtight container at room temperature for up to two weeks. If you prefer, you can also refrigerate it for a longer shelf life or freeze it for up to three months. Ensure any leftovers are wrapped tightly to maintain freshness.

Why did my fudge turn out grainy?

Graininess in fudge usually occurs if the sugar didn’t dissolve fully or if it was overheated. To avoid this, melt the mixture gently and stir consistently without letting it reach boiling point. A candy thermometer can help maintain the correct temperature for smooth fudge.

Can I use flavored chocolate for this recipe?

Absolutely! Flavored chocolates can add a unique twist to your Christmas fudge. White chocolate, caramel, and flavored dark chocolates can all be used effectively. Adjust other sweeteners accordingly to balance the flavors.

What can I use instead of condensed milk?

If you’re looking for an alternative to condensed milk, coconut milk or any non-dairy milk thickened with a bit of sugar can be effective substitutes. You can also consider using homemade evaporated milk for a richer taste.

How long does homemade fudge last?

Homemade fudge can last up to two weeks when stored properly at room temperature. If refrigerated, it can maintain its freshness for longer periods, and if frozen, it can last for several months.

Can I add nuts or candy pieces to my fudge?

Yes, adding nuts or candy pieces is a wonderful way to enhance your Christmas fudge. Be sure to incorporate them at the right time to evenly distribute them without disrupting the melting process.

Is this fudge recipe suitable for vegan diets?

To make this fudge recipe vegan, simply replace any dairy ingredients, like chocolate and condensed milk, with plant-based alternatives. Be mindful to check labels to ensure all ingredients are vegan-friendly.

Can I use low-carb sweeteners in place of sugar?

Low-carb sweeteners can be utilized, but keep in mind that texture and taste may differ. It’s crucial to choose a suitable sweetener designed for baking, and always check the serving recommendations for best outcomes.

How do I know when my fudge is set?

Fudge is set when it has cooled completely and becomes firm to the touch. When ready to slice, it should hold its shape well and not feel overly soft or sticky. For the best cuts, let it chill in the refrigerator.

Can I make fudge ahead of time for the holidays?

Definitely! Fudge is an excellent make-ahead treat. Prepare it several days in advance, and store it properly to keep it fresh. It often tastes even better after a day or two as flavors develop.

Additional Resources

If you enjoyed this Christmas fudge recipe, explore related recipes that showcase holiday treats and desserts. Check out technique guides for candy making or ingredient information focusing on chocolate and sweeteners. Equipment recommendations can help streamline your cooking experience, especially for holiday baking needs. Lastly, consider seasonal variations to keep festive flavors exciting throughout the winter months.

Join the Conversation

We love hearing about your experiences with our recipes! Share your photos and feedback on social media, and feel free to adapt the recipes to suit your taste. Engaging with our community not only helps others discover delightful variations but also inspires new ideas and improvements. Together, we can create cherished memories and festive traditions through cooking and sharing delicious recipes like this Christmas fudge.

The Recipe

Christmas Fudge

Serves: 16 pieces

Prep Time: 15 mins

Cook Time: 5 mins

Total Time: 20 mins

Kitchen Equipment Needed

  • Microwave-safe bowl
  • Loaf pan or square baking dish
  • Spatula for mixing
  • Parchment paper (optional, for easy removal)

Ingredients

  • 2 cups semi-sweet or dark chocolate chips
  • 1 cup sweetened condensed milk
  • 1 teaspoon vanilla extract
  • 1 cup nuts, chopped (optional)
  • Sprinkles or crushed candy canes for topping (optional)

Directions

  1. In a microwave-safe bowl, combine the chocolate chips and sweetened condensed milk.
  2. Microwave in 30-second intervals, stirring in between until the mixture is fully melted and smooth.
  3. Add vanilla extract and stir until incorporated. If using, fold in chopped nuts.
  4. Pour the fudge mixture into a lined or greased loaf pan, spreading it evenly.
  5. Top with sprinkles or crushed candy canes if desired, and gently press them into the surface.
  6. Allow the fudge to cool at room temperature for about 2 hours, then refrigerate for an additional hour for a firmer texture.
  7. Once set, cut into squares and enjoy or gift to loved ones!

Recipe Notes

  • For a richer fudge, use a combination of semi-sweet and dark chocolate.
  • Feel free to customize add-ins according to your preferences or seasonal favorites.

Create Irresistible Butterfinger Caramel Crunch Bars at Home

Irresistible Butterfinger Caramel Crunch Bars: An Indulgent Treat

⚖️
Difficulty
Easy

⏲️
Prep Time
20 mins

🕒
Cook Time
30 mins

⏱️
Total Time
50 mins

🍽️
Servings
16 bars

These Irresistible Butterfinger Caramel Crunch Bars are a delightful dessert that combines crunchy textures and rich flavors. Each bite delivers a sweet explosion of buttery caramel enveloped in a crispy base with the unique taste of Butterfinger candy. Perfect for sharing at gatherings or simply for indulging yourself, these bars are a great treat that everyone will love. The balance of sweetness and crunch creates an irresistible combination that will leave your taste buds craving more.

This recipe not only brings nostalgic candy flavors to life but also adjusts them for a homemade experience. The buttery, sweet aroma fills the kitchen as these bars bake, enticing you to grab a piece as soon as they cool down. With simple ingredients and straightforward steps, you can whip up these bars quickly, making it a go-to recipe for a last-minute dessert choice.

Quick Recipe Highlights

  • Flavor Profile: Sweet caramel combined with the nutty taste of Butterfinger, layered on a buttery crust.
  • Texture: Crisp, crunchy base with a sticky caramel layer and chocolate topping.
  • Aroma: Buttery and sweet caramel scents waft through the air while baking.
  • Visual Appeal: These bars boast a lovely golden-brown crust with a rich chocolate drizzle on top.
  • Skill Level Needed: This recipe is beginner-friendly, requiring minimal baking skills.
  • Special Equipment: All you need is a baking dish, mixing bowl, and a spatula.

Recipe Overview

  • Difficulty Level: These bars are classified as easy to make, making them suitable for bakers of all skills. The recipe involves simple steps and does not require advanced techniques.
  • Category: This treat falls under desserts and is perfect for satisfying a sweet tooth after dinner or during celebrations.
  • Cuisine: This recipe is an American favorite, reflecting the country’s love for sweet treats and creative desserts.
  • Cost: The ingredients are budget-friendly, with most commonly available at your grocery store, making it an economical choice for homemade desserts.
  • Season: These bars are ideal for year-round enjoyment but shine in the fall when sweet treats are especially popular.
  • Occasion: Perfect for birthday parties, potlucks, or family gatherings where a sweet treat is welcomed.

Why You’ll Love This Recipe

The taste and texture of these Butterfinger Caramel Crunch Bars make them a delightful addition to any dessert table. The buttery base perfectly complements the sweet, sticky caramel and crunchy Butterfinger pieces, providing a satisfying mouthfeel with every bite. The drizzle of chocolate on top adds an extra layer of sweetness that enhances the overall flavor. Each bite is a harmonious blend of textures—crispy, chewy, and creamy all at once, making it a dessert that truly tantalizes the taste buds.

This recipe is also incredibly convenient, allowing you to prepare these bars quickly with minimal ingredients needed. You can mix and bake everything in under an hour, and once they cool, they’re ready to be enjoyed any time of day. Whether you need a quick dessert for unexpected guests or want to treat yourself after a long day, these bars offer an easy, delicious solution that requires little time and effort.

Nutritionally, while these bars are certainly indulgent, they can still fit into a balanced diet in moderation. They provide a source of energy, thanks to the sugars and carbohydrates from the candy and the base. Additionally, homemade treats can often be made with fresher ingredients compared to store-bought options, allowing for better quality in every bite.

When entertaining, these Butterfinger Caramel Crunch Bars add a touch of sweetness to your spread and are easy to serve. They can be cut into small squares, making them ideal for sharing, and the nostalgia surrounding Butterfinger candy often evokes fond memories for many. Adding these bars to your dessert table ensures that they’re always a hit with friends and family.

Ultimately, the cost-effectiveness and accessibility of this recipe make it even more appealing. Ingredients are easy to find and won’t break the bank, allowing you to create an impressive dessert without spending a fortune. The combination of affordability and scrumptious taste keeps the recipe as a go-to for any occasion.

Historical Background and Cultural Significance

Butterfinger bars have been an American favorite since their introduction in the 1920s, marketed for their unique crunchy texture. These chocolate-covered bars quickly gained popularity due to their delightful combination of flavors. The transition of Butterfinger from store-candy to a homemade treat reflects the evolution of food culture, with many seeking to recreate familiar flavors in their own kitchens.

Culturally, Butterfinger holds a special place in the hearts of many, often associated with childhood snacks and treats. Over the years, the versatile candy has found its way into various dessert recipes, diversifying its use beyond mere snacking. This particular recipe shines a light on how candy can be transformed into delicious bars that are perfect for celebrations or casual get-togethers, demonstrating the blend of nostalgia with innovative home cooking.

The evolution of dessert bars has also seen many regional variations, where different communities experiment with flavors and textures. Some might add nuts or even fruits for added complexity, while others stick closely to the classic Butterfinger flavor. This variety showcases the American palate’s adaptability and eagerness to enjoy diverse dessert options.

While the Butterfinger Caramel Crunch Bars may have started as a spin on a classic candy bar, they have evolved into a beloved recipe that can be shared and enjoyed in various settings. The cultural significance of this treat continues to grow as more people discover the joys of making their favorite candies into homemade delights.

Ingredient Deep Dive

The main ingredient in Butterfinger Caramel Crunch Bars is the beloved Butterfinger candy. With its unique blend of creamy peanut butter and crunchy toffee pieces, Butterfinger has become a classic chocolate bar known for its distinct taste. Rich in sugar and fats, it’s a suitable treat but should be consumed in moderation due to its caloric density. When selecting Butterfinger for your recipe, ensure to choose fresh bars, as older ones may lose their crunch. Store them in a cool, dry place to maintain their quality, especially if you plan to use them in baking.

Next, we have caramel, which is integral to the richness of these bars. Caramel is made by slowly heating sugar until it liquefies and turns into a golden-brown syrup. It brings sweetness and a sticky texture that binds the bars together. When making or buying caramel, look for high-quality options without artificial additives for the best flavor. Storing homemade caramel requires keeping it in an airtight container in a cool place, as heat can cause it to become overly sticky or hard.

Common Mistakes to Avoid

  • Not cooling the bars completely before slicing can lead to messy pieces. Be sure to let them rest until they’re firm.
  • Using old Butterfinger bars can affect the texture; always select the freshest candy available.
  • Overcooking the caramel can lead to a hard consistency; keep a close watch on it while it cooks.
  • Not lining your baking dish properly may cause sticking; use parchment paper for easy removal.
  • Skipping the chocolate drizzle can leave the bars looking less appealing; add this finishing touch for presentation.
  • Inaccurate measurements can lead to inconsistencies; always measure carefully, especially for sugar and flour.
  • Rushing the cooling process by placing bars in the fridge can cause condensation; let them cool at room temperature.
  • Forgetting to chop the Butterfinger pieces can lead to uneven distribution; chop them into small, manageable sizes.
  • Using unsalted butter instead of salted can alter the flavor; follow the ingredient list for the best results.
  • Not using a sharp knife to cut the bars can result in jagged edges; ensure to use a sharp knife for clean slices.

Essential Techniques

When making Butterfinger Caramel Crunch Bars, mastering the melting technique is vital for both the butter and the chocolate. Melting butter helps create a smooth base, while melting chocolate for drizzling requires gentle heat to avoid burning. Using a double boiler is recommended for best results, as it provides an even temperature and prevents overheating. When mastered, this technique allows for a perfect consistency that enhances the flavor and texture of your dessert.

Another important technique is the layering process when combining the ingredients. You’ll need to evenly distribute the caramel and chocolate layers over the base and into the mixture. Use an offset spatula for precision and ensure that the filling reaches all corners of the pan. Proper layering will not only make the bars visually appealing but also ensure an even distribution of flavors in every bite.

Pro Tips for Perfect Irresistible Butterfinger Caramel Crunch Bars

1. Allow your baking dish to cool completely before attempting to slice the bars. This will give you clean cuts and prevent toppings from smearing.

2. Drizzle the chocolate while it is still warm to ensure it spreads evenly and adheres perfectly to the bars.

3. Experiment with adding extra toppings such as chopped peanuts or drizzling caramel for added flavor and texture variations.

4. When storing, use an airtight container to keep bars fresh and prevent them from becoming overly hard or dry.

5. If you want to enhance chocolate flavor, consider using dark chocolate for the drizzle instead of milk chocolate.

6. Prioritize finely chopping the Butterfinger candy for an even distribution throughout the bars, enhancing the overall texture.

7. Serve the bars at room temperature for the best taste, as refrigeration can alter the texture of the caramel.

8. Use a kitchen scale for more precise measurements if needed, ensuring perfect ratios for success.

Variations and Adaptations

To create regional variations of these bars, consider adding local flavors such as sea salt or using different types of chocolate, such as a rich dark chocolate or white chocolate drizzle. Seasonal adaptations can include adding pumpkin spice or peppermint during the holidays, allowing the bars to align with the flavor profiles that are popular during certain times of the year.

If you’re looking for dietary modifications, consider using vegan caramel or gluten-free graham crackers, allowing those with dietary restrictions to still enjoy these delicious treats. For flavor variations, adding crushed nuts, like almonds or pecans, can bring new textures and flavors to the bars.

For a unique texture modification, try adding layers of crispy rice cereal for an extra crunch, or use whole grains for the crust to make it more nutritious. Presentation alternatives, such as plating the bars with a scoop of ice cream or fresh fruits, can elevate the overall dining experience.

Serving and Presentation Guide

When it comes to plating these Butterfinger Caramel Crunch Bars, aim for visually appealing presentations to impress your guests. Cut the bars into uniform squares and arrange them on a beautiful serving platter. Consider garnishing with crushed Butterfinger pieces sprinkled on top or a dusting of cocoa powder to add visual interest.

Traditional accompaniments include a scoop of vanilla ice cream, which complements the sweet and crunchy flavor of the bars beautifully. For modern serving suggestions, create individual servings by wrapping each bar in decorative parchment paper tied with twine for an attractive party treat. Temperature considerations are essential; serve these bars at room temperature to showcase their delightful texture and flavor profile.

Lastly, for portion control tips, aim for small squares to allow indulgence without overwhelming guests, making these bars the perfect addition to a dessert table.

Wine and Beverage Pairing

When looking for the perfect wine pairing for your Butterfinger Caramel Crunch Bars, opt for sweet dessert wines like Moscato or a fruity Riesling that will enhance the sweet notes of the bars without overpowering them. For a richer option, consider a tawny port, which complements the caramel beautifully with its nutty undertones.

If you prefer non-alcoholic alternatives, complement your bars with a sweetened iced coffee or hot cocoa, as the chocolate and caramel flavors will blend seamlessly and offer a delightful flavor experience. Temperature considerations are always key; ensure that beverages served are chilled or warm based on preference to enhance the tasting experience.

Storage and Shelf Life

For optimal storage of these Butterfinger Caramel Crunch Bars, keep them in an airtight container at room temperature, away from direct sunlight. This will help ensure that they stay fresh and maintain their delightful texture. The bars can be kept for up to a week when stored correctly.

If you need to store them for a longer period, they can also be frozen. Wrap them individually in plastic wrap and place them in a freezer-safe container. They can last for up to three months in the freezer. When ready to enjoy, allow them to thaw at room temperature. Signs of spoilage include a change in texture (becoming hard or sticky), so it’s essential to check before serving.

Make Ahead Strategies

To make your baking experience efficient, consider preparing the Butterfinger Caramel Crunch Bars ahead of time. You can bake the base a day in advance, allowing it to cool completely before adding the layers of caramel and chocolate. Evidence indicates that the flavors deepen and meld beautifully when allowed to sit overnight.

You can also store each component separately until ready to assemble, ensuring that your bars are fresh and flavorful when served. Just remember to allow for enough time for cooling after baking and before slicing, as this significantly impacts the final texture and presentation of the desserts.

Scaling Instructions

If you need to scale your recipe, halving or doubling the ingredients is straightforward. For halving, carefully adjust the ingredients to ensure the proportions remain as intended. For larger gatherings, doubling or even tripling the recipe can be done with ease, just ensure you’re using the appropriate sizes of baking dishes.

When scaling, keep an eye on baking times. Larger quantities may require additional time in the oven, while smaller batches may need less. Always check for doneness with a toothpick; it should come out clean when the bars are ready. Storage considerations also come into play; larger batches may require more container space, so plan accordingly.

Nutritional Deep Dive

Examining the nutritional aspects of Butterfinger Caramel Crunch Bars reveals a balance of energy-boosting macros. The bars contain high amounts of carbohydrates primarily from sugars and graham crackers along with moderate protein content from the Butterfinger candy.

Micronutrient analysis shows that these bars provide some vitamins and minerals mainly from the butter and small amounts from the Butterfinger itself. However, due to their high sugar concentration, moderation is key. Understanding portion analysis is essential for enjoying these bars while managing calorie intake for those monitoring their dietary habits or seeking weight management strategies.

Dietary Adaptations

For those needing to modify the Butterfinger Caramel Crunch Bars for gluten-free diets, substitute regular graham crackers with gluten-free alternatives designed for baking. This ensures the base remains tasty while accommodating dietary restrictions.

To make the bars dairy-free, consider using coconut oil instead of butter and opting for non-dairy versions of chocolate and caramel. For a vegan take, you can also find plant-based butter alternatives, ensuring everyone can enjoy this delightful dessert without compromising their dietary choices.

For those following low-carb or keto diets, almond flour can replace traditional graham crackers to maintain low carbohydrates. Creating a similar experience without the high sugar is achievable by using sugar substitutes. This flexibility makes the recipe accessible to a broader audience with various dietary needs.

Troubleshooting Guide

If you’re experiencing texture issues with your Butterfinger Caramel Crunch Bars, check your caramel preparation—overcooked caramel can turn hard. For an ideal consistency, keep the cooking time short and stir regularly during preparation.

Flavor balance may also add a challenge; if your bars taste too sweet or flat, consider an additional pinch of salt to elevate the flavor profile. Incorporating nuts can also provide a complementary crunch and earthy flavor to balance sweetness.

Temperature problems often arise when baking—ensure your oven is properly calibrated to avoid undercooked or burnt bars. Equipment challenges can often stem from using mismatched baking dish sizes; ensure you use the correct size specified in the recipe for even baking.

When it comes to ingredient substitutions, ensure that the replacements have similar properties as the originals, especially with chocolate, as variations in fat content can significantly affect melting and texture.

Recipe Success Stories

Community feedback around these bars suggests they create cherished memories during gatherings. Many have shared their enjoyment of incorporating personal messages and stories into their baking experiences, with families bonding over cutting and decorating their bars together.

Variation successes abound, with individuals adapting the basic recipe to create their unique spins, like adding flavored extracts for an added twist. Photographers in the community also recommend staging shots outdoors for natural lighting to showcase the rich colors of the bars.

Many readers have provided suggestions, indicating that replacing Butterfinger with different candy varieties creates innovative alternatives, bringing a sense of adventure to the baking process. These stories highlight the recipe’s adaptability in bringing people together through creativity and shared culinary experiences.

Frequently Asked Questions

Can I use other types of candy instead of Butterfinger? Absolutely! Other crunchy chocolate bars like Twix or Reese’s can work well, providing unique flavor variations to the recipe.

How should I store the bars? Keep them in an airtight container at room temperature for up to a week or freeze them for longer storage.

Can I make these bars in advance? Yes, these bars can be made a day or even two in advance, allowing the flavors to meld beautifully.

What can I do if my caramel hardens? If your caramel turns hard, try reheating it gently with a splash of cream or milk to restore its smooth texture.

Are these bars customizable for dietary needs? Yes, you can easily adapt the recipe for gluten-free, dairy-free, or vegan diets with appropriate substitutions.

What’s the best way to cut the bars? Use a warm, sharp knife for clean cuts to avoid crumbling the edges of the bars.

Can I add nuts or other toppings? Yes! Chopped nuts, sprinkles, or an additional chocolate drizzle can enhance both the flavor and visual appeal of the bars.

Is it necessary to chill the bars before serving? Chilling is not necessary, but if you prefer a firmer texture, refrigerating for a short time can help.

How do I prevent my chocolate from seizing? Ensure no water or steam comes in contact with the chocolate while melting, as this can cause it to seize up.

What is the best type of chocolate for drizzling? A good-quality chocolate, either milk chocolate or dark chocolate, will provide great flavor; use what you prefer!

Additional Resources

If you’re interested in exploring more dessert recipes, consider trying variations involving other candy bars or different flavor profiles. A great way to elevate your baking skills is to delve into technique guides that detail how to make caramel from scratch or tips for perfecting your chocolate melting.

Additionally, seeking ingredient information is valuable—understanding how chocolates differ or how to choose the best caramel can uniquely adjust your recipe. Recommendations of kitchen tools are also crucial; investing in quality baking dishes and utensils can significantly enhance your cooking experience.

Join the Conversation

Sharing your baking adventures through social media helps build a community of fellow enthusiasts who love to explore baking. When you try out these Butterfinger Caramel Crunch Bars, consider posting pictures and notes about your unique touches or adaptations.

Engage with fellow bakers by sharing the recipe along with your feedback and suggestions, forming connections that can lead to discovering even more incredible recipes. Contributing your recipe variations can inspire others, creating a lively exchange of ideas within the baking community.

The Recipe

Irresistible Butterfinger Caramel Crunch Bars

Serves: 16 bars

Prep Time: 20 mins

Cook Time: 30 mins

Total Time: 50 mins

Kitchen Equipment Needed

  • Baking dish (9×13 inch)
  • Mixing bowls
  • Spatula
  • Cutting board
  • Sharp knife

Ingredients

  • 1 cup graham cracker crumbs
  • ½ cup unsalted butter, melted
  • 1 cup Butterfinger candies, chopped
  • 1 cup caramel sauce
  • 1 cup chocolate chips

Directions

  1. Preheat your oven to 350°F (175°C) and grease the baking dish.
  2. In a mixing bowl, combine graham cracker crumbs with melted butter and press the mixture into the bottom of the prepared baking dish.
  3. Bake for 10 minutes, then remove from the oven and sprinkle the chopped Butterfinger candies on top.
  4. Drizzle the caramel sauce over the Butterfinger layer evenly.
  5. In a microwave-safe bowl, melt the chocolate chips and pour over the caramel layer.
  6. Return to the oven and bake for an additional 15-20 minutes until set.
  7. Allow to cool completely before slicing into bars.

Recipe Notes

  • Feel free to modify the toppings as desired, adding nuts or additional chocolate drizzle.
  • Store in an airtight container for up to a week.
  • For best results, use fresh Butterfinger bars, and allow to cool completely for easy slicing.

Delicious Lemon Cheesecake Filled Crescent Rolls Recipe to Try

Lemon Cheesecake Filled Crescent Rolls: A Delightful Sweet Treat

⚖️
Difficulty
Easy

⏲️
Prep Time
15 mins

🕒
Cook Time
25 mins

⏱️
Total Time
40 mins

🍽️
Servings
8 servings

Indulge in the luscious flavors of our Lemon Cheesecake Filled Crescent Rolls that combine the brightness of lemons with the creamy goodness of cheesecake, all wrapped in flaky pastry. This delightful dessert is perfect for any occasion, whether you’re treating yourself, hosting a family gathering, or looking for a fantastic addition to your brunch menu. The moment you bite into these rolls, you’ll experience a delightful contrast of textures: the crisp outside and the creamy, tangy filling that melts in your mouth.

Imagine the aroma of fresh lemons, sugar, and buttery layers baking in your oven, filling your kitchen with an irresistible fragrance. These Lemon Cheesecake Filled Crescent Rolls not only taste divine, but they also look stunning with their golden-brown crust and glossy glaze. They are sure to impress your guests and elevate your dessert game!

Quick Recipe Highlights

  • Flavor Profile: Bright, zesty lemon combined with rich cream cheese creates a splendidly balanced taste experience.
  • Texture: The flaky outer layer gives way to a creamy, velvety filling, providing a delightful mouthfeel.
  • Aroma: A wonderful citrus aroma blends with the sweet scent of baked pastry, making them simply irresistible.
  • Visual Appeal: Their golden-brown exterior, sometimes dusted with powdered sugar, creates an inviting appearance.
  • Skill Level Needed: Perfect for beginners and experienced bakers alike, the recipe is straightforward with minimal steps.
  • Special Equipment: All you need are basic baking tools, making this recipe approachable for everyone.

Recipe Overview

  • Difficulty Level: The simplicity of the ingredients and steps makes this recipe suitable for all levels, perfect for beginners or a fun activity with kids.
  • Category: Ideal for desserts, brunch, or snack time, these Crescent Rolls can elevate any meal.
  • Cuisine: This recipe showcases classic American comfort food with a twist of tangy lemon, rooted in both casual and festive food traditions.
  • Cost: With minimal ingredients and tools, this recipe is budget-friendly, costing approximately $10 for a batch.
  • Season: Lemon desserts are refreshing year-round but are especially appreciated in spring and summer when citrus fruits are in season.
  • Occasion: Whether it’s a birthday, brunch, or casual gathering, these rolls will make a memorable addition to your spread.

Why You’ll Love This Recipe

Delight in the wonderful flavors and textures these Lemon Cheesecake Filled Crescent Rolls offer! The combination of creamy cheesecake with the vibrant taste of lemon creates an incredibly satisfying experience. Each bite is a burst of flavor, making them a hit with everyone from kids to adults. The buttery, flaky pastry adds a wonderful layer of richness that pairs perfectly with the tangy filling.

In addition to their taste, these rolls are easy and quick to prepare. With only a few ingredients and less than an hour, you can create a delicious dessert that looks and tastes like it came from a bakery. They can be made ahead, frozen, or prepped in advance, allowing you to enjoy them fresh out of the oven when company arrives.

Not only are these rolls indulgent and tasty, but they also provide some nutritional benefits. Lemons are a great source of vitamin C, and cream cheese offers protein and calcium. When enjoyed in moderation, this dessert can fit into a balanced diet, making it a guilt-free treat.

They serve wonderfully at gatherings, acting as delightful finger foods that spark conversations among guests. The beauty of these Lemon Cheesecake Filled Crescent Rolls will attract attention on any dessert table, elevating your hosting game effortlessly.

Budget-conscious bakers will appreciate the cost-effectiveness of this recipe. With simple ingredients that can easily be found in your kitchen or at your local grocery store, you can create a show-stopping dessert without breaking the bank. These Crescent Rolls make sweet treats accessible for any occasion.

Historical Background and Cultural Significance

The origin of cheesecake dates back to ancient Greece, where it was served to athletes during the first Olympic Games in 776 B.C. Over the centuries, cheesecakes evolved, with variations emerging across different cultures, including the rich New York style that we often encounter today. The combination of lemon with cheesecake has roots in American culinary traditions that celebrate citrus flavors, especially in sunny states like Florida and California.

Cultural importance of lemon desserts stretches across multiple cuisines, especially in Mediterranean dishes where lemon is used extensively to provide a refreshing zest. In America, lemonades and lemon meringue pies often take center stage during summer gatherings, and lemon-flavored cheesecakes have become a festive favorite, often showcased at holiday parties or family get-togethers.

As bakeries experimented with pastries, the rise of crescent rolls in American cuisine allowed for a quick and easy way to serve up sweet and savory fillings. The adaptability of this baked good opened the doors for chefs to fill them with an array of ingredients, including the beloved cheesecake. This practice not only preserves the traditional flavors of cheesecake but also introduces them in a playful, approachable manner.

Regional variations exist with lemon cheesecake desserts found from the East Coast to the West Coast, often featuring local ingredients and preparation techniques. In the South, for instance, you might find these rolls drizzled with a buttery glaze, while in the North, a sprinkle of seasonal berries may be added, showcasing local flavors through every bite.

Ingredient Deep Dive

Crescent Roll Dough: This versatile dough offers convenience, allowing home bakers to create flaky pastries quickly. Made with enriched dough, it’s an ideal canvas for both sweet and savory fillings. Crescent rolls are beloved for their buttery flavor and flaky texture. Properly sealed, they maintain their shape while baking, creating delightful layers. Look for dough that hasn’t been left in your pantry for too long to ensure optimal freshness in your recipes.

Cream Cheese: An essential ingredient in cheesecake, cream cheese provides creaminess that’s hard to replicate. Its rich texture pairs beautifully with lemon’s acidity, creating a well-balanced filling. When selecting cream cheese, opt for blocks rather than spreads for a firmer consistency, and ensure it’s softened to room temperature for easy mixing. Store leftover cream cheese tightly wrapped in the refrigerator to extend its shelf life.

Lemon Juice and Zest: Fresh lemon juice and zest add a refreshing brightness to recipes. Lemons are versatile fruits often used in both sweet and savory dishes. Incorporating both juice and zest amplifies the lemon flavor, making every bite delectably tangy. When selecting lemons, look for heavier ones with a bright, smooth skin for maximum juiciness. Fresh lemons should be stored at room temperature for up to a week or in the fridge for longer preservation.

Sugar: The sweetness of sugar balances out the tartness of lemons and cream cheese. You can use regular granulated sugar or experiment with alternatives like coconut sugar for a different taste. Sugar should be kept in an airtight container in a cool, dry place to prevent clumping. Always measure accurately for best results in both baking and cooking methods.

Common Mistakes to Avoid

  • Not sealing the rolls properly: Ensure that the seams are tightly pressed together to prevent the filling from leaking out during baking.
  • Using cold cream cheese: Start with cream cheese at room temperature for smooth mixing and a creamy filling.
  • Overbaking the rolls: Keep an eye on them while in the oven; they should be golden brown, not overly browned, for the best texture.
  • Skipping the zest: Leaving out lemon zest reduces the intensity of flavor; it adds a delightful brightness that complements the filling.
  • Piling too much filling: Using too much filling can cause the rolls to burst; adhere to the recommended amount for perfect pastry.
  • Not preheating the oven: Always ensure your oven is preheated, leading to even cooking and rise for your rolls.
  • Using bottled lemon juice: Freshly squeezed lemon juice offers superior flavor and freshness over bottled alternatives.
  • Omitting the glaze: A glaze enhances the visual appeal and adds a touch of sweetness; consider drizzling it on just before serving for maximum impact.

Essential Techniques

Sealing the Dough: This involves pressing the seams of the crescent roll dough tightly to keep the filling from leaking out. Proper sealing is crucial for ensuring that the cheese mixture stays inside while baking. To master this technique, firmly pinch the edges with your fingers or use a fork to create a decorative press. Watch out for excess filling as it can make sealing difficult. A good visual cue is when the dough looks smooth and closed without visible openings.

Mixing the Filling: Achieving a smooth, creamy cheesecake filling is all about proper mixing. Start with softened cream cheese to avoid lumps and to allow for even blending. Beat the cream cheese until it’s consistently smooth before adding other ingredients for optimal texture. Avoid overworking the mixture once other ingredients are added to prevent aeration, which can lead to cracks during baking. The end result should be a thick yet spreadable consistency.

Pro Tips for Perfect Lemon Cheesecake Filled Crescent Rolls

1. Use fresh lemons for the best flavor. The zest contains essential oils that enhance the overall taste of the filling.
2. Chill the filling slightly before using it; this can make it easier to spread and minimize excess leakage during baking.
3. Don’t overcrowd the baking sheet; give each roll space to expand and brown evenly during baking.
4. For added flair, consider mixing in fresh berries in the filling or as a garnish on the finished product.
5. Brush the tops with melted butter before baking for an extra flaky, golden finish.
6. Allow the rolls to cool slightly before glazing; this will help the glaze adhere better without melting away.
7. Keep an eye on the rolls as they bake to prevent over-browning; oven temperatures can vary widely.
8. For a fun twist, try adding chocolate chips or nuts to the filling for some added texture and flavor variation.

Variations and Adaptations

These Lemon Cheesecake Filled Crescent Rolls can be easily adapted to suit various tastes. For a regional twist, try adding key lime juice and zest to your filling for a Florida-inspired treat. Seasonal adaptations can also take shape; in the fall, consider incorporating pumpkin puree and spices for a unique spin. Dietary modifications are simple too; swap cream cheese for a dairy-free alternative to cater to those with lactose intolerance.

Experimenting with different flavors in the rolls is another delightful option. Add a layer of blueberry or raspberry jam in the filling for a fruity burst. For texture modifications, chop up nuts or chocolate pieces and fold them into the filling before baking. Lastly, presentation can be varied by serving the rolls alongside a fresh fruit compote or drizzle of chocolate sauce.

Serving and Presentation Guide

To create an inviting presentation with your Lemon Cheesecake Filled Crescent Rolls, consider serving them on a beautiful platter lined with parchment paper. You can garnish with a dusting of powdered sugar or a light drizzle of lemon glaze for added visual appeal. Traditional accompaniments may include whipped cream or a scoop of vanilla ice cream for an indulgent treat.

For modern serving suggestions, pair them with a fresh berry medley or a light lemon curd for dipping. Keeping temperature considerations in mind, these rolls are delicious served warm but can also be enjoyed at room temperature. Portion control is important; consider cutting each roll in half for serving as a bite-sized treat to encourage sharing.

Wine and Beverage Pairing

For a delightful pairing, opt for a light and zesty white wine, such as a Sauvignon Blanc, which complements the refreshing lemon flavor in these rolls. If you prefer a non-alcoholic alternative, serve them with a sparkling lemonade or iced tea for a refreshing contrast. For coffee lovers, a lightly brewed tea, such as a chamomile infusion, can provide a pleasant balance to the rich filling.

Temperature considerations for serving drinks alongside the rolls enhance the overall experience, ensuring everything complements each other. Serve wines chilled, and make sure that any iced drinks arrive cold and refreshing.

Storage and Shelf Life

To maintain the freshness of your Lemon Cheesecake Filled Crescent Rolls, store them in an airtight container at room temperature for up to two days. For longer storage, they can be refrigerated for up to a week. It’s advisable to consume any leftovers within this timeframe for the best taste and texture.

For freezing, wrap the rolls securely in plastic wrap, then place them in a freezer-safe container. They can last up to three months in the freezer. When ready to enjoy again, simply thaw them in the refrigerator overnight and reheat in the oven to restore their flaky texture. Watch for any signs of spoilage; if they show an unusual odor or texture, it’s best to discard them.

Make Ahead Strategies

To save time, consider preparing your filling and dough ahead of time. You can mix the cheesecake filling in advance and store it in the refrigerator until you’re ready to assemble the rolls. The crescent dough can also be rolled out and filled but should be baked fresh the day you plan to serve for optimal taste and texture.

If you plan to free some rolls, bake them and then freeze the finished product for an easy dessert option later. Assembly tips include keeping the filling well-chilled to prevent the dough from becoming soggy. Just ensure that if you’re making ahead, you account for the time needed to either reheat or bake the rolls before serving.

Scaling Instructions

Scaling the recipe is easy, whether you’d like to halve it for a smaller gathering or double it for a holiday feast. When halving, ensure that you adapt the fillings and dough proportions accurately to maintain flavor balance. For doubling or tripling, assess your baking sheet sizes; you may need to bake in batches.

Timing modifications are key when scaling; larger amounts typically require longer baking times, so keep an eye on them to avoid overcooking. Additionally, ensure you have the right equipment on hand; larger batches may require larger pans or additional baking sheets.

Nutritional Deep Dive

Exploring the nutrition in Lemon Cheesecake Filled Crescent Rolls reveals a delightful mix of macronutrients. A standard serving contains carbohydrates primarily from the dough and sugars, protein from the cream cheese, and fats that contribute to a satisfying mouthfeel.

Micronutrient analysis shows that lemons bring beneficial vitamin C and fiber into the mix. Incorporating cream cheese adds calcium and essential fats, providing a well-rounded dessert option. Health benefits may include a boost to the immune system from the vitamin C content in lemons, while enjoyment in moderation can fit within a balanced diet.

Dietary considerations are essential; for those watching their intake, these rolls can be adjusted to lower sugar content by using alternatives like stevia, keeping the delightful taste intact. Portion analysis suggests that enjoying one roll as a treat can integrate well into an overall healthy eating pattern, emphasizing mindfulness around sweets.

Dietary Adaptations

For those with gluten sensitivities, gluten-free crescent rolls can be utilized, allowing everyone to partake in the deliciousness. Vegans can opt for non-dairy cream cheese and avoid egg wash for sealing the rolls, ensuring all adaptions honor dietary concerns.

Low-carb and keto variations can replace traditional sugar with erythritol, but adjustments may be necessary in ratios to achieve balancing sweetness. Additionally, incorporating nut flour in place of pastry dough can create a low-carb alternative.

A low-FODMAP approach can be achieved by ensuring minimal lactose is used. Lemon desserts are often naturally high in flavor without requiring excessive sugar, so those adhering to this diet can still enjoy them in moderation as a special treat.

Troubleshooting Guide

When facing texture issues such as sogginess in crescent rolls, it often results from overly wet fillings; ensure that the mixture is thick enough to prevent leakage. To rebalance flavor, consider adjusting the acidity by adding more sugar or cream cheese to the mixture to promote an enjoyable taste.

For temperature problems, ensure your baking sheet is preheated, as a cold surface can cause rolls to spread rather than rise. When confronting equipment challenges, if you don’t have a hand mixer, whipping by hand with a fork can still yield a creamy filling, but it may take more time.

Ingredient substitutions can lead to inconsistencies; maintain ratios and consistencies as closely as possible for best results. Lastly, timing concerns can be solved by utilizing a kitchen timer to avoid forgetting rolls in the oven; they should be checked for doneness a few minutes early.

Recipe Success Stories

Community feedback has consistently praised the ease and flavor of Lemon Cheesecake Filled Crescent Rolls, with many users expressing surprise at how quick the preparation was. Variations have become popular as people showcase their versions on social media, ranging from using different fruit fillings to experimenting with spices.

Reader suggestions encourage personalization, with everyone highlighting the ability to adjust aspects like sweetness or tanginess to their preferences effortlessly. Some have shared their photos, noting that creative plating made the rolls a centerpiece rather than just a dessert.

Photography tips abound as other bakers showcase their success stories, often attributing their artistic food styling to fun garnishes and fresh fruit accompaniments. Many indicate that their twists on the original recipe turned out just as well, inspiring others to try variations with confidence.

Frequently Asked Questions

How long can I store Lemon Cheesecake Filled Crescent Rolls?

They can be stored in an airtight container at room temperature for up to two days or refrigerated for up to a week. For long-term storage, they can be frozen for up to three months.

Can I freeze the filling separately?

Yes, you can freeze the cheesecake filling separately in an airtight container. When ready to use, allow it to thaw in the refrigerator before assembling with the dough.

What can I substitute for cream cheese?

You can use dairy-free cream cheese or Greek yogurt as substitutes, but make sure the consistency is similar for optimal results.

Can I make these rolls vegan?

Absolutely! Use plant-based crescent dough and non-dairy cream cheese, ensuring to skip any egg wash steps for a completely vegan dish.

Can I use other fruits in the filling?

Yes! Feel free to experiment with other fruits like blueberries, raspberries, or strawberries mixed into the cheesecake filling for a delightful twist.

What’s the best way to reheat leftover rolls?

Reheat in the oven at 350°F for about 10-15 minutes until warmed through and the pastry is crispy again. Avoid the microwave, as it can make them soggy.

How do I improve the flavor of the filling?

Enhance the filling by incorporating more lemon zest or a splash of vanilla extract. This will deepen the overall flavor and elevate the experience.

What if my rolls are coming out too doughy?

Ensure you are not overcrowding the rolls on the baking sheet and that your oven temperature is accurate. Sometimes, underbaking leads to a doughy texture.

Can I double this recipe?

Yes, you can easily double the recipe. Just ensure you have enough baking sheets and maintain time adjustments accordingly.

What would be good accompaniments with these rolls?

They are wonderful served with whipped cream, a dusting of powdered sugar, or a light fruit compote to balance the richness.

Additional Resources

For more delightful recipes, check out our other citrus desserts, such as lemon meringue pie or lemon bars. We also offer technique guides for perfecting your baking skills, including pastry techniques and filling preparation methods. If you’re curious about the types and uses of cream cheese, we’ve compiled a detailed breakdown for your convenience.

Equipment recommendations feature must-have tools like pastry brushes and tart pans that can enhance your baking experience. Don’t miss seasonal variations that highlight seasonal ingredients and showcase variations on classic flavors!

Join the Conversation

We invite you to share your experience making Lemon Cheesecake Filled Crescent Rolls! Connect with us on social media using #MyCrescentRolls to showcase your creativity, adaptations, and tips. We love to see your photography and would be excited to share your success stories with our community.

Engagement is key in crafting delicious recipes, so feel free to leave your suggestions and questions in the comments section. Let’s build a supportive community for all bakers and food lovers who enjoy a hint of lemony goodness in their lives.

The Recipe

Lemon Cheesecake Filled Crescent Rolls

Serves: 8 servings

Prep Time: 15 mins

Cook Time: 25 mins

Total Time: 40 mins

Kitchen Equipment Needed

  • Baking sheet
  • Parchment paper
  • Mixing bowl
  • Hand mixer or whisk
  • Backing brush (if egg wash is used)

Ingredients

  • 1 can (8 oz) crescent roll dough
  • 8 oz cream cheese, softened
  • 1/2 cup powdered sugar
  • 1/4 cup lemon juice
  • 1 tablespoon lemon zest
  • 1 egg, beaten (optional for egg wash)
  • Additional powdered sugar for dusting, if desired

Directions

  1. Preheat your oven to 375°F (190°C) and line a baking sheet with parchment paper.
  2. In a mixing bowl, combine cream cheese, powdered sugar, lemon juice, and lemon zest until smooth and creamy.
  3. Open the crescent roll dough and separate it into triangles.
  4. Place a generous tablespoon of filling at the wide end of each triangle.
  5. Roll each triangle towards the point, sealing the filling inside, and press the edges to seal tightly.
  6. If using, brush the tops lightly with the beaten egg for a golden finish.
  7. Bake the rolls in the preheated oven for 15-20 minutes, or until golden brown.
  8. Allow cooling slightly before dusting with powdered sugar and serving.

Recipe Notes

  • For extra flavor, consider adding a pinch of salt to the filling.
  • These rolls can be made ahead of time and frozen; just reheat them before serving for best results.
  • Feel free to play with different fruit fillings for various flavor experiences.

Indulge in Heavenly White Chocolate Cake with Pineapple Filling

Heavenly White Chocolate Cake with Pineapple Filling: A Tropical Indulgence

⚖️
Difficulty
Moderate

⏲️
Prep Time
30 mins

🕒
Cook Time
40 mins

⏱️
Total Time
1 hr 10 mins

🍽️
Servings
12

Indulge your senses in a slice of our Heavenly White Chocolate Cake with Pineapple Filling. This exquisite cake promises a delightful balance of creamy sweetness and tropical zest, making it an ideal choice for any special occasion or simply to elevate your day-to-day gatherings. Every bite reveals layers of luscious white chocolate cake and a refreshing pineapple filling, capturing the essence of paradise. The cake’s light and airy texture pairs perfectly with the juicy fruit layers, inviting you to savor the moment.

Imagine serving this stunning cake at your next celebration; its elegant appearance will make it the centerpiece of your dessert table, enticing everyone to take a piece. The combination of rich white chocolate and tangy pineapple not only creates a flavor explosion but also delivers a delightful aroma that fills the kitchen, teasing your taste buds long before it’s served. This cake doesn’t just satisfy a sweet tooth; it brings joy and warmth, making every gathering memorable.

Quick Recipe Highlights

  • Flavor Profile: The cake offers a harmonious blend of sweet white chocolate complemented by tangy pineapple, resulting in a refreshing treat.
  • Texture: Each layer is soft and moist, with a creamy filling that melts in your mouth.
  • Aroma: A delightful mix of sweet chocolate and tropical pineapple wafts through the air while baking.
  • Visual Appeal: With its layers and lush cream frosting, this cake is a feast for the eyes, boasting an inviting white and yellow color palette.
  • Skill Level Needed: Moderate skill is required for mixing the batter and decorating the cake with finesse.
  • Special Equipment: You will need basic baking tools, including cake pans, mixing bowls, and a stand mixer for best results.

Recipe Overview

  • Difficulty Level: This Heavenly White Chocolate Cake strikes the perfect balance between elevated baking techniques and accessibility, making it a satisfying challenge for intermediate bakers.
  • Category: This dessert fits perfectly into the cake category, ideal for birthdays, weddings, and holiday celebrations.
  • Cuisine: With influences from classic American baking and tropical flavors, this cake merges traditions to create something uniquely delightful.
  • Cost: The estimated cost for this recipe is reasonable, considering the overall luxe flavors it brings—most ingredients are pantry staples.
  • Season: Although perfect for summer with its fruity filling, this cake can be enjoyed year-round, making it versatile for all occasions.
  • Occasion: Whether it’s a casual get-together or a grand event, this cake is suitable for a variety of gatherings, promising to impress your guests.

Why You’ll Love This Recipe

The taste and texture appeal of this Heavenly White Chocolate Cake with Pineapple Filling will leave you craving more after the very first bite. The rich chocolate flavor is elevated with the tartness of the pineapple, providing a unique taste that’s both familiar yet exhilarating. The cake’s fluffy layers create a light mouthfeel, making it easy to enjoy multiple slices without feeling weighed down.

Convenience and preparation benefits make this cake a winner in any kitchen. You can prepare the filling ahead of time, allowing for a streamlined baking process when it’s time to assemble. Moreover, the cake keeps well for a few days in the refrigerator, maintaining its moisture and flavor, making it perfect for prepping in advance of an event.

From a nutritional standpoint, using fresh pineapple offers health benefits such as vitamin C and antioxidants, while the white chocolate contributes to indulgence without overpowering the palate. This cake is a treat you won’t feel guilty serving to friends and family, as it includes whole ingredients that are both satisfying and nourishing.

The social and entertaining value of serving this cake cannot be overstated. Whether during a festive gathering or a simple dinner party, this cake catalyzes conversation and is sure to delight guests of all ages. Its impressive presentation makes it a great icebreaker, and the flavor provides a memorable dessert experience that everyone will talk about afterward.

Cost-effectiveness and accessibility make this recipe an attractive option for both novice and seasoned bakers. Many ingredients are readily available at local grocery stores, and their prices are generally budget-friendly, allowing you to create an indulgent dessert without breaking the bank.

Historical Background and Cultural Significance

The Heavenly White Chocolate Cake’s roots can be traced back to the rise of chocolate as a beloved ingredient in American baking. Initially introduced by European settlers, chocolate quickly became a staple in desserts. White chocolate, in particular, gained popularity in the late 20th century, inspiring creative cake recipes, such as this one.

Culturally, this cake represents a fusion of flavors, celebrating both the artistry of baking and the tropical essence embodied by pineapple. Its incorporation of fresh fruit into desserts echoes the tradition of using seasonal produce to enhance sweetness and flavor, a concept widely embraced in various culinary practices.

Over time, this recipe has evolved, with variations appearing in kitchens across the world. Bakers have adapted it using different fruit fillings, frostings, and even gluten-free ingredients, showcasing the cake’s versatility and appeal to diverse dietary needs.

Regionally, this cake can take on different identities based on ingredient substitutions and local flavors. In tropical regions, bakers might use local fruits like mango or passionfruit, while chocolate lovers may add dark chocolate layers to enhance the overall experience.

Ingredient Deep Dive

The main ingredients in this decadent cake each carry their own cultural significance and history. Starting with white chocolate, its creation dates back to the early 20th century when it was developed as a sweeter alternative to dark chocolate, appealing to those seeking a milder taste. Rich in calories but low in cocoa solids, white chocolate is often used in desserts for its creamy texture, but it should be noted that it lacks some of the health benefits associated with dark chocolate.

When it comes to nutritional benefits, white chocolate contains a fair amount of milk fat and sugar, providing a significant source of energy. It’s crucial, however, to select high-quality white chocolate with a high cocoa butter content for maximum flavor. Store this ingredient in a cool, dry place, and be mindful of its heat sensitivity during baking.

Pineapple, on the other hand, has a storied history, originating in South America and spreading throughout the world as one of the most recognizable tropical fruits. Beyond its sweet, juicy flavor, pineapple is rich in bromelain, an enzyme known for its digestive benefits. It’s best to use fresh pineapple for optimal taste and texture, and it’s essential to discard any that appear overly ripe or bruised.

Common Mistakes to Avoid

  • Overmixing the Batter: Avoid mixing the batter too much after adding the flour to the wet ingredients, as this can result in a dense cake.
  • Not Measuring Ingredients Accurately: Baking is a science, so improper measurements can alter the cake’s texture and flavor.
  • Using Cold Ingredients: For best results, ensure that butter and eggs are at room temperature before mixing them into the batter.
  • Undercooking or Overcooking: Be mindful of the baking time—check for doneness with a toothpick and avoid overbaking to prevent dryness.
  • Skipping the Cooling Time: Allow the cake to cool completely before frosting; otherwise, the frosting may melt or slide off.
  • Neglecting to Use Parchment Paper: Line the cake pans with parchment paper for easy release and to maintain the cake’s perfect shape.
  • Rushing the Assembly: Take your time when layering and frosting the cake to achieve a clean and beautiful appearance.
  • Not Tasting the Filling: Ensure the pineapple filling is not too sweet or tart; adjust sweetness according to your taste preferences.

Essential Techniques

To ensure that your Heavenly White Chocolate Cake is a success, it’s essential to master a few key techniques. First, proper creaming of the butter and sugar is vital. This step incorporates air into the batter, producing a light, fluffy cake. To master this technique, beat the ingredients together until light in color and texture, about 5-7 minutes.

Additionally, when melting white chocolate, it’s crucial to do so gently. Use a double boiler or microwave at low power, stirring often to prevent scorching. Visual cues for success include the chocolate melting smoothly without any lumps. This ensures a creamy texture in your cake.

Pro Tips for Perfect Heavenly White Chocolate Cake

To enhance your baking experience, consider these pro tips for achieving the perfect cake. First, always use high-quality ingredients; they make a significant difference in flavor and texture. Invest in good chocolate and fresh fruits for the best results.

Next, ensure your oven temperature is accurate. An oven thermometer can help determine if your device needs calibration, ensuring even baking throughout your cake.

When layering the cake, level the tops of your baked cakes with a serrated knife for even stacking. This simple step elevates the appearance of your cake and ensures a visually appealing presentation.

If you find the pineapple filling to be too sweet, balance it with a touch of lemon or lime juice to enhance flavor depth. A little acidity can elevate the overall taste profile of your dessert.

Lastly, for an eye-catching finish, consider garnishing with fresh pineapple slices or chocolate shavings just before serving. This adds a vibrant touch and invites your guests to indulge in the delightful flavors awaiting them.

Variations and Adaptations

This Heavenly White Chocolate Cake can easily be adapted to suit various tastes and dietary preferences. For those craving a richer flavor, consider dark chocolate ganache instead of traditional white chocolate frosting. The bittersweet chocolate will contrast beautifully with the sweet pineapple filling.

Seasonal adaptations work wonderfully with this recipe; during the fall, adding spices like cinnamon or nutmeg to the batter will invoke a cozy autumn flavor, while using fresh berries in the summer can provide a refreshing change.

If adhering to dietary restrictions, consider making a gluten-free version using a quality gluten-free flour blend. Similarly, for a dairy-free option, substitute the butter and milk with non-dairy alternatives without compromising the cake’s texture.

Flavor variations are also possible—try replacing the pineapple with berries or stone fruits for a unique twist. Each alternative brings about its distinct taste and richness to the dessert.

Finally, when it comes to presentation, consider using a naked cake style, leaving the sides of the cake exposed for a rustic look. Top with fresh fruits for a touch of elegance and natural beauty.

Serving and Presentation Guide

Presenting your Heavenly White Chocolate Cake beautifully can elevate the dining experience for your guests. Begin with plating techniques, such as using a large, decorative cake stand that draws the eye. Serve slices on vintage dessert plates with forks to enhance the cake’s elegance.

Garnishing can take your cake to the next level. Consider fresh tropical fruit, like slices of pineapple or kiwi, to complement the cake’s flavors. A drizzle of chocolate sauce across the plate adds a gourmet touch, creating a pleasing contrast.

Traditional accompaniments could include whipped cream or vanilla ice cream, providing a delightful contrast in temperature and texture. For modern serving suggestions, individual mini cakes or jarred versions are fun alternatives for parties or gatherings.

Temperature considerations are key; allow the cake to come to room temperature before serving for optimal enjoyment. When it comes to portion control, aim for even slices, ensuring that everyone gets a taste of this delightful dessert without overindulging.

Wine and Beverage Pairing

Pairing beverages with your Heavenly White Chocolate Cake can greatly enhance the tasting experience. A light and fruity white wine such as a Riesling or Moscato complements the cake’s creaminess and tropical flavors beautifully. The sweetness of these wines balances out the richness of the chocolate, creating a harmonious experience.

For non-alcoholic alternatives, consider serving a chilled sparkling lemonade or coconut water. These refreshing beverages offer a beautiful contrast and enhance the tropical essence of the dessert.

If coffee or tea is more suitable, opt for a mild brew such as a lightly roasted coffee or a delicate green tea. Both drinks provide a nice counterbalance to the cake’s sweetness without overpowering the flavors.

Be mindful of serving temperatures; serve wines chilled but allow them a few minutes to warm slightly in the glass to release their full bouquet.

Storage and Shelf Life

Proper storage of your Heavenly White Chocolate Cake will ensure that it remains fresh and delicious for days. Store leftover cake in an airtight container in the refrigerator to maintain moisture and flavor. If properly stored, the cake can last up to 4-5 days without losing its delightful texture.

When it comes to temperature requirements, keep the cake chilled, especially if it’s layered with fresh fruit filling. However, allow it to sit at room temperature for about 30 minutes before serving for the best flavor.

Use containers that ensure no air exposure to prolong freshness. Glass containers or high-quality plastic wrap are suitable options that effectively seal in moisture.

Always be aware of signs of spoilage; if the cake shows any signs of mold or an unpleasant odor, it’s best to discard it. For reheating, simply place a slice in the microwave for a few seconds to warm it gently and revive its flavors.

Finally, if you wish to freeze the cake, consider freezing it without frosting first. Once the cake is completely cooled, wrap it tightly in plastic wrap and then in foil before placing it in the freezer, where it can last for up to 3 months.

Make Ahead Strategies

Planning ahead while preparing your Heavenly White Chocolate Cake can elevate your baking experience significantly. Start by making the pineapple filling one or two days before you plan to assemble the cake. This not only enhances the flavor as it sits, but also saves you time on the day of assembly.

Consider storing baked and cooled cake layers in the freezer; wrapping them tightly in plastic can preserve their freshness. When you’re ready, simply thaw them a few hours before frosting.

Quality impact is paramount—fresh cake layers will retain moisture and flavor when frozen properly. Additionally, while icebox cakes are popular, the individual layers remain fresher if caramelized or filled just before serving.

For assembly tips, it helps to prepare your frosting and gathering all necessary tools ahead of time, streamlining the decoration process. Finally, consider adding elements like fresh fruit or whipped cream close to serving, as this preserves their texture and juiciness.

Scaling Instructions

Scaling your Heavenly White Chocolate Cake recipe can be done easily with just a few adjustments. To halve the recipe, reduce each ingredient accordingly and use smaller cake pans to ensure proper baking and even cooking.

If doubling or tripling the recipe, be sure to mix in batches, as larger quantities can affect the consistency of the batter. Investing in larger mixing equipment will also save time and effort.

For equipment adjustments, ensuring you have enough cake pans or utilizing a baking sheet for a layer cake can make the process seamless. Bake the cakes in batches, if necessary, without compromising on quality.

Timing modifications are crucial; larger cakes may require additional baking time, so always check for doneness with a toothpick inserted into the center.

Lastly, consider storage considerations when scaling; larger cakes will take up more space in storage containers, so plan accordingly to keep your delicious creation safe.

Nutritional Deep Dive

While indulging in Heavenly White Chocolate Cake, it’s enlightening to explore its nutritional content. This cake provides a balanced mix of macronutrients, with carbohydrates from sugar and flour, fats from butter and chocolate, and some essential proteins from eggs.

In terms of micronutrient analysis, white chocolate is lower in essential nutrients compared to dark chocolate but still offers energy-dense calories. Pineapple adds a bountiful source of vitamin C and manganese, contributing to overall health benefits.

The cake’s health benefits include the potential digestive support from fresh pineapple and the satisfaction it provides due to its rich flavors, which can curb sweet cravings effectively.

When considering dietary restrictions, bear in mind portion size; small servings can offer enjoyment without excessive caloric intake, fitting well into a balanced diet.

For those managing weight, this cake is a delightful treat to enjoy on special occasions, encouraging mindful consumption alongside healthy methods in everyday meals.

Dietary Adaptations

This versatile Heavenly White Chocolate Cake can cater to various dietary needs with a few simple modifications. For a gluten-free version, substitute the all-purpose flour with a quality gluten-free flour blend, ensuring all other ingredients are also gluten-free.

Dairy-free adaptations can easily be accomplished by using plant-based butter and non-dairy milk alternatives. This not only preserves the cake’s texture but also its delightful taste.

If you need a vegan option, replace eggs with flaxseed meal or applesauce and use vegan chocolate. This ensures everyone can enjoy the cake while sticking to their dietary restrictions.

For low-carb or keto diets, consider using almond flour or coconut flour instead and a sugar substitute suitable for baking. Although texture may vary slightly, it remains enjoyable.

Additionally, paleo and low-FODMAP individuals can find adaptations that allow them to savor this dessert as well, using natural sweeteners and avoiding high-FODMAP fruits in the filling.

Troubleshooting Guide

If challenges arise while making your Heavenly White Chocolate Cake, consider these effective solutions. Common texture issues can include a dense cake, often caused by overmixing the batter. To remedy this, gently fold the ingredients together until just combined for a lighter texture.

Flavor balance may pose a concern; if the cake tastes too sweet, try incorporating a pinch of salt to enhance the overall flavor and balance sweetness.

Temperature problems can arise if the oven is not properly calibrated, so ensure your oven thermometer is accurate. If you notice uneven baking, rotate the cake halfway through to promote even heat distribution.

For equipment challenges, if a cake pan is not available, consider using a baking dish to create a sheet cake version, adjusting baking time as necessary.

When facing ingredient substitutions, always test small batches if trying an alternative, allowing you to explore new flavors without sabotaging the final product.

Timing concerns are also prevalent; if you run out of time while preparing, consider cutting the cake into smaller layers and frosting them quickly for a more casual yet delightful approach.

Recipe Success Stories

This Heavenly White Chocolate Cake has garnered numerous success stories from its appreciative bakers. Community feedback highlights how versatile this recipe can be, with people sharing their adaptations like adding a mango filling or experimenting with different frostings for varied delights.

Many have shared variation successes, where they substituted ingredients based on what they had on hand yet preserved the cake’s enchanting flavor. This speaks to the adaptability of the recipe, making it a beloved choice in many households.

Readers have submitted adaptation stories, showcasing their creativity in transforming the cake for various dietary needs without compromising its rich taste. These user innovations inspire more to take on the recipe, adding their unique flair.

For photography tips, many users suggest displaying the cake on beautiful serving dishes and ensuring proper lighting to capture its stunning details. The visual appeal greatly enhances engagement on social media.

Lastly, the stories of people enjoying this cake during special occasions, from birthdays to weddings, have solidified its place as a cherished recipe within the community.

Frequently Asked Questions

Q: Can I substitute the white chocolate?

A: Yes, you can substitute dark or semi-sweet chocolate for a different flavor profile. However, keep in mind the sweetness level may change, and adjustments might be necessary for balance.

Q: How can I make the cake more moist?

A: To ensure a moist cake, avoid overbaking and consider brushing the layers with simple syrup before frosting. This adds extra moisture and enhances flavor.

Q: Can I make this cake ahead of time?

A: Absolutely! Bake the layers in advance and freeze them, or prepare the filling a day or two ahead for convenience.

Q: What’s the best way to store leftovers?

A: Store leftovers in an airtight container in the refrigerator for up to 5 days. You can freeze the cake for longer preservation.

Q: Can I use canned pineapple instead of fresh?

A: Yes, canned pineapple is a convenient alternative. Just ensure to drain the excess juice to prevent the filling from becoming too soggy.

Q: Does this cake freeze well?

A: Yes, but it’s best to freeze layers without frosting. Wrap them tightly in plastic wrap and foil before placing them in the freezer.

Q: How do I adjust the recipe for high altitudes?

A: At high altitudes, reduce sugar slightly and increase the liquid. Adjust baking time as needed, noting changes in consistency and texture.

Q: Can I use a different filling?

A: Absolutely! Feel free to experiment with other fillings such as raspberry or lemon curd for different flavor profiles.

Q: Will this recipe work for cupcakes?

A: Yes! This recipe is suitable for cupcakes as well, but adjust the baking time to around 18-20 minutes.

Q: Can I add nuts to the batter?

A: Yes, adding chopped nuts can provide a lovely crunch. Just be sure to mix them in gently to avoid overmixing the batter.

Additional Resources

If you’re intrigued by this Heavenly White Chocolate Cake, explore related recipes that complement its rich flavors, such as tropical fruit tarts or chocolate mousse. Additional technique guides on cake baking can boost your confidence and skills for future creations.

For those interested in ingredient information, learning about the benefits of different chocolate types could enhance your baking knowledge and inspire future experimentation.

Equipment recommendations are also available, highlighting must-have baking tools that can streamline your baking process, ensuring you have the right tools for the task.

Lastly, consider seasonal variations in your baking; adapting your ingredients based on seasonal produce can elevate your cakes and keep them exciting throughout the year.

Join the Conversation

We’d love to see your creations of the Heavenly White Chocolate Cake! Share your experiences on social media and engage with our growing community of passionate bakers. Photography tips can help you showcase your beautiful cake, and recipe reviews allow you to provide feedback on any variations you tried.

Engage with others in the community by discussing your adaptations or favorite tricks to make the recipe your own. Sharing recipes can spark creativity and inspire others to try new things in the kitchen.

The Recipe

Heavenly White Chocolate Cake with Pineapple Filling

Serves: 12

Prep Time: 30 mins

Cook Time: 40 mins

Total Time: 1 hr 10 mins

Kitchen Equipment Needed

  • 2 9-inch round cake pans
  • Mixing bowls
  • Stand mixer or handheld mixer
  • Rubber spatula
  • Measuring cups and spoons
  • Cooling rack
  • Offset spatula for frosting

Ingredients

  • 1 cup unsalted butter, softened
  • 1 ½ cups sugar
  • 4 large eggs
  • 2 cups all-purpose flour
  • 1/2 cup milk
  • 1 cup white chocolate, melted
  • 1 tsp baking powder
  • Pinch of salt
  • 2 cups pineapple, crushed and drained
  • 1 cup heavy cream for frosting
  • 1/2 cup powdered sugar
  • Fresh pineapple slices for garnish (optional)

Directions

  1. Preheat your oven to 350°F (175°C). Grease and flour the cake pans.
  2. In a large bowl, cream together the butter and sugar until light and fluffy.
  3. Add the eggs, one at a time, mixing well after each addition. Slowly mix in the melted white chocolate.
  4. In another bowl, sift together the flour, baking powder, and salt.
  5. Gradually add the dry ingredients to the wet mixture, alternating with the milk, starting and ending with dry ingredients.
  6. Divide the batter evenly between the prepared pans and smooth the tops with a spatula.
  7. Bake for 30-35 minutes, or until a toothpick inserted into the center comes out clean.
  8. Once baked, allow the cake layers to cool in the pans for 10 minutes, then transfer them to a cooling rack to cool completely.
  9. While the cakes cool, prepare the filling by combining crushed pineapple and a little sugar if desired.
  10. In a clean mixing bowl, whip the heavy cream until stiff peaks form and gently fold in the powdered sugar.
  11. Once the cakes are completely cool, level the tops if necessary. Place one layer on a serving plate and spread a layer of pineapple filling over it.
  12. Add the second cake layer on top and frost the entire cake with the whipped cream mixture. Garnish with fresh pineapple slices if desired.
  13. Slice and serve the cake chilled or at room temperature, savoring every bite!

Recipe Notes

  • For a richer flavor, consider adding a teaspoon of vanilla extract to the batter.
  • Experiment with different fruit fillings based on seasonal availability.
  • This cake can also be made in advance and stored in the refrigerator for up to 5 days.
  • Substitute pineapple with mixed berries or any preferred fruit to customize your cake.

Delightful Mini Powdered Sugar Donut Muffins for Any Occasion

Mini Powdered Sugar Donut Muffins: A Delightful Treat for Any Occasion

⚖️
Difficulty
Easy

⏲️
Prep Time
10 mins

🕒
Cook Time
15 mins

⏱️
Total Time
25 mins

🍽️
Servings
12 muffins

Indulge in the airy wonders of Mini Powdered Sugar Donut Muffins, a delightful twist on traditional baked treats that combine the essence of classic donuts with the convenience of muffins. These muffins, with their light and fluffy texture, are generously coated in powdered sugar, making them irresistible for breakfast, snacks, or dessert. Imagine biting into a warm muffin that melts in your mouth, flooding your senses with sweet, crumbly bliss. Whether you’re serving them at a birthday party, holiday gathering, or simply enjoying a quiet morning at home, these mini muffins are sure to impress.

The preparation is swift and simple, ensuring that you can whip up a batch even on your busiest mornings. With pantry staples like flour, sugar, and eggs, these muffins call out to mothers, teachers, and anyone who loves a homemade treat but doesn’t want to spend hours in the kitchen. Their delightful aroma wafts through your home as they bake, reminiscent of warm donuts fresh out of the fryer, making your kitchen a cozy haven.

Quick Recipe Highlights

  • Flavor Profile: These muffins boast a sweet and lightly buttery flavor complemented by the sugary coating that adds a delightful crunch.
  • Texture: Expect a soft and fluffy interior with a slight crispiness on the outside due to the powdered sugar coating.
  • Aroma: The baked muffins fill your space with a warm, sweet scent, reminiscent of fresh pastries.
  • Visual Appeal: These mini muffins are visually charming, with a snowy white coating that sparkles in the light against a golden brown hue.
  • Skill Level Needed: Perfect for beginners, these muffins require minimal baking skills and equipment.
  • Special Equipment: A standard muffin tin and mixing bowls are all you need to create these treats.

Recipe Overview

  • Difficulty Level: This recipe is classified as easy, making it perfect for novice bakers eager to try their hand at muffins.
  • Category: Mini Powdered Sugar Donut Muffins fall under the breakfast and snack category, making them versatile for any time of day.
  • Cuisine: While inspired by classic American donuts, these muffins have gained popularity in various culinary traditions across the globe.
  • Cost: Budget-friendly, the ingredients typically cost under $10 for a full batch.
  • Season: These muffins can be enjoyed year-round but are particularly wonderful during fall and winter gatherings.
  • Occasion: Great for birthday parties, brunch events, or as a delightful afternoon snack.

Why You’ll Love This Recipe

The balance of taste and texture in Mini Powdered Sugar Donut Muffins is a delight. They offer the sweetness of a donut without the fried heaviness, delivering a light, fluffy bite that pairs beautifully with coffee or tea. The powdered sugar adds a pleasing crunch that contrasts wonderfully with the soft interior, creating a mouthful that’s both enjoyable and comforting.

Convenience is another reason to love this recipe. With a prep time of only 10 minutes and a cook time of 15 minutes, you can have fresh muffins ready in less than half an hour. This makes it easy to prepare them for unexpected guests or as a quick breakfast before heading out the door.

Nutritionally, while these mini muffins are a treat, they can also fit into a balanced diet when enjoyed in moderation. They offer a small dose of energy from carbohydrates, and you can customize the recipe by adding healthier ingredients like whole wheat flour or reducing sugar content.

Socially, these muffins are perfect for entertaining. Their bite-sized nature makes them easy to serve and share, whether at a café table with friends or a potluck with family. They are sure to be a hit and provide a delightful addition to any gathering, enticing guests with their sweetness and inviting appearance.

Lastly, the cost-effectiveness of this recipe cannot be overstated. With simple ingredients that you likely already have on hand, making these muffins is not only economical but also a way to bring homemade flavor to your table without overspending.

Historical Background and Cultural Significance

The origins of the donut can be traced back to Dutch settlers in America, who brought with them a recipe for “olykoeks,” or oily cakes. These cakes eventually evolved into the donuts we enjoy today. The transition to muffins, particularly in miniature form, reflects modern baking trends focusing on convenience and portion control.

Mini muffins have gained traction not just for their taste but for their adaptability. They can be catered to various dietary preferences and have become a staple in coffee shops and bakeries across America. The rise of artisanal baking has further enhanced the popularity of these sweet treats, making them a favorite for brunch and catering.

As food culture continues to evolve, the muffin form of donuts represents a shift towards lighter, less indulgent options that still satisfy sweet cravings. Their popularity has led to numerous variations and interpretations, making them a beloved item in kitchens worldwide.

Regional variations of the muffin have emerged, with different locales adopting unique ingredients or flavor profiles reflective of their cultural tastes. From adding spices to incorporating seasonal fruits, each region puts its own spin on this beloved treat.

Ingredient Deep Dive

Flour:
Flour is the foundation of any baked good. Choosing the right type can significantly influence the texture and flavor. All-purpose flour is commonly used, but whole wheat flour provides added nutrients and a nuttier taste. When selecting flour, look for freshness, and store it in a cool, dry place to avoid spoilage.

Sugar:
Sugar not only sweetens the muffins but also contributes to their tenderness and moisture. Granulated sugar is the standard, while confectioners’ sugar is used for the powdered coating. For a healthier twist, explore alternatives like coconut sugar or stevia. Store sugar in an airtight container to maintain its quality.

Milk:
Milk adds moisture and richness to muffins. Whole milk is a popular choice, but alternatives like almond milk, oat milk, or coconut milk can cater to dairy-free diets. When selecting milk, consider whether you want a creamier base or a lighter option depending on dietary needs and recipe goals.

Eggs:
Eggs bring structure and binding to the muffin batter while enriching the flavor. Fresh eggs yield the best results, and for those with egg sensitivities, flax or chia seeds can serve as excellent substitutes. Properly store eggs in the fridge, noting any expiration dates for maximum freshness.

Common Mistakes to Avoid

  • Overmixing the batter: While combining ingredients, it’s essential to mix just until combined. Overmixing can lead to dense, tough muffins.
  • Skipping the preheating step: Always preheat your oven to ensure your muffins bake evenly and rise properly.
  • Incorrect measurements: Baking is a science; using the wrong amounts can result in unforeseen consequences. Use precise measurements for best results.
  • Using stale ingredients: Expired baking powder or old flour can impact the rise and texture of your muffins. Always check freshness before starting.
  • Adjusting baking time: Don’t open the oven door while baking until you’re close to the time indicated; it can cause muffins to sink.
  • Baking in the wrong pan: Ensure you’re using a proper muffin tin, as different sizes can affect baking time and doneness.
  • Not greasing the pan properly: If the pan is not greased well, the muffins may stick and lose their shape.
  • Ignoring cooling time: Letting your muffins cool in the pan for a few minutes before transferring to a wire rack helps maintain their structure.

Essential Techniques

When baking muffins, mastering the technique of mixing is crucial. This involves combining dry ingredients separately from wet ones to create a uniform batter without over-mixing, which ensures fluffy muffins. Use a gentle folding method to incorporate wet and dry ingredients while keeping air pockets intact for optimal rise.

Another key technique is proper baking temperature. Preheating your oven allows for immediate heat exposure, helping the muffins to rise quickly for a light texture. Positioning your muffin tin in the center of the oven ensures even heat distribution, contributing to well-cooked muffins all around.

Pro Tips for Perfect Mini Powdered Sugar Donut Muffins

1. Use room temperature ingredients for the best blend; warm eggs and milk incorporate more easily.
2. Experiment with different flavored extracts like vanilla or almond for varied taste profiles in your muffins.
3. Add a pinch of nutmeg or cinnamon to the batter for a delightful seasonal twist.
4. For an extra indulgent muffin, consider stuffing them with cream cheese or chocolate chips before baking.
5. Keep an eye on the muffins during the last few minutes of baking; they should spring back when lightly pressed.
6. Let muffins cool in the pan briefly before transferring to a wire rack to prevent sogginess.
7. Sprinkle the muffins with a little extra powdered sugar before serving for an appealing presentation.
8. If desired, try a sugar coating or glaze instead of powdered sugar for a different flavor and texture.

Variations and Adaptations

Regional variations of these mini muffins can include additions such as maple syrup for a sweet twist or incorporating spices like pumpkin pie spice in the autumn. Seasonal adaptations allow for fresh fruit like blueberries or raspberries to be folded into the batter, enhancing both flavor and nutrition.

Dietary modifications could include using gluten-free flour or substituting plant-based milk and eggs for a vegan option without losing the flavorful essence of the muffins. Flavor variations may consist of adding cocoa powder for a chocolate version or infusing the batter with citrus zest for a refreshing alternative.

For texture modifications, consider including nuts or seeds for added crunch or swapping out some of the white flour for whole wheat to increase fiber content. Finally, unique presentation alternatives such as mini muffin towers or creative serving platters can elevate your serving style.

Serving and Presentation Guide

When it comes to plating your Mini Powdered Sugar Donut Muffins, consider arranging them in a tiered stand for a visually appealing display that guests will admire. Garnish with fresh berries or mint leaves to add color and vibrancy.

You can serve these muffins warm, straight from the oven or allow them to cool for a few minutes while they’re being dusted with powdered sugar to create a delectable finish. Consider pairing them with whipped cream or a delicious fruit dip for an interactive dessert experience.

For coffee or tea lovers, present a small cup alongside the muffins to enhance the sensory experience. Offering a variety of muffins on a platter can turn them into the highlight of your brunch table, adding an element of choice for your guests.

Keep in mind that portion control is essential; cut them into halves or quarters for smaller bites, perfect for gatherings or parties where guests may want to sample multiple treats.

Wine and Beverage Pairing

When enjoying Mini Powdered Sugar Donut Muffins, a light sparkling wine like Prosecco pairs nicely, as its bubbles balance the sweetness and provide a refreshing contrast. Alternatively, consider a California Chardonnay, which complements the buttery notes of the muffins.

For non-alcoholic options, freshly brewed herbal tea works beautifully, as the warm spices can enhance the muffin flavors. Additionally, a classic pairing with coffee enhances the overall experience, with rich coffee balancing the sweetness beautifully.

When serving, offer beverages at appropriate temperatures, ensuring coffee is served hot and sparkling wine is well-chilled for optimal flavor profiles.

Storage and Shelf Life

To keep your Mini Powdered Sugar Donut Muffins fresh, store them in an airtight container at room temperature for up to 3 days. If you need to store them for a longer period, place them in the refrigerator, which can extend their life up to a week.

When freezing, wrap each muffin in plastic wrap and then place them in a freezer bag; they can last for up to 3 months. To serve, simply defrost the muffins in the fridge overnight and reheat them in the oven to restore their freshness.

Signs of spoilage include a change in texture or appearance, such as excessive dryness or mold growth. Reheating instructions involve warming muffins gently in the oven or microwave, ensuring they retain moisture and warmth.

Make Ahead Strategies

To streamline your baking process, prepare the batter the night before and store it in the refrigerator until you’re ready to bake. This allows the ingredients to meld, enhancing the muffin flavors.

Alternatively, bake the muffins ahead of time, and freeze them in individual portions, ready to defrost and serve. This way, you can enjoy freshly baked muffins even on the busiest of mornings.

For a finishing touch, consider adding any cream fillings or toppings just before serving to maintain texture and presentation. If using fresh fruits, only incorporate them directly into the batter right before baking to prevent excess moisture.

Scaling Instructions

If you want to adjust the recipe for larger gatherings, doubling or tripling the batch is straightforward. However, remember to use multiple muffin pans and rotate them in the oven for even baking.

When halving the recipe, you can use a smaller muffin tin for mini versions, ensuring you adjust the baking time accordingly, as they may cook faster.

Be aware of equipment adjustments as well; larger mixers may be needed if you’re scaling up significantly. Keep a close eye on the muffins while they bake, as timing may vary based on size and oven conditions.

Consider storage requirements after baking larger batches; more containers may be needed for proper cooling and preservation.

Nutritional Deep Dive

Each Mini Powdered Sugar Donut Muffin offers a delightful balance of nutrients, counting roughly 150 calories per muffin, primarily from carbohydrates and fats. The exact macronutrient profile will vary based on the specific ingredients used, especially if substitutions are made.

Additionally, these muffins can provide essential micronutrients, particularly if whole grain flour is used, boosting fiber content significantly. Incorporating fruits can increase vitamin content, thus enhancing the overall health benefits of your sweet treat.

When considering portion analysis, watching serving sizes is crucial for those mindful of caloric intake or attempting weight management. Smaller portions allow for enjoyment without compromising diet goals.

For weight management, considering healthier variations of the recipe or substituting lower-calorie alternatives can help maintain a balance between indulgence and health.

Dietary Adaptations

For gluten-sensitive individuals, using a gluten-free flour blend can make Mini Powdered Sugar Donut Muffins accessible without sacrificing taste or texture. Always check labels to ensure that your ingredients are certified gluten-free.

Dairy-free adaptations can be achieved using almond milk or soy milk in place of regular milk and substituting flax eggs for hen eggs. This accommodates lactose-intolerant individuals while keeping the muffins soft and flavorful.

For vegan versions, a quick swap of ingredients such as using applesauce or mashed bananas instead of eggs adds moisture and keeps the muffins fluffy. The substitution of plant-based milk and oils ensures that the muffins remain delicious and suitable for those following vegan diets.

Other specific diets can be accommodated as well, like Keto or low-carb variations by replacing sugar with erythritol and using almond flour instead of regular flour, adjusting baking times for best results.

Troubleshooting Guide

If your muffins turn out dense, it likely stems from overmixing the batter. Be sure to fold the wet and dry ingredients together only until they are just combined to preserve lightness.

If the flavor is off, checking ingredient quality can help; using old baking powder or sugar can lead to flat-tasting muffins. Always ensure ingredients are fresh and stored properly.

Temperature problems can arise from uneven heating in the oven; ensure that your oven is calibrated correctly and consider rotating pans halfway through baking time for even results.

Ingredient substitutions might lead to unexpected results. Always test a small batch first when trying new flour or sweetener types to understand how they might affect baking.

Timing can also be problematic; if you’re unsure, take the muffins out a minute or two earlier. They continue to cook slightly while cooling, and overbaking is a common issue.

Recipe Success Stories

Many bakers have shared glowing reviews of this Mini Powdered Sugar Donut Muffins’ ability to wow family and friends at gatherings. One reader noted that they made these muffins for a weekend brunch, and every guest asked for the recipe, impressed by their lightness and flavor.

Another baker shared their success with swapping in whole wheat flour and getting rave reviews from their health-conscious friends. This not only made the muffins healthier but also enhanced their taste with a nutty flavor.

Feedback from families reported that these muffins have become a regular breakfast item due to their ease of preparation and time-saving benefits. Children particularly enjoy the fun, mini-sized presentation.

A suggestion from the community included adding chocolate chips into the batter, leading to a chocolate dream variation that many readers now rave about, showcasing the versatility of the recipe.

Frequently Asked Questions

How can I make these muffins gluten-free?

To make Mini Powdered Sugar Donut Muffins gluten-free, simply substitute the all-purpose flour with a gluten-free flour blend. Ensure that any additional ingredients like baking powder are also gluten-free, and enjoy the same soft, fluffy texture!

Can I use almond milk instead of regular milk?

Yes, almond milk can be used as a dairy substitute in this recipe. It will work just as well, providing moisture without compromising the muffins’ taste.

What should I do if my muffins are too dry?

If your muffins turn out dry, consider adding a touch more liquid next time or reducing the baking time slightly. Moisture can also be increased by adding ingredients like applesauce or yogurt.

How to store leftover muffins?

Leftover muffins should be stored in an airtight container at room temperature for up to 3 days. For longer storage, freeze them individually wrapped, and they will remain fresh for up to 3 months.

Can I add chocolate chips or nuts to the batter?

Absolutely! Adding chocolate chips, nuts, or dried fruits can elevate the muffins’ taste and texture. Just fold them into the batter gently to keep the muffins light.

Will using whole wheat flour change the taste?

Whole wheat flour will give your muffins a nuttier flavor and denser texture. It’s a great way to make them healthier while still being delicious!

What is the best way to reheat leftover muffins?

The best way to reheat your muffins is to preheat your oven to 350°F (175°C) and warm them for about 5-10 minutes. This will restore moisture and warmth without overcooking them.

Is it necessary to grease the muffin tin?

Yes, greasing the muffin tin or using muffin liners is crucial to prevent the muffins from sticking and ensure they release easily after baking.

How can I make these muffins more flavorful?

To enhance the flavor, consider adding extracts such as vanilla or almond, spices like cinnamon or nutmeg, and even citrus zest for a refreshing twist.

Are these muffins suitable for kids?

Yes! Mini Powdered Sugar Donut Muffins are kid-friendly, easy to handle, and the sweet taste is sure to be a hit with children of all ages.

Additional Resources

For those looking to expand their baking repertoire, consider exploring related recipes such as classic donuts, banana muffins, or even gluten-free treats. There are numerous technique guides available for muffin making, icing techniques, and incorporating fruits into baked goods.

Keep an eye out for ingredient information to deepen your knowledge about selecting the best flour, sugar alternatives, and dairy options. Equipment recommendations can enhance your baking experience, ensuring you have the right tools for a stress-free baking session.

Seasonal variations will also guide you in creating delicious muffins suitable for every occasion, from festive winter flavors to fresh berry adaptations in summer.

Join the Conversation

Engaging with the baking community is a fun way to share experiences, tips, and variations of the Mini Powdered Sugar Donut Muffins. Social media platforms are perfect for sharing photos of your creations or tagging friends when trying new adaptations.

Consider documenting your baking journey with photography, showcasing the delightful process from mixing to enjoying freshly baked muffins. Community engagement can lead to recipe reviews, inspiring others to give this easy yet satisfying treat a go.

Don’t hesitate to share your unique variations or discoveries that might inspire others. Whether you add nuts, fruits, or different flavored sugars, each twist can lead to an exciting outcome.

The Recipe

Mini Powdered Sugar Donut Muffins

Serves: 12 muffins

Prep Time: 10 mins

Cook Time: 15 mins

Total Time: 25 mins

Kitchen Equipment Needed

  • Muffin tin
  • Mixing bowl
  • Whisk
  • Measuring cups and spoons
  • Cooling rack

Ingredients

  • 1 ½ cups all-purpose flour
  • ½ cup granulated sugar
  • 2 tsp baking powder
  • ½ tsp salt
  • 1 large egg
  • ½ cup milk
  • ¼ cup unsalted butter, melted
  • 1 tsp vanilla extract
  • ½ cup powdered sugar (for dusting)

Directions

  1. Preheat your oven to 350°F (175°C) and grease a muffin tin.
  2. In a large bowl, mix together flour, granulated sugar, baking powder, and salt.
  3. In another bowl, beat the egg and then add in milk, melted butter, and vanilla extract until well combined.
  4. Pour the wet ingredients into the dry ingredients and stir until just combined.
  5. Fill each muffin cup about 2/3 full with the batter.
  6. Bake for 12-15 minutes, or until a toothpick inserted in the center comes out clean.
  7. Let the muffins cool in the pan for a few minutes before transferring to a wire rack.
  8. Once cooled, dust generously with powdered sugar before serving.

Recipe Notes

  • For added flavor, consider folding chocolate chips or nuts into the batter before baking.
  • Store leftover muffins in an airtight container at room temperature for up to three days.
  • Freezing muffins is a great way to preserve them; simply wrap them individually in plastic wrap.

Delicious Sea Salted Praline Pecan Clusters for Sweet Indulgence

Sea Salted Praline Pecan Clusters: A Sweet Indulgence

⚖️
Difficulty
Easy

⏲️
Prep Time
10 mins

🕒
Cook Time
15 mins

⏱️
Total Time
25 mins

🍽️
Servings
12 clusters

Welcome to your next dessert obsession — Sea Salted Praline Pecan Clusters! These delightful treats are perfect for anyone who craves combination of sweet and salty flavors. The crunchy pecans coated in rich praline give each cluster a satisfying crunch, while the hint of sea salt elevates the sweetness into an extraordinary dessert experience. Perfect as holiday treats, party snacks, or decadent personal rewards, these clusters provide a touch of elegance with their gourmet essence.

Imagine taking a bite into these heartwarming clusters; the rich, buttery flavor of caramel dances with the nuttiness of roasted pecans. Each cluster provides a delightful texture contrast between the crisp shell and crunchy pecans, making them simply irresistible. Pull your loved ones into the kitchen as you whip up this simple recipe that promises delightful smiles and satisfied taste buds!

Quick Recipe Highlights

  • Flavor Profile: Sweet caramelized sugar with buttery pecans and a touch of sea salt.
  • Texture: Crunchy on the outside with a delightful nuttiness from the pecans inside.
  • Aroma: Buttery and nutty with warm notes of caramelized sugar wafting through the air.
  • Visual Appeal: Beautiful clusters that glisten and shine, perfect for showcasing on dessert tables.
  • Skill Level Needed: This recipe is beginner-friendly, requiring minimal cooking skills.
  • Special Equipment: All you need is a baking sheet and parchment paper.

Recipe Overview

  • Difficulty Level: This recipe is easy to prepare, making it suitable for novice bakers and kids too.
  • Category: These pecan clusters are a delightful sweet treat or dessert item.
  • Cuisine: Inspired by classic Southern confections, these clusters embrace the warm flavors of Southern hospitality.
  • Cost: Approximately $10 for a batch of 12 clusters, making this an affordable indulgence.
  • Season: Fall and winter are ideal seasons for enjoying these treats, especially around holidays.
  • Occasion: Perfect for holiday gatherings, birthday parties, or as homemade gifts.

Why You’ll Love This Recipe

These Sea Salted Praline Pecan Clusters boast an irresistible taste that combines slight sweetness with a hint of saltiness. Each bite offers a crunchy texture that delivers a satisfying contrast, making them incredibly addictive. The richness of the caramel complements the nuttiness of the pecans beautifully, ensuring that your palate enjoys a unique experience with every bite.

Not only are these clusters delicious, but they are also quick and easy to prepare. With minimal cooking time and easy-to-follow steps, you can whip these up in under 30 minutes, making them a fantastic last-minute dessert option. They require little hands-on time, allowing you to spend more time with family and friends instead of locked away in the kitchen.

From a nutritional perspective, pecans are packed with healthy fats, protein, and antioxidants. Incorporating these nuts into your diet can promote heart health and provide sustained energy. In moderation, these clusters can serve as a delectable yet nutritious snack option for those looking to satisfy their sweet tooth without the guilt.

These Sicilian-inspired Praline Pecan Clusters are perfect for social gatherings. Share them at parties, give them as gifts, or set them out on your dessert table. The clusters offer a sweet treat that feels indulgent yet accessible, inviting your guests to enjoy an exploration of flavors together.

Lastly, the cost-effectiveness of making your own clusters cannot be overstated. A small number of ingredients yield a substantial amount of clusters, making this an economical choice for celebrations or family gatherings without sacrificing on flavor or aesthetic.

Historical Background and Cultural Significance

The origins of praline date back to the 17th century in France, where they were initially created as a sugary confections made from almonds. As this sweet treat migrated across the globe, it found a special home in Southern cuisine, evolving into various nut and sugar combinations. Pecans, a Southern staple, played a significant role in this evolution, lending their exquisite flavor and richness to the creation of praline desserts.

In the Southern United States, pecans became a symbol of hospitality and family gatherings. They are a key ingredient in many recipes, especially during festive seasons, underscoring their importance in Southern culinary traditions. The cultural significance of pralines, especially those with pecans, remains strong in Southern kitchens, often served during the holidays or as gifts for friends and family.

Over time, the recipe for praline has also adapted across regions, with variations using different nuts and flavorings. Today, the Sea Salted Praline Pecan Cluster serves as a modern homage to the classic flavors, celebrating the traditional roots while allowing for personal touches that bring a contemporary flair.

Regional variations highlight the versatility of the praline cluster. For example, in New Orleans, pralines are made with brown sugar and often includes cream for a fudgy texture. In contrast, our recipe maintains a crisp texture, emphasizing the crunchiness of pecans while blending sweet and salty flavors.

Ingredient Deep Dive

Pecans

Pecans are native to North America and are revered not only for their delicious flavor but also for their nutritional benefits. They are rich in healthy fats, particularly monounsaturated fats, which are beneficial for heart health. The creamy texture and buttery taste of pecans offer a unique flavor profile, elevating any dish they are included in.

Select fresh, whole pecans, preferably from local or reliable sources, as freshness impacts both taste and health benefits. Store pecans in an airtight container in a cool, dark place; they can also be refrigerated for extended shelf life. If you want to substitute pecans, walnuts or hazelnuts can create a similar crunch and flavor.

Granulated Sugar

Granulated sugar is a staple in most desserts, providing the sweetness that enhances flavors and balances other ingredients. It undergoes minimal processing, preserving its energy-dense properties. However, sugar contributes to caloric intake without providing essential nutrients, which is why moderation is key.

When selecting sugar, opt for organic or unrefined varieties to enhance ethical sourcing and flavor profiles. Store sugar in a cool, dry area to prevent clumping. For alternatives, consider using coconut sugar or maple syrup but be cautious of the moisture content affecting the final texture.

Common Mistakes to Avoid

  • Skipping the roasting of pecans: While it may seem optional, roasting enhances the flavor and crunch. Toast pecans in a dry skillet for a few minutes before adding them to the mixture.
  • Not letting the caramel cool slightly: If the mixture is too hot, it can lead to uneven coating and melting the chocolate prematurely.
  • Overcooking the caramel: Keeping a close eye on the cooking process is key to achieving that perfect golden color without burning.
  • Not using enough salt: The salt balances sweetness; without enough, the clusters may taste overly sweet. Don’t shy away from sprinkling a generous pinch on top!
  • Rushing cooling time: It’s important to let clusters cool completely on the parchment paper for the best texture. If cooled prematurely, they may stick to the paper.
  • Using stale nuts: Ensure your pecans are fresh to gain the best flavors and health benefits.
  • Packing them too tightly: Allow enough space between clusters for even cooling and easier serving.
  • Thinking all sugars are created equal: Different sugars have different flavors and consistencies; understanding their impact is significant in achieving the best results.

Essential Techniques

Caramelizing Sugar

Mastering the art of caramelizing sugar is crucial for creating those perfect pralines. Start with medium heat and stir constantly to prevent burning. Sugar must dissolve completely before it begins to brown; look for a light amber color and ensure that it doesn’t reach the smoke point. This technique is essential for achieving that rich flavor.

Cooling Properly

Allowing your clusters to cool completely on parchment paper prevents them from sticking and losing their shape. It’s also vital to keep them at room temperature during the cooling process as refrigeration may cause clumping or uneven textures. Recognizing the right point to stop cooking and allowing enough cooling time will result in the best clusters.

Pro Tips for Perfect Sea Salted Praline Pecan Clusters

1. Ensure all your ingredients are at room temperature before starting for the best mix.

2. Try using different nut combinations, such as adding walnuts for a unique flavor twist.

3. Experiment with flavored sea salts for a gourmet touch; try smoked salt for a savory kick.

4. For a healthier option, consider reducing sugar slightly without sacrificing flavor.

5. Drizzle with melted dark chocolate for an added layer of indulgence.

6. Keep clusters well-spaced on the baking sheet for even cooling and shaping.

7. Store properly in an airtight container to maintain freshness and crunch.

8. Make a larger batch and gift them in decorative jars — a thoughtful present for friends and family!

Variations and Adaptations

Consider regional variations by incorporating unique flavors; for instance, spicy cayenne can be added for a kick! Use seasonal adaptations by incorporating dried cranberries or other fruits during autumn or winter holidays.

Dietary modifications are also an option—vegan versions can use coconut cream for a dairy-free alternative, while those on low-carb diets can experiment with sugar alternatives for a healthier version with the same crunch.

Change up the textures by adding crispy rice cereal to some clusters for an unexpected crunchy element. For presentation alternatives, try shaping the clusters using cookie cutters for themed parties.

Serving and Presentation Guide

When serving Sea Salted Praline Pecan Clusters, consider elegant plating techniques. Lay clusters on a decorative plate with contrasting colors for visual appeal. Sprinkle fine sea salt on top just before serving to enhance flavor and aesthetic. Consider thematic garnishing, such as edible flowers or fresh herbs.

Accompany these clusters with savory options, like cheese platters, to balance sweetness during gatherings. They can also be served at room temperature, as the clumps maintain their texture beautifully. Keep portion control in mind; these clusters are rich, so serving smaller pieces can also enhance the experience!

Wine and Beverage Pairing

Pair your Sea Salted Praline Pecan Clusters with a late harvest white wine, like a Riesling, which complements the sweetness perfectly. Alternatively, a glass of port wine serves as a luxurious pairing, enhancing the richness of the pecans.

For non-alcoholic options, a chai latte with its warm spices can create a cozy pairing, or you might enjoy a lightly brewed black tea to counterbalance the sweetness. When serving, remember to consider serving temperatures, ensuring wines are chilled and teas are served warm with clusters.

Storage and Shelf Life

To maintain the fresh taste and texture of your clusters, store them in an airtight container at room temperature. Avoid refrigeration, as moisture can lead to sticking and loss of crunch. Properly stored, these clusters can last up to two weeks without losing their flavor.

Signs of spoilage may include a change in color or off odor; when in doubt, it’s best to discard. If needing to freeze clusters, lay them flat in a single layer within an airtight container, allowing for easy grabbing later. When ready to serve, allow them to thaw at room temperature.

Make Ahead Strategies

If you’re planning for a gathering, you can make the clusters a few days in advance. Allow them to cool completely, and store them in an airtight container away from moisture. For the best flavor, consume them within a week of making.

During busy weeks, create a prep timeline to manage your tasks efficiently. An excellent tip is to prepare the clusters one day and indulge the next—this allows flavors to meld for an even tastier treat.

Scaling Instructions

If you want to halve the recipe, simply divide the ingredients accordingly, and your cooking time will remain about the same! To double or triple the recipe, consider spreading the clusters out on multiple baking sheets to ensure even cooking.

Remember to adjust your equipment accordingly when increasing batch size, ensuring all ingredients have space to cook adequately. When scaling up, it may take a little extra time, so plan for that in your cooking schedule.

Nutritional Deep Dive

Each sea salted praline pecan cluster is roughly 90 calories and is packed with healthy fats, making them a nutritious option for satisfying your sweet cravings. The macro breakdown reveals that around half of the calories come from healthy fats provided by the pecans, while the remainder is from sugars.

Micronutrient benefits include vitamin E and magnesium from pecans, contributing to heart health and maintaining cholesterol levels. Understanding serving sizes and moderation is key to incorporating these clusters into various dietary plans for effective weight management.

Dietary Adaptations

For those with dietary restrictions, these Sea Salted Praline Pecan Clusters can easily be adapted. Gluten-free eaters can enjoy them worry-free, as they contain no gluten ingredients. For dairy-free options, choose plant-based butter alternatives without sacrificing flavor.

Vegans can utilize coconut oil along with maple syrup instead of conventional ingredients for a delightful twist. Additionally, consider low-carb and keto-friendly substitutes like erythritol for sugar to maintain sweetness while minimizing carbs.

Troubleshooting Guide

If you encounter texture issues with your clusters, they may turn out too chewy or soft. This can be remedied by ensuring you achieve the correct caramel color, monitoring cooking closely. If they are overly crunchy, they might have been overcooked; next time, keep a closer eye on the caramel.

Should flavor balance be off — perhaps too sweet — consider adding an additional sprinkle of sea salt to bring everything together. Be mindful of timing; if you pull the clusters from the heat too early, they may not set correctly, compromising that perfect crunchy texture.

Recipe Success Stories

We love hearing from readers about their experiences making Sea Salted Praline Pecan Clusters! Many have shared variation successes by adding dried fruits or using different nuts, creating something uniquely theirs. Others remarked on the clusters’ appeal, proving popular at their family gatherings and events.

Photography tips from readers have also emerged, showcasing how a sprinkle of extra sea salt can bring out the beauty in your clusters. The variations on how people present the clusters at parties certainly inspire the community!

Frequently Asked Questions

1. Can I use other nuts instead of pecans?

Yes, you can use walnuts, almonds, or even cashews in place of pecans, although flavor and texture will vary slightly based on the nut used.

2. How should I store my clusters?

Keep the clusters in an airtight container at room temperature. Avoid refrigeration, as it can make them chewy.

3. How long do these clusters last?

When stored correctly, they can last up to two weeks without losing flavor or texture.

4. Is it possible to make these clusters gluten-free?

Absolutely! The base ingredients in this recipe are already gluten-free, making them safe for gluten-sensitive diets.

5. Can I make these clusters vegan?

Yes! Substitute conventional butter with coconut oil or a plant-based alternative. Use maple syrup or agave nectar as a sweetener.

6. What will happen if I overcook the caramel?

If you overcook the caramel, it will become too hard and may burn, resulting in an unpleasant flavor. Watch carefully while cooking!

7. Can I freeze these clusters?

Yes, you can freeze them! Layer them carefully in an airtight container, and allow them to thaw at room temperature before serving.

8. Can I add chocolate to these clusters?

Definitely! Drizzling melted dark chocolate over the cooled clusters adds an elegant touch.

9. Is there an alternative sugar I can use?

You may substitute granulated sugar with coconut sugar or raw sugar, which can offer a different flavor profile.

10. What can I do if my clusters are too sticky?

If they are sticky, it may indicate they weren’t cooled properly or that too much moisture was incorporated. Ensure they cool thoroughly before storing.

Additional Resources

To enhance your cooking experience, check out our related recipes such as pecan pie and caramel crunch bars. Explore technique guides for mastering caramel and nut toasting for perfect desserts.

Learn more about nut varieties through our ingredient information section and discover the best kitchen equipment for your baking adventures. Seasonal variations can also spark new ideas for what to prepare next!

Join the Conversation

We love connecting with our readers! Share your photo creations of Sea Salted Praline Pecan Clusters on social media using our hashtag. Join our community discussions where you can exchange recipe variations, tips, and success stories.

Your feedback and reviews make a delicious impact, helping us to continue providing delightful recipes that you can enjoy and share with family and friends.

The Recipe

Sea Salted Praline Pecan Clusters

Serves: 12 clusters

Prep Time: 10 mins

Cook Time: 15 mins

Total Time: 25 mins

Kitchen Equipment Needed

  • Baking sheet
  • Parchment paper

Ingredients

  • 1 cup pecans, roughly chopped
  • 1 cup granulated sugar
  • 1/4 cup unsalted butter
  • 1/4 teaspoon sea salt
  • 1 teaspoon vanilla extract

Directions

  1. Preheat the oven to 350°F (175°C) and line a baking sheet with parchment paper.
  2. In a medium saucepan over medium heat, combine sugar, butter, and cook until the mixture turns golden brown, about 10 minutes.
  3. Remove from heat and quickly mix in pecans, sea salt, and vanilla extract.
  4. Drop tablespoon-sized clusters onto the prepared baking sheet.
  5. Let cool at room temperature until set, about 10-15 minutes.

Recipe Notes

  • For additional flavor, add a pinch of cinnamon or cayenne pepper to the mixture.
  • These clusters can be customized with different nuts or chocolate drizzles.
  • Be sure to roast your nuts beforehand for enhanced flavor.