Best Strawberry Rhubarb Crisp – Easy Homemade Recipe

best-strawberry-rhubarb-crisp

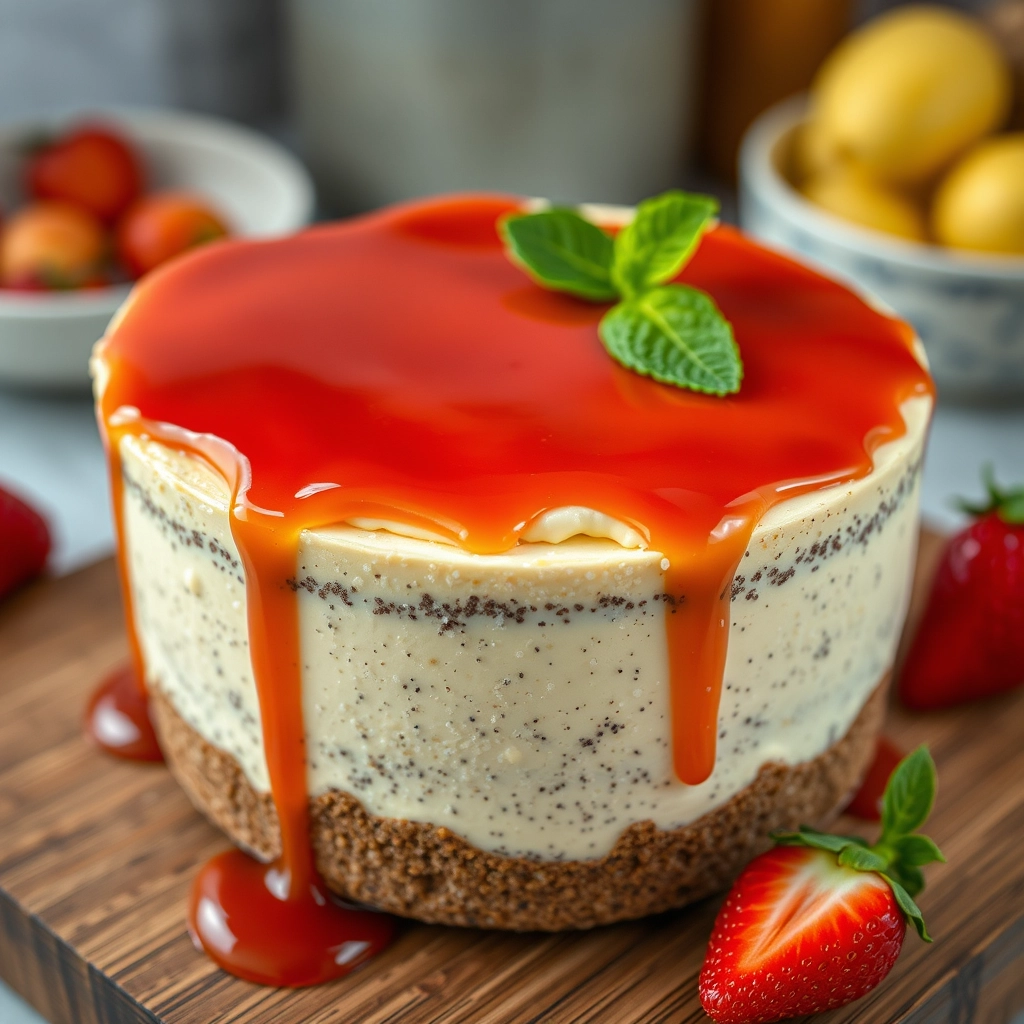
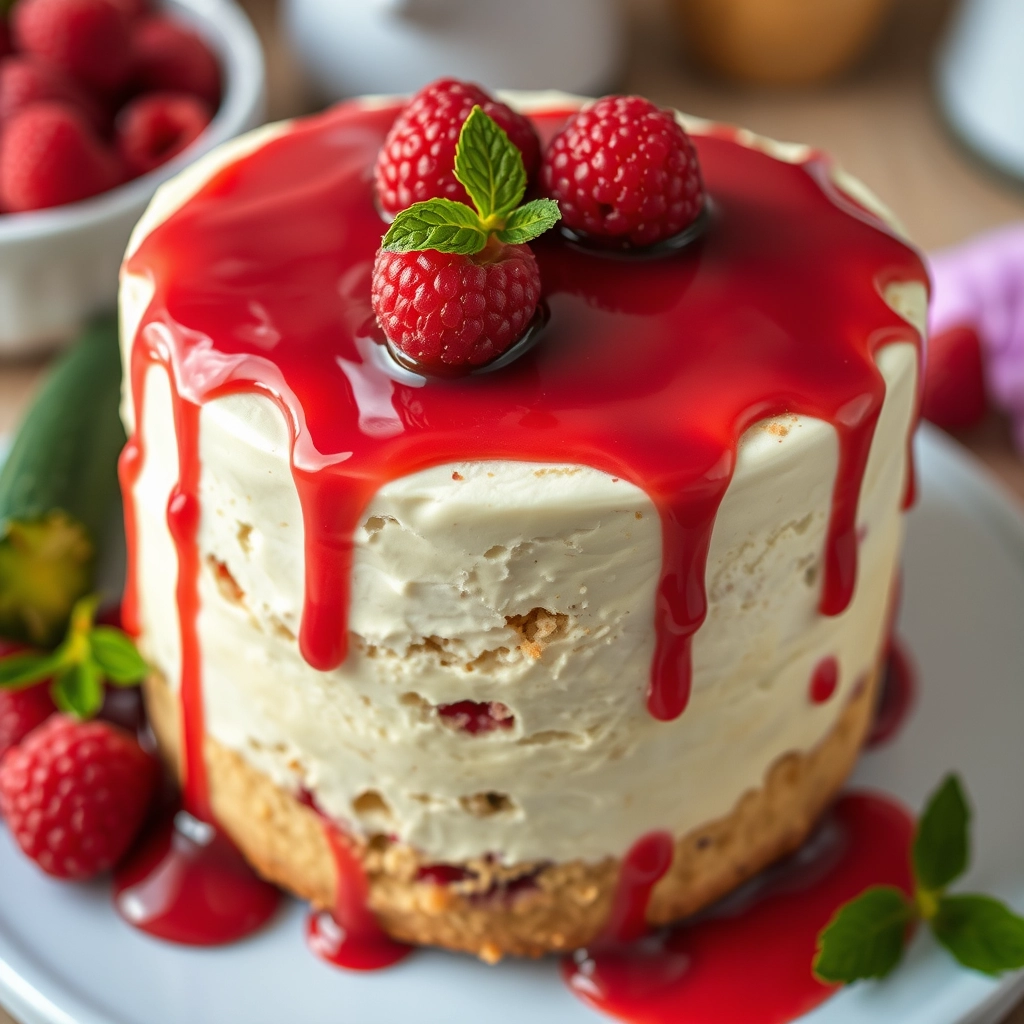
The Sweet-Tart Love Story of Strawberry Rhubarb Crisp

There’s something magical about the first ruby-red stalks of rhubarb appearing at the farmers’ market each spring. I remember my grandmother’s hands, dusted with flour and speckled with sugar, as she’d layer tart rhubarb with sweet strawberries in her chipped ceramic baking dish. The way the kitchen filled with that unmistakable jammy perfume still makes my heart swell. This strawberry rhubarb crisp is my love letter to those memories – the perfect balance of nostalgic comfort and effortless baking that lets the fruits shine.

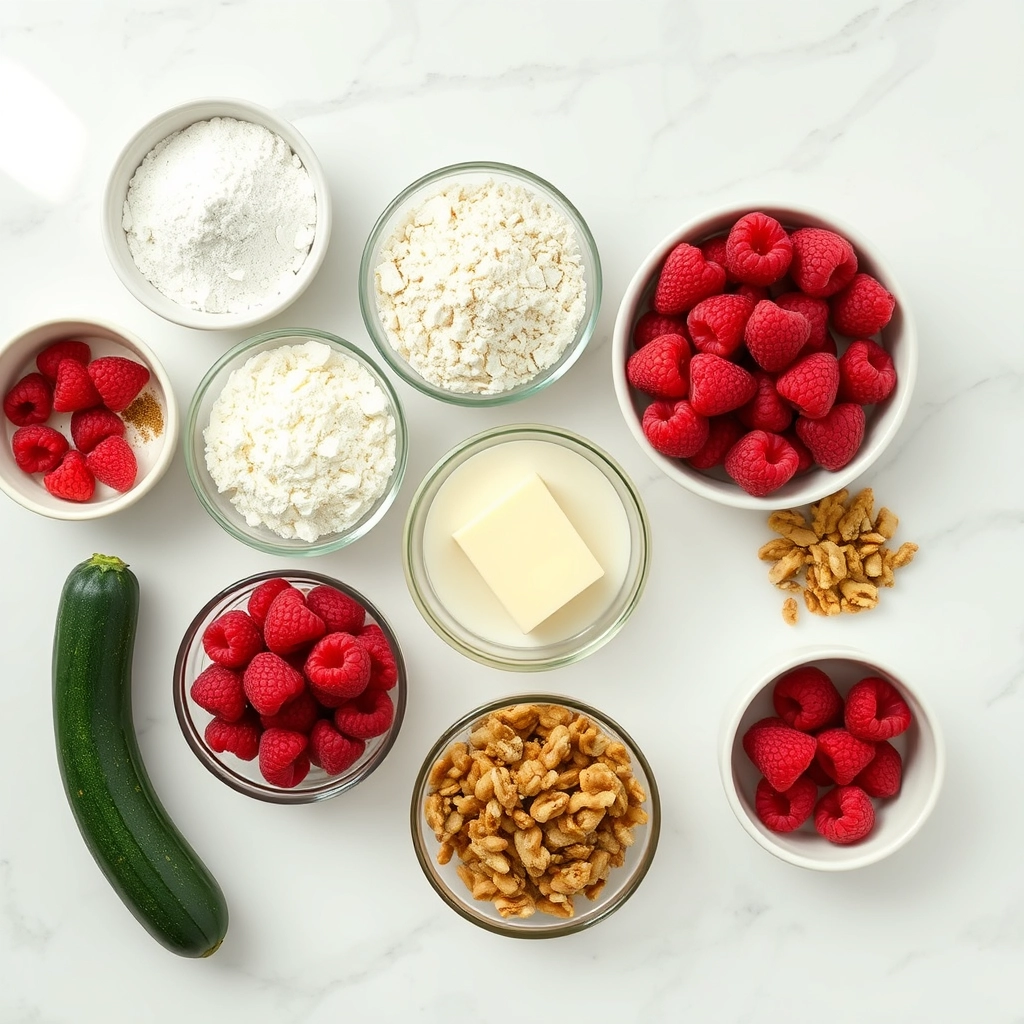
Gathering Your Ingredients

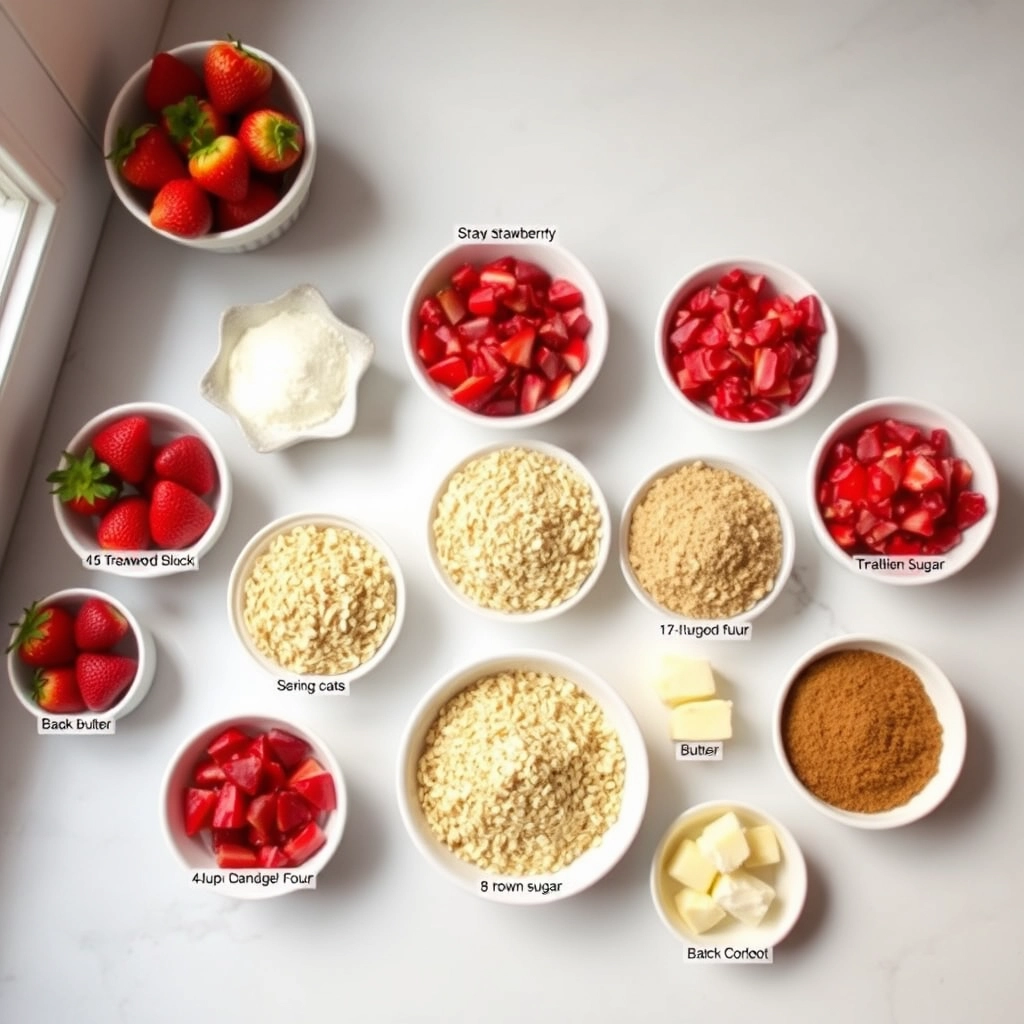
What I adore about this recipe is how the short ingredient list transforms into something extraordinary. Here’s what you’ll need:

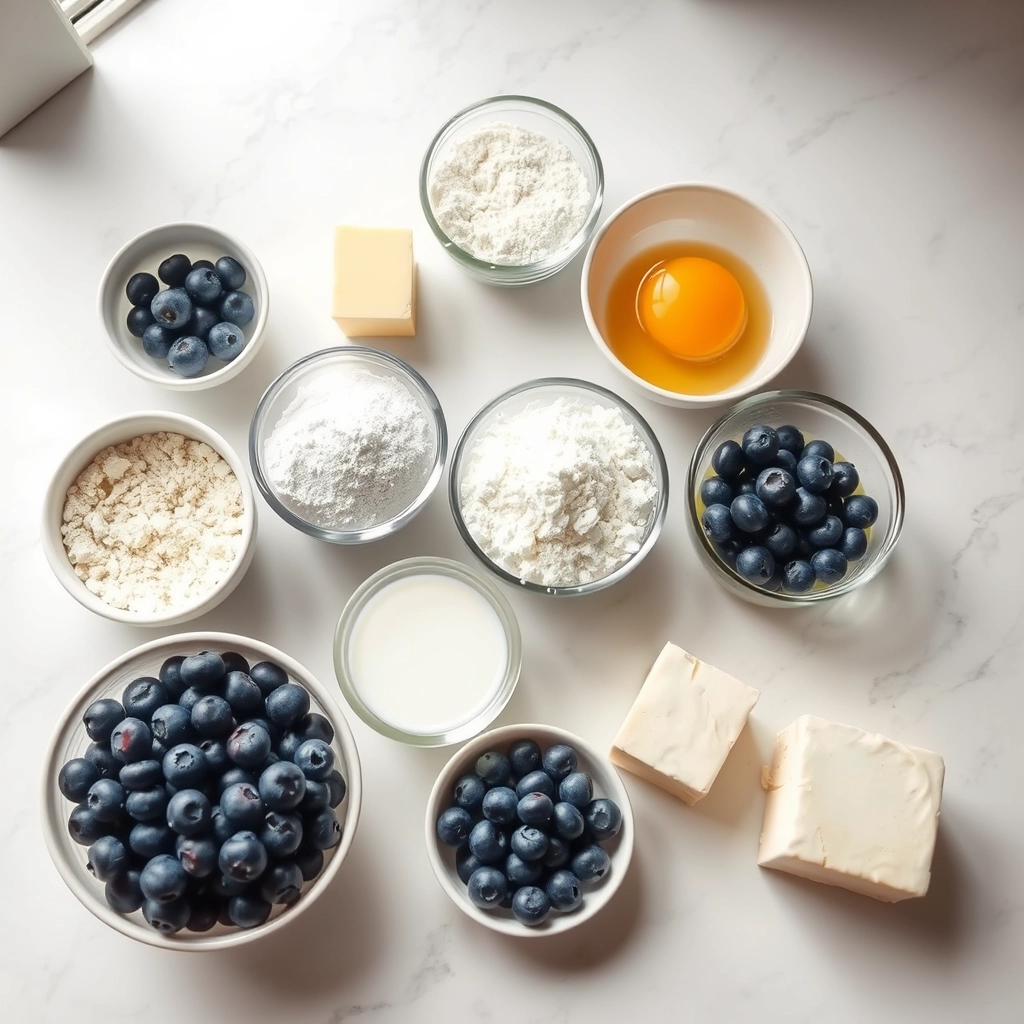
  • 4 cups fresh rhubarb – Look for firm, bright pink stalks (the redder the sweeter!) chopped into 1-inch pieces. Don’t use the leaves – they’re toxic!
  • 2 cups strawberries – Hulled and quartered. I like to mix some underripe berries in for texture.
  • 3/4 cup granulated sugar – This might seem like a lot, but rhubarb needs it! You can reduce slightly if your berries are very sweet.
  • 1 tablespoon lemon juice – The brightness cuts through the sweetness beautifully.
  • 1 teaspoon vanilla extract – My secret weapon for depth of flavor.
  • 1/4 teaspoon salt – Just a pinch to make all the flavors pop.
  • 1 cup old-fashioned oats – The heart of our crisp topping – don’t use instant!
  • 1/2 cup all-purpose flour – I’ve successfully substituted with gluten-free blends too.
  • 1/2 cup packed brown sugar – For that caramelized crunch we all crave.
  • 1/2 teaspoon cinnamon – A warm whisper of spice.
  • 1/2 cup (1 stick) cold unsalted butter – Cubed. The colder, the flakier the topping!

Creating Your Crisp Masterpiece

Now for the fun part – let’s make some magic happen:

  1. Preheat your oven to 375°F (190°C) and grab your favorite 9×9 baking dish (no need to grease it – the butter in the topping will handle that!).
  2. Make the filling: In a large bowl, gently toss together the rhubarb, strawberries, granulated sugar, lemon juice, vanilla, and salt until everything is evenly coated. Let this sit while you prepare the topping – you’ll notice the sugar starts drawing out the juices, creating its own glorious syrup.
  3. Create the crisp topping: In a separate bowl, whisk together the oats, flour, brown sugar, and cinnamon. Now take those cold butter cubes and use your fingers to work them into the dry ingredients until you have a crumbly mixture with pea-sized butter pieces throughout. Pro tip: If your kitchen is warm, pop the bowl in the fridge for 10 minutes if the butter starts melting.
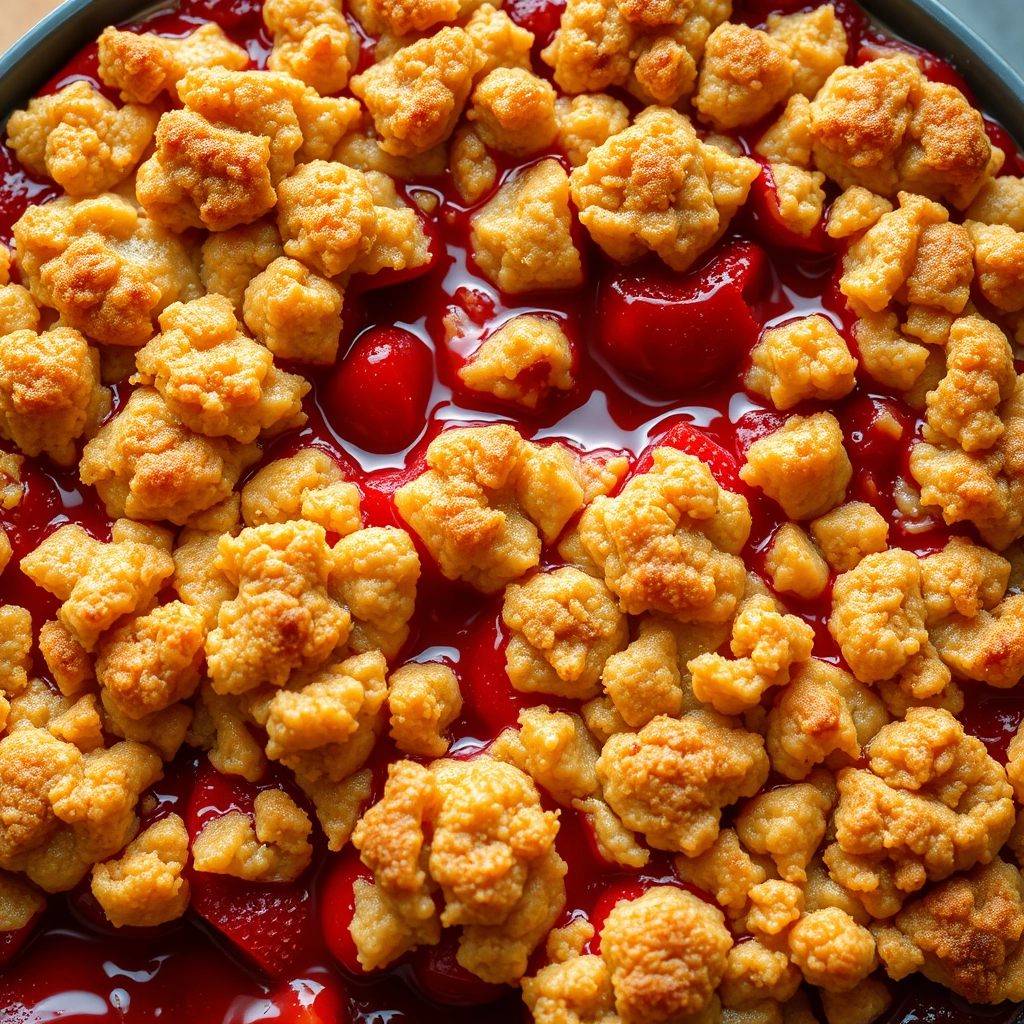
  4. Assemble with love: Pour the fruit mixture (and all those accumulated juices!) into your baking dish. Sprinkle the oat topping evenly over the fruit – don’t press it down, we want those craggy bits to get extra crispy.

Pro Tips for the Perfect Strawberry Rhubarb Crisp

Every baker has their little secrets, and after making this crisp countless times, I’ve gathered a few tricks to ensure yours turns out perfectly every time:

  • Use cold butter: For the crispiest topping, make sure your butter is chilled when you work it into the flour mixture. This creates those delightful buttery pockets as it bakes.
  • Let it rest: As tempting as it is to dive right in, allow your crisp to cool for at least 15 minutes after baking. This helps the juices thicken slightly.
  • Adjust sweetness: Taste your fruit before baking—if your strawberries are very sweet, you may want to reduce the sugar slightly.

Delicious Variations and Substitutions

This recipe is wonderfully adaptable! Here are some ways to make it your own:

  • Berry swap: Try using raspberries or blackberries instead of strawberries for a different flavor profile.
  • Gluten-free option: Substitute the all-purpose flour with your favorite gluten-free blend in both the filling and topping.
  • Nutty crunch: Add ½ cup chopped pecans or almonds to the crisp topping for extra texture.
  • Citrus twist: Add the zest of one orange to the fruit mixture for a bright, citrusy note.

What to Serve With Your Strawberry Rhubarb Crisp

While this dessert is heavenly on its own, here are some perfect pairings:

  • A scoop of vanilla bean ice cream (the classic choice!)
  • Freshly whipped cream with a hint of vanilla
  • A dollop of Greek yogurt for a slightly tangy contrast
  • Warm custard sauce for an extra indulgent treat

Storage and Reheating Tips

This crisp keeps beautifully, though it rarely lasts long in our house!

  • Room temperature: Cover with foil and store at room temperature for up to 2 days.
  • Refrigerator: For longer storage (up to 5 days), keep in the fridge in an airtight container.
  • Freezing: You can freeze the baked crisp for up to 3 months. Thaw overnight in the refrigerator before reheating.
  • Reheating: Warm individual portions in the microwave for 30-45 seconds, or place the whole dish in a 350°F oven for 10-15 minutes until heated through.

Frequently Asked Questions

Can I use frozen fruit instead of fresh?

Absolutely! No need to thaw—just add an extra tablespoon of cornstarch to account for the additional liquid.

My crisp topping isn’t browning—what can I do?

If your topping needs more color after baking, pop it under the broiler for 1-2 minutes, watching carefully to prevent burning.

Can I make this recipe ahead of time?

Yes! Assemble the crisp (unbaked) up to a day in advance and refrigerate. Add 5-10 minutes to the baking time if baking straight from the fridge.

How do I know when the crisp is done?

The fruit should be bubbling around the edges, and the topping should be golden brown. If you insert a knife, the rhubarb should be tender.

Final Thoughts

There’s something truly magical about the combination of tart rhubarb and sweet strawberries under that golden, buttery crisp topping. This dessert isn’t just food—it’s a warm hug on a plate, a taste of summer sunshine, and a reminder of simpler times. Whether you’re serving it to guests or enjoying it quietly with a cup of tea, I hope this strawberry rhubarb crisp brings as much joy to your table as it has to mine over the years. Happy baking!

Print
clock clock iconcutlery cutlery iconflag flag iconfolder folder iconinstagram instagram iconpinterest pinterest iconfacebook facebook iconprint print iconsquares squares iconheart heart iconheart solid heart solid icon

Strawberry Rhubarb Crisp


  • Author: Trusted Blog

Description

A sweet and tangy dessert featuring fresh strawberries and rhubarb topped with a crunchy oat crumble.


Ingredients

Scale

For the Crust:

  • 4 cups strawberries, hulled and sliced
  • 4 cups rhubarb, chopped
  • 1 cup granulated sugar
  • 1/4 cup cornstarch
  • 1 teaspoon vanilla extract
  • 1 cup old-fashioned oats
  • 1/2 cup all-purpose flour
  • 1/2 cup brown sugar
  • 1/2 teaspoon ground cinnamon
  • 1/2 cup unsalted butter, chilled and cubed

Instructions

1. Prepare the Crust:

  1. Preheat oven to 375°F (190°C). Grease a 9×13-inch baking dish.
  2. In a large bowl, combine strawberries, rhubarb, granulated sugar, cornstarch, and vanilla. Toss to coat evenly and transfer to the baking dish.
  3. In another bowl, mix oats, flour, brown sugar, and cinnamon. Add cubed butter and use your fingers to work it into the dry ingredients until crumbly.
  4. Sprinkle the oat mixture evenly over the fruit mixture in the baking dish.
  5. Bake for 30-35 minutes, or until the topping is golden brown and the fruit is bubbling.
  6. Let cool for 10 minutes before serving. Serve warm with vanilla ice cream if desired.

Notes

You can customize the seasonings to taste.

Easy Cheesecake Chia Pudding – Creamy & Delicious

easy-cheesecake-chia-pudding

A Sweet Little Secret: Cheesecake Chia Pudding for Lazy Mornings

There’s something magical about a recipe that feels indulgent but takes almost no effort—especially on those mornings when you’re craving something sweet but can’t fathom turning on the stove. That’s how this cheesecake chia pudding came to be in my kitchen. One bleary-eyed Saturday, I stood in front of the fridge, staring at a half-empty tub of cream cheese, and thought: What if…? A few stirs later, and voilà—a creamy, dreamy breakfast (or dessert!) that tastes like dessert but fuels you like a proper meal. It’s become my not-so-guilty pleasure, and today, I’m sharing it with you.

The Ingredients: Simple, Wholesome, and Oh-So-Creamy

  • 1/4 cup chia seeds – Tiny but mighty, these little guys puff up into the perfect pudding texture.
  • 1 cup unsweetened almond milk (or any milk you love) – Creamy, nutty, and just the right base.
  • 2 tbsp cream cheese, softened – The “cheesecake” star! Full-fat gives the richest flavor, but light works too.
  • 1 tbsp maple syrup or honey – A touch of natural sweetness. Adjust to taste—I sometimes add a dash more if I’m craving extra decadence.
  • 1/2 tsp vanilla extract – The warmth that ties it all together.
  • A pinch of salt – Trust me, it makes the flavors pop.
  • Fresh berries or a drizzle of jam (for serving) – Because every cheesecake needs a fruity finish!

Let’s Make It: Effortless Creaminess in 5 Minutes (Plus Patience!)

  1. Whisk the magic together. In a bowl or jar, vigorously whisk the softened cream cheese with almond milk until smooth—no lumps allowed! Add the maple syrup, vanilla, and salt, and whisk again until silky.
  2. Welcome the chia seeds. Sprinkle them in and stir well. At first, it’ll seem too liquidy, but don’t fret—they’ll work their thickening magic soon.
  3. Wait (the hardest part!). Let the mixture sit for 5 minutes, then give it another stir to break up any clumps. Cover and refrigerate for at least 2 hours (overnight is even better!).
  4. Dream of toppings. As it chills, imagine your perfect finish: a handful of juicy strawberries? A dollop of tart raspberry jam? Crumbled graham crackers for that true cheesecake vibe? The choice is yours.

And just like that, you’ve got a jar of creamy bliss waiting for you in the fridge. The hardest part is resisting the urge to peek every five minutes—but I promise, the wait is worth it. Stay tuned for the finishing touches and my favorite serving ideas in part two!

Now that you’ve got the basics of this dreamy cheesecake chia pudding down, let’s talk about how to make it your own! Whether you’re craving a little extra indulgence or need to tweak it for dietary needs, this recipe is wonderfully adaptable.

Pro Tips & Variations

  • Flavor Boost: Add a teaspoon of vanilla extract or a pinch of cinnamon to the chia mixture for extra warmth.
  • Dairy-Free: Swap the cream cheese for coconut yogurt or dairy-free cream cheese alternatives.
  • Fruit Swirl: Before chilling, gently swirl in some mashed berries or a spoonful of fruit preserves for a pretty marbled effect.
  • Crunch Factor: Top with granola, chopped nuts, or even crumbled graham crackers for that classic cheesecake crust texture.

Perfect Pairings

This pudding shines on its own, but here are some delightful ways to serve it:

  • With a drizzle of honey or maple syrup for extra sweetness
  • Topped with fresh seasonal fruit like strawberries, blueberries, or sliced peaches
  • As part of a brunch spread alongside muffins or scones
  • Layered in a parfait glass with granola for added texture

Storage & Reheating

Your chia pudding will keep beautifully in the refrigerator for 3-4 days when stored in an airtight container. The texture actually improves as it sits! If it thickens too much, simply stir in a splash of milk to loosen it up. While best served chilled, you can let it sit at room temperature for about 10 minutes if you prefer a less-cold treat.

Frequently Asked Questions

Can I use frozen fruit for toppings?
Absolutely! Thaw frozen berries and pat them dry before using. The juices make a lovely natural syrup too.

Is there a way to make this protein-packed?
Yes! Stir in a scoop of your favorite vanilla or unflavored protein powder when mixing the chia seeds.

My pudding turned out too thick. What can I do?
Simply whisk in a little extra milk (regular or plant-based) until you reach your desired consistency.

Can I make this without sweetener?
Of course! The natural sweetness from any fruit toppings might be enough for you. You can always add sweetener to individual servings if needed.

There’s something truly magical about transforming simple ingredients into a dessert that feels both indulgent and nourishing. Whether you’re meal prepping for the week or treating yourself to a little moment of sweetness, this cheesecake chia pudding is sure to become a beloved staple. The creamy texture, the subtle tang, the endless customization options – it’s the kind of recipe that feels like a warm hug in dessert form. Here’s to many cozy mornings and sweet evenings with this delightful treat!

Print
clock clock iconcutlery cutlery iconflag flag iconfolder folder iconinstagram instagram iconpinterest pinterest iconfacebook facebook iconprint print iconsquares squares iconheart heart iconheart solid heart solid icon

Cheesecake Chia Pudding


  • Author: Trusted Blog

Description

A creamy, no-bake chia pudding with the rich flavor of cheesecake, perfect for a healthy dessert or breakfast.


Ingredients

Scale

For the Crust:

  • 1/4 cup chia seeds
  • 1 cup almond milk
  • 4 oz cream cheese, softened
  • 2 tbsp honey or maple syrup
  • 1 tsp vanilla extract
  • 1/4 tsp lemon zest
  • Fresh berries for topping

Instructions

1. Prepare the Crust:

  1. In a bowl, whisk together almond milk, softened cream cheese, honey, vanilla extract, and lemon zest until smooth.
  2. Add chia seeds and stir well to combine. Let the mixture sit for 5 minutes, then stir again to prevent clumping.
  3. Cover and refrigerate for at least 4 hours or overnight. Serve chilled with fresh berries on top.

Notes

You can customize the seasonings to taste.

Best Lemon Poppy Seed Bread – Easy Homemade Recipe

best-lemon-poppy-seed-bread

The Sweet Sunshine of Lemon Poppy Seed Bread

There’s something about lemon poppy seed bread that feels like a hug from the sun. Maybe it’s the bright citrusy aroma that fills the kitchen, or the cheerful little poppy seeds that speckle each slice like edible confetti. Whatever it is, this bread has been my go-to for lazy weekend baking, last-minute hostess gifts, and those days when I just need a little edible sunshine. The first time I made it, I was craving something light yet comforting—something that reminded me of spring mornings and my grandmother’s old recipe box. This version is tender, moist, and just sweet enough, with a delicate glaze that makes it feel extra special.

Ingredients You’ll Need

Gather these simple ingredients, and let’s bake a loaf that’ll make your kitchen smell like a sunny café:

  • 2 cups all-purpose flour – The foundation of our bread. Spoon and level it for the perfect texture.
  • 1 ½ tsp baking powder – A little lift to keep things fluffy.
  • ½ tsp baking soda – Works with the powder to give that perfect rise.
  • ½ tsp salt – Just enough to balance the sweetness.
  • 2 tbsp poppy seeds – These tiny black gems add crunch and whimsy.
  • ½ cup unsalted butter, softened – Room temperature is key for a smooth batter.
  • 1 cup granulated sugar – Sweet but not overpowering, letting the lemon shine.
  • 2 large eggs – Fresh eggs make all the difference in richness.
  • 1 tsp vanilla extract – A warm undertone to complement the lemon.
  • ½ cup whole milk – For moisture and tenderness.
  • Zest of 2 lemons – The real star! Fresh zest packs the brightest flavor.
  • ¼ cup fresh lemon juice – Bottled just won’t give the same zing.

Let’s Bake: Step-by-Step

Now, let’s turn these ingredients into a golden, citrusy delight. Here’s how to make magic happen:

  1. Preheat and Prep – Preheat your oven to 350°F (175°C). Grease a 9×5-inch loaf pan and line it with parchment paper for easy removal. (Trust me, no one wants a stuck loaf!)
  2. Whisk the Dry Ingredients – In a medium bowl, whisk together the flour, baking powder, baking soda, salt, and poppy seeds. Set aside—this ensures everything is evenly distributed.
  3. Cream Butter and Sugar – In a large bowl, beat the softened butter and sugar together until light and fluffy, about 2-3 minutes. Scrape down the sides as needed. This step is crucial for a tender crumb!
  4. Add Eggs and Flavor – Beat in the eggs one at a time, then stir in the vanilla, lemon zest, and lemon juice. The batter might look a little curdled at this point—don’t worry, it’ll come together beautifully.
  5. Alternate Wet and Dry – Gradually add the dry ingredients to the butter mixture, alternating with the milk. Start and end with the dry ingredients, mixing just until combined. Overmixing = tough bread, and we want tender!

At this point, your batter should be thick, fragrant, and speckled with poppy seeds. Pour it into your prepared loaf pan, smooth the top, and get ready for the oven. But before we pop it in, here’s a little secret: let the batter sit for 10 minutes. This helps the poppy seeds soften slightly, giving the bread an even better texture.

Pro Tips, Variations, and Substitutions

This lemon poppy seed bread is wonderfully forgiving, but a few extra tricks can take it from good to great:

  • For extra zing: Add 1 tablespoon of lemon zest to the batter for an even brighter citrus flavor.
  • Buttermilk swap: No buttermilk? Mix 1 cup milk with 1 tablespoon lemon juice or vinegar and let it sit for 5 minutes.
  • Gluten-free option: Substitute a 1:1 gluten-free flour blend—just check that it contains xanthan gum.
  • Mini loaves: Divide the batter into 4 small loaf pans and reduce baking time to 25–30 minutes.

What to Serve With Lemon Poppy Seed Bread

This sunny loaf is delightful on its own, but here are a few pairing ideas to make it shine:

  • Slather with lemon curd or honey butter for extra indulgence.
  • Serve alongside a berry compote or fresh strawberries for a brunch-worthy treat.
  • Pair with a cup of Earl Grey tea or iced lavender lemonade for a cozy afternoon.

Storage and Reheating Tips

To keep your bread tasting fresh:

  • Room temperature: Store in an airtight container for up to 3 days.
  • Freezing: Wrap tightly in plastic and freeze for up to 3 months. Thaw overnight before serving.
  • Reheating: Warm slices in a toaster oven or microwave for 10–15 seconds to revive that just-baked texture.

Frequently Asked Questions

Can I use bottled lemon juice instead of fresh?

Fresh lemon juice is best for flavor, but in a pinch, bottled will work—just add an extra teaspoon of zest to compensate.

Why didn’t my bread rise much?

Check your baking powder’s expiration date! Old leavening agents lose potency. Also, avoid overmixing the batter.

Can I make this into muffins?

Absolutely! Fill muffin tins 2/3 full and bake at 375°F for 18–20 minutes.

Are poppy seeds necessary?

They add lovely texture, but you can omit them for a simple lemon loaf—just reduce the milk by 1 tablespoon.

A Slice of Sunshine

There’s something magical about the way lemon and poppy seeds come together in this tender, fragrant bread. Whether you’re sharing it with neighbors over coffee or savoring a quiet moment with a book, this recipe is like a little hug in loaf form. I hope it brings as much joy to your kitchen as it has to mine—happy baking!

Print
clock clock iconcutlery cutlery iconflag flag iconfolder folder iconinstagram instagram iconpinterest pinterest iconfacebook facebook iconprint print iconsquares squares iconheart heart iconheart solid heart solid icon

Lemon Poppy Seed Bread


  • Author: Trusted Blog

Description

A moist and tangy lemon poppy seed bread with a sweet glaze.


Ingredients

Scale

For the Crust:

  • 1 1/2 cups all-purpose flour
  • 1/2 teaspoon baking soda
  • 1/2 teaspoon baking powder
  • 1/2 teaspoon salt
  • 1 tablespoon poppy seeds
  • 1/2 cup unsalted butter, softened
  • 1 cup granulated sugar
  • 2 large eggs
  • 1/2 cup sour cream
  • 1/4 cup fresh lemon juice
  • 1 tablespoon lemon zest

Instructions

1. Prepare the Crust:

  1. Preheat oven to 350°F (175°C). Grease a 9×5-inch loaf pan.
  2. In a bowl, whisk together flour, baking soda, baking powder, salt, and poppy seeds.
  3. In a separate bowl, cream butter and sugar until light and fluffy. Beat in eggs one at a time.
  4. Mix in sour cream, lemon juice, and lemon zest.
  5. Gradually add the dry ingredients to the wet ingredients, mixing just until combined.
  6. Pour batter into the prepared loaf pan and bake for 45-50 minutes, or until a toothpick inserted comes out clean.
  7. Let cool in the pan for 10 minutes, then transfer to a wire rack to cool completely.

Notes

You can customize the seasonings to taste.

Best Zucchini Raspberry Cake – Moist & Flavorful Recipe

best-zucchini-raspberry-cake

The Zucchini Raspberry Cake That Stole My Heart

There’s something magical about the moment summer’s bounty meets the warmth of the oven. I’ll never forget the first time I baked this zucchini raspberry cake—it was one of those lazy afternoons when my garden seemed to whisper recipes to me. The zucchini plants were practically waving their leafy arms, begging to be used, while a pint of raspberries sat on the counter like little rubies waiting to shine. What emerged from the oven that day was so moist, so perfectly balanced between earthy and bright, that it’s become my most requested summer dessert ever since.

Ingredients That Make This Cake Sing

  • 2 cups grated zucchini – Don’t wring it out! That moisture is our secret weapon for the most tender crumb.
  • 1 ½ cups fresh raspberries – Their tartness cuts through the sweetness beautifully. Frozen work too, but toss them in flour first.
  • 2 cups all-purpose flour – I sometimes swap ½ cup for whole wheat when I want extra nuttiness.
  • 1 cup granulated sugar – Just enough to sweeten without overpowering the garden flavors.
  • ½ cup brown sugar – For that caramel depth that makes people go “Mmm, what is that?”
  • 3 large eggs – Room temperature, always. They incorporate better for an even texture.
  • ¾ cup vegetable oil – The neutral flavor lets our stars shine, but melted butter works for special occasions.
  • 1 tsp vanilla extract – My Madagascar bourbon vanilla makes the aroma unforgettable.
  • 2 tsp cinnamon – The warm hug that ties zucchini and raspberries together.
  • 1 tsp baking soda – Our lift and fluff-maker.
  • ½ tsp salt – The flavor enhancer every good baker knows is essential.

Let’s Bake Some Summer Magic

Step 1: Preheat your oven to 350°F (175°C) and grease a 9×13 inch baking pan. I like to line mine with parchment paper too—it makes serving so elegant when you can lift the whole cake out.

Step 2: In a large bowl, whisk together the flour, both sugars, cinnamon, baking soda, and salt. Take a deep breath—that cinnamon scent is already telling you this will be good.

Step 3: In another bowl, beat the eggs lightly before adding the oil and vanilla. Watch how the mixture turns pale and slightly thick—this emulsion is what gives our cake its luxurious mouthfeel.

Step 4: Now the fun part! Gradually add the dry ingredients to the wet, mixing just until combined. Overmixing is the enemy of tenderness here. The batter will be thick—that’s perfect.

Step 5: Fold in the grated zucchini with a gentle hand. You’ll think “This can’t possibly incorporate,” but keep folding patiently. The zucchini releases its moisture as you go, transforming the batter into a gorgeous, speckled green mixture.

Pro Tips, Variations, and Substitutions

This zucchini raspberry cake is wonderfully forgiving, but a few little tricks can take it from great to extraordinary:

  • For extra moisture: Let the shredded zucchini sit in a colander for 10 minutes, then squeeze out excess liquid with your hands before adding to the batter.
  • Berry swaps: No raspberries? Fresh or frozen blackberries, blueberries, or chopped strawberries work beautifully too.
  • Gluten-free option: Substitute the all-purpose flour with a 1:1 gluten-free baking blend for equally delicious results.
  • Zesty twist: Add the zest of one lemon to the batter for a bright, citrusy note that pairs perfectly with the raspberries.

What to Serve With Your Cake

This cake shines all on its own, but if you want to make it extra special:

  • A dollop of freshly whipped cream or vanilla ice cream melts beautifully over a warm slice.
  • For breakfast or brunch, pair it with a hot cup of Earl Grey tea or freshly brewed coffee.
  • Drizzle with a simple powdered sugar glaze (just mix 1 cup powdered sugar with 2-3 tbsp milk) for a slightly sweeter treat.

Storage and Reheating Tips

This cake stays moist for days when stored properly:

  • Room temperature: Keep in an airtight container for up to 3 days.
  • Refrigerator: For longer storage (up to 5 days), refrigerate in an airtight container.
  • Freezing: Wrap individual slices tightly in plastic wrap, then foil, and freeze for up to 3 months. Thaw at room temperature when ready to enjoy.
  • Reheating: Microwave a slice for 10-15 seconds to bring back that fresh-from-the-oven warmth.

Frequently Asked Questions

Can I use frozen raspberries?

Absolutely! No need to thaw – just toss them in frozen to prevent color bleeding. You may need to bake 2-3 minutes longer.

My cake is browning too fast – help!

Simply tent loosely with aluminum foil if the top is browning before the center is done. This happens especially in darker pans.

Can I make this into muffins?

Yes! Divide batter into a greased muffin tin and bake at 375°F for 18-22 minutes. Perfect for on-the-go treats.

Why is my cake dense?

Overmixing the batter can lead to denseness. Mix just until ingredients are incorporated – a few lumps are okay!

Final Thoughts

There’s something truly magical about this zucchini raspberry cake – the way the tart berries play against the sweet, moist crumb, how the zucchini keeps it impossibly tender for days, and how one bite transports you to lazy summer afternoons. Whether you’re serving it at a backyard gathering, packing slices in lunchboxes, or enjoying a quiet moment with your morning coffee, this cake is bound to become a cherished recipe in your collection. Happy baking, friends – may your kitchen be filled with the sweet aroma of this delightful treat!

Print
clock clock iconcutlery cutlery iconflag flag iconfolder folder iconinstagram instagram iconpinterest pinterest iconfacebook facebook iconprint print iconsquares squares iconheart heart iconheart solid heart solid icon

Zucchini Raspberry Cake


  • Author: Trusted Blog

Description

A moist and flavorful cake made with fresh zucchini and raspberries, perfect for a summer dessert.


Ingredients

Scale

For the Crust:

  • 2 cups all-purpose flour
  • 1 teaspoon baking powder
  • 1/2 teaspoon baking soda
  • 1/2 teaspoon salt
  • 1 teaspoon ground cinnamon
  • 1/2 cup unsalted butter, softened
  • 1 cup granulated sugar
  • 2 large eggs
  • 1 teaspoon vanilla extract
  • 1 1/2 cups grated zucchini
  • 1 cup fresh raspberries
  • 1/2 cup chopped walnuts (optional)

Instructions

1. Prepare the Crust:

  1. Preheat oven to 350°F (175°C). Grease and flour a 9-inch round cake pan.
  2. In a medium bowl, whisk together flour, baking powder, baking soda, salt, and cinnamon.
  3. In a large bowl, beat butter and sugar until light and fluffy. Add eggs one at a time, then stir in vanilla.
  4. Gradually mix in the dry ingredients until just combined. Fold in grated zucchini, raspberries, and walnuts (if using).
  5. Pour batter into the prepared pan and smooth the top. Bake for 30-35 minutes or until a toothpick inserted comes out clean.
  6. Let cool in the pan for 10 minutes, then transfer to a wire rack to cool completely.

Notes

You can customize the seasonings to taste.

Classic Linzer Strawberry Heart Cookies Recipe

classic-linzer-strawberry-heart-cookies

The Sweet Tradition of Linzer Heart Cookies

There’s something magical about baking cookies that carry both history and heart. Every winter, my grandmother would pull out her well-loved wooden rolling pin and a jar of homemade strawberry jam, filling her tiny kitchen with the warm scent of buttery dough and sweet fruit. She’d wink as she pressed heart-shaped cutouts into the delicate cookies, whispering that these were “love letters in pastry form.” Now, whenever I make these Classic Linzer Strawberry Heart Cookies, I’m transported back to those flour-dusted afternoons—where patience, precision, and a little bit of whimsy came together to create edible treasures.

Ingredients You’ll Need

  • 2 cups all-purpose flour – The backbone of our dough. Spoon and level it for the perfect texture!
  • 1 cup almond flour – A nutty twist that gives Linzers their signature crumbly tenderness.
  • 1/2 teaspoon cinnamon – Just a whisper of warmth to complement the berries.
  • 1/4 teaspoon salt – Balances the sweetness like a gentle hug.
  • 1 cup unsalted butter, softened – European-style butter (with 82% fat) makes these extra luxurious.
  • 2/3 cup granulated sugar – Not overly sweet—these cookies let the jam shine.
  • 1 large egg yolk – Adds richness without making the dough heavy.
  • 1 teaspoon vanilla extract – Use the real stuff—it’s worth it.
  • 1/2 cup strawberry jam – Seedless gives a smooth finish, but chunky homemade jam has rustic charm.
  • Powdered sugar, for dusting – The snowy finish that makes these cookies look like winter fairytales.

Step-by-Step: Crafting Your Cookie Hearts

1. The Dough Dance
In a medium bowl, whisk together the all-purpose flour, almond flour, cinnamon, and salt. Set aside. In a large bowl, cream the butter and sugar until pale and fluffy—about 3 minutes with a hand mixer. Add the egg yolk and vanilla, mixing until just combined. Gradually add the dry ingredients, mixing on low until the dough comes together in a soft ball. Tip: If the dough feels sticky, wrap it in plastic and chill for 15 minutes—it’ll be easier to handle.

2. Rolling with Love
Divide the dough in half and roll one portion between two sheets of parchment paper to 1/4-inch thickness. Slide the rolled dough (parchment and all) onto a baking sheet and chill for 30 minutes. Repeat with the second half. This patience pays off—cold dough holds those heart shapes beautifully!

3. Cutting Out the Magic
Preheat your oven to 350°F (175°C). Using a 2.5-inch heart-shaped cutter, stamp out cookies from the first chilled dough sheet. For half of them, use a smaller heart cutter (or a piping tip!) to create a “window” in the center. Transfer all hearts to a parchment-lined baking sheet, spacing them 1 inch apart. Save the scraps—you can reroll them once for extra cookies!

Pro Tips for Perfect Linzer Strawberry Heart Cookies

Creating these delicate cookies is easier when you keep a few tricks in mind:

  • Chill your dough twice – after mixing and after cutting shapes. This prevents spreading and keeps those heart shapes crisp.
  • Dust smarter – For the powdered sugar topping, wait until cookies are completely cooled to prevent melting.
  • Jam thickness matters – If your strawberry jam is too runny, simmer it gently for 5 minutes to thicken before filling.

Delicious Variations to Try

While the classic version is heavenly, these twists are equally wonderful:

  • Citrus zest – Add 1 tsp lemon or orange zest to the dough for brightness
  • Nut alternatives – Try hazelnuts or pecans instead of traditional almonds
  • Seasonal fillings – Raspberry jam in summer, spiced apple butter in fall
  • Chocolate lovers – Brush melted chocolate on the underside before sandwiching

Perfect Pairings for Your Heart Cookies

These dainty treats shine when served with:

  • A pot of Earl Grey tea with a splash of milk
  • Sparkling rosé for an elegant afternoon treat
  • Vanilla bean ice cream for an indulgent dessert
  • Fresh berries and whipped cream for a beautiful brunch addition

Keeping Your Cookies Fresh

To maintain that just-baked quality:

  • Storage: Keep unfilled cookies in an airtight container for up to 1 week. Fill with jam just before serving.
  • Freezing: Dough freezes beautifully for up to 3 months. Thaw overnight in fridge before rolling.
  • Reviving: If cookies soften, refresh in a 300°F oven for 3 minutes to crisp up.

Frequently Asked Questions

Can I make these gluten-free?
Absolutely! Substitute the all-purpose flour with a 1:1 gluten-free baking blend. The nut flour helps maintain texture.

Why do my cookies spread too much?
This usually means the dough wasn’t chilled enough or your baking powder is too active. Try reducing baking powder by 1/4 tsp.

Can I use frozen strawberries for the jam?
Yes! Frozen berries work wonderfully. Just thaw and drain excess liquid before cooking down.

How far in advance can I assemble the filled cookies?
For best texture, assemble no more than 4 hours before serving. The jam will soften the cookies over time.

A Sweet Final Thought

There’s something magical about pulling a tray of these strawberry heart cookies from the oven – the way the kitchen fills with the comforting aroma of toasted nuts and sweet berries, the satisfaction of seeing those perfect little heart windows peek through. Whether you’re baking them for a special Valentine, a holiday cookie exchange, or just to treat yourself, these Linzer cookies carry love in every bite. May your baking be joyful and your cookies be as sweet as the memories you create with them.

Print
clock clock iconcutlery cutlery iconflag flag iconfolder folder iconinstagram instagram iconpinterest pinterest iconfacebook facebook iconprint print iconsquares squares iconheart heart iconheart solid heart solid icon

Linzer Strawberry Heart Cookies


  • Author: Trusted Blog

Description

Classic buttery Linzer cookies shaped like hearts, filled with sweet strawberry jam for a delightful treat.


Ingredients

Scale

For the Crust:

  • 1 cup unsalted butter, softened
  • 2/3 cup granulated sugar
  • 1 large egg
  • 1 tsp vanilla extract
  • 2 1/2 cups all-purpose flour
  • 1/2 tsp salt
  • 1/2 cup strawberry jam
  • Powdered sugar for dusting

Instructions

1. Prepare the Crust:

  1. Cream butter and sugar until light and fluffy. Beat in egg and vanilla.
  2. Whisk flour and salt in a separate bowl, then gradually mix into butter mixture until dough forms.
  3. Divide dough in half, flatten into discs, wrap in plastic, and chill for at least 1 hour.
  4. Roll dough to 1/4-inch thickness. Cut out heart shapes, using a smaller heart cutter for half to create window tops.
  5. Bake at 350°F for 10-12 minutes until edges are golden. Cool completely.
  6. Spread jam on solid hearts, dust window tops with powdered sugar, and sandwich together.

Notes

You can customize the seasonings to taste.

Best Watermelon Margarita – Refreshing Summer Drink

best-watermelon-margarita-summer-drink

The Best Watermelon Margarita – A Sip of Summer Sunshine

There’s something magical about the first bite—or sip—of summer. For me, it’s the moment I sink my teeth into a juicy, ripe watermelon, its sweetness bursting like liquid sunshine. And when that same watermelon finds its way into a frosty margarita? Pure bliss. I remember the first time I tried a watermelon margarita at a little beachside cantina in Mexico—the salt-kissed rim, the tang of lime, and that unmistakable melon freshness. It was love at first sip. Now, it’s my go-to drink for backyard gatherings, lazy afternoons by the pool, or just because it’s Tuesday and life deserves a little celebration.

Ingredients You’ll Need

This recipe is all about simplicity and letting the watermelon shine. Here’s what you’ll need to make the most refreshing margarita of your summer:

  • Fresh watermelon (about 4 cups cubed) – The star of the show! Look for one that feels heavy for its size with a creamy yellow spot—that’s how you know it’s ripe and sweet.
  • Good-quality tequila (2 oz per drink) – Blanco tequila is my favorite here—it’s crisp and lets the watermelon flavor take center stage.
  • Fresh lime juice (1 oz per drink) – Please, please use fresh limes. Bottled lime juice just doesn’t have the same bright, zippy flavor.
  • Orange liqueur (½ oz per drink) – Cointreau or Triple Sec both work beautifully.
  • Agave syrup (½ oz per drink) – This balances the tartness. Adjust to taste depending on how sweet your watermelon is.
  • Tajín or coarse salt for the rim – I love the spicy-sweet kick of Tajín, but classic salt works too!
  • Ice – Lots of it. We want these frosty cold.
  • Optional: Fresh mint or a lime wedge for garnish – Because pretty drinks taste even better.

How to Make the Perfect Watermelon Margarita

Now, let’s turn these simple ingredients into something extraordinary. Here’s my step-by-step guide, complete with all the little tips I’ve picked up over the years:

  1. Prep your watermelon. Cut it into chunks (remove the seeds if yours has them) and blend until smooth. For an ultra-silky texture, strain the juice through a fine-mesh sieve—but if you’re feeling lazy (no judgment!), a little pulp never hurt anyone.
  2. Rim your glasses. Run a lime wedge around the rim of each glass, then dip it into a shallow plate of Tajín or salt. This step feels ceremonial to me—like you’re setting the stage for something special.
  3. Shake it up! In a cocktail shaker, combine tequila, lime juice, orange liqueur, agave, and ½ cup of your fresh watermelon juice. Add a generous handful of ice and shake like you mean it—about 15 seconds, until the shaker feels frosty in your hands.
  4. Strain and serve. Fill your prepared glasses with fresh ice, then strain the margarita over the top. The vibrant pink color alone will make you smile.

And just like that, you’ve bottled summer in a glass. But wait—there’s more! In the next part of this post, I’ll share my favorite variations (hello, spicy watermelon margarita!), tips for making a big batch for parties, and the secret to keeping these drinks icy cold on even the hottest days.

Pro Tips, Variations, and Substitutions

Making the perfect watermelon margarita is all about balance and personal preference. Here are some expert tips to elevate your drink:

  • Use frozen watermelon: Skip the ice and freeze cubed watermelon overnight for a slushier, more flavorful texture.
  • Adjust sweetness: If your watermelon isn’t super sweet, add a teaspoon of honey or agave syrup.
  • Spice it up: Add a pinch of chili powder or Tajín to the rim for a sweet-and-spicy kick.
  • Non-alcoholic version: Simply omit the tequila and triple sec—it’s just as refreshing!
  • Tequila alternatives: Vodka or white rum can work in a pinch, though the flavor profile will change slightly.

What to Serve With Your Watermelon Margarita

This vibrant drink pairs beautifully with summer favorites. Try serving it alongside:

  • Fresh guacamole and crispy tortilla chips
  • Grilled shrimp or fish tacos with lime crema
  • A simple watermelon and feta salad for a refreshing contrast
  • Spicy mango salsa and plantain chips

Storage and Reheating Tips

While margaritas are best enjoyed fresh, you can prepare some components ahead of time:

  • Watermelon puree: Store in an airtight container in the fridge for up to 2 days.
  • Batch preparation: Mix all ingredients (except ice) and refrigerate for up to 24 hours. Shake with ice when ready to serve.
  • Leftover margarita: Freeze in ice cube trays to use in future batches—no waste!

Frequently Asked Questions

Can I use seedless watermelon?

Absolutely! Seedless watermelon works perfectly and saves you the step of removing seeds. Just make sure it’s ripe and sweet for the best flavor.

What if I don’t have a blender?

No problem! Muddle the watermelon with a fork or potato masher, then strain through a fine mesh sieve to get the juice. It will be slightly less smooth but just as tasty.

How can I make it less strong?

Simply reduce the tequila by half and add more watermelon juice or a splash of sparkling water. The drink will still have great flavor but less alcohol content.

Can I make this ahead for a party?

Yes! Prepare the watermelon puree and mix with other ingredients (except ice) up to a day in advance. Store in the fridge and shake with ice when serving.

Final Thoughts

There’s something magical about the combination of juicy watermelon, zesty lime, and smooth tequila that just screams summer. Whether you’re lounging by the pool, hosting a backyard barbecue, or simply treating yourself after a long day, this watermelon margarita is guaranteed to bring a smile to your face. The vibrant pink hue alone is enough to lift your spirits! So grab your favorite glass, maybe an extra for a friend, and toast to sunny days and sweet moments. Here’s to making memories, one refreshing sip at a time.

Print
clock clock iconcutlery cutlery iconflag flag iconfolder folder iconinstagram instagram iconpinterest pinterest iconfacebook facebook iconprint print iconsquares squares iconheart heart iconheart solid heart solid icon

Watermelon Margarita


  • Author: Trusted Blog

Description

A refreshing and fruity twist on the classic margarita, perfect for summer.


Ingredients

Scale

For the Crust:

  • 2 cups fresh watermelon, cubed
  • 1/2 cup tequila
  • 1/4 cup triple sec
  • 1/4 cup lime juice
  • 2 tablespoons agave syrup
  • 1 cup ice cubes
  • Salt or sugar for rimming the glass (optional)
  • Lime wedges and watermelon slices for garnish

Instructions

1. Prepare the Crust:

  1. Blend the watermelon cubes until smooth, then strain to remove pulp if desired.
  2. In a shaker, combine the watermelon juice, tequila, triple sec, lime juice, agave syrup, and ice. Shake well.
  3. Rim glasses with salt or sugar (optional), fill with ice, and pour the margarita mixture over.
  4. Garnish with lime wedges and watermelon slices. Serve immediately.

Notes

You can customize the seasonings to taste.

Classic Southern Tea Cake Cookies – Easy Recipe

classic-southern-tea-cake-cookies

The Sweet Simplicity of Southern Tea Cake Cookies

There’s something magical about the scent of butter and sugar dancing together in a warm kitchen. I remember standing on tiptoe as a child, peering over my grandmother’s flour-dusted countertop as she rolled out these delicate tea cakes. They weren’t fancy, but they were perfect – crisp at the edges, tender in the middle, with just a whisper of vanilla that made them taste like home. Today, I’m sharing that beloved family recipe with you, because some traditions are too sweet not to pass on.

Ingredients That Tell a Story

  • 1 cup (2 sticks) unsalted butter, softened – The foundation of any good tea cake. I always use real butter for that irreplaceable rich flavor.
  • 1 ½ cups granulated sugar – Southern baking isn’t shy about sweetness, but you can reduce this slightly if you prefer.
  • 2 large eggs – Room temperature eggs incorporate better, giving your cookies that perfect texture.
  • 1 teaspoon pure vanilla extract – The secret whisper of flavor. Splurge on the good stuff – it makes all the difference.
  • 3 cups all-purpose flour – Measured correctly (spoon and level method!) for tender cookies that aren’t tough.
  • 1 teaspoon baking powder – Our little leavening helper for just the right amount of lift.
  • ½ teaspoon salt – Balances the sweetness and enhances all the flavors.
  • ¼ cup buttermilk – The Southern baker’s secret weapon for tenderness. No buttermilk? Make your own with 1/4 cup milk + 3/4 tsp vinegar.

Baking With Love: The Method

Let’s create some magic together. Preheat your oven to 350°F (175°C) and line your baking sheets with parchment paper – this little step prevents sticking and makes cleanup a breeze.

  1. Cream the butter and sugar until light and fluffy, about 3-4 minutes with a stand mixer or 5-6 with a hand mixer. This isn’t just mixing – we’re incorporating air for that perfect texture. Scrape down the bowl occasionally.
  2. Add eggs one at a time, mixing well after each addition. Then stir in the vanilla. The mixture might look slightly curdled – that’s normal and will come together when we add the dry ingredients.
  3. Whisk together the dry ingredients in a separate bowl. This ensures even distribution of the baking powder and salt – no one wants a bite with too much leavener!
  4. Alternate adding the dry ingredients and buttermilk to the butter mixture, beginning and ending with the dry ingredients. Mix just until combined after each addition – overmixing leads to tough cookies.
  5. The dough should be soft but not sticky. If it clings to your fingers, add a tablespoon more flour at a time until it’s workable. Cover and chill for 30 minutes if your kitchen is warm.

As we pause here to let our dough rest (or for you to preheat your oven if you haven’t yet), I can almost smell these cookies baking already. There’s something so comforting about the rhythm of baking – the measuring, the mixing, the waiting. Stay tuned for the rolling, cutting, and baking magic coming up next…

Pro Tips for Perfect Tea Cakes Every Time

After making hundreds of batches of these nostalgic cookies, I’ve learned a few secrets to tea cake perfection:

  • Butter temperature matters: Your butter should be softened but still cool to the touch – about 65°F. Too warm and your cookies will spread.
  • The flour trick: For extra tender cookies, replace 2 tablespoons of all-purpose flour with cornstarch.
  • Patience pays off: Letting the dough chill for 30 minutes prevents spreading and allows flavors to meld.

Delicious Variations to Try

While the classic version is heavenly, sometimes it’s fun to mix things up:

  • Lemon zest tea cakes: Add 2 teaspoons of lemon zest to the dough for a bright twist
  • Brown butter version: Brown your butter first for a nutty, caramelized flavor
  • Spiced tea cakes: Mix in ½ teaspoon cinnamon + ¼ teaspoon nutmeg
  • Glazed option: Drizzle with a simple powdered sugar glaze after baking

What to Serve With Tea Cakes

These humble cookies shine alongside:

  • A steaming cup of Earl Grey or chamomile tea
  • Fresh berries and whipped cream for a simple dessert
  • Vanilla ice cream for tea cake sandwiches
  • Your favorite jam for spreading

Storage and Reheating Tips

To keep your tea cakes tasting fresh:

  • Store in an airtight container at room temperature for up to 5 days
  • Freeze baked cookies for up to 3 months – thaw at room temperature
  • For that just-baked taste, warm in a 300°F oven for 3-5 minutes
  • Dough can be refrigerated for 3 days or frozen for 2 months

Tea Cake FAQs

Can I make these without a mixer?
Absolutely! Use a wooden spoon and some elbow grease – your grandmother certainly did.

Why are my tea cakes dry?
You likely overmeasured the flour. Try spooning flour into your measuring cup and leveling it off.

Can I use margarine instead of butter?
While possible, butter gives the best flavor and texture. If substituting, use stick margarine, not tub.

How thin should I roll the dough?
About ¼ inch thick is perfect – they’ll puff slightly while baking but stay tender.

A Final Word From My Kitchen

There’s something magical about pulling a tray of golden tea cakes from the oven – that sweet, buttery aroma filling the kitchen, the promise of simple pleasures to come. Whether you’re carrying on a family tradition or starting a new one, these humble cookies have a way of making any day feel special. I hope this recipe becomes part of your story, creating warm memories one delicious bite at a time. Now go put the kettle on – your tea cakes are waiting!

Print
clock clock iconcutlery cutlery iconflag flag iconfolder folder iconinstagram instagram iconpinterest pinterest iconfacebook facebook iconprint print iconsquares squares iconheart heart iconheart solid heart solid icon

Southern Tea Cake Cookies


  • Author: Trusted Blog

Description

Classic Southern tea cake cookies that are soft, buttery, and lightly sweetened—perfect with a cup of tea or coffee.


Ingredients

Scale

For the Crust:

  • 1 cup unsalted butter, softened
  • 1 1/2 cups granulated sugar
  • 2 large eggs
  • 1 teaspoon vanilla extract
  • 3 cups all-purpose flour
  • 1/2 teaspoon baking soda
  • 1/2 teaspoon salt
  • 1/4 cup buttermilk

Instructions

1. Prepare the Crust:

  1. Preheat oven to 350°F (175°C) and line baking sheets with parchment paper.
  2. In a large bowl, cream together butter and sugar until light and fluffy. Beat in eggs one at a time, then stir in vanilla.
  3. In a separate bowl, whisk together flour, baking soda, and salt. Gradually add dry ingredients to the butter mixture, alternating with buttermilk, until dough forms.
  4. Roll dough into 1-inch balls and place on prepared baking sheets. Flatten slightly with the bottom of a glass.
  5. Bake for 10-12 minutes, or until edges are lightly golden. Cool on wire racks before serving.

Notes

You can customize the seasonings to taste.

Best Blueberry Cream Cheese Bread Recipe

best-blueberry-cream-cheese-bread

The Coziest Blueberry Cream Cheese Bread You’ll Ever Bake

There’s something magical about the way blueberries burst in the oven, their juices swirling into tender crumbs of cake. I discovered this recipe on a rainy Sunday when my kitchen smelled like childhood summers—warm sugar, vanilla, and that unmistakable tang of cream cheese. My grandmother used to say that baking with berries is like capturing sunshine in a loaf pan, and this blueberry cream cheese bread proves just that. Whether you’re serving it with tea for an afternoon pick-me-up or gifting it to a neighbor (who will instantly adore you), this recipe is a little hug in edible form.

Ingredients You’ll Need

  • 2 cups all-purpose flour – Spoon and level it for the perfect texture! Too much flour makes dense bread, and we want cloud-soft crumbs.
  • 1 tsp baking powder – Our gentle lift for that ideal rise.
  • ½ tsp salt – Just enough to make the sweetness sing.
  • ½ cup unsalted butter, softened – Room temperature is key here. Press your finger into it—it should leave a slight indent without sinking.
  • 1 cup granulated sugar – Some recipes use less, but this amount gives that nostalgic bakery-style sweetness.
  • 2 large eggs – Crack them into a separate bowl first (trust me, fishing out shell bits is no one’s idea of fun).
  • 1 tsp vanilla extract – Pure vanilla, if you have it. That warm, floral note makes all the difference.
  • ½ cup whole milk – The fat content keeps the crumb luxuriously moist.
  • 1 ½ cups fresh blueberries – Toss them in a spoonful of flour to prevent sinking! Frozen work too, but don’t thaw them—just add a few extra minutes to the bake time.

For the Cream Cheese Swirl:

  • 8 oz cream cheese, softened – Full-fat, please. This is the silky heart of our bread.
  • ¼ cup sugar – Just enough to balance the tang.
  • 1 egg yolk – It enriches the swirl without making it too dense.

Let’s Bake Together

Step 1: Preheat your oven to 350°F (175°C) and grease a 9×5-inch loaf pan. I like to line mine with parchment paper too—it makes lifting out the bread so satisfyingly easy.

Step 2: In a medium bowl, whisk together the flour, baking powder, and salt. Take a deep breath—that powdery, promise-filled scent is the start of something wonderful.

Step 3: In a large bowl, beat the butter and sugar until light and fluffy. This takes about 3 minutes with a hand mixer. Don’t rush it! Creaming properly gives the bread its tender structure.

Step 4: Add the eggs one at a time, mixing well after each, then stir in the vanilla. The batter should look like pale gold silk at this point.

Step 5: Alternate adding the flour mixture and milk to the butter mixture, beginning and ending with flour. Fold gently—overmixing leads to tough bread, and we’re aiming for melt-in-your-mouth softness.

Step 6: Toss the blueberries with a teaspoon of flour (this little trick keeps them from sinking to the bottom), then fold them into the batter with a spatula. The batter will turn faintly purple in spots, like a watercolor painting.

Pro Tips, Variations, and Substitutions

This blueberry cream cheese bread is wonderfully forgiving, but here are a few ways to make it your own:

  • Berry Swap: Fresh raspberries or blackberries work beautifully if blueberries aren’t in season.
  • Lemon Zest: Add a teaspoon of lemon zest to the batter for a bright, citrusy twist.
  • Nutty Crunch: Fold in ½ cup of chopped walnuts or pecans for extra texture.
  • Dairy-Free Option: Substitute the cream cheese with a plant-based alternative and use almond milk instead of regular milk.

What to Serve It With

This bread is delightful on its own, but here are a few pairing ideas to make it even more special:

  • A warm cup of vanilla chai tea or dark roast coffee for a cozy morning treat.
  • A dollop of whipped cream or a scoop of vanilla ice cream for dessert.
  • Fresh berries and a drizzle of honey for an elegant brunch presentation.

Storage and Reheating Tips

To keep your blueberry cream cheese bread tasting fresh:

  • Room Temperature: Store in an airtight container for up to 2 days.
  • Refrigerator: For longer freshness, refrigerate for up to 5 days.
  • Freezing: Wrap slices tightly in plastic wrap and freeze for up to 3 months. Thaw at room temperature before enjoying.
  • Reheating: Warm slices in the microwave for 10–15 seconds or toast lightly for a crisp edge.

Frequently Asked Questions

Can I use frozen blueberries?

Yes! Just toss them in a bit of flour before folding into the batter to prevent excess moisture.

Why did my cream cheese swirl sink?

If the batter is too thin, the swirl may sink. Make sure your cream cheese mixture is thick and your bread batter isn’t overmixed.

Can I make this into muffins?

Absolutely! Divide the batter into a muffin tin and bake at 375°F for 18–22 minutes.

How do I prevent the bread from sticking to the pan?

Grease the loaf pan well and line it with parchment paper for easy removal.

A Cozy Final Thought

There’s something truly magical about pulling a loaf of freshly baked blueberry cream cheese bread from the oven—the sweet aroma filling the kitchen, the tender crumb studded with juicy berries, and that irresistible cream cheese swirl. Whether you’re sharing it with loved ones or savoring a quiet moment with a slice and a cup of tea, this recipe is sure to become a cherished favorite. Happy baking!

Print
clock clock iconcutlery cutlery iconflag flag iconfolder folder iconinstagram instagram iconpinterest pinterest iconfacebook facebook iconprint print iconsquares squares iconheart heart iconheart solid heart solid icon

Blueberry Cream Cheese Bread


  • Author: Trusted Blog

Description

A moist and flavorful bread swirled with creamy cheese and bursting with fresh blueberries.


Ingredients

Scale

For the Crust:

  • 1 1/2 cups all-purpose flour
  • 1 tsp baking powder
  • 1/4 tsp salt
  • 1/2 cup unsalted butter, softened
  • 3/4 cup granulated sugar
  • 2 large eggs
  • 1 tsp vanilla extract
  • 1/2 cup milk
  • 1 cup fresh blueberries
  • 4 oz cream cheese, softened
  • 1/4 cup powdered sugar

Instructions

1. Prepare the Crust:

  1. Preheat oven to 350°F (175°C). Grease a 9×5-inch loaf pan.
  2. In a bowl, whisk together flour, baking powder, and salt.
  3. In a separate bowl, beat butter and granulated sugar until light and fluffy. Add eggs one at a time, then mix in vanilla.
  4. Alternately add the flour mixture and milk to the butter mixture, beginning and ending with flour.
  5. Gently fold in blueberries.
  6. In another bowl, beat cream cheese and powdered sugar until smooth.
  7. Pour half the batter into the loaf pan. Spoon cream cheese mixture over the batter, then top with remaining batter. Swirl gently with a knife.
  8. Bake for 50-60 minutes or until a toothpick inserted comes out clean. Cool in pan for 10 minutes, then transfer to a wire rack.

Notes

You can customize the seasonings to taste.

Best Russian Buttercream – Smooth and Rich Frosting

best-russian-buttercream-frosting

The Buttercream That Stole My Heart (And My Cake)

There’s something magical about the moment a cake comes together—the layers stacked, the filling nestled between, and then…the frosting. Oh, the frosting! I still remember the first time I tried Russian buttercream at a tiny bakery in St. Petersburg. The snow was falling outside, the samovar was steaming, and one bite of that impossibly smooth, rich frosting made me forget all about the cold. I knew right then I had to master this recipe. After years of tweaking (and many, many cake slices), I’m thrilled to share my perfected version with you.

Why This Buttercream Wins Every Time

Unlike traditional American buttercream that can be overly sweet or Swiss meringue buttercream that requires patience, Russian buttercream strikes the perfect balance. It’s luxuriously smooth, not too sweet, and comes together with just two main ingredients (plus a little love). It pipes like a dream, holds its shape beautifully, and tastes like sweetened whipped butter—because, well, that’s essentially what it is!

Ingredients You’ll Need

  • 4 sticks (2 cups) European-style unsalted butter – The higher fat content (82-86%) is crucial for that velvety texture. My favorite is Plugrá, but any good European butter will do.
  • 1 (14 oz) can sweetened condensed milk – Not evaporated milk! This is the magic ingredient that gives the perfect sweetness and stability.
  • 1 teaspoon pure vanilla extract – Or get creative with almond extract, citrus zest, or even a splash of liqueur!
  • Pinch of fine sea salt – Just a whisper to balance the sweetness.

Step-by-Step: Creating Buttercream Magic

Step 1: Butter at Just the Right Temperature
Take your butter out of the fridge 1-2 hours before starting. You want it softened to about 65°F—cool to the touch but easily indented when pressed. Too warm and your frosting will be greasy; too cold and it won’t incorporate properly.

Step 2: Whip It Good
In the bowl of a stand mixer fitted with the paddle attachment (not the whisk!), beat the butter on medium speed for 5-7 minutes until it’s pale, fluffy, and almost resembles whipped cream. Scrape down the bowl frequently—this step is crucial for that airy texture.

Step 3: The Slow Pour
With the mixer on low speed, drizzle in the sweetened condensed milk about ¼ cup at a time, letting each addition fully incorporate before adding more. This gradual process prevents the frosting from breaking or becoming grainy.

Step 4: Flavor & Finish
Once all the condensed milk is incorporated, add your vanilla and salt. Then crank the mixer up to medium-high for one final minute of whipping—this is when the magic happens and your frosting becomes impossibly light and silky.

Pro Tips for Perfect Russian Buttercream

Creating the smoothest, dreamiest Russian buttercream is easier than you think with these insider secrets:

  • Temperature matters: Your butter should be softened but still cool to the touch – about 65°F (18°C). Too warm and your frosting will be greasy; too cold and it won’t incorporate properly.
  • Slow and steady wins the race: Add the sweetened condensed milk in very small increments, mixing thoroughly between each addition. This prevents separation and creates that signature silky texture.
  • Flavor boost: For extra depth, add a pinch of fine sea salt or 1/2 teaspoon of high-quality vanilla extract (or both!).

Delicious Variations to Try

One of the best things about Russian buttercream is how easily it adapts to different flavors:

  • Chocolate lover’s dream: Mix in 1/4 cup sifted cocoa powder or melted and cooled dark chocolate
  • Citrus delight: Add 1-2 tablespoons of lemon, orange, or lime zest
  • Coffee kick: Stir in 1-2 teaspoons of instant espresso powder dissolved in 1 teaspoon hot water
  • Berry burst: Fold in 1/4 cup freeze-dried berry powder for a natural pop of color and flavor

What to Serve With Russian Buttercream

This versatile frosting pairs beautifully with:

  • Classic sponge cakes or genoise
  • Chocolate cupcakes (especially with that coffee variation!)
  • Red velvet cake for a stunning contrast
  • As a filling between macaron shells
  • Simply spread on toast or scones for an indulgent breakfast

Storage and Reheating Tips

Russian buttercream keeps wonderfully when stored properly:

  • Refrigerator: Store in an airtight container for up to 2 weeks
  • Freezer: Portion and freeze for up to 3 months in sealed bags or containers
  • Reviving chilled frosting: Let come to room temperature, then rewhip for 2-3 minutes to restore fluffy texture
  • Emergency fix: If your frosting separates, place the bowl over a warm water bath for 10 seconds, then rewhip

Frequently Asked Questions

Can I use evaporated milk instead of sweetened condensed milk?

Unfortunately no – the sugar content and consistency of sweetened condensed milk is essential for the proper texture and sweetness. Evaporated milk won’t provide the same results.

Why is my buttercream too soft?

This usually happens if either the butter was too warm or the kitchen is very hot. Pop the bowl in the refrigerator for 15 minutes, then rewhip. Adding 1/4 cup powdered sugar can also help stabilize it.

Can I make this dairy-free?

Yes! Use high-quality plant-based butter (the stick kind works best) and coconut sweetened condensed milk. The flavor will be slightly different but still delicious.

How far in advance can I frost a cake with this?

Russian buttercream holds up beautifully – you can frost cakes 1-2 days ahead when stored in a cool place. For longer storage, refrigerate then bring to room temperature before serving.

A Sweet Final Thought

There’s something magical about Russian buttercream – the way it transforms simple ingredients into clouds of creamy perfection never fails to delight. Whether you’re frosting a birthday cake, filling delicate pastries, or just sneaking a spoonful from the bowl (we won’t tell!), this timeless recipe is sure to become a staple in your kitchen. The rich history and foolproof method make it a frosting you’ll return to again and again, creating sweet memories with every batch.

Print
clock clock iconcutlery cutlery iconflag flag iconfolder folder iconinstagram instagram iconpinterest pinterest iconfacebook facebook iconprint print iconsquares squares iconheart heart iconheart solid heart solid icon

Russian Buttercream


  • Author: Trusted Blog

Description

A simple and rich buttercream made with butter and sweetened condensed milk, perfect for frosting cakes and cupcakes.


Ingredients

Scale

For the Crust:

  • 1 cup unsalted butter, softened
  • 1 can (14 oz) sweetened condensed milk
  • 1 teaspoon vanilla extract
  • Pinch of salt

Instructions

1. Prepare the Crust:

  1. In a large bowl, beat the softened butter until light and fluffy, about 3-4 minutes.
  2. Gradually add the sweetened condensed milk while continuing to beat the mixture.
  3. Add the vanilla extract and a pinch of salt, then beat until smooth and creamy, about 2-3 more minutes.
  4. Use immediately to frost cakes or cupcakes, or store in the refrigerator for up to a week.

Notes

You can customize the seasonings to taste.

Best Coconut Custard Pie – Creamy and Delicious

best-coconut-custard-pie

The Comfort of Coconut Custard Pie

There’s something about the scent of toasted coconut and vanilla that wraps around you like a warm hug. I remember the first time I tasted coconut custard pie—it was at a little roadside diner during a summer road trip, the kind of place where the booths were vinyl and the coffee was bottomless. One bite of that creamy, dreamy pie, and I was hooked. Years later, I set out to recreate that magic in my own kitchen, and after many trials (and a few happy accidents), I landed on this recipe—the best coconut custard pie you’ll ever make. It’s silky, rich, and just sweet enough, with a golden crust that shatters delicately with every forkful.

Ingredients You’ll Need

Before we dive into the magic, let’s gather our ingredients. This pie is simple but relies on quality components for that unforgettable flavor:

  • 1 unbaked 9-inch pie crust – Homemade is lovely, but a good store-bought crust works beautifully too. (No judgment here!)
  • 4 large eggs – Room temperature is key for a smooth custard.
  • 1 ½ cups whole milk – The richness makes all the difference.
  • 1 cup heavy cream – Because custard should be luxuriously creamy.
  • ¾ cup granulated sugar – Just enough sweetness to let the coconut shine.
  • 1 teaspoon pure vanilla extract – The good stuff, please!
  • ¼ teaspoon salt – A pinch to balance the flavors.
  • 1 cup sweetened shredded coconut – Plus a little extra for toasting on top.
  • 2 tablespoons unsalted butter, melted – For that golden, buttery finish.

Let’s Make Some Magic

Now, let’s walk through the steps together. This pie is forgiving, but a few little tricks will ensure perfection:

  1. Preheat your oven to 350°F (175°C). While it warms up, place your unbaked pie crust in a 9-inch pie dish and crimp the edges prettily. No need to pre-bake—this custard bakes up beautifully with the crust.
  2. Whisk the eggs gently. In a large bowl, beat the eggs just until the yolks and whites are blended. Over-whipping can create bubbles, and we want our custard silky-smooth.
  3. Warm the milk and cream. In a saucepan over low heat, warm the milk and cream just until steam rises (don’t let it boil). This helps the sugar dissolve and ensures an even bake.
  4. Combine everything with love. Slowly pour the warm milk mixture into the eggs while whisking constantly. Add the sugar, vanilla, salt, and shredded coconut, then stir in the melted butter. The filling should smell like a tropical dream at this point.

At this stage, your kitchen likely smells heavenly, and you’re just a bake away from pie perfection. But before we slide it into the oven, there’s one more little secret to share…

Pro Tips, Variations, and Substitutions

Making the perfect coconut custard pie is all about balancing flavors and textures. Here are some expert tips and fun twists to try:

  • Toast the coconut for 5-7 minutes at 350°F before adding it to the filling for a deeper, nuttier flavor.
  • For a tropical twist, add a teaspoon of rum extract or a tablespoon of dark rum to the custard mixture.
  • Dairy-free? Substitute full-fat coconut milk for the regular milk and use a plant-based butter alternative.
  • Gluten-free option: Use your favorite gluten-free pie crust or make a crustless version by baking the filling in greased ramekins.
  • Extra creamy texture: Replace ¼ cup of milk with heavy cream for an ultra-luxurious custard.

What to Serve With Coconut Custard Pie

This dreamy pie is delicious on its own, but here are some perfect pairings:

  • A dollop of freshly whipped cream or vanilla ice cream
  • Fresh berries like raspberries or strawberries for a tart contrast
  • A drizzle of caramel or chocolate sauce for extra indulgence
  • A cup of strong coffee or tropical iced tea

Storage and Reheating Tips

To keep your coconut custard pie at its best:

  • Storage: Cover tightly with plastic wrap or store in an airtight container in the refrigerator for up to 4 days.
  • Freezing: Wrap individual slices in plastic wrap and freeze for up to 2 months. Thaw overnight in the refrigerator.
  • Reheating: For best texture, enjoy chilled or at room temperature. If you prefer it warm, heat individual slices in a 300°F oven for 5-7 minutes.

Frequently Asked Questions

Can I use sweetened coconut instead of unsweetened?

Absolutely! Just reduce the sugar in the recipe by about ¼ cup since sweetened coconut already contains sugar.

Why did my custard turn out runny?

This usually happens if the pie didn’t bake long enough or cooled too quickly. Make sure the center jiggles slightly but isn’t liquid when you remove it from the oven, and let it cool gradually at room temperature.

Can I make this pie ahead of time?

Yes! In fact, it’s better when made at least 4 hours ahead so the custard has time to set properly. It keeps beautifully overnight.

Is there a way to prevent the crust from getting soggy?

Try blind baking the crust for 10 minutes before adding the filling, or brush the unbaked crust with beaten egg white and bake for 2 minutes to create a moisture barrier.

A Sweet Final Thought

There’s something truly special about the way this coconut custard pie brings people together. Whether it’s the star of your holiday dessert table or a simple weeknight treat, its creamy texture and tropical flavor never fail to delight. Every bite carries the warmth of home and the joy of sharing something made with love. So go ahead – slice yourself an extra-large piece, pour a cup of something comforting, and savor every delicious moment.

Print
clock clock iconcutlery cutlery iconflag flag iconfolder folder iconinstagram instagram iconpinterest pinterest iconfacebook facebook iconprint print iconsquares squares iconheart heart iconheart solid heart solid icon

Coconut Custard Pie


  • Author: Trusted Blog

Description

A creamy and delicious coconut custard pie with a flaky crust.


Ingredients

Scale

For the Crust:

  • 1 9-inch pie crust (unbaked)
  • 1 cup granulated sugar
  • 1/4 cup all-purpose flour
  • 1/4 teaspoon salt
  • 4 large eggs
  • 2 cups whole milk
  • 1 teaspoon vanilla extract
  • 1 cup shredded sweetened coconut

Instructions

1. Prepare the Crust:

  1. Preheat oven to 350°F (175°C).
  2. In a large bowl, whisk together sugar, flour, and salt.
  3. Beat in eggs one at a time, then stir in milk and vanilla extract until smooth.
  4. Fold in shredded coconut and pour the mixture into the unbaked pie crust.
  5. Bake for 45-50 minutes, or until the custard is set and the top is golden brown.
  6. Let cool completely before serving.

Notes

You can customize the seasonings to taste.