Easy Strawberry Cheesecake Bites – Perfect Party Dessert

easy-strawberry-cheesecake-bites-party

Introduction

Hi there! I’m Emily, the heart and soul behind brekcakes.com. From my earliest memories, the kitchen has always been a place of warmth and creativity. It’s where I discovered the magic of turning simple ingredients into extraordinary meals and learned that the best dishes are often made with love as the main ingredient.

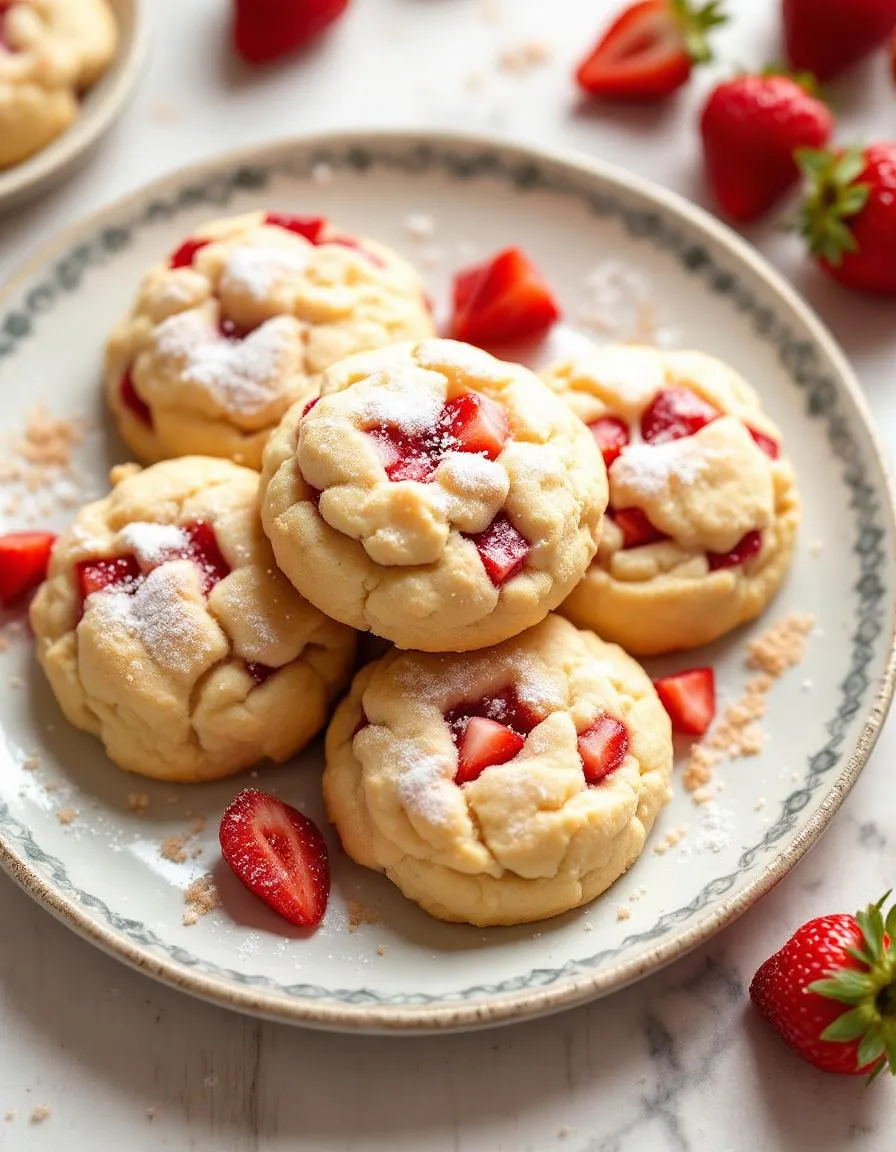
If you’ve ever craved a dessert that’s both indulgent and effortless, you’re in the right place. Today, I’m sharing my irresistible Strawberry Cheesecake Bites—a treat that combines creamy richness with the bright freshness of strawberries. Whether you’re hosting a party or simply treating yourself, these little delights promise to bring joy with every bite. Plus, they’re surprisingly easy to make, even if you’re short on time.

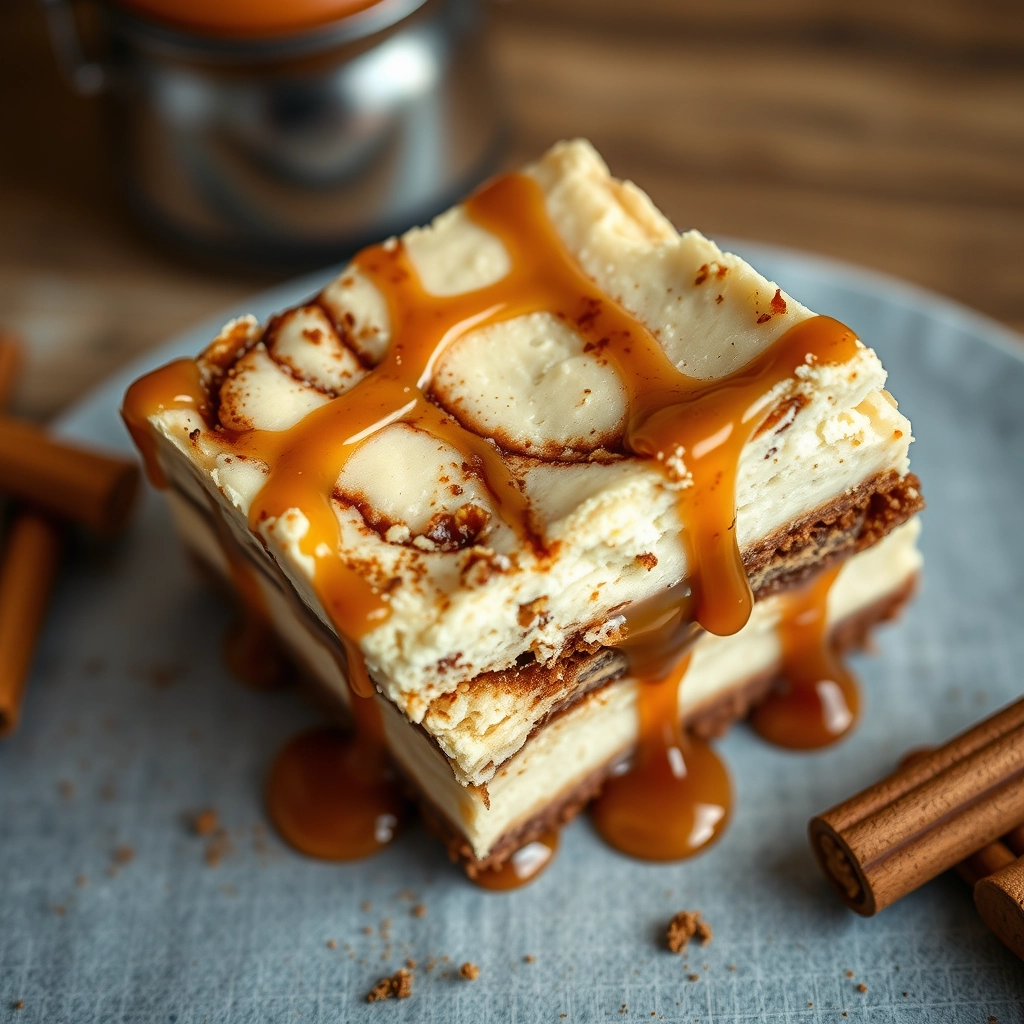
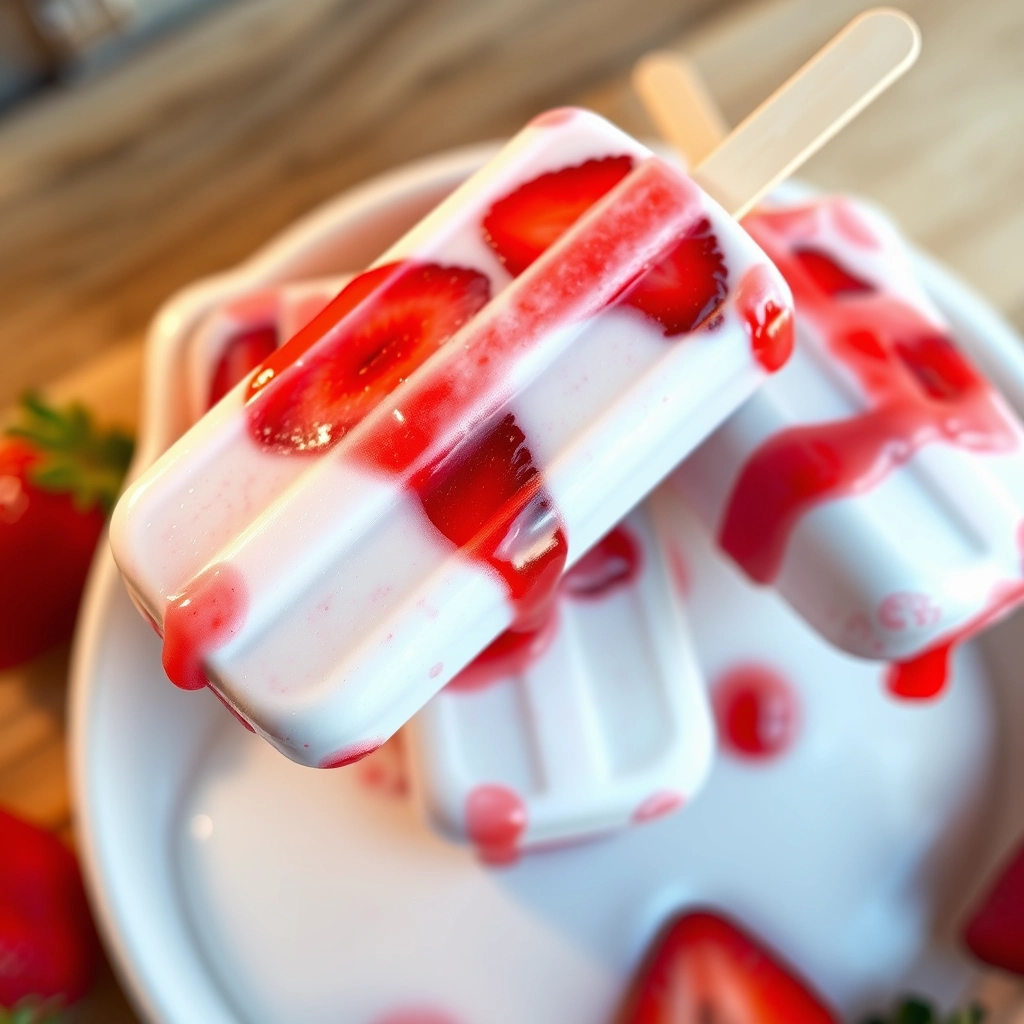
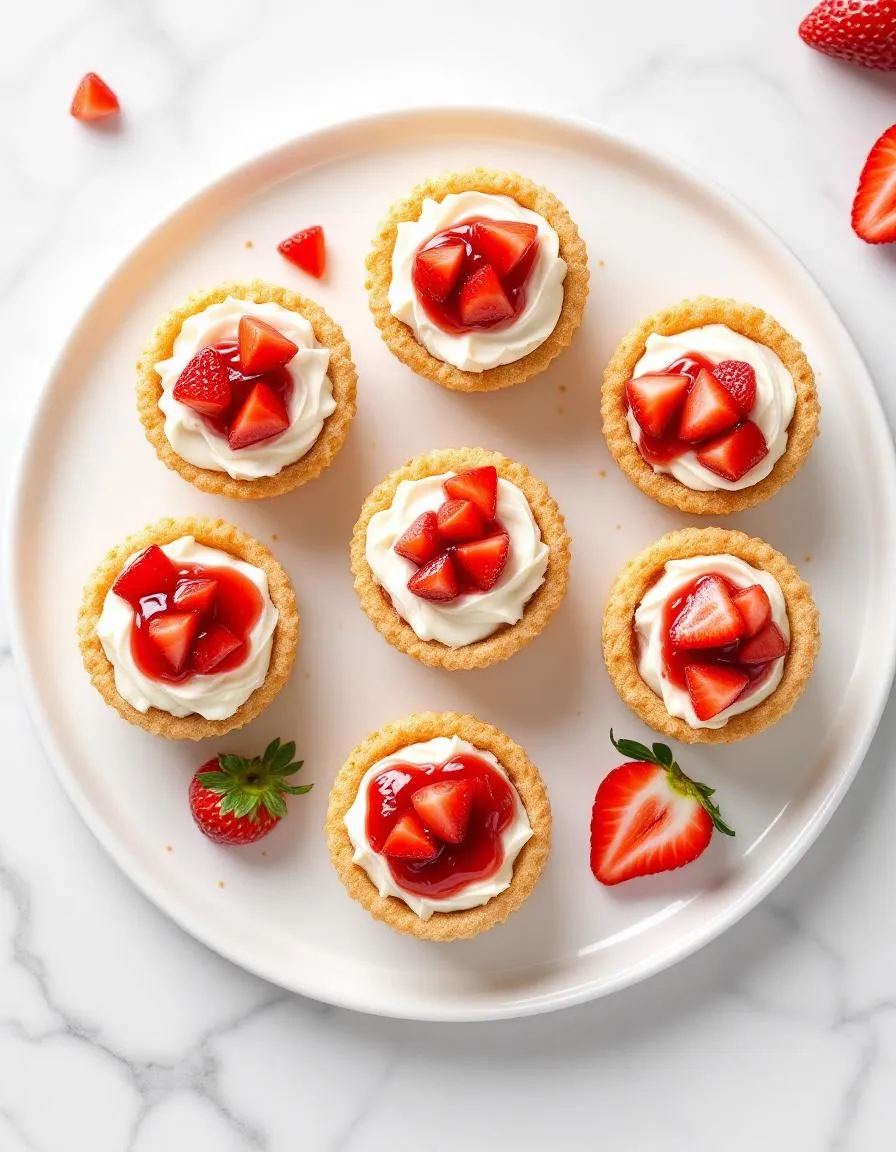
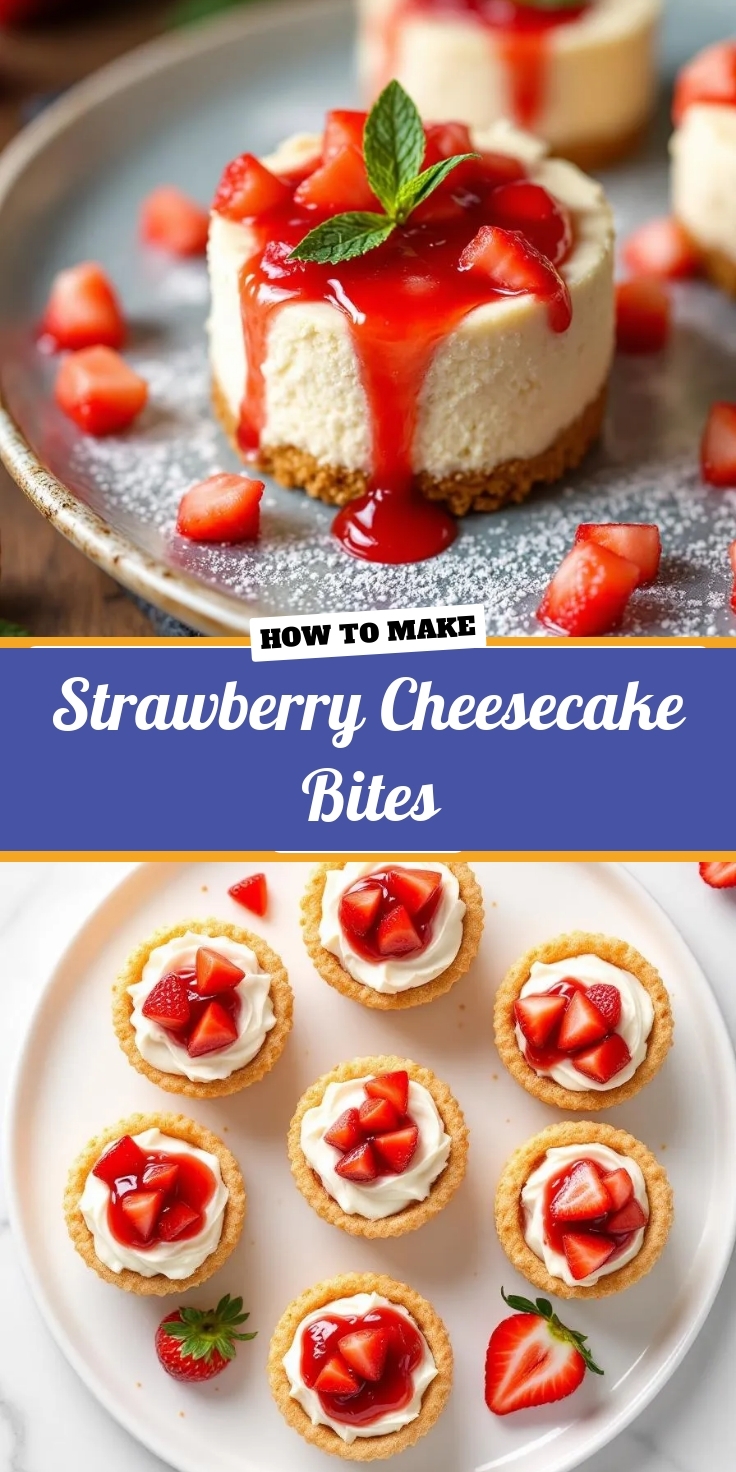
Strawberry Cheesecake Bites are the perfect bite-sized dessert for any occasion. They feature a buttery graham cracker crust, a velvety cream cheese filling, and a juicy strawberry topping that adds a burst of flavor. What makes them special is their versatility. You can serve them at summer picnics, holiday gatherings, or even as a sweet midday pick-me-up. Unlike traditional cheesecakes, these mini versions require no baking, so you can whip them up in minutes. If you love no-bake desserts as much as I do, you’ll adore my Easy No-Bake Desserts collection. And if strawberries are your weakness, don’t miss my Strawberry Lover’s Guide for more fruity inspiration.

Why I Love This Recipe

These Strawberry Cheesecake Bites hold a special place in my heart because they remind me of lazy summer afternoons with my grandmother. She taught me how to balance sweetness with tanginess, and this recipe captures that harmony perfectly. Every time I make them, I’m transported back to her kitchen, where laughter and dessert were always on the menu. Now, I hope they bring the same warmth to your table.

Health and Nutrition

Why it’s good for your body

Strawberry Cheesecake Bites pack a surprising nutritional punch while satisfying your sweet tooth. First, fresh strawberries deliver a hefty dose of vitamin C, which boosts immunity and supports glowing skin. Additionally, the natural antioxidants in strawberries help combat inflammation, making these bites a smarter indulgence. Meanwhile, the cream cheese provides a modest amount of protein and calcium, which strengthens bones and keeps you fuller longer.

Moreover, Strawberry Cheesecake Bites often use a nut-based crust or lighter alternatives, reducing refined flour intake. This means you get more fiber and healthy fats, which aid digestion and heart health. Since portion control is built in, you can enjoy a treat without overdoing it. Finally, the balance of sweet and tart flavors satisfies cravings quickly, so you’re less likely to reach for extra snacks.

Ultimately, Strawberry Cheesecake Bites prove that desserts can be both delicious and nourishing. By choosing quality ingredients, you turn a simple treat into a guilt-free pleasure.

How it fits in a healthy lifestyle

Strawberry Cheesecake Bites fit seamlessly into balanced eating habits. For gluten-free diets, simply swap the crust for almond flour or oats, keeping the recipe celiac-friendly. If you’re watching sugar intake, natural sweeteners like honey or maple syrup work beautifully. These bites also pair well with protein-rich snacks, like Greek yogurt, for a satisfying afternoon pick-me-up.

For heart-healthy choices, the strawberries and nuts in Strawberry Cheesecake Bites provide unsaturated fats and fiber. Check out our gluten-free dessert guide for more smart swaps. Plus, pre-portioning treats helps maintain mindful eating—a key habit for long-term wellness. If you love fruity desserts, our berry smoothie bowls offer another nutrient-packed option. With a little creativity, you can enjoy every bite without compromising your goals.

Print
clock clock iconcutlery cutlery iconflag flag iconfolder folder iconinstagram instagram iconpinterest pinterest iconfacebook facebook iconprint print iconsquares squares iconheart heart iconheart solid heart solid icon

Strawberry Cheesecake Bites


  • Author: Chef Emy

Description

Delicious bite-sized strawberry cheesecake treats perfect for any occasion.
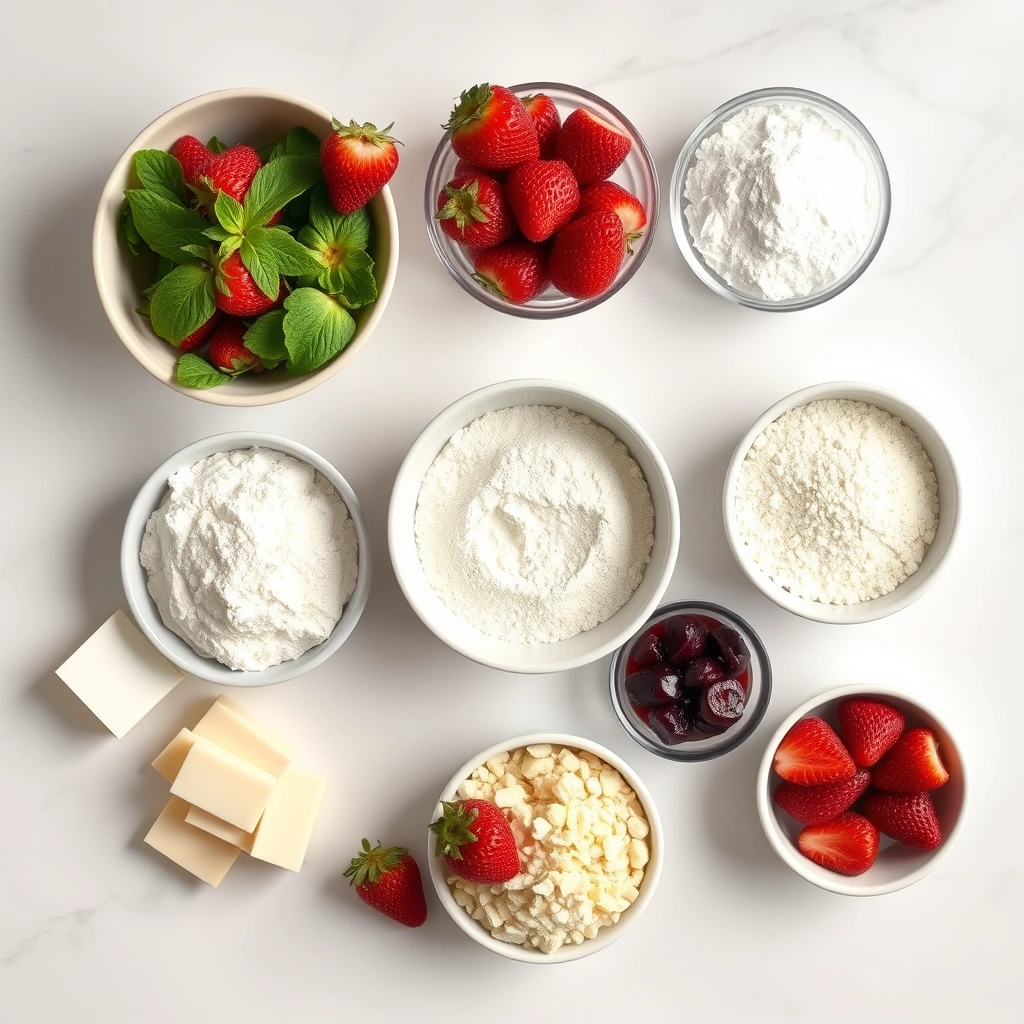
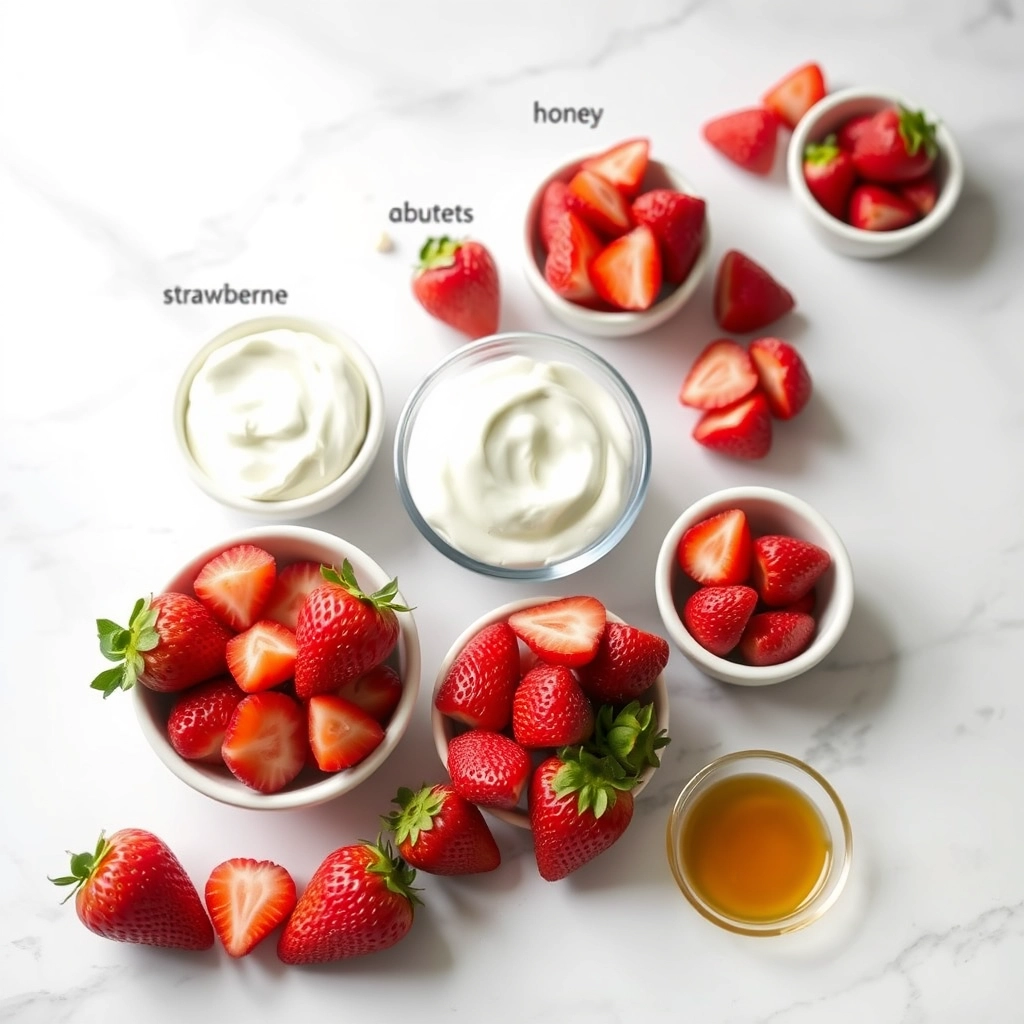
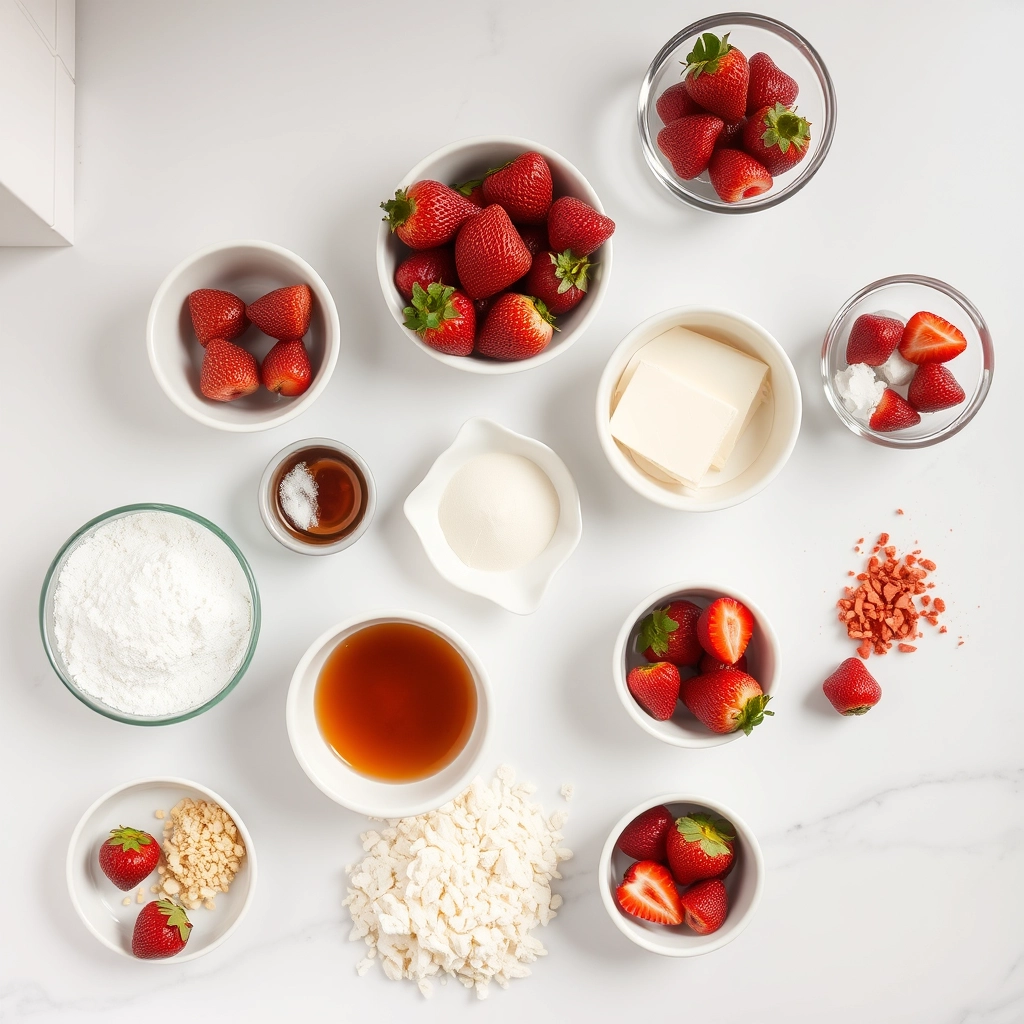

Ingredients

Scale

For the Crust:

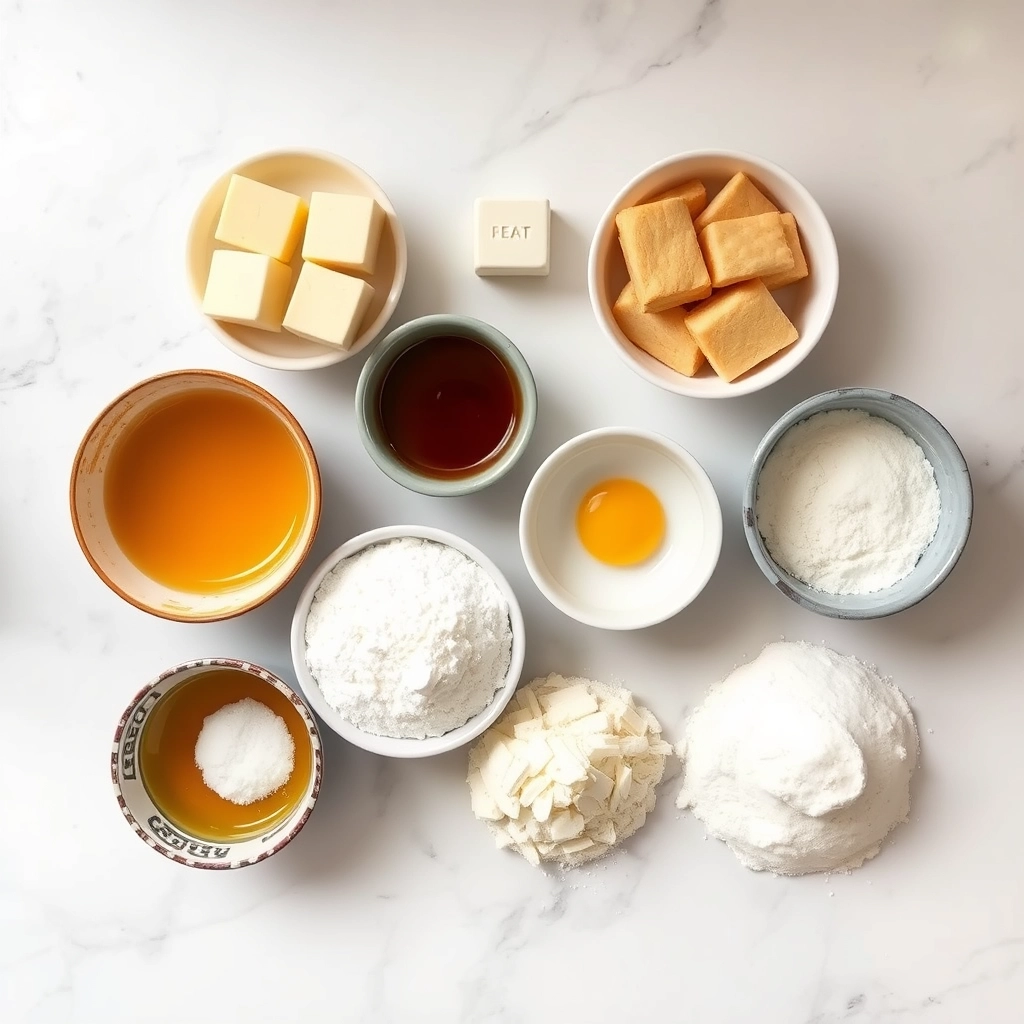
  • 1 cup graham cracker crumbs
  • 2 tbsp melted butter
  • 8 oz cream cheese, softened
  • 1/4 cup powdered sugar
  • 1 tsp vanilla extract
  • 1/2 cup fresh strawberries, diced
  • 1/4 cup strawberry jam

Instructions

1. Prepare the Crust:

  1. In a small bowl, mix graham cracker crumbs with melted butter until well combined. Press into mini muffin tins to form crusts.
  2. In another bowl, beat cream cheese, powdered sugar, and vanilla extract until smooth.
  3. Spoon the cream cheese mixture over the crusts. Top with diced strawberries and a small dollop of strawberry jam. Chill for at least 1 hour before serving.

Notes

You can customize the seasonings to taste.

How to Prepare This Dish

Steps and time-saving tips

Start by preheating your oven to 325°F and lining a mini muffin tin with paper liners. Meanwhile, crush graham crackers into fine crumbs and mix them with melted butter until the texture resembles wet sand. Press a spoonful of this mixture into each liner to form the crust, then bake for 5 minutes to set it. While the crust cools, beat softened cream cheese with sugar until smooth, then whisk in vanilla extract and a touch of lemon juice for brightness. Gently fold in whipped cream to keep the filling light and airy. Spoon this mixture over the crusts, smoothing the tops with a spatula. Chill the Strawberry Cheesecake Bites for at least 2 hours, or until firm. For the topping, slice fresh strawberries and toss them with a bit of sugar to enhance their natural sweetness. Just before serving, place a strawberry slice on each bite and drizzle with melted chocolate or a glaze. If you’re short on time, use store-bought graham cracker crumbs or a piping bag to speed up assembly.

Mistakes I’ve made and learned from

Early on, I overbaked the crust, leaving it too hard to enjoy. Now, I set a timer for 5 minutes and check for a lightly golden edge. Another mishap? Using cold cream cheese, which left lumps in the filling. Lesson learned: always let it soften on the counter first. For more cheesecake tips, check out my guide on achieving the perfect cheesecake texture. Also, if your strawberries release too much juice, pat them dry before topping to avoid soggy bites. For more strawberry prep tricks, see my fresh strawberry tips. These small adjustments make all the difference!

Cultural Connection and Variations

Where this recipe comes from

Strawberry Cheesecake Bites trace their roots to the classic New York cheesecake, but they’ve taken on a life of their own as a portable, party-friendly treat. Originally, cheesecake dates back to ancient Greece, where athletes enjoyed it for energy. However, the addition of strawberries and the bite-sized twist gives this version a modern, playful vibe. In Japan, for example, they often lighten the cream cheese with whipped cream for a fluffier texture, while in Italy, bakers might swap strawberries for Amarena cherries.

My family puts a Southern spin on Strawberry Cheesecake Bites by adding a splash of bourbon to the crust. Meanwhile, in Mexico, some cooks layer them with dulce de leche for extra richness. No matter where you go, people love adapting this dessert to local flavors. Whether you’re serving them at a summer picnic or a winter holiday party, these little bites always feel special.

How it fits in today’s cooking

Today, Strawberry Cheesecake Bites fit perfectly into our fast-paced, shareable-food culture. They’re a hit at baby showers, potlucks, or even as a sweet treat after a weeknight dinner. Modern cooks also love how easy they are to customize—swap the strawberries for blueberries in summer or drizzle them with chocolate for a decadent twist. Plus, with gluten-free and vegan versions popping up, everyone can enjoy them.

Seasonal baking trends keep this recipe fresh, too. During Valentine’s Day, bakers shape them into hearts, while holiday dessert tables often feature peppermint-dusted versions. Whether you’re a beginner or a pro, Strawberry Cheesecake Bites offer endless ways to get creative in the kitchen.

Taste and Texture

What makes it delicious

Strawberry Cheesecake Bites deliver a burst of sweet, tangy joy with every bite. The creamy cheesecake filling melts luxuriously on your tongue, while the buttery graham cracker crust adds a satisfying crunch. Fresh strawberries lend a juicy, slightly tart contrast, and their bright aroma makes each piece irresistible. Meanwhile, a hint of vanilla deepens the richness, creating a dessert that feels indulgent yet light. Whether chilled or slightly softened, Strawberry Cheesecake Bites offer a perfect harmony of textures and flavors you’ll crave again and again.

Boosting the flavor

Elevate your Strawberry Cheesecake Bites with easy tweaks that amplify their deliciousness. For a bolder berry flavor, swirl in homemade strawberry compote before chilling. Alternatively, drizzle them with warm white chocolate or a sprinkle of lemon zest for a zesty twist. If you love contrasting textures, try rolling the edges in crushed graham crackers or toasted nuts. A pinch of cinnamon in the crust can also add warmth, making each bite even more memorable. Get creative—these little treats are a canvas for your favorite flavors!

Tips for Success

Best practices for results

Always chill your cream cheese before mixing to prevent a runny filling for Strawberry Cheesecake Bites. Meanwhile, use room-temperature eggs to help the batter blend smoothly without lumps. For the best texture, press the crust firmly into the pan so it holds together when sliced. Additionally, let the bites cool completely before adding strawberry topping to avoid a soggy base. Finally, refrigerate them for at least two hours to set perfectly every time.

Mistakes to avoid

Avoid overmixing the batter, as this can incorporate too much air and cause cracks in your Strawberry Cheesecake Bites. Instead, gently fold ingredients until just combined. Many bakers also skip lining the pan, but parchment paper ensures easy removal and clean slices. If your cheesecake sinks in the center, check your oven temperature with a thermometer for accuracy. For more troubleshooting, explore our common cheesecake mistakes guide. Also, if the strawberry topping seeps into the crust, try thickening it with a fruit glaze technique for a polished finish.

Serving and Pairing Suggestions

How to serve this dish

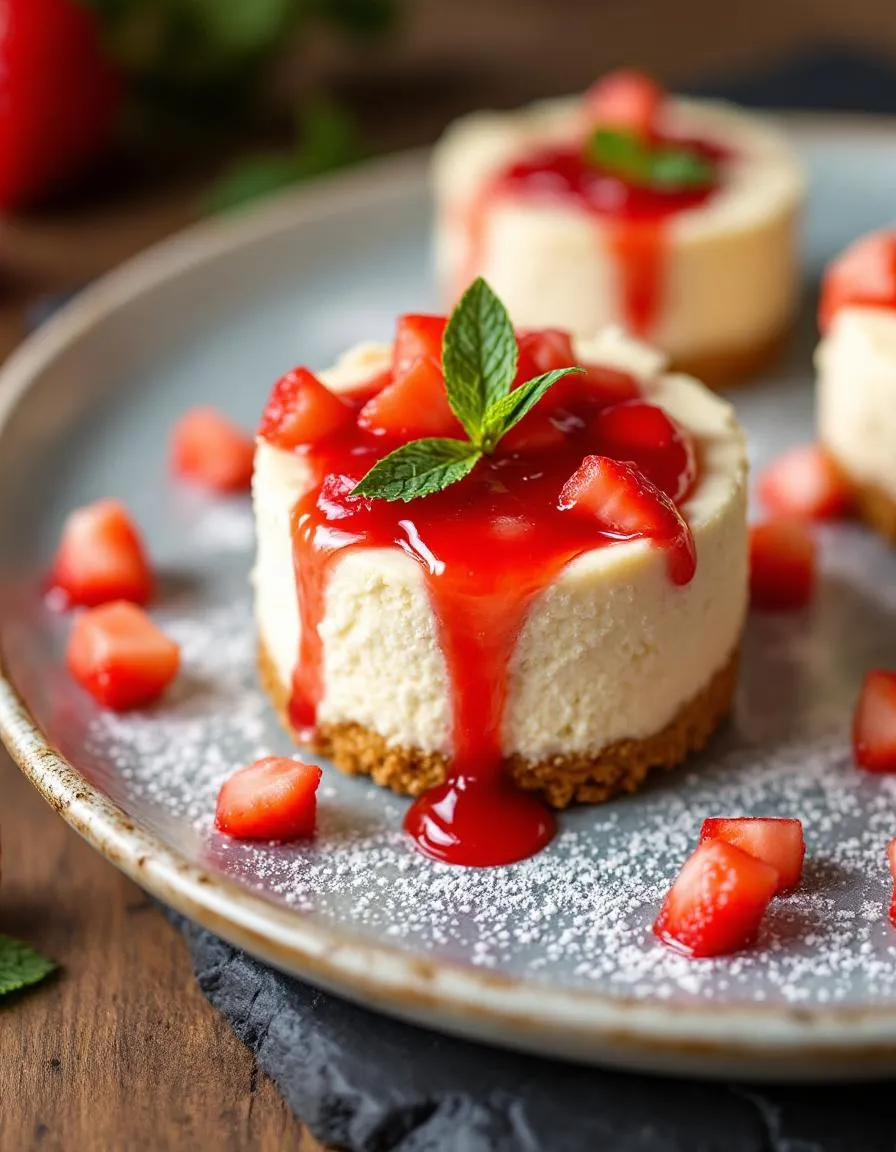
Serve Strawberry Cheesecake Bites on a elegant platter for a stunning dessert display. For a festive touch, arrange them in a circular pattern and garnish with fresh mint leaves or a dusting of powdered sugar. Alternatively, place each bite in mini cupcake liners for easy handling at parties. These bite-sized treats shine at brunches, baby showers, or holiday gatherings. To elevate the presentation, drizzle melted chocolate or a strawberry sauce over the top just before serving.

What goes well with it

Pair Strawberry Cheesecake Bites with a glass of sparkling rosé for a refreshing contrast to their creamy texture. If you prefer non-alcoholic options, try them with a chilled lavender lemonade, which balances the sweetness perfectly. For a richer experience, serve them alongside our homemade whipped cream or a scoop of vanilla bean ice cream. If you love fruity desserts, our mixed berry parfait makes a delightful companion to these cheesecake bites.

How do you make Strawberry Cheesecake Bites without a crust?

You can make crustless Strawberry Cheesecake Bites by blending cream cheese, sugar, and vanilla, then folding in diced strawberries. Pour the mixture into mini muffin liners and chill until firm. These no-crust bites are lighter but still deliver the classic strawberry cheesecake flavor.

Can you freeze Strawberry Cheesecake Bites for later?

Yes, Strawberry Cheesecake Bites freeze well for up to 2 months. Place them in a single layer on a tray to freeze solid, then transfer to an airtight container. Thaw in the fridge for 1–2 hours before serving to maintain their texture.

What’s the best way to decorate Strawberry Cheesecake Bites?

Top Strawberry Cheesecake Bites with fresh strawberry slices, a drizzle of melted chocolate, or a dusting of graham cracker crumbs. For a festive touch, add a tiny mint leaf or edible glitter. These decorations enhance both flavor and presentation.

Are Strawberry Cheesecake Bites gluten-free?

Strawberry Cheesecake Bites can be gluten-free if you use gluten-free graham crackers or skip the crust entirely. Always check labels on ingredients like cream cheese fillers to ensure compliance. Many recipes adapt easily for gluten-free diets without sacrificing taste.

Best Refreshing Lemonade Pie – Easy No-Bake Recipe

best-refreshing-lemonade-pie

Introduction

Hi there! I’m Emily, the heart and soul behind brekcakes.com. From my earliest memories, the kitchen has always been a place of warmth and creativity. It’s where I discovered the magic of turning simple ingredients into extraordinary meals and learned that the best dishes are often made with love as the main ingredient.

There’s something undeniably special about desserts that bring back childhood memories while still feeling fresh and exciting. That’s exactly why I adore this Refreshing Lemonade Pie—it’s a nostalgic yet vibrant treat that instantly lifts your spirits. Whether you’re hosting a summer barbecue or simply craving a sweet escape, this pie delivers a burst of citrusy joy in every bite. Plus, it’s incredibly easy to make, so you can focus on savoring the moment rather than stressing over complicated steps.

Refreshing Lemonade Pie is the perfect balance of tangy and sweet, featuring a creamy filling made with real lemon juice and a buttery graham cracker crust. Unlike heavy desserts that weigh you down, this pie feels light and uplifting, making it ideal for warm-weather gatherings or anytime you need a pick-me-up. Over the years, I’ve shared countless variations of lemon-based treats on the blog, like my Lemon Blueberry Cheesecake Bars, but this pie holds a special place in my heart. It’s a crowd-pleaser that never fails to impress, yet it’s simple enough for beginners to master. If you’re looking for more no-bake inspiration, check out my No-Bake Strawberry Delight, another favorite that pairs beautifully with this zesty dessert.

Why I Love This Recipe

Refreshing Lemonade Pie reminds me of lazy summer afternoons spent with my grandmother, who always had a chilled dessert waiting when I visited. Her version was a little tangier, a little sweeter, and utterly unforgettable. When I recreate it today, I can’t help but smile—it’s like bringing a piece of her kitchen into my own. Beyond the nostalgia, I love how this recipe adapts to any occasion. Whether I’m serving it at a picnic or enjoying a slice with my morning coffee, it never loses its charm. That’s the magic of a truly great dessert: it’s more than just flavors—it’s a feeling.

Health and Nutrition

Why it’s good for your body

Refreshing Lemonade Pie packs a bright, citrusy punch while offering surprising health perks. First, lemons provide a hefty dose of vitamin C, which boosts immunity and supports glowing skin. Additionally, the natural acidity in Refreshing Lemonade Pie aids digestion, making it a light yet satisfying treat. Unlike heavy desserts, this pie won’t weigh you down thanks to its airy texture and zesty flavor.

Moreover, Refreshing Lemonade Pie often includes Greek yogurt or whipped cream, adding a protein boost. These ingredients help stabilize blood sugar levels, so you avoid the energy crash that comes with overly sugary treats. The pie also contains antioxidants from lemon zest, which fight inflammation and promote overall wellness. Whether you enjoy a slice as a midday pick-me-up or a post-dinner delight, it delivers both flavor and nourishment.

Finally, the simplicity of Refreshing Lemonade Pie means you control the sweetness. By using honey or maple syrup instead of refined sugar, you create a dessert that’s both indulgent and mindful. With every bite, you get a burst of flavor and a handful of health benefits.

How it fits in a healthy lifestyle

Refreshing Lemonade Pie fits seamlessly into balanced eating habits. For gluten-free diets, swap traditional crusts for almond flour or oat-based alternatives. Heart-healthy eaters can opt for low-fat dairy or coconut milk to keep saturated fats in check. Since the pie is naturally light, it pairs well with protein-rich meals, like grilled chicken or a quinoa salad, for a satisfying yet nutritious spread.

If you’re watching your sugar intake, try our low-sugar dessert swaps to customize the recipe. For those seeking more gut-friendly options, explore our probiotic-rich ingredients to enhance the pie’s digestive benefits. Whether you’re meal prepping or hosting a gathering, Refreshing Lemonade Pie proves that healthy eating can still feel like a celebration.

Print
clock clock iconcutlery cutlery iconflag flag iconfolder folder iconinstagram instagram iconpinterest pinterest iconfacebook facebook iconprint print iconsquares squares iconheart heart iconheart solid heart solid icon

Refreshing Lemonade Pie


  • Author: Chef Emy

Description

A tangy and sweet no-bake pie with a creamy lemonade filling and a buttery graham cracker crust.


Ingredients

Scale

For the Crust:

  • 1 1/2 cups graham cracker crumbs
  • 1/3 cup granulated sugar
  • 6 tablespoons melted butter
  • 1 can (14 oz) sweetened condensed milk
  • 1/2 cup frozen lemonade concentrate, thawed
  • 1 cup heavy whipping cream
  • 1 tablespoon powdered sugar
  • Lemon slices for garnish (optional)

Instructions

1. Prepare the Crust:

  1. In a bowl, mix graham cracker crumbs, granulated sugar, and melted butter until combined.
  2. Press the mixture firmly into a 9-inch pie dish to form the crust. Chill in the refrigerator for 30 minutes.
  3. In a large bowl, whisk together sweetened condensed milk and lemonade concentrate until smooth.
  4. In a separate bowl, whip the heavy cream and powdered sugar until stiff peaks form.
  5. Gently fold the whipped cream into the lemonade mixture until fully incorporated.
  6. Pour the filling into the chilled crust and spread evenly.
  7. Refrigerate the pie for at least 4 hours or until set.
  8. Garnish with lemon slices before serving if desired.

Notes

You can customize the seasonings to taste.

How to Prepare This Dish

Steps and time-saving tips

Start by crushing graham crackers into fine crumbs for the crust. Meanwhile, melt butter and mix it with the crumbs until they hold together. Press this mixture firmly into a pie dish, then chill it for 10 minutes to set. While the crust firms up, whisk sweetened condensed milk, lemon juice, and lemon zest in a bowl until smooth. For a quicker option, use bottled lemon juice, but fresh juice adds a brighter flavor. Gently fold in whipped topping until fully combined, then pour the filling over the crust. Smooth the top with a spatula and refrigerate the Refreshing Lemonade Pie for at least 4 hours, though overnight is ideal. Before serving, garnish with lemon slices or extra zest for a pop of color. If you’re short on time, freeze the pie for 2 hours instead—just let it soften slightly before slicing.

Mistakes I’ve made and learned from

I once rushed the crust and didn’t press it firmly enough, causing it to crumble when sliced. Now, I use the bottom of a glass to pack it tightly, which works perfectly. Another time, I overmixed the filling, making it too dense. A light hand when folding in the whipped topping keeps the Refreshing Lemonade Pie airy and creamy. If you’re new to no-bake desserts, check out my guide to no-bake desserts for more tricks. Also, don’t skip the chilling time—I learned the hard way that impatience leads to a soupy slice. For more pie-making wisdom, my pie crust secrets post covers all the basics.

Cultural Connection and Variations

Where this recipe comes from

Refreshing Lemonade Pie carries the bright, tangy spirit of summer in every bite. Many trace its roots to Southern U.S. potlucks, where cooks transformed humble ingredients like lemonade concentrate and sweetened condensed milk into a creamy, no-bake delight. However, others argue it evolved from vintage lemon icebox pies, which gained popularity in the early 20th century when refrigeration became widespread. Either way, this dessert quickly became a staple for picnics and family reunions.

Around the world, similar treats put a regional spin on the concept. In Italy, lemon granita fills tart shells for a lighter, icy version. Meanwhile, Mexican chefs might add a pinch of chili powder to balance the sweetness, creating a sweet-heat contrast. Even within the U.S., some families swap graham cracker crusts for shortbread or add a layer of fresh berries. Refreshing Lemonade Pie adapts effortlessly, making it a canvas for creativity.

How it fits in today’s cooking

Today, Refreshing Lemonade Pie remains a crowd-pleaser, especially during scorching summers when no one wants to turn on the oven. Modern cooks streamline it further with store-bought crusts or elevate it with homemade whipped cream and edible flowers. It’s also a star at holiday gatherings, offering a zesty counterpoint to rich dishes like Decadent Chocolate Truffle Cake.

Health-conscious bakers tweak the recipe too, using Greek yogurt or coconut milk for a lighter twist. Others pair it with Classic Vanilla Bean Cupcakes for a dessert spread that balances tangy and sweet. Whether served at a backyard BBQ or a formal dinner, Refreshing Lemonade Pie proves that some classics only get better with time.

Taste and Texture

What makes it delicious

Refreshing Lemonade Pie delivers a burst of bright, tangy sweetness with every bite. The creamy filling melts on your tongue, balancing the zesty punch of fresh lemon juice and the subtle richness of condensed milk. Meanwhile, the buttery graham cracker crust adds a satisfying crunch, creating a perfect contrast to the smooth, velvety center. A hint of vanilla lingers in the background, rounding out the flavors with warmth. Best of all, the citrusy aroma wafting from each slice makes Refreshing Lemonade Pie irresistible even before the first forkful.

Boosting the flavor

For an extra layer of flavor, try folding whipped coconut cream into the filling for a tropical twist. Alternatively, garnish each slice with a sprinkle of toasted coconut or a drizzle of homemade berry sauce to complement the lemon’s tartness. If you love bold contrasts, a pinch of sea salt on top heightens the pie’s sweetness. For more inspiration, explore our guide to easy summer desserts that pair perfectly with Refreshing Lemonade Pie.

Tips for Success

Best practices for results

Always chill your crust for at least 30 minutes before baking to prevent shrinking. Use fresh lemon juice for the filling to give your Refreshing Lemonade Pie its signature bright flavor. Meanwhile, whisk the filling ingredients thoroughly to avoid lumps, and let the pie set fully in the fridge for four hours before slicing. For extra stability, consider adding a teaspoon of cornstarch to the filling mixture. Finally, garnish with zest just before serving to keep it vibrant.

Mistakes to avoid

Avoid overmixing the crust dough, as this can make it tough instead of flaky. If your Refreshing Lemonade Pie filling seems too runny, check that you used full-fat condensed milk—low-fat versions often lack thickness. For more tips on perfecting pie textures, explore our guide to baking troubleshooting. Also, never skip blind baking the crust; a soggy bottom ruins the texture. Learn how to master pie crusts for foolproof results every time.

Serving and Pairing Suggestions

How to serve this dish

Refreshing Lemonade Pie shines when you serve it chilled on a hot summer day. For a stunning presentation, garnish each slice with a twist of lemon zest or a dollop of whipped cream. Alternatively, top it with fresh berries for a pop of color. This pie makes a perfect centerpiece for picnics, potlucks, or even as a light dessert after a barbecue. If you want to elevate the experience, serve it in individual mason jars for a fun, portable treat.

What goes well with it

Pair Refreshing Lemonade Pie with a tall glass of iced tea for a classic summer combo. The subtle bitterness of the tea balances the pie’s tangy sweetness. For a richer contrast, try it alongside our Vanilla Bean Cheesecake, which adds a creamy texture to the mix. If you prefer something lighter, a scoop of Berry Sorbet enhances the citrus notes while keeping the dessert refreshing. Either way, these pairings turn a simple slice into a memorable meal finale.

What is Refreshing Lemonade Pie made of?

Refreshing Lemonade Pie typically combines lemonade concentrate, sweetened condensed milk, whipped topping, and a graham cracker crust. The tangy lemon flavor balances perfectly with the creamy texture, making it a perfect summer dessert.

Can I make Refreshing Lemonade Pie ahead of time?

Yes! Refreshing Lemonade Pie is ideal for making ahead since it needs time to set in the freezer or fridge. Prepare it a day before serving to ensure the perfect firm yet creamy consistency.

How long does Refreshing Lemonade Pie last in the fridge?

Refreshing Lemonade Pie stays fresh in the fridge for 3-4 days when covered tightly. For longer storage, freeze it for up to 2 weeks—just thaw slightly before serving for the best texture.

Can I use fresh lemons instead of lemonade concentrate?

Absolutely! Swap lemonade concentrate for fresh lemon juice and zest, but adjust sweetness with extra sugar or condensed milk. Refreshing Lemonade Pie will still taste bright and citrusy with this homemade twist.

Best Strawberry Shortcake Cookies – Easy Homemade Recipe

best-strawberry-shortcake-cookies

Introduction

Hi there! I’m Emily, the heart and soul behind brekcakes.com. From my earliest memories, the kitchen has always been a place of warmth and creativity. It’s where I discovered the magic of turning simple ingredients into extraordinary meals and learned that the best dishes are often made with love as the main ingredient.

There’s something undeniably special about biting into a dessert that feels like a hug. That’s exactly what Strawberry Shortcake Cookies deliver—a burst of summer sweetness in every crumb. Whether you’re craving a nostalgic treat or need a showstopper for your next gathering, these cookies capture the essence of homemade joy. Plus, they’re easier to make than you might think, so you can enjoy that classic strawberry shortcake flavor without the fuss.

Strawberry Shortcake Cookies combine the best parts of a beloved dessert into a portable, irresistible form. Imagine tender, buttery cookies studded with fresh strawberries and a hint of vanilla, all finished with a delicate dusting of sugar. They’re perfect for picnics, lunchboxes, or even a quiet moment with a cup of tea. What makes them stand out? Unlike traditional shortcake, these cookies bake up soft yet sturdy, so they hold their shape while melting in your mouth. If you’ve ever loved my Classic Vanilla Cupcakes, you’ll adore how these cookies bring that same comforting vibe with a fruity twist. And for those who appreciate a good baking hack, they’re a fantastic way to use up leftover strawberries before they go soft—just like in my Berry Crumble Bars.

Why I Love This Recipe

Strawberry Shortcake Cookies remind me of lazy summer afternoons at my grandma’s house, where she’d let me sneak berries from the bowl before baking. Now, every time I make them, that same childlike excitement bubbles up. The way the strawberries caramelize slightly in the oven, the buttery aroma filling the kitchen—it’s pure happiness on a baking sheet. Most importantly, they’re a recipe that invites you to slow down and savor the little things, something we could all use more of these days.

Health and Nutrition

Why it’s good for your body

Strawberry Shortcake Cookies pack a surprising nutritional punch while satisfying your sweet tooth. First, fresh strawberries add a dose of vitamin C, which supports immune health and skin vitality. Additionally, these cookies often include whole grains or oats, providing fiber to keep digestion smooth and energy levels steady. Unlike overly processed treats, Strawberry Shortcake Cookies balance natural sweetness with wholesome ingredients.

Moreover, strawberries bring antioxidants like anthocyanins, which help combat inflammation. When you enjoy these cookies, you also benefit from the heart-healthy fats in butter or alternative oils, depending on the recipe. Transitioning to a smarter dessert choice, Strawberry Shortcake Cookies deliver flavor without excessive refined sugars. Finally, the inclusion of dairy or plant-based yogurt in some recipes adds a touch of protein and probiotics for gut health.

How it fits in a healthy lifestyle

Strawberry Shortcake Cookies fit seamlessly into a balanced diet when enjoyed mindfully. For a gluten-free version, simply swap traditional flour for almond or oat flour, making them a great option for those with dietary restrictions. If you’re watching sugar intake, reduce the sweetener slightly and let the natural strawberries shine. Pair them with a protein-rich snack like Greek yogurt to create a satisfying, well-rounded treat.

These cookies also align with heart-healthy eating when made with wholesome fats and minimal processed ingredients. For more ideas on balancing indulgences with nutrition, explore our guide to healthy dessert swaps. If you’re meal prepping, bake a batch and store them for portion-controlled sweetness throughout the week. Check out our tips for meal prep snacks to keep your routine both convenient and nutritious.

Print
clock clock iconcutlery cutlery iconflag flag iconfolder folder iconinstagram instagram iconpinterest pinterest iconfacebook facebook iconprint print iconsquares squares iconheart heart iconheart solid heart solid icon

Strawberry Shortcake Cookies


  • Author: Chef Emy

Description

Deliciously soft and fruity cookies that capture the essence of strawberry shortcake in every bite.


Ingredients

Scale

For the Crust:

  • 1 cup fresh strawberries, diced
  • 2 cups all-purpose flour
  • 1/2 cup granulated sugar
  • 1/2 teaspoon baking powder
  • 1/4 teaspoon salt
  • 1/2 cup unsalted butter, softened
  • 1 large egg
  • 1 teaspoon vanilla extract
  • 1/4 cup heavy cream
  • 1 tablespoon turbinado sugar (for sprinkling)

Instructions

1. Prepare the Crust:

  1. Preheat oven to 375°F (190°C) and line a baking sheet with parchment paper.
  2. In a bowl, whisk together flour, granulated sugar, baking powder, and salt.
  3. Beat in softened butter until the mixture resembles coarse crumbs. Add egg, vanilla extract, and heavy cream, mixing until dough forms.
  4. Gently fold in diced strawberries until evenly distributed.
  5. Drop tablespoon-sized portions of dough onto the prepared baking sheet, spacing them 2 inches apart. Sprinkle with turbinado sugar.
  6. Bake for 12-15 minutes or until edges are lightly golden. Let cool on the baking sheet for 5 minutes before transferring to a wire rack.

Notes

You can customize the seasonings to taste.

“`html

How to Prepare This Dish

Steps and time-saving tips

Start by preheating your oven to 350°F and lining a baking sheet with parchment paper. Meanwhile, whisk together the flour, baking powder, and salt in a large bowl. In a separate bowl, cream the butter and sugar until light and fluffy, then beat in the egg and vanilla. Gradually fold the dry ingredients into the wet mixture, but avoid overmixing—just combine until no streaks remain. Gently fold in the diced strawberries, as they’ll soften during baking. Scoop tablespoon-sized dough portions onto the baking sheet, spacing them about two inches apart. Bake for 12-15 minutes until the edges turn golden. Let the Strawberry Shortcake Cookies cool slightly before dusting them with powdered sugar. For a time-saving tip, freeze the dough in advance and bake straight from frozen, adding an extra minute or two to the cooking time. If the strawberries release too much juice, pat them dry with a paper towel before folding them in to prevent soggy cookies.

Mistakes I’ve made and learned from

I once rushed the creaming step, leaving my Strawberry Shortcake Cookies dense instead of light. Now, I beat the butter and sugar for a full three minutes until pale and fluffy—it makes all the difference. Another blunder? Adding wet strawberries straight to the dough, which turned the cookies gummy. After trial and error, I learned to pat them dry first, just like I do for my Strawberry Cupcakes. And if your cookies spread too much, chill the dough for 30 minutes before baking. Trust me, it’s a game-changer, just like the tricks I picked up while perfecting my Classic Shortbread. Small adjustments lead to big improvements!

“`

Cultural Connection and Variations

Where this recipe comes from

Strawberry Shortcake Cookies carry the sweet nostalgia of summer picnics and family gatherings. Originally inspired by classic strawberry shortcake, this portable twist captures the essence of the beloved dessert in bite-sized form. Many trace its roots to American home bakers who wanted a quicker, handheld version of the traditional layered treat. However, you’ll find similar concepts worldwide. In Japan, for example, strawberry-filled wagashi (traditional sweets) highlight seasonal fruit with delicate textures, while British scones often pair strawberries and cream for afternoon tea.

In my family, Strawberry Shortcake Cookies became a staple during berry season. My grandmother would fold fresh strawberries into a buttery dough, creating tender cookies that melted in your mouth. Some Southern bakers add a hint of lemon zest for brightness, while others in the Midwest might swap strawberries for rhubarb in early spring. No matter the variation, the magic lies in balancing juicy fruit with a lightly sweet, crumbly base—a universal comfort that transcends borders.

How it fits in today’s cooking

Today, Strawberry Shortcake Cookies remain a favorite for their versatility. They fit seamlessly into modern lifestyles, whether as a lunchbox treat, a brunch addition, or a last-minute dessert for potlucks. Many home cooks now experiment with gluten-free flours or vegan butter to accommodate dietary needs, proving the recipe’s adaptability. For those who love seasonal baking, these cookies also pair beautifully with other summer fruits—try them with peaches or raspberries for a twist.

You’ll often spot Strawberry Shortcake Cookies at farmers’ markets or bake sales, where their rustic charm wins hearts. They’re also a fantastic way to use overripe strawberries, reducing food waste while creating something delicious. If you’re looking for more inspiration, check out our guide to summer dessert recipes or explore how to bake with seasonal fruit. Whether you stick to tradition or put your own spin on them, these cookies keep the joy of homemade sweets alive in every bite.

Taste and Texture

What makes it delicious

Strawberry Shortcake Cookies deliver a burst of sweet, juicy strawberry flavor in every bite, balanced by the buttery richness of shortcake-inspired dough. The fresh strawberries caramelize slightly while baking, creating pockets of jammy sweetness that contrast beautifully with the tender, crumbly cookie base. A hint of vanilla and a touch of sugar add warmth, while the edges crisp up just enough to give a satisfying bite. Meanwhile, the aroma of baked strawberries and golden butter fills the kitchen, making these cookies irresistible even before the first taste. Whether enjoyed warm or at room temperature, Strawberry Shortcake Cookies offer a nostalgic yet fresh twist on the classic dessert.

Boosting the flavor

For an extra layer of indulgence, try folding in white chocolate chips or drizzling melted vanilla glaze over the cooled cookies. A pinch of lemon zest brightens the strawberry flavor, while a sprinkle of turbinado sugar before baking adds a delicate crunch. If you love pairing berries with herbs, a touch of finely chopped basil or mint elevates the cookies with a refreshing twist. For more inspiration, explore our guide to baking with fresh berries or discover how to perfect your cookie texture with tips from our cookie baking secrets. With these simple tweaks, Strawberry Shortcake Cookies become even more memorable.

Tips for Success

Best practices for results

Always chill the dough for at least 30 minutes before baking Strawberry Shortcake Cookies to prevent spreading. Use fresh strawberries for the best flavor, but pat them dry to avoid excess moisture. For a tender texture, mix the dough just until combined, and line your baking sheet with parchment paper. Finally, let the cookies cool completely on the tray so they firm up perfectly.

Mistakes to avoid

Overmixing the dough can make Strawberry Shortcake Cookies tough, so fold ingredients gently. Also, avoid overcrowding the baking sheet, as this leads to uneven baking. If your cookies turn out too soft, check your oven temperature with a thermometer for accuracy. For more baking tips, explore our guide on perfect cookie texture. And if strawberries release too much liquid, learn how to use fruit in baking without sogginess.

Serving and Pairing Suggestions

How to serve this dish

Serve Strawberry Shortcake Cookies warm for a gooey, melt-in-your-mouth experience. Alternatively, let them cool slightly for a firmer texture. For a stunning presentation, arrange them on a rustic wooden board or a pastel-colored plate. Meanwhile, garnish with fresh strawberry slices and a dusting of powdered sugar to highlight their sweet, fruity flavor. These cookies shine at brunch gatherings, baby showers, or summer picnics. If you want to elevate the experience, serve them alongside a scoop of vanilla ice cream for an irresistible dessert.

What goes well with it

Pair Strawberry Shortcake Cookies with a chilled glass of homemade lemonade for a refreshing contrast to their rich sweetness. Alternatively, try them with a cup of Earl Grey tea, as the bergamot notes beautifully balance the strawberry flavor. For a decadent twist, drizzle them with our vanilla glaze or serve them with a side of whipped cream frosting. Either option adds a creamy texture that enhances every bite.

What are the key ingredients for Strawberry Shortcake Cookies?

The key ingredients for Strawberry Shortcake Cookies include fresh strawberries, flour, sugar, butter, and vanilla extract. Some recipes also incorporate white chocolate chips or a drizzle of glaze to enhance the flavor. These cookies capture the classic taste of strawberry shortcake in a portable, bite-sized treat.

How do you keep Strawberry Shortcake Cookies from getting soggy?

To prevent Strawberry Shortcake Cookies from becoming soggy, pat dry the chopped strawberries with a paper towel before folding them into the dough. You can also bake the cookies until they’re golden around the edges and store them in an airtight container with a parchment paper liner to absorb excess moisture.

Can you freeze Strawberry Shortcake Cookies?

Yes, you can freeze Strawberry Shortcake Cookies for up to 2 months. Place them in a single layer on a baking sheet to freeze individually, then transfer to a freezer-safe bag. Thaw at room temperature before serving to enjoy their fresh-baked texture.

Are Strawberry Shortcake Cookies gluten-free?

Traditional Strawberry Shortcake Cookies are not gluten-free, but you can easily adapt the recipe by using a 1:1 gluten-free flour blend. Ensure all other ingredients, like vanilla extract and baking powder, are certified gluten-free to accommodate dietary needs without sacrificing flavor.

Best Twinkie Cake – Easy Homemade Recipe

best-twinkie-cake-easy-recipe

Introduction

Hi there! I’m Emily, the heart and soul behind brekcakes.com. From my earliest memories, the kitchen has always been a place of warmth and creativity. It’s where I discovered the magic of turning simple ingredients into extraordinary meals and learned that the best dishes are often made with love as the main ingredient.

There’s something undeniably nostalgic about biting into a soft, creamy dessert that takes you straight back to childhood. That’s exactly why I adore Twinkie Cake—it captures the playful spirit of those golden sponge treats while elevating them into a showstopping dessert. Whether you’re hosting a party or simply craving a sweet escape, this recipe delivers joy in every slice. Plus, it’s surprisingly easy to make, even if you’re new to baking.

Twinkie Cake is a dreamy twist on the classic snack cake, featuring layers of fluffy vanilla sponge, rich cream filling, and a velvety whipped topping. Unlike the store-bought version, this homemade delight lets you control the quality of ingredients, ensuring a fresher, more decadent experience. For anyone who grew up loving Twinkies, this cake is a heartfelt homage. Meanwhile, if you’re exploring retro desserts, it’s a must-try. The recipe fits perfectly with brekcakes.com’s mission: approachable, fun, and deeply satisfying. After all, baking should feel like a celebration, not a chore. And if you’re looking for more crowd-pleasers, my easy layer cakes collection has plenty of inspiration.

Why I Love This Recipe

Twinkie Cake holds a special place in my heart because it reminds me of lazy summer afternoons at my grandma’s house. She’d always have a box of Twinkies tucked away for us kids, and the first bite felt like pure happiness. Recreating that magic in cake form lets me share that same warmth with my own family—and now, with you. Every time I bake it, I’m reminded that the simplest treats often carry the sweetest memories.

Health and Nutrition

Why it’s good for your body

Twinkie Cake brings more to the table than just irresistible flavor. For starters, it delivers a quick energy boost thanks to its balanced mix of carbohydrates and fats. While it’s a treat, it also contains small amounts of protein and calcium, which support muscle function and bone health. Plus, the joy of eating Twinkie Cake can actually lift your mood, making it a fun way to indulge responsibly.

Another benefit of Twinkie Cake is its convenience. Because it’s pre-portioned, you can easily enjoy a single serving without overdoing it. Meanwhile, the soft texture makes it a great option for those with sensitive teeth or anyone craving a gentle dessert. Of course, moderation is key, but when you savor Twinkie Cake mindfully, it fits right into a varied diet.

Finally, Twinkie Cake works well as an occasional reward after a workout or a long day. The sugars provide fast-acting fuel, while the lightness prevents that overly full feeling. Whether you pair it with a protein shake or enjoy it solo, Twinkie Cake adds a little sweetness to life without derailing your health goals.

How it fits in a healthy lifestyle

Twinkie Cake might not be a superfood, but it has a place in balanced eating. If you’re watching portions, its individual size helps prevent overindulgence. For gluten-free diets, try pairing it with a gluten-free snack to keep things diverse. Even better, enjoy it alongside a protein-rich option like Greek yogurt to balance blood sugar.

Busy lifestyles also benefit from Twinkie Cake’s grab-and-go appeal. Keep one in your bag for a quick pick-me-up between meetings or errands. And if you’re meal prepping, check out these healthy dessert swaps to round out your plan. Remember, treats like Twinkie Cake taste even better when you savor them as part of an overall nutritious routine.

Print
clock clock iconcutlery cutlery iconflag flag iconfolder folder iconinstagram instagram iconpinterest pinterest iconfacebook facebook iconprint print iconsquares squares iconheart heart iconheart solid heart solid icon

Twinkie Cake


  • Author: Chef Emy

Description

A fun and nostalgic cake inspired by the classic Twinkie snack, featuring a light sponge cake filled with a creamy vanilla center.


Ingredients

Scale

For the Crust:

  • 1 box yellow cake mix
  • 3 large eggs
  • 1/2 cup vegetable oil
  • 1 cup water
  • 1 cup heavy whipping cream
  • 1/2 cup powdered sugar
  • 1 tsp vanilla extract
  • 1/2 cup marshmallow fluff

Instructions

1. Prepare the Crust:

  1. Preheat oven to 350°F (175°C) and grease a 9×13-inch baking pan.
  2. In a large bowl, mix the cake mix, eggs, oil, and water until smooth. Pour into the prepared pan.
  3. Bake for 25-30 minutes or until a toothpick inserted comes out clean. Let cool completely.
  4. In a mixing bowl, whip the heavy cream, powdered sugar, and vanilla until stiff peaks form. Fold in the marshmallow fluff.
  5. Once the cake is cooled, use a knife to create small slits across the top. Pipe or spoon the cream filling into the slits.
  6. Serve immediately or refrigerate until ready to serve.

Notes

You can customize the seasonings to taste.

How to Prepare This Dish

Steps and time-saving tips

Start by preheating your oven to 350°F and greasing a 9×13-inch baking pan. Meanwhile, whisk together the dry ingredients—flour, sugar, baking powder, and salt—in a large bowl. In another bowl, beat the eggs, milk, and vanilla until smooth. Gradually mix the wet ingredients into the dry, stirring just until combined to avoid overworking the batter. Pour the batter into the pan and bake for 25-30 minutes, or until a toothpick comes out clean. Let the cake cool completely before moving to the next step.

While the cake cools, prepare the creamy filling by whipping softened butter, powdered sugar, and marshmallow fluff until light and fluffy. Slice the cake horizontally into two even layers, then spread the filling generously over the bottom layer. Gently place the top layer back on and press down slightly. For a final touch, drizzle the Twinkie Cake with a simple glaze made from powdered sugar and milk. Chill for at least an hour before slicing to let the flavors meld. If you’re short on time, pop the cake in the freezer for 20 minutes instead.

Mistakes I’ve made and learned from

I once rushed the cooling process and tried to slice the Twinkie Cake too soon, which turned into a crumbly mess. Now, I always let it cool completely—patience pays off! Another time, I overmixed the batter, resulting in a dense cake instead of the light, airy texture I wanted. A gentle hand makes all the difference. If you’re new to layering cakes, check out my guide to layering cakes like a pro for foolproof tips. And if your filling isn’t holding its shape, my frosting fixes post has solutions to save the day.

Cultural Connection and Variations

Where this recipe comes from

Twinkie Cake holds a special place in American dessert culture, blending nostalgia with irresistible sweetness. Originally inspired by the iconic Twinkie snack cakes, this dessert transforms the classic treat into a layered masterpiece. Many families, especially in the Midwest and South, serve it at potlucks or birthdays, where its creamy filling and golden sponge layers steal the show. Some bakers even add a drizzle of caramel or a sprinkle of crushed peanuts for extra crunch.

Around the world, similar desserts take on local twists. In Japan, for example, fluffy cream-filled cakes often feature matcha or red bean paste. Meanwhile, in Mexico, tres leches cake shares the same love for moist, milky layers as Twinkie Cake. Back home, my grandma always made hers with a splash of vanilla pudding between layers, turning it into a weekend staple. Whether you grew up with it or just discovered it, Twinkie Cake carries that universal joy of simple, comforting indulgence.

How it fits in today’s cooking

Today, Twinkie Cake remains a crowd-pleaser, especially for those who crave retro desserts with a modern twist. Many home cooks lighten it up by swapping in whipped coconut cream or gluten-free sponge layers, proving its versatility. During holidays, it often appears alongside classic banana bread or salted caramel brownies as part of a dessert spread. Its no-fuss prep also makes it perfect for weeknight treats or last-minute gatherings.

Social media has given Twinkie Cake new life too, with bakers sharing vibrant versions topped with fresh berries or edible flowers. Whether you stick to tradition or experiment, this dessert adapts effortlessly to today’s tastes. After all, some cravings—like that first bite of Twinkie Cake—never go out of style.

Taste and Texture

What makes it delicious

Twinkie Cake delivers a dreamy combination of fluffy, cloud-like layers and rich, velvety cream filling. Each bite melts in your mouth, thanks to the airy sponge cake that soaks up just the right amount of sweetness. Meanwhile, the creamy center adds a luscious contrast, reminiscent of classic Twinkies but with an extra indulgent twist. The vanilla-infused batter offers a warm, buttery aroma, while the whipped filling brings a smooth, almost custard-like texture. Whether served chilled or at room temperature, Twinkie Cake balances lightness and decadence in every slice.

Boosting the flavor

For an even more irresistible Twinkie Cake, try brushing the sponge layers with a touch of rum syrup or vanilla-infused milk before assembling. This trick keeps the cake moist and amplifies its signature flavor. Alternatively, fold a sprinkle of cinnamon or nutmeg into the batter for a cozy, spiced undertone. If you love extra texture, top your Twinkie Cake with toasted coconut flakes or a drizzle of homemade caramel sauce. For a fruity twist, layer fresh strawberries or a smear of raspberry compote between the cake rounds. Small tweaks can transform this dessert into your new signature treat.

Tips for Success

Best practices for results

Always preheat your oven before baking Twinkie Cake to ensure even cooking. For the best texture, use room-temperature ingredients, especially butter and eggs, as they blend more smoothly into the batter. Additionally, lightly grease your pan and line it with parchment paper to prevent sticking. Finally, let the Twinkie Cake cool completely before slicing to avoid crumbling. These simple steps guarantee a moist, fluffy result every time.

Mistakes to avoid

Avoid overmixing the batter, as this can make your Twinkie Cake dense instead of light. Instead, gently fold the ingredients until just combined. Another common mistake is skipping the cooling step, which can cause the cake to fall apart. For more troubleshooting tips, check out our guide on common baking mistakes. If your cake turns out dry, consider brushing it with a simple syrup—this trick and others are covered in our moist cake secrets post.

Serving and Pairing Suggestions

How to serve this dish

Twinkie Cake shines when you serve it with flair. For a fun twist, slice it into individual squares and arrange them on a vintage cake stand. Alternatively, layer it with fresh berries and a dollop of whipped cream for a playful dessert. Since Twinkie Cake has a nostalgic charm, it’s perfect for potlucks, birthday parties, or even as a sweet surprise at brunch. To make it extra inviting, drizzle caramel sauce over the top or sprinkle crushed peanuts for added texture.

What goes well with it

Pair Twinkie Cake with a cold glass of milk for a classic combo that highlights its creamy filling. If you prefer something bolder, try it with a scoop of homemade vanilla ice cream to balance the cake’s sweetness. For a cozy treat, serve it alongside a warm mug of spiced chai latte, which adds a hint of warmth to every bite. Each pairing enhances the light, fluffy texture of Twinkie Cake while keeping the flavors harmonious.

What is a Twinkie Cake made of?

A Twinkie Cake typically combines the flavors of the classic snack with a homemade twist. It often includes layers of sponge cake filled with a creamy vanilla or custard filling, mimicking the iconic Twinkie texture. Some recipes even incorporate actual Twinkies for extra authenticity.

How do you keep a Twinkie Cake moist?

To keep your Twinkie Cake moist, brush the cake layers with simple syrup before assembling. Store it in an airtight container at room temperature for up to 2 days, or refrigerate if using perishable fillings. The creamy filling in a Twinkie Cake helps maintain moisture naturally.

Can you make a Twinkie Cake without Twinkies?

Absolutely! A homemade Twinkie Cake replicates the flavor without using actual Twinkies. The key is using a light sponge cake and rich vanilla filling. This version often tastes fresher and lets you control the ingredients while keeping that nostalgic Twinkie Cake appeal.

Why is my Twinkie Cake filling runny?

A runny filling in your Twinkie Cake usually means the custard or buttercream wasn’t thick enough before assembly. Let fillings chill thoroughly, and consider adding cornstarch or powdered sugar to stabilize them. Proper cooling ensures your Twinkie Cake holds its shape when sliced.

Easy Cinnamon-Sugar Air Fryer Banana Chips Recipe

easy-cinnamon-sugar-air-fryer-banana-chips

A Sweet Memory and a Healthier Twist

There’s something about the scent of cinnamon and sugar that instantly transports me back to my grandmother’s kitchen. She’d always have a jar of homemade banana chips tucked away, ready to satisfy our after-school cravings. But let’s be honest—her deep-fried version, while delicious, wasn’t exactly what you’d call a health food. That’s why I set out to recreate that nostalgic flavor with my air fryer, and friends, the result is nothing short of magical.

These cinnamon-sugar banana chips are everything you want in a snack: crisp, sweet with just the right hint of spice, and guilt-free enough that you can pop them like candy. Plus, they make your kitchen smell like a cozy autumn afternoon, even in the middle of July. Let me show you how simple it is to turn humble bananas into golden, shatteringly crisp delights.

Ingredients You’ll Need

  • 3-4 just-ripe bananas – Look for bananas that are yellow with maybe a freckle or two. Too green and they won’t be sweet enough; too ripe and they’ll be tricky to slice thinly.
  • 1 tablespoon lemon juice – Our little secret to keeping the bananas from browning too much. Fresh is best, but bottled works in a pinch!
  • 2 tablespoons granulated sugar – I like using regular white sugar for that classic crunch, but coconut sugar works beautifully too if you want a deeper flavor.
  • 1 teaspoon ground cinnamon – The soul of this recipe! Ceylon cinnamon is my favorite for its delicate sweetness.
  • A pinch of salt – Just a whisper to balance all that sweetness.
  • Cooking spray or melted coconut oil – For that perfect crispness without sticking.

Let’s Make Some Magic

Step 1: First, let’s prep our bananas. Slice them into thin, even rounds—about 1/8 inch thick is perfect. I find a sharp chef’s knife works better than a mandoline here (bananas can be slippery little things!). As you slice, arrange the rounds in a single layer on a plate and drizzle lightly with lemon juice. This keeps them looking pretty and bright.

Step 2: In a small bowl, whisk together your sugar, cinnamon, and that all-important pinch of salt. Take a deep breath—that aroma is happiness in a bowl. Set this aside for now; we’ll come back to it when the bananas are perfectly crisp.

Step 3: Lightly spray your air fryer basket with oil or brush with melted coconut oil. Arrange the banana slices in a single layer—no overlapping! They need their personal space to crisp up properly. You’ll likely need to work in batches unless you have a very large air fryer.

Step 4: Set your air fryer to 300°F (150°C). This lower temperature is key—it allows the bananas to dry out and crisp up without burning. Cook for about 8 minutes, then carefully flip each slice (I use silicone-tipped tongs for this delicate operation). Continue cooking for another 6-8 minutes until golden and crisp at the edges. They’ll crisp up more as they cool, so don’t worry if they seem slightly soft when hot.


Easy Cinnamon-Sugar Air Fryer Banana Chips Recipe

Pro Tips, Variations, and Substitutions

Making these cinnamon-sugar banana chips is as easy as it gets, but here are a few extra tips to ensure perfection every time:

  • Slice evenly: Use a mandoline or sharp knife to ensure all banana slices are the same thickness for even cooking.
  • Adjust sweetness: If you prefer less sugar, simply reduce the amount or swap it for a sugar substitute like monk fruit or coconut sugar.
  • Spice it up: Add a pinch of nutmeg or cardamom to the cinnamon-sugar mix for extra warmth.
  • Go savory: Skip the sugar and try a sprinkle of chili powder or smoked paprika for a unique twist.

What to Serve With Banana Chips

These crispy, sweet banana chips are incredibly versatile. Here are a few delicious pairings:

  • Enjoy them as a snack on their own—perfect for mid-day cravings!
  • Serve alongside yogurt or oatmeal for a crunchy topping.
  • Pair with a scoop of vanilla ice cream for a simple dessert.
  • Add them to trail mix for a sweet and satisfying boost.

Storage and Reheating Tips

To keep your banana chips fresh and crispy:

  • Storage: Store in an airtight container at room temperature for up to 3 days. If they soften, a quick re-crisp in the air fryer will bring them back to life.
  • Freezing: These chips don’t freeze well, as they can become soggy when thawed—best enjoyed fresh!

Frequently Asked Questions

Can I use ripe bananas?

Yes! Just note that very ripe bananas will be sweeter and may brown slightly faster in the air fryer.

Why are my banana chips not crispy?

If your chips are chewy, they may need more time in the air fryer. Cook in 2-minute increments until they reach your desired crispness.

Can I make these in the oven?

Absolutely! Bake at 200°F (95°C) for 1.5–2 hours, flipping halfway, until crispy.

Do I need to peel the bananas before slicing?

Yes! Always peel bananas before slicing—the skins are not edible in this recipe.

Final Thoughts

There’s something so comforting about the aroma of cinnamon and sugar filling the kitchen as these banana chips crisp up in the air fryer. Whether you’re looking for a wholesome snack, a crunchy topping, or just a little sweet treat, this recipe is sure to delight. Happy air frying, and enjoy every crispy bite!


Print

clock clock iconcutlery cutlery iconflag flag iconfolder folder iconinstagram instagram iconpinterest pinterest iconfacebook facebook iconprint print iconsquares squares iconheart heart iconheart solid heart solid icon

Cinnamon-Sugar Air Fryer Banana Chips


  • Author: Trusted Blog

Description

Crispy, sweet, and lightly spiced banana chips made easily in the air fryer.


Ingredients

Scale

For the Crust:

  • 2 large bananas (slightly underripe)
  • 1 tbsp granulated sugar
  • 1/2 tsp ground cinnamon
  • 1 tsp lemon juice
  • 1/2 tbsp melted butter or coconut oil

Instructions

1. Prepare the Crust:

  1. Preheat air fryer to 300°F (150°C).
  2. Slice bananas into 1/8-inch thick rounds. Toss with lemon juice to prevent browning.
  3. In a small bowl, mix sugar and cinnamon. Brush banana slices lightly with melted butter, then sprinkle with cinnamon-sugar mixture.
  4. Arrange banana slices in a single layer in the air fryer basket (work in batches if needed).
  5. Air fry for 12-15 minutes, flipping halfway, until golden and crispy. Let cool completely to crisp up further.

Notes

You can customize the seasonings to taste.

Best Caramel Crunch Cheesecake Fruit Salad Recipe

best-caramel-crunch-cheesecake-salad

The Cheesecake Fruit Salad That Stole My Heart (And Every Potluck)

There’s something magical about a dessert that feels like a hug in a bowl—especially when it involves cheesecake and summer-ripe fruit. I first stumbled upon this caramel crunch cheesecake fruit salad at a neighborhood barbecue last year, where it sat unassumingly next to a tower of chocolate cupcakes. One bite, and I abandoned all polite party etiquette, hovering near the bowl like a dessert guardian. The hostess laughed and whispered, “It’s the caramel sauce—it makes people forget their manners.” She was right. Now, it’s my go-to for lazy Sunday brunches, baby showers, and those “I need something sweet STAT” moments. Let’s make it together!

Ingredients You’ll Want to Hug

  • 2 cups fresh strawberries – Hulled and quartered. Their juicy sweetness is the backbone of this salad.
  • 1 cup pineapple chunks – Fresh or canned (just drain well!). That tropical tang cuts through the richness.
  • 1 cup green grapes – Halved. They add a lovely pop of texture.
  • 1 banana – Sliced (toss in lemon juice to prevent browning if prepping ahead).
  • 1 cup cheesecake pudding mix – The secret weapon! Instant or cook-and-serve both work.
  • 1 ½ cups cold milk – Whole milk makes it extra creamy, but any kind will do.
  • 1 cup whipped topping – Thawed. Fold it in gently for cloud-like fluffiness.
  • ½ cup caramel sauce – Store-bought or homemade. Warm it slightly for drizzling magic.
  • ½ cup crushed graham crackers – Toast them lightly for extra crunch. (Pro tip: add a pinch of cinnamon!)

Let’s Make the Magic Happen

Step 1: The Fruit Fiesta
In a large bowl, gently toss together the strawberries, pineapple, grapes, and banana. If you’re prepping ahead, hold off on the banana until serving—it’s a bit of a diva and browns easily. I like to let the fruit sit for 10 minutes to mingle their juices—it’s like a pre-party for flavors.

Step 2: Cheesecake Clouds
In another bowl, whisk the cheesecake pudding mix with cold milk until thickened (about 2 minutes). Let it sit for 5 minutes to set—patience, darling! Then, fold in the whipped topping with a spatula until just combined. Overmixing deflates the fluff, and we want pillowy perfection.

Step 3: The Grand Assembly
Pour the cheesecake mixture over the fruit and fold gently—think of it as tucking them into a creamy blanket. Drizzle half the caramel sauce over the top (resist drinking it straight from the jar… or don’t, I won’t judge). Sprinkle with crushed graham crackers right before serving—they stay crunchier that way.

Pro Tips, Variations, and Substitutions

This Caramel Crunch Cheesecake Fruit Salad is wonderfully versatile, so don’t be afraid to make it your own! Here are some ideas to customize it:

  • Fruit Swap: Swap out any fruit for what’s in season—mangoes, kiwi, or even pomegranate arils would be delicious.
  • Lighter Option: Use Greek yogurt instead of cream cheese for a tangier, protein-packed twist.
  • Extra Crunch: Add toasted coconut flakes or chopped nuts like pecans for an extra layer of texture.
  • Dairy-Free: Substitute the cream cheese with a dairy-free alternative and use coconut whipped cream.

What to Serve It With

This fruit salad is a star on its own, but it also pairs beautifully with so many dishes! Try serving it alongside:

  • A warm slice of coffee cake or cinnamon rolls for a decadent brunch.
  • Grilled meats like chicken or pork chops—the sweetness balances savory flavors perfectly.
  • A scoop of vanilla ice cream for an indulgent dessert.

Storage and Reheating Tips

To keep your fruit salad fresh and delicious:

  • Refrigerate: Store in an airtight container for up to 2 days. The caramel sauce may thicken, so give it a gentle stir before serving.
  • No Reheating Needed: This dish is best enjoyed cold, straight from the fridge!
  • Prep Ahead: You can chop the fruit and mix the cheesecake filling a day in advance, but wait to assemble until just before serving to keep the texture perfect.

Frequently Asked Questions

Can I use frozen fruit?

Fresh fruit is best for texture, but if you must use frozen, thaw and drain it well to avoid excess liquid.

How do I prevent the apples from browning?

Toss them in a little lemon juice before mixing—it keeps them fresh and adds a nice zing!

Can I make this ahead for a party?

Absolutely! Prep all components separately and assemble an hour before serving for the best results.

What if I don’t have caramel sauce?

Honey or maple syrup makes a lovely substitute—just drizzle lightly to taste.

Final Thoughts

There’s something truly magical about this Caramel Crunch Cheesecake Fruit Salad—it’s creamy, crunchy, sweet, and fresh all at once. Whether you’re serving it at a summer picnic, a holiday brunch, or just treating yourself on a cozy afternoon, it’s sure to bring smiles all around. I hope this recipe becomes a cherished favorite in your home, just like it is in mine. Happy cooking, and enjoy every delicious bite!

Print
clock clock iconcutlery cutlery iconflag flag iconfolder folder iconinstagram instagram iconpinterest pinterest iconfacebook facebook iconprint print iconsquares squares iconheart heart iconheart solid heart solid icon

Caramel Crunch Cheesecake Fruit Salad


  • Author: Trusted Blog

Description

A delightful fruit salad with creamy cheesecake flavors and a caramel crunch topping.


Ingredients

Scale

For the Crust:

  • 2 cups strawberries, sliced
  • 1 cup blueberries
  • 1 cup grapes, halved
  • 1 banana, sliced
  • 1 apple, diced
  • 8 oz cream cheese, softened
  • 1/4 cup powdered sugar
  • 1 tsp vanilla extract
  • 1/2 cup caramel sauce
  • 1/2 cup granola or crushed graham crackers

Instructions

1. Prepare the Crust:

  1. In a large bowl, combine strawberries, blueberries, grapes, banana, and apple.
  2. In a separate bowl, beat cream cheese, powdered sugar, and vanilla until smooth.
  3. Fold the cream cheese mixture into the fruit until evenly coated.
  4. Drizzle caramel sauce over the top and sprinkle with granola or crushed graham crackers.
  5. Chill for at least 30 minutes before serving.

Notes

You can customize the seasonings to taste.

Best Cinnamon Roll Cheesecake Bars Recipe

best-cinnamon-roll-cheesecake-bars

The Cozy Magic of Cinnamon Roll Cheesecake Bars

There’s something about the scent of cinnamon swirling through the kitchen that feels like a hug from the inside out. Maybe it’s the way it mingles with butter and sugar, or how it instantly transports me back to lazy Sunday mornings when my grandmother would pull a pan of golden cinnamon rolls from the oven. But let’s be honest—sometimes, you want that same warm, spiced comfort without the fuss of yeast and rising dough. That’s where these Cinnamon Roll Cheesecake Bars come in: all the nostalgia, half the effort, and twice the decadence.

Ingredients You’ll Need

Before we dive in, let’s gather our ingredients. Trust me, every one of these plays a starring role in creating that perfect balance of creamy, spiced, and buttery goodness.

  • For the crust:
    • 2 cups all-purpose flour (spooned and leveled—no packing!)
    • ½ cup granulated sugar (just enough sweetness to complement the tangy cheesecake)
    • 1 tsp baking powder (for a tender crumb)
    • ½ tsp salt (don’t skip this—it makes all the flavors pop)
    • ¾ cup unsalted butter, cold and cubed (the key to a flaky, shortbread-like base)
    • 1 large egg (our binding agent, but also adds richness)
  • For the cheesecake layer:
    • 16 oz cream cheese, softened (full-fat, please—this is no time for shortcuts)
    • ½ cup granulated sugar (adjust to your sweetness preference)
    • 1 tsp vanilla extract (the secret whisper of warmth)
    • 1 large egg (room temperature blends smoother)
  • For the cinnamon swirl:
    • ¼ cup unsalted butter, melted (hello, glossy ribbons of flavor)
    • ½ cup brown sugar (for that deep, caramel-like sweetness)
    • 1 tbsp ground cinnamon (the heart and soul of the recipe)

Let’s Bake Some Comfort

Now that we’ve got everything ready, it’s time to create magic. Preheat your oven to 350°F (175°C) and line an 8×8-inch baking pan with parchment paper, leaving some overhang for easy lifting later. (Pro tip: A light spritz of cooking spray under the parchment keeps it from sliding around.)

  1. Make the crust: In a food processor or large bowl, pulse (or cut with a pastry cutter) the flour, sugar, baking powder, and salt together. Add the cold butter cubes and blend until the mixture resembles coarse crumbs. Add the egg and pulse just until the dough starts to clump—don’t overmix! Press this evenly into your prepared pan, using the back of a spoon or your fingers to create a firm, even layer. Par-bake for 15 minutes until just set. This prevents a soggy bottom—a tragedy we shall avoid!
  2. While the crust bakes, whip up the cheesecake layer: In a stand mixer or with a hand mixer, beat the cream cheese until smooth and creamy. Add the sugar and vanilla, mixing until no lumps remain. Scrape down the sides, then add the egg, mixing just until combined. Overbeating incorporates too much air, which can lead to cracks. We want velvety, not puffy!

At this point, your kitchen should smell like buttery heaven, and the crust will be ready for its next act. Pour the cheesecake batter over the warm crust, smoothing it gently with an offset spatula. Now, for the pièce de résistance…


Pro Tips, Variations, and Substitutions

These cinnamon roll cheesecake bars are already a dream come true, but here are a few ways to make them even more special:

  • For extra gooeyness: Drizzle caramel or cream cheese glaze over the top before serving.
  • Nut lovers: Sprinkle chopped pecans or walnuts between the layers for a delightful crunch.
  • Dairy-free option: Use vegan cream cheese and plant-based butter—just be sure to adjust baking time slightly.
  • Spice it up: Add a pinch of cardamom or nutmeg to the cinnamon sugar for a warm, aromatic twist.

What to Serve With Cinnamon Roll Cheesecake Bars

These bars are heavenly on their own, but if you want to take dessert to the next level, try pairing them with:

  • A scoop of vanilla bean ice cream (the melty contrast is divine!)
  • Freshly brewed coffee or a chai latte
  • Warm spiced cider for a cozy fall treat

Storage and Reheating Tips

To keep your bars tasting fresh:

  • Room temp: Store in an airtight container for up to 2 days.
  • Refrigerator: Keep chilled for up to 5 days—let sit at room temperature for 15 minutes before serving.
  • Freezer: Wrap tightly and freeze for up to 3 months. Thaw overnight in the fridge.
  • Reheating: Warm individual slices in the microwave for 10-15 seconds for that fresh-from-the-oven feel.

Frequently Asked Questions

Can I make these ahead of time?
Absolutely! These bars actually taste even better the next day as the flavors meld together. Just store them properly and add any glazes right before serving.

Why is my cheesecake layer cracking?
This usually happens from overmixing or rapid temperature changes. Make sure all ingredients are room temperature, don’t overbeat the batter, and let the bars cool gradually in the turned-off oven with the door slightly ajar.

Can I use puff pastry instead of crescent dough?
You can, but the texture will be flakier and less soft. If using puff pastry, par-bake it for 5 minutes before adding the cheesecake layer to prevent sogginess.

How do I get clean slices?
Use a sharp knife dipped in hot water and wiped clean between cuts. For extra neat bars, chill the whole pan for 30 minutes before slicing.

A Sweet Final Thought

There’s something magical about combining two beloved desserts into one irresistible treat. These cinnamon roll cheesecake bars are perfect for lazy weekend brunches, holiday gatherings, or just because you deserve something special. As the sweet aroma of cinnamon fills your kitchen and that first creamy, gooey bite melts in your mouth, you’ll know—this is what happy tastes like. Now go forth and bake with joy!


Print

clock clock iconcutlery cutlery iconflag flag iconfolder folder iconinstagram instagram iconpinterest pinterest iconfacebook facebook iconprint print iconsquares squares iconheart heart iconheart solid heart solid icon

Cinnamon Roll Cheesecake Bars


  • Author: Trusted Blog

Description

A delicious fusion of cinnamon rolls and cheesecake in easy-to-serve bars.


Ingredients

Scale

For the Crust:

  • 1 can refrigerated cinnamon roll dough (8 rolls)
  • 16 oz cream cheese, softened
  • 1/2 cup granulated sugar
  • 1 tsp vanilla extract
  • 1 large egg
  • 1/4 cup butter, melted
  • 1/4 cup brown sugar
  • 1 tsp ground cinnamon

Instructions

1. Prepare the Crust:

  1. Preheat oven to 350°F (175°C). Grease a 9×9 inch baking pan.
  2. Separate cinnamon rolls and press them into the bottom of the prepared pan to form a crust.
  3. In a bowl, beat cream cheese, granulated sugar, and vanilla until smooth. Add egg and mix until combined.
  4. Pour cream cheese mixture over the cinnamon roll crust.
  5. In a small bowl, mix melted butter, brown sugar, and cinnamon. Drizzle over the cheesecake layer.
  6. Bake for 25-30 minutes or until center is set. Cool completely before cutting into bars.

Notes

You can customize the seasonings to taste.

Easy Lemon Curd Recipe – Quick Homemade Delight

easy-lemon-curd-recipe-homemade

The Joy of Homemade Lemon Curd: Sunshine in a Jar

There’s something magical about the first bite of lemon curd—that perfect balance of tart and sweet, smooth yet vibrant. I remember the first time I tasted it as a child, perched on my grandmother’s kitchen counter as she slathered it onto warm scones. The way her eyes crinkled when she saw my face light up with that first tangy spoonful…well, let’s just say it sparked a lifelong love affair. Now, whenever I make this easy lemon curd recipe, it’s like bottling sunshine—and today, I’m so excited to share that joy with you.

Ingredients You’ll Need

  • 4 large lemons – Always choose unwaxed ones if possible (or give them a good scrub!). We’ll use both the zest and juice for maximum citrusy brightness.
  • 1 cup granulated sugar – The perfect amount to balance the tartness without overwhelming the lemon’s natural zing.
  • 4 large eggs – Room temperature eggs blend more smoothly into the mixture—trust me, it makes a difference!
  • 1/2 cup unsalted butter – Cut into small cubes. The butter adds that luxurious, velvety texture we all adore.
  • Pinch of salt – Just a whisper to elevate all the flavors.

Let’s Make Some Sunshine: Step-by-Step

Step 1: Zest with Love
Using a fine grater, zest all four lemons into a heatproof bowl. As you do, breathe in that incredible citrus perfume—it’s instant mood therapy! Pro tip: Avoid the white pith beneath the yellow zest—it can add bitterness.

Step 2: Juice Those Beauties
Roll your lemons firmly on the counter before cutting and juicing—this helps release every precious drop. You’ll need about 1/2 cup of fresh lemon juice. Strain it to catch any seeds or pulp for the silkiest texture.

Step 3: Create Your Base
In that same bowl with your zest, whisk together the lemon juice, sugar, eggs, and salt until completely combined. Don’t worry if it looks a bit frothy—that’s exactly what we want at this stage!

Step 4: The Gentle Cook
Set up a double boiler (or place your bowl over a saucepan with 2 inches of simmering water). This indirect heat is the secret to preventing scrambled eggs! Stir constantly with a silicone spatula for about 10 minutes until the mixture thickens enough to coat the back of a spoon…

Pro Tips, Variations, and Substitutions

Making lemon curd is simple, but a few tricks can take it from good to extraordinary:

  • Use fresh lemons—bottled juice just doesn’t give the same bright, zesty flavor.
  • Strain for silkiness: If you want an ultra-smooth texture, pass the curd through a fine-mesh sieve before jarring.
  • Swap the citrus: Try limes, oranges, or even grapefruit for a fun twist.
  • Dairy-free? Substitute butter with coconut oil for a rich, tropical note.
  • Less sweet: Reduce the sugar by a tablespoon or two if you prefer a tangier curd.

What to Serve With Lemon Curd

This sunny spread is endlessly versatile! Here are some of my favorite ways to enjoy it:

  • Slathered on warm scones or buttery toast
  • Layered in a parfait with yogurt and fresh berries
  • As a filling for tarts, cakes, or thumbprint cookies
  • Dolloped over pancakes or waffles for a citrusy breakfast
  • Swirled into whipped cream for a dreamy dessert topping

Storage and Reheating Tips

Fresh lemon curd keeps beautifully if stored right:

  • Refrigerate in an airtight jar for up to 2 weeks.
  • Freeze for up to 3 months—thaw overnight in the fridge before using.
  • Reheat gently in a saucepan over low heat if it thickens too much, stirring in a splash of water if needed.

Frequently Asked Questions

Can I use bottled lemon juice?

While fresh is best, bottled juice works in a pinch—just expect a slightly less vibrant flavor.

Why did my curd turn grainy?

This usually happens if the eggs overcook. Keep the heat low and stir constantly for a silky texture.

How do I know when it’s done?

The curd should coat the back of a spoon, and a finger drawn through it leaves a clean line.

Can I make it ahead for gifting?

Absolutely! Pour into small sterilized jars, seal tightly, and refrigerate—it makes a lovely homemade present.

A Sweet Final Thought

There’s something truly magical about homemade lemon curd—the way its bright, tangy sweetness can turn an ordinary morning into something special. Whether you’re spreading it on toast, folding it into a dessert, or sneaking a spoonful straight from the jar (no judgment here!), I hope this recipe brings a little sunshine to your kitchen. Happy cooking!

Print
clock clock iconcutlery cutlery iconflag flag iconfolder folder iconinstagram instagram iconpinterest pinterest iconfacebook facebook iconprint print iconsquares squares iconheart heart iconheart solid heart solid icon

Easy Lemon Curd


  • Author: Trusted Blog

Description

A smooth, tangy, and sweet lemon curd that’s perfect for spreading on toast, filling cakes, or topping desserts.


Ingredients

Scale

For the Crust:

  • 3 large eggs
  • 1 cup granulated sugar
  • 1/2 cup fresh lemon juice (about 34 lemons)
  • 1 tbsp lemon zest
  • 1/2 cup unsalted butter, cubed

Instructions

1. Prepare the Crust:

  1. In a medium saucepan, whisk together eggs, sugar, lemon juice, and lemon zest until well combined.
  2. Place the saucepan over low heat and add the butter. Stir constantly until the mixture thickens and coats the back of a spoon (about 10-15 minutes).
  3. Remove from heat and strain through a fine-mesh sieve into a bowl. Cover with plastic wrap, pressing it directly onto the surface to prevent a skin from forming. Chill in the refrigerator for at least 2 hours before using.

Notes

You can customize the seasonings to taste.

Classic French Butter Cookies – Easy Recipe

classic-french-butter-cookies-recipe

The Joy of Classic French Butter Cookies

There’s something almost magical about the scent of butter and sugar caramelizing in the oven—a fragrance that instantly transports me to my grandmother’s tiny Parisian kitchen. She would pull out her worn baking sheets, dusted with years of love, and whip up these delicate, golden French butter cookies with effortless grace. I remember sneaking bites of the dough when she wasn’t looking, the rich, velvety texture melting on my tongue. Now, whenever I bake these cookies, I feel that same warmth—the kind that turns a simple treat into a cherished memory.

Ingredients You’ll Need

Gathering the right ingredients is the first step to creating these buttery delights. Here’s what you’ll need:

  • 1 cup (225g) unsalted butter, softened – The star of the show! Use high-quality European-style butter if you can—it has a higher fat content, which makes these cookies extra tender.
  • 2/3 cup (130g) granulated sugar – Just enough sweetness to balance the richness of the butter.
  • 1 large egg yolk – This adds richness and helps bind the dough without making it tough.
  • 1 teaspoon pure vanilla extract – A splash of vanilla enhances the buttery flavor beautifully.
  • 2 cups (250g) all-purpose flour – Measure it properly by spooning it into your cup and leveling it off—no packed flour here!
  • 1/4 teaspoon fine sea salt – A pinch to balance the sweetness and elevate the flavors.

Step-by-Step Baking Guide

Now, let’s bring these cookies to life. Follow these steps, and you’ll have a batch of melt-in-your-mouth goodness in no time.

Step 1: Cream the Butter & Sugar

In a large mixing bowl, beat the softened butter and sugar together until light and fluffy—about 3-4 minutes. This step is crucial! The air you incorporate here will give your cookies that perfect delicate crumb. If your butter is too cold, microwave it for just 5-10 seconds to soften it slightly.

Step 2: Add the Egg Yolk & Vanilla

Once your butter mixture is pale and creamy, add the egg yolk and vanilla. Mix just until combined—overmixing can make the dough dense. Scrape down the sides of the bowl to ensure everything is evenly incorporated.

Step 3: Fold in the Dry Ingredients

Sift the flour and salt together, then gently fold them into the wet ingredients. I like to use a rubber spatula for this step to keep the dough tender. Stop mixing as soon as the flour disappears—overworking the dough will lead to tough cookies.

Step 4: Shape & Chill the Dough

Turn the dough out onto a lightly floured surface and shape it into a log about 1.5 inches in diameter. Wrap it tightly in plastic wrap and chill for at least 1 hour (or up to 2 days). This resting time allows the flavors to meld and makes slicing easier. If you’re in a hurry, 30 minutes in the freezer will do in a pinch!

Pro Tips for Perfect French Butter Cookies

Every baker has their little secrets, and after years of making these delicate treats, I’ve gathered a few that make all the difference:

  • Chill your dough thoroughly—this prevents spreading and keeps those beautiful shapes intact.
  • Use European-style butter (like Plugrá) for that extra rich, melt-in-your-mouth texture.
  • Roll dough between parchment to avoid adding extra flour that can make cookies tough.
  • Bake one tray at a time for even cooking—patience rewards you with golden perfection!

Delicious Variations to Try

While the classic version is heavenly, sometimes it’s fun to play with flavors:

  • Citrus zest: Add 1 tbsp lemon or orange zest to the dough for a bright twist
  • Almond: Replace ¼ cup flour with almond flour and sprinkle with sliced almonds
  • Chocolate-dipped: Melt dark chocolate and dip half of each cooled cookie
  • Spiced: Mix in ½ tsp cinnamon or cardamom for cozy warmth

What to Serve With Your Cookies

These buttery delights pair beautifully with:

  • A steaming cup of Earl Grey tea with a splash of milk
  • Fresh berries and whipped cream for an elegant dessert
  • Vanilla ice cream sandwich between two cookies
  • Afternoon coffee—they’re perfect for dunking!

Storage & Reheating Tips

To keep your cookies tasting fresh:

  • Room temperature: Store in an airtight container for up to 1 week
  • Freezing: Layer between parchment in a freezer bag for up to 3 months
  • Reviving: Warm chilled cookies at 300°F for 3 minutes to restore crispness

Frequently Asked Questions

Can I make these cookies without a stand mixer?
Absolutely! Use a hand mixer or even mix by hand—just be sure your butter is properly softened.

Why did my cookies spread too much?
This usually happens if the dough wasn’t chilled enough or if your baking sheet was too warm. Try popping the shaped cookies in the fridge for 10 minutes before baking.

Can I use salted butter?
You can, but reduce the added salt by half. Unsalted butter gives you better control over the flavor.

How thin should I roll the dough?
About ¼ inch is perfect—thicker cookies stay softer, thinner ones get crispier.

A Final Word of Butter Love

There’s something magical about pulling a tray of golden French butter cookies from the oven—the way the kitchen fills with that sweet, buttery aroma that feels like a warm hug. Whether you’re making these for a special occasion or just to brighten an ordinary Tuesday, I hope this recipe brings you as much joy as it’s brought me over the years. Don’t forget to share (or not—we won’t judge if you keep them all to yourself!). Happy baking!

Print
clock clock iconcutlery cutlery iconflag flag iconfolder folder iconinstagram instagram iconpinterest pinterest iconfacebook facebook iconprint print iconsquares squares iconheart heart iconheart solid heart solid icon

French Butter Cookies


  • Author: Trusted Blog

Description

Delicate, buttery cookies with a crisp texture and rich flavor, perfect for tea time or dessert.


Ingredients

Scale

For the Crust:

  • 1 cup unsalted butter, softened
  • 1/2 cup granulated sugar
  • 1 large egg yolk
  • 1 teaspoon vanilla extract
  • 2 cups all-purpose flour
  • 1/4 teaspoon salt

Instructions

1. Prepare the Crust:

  1. Preheat oven to 350°F (175°C) and line baking sheets with parchment paper.
  2. In a large bowl, cream together butter and sugar until light and fluffy. Beat in egg yolk and vanilla.
  3. Gradually mix in flour and salt until just combined. Do not overmix.
  4. Roll dough into 1-inch balls and place on prepared baking sheets. Flatten slightly with a fork.
  5. Bake for 12-15 minutes or until edges are lightly golden. Cool on wire racks.

Notes

You can customize the seasonings to taste.

Easy Strawberry Yogurt Popsicles – Homemade Recipe

easy-strawberry-yogurt-popsicles-recipe

A Sweet Summer Memory in Every Bite

There’s something magical about the first strawberry of summer, isn’t there? That burst of ruby-red sweetness takes me straight back to childhood summers spent at my grandmother’s house, where she’d always have a batch of homemade strawberry treats waiting in her old-fashioned freezer. These strawberry yogurt popsicles are my grown-up tribute to those sticky-fingered afternoons – simple, wholesome, and packed with that same nostalgic joy.

Ingredients You’ll Need

  • 2 cups fresh strawberries – Look for berries that are fragrant and deeply colored. If they’re not perfectly ripe, a quick maceration with a sprinkle of sugar helps!
  • 1 cup Greek yogurt – I prefer full-fat for creaminess, but any variety works. For dairy-free, coconut yogurt is lovely.
  • 1/4 cup honey or maple syrup – Adjust to your sweetness preference. The riper your berries, the less sweetener you’ll need.
  • 1 teaspoon vanilla extract – That warm note makes all the difference.
  • A pinch of salt – Just a whisper to make the flavors sing.
  • 1 tablespoon lemon juice – Brightens everything up beautifully.

Let’s Make Some Sunshine

First, give your strawberries a gentle bath and pat them dry. Hull them (that’s just removing the green tops) and slice them in half. If you’ve got little helpers in the kitchen, this is the perfect job for small hands!

Now, let’s get blending. Toss the strawberries into your blender or food processor along with the honey, lemon juice, and vanilla. Pulse a few times until you get a lovely, chunky puree – we’re not going for completely smooth here. Those little bits of strawberry make each popsicle bite exciting!

In a separate bowl, whisk together the yogurt and pinch of salt until it’s smooth and dreamy. Then, gently fold in about three-quarters of your strawberry mixture, leaving pretty pink swirls throughout. This marbling effect makes each popsicle look like a summer sunset when frozen.

Here’s my favorite trick: Spoon a little of the remaining strawberry puree into each popsicle mold first, then alternate layers of the yogurt mixture and more puree. This creates those gorgeous layered stripes that make everyone say “wow!” when they take their first lick.

Pro Tips, Variations, and Substitutions

Making strawberry yogurt popsicles is wonderfully forgiving, but a few expert tips can take them from good to great:

  • Ripeness matters: Use the sweetest, juiciest strawberries you can find—it makes all the difference in flavor.
  • Texture tweaks: For a creamier pop, blend the yogurt and strawberries until ultra-smooth. For a rustic feel, leave tiny strawberry bits.
  • Dairy-free? Swap regular yogurt for coconut or almond milk yogurt.
  • Extra tang: Add a squeeze of lemon juice to brighten the flavors.
  • Sweetener options: Honey or maple syrup work beautifully instead of sugar.

What to Serve With Your Popsicles

These popsicles shine on their own, but they’re even more fun with playful pairings:

  • Crumbled graham crackers or granola for a crunchy contrast
  • A drizzle of melted dark chocolate for a decadent touch
  • Fresh mint leaves for a refreshing garnish
  • Alongside a fruit salad for a light summer dessert spread

Storage and Reheating Tips

Keep your popsicles tasting fresh:

  • Freezing: Store in an airtight container or popsicle bag for up to 2 months.
  • Prevent freezer burn: Wrap individually in parchment paper if storing long-term.
  • Too hard? Let sit at room temperature for 3–5 minutes before enjoying.
  • No reheating needed! (Though licking them before they melt counts as a life skill.)

Frequently Asked Questions

Can I use frozen strawberries?
Absolutely! Thaw them first and drain excess liquid to avoid icy popsicles.

Why did my popsicles turn out icy?
This usually happens if the mixture has too much liquid. Try adding a tablespoon of honey or blending in a banana for creaminess.

How do I get the popsicles out of the mold easily?
Run warm water over the mold for 10–15 seconds—they’ll slide right out!

Can I make these without a popsicle mold?
Yes! Use small paper cups with wooden sticks, or even an ice cube tray for mini treats.

A Sweet Final Thought

There’s something magical about homemade popsicles—the way they bring back childhood summers, the joy of sharing something you made with your own hands. These strawberry yogurt popsicles aren’t just a treat; they’re little sticks of happiness waiting to be enjoyed. Whether you’re cooling off after gardening or surprising the kids with an after-school snack, I hope this recipe becomes your new warm-weather tradition. Now go grab a pop, sit in the sunshine, and savor the simple sweetness of summer.

Print
clock clock iconcutlery cutlery iconflag flag iconfolder folder iconinstagram instagram iconpinterest pinterest iconfacebook facebook iconprint print iconsquares squares iconheart heart iconheart solid heart solid icon

Strawberry Yogurt Popsicles


  • Author: Trusted Blog

Description

A refreshing and healthy treat made with fresh strawberries and creamy yogurt.


Ingredients

Scale

For the Crust:

  • 2 cups fresh strawberries, hulled and sliced
  • 1 cup plain Greek yogurt
  • 2 tablespoons honey
  • 1 teaspoon vanilla extract

Instructions

1. Prepare the Crust:

  1. Blend strawberries, yogurt, honey, and vanilla extract in a blender until smooth.
  2. Pour the mixture into popsicle molds, leaving a little space at the top.
  3. Insert popsicle sticks and freeze for at least 4 hours or until solid.
  4. To unmold, run warm water over the outside of the molds for a few seconds.

Notes

You can customize the seasonings to taste.