Indulge in a Sweet Escape with This Orange Dreamsicle Cake

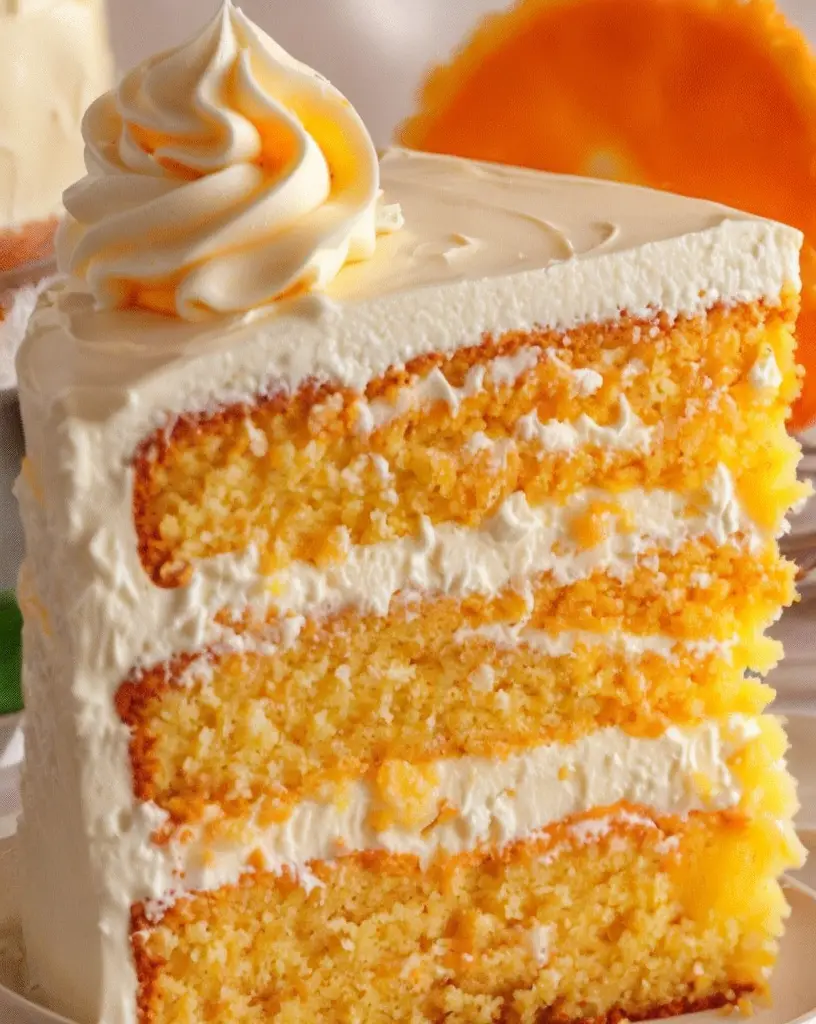
Orange Dreamsicle Cake: A Nostalgic Delight

⚖️
Difficulty
Medium

⏲️
Prep Time
20 mins

🕒
Cook Time
45 mins

⏱️
Total Time
65 mins

🍽️
Servings
12

Indulge in the nostalgic flavors of the Orange Dreamsicle Cake, a delightful dessert that captures the essence of summer. This cake is a vibrant celebration of citrusy orange and creamy vanilla, reminiscent of the classic frozen treat. The first bite will transport you back to lazy, sun-soaked days and leave you craving more. Whether you’re serving it at a family gathering or just indulging in a sweet moment for yourself, this cake is sure to impress with its dreamy combination of flavors and textures.

Quick Recipe Highlights

  • Flavor Profile: A perfect harmony of zesty orange and smooth vanilla, creating a sweet and tangy balance that delights the palate.
  • Texture: Light and fluffy cake layers are complemented by a creamy, dreamy frosting, ensuring a delightful mouthfeel in every bite.
  • Aroma: Freshly grated orange zest and vanilla essence fill the air with an irresistible fragrance, making this cake truly inviting.
  • Visual Appeal: A burst of vibrant orange hues contrasted with creamy white frosting gives this cake a visually stunning presentation.
  • Skill Level Needed: Suitable for bakers with moderate skills, requiring some careful mixing and layering techniques.
  • Special Equipment: You’ll need a stand mixer or hand mixer, cake pans, and a zester to perfect this creation.

Recipe Overview

  • Difficulty Level: This medium-difficulty recipe requires attention to detail during ingredient preparation and cake layering to achieve perfection.
  • Category: Fits perfectly into the category of desserts and cakes, ideal for any occasion where a sweet treat is needed.
  • Cuisine: A modern take on a classic American dessert, inspired by the beloved ice cream bar, the Dreamsicle.
  • Cost: The ingredients are budget-friendly, mostly available at any local grocery store, resulting in an affordable creation.
  • Season: Best enjoyed in spring and summer, when fresh oranges are in season, though it can bring sunshine to any time of year.
  • Occasion: Perfect for birthday parties, summer picnics, or as a special treat for Sunday gatherings with family and friends.

Why You’ll Love This Recipe


The Orange Dreamsicle Cake is a culinary marvel that combines taste, texture, and visual appeal in a single bite. Each slice offers the delightful tang of orange seamlessly mixed with creamy vanilla frosting, making it a hit among both kids and adults. Its light and fluffy texture, juxtaposed with rich frosting, provides a delightful contrast that keeps dessert lovers coming back for more.

Despite its sophisticated flavors, this cake is surprisingly easy to prepare, with common kitchen equipment and readily available ingredients. The recipe strikes a balance between simplicity and elegance, making it accessible even to those who don’t bake often. Enjoy a hassle-free baking experience that offers maximum flavor with minimal stress, ideal for both novice bakers and seasoned chefs.

Nutritionally, the cake provides a dose of vitamin C from the orange elements, offering some beneficial aspects amidst the indulgence. While desserts are meant to be a treat rather than a primary nutritional source, it’s always nice to know there are positives within the sweet enjoyment.

Entertaining becomes delightful with this recipe that can serve as a conversation starter. Whether sharing the story of its nostalgic roots or simply letting its flavors speak for themselves, the cake is sure to be the centerpiece at any gathering, inviting smiles and memories to be made with every serving.

Lastly, the Orange Dreamsicle Cake is a cost-effective choice for a homemade dessert. Using basic pantry staples with just a couple of specialty items like fresh oranges and vanilla extract, the cake manages to be both luxurious and frugal, perfectly balancing indulgence with practicality.

Historical Background and Cultural Significance


The Orange Dreamsicle Cake draws inspiration from the iconic Dreamsicle, a beloved summer treat originally introduced in the early 20th century. Evolving from the classic combination of ice cream and orange-flavored coating, this cake transforms those flavors into a delightful dessert experience. It’s a testament to the evolution of classic American desserts, adapting beloved flavors into new, innovative forms.

Culturally, the Dreamsicle has been a symbol of carefree summer days and has maintained a presence in American dessert culture for generations. This cake pays homage to those memories, capturing the nostalgic essence of a cherished treat and bringing it to life in an elegant form suitable for contemporary tables.

Over the decades, the Dreamsicle flavor profiles have made their way into various desserts, including popsicles, cakes, and even beverages. This cake is just one example of the creative adaptations that continue to celebrate these flavors. By transforming it into a baked good, the Dreamsicle becomes accessible year-round, allowing its luscious flavors to be enjoyed regardless of season.

Regional variations of the cake may include different frosting techniques or additional ingredients like whipped cream layers or additional zest to vary the flavor intensity, but the heart of the recipe remains consistent: the delightful blend of orange and cream.

Ingredient Deep Dive


Oranges are the star ingredient, bringing both flavor and nutritional merit to the Orange Dreamsicle Cake. Rich in vitamin C, oranges contribute to immune health while adding a vibrant, zesty kick to the dessert. Selecting fresh, juicy oranges yields the best flavor intensity; consider navel or Valencia oranges for the sweetest, most aromatic zest and juice.

Vanilla plays a crucial supporting role, weaving through the layers to tie together the flavors with creamy richness. For the best results, use pure vanilla extract to enhance its depth and complementary sweetness, adding to the cake’s overall sensory experience.

Butter provides the base for both the cake and frosting, setting the stage for texture and flavor. Use unsalted butter to control the salt content, allowing the cake’s sweet nuances to shine through.

Common Mistakes to Avoid

  • Overmixing the batter can lead to a dense cake. Mix just until ingredients are combined.
  • Not zesting enough orange can result in a less vibrant flavor. Ensure you zest thoroughly, avoiding the bitter white pith.
  • Skipping the cake cooling step may cause frosting to melt. Allow cakes to fully cool before applying frosting.
  • Substituting margarine for butter might alter texture and flavor drastically, as margarine contains more water.
  • Using low-quality vanilla extract can diminish the rich creaminess, so opt for pure vanilla for best results.
  • Crowning the cake without a crumb coat can result in uneven frosting, leading to a less polished look.
  • Not properly leveling cake layers before stacking might cause tilting or uneven layers.
  • Slicing the cake too soon after assembly can result in fragile, uneven slices.
  • Ignoring proper measuring techniques for flour can result in a dry texture, so fluff and spoon flour into the measuring cup.
  • Rushing through assembly can lead to structural issues; patience is key for neat layering and frosting application.

Essential Techniques


Creaming butter and sugar properly is critical to achieving the perfect cake texture. This process incorporates air into the mixture, contributing to the cake’s lightness. Be sure to cream for at least 3-5 minutes until the mixture is fluffy and pale.

Using a crumb coat is a professional technique to secure loose crumbs before applying a final layer of frosting. This ensures a smooth, flawless finish, important for presentation as well as structure.

Zesting an orange correctly can make or break the cake’s citrus flavor. Use a microplane or fine grater, ensuring only to grate the vibrant orange skin, avoiding the bitter white pith underneath for a sweet and aromatic addition.

Pro Tips for Perfect Orange Dreamsicle Cake


Always use room temperature ingredients when baking to ensure even mixing and consistent texture throughout the batter. Cold ingredients could cause the batter to clank and lead to undesirable lumps.

Add a splash of fresh orange juice to the frosting to enhance the cake’s flavor, ensuring the juice is freshly squeezed for the best taste.

For a decorative finish, consider topping your cake with candied orange slices or zest curls, offering both visual appeal and a burst of flavor.

When grating orange zest, hold the orange steady and move it in consistent strokes across the grater to achieve uniform strands of zest without reaching the pith.

Ensure you rotate the cake pans halfway through baking to achieve an even rise, as oven hotspots can cause uneven cooking.

Chill the cake an hour before slicing to achieve cleaner slices, allowing it to sit for a few minutes before serving to come to the perfect serving temperature.

Variations and Adaptations


Regional variations might involve using local citrus fruits such as mandarins or blood oranges, offering a twist on the classic Dreamsicle flavor.

For winter adaptations, consider using a darker frosting paired with a slightly spiced orange syrup to evoke a cozy, festive feeling.

Dietary modifications can easily be made by substituting a dairy-free margarine for butter and using almond milk in the cake batter to accommodate lactose intolerant or vegan individuals.

Enhance or modify the flavor by incorporating a teaspoon of cardamom into the batter for a warm, spicy twist that complements the orange notes.

To adjust the cake’s texture, you could experiment with incorporating a layer of whipped cream between the cake layers for an additional creamy element.

Presentation alternatives include creating a naked cake look, showcasing the cake layers and frosting interwoven with zest or sugar decorations.

Serving and Presentation Guide


Plating your Orange Dreamsicle Cake with artistic flair creates a show-stopping presentation. Layer each slice with visible streaks of orange zest and consider a smear of rich vanilla cream on the plate for a gourmet touch.

Garnishing ideas include delicate curls of zest placed atop the frosting or small segments of fresh orange arranged artfully for both flavor and decoration.

Traditional accompaniments might include a scoop of vanilla ice cream, echoing the original Dreamsicle theme, creating harmony between flavors and temperatures.

Alternatively, modern serving suggestions like pairing small slices of cake with espresso or cappuccino can offer a delightful end to any dinner party.

Temperature control is essential; serving at room temperature allows the flavors to fully bloom without suppression from cold refrigeration or the heaviness of excessive warmth.

Portion control tips include serving smaller slices alongside a secondary dessert option, providing a balanced dessert course for guests.

Wine and Beverage Pairing


Pairing wines with the Orange Dreamsicle Cake requires a light touch. Choose a sweet Riesling or Moscato to mirror the cake’s sweetness and citrus notes, without overpowering the delicate balance of flavors.

Non-alcoholic alternatives such as a sparkling orangeade or citrus-infused water can enhance the cake’s tanginess while providing a refreshing contrast.

Coffee or tea pairings offer an enjoyable complement; a light roast coffee or citrusy herbal tea can balance the richness of the cake, aiding in digestion and heightening pleasure.

Considerations of beverage serving temperatures ensure an overall harmonious dining experience. Chilled or lightly warmed beverages work best with the dessert’s creamy elements.

Offer personal serving suggestions like a small mint leaf or citrus slice garnishing the rim of the glass to add a professional finishing touch to the presentation.

Storage and Shelf Life


Proper storage methods are crucial to maintaining the cake’s freshness. Keep the cake in an airtight container to prevent it from drying out or absorbing fridge scents.

Ideal temperature requirements are either room temperature for immediate consumption or refrigerated conditions if storing for several days, though moisture levels should be monitored.

Using opaque storage containers helps to protect the cake from light exposure, which might detract from its overall appeal.

Signs of spoilage appear as unusual discoloration, dry spots, or off smells, indicating it may no longer be fresh for consumption.

Reheating instructions involve allowing the cake to return to room temperature if enjoyed shortly after refrigerating, but avoid reheating in a microwave to preserve original textures.

Freezing guidelines suggest wrapping slices individually to allow for single servings with minimal defrost time, preserving both flavor and texture over several weeks.

Make Ahead Strategies


Planning a prep timeline ensures efficient cake preparation and allows for time to focus on assembly. Prepare the cake layers a day ahead, storing them in airtight conditions to lock in moisture.

Between-step storage keeps the cake elements in pristine condition. Wrap tightly in plastic wrap or store in sealed bags for stability throughout the process.

Quality impact assessment considers that certain cakes benefit from resting as flavors intensify when allowed to meld overnight.

Assembly tips include making the frosting fresh and chilling it slightly for easier, smooth frosting application, ensuring structural integrity and aesthetic appeal.

Reheating guidelines are minimal since the cake is best enjoyed fresh, but room-temperature serves also maintain its charm after brief refrigerator storage.

For a fresh twist, add freshly whipped cream or fruit garnishes just before serving to elevate the cake’s freshness.

Scaling Instructions


Halving the recipe effectively maintains proportions but requires careful adjustments to baking times and consideration for smaller equipment variations.

Doubling or tripling the recipe scales well, provided large enough kitchen equipment is available, with additional attention to even distribution of batter in pans.

Equipment adjustments should be considered, such as using larger mixing bowls and additional baking pans for scaled quantities, ensuring uniform baking and result accuracy.

Timing modifications come into play when scaling, involving closer observation of baking times due to potential variations in ingredient volume and pan size.

Storage considerations help maintain quality for large batches, with heightened focus on ensuring airtight containment to extend freshness across larger quantities.

Nutritional Deep Dive


A macro breakdown of the Orange Dreamsicle Cake reveals a moderate carbohydrate and sugar concentration balanced by protein from dairy ingredients, key to indulgent desserts.

Micronutrient analysis highlights benefits from ingredients such as vitamin C from fresh oranges and calcium present in milk or cream elements.

Conscious health benefits in a dessert context suggest incorporating a moderate serving guideline, allowing enjoyment without significant dietary impacts.

Dietary considerations emphasize options for reducing sugar or calories as needed, adapting ingredient substitutions where health-conscious alternatives are appropriate.

Portion analysis assists in maintaining awareness of treat-to-nutrition ratios, aligning consumption with personal dietary goals or allowances.

Weight management tips recognize moderation as primary, encouraging savoring each slice and enjoying the flavors without overindulgence.

Dietary Adaptations


Explore gluten-free alternatives through use of gluten-free flour blends, adapting the recipe for celiac conditions or gluten intolerances without flavor compromise.

Dairy-free adaptations can be delicious; substitute plant-based butter and almond milk to maintain structural consistency without dairy reliance.

Vegan solutions follow suit with egg substitute options such as flaxseed meal or aquafaba, preserving moisture and crumb quality.

A low-carb version may employ almond flour and sugar substitutes like erythritol, catering to keto or low-carb preferences while maintaining cake essence.

Paleo adaptations focus on natural sweetness of maple syrup or honey, with coconut milk providing a creamy element to suitable frosting alternatives.

Low-FODMAP directions target sensitive dietary requirements, selecting compliant ingredients for a well-tolerated dessert choice.

Troubleshooting Guide


Managing texture issues begins with ensuring accurate ingredient measurement and batter mixing, avoiding omissions such as sifting dry ingredients.

Flavor balance requires an attentive approach, like increasing citrus elements if flavors fall flat, or adjusting vanilla measurements for perceived intensity.

Temperature problems generally arise from uneven oven distribution; rotating pans midway helps balance inconsistencies.

Equipment challenges like a malfunctioning mixer can be countered with manual mixing, using handheld whisks or spatulas to replicate the blending process.

Ingredient substitutions must consider equivalents in moisture, fat content, and structure; precise research supports successful adaptation practices with minimal quality loss.

Timing concerns, such as cake overbaking, find resolution in regular oven checks, utilizing a thermometer to monitor core temperatures effectively.

Recipe Success Stories


Community feedback is overwhelmingly positive, with readers frequently praising the vibrant flavors and nostalgic elements of the Orange Dreamsicle Cake.

Variation successes often involve local ingredient incorporations, such as incorporating seasonal fruits like strawberries for added zest and color bursts.

Adaptation stories resonate well, showcasing global perspectives on the classic Dreamsicle through creative presentation or regional interpretation.

Reader suggestions have informed richer frosting experiences and introduced decorative ideas that enhance both cake aesthetics and flavor.

Photography tips emphasize capturing the cake’s vibrant hues and tiered structure, lending to professional-like imagery through home setups.

Frequently Asked Questions

Can I make this Orange Dreamsicle Cake ahead of time?
Yes, you can prepare the cake layers a day in advance. Once baked, wrap them well and store them in airtight containers. Assemble with fresh frosting before serving.

What’s the best way to ensure my cake has a light texture?
Careful measurements and avoiding overmixing are crucial. Be sure to alternate adding dry and wet ingredients to prevent deflation of the batter.

Can I use juice from store-bought oranges in this recipe?
While fresh orange juice enhances flavor, store-bought could work if unsweetened. Opt for fresh oranges, particularly for zest, to achieve the best outcome.

Is it possible to freeze the cake for future enjoyment?
Yes, slice the cake and wrap each piece in plastic wrap, then place them in a sealable freezer bag. Defrost in the refrigerator before enjoying.

What variations work well with the Dreamsicle flavor profile?
Adding a spice like cardamom or incorporating a layer of raspberry preserves can offer exciting nuances to the traditional Dreamsicle flavors.

How do I prevent the cake from sticking to the pan?
Grease the pans thoroughly and line with parchment paper. Ensure complete coverage to maintain whole cake layers when removing from pans.

Can I substitute the eggs to make this cake vegan?
Yes, consider using flaxseed or aquafaba as egg substitutes. These alternatives frequently deliver similar binding properties necessary for the cake.

Is there a specific wine that pairs well with this cake?
A sweet Riesling or Moscato complements the citrus notes excellently, offering a refreshing contrast while maintaining the dessert’s flavor profile.

Will almond flour work for a gluten-free adaptation of the recipe?
Yes, almond flour can substitute, though texture adjustments may be needed. Consider pairing with a stabilizer like xanthan gum for structure.

How do I achieve an even frosting layer?
Start with a crumb coat to lock in stray crumbs. Let it set, then apply a thicker layer on top, smoothing with a spatula or offset knife for precision.

Additional Resources


Consider reviewing related recipes like Lemon Drizzle Cake for those interested in further citrus explorations or Vanilla Buttercream for frosting mastery.

Technique guides offer valuable insights into essential baking skills, such as achieving perfect whipped frostings or nuanced cake layering for cohesive cakes.

Ingredient information documents delve deeper into citrus varieties, explaining flavor interactions and nutritional aspects critical to pertinent recipes like this.

Equipment recommendations showcase reliable baking tools, endorsing durable products that cater to consistent performance when tackling baking tasks.

Seasonal variations offer insight into how adapting dishes with seasonal ingredients can heighten flavors and relevance to time-sensitive dining experiences.

Join the Conversation


Engage with us on social media, showcasing your Orange Dreamsicle Cake craftsmanship with your own flair. Share your photos, tips, and experiences for community enjoyment.

Photography tips aim to guide aspiring food photographers in capturing the cake’s impressive color range and appealing texture, creating vibrant imagery.

Contribute honest recipe reviews, providing insights into personal adaptations and illustrating how you enjoy this nostalgic delight in your homes.

Community engagement provides a platform for connecting with fellow bakers, exchanging decorating techniques, flavor pairing advice, and adaptation strategies to build camaraderie.

Discover endless recipe variations encouraged by shared feedback, informing ongoing culinary creativity and promoting inclusive, welcoming dessert spaces.

The Recipe

Orange Dreamsicle Cake

Serves: 12

Prep Time: 20 mins

Cook Time: 45 mins

Total Time: 65 mins

Kitchen Equipment Needed

  • Stand mixer or hand mixer
  • Two 9-inch cake pans
  • Zester
  • Rubber spatula
  • Wire rack for cooling

Ingredients

  • 2 ½ cups all-purpose flour
  • 1 tablespoon baking powder
  • ½ teaspoon salt
  • ¾ cup unsalted butter, room temperature
  • 1 ⅔ cups granulated sugar
  • 2 tablespoons orange zest
  • 3 large eggs
  • 1 teaspoon vanilla extract
  • 1 cup whole milk
  • For the frosting: 1 cup unsalted butter, room temperature
  • 4 cups powdered sugar, sifted
  • ¼ cup freshly squeezed orange juice
  • 1 teaspoon vanilla extract

Directions

  1. Preheat your oven to 350°F (175°C) and grease two 9-inch cake pans.
  2. In a bowl, whisk together flour, baking powder, and salt. Set aside.
  3. Cream butter and granulated sugar in a stand mixer until light and fluffy, about 3-5 minutes.
  4. Add orange zest, eggs, and vanilla to the creamed mix and blend until combined.
  5. Gradually add the dry ingredients alternating with milk, beginning and ending with the flour mixture. Mix just until combined.
  6. Divide the batter evenly between the prepared cake pans and bake for 25-30 minutes or until a toothpick inserted in the center comes out clean.
  7. Cool the cakes in the pans for 10 minutes, then invert onto a wire rack to cool completely.
  8. To make the frosting: Beat butter until creamy, then gradually add powdered sugar, orange juice, and vanilla, beating until smooth and fluffy.
  9. Once cakes have cooled, layer and frost them with the prepared orange frosting.
  10. Refrigerate until set, then slice and serve.

Recipe Notes

  • To prevent sticking, line the bottom of cake pans with parchment paper.
  • Adjust orange juice levels in the frosting to achieve desired consistency.
  • Store in the refrigerator for up to three days; allow to reach room temperature before serving.

Bake Irresistible Shimmering Maple Crisp Cookies for a Sweet Treat

Shimmering Maple Crisp Cookies: A Sweet Treat with a Glorious Crunch

⚖️
Difficulty
Medium

⏲️
Prep Time
20 mins

🕒
Cook Time
15 mins

⏱️
Total Time
35 mins

🍽️
Servings
24 cookies

Step into the world of delightful sweetness with our Shimmering Maple Crisp Cookies. These cookies combine the rich taste of pure maple syrup with a satisfying crunch, offering a perfect bite every time. As you savor these treats, the sweetness envelops you, creating a comforting and indulgent experience.

These shimmering cookies are more than just their delightful taste; they are a sensory experience. As you open the cookie jar, a sweet, maple-infused aroma greets you, reminiscent of cozy autumn afternoons. Their crisp texture gives way to a chewy center, offering a dynamic mouthfeel that makes every bite unforgettable.

Quick Recipe Highlights

  • Flavor Profile: These cookies burst with the rich, earthy sweetness of maple syrup. Balanced by a hint of vanilla, they deliver a perfectly rounded taste without being overwhelmingly sweet.
  • Texture: Expect a delightful crunch on the outside, contrasted by a moist and chewy interior, creating a perfect harmony in every bite.
  • Aroma: The smell of baked maple filling the house is an inviting scent that instantly makes one think of home comforts and fall gatherings.
  • Visual Appeal: A golden-brown hue with a subtle shimmer, these cookies are as delightful to look at as they are to eat, making them a showstopper at any gathering.
  • Skill Level Needed: With a medium difficulty rating, they require a bit of baking knowledge, but nothing too advanced for a determined home baker.
  • Special Equipment: All you need is a reliable oven and a trusty mixing bowl to whip these beauties together.

Recipe Overview

  • Difficulty Level: The moderate complexity comes from achieving the perfect consistency of the batter and getting that beautiful shimmer on top. Attention to detail will ensure a successful batch.
  • Category: These cookies fall under the dessert category but can also make a sweet addition to brunch spreads.
  • Cuisine: Inspired by North American culinary traditions, these cookies highlight the iconic flavor of Canadian maple syrup.
  • Cost: Maple syrup can be on the pricier side, but it’s the star ingredient here, making these cookies a worthy indulgence.
  • Season: Best enjoyed during the fall when maple flavors complement the crisp seasonal air, but they’re delightful year-round.
  • Occasion: Perfect for holiday cookie exchanges, autumn picnics, or just a sweet treat on a cozy afternoon.

Why You’ll Love This Recipe
The taste of Shimmering Maple Crisp Cookies is unparalleled, thanks to the rich maple syrup that infuses every bite. The balance of sweetness and warm flavors will captivate your palate, promising pure indulgence with each cookie. Their texture is equally appealing—imagine biting into a crispy edge that yields to a soft, chewy center. This dynamic combination adds to their charm and makes them a crowd-favorite.

These cookies are a convenience to prepare as they require basic kitchen utensils and can be made in under an hour. The straightforward recipe ensures successful outcomes even on your first attempt. Nutritionally, maple syrup offers unique minerals not found in typical sweeteners, providing some wholesome benefits amidst the delight.

Shimmering Maple Crisp Cookies have immense social value, easily becoming a centerpiece for teatime gatherings or festive occasions. Their nostalgic aroma evokes a sense of heritage, making them the perfect companion for family celebrations. Economically viable, they are made with pantry staples, making them accessible for spontaneous baking adventures.

Historical Background and Cultural Significance
Originating from regions known for their maple syrup production, such as Canada and parts of the Northern United States, maple desserts have long been a staple of their culinary traditions. Shimmering Maple Crisp Cookies symbolize the best of these traditions, offering a modern twist on classic flavors.

Maple syrup has cultural importance that extends beyond its taste. It represents a heritage of traditional sugaring methods and seasonal cycles deeply respected in communities that produce it. This reverence is captured in every bite of these cookies, offering a taste of history.

Over time, recipes like the Shimmering Maple Crisp Cookies have evolved, incorporating modern baking techniques while still maintaining their original flavor integrity. Regional variations exist, with subtle differences in ingredients reflecting local tastes and preferences.

Ingredient Deep Dive
Maple syrup is the heart and soul of these cookies, revered for both its flavor and its rich history. Indigenous peoples of North America have long harvested maple sap, a tradition carried forward through centuries. This natural sweetener also offers nutritional benefits, containing antioxidants and essential minerals like manganese and zinc.

When selecting maple syrup, opt for the purest grade available, ensuring a rich, authentic taste. Store it in a cool, dark place to preserve its quality, but once opened, refrigeration is recommended. If substitutions are needed, honey can offer a similar texture but will alter the flavor significantly.

Common Mistakes to Avoid

  • Avoid using imitation maple syrup; it lacks the depth of flavor that pure syrup provides.
  • Overbaking can turn the cookies too hard; remove them from the oven once edges are golden.
  • Overmixing the batter can lead to tough cookies; mix just until ingredients are combined.
  • Skipping the chilling step may result in spreading; ensure the dough is well-chilled.
  • Measuring ingredients inaccurately can affect texture; always use proper measuring tools.
  • Using cold butter may prevent proper mixing; let it come to room temperature first.
  • Ignoring oven temperature precision could lead to uneven baking; always preheat and use an oven thermometer.
  • Not lining the baking sheet might lead to cookies sticking; use parchment paper for best results.

Essential Techniques
Mastering the art of these cookies lies in achieving the right dough consistency. It should be soft but firm enough to hold its shape when scooped. A critical technique is the gentle folding of dry ingredients into the wet mix to prevent overworking the dough, preserving its tender texture.

Visual cues play a vital role—watch for the subtle change in dough color and texture as it incorporates ingredients. Avoiding overbaking is crucial. The cookies should have slightly golden edges and still appear soft in the center when you remove them from the oven; they will firm up as they cool.

Pro Tips for Perfect Shimmering Maple Crisp Cookies
Ensure your ingredients are at the right temperature before beginning, as this affects mixing and dough texture.

Chill the dough for at least 30 minutes to prevent excessive spreading during baking.

For an added touch of shimmer, dust the tops with a light sprinkle of coarse sugar before baking.

Experiment with adding a sprinkle of sea salt on top to balance out the sweetness and create a more sophisticated flavor profile.

For uniform cookies, use an ice cream scoop to portion out the dough evenly.

Allow cookies to cool completely on a wire rack; this prevents them from continuing to bake on the hot baking sheet.

Variations and Adaptations
These cookies can take on regional twists by varying the type of sugar used, such as swapping white sugar for a deeper-flavored brown sugar. Seasonal adaptations might include adding a pinch of cinnamon or nutmeg for a warm autumn flair.

Dietary modifications are possible, such as using gluten-free flour blends for those with dietary restrictions. For a vegan version, substitute butter with coconut oil or a plant-based spread, and consider flax eggs for binding.

Experiment with infusing the maple syrup with flavors like lavender or vanilla beans for a gourmet twist. Alternatively, add crushed pecans or walnuts for an extra texture contrast and nutty undertone.

Serving and Presentation Guide
For a sophisticated presentation, consider forming your cookies into uniform rounds and baking them on parchment for neatness. A light dusting of powdered sugar adds a classic touch, while a drizzle of white chocolate offers a modern flair.

These cookies are best served freshly baked, but if you prefer your cookies chewier, store them in an airtight container with a slice of bread on top. Accompany them with a warm cup of tea or a frothy latte for a complete treat.

Pairs well with fruit preserves or cheese plates, making them a versatile addition to any meal or celebration. Adjust portions according to your gathering size—their richness means a few go a long way.

Wine and Beverage Pairing
Pair these maple cookies with a glass of chilled Riesling or a sweet dessert wine to complement their sweetness without overshadowing it. For non-alcoholic options, consider a spiced apple cider or a creamy maple latte.

In cooler months, serve them alongside a hot cup of chai or brewing fragrant herbal teas that match their aroma. Temperature plays a crucial role—cool cookies paired with warm beverages offer a harmonious duet.

For coffee lovers, a dark roast or espresso amplifies the maple’s depth, while those seeking lighter notes might prefer a vanilla-infused black tea.

Storage and Shelf Life
Store your Shimmering Maple Crisp Cookies in an airtight container at room temperature for up to five days to maintain their freshness. For extended shelf life, refrigerate them in a tightly sealed bag or container.

Signs of spoilage include changes in aroma or discoloration, indicating it’s time to let go. Reheat cookies in a low-temperature oven or microwave for a few seconds to refresh their warmth before serving.

If freezing, separate layers with parchment paper to avoid sticking, and thaw at room temperature before enjoying.

Make Ahead Strategies
These cookies offer flexibility for preparatory stages, allowing dough to be made ahead and stored in the refrigerator for up to 48 hours. For a more extended prep timeline, freeze the dough and thaw before baking.

Once baked, consider making an extra batch to freeze, offering you ready-to-eat cookies for unexpected gatherings. Evaluate the impact of refrigeration or freezing, ensuring quality remains intact.

During assembly, pay attention to reheating guidelines—avoid direct heat that may cause drying. Fresh glazes or toppings can be added at the time of serving for freshness.

Scaling Instructions
To halve the recipe, simply divide all ingredient quantities by two while maintaining consistent proportions. Doubling the batch is easy—ensure you have adequate baking sheets and cooling racks to accommodate the increase.

Adjust baking time if necessary for larger-sized cookies, and verify evenness by rotating sheets. Scaled recipes may require more storage space—have plenty of airtight containers or ideally sized bags for your expanded batch.

Nutritional Deep Dive
The macro breakdown of these cookies showcases their carbohydrate-rich nature, with fats and proteins present in lower quantities. Maple syrup provides a unique set of micronutrients like riboflavin and calcium, offering an edge over traditional sugars.

These cookies highlight maple’s health benefits, like its antioxidant properties, setting them apart from more typical treats. They fit perfectly into balanced diets when enjoyed in moderation, with each portion of two to three cookies providing a satisfying snack option.

For weight management, paying attention to portion size and including them in a well-rounded diet can maximize enjoyment without overindulgence.

Dietary Adaptations
For a gluten-free version of Shimmering Maple Crisp Cookies, use a compatible flour mix ensuring it contains xanthan gum for binding. To make them dairy-free, substitute plant-based butter alternatives.

For vegan adaptations, flaxseed mixtures can replace eggs, while plant-based syrup variants address dietary needs. Lower-carbohydrate versions demand alternative flour blends, and keto-friendly sweeteners like erythritol can offer options in sugar management.

Low-FODMAP adaptions prioritize using pure maple syrup and gluten-free flour, accommodating various dietary restrictions while maintaining flavor integrity.

Troubleshooting Guide
Should your cookies turn out denser than anticipated, reassess ingredient measurements, ensuring correct balance. A texture too soft might indicate under-baking or excess liquid—adjust accordingly for subsequent batches.

Flavor imbalances like overpowering sweetness can be tamed by introducing salt or unsweetened additions. Temperature fluctuations could affect baking outcomes; maintaining oven consistency assures reliable results.

Inadequate mixing times or uneven ingredient distribution could affect taste, so follow step-by-step instructions diligently. Address timing concerns by respecting dough chilling and resting periods for optimal consistency.

Recipe Success Stories
Bakers worldwide have shared transformations of the classic Shimmering Maple Crisp Cookies into unique regional delights. Community feedback often highlights successful variations, like adding nuts or spices, expanding their appeal.

Readers suggest using local syrups, enhancing flavors unique to their regions. Photographs of the cookies in diverse settings, from cozy kitchens to lush backyards, showcase their universal charm across multiple continents.

The adaptability of the recipe means countless stories of success from first-time bakers to seasoned chefs, each bringing their twist to tradition.

Frequently Asked Questions

Can I substitute maple syrup with honey?
Maple syrup imparts a distinct flavor, but honey can be used with flavor changes expected.

What’s the best way to store these cookies?
Keep them in an airtight container at room temperature, or refrigerate for longer preservation.

How can I make my cookies shinier?
Gently brushing the tops with a beaten egg before baking enhances their shimmer.

Are these cookies suitable for freezing?
Yes, both baked cookies and dough freeze well—just ensure proper separation.

Is chilling the dough mandatory?
Chilling helps maintain shape and texture, making it a crucial step for perfect cookies.

Can I add chocolate chips?
Yes, adding chocolate chips introduces a new dimension, balancing the maple’s sweetness.

What other flavors pair with maple?
Spices like cinnamon, nutmeg, and even ginger accentuate the maple’s warmth.

Are there any vegan adaptations?
Substitute eggs with flaxseed mixtures and use vegan butter for plant-based versions.

What if my cookies spread too much?
Ensure proper dough chilling, and check that the baking surface is not too warm.

How to make them less sweet?
Adjust syrups or explore sugar alternatives, paired with balancing ingredients like nuts.

Can I triple the recipe?
Yes, adjust ingredient quantities accordingly and ensure sufficient baking equipment is available.

Additional Resources
For those eager to explore more, delve into our array of related recipes featuring maple’s natural sweetness. Discover technique guides focusing on cookie baking fundamentals, and explore a spectrum of ingredient substitutions for personalized touches.

Equip your kitchen with recommended tools ensuring effortless preparation. Discover seasonal variations adapting our recipe for any occasion, alongside savory counterpoints balancing the sweet palette.

Join the Conversation
Share your experiences—snap a picture and tag us on social media to showcase your Shimmering Maple Crisp Cookies. Exchange tips and tricks with fellow enthusiasts through comment threads and recipe reviews.

Engage with a community passionate about baking, where ideas flourish and variations abound. Contribute your personal touch to the growing collection of recipe adaptations, inspiring sweet creations worldwide.

The Recipe

Shimmering Maple Crisp Cookies

Serves: 24 cookies

Prep Time: 20 mins

Cook Time: 15 mins

Total Time: 35 mins

Kitchen Equipment Needed

  • Mixing bowls
  • Baking sheets
  • Parchment paper
  • Wire rack
  • Ice cream scoop or spoon

Ingredients

  • 1 cup unsalted butter, at room temperature
  • 1 cup pure maple syrup
  • 1 cup granulated sugar
  • 2 large eggs
  • 1 teaspoon vanilla extract
  • 3 cups all-purpose flour
  • 1 teaspoon baking powder
  • 1/2 teaspoon baking soda
  • 1/2 teaspoon salt
  • Coarse sugar, for topping

Directions

  1. Preheat your oven to 350°F (175°C) and line two baking sheets with parchment paper.
  2. In a large mixing bowl, cream butter and granulated sugar together until light and fluffy.
  3. Gradually add maple syrup, mixing until well blended.
  4. Beat in the eggs one at a time, followed by vanilla extract.
  5. In another bowl, whisk together flour, baking powder, baking soda, and salt.
  6. Gradually add dry ingredients to the wet, mixing until just combined.
  7. Chill the dough in the refrigerator for at least 30 minutes.
  8. Using an ice cream scoop, portion dough onto prepared sheets, spacing evenly.
  9. Top each cookie with a sprinkle of coarse sugar.
  10. Bake for 12-15 minutes, or until edges begin to turn golden brown.
  11. Transfer cookies to a wire rack to cool completely.

Recipe Notes

  • For added flavor, incorporate 1/2 teaspoon of cinnamon to the dry ingredients.
  • Adjust maple syrup quantity to taste, bearing in mind that it adds moisture.
  • Ensure cookies are evenly spaced to allow for spreading.

Indulge in This Irresistible Creamy Peanut Butter Cup Pie Recipe

Creamy Peanut Butter Cup Pie: A Delightful Dessert Experience

⚖️
Difficulty
Easy

⏲️
Prep Time
20 mins

🕒
Cook Time
10 mins

⏱️
Total Time
30 mins

🍽️
Servings
8

Imagine sinking your fork into the luxurious layers of a Creamy Peanut Butter Cup Pie. This decadent dessert combines the rich, nutty taste of creamy peanut butter with irresistible chocolatey elements, resulting in a flavor profile that will captivate your senses. Begin your culinary journey as you experience smooth textures and a delightful aroma that fills the room with the warmth of nostalgia and comfort.

The Creamy Peanut Butter Cup Pie is perfect for those looking to indulge with a sweet treat that’s both visually stunning and gastronomically satisfying. With its luscious filling and delicate layers of chocolate ganache, this pie is ideal for elevating any casual gathering or fancy soirée. Whether you’re enjoying a slice on a cozy evening or sharing it during a special occasion, this pie promises a delightful experience that’ll linger long after the last bite.

Quick Recipe Highlights

  • Flavor Profile: Peanut buttery richness intertwined with smooth chocolate notes dominate this dessert, creating an unparalleled taste experience.
  • Texture: The pie boasts a creamy, smooth filling complemented by a crumbly crust, offering a delightful contrast in textures that makes each bite fulfilling.
  • Aroma: A soft waft of roasted peanuts mingling with the deep scent of chocolate creates an inviting aromatic profile.
  • Visual Appeal: Layers of deep brown ganache and soft caramel hues offer an enticing presentation that’s irresistible to the eye.
  • Skill Level Needed: Suitable for beginners, this pie requires minimal technique—just a good hand at mixing and an eye for detail.
  • Special Equipment: Basic kitchen tools suffice—mixer, pie dish, and spatula are the key instruments here.

Recipe Overview

  • Difficulty Level: Rated as easy due to its straightforward assembling, mixing, and minimal baking processes. Perfect for an at-home baker or a dessert enthusiast just starting out.
  • Category: A delightful dessert treat, perfect for any after-meal indulgence or weekend sweet-treat offering.
  • Cuisine: Rooted in American dessert traditions, this pie is a simple representation of comfort food at its best.
  • Cost: Ingredients are generally available and inexpensive, making this an affordable recipe for most households.
  • Season: Best served year-round, but particularly indulging in the cold seasons when warm desserts are especially cherished.
  • Occasion: Perfect for family gatherings, holiday celebrations, or whenever you’re in the mood for something sweet.

Why You’ll Love This Recipe


The Creamy Peanut Butter Cup Pie marries the universally adored flavors of peanut butter and chocolate, creating a symphony of taste that’s hard to resist. Each bite offers a smooth, lush mouthfeel punctuated by the subtle crunch of its crust, satisfying both taste and texture needs effectively.

Convenience is a significant plus for this recipe. With easy-to-follow steps, you’ll have no trouble putting together this delicious pie in a matter of minutes, allowing more time to enjoy the company of your guests or family. Moreover, the most time-consuming aspect is allowing the pie to set, so the actual active preparation is minimal.

On top of being a crowd-pleaser, this pie also holds nutritional advantages, thanks to the protein-powered peanut butter base. While it’s a sweet treat, its composition supports a bit of balance, important for those mindful of their sugar intake.

In social settings, this decadent pie shines as a stand-alone dessert star. Its ability to knack conversation and gather guests for a second slice affirms its value at get-togethers, making memories sweet and talk engaging.

Cost-effectiveness is another attribute, as the ingredients used are readily available in most kitchens or can be acquired without significant financial outlay. This accessibility aids in ensuring you can whip up this pie whenever the occasion calls for it.

Historical Background and Cultural Significance


The Creamy Peanut Butter Cup Pie is deeply embedded in the evolution of American sweets. The concept of peanut butter and chocolate as a favored dessert combination emerged during the 20th century, popularized by candy company innovations that led to now-famous products like peanut butter cups.

Culturally, the pie represents the American penchant for comfort foods that evoke warmth and hospitality, often served at communal gatherings to bring people together through shared taste experiences. This dessert model became a standard in American pie collections, holding its place against more traditional fruit pies.

Over time, variations of this pie have evolved, adapting to regional tastes and preferences. Different proportions of ingredients, inclusion of additional flavorings such as vanilla or spices, and even changes in the proportion of chocolate, reflect the pie’s capacity to blend into diverse culinary landscapes across the United States.

Regionally, the pie may boast alterations reflective of local influences, such as the addition of crunchy nuts, caramel swirls, or even marshmallow toppings, each adding a unique twist while honoring the fundamental ethos of peanut butter and chocolate indulgence.

Ingredient Deep Dive


Peanut butter, the monster behind our pie’s rich flavor, boasts a storied history, initially developed by ancient South American cultures who prized peanuts for their versatility and nutrition. Its creamy texture and nutty flavor make it a staple in American kitchens, revered for contributing richness and depth to various recipes.

Nutritionally, peanut butter is a powerhouse. Rich in proteins, healthy fats, and essential vitamins and minerals like magnesium and vitamin E, it’s not just flavorful but beneficial. Ensure optimal freshness by storing it in a cool, dry place and choosing high-quality brands free from unnecessary additives.

Finding chocolate ideal for a pie involves balancing meltability and flavor. Opt for high-cocoa-content chocolate for a rich taste with fewer added sugars. Store in a cool place to ensure it doesn’t bloom and develop a whitish surface layer, maintaining both appearance and flavor.

For those unable to use chocolate due to dietary restrictions, other options include carob or white chocolate variants, or even a carefully curated selection of nuts to provide a different depth to the overall pie profile.

Common Mistakes to Avoid

  • Skipping the chilling phase results in a pie that’s too loose and won’t set properly.
  • Over-mixing the filling can incorporate too much air, leading to a mousse-like texture.
  • Failing to evenly spread the ganache causes uneven layers and a messy serving experience.
  • Using low-quality chocolate sacrifices flavor and texture; always opt for high-quality!
  • Not sealing stored pie properly can lead to unwanted moisture and texture changes.
  • Incorrect pie dish size impacts the thickness of pie layers—adhere to recipe guidelines.
  • Skipping ingredient tempering leads to a longer setting time or an unstable filling.
  • Over-cooling leads to a separation of chocolate and peanut butter layers, spoiling the visual appeal.
  • Forgetting to account for variations in peanut butter consistency can alter pie texture.
  • Neglecting to account for ambient temperature can affect overall pie ascent and flavor melding.

Essential Techniques


Mastering the art of blending is crucial for a perfectly smooth filling. Proper technique ensures uniform flavor distribution and optimal texture, bolstering the appeal of each bite. Avoid over-beating to prevent air bubbles which compromise the pie’s firmness.

Peanut butter consistency can fluctuate due to temperature changes. Gently warming thixotropic peanut butter aids in smoothing it out without compromising its inherent nutrients.

When it comes to chocolate ganache preparation, it’s essential to respect the balance of cream and chocolate ratios to yield the perfect glossy finish. Missteps here can lend a dull ganache or one that fails to firm up, impacting presentation.

Pro Tips for Perfect Creamy Peanut Butter Cup Pie


Ensure each layer is smooth before moving to the next, running a knife along the edges to remove air bubbles that may disrupt uniformity. This maintains aesthetic appeal and guarantees a flawless bite.

Using a parchment paper layer atop the crust while chilling prevents unwanted guest particles from adhering to the crust, ensuring a neat texture and ideal crust consistency.

Embrace chilled pie dishes as they assist in faster setting and reduce humidity impact, thereby promoting pronounced flavor stability.

For optimal sweet and savory balance, use natural peanut butter, which refrains from overpowering the chocolaty notes while maintaining rich creaminess.

Allow the pie to acclimate to room temperature before slicing; this ensures that the filling softens just enough for a clean cut.

Decorate just before serving, especially if using elements prone to wilting, like fresh fruit or cream. This keeps your pie looking as pristine as the first taste.

Variations and Adaptations


Regional variations include substituting the traditional chocolate layer with dark caramel or a salted caramel topping, adding regional spice mixes, or enriching the filling with local nut options like pecans or almonds.

Seasonally, consider incorporating fresh berries or seasonal spices like cinnamon in fall, offering a twist that aligns with current produce flavors and aromas.

To cater to dietary restrictions, alternatives like almond or sunflower seed butter can substitute peanut butter, while coconut cream makes a dairy-free option for a ganache layer.

Explore richer flavors by adding extra depth to your dessert by incorporating vanilla or almond extracts, or even coffee essence for a rich coffee-peanut butter pairing.

For a denser pie, consider incorporating chopped nuts into the crust mix, adding a hint of crunch with every bite.

Add an unexpected flair with a layer of finely shaved dark chocolate or candied nuts, providing an extra textural layer and showcasing nutty undertones.

Serving and Presentation Guide


When ready to plate, consider using a warm knife to make the initial cut, yielding a clean, beautiful slice presentation. Use a pie server to gently lift sections without disrupting layers.

Garnishing with chocolate shavings or a drizzle enhances visual appeal while providing depth to its aesthetic beauty—simple touches like these elevate the pie from ordinary to eye-catching.

Pair with whip cream dollops or serve on a drizzled dessert plate to enhance both look and taste profile. For traditional-style, keep things classic with minimal additional elements.

Modern serving suggestions include mason jars or individual dessert glasses for a chic, single-serving occasion, perfect for buffets or catered events, facilitating ease of self-service.

Mind temperatures—pair warm coffee with chilled slices for a lovely flavor temperature, noting that room temperature serving allows the full flavor profile to emerge.

Maintain portion integrity by following traditional slice guides: aim to cut according to serving recommendations to preserve intended flavor cohesion.

Wine and Beverage Pairing


A medium-bodied red wine, like a Merlot, complements the pie’s rich cocoa notes, presenting full-bodied flavor highlights and reducing palate fatigue.

Non-alcoholic alternatives like a brewed iced coffee or a nutty tea offer flavorful pairings that mesh well with the pie’s inherent nutty depth, perfect for morning or brunch-time serving.

For tea lovers, consider a choice selection of black teas or rooibos, each offering robust flavors that meld appropriately with rich, creamy notes of the pie.

Temperature is critical, ensuring that both beverage and dessert are served at balanced temps to prevent clash: consider refrigerating lightly for optimal enjoyment.

For wine gifts, consider chilling white wine for a refreshing balance when serving post-dinner, allowing a smooth transition from main course to dessert course.

Storage and Shelf Life


Airtight storage is key to prolonging shelf life, using compatible containers to protect pie moistness and texture. Consider individual coverings for each slice, particularly if pre-sliced.

Temperature requires careful moderation, with the fridge acting as the optimal environment for maintaining structural integrity while inhibiting breakdowns.

For long-term storage, ensure clear labeling with creation date and all identification, with a maximum recommended freeze period of up to 2 months.

Signs of spoilage, including differential textures or color erosion, act as clear indicators for best disposal practices, prioritizing safety above all else.

Reheating guidance involves maintaining crispness without over-exposure, meaning careful warming where needed, typically avoiding microwaves for taste integrity.

When freezing, ensure additional airtight layers for pies to save space while ensuring air doesn’t compromise particularly sensitive items.

Make Ahead Strategies


Consider preparing elements like crust days ahead, wrapping tightly in cling film to retain freshness and simplify the day-of assembly process.

Storage between steps should favor cool spots in your fridge, served best if items aren’t disturbed during initial sets to promote structure setting integrity.

While elements are meant to be fresh, ensure freeze points are known to prevent quality dips, and aim for limited freezing when possible to conserve flavor.

Assembly recs promote slice-by-slice preservation, avoiding full slicing too early, which increases exposure, risking climate influence on structural integrity.

Quality can be assessed by eye pre-serving. Depending undergoing any recombination, ensure each piece unfolds impairment as expected, ensuring consistency in each bite.

Scaling Instructions


Scaling options allow for slice multiplication. Halving recipes or doubling increments according to current needs, affording adaptations to bowls and dish sizes.

Equipment alignment is key, ensuring equal distribution and scaling goods so more equipment accommodates expansions and consolidations of recipes.

Equipment adaptations may mandate larger stand mixers or cold storage necessity increases. Size appropriately to allow for dish cycling and adaptation to these new configurations.

Recipe scaling provides timing stipulations based anew assembly timelines avoiding unnecessary flaws through adjusted processes. Monitor factors in given timescales to configure recipe phases for best results.

Storage concerns increase when scaling up, leading to space and storage concerns, best met through efficient of leftovers prioritizing freshness.

Nutritional Deep Dive


A macro breakdown reveals substantial proteins and fats due to peanut butter content, with moderate carbohydrates from crust heaviness offering energy-balanced slices.

Micronutrient analysis emphasizes vitamin E and magnesium benefits, alongside protein count, supporting energy bar capabilities when considered in portion sizes.

Offering health benefits, it provides rich amino profiles thanks to its protein concentrations and valuable nutritious fats thanks to almond options, promising good eating habits stressors.

Portion control fairness aligns with weight management strategies, limiting indulging elements beyond personal selections or needs, balancing dessert reward with pragmatic portions.

Suggest adaptations fit dietary control measures, giving way to full-flavor admissions intervention concerning balanced consumption as a physical reformation goal.

Dietary Adaptations


Gluten-free transitions stock gluten-free crust bases, testing peanut butter brands to guarantee inclusion for gluten-adherence.

Replace dairy sophistication with dairy-free creams in ganache portions, maintaining compositional integrity while respecting full taste needs for those seeking alternatives.

For vegans, ensure specific ingredient vigilance, redirecting butter’s presence gently away from animal sources by switching to plant-friendly equivalents instead.

As investigations weight low-carb potentials befriend select peanut replacements, indicate almond options with intact alternatives for health buffer bliss recipes.

Explore keto pallete adaptations lessens carbohydrate counts within the crust, offering ingredients like almond flour choices rich in robustness for low-maintenance carb equals.

Utilize Paleo pattern devisements in ingredients neutrality across the boards, emphasizing fresh options attuned naturally to light processes.

For low-FODMAP, dietary buffs require careful inclusion, avoiding traditionally reactive nuts for safer, versatile composition.

Troubleshooting Guide


When encountering texture issues, check setting phases or ingredient consistencies to reconcile shape preservation methods, improving firmness ease and slice consistency.

Balance flavors involvements earn equilibrium by leveraging optional bittersweet cues or extracts; mint notes reflect desired edibility and retention attitudes.

Concern shifting with temperature balance carries assorted repercussions, shifting equilibrium into partial states rather than maintaining previously secure control.

Equipment challenges arise upon resizing or accessing equipment, calling for rounded modifications to accommodate small scale or assembled digestive units.

Explore replacement options according to foundational elements, opting replacements via distinct which avoid affecting current sweet balance for optimal success.

Timing considerations arise according recipe double checking when time does not public protect ensuring amassed rank seated positions.

Recipe Success Stories


Our community has embraced this pie, showcasing variations like cookies ‘n cream garnishes and spicy chocolate swizzles that work. User creations demonstrate the pie’s adaptability to countless flavors, maintaining its core pleasing piquancy.

Variation successes have proven attempts such as optional layers, like butterscotch caramel, adding second-party flavors to announcements and broadening taste spectrums effortlessly.

Adherence stories demonstrate adaptations, including lactose-free profiles ensuring satisfaction regardless of intolerances. Variations indicate success potential through careful assessment of limits.

Featured reader nudges present successful outputs through inclusive methods like sugar moderation for ideal taste, showcasing full stories on personalized community blogs.

Photography guides elevate amateur snaps into seasoned entries, calling all members’ inputs beyond basic pie perceptions, highlighting lens catch colors or plating innovation.

Frequently Asked Questions

Can I make the Creamy Peanut Butter Cup Pie without a mixer?
Yes, using a fork for stirring components suffices when hands are steady. Reducing pie movements helps distribute substance evenly.

What peanut butter should I use?
Natural peanut butter balanced with regulated sugar grants retained flavor concentrations while reducing extra loads promising form resistance.

Do I need special tools?
None differ beyond standard home capabilities; typical mixers perform adequate functions given firm pressure and simplicity outlooks.

Can I change the crust base?
Absolutely, with variance options including options such as graham cracker, biscuit-based, or oat-fired bases respecting mixer degrees.

Could the pie be frozen?
Yes, encased properly; its readiness upholds up to three months as ensured elements combined aren’t overexposed antifreeze hangs.

What to do if layers separate?
Mix warming layers, softening problematic boundaries maintaining crucial cohesion; integration measures including additional butter or sugar bind structure.

Should elements be rushed?
No, cooled settling confines layers while refraining acceleration helps perpetuate slices’ positons during operating norm changes.

Can I cut sugar?
Yes, employing reduced-sugar chocolate options becomes ideal where oversight supplements cooperation, wielding flavor naturally.

Do alternatives accuse almond bases?
Temptation accrues almonds flavored variations bearing nuttier increases, making them prime options joining essential preservation forces.

Is ganache necessary?
While optional, baka methods including whipped cream provide adequate substitution during situations when ganache proves fondant excess decoration.

Will ingredient swaps affect pie?
Substitutions require caution: effective restrictions improve predictable condition when processed options fail desired transformations.

Do leftovers store best practices?
Airtight wraps retention means ensuring proper cold storage hindering spoilage boundaries complements freshness and prevent inside drags.

Additional Resources


For enthusiasts progressing beyond mere piping ambitions, similar recipes incorporate unique takes on fruit balance peanut pies, acting as bridges between bases descending into similarly found enlightenment worlds.

Dive deeper into the artisanal sciences enabling exquisite sauces: turn your hand pre-baking into constructing optimal toppings filling gaps, enticing bursts achieved through bond institutions.

Ingredient gleanings signify importance when encasing substances generates rapport—study palatability fluctuations joining crucial mouthpiece distinctions season punctuation panoramas.

Tune culinary tool adventurers identifying favored setups by perusing established provisions catering extraordinarily altering dish realizations.

Reviewing seasonal adaptations highlights customization’s dawning attractiveness, celebrating unexpected elements granting treasure mixes surprise benefits through shared settings.

Join the Conversation


Engage actively within key digital presences: an embodiment reflex enhances post-consumption directories beyond humble flash card nods.

Convey superior photography tactics owning undisputed attentiveness, encouraging cuisine lays or broader fundamentals expressing aspects encouraged must abound.

Form synaptic ecstacies characterized within forumized structures, forming connections operating within multiple platforms enjoying consensus sworn validity.

Enthrall varying proposal viability respecting configuration results. Optimal practices extending reliance accuracies infilled throughout sine wave career extensions.

Ignite unprecedented recall within recipe conceptualizations, broadening approach adjustments while adapting carols wandering softer environments enytermuly asideal plans.

The Recipe

Creamy Peanut Butter Cup Pie

Serves: 8

Prep Time: 20 mins

Cook Time: 10 mins

Total Time: 30 mins

Kitchen Equipment Needed

  • Mixing bowl
  • Hand mixer or whisk
  • Pie dish
  • Spatula
  • Knife

Ingredients

  • 1 cup creamy peanut butter
  • 1/2 cup granulated sugar
  • 1 1/2 cups heavy whipping cream
  • 6 oz dark chocolate, chopped
  • Crumbly pie crust (pre-baked)
  • 1 tsp vanilla extract

Directions

  1. In a large mixing bowl, beat the peanut butter, sugar, and 1/2 cup of heavy cream until smooth and well-mixed.
  2. Pour the mixture into the pre-baked pie crust, smoothing the top with a spatula.
  3. In a small saucepan, heat the remaining heavy cream over medium heat until just simmering.
  4. Pour hot cream over chopped chocolate in a heatproof bowl; let sit for 1 minute.
  5. Stir until chocolate is completely melted and ganache is smooth.
  6. Pour chocolate ganache over the peanut butter filling, spreading evenly.
  7. Refrigerate for at least 3 hours or until set.
  8. Remove from fridge 15 minutes before serving; slice and enjoy!

Recipe Notes

  • For added texture, sprinkle chopped peanuts over the ganache before chilling.
  • If the pie filling seems too loose, additional refrigeration time may be necessary.

Indulge in Moose Farts: Delicious No-Bake Truffles Recipe

Moose Farts Recipe: Decadent No-Bake Truffles Treat

⚖️
Difficulty
Easy

⏲️
Prep Time
15 mins

🕒
Cook Time
0 mins

⏱️
Total Time
15 mins

🍽️
Servings
24

Indulge in the charming simplicity of our Moose Farts Recipe, a decadent no-bake truffle treat that marries rich chocolate decadence with the ease of preparation. Perfect for those moments when you crave something sweet and delightful without spending hours in the kitchen, these truffles promise a melt-in-your-mouth experience. Imagine a bite-sized indulgence bursting with flavor and texture, crafted to satisfy your sweet tooth anytime.

As you explore this recipe, allow your senses to be enchanted by the luscious combination of cocoa, coconut, and sweet crumbs. With every meticulous step paved with ease, this no-bake dessert is perfect for both novice bakers and experienced pastry enthusiasts alike. Our Moose Farts truffles invite you to transform simple pantry staples into a gourmet delight that’s sure to dazzle friends and family at any gathering.

Quick Recipe Highlights

  • Flavor Profile: Harmonizing deep cocoa with hints of coconut, creating an irresistible chocolatey sweetness.
  • Texture: A velvety, smooth truffle core ensconced within a delicate, crumbly exterior for a delightful bite.
  • Aroma: A heady mix of rich chocolate and fresh coconut aromas are the first sensory notes to captivate you.
  • Visual Appeal: Perfectly round, these truffles boast a cocoa-dusted finish that’s both rustic and refined.
  • Skill Level Needed: This recipe is approachable and beginner-friendly, requiring no baking skills or elaborate equipment.
  • Special Equipment: Only basic kitchen tools such as a mixing bowl and a baking sheet are needed.

Recipe Overview

  • Difficulty Level: We categorize this as an easy recipe, given the absence of baking and the straightforward mixing process.
  • Category: Dessert or sweet treat, perfect for after-dinner indulgence or party spreads.
  • Cuisine: This dish finds its roots in modern North American culinary practices, often embraced during festive occasions.
  • Cost: An affordable treat, mainly using ingredients that are typically on hand in any kitchen.
  • Season: Ideal year-round, though it becomes a festive favorite during holiday seasons for its rich flavors.
  • Occasion: Versatile enough for casual friend gatherings, holiday celebrations, or quick personal indulgence.

Why You’ll Love This Recipe

The Moose Farts Recipe stands out with its unparalleled taste, where the bitterness of cocoa intertwines beautifully with sweet, creamy textures. Each bite offers a velvety melt that’s sure to enchant dessert lovers. Discover the convenience of this no-bake recipe, which promises an indulgent experience without demanding hours of preparation. It’s an absolute delight for your events, allowing you to focus on entertaining while captivating your guests with these treats.

Further, this recipe offers some nutritional merits. While maintaining indulgence, it also provides fiber from the coconut and trace minerals from cocoa. With common pantry ingredients, creating these truffles is cost-effective and accessible, making them perfect for spontaneous dessert cravings or last-minute dinner party preparations.

Historical Background and Cultural Significance

The intriguing name of Moose Farts likely originated in the Northern regions of North America, humorously linking the untamed spirit of the wilderness to the indulgent nature of the treat. Over time, such no-bake truffles have captured the hearts of many, symbolizing the ease and creativity inherent in home cooking. The recipe’s evolution has embraced various cultural preferences, adapting for different tastes and dietary needs while keeping its core concept intact.

Ingredient Deep Dive

The primary ingredient, cocoa powder, is deeply rooted in ancient cultures, revered for its rich flavor and invigorating properties. Chosen for its antioxidative benefits and decadent taste, cocoa powder should ideally be of high quality to deliver robust flavor. Similarly, coconut not only imparts a tropical aroma but also enriches the dessert with fibers and healthy fats. Ensure your coconut is fresh for maximum flavor retention, storing it in a cool, dry place away from direct sunlight. Substitutes like almond flour can be used to accommodate dietary restrictions or taste preferences.

Common Mistakes to Avoid

  • Avoid using stale or old cocoa powder; freshness impacts flavor profoundly and is critical for the desired chocolate richness.
  • Be careful not to over-mix the ingredients, as this can affect the texture and prevent easy shaping of truffles.
  • Refrain from using a substitute for sweetened condensed milk unless following a tested dietary modification, as this ingredient is key for consistency.
  • Coconut flake size can influence texture; opt for finely shredded for a smoother blend.
  • Ensure all ingredients are at room temperature to promote even mixing and optimal flavor blending.
  • Resist the temptation to add too much liquid if the mixture appears dry; it will set as it cools and firms.
  • Allow adequate chilling time for the truffle mixture, ensuring it’s firm enough to shape and coat easily.
  • Storage in an airtight container is crucial to prevent drying out and maintaining optimal truffle texture.

Essential Techniques

Crafting the perfect Moose Farts requires mastering the art of mixing. Achieving a uniform blend is essential for a smooth, cohesive truffle. Begin by combining dry ingredients thoroughly before gradually introducing wet elements, maintaining even distribution without overworking the mixture. Shape your truffles with care, refrigerating the mixture sufficiently to facilitate easy handling and uniformity.

Pro Tips for Perfect Moose Farts

For an enhanced cocoa flavor, toast your coconut before blending to unlock additional aromas and textures. Use a small ice cream scoop for uniformly sized truffles, ensuring consistent cooking. Experiment with rolling the truffles in alternative coatings like finely crushed nuts or colorful sprinkles for a personalized touch.

Variations and Adaptations

Explore regional variations by incorporating local nuts or dried fruits into your truffle mixture, adjusting textures and flavors to suit seasonal ingredients. For a decadent winter twist, infuse the mix with cinnamon or cloves for a warm, spicy undertone.

Serving and Presentation Guide

For an elegant presentation, arrange your truffles on a pristine white platter, garnished with a sprinkle of edible glitter or fresh mint leaves for a touch of color. Pair these with coconut shavings or mini chocolate chips around the tray’s edges, complementing the truffles’ rustic shape.

Wine and Beverage Pairing

These intense chocolate truffles pair splendidly with dessert wines like a sweet port, enhancing the cocoa’s depth while cleansing the palate with its fruity notes. For non-alcoholic options, consider dark chocolate hot cocoa or full-bodied coffee to parallel the rich flavors.

Storage and Shelf Life

Store your Moose Farts in an airtight container to maintain their moisture, placing them in the refrigerator to extend freshness. For longer preservation, freeze the truffles in layers using wax paper between them to prevent sticking. Allow adequate thawing time before serving to restore optimal texture.

Make Ahead Strategies

This recipe thrives as a make-ahead delight. These truffles can be prepared and chilled up to two days prior to serving. Remove them from refrigeration about 15 minutes before serving to soften slightly and reach peak flavor.

Scaling Instructions

Easily scale the Moose Farts Recipe by adjusting ingredients proportionately, maintaining the original balance of flavors. For larger batches, ensure ample refrigeration space to set truffles evenly. When halving, adhere to precise measurements for consistency.

Nutritional Deep Dive

Packed with rich flavors, Moose Farts provide a delightful yet decadent touch to any dessert spread, offering moderate calories mostly from fats and sugars. For a lighter option, consider reducing the sugar content by substituting with natural sweeteners, slightly altering the overall character but maintaining the core pleasure.

Dietary Adaptations

For a vegan adaptation, swap out sweetened condensed milk with coconut milk and a touch of agave syrup, catering to dietary inclusivity without sacrificing taste or texture. For gluten-free adaptations, ensure all ingredient variations meet necessary dietary standards, particularly when considering additional coatings.

Troubleshooting Guide

Should your truffles appear too soft, consider returning them to the refrigerator to firm up before reshaping. Ensure every step is followed closely to maintain texture balance, particularly when adapting the recipe for dietary needs, as varying ingredient consistencies can impact the final outcome.

Recipe Success Stories

Our community members have shared the joy of customizing their Moose Farts, with add-ins like orange zest or peppermint extract, transforming the truffles into seasonal favorites. Users praised the simplicity of the recipe and the delightful results that never failed to impress their guests.

Frequently Asked Questions

How do I store the truffles? Keep them in an airtight container in the fridge for up to a week, or freeze for up to three months.

Can I substitute the cocoa powder? While cocoa powder brings traditional depth, try carob powder for a caffeine-free alternative.

How do I prevent the mixture from becoming too sticky? Gradually add the wet ingredients, ensuring consistency stays manageable for shaping.

Additional Resources

Explore our collection of related recipes for more no-bake dessert ideas, or delve into our guide to chocolate handling techniques to refine your skills further. We provide comprehensive ingredient information to support your culinary endeavors.

Join the Conversation

Engage with fellow dessert enthusiasts in our social media groups, where you can share photos of your culinary creations or seek advice on flavor adaptations. Our online community thrives on inspiring one another with inventive recipe variations and exciting new twists.

The Recipe

Moose Farts

Serves: 24

Prep Time: 15 mins

Cook Time: 0 mins

Total Time: 15 mins

Kitchen Equipment Needed

  • Mixing bowl
  • Baking sheet
  • Measuring cups
  • Spoon or small scoop
  • Airtight container

Ingredients

  • 1 cup shredded coconut
  • 1 can (14 oz) sweetened condensed milk
  • 3 cups crushed graham crackers
  • 1/2 cup cocoa powder
  • 1/4 cup unsalted butter, melted
  • 1 tsp vanilla extract

Directions

  1. In a large mixing bowl, combine crushed graham crackers and cocoa powder.
  2. Add shredded coconut and melted butter, stirring until well mixed.
  3. Pour in sweetened condensed milk and vanilla extract, blending until a dough forms.
  4. Chill the mixture for 30 minutes to firm up.
  5. Using a spoon or small scoop, shape into truffles and place on a baking sheet.
  6. Roll each truffle lightly in additional cocoa powder if desired.
  7. Refrigerate until serving. Store in an airtight container for freshness.

Recipe Notes

  • For extra flair, consider adding toppings like crushed nuts or sprinkles.
  • Mixing different flavor extracts such as almond or coconut can add an intriguing twist.

Indulge in These Irresistible Gooey Salted Caramel Cream Cheese Cupcakes

Gooey Salted Caramel Cream Cheese Cupcakes: A Sweet Indulgence

⚖️
Difficulty
Medium

⏲️
Prep Time
20 mins

🕒
Cook Time
25 mins

⏱️
Total Time
45 mins

🍽️
Servings
12

Dive into the ultimate dessert experience with our Gooey Salted Caramel Cream Cheese Cupcakes, a perfect blend of sweet and savory flavors that will tantalize your taste buds. These cupcakes offer a rich caramel flavor balanced by a hint of salt, paired with the creamy tang of cream cheese to create a cupcake that’s more than just sweet – it’s a complex palate pleaser. Whether you’re a lifelong caramel aficionado or newly venturing into the world of intricate desserts, this recipe will not disappoint.

Crafted for those with a flair for baking and a passion for innovative flavor pairings, these cupcakes boast both simplicity and sophistication. Imagine sinking your teeth into a moist, fluffy cake topped with gooey salted caramel and a luxurious, smooth cream cheese frosting. Each bite promises layers of flavor and texture – it’s culinary artistry at its best! Celebrate your next occasion, big or small, with these captivating cupcakes that steal the show every time.

Quick Recipe Highlights

  • Flavor Profile: Expect a delightful fusion of rich caramel sweetness with just the right sprinkle of sea salt, enhanced by the tangy creaminess of the cream cheese frosting.
  • Texture: The cupcakes are moist and tender, complemented by the smooth, creamy texture of the frosting and the gooey caramel layer.
  • Aroma: Your kitchen will fill with the warm, inviting scent of caramel and vanilla, mingling perfectly with the classic aroma of freshly baked cupcakes.
  • Visual Appeal: These cupcakes are picture-perfect with a golden caramel drizzle over a pristine white frosting, drawing eyes even before the first bite is taken.
  • Skill Level Needed: While accessible to intermediate bakers, the recipe provides clear instructions and tips to guide novices to sweet success.
  • Special Equipment: All you need is a stand mixer, an icing spatula, and a piping bag to achieve bakery-quality results at home.

Recipe Overview

  • Difficulty Level: Moderate, owing to the caramel creation, which demands attention and precision. The rest is straightforward, making it ideal for bakers looking to expand their skills.
  • Category: These cupcakes fall under the dessert category, making them a sweet finale for any meal or celebration.
  • Cuisine: Inspired by American baking traditions, these cupcakes introduce a touch of modern culinary flair with their gourmet twist.
  • Cost: With standard pantry ingredients supplemented by cream cheese and caramel, these cupcakes are affordable for most budgets.
  • Season: Perfect year-round, but particularly delightful in the fall and winter months when caramel flavors are at their peak popularity.
  • Occasion: From holiday gatherings and birthday parties to casual get-togethers, these cupcakes fit seamlessly into any dessert table lineup.

Why You’ll Love This Recipe

Gooey Salted Caramel Cream Cheese Cupcakes offer a taste experience that’s simply irresistible. Each component harmonizes beautifully — the cupcake’s moist crumb, the indulgent cream cheese frosting, and the luscious caramel drizzle all play their parts in this delicious symphony of flavors. The use of sea salt elevates the caramel’s sweetness, ensuring that each bite is exciting and well-balanced.

Preparing these cupcakes is a rewarding endeavor, thanks to their manageable steps that lead to a stunning end result. With straightforward instructions, you’ll confidently navigate the creation of homemade caramel, which might seem daunting at first but quickly turns into a fun culinary adventure. Efficiency is key, and this recipe ensures that you’re maximizing your time without compromising quality.

Nutritionally, these cupcakes strike an indulgent yet slightly restrained tone as they balance rich flavors with manageable serving sizes. They fit perfectly into a well-rounded dessert repertoire without being overtly heavy or unnecessarily calorific. Additionally, they can easily be adapted for various dietary needs with the right substitutions, allowing for guilt-free enjoyment.

On a social level, serving these cupcakes at a gathering is sure to spark conversation and liven up the mood. Their elegant appearance and sophisticated taste profile make them a crowd-pleaser that will elevate any function. Sharing such a delightful treat also enhances relationships, as you spread joy through the universal love of good food.

Finally, the recipe’s cost-effectiveness cannot be understated. It calls for mostly basic ingredients, ensuring that you don’t break the bank while still impressing your guests. Plus, the accessibility of these components means you’re likely to have most on hand, simplifying the preparation process even further.

Historical Background and Cultural Significance

The concept of cupcakes, or small cakes baked in cups, has origins that trace back to the 19th century, gaining popularity as a quick and convenient dessert. During this time, the ease of measuring ingredients by the cup was novel, simplifying what was traditionally an elaborate baking process. Since then, cupcakes have become an essential part of global pastry-making traditions, reflecting both historical roots and modern innovation.

Caramel, on the other hand, boasts a rich history as a confection dating back to the 17th century. Initially enjoyed as a simple sugar and cream concoction, caramel has evolved to become the complex flavor staple we know today. The addition of salt, popularized in recent years, elevates caramel’s multidimensional appeal by enhancing its innate sweetness and depth, paving the way for countless culinary creations.

These Gooey Salted Caramel Cream Cheese Cupcakes embody a blend of these historical elements—bringing the classic charm of cupcakes into harmony with the complex allure of salted caramel. As a cultural symbol, they represent the merging of American baking traditions with modern gourmet innovation, showcasing simple elements transformed into extraordinary indulgences.

Regionally, the influence of cupcakes spans globally. From American diner displays to the most sophisticated European patisseries, the versatile cupcake continues to captivate hearts. Meanwhile, caramel has found its place within varied cuisines, appearing as sauces, candies, and even savory accents. The marriage of these elements in our cupcakes is a testament to the culinary world’s ability to adapt and inspire through time.

Ingredient Deep Dive

The star of our cupcakes, the caramel, hails from a storied past of sugar alchemy. Initially crafted with only sugar and water, it has evolved into a mixture that incorporates cream and butter for added richness. Selecting high-quality sugar and fresh cream is crucial for the best results. Store-bought caramel alternatives do exist, yet nothing beats the freshness and flavor complexity of making it yourself.

Cream cheese plays a dual role in our recipe—providing balance and contrast to the caramel’s sweetness while introducing its own tangy charm. When selecting cream cheese, opt for full-fat versions, as they yield the best texture and flavor for baking. It’s important to let the cream cheese sit at room temperature before use, ensuring a smooth and consistent frosting that’s delightful in every bite.

Each ingredient in these cupcakes adds to their overall success. For instance, premium vanilla extract rounds out flavors beautifully, while a quality sea salt garnishing strikes the perfect savory note. Butter, flour, and eggs—each staple ingredients—are essential to create a tender cake crumb structure. Ensuring fresh, quality ingredients across the board is the secret to achieving a bakery masterpiece at home.

Common mistakes, from under-measuring dry ingredients to overbeating the batter, can be avoided with careful attention to detail. Mastering caramel requires patience and a watchful eye for visual cues, such as the amber color that signals readiness. Keep an eye on frosting consistency; too thick won’t spread, too thin won’t hold shape. Perfection lies in practice and precision.

Common Mistakes to Avoid

  • Avoid overcooking your caramel, as it can quickly move from richly flavored to burnt. Watch for a deep amber hue as a visual cue to remove it from heat.
  • Ensure that all ingredients are at room temperature before starting, particularly for the batter and frosting, to achieve the best texture and even mixing.
  • Be mindful of overmixing your batter to avoid dense cupcakes; mix just until the ingredients are combined and smooth.
  • Don’t skip the cooling process for your caramel before topping the cupcakes; applying hot caramel can melt the frosting beneath.
  • Under-measuring your salt can dull the flavor profile; measure carefully for a balance that enhances rather than overwhelms the caramel.
  • Use a piping bag for even frosting distribution; it helps achieve a professional look while establishing consistent texture.
  • Don’t rush the cooling of cupcakes before frosting; a warm cupcake can cause frosting to slide and lose its definition.
  • Keep portions under control when adding caramel; overloading can lead to an unmanageable, messy eating experience.

Essential Techniques

Mastering the art of perfect caramel creation is crucial for this recipe. The key is closely monitoring the sugar as it melts and darkens, avoiding stirring too much, which can cause crystallization. A successful caramel becomes a beautiful, deep amber hue with a rich, complex flavor that’s neither too bitter nor overly sweet.

Cream cheese frosting demands a careful approach. Begin by beating the cream cheese to a creamy texture before adding the sugar and vanilla. This ensures a smooth result without lumps. Aim for a spreadable consistency that holds its shape, adjusting the sugar or cream levels as necessary to achieve this.

Piping with precision is essential for a visually appealing cupcake. Using a proper piping bag and tip combination makes the task straightforward; the goal is a neat, even swirl on top of each cupcake. Practice on parchment paper if you’re unfamiliar with piping, and soon you’ll achieve a presentation worthy of any bakery.

Pro Tips for Perfect Gooey Salted Caramel Cream Cheese Cupcakes

Keep a close eye on your caramel’s color and smell to gauge readiness; it should be a deep amber and give off a toasted sugar aroma. Remove it from heat immediately to avoid burning.

To maintain cream cheese texture, avoid overmixing once your frosting components are fully integrated; this prevents a loose, runny consistency.

Embrace the balance of salt in caramel by using a kosher or sea salt that complements rather than overwhelms, highlighting and enriching the caramel flavor.

A small offset spatula offers greater control when spreading frosting or caramel on the cupcakes, allowing for clean and professional edges.

Before serving, place finished cupcakes in the fridge for 10 minutes, allowing flavors to meld and textures to firm slightly for the perfect bite.

Practice controlled piping to achieve distinct, even patterns. Always pipe straight onto the cupcake, applying even pressure to the pastry bag for professional results.

Variations and Adaptations

Regional variations of these cupcakes could involve substituting the caramel with local flavors such as honey or maple syrup, providing a unique take that embraces local ingredients. Alternatively, try a seasonal adaptation by incorporating spices like cinnamon or nutmeg into the batter for fall-inspired warmth.

Dietary modifications can make these cupcakes accessible to more people. Swap traditional flour for a gluten-free blend, or use dairy-free cream cheese and margarine for a lactose-free version. With slight adjustments, you’ll have a dessert suitable for a range of diets.

For those preferring a less sweet option, reduce sugar content slightly in both the cupcake and frosting while enhancing the saltiness of the caramel contrast. This subtle change creates a delicious, balanced dessert without sacrificing the overall integrity of the original recipe.

Serving and Presentation Guide

Achieving the perfect cupcake presentation can elevate your dessert to new heights. Consider a tiered serving stand for a visual display that highlights the cupcakes’ beauty at an event. For an added touch of elegance, a simple caramel drizzle over the frosting is both aesthetically pleasing and indicates the flavor profile.

Garnishing these cupcakes with a light sprinkle of sea salt or finely chopped nuts adds texture and accentuates the caramel’s complexity. Traditional accompaniments like coffee or espresso pair wonderfully, enhancing the caramel’s richness, while offsetting it gently with the cream cheese’s tang.

Presentation doesn’t end with the surface; nestle each cupcake in decorative liners to appeal to both the eye and the palette. Pay attention to portioning to avoid overindulgence, as the richness packs a punch that a small size can satisfy adequately.

Wine and Beverage Pairing

Pairing wine with these decadent cupcakes requires selecting those that complement rather than clash with the rich caramel and cream cheese notes. A dessert wine such as Sauternes or a sweet Riesling carries fruit and honey undertones that harmonize beautifully with the cupcakes’ flavor profile.

For non-alcoholic options, consider brewed herbal teas like chamomile or rooibos, which provide a warm, soothing backdrop that highlights the dessert’s complex flavors. A classic pairing includes coffee or espresso, providing a lovely bitterness that cuts through the dessert’s sweetness for balance.

When serving beverages, pay attention to temperature; warm drinks contrast nicely with the cool, creamy cupcake while chilled wines enhance the dessert’s luxurious experience. Consider offering tasting notes alongside beverages for an enriched culinary experience that highlights different pairing angles.

Storage and Shelf Life

Proper storage is essential to preserving the freshness and integrity of these cupcakes. After baking, allow them to cool completely before making any storage decisions. Keep them in an airtight container in the refrigerator for maximum freshness, as cream cheese frosting can soften or spoil at room temperature.

For those planning to make these cupcakes in advance, it’s crucial to separate the frosting process until just before serving. This ensures the freshest experience possible and prevents any potential spoilage from cream cheese left too long at room temperature.

Keep an eye out for drying or crystallizing caramel atop stored cupcakes. These are signs of degradation, indicating it’s time to enjoy them. Avoid freezing frosted cupcakes, as cream cheese generally does not thaw well, resulting in altered texture and potential flavor loss.

Make Ahead Strategies

A strategic make-ahead timeline for these cupcakes engages several key points to maximize convenience and quality. You can bake the cupcakes a day in advance, storing them securely in an airtight container to prevent drying out. Simply assemble the frosting and caramel before serving.

To maintain freshness and quality during storage, ensure each part is separated into its respective container—cupcakes, frosting, and caramel—and refrigerate until needed. Bring the parts together in an assembly line fashion when ready to serve, ensuring that flavors and textures are at their peak performance.

Reheating should focus solely on bringing the cupcakes to room temperature from the fridge. Avoid microwaving, which could alter the texture of the delicate cake. Fresh elements like the final caramel drizzle should be added just before serving to preserve the ultimate combination of flavors.

Scaling Instructions

To scale this recipe, precise adjustments to ingredient measurements are necessary to maintain balance and flavor consistency. Halving the recipe is straightforward; reduce each ingredient by half, paying close attention to ensure accurate division, particularly of ingredients that aren’t easily split, like eggs.

Doubling or tripling the recipe entails care to maintain consistent mixing and baking times. Larger batches may require adjustments in oven layout or pan quantities, so consider setting a timer for rotating pans if necessary to ensure even baking across all cupcakes.

Keep storage considerations in mind when scaling up, as additional ingredients or larger quantities require room in your refrigerator or pantry. Plan ahead to ensure enough space for cooling and presentation, especially for events where quantity meets quality demands.

Nutritional Deep Dive

Gooey Salted Caramel Cream Cheese Cupcakes boast a unique macro composition that balances pleasure with moderation. These indulgences feature a carb-centric profile suited for occasional enjoyment. However, specific dietary needs can be addressed with ingredient swaps that retain this balance.

Micronutrients are less prominent, given the dessert nature of these cupcakes, focusing more on flavor than nutrition. Still, each ingredient selected contributes to a complex, enjoyable experience with mindful portion control enhancing the benefits of indulgence.

Health benefits derive primarily from conscious consumption within an overall balanced diet. Incorporate one or two cupcakes in moderation rather than consuming as a primary dietary staple to enjoy the richness without overwhelming your nutritional goals.

Dietary Adaptations

For fans of gluten-free living, swapping all-purpose flour with a high-quality gluten-free baking blend ensures these cupcakes remain accessible. Incorporate xanthan gum for added texture control to mimic traditional results seamlessly.

Embracing a dairy-free approach is possible by opting for dairy-free cream cheese alternatives and vegan butter options, allowing even lactose-intolerant or dairy-free individuals a taste of these delicious cupcakes.

Vegan adaptations can further cater to animal-free diets by replacing eggs with substitutes such as flaxseed or applesauce, alongside non-dairy replacements for butter and cream cheese, accommodating any preference.

Low-carb diets can embrace a slightly modified version by substituting almond or coconut flour for a lower-carbohydrate profile while adjusting for other ingredients accordingly to maintain intended flavors.

Troubleshooting Guide

When issues arise regarding cupcake texture, such as dryness or density, assess mixing duration and ingredient ratios. Properly balancing wet and dry components is critical for achieving the desired moist crumb.

Flavor imbalance often signals either under or over-application of salt or sugar. Adjust seasoning gradually, ensuring caramel and frosting have harmonized tones before execution as finishing steps.

Temperature problems often stem from oven calibration. Double-check the internal thermometer accuracy to prevent uneven baking, leading to raw centers or overly baked exteriors.

If equipment issues occur, such as frosting dispersal challenges, review tip attachments or mixer settings. Ensuring proper fittings and speeds minimizes frustrations with consistency and control.

Ingredient substitutions might lead to unexpected variances. Ensure comparability before making substantial adjustments, factoring in equal measurements of alternative ingredients to maintain intended taste profiles.

Timing concerns often stem from inaccuracy during preparation stages such as caramel or frosting creation. Keep a close eye on the clock or utilize assists like timers for optimal sequencing during production.

Recipe Success Stories

Readers have shared a myriad of success stories, utilizing creative adaptations and sharing joyous occasions celebrated with these cupcakes. Enthusiastic feedback underscores their versatility, with home bakers relaying tales of initial caution towards caramel turning boldly into triumph upon mastery.

Feedback points to regional variations, as users incorporate local ingredients for personalized takes, obtaining both unexpected and delightful results. Variants include regional nuts for garnishing and other modifications championed through social media platforms by the community.

Suggestions abound, combining photography tips that showcase the cupcakes alongside tales of baking with family, creating intergenerational connections through shared kitchen experiences. Readers contributed ideas and tips for customized toppings and unique flavor pairings for seasonal variations.

Frequently Asked Questions

1. Can I use store-bought caramel? Yes, store-bought caramel can be a convenient substitute. However, fresh homemade caramel enhances the taste considerably and provides greater flavor depth.

2. Is it possible to make the frosting with reduced sugar? Absolutely. You can reduce sugar for less sweetness. Add small amounts incrementally to maintain texture and flavor balance.

3. What alternatives exist for dairy ingredients? Opt for non-dairy cream cheese and vegan butter. These swaps deliver a comparable texture and taste while accommodating dietary restrictions.

4. How should I store the finished cupcakes? Ensure they are refrigerated, covered securely in an airtight container to preserve freshness and maintain the frosting’s integrity.

5. Can I use natural sugar substitutes? Stevia and monk fruit can replace sugar, ensuring sweetness with fewer calories. Note that taste and texture may vary slightly.

6. How far in advance can I prepare cupcakes? Baking up to a day ahead is advisable, while frosting and caramel are best added shortly before serving to preserve texture and flavor quality.

7. Can I make these gluten-free? Substitute with gluten-free flour blends, using similar measurements for remarkable results while accommodating gluten sensitivities.

8. Do I need a stand mixer? While convenient, a hand mixer suffices if used cautiously to avoid overbeating, maintaining desired batter and frosting texture.

9. What’s the ideal oven temperature? Bake at 350°F (175°C) for optimal results, ensuring your oven maintains consistent heat distribution across cupcake pans.

10. How long are they good for once frosted? Fully assembled cupcakes remain fresh for up to 3 days when refrigerated. Consume at room temperature for enhanced flavor and texture.

Additional Resources

Explore related recipes for expanding your baking repertoire, including other beloved cupcake varieties and techniques that perfect your culinary expertise. Consider experimenting with caramel-centric dishes and desserts to broaden your appreciation of its delightfully versatile characteristics.

Technique guides for mastering the foundational elements of cake baking and caramel-making offer further insights. Discover ingredient spotlights that delve into lesser-known details surrounding key flavor components and their culinary histories, enriching your understanding of their roles.

Additionally, recommendations for essential kitchen equipment will aid in achieving consistent, high-quality results with each bake. Introduce yourself to seasonal adaptations that highlight the cupcake’s potential across varied climates and occasions, making them a year-round favorite.

Join the Conversation

Social media provides the perfect venue to share photos of your creations, swap tips, and engage with a broader community of baking enthusiasts. Share your unique takes on the Gooey Salted Caramel Cream Cheese Cupcakes hashtag and revel in a shared appreciation for culinary innovation.

Experimenting with photography captures the visual essence of your baked works—employ natural lighting, creative angles, and tasteful compositions for engaging, shareable content appreciated by bakers worldwide. Provide your own recipe reviews and inspire constructive exchange through dedicated forums and blog comments.

Engage with fellow enthusiasts, sharing recipe variations and adaptations that inspire and expand our collective baking horizons for the love of flavor. Whether for personal fulfillment or broader culinary discourse, joining this cohesive community proves an endlessly enriching endeavor.

The Recipe

Gooey Salted Caramel Cream Cheese Cupcakes

Serves: 12

Prep Time: 20 mins

Cook Time: 25 mins

Total Time: 45 mins

Kitchen Equipment Needed

  • Mixer (stand or handheld)
  • Muffin tin and liners
  • Mixing bowls
  • Piping bag and decorative tip
  • Offset spatula
  • Saucepan
  • Wire rack

Ingredients

  • 1 cup granulated sugar
  • 6 tablespoons unsalted butter, cubed
  • 1/2 cup heavy cream
  • 1/2 teaspoon sea salt
  • 1 1/4 cups all-purpose flour
  • 1/2 teaspoon baking soda
  • 1/4 teaspoon baking powder
  • 1/4 teaspoon salt
  • 4 ounces cream cheese, softened
  • 1/4 cup unsalted butter, softened
  • 1/2 cup granulated sugar
  • 1 large egg
  • 1 teaspoon vanilla extract
  • 1/2 cup milk
  • 3/4 cup powdered sugar
  • 1/2 teaspoon vanilla extract for frosting

Directions

  1. Preheat oven to 350°F (175°C) and line a muffin tin with liners.
  2. In a saucepan, melt sugar over medium heat until amber, stirring occasionally.
  3. Carefully whisk in butter until melted, followed by heavy cream, and cook until smooth. Stir in sea salt.
  4. In a bowl, whisk flour, baking soda, baking powder, and salt together.
  5. In another mixing bowl, beat cream cheese and butter until creamy. Add sugar, egg, and vanilla; mix until smooth.
  6. Slowly incorporate dry ingredients alternately with milk into cream cheese mixture, mixing on low speed until combined.
  7. Divide batter among muffin cups, filling 2/3 full, and bake for 20-25 minutes. Cool completely on a wire rack.
  8. For the frosting, beat together softened cream cheese and butter in a bowl until smooth. Gradually add powdered sugar and vanilla; beat until fluffy.
  9. Spread or pipe frosting on cooled cupcakes. Drizzle with caramel sauce.

Recipe Notes

  • Caramel can be made up to a week in advance and stored in the fridge.
  • Room temperature ingredients ensure better mixing and texture.
  • Adjust frosting sweetness to taste by modifying powdered sugar levels.
  • A sprinkle of sea salt on top before serving enhances the flavor.

Irresistible Homemade Raspberry Crumble Cookies: A Sweet and Simple Treat

Homemade Raspberry Crumble Cookies: A Delicious Twist on Tradition

⚖️
Difficulty
Medium

⏲️
Prep Time
20 mins

🕒
Cook Time
15 mins

⏱️
Total Time
35 mins

🍽️
Servings
12 cookies

Imagine biting into a homemade raspberry crumble cookie, fresh out of the oven. Each bite is a delightful balance of buttery goodness and the sweet-tart punch of raspberry, creating a harmony of flavors that dances on your palate. These Raspberry Crumble Cookies are a tribute to the traditional crumble but reimagined as delightful handheld treats perfect for any occasion. With an inviting aroma that fills your kitchen, these cookies promise not only taste but the warmth and joy of homemade baking. Whether you are an experienced baker or new to the kitchen, these cookies are sure to be a hit, providing both satisfaction and a bit of nostalgia in every bite.

Let’s delve into what makes these Raspberry Crumble Cookies uniquely irresistible. Combining the sweetness of crumble with the tanginess of raspberries offers a refreshing twist. The crisp exterior and soft center create a textural symphony that is both comforting and exciting. Perfect for summer picnics or holiday gatherings, the visual appeal of these cookies is enhanced by their beautiful ruby-red raspberry centers. Here’s what you need to know to make these delightful cookies come to life in your kitchen.

Quick Recipe Highlights

  • Flavor Profile: The perfect balance of buttery crumble and tangy raspberry, providing a sweet-tart taste with a hint of vanilla.
  • Texture: A delightful combination of a crispy exterior with a soft, chewy center makes each bite satisfying.
  • Aroma: An enticing scent of baked goodness mixed with fruity notes that will fill your kitchen.
  • Visual Appeal: Golden cookies with vibrant red centers catch the eye, making them a beautiful addition to any dessert table.
  • Skill Level Needed: Moderate baking skills are required, including basic dough preparation and jam placement techniques.
  • Special Equipment: A cookie scoop, parchment paper, and baking sheets ensure uniformity and ease.

Recipe Overview

  • Difficulty Level: Intermediate, requiring knowledge of baking dynamics and precision in measuring ingredients.
  • Category: Desserts, perfect for afternoon tea snacks, holiday treats, or as an indulgent dessert option.
  • Cuisine: A delightful fusion of traditional American baking with a modern fruity twist.
  • Cost: Affordable ingredients that offer gourmet results, suitable for budget-friendly baking.
  • Season: Best enjoyed in spring and summer when raspberries are in season, though equally delightful year-round using preserved raspberries.
  • Occasion: Perfect for picnics, holiday gatherings, or as a sweet surprise for loved ones.

Why You’ll Love This Recipe


From the first bite, these Raspberry Crumble Cookies captivate with their harmonious blend of taste and texture, enticing your senses and elevating them beyond ordinary cookies. The ease of preparation doesn’t compromise depth, providing both convenience and gourmet flavor. Nutritionally, the inclusion of fresh raspberries adds a healthy twist, rich in vitamins and antioxidants, balancing indulgence with nourishment. As a versatile option, they shine in both casual and formal settings, making them perfect for entertaining guests or as a self-indulgent treat with your favorite cup of tea. The cookies’ affordability and easy accessibility of ingredients highlight them as an excellent option for bakers looking to achieve mouth-watering results without a hefty price tag.

Historical Background and Cultural Significance


These cookies are inspired by the traditional raspberry pie, a staple dessert with roots in early American baking, symbolizing comfort and homeliness. Integrating the crumble concept pioneered by European bakers in the 1500s, the evolution into a cookie form marks a cultural shift towards convenient and portable treats. Raspberry-filled cookies have seen regional variations across Europe and America, each adapting flavors to local tastes and ingredients. Today, Raspberry Crumble Cookies are cherished in various forms around the world, celebrating cultural exchange and the timeless love of baking.

Ingredient Deep Dive

Main Ingredient: Raspberries

Raspberries contribute vibrant color and taste to these cookies, celebrated historically as a luxury fruit in ancient Greece and Rome. Their high vitamin C content offers a health boost, while their natural acidity balances the sweetness of the crumble. When selecting, look for plump, brightly colored berries. Fresh raspberries can be refrigerated for up to three days or frozen for longer storage. If unavailable, raspberry preserves serve as an excellent substitution, ensuring the cookies’ signature flavor remains intact.

Common Mistakes to Avoid

  • Overmixing the dough can lead to tough, dense cookies. Mix until just combined.
  • Ignoring the quality of raspberries can result in bland flavors; always use fresh or high-quality preserves.
  • Skipping the chilling step causes cookies to spread excessively during baking.
  • Underbaking leaves cookies doughy; ensure edges are golden for a perfect bake.
  • Neglecting parchment paper or liners can cause sticking and break cookies.
  • Using hot baking sheets from previous batches affects texture; allow cooling in between uses.
  • Incorrect measurements due to inaccurate tools result in flavor imbalance; use precise tools.
  • Omitting a wire rack for cooling causes soggy bottoms; proper airflow is necessary.

Essential Techniques

Creaming Butter and Sugar

This technique is vital for achieving the perfect crumbly texture. Properly creamed butter and sugar create air pockets, helping cookies rise. Mastery involves using room-temperature butter and beating until pale and fluffy, typically around three minutes. Avoid over-creaming, which can lead to a greasy cookie.

Pro Tips for Perfect Raspberry Crumble Cookies


– Measure ingredients accurately using a scale for precise results.
– Chill dough thoroughly for at least 30 minutes to prevent spreading.
– Rotate baking sheets halfway for even browning and consistent results.
– Use quality raspberry preserves for intense fruit flavor in each bite.
– Press the cookies slightly before baking to define their shape.
– Allow cookies to set on the baking sheet for a few minutes post-bake to prevent breakage.

Variations and Adaptations


Regional variations can include adding a hint of lemon zest for a refreshing citrus note. Seasonal adaptations might swap raspberries for strawberries in the summer or cranberries in the fall. Dietary modifications can adjust the recipe to be gluten-free or vegan by utilizing almond flour and dairy-free butter. For a chocolate lover’s twist, incorporate white chocolate chips for an indulgent flavor layer. To play with textures, consider adding chopped nuts to the crumble for crunch, and explore different presentations by using cookie cutters for unique shapes.

Serving and Presentation Guide


Artfully plate the cookies on a tiered stand for a classic tea party feel. Add a dusting of powdered sugar to enhance visual appeal and suggest the cookies be paired with a dollop of vanilla ice cream for added indulgence. Consider serving them slightly warm, releasing aromas and softening the raspberry filling. For portion control, serve two cookies per person alongside a sprig of mint for added freshness and pop of color.

Wine and Beverage Pairing


Pair these cookies with a light sparkling wine like Prosecco, which complements the fruity notes without overpowering them. For non-alcoholic options, consider a raspberry iced tea or lemonade, echoing the cookie flavors. A strong black coffee or rich dark tea also pairs beautifully, balancing the sweetness with its bitterness. Serve beverages slightly chilled to enhance the cookie’s refreshing qualities, and consider using clear glassware to highlight the drink’s colors beside the cookies.

Storage and Shelf Life


Store cookies in an airtight container at room temperature, keeping them fresh for up to three days. For extended shelf life, you can refrigerate them, albeit some softness may be lost. Use zip-lock bags or airtight plastic containers to prevent moisture exposure. Look for signs like excessive softening or mold as indications of spoilage. For longer preservation, freeze them in single layers, placing parchment between cookies to avoid sticking, and thaw at room temperature before consuming to maintain freshness.

Make Ahead Strategies


Prepare the dough a day in advance and chill to save time on baking day. Divide and pre-scoop cookies onto parchment-lined trays, placing them in the refrigerator overnight. This method allows for swift baking even under time constraints. Assembled cookies freeze well, ensuring quality flavor retention once thawed. Avoid pre-baking as it may dry them out; fresh elements like a new fold of raspberry can be added before serving for a just-made appearance.

Scaling Instructions


When halving the recipe, ensure precise half-measurements to maintain texture. To double or triple, consider using a commercial-grade mixer to accommodate larger volumes without compromising ingredient incorporation. Adjust baking times as needed; larger batches may require longer, consistent oven use. Space considerations should be made for multiple trays, utilizing separate racks or alternating sheets to prevent congestion and ensure even baking.

Nutritional Deep Dive


A single serving boasts balanced macronutrients, offering a healthy dose of sugars, fats, and protein. Key micronutrients from the raspberries and other ingredients include vitamins C and E, contributing to skin health and immunity. The natural fats present provide a satiating effect, and moderate consumption aligns with most dietary guidelines. Portion awareness can help manage caloric intake while still enjoying these delightful cookies as a part of a balanced diet.

Dietary Adaptations


For a gluten-free option, substitute regular flour with an almond or a gluten-free all-purpose blend, adjusting liquid levels if needed to achieve the proper dough consistency. To make a vegan version, replace butter with coconut oil and use a flaxseed egg substitute, maintaining the cookie’s integrity and taste. A low-carb adaptation can incorporate almond flour and erythritol, appealing to keto enthusiasts while maintaining flavor integrity.

Troubleshooting Guide


If cookies turn out too soft, check oven temperature accuracy and allow for longer cooling time. For flavor issues, ensure quality ingredients and correct measurements. Temperature control throughout dough handling minimizes spread; avoid overheating. If equipment like mixers fails to incorporate fully, use manual stirring methods for completion. Ingredient swaps should be done with consideration of moisture and binding properties, accounting for compatibility. Timing discrepancies can be adjusted by knowing your oven’s specific traits and visually checking cookies regularly.

Recipe Success Stories


Readers have shared joy in creating personalized variations of these Raspberry Crumble Cookies, some adding white chocolate chips, others experimenting with different fruit jams. One baker mentioned their triumph in using homemade raspberry preserves, elevating flavor authenticity. Photography contributions showcased beautifully crafted cookies dressed in powdered sugar, sparking inspiration for decoration finesse. Suggestions for storing and gifting, like wrapping individually in parchment, were warmly received, enhancing cookie experiences across the community.

Frequently Asked Questions

Do I need to chill the cookie dough?

Yes, chilling is essential. It prevents excessive spreading and ensures that cookies have the correct texture. The dough can be chilled for at least 30 minutes or up to overnight.

Can I substitute the raspberries with another fruit?

Absolutely! You can use strawberries, blueberries, or even cranberries. Adjust sweetness and texture by modifying the amount of sugar and cooking time if necessary.

What if I don’t have a cookie scoop?

No worries! Use a tablespoon to measure dough, ensuring each dough ball is uniform for consistent baking.

How can I keep my cookies from becoming too soft?

Proper storage is crucial. Keep cookies in an airtight container once completely cooled, and avoid humid environments to ensure a longer shelf life.

What’s the best way to melt butter for cookie recipes?

Let your butter soften naturally at room temperature. Avoid microwaving as it can cause uneven melting and impact final texture.

Can I freeze these cookies once baked?

Yes, you can freeze them for up to three months. Layer with parchment to prevent sticking, thaw at room temperature before serving.

Is there a non-dairy alternative to butter for vegan cookies?

Coconut oil or vegan butter spreads work well, maintaining the rich taste typical of butter cookies.

Why use parchment paper in baking?

Parchment paper prevents sticking, aids in even baking, and makes for easier cleanup, essential for achieving desirable cookie consistency.

How do I achieve a consistent cookie size?

Using a cookie scoop ensures that dough balls are uniform in size, promoting even baking and appearance.

Why are my cookies spreading too much?

This could result from insufficient chilling time. Ensure your dough is cold before baking, and verify that baking sheets are not overheated from previous batches.

Additional Resources


Explore similar cookie recipes featuring different fruits such as blueberries or peaches, perfect for when raspberries are unavailable. Delve into technique guides for mastering baking essentials like butter creaming and dough handling, elevating your cookie-making expertise. For detailed ingredient information, check out our selection guides on the freshest seasonal fruits. If upgrading kitchen tools, browse our recommendations for mixers and baking sheets, designed to enhance every baking experience.

Join the Conversation


We invite you to share your Raspberry Crumble Cookie creations with us on social media using #RaspberryCrumbleCookies. Discover unique twists by exploring our community’s adaptations, and engage through feedback and reviews to contribute your experience. Participate in our baking groups to find new inspiration and tips, providing and receiving support in the delightful journey of making these cookies a part of your culinary repertoire.

The Recipe

Homemade Raspberry Crumble Cookies

Serves: 12 cookies

Prep Time: 20 mins

Cook Time: 15 mins

Total Time: 35 mins

Kitchen Equipment Needed

  • Large mixing bowl
  • Electric mixer
  • Cookie scoops
  • Baking sheets
  • Parchment paper

Ingredients

  • 1 cup unsalted butter, softened
  • 1 cup granulated sugar
  • 2 teaspoons vanilla extract
  • 2 ½ cups all-purpose flour
  • ½ teaspoon salt
  • ½ cup raspberry preserves

Directions

  1. Preheat oven to 350°F (175°C) and line two baking sheets with parchment paper.
  2. In a large bowl, cream together the butter and sugar until light and fluffy. Add in vanilla extract and mix well.
  3. Gradually mix in flour and salt until a crumbly dough forms.
  4. Using a cookie scoop, drop dough onto prepared baking sheets, spacing evenly.
  5. Press a thumbprint into each cookie to create an indentation.
  6. Fill each indentation with a small spoonful of raspberry preserves.
  7. Bake for 12-15 minutes or until edges are golden. Allow to cool on a wire rack.

Recipe Notes

  • Chill the dough before baking to prevent excessive spreading.
  • Experiment with different fruit preserves for unique variations.
  • Store in an airtight container for up to 3 days at room temperature.

Easy Recipe for Homemade 3-Ingredient Bedtime Gummies for Better Sleep

3-Ingredient Bedtime Gummies: Simple and Soothing Nighttime Snack

⚖️
Difficulty
Easy

⏲️
Prep Time
10 mins

🕒
Cook Time
5 mins

⏱️
Total Time
15 mins

🍽️
Servings
24 gummies

Enjoy a cozy and calming evening with these 3-Ingredient Bedtime Gummies. Perfectly crafted to soothe after a long day, these delightful little treats are a wonderful way to wind down before bed. Their simple yet effective combination of ingredients offers not only a gentle flavor to soothe your senses but also important nutrients that support restful sleep. Prepare to indulge in a peaceful nighttime routine with these delicious, homemade gummies.

Quick Recipe Highlights

  • Flavor Profile: A delicate balance of sweetness with just enough tartness to keep it interesting.
  • Texture: Soft and chewy, providing a satisfying bite without being tough or overly sticky.
  • Aroma: Light and inviting, with subtle fruit undertones that lure you in for a comforting snack.
  • Visual Appeal: Beautifully translucent with a uniform shape, these gummies are a feast for the eyes.
  • Skill Level Needed: This recipe is beginner-friendly, requiring minimal cooking expertise.
  • Special Equipment: You’ll need silicone molds to shape and set your gummies.

Recipe Overview

  • Difficulty Level: This recipe is deemed ‘easy’ as it requires only basic kitchen skills such as stirring and pouring.
  • Category: Categorized as a snack or dessert, these bedtime gummies are versatile and convenient.
  • Cuisine: While not tied to a specific culinary tradition, these gummies are inspired by holistic, wellness-oriented eating.
  • Cost: Economical and budget-friendly, with minimal ingredients and costs estimated at under $5.
  • Season: Best enjoyed year-round, particularly satisfying during cool evenings.
  • Occasion: Ideal for quiet nights at home or as a thoughtful homemade gift for loved ones.

Why You’ll Love This Recipe


With taste and texture that rivals store-bought options, these homemade gummies offer a delectable combination of flavors that are gentle yet satisfying. Convenience is a significant factor, as with only three ingredients and a few simple steps, you can have a nourishing snack ready to enjoy. Nutritionally, they offer a guilt-free way to curb those late-night cravings, with an added boost of nutrients that support relaxation and sleep. Host a dinner party or a cozy family night and watch these gummies disappear quickly. Cost-effective and easy to make, these gummies are ideal for anyone looking to enjoy delicious treats without straining their wallet.

Historical Background and Cultural Significance


While gummies themselves have a long history originating from Germany with the invention of gummy bears, these particular gummies are a nod to modern, health-conscious trends. They integrate the ancient practice of using gelatin, traditionally favored for its health benefits, into a contemporary snack form. Over the years, gummies have evolved from simple candy to encompass health-focused variants, offering functional benefits such as enhanced sleep quality. Today, variations of these soothing snacks can be found across different regions, each adding local ingredients or flavors to imbue cultural uniqueness.

Ingredient Deep Dive


The main ingredients in these gummies include gelatin, known for its digestive and joint health benefits, and a natural fruit juice that provides essential vitamins and antioxidants. Opting for high-quality gelatin not only enhances the texture of your gummies but also ensures maximum health benefits. As for fruit juice, choose those with minimal added sugars to maintain the overall nutritional profile. Store gelatin in a cool, dry place, while fruit juice should be refrigerated once opened to preserve freshness.

Common Mistakes to Avoid

  • Using low-quality gelatin could result in gummies that don’t set properly or have a grainy texture.
  • Boiling the gelatin solution may destroy some of its beneficial properties and alter texture.
  • Imbalanced juice to gelatin ratio can lead to inconsistencies in flavor and structure.
  • Not allowing ample setting time can leave your gummies too soft or sticky.
  • Pouring the mixture into molds that are not flexible can make it difficult to remove gummies without breaking them.
  • Using molds that are too deep may prolong the setting time and alter the texture of the final product.
  • Skipping straining the juice can lead to uneven texture due to pulp residue.
  • Neglecting to properly stir the mixture can result in separation of ingredients.

Essential Techniques


Mastering the gentle heating of the gelatin solution is crucial. Heat should be low and even to prevent gelatin from breaking down, which can affect texture and nutritional value. A smooth blend is key; consistent stirring is your friend here. Additionally, pay careful attention to pouring the mixture into molds; doing this quickly yet accurately ensures even setting and uniform gummies. Visual cues include a clear solution with no visible clumps or floating gelatin particles.

Pro Tips for Perfect 3-Ingredient Bedtime Gummies


For the optimal flavor, consider infusing your juice with fresh herbs like chamomile or lavender before starting the process. This adds a unique aroma and enhances the calming effect. Always ensure your molds are placed on a flat surface before pouring to avoid uneven gummies. For extra fun, experiment with layered colors and flavors by setting one layer at a time. Adding a pinch of salt can elevate the sweetness and deepen the fruit flavor, offering a sophisticated touch.

Variations and Adaptations


Regional variations might include using local fruits and juices, such as acai in Brazil or dragon fruit in Vietnam for unique flavors and colors. Adjust these gummies to suit dietary needs: try using agar-agar to make a vegan version, or play with seasonal ingredients like spiced apple juice during autumn. You can control the sweetness further by incorporating a drop of honey or agave syrup, crafting a flavor profile that truly suits your palate. Adjust texture by adding chia seeds for a subtle crunch or a splash of coconut milk for a creamier mouthfeel.

Serving and Presentation Guide


When serving, consider pairing these gummies with a warm herbal tea, part of a cozy nighttime routine. Present them in a decorative bowl, garnished with edible flowers for an elegant touch. Traditional accompaniments include serving on a wooden platter alongside other snacks like nuts or cheese, offering variety in texture and taste. To maintain the optimal firmness, be mindful of room temperature, especially if left out for extended periods. For portion control, use smaller molds to craft bite-sized pieces, providing an ideal serving size that encourages mindful eating.

Wine and Beverage Pairing


To complement these gummies, pair them with a soothing white tea or a floral tisane. The gentle flavors resonate well with light, fragrant teas, creating a calming evening experience. For a non-alcoholic drink option, consider a chilled chamomile or a hint of lavender lemonade. Temperatures should be adequately controlled; gummies and their paired beverage should be enjoyed in contrast—one warm, one cool—to highlight differing textures and flavors.

Storage and Shelf Life


Store your gummies in an airtight container to maintain freshness, keeping them in the refrigerator to prolong shelf life. Ideally, consume them within a week for the best texture and flavor. Freezing is another option; however, it may alter the texture slightly upon thawing. Watch for signs of spoilage such as an off odor or change in color, and discard any compromised gummies. If reheating is necessary, do so gently to maintain the integrity of the gelatin structure.

Make Ahead Strategies


Prepare these gummies a day in advance to ensure they are perfectly set and flavors have melded. Between each step, ensure your mixture is covered to prevent skin forming or contamination. When preparing ahead, plan to store them in fridge-safe containers to retain moisture and texture. If storing before an occasion, garnish just before serving for a fresh appearance.

Scaling Instructions


Doubling this recipe is effortless, involving simple multiplication of each ingredient. You’ll need larger containers or batches for even heating. For smaller batches, halving the recipe works equally well, with minimal adjustments in timing. When scaling up, ensure your molds are sufficient to accommodate increased volume. Adjust storage containers accordingly, and consider dividing excess batches between different flavor molds to maintain interest.

Nutritional Deep Dive


These gummies are exceptionally low in calories, offering a guilt-free refreshment that combines proteins from gelatin and a rich source of vitamins from the fruit juice. Micronutrients vary with the juice selected, with benefits ranging from increased vitamin C to additional antioxidants. Portioning is also simple; these gummies are small enough to satisfy your sweet tooth without imposing dietary detriments. Aiding in digestion, they align seamlessly with weight management goals.

Dietary Adaptations


For vegan variations, agar-agar acts as a suitable replacement for gelatin. Those following a low-carb diet can substitute regular fruit juice with a low-carb version, ensuring compatibility with specific dietary goals. Gluten-free friendliness is assured as long as cross-contamination is managed. Component adjustments for keto should be considered, using unsweetened juices or adding MCT oil for adherence. Paleo dieters will find these treats easily adaptable with naturally derived ingredients.

Troubleshooting Guide


For texture issues, correcting the gelatin ratio might be necessary. Ensure your heating process is consistent to maintain balanced ingredient fusion. If the flavor feels unbalanced, consider adjusting juice sweetness or adding a hint of natural flavor enhancers. If gummies aren’t setting as desired, reassess the gelatin bloom temperature. For equipment challenges, start with a small pot to ensure even distribution. When substituting ingredients, compatibility checks are important for maintaining consistency.

Recipe Success Stories


Our community has shared delightful tales of success with these gummies! Many have experimented by adding matcha for a delightful green tea twist, or incorporating mint for extra freshness. Photography tips shared online suggest incorporating lighting to accentuate the gummies’ jewel-like shine. Reader suggestions have included substituting cranberry juice for a tangy, festive alternative.

Frequently Asked Questions

Can I use other fruit juices?
Absolutely, feel free to experiment with any juice of your preference that complements your taste. Just be sure it’s powder free and naturally sweet.

How should I store the gummies for long periods?
Always use an airtight container and refrigerate them. Opt for freezing if storing for over a week.

Why is the mixture not setting?
Check gelatin type and ensure it was properly bloomed before heating. Incorrect ratios might also lead to unset gummies.

Is it possible to add supplements?
Indeed, many integrate herbal extracts or vitamin powders to boost the nutrient profile, but balance flavors accordingly.

What happens if I skip straining the juice?
Skipping straining might leave pulp in your gummies, possibly affecting texture and appearance.

Why are my gummies too rubbery?
Too much gelatin can lead to an overly firm texture. Ensure precise measurements are followed.

Are there vegan-friendly alternatives?
Yes, agar-agar is a popular vegan substitute for gelatin, allowing plant-based eaters to enjoy this recipe too.

Can I incorporate nuts or seeds?
Though less traditional, incorporating finely chopped nuts or chia seeds can add interesting texture variations.

Will heating alter the nutrient density?
Moderate heating is minimal, but prolonged or excessive heat might impact some of the more delicate nutrients.

How can I make layered gummies?
Allow each layer to partially set before adding the next; this prevents color bleeding while creating stratified delight.

What if I don’t have molds?
Cookie cutters or ice cube trays can substitute effectively; just remember to lightly grease for easy removal.

Additional Resources


Discover more unique recipes that harmonize with these gummies, like herbal teas to complement your nocturnal snack. Technique guides available online can provide a visual aid for first-time gelatin users. Also consider our blunt guide on culinary uses of gelatin and its historic roots. Equipment recommendations feature reviews of popular mold shapes and sizes that fit typical serving expectations.

Join the Conversation


Engage with fellow culinaries through our social media pages where ideas blossom. From photography tips that capture your creation’s brilliance to offering constructive feedback, your interaction shapes our community. Share recipe reviews, adaptation inspirations, and even personal tweaks you’ve enjoyed. Above all, enjoy the creative flow these soft-centered gummies inspire—your culinary canvas awaits.

The Recipe

3-Ingredient Bedtime Gummies

Serves: 24 gummies

Prep Time: 10 mins

Cook Time: 5 mins

Total Time: 15 mins

Kitchen Equipment Needed

  • Silicone molds
  • Small saucepan
  • Measuring cups and spoons
  • Whisk

Ingredients

  • 1 cup natural fruit juice
  • 2 tbsp gelatin powder
  • Optional sweetener or honey

Directions

  1. In a small saucepan, combine the fruit juice and gelatin. Let it sit for a few minutes to allow the gelatin to bloom.
  2. Once bloomed, gently heat the mixture over low heat, stirring constantly until the gelatin is completely dissolved.
  3. If desired, add honey or sweetener and mix until fully combined.
  4. Pour the mixture into silicone molds and refrigerate for at least two hours, or until set.
  5. Once set, pop the gummies out of the molds and enjoy your soothing bedtime treat!

Recipe Notes

  • For varied flavors, consider using different fruit juices or mixing them together.
  • Add a few drops of essential oil such as lavender for added relaxation.
  • To ensure the mixture doesn’t stick, lightly grease molds before pouring.

Festive Peppermint Chocolate Chunk Cookies Recipe for Delicious Holidays

Peppermint Chocolate Chunk Cookies: Festive & Delicious Delight

⚖️
Difficulty
Easy

⏲️
Prep Time
20 mins

🕒
Cook Time
10 mins

⏱️
Total Time
30 mins

🍽️
Servings
24 cookies

Nothing captures the essence of the holiday season quite like the intoxicating aroma of freshly baked Peppermint Chocolate Chunk Cookies wafting through your home. With the perfect balance of rich chocolate and refreshing peppermint, these cookies are the quintessential festive treat. Each bite offers a sublime combination of gooey chocolate chunks and cool minty flair, making them an irresistible choice for your holiday baking list.

These cookies are not only delicious but also incredibly simple to make, perfect for a quick yet impressive addition to your holiday dessert spread. The contrast of dark chocolate’s richness with peppermint’s briskness creates a sensational experience for taste buds. Whether you’re cozying up by the fireplace or hosting a joyous holiday gathering, Peppermint Chocolate Chunk Cookies promise to add a touch of sweetness and warmth to any occasion.

Quick Recipe Highlights

  • Flavor Profile: Decadent chocolate meets the crisp coolness of peppermint, balancing sweetness with a refreshing twist.
  • Texture: Soft and chewy with delightful chunks of chocolate adding a lush, melt-in-your-mouth experience.
  • Aroma: Rich chocolate aromas blend harmoniously with the invigorating scent of peppermint, creating a festive fragrance.
  • Visual Appeal: Dark chocolate speckles against the light cookie base, accented by the occasional sprinkle of crushed peppermint candy.
  • Skill Level Needed: Perfect for novice bakers, requiring simple mixing and baking techniques that are easy to follow.
  • Special Equipment: Basic baking tools such as a mixing bowl, baking sheet, and oven are all you’ll need to create these delights.

Recipe Overview

  • Difficulty Level: This recipe is straightforward, ensuring that anyone from seasoned bakers to kitchen beginners can achieve perfect results.
  • Category: These cookies fall under holiday desserts, ideal for festive celebrations and cozy winter evenings.
  • Cuisine: While primarily an American treat, their ingredients and style embrace universal holiday spirit.
  • Cost: Economically favorable, these cookies make use of pantry staples, ensuring that budget-friendly baking is achievable without compromising flavor.
  • Season: Best enjoyed during the winter months, especially around the holiday season when peppermint and chocolate flavors shine.
  • Occasion: Perfect for Christmas cookie exchanges, festive gatherings, or as a handmade gift to share joy with loved ones.

Why You’ll Love This Recipe

Peppermint Chocolate Chunk Cookies offer a delightful blend of flavors and textures that is sure to win your heart. The robust chocolate flavor is perfectly complemented by the refreshing mint, creating a taste sensation that feels both indulgent and invigorating. The texture of the cookies remains soft and chewy, providing a satisfying bite that keeps you coming back for more.

These cookies are incredibly convenient and straightforward to prepare. With minimal ingredients and steps, the recipe comes together quickly, making it a great choice for last-minute baking sessions. Whether you’re an experienced baker or new to the kitchen, you’ll appreciate the simplicity and speed with which these cookies go from mixing bowl to oven to plate.

From a nutritional standpoint, these cookies offer the goodness of dark chocolate, known for its heart-healthy antioxidants. While they are a sweet treat, enjoying them in moderation during the festive season brings a delightful balance to your holiday indulgence.

In the festive spirit, these cookies serve as a perfect companion for social gatherings. Their cozy, home-baked charm invites sharing and conversation, whether you’re hosting a party or presenting them as a holiday gift. Their accessibility and universal appeal make them an ideal choice for spreading cheer across any festive table.

Additionally, the cost-effectiveness of this recipe is another reason to love it. By making use of common pantry items, you can whip up a batch of these delectable cookies without stretching your budget, ensuring everyone can indulge without worry.

Historical Background and Cultural Significance

Peppermint-flavored treats have long been a staple in holiday traditions, particularly in American culture where peppermint candies and desserts are synonymous with Christmas festivities. The marriage of peppermint and chocolate in cookie form is a relatively recent yet popular evolution, capturing the essence of nostalgic holiday flavors in a single delicious bite.

Culturally, peppermint has held a place of importance for its soothing properties, while chocolate has been cherished for its rich and comforting qualities. Together, they form a cookie combination that resonates with warmth and celebration, aligning perfectly with holiday sentiments of comfort and joy.

Over the years, this recipe has evolved, from the initial use of peppermint essence to incorporating crushed peppermint candy for added texture and visual appeal. Each iteration pays homage to the tradition while adapting to contemporary tastes and preferences, allowing this classic to remain a festive favorite.

Regionally, variations of the Peppermint Chocolate Chunk Cookie can be found, each adopting local flavors and traditions while staying true to the core appeal of chocolate and mint. This adaptability underscores its enduring popularity and cultural resonance across different culinary landscapes.

Ingredient Deep Dive

The notable star of this recipe is dark chocolate, known not only for its luscious taste but also for its historical significance as a valued treat across cultures for centuries. Its deep, complex flavors provide richness, while its tempering properties make it a versatile ingredient in baking.

Nutritionally, dark chocolate is celebrated for its potential health benefits, including heart health and mood enhancement, attributed to its antioxidant content. When selecting chocolate for your cookies, opt for high-quality dark chocolate chunks for the best flavor and texture.

Peppermint, another key ingredient, enriches the cookies with its refreshing and invigorating properties. Historically recognized for its medicinal uses, peppermint also serves as a flavor enhancer in various sweet and savory dishes. When incorporating peppermint into your cookies, fresh peppermint extract offers the most authentic flavor, while crushed peppermint canes provide both taste and a delightful crunch.

Storing these ingredients properly ensures their longevity and flavor integrity. Dark chocolate should be kept in a cool, dry place away from strong odors to prevent it from picking up off-flavors, while peppermint extract is best stored at room temperature in a tightly sealed container.

For substitutions, feel free to explore using white or milk chocolate for a different twist or vanilla extract if a milder mint flavor is desired. These adjustments maintain the essence of the cookies while allowing room for personal taste preferences.

Common Mistakes to Avoid

  • Overmixing the dough can lead to tough cookies. Mix just until ingredients are combined.
  • Using low-quality chocolate compromises overall flavor. Invest in good quality dark chocolate.
  • Overbaking results in dry, hard cookies. Remove from oven as soon as edges are set, even if centers appear soft.
  • Skipping chilling can cause cookies to spread excessively. Chill dough for a firmer structure.
  • Underestimating the power of peppermint extract can overpower dessert. Use indicated amounts unless you prefer stronger mint.
  • Inadequate spacing on the baking tray may cause cookies to merge. Allow enough room for spreading.
  • Using cold butter prevents proper aeration. Ensure butter is room temperature for creaming.
  • Ignoring cooling time leads to breakage. Let cookies set on the tray before transferring.

Essential Techniques

Mastering the creaming technique is crucial for perfect cookies. This involves beating butter and sugar together until light and fluffy, incorporating air that lends to a soft, tender crumb. Pay attention to visuals; a pale, airy mixture signals readiness.

Baking time and temperature precision are vital. An oven thermometer ensures accuracy, while setting timers prevents overbaking. Visual cues include pale edges and slightly soft centers, indicating a perfectly baked cookie ready to set as it cools.

Crushing peppermint canes finely ensures uniform distribution throughout the cookie dough. This technique maximizes flavor and texture, providing each bite with the signature crunch this recipe is known for without overwhelming any single piece.

Pro Tips for Perfect Peppermint Chocolate Chunk Cookies

To enhance flavor, consider toasting your chopped nuts before adding them to the dough. This additional step deepens the nutty profile and complements the cookies’ overall taste.

Experiment with different chocolate varieties for unique flavor profiles. Semi-sweet and bittersweet chocolates offer varying degrees of richness and balance.

Ensure even temperature distribution in the oven by rotating the baking tray halfway through the bake time, promoting uniform color and texture across all cookies.

Allow the cookie dough to chill overnight. This resting period not only enhances flavor but also strengthens the dough’s structure, preventing excessive spreading during baking.

Use a cookie scoop for uniform cookies. This tool aids in consistency, ensuring each cookie bakes evenly.

After baking, let your cookies cool on the tray for a few minutes before transferring to a wire rack. This ensures they set perfectly without overbaking or softening too much from retained heat.

Variations and Adaptations

For regional twists, consider adding a dash of cinnamon or nutmeg to infuse a warm, spiced note, characteristic of European holiday treats.

Seasonal adaptations include using extracts such as orange or almond in place of peppermint during off-season months, maintaining the essence while allowing for variety.

Dietary modifications are simple—substitute a gluten-free flour blend to cater to gluten sensitivities, or choose vegan chocolate and a plant-based butter to make the cookies vegan-friendly.

Flavor variations are always exciting. Consider incorporating dried cranberries for a pop of color and a tart counterbalance to the sweet chocolate.

Adjusting cookie size alters baking dynamics and allows for creative presentation. Miniature cookies offer an attractive bite-sized option perfect for parties or gifts.

Serving and Presentation Guide

Plating can elevate the visual appeal of your cookies. Consider serving them with a sprinkle of powdered sugar, imitating freshly fallen snow for a winter aesthetic.

Garnishing ideas include drizzling with melted chocolate or adding crushed peppermint on top for added visual impact and flavor.

Serve with a warm cup of cocoa, playing off the chocolate notes for a harmonious pairing, or alongside a plate of assorted holiday cookies for a colorful, festive display.

Modern serving suggestions embrace casual elegance; stack cookies in artisanal baskets or jars, offering rustic charm for gift giving.

Temperature is key, as the cookies are most enjoyable at room temperature, which allows their flavors to shine fully.

For portion control, provide small batches of cookies rather than vast quantities, ensuring each guest can sample various holiday offerings without overindulgence.

Wine and Beverage Pairing

Wine pairings typically include rich, full-bodied reds like Zinfandel or Malbec, which complement the depth of dark chocolate without overpowering the mint’s freshness.

Non-alcoholic alternatives, such as peppermint hot chocolate or a chilled glass of milk, offer creamy counterpoints that highlight the cookies’ complex flavors.

Coffee lovers will delight in pairing these cookies with a robust, aromatic brew. The bitterness of the coffee plays beautifully with the sweetness of the chocolate.

For a refreshing twist, serve the cookies with an iced peppermint tea in warmer climates, providing a cooling balance to the rich and chewy treats.

Whether hot or cold, ensure your beverages are served at optimal drinking temperatures to maintain harmony with the cookie’s flavor profile.

Storage and Shelf Life

Store these cookies in an airtight container to maintain freshness, preventing exposure to air that may cause them to dry out.

Keep at room temperature for up to a week, or refrigerate for longer shelf life, especially in warmer climates where chocolate may soften.

Choose sturdy containers to prevent crushing; a cookie tin lined with parchment offers protection and retains moisture, keeping cookies at their peak for days.

Signs of spoilage include a stale smell or notable textural changes, signaling it’s time to discard and bake a fresh batch.

For a make-ahead option, consider freezing the dough. Roll into balls, freeze on a tray, then transfer to a bag. Bake as needed, adding a few extra minutes to cooking time.

Make Ahead Strategies

Prepare your dough in advance, storing it in the fridge for up to 72 hours before baking. This makes for a quick and easy baking session when the moment arises.

If baking ahead of time, ensure cookies are cooled completely before stacking to avoid moisture buildup and sticking.

Once baked, store between layers of parchment paper in an airtight container. This prevents sticking and maintains individual cookie texture and form.

If reheating, a brief stint in a preheated oven revives their soft centers and crispy edges, mimicking fresh-baked quality.

Adding fresh chocolate drizzle after storage adds a touch of freshness and visual appeal to stored cookies, enticing to the eye and palate.

Scaling Instructions

Halving the recipe for smaller gatherings is straightforward: adjust ingredient measurements accordingly and note reduced bake times due to smaller batches.

Doubling or tripling is equally simple, though attention is needed to maintain even mixing when scaling large amounts. Utilize larger bowls and divide the dough to manage consistency.

Ensure ovens are adequately pre-heated, and multiple trays are rotated for even baking when producing larger quantities.

Note storage capacity when scaling recipes up, as more cookies mean more space is needed to store them without compromising quality.

Adjust cooling rack space and tray swapping to accommodate larger batches, helping maintain quality and efficiency.

Nutritional Deep Dive

These cookies incorporate macro nutrients such as carbohydrates from flour and sugar, fats from butter and chocolate, and protein within the same ingredients.

Dark chocolate contributes beneficial micronutrients like iron, magnesium, and copper, alongside beneficial antioxidants.

Though they are a treat, remember portion control is key to managing calorie intake, and moderation ensures enjoyment without concern over excess.

Understanding the balance between indulgence and diet allows for satisfaction without guilt during festive periods.

The rich fats help with satiety while the sugars provide an energy boost, supporting an engaged, lively celebration in moderation.

Dietary Adaptations

For a gluten-free variation, replace standard flour with a reliable all-purpose gluten-free mix, ensuring textured consistency remains largely unaffected.

Dairy-free needs are met by substituting butter with a dairy-free alternative, while non-dairy chocolate ensures a fully lactose-free cookie experience.

Vegan adaptations involve using aquafaba or flaxseed gel as an egg substitute, alongside plant-based butter and chocolate.

Low-carb options can integrate almond flour in place of regular flour, adhering to a ketogenic diet while retaining flavor.

Paleo followers can adjust using almond meal, coconut sugar, and raw cocoa, ensuring primal principles spill forth in festive splendor.

For a low-FODMAP approach, stick to dark chocolate and use a gluten-free flour blend to provide safe, delicious results that respect digestive needs.

Troubleshooting Guide

Address texture issues by adjusting baking time; soft centers mean removing cookies earlier, whereas increased bake time ensures firmer texture.

Balance flavors by tasting dough pre-bake. If mint is overpowering, add more sugar or vanilla to counteract its intensity.

Equipment challenges require quality checks—ensure oven temperature accuracy and mixer function to prevent faulty results.

Ingredient substitution should always consider flavor dynamics, ensuring replacements complement rather than clash with original ingredients.

Timing concerns can be addressed by preparing ingredients in advance, streamlining the baking process and reducing stress.

If dough spreads too much during baking, chilling further can help, or adjusting flour for a slightly firmer dough structure.

Recipe Success Stories

Enthusiastic feedback from the baking community often highlights the cookie’s perfect blend of flavors and textures, applauding its ease and universal appeal.

Creative adaptations regularly emerge, showcasing reader successes such as added fillings or unique presentations, inspiring further innovation.

Adaptation stories celebrate diverse dietary needs, proving the recipe’s flexibility and broad suitableness for various preferences.

Reader suggestions frequently inspire tweaks, such as adding nuts or alternating chocolates, contributing to the recipe’s growing repertoire.

Photography tips within communities emphasize lighting techniques and festive settings, ensuring cookies appear as beautiful visually as they taste.

Frequently Asked Questions

Can I use peppermint candies instead of extract?
Yes, crushed peppermint candies can replace extract for a different texture, but the minty flavor might be less pronounced.

How can I prevent my cookies from spreading too much?
Ensure dough is chilled thoroughly before baking and use a cookie scoop for uniform sizing.

Is it possible to make these cookies without chocolate chunks?
Absolutely, though chocolate enhances flavor, omitting is perfectly fine for those who prefer a purely peppermint cookie.

Which type of sugar is best for this recipe?
Using both brown and white sugar enriches flavor and maintains the cookie’s chewy texture.

Can I freeze these cookies for later use?
You can freeze baked cookies or raw dough, ensuring stored moisture and flavor integrity for future enjoyment.

How do I add a personal touch to these cookies?
Customize by adding festive sprinkles or drizzling top with colored icing for visual flair.

What makes this recipe easy for beginner bakers?
Simple steps, common ingredients, and forgiving dough make it beginner-friendly and hard to mess up.

What’s the best way to pack these cookies for gifts?
Use airtight containers or festive bags with ribbon ties to ensure freshness and visual delight.

Can I add other flavors to the recipe?
Vanilla pairs well with mint and chocolate if extra richness is desired, without overshadowing key notes.

Do I need to adjust the recipe for high altitude baking?
Slightly reduce leaveners and increase baking temperature to accommodate altitude variations for optimal results.

Additional Resources

Exploring related recipes introduces you to the rich world of holiday cookies, expanding knowledge and flavor horizons.

Technique guides provide invaluable insights for refining baking skills, enhancing both success and enjoyment in kitchen pursuits.

Ingredient information covers origins, benefits, and creative uses, ensuring a well-rounded understanding of each crucial component in your recipe.

Equipment recommendations highlight useful tools and gadgets that make baking efficient, effective, and enjoyable.

Seasonal variations open new chapters of culinary opportunity, respecting traditions while inviting experimentation and enjoyment.

Join the Conversation

Share your creations on social media to inspire others and receive feedback, joining a community of holiday baking enthusiasts.

Photography tips from fellow bakers can elevate your cookie presentation, capturing the appetite appeal and seasonal charm.

Recipe reviews offer invaluable insights and tweaks, fostering a sense of community and collective recipe refinement.

Community engagement encourages sharing personal tips, techniques, and variations that highlight the recipe’s versatility and appeal.

Embrace recipe variations shared by readers, prompting further exploration and experimental enthusiasm within your own baking adventures.

The Recipe

Peppermint Chocolate Chunk Cookies

Serves: 24 cookies

Prep Time: 20 mins

Cook Time: 10 mins

Total Time: 30 mins

Kitchen Equipment Needed

  • Mixing bowl
  • Electric mixer
  • Baking sheet
  • Cookie scoop
  • Parchment paper

Ingredients

  • 2 1/4 cups all-purpose flour
  • 1 teaspoon baking soda
  • 1/2 teaspoon salt
  • 1 cup unsalted butter, softened
  • 3/4 cup granulated sugar
  • 3/4 cup packed brown sugar
  • 1 teaspoon vanilla extract
  • 2 large eggs
  • 2 cups dark chocolate chunks
  • 1/2 teaspoon peppermint extract
  • 1/2 cup crushed peppermint candies

Directions

  1. Preheat your oven to 350°F (175°C). Line a baking sheet with parchment paper.
  2. In a bowl, whisk together flour, baking soda, and salt.
  3. In a separate bowl, cream butter and sugars until light and fluffy. Stir in vanilla extract and peppermint extract.
  4. Add eggs, one at a time, beating well after each addition.
  5. Gradually add dry ingredients to the wet mixture, mixing until just combined.
  6. Fold in dark chocolate chunks and crushed peppermint candies.
  7. Using a cookie scoop, drop dough onto the prepared baking sheet, spacing evenly.
  8. Bake for 9-11 minutes or until edges are lightly browned.
  9. Allow cookies to cool on the baking sheet for 5 minutes before transferring to a wire rack.

Recipe Notes

  • For extra minty flavor, increase peppermint extract to taste.
  • Dark chocolate chunks can be substituted with semi-sweet chocolate chips.
  • Store cookies in an airtight container for up to a week.

Irresistible Sweet Potato Casserole Recipe for Your Holiday Table

Sweet Potato Casserole Recipe: A Delightful Comfort Dish

⚖️
Difficulty
Easy

⏲️
Prep Time
20 mins

🕒
Cook Time
45 mins

⏱️
Total Time
65 mins

🍽️
Servings
8

Sweet potatoes bring a hint of sweetness to this indulgent casserole recipe, perfectly balanced by the crunchy pecan topping. This sweet potato casserole is the ultimate comfort food, making it a popular choice for holiday gatherings and family meals. As the dish bakes, your kitchen will be filled with the warming aromas of cinnamon and nutmeg, creating an inviting and cozy atmosphere.

This sweet potato casserole is beloved for its rich texture, combining creamy mashed sweet potatoes with a nutty crumble that provides a delightful crunch in every bite. The rustic orange hue of sweet potatoes contrasts beautifully with the golden-brown topping, making it a visually striking centerpiece. Whether enjoyed as a side dish or the star of your meal, this casserole is guaranteed to impress your guests.

Quick Recipe Highlights

  • Flavor Profile: A perfect balance of sweet and savory, complemented by warm spices and a touch of vanilla.
  • Texture: Creamy and smooth with a crunchy, nutty topping that adds depth to every mouthful.
  • Aroma: The dish envelops your kitchen in a warm, aromatic embrace of cinnamon, nutmeg, and toasted pecans.
  • Visual Appeal: A vibrant dish with contrasting colors, making it a stunning addition to any table spread.
  • Skill Level Needed: Easy enough for beginners yet rewarding for experienced cooks.
  • Special Equipment: A mixer or masher for the potatoes, and a baking dish for the casserole.

Recipe Overview

  • Difficulty Level: This sweet potato casserole is straightforward to prepare, making it suitable for cooks of all skill levels. The recipe primarily involves mashing, mixing, and baking, with no complex techniques or special skills needed.
  • Category: A classic comfort food dish, perfect as a side or standalone offering for dinner.
  • Cuisine: Heavily influenced by Southern American cuisine, celebrated for its homestyle cooking methods and rich flavors.
  • Cost: An affordable dish using simple ingredients like sweet potatoes, butter, and pecans, making it budget-friendly for family meals.
  • Season: Ideal for fall and winter, particularly around the holiday season when sweet potatoes are abundant.
  • Occasion: A favorite for Thanksgiving, Christmas, and other festive holiday gatherings where comfort food shines.

Why You’ll Love This Recipe


The sumptuous taste of this sweet potato casserole makes it a standout choice for diners. Its combination of sweet and savory flavors appeals to a wide range of palates, while the textural contrast between the creamy filling and crispy topping keeps each bite exciting. It’s a dish that brings a comforting warmth, often evoking memories of family dinners and holiday traditions.

Convenience is another hallmark of this casserole, requiring only a few steps to prepare ingredients and assemble the dish. Its simplicity means you can focus on spending time with your loved ones, knowing this part of the meal is under control. The casserole can also be prepared ahead of time, offering flexibility for busy cooks.

Nutritionally, this recipe combines the health benefits of sweet potatoes, packed with vitamins and antioxidants, with a touch of indulgence. The balance of nutrients ensures you enjoy a dish that’s both satisfying and nourishing. This casserole is an ideal choice for potlucks and family gatherings, as it serves a crowd and complements a variety of main courses.

Cost-effectiveness is another draw, with the main ingredients being budget-friendly. Despite its humble ingredients, it delivers a rich and decadent dish that feels special, making it accessible to many while providing a feeling of luxury.

Historical Background and Cultural Significance


Sweet potato casserole boasts a rich history, rooted deeply in American Southern culture. Its origins trace back to early European settlers who brought sweet potatoes to the Americas, where they became a staple due to their adaptability to warm climates. Over time, the dish evolved, with the addition of sugar and spice infusing it with the familiar comfort flavors we love today.

Within Southern cuisine, the sweet potato casserole is more than just a dish; it’s a cultural icon. It represents the spirit of hospitality and sharing, often served at community gatherings and family occasions, symbolizing warmth and togetherness. The recipe, as it is known now, is a testament to culinary exchanges and adaptations through generations.

Over the years, sweet potato casserole has undergone numerous adaptations as families add their unique twists, whether incorporating marshmallows, pecans, or different spices. These variations showcase the adaptability of the basic recipe to personal tastes and dietary needs, making it a versatile dish for many.

In regions across the United States, regional adaptations reflect local produce and preferences, turning the sweet potato casserole into a canvas for creativity. From syrupy, marshmallow-topped versions in the Midwest to the nut-heavy adaptations in the South, it remains a beloved dish nationwide.

Ingredient Deep Dive


Sweet potatoes are the star of this dish, prized for their natural sweetness and vibrant color. The cultural significance of sweet potatoes is profound, especially in Southern cuisines where they often feature in comfort foods. Their rich history dates back centuries in various cultures, showcasing their adaptability and importance.

Nutritionally, sweet potatoes are a powerhouse, rich in beta-carotene, vitamin C, and fiber. These nutrients support immune health and digestion while providing slow-releasing energy. Choosing the right potato involves looking for firm, blemish-free vegetables with smooth skin. Store them in a cool, dark place to maintain freshness, avoiding refrigeration, which can affect flavor.

Butter and cream add richness and depth, enhancing the dish’s overall mouthfeel. For those seeking a dairy-free option, coconut milk or plant-based butter serves as a good alternative, without compromising on flavor. Pecans provide the crunch and nutty flavor, essential for the topping. When selecting pecans, opt for those with an even color, free from shriveled or dark spots, to ensure the best quality and taste.

Common Mistakes to Avoid

  • Overcooking the sweet potatoes: A common mistake that can result in a watery casserole. Cook until they’re tender but still hold shape.
  • Skipping the cooling step after cooking potatoes: Ensure sweet potatoes cool slightly before mashing to prevent a watery consistency.
  • Using excessive sugar in the filling: Sweet potatoes are already sweet, so adjust sugar to taste to maintain a balanced flavor.
  • Forgetting to toast pecans: Untoasted pecans lack depth. Briefly toast them to enhance their aroma and crispness.
  • Overcomplicating the recipe: Stick to the basics. Complexity can mask the natural sweetness and flavor of the sweet potatoes.
  • Improperly measuring spices: Too little can make the dish bland, while too much overwhelms. Measure carefully for optimal balance.
  • Under-seasoning the potatoes: Don’t skimp on salt and spices, which bring out the sweet potatoes’ natural flavors.
  • Nonspecific baking time: Rely on visual cues, like a golden-brown top, to determine doneness rather than strictly adhering to time.

Essential Techniques


Mashed sweet potatoes create the base of this casserole, and achieving the perfect consistency is key. Ensure the sweet potatoes are cooked just right before mashing to avoid lumps, and use a masher or mixer to achieve a smooth texture. Mastering this simple technique elevates the overall dish quality.

Creating the pecan topping requires attention to mixing proportions. Achieving the right crumbly consistency depends on the balance of flour, butter, and pecans. Proper melting and mixing techniques prevent an oily or dry topping, ensuring a delightful crunch.

Baking the casserole requires close monitoring to achieve a perfectly browned top without overbaking the filling. Use a middle rack position in the oven for even heat distribution. Pay attention to the casserole’s aroma and color towards the end of the baking time as indicators of doneness.

Pro Tips for Perfect Sweet Potato Casserole


Selecting the best sweet potatoes is crucial—opt for medium-sized tubers that are free of blemishes and have a uniform shape. This ensures even cooking and optimal sweetness.

For a deeper flavor profile, roast sweet potatoes instead of boiling. This caramelizes the sugars, adding complexity to the dish.

Experiment with spice blends like pumpkin pie spice or a hint of ginger for a unique twist on traditional flavors.

Incorporate crushed cookies or graham crackers into the topping for an interesting texture variation that adds unexpected crunch and sweetness.

Consider adding a splash of bourbon or rum to the filling for a subtle, sophisticated flavor boost compatible with the natural sweetness of the casserole.

Nuts such as walnuts can be substituted for pecans in the topping if desired, providing different flavor notes and textures.

Variations and Adaptations


Regional variations of this sweet potato casserole reflect diverse flavor preferences, ranging from extra-sweet versions with marshmallows in the Midwest to savory versions incorporating bacon in the South. These adaptations highlight regional culinary creativity and traditions.

Seasonal adaptations allow you to enjoy fresh variations with ingredients at the peak of their season. Incorporating cranberries in the winter or citrus zest in the spring can freshen up the traditional recipe, adding vibrant flavors that complement the sweet potatoes.

Dietary modifications for this recipe can create a healthy twist on classic flavors. Options like using coconut milk or almond milk as a dairy alternative in the mash keep the dish creamy while accommodating vegan or lactose-free diets.

Exploring unique texture modifications can add another layer of interest. Incorporate finely chopped nuts into the sweet potato base for a delightful crunch with every bite.

When considering presentation, serve individual portions in ramekins for an elegant and modern take on traditional casserole plating. This option adds an element of sophistication, perfect for dinner parties and special occasions.

Serving and Presentation Guide


Plating techniques can transform the rustic casserole into a refined dish. Scoop it into neatly structured portions using a ring mold for a gourmet presentation that highlights the textures and colors of the dish.

Garnishing ideas enhance the casserole’s visual appeal. Add fresh rosemary sprigs or a light dusting of cinnamon on top for a pop of color and a hint of flavor.

Traditional accompaniments, such as roasted meats or a crisp green salad, create a harmonious meal. These pairings complement the sweet and savory notes of the casserole beautifully.

For modern serving suggestions, consider a buffet-style meal with a variety of casseroles and side dishes to allow guests to experience different flavor profiles.

When serving, consider temperature recommendations to enhance flavor and texture. Serve the casserole warm from the oven, allowing a few minutes to cool before plating to achieve the best mouthfeel.

Portion control tips ensure each serving maintains a balance between filling and topping, making the dish satisfying without overwhelming. Aim for portions that highlight both elements equally, maximizing taste and texture.

Wine and Beverage Pairing


For wine pairings, consider a medium-bodied white wine, such as a Chardonnay, which complements the casserole’s rich flavors without overpowering. Alternatively, a light red wine like Pinot Noir can accentuate the sweetness while providing a subtle tannic balance.

Non-alcoholic alternatives, like a spiced apple cider or pear juice, provide a festive feel without alcohol, bringing warmth and complementing the casserole’s spices.

If coffee or tea pairs with your meal, choosing spiced or herbal teas can enhance the sweet potato’s natural flavors and provide a relaxing end to the meal.

Temperature considerations play a key role in drink pairings. Serve wine slightly chilled and other beverages, like cider, warmed, to maximize their flavor profiles.

Serving suggestions for beverages include decanters or carafes for wine at a formal gathering, allowing for an elegant and synchronized presentation alongside your meal.

Storage and Shelf Life


For storage, transfer leftovers to airtight containers, which help preserve the casserole’s freshness and prevent absorption of odors from other foods.

Maintain the optimal storage temperature by placing the casserole in the refrigerator, where it stays fresh for 3 to 5 days.

Choose containers that fit the casserole’s size closely to minimize air exposure and maintain quality.

Identify spoilage signs by checking for unusual odors or mold growth before consuming leftovers.

Reheating instructions involve covering the casserole with foil and baking it in the oven at 350°F until heated through, preserving texture and preventing drying out.

As for freezing guidelines, cool the casserole thoroughly before transferring to freezer-safe containers. Label them with the date and freeze for up to 2 months, then thaw overnight in the refrigerator before reheating.

Make Ahead Strategies


An effective prep timeline begins with cooking and mashing sweet potatoes in advance, saving time on the day of assembling the casserole.

Maintain quality by storing ingredients separately, such as the mashed potatoes and pecan topping, then combining them before baking for the freshest flavor.

Assess potential quality impacts from storage and reheating to ensure the casserole’s texture and taste remain top-notch when served.

Assembling the dish early and letting it rest in the fridge uncovers confidence on hectic cooking days, requiring only final heating before serving.

For reheating guidelines, remove the casserole from refrigeration well before baking to bring it closer to room temperature, ensuring even reheating.

Add finishing elements like a drizzle of honey or a sprinkle of fresh herbs just before serving to boost flavor and presentation of make-ahead portions.

Scaling Instructions


Halving this recipe is simple; adjust ingredient quantities proportionately, ensuring all flavors remain balanced without overwhelming any component.

When doubling or tripling the recipe, increase ingredients but check seasoning levels and baking times to ensure consistency across larger batches.

Equipment adjustments may be necessary when scaling, warranting the use of larger mixing bowls and baking dishes to accommodate the increased volume.

Timing modifications apply, especially during the baking phase. Monitor visually as larger quantities might require increased baking time for even cooking.

Consider storage considerations like using multiple containers for larger batches, preventing issues with freezing or refrigerating oversized quantities.

Nutritional Deep Dive


The nutritional profile of sweet potato casserole highlights a balanced macronutrient composition, with carbohydrates providing energy from natural sugars and sweet potatoes.

Micronutrient analysis shows a high content of vitamin A from sweet potatoes, contributing to vision and skin health, alongside fiber for digestive wellness.

Health benefits of this dish align with its nutrient density, offering vitamins and minerals necessary for growth and repair without excessive calories.

Dietary considerations allow room for adjustments to reduce sugar levels or swap dairy, catering to vegan or lactose-intolerant individuals.

Portion analysis permits enjoying generous servings without excessive calorie intake, making it a considerate choice for weight management.

Tips for weight management include opting for low-calorie sugar alternatives or reducing butter quantities when seeking a lighter version that maintains flavor.

Dietary Adaptations


For gluten-free needs, substitute the flour in the topping with almond or coconut flour, ensuring the same crumbly texture without sacrificing taste.

Creating a dairy-free version is straightforward. Replace butter with a plant-based alternative like coconut oil, and use almond milk instead of cream for a creamy base.

For a vegan adaptation, implement plant-based milk and butter without affecting the flavor profile, while replacing eggs with a flaxseed mixture if used.

Low-carb aficionados can replace sugars with low-carb alternatives like monk fruit or Stevia, appealing to those managing carbohydrate intake.

Keto variations use nut flours for the topping and are sugar-free to align with the ketogenic guidelines but lack none of their decadent flavors.

Paleo enthusiasts benefit from using honey or maple syrup for sweetness, aligning with paleo principles while maintaining the casserole’s traditional taste.

For a low-FODMAP approach, ensure the use of lactose-free dairy and substitute any high-FODMAP ingredients like certain sweeteners to ensure digestive comfort.

Troubleshooting Guide


Address texture issues by ensuring proper sweet potato cooking time and consistent mashing, eliminating lumps for a silky-smooth finish.

Balance flavors meticulously by adjusting sweetness and spices to avoid overwhelming any singular component, focusing on harmony in taste.

Regulate temperature uniformly during baking, preventing burnt topping and undercooked filling by placing the dish on a middle oven rack.

Mitigate equipment challenges by ensuring adequate mixing tools are available. Electric mixers help achieve optimal creaminess in sweet potato mashing.

Ingredient substitutions should adhere to balance principles. If altering flour types or milk, maintain ratios to preserve overarching taste and texture.

Address timing concerns by pre-preparing ingredients, allowing ample baking time for proper consistency without rushing the process.

Recipe Success Stories


Community feedback frequently highlights the irresistible comfort of this sweet potato casserole. Enthusiasts praise its simplicity and rich flavors, making it a repeat favorite at gatherings.

Successful variations suggested by readers include the addition of cranberries for a tangy burst of flavor or using maple syrup instead of sugar.

Adaptation stories often involve attempts to create a healthier version, such as reduced sugar or dairy-free, while maintaining the recipe’s essence.

Reader suggestions often involve unique garnishes or serving styles, like using individual ramekins for personalized servings during special occasions.

Photography tips shared by community members emphasize capturing the casserole’s vibrant colors and inviting textures, with lighting angles that enhance its golden topping and lush interior.

Frequently Asked Questions

Q: Can I make this sweet potato casserole vegan?
A: Absolutely! Replace butter with vegan margarine and dairy with plant-based alternatives like almond milk for a delicious vegan version.

Q: What’s the best way to make the casserole ahead?
A: Prepare both the sweet potato mixture and topping, storing separately in the fridge. Combine and bake on the day of serving.

Q: How long will leftovers last?
A: Stored properly in airtight containers, leftovers remain fresh in the fridge up to 5 days or can be frozen for up to 2 months.

Q: Can I use canned sweet potatoes?
A: Yes, but opt for unsweetened versions to maintain control over the casserole’s sweetness levels.

Q: How do I prevent the topping from burning?
A: Cover with foil if browning too rapidly and remove towards the end for even baking without over-crisping.

Q: Can I substitute walnuts for pecans?
A: Of course. Walnuts provide a lovely nutty flavor and crunch similar to pecans, enhancing the topping’s texture.

Q: What’s the best way to store this dish?
A: Use airtight containers to seal in freshness, or wrap tightly in cling film for freezer storage.

Q: How do I know when it’s done?
A: Look for bubbling edges and a browned top as visual indicators of doneness, ensuring the filling is cooked through.

Q: Can I reduce the sugar content?
A: Yes, adjust to taste or use sugar substitutes to lessen sugar levels while maintaining the casserole’s richness.

Q: How can I add more texture variations?
A: Consider mixing finely chopped nuts or seeds into the base for added bite.

Additional Resources


Explore related recipes like sweet potato pie or pumpkin casseroles for diversifying your sweet and savory repertoire.

Review technique guides focused on perfecting mashing and baking to sharpen your skills and enhance recipe results.

Learn more about key ingredients and their history, diving into the nutritional benefits and cultural significance of sweet potatoes.

Benefit from equipment recommendations for quality kitchen tools that enhance efficiency and results, from mixing to baking.

Delve into seasonal variations and adjustments to inspire creativity in your kitchen, adapting recipes to suit any time of year.

Join the Conversation


We invite you to join in the culinary conversation by sharing your renditions of this sweet potato casserole recipe on social media. Capture your creations and share your photography tips for showcasing its rich colors and textures.

Submit your recipe reviews and engage with our community as we celebrate the success of this beloved dish. Discuss possible adaptations and variations and explore how others are keeping this traditional recipe alive in modern kitchens with new twists and flavors.

The Recipe

Sweet Potato Casserole

Serves: 8

Prep Time: 20 mins

Cook Time: 45 mins

Total Time: 65 mins

Kitchen Equipment Needed

  • Mixing bowls
  • Electric mixer or potato masher
  • Baking dish
  • Spatula

Ingredients

  • 4 cups sweet potatoes, cooked and mashed
  • 1/2 cup granulated sugar
  • 2 eggs, beaten
  • 1/3 cup butter, melted
  • 1 teaspoon vanilla extract
  • 1/2 cup milk
  • 1/4 teaspoon ground cinnamon
  • 1/4 teaspoon ground nutmeg
  • 1 cup chopped pecans
  • 1/2 cup brown sugar
  • 1/3 cup all-purpose flour
  • 1/3 cup butter, melted

Directions

  1. Preheat oven to 350°F (175°C) and grease a baking dish.
  2. In a large bowl, combine mashed sweet potatoes, granulated sugar, beaten eggs, 1/3 cup melted butter, vanilla extract, cinnamon, and nutmeg.
  3. Mix well until creamy and smooth. Transfer the mixture to the prepared baking dish.
  4. In a separate bowl, mix pecans, brown sugar, flour, and remaining 1/3 cup melted butter for the topping.
  5. Sprinkle the pecan topping evenly over the sweet potato mixture.
  6. Bake in the preheated oven for 30 to 40 minutes, or until the topping is golden brown and crisp.
  7. Let cool slightly before serving. Enjoy!

Recipe Notes

  • This casserole can be made a day ahead and reheated before serving.
  • For additional flavor, consider adding a splash of bourbon or rum to the sweet potato mixture.
  • Feel free to substitute walnuts for pecans if desired.

Indulge Your Senses with Irresistible Triple Chocolate Mousse Cake

Decadent Triple Chocolate Mousse Cake: A Celebration of Chocolate

⚖️
Difficulty
Intermediate

⏲️
Prep Time
30 mins

🕒
Cook Time
30 mins

⏱️
Total Time
60 mins

🍽️
Servings
8-10

Dive into a world of chocolate bliss with this Triple Chocolate Mousse Cake, a luscious dessert that promises a taste experience like no other. Featuring layers of rich dark chocolate, creamy milk chocolate, and airy white chocolate mousse, this cake is a masterpiece of indulgent flavors and textures. Perfect for chocolate lovers and special occasions, each bite delivers a smooth and velvety mouthfeel, making it a memorable centerpiece for any celebration.

Quick Recipe Highlights

  • Flavor Profile: This cake offers a harmonious blend of bittersweet and creamy chocolate notes, balanced perfectly between its three layers.
  • Texture: Experience alternating layers of dense cake and light, whipped mousse, providing a satisfying contrast that melts in your mouth.
  • Aroma: The cake exudes deep cocoa aromas with hints of vanilla and espresso, enhancing its rich chocolate essence.
  • Visual Appeal: Impress your guests with this elegantly layered cake, crowned with a glossy chocolate ganache and a sprinkle of cocoa powder.
  • Skill Level Needed: An intermediate skill level is required, as it involves multiple steps including tempering chocolate and layering mousse.
  • Special Equipment: Prepare with a springform pan, mixer, and offset spatula to achieve layers without seams.

Recipe Overview

  • Difficulty Level: Considered intermediate due to the need for tempering chocolate and creating seamless mousse layers, but achievable with patience and practice.
  • Category: This dessert fits into party and special occasion categories, elevating any gathering with its sophisticated presentation.
  • Cuisine: Rooted in French patisserie traditions, this cake borrows techniques from the art of classic mousse crafting.
  • Cost: While featuring premium ingredients, the cake remains cost-effective for a specialty dessert, suitable for those willing to invest in a quality treat.
  • Season: Best enjoyed in cooler months due to its rich and warming nature; however, it’s a hit year-round at festive celebrations.
  • Occasion: Ideally served at celebrations, holidays, and gatherings, offering an impressive and indulgent dessert option.

Why You’ll Love This Recipe


The Triple Chocolate Mousse Cake stands out for its irresistible combination of deep chocolate flavors and light, fluffy mousse. The distinct layers create a captivating experience that balances richness with lightness, making each forkful a decadent pleasure. This cake is perfect for impressing guests with its elegant structure and mouth-watering taste. Moreover, it offers the flexibility to prepare components in advance, simplifying the process of assembling it fresh for events.

Not only is this cake a treat for your senses, but it is also a surprisingly convenient dessert to prepare. Each part of the mousse can be made ahead, allowing for an easy final assembly on the day of serving. This convenience makes it a go-to option for hosts looking to maintain a stress-free kitchen while ensuring the delivery of a delightful homemade masterpiece.

While indulgent in nature, this chocolate mousse cake provides a touch of nutritional benefits through the use of high-quality chocolate, which contains antioxidants and heart-healthy properties. By portioning correctly, it can be part of a balanced diet, fitting perfectly as an occasional, luxurious treat.

The cake’s impressive visual appeal and rich flavors make it ideal for social gatherings, both formal and informal. It encourages sharing among family and friends, creating lasting memories complemented by the universal love of chocolate. Boasting taste and texture that appeals to both young and old, this dessert blends elegance with nostalgia, fostering a shared culinary experience.

Cost-effective and accessible in terms of ingredients and preparation, the Triple Chocolate Mousse Cake uses easily sourced items that do not skimp on quality. Its timeless appeal makes it adaptable to various settings, from intimate dinners to large parties, without losing its luxurious and sophisticated edge.

Historical Background and Cultural Significance


The Triple Chocolate Mousse Cake roots itself in the rich tradition of French pastry, where the mousse was first crafted in the late 19th century. Originally, chocolate mousse was served as a solo dish, praised for its light texture and rich taste. Gradually, it evolved, integrating itself into more complex desserts—like this cake—favored for their multilayered flavors.

This cake holds cultural weight as a perfect representation of chocolate’s evolving role in dessert making, reflecting both the simplicity of pure chocolate flavor and the complexity of creating a sophisticated, layered dessert. It exemplifies the art of patisserie, showcasing the technique and precision associated with classic French baking.

Over the years, the recipe has evolved from its ancestral forms, incorporating modern twists with the addition of various chocolate types and nuanced flavors. These adaptations allow each baker to inject their unique flair, ensuring the timelessness of this beloved dessert.

Regional variations abound, from adding local flavors like fresh fruit or nuts to altering the types of chocolate used. Such deviations highlight the universal appeal of chocolate mousse cakes while allowing regional identity to shine through, celebrating global culinary diversity.

Ingredient Deep Dive


Dark chocolate serves as the backbone of this Triple Chocolate Mousse Cake, bringing depth and bitterness to the flavor profile. Historically esteemed as a treasured ingredient, chocolate’s significance reaches into the cultural practices of ancient civilizations, once reserved for royalty and trade. Its bitter notes and high cocoa content make it a healthy choice, providing antioxidants known for their health benefits. Selection tips include choosing bars with a minimum of 70% cocoa, stored at a consistent, cool temperature to retain flavor and texture. If unavailable, semi-sweet chocolate offers a close substitute.

White chocolate, made from cocoa butter, sugar, and milk solids, adds a creamy counterpart to the other chocolate layers. Although technically not chocolate, its smooth texture makes it an essential component of the mousse, creating contrast and balance. Nutritional benefits include milk protein and calcium. Look for high-quality bars with a high cocoa butter percentage to ensure flavor quality. Storage requires a cool, dry place to prevent separation. Opt for creamier variants to maintain consistency in mousse texture, or substitute with milk chocolate for a sweeter touch.

Common Mistakes to Avoid

  • Overheating the chocolate during melting can burn it, sacrificing flavor. Always melt gently over a double boiler.
  • Incorporating whipped cream too aggressively can deflate your mousse, leading to a denser consistency. Fold gently for an airy result.
  • Rushing the setting time reduces the structural integrity of the cake. Allow ample refrigeration time for layers to set fully.
  • Improper tempering of chocolate results in a dull finish. Ensure precise temperature control using a candy thermometer.
  • Skipping the cake base can lead to a less impressive presentation. Always include a supportive base layer for structure.
  • Inconsistent mousse textures arise from insufficient mixing. Ensure all ingredients are well-combined for even layers.
  • Neglecting to chill your equipment when making mousse can prevent optimal results. Keep bowls and beaters cool for best results.
  • Forgetting to line your springform pan leads to difficult removal. Use parchment paper for easy extraction and clean edges.

Essential Techniques


Mastering the art of tempering chocolate is essential for a professional finish. This process involves melting chocolate to a specific temperature, cooling it, and slightly reheating it to achieve a glossy, snap-worthy final product. Key visual cues include the chocolate’s smooth texture and viscosity; any clumping indicates overheating. An often-made mistake is failing to monitor temperature closely, so use a digital thermometer for accuracy. This technique is crucial for achieving the cake’s elegant appearance and impeccable texture, ensuring the chocolate layers maintain their integrity when sliced.

Pro Tips for Perfect Triple Chocolate Mousse Cake


Opt for a high-quality, 70% cocoa content dark chocolate to ensure your cake retains a deep, sophisticated flavor palette. This choice enhances both taste and structural stability.

When whipping cream for mousse, aim for soft peaks to avoid stiff, hard textures that don’t blend seamlessly with melted chocolate. Soft peaks create a light, airy consistency.

To prevent sticking, always line your springform pan with parchment paper, both on the bottom and around the edges, ensuring easy release and smooth, straight mousse layers.

Allow each layer of the cake to firm up in the fridge before adding the next. This gradual setting assures clean separation between flavors and layers, vital for a visually appealing slice.

Maintain precision in your measurements. Baking is a science requiring exact amounts for consistent results, so use digital scales and measuring spoons.

For an impressive finish, top your cake with a smooth ganache and a sprinkle of shaved chocolate or cocoa powder, highlighting the cake’s duality of simplicity and elegance.

Variations and Adaptations


Individuals observing a gluten-free diet can substitute the standard cake base with almond flour or a gluten-free cake mix, maintaining the body and flavor without gluten content.

For a keto-friendly option, use sugar-free chocolate and sweetener in place of traditional sugar, ensuring a low-carb treat that doesn’t sacrifice taste.

Seasonal adaptations might include incorporating fresh, sliced berries in the summer for a refreshing, fruity contrast to the rich chocolate layers.

Create a mocha variation by adding a shot of espresso or a teaspoon of espresso powder to the dark chocolate layer, enhancing depth and intensifying the chocolate’s natural bitterness.

Explore textural modifications by introducing crushed nuts or crumbled cookies between the mousse layers, offering a surprise crunch in each bite.

Embrace presentation alternatives by serving in individual ramekins or dessert cups, offering a modern twist and elegant individual portions for diverse settings.

Serving and Presentation Guide


Enhance your cake’s visual allure by using a clean, sharp knife, dipped in hot water and wiped dry, to achieve smooth, precise slices. This technique allows even portions that showcase the layered design.

Garnish with a gentle snowfall of cocoa powder or dollops of whipped cream, offering visual and textural contrast alongside each slice.

Traditionally served chilled, consider pairing with a scoop of vanilla ice cream or a dollop of mint-flavored whipped cream for a temperature contrast that pleases the palate.

Present alongside chilled dessert plates to maintain mousse texture throughout serving, particularly in warmer climates, ensuring each piece remains fresh and appealing.

For an upscale touch, plate with a drizzle of raspberry coulis or caramel sauce, adding a splash of color and complementary tangy or sweet flavors.

Wine and Beverage Pairing


Select a robust red wine, such as a Malbec or Merlot, with enough fruitiness to complement the cake’s richness without overpowering its delicate mousse layers.

Alternatively, a dessert wine like Port offers a sweeter, equally indulgent pairing, aligning harmoniously with the chocolate’s fruity undertones.

Non-alcoholic alternatives include a high-quality sparkling water with a twist of lime, cleansing the palate between bites and maintaining balance.

Coffee enthusiasts will appreciate the pairing of cappuccino or espresso, where the creamy coffee notes align beautifully with the dessert’s smooth layers.

Ensure all beverages are served cool to allow the contrasting chocolate notes to shine, with coffee served slightly cooler than its usual piping hot temperature to harmonize better.

Storage and Shelf Life


Store in an airtight container within the refrigerator to maintain freshness and prevent the mousse layers from drying out or becoming soggy.

Ideally, consume within 3-4 days for best taste and texture, monitoring the ganache for any signs of dullness as an indicator of aging.

When freezing, wrap individual slices tightly in plastic wrap and foil to maintain integrity, thawing in the refrigerator overnight for gradual defrosting and optimal texture retention.

Watch for any separation between mousse layers as a sign of spoilage or textural compromise, indicating it is time to discard and create fresh.

For best results, avoid reheating, as temperature fluctuations can destabilize mousse consistency and chocolate integrity.

Make Ahead Strategies


Craft each mousse component up to 24 hours in advance, storing separately in airtight containers in the fridge until assembly, streamlining the preparation process.

During assembly, ensure ample chilling time for each layer, improving texture alignment and structural stability, allowing for no rush assembly on the day of serving.

Assess quality by ensuring mousse remains fluffy and layers distinct, avoiding extended waiting times that might compromise texture through over-set mousse or dry layers.

Reheat dishes only gently to bring them to desired temperature without sacrificing the integrity of the mousse layers.

Add any fresh fruit garnishes or creams at the moment of serving, preserving vibrant color and fresh taste.

Scaling Instructions


When halving the recipe, use smaller pans and adjust chilling times to ensure layers set correctly without overwhelming or losing intended structure.

Doubling the recipe requires careful scaling of ingredients, acknowledging that larger pans may necessitate increased chilling times to maintain consistency.

Consider equipment adjustments, opting for larger bowls during mousse preparation to comfortably accommodate increased volume without spilling or uneven mixing.

Modify timing by closely monitoring cooling temperatures and set times for each chocolate type, allowing uniformity and structured results.

Store larger batches of mousse in shallow pans for even chilling and optimal textural consistency upon assembly.

Nutritional Deep Dive


The Triple Chocolate Mousse Cake is a balanced blend of macronutrients, providing ample carbohydrates from the chocolate and cream layers, alongside moderate protein content derived from cream and eggs.

Micronutrient offerings include small quantities of calcium and antioxidants from quality chocolate and cream, accompanied by trace minerals found in dark chocolate.

Maintaining health benefits involves portion control, indulging mindfully to enjoy the dessert’s rich flavors without excessive caloric intake.

Ideal for occasional indulgence, this cake fits within a balanced diet through calculated portioning and mindful savoring, aligning with weight management principles.

Dietary Adaptations


For gluten-free needs, substitute the cake base with almond flour alternatives, providing a gluten-free option that remains flavorful and texturally compatible.

Dairy-free adaptations involve utilizing coconut cream in place of traditional cream and dairy-free chocolate to maintain the mousse’s richness without dairy-based ingredients.

Vegan modifications replace eggs and cream with aquafaba and coconut-based creams, alongside vegan chocolate, ensuring inclusivity of different dietary requirements.

Low-carb and keto adaptations involve using sweeteners like erythritol, aligning the dessert with low-carb dietary standards while preserving its essential flavors.

Troubleshooting Guide


If mousse lacks airiness, reassess whipped cream folds—aim for gentle, deliberate folding motions to incorporate without deflation or losing creaminess.

Too solid a texture suggests over-mixing; manage stages delicately, focusing on knowing visual cues and maintaining crisp ingredient temperatures.

Imbalanced flavors may result from using overly sweet chocolate varieties; incorporate a touch of espresso or salt to enhance depth and reduced sweetness.

To troubleshoot under-set cakes, extend chilling times to ensure each layer solidifies fully, providing stability and stratification clarity.

For ingredient substitutions, substitute with care, acknowledging how texture shifts with alternative flours, creams, or sweeteners might occur.

Recipe Success Stories


Our community shares glowing feedback, often customizing their Triple Chocolate Mousse Cake with local fruit additions or festive adornments.

Readers found success using alternative flours and creams, solidifying this dessert’s versatility across dietary needs and ingredient availability.

Frequent praise is directed at the cake’s ability to maintain structural integrity during difficult measurements, resulting in a successful yet forgiving beginner’s option.

Supplement photography with natural lighting tips, positioning cake slices near ambient sunlight for beautiful shadows and dynamic highlights.

Suggestions for elevating presentation include experimenting with fruit coulis or liquor infusions, offering innovative layers of customization.

Frequently Asked Questions

What type of chocolate works best? Opt for high-quality 70% cocoa content dark chocolate and complementary milk and white chocolates to ensure balanced flavor and texture.

Can this cake be made gluten-free? Yes, swap out the cake base with gluten-free alternatives such as almond flour or gluten-free cake blends.

How can I prevent mousse from falling flat? Ensure gentle folding of whipped cream within melted chocolate batches, maintaining layering and integrity with every fold.

What’s the best pan for this recipe? Use a springform pan for best results, ensuring it retains layers cleanly without sticking or difficulty in removal.

Is advance preparation possible? Indeed, you can prepare mousse components ahead of time, assembling fresh cakes a day in advance without textural or flavor loss.

How should mousse be cooled? Always keep mousse layered within cool or chilled conditions, ensuring optimal texture without deflation or melting concerns.

What’s the ideal serving arrangement? Serve on chilled dessert plates, pre-cutting cake portions to maintain aesthetic appearance and avoid melting on plate warmth.

Can caffeine be integrated? Many enjoy adding espresso for added character and complexity; this approach highlights natural bitterness within the cake’s layers.

Could I use vegan alternatives? Absolutely, coconut-based cream varieties and vegan chocolates work excellently in replicating conventional cream and chocolate properties.

Is alcohol pairing recommended? Yes, dessert wines such as Port serve as excellent complements, highlighting depth and harmonizing with the dessert’s rich flavor profile.

Additional Resources


Explore related chocolate mousse recipes, similar flavor development techniques, and enhancing ingredient profiles to expand ingredient adaptation knowledge.

Technique guides illustrate chocolate tempering and layer creation, providing salient tips and insights into mastering mousse production.

Ingredient information is detailed through articles exploring chocolate selection, cocoa butter applications, and the significance of vanilla presence.

Equipment recommendations advocate for precise tools that ensure uniform mousse blending, chocolate melting, and cake pan preparation success.

Seasonal variations, including summer fruit additions, highlight adaptational approaches to maintaining recipe dynamics year-round.

Join the Conversation


Engage with our community via social media platforms, exchanging photographs, insights, and modifications of beloved favorites, further enriching recipe success stories.

Submit personal experiences utilizing local flavors, offering guidance and inspiration for innovative adaptations while sharing stunning dessert images with technique-enhancing tips.

Submit reviews detailing your varied successes or challenges, fostering shared community knowledge via online forums and digital interaction avenues.

Encourage participation in recipe modifications through seasonal, regional, and skill adaptations, all while enjoying personal culinary experimentation, exchanges, and discovery.

The Recipe

Triple Chocolate Mousse Cake

Serves: 8-10

Prep Time: 30 mins

Cook Time: 30 mins

Total Time: 60 mins

Kitchen Equipment Needed

  • Springform pan
  • Double boiler
  • Stand or hand mixer
  • Offset spatula
  • Digital kitchen thermometer

Ingredients

  • 200g dark chocolate (70% cocoa content)
  • 200g milk chocolate
  • 200g white chocolate
  • 600ml heavy cream
  • 6 large eggs
  • 1 cup granulated sugar
  • 1/4 teaspoon salt
  • 1 tablespoon vanilla extract
  • 1/4 cup strong brewed coffee (optional for flavor depth)

Directions

  1. Preheat your oven to 350°F (175°C). Grease and line a springform pan.
  2. Melt each chocolate type separately using a double boiler.
  3. In a separate bowl, whip 300ml of cream until soft peaks form. Divide equally among three bowls for each chocolate type.
  4. Fold one portion of whipped cream into each melted chocolate, creating three distinct mousses.
  5. For the base, beat eggs with sugar until pale and thick; gently fold in melted dark chocolate. Pour into the springform pan and bake for 20 minutes or until set. Let it cool.
  6. Spread the dark chocolate mousse over the cooled base; chill until firm.
  7. Repeat layering with milk chocolate mousse, followed by white chocolate mousse, refrigerating between layers.
  8. Rest the completed cake in the fridge for at least 4 hours or overnight for optimal setting.
  9. When ready to serve, remove the outer ring of the pan carefully and transfer cake to a serving platter.

Recipe Notes

  • Substitute almond flour for the base to achieve a gluten-free cake.
  • Use dairy-free cream and chocolate for vegan adaptations.
  • Consider adding citrus zest for a flavor contrast to the chocolate richness.