Delightful Rose Pistachio Cheesecake Ice Cream Recipe to Savor

Rose Pistachio Cheesecake Ice Cream: A Delightful Dessert Experience

⚖️
Difficulty
Medium

⏲️
Prep Time
30 mins

🕒
Cook Time
0 mins

⏱️
Total Time
8 hours (chill time)

🍽️
Servings
6-8

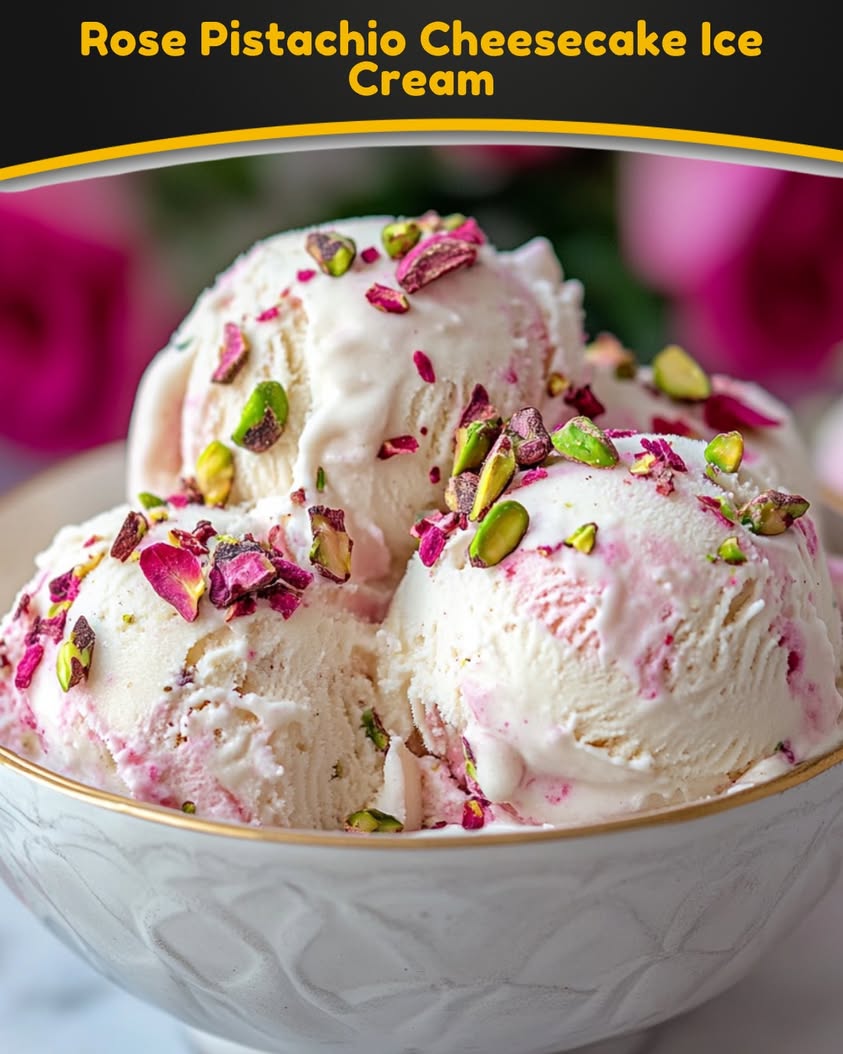
Indulging in a bowl of Rose Pistachio Cheesecake Ice Cream is not just enjoying another dessert; it’s an exquisite experience. The enchanting combination of creamy cheesecake and fragrant rose water, paired with the salty crunch of pistachios, dances on your palate. This homemade ice cream not only offers an ideal way to cool off on a hot summer day but also transports you to a luxurious bazaar filled with aromas and sights that evoke tales from the East.

Imagine scooping into a luscious, velvety texture that immediately melts in your mouth, the floral notes of rose mingling beautifully with buttery, nutty pistachios. Each bite brings a beautiful harmony of flavors, making it hard to resist reaching for another. Enhanced with festive pistachio pieces, this treat is perfect for special occasions or simply as a sweet reward after a long day.

Quick Recipe Highlights

  • Flavor Profile: The balance of sweet creaminess and floral rose flavor creates a uniquely satisfying dessert.
  • Texture: Creamy and smooth with a delightful crunch from the pistachio pieces, making it a textural delight.
  • Aroma: The subtle scent of rosewater combined with toasted pistachios marks an aromatic sensation that elevates this dessert.
  • Visual Appeal: A stunning pale pink hue dotted with green pistachios makes for an elegantly inviting dessert.
  • Skill Level Needed: This recipe requires intermediate skills involving whipping, mixing, and the patience to freeze until perfectly set.
  • Special Equipment: An ice cream maker is essential to achieve that creaminess that hand-churning cannot replicate.

Recipe Overview

  • Difficulty Level: This Rose Pistachio Cheesecake Ice Cream requires a moderate level of skill, primarily because it includes tempering ingredients and achieving the right consistency.
  • Category: This dessert falls into the ice cream category, making it an ideal summer or celebratory treat.
  • Cuisine: With roots steeped in Middle Eastern flavors, this ice cream pays homage to traditional sweets that celebrate unique culinary heritage.
  • Cost: The approximate cost of this recipe is reasonable, especially considering the high-quality ingredients like cream cheese and pistachios that contribute to flavor and richness.
  • Season: Best enjoyed in warmer months, this dessert can elevate summer gatherings or any event needing a refreshing finish.
  • Occasion: Perfect for birthdays, dinner parties, or casual warm evenings spent with loved ones; it brings an element of sophistication to any occasion.

Why You’ll Love This Recipe

Each bite of this Rose Pistachio Cheesecake Ice Cream is a sensory delight that combines rich, creamy sweetness with nutty undertones and floral hints. The cheesecake essence integrates wonderfully with the ice cream, leading to a flavor profile that is both unique and comforting. Not only does it appeal to traditional dessert lovers, but it also caters to those looking for a distinctive twist on classic flavors.

Preparation of this ice cream is a straightforward process that offers both convenience and satisfaction. Minimal effort is needed to produce a dessert that rivals any gourmet ice cream shop, allowing you to impress guests without compromising on your time. Moreover, once you’ve gathered your ingredients, the hardest part is merely waiting for it to freeze, providing an excellent opportunity to unwind.

Nutritionally, this dessert brings some benefits. The incorporation of pistachios adds healthy fats and a good amount of protein, which is essential for a balanced diet. Meanwhile, the creamy base allows for indulgence without a heavy feeling, making it a delightful end to your meal.

Socially, serving this unique flavor can ignite conversations about culinary traditions and personal memories associated with ice cream. Its eye-catching color and diverse flavors make it a centerpiece for any dessert table, drawing guests to try something new.

When it comes to cost, making your own ice cream is significantly more economical than purchasing premium flavors from stores. This Rose Pistachio Cheesecake Ice Cream allows you to indulge in a gourmet dessert experience while maintaining a budget-friendly approach.

Historical Background and Cultural Significance

The origins of Rose Pistachio Cheesecake Ice Cream can be traced back to Middle Eastern desserts, where floral and nut flavors are celebrated in numerous culinary traditions. The use of rosewater dates back thousands of years and remains a staple in many cultures for both its flavor and fragrance. It is often associated with love and beauty in various customs, making this ice cream not just a treat but a celebration of rich history.

Culturally, desserts like these embody the practices of hospitality and sharing, a vital part of gatherings in many communities. Serving desserts with sweet and savory contrasts, often enriched with nuts and spices, is a testament to the region’s vibrant culinary landscape. This ice cream honors that tradition, inviting those who taste it to partake in a global culinary dialogue.

As this recipe evolved, the integration of cream cheese came into play, reflecting modern tastes while maintaining traditional flavors. The incorporation of local ingredients has given rise to numerous adaptations, allowing variations to emerge across different regions.

Regional variations of this dessert are abundant, with different nuts utilized based on local availability and personal tastes. The combination of spices like cardamom or cinnamon can also add unique twists, showcasing how traditional recipes evolve while preserving their essence.

Ingredient Deep Dive

Pistachios:
Pistachios have a long history, deeply rooted in the Middle Eastern culinary tradition. They are known not just for their flavor and texture but also for their health benefits, including high levels of protein, fiber, and healthy fats. When selecting pistachios, look for bright green nuts with no blemishes, preferably unsalted for this dessert. Store them in a cool, dry place to maintain freshness, and feel free to substitute with other nuts like almonds or cashews if desired.

Rosewater:
Rosewater has been used as a flavoring agent in various cultures for centuries. It adds a subtle floral note that enhances the taste of many desserts. The nutritional benefits of rosewater include antioxidants that may promote skin health. When purchasing, opt for pure rosewater without additional additives. For storage, keep it in a cool, dark place. If rosewater isn’t available, consider alternative floral essences like orange blossom or delicate flavorings to maintain that essential essence in the ice cream.

Common Mistakes to Avoid

  • Using synthetic rose flavoring instead of natural rosewater, which can lead to an overpowering taste.
  • Skipping the cooling step before churning, which ensures the mixture reaches a proper texture and flavor.
  • Over-whipping the cream, resulting in a grainy texture that can ruin the overall creaminess of the ice cream.
  • Not pre-chilling your ice cream maker bowl, which can prevent the mixture from freezing effectively.
  • Using stale or poorly stored pistachios that can detract from the freshness and overall flavor.
  • Neglecting to taste and adjust sweetness levels, as some brands of cream cheese can be stronger in flavor than others.
  • Failing to allow proper freezing time can result in a soft and unsatisfactory end product.
  • Not letting the ice cream sit for a few minutes at room temperature before scooping, which makes it easier to serve.
  • Assuming all ice cream makers are the same; follow specific instructions for your model for optimal results.
  • Serving ice cream too cold without proper thawing, which can mask its intended flavors.

Essential Techniques

Whipping cream is crucial for achieving that perfect light and airy texture in ice cream. To master this skill, use a chilled bowl and beaters, as cold equipment can help maintain the integrity of the cream. Watch for visual cues, such as soft peaks, where the cream starts to hold shape but isn’t over-whipped.

Chilling your mixture is another essential technique. Cooling the base before churning allows the flavors to meld and makes for a smoother texture. Ensure the mixture is well-blended with no lumps before transferring it to the ice cream maker. Common pitfalls include not allowing enough time in the fridge or using a base that is still warm.

Pro Tips for Perfect Rose Pistachio Cheesecake Ice Cream

Incorporate flavor layers by adding rose water gradually and tasting until the desired intensity is achieved. This method ensures the floral taste complements rather than overwhelms the dessert.

Use freshly toasted pistachios to enhance their nutty flavor. Cool them completely before adding to the ice cream for the best texture.

A touch of lemon juice can brighten flavors and balance the sweetness of the cheesecake base, so consider including a few drops for added complexity.

Allow your ice cream to sit at room temperature for a few minutes before serving to ensure a smooth scoop every time.

For a gourmet twist, serve on a bed of rose petals or top with a drizzle of honey and extra pistachios for elegant presentation.

Experiment with adding a pinch of salt to heighten the overall flavor of the ice cream. Salty-sweet combinations can be incredibly satisfying in desserts.

Variations and Adaptations

This recipe can be adapted regionally by incorporating local nuts or alternative floral essences depending on availability. For example, try using cardamom-spiced pistachios for a distinct flavor profile that honors Middle Eastern traditions.

Seasonally, consider adding fresh fruits like raspberries or strawberries as a delightful contrast during summer months. Blending in fresh fruit purée can create a vibrant swirly effect.

Dietary modifications can include substituting cream with coconut cream for a vegan version, perfect for plant-based diets while retaining the luscious consistency.

Flavor variations are endless; try infusing spices like saffron for an exotic twist or creating a swirl of chocolate fudge for a playful combination.

Regarding texture modifications, you can add more mix-ins like a crumble of graham crackers to mimic a cheesecake crust, bringing additional crunch to every spoonful.

Presentation alternatives can include serving the ice cream in dessert cups topped with edible flowers, giving it an elegant look befitting any fancy gathering.

Serving and Presentation Guide

Plating techniques matter greatly for desserts like ice cream. Use a clean, wide bowl or cone to showcase the beautiful colors of your Rose Pistachio Cheesecake Ice Cream.

Garnishing can elevate your dessert; consider scattering chopped pistachios or placing a few edible rose petals on top to enhance visual appeal.

Traditional accompaniments could involve pairing the ice cream with delicate shortbread cookies or serving it alongside a sweet Middle Eastern pastry like baklava for a traditional touch.

Modern serving suggestions may include incorporating elements like candied citrus or infusing a splash of prosecco for a more unexpected experience.

Don’t forget temperature considerations; serve the ice cream slightly softened to ensure that rich flavors aren’t masked by coldness.

For portion control, consider using an ice cream scooper for uniform servings, making it easier to manage portions during gatherings.

Wine and Beverage Pairing

For wine pairings, a light dessert wine like Moscato could complement the sweet floral notes of the ice cream. The sweetness of the wine enhances the overall experience without overwhelming your palate.

For non-alcoholic alternatives, try serving with sparkling rose lemonade to reflect the dessert’s flavors while providing a refreshing contrast.

Coffee and tea lovers can enjoy this ice cream alongside a light jasmine tea or a mild coffee blend that won’t overpower the delicate flavors.

Temperature considerations play an important role; ensure that any beverages served are chilled to maintain that refreshing note throughout your dessert experience.

Serving suggestions can vary widely; consider offering a small tasting flight of beverages to enhance the celebration around this exquisite ice cream.

Storage and Shelf Life

For proper storage, keep your Rose Pistachio Cheesecake Ice Cream in an airtight container to prevent freezer burn. It’s essential to avoid repeated thawing and refreezing to maintain texture.

The ideal freezing temperature for ice cream is around -20°F (-29°C) to keep its consistency firm. Store it at the back of the freezer, away from temperature fluctuations, often found near the door.

You can use sturdy plastic or glass containers for storage, ensuring they have tight seals to keep out air and moisture. This will help preserve its creamy texture and flavors.

Signs of spoilage include ice crystals forming and a grainy texture upon thawing, indicating it’s time to discard.

Reheating isn’t applicable to ice cream, but should you wish to create a milkshake, simply blend with a splash of milk until reaching your desired consistency.

Freezing guidelines suggest that homemade ice cream is best consumed within 1-2 weeks for optimum freshness. Beyond this, flavors and textures may diminish.

Make Ahead Strategies

Prep your Rose Pistachio Cheesecake Ice Cream base in advance; this allows the flavors to intermingle beautifully. Completing this step the day before serving will help to achieve the best flavor profile.

If your recipe includes steps that require chilling or tempering, you can space out the process over a few days to avoid a last-minute rush.

For optimal storage between steps, keep your ice cream mixture in an airtight container in the refrigerator while it cools and overnight if necessary.

Assessing quality impact is vital; ensure the base is smooth, rich, and fully adapted to the flavors before churning. A poorly blended base can affect the ice cream’s outcome.

When assembling the final dessert, consider adding fresh elements, such as garnishing with fresh pistachios or petals just before serving for optimal texture and appeal.

Always remember that logistical planning will ensure hassle-free enjoyment of this exquisite dessert, letting you focus on savoring it with family and friends.

Scaling Instructions

If you want to halve the recipe, use half of each ingredient while keeping the same mixing and freezing times. This will ensure consistent texture and flavor without complications.

Doubling or tripling the recipe requires attention to your ice cream maker’s capacity. Make sure to churn batches in accordance with your unit’s instructions to achieve the same creamy finish.

Equipment adjustments may involve portioning mixes into smaller bowls or working in batches if your equipment can’t handle larger volumes at once.

Timing modifications should also reflect increased volume; while churning times might not change significantly, the freezing component could take longer based on quantity.

Storage considerations remain paramount; ensure larger batches are stored in adequately sized containers that allow for some expansion during freezing.

Nutritional Deep Dive

A macro breakdown indicates that each serving of Rose Pistachio Cheesecake Ice Cream provides a mixture of carbohydrates and healthy fats, making it a dessert that satisfies without excessive guilt.

Micronutrient analysis highlights the presence of vitamin E from pistachios, along with calcium and protein largely contributed by cream and cream cheese.

Health benefits include the antioxidant properties from rosewater and the healthy fats in pistachios, promoting heart health and overall nutritional balance.

Dietary considerations should be acknowledged, especially for those watching their sugar intake; adjusting sweetness levels in the recipe could cater to specific needs without losing flavor.

For weight management, indulging in this ice cream can be enjoyed in moderation, allowing for a delightful treat that doesn’t derail health goals.

Portion analysis is important; consider keeping serving sizes consistent and mindful, an aspect often lost in home-made indulgences.

Dietary Adaptations

Making this Rose Pistachio Cheesecake Ice Cream gluten-free is straightforward, as no gluten-containing ingredients are included. Always ensure your pistachios are processed in a gluten-free environment if sensitivities are present.

For a dairy-free option, swap out cream and cheese with coconut-based alternatives, allowing vegan enthusiasts to enjoy this rich dessert without compromise.

Adaptations for a low-carb or keto-friendly version entail utilizing sugar alternatives like erythritol while maintaining the cream’s richness with ample fats for flavor.

Paleo adaptations can be achieved by substituting dairy with nut or coconut cream while using natural sweeteners such as honey or maple syrup for taste balance.

This recipe can be modified as low-FODMAP by ensuring ingredients like cream cheese are lactose-free, making it accessible for those with dietary sensitivities.

Troubleshooting Guide

Texture issues often arise from incorrect ice cream base temperatures; ensure the mixture is thoroughly chilled before churning to achieve a consistent creamy texture.

Flavor balance problems can typically be resolved by adjusting sweetness or acidity. Try adding a touch of lemon juice or additional rosewater to create better depth.

Temperature problems may be fixed by ensuring your freezer is set at a consistent temperature. If ice cream becomes too hard, let it soften slightly before serving for an enjoyable experience.

Equipment challenges can occur with ice cream makers; make sure your equipment is functioning properly, and pre-chill all parts to avoid failure in the freezing process.

Ingredient substitutions might lead to unexpected results. Emphasize using analogs that replicate flavors closely for the best outcomes.

Timing concerns with freezing should be managed by being patient; sometimes, homemade ice cream takes longer than store-bought versions, and rushing may lead to a poor end product.

Recipe Success Stories

Community feedback has been overwhelmingly positive, with many praising the unique flavor combinations that embody cultural richness in this Rose Pistachio Cheesecake Ice Cream.

Variation successes often include swapping out pistachios for almonds, with readers reporting the flavors retaining their delightful essence across substitutions.

Adaptation stories emerge frequently, highlighting how readers have personalized the base with seasonal fruits or spices to suit their individual tastes.

Reader suggestions have even included combination flavors with chocolate, inspiring culinary creativity while still honoring the recipe’s origins.

Photography tips often recommend capturing the ice cream in natural light, emphasizing the colors and textures to invite potential bakers to try their hand at this delicacy.

Frequently Asked Questions

1. Can I make this ice cream without an ice cream maker?
Yes, you can, though results may vary. You can place the mixture in the freezer and stir every 30 minutes for the first 2-3 hours to break up ice crystals.

2. How long can I store the ice cream?
This ice cream can be stored in the freezer for up to 2 weeks, though it’s best enjoyed fresh.

3. Can I use other nuts instead of pistachios?
Absolutely! Almonds, cashews, or even hazelnuts can be substituted, each offering a unique twist to the recipe.

4. Is it possible to make this recipe vegan?
Yes, by using non-dairy cream cheese and coconut cream, you can create a delicious vegan alternative.

5. How can I adjust the sweetness?
Taste the mixture before freezing; you can add more sweetener if necessary, depending on your preference.

6. What if I don’t have rosewater?
You can substitute with orange blossom water or add vanilla extract for a different, yet delicious flavor profile.

7. My ice cream is too hard. What can I do?
If your ice cream is too hard, let it sit at room temperature for a few minutes before serving for easier scooping.

8. Can I make this dairy-free?
Yes! Use coconut cream in place of dairy ingredients to create a rich and delicious alternative.

9. What about portion sizes?
This recipe serves 6-8, but you can adjust serving sizes according to your preference; just remember to keep it balanced.

10. Can I make it a day ahead of time?
Making it a day in advance can deepen the flavors and improve the texture, making it a great upfront dessert option.

Additional Resources

For those interested in expanding their dessert repertoire, check out related recipes like Lavender Honey Ice Cream or Mango Coconut Sorbet, which incorporate similar floral notes.

Technique guides on how to perfect homemade ice cream can elevate your dessert game, ensuring you have the right methods at your disposal.

Ingredient information is crucial, especially for those pursuing high-quality components like artisanal pistachios or specialty creams to enhance flavors.

Recommended equipment includes high-quality ice cream makers and storage containers that help maintain the ice cream’s impeccable textures and flavors.

Seasonal variations can keep your dessert fresh and exciting; don’t hesitate to explore different fruits and spices as the seasons change.

Join the Conversation

We’d love to hear from you! Share your experiences with this Rose Pistachio Cheesecake Ice Cream on social media, using the hashtag #RosePistachioIceCream.

Photography tips can help you capture the aesthetic of your delightful creations, so tag us in your posts!

Recipe reviews allow others to see how you personalized and enjoyed this dessert, adding to a communal appreciation of culinary creativity.

Engaging the community is essential; share your variations or adaptations to inspire others to try their hand at this unique ice cream recipe.

Explore vibrant flavors and textures while enjoying a conversation starter that is bound to bring people together over a bowl of your homemade treat.

The Recipe

Rose Pistachio Cheesecake Ice Cream

Serves: 6-8

Prep Time: 30 mins

Cook Time: 0 mins

Total Time: 8 hours (chill time)

Kitchen Equipment Needed

  • Ice cream maker
  • Mixing bowl
  • Whisk
  • Measuring cups and spoons
  • Spatula
  • Airtight container for storage

Ingredients

  • 8 oz (225 g) cream cheese, softened
  • 1 cup (240 ml) heavy cream
  • 1 cup (240 ml) sweetened condensed milk
  • 1/4 cup (60 ml) rosewater
  • 1/2 cup (75 g) pistachios, chopped
  • Pinch of salt
  • 1/4 cup (50 g) sugar (optional, adjust to taste)

Directions

  1. In a mixing bowl, beat the softened cream cheese until smooth, then add the heavy cream and sweetened condensed milk. Mix until well blended.
  2. Incorporate the rosewater and a pinch of salt, ensuring everything is well combined. Taste and adjust sweetness if needed.
  3. Fold in the chopped pistachios gently to avoid breaking them.
  4. Transfer the mixture into your ice cream maker and churn according to the manufacturer’s instructions until it reaches a soft-serve consistency.
  5. Pour the churned ice cream into an airtight container and freeze for at least 8 hours until firm.
  6. Once frozen, let it sit at room temperature for a few minutes before scooping. Enjoy your homemade Rose Pistachio Cheesecake Ice Cream!

Recipe Notes

  • You can substitute rosewater with orange blossom water for a different flavor.
  • If you prefer a smoother texture, blend the mixture with a hand blender for a few seconds before churning.
  • Experiment with adding chocolate chips for a unique twist!

Indulge in Key Lime Pie Cheesecake Piña Colada Delight

Key Lime Pie Cheesecake Piña Colada: A Tropical Twist on a Classic Dessert

⚖️
Difficulty
Medium

⏲️
Prep Time
30 mins

🕒
Cook Time
60 mins

⏱️
Total Time
90 mins

🍽️
Servings
8

Indulge in the luxurious layers of flavor found in this Key Lime Pie Cheesecake Piña Colada, where the tangy essence of key lime meets the rich, creamy texture of cheesecake. Each bite is a mini-vacation for your taste buds, inviting the refreshing, tropical vibes of a piña colada right into your kitchen. The contrasting flavors and textures will transport you to sun-drenched beaches, making it the perfect dessert for summer parties, family gatherings, or simply a well-deserved treat at home.

This dessert is not merely about flavor; it’s an experience. The smooth cheesecake sits atop a graham cracker crust, complemented by a vibrant key lime filling that adds a zesty punch. The addition of coconut cream resonates with the essence of a classic piña colada, bringing forth an island paradise in every slice. Whether served at a festive gathering or enjoyed quietly at home, this cheesecake promises to excite your palate and spark joy.

Quick Recipe Highlights

  • Flavor Profile: This dessert offers a delightful blend of tartness from the key limes, creaminess from the cheesecake, and tropical sweetness from the coconut.
  • Texture: The smooth, velvety cheesecake contrasts beautifully with the crunchy graham cracker crust, making each bite a textural delight.
  • Aroma: The enticing scent of fresh limes combined with the warmth of baked coconut fills the air, creating an inviting atmosphere.
  • Visual Appeal: Layers of vibrant green lime filling peeking through a golden crust create an eye-catching dessert that’s as beautiful as it is delicious.
  • Skill Level Needed: While slightly advanced, this recipe is manageable for any adventurous baker with a bit of patience.
  • Special Equipment: You’ll need a springform pan for the cheesecake and a good mixer for achieving a smooth filling.

Recipe Overview

  • Difficulty Level: This Key Lime Pie Cheesecake Piña Colada can be categorized as medium due to its multi-layered approach and need for precise baking times.
  • Category: As a decadent dessert, it fits within both the cheesecake and summer dessert categories.
  • Cuisine: This recipe combines classic American methods with a tropical twist, reflecting influences from Caribbean cuisine.
  • Cost: Ingredients are relatively affordable, with an estimated total cost around $15-20, depending on local pricing.
  • Season: Best enjoyed during warm months, especially in summer when tropical flavors shine brightest.
  • Occasion: Perfect for celebrations such as birthdays, summer parties, or any gathering that calls for a delightful dessert.

Why You’ll Love This Recipe

Experience the delightful harmony of tangy, sweet, and tropical flavors that this Key Lime Pie Cheesecake Piña Colada brings together. Each bite provides a refreshing contrast to traditional heavy desserts, making it a preferred choice on a hot day. As the creamy cheesecake melts in your mouth, you’ll appreciate the vibrant notes of fresh lime that linger on your palate, effortlessly whisking you away to a beachside paradise.

This dessert not only impresses with taste but is also relatively easy to prepare. While it requires some time to chill, the hands-on effort is minimal, allowing you to spend time with guests rather than stuck in the kitchen. The simple layering technique enhances the presentation, making it a show-stopping centerpiece for any table.

Not to be overlooked are the nutritional benefits; this dessert contains protein from cream cheese and is made with fresh lime juice, offering a dose of vitamin C. The use of coconut adds healthy fats, making this a more wholesome dessert choice compared to others laden with refined sugars and artificial ingredients.

Hosting friends or family becomes an even more delightful experience when serving this dessert. Its tropical flavors create a party atmosphere that encourages conversation and laughter, inviting everyone to share their favorite summer memories. Whether it’s a backyard barbecue or a fancy dinner, this cheesecake is sure to impress and delight every palate.

Lastly, this Key Lime Pie Cheesecake Piña Colada is a budget-friendly treat. With affordable ingredients and a simple recipe, you can indulge in a tropical dessert without breaking the bank. Plus, it yields multiple servings, allowing you to serve a crowd or enjoy leftovers throughout the week.

Historical Background and Cultural Significance

The key lime pie is a beloved dessert that originated in the Florida Keys in the late 19th century. It is traditionally made with key lime juice, sweetened condensed milk, and egg yolks, reflecting the limited access to fresh ingredients in the island community. This cheesecake adaptation honors that traditional dessert while incorporating sophisticated elements and modern flavors.

Culturally, key lime pie represents a symbol of the Florida Keys and the overall laid-back vibe of the region. Its popularity soared when it became the official dessert of Florida, solidifying its place in culinary history. This cheesecake version brings together different cultural inspirations, such as the piña colada, which has roots in Puerto Rican tradition, showcasing the fusion of culinary practices across different regions.

Over the decades, the recipe for key lime pie evolved significantly, adapting to varying tastes and styles. From its humble origins, bakers began experimenting with textures and flavors, leading to the creation of cheesecakes, tarts, and various twists on the classic pie. The Key Lime Pie Cheesecake Piña Colada is a trendy iteration that honors this legacy while offering a refreshing take.

Regional variations also play a role in the dessert’s evolution. In parts of the Caribbean, coconut is often included in desserts, tying in beautifully with the flavors of the piña colada and creating a cross-cultural dialogue that celebrates tropical ingredients. This recipe encapsulates that spirit of adventure by blending customs and tastes into one delectable dessert.

Ingredient Deep Dive

Key Limes:
Native to the Florida Keys, key limes have a distinct flavor profile that is more tart and aromatic than bottled lime juice. They add a punch of acidity that enhances the sweetness of desserts, making them a must-have in this cheesecake. When selecting key limes, choose those that feel slightly soft and have a vibrant, yellow-green color. Store them in the fridge for extended freshness. If unavailable, regular Persian limes can be used as a substitute.

Cream Cheese:
A foundational element of cheesecake, cream cheese brings richness and a creamy texture that perfectly balances the tartness of key limes. Made from milk and cream, it also provides a slight tang that complements the lime flavors. Look for full-fat cream cheese for the best results, ensuring it’s at room temperature before mixing for a smoother consistency. Store unused cream cheese in the refrigerator, and it can be frozen if necessary.

Coconut Cream:
Coconut cream enhances the tropical theme of this dessert, delivering a luscious, velvety texture. Rich in healthy fats, it adds depth and creaminess while embodying the flavors of a classic piña colada. When selecting coconut cream, avoid products with artificial additives; choose pure options for antioxidants and nutrients. It can be stored in a cool pantry or fridge and remains stable when stored correctly.

Graham Crackers:
The undeniably classic choice for any cheesecake crust, graham crackers provide a crunchy textural contrast and a hint of sweetness. Made from whole grains, they are often enjoyed in various desserts across the United States. To maximize freshness, keep them in a sealed bag and use within a few months after opening. Experience the joy of a homemade crust by crushing whole crackers and mixing them with melted butter for a delicious base.

Sugar:
Sugar is not only a sweetening agent but also contributes to the cheesecake’s tender texture. Granulated sugar provides the necessary sweetness to balance the tartness of lime and coconut. For a refined twist, consider using coconut sugar or honey as alternatives, keeping in mind that they will slightly alter the flavor and texture. Store sugar in a cool, dry place and ensure it remains free from moisture to last longer.

Common Mistakes to Avoid

  • Skipping the resting period: Allowing the cheesecake to cool properly helps in setting the texture and flavor, so be patient.
  • Overmixing the batter: This can incorporate too much air, causing the cheesecake to crack; mix until just combined.
  • Using cold ingredients: Always ensure your cream cheese and eggs are at room temperature for an even blend.
  • Not preheating the oven: Failing to preheat can result in uneven baking, affecting the cheesecake’s consistency.
  • Removing the cheesecake too soon: It should be chilled completely before cutting to achieve clean slices.
  • Overbaking: Keep an eye on the cooking time to avoid dryness; the cheesecake should be slightly jiggly in the center when done.
  • Neglecting flavor balance: Taste the filling before baking to ensure the sweetness and acidity complement each other.
  • Skipping the water bath: This step helps regulate the temperature during baking, preventing cracks in the cheesecake.
  • Failure to grease the pan: Don’t skip greasing to ensure a smooth release after baking; use cooking spray or butter.
  • Ignoring presentation: Take time to garnish and plate; the final look enhances the entire dining experience.

Essential Techniques

Water Bath Method:
Using a water bath (bain-marie) for baking cheesecake is crucial in preventing cracks and ensuring even cooking. This technique helps maintain moisture and provides a stable heat environment. To master this, wrap the bottom of your springform pan in aluminum foil to prevent water from seeping in, then place it in a larger baking dish filled with hot water. This creates a humid environment, essential for a lush cheesecake.

Proper Mixing:
Achieving a smooth filling is crucial for a delicious cheesecake. Mixing should be done gently, using a low speed on your mixer. Start with the cream cheese until soft, adding sugar gradually while scraping down the sides of the bowl. Incorporating eggs one at a time prevents overmixing, which can create air bubbles and lead to cracks. Aim for a silky texture before pouring into the crust.

Pro Tips for Perfect Key Lime Pie Cheesecake Piña Colada

1. Use fresh key limes for the best flavor; bottled juice lacks the aromatics and tanginess of the real fruit.
2. Chill your cheesecake overnight for optimal texture and flavor integration, allowing the flavors to meld beautifully.
3. Add a sprinkle of toasted coconut on top for added texture and a wonderful aroma.
4. For a more intense coconut flavor, consider using coconut-flavored cream cheese and yogurt in the filling.
5. If the cheesecake cracks, don’t worry; garnish with whipped cream and lime zest to cover up those imperfections.
6. Serve it with a scoop of vanilla ice cream or a drizzle of coconut sauce for an indulgent twist.
7. Use a sharp knife dipped in warm water to slice for cleaner cuts.
8. Consider swapping out the graham cracker crust for a cookie or nut-based crust for a gluten-free option.

Variations and Adaptations

The Key Lime Pie Cheesecake Piña Colada encourages creativity, as various adaptations can enhance its flavors and appeal. For a regional variation, try incorporating mango into the filling for a tropical fruit twist, or layer in fresh berries for added texture and color. You could also explore seasonal adaptations, such as using pumpkin puree and spices for a fall-themed cheesecake.

Dietary modifications can accommodate a wider range of preferences. Consider making a gluten-free crust using almond flour or gluten-free cookies, and for a vegan option, substitute cream cheese with cashew cream or a tofu-based mixture. Flavor variations are abundant; try infusing the filling with herbs like mint or basil to create a unique flavor profile.

Texture modifications can transform this classic cheesecake into a light mousse by whipping the cream cheese until fluffy. Finally, presentation alternatives like individual mini cheesecakes in jars can make for a fun serving suggestion, perfect for picnics or casual gatherings.

Serving and Presentation Guide

Presentation significantly elevates the dining experience of your Key Lime Pie Cheesecake Piña Colada. Begin with plating techniques; a simple yet elegant approach involves placing a slice in the center of the plate, drizzling with homemade coconut sauce, and garnishing with lime slices and freshly whipped cream.

Garnishing ideas include adding microgreens or edible flowers for a pop of color or a sprinkle of lime zest for an aromatic touch. Traditional accompaniments can be a scoop of coconut ice cream or a side of whipped topping. For modern serving suggestions, consider creating a dessert board with slices of cheesecake alongside fresh fruits, toasted coconut, and chocolate-covered treats.

Temperature considerations are also essential; serve the cheesecake chilled for the best flavor. Finally, for portion control tips, consider slicing into smaller pieces, ensuring guests can savor the tropical flavors without overindulgence.

Wine and Beverage Pairing

When pairing drinks with Key Lime Pie Cheesecake Piña Colada, consider refreshing choices that enhance its tropical flavors. A sweet Riesling or Moscato complements the dessert’s acidity and sweetness quite nicely. For a sparkling alternative, try a Prosecco or a light Champagne, which adds a celebratory touch to your meal.

For non-alcoholic alternatives, a refreshing coconut water spritzer infused with lime is delightful, balancing sweetness and zest perfectly. If you prefer coffee or tea pairings, a light herbal tea or iced coffee with a hint of coconut can be an excellent way to contrast the richness of the cheesecake.

Additionally, always keep temperature considerations in mind; all beverages should be served chilled to enhance the summer vibe that this dessert embodies. Serve drinks in oversized glasses garnished with lime wedges or mint leaves for added flair.

Storage and Shelf Life

To preserve the quality of your Key Lime Pie Cheesecake Piña Colada, proper storage is essential. Refrigerate the cheesecake immediately after it has cooled to room temperature. Keep it covered with plastic wrap or in an airtight container to prevent it from absorbing any odors in the fridge. Ideal storage conditions will prolong the shelf life to about 4-5 days.

If you need to store it longer, consider freezing the cheesecake! Wrap individual slices in plastic wrap and then in aluminum foil for extra protection. This method can preserve the dessert for up to three months. Signs of spoilage may include changes in texture or a sour smell, so always double-check before serving.

When it’s time to enjoy your frozen slices again, allow the cheesecake to thaw overnight in the refrigerator for the best results, and avoid reheating in the microwave to maintain the texture.

Make Ahead Strategies

Making the Key Lime Pie Cheesecake Piña Colada in advance is an excellent way to save time while hosting or preparing for a special occasion. Start by prepping the crust and filling a day ahead, refrigerating them separately. This will allow the flavors to develop fully.

Assembling the cheesecake the day before serving also helps the layers set properly, ensure optimal firmness, and allows for easy cutting. Always cover the cheesecake once it’s completed and chill no less than four hours before serving, or preferably overnight.

If you’d like, consider final assembly, such as adding toppings or fresh garnishes, right before serving to maintain their freshness. Store any leftovers properly to ensure they remain delectable for days to come.

Scaling Instructions

When it comes to scaling your Key Lime Pie Cheesecake Piña Colada recipe, planning is vital. To halve the recipe, adjust each ingredient proportionally while ensuring baking times remain consistent with smaller batches. Take care to monitor the cheesecake closely, as smaller sizes can require less time in the oven.

If you’re doubling or tripling the recipe, be sure to utilize larger baking dishes or additional springform pans. Keep in mind that baking time may need to be adjusted; larger cheesecakes may require longer baking and cooling times.

Finally, consider equipment adjustments; if necessary, mix in batches or use multiple ovens if available to streamline the process. Maintain consistent storage considerations as they impact the time and quality of the final product.

Nutritional Deep Dive

Understanding the nutritional aspects of the Key Lime Pie Cheesecake Piña Colada is essential for making informed dietary decisions. A typical slice offers a well-balanced treat with approximately 350 calories, featuring macronutrients such as 20g of carbs, 8g of protein, and 25g of fat derived from creamy ingredients.

Micronutrient analysis reveals beneficial elements as well; for instance, key limes provide vitamin C, while coconut cream adds manganese and healthy fats, boosting overall energy levels. This dessert can be a suitable inclusion in balanced dietary plans when moderation is practiced.

When considering health benefits, this cheesecake offers a delicious way to indulge in the rich flavors nutritiously. Portion analysis is crucial—enjoying a single slice can satisfy cravings without overindulgence, while weight management tips indicate being mindful of ingredient choices and portion sizes for a healthier dessert experience.

Dietary Adaptations

For those with specific dietary needs, the Key Lime Pie Cheesecake Piña Colada can be easily adapted. For a gluten-free variant, replacing the graham cracker crust with crushed nuts or gluten-free cookies provides the same crunch without gluten.

If you’re looking for a dairy-free option, consider using cashew cream or a dairy-free cream cheese alternative, paired with coconut milk for a consistent texture while keeping the tropical essence intact.

Vegans can create a scrumptious dessert by opting for silken tofu blended with nutritional yeast for a cheesy flavor, along with coconut cream for the rich texture. Low-carb enthusiasts need only replace the sugar with erythritol or stevia, ensuring the flavors remain intact.

Keto and paleo diets also support variations like almond flour crusts or natural sweeteners while maintaining healthy fats from coconut. Taking account of the low-FODMAP diet, use lactose-free cream cheese and adjust sweeteners for a recipe that suits those with sensitivities.

Troubleshooting Guide

If you encounter any issues while preparing the Key Lime Pie Cheesecake Piña Colada, there are practical solutions to common problems. For texture issues like a grainy consistency, ensure that cream cheese is sufficiently softened before mixing. Using a hand mixer can ensure a smooth blend.

Flavor balance can sometimes be off, so when in doubt, taste as you mix! Adjust sweetness with additional sugar or acidity with lime juice to create the desired flavor profile.

Temperature problems often arise from omitted water baths; always bake in a water bath to prevent overheating and cracking. Equipment challenges, like incorrect oven temperatures, may be resolved using an oven thermometer to check accuracy before baking.

For ingredient substitutions, ensure replacements are of equal weight and that flavor profiles complement the overall recipe, adjusting as necessary. Timing concerns can also be addressed by planning and prepping ingredients in advance for a smoother baking experience.

Recipe Success Stories

The Key Lime Pie Cheesecake Piña Colada has garnered praise from countless home bakers for its appealing balance of flavors and textures. Community feedback often highlights the surprisingly easy preparation and the little-known delight of gelled layers brilliantly performing together.

Variation successes have become conversation starters, with some trying unique adjustments such as adding key lime zest to the filling for extra zestiness or even topping with tropical fruits, providing a fresh twist to the classic dish.

Reader suggestions include sharing this recipe with friends who have summer birthdays, transforming it into a must-have dessert tradition. Photography tips have also emerged, inspiring enthusiastic bakers to present theirs on social media platforms, showcasing colorful layers and garnishes.

With honest adaptations circulating throughout cooking communities, many have taken the plunge to personalize the cheesecake based on dietary needs and flavor preferences. Feedback continues to inspire and cultivate a sense of camaraderie among dessert aficionados.

Frequently Asked Questions

1. Can I use frozen key limes? Yes, you can use frozen key limes, but the flavor may differ slightly compared to fresh. Ensure to thaw them completely before juicing to yield maximum juice.

2. How long does the cheesecake need to cool? It is recommended to let the cheesecake cool for at least two hours at room temperature before transferring it to the refrigerator. This helps in setting properly.

3. Can I make this cheesecake vegan? Absolutely! Substitute the cream cheese with a vegan alternative, like silken tofu or cashew cream, and use non-dairy milk products to maintain the creaminess.

4. What if I don’t have coconut cream? If coconut cream is unavailable, you may use coconut milk, but be sure to reduce the amount slightly, as it is thinner than cream.

5. Can I freeze leftover cheesecake? Yes, you can freeze the cheesecake for up to three months. Wrap it tightly in plastic wrap and aluminum foil before freezing.

6. How do I prevent cracks in my cheesecake? To prevent cracks, bake in a water bath, avoid overmixing the batter, and ensure the cheesecake does not bake too long.

7. What can I use if I don’t have a springform pan? A regular cake pan can be used, but be sure to line it thoroughly with parchment paper for easy removal.

8. How long does the cheesecake last in the fridge? Properly stored in an airtight container, the cheesecake can last 4-5 days in the refrigerator.

9. Can I use bottled lime juice? While bottled lime juice can work, fresh key lime juice offers a distinct flavor that elevates the entire dessert.

10. Can I add other flavors to the cheesecake? Definitely! You can incorporate flavors like mango, passion fruit, or even chocolate to personalize your cheesecake further.

Additional Resources

If you’re intrigued by the Key Lime Pie Cheesecake Piña Colada recipe, explore related recipes such as classic key lime pie or tropical fruit tarts. Technique guides on cheesecake preparation can provide helpful insights into achieving perfect texture every time.

Additionally, delve into ingredient information to discover more about the nutritional benefits of key limes, cream cheese, and coconut milk, enhancing your understanding of this indulgent treat. Always consider recommendations for kitchen equipment that helps with efficiency, like quality mixers and suitable baking pans.

Explore seasonal variations to adapt your baking to include vibrant summer fruits, stimulating creativity in your dessert-making journey.

Join the Conversation

We invite you to share your experiences with this Key Lime Pie Cheesecake Piña Colada recipe on social media. Document your baking process, share your unique adaptations, or offer your tips in the comments section below.

For photography tips, experiment with different angles and angles of light to showcase the vibrant colors and textures of your cheesecake. We appreciate all feedback—your input contributes to our community.

Encourage recipe reviews among fellow bakers to create a supportive atmosphere that celebrates culinary exploration. From novice to expert, this cheesecake recipe brings people together, encouraging dialogue about flavors and baking adventures.

The Recipe

Key Lime Pie Cheesecake Piña Colada

Serves: 8

Prep Time: 30 mins

Cook Time: 60 mins

Total Time: 90 mins

Kitchen Equipment Needed

  • Springform pan
  • Mixer
  • Mixing bowls
  • Baking dish for water bath
  • Measuring cups and spoons
  • Whisk
  • Spatula

Ingredients

  • 1 ½ cups graham cracker crumbs
  • ½ cup unsalted butter, melted
  • 24 oz cream cheese, softened
  • 1 cup granulated sugar
  • 3 large eggs
  • ¾ cup fresh key lime juice
  • 1 can (15 oz) coconut cream
  • Zest of 2 key limes

Directions

  1. Preheat your oven to 325°F (160°C). Prepare a springform pan by greasing it lightly.
  2. In a mixing bowl, combine graham cracker crumbs and melted butter; press mixture into the bottom of the pan.
  3. Using an electric mixer, beat softened cream cheese until fluffy, approximately 2-3 minutes.
  4. Add sugar and lime juice, mixing until well combined. Scrape down the sides and mix in the eggs one at a time.
  5. Pour the cheesecake filling into the crust and smooth out the top with a spatula.
  6. Prepare a water bath by placing the springform pan into a larger baking dish. Fill the dish with water until it reaches halfway up the sides of the springform pan.
  7. Bake in the preheated oven for 60 minutes or until the center is slightly jiggly. Turn off the oven and leave the door ajar for 30 minutes.
  8. Remove the cheesecake from the oven and refrigerate for at least 4 hours or overnight for best results.
  9. Before serving, top with coconut cream and zest for a tropical touch.

Recipe Notes

  • For best results, allow the cheesecake to chill overnight.
  • Consider garnishing with toasted coconut and lime zest before serving.
  • This recipe can be adapted by adding different fruit flavors or using alternative crusts as desired.

Indulge in Decadent Nutella Cream-Filled Crêpes at Home

Indulgent Nutella Cream-Filled Crêpes: A Chocolate Lover’s Delight

⚖️
Difficulty
Easy

⏲️
Prep Time
15 mins

🕒
Cook Time
10 mins

⏱️
Total Time
25 mins

🍽️
Servings
4

Crêpes are a delightful treat that can be filled with a variety of delicious fillings, but nothing quite compares to the rich, velvety experience of Nutella Cream-Filled Crêpes. This recipe takes the classic French crêpe and elevates it with a luscious Nutella cream filling that creates a heavenly balance of flavors. Imagine biting into a warm, delicate crêpe, the slight sweetness dancing on your palate while the rich chocolate-hazelnut goodness envelopes your taste buds. This indulgent dessert is perfect for breakfast, a sweet snack, or an elegant dessert at your next gathering!

The beauty of Nutella Cream-Filled Crêpes lies not only in their exquisite flavor but also in their simple preparation. With just a handful of ingredients, you can whip up a batch in no time, making it a fantastic choice for both novice and seasoned cooks. The combination of soft, warm crêpes and a decadent filling is sure to impress anyone who takes a bite, inviting them to savor every moment. Whether drizzled with a bit of melted chocolate or adorned with fresh berries, these crêpes are a feast for the eyes as well as the taste buds.

Quick Recipe Highlights

  • Flavor Profile: The sweet and nutty flavor of Nutella pairs perfectly with the soft, buttery crêpes, creating a rich and indulgent taste experience.
  • Texture: The crêpes are thin and delicate, providing a perfect contrast to the smooth, creamy filling.
  • Aroma: The enticing aroma of freshly cooked crêpes combined with the irresistible scent of melted chocolate will fill your kitchen.
  • Visual Appeal: Golden brown crêpes filled with glossy Nutella cream and garnished with fruit or whipped cream look stunning on any plate.
  • Skill Level Needed: This recipe is designed for beginners, requiring minimal cooking skills and just a little practice to perfect the crêpe technique.
  • Special Equipment: A non-stick skillet or crêpe pan works best for cooking the crêpes, ensuring easy flipping and perfect results.

Recipe Overview

  • Difficulty Level: This Nutella Cream-Filled Crêpes recipe is classified as easy, making it accessible for anyone who wants to impress without the stress. You’ll find that crêpe-making is a delightful task once you get the hang of it!
  • Category: This dish falls under the dessert category, but it can also make for a luxurious breakfast or brunch option.
  • Cuisine: French cuisine is celebrated for its elegance and finesse, and crêpes are a classic staple that have gained worldwide popularity. These Nutella-filled variations add to that delightful tradition.
  • Cost: The cost to make these crêpes is relatively low, with basic pantry staples and Nutella being the main ingredients, making it an affordable treat.
  • Season: Nutella Cream-Filled Crêpes are a favorite year-round, but they shine during special occasions, family gatherings, or as a sweet treat on chilly mornings.
  • Occasion: These crêpes are perfect for brunches, birthdays, or any festive occasion where a touch of sweetness is in order.

Why You’ll Love This Recipe

The taste and texture of Nutella Cream-Filled Crêpes are truly delightful. The combination of rich chocolate hazelnut filling and soft crêpes creates an experience that is indulgent yet light. Each bite is like a warm hug, reminiscent of cozy afternoons spent enjoying sweet treats.

Convenience is another major benefit of this recipe. With just a few ingredients and minimal time required, you can easily whip up a batch of delightful crêpes whenever the mood strikes you. They can be prepared ahead of time and filled right before serving, making them an ideal dessert for entertaining.

Nutritionally, while these crêpes are indulgent, they can be made a bit healthier by using whole wheat flour or adding fruits like bananas or strawberries for a burst of freshness and added nutrients. This flexibility allows you to cater to different dietary preferences while still enjoying the classic flavor combination.

Sharing Nutella Cream-Filled Crêpes brings people together. Whether served to family during a leisurely breakfast or as party platters for friends, these crêpes are a conversation starter and a treat that everyone can enjoy. Their versatility allows for fun toppings, making for interactive and delightful gatherings.

Cost-effectiveness is also a huge plus. With basic pantry staples, this recipe allows you to create an impressive dessert without breaking the bank. Nutella can often be found in bulk, making it even more economical to prepare these crêpes for celebrations or everyday indulgence.

Historical Background and Cultural Significance

The origin of crêpes dates back to the Brittany region of France and has evolved over centuries. Traditional crêpes are made with just flour, eggs, and milk, resulting in a thin and flexible creation beloved by many. Nutella, while more modern, made its debut in the 1960s and quickly became a worldwide sensation.

Crêpes hold a special place in French culinary culture, often celebrated during La Chandeleur, a day dedicated to crêpes. This day marks the end of winter and is a time for families to gather, celebrate, and enjoy delicious, warm crêpes together.

Over the years, the filling options for crêpes have multiplied, reflecting the global love for experimentation in cooking. From sweet treats filled with fruit and chocolate to savory crêpes filled with cheese and greens, variations are endless.

Regional variations of crêpes abound; in some parts of France, you’ll find thicker varieties known as “galettes,” typically made with buckwheat and often served savory. Each province has its take on how crêpes are prepared and served, making this dish a beloved aspect of French cuisine.

Ingredient Deep Dive

Flour: Commonly used all-purpose flour provides the base for crêpes, offering excellent texture and stability. Look for finely milled flours for the best results. Opting for whole wheat flour increases fiber content while maintaining the beloved crêpe’s essence.

Milk: Milk offers creaminess and richness to the batter, but alternatives such as almond or oat milk can provide great results for those with dietary restrictions. When selecting milk, using whole milk yields the most decadent texture.

Nutella: This chocolate-hazelnut spread is the star of this recipe, providing deeply satisfying flavor and creaminess. It’s a crowd favorite for a reason: its smooth texture and sweet, nostalgic taste. Nutella can be substituted with homemade or alternative nut butters for variations.

Eggs: Eggs are crucial for binding the crêpe batter together and adding richness. Various egg substitutes can also work, such as flaxseed or chia seed mixtures, for vegan adaptations.

Butter: Melted butter adds richness and flavor to both the batter and the cooking surface. Look for high-quality unsalted butter to maintain control over the crêpe’s saltiness in flavor.

Powdered Sugar: A light dusting of powdered sugar provides a touch of sweetness and lovely finishing texture without overwhelming the dish. For those looking for alternatives, coconut sugar or agave can enhance the sweetness naturally.

Common Mistakes to Avoid

  • Using cold ingredients: Always use room temperature ingredients for a smoother batter—a must for perfect crêpes.
  • Pancake-like thickness: Ensure your batter is thin to achieve the classic crêpe consistency. If it’s too thick, you’ll end up with fluffy pancakes instead.
  • Not letting the batter rest: Allowing the batter to sit for at least 30 minutes helps the gluten relax, leading to tender crêpes.
  • Overheating the pan: Excessive heat can cause uneven cooking, resulting in burnt or undercooked crêpes. A medium heat is ideal.
  • Skimping on butter: Ensuring your pan is adequately buttered results in crêpes that won’t stick and have a lovely golden color.
  • Flipping too soon: Wait until the edges start to lift and the surface is set before attempting to flip, ensuring a perfectly cooked crêpe.
  • Forgetting to practice: Like many skills, mastering crêpes takes practice. Don’t be discouraged by imperfections; they still taste delicious!
  • Using the wrong pan: A non-stick skillet or crêpe pan enhances the cooking process, preventing sticky disasters.
  • Forgetting to taste the batter: Sample the batter before cooking; adjusting sweetness or flavorings can greatly enhance your crêpes.
  • Skipping garnishes: Presentation matters! Always consider garnishing your crêpes for an appealing visual and flavor boost.

Essential Techniques

Batter preparation: Properly combining ingredients is crucial. Use a whisk to ensure no lumps remain for a smooth batter, allowing the gluten to form which provides necessary elasticity in crêpes.

Cooking temperature: Cooking on medium heat is essential for evenly cooked crêpes. Too hot, and they burn; too low, and they become chewy instead of tender.

Flipping technique: To achieve a flawless flip, use a spatula to loosen the edges before carefully lifting from the pan. A swift and confident motion ensures they land copiously without tearing.

Filling and folding: Fill crêpes towards one end and fold them carefully to avoid tearing. The right amount of filling ensures easy handling while maintaining structural integrity.

Pro Tips for Perfect Nutella Cream-Filled Crêpes

1. Always use quality ingredients! Fresh eggs and real Nutella will make a significant difference in flavor.

2. Before cooking, preheat your non-stick pan to ensure a crisp finish. Test with a drop of water; it should sizzle on contact.

3. Consider using a ladle for pouring the batter into the pan; this helps with portion control and consistent crêpe sizes.

4. Rotate the pan while pouring the batter to create an even layer, providing a nice circular shape.

5. Allow your crêpes to cool slightly before filling. This reduces the risk of the filling melting too much and spilling out!

6. Try different fillings! Experiment with ricotta cheese and fruit combinations or savory options to broaden your crêpe repertoire.

7. Serve immediately for the best experience. Freshly made crêpes taste infinitely better than reheated versions.

8. Make a large batch ahead, stack them with parchment paper between layers to keep them from sticking while cooling.

Variations and Adaptations

Regional variations: In France, try different fillings such as lemon sugar or caramelized apples to add local flair to your crêpes.

Seasonal adaptations: Use seasonal fruits, like strawberries in spring or pumpkin puree in fall, to create unique flavors that reflect the changing seasons.

Dietary modifications: For gluten-free options, use a gluten-free flour blend that mimics the consistency of traditional flours while preparing your crepe batter.

Flavor variations: Experiment with flavored Nutella, such as hazelnut spread with a hint of orange zest, to add a twist to the classic taste.

Texture modifications: Add a splash of cream cheese to your Nutella filling for a richer, creamier texture that contrasts beautifully with the soft crêpes.

Presentation alternatives: Layer crêpes with different fillings and stack them like a lasagna for an elegant, multi-layer dessert dish.

Serving and Presentation Guide

For a stunning presentation, stack your Nutella Cream-Filled Crêpes on a decorative plate. Dust them lightly with powdered sugar for a sweet touch, and add fresh berries or mint leaves for a burst of color.

Consider drizzling warm chocolate sauce or a balsamic reduction over the top for an artistic flair that enhances the visual appeal and adds extra flavor dimensions.

Traditional accompaniments, like whipped cream or crème fraîche, balance the sweetness of Nutella while providing contrasting temperature and texture.

Modern serving suggestions might include pairing with a scoop of vanilla or hazelnut gelato for an indulgent experience.

Serve warm, as crêpes taste best right off the pan. If preparing in advance, keep them warm in a low oven until ready to serve. Portion control is key; aim for one crêpe per person, allowing guests to indulge without overwhelming the senses.

Wine and Beverage Pairing

For wine pairings, sweeter dessert wines like Moscato or a light-bodied Pinot Noir enhance the chocolate notes of Nutella without overpowering it. Sparkling wines can also work wonderfully, bringing a refreshing contrast.

For non-alcoholic options, consider pairing these crêpes with fresh orange juice or a rich hazelnut coffee, enhancing the flavor profile while offering delightful beverages for everyone.

If you’re a tea lover, try blending chamomile or chai for a warm, soothing drink that complements the sweetness of your crêpes beautifully. Serve these beverages at a warm temperature to maintain balance with the dish.

Storage and Shelf Life

To store Nutella Cream-Filled Crêpes, place them in an airtight container in the refrigerator for up to three days. Using wax paper between layers can prevent them from sticking together.

Always pay attention to temperature requirements; crêpes should be cooled completely before refrigerating to avoid sogginess.

For signs of spoilage, keep an eye out for any off smells or discoloration in the Nutella. Reheat crêpes gently in the microwave or on the stovetop for the best texture.

Freezing is also an option, with crêpes lasting up to two months in the freezer. Wrap tightly in plastic wrap and aluminum foil to preserve freshness and prevent freezer burn.

Make Ahead Strategies

If planning to serve Nutella Cream-Filled Crêpes for an event, preparing the batter ahead of time can significantly reduce stress. The batter can be refrigerated overnight and used the next day.

Additionally, you can cook and store crêpes a day in advance, just ensure they are layered with parchment paper to maintain freshness. Just reheat quickly before serving.

For optimal assembly, set up a filling station where guests can personalize straight from the crêpe to the Nutella station.

To enhance quality, avoid filling too far in advance—fill crêpes ready to serve to ensure that they taste freshly made.

Scaling Instructions

To scale this recipe down, simply halve all ingredients. This ensures you maintain the right consistency and flavor balance for smaller servings.

Doubling or tripling the recipe is straightforward. Use larger mixing bowls and ensure you have a pan large enough to accommodate the additional batter.

Adjustments in timing are necessary as well; larger batches may take longer to cook through, so ensure you keep an eye on them.

For storing, you can freeze any excess crêpes layered as previously mentioned, ensuring that you maintain quality when reheating.

Nutritional Deep Dive

Nutella Cream-Filled Crêpes can be indulgent, so understanding the nutritional breakdown is useful for portion control. Each crêpe provides a mix of carbohydrates, fats, and sugars mainly derived from flour and Nutella.

The potential health benefits, if chosen thoughtfully, can include energy from the carbohydrates, some fiber from whole grain flours, and essential vitamins, especially when filled with fruits.

Micronutrient analysis indicates that opting for whole wheat and adding fruit fillings can provide increased fiber and vitamins, making each serving more balanced nutritionally.

Portraying moderation in portions can assist with weight management while enhancing the delicious experience of flavorful indulgence.

Dietary Adaptations

For those seeking gluten-free options, using gluten-free flour blends can provide similar textures without the gluten contents.

Dairy-free adaptations can utilize plant-based milks and Nutella alternatives such as almond butter or oat-based spreads to maintain flavor.

Vegan crêpes can replace eggs with flaxseed meal mixed with water, creating a satisfying substitute that binds well while maintaining texture.

For low-carb diets, explore reduced carb flour alternatives while being a bit more liberal with fillings to maintain flavor and satisfaction.

Keto dieters can adjust ingredients accordingly using keto-friendly sweeteners along with nut-based flours for a balanced approach.

Paleo versions can rely more on coconut flour and natural sweeteners while preserving the essence of the dish without processed ingredients.

Low-FODMAP adaptations entail careful consideration of sweetness and flour types, favoring gluten-free options that do not include high-FODMAP ingredients.

Troubleshooting Guide

If you experience texture issues, ensure your batter resembles heavy cream in viscosity for the best crêpe results. Too thick, and they won’t spread; too thin, and they won’t hold together.

Flavor balance can be adjusted through taste-testing the batter. Adding vanilla extract or a pinch of salt can enrich the flavor significantly.

Temperature problems often arise from incorrect heat settings—too low will yield soggy crêpes, while too high burns quickly, so a proper balance is key.

Equipment challenges may stem from improper pans; ensuring your non-stick pan is well-maintained prevents sticking and promotes even cooking.

Ingredient substitutions should be approached with caution. For best results, match ingredients in functional equivalence rather than trying to creatively adapt without prior knowledge.

Timing concerns can occur if crêpes sit too long; serving them immediately after preparation will guarantee optimal quality and flavor.

Recipe Success Stories

Community feedback on Nutella Cream-Filled Crêpes often highlights how easy and enjoyable the recipe is. Many users rave about how quickly it becomes a family favorite and a go-to dessert for parties.

Variation successes show readers opting for fruit-filled alternatives, capturing the essence of fresh fruits paired with the richness of chocolate in other applications.

Adaptation stories often recount incredible discoveries through experimentation, such as adding different spices, which leads to surprising flavor twists that keep the experience fresh.

Reader photographs showcase beautiful presentations, inspiring others to play with plating and garnishes, showcasing their unique creativity and bringing joy into the kitchen.

Frequently Asked Questions

Can you make crêpes ahead of time? Absolutely! You can prepare crêpes in advance and store them layered in parchment paper in the refrigerator or freezer for later use.

What can I use instead of Nutella? You can use any nut butter or a chocolate hazelnut spread that suits your taste preferences or dietary restrictions.

How do I keep the crêpes warm before serving? You can keep cooked crêpes warm in a low oven, wrapping them in foil to prevent them from drying out.

Can I freeze the crêpes? Yes! Freeze crêpes individually layered with parchment paper to prevent sticking, and reheat them as needed.

What type of flour is best for crêpes? All-purpose flour works great, but you can also experiment with whole wheat or gluten-free flour for different textures.

How thin should the crêpe batter be? The batter should be similar to heavy cream for the best results; it will spread easily and cook evenly.

Can I make these crêpes vegan? Yes! Substitute eggs with a flaxseed mixture and use plant-based milk and Nutella alternatives for a delicious vegan option.

How do I prevent my crêpes from sticking to the pan? Make sure your skillet is well-greased with butter or oil before pouring in the batter, ensuring an easy release.

What toppings pair well with Nutella crêpes? Fresh fruits, whipped cream, and a dusting of powdered sugar accentuate the flavors perfectly, adding color and flavor.

How long do cooked crêpes last in the fridge? Stored properly in an airtight container, crêpes will last for up to three days in the refrigerator.

Can I add other flavors to the crêpes? Absolutely! Experiment with vanilla extract or spices like cinnamon to add depth to the flavor of the batter.

Additional Resources

For related recipes, explore our collections of sweet and savory crêpes. You’ll find delightful ways to enjoy your crêpes filled with seasonal highlights or different flavor profiles.

Our technique guides will also help refine your crêpe-making skills, ensuring that every batch is perfectly executed and deliciously satisfying.

Ingredient information can assist you in understanding the best options to use for diverse dietary preferences while maintaining the integrity of flavor.

Equipment recommendations can guide you to the best pans for crêpe-making, and seasonal variations will keep your crêpe game fresh throughout the year.

Join the Conversation

We want to hear from you! Share your photos of Nutella Cream-Filled Crêpes on social media with #CrêpeLove, and be sure to tag us for a chance to be featured!

Share your recipe reviews and feedback within our community, fostering a love and appreciation for cooking together, and discover new tips locally from fellow fans.

Feel free to offer your own variations or adaptations; we love inspiring creativity in the kitchen and look forward to seeing how you make these crêpes your own.

Lastly, don’t forget to save this recipe for later and share it with your friends and family—because everyone deserves a taste of Nutella Cream-Filled Heaven!

The Recipe

Nutella Cream-Filled Crêpes

Serves: 4

Prep Time: 15 mins

Cook Time: 10 mins

Total Time: 25 mins

Kitchen Equipment Needed

  • Non-stick skillet or crêpe pan
  • Mixing bowl
  • Whisk or electric mixer
  • Spatula
  • Measuring cups and spoons

Ingredients

  • 1 cup all-purpose flour
  • 2 large eggs
  • 1 ½ cups milk
  • 2 tablespoons melted butter
  • ¼ cup Nutella
  • Powdered sugar for dusting
  • Fresh fruits for garnishing (optional)

Directions

  1. In a mixing bowl, whisk together the flour, eggs, and milk until smooth.
  2. Add melted butter and stir until well combined.
  3. Heat a non-stick skillet over medium heat and add a small amount of butter.
  4. Pour about ¼ cup of batter into the skillet, swirling to cover the bottom evenly.
  5. Cook for about 1-2 minutes until the edges lift and the bottom is lightly browned.
  6. Flip and cook the other side for another minute before removing. Repeat with the remaining batter.
  7. Spread a layer of Nutella in the center of each crêpe, fold, and serve immediately.

Recipe Notes

  • Feel free to customize fillings; add fresh fruits or cream cheese for added flavor.
  • Store leftover crêpes in an airtight container with parchment paper between layers.

Decadent Guinness Chocolate Cake Recipe for Chocolate Lovers

Decadent Guinness Chocolate Cake: A Rich Indulgence

⚖️
Difficulty
Moderate

⏲️
Prep Time
20 mins

🕒
Cook Time
45 mins

⏱️
Total Time
65 mins

🍽️
Servings
12

Indulge in the rich, velvety delight of our Guinness Chocolate Cake, a dessert that perfectly blends deep cocoa flavor with the unique notes of Guinness stout. This cake beautifully balances sweetness with a hint of bitterness, offering a sophisticated twist to traditional chocolate cake recipes. Each bite envelops the senses, delivering a moist, fudgy texture that melts in your mouth. Perfect for celebrations or a cozy family gathering, this cake is sure to impress both chocolate lovers and food adventurers alike.

As you prepare to make this Guinness Chocolate Cake, you will discover the allure of its warm, intoxicating aroma while mixing the rich, dark batter. The dessert bakes to a luscious, deep brown, and when topped with a glossy cream cheese frosting, it becomes a showstopper fit for any occasion. Whether served at birthday celebrations or festive holiday dinners, it invites compliments with every slice. Let’s dive into the details of this delightful chocolate cake that will soon become a cherished favorite in your recipe collection.

Quick Recipe Highlights

  • Flavor Profile: A harmonious blend of robust chocolate and subtle notes of stout, creating a unique depth of flavor.
  • Texture: Exceptionally moist and dense, this cake has a rich, fudgy mouthfeel that lingers pleasantly.
  • Aroma: The intoxicating scent of brewed stout intermingles with the sweetness of sugar and cocoa, drawing you in.
  • Visual Appeal: A luscious dark chocolate cake adorned with a creamy white frosting that contrasts beautifully.
  • Skill Level Needed: This recipe requires moderate baking skills, making it accessible yet rewarding.
  • Special Equipment: You’ll need standard baking tools such as mixing bowls, a whisk, and cake pans, alongside an electric mixer if available.

Recipe Overview

  • Difficulty Level: Moderate, as it requires precision in measuring and mixing, but easily achievable for home bakers.
  • Category: This recipe falls under desserts, specifically within the cake category, ideal for any sweet occasion.
  • Cuisine: Inspired by classic Irish cooking traditions, this cake reflects the rich flavors of Ireland’s famous stout.
  • Cost: A budget-friendly dessert, with ingredients costing approximately $15 for a family-sized serving.
  • Season: Suitable for year-round baking, particularly popular around holidays and celebrations.
  • Occasion: Perfect for birthdays, anniversaries, and any gathering that calls for a touch of elegance.

Why You’ll Love This Recipe

This Guinness Chocolate Cake is a feast for the senses, combining a rich chocolate flavor with unique beer undertones, making every bite an indulgent experience. The perfect fusion of flavors creates a cake that is not overly sweet, making it a delightful finish after any meal. Each slice retains a luxurious texture that contrasts with its creamy frosting, providing an irresistible mouthfeel.

Beyond its taste, the simplicity of preparation adds to its allure. With only a handful of ingredients and minimal steps, even novice bakers can impress their guests. The process of creating this cake serves as a joyful experience—mixing wet and dry ingredients together in anticipation of the rich odors that will fill your kitchen as it bakes.

Moreover, this cake can be a conscious choice for those looking for dessert options that include natural ingredients. Made with cocoa and stout, it can provide a more healthful profile compared to more processed desserts, highlighting cocoa’s antioxidants and the depth of flavor that stout can bring.

This cake also serves as an excellent centerpiece for social gatherings. The moment you present it, your guests will be captivated not only by its appearance but also by the indulgent flavors it promises. It creates a perfect conversation starter—a shared enjoyment that brings friends and family together.

Lastly, it is cost-effective, allowing for a high-end dessert experience without breaking the bank. The balance of the ingredient list makes it an accessible treat, providing an opportunity to create a luxurious cake at home for any celebration.

Historical Background and Cultural Significance

The story of the Guinness Chocolate Cake finds its roots in the rich culinary landscape of Ireland, where Guinness stout has been a beloved staple for centuries. Originally brewed in 1759, this iconic stout gained a reputation not only as a vibrant beverage but also as a culinary ingredient, lending depth and flavor to various recipes. The tradition of using stout in desserts showcases the cultural blending of drinks and sweets in Irish cuisine.

Culturally, this cake highlights the joy of indulgence associated with Irish celebrations. Whether during St. Patrick’s Day festivities or family gatherings, desserts like this cake become a centerpiece, showcasing the pride of homemade baking and the rich flavors of the region. It’s not just a dessert but a celebration of Irish heritage.

Over time, the adaptation of this cake into various forms has evolved, with countless versions emerging across kitchens worldwide. Each iteration serves to honor the original while infusing local tastes, making it a versatile recipe that can suit different palates while maintaining its classic essence.

Today, this cake is cherished not only for its delicious taste but as a symbol of gathering and celebration, bringing communities together through shared meals and fond memories, preserving its importance in both culinary and social traditions.

Ingredient Deep Dive

Guinness Stout: This unique stout not only adds richness and depth to the cake but also embodies the heart of Irish brewing culture. The dark brew enhances chocolate flavors, making it a superb choice for dessert innovations. Nutritionally, stout provides iron and antioxidants, although moderation is key due to its alcohol content. When choosing, opt for fresh cans to ensure peak flavor and store in a cool, dark place to maintain quality.

For substitutions, consider using other dark beers or even coffee if you prefer an alcohol-free version, maintaining the robust flavors essential to the cake.

Cocoa Powder: Serving as the foundation of this recipe, high-quality cocoa powder enriches the cake’s flavor and color. Its versatility allows for incorporation in various baked goods, while it’s rife with antioxidants and can enhance heart health. When selecting, ensure it’s unsweetened and of a fine texture, as this will yield the best results in your cake.

Storage should involve a cool, dry place away from light to prolong freshness. If needed, Dutch-processed cocoa can serve as a substitute, although it provides a slightly different flavor profile.

Granulated Sugar: This common sweetener not only provides sweetness but also contributes to the cake’s overall structure and moisture. Sugar is crucial for achieving the desired texture and caramelization during baking. Properly stored, sugar has an indefinite shelf life—just keep it in an airtight container to avoid clumping.

For alternatives, consider coconut or brown sugar, which can impart differing flavors and textures to your cake, allowing for creative twists on the traditional recipe.

Common Mistakes to Avoid

  • Underbaking: Ensure that you accurately gauge your cake’s doneness using a toothpick; it should come out clean, or with only a few crumbs.
  • Overmixing: Mixing your batter too much can lead to a dense cake. Mix just until combined and don’t be afraid to leave some lumps.
  • Incorrect oven temperature: Always preheat your oven and consider using an oven thermometer to verify accuracy.
  • Using cold ingredients: Allow your eggs and butter to come to room temperature before mixing for better incorporation.
  • Not measuring accurately: Use standard measuring cups and spoons to ensure precision in your ingredients.
  • Forgetting to flour the pans: Properly greasing and flouring your pans will help the cake release easily after baking.
  • Ignoring ingredient freshness: Always check the expiration dates on your baking ingredients, especially the baking powder and cocoa.
  • Not allowing the cake to cool: Allow your cake to cool completely before frosting to help the frosting maintain its shape.

Essential Techniques

Sifting Dry Ingredients: Sifting your flour and cocoa helps aerate them, leading to a lighter cake. Use a fine-mesh sieve and do this over your mixing bowl to ensure you catch any lumps.

Folding Techniques: Carefully fold in the wet and dry ingredients rather than stirring aggressively. This gentle method preserves air bubbles, contributing to the cake’s lightness.

Pro Tips for Perfect Guinness Chocolate Cake

1. Use room temperature ingredients for better emulsification, creating a smoother batter.

2. Experiment with flavored extracts such as vanilla or almond to add extra depth to your cake.

3. Allow the cake layers to cool completely before removing them from the pans to avoid breakage.

4. Brush the layers with simple syrup for enhanced moisture and flavor.

5. For a more intense flavor, consider a dark chocolate frosting that complements the cake beautifully.

6. Decorate with chocolate shavings or edible gold leaf for an upscale presentation.

7. Make sure to chill your frosting for easier spreading if it’s too runny.

8. Always taste your batter before baking to adapt sweetness or chocolate level to your liking.

Variations and Adaptations

For those interested in trying different flavors, consider adding a hint of orange zest to enhance the chocolate notes in your cake. This citrus infusion provides a refreshing contrast that pairs beautifully with stout.

If you’re looking for seasonal adaptations, try incorporating pumpkin spice into the batter for a fall-inspired cake, or include peppermint extract around Christmas for a festive touch.

For dietary modifications, consider using gluten-free flour instead of standard flour yielding a gluten-free version that maintains flavor without sacrificing texture.

Incorporating nuts such as chopped walnuts or pecans can provide a delightful crunch and additional flavor complexity to your cake.

Texture variations can involve adding a layer of chocolate ganache between the cake layers to create a richer experience.

For a luxurious presentation, drizzle with a homemade chocolate sauce or serve alongside fresh berries for contrast.

Serving and Presentation Guide

When it comes to serving your Guinness Chocolate Cake, consider elegant plating techniques. Classic round slices are always a hit, but try using a serrated knife for clean cuts that maintain presentation. A dusting of cocoa powder on white plates offers a stunning contrast.

Garnishing with chocolate shavings or fresh mint leaves can add an appealing burst of color and enhance the overall aesthetic. Traditional accompaniments could include a scoop of vanilla ice cream or dollop of whipped cream.

For modern presentations, consider using mini cake jars for single servings, decorated with layers of frosting and berries, which can add a chic touch.

Wine and Beverage Pairing

The rich, malty notes of Guinness chocolate cake pair exceptionally well with a robust red wine like Cabernet Sauvignon or a sweet dessert wine such as Port. For a lighter option, consider pairing it with bubbly Prosecco, complementing the cake’s sweetness and bringing a refreshing contrast.

Alternatively, coffee lovers can enjoy this cake with a strong espresso or a smooth latte, enhancing the chocolate flavors. Non-alcoholic options might include dark chocolate or malted milkshakes that mirror the cake’s flavors.

Storage and Shelf Life

To store your Guinness Chocolate Cake, place it in an airtight container at room temperature for up to three days. If you’d like to extend its life, refrigerate it for up to a week.

If you choose to freeze it, wrap the cake tightly in plastic wrap and place it in a freezer-safe container. It can be frozen for up to three months. For reheating, gently warm individual slices in the microwave or oven until just heated through.

Make Ahead Strategies

You can prepare the cake layers a day in advance, allowing them to cool completely before wrapping and refrigerating. Frosting can also be made ahead and stored in the fridge. Just be sure to give it a good stir before using.

For optimal freshness, assemble the cake just before serving, especially if adding fresh fruits or whipped cream that do not hold up well.

Scaling Instructions

If you want to halve the recipe, do not forget to adjust baking times and ensure all measurements are accurately reduced for even results.

Scaling up the recipe for larger gatherings requires doubling the ingredients and closely monitoring the baking time, as larger cakes may take longer to cook through in the center.

Nutritional Deep Dive

This chocolate cake, while indulgent, can be balanced within a broader diet. For a standard serving, it typically offers a rich source of carbohydrates, primarily from sugar and flour, alongside some proteins from the eggs and yogurt.

Pay attention to portion sizes, as moderation is key. Enjoying one slice as part of a balanced meal can allow indulgence while adhering to healthy eating guidelines.

Dietary Adaptations

For gluten-free modifications, substitute regular flour with almond or coconut flour. Ensure other ingredients are also free from gluten, using a gluten-free stout.

For a dairy-free version, consider almond or oat milk yogurt instead of regular yogurt and use dairy-free butter alternatives. These adaptations allow everyone to enjoy the richness of this cake while accommodating dietary restrictions.

Troubleshooting Guide

If your cake turns out denser than expected, it may have been overmixed or too much flour was added; make sure to correctly measure your flour for future attempts.

Should your cake rise unevenly, check your oven’s calibration or try rotating the pan halfway through baking to encourage even cooking.

Recipe Success Stories

Many readers have shared their success with this Guinness Chocolate Cake, often noting its impressively luxurious texture and flavor. Experimentations with flavors or frostings have led to uniquely personal versions that yield compliments from family and friends.

A handful of bakers have discovered that this cake freezes beautifully, allowing them to prep for events up to three months in advance. Personal stories of perfecting the recipe have become popular on food blogs and social media.

Frequently Asked Questions

Can I use another type of beer? Absolutely! While Guinness provides a distinct flavor, any dark beer works well for an interesting twist.

How do I make the frosting fluffy? Beaten cream cheese combined with whipped cream will yield a light, fluffy frosting.

Can I bake this as cupcakes? Yes! Adjusting baking time to approximately 20 minutes will render delightful cupcakes.

Is this cake suitable for kids? Though it contains alcohol, the cooking process evaporates most of it, but consider using a non-alcoholic stout for a kid-friendly version.

How do I prevent the cake from sticking to the pan? Thoroughly greasing and flouring the pans is essential in ensuring easy release once baked.

Can this cake be made ahead of time? Certainly, and it tastes even better the next day after flavors meld together.

What toppings can I use? Consider fresh fruits, powdered sugar, and various frostings tailored to your taste.

How long can the cake last without refrigeration? If covered properly, it remains fresh at room temperature for up to three days.

Can I add other flavorings? Yes, adding flavors like mint or orange zest can elevate the cake uniquely!

What if my batter is too thick? You can add a tablespoon of milk at a time until reaching the desired consistency before baking.

How can I ensure an even bake? Make sure your oven is preheated, and check your cake by rotating it halfway through.

Additional Resources

Explore similar recipes in our collection featuring unique cakes and other rich desserts that embrace chocolate and beer-infused flavors.

We also provide technique guides for perfecting cake baking and handling various types of frostings and decorations to elevate your baking skills.

Join the Conversation

Share your creations of the Guinness Chocolate Cake on social media, tagging us! We love to see how you personalize it, and your feedback helps fellow bakers learn and grow.

Engage with our community by sharing your success stories and recipe variations that enhance this cherished recipe. Together, we can celebrate the joy of baking!

The Recipe

Guinness Chocolate Cake

Serves: 12

Prep Time: 20 mins

Cook Time: 45 mins

Total Time: 65 mins

Kitchen Equipment Needed

  • Mixing bowls
  • Whisk or electric mixer
  • Measuring cups and spoons
  • Cake pans (9-inch round)
  • Cooling rack
  • Spatula

Ingredients

  • 1 cup Guinness stout
  • 1 cup unsweetened cocoa powder
  • 2 cups granulated sugar
  • 1 ¾ cups all-purpose flour
  • 1 ½ teaspoons baking powder
  • 1 teaspoon baking soda
  • ½ teaspoon salt
  • ½ cup unsalted butter, softened
  • 2 large eggs
  • 2 teaspoons vanilla extract
  • 1 cup sour cream

Directions

  1. Preheat your oven to 350°F (175°C) and grease and flour your cake pans.
  2. In a medium saucepan, combine the Guinness and cocoa powder over low heat, stirring until smooth. Remove from heat and let cool.
  3. In a large mixing bowl, whisk together the sugar, flour, baking powder, baking soda, and salt.
  4. In another bowl, mix the butter and sour cream until smooth. Add the eggs and vanilla, mixing until well combined.
  5. Slowly add the cooled Guinness mixture to the butter mixture, stirring until everything is incorporated.
  6. Gradually fold the dry ingredients into the wet ingredients until just combined.
  7. Pour the batter evenly into the prepared cake pans and bake for 30-35 minutes, or until a toothpick comes out clean.
  8. Let the cakes cool in the pans for 10 minutes, then transfer to a cooling rack to cool completely.
  9. Once cooled, frost with your favorite frosting and serve.

Recipe Notes

  • For frosting, cream cheese frosting complements the cake beautifully.
  • Keep leftovers stored in an airtight container for up to three days at room temperature.
  • If freezing, wrap tightly in plastic wrap and store for up to three months.

Indulge in Decadence with Caramel Apple Cheesecake Cake Recipe

Caramel Apple Cheesecake Cake: A Delightful Fall Dessert

⚖️
Difficulty
Intermediate

⏲️
Prep Time
30 mins

🕒
Cook Time
1 hour

⏱️
Total Time
1 hour 30 mins

🍽️
Servings
12

Indulge in the heavenly flavors of a Caramel Apple Cheesecake Cake—a perfect blend of creamy cheesecake, tender apples, and rich caramel sauce. This delightful dessert combines the best of a classic cheesecake with the comforting taste of spiced apples, making it ideal for fall gatherings, festive celebrations, or a sweet ending to any meal. Imagine slicing into a moist cake, revealing layers of creamy cheesecake and soft, caramelized apples, topped off with a glossy caramel drizzle. Each bite will transport you to a cozy autumn afternoon, bringing warmth and sweetness with it.

Not only is this cake a visual showstopper, but it also delights the senses with its rich aroma of baked cinnamon apples and caramel. Whether you’re baking for a special occasion or simply to satisfy a sweet tooth, this recipe makes a stunning centerpiece that friends and family will rave about. Get ready to enjoy an irresistible dessert that’s as pleasing to the eye as it is to the palate!

Quick Recipe Highlights

  • Flavor Profile: The cake boasts a sweet and tangy combination of creamy cheesecake contrasted by the tartness of fresh apples, all enhanced by the rich notes of caramel.
  • Texture: Experience a delightful balance of textures with a smooth cheesecake layer, tender cooked apples, and a fluffy cake base that adds a satisfying bite.
  • Aroma: The wafting scent of baked apples, caramel, and warming spices fill your kitchen, creating an inviting atmosphere that signals dessert time.
  • Visual Appeal: Beautifully layered with glistening caramel on top and complemented by apple slices, this cake is both impressive and mouthwatering.
  • Skill Level Needed: Although the recipe requires some intermediate baking skills, the results are well worth the effort, making it perfect for any home baker.
  • Special Equipment: You’ll need standard baking tools, including a springform pan and a mixer, to achieve the best results.

Recipe Overview

  • Difficulty Level: This Caramel Apple Cheesecake Cake is classified as intermediate due to the multiple components; it requires both baking and assembling.
  • Category: This dessert fits perfectly into the categories of cakes and cheesecakes, making it great for birthdays, holidays, or family gatherings.
  • Cuisine: Drawing inspiration from classic American desserts, this recipe captures the essence of seasonal fall flavors, highlighting the use of fresh apples.
  • Cost: Approximately $15 to $20, depending on the choice of apples and the quality of cream cheese, provides a deliciously rich dessert that can serve a crowd.
  • Season: Best enjoyed during the autumn months when apples are in season, this cake embraces the spirit of fall and evokes feelings of comfort and warmth.
  • Occasion: Perfect for Thanksgiving celebrations, fall parties, or even a cozy dinner at home, this dessert is sure to impress guests.

Why You’ll Love This Recipe

This Caramel Apple Cheesecake Cake is a delightful dessert that masterfully combines flavors and textures for an unforgettable taste experience. Each slice reveals layers of creamy cheesecake paired with tender apple slices, caramel, and a fluffy cake base. The sweetness of the caramel perfectly balances the tartness of the apples, creating a cake that is not overly sweet but rather a refreshing delight that will please your taste buds.

Preparing this cake may seem daunting, but the step-by-step process makes it approachable for home bakers. You can enjoy the flexibility of making certain components ahead of time, reducing the last-minute stress when hosting gatherings. With minimal hands-on time and a bit of patience while it cools and sets, you’ll find that this cheesecake cake can easily fit into your baking routine.

Nutritionally, using fresh apples means that you’re incorporating natural fruit flavors into this delectable dessert. Apples provide dietary fiber and vitamin C, making them a healthier alternative in your sweet treat. While cheesecakes can be rich, this specific recipe allows for moderation and indulgence, making it a satisfying option that doesn’t compromise on flavor.

Gathering friends and family around a slice of this cake fosters social connections over delicious food. Whether served at a festive gathering or as a quiet treat at home, this dessert invites conversation and shared memories to unfold. It can also be an excellent conversation starter, with everyone wanting to know how you created such a masterpiece.

The cost-effectiveness of this recipe is an added bonus. Using staple ingredients, most of which you may already have on hand, allows you to create a luxurious dessert without breaking the bank. The wide range of servings means this cake can easily feed a crowd for a special occasion without skimping on quality or flavor.

Historical Background and Cultural Significance

The Caramel Apple Cheesecake Cake brings together the rich traditions of American baking with the flavors of classic fall favorites. The origins of cheesecake can be traced back to ancient Greece, where it was served to athletes at the first Olympic games. Over the centuries, this dessert evolved into numerous variations, particularly in the United States, where rich, creamy cheesecakes became a staple.

Apples, on the other hand, have a deep-rooted cultural significance in American history. With early settlers bringing them to the New World, apples became a symbol of abundance and were widely used in various desserts, celebrating the harvest season. Together, the cheesecake and apple pie traditions fuse into this contemporary dessert, showcasing beloved flavors that highlight American culinary heritage.

The evolution of this recipe over time reflects changing tastes and the desire for innovative desserts. It captures the nostalgia of autumn hues and seasonal flavors, appealing to modern palates who seek both visual appeal and rich flavors in their sweets. As home bakers share recipes through generations, this cake has become a beloved favorite across many households.

Regional variations of the caramel apple dessert can be seen in different states, where local apples and traditions influence the method of preparation. Some regions may even introduce spices like nutmeg and ginger, adding warmth and complexity to the flavor profile. This adaptability ensures that the Caramel Apple Cheesecake Cake remains a cherished treat throughout the seasons.

Ingredient Deep Dive

Apples are the star ingredient in this dessert. Their natural sweetness and tartness enhance the flavor profile, making them a perfect match for cheesecake. Apples are rich in antioxidants and dietary fiber, contributing to a healthier dessert. When selecting apples for this recipe, opt for firm varieties such as Granny Smith or Honeycrisp for their ideal balance of sweetness and tartness. Store them in a cool, dry place, and they will keep fresh for weeks. Alternatively, you can use canned pie filling for a simplified approach.

The cream cheese in the cheesecake layer is essential for creating a rich and smooth texture. A staple in many desserts, the history of cream cheese dates back to the late 19th century in the United States. Nutritionally, it adds creaminess, but it’s wise to use it in moderation. Opt for full-fat cream cheese for the desired richness, but low-fat varieties can also work. Store leftovers tightly wrapped in the fridge.

Common Mistakes to Avoid

  • Using warm ingredients: Ensure all your ingredients, especially cream cheese, are at room temperature. This helps achieve a smooth batter and prevents lumps in the cheesecake.
  • Not properly greasing the pan: Make sure to grease your springform pan well to avoid sticking. Lining the bottom with parchment paper also helps.
  • Overmixing the batter: Mix until just combined to maintain a light and airy texture. Overmixing can lead to cracks in the cheesecake.
  • Skipping the cooling phase: Allow the cake to cool in the pan before removing it. This helps prevent cracks and ensures a more stable dessert.
  • Using too many apples: Balance the amount of apples with the other layers to keep the cake moist without making it soggy.
  • Baking at the wrong temperature: Ensure your oven is preheated accurately. Too high of a temperature can cause the cheesecake to crack.
  • Not chilling the cake: After baking, let your cake chill completely before serving. This enhances the flavors and allows for cleaner slices.
  • Not following the assembly order: Layering your cheesecake and apple filling correctly is crucial for achieving the intended texture and taste.

Essential Techniques

Mastering the cheesecake layer is key to this recipe’s success. Start by softening the cream cheese and mixing it at low speed to avoid air bubbles, which can cause cracks. Aim for a smooth, creamy texture without overmixing, and ensure it’s well incorporated with the sugar and eggs. Visual cues for success include a uniform color and texture, without lumps.

Caramelizing the apples requires attention to detail. Cook them on low heat to allow the natural sugars to develop without burning. Stir gently, and monitor closely for even cooking. Perfectly caramelized apples should be tender yet hold their shape, adding a delicious contrast to the cheesecake layer.

Pro Tips for Perfect Caramel Apple Cheesecake Cake

1. Use high-quality cream cheese for a luxuriously smooth cheesecake layer, as it significantly influences the overall taste.

2. Select crisp apples for the best texture—soft or mealy apples won’t hold up during cooking and can lead to a mushy filling.

3. Allow your cheesecake cake to chill overnight for improved flavor development and easier slicing.

4. Opt for homemade caramel sauce for a richer flavor, but store-bought works in a pinch.

5. Serve warm or at room temperature for the best taste—this enhances the flavors and textures.

6. Garnish the cake with whipped cream or crushed nuts for added flavor and visual appeal.

7. Ensure that each layer is evenly distributed in the pan for a balanced slice with every serving.

8. Dust the top with powdered sugar prior to serving for an elegant finish.

Variations and Adaptations

Regional variations of this dessert can introduce local flavors such as using cinnamon apples from the Midwest or pecans for a Southern touch. Seasonal adaptations could include substituting the apples with ripe pears for a different flavor profile while maintaining that fall essence.

For dietary modifications, consider making a gluten-free version by substituting all-purpose flour with almond or coconut flour. This not only accommodates gluten sensitivities but also adds a nutty flavor to the cake.

If you want a stronger caramel flavor, incorporate additional caramel between the layers as well as on top, enhancing the sweetness while balancing the cheesecake’s richness. Texture modifications might involve adding crushed graham crackers to the crust for a bit more crunch, or including a layer of whipped cream cheese frosting for a lighter finish.

For presentation alternatives, serve individual mini cheesecakes in jars—perfect for events and easy to transport. Divide the layers neatly into small jars and allow guests to enjoy their personal serving.

Serving and Presentation Guide

For plating, use a sharp knife to slice the cake into clean pieces. A warm knife dipped in hot water will help achieve cleaner cuts. Consider using a cake stand to elevate the presentation. For garnishing, top with whipped cream, a drizzle of caramel, and a sprinkle of chopped nuts for added texture.

Traditional accompaniments include a scoop of vanilla bean ice cream or a dollop of freshly whipped cream, which can complement the rich flavors of the cake beautifully. Modern serving suggestions might include a side of spiced caramel sauce or apple compote to intensify the apple flavor.

Serving temperature matters as well; serving the cake slightly warm will enhance the caramel’s flavor and provide a delightful experience. Portion control is also critical—cutting appropriate-sized slices allows everyone to enjoy the dessert without feeling overly indulgent.

Wine and Beverage Pairing

Pair this Caramel Apple Cheesecake Cake with a sweet dessert wine such as a late harvest Riesling or a creamy Chardonnay that won’t overpower the sweetness of the caramel. Both wines enhance the flavor of the apples while adding a sophisticated touch to your dessert experience.

If you’re looking for non-alcoholic options, serve it with a spiced apple cider which mirrors the flavors in the cake and adds a festive feel. Hot beverages like chai or a rich roasted coffee are also great companions to round out the dessert.

Storage and Shelf Life

To store your Caramel Apple Cheesecake Cake, wrap it tightly with plastic wrap or aluminum foil and keep it in the refrigerator for up to five days. Ensure it’s cooled completely before wrapping to maintain freshness.

If you’re planning to freeze portions, slice the cake and place them in an airtight container or freezer bag. The cake can last up to three months in the freezer; simply let it thaw in the fridge before serving. Check for signs of spoilage such as off smells or changes in texture before consuming.

Make Ahead Strategies

To maximize your time, prepare the cheesecake layer a day in advance and store it in the refrigerator. This can enhance its flavor as it sits. Similarly, you can caramelize your apples ahead of time, letting them cool before layering them in the cake.

Quality impacts the final result; avoid assembling the cake until a few hours before serving, as this allows the layers to maintain their individual textures. When ready to serve, simply reassemble, and garnish for a fresh presentation.

Scaling Instructions

To halve the recipe, use a 6-inch springform pan instead, adjusting baking times as needed to prevent overcooking. For parties, doubling the recipe is simple and only requires a larger pan, like a 12-inch springform, with potentially increased baking time by about 10-15 minutes.

When scaling, ensure you have enough ingredients on hand before starting. This might require checking your pantry for sufficient quantities of cream cheese, apples, and sugar. Adjust the storage methods based on how much dessert you have left—bigger batches may need additional storage space.

Nutritional Deep Dive

Examining the macro breakdown, each slice contains a balance of carbohydrates from the apples and sugars, fats from the cream cheese, and proteins also from the dairy. This cake can satisfy your sweet cravings while still contributing valuable nutrients from fruit.

Micronutrient analysis shows benefits, with apples providing vitamin C and potassium, which can promote overall health. For those watching their diet, consider portion analysis as moderation is key; one slice can serve as a delightful treat without compromising dietary efforts.

Dietary Adaptations

For gluten-free adaptations, swap out regular flour for certified gluten-free flour blends or almond flour for a different texture and flavor profile. This variation allows gluten-sensitive individuals to enjoy the same delightful taste without worry.

Vegan modifications can involve using plant-based cream cheese and flax eggs to substitute traditional ingredients, retaining the dessert’s creamy texture while accommodating different dietary preferences.

A low-carb version can focus on using a nut crust instead of traditional cake flour, and sugar substitutes like erythritol or monk fruit for sweetness while keeping the net carbs low. This adaptation makes the dessert suitable for keto followers without sacrificing flavor.

Troubleshooting Guide

If you encounter texture issues and the cheesecake is too dense, ensure your cream cheese is adequately softened to create a lighter batter. Mixing at lower speeds helps alleviate air bubbles that contribute to cracked surfaces.

Flavor balance problems may arise if the apples are overly tart; adding additional sweetness via caramel sauce or sugar can round out the flavors effectively. Always taste the filling before assembly to adjust as needed.

Recipe Success Stories

Readers suggest using local apples from farmer’s markets to enhance flavor and support local agriculture, resulting in a fresher, more delicious cake. Photography tips included utilizing natural lighting to capture the cake’s layers and textures beautifully for social media.

Frequently Asked Questions

Q1: Can I make this cake gluten-free?

A1: Yes, you can substitute regular all-purpose flour with gluten-free flour for the cake base, ensuring that all other ingredients are also gluten-free as needed.

Q2: How long will this cake last in the fridge?

A2: Generally, the cake will last about 5 days in the refrigerator when stored properly in an airtight container.

Q3: Is it possible to make this dessert vegan?

A3: Absolutely! Substitute cream cheese for plant-based cream cheese and use egg replacements like flax eggs to maintain the creamy texture.

Q4: Can I freeze leftover slices?

A4: Yes, slices can be frozen for up to three months. Just wrap them tightly to prevent freezer burn and allow for a thawing period in the fridge before serving.

Q5: Do I need to use a springform pan?

A5: While a springform pan is recommended for easy removal, you can also use a regular round cake pan; just make sure to line it with parchment paper for easy release.

Q6: What’s the best way to store leftovers?

A6: Store leftovers in the refrigerator wrapped in plastic wrap or in an airtight container to maintain freshness.

Q7: Can I use other fruits besides apples?

A7: Yes! Pears or berries are excellent substitutes that can offer a delightful twist on the original recipe.

Q8: What type of apples should I use?

A8: Firm varieties such as Granny Smith or Honeycrisp are recommended for their tartness and ability to hold up during baking.

Q9: How can I ensure my cheesecake doesn’t crack?

A9: Mixing at a low speed and baking in a water bath can help mitigate cracking during the baking process.

Q10: Can I add nuts to the recipe?

A10: Absolutely! Chopped nuts can be incorporated into the crust or sprinkled on top for added crunch and flavor.

Additional Resources

If you enjoyed this Caramel Apple Cheesecake Cake, you might love exploring related recipes such as classic apple pie or other variations of cheesecake. Consider delving into technique guides for perfecting your baking skills or browsing ingredient information to expand your knowledge of seasonal produce.

For equipment recommendations, check out essential baking tools and utensils that can simplify your cooking process while ensuring delicious results. Explore seasonal variations that capture the essence of fall cooking using locally-sourced ingredients.

Join the Conversation

We invite you to share your experiences with this Caramel Apple Cheesecake Cake—post photos, tips, and variations on social media. Engaging with your cooking community can offer fresh ideas and inspiration while fostering a love for baking.

Don’t forget to leave your recipe reviews and feedback! Your input not only helps fellow bakers but also fosters a thoughtful exchange where we can all learn from one another’s successes and challenges.

The Recipe

Caramel Apple Cheesecake Cake

Serves: 12

Prep Time: 30 mins

Cook Time: 1 hour

Total Time: 1 hour 30 mins

Kitchen Equipment Needed

  • Springform pan
  • Mixing bowls
  • Hand mixer or stand mixer
  • Rubber spatula
  • Measuring cups and spoons
  • Knife for slicing

Ingredients

  • For the Cake:
  • 2 cups all-purpose flour
  • 1 cup granulated sugar
  • 1/2 cup unsalted butter, softened
  • 2 large eggs
  • 1 cup whole milk
  • 2 teaspoons baking powder
  • 1 teaspoon vanilla extract
  • 1/2 teaspoon salt
  • For the Cheesecake Layer:
  • 2 packages (8 oz each) cream cheese, softened
  • 1 cup granulated sugar
  • 3 large eggs
  • 1 teaspoon vanilla extract
  • For the Caramelized Apples:
  • 4 medium apples, peeled and chopped
  • 1/2 cup brown sugar
  • 1 teaspoon cinnamon
  • 1 tablespoon lemon juice
  • 1/4 cup caramel sauce for drizzling

Directions

  1. Preheat oven to 350°F (175°C). Grease a 9-inch springform pan.
  2. In a large bowl, mix together flour, baking powder, and salt. Set aside.
  3. In another bowl, cream together the softened butter and granulated sugar until light and fluffy. Add eggs, milk, and vanilla; mix well.
  4. Gradually add the dry ingredients to the wet mixture, mixing until fully combined. Pour the batter into the prepared pan.
  5. In a separate bowl, beat the cream cheese until smooth. Add sugar, eggs, and vanilla; mix until well combined.
  6. Pour the cheesecake mixture over the cake batter in the pan.
  7. For the caramelized apples, combine apples, brown sugar, cinnamon, and lemon juice in a pan. Cook over medium heat until apples are tender, about 5-7 minutes.
  8. Spread the caramelized apples evenly over the cheesecake layer in the pan.
  9. Bake in the preheated oven for 60 minutes, or until the cheesecake is set and the edges are lightly golden.
  10. Allow cake to cool in the pan before releasing the sides. Drizzle with caramel sauce before serving.

Recipe Notes

  • For a sweeter cake, feel free to add more sugar to the apple mixture based on your preference.
  • Ensure all ingredients are at room temperature for better mixing and texture.
  • This cake can also be made in advance and stored in the refrigerator for maximum flavor.

Delicious Tiramisu Cupcakes: A Delightful Twist on Classic Dessert

Tantalizing Tiramisu Cupcakes: A Delectable Twist on the Classic Dessert

⚖️
Difficulty
Moderate

⏲️
Prep Time
30 mins

🕒
Cook Time
20 mins

⏱️
Total Time
50 mins

🍽️
Servings
12 cupcakes

Tiramisu cupcakes are a delightful twist on the iconic Italian dessert that you know and love. Imagine the classic flavors of coffee, cocoa, and mascarpone cheese, all packed into a fluffy and moist cupcake. These irresistible treats offer a perfect balance of sweetness and richness, making them ideal for any occasion. Whether you’re hosting a party, celebrating a special event, or simply craving a sweet indulgence, these tiramisu cupcakes are sure to impress your guests and satisfy your taste buds.

Each bite of these tantalizing cupcakes is a delicate dance of flavors and textures. The intense coffee-soaked sponge perfectly complements the creamy mascarpone frosting, creating a luscious mouthfeel. Topped with a dusting of cocoa powder, these cupcakes not only taste divine but also look elegant and inviting. And if you’re a fan of coffee-flavored desserts, these tiramisu cupcakes will become an instant favorite that you’ll crave time and again.

Quick Recipe Highlights

  • Flavor Profile: The combination of rich coffee, smooth mascarpone, and a hint of cocoa provides a delightful and nostalgic taste.
  • Texture: Each cupcake features a light and fluffy base with a creamy frosting that melts in your mouth.
  • Aroma: The sweet aroma of coffee intertwined with luscious cream brings anticipation with every bite.
  • Visual Appeal: Tiramisu cupcakes are elegantly presented with a dusting of cocoa, making them as beautiful as they are delicious.
  • Skill Level Needed: This recipe requires moderate baking skills, making it perfect for both beginners and experienced bakers.
  • Special Equipment: No fancy tools are needed; just standard baking supplies, some cupcake liners, and a mixer.

Recipe Overview

  • Difficulty Level: Moderate, as it requires both baking and frosting techniques to perfect the cupcakes.
  • Category: Dessert, perfect as a sweet ending to any meal.
  • Cuisine: Italian-inspired, capturing the essence of traditional tiramisu in a new form.
  • Cost: Approximately $15, depending on ingredient brands and quantities purchased.
  • Season: Best enjoyed year-round, but especially delightful during gatherings and holiday seasons.
  • Occasion: Suitable for birthdays, potlucks, and any event where a touching dessert is welcomed.

Why You’ll Love This Recipe

The taste and texture of these tiramisu cupcakes offer a unique twist on the beloved dessert, making them a hit with everyone from children to adults. The rich flavor of coffee combined with smooth mascarpone creates a dessert experience that is nothing short of heavenly. The creamy frosting contrasts beautifully with the light cupcake, making it a satisfying treat that is easy to enjoy.

Convenience plays a key role in the appeal of these cupcakes. Unlike traditional tiramisu, which can be time-consuming and complex, this recipe allows you to enjoy the delicious flavors of tiramisu in a bite-sized format. Perfect for those who want to impress guests without fussing over intricate layers, these cupcakes come together in less than an hour.

From a nutritional perspective, these tiramisu cupcakes can offer some benefits when made with quality ingredients. Using fresh eggs and real mascarpone cheese elevates their appeal, while portion control is easier with cupcakes compared to larger desserts. Indulging in moderation allows you to enjoy a delightful dessert without the guilt.

When it comes to social occasions, serving tiramisu cupcakes provides a fun and interactive experience. Guests can indulge in their own portion, allowing everyone to savor the flavors without the mess of slicing a classic cake. The elegant presentation also sparks conversation and enjoyment around the dessert table.

Lastly, the cost-effectiveness of this recipe makes it a smart choice for any gathering. With simple ingredients that are often found in pantries, these cupcakes offer an impressive dessert option that won’t break the bank. Friends and family will admire the delicious results, making them feel special without compromising your budget.

Historical Background and Cultural Significance

The origin of tiramisu dates back to the 1960s in Treviso, Italy, where it emerged as a popular dessert reflecting the rich culinary traditions of the region. Initially crafted by using leftover ingredients, such as coffee-soaked ladyfingers and mascarpone, it quickly evolved into a favorite choice for celebratory occasions.

Tiramisu bears cultural importance as it captures the essence of Italian hospitality and indulgence. Often enjoyed during festive celebrations, weddings, and family gatherings, it embodies the communal spirit of sharing delicious food. The layered dessert reflects the Italian philosophy of combining simple ingredients to create remarkable flavors.

Over time, tiramisu has undergone multiple iterations, adapting to modern tastes and preferences. Today, variations can include seasonal flavors, such as pumpkin or berry, showcasing the versatility of the classic dessert. This evolution highlights how food can change while still honoring its roots.

Regional variations exist, with some areas of Italy offering unique twists that celebrate local ingredients. From different types of coffee to incorporating local spirits, the regional adaptations enrich the history of tiramisu, allowing it to remain relevant and cherished in culinary scenes worldwide.

Ingredient Deep Dive

Coffee

Originating from Ethiopia, coffee has traveled the globe, becoming a staple drink in many cultures. Not only does it provide a deep flavor that enhances desserts like tiramisu, but it also brings beneficial antioxidants. Opt for freshly brewed coffee for the best flavor.

When selecting coffee for your cupcakes, choose a dark roast for rich, robust flavors. Store any leftover coffee in an airtight container in the refrigerator for a few days to maintain its freshness. If you’re looking for alternatives, try using coffee substitutes, such as chicory.

Mascarpone Cheese

Mascarpone is a creamy Italian cheese made from cream, renowned for its smooth texture and rich flavor. This cheese is a key player in tiramisu, providing the signature creaminess that balances the coffee’s intensity. Nutritionally, mascarpone is high in fat but offers protein.

To select the best mascarpone, look for a brand that includes only two ingredients: cream and citric acid. Store it in the refrigerator and use it within a few days of opening for optimal freshness. Alternatives like cream cheese can be used, though they alter the flavor slightly.

Common Mistakes to Avoid

  • Overmixing the batter: Mixing too much can lead to dense cupcakes instead of a light texture.
  • Using stale coffee: Freshly brewed coffee enhances flavor; stale coffee can make the cupcakes taste flat.
  • Skipping room temperature ingredients: Cold eggs and butter can lead to uneven mixing, affecting the texture.
  • Incorrect baking time: Keep an eye on your baking time to prevent dry or undercooked cupcakes.
  • Not allowing cupcakes to cool fully: Frosting while warm can melt your frosting, ruining the presentation.
  • Using low-quality cocoa powder: This affects the overall flavor; opt for high-quality Dutch-processed cocoa.
  • Forgetting to flavor the frosting: A pinch of coffee or coffee liqueur in the frosting enhances the overall tiramisu flavor.
  • Improper storage: Store cupcakes in an airtight container to prevent dryness.

Essential Techniques

When making tiramisu cupcakes, mastering the technique of soaking your cake base in coffee is critical. This step adds flavor and moisture. Soak the cupcakes just enough to absorb the liquid without becoming overly soggy. A visual cue for success is a light, uniform color change within the cupcake.

Frosting the cupcakes properly is equally important. Use a piping bag for elegant swirls but don’t overfill it, as this can cause mess and uneven distribution. Look for a smooth, glossy finish as a sign of well-crafted frosting, ensuring it remains firm enough to hold its shape.

Pro Tips for Perfect Tiramisu Cupcakes

– For an added flavor boost, substitute half the milk in the frosting with coffee liqueur to enhance the dessert’s richness.
– Make sure all your ingredients are at room temperature for even mixing and better volume.
– Allow the cupcakes to cool completely before frosting them to ensure the frosting retains its shape.
– Use a toothpick to check for doneness; it should come out clean when the cupcakes are baked through.
– Experiment with different types of cocoa powder for varying depths of chocolate flavor.
– To create visually appealing cupcakes, use a contrasting garnish, such as chocolate shavings or espresso beans.
– Make mini versions of these cupcakes for bite-sized treats perfect for parties.
– Keep any leftover cupcakes in the refrigerator to maintain freshness, especially because of the cream in the frosting.

Variations and Adaptations

Regional variations of tiramisu cupcakes might include incorporating local flavors or ingredients. For example, adding a hint of orange zest can create a refreshing twist reminiscent of Italian citrus desserts. Seasonal adaptations include using pumpkin puree during autumn for a cozy fall flavor.

Dietary modifications can also be made to cater to specific preferences. Gluten-free flour can replace regular flour, ensuring that those with gluten sensitivities can also enjoy these delicious treats. Vegan versions can be achieved by using plant-based substitutes for eggs and mascarpone.

Flavor variations like adding peanut butter to the frosting or including crushed nuts in the batter can create new taste experiences while staying true to the essence of tiramisu. Presentation alternatives include serving them in elegant cups for a more sophisticated look.

Serving and Presentation Guide

For an attractive presentation, consider using elegant cupcake liners that complement the dessert theme. Garnish with a light dusting of cocoa powder and a single coffee bean on top for elegance. A simple but effective plating technique is to arrange the cupcakes on a tiered serving stand for visual impact.

Pair these cupcakes with a dollop of whipped cream or a scoop of vanilla ice cream on the side for added indulgence. Serving temperatures should be chilled slightly, ensuring the frosting remains firm while offering a refreshing experience.

Portion control is also key; aim for standard cupcake sizes that are easy to manage for guests, ensuring everyone can enjoy a bite without overwhelming sweetness.

Wine and Beverage Pairing

When it comes to wine pairings, consider serving the tiramisu cupcakes with a glass of sweet dessert wine, such as Vin Santo or a late-harvest Riesling. These wines enhance the flavor profile without overpowering the delicate coffee and mascarpone notes.

For non-alcoholic alternatives, a rich, creamy Irish cream-flavored coffee serves as a lovely complement to the cupcakes while echoing their flavors. If you’d like a warmer drink, a cup of mocha or cappuccino complements the dessert’s coffee base beautifully.

Temperature is an important consideration; serve both the cupcakes and beverages slightly chilled for a refreshing contrast that enhances the overall tasting experience. Additionally, serving with a side of sparkling water can cleanse the palate between bites.

Storage and Shelf Life

To maintain the freshness of tiramisu cupcakes, store them in an airtight container in the refrigerator. This prevents dryness while keeping the frosting intact. They can be enjoyed for up to five days if properly stored, ensuring that they remain enjoyable over time.

When it comes to reheating, microwave for just a few seconds to slightly warm the cupcake without melting the frosting too much. Make sure to check for signs of spoilage, like an off smell or discoloration in the frosting, as this can occur if stored for too long.

If you want to freeze leftovers, wrap each cupcake in plastic wrap and place them in a freezer-safe bag or container. Cupcakes can last up to three months in the freezer; however, keep in mind that the texture of the frosting may change slightly upon thawing.

Make Ahead Strategies

Making tiramisu cupcakes ahead of time is straightforward. Prepare the cupcake batter and bake them a day or two in advance, letting them cool completely. Store them in an airtight container until ready to frost to maintain freshness and prevent drying.

You can also make the mascarpone frosting in advance and store it in the refrigerator. When ready to serve, simply whip it back to smooth perfection and frost the cupcakes on the day of the event for optimal flavor.

If desired, you can assemble the cupcakes a few hours before serving, ensuring you keep them covered in the fridge. Just remember to add any garnishes just before serving to maintain their appeal and freshness.

Scaling Instructions

To halve the recipe, simply divide each ingredient amount by two while using the same baking method. Adjust baking time slightly, as less batter may require a shorter time in the oven.

If doubling or tripling the recipe, increase the ingredient amounts proportionally. Note that you will also want larger mixing bowls to accommodate the increase in batter. Keep an eye on baking times, as larger batches often require additional time to ensure thorough baking.

When scaling your recipe, consider the size and capacity of your equipment—make sure you have enough pans, and if you are using convection ovens, adjust temperatures by 25°F for optimal results.

Nutritional Deep Dive

The macro breakdown of tiramisu cupcakes typically includes carbohydrates, protein, and fat, making them an indulgent treat. However, using whole ingredients can provide essential nutrients, making this dessert not just a guilty pleasure.

Micronutrient analysis focuses on vitamins and minerals found in ingredients like eggs, which provide essential proteins, and cocoa powder, which is rich in antioxidants. These nutrients can contribute to a balanced diet when enjoyed in moderation.

While enjoying these cupcakes, mindful portion control is important. Each cupcake provides a decadent treat that fits into a balanced diet. Include them as part of a day filled with nutrient-rich foods to maintain overall health and well-being.

For those managing weight, these cupcakes can be a part of enjoyable eating, reminding us that balance is key when indulging in sweets. Sharing a cupcake can also make the experience more manageable and pleasurable.

Dietary Adaptations

For gluten-free cupcakes, substitute all-purpose flour with a gluten-free blend to maintain the texture and flavor integrity of the dessert. Check for certified gluten-free labels for safety during baking.

Those who follow a dairy-free diet can replace the mascarpone with a plant-based cream cheese or coconut cream alternative while using a dairy-free milk substitute in the batter and frosting.

Vegan adaptations can involve using flax eggs and dairy-free cream to replicate traditional ingredients. A low-carb version can be achieved using almond flour and sugar substitutes, ensuring that dessert remains enjoyable for those on strict diets.

Mediterranean-inspired adaptations can include the addition of orange zest or using ricotta in place of mascarpone for a refreshing variation while maintaining a classic design.

Troubleshooting Guide

If the texture of your cupcakes turns out dense, this is often a sign of overmixing the batter. Make sure to fold gently, keeping air in the mix for a lighter outcome.

If the flavor feels unbalanced, it might be due to the quality of the coffee used. Always opt for rich, freshly brewed coffee to enhance the overall taste of your cupcakes.

When facing temperature problems, if your cupcakes are burning on the outside and undercooked inside, recheck your oven’s temperature calibration and use an oven thermometer to confirm accuracy.

Ingredient substitutions can lead to unexpected results; using margarine instead of butter, for example, can alter both texture and flavor. Stick to original recipes for the best results, and be cautious when making changes.

Timing issues can arise when you open the oven door too frequently while baking, causing fluctuation in temperature. Aim to minimize door openings until the baking time nears completion to ensure even baking.

Recipe Success Stories

Community feedback has shown that these tiramisu cupcakes have become a favorite! Many have shared their excitement after introducing guests to these delightful treats at gatherings. Readers have expressed joy at how simple yet impressive they appear.

Variation successes have flourished with many trying different frostings and flavor infusions while maintaining the spirit of the original recipe. Some readers have mentioned using vegan substitutes and achieving equally delicious results, showcasing impressive adaptability.

Adaptation stories highlight the versatility of the recipe. From hosting birthday parties to elegant holiday dinners, many have turned to these cupcakes as their go-to dessert when seeking to impress guests.

Photography tips have also been shared, with many readers pointing out that the combination of coffee and cocoa creates beautiful contrast in photos, making the cupcakes an eye-catching centerpiece for desserts.

Frequently Asked Questions

1. Can I make tiramisu cupcakes in advance?

Yes! You can bake and store the cupcakes a day or two ahead. Frost them just before serving to maintain freshness.

2. What if I don’t have mascarpone cheese?

You can substitute with cream cheese or a blend of cream cheese and sour cream for a similar texture and flavor.

3. Are there gluten-free options available?

Absolutely! Use a gluten-free flour blend in place of all-purpose flour for a delicious gluten-free version.

4. How should I store leftover cupcakes?

Store cupcakes in an airtight container in the refrigerator to maintain moisture and freshness for up to five days.

5. Can I freeze tiramisu cupcakes?

Yes, they can be frozen for up to 3 months. Wrap them individually in plastic wrap and store in a freezer-safe bag.

6. Do I need to use espresso coffee?

Regular brewed coffee can be used instead of espresso, but espresso enhances the flavor depth.

7. How do I prevent my cupcakes from sinking?

Avoid overmixing the batter and ensure your oven is preheated to the right temperature before baking.

8. Can I modify the frosting flavor?

Definitely! Adding coffee liqueur or cocoa powder can create delightful variations in the frosting flavor.

9. What is the best way to frost these cupcakes?

Using a piping bag creates beautiful swirls and helps achieve a more professional-looking finish.

10. Can I make a cake instead of cupcakes?

Yes! You can bake the batter in a cake pan, just adjust the baking time accordingly.

Additional Resources

For those looking to dive deeper into dessert-making, explore our related recipes, including classic Italian desserts like panna cotta and cannoli. These recipes share similarities with tiramisu and offer variety for your dessert table.

Technique guides on cake baking and frosting will provide valuable tips for perfecting your baking skills. Understanding different types of flour and their effects on texture can enhance your confidence in the kitchen.

Ingredient information resources can help you choose the best products for recipes, including insights on selecting the freshest mascarpone or high-quality cocoa powder. Understanding how variations can change recipes can lead to exciting new creations.

Equipment recommendations will help stock your bakery with essential tools like high-quality mixers, sturdy baking pans, and decorative serving trays to elevate your dessert presentations.

Join the Conversation

We invite you to engage with our community on social media, sharing your own versions of these tiramisu cupcakes. Post your photographs and tag us to inspire others with your creativity!

Recipes thrive on feedback, and we love hearing your thoughts and suggestions. Connect with fellow bakers to exchange tips, adaptations, and experiences that have led to the perfect cupcake.

Feedback and community reviews play a critical role in refining our recipes. Your insights help shape the desserts we share and create a vibrant culinary community!

Reflect on your experiences and invite your friends and family to try making these delightful cupcakes with you, turning dessert-making into a fun and rewarding group activity.

The Recipe

Tiramisu Cupcakes

Serves: 12 cupcakes

Prep Time: 30 mins

Cook Time: 20 mins

Total Time: 50 mins

Kitchen Equipment Needed

  • Mixing bowls
  • Electric mixer
  • Cupcake pan
  • Cupcake liners
  • Piping bag
  • Toothpick for testing

Ingredients

  • 1 cup all-purpose flour
  • 1 cup granulated sugar
  • 1/2 cup unsalted butter, softened
  • 2 large eggs
  • 1/2 cup brewed coffee, cooled
  • 1 teaspoon baking powder
  • 1/2 teaspoon vanilla extract
  • 1/2 cup mascarpone cheese
  • 1 1/2 cups heavy cream
  • 1/4 cup cocoa powder for dusting
  • Optional: Coffee liqueur for flavor

Directions

  1. Preheat the oven to 350°F (175°C) and line a cupcake pan with liners.
  2. In a mixing bowl, cream together the butter and sugar until light and fluffy.
  3. Add eggs one at a time, beating well after each addition, then mix in the vanilla extract.
  4. In another bowl, whisk together the flour and baking powder, then gradually add to the butter mixture, alternating with the cooled coffee.
  5. Spoon the batter into the lined cupcake pan, filling each cup about 2/3 full.
  6. Bake for 18-20 minutes or until a toothpick inserted comes out clean. Allow to cool completely.
  7. For the frosting, in a mixing bowl, whip the heavy cream until soft peaks form.
  8. Gently fold in the mascarpone cheese and sweeten with coffee liqueur if desired.
  9. Pipe the frosting onto cooled cupcakes and dust with cocoa powder before serving.

Recipe Notes

  • For a stronger coffee flavor, consider adding a few tablespoons of coffee liqueur into the batter.
  • Store any leftover cupcakes in an airtight container in the refrigerator for up to five days.
  • You can add chocolate shavings as an extra garnish for added texture and flavor.

Indulge in Irresistible Choco Swiss Roll Delight Recipe Today

Choco Swiss Roll Delight: A Decadent Chocolate Treat

⚖️
Difficulty
Medium

⏲️
Prep Time
20 mins

🕒
Cook Time
25 mins

⏱️
Total Time
45 mins

🍽️
Servings
8 servings

Indulging in a slice of Choco Swiss Roll Delight offers a heavenly experience that no dessert lover should miss. This enchanting roll is made with rich chocolate cake that’s airy, light, and wrapped around a luscious chocolate cream filling. Whether you’re serving it at a birthday party, a festive gathering, or simply enjoying a sweet afternoon treat, this Swiss roll is certain to delight the senses. Each bite reveals layers of texture and flavor that meld nostalgia and deliciousness, bringing joy to all who partake.

The beauty of the Choco Swiss Roll Delight becomes truly apparent when you uncover its interior. The soft, moist chocolate sponge envelops a creamy, velvety filling that has just the right balance of sweetness and cocoa intensity. It’s a dessert that appeals not only to the taste buds but also to the eyes, making it a stunning centerpiece for any dessert table. Plus, this recipe is a testament to the joys of baking at home, allowing you to create a professional-quality dessert without needing extensive culinary training.

Quick Recipe Highlights

  • Flavor Profile: The chocolate cake strikes a perfect contrast with the rich cream filling, creating a balanced, satisfying dessert experience.
  • Texture: Each slice is a celebration of textures, from the fluffy sponge to the smooth, creamy center, ensuring a delightful mouthfeel.
  • Aroma: The inviting scent of freshly baked chocolate wafts through your kitchen, making it hard to resist this indulgent treat.
  • Visual Appeal: The roll, dusted with powdered sugar and elegantly sliced, showcases beautiful swirls of chocolate that are as appealing as they are delicious.
  • Skill Level Needed: This recipe requires a medium skill level, making it accessible for beginners with some baking experience.
  • Special Equipment: All you need is a baking sheet, parchment paper, and a mixer to create this delightful dessert.

Recipe Overview

  • Difficulty Level: This Choco Swiss Roll Delight is classified as medium difficulty due to the rolling technique but is manageable with patience and practice.
  • Category: It falls within the dessert category, serving perfectly for after-dinner treats and special occasions.
  • Cuisine: This recipe is inspired by classic Swiss desserts, known for their elegant presentation and rich flavor.
  • Cost: The ingredients are affordable, with a total estimated cost around $10, making it an economical choice for sweet gatherings.
  • Season: Great for year-round enjoyment, particularly during winter festivities, when chocolate desserts are especially cherished.
  • Occasion: Perfect for birthdays, tea parties, and holiday celebrations, this dessert impresses every guest at your table.

Why You’ll Love This Recipe

With its exquisite combination of taste and texture, Choco Swiss Roll Delight is a must-have for dessert lovers. The chocolate sponge’s lightness paired with the thick cream filling ensures every bite is a joyous celebration of flavor. Easy preparation makes it convenient for both novice and experienced bakers alike, allowing you to whip up this delight with minimal fuss.

Nutritionally, it can offer a touch of indulgence without overwhelming guilt, encouraging moderation while still satisfying a sweet tooth. Socially, this dessert shines at gatherings; its unique presentation and delightful flavor prompt conversations and compliments, making it a crowd favorite. Finally, its affordability ensures you can create a stunning dessert without breaking the bank, proving that great taste doesn’t have to come with a hefty price tag.

Historical Background and Cultural Significance

The origins of the Swiss roll can be traced back to the 19th century, where it began as a simple rolled cake filled with sweet cream. It soon evolved into a beloved dessert in various cultures, particularly in Switzerland, where the name is derived. Initially, the concept of rolling cakes was a clever method to preserve moisture and maintain freshness.

Throughout the years, the art of making Swiss rolls has seen numerous adaptations, including diverse fillings and flavor profiles, catering to regional tastes. In many cultures, it’s celebrated during special occasions, symbolizing togetherness and joy as friends and family gather to enjoy this delightful treat.

In contemporary cuisine, variations such as the Choco Swiss Roll Delight not only maintain the traditional elements but also infuse modern twists, appealing to new generations of dessert enthusiasts. Regional variations seen across Asia, Europe, and America highlight the versatility and universal enjoyment of this classic rolled dessert.

The cultural impact of Swiss rolls extends beyond just their delightful taste; they embody the rich tradition of baking and the sharing of food as a form of love, connection, and expression. Many bakers treasure family recipes passed down through generations, reinforcing the enduring legacy of this charming dessert.

Ingredient Deep Dive

Flour
Flour serves as the foundation for the Choco Swiss Roll Delight, integral to creating the right texture. With its high starch content, all-purpose flour results in a balanced structure that holds the roll together. When choosing flour, look for a finely milled version to ensure a light and fluffy sponge. Store it in a cool, dry place and consider substituting with cake flour for an even lighter texture.

Cocoa Powder
Cocoa powder is key to achieving the rich chocolate essence in this dessert. It’s made from fermented, roasted cocoa beans and is high in antioxidants. When selecting cocoa powder, opt for Dutch-processed varieties for a smoother flavor profile. Store it in an airtight container, and for a twist, consider using dark cocoa powder for an intense chocolate hit that will elevate your Swiss roll to new heights.

Common Mistakes to Avoid

  • Overmixing the Batter: This can lead to a dense sponge rather than a light, airy texture. Mix just until combined to keep it fluffy.
  • Underbaking the Roll: The cake should spring back when pressed lightly. Underbaking can lead to a soggy roll that won’t hold its shape.
  • Not Sifting Dry Ingredients: Sifting flour and cocoa powder helps to eliminate lumps and aerates the mixture, ensuring a smoother batter.
  • Rolling the Cake Too Early: Allow the cake to cool briefly before rolling to prevent cracks and ensure a smooth roll.
  • Using the Wrong Parchment Paper: Always use parchment paper intended for baking; otherwise, your cake may stick and fall apart.
  • Skipping the Cooling Step: Proper cooling is essential for the structure of the sponge. Don’t rush this process.
  • Poor Filling Technique: Apply the filling evenly to avoid a lopsided roll. Use a spatula for a smooth application.
  • Not Dusting with Powdered Sugar: A light dusting before serving not only adds sweetness but also enhances presentation.

Essential Techniques

Creating the Perfect Sponge
The sponge is the heart of the Choco Swiss Roll Delight, requiring careful technique. It’s important to beat the eggs until light and fluffy, incorporating air to ensure the cake rises correctly while baking. Watch for the ribbon stage, where the batter falls in thick ribbons from the whisk—a visual cue for success. Avoid overmixing to maintain the airiness.

Rolling the Cake
Mastering the rolling technique is crucial for presentation. Once the sponge is slightly cooled, gently but firmly roll it with the parchment paper from one end. Use a kitchen towel to help shape it if needed. Avoid too much pressure, as this can lead to cracks. Let the rolled sponge cool completely before unrolling it for filling, which will prevent future cracks during the final rolling.

Pro Tips for Perfect Choco Swiss Roll Delight

1. Always preheat your oven to ensure even baking and the ideal rise for your sponge cake.
2. Use room-temperature eggs as they aerate better, helping achieve a fluffy texture in the batter.
3. When making the filling, whip the cream just to stiff peaks—overwhipped cream can turn grainy.
4. Experiment with different flavored extracts, like almond or peppermint, to add variety to the filling.
5. For added richness, fold in melted dark chocolate into the cream filling before spreading.
6. Dust the exterior with cocoa powder or colored sugar for a visually appealing finish.
7. Prepare the Swiss roll in advance and store it in the refrigerator until it’s time to serve for easier slicing.
8. Have a sharp knife ready for clean cuts; dipping it in warm water can help achieve clean slices without tearing.

Variations and Adaptations

There are countless variations of the Choco Swiss Roll Delight that cater to different tastes and preferences. For a berry-infused twist, consider incorporating fresh raspberries or strawberries into the cream filling. You can also create a seasonal adaptation by featuring pumpkin or spiced flavors during the fall, replacing cocoa with pureed pumpkin and warm spices.

Additionally, keep dietary needs in check by creating gluten-free or dairy-free versions using almond flour or coconut cream. Jazz it up with flavor variations like mint, coffee, or orange zest by mixing the zest into the filling or adding extracts for depth. For a vibrant presentation, utilize colorful fruit garnishes or chocolate shavings as alternatives to traditional dusting.

Serving and Presentation Guide

The presentation of your Choco Swiss Roll Delight is as important as its flavor. For optimal plating, place a sliced roll on a decorative plate, allowing the spiral pattern to be the centerpiece. Consider garnishing with fresh berries and a sprig of mint to add a splash of color. Drizzling melted chocolate or a fruit coulis around the plate can elevate the dish further.

A dusting of powdered sugar immediately before serving enhances visual appeal while balancing the sweetness. Temperature matters too; serve chilled or at room temperature, ensuring optimal flavor and texture. For portion control, consider serving smaller slices for larger gatherings, allowing everyone to enjoy a taste without overwhelming their palate.

Wine and Beverage Pairing

Pairing beverages with Choco Swiss Roll Delight elevates the entire dessert experience. Rich red wines like Merlot, with their fruity undertones, complement the chocolate beautifully. If you prefer white wine, a dessert wine such as Moscato provides a delightful contrast to the rich sweetness of the cake.

For non-alcoholic options, consider pairing with fresh mint tea or a decadent hot chocolate topped with whipped cream. If you are enjoying this treat with coffee, opt for a rich espresso to enhance the overall chocolate flavor without overwhelming sweetness. Remember to serve all beverages chilled or at room temperature to create a balanced experience.

Storage and Shelf Life

To maximize the shelf life of your Choco Swiss Roll Delight, store it in an airtight container in the refrigerator. This will help preserve its moisture and keep it fresh for up to 3-4 days. If you’re looking to store longer, consider freezing individual slices wrapped in plastic wrap, which can last up to a month.

Ensure that all components are cool before wrapping to avoid condensation. To enjoy it again, simply thaw in the refrigerator overnight and allow it to come to room temperature before serving. Look out for signs of spoilage like changes in texture or off-flavors—freshness is key to maintaining the delightful experience of this dessert.

Make Ahead Strategies

For convenience, the Choco Swiss Roll Delight can be prepared ahead of time. Bake the sponge up to a day in advance and store it tightly wrapped until you’re ready to fill and roll. This strategy allows flavors to deepen while keeping the sponge moist.

Once rolled, it can chill in the refrigerator, making it excellent for gatherings where you need to free up time on the day of the event. If storing filled rolls, consider keeping the cream and cake separate until ready to serve for the freshest flavor. Remove the roll from the fridge about 30 minutes before serving to allow it to return to the ideal texture.

Scaling Instructions

Scaling the Choco Swiss Roll Delight is a breeze if you’re planning for a crowd or want to make smaller servings. To halve the recipe, simply divide the ingredient amounts by two and adjust baking times accordingly. For doubling or tripling the recipe, be mindful of adjusting baking sheets and oven space to allow for even cooking.

Ensure to bake in batches if necessary and keep an eye on the texture and color as larger rolls may require additional time. When scaling, remember to use pan sizes appropriate for your batch, and align your rolling techniques to maintain consistent results.

Nutritional Deep Dive

Understanding the nutritional value of Choco Swiss Roll Delight begins with recognizing its macro breakdown. A typical slice contains carbohydrates primarily from flour and sugar, fat from cream, and negligible protein. When assessing micronutrients, note that cocoa powder contributes iron and antioxidants, while cream provides calcium.

For those mindful of dietary considerations, enjoy this dessert in moderation. Understanding portion sizes can help with weight management, allowing for indulgence while staying within caloric goals. The satisfaction from each slice can lead to shared enjoyment, making it worth every calorie while maintaining a balanced approach to dessert consumption.

Dietary Adaptations

Creating dietary adaptations for the Choco Swiss Roll Delight broadens its accessibility. For a gluten-free version, utilize almond or coconut flour, ensuring the texture remains light and airy. When crafting a dairy-free variant, consider using coconut cream or nut-based replacements in the filling.

Vegan options can feature aquafaba for the sponge and plant-based cream for the filling, maintaining the rich experience without using animal products. For delicious low-carb or keto adaptations, substitute sweeteners for sugar, allowing enjoyment without compromising dietary goals.

Troubleshooting Guide

Texture issues often arise when making the Choco Swiss Roll Delight. If the sponge is too dry, consider reducing baking time or checking for accuracy in oven temperature. For a gummy texture, ensure adequate mixing of ingredients to develop the proper structure before baking.

Timing concerns represent another common challenge; if the roll cracks while being shaped, it may have cooled too quickly. Solutions include reheating the sponge briefly in the oven if needed. When experimenting with substitutions, keep ratios in mind; ingredients should maintain a balanced composition for success.

Recipe Success Stories

Many home bakers have shared delightful feedback on their Choco Swiss Roll Delight experiences. Some have masterfully adapted the recipe for special occasions, experimenting with different fillings and flavors that turned out to be crowd pleasers. One reader converted the recipe into a mini Swiss roll format for individual servings, garnering appreciation at parties.

Another community member learned how to photograph the roll beautifully for an online recipe blog, showcasing its swirls and rich fillings. As stories and suggestions circulate, it reinforces the shared joy of creating and sharing this delicious dessert, inspiring others to venture forth with their own ideas and adaptations.

Frequently Asked Questions

Can I use a different filling besides chocolate cream?

Absolutely! The Choco Swiss Roll Delight is versatile, and you can experiment with fillings like vanilla pastry cream, fruit preserves, or even flavored whipped cream. Just ensure it has a similar texture to make rolling easier.

How do I prevent my cake from cracking when rolling?

To avoid cracks, ensure the sponge is slightly warm but not hot when rolling. Additionally, rolling it with the parchment paper helps retain its shape and makes unrolling and filling easier later on.

Can I freeze the Swiss roll?

Yes, you can freeze the Swiss roll! Wrap it tightly in plastic wrap and store it in a freezer-safe container. Thaw it in the refrigerator before serving for the best texture.

What’s the best way to store leftover Swiss roll?

Store leftover Choco Swiss Roll Delight in an airtight container in the refrigerator. It can last for about 3-4 days, maintaining its flavor and freshness.

What kind of cocoa powder should I use?

For optimal flavor, use unsweetened cocoa powder, preferably Dutch-processed, as it provides a rich, deep chocolate taste essential for the dessert.

Is it possible to make a mini version of this Swiss roll?

Yes! You can make a mini version by baking the sponge in a smaller pan and then following the same rolling and filling technique. It’s perfect for individual servings!

Can I add coffee flavor to the sponge?

Definitely! Adding instant coffee granules or espresso powder to your batter can enhance the chocolate flavor and create a delicious mocha Swiss roll.

What can I do if my sponge turned out dense?

If your sponge is dense, it may be due to overmixing the batter or not aerating the eggs enough. Ensure you whip the eggs well to incorporate air and fold in the dry ingredients gently.

How do I achieve the perfect cream texture for filling?

Whip the cream until stiff peaks form, ensuring not to overwhip, as this can lead to a grainy texture. Keep it chilled until ready to spread for the best results.

Is the Swiss roll gluten-free friendly?

Yes, you can make it gluten-free by using almond flour or a gluten-free all-purpose blend. Just be sure to adjust the proportions for the best results.

How can I make this recipe nut-free?

This recipe can be made nut-free by ensuring that all ingredients, especially the flour blend, are processed in a nut-free facility. Stick with traditional all-purpose flour for safety.

Additional Resources

For more delightful dessert recipes, check out our collections of cakes and pastries, where similar rolls and indulgent treats await your discovery. Explore technique guides that delve deeper into the world of baking, highlighting essential skills like whipping cream and proper mixing techniques.

Browse through ingredient information to learn more about selections and substitutions, enabling you to customize the Choco Swiss Roll Delight to suit your tastes. Additionally, consider equipment recommendations to ensure you have the best tools for your baking needs, elevating your kitchen game with ease.

Join the Conversation

We encourage you to share your own experiences and variations of the Choco Swiss Roll Delight. Post your photos and feedback on social media, and tag us to connect. Engage with our baking community by leaving your questions, sharing tips, or discussing successes—every story adds value and inspiration to our culinary journey.

Your reviews and suggestions help continual recipe improvements and enhance community learning. Help us create a supportive network of creativity and deliciousness as we explore the wonderful world of baking together.

The Recipe

Choco Swiss Roll Delight

Serves: 8 servings

Prep Time: 20 mins

Cook Time: 25 mins

Total Time: 45 mins

Kitchen Equipment Needed

  • Baking sheet
  • Parchment paper
  • Mixing bowl
  • Hand or stand mixer
  • Spatula
  • Plastic wrap

Ingredients

  • 4 large eggs
  • 1 cup granulated sugar
  • 1/2 cup all-purpose flour
  • 1/3 cup unsweetened cocoa powder
  • 1/4 teaspoon baking powder
  • 1/4 teaspoon salt
  • 1 cup heavy cream
  • 1/4 cup powdered sugar
  • 1 teaspoon vanilla extract

Directions

  1. Preheat your oven to 350°F (180°C) and line a baking sheet with parchment paper.
  2. In a mixing bowl, beat the eggs and granulated sugar together until light and fluffy.
  3. In a separate bowl, sift together flour, cocoa, baking powder, and salt.
  4. Gently fold the dry ingredients into the egg mixture until just combined.
  5. Spread the batter evenly in the prepared pan and bake for 20 minutes or until the cake springs back when pressed lightly.
  6. Once baked, remove from the oven and allow it to cool slightly before rolling.
  7. While cooling, in another bowl, whip heavy cream with powdered sugar and vanilla extract until stiff peaks form.
  8. Once the cake is cool, place it on a clean kitchen towel and carefully peel off the parchment paper.
  9. Spread the whipped cream filling evenly over the surface of the sponge.
  10. Gently roll the sponge using the towel to help guide it, starting from one end.
  11. Wrap the completed roll in plastic wrap and refrigerate for at least one hour before serving.
  12. Slice and enjoy your Choco Swiss Roll Delight!

Recipe Notes

  • For a rich chocolate experience, consider adding melted dark chocolate to your cream filling.
  • Make sure to dust with powdered sugar before serving for an elegant finishing touch.

Delicious Strawberry Buttercream Cake Recipe for Every Occasion

Strawberry Buttercream Cake: A Delightfully Sweet Treat

⚖️
Difficulty
Medium

⏲️
Prep Time
30 mins

🕒
Cook Time
30 mins

⏱️
Total Time
60 mins

🍽️
Servings
10

Looking for a dessert that seamlessly combines the sweetness of strawberries with the rich flavor of buttercream? Look no further than this Strawberry Buttercream Cake! This delightful cake layers fluffy vanilla sponge cake with a luscious strawberry buttercream, making it perfect for birthdays, anniversaries, or any celebration that calls for a special treat. Each bite is a heavenly experience – the creamy frosting perfectly complements the moist layers of cake, while fresh strawberries add a burst of flavor that makes this dessert unforgettable.

Let your taste buds dance with joy as you enjoy the perfect blend of textures and flavors. The lightness of the cake combined with the smooth, rich buttercream creates a delightful mouthfeel, making this Strawberry Buttercream Cake not just a dessert, but an indulgent experience. Whether you’re a seasoned baker or a novice in the kitchen, this recipe is designed to impress and satisfy anyone who takes a bite.

Quick Recipe Highlights

  • Flavor Profile: This cake features a harmonious sweetness from both the strawberries and the cake, complemented by a creamy, buttery richness from the buttercream.
  • Texture: The light sponge cake paired with fluffy buttercream creates a delightful contrast that melts in your mouth, enhancing the overall eating experience.
  • Aroma: The inviting aroma of freshly baked vanilla cake and strawberries wafts through the air, creating anticipation and excitement.
  • Visual Appeal: The vibrant pink hue of the buttercream and the fresh strawberries on top create a stunning centerpiece that grabs attention.
  • Skill Level Needed: While this cake has some complexities, it is approachable for anyone with basic baking skills.
  • Special Equipment: You’ll need a mixing bowl, electric mixer, cake pans, and pastry bags for decorating.

Recipe Overview

  • Difficulty Level: Medium – While the steps involve baking and frosting, they are manageable for any home baker willing to invest time and care.
  • Category: Dessert – This is a delicious cake suitable for a range of sweet occasions, whether served at a birthday party or as an afternoon treat.
  • Cuisine: American – This cake represents a classic American dessert, often featuring in celebrations and family gatherings.
  • Cost: Relatively low cost – With basic pantry staples and fresh strawberries, this dessert is both affordable and rewarding.
  • Season: Spring and Summer – Fresh strawberries peak during these seasons, making them ideal for this cake when they’re most flavorful.
  • Occasion: Perfect for birthdays, springtime picnics, or celebrating special moments with friends and family.

Why You’ll Love This Recipe

The Strawberry Buttercream Cake is a delightful treat that appeals to all ages. Its light, airy sponge cake pairs beautifully with the creamy buttercream, creating a perfect balance of flavors that makes each bite special. The sweetness of the strawberries is enhanced by the lush buttercream, making it irresistible.

This cake is also incredibly convenient to prepare. It doesn’t require any advanced baking techniques or specialized equipment, making it accessible to novice bakers. You can whip it up in a little over an hour and have a beautiful cake ready to impress your guests.

Additionally, strawberries provide not only sweetness but also nutritional benefits, contributing vitamins and antioxidants to your dessert. This means you can enjoy your cake guilt-free while treating yourself to a little bit of health.

The social aspect of serving this cake at gatherings is priceless. It brings people together, sparking joy and conversation. Everyone loves a slice of cake, and the strawberry flavor often evokes warm memories and happy moments.

Finally, the cost-effectiveness of this cake is a major plus. Using simple ingredients that you probably have at home, along with the affordability of strawberries during their peak season, makes this cake a delightful, budget-friendly dessert option.

Historical Background and Cultural Significance

The roots of the Strawberry Buttercream Cake can be traced back to American baking culture, where cakes have been an essential part of celebrations for generations. Cakes have been traditionally used in various ceremonies, marking milestones in life, and the Strawberry Buttercream variant stands out due to its delightful flavor profile and its use of fresh fruit.

Culturally, strawberries have held a symbolic meaning for many traditions, often representing abundance and warmth. Their bright color and sweet taste make them a favorite in dessert recipes, enhancing the celebratory feel of any event.

Over the years, recipes have evolved, incorporating different techniques and flavor combinations, but the essence of enjoying a beautifully layered cake remains. Many families have their unique takes on the Strawberry Buttercream Cake, often passed down through generations, preserving the family’s culinary legacy.

Regional variations of the Strawberry Buttercream Cake also exist. In some parts of the United States, bakers might substitute the strawberry buttercream with other fruit flavors depending on seasonal availability, making it a versatile recipe that adapts to local tastes and traditions.

Ingredient Deep Dive

1. Strawberries:
Strawberries are much loved for their sweet and tangy flavor. They are rich in vitamins, particularly vitamin C, which boosts the immune system. When selecting strawberries, look for firm, vibrant-colored berries with a fresh green cap. Store them in the fridge to prolong freshness, and use them within a few days for the best flavor. If fresh strawberries aren’t available, you can also use frozen strawberries; just ensure they are thawed and drained properly.

2. Butter:
Butter is a crucial ingredient that brings richness and flavor to the cake. It also adds moisture, creating a tender crumb. Always choose high-quality unsalted butter for baking as it allows you to control the saltiness of your recipe. Butter should be at room temperature for improved incorporation into the batter. For storage, keep butter in the fridge, and you can freeze it for up to six months. Substitutions include margarine or non-dairy butter for lactose-intolerant individuals.

3. All-Purpose Flour:
This staple ingredient is responsible for the cake’s structure. Choose a fine-milled flour for a lighter texture. Flour should be stored in an airtight container in a cool, dry place for freshness. If you require a gluten-free option, consider using almond flour or a gluten-free flour mix tailored for baking.

4. Eggs:
Eggs add richness and moisture to the cake, and they help in leavening as well. When selecting eggs, look for fresh eggs from reputable sources. They can be stored in the refrigerator and have a long shelf life. For egg substitutes, you can use flaxseed meal or commercial egg replacers for vegan options, though the texture might slightly change.

Common Mistakes to Avoid

  • Not measuring ingredients accurately can lead to a dense or dry cake. Use a digital scale or measuring cups for precision.
  • Overmixing the batter will incorporate too much air, resulting in a tough texture. Mix just until the ingredients are combined.
  • Baking at the wrong temperature can affect the rise and texture. Always preheat your oven before placing the cake inside.
  • Not allowing the cake layers to cool before frosting can result in melted buttercream and a mess.
  • Using cold ingredients can result in poor emulsification. Remember to let eggs and butter sit at room temperature.
  • Skipping the use of parchment paper may cause sticking. Line your pans for easy removal.
  • Using low-quality butter can alter the flavor. Invest in good quality for the best results.
  • Not leveling cake layers can lead to a lopsided cake. Use a serrated knife to ensure they are even.
  • Forgetting to wipe your mixing bowls clean after incorporating butter can lead to residual fat that alters the frosting texture.
  • Underestimating the importance of chilling the decorated cake can cause the buttercream to melt or smudge during transport.

Essential Techniques

1. **Creaming Butter and Sugar**: This technique is crucial for achieving a light, fluffy texture in your cake. By incorporating air into the butter, you create a structure that helps the cake rise. Master this by gradually adding sugar to room temperature butter and beating until pale and fluffy, about 3-5 minutes. A common pitfall is not creaming long enough; watch for the mixture to turn light and visibly increase in volume.

2. **Folding in Dry Ingredients**: When incorporating flour and other dry ingredients, it’s essential to fold gently to avoid deflating the batter. Use a spatula and a gentle up-and-over motion to combine without losing the volume. The aim is to maintain the air trapped during creaming, so be cautious of mixing too hard. Visual cues for success include a batter that’s just combined with some streaks of flour remaining – it will finish mixing in the oven.

3. **Whipping Egg Whites**: Whipping egg whites is key to adding volume and lightness to certain cake recipes. Ensure the bowl and beater are clean and dry, as any fat can prevent whites from whipping up properly. Beat until stiff peaks form; this means the whites stand tall rather than drooping. A common mistake is over-whipping, which can result in dry and grainy egg whites. Stop when they hold their shape perfectly.

4. **Making Buttercream**: A classic buttercream is created by beating room temperature butter until smooth and creamy before gradually adding powdered sugar. To avoid graininess, sift the sugar and add milk or cream to achieve the desired consistency. Common pitfalls include incorporating too much sugar too quickly or using cold butter, which won’t mix properly. The buttercream should be light and spreadable; if it looks too thick, add a splash of milk.

Pro Tips for Perfect Strawberry Buttercream Cake

1. Use fresh, in-season strawberries for the best flavor. They should be ripe and sweet, enhancing the overall taste of the cake.

2. Chill your frosting before applying it to the cake, as this helps to stabilize it and makes it easier to work with.

3. Level your cake layers using a serrated knife to ensure even frosting and stacking.

4. Experiment with different flavor extracts (like vanilla or almond) in your buttercream to elevate the overall flavor profile.

5. Allow the cake to sit for a few hours before serving. This lets the flavors meld beautifully while keeping it moist.

6. Decorate with extra strawberry slices and sprigs of mint for a beautiful presentation and added flavor.

7. Make sure your butter is at room temperature to achieve the best consistency for both the cake and frosting.

8. If you notice your cake doming upwards, gently press down while it cools to help maintain even layers.

Variations and Adaptations

You can add a twist to the basic Strawberry Buttercream Cake by experimenting with various flavors. For example, consider incorporating lemon zest in the batter for a refreshing citrus kick. Different berry combinations—like raspberries or blueberries—can also provide a delightful alternative to strawberries.

When it comes to seasonal adaptations, utilizing pumpkin puree in the winter can create a rich, spiced version of the cake. This makes it perfect for holiday gatherings. Dietary modifications, like using coconut cream in the buttercream, can cater to vegan needs without sacrificing flavor.

For a fun texture variation, consider adding crushed nuts, such as almonds or walnuts, to the batter for contrasting bites and added crunch. Presentation alternatives, such as making mini cakes or cupcakes, can provide a beautiful array of desserts suitable for a buffet or celebration.

Serving and Presentation Guide

When serving this Strawberry Buttercream Cake, consider adding a layer of sliced strawberries in between the cake layers for added flavor and visual appeal. A simple yet effective plating technique involves presenting each slice on a decorative plate alongside a dollop of whipped cream or a scoop of vanilla ice cream.

For garnish, consider sprinkling fresh mint leaves or edible flowers to enhance its aesthetics. If serving at an event, aim for a tiered display, showcasing the cake’s height and layered beauty. It’s also vital to consider serving temperatures; the cake is best enjoyed at room temperature, which enhances its flavor profile.

Portion control is important – cut even, manageable slices to ensure your guests enjoy the dessert without overwhelming portions. Consider providing cake forks for aesthetic appeal while enhancing the overall dessert experience.

Wine and Beverage Pairing

For the ultimate pairing experience, consider a glass of sparkling wine, such as Prosecco or Champagne. The effervescence cuts through the richness of the cake while complementing the sweetness of the strawberries beautifully.

If you’re looking for non-alcoholic alternatives, a refreshing lemonade or iced tea works well, providing a citrusy balance to the dessert. For a warm accompaniment, herbal teas like chamomile or mint can enhance the cake experience without overpowering it.

Temperature considerations are essential; serve the wine chilled and the cake at room temperature for the best flavor experience. This balance ensures a pleasant pairing that enhances both the cake and your beverage of choice.

Storage and Shelf Life

To ensure your Strawberry Buttercream Cake stays fresh, store it in an airtight container in the refrigerator. Properly stored, it can last up to three days, though it’s best enjoyed fresh. If it’s decorated with buttercream, expect a slight firming in texture as it cools.

If you wish to extend shelf life, you can freeze the cake. Wrap it tightly in plastic wrap and then in aluminum foil. This keeps the cake fresh for up to three months. To serve, allow it to thaw in the refrigerator overnight before letting it come to room temperature.

Signs of spoilage include discoloration or an off smell, signaling that it’s best to dispose of the cake. Reheating is not recommended for this dessert, as it can compromise both taste and texture.

Make Ahead Strategies

To streamline your baking process, consider preparing the cake layers and buttercream a day in advance. Bake the layers, allow them to cool, and wrap them tightly in plastic wrap. Store them in the fridge until you’re ready to frost them.

The buttercream can also be made ahead and stored in an airtight container. When it’s time to decorate, re-whip the buttercream for a few minutes to restore its fluffy texture. This allows you to assemble the cake quickly without compromising quality.

Fresh element additions, like strawberries, should be added just before serving. This ensures they maintain their freshness and visual appeal. If you’re assembling the cake in advance, consider placing parchment between the layers to prevent sticking and preserve appearance.

Scaling Instructions

When halving the Strawberry Buttercream Cake recipe, scale down the ingredients accordingly, and use smaller cake pans to ensure even baking. Baking times can slightly decrease, so monitor your cakes as they bake.

For doubling or tripling the recipe, use larger mixing bowls and pans to accommodate the additional batter. Adjust your baking times as needed; cakes may take longer to bake, so be sure to check with a toothpick for doneness.

Make sure to scale your frosting ingredients to maintain balanced ratios for the best flavor and texture. Consider the size of your equipment, as larger quantities may require multiple baking sessions, especially if using smaller pans.

Nutritional Deep Dive

In every slice of Strawberry Buttercream Cake, you’ll enjoy a delightful balance of macronutrients. The cake provides carbohydrates from the sugar and flour while fats come primarily from the butter, creating a rich, satisfying dessert.

Micronutritionally, strawberries add valuable vitamins such as vitamin C and potassium, complementing the cake’s overall nutrient profile. This fruit elevates the dessert’s health benefits compared to other sugary treats.

However, due to the sugars and fats involved, portion control is key for weight management. Enjoy a moderate slice to satisfy your sweet tooth without excessive indulgence. Offering a fruit-rich dessert like this aligns well with health-conscious choices, balancing treat with nutrition.

Dietary Adaptations

To adapt this Strawberry Buttercream Cake for gluten-free diets, consider using a gluten-free all-purpose flour blend. This allows individuals with gluten sensitivities to enjoy this delightful dessert without concern.

For dairy-free options, substitute butter with coconut oil or a plant-based butter alternative. Use non-dairy milk and dairy-free cream cheese for the buttercream to maintain rich flavors while accommodating dietary restrictions.

Vegan adaptations can easily replace eggs with flaxseed meal or chia seeds mixed in water. This results in a surprisingly similar texture and flavor, keeping the cake inclusive for all.

Low-carb and keto variations may use almond flour instead of regular flour, and sugar substitutes like erythritol or stevia can help reduce the overall carbohydrate content significantly.

Troubleshooting Guide

If you encounter texture issues like a dense cake, ensure that you’re measuring flour accurately and not overmixing the batter. A light and airy cake should be the ultimate goal.

Flavor balance problems can arise if you’re using low-quality ingredients. Always use fresh, high-quality butter and sugar to enhance the overall taste. Additionally, adding a pinch of salt can elevate sweetness.

Temperature problems often stem from an uncalibrated oven. Ensure your oven is properly preheated, and use an oven thermometer to confirm accurate baking temperatures. If the cake is browning too quickly, tent it with foil.

For equipment challenges, familiarize yourself with your mixer to understand its power. Know when it’s ready to whip and incorporate ingredients so you can achieve the right texture without mishaps.

If ingredient substitutions affect the outcome, keep a close eye on texture and taste. It’s essential to be adaptable and willing to adjust based on what you have available in your pantry.

Recipe Success Stories

Many bakers have shared their delightful experiences with the Strawberry Buttercream Cake, highlighting how well it turned out for various celebrations. This cake has proven to be a crowd-pleaser, with families serving it for birthdays, picnics, and holiday gatherings.

Readers often express their excitement when they adapt the recipe, noting how versatile it is for different fruit variations. Success stories from those who have made it gluten-free or dairy-free demonstrate the cake’s accessibility to everyone in their families.

Photography submissions show not only successful cake layers but also imaginative presentations, showcasing how creativity can elevate the standard cake recipe. Sharing these experiences strengthens the community around this beloved dessert.

Adaptation stories frequently inspire other readers, with new flavor combinations or ingredient swaps. These success stories often highlight the joy this simple recipe brings, encouraging even novice bakers to give it a try.

Frequently Asked Questions

1. Can I use frozen strawberries for the buttercream?
Yes, frozen strawberries can be used, but ensure they are fully thawed and drained to avoid excess moisture that can affect the consistency of the buttercream.

2. How should I store leftover cake?
Store leftover cake in an airtight container in the refrigerator for up to three days. It’s best served at room temperature.

3. Can I make this cake ahead of time?
Yes, the cake layers can be baked and wrapped in plastic wrap a day in advance. Prepare the buttercream the day of decorating for the best texture.

4. What can I use if I don’t have butter on hand?
You can substitute butter with coconut oil or margarine, maintaining similar ratios, though the flavor may vary slightly.

5. How do I achieve a fluffy buttercream?
Make sure your butter is room temperature before creaming, and gradually add powdered sugar. Whip for a few minutes until light and fluffy.

6. Is there a vegan alternative for this recipe?
Yes! Use plant-based butter and replace eggs with flaxseed meal mixed with water. You can also use almond or coconut milk in the batter.

7. Can I freeze the cake?
Yes! Wrap the cooled cake tightly in plastic wrap and aluminum foil, and freeze for up to three months.

8. How can I make the cake less sweet?
Try reducing the sugar in the cake and buttercream by a third or adding a pinch of salt to balance the flavors.

9. What flavor variations can I try?
You can experiment with other fruit flavors, like raspberry or lemon, by substituting berries or adding citrus zest.

10. Can I make mini versions of this cake?
Absolutely! Use smaller cake pans to create individual servings, adjusting the baking time appropriately.

Additional Resources

To further enhance your baking skills, explore related recipes that pair beautifully with your Strawberry Buttercream Cake, such as lemon curd tarts or refreshing fruit salads. Technique guides on mastering cake decoration can also serve you well as you wow your guests with your presentation skills.

Learn more about your ingredients, their origins, and uses in baking. Familiarize yourself with recommendations for cake pans and mixers that elevate the baking experience, ensuring your success each time.

Additionally, consider exploring seasonal variations that incorporate fresh produce as they become available, allowing your recipes to change with the seasons while maintaining a delicious flavor.

Join the Conversation

We invite you to share your Strawberry Buttercream Cake experiences on social media! Snap a photo of your beautiful creation and use the hashtag #StrawberryButtercreamCake. Engage with our community by sharing tips, tricks, and modifications that you’ve enjoyed.

Posting recipe reviews and feedback not only helps improve the recipe but also inspires others to try their hand at it. Let’s build a community where food lovers can suggest ideas and share their success stories, creating a network of culinary creativity focused on delicious desserts.

The Recipe

Strawberry Buttercream Cake

Serves: 10

Prep Time: 30 mins

Cook Time: 30 mins

Total Time: 60 mins

Kitchen Equipment Needed

  • Mixing bowl
  • Electric mixer
  • Cake pans
  • Pastry bags for decorating
  • Serrated knife for leveling

Ingredients

  • 2 cups all-purpose flour
  • 1 ½ cups granulated sugar
  • ½ cup unsalted butter, softened
  • 3 large eggs
  • 1 cup whole milk
  • 2 tsp baking powder
  • ½ tsp salt
  • 1 tsp vanilla extract
  • 1 cup strawberries, pureed for buttercream
  • 1 cup unsalted butter, softened for frosting
  • 4 cups powdered sugar

Directions

  1. Preheat oven to 350°F (175°C). Grease and flour two 9-inch round cake pans.
  2. In a mixing bowl, cream together the butter and granulated sugar until light and fluffy.
  3. Add the eggs one at a time, mixing well after each addition. Stir in vanilla extract.
  4. In another bowl, combine flour, baking powder, and salt. Gradually add to the butter mixture, alternating with milk until well combined.
  5. Pour the batter evenly into the prepared pans and bake for 30 minutes, or until a toothpick comes out clean.
  6. Allow cakes to cool in pans for 10 minutes before transferring to a wire rack to cool completely.
  7. While the cakes cool, prepare the buttercream by creaming the softened butter, then gradually adding the powdered sugar and the strawberry puree until smooth and fluffy.
  8. Once cooled, level the cake layers if needed, and place one layer on a serving plate. Spread a layer of strawberry buttercream over it.
  9. Top with the second layer and frost the top and sides of the cake with remaining buttercream.
  10. Decorate with fresh strawberries on top, and chill the cake before serving.

Recipe Notes

  • For added flavor, consider incorporating lemon zest into the batter.
  • Optional: Add food coloring to the buttercream for a vibrant look.
  • Store any leftover cake in an airtight container in the refrigerator.

Best Maple Bacon Waffle Burger Recipe for Breakfast Lovers

Maple Bacon Waffle Burger: A Sweet and Savory Delight

⚖️
Difficulty
Medium

⏲️
Prep Time
20 mins

🕒
Cook Time
15 mins

⏱️
Total Time
35 mins

🍽️
Servings
4

The Maple Bacon Waffle Burger is a delightful fusion that elevates your burger experience. Imagine crispy, salty bacon paired with a fluffy maple syrup-infused waffle, creating a sweet and savory combination that dances delightfully on your palate. The warmth of the maple syrup’s sweetness complements the richness of the ground beef patty, while the crispy bacon adds a satisfying crunch. This recipe is not just a meal, but a celebration of flavor and indulgence, making it perfect for brunch or dinner gatherings.

Get ready to impress your family and friends with this unique culinary creation. The process may involve a few steps, but the rewarding outcome will be worth every moment spent in the kitchen. Bite into layers of flavor and texture—soft waffle, juicy burger, crisp bacon, and a hint of maple melting into every savory bite. This dish goes beyond typical burgers and leaves you craving more!

Quick Recipe Highlights

  • Flavor Profile: This dish features a heavenly mix of sweet maple syrup, salty bacon, and savory beef, resulting in an explosion of taste that tantalizes the taste buds.
  • Texture: The contrast between the fluffy waffle, crispy bacon, and juicy burger creates a wonderful mouthfeel that is irresistibly satisfying.
  • Aroma: The aroma of sizzling bacon and fresh waffles fills the air, inviting everyone to the table to experience its mouth-watering allure.
  • Visual Appeal: Beautifully presented, the golden brown waffles and darkened, grilled patty topped with perfectly crispy bacon make this dish a feast for the eyes.
  • Skill Level Needed: This recipe requires basic cooking skills, making it accessible for novice cooks looking to create something impressive.
  • Special Equipment: A waffle maker is essential for this recipe, along with a grill or frying pan for cooking the burger.

Recipe Overview

  • Difficulty Level: The Maple Bacon Waffle Burger is classified as medium difficulty due to the coordination of multiple components, including cooking the patties and waffles simultaneously.
  • Category: Primarily served as a brunch item, this dish can easily transition into a hearty dinner option that will impress any guest.
  • Cuisine: Rooted in American comfort food traditions, this burger showcases the creativity of combining breakfast and traditional burger elements into a delightful twist.
  • Cost: The estimated cost for making this recipe is relatively budget-friendly, particularly as the main ingredients can be sourced affordably in most grocery stores.
  • Season: Ideal for any season but particularly enjoyed during late spring and summer when outdoor grilling is appealing and picnic gatherings are abundant.
  • Occasion: Perfect for weekend brunches, family gatherings, or a casual cookout with friends, making any occasion festive and delicious.

Why You’ll Love This Recipe

The Maple Bacon Waffle Burger is beloved for its robust taste and delightful textures. Combining sweet and savory gives it an edge over traditional burgers. Each bite provides satisfaction that mainstream burgers often lack. It serves as a comfort food for many, transcending regular meal boundaries.

Convenience is another reason this recipe shines. With simple ingredients and straightforward instructions, you can whip this gourmet burger up in under 40 minutes. You’ll enjoy a delicious homemade bite that is perfect for last-minute entertaining or family breakfasts.

The nutritional aspect cannot be overlooked, either. This recipe incorporates protein from the burger and bacon, providing necessary sustenance, while the waffles can be made using whole grain options for added fiber.

Socially, it appeals to a range of tastes, making it an excellent centerpiece for any gathering. Sharing this unique dish will spark conversation and delight your guests, ensuring everyone leaves satisfied and raving.

Finally, it is cost-effective. Using common ingredients that can often be found in your fridge or pantry means little fuss and maximum flavor, allowing you to serve a gourmet experience without breaking the bank.

Historical Background and Cultural Significance

Originating in the US, the concept of the burger has evolved drastically since its inception in the 19th century. The combination of waffles and burgers specifically is a delightful contemporary twist reflecting modern culinary creativity.

Within American culture, burgers represent comfort food. By merging this beloved dish with breakfast elements, such as waffles and bacon, it recognizes the role of brunch in socializing and community, bridging casual meals with more celebratory dining.

This recipe showcases how American cuisine continues to evolve, creating novel dishes that reflect current food trends focused on fusion and unique pairings.

Waffle burgers have seen a rise in popularity within food trucks and street styles, showcasing local variations that contribute to culinary exploration and the revival of classic flavors with innovative approaches.

Ingredient Deep Dive

Bacon: Bacon holds a significant place in culinary history, particularly within American and European cuisines. It’s revered for its flavor and crispy texture, used in various dishes from breakfast delights to salads. Nutritionally, it provides protein and fats, and can be stored in the refrigerator for several weeks. For those looking to make substitutions, turkey bacon is a popular alternative with lower fat content.

Burger Patty: The classic beef patty serves as the heart of this recipe. Ground beef’s history in cooking stretches back centuries, celebrating its high-protein content. When selecting, choose high-quality, lean cuts for better flavor and health benefits. Alternatives like ground turkey or plant-based patties can easily replace beef for dietary needs.

Waffle Batter: Made from simple ingredients, waffle batter is a staple for breakfast. Its cultural significance relates to the ease of preparation and versatility in sweet or savory dishes. Nutritionally, opt for whole grain flours for added fiber. Storing unused batter is easy; just keep it refrigerated and use within a few days. You can also make gluten-free versions using almond or coconut flour.

Common Mistakes to Avoid

  • Using thick bacon: Avoid using very thick bacon, as it may not crisp up properly when cooked alongside the waffles.
  • Overcooking the burger: Cooking the burger too long can lead to a dry texture, so aim for medium doneness for optimum juiciness.
  • Waffle batter too thick: A batter that’s too thick may result in dense, chewy waffles. Ensure it’s pourable for the best outcome.
  • Not preheating the waffle maker: Always preheat your waffle iron to achieve a crispy outer layer on the waffles.
  • Skipping seasoning: Failing to season your burger patties will lead to bland taste; always incorporate salt and pepper into the meat mixture.
  • Assembling too early: Wait until the waffles and burgers have cooled slightly before stacking to avoid sogginess from steam.
  • Using incorrect oil: Using an oil with a low smoking point may lead to burnt flavors; opt for canola or vegetable oil for frying.
  • Not letting the waffle iron rest: Avoid opening the waffle maker too soon; allow it to cook the waffles fully for an optimal texture.
  • Overloading with toppings: While toppings are great, too many can make the burger unwieldy and difficult to eat.
  • Lack of diversity in the seasonings: Using varied spices will enhance the overall flavor profile significantly.

Essential Techniques

To master the art of cooking bacon, start with a cold skillet; this allows it to render the fat gradually while achieving perfect crispness. Watch for a golden brown color and avoid high heat.

For the burger patties, ensure that you handle the meat minimally when forming the patties; overworking the mixture can lead to tough burgers. Cooking the patties should be done on medium-high heat, allowing for a good sear while maintaining moisture inside.

When preparing the waffle batter, it’s essential to fold it gently. This technique helps to incorporate air, resulting in fluffy waffles. A good indicator of doneness is a crisp outer layer and an effortless release from the waffle iron.

Pro Tips for Perfect Maple Bacon Waffle Burger

Ensure your waffle iron is well-greased to prevent sticking and allow for easy removal of waffles.

Cook bacon until crispy but not burnt as the flavors will enhance your burger immensely.

Consider smoking the burger patties to add an additional layer of depth to your dish.

Use fresh herbs such as thyme or parsley sprinkled on top for a touch of freshness.

Opt for maple syrup with a rich flavor to elevate the overall taste experience.

Let the burgers rest a few minutes after cooking to retain juiciness when you cut into them.

For a gourmet feel, serve with a side of arugula and pickled red onions for balance.

Variations and Adaptations

Regional variations can feature local cheeses, like pepper jack or gouda, melted over the burgers before serving. Seasonal adaptations might include adding ripe summer tomatoes or avocados for a fresh twist in the warmer months.

For dietary modifications, you may substitute with plant-based patties for a vegan option. Gluten-free waffles can be made with almond flour for those avoiding gluten.

Flavors can be adapted by mixing different syrups like blueberry or agave alongside the maple, offering complexity while keeping it sweet.

Texture variations can include using crispy fried onions as an additional topping for crunch or avocados for creaminess.

Serving this dish on a bed of greens instead of traditional buns can switch up the presentation entirely, catering to a more health-conscious crowd.

Serving and Presentation Guide

For plating, stack the burger high on the waffle and drizzle with syrup to create an enticing look. Use a toothpick to hold the burger together and add decorative herbs as garnishing.

Consider traditional accompaniments like fried eggs on top, adding visual appeal and additional flavor layers.

Temperature considerations are vital; ensure that the burger is warm, and the waffles are freshly made, providing an inviting experience.

Portion control is simple, considering keeping the burger’s size manageable for guests to enjoy without overwhelming bites.

Wine and Beverage Pairing

For wine pairings, go for a medium-bodied Chardonnay that complements the richness of the burger and sweetness of the waffles beautifully.

Non-alcoholic alternatives could include sparkling apple cider that harmonizes with the maple syrup flavors without overpowering the dish.

If coffee or tea is more your style, a light roast coffee can enhance the flavors of the sweet and savory burger in a remarkable way.

Storage and Shelf Life

Store leftover waffles and burger patties separately in airtight containers in the fridge for up to three days. Reheat in an oven or air fryer for optimal texture preservation.

Avoid keeping assembled burgers for longer periods as they will become soggy; instead, freeze cooked components separately for up to three months.

Signs of spoilage include an off smell from the burger patties or mold on the waffles; always check for freshness before consumption.

Make Ahead Strategies

You can prepare waffle batter a day in advance; simply refrigerate it until ready to use. This way, you’ll facilitate a faster cooking process during your meal preparation.

Cooked bacon and burger patties can be stored in the fridge, ready to be reheated just before assembly for a quick meal.

With assembly tips, keep waffles crisp by stacking burgers and toppings just before serving. Fresh ingredients can be added at this time for preservation of quality.

Scaling Instructions

To halve the recipe, simply divide all ingredients in half, making it manageable for smaller groups or individuals.

Doubling or tripling will require extra waffle makers or cooking in batches to maintain quality; adjust timing slightly as needed.

When scaling, always consider storage; consistent rotation and ensuring the freshest ingredients lead to better overall taste.

Nutritional Deep Dive

This recipe offers a balanced macro breakdown, featuring protein from the beef patties and bacon, carbs from the waffles, and fats from cooking oils.

Micronutrient-wise, bacon provides essential nutrients like B vitamins, while using whole-grain flour in waffles increases fiber intake.

For dietary considerations, those with dietary restrictions can adjust the ingredients to suit their preferences without losing the essence of the dish.

Dietary Adaptations

For gluten-free diners, substitute traditional breading and flour options with rice flour or gluten-free mixes suitable for waffles.

Dairy-free versions can be achieved by replacing butter with coconut oil or non-dairy butter substitutes, allowing everyone to enjoy flavor-rich waffles.

Vegan adaptations can simplify the recipe by using vegan patties made from beans or lentils, providing protein while avoiding animal products.

Troubleshooting Guide

Texture issues often stem from overcooking; ensure a reasonable cooking time for patty tenderness while keeping waffles fluffy.

For flavor balance, under-seasoned burger patties can be corrected by adding more seasoning during the formation step.

If cooking temperatures are inconsistent, investing in a good meat thermometer helps achieve the desired doneness every time.

Recipe Success Stories

Feedback from the community highlights the versatility of this recipe, with many sharing personal variations and creative adaptations for different taste preferences.

Readers often report less than typical flavor expectations, finding new favorite twists on the classic burger and waffle combination.

Photography tips suggest capturing the dish as it is assembled for an inviting, social-media-worthy presentation, showcasing that it is not only delicious but very Instagrammable!

Frequently Asked Questions

Q1: Can I use frozen waffles for this recipe?

A1: Yes, frozen waffles can work; however, homemade waffles tend to add a fresher flavor and texture that enhances the overall experience.

Q2: Can the Waffle Burger be made ahead of time?

A2: Components can be prepped ahead; store everything in the refrigerator and assemble shortly before serving to maintain freshness.

Q3: How do I prevent waffles from sticking to the waffle iron?

A3: Always ensure your waffle iron is preheated and well-greased to prevent sticking and make removal easier.

Q4: What’s the best way to reheat leftover burgers?

A4: Reheat in an oven or air fryer to retain crispness rather than using a microwave, which can create a soggy texture.

Q5: How can I add more flavors to the burger?

A5: Try adding cheese, sautéed onions, or mushrooms, or use infused oils or seasonings to elevate the overall taste.

Q6: What type of bacon works best?

A6: Thick-cut bacon is preferred for its ability to crisp up nicely without becoming overly greasy when cooked.

Q7: Is this recipe suitable for meal prepping?

A7: Yes, you can meal prep the components separately for easy assembly throughout the week, just ensure to store correctly.

Q8: Can I use different meats for the patty?

A8: Absolutely! Ground turkey, chicken, or even plant-based substitutes like lentils work nicely for variety.

Q9: What is the best way to serve these burgers?

A9: Serve immediately post-assembly drizzled with maple syrup, along with fresh greens or seasonal sides for added balance.

Q10: How can I make a healthier version of the Waffle Burger?

A10: Substitute leaner meat, use whole grain waffles, and offer toppings like avocado and greens instead of heavier sauces for a nutritious twist.

Additional Resources

To explore similar recipes, consider trying out egg and cheese sandwiches or gourmet pancake stacks for delightful breakfast experiences.

For cooking techniques, check out guides on perfecting your waffle-making skills or grilling burgers perfectly every time.

If you’re interested in ingredient information, consider researching the benefits and uses of alternative flours or meats.

Join the Conversation

Share your experiences making the Maple Bacon Waffle Burger over social media, engaging with our community for additional tips and variations.

Invite your followers to share their unique twists on the recipe or how they enjoyed the burger at gatherings, enhancing the recipe’s charm.

Take part in food photography tips to present not just this dish, but every homemade creation beautifully on your platforms to inspire others.

The Recipe

Maple Bacon Waffle Burger

Serves: 4

Prep Time: 20 mins

Cook Time: 15 mins

Total Time: 35 mins

Kitchen Equipment Needed

  • Waffle maker
  • Skillet or grill
  • Mixing bowl
  • Measuring cups and spoons
  • Spatula

Ingredients

  • 1 lb ground beef
  • 8 slices thick-cut bacon
  • 2 cups all-purpose flour
  • 2 tablespoons sugar
  • 1 tablespoon baking powder
  • 1/2 teaspoon salt
  • 2 large eggs
  • 1 3/4 cups milk
  • 1/4 cup melted butter
  • 1/2 cup maple syrup (plus more for serving)

Directions

  1. Begin by cooking the bacon in a skillet until crispy. Drain on paper towels and set aside.
  2. In a large bowl, mix together the flour, sugar, baking powder, and salt for the waffle batter.
  3. In a separate bowl, whisk together eggs, milk, melted butter, and maple syrup. Combine with the dry ingredients until just mixed; do not overmix.
  4. Heat the waffle maker, and cook waffles according to the manufacturer’s instructions.
  5. While the waffles are cooking, form the ground beef into patties and season with salt and pepper. Cook in a skillet or grill until desired doneness.
  6. Once waffles and patties are cooked, assemble your burger by placing a patty on a waffle, top with crispy bacon and additional maple syrup, another waffle on top, and serve immediately.

Recipe Notes

  • Feel free to experiment with different toppings like sliced avocados or fried eggs.
  • If you prefer a spicier flavor, add jalapeños or pepper jack cheese to the burger.
  • These burgers can also be made using alternative flours for a gluten-free option.

Indulge in Decadent Peanut Butter Cup Gooey Cookie Bars

Delicious Peanut Butter Cup Gooey Cookie Bars: A Sweet Indulgence

⚖️
Difficulty
Easy

⏲️
Prep Time
15 mins

🕒
Cook Time
25 mins

⏱️
Total Time
40 mins

🍽️
Servings
12 bars

Peanut Butter Cup Gooey Cookie Bars are the ultimate treat for any dessert lover. With a rich peanut butter flavor complemented by chocolate, these bars are decadent yet easy to make. The combination of buttery cookie dough mixed with creamy peanut butter and melted chocolate creates an indulgent experience that tantalizes the taste buds. Each bite delivers a sensation of warmth and comfort, making these cookie bars perfect for sharing with friends, family, or enjoying as a late-night snack.

The process of making these gooey cookie bars is as enjoyable as devouring them. The aroma fills your kitchen with sweet, nutty notes while the chocolate and peanut butter melt together to form a delightful filling. These bars not only satisfy your sweet cravings but also evoke nostalgia, reminiscent of childhood treats. Their visually appealing layers, with a golden brown top and gooey chocolate center, make them a standout dessert for gatherings or quiet evenings at home.

Quick Recipe Highlights

  • Flavor Profile: The rich peanut butter flavor combined with sweet chocolate creates a perfect balance of savory and sweet.
  • Texture: These bars deliver a gooey center encased in a perfectly baked cookie layer, offering a delightful contrast between the chewy cookies and creamy filling.
  • Aroma: The warm, inviting scent of melting chocolate and roasted peanuts adds to the overall indulgence of the recipe.
  • Visual Appeal: Golden-brown layers over a luscious, gooey chocolate center make for an irresistible dessert showcase.
  • Skill Level Needed: This recipe is simple, perfect for novice bakers looking to impress with minimal effort.
  • Special Equipment: All you need is a mixing bowl, a baking pan, and a reliable oven to create this mouthwatering treat.

Recipe Overview

  • Difficulty Level: This recipe is categorized as easy due to its straightforward steps and minimal ingredients, making it accessible for all skill levels.
  • Category: Dessert bars – a popular option for potlucks, parties, or simply as a satisfying treat at dinner.
  • Cuisine: Primarily influenced by American baking traditions, this recipe combines classic flavors that resonate with many dessert lovers.
  • Cost: The ingredients are affordable, typically costing around $10-15, depending on brand choices and sales.
  • Season: These cookie bars are ideal for all seasons, particularly in the fall and winter when comfort food is especially valued.
  • Occasion: Perfect for birthdays, holiday gatherings, or casual get-togethers with friends.

Why You’ll Love This Recipe

With each bite of Peanut Butter Cup Gooey Cookie Bars, expect a perfect balance of sweetness and saltiness. The richness of peanut butter combined with chocolate makes for a heavenly experience, bringing satisfaction that lingers. The texture contrast between the crunchy cookie layer and the gooey filling excites your palate.

Convenience is another highlight. This recipe allows for quick preparation and baking, providing a delightful dessert in just about 40 minutes. It calls for common ingredients found in most kitchens, eliminating the need for a special shopping trip. Families can easily make these together, enjoying the baking process and bonding over sweet treats.

Nutritionally, while indulgent, peanut butter offers protein and healthy fats, making these cookie bars slightly more substantial than average desserts. This unique twist makes you feel good sharing them as treats for kids and adults alike. Plus, these bars can satisfy your sweet tooth without being overly rich, keeping you coming back for more.

Socially, these bars serve as conversation starters when shared at gatherings. Friends will marvel at your baking skills when you present this deliciously baked dessert, inviting them to share their own fond reminiscences of peanut butter treats from their childhood. The joy of sharing something homemade adds to their allure.

Cost-effectiveness can’t be overlooked. Given their affordability and the yield of a dozen bars, you’ll find them to provide excellent value. With minimal effort and expense, you can provide satisfaction to a crowd, making them an ideal option for any casual event or family function.

Historical Background and Cultural Significance

Peanut butter has a rich history in American cuisine dating back to the late 19th century when it was first patented in the United States. Initially popularized as a health food, peanut butter soon found its place in countless desserts, including cookies and bars. The combination of chocolate and peanut butter emerged as a classic duo, favored by many dessert enthusiasts.

The cultural importance of peanut butter extends beyond its flavor; it represents comfort and nostalgia for many. In numerous households, treats made with it are a staple at holiday gatherings and kids’ birthday parties, capturing the essence of family togetherness. Every generation has its variations, from traditional peanut butter cookies to innovative bars like these.

Over the years, the recipe for Peanut Butter Cup Gooey Cookie Bars has evolved, incorporating various ingredients and methods. Today, you can find a multitude of adaptations, ranging from gluten-free to no-bake versions, appealing to different dietary preferences and lifestyles while retaining the core identity of this beloved treat.

Regional variations are also noteworthy, with some areas adding local flavors like maple syrup or using different nut butters. Each variation brings a unique twist to this classic, demonstrating the versatility and adaptability of the recipe across cultures and personal tastes.

Ingredient Deep Dive

  • Peanut Butter: A staple in many households, this ingredient is not only delicious but also provides a good source of protein and healthy fats. Opt for creamy or chunky depending on your texture preference. When selecting peanut butter, look for natural options without added sugars or hydrogenated oils for the healthiest choice. For storage, keep it in a cool, dry place, and it can be refrigerated for an extended shelf life. Alternatives like almond butter can work well too.
  • Chocolate Chips: The primary source of sweetness and richness, chocolate chips are widely loved for their convenience. Semi-sweet chips provide the perfect balance of sweetness for these bars, although you can explore dark chocolate versions for a richer taste. Be mindful of storage, as they should be kept in a cool and dry location. For those looking to cut down on sugar, using sugar-free or dark chocolate chips can be a solid substitution.
  • Flour: Essential for structure, flour acts as the backbone of the cookie dough. All-purpose flour is typically used, but whole wheat flour can add nutritional value if desired. When purchasing flour, look for brands that indicate freshness, and store in airtight containers to prevent rancidity. For gluten-free adaptations, consider almond or oat flour as great substitutes that provide unique flavors and textures.
  • Sugar: This sweetener not only adds flavor but also contributes to the overall texture of the bars. A mixture of granulated and brown sugar often enhances flavor profiles. When choosing sugar, opt for organic versions if possible, as they are less processed. Properly store sugar in an airtight container to keep it moisture-free. For healthier alternatives, look into coconut sugar or maple syrup as substitutes that add distinct flavors.

Common Mistakes to Avoid

  • Overmixing the Dough: When combining ingredients, overmixing can lead to tough bars instead of tender cookie layers. Mix just until combined for the best texture.
  • Not Measuring Ingredients Carefully: Baking requires precision, so use proper measuring techniques to ensure accurate ingredient ratios. Use a kitchen scale for the best accuracy.
  • Using Cold Ingredients: For optimal blending, ensure ingredients, especially butter and eggs, are at room temperature. This allows for smoother mixing and better texture.
  • Skipping Parchment Paper: Lining your baking pan with parchment ensures easy removal and prevents sticking, which is essential for maintaining the bar’s shape.
  • Underbaking: To achieve that gooey center, underbake slightly. Trust the cooling process, as the bars will continue to firm up outside the oven.
  • Incorrect Oven Temperature: Every oven is different; using an oven thermometer can help ensure accurate baking temperatures, leading to perfect results.
  • Storing Improperly: Failing to store leftovers correctly can lead to dry or stale bars. Always cover tightly and store in a cool place.
  • Ignoring Flavor Additions: Spice up the recipe by adding spices like cinnamon or a pinch of salt to enhance the flavors further. Don’t hesitate to customize!
  • Rushing to Cut: Allow the bars to cool completely before cutting. This step is crucial for achieving clean edges and the right consistency.

Essential Techniques

Baking requires specific techniques for success. One essential method is creaming butter and sugar, where you combine softened butter with sugar until light and fluffy. This step incorporates air, leading to a lighter texture in your bars. To master creaming, use a stand mixer or hand mixer on medium speed, avoiding overmixing for optimal results. Look for a pale color and fluffy consistency to indicate success.

Another technique is measuring dry ingredients accurately. Proper measurement is vital for achieving the desired baking chemistry. Use proper measuring cups for dry ingredients, leveling off with a knife for accuracy. Common pitfalls include scooping flour directly from the bag, which can lead to packing and excess usage; instead, spoon flour into your measuring cup for an accurate measurement.

Pro Tips for Perfect Peanut Butter Cup Gooey Cookie Bars

1. For a more intense chocolate flavor, consider swirling melted chocolate into the cookie dough before baking, creating a marbled effect.
2. Use a blend of milk chocolate and dark chocolate chips for depth and richness, adding complexity to each bite.
3. Experiment with different peanut butter: try honey-roasted or flavored varieties for added sweetness and uniqueness.
4. Allow the bars to cool in the pan for easier lifting out; using parchment paper helps tremendously.
5. Store any leftovers in an airtight container at room temperature for up to five days, maintaining freshness.
6. These bars freeze beautifully; wrap individually and store in a freezer bag for up to 3 months for a quick treat anytime.
7. Enhance presentation by drizzling melted chocolate over the top before slicing for an elegant finish.
8. Sprinkle a bit of flaky sea salt on top after baking for a delightful contrast to the sweetness.

Variations and Adaptations

Peanut Butter Cup Gooey Cookie Bars can be easily adapted to suit various tastes. For a regional twist, add crushed pretzels for a salty-sweet combination or incorporate your favorite candy bars into the chocolate filling. Seasonal adaptations could include adding pumpkin spice in the fall or peppermint extract during the winter holidays to give a festive flair.

Dietary modifications can include using natural peanut butter and organic sweeteners for a healthier option, and gluten-free flour as an alternative for a gluten-sensitive audience. Additionally, flavor variations like adding finely chopped nuts can enhance texture, while chocolate syrups or caramel can be drizzled for extra indulgence.

For those focusing on a lighter dessert, consider reducing the sugar in the recipe or using apple sauce as a substitute for some of the fat. Presentation alternatives might involve cutting the bars into fun shapes or serving them in decorative cases for parties, allowing for creativity in how you share these delightful treats.

Serving and Presentation Guide

Presenting Peanut Butter Cup Gooey Cookie Bars can elevate your dessert table. Start with a clean cutting board or cake stand; removing bars with a sharp knife after cooling ensures clean edges. Consider plating the bars in a staggered layout to capture attention or place them in cute dessert cups for individual servings.

For garnishing ideas, drizzle melted chocolate over the sliced bars and top with crushed nuts or a sprinkle of sea salt for visual impact. Traditional accompaniments like vanilla ice cream or whipped cream can enhance the experience while modern serving suggestions could include a dusting of cocoa powder for elegance.

Temperature is also crucial, as these bars taste divine when slightly warm, and the chocolate filling remains gooey. Portion control may be achieved by cutting smaller squares and serving them on shared platters, allowing guests to savor more without overindulging.

Wine and Beverage Pairing

When pairing with wine, consider a dessert wine like late harvest Riesling or a chocolate port, both of which complement the sweet richness of the bars. These drinks can enhance the chocolate and peanut butter flavors, creating a well-rounded dessert experience.

For non-alcoholic options, a cold glass of milk is always a classic choice, but you might also explore a rich hot chocolate or a creamy vanilla latte, both of which pair beautifully with the cookie bars. If serving coffee, opt for a dark roast to contrast with the sugariness of the dessert, or even an espresso that pairs wonderfully with sweet treats.

Storage and Shelf Life

Proper storage is key for keeping Peanut Butter Cup Gooey Cookie Bars fresh. Store the bars in an airtight container at room temperature for up to five days. If you’ve made a larger batch or want to save some for later, consider refrigerating them, where they’ll last for about a week.

For longer storage, these bars freeze exceptionally well. Wrap each one individually in plastic wrap or foil before placing them in an airtight container or freezer-safe bag. They can remain frozen for up to three months. When ready to enjoy, thaw at room temperature or heat them briefly in the microwave for a warm dessert experience.

Be sure to keep an eye out for signs of spoilage, such as off-putting smells or changes in texture. If you notice any dryness or hardening, they may not be as enjoyable but often can be revived with a quick microwave burst.

Make Ahead Strategies

Make-ahead strategies for Peanut Butter Cup Gooey Cookie Bars are simple and convenient. Prepare the dough a day in advance and keep it in the refrigerator, allowing flavors to meld and providing fresher-tasting bars when baked. If you prefer, assemble the bars ahead of time and store them in the fridge until you’re ready to bake.

For best results, make sure to portion the dough into the baking pan quickly to avoid any drying on the edges. When you’re ready to bake, simply follow the same instructions while keeping an eye on baking time, as chilled dough may require a minute or two longer due to its temperature.

Quality impact assessment is essential, as having the dough sit overnight enhances the final texture and flavor depth significantly. Also, when freezing the completed bars, place them in an airtight container after they’ve cooled completely to maintain moisture.

Scaling Instructions

Scaling up or down is easily managed with this recipe. To halve the recipe, simply use half the ingredients and bake in a smaller pan. Adjust cooking time accordingly, keeping a close eye on doneness.

If doubling or tripling, be mindful of your mixing bowl’s capacity and consider baking in batches or using multiple pans. When working with larger volumes, timing might need adjustment; check for doneness a few minutes earlier to avoid overbaking.

Store any extra bars by ensuring they’re fully cooled, then wrapping individually or in a single container to prevent them from sticking together. Freezing portions for later enjoyment can help with managing quantity, allowing you to enjoy a fresh treat whenever the craving strikes.

Nutritional Deep Dive

Understanding the macro breakdown of Peanut Butter Cup Gooey Cookie Bars reveals a satisfying vegetable balance between carbohydrates, fats, and proteins. Each bar typically contains a good amount of calories, mostly stemming from the peanut butter and chocolate.

Micronutrient analysis shows these bars provide essential nutrients such as potassium and magnesium from the peanut butter, along with small amounts of iron from whole wheat flour if used. These nutrients contribute to overall health, making the bars a more wholesome dessert option compared to many store-bought alternatives.

When considering health benefits, the inclusion of peanut butter delivers heart-healthy fats and protein, which can aid in satiety, helping to prevent excessive consumption. However, portion analysis remains key, with moderation advised to maintain a balanced diet.

Weight management tips include enjoying these bars as an occasional treat while pairing them with an active lifestyle to balance calorie intake. Sharing these bars can also aid in portion control, making them a perfect addition to social gatherings.

Dietary Adaptations

For gluten-free versions of Peanut Butter Cup Gooey Cookie Bars, substitute all-purpose flour with almond or coconut flour. These alternatives provide different textures while retaining flavor, making them accessible for gluten-sensitive diets.

For dairy-free options, utilize dairy-free chocolate chips and a plant-based spread instead of butter. This modification keeps the flavor profile appealing while catering to vegan preferences, ensuring everyone can partake in this delicious treat.

Low-carb eaters can explore using almond flour instead and sugar alternatives like erythritol to reduce carbohydrates without sacrificing flavor. This adaptation creates a dessert that’s lighter on the glycemic index while still being truly satisfying.

Keto and paleo versions focus on natural sweeteners and nut-based flours to maintain the dieters’ requirements. Each adaptation stays true to the essence of the bars while accommodating specific dietary restrictions and preferences.

Troubleshooting Guide

If your bars come out too dry, it’s likely due to overbaking or incorrect measurements. Keep a close eye on them during baking, and aim for a slightly underbaked center. You can also consider adding a bit of extra butter or a drizzle of syrup to enhance moisture in future batches.

Texture issues often stem from overmixing the dough; avoid this during the creaming stage. Use a gentle folding method post-adding dry ingredients to maintain a tender crumb.

Flavor imbalances can occur if you forget salt; a pinch will help to enhance all the other flavors. If you accidentally overshoot the sugar, balance it with a tiny bit of salt for a harmonious flavor.

If working with stubborn pans, ensure adequate greasing or parchment usage. The non-stick spray or butter should adequately cover the pan to avoid sticking, ensuring clean removal without damage.

For timing concerns, consider your oven’s accuracy. Investing in an oven thermometer can help ensure your baking times are consistent and reliable across various recipes, including this one.

Recipe Success Stories

Readers have shared numerous success stories about Peanut Butter Cup Gooey Cookie Bars. Many have commented on how easy and forgiving the recipe is, allowing for various modifications that led to delightful twists on the original.

Variations have proven popular, with some readers successfully incorporating different nut butters, caramel swirls, or even fruit fillings. These adaptations not only provided a personal touch but also showcased community creativity and shared love for peanut butter flavors.

Photography tips from readers highlight the importance of natural light and cleanup for better presentation. Many found that photographing the bars with a cup of coffee or a scoop of ice cream beside created a mouth-watering display, encouraging enthusiastic responses on social media.

Community engagement has also played a critical role in the success of this recipe, as readers share their personal experiences and variations, creating a lively dialogue around all things peanut butter dessert-related.

Frequently Asked Questions

Q1: Can I substitute peanut butter for almond butter?

A1: Yes, almond butter can be used as a 1:1 substitute for peanut butter in this recipe. The flavor will differ but will still produce a delicious result.

Q2: How can I make these bars less sweet?

A2: To reduce sweetness, you can use dark chocolate chips instead of semi-sweet, or cut back on the sugar by using a natural sweetener like stevia.

Q3: Can I store these bars in the fridge?

A3: Absolutely! These bars can be stored in an airtight container in the fridge for up to a week, keeping them fresh and delicious.

Q4: Are these bars suitable for freezing?

A4: Yes, they freeze well! Wrap each bar individually and store them in a freezer-safe container for up to three months for a quick treat later.

Q5: What can I use if I don’t have chocolate chips?

A5: You can chop up a chocolate bar or use cocoa powder, but the latter will need to be adjusted within the recipe to maintain texture.

Q6: Can I make these bars nut-free?

A6: To make them nut-free, replace the peanut butter with sunflower seed butter, maintaining the proportions for a similar taste and texture.

Q7: How do I know when the bars are done baking?

A7: The edges should be slightly golden, and the center will look set but not fully firm. The bars will continue to cook slightly after being removed from the oven.

Q8: Can I add other mix-ins like coconut or chopped nuts?

A8: Definitely! Feel free to add chopped nuts, chocolate chunks, or shredded coconut for additional texture and flavor throughout the bars.

Q9: What dish can I use to bake these bars?

A9: A standard 9×13 inch baking dish works best for this recipe, ensuring a proper depth for even cooking and great results.

Q10: Can I use natural peanut butter in this recipe?

A10: Yes, natural peanut butter can be used; just make sure it is well-mixed and not too runny for the best results.

Additional Resources

For those looking to explore more delightful treats, check out our collection of related recipes such as classic chocolate chip cookies, no-bake desserts, and nutritious oatmeal bars. Each provides unique flavors while maintaining ease of preparation.

Furthermore, our technique guides can offer valuable insights into baking fundamentals, including mixing methods and ingredient substitutions that can elevate your baking skills. Knowledge of ingredient types enhances your understanding of flavor profiles and textures.

Equipment recommendations are beneficial when investing in baking essentials; high-quality measuring tools, mixing bowls, and baking sheets can make a significant difference in your results.

Lastly, as seasons change, adapt your recipes accordingly to incorporate seasonal fruits or flavors, providing an ever-evolving dessert experience that keeps your baking exciting and delightful.

Join the Conversation

Engage with us on social media by sharing your pictures of your Peanut Butter Cup Gooey Cookie Bars. Join the community by using the unique recipe hashtag and leave feedback about your baking experiences and any variations you’ve tried.

Feel free to snap photos of your baking process and the final results, as we love to see how our community enjoys their creations. Recipe reviews and constructive feedback are always welcome, helping others discover tips that contribute to their success in the kitchen.

We encourage ongoing community engagement by sharing your own recipe twists and favorite serving suggestions. With each post, help inspire a new wave of bakers and dessert lovers to enjoy and experiment with this delightful cookie bar recipe.

The Recipe

Peanut Butter Cup Gooey Cookie Bars

Serves: 12 bars

Prep Time: 15 mins

Cook Time: 25 mins

Total Time: 40 mins

Kitchen Equipment Needed

  • Mixing bowl
  • Baking pan (9×13 inch)
  • Measuring cups and spoons
  • Spatula or wooden spoon
  • Parchment paper (optional)

Ingredients

  • 1 cup creamy peanut butter
  • 1/2 cup butter, softened
  • 1 cup granulated sugar
  • 1/2 cup brown sugar, packed
  • 2 large eggs
  • 1 teaspoon vanilla extract
  • 1 1/2 cups all-purpose flour
  • 1 teaspoon baking soda
  • 1/2 teaspoon salt
  • 1 cup chocolate chips
  • 1/2 cup chopped peanut butter cups (optional)

Directions

  1. Preheat the oven to 350°F (175°C). Grease the baking pan or line with parchment paper.
  2. In a mixing bowl, cream together peanut butter, softened butter, granulated sugar, and brown sugar until smooth.
  3. Add in the eggs and vanilla extract, mixing until fully incorporated.
  4. In another bowl, whisk together the flour, baking soda, and salt. Gradually add this dry mixture to the wet mixture, stirring until just combined.
  5. Fold in the chocolate chips and optional peanut butter cups.
  6. Spread the batter evenly in the prepared baking pan.
  7. Bake for 25-30 minutes, or until the edges are golden and a toothpick inserted comes out with moist crumbs.
  8. Allow to cool in the pan before cutting into bars.

Recipe Notes

  • For a richer flavor, feel free to use dark chocolate chips.
  • Store any leftovers in an airtight container at room temperature for up to five days.
  • These bars can easily be made ahead of time and stored in the freezer.
  • Customize with your favorite mix-ins like nuts or dried fruit for added variety.