Honey Butter Cornbread Poppers: A Sweet and Savory Treat
Welcome to a delicious treat that combines the rich sweetness of honey and the buttery goodness of cornbread in bite-sized poppers. Honey Butter Cornbread Poppers are perfect for any occasion, whether it’s a casual family dinner, a festive gathering, or even a potluck. These delightful morsels are not only easy to prepare, but they also promise to satisfy your taste buds with their irresistibly sweet and savory flavor profile. Each popper is a bite of warm, comforting goodness, ideal for dipping in additional honey butter for that extra touch of sweetness.
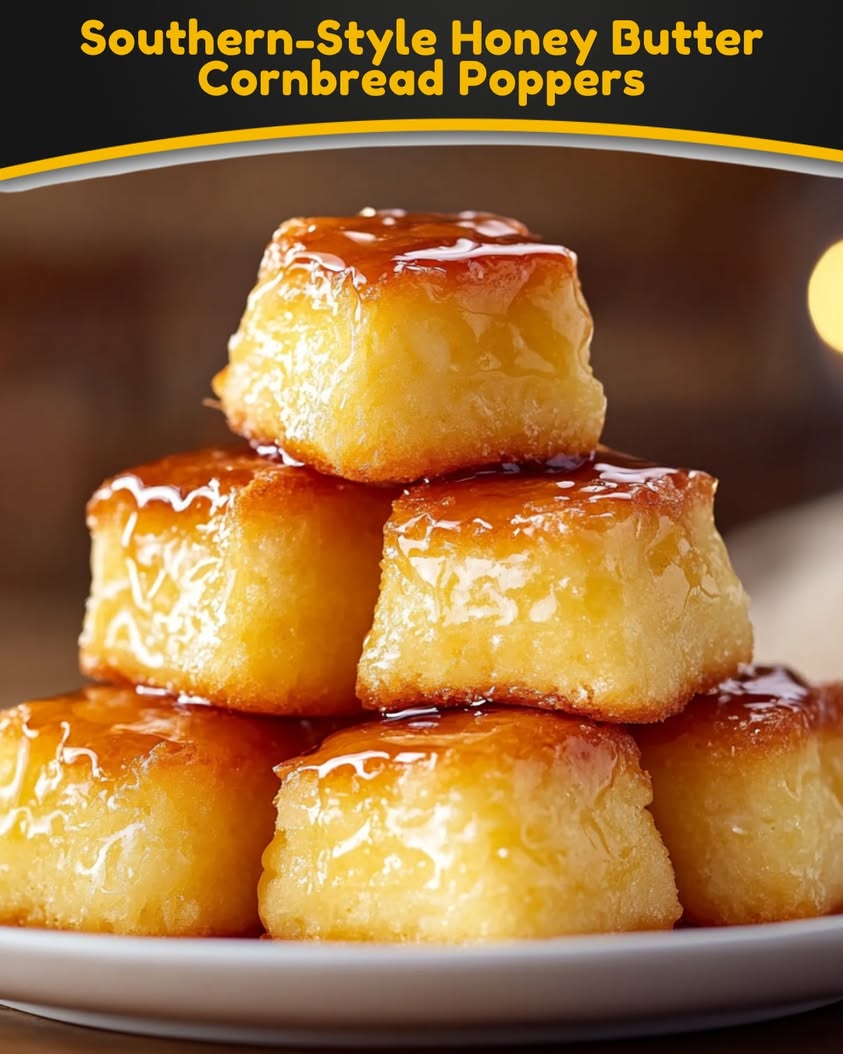
These poppers are a delightful twist on traditional cornbread. They encapsulate the essence of comfort food while being fun and approachable for all ages. Picture it: golden-brown poppers with a tender, buttery center that melts in your mouth, accompanied by a rich aroma of freshly baked cornmeal. Plus, they can easily be served as an appetizer or a side dish, which makes them an incredibly versatile recipe for your culinary repertoire.
Quick Recipe Highlights
- Flavor Profile: These poppers boast a delightful combination of sweet honey and rich butter, creating a warm and inviting flavor that’s perfect for snacking.
- Texture: The outside of each popper is slightly crispy, while the inside remains soft and moist, providing a delightful contrast that enhances every bite.
- Aroma: The aroma of freshly baked cornbread mingled with honey butter fills the kitchen, inviting everyone to gather around for a taste.
- Visual Appeal: With their golden hue and appealing round shape, these poppers are as visually enticing as they are delicious, making them a centerpiece on any table.
- Skill Level Needed: This recipe is perfect for beginners as well as seasoned cooks, requiring minimal culinary expertise and yielding impressive results.
- Special Equipment: You will need muffin tins and a mixing bowl, making this an accessible recipe for any home cook.
Recipe Overview
- Difficulty Level: This recipe is easy and approachable, requiring only basic mixing and baking skills that even kids can assist with.
- Category: Perfect as an appetizer or side dish, they also serve well as a breakfast treat.
- Cuisine: This recipe draws inspiration from traditional Southern cuisine, highlighting the popularity of cornbread in American households.
- Cost: Inexpensive to make with basic pantry staples, these poppers can be made for a few dollars, making them budget-friendly.
- Season: Great year-round, but especially comforting during the fall and winter months when warm, hearty dishes are preferred.
- Occasion: Ideal for holiday festivities, gatherings with friends, or even as a simple weeknight treat.
Why You’ll Love This Recipe
Each Honey Butter Cornbread Popper provides a welcome burst of flavor that is inherently satisfying. The rich combination of honey and butter makes each bite a taste of comfort, bringing familiar warmth and joy reminiscent of home-cooked meals. When you gather around and enjoy these poppers, the sweet aroma fills the air, reminiscent of cozy family moments and shared laughter.
The convenience of this recipe is another reason to love it. With a prep time of just 15 minutes and a cooking time of only 20 minutes, these poppers will quickly become a go-to choice for your busy schedule. You can whip them up quickly for last-minute gatherings or an easy weeknight side dish.
Nutritionally, cornbread can be a great source of whole grains and fiber, offering sustenance while keeping your energy levels stable throughout the day. Plus, the addition of honey can promote a natural sweetness without refined sugars. A perfect choice for those looking for a satisfying yet nutritious option.
Socially, these poppers are fantastic for sharing. Their bite-sized nature makes them easy to serve at parties while encouraging mingling among guests. They are a popular item that can spark conversations and smiles alike—a definite crowd-pleaser!
Lastly, they’re cost-effective. Using common pantry staples, you can produce a delightful dish without breaking the bank. Families can enjoy hearty, home-cooked snacks that are delicious and affordable.
Historical Background and Cultural Significance
The origins of cornbread date back to the Indigenous peoples of North America, who utilized corn as a staple food long before European settlers arrived. As corn became a crucial component of Southern cooking, cornbread emerged as a beloved dish, often associated with comfort and community gatherings.
In Southern culture, cornbread has deep-rooted significance, symbolizing hospitality and home. Dishes like honey butter cornbread poppers reflect an evolution of traditional recipes, combining classic ingredients with contemporary culinary twists suitable for modern palates.
Throughout the years, variations of cornbread have appeared, often influenced by regional preferences. The Honey Butter Cornbread Poppers merge the classic sweetness of honey with the savory essence of cornbread. This evolution demonstrates how traditional flavors can inspire new creations within home cooking today.
Regional variations of cornbread across the U.S. showcase diverse ingredients, from jalapeños in Texas to sweet variations enriched with fruits. This flexibility highlights the cultural significance of cornbread as a canvas for creativity in many Southern kitchens.
Ingredient Deep Dive
Cornmeal: The backbone of cornbread, cornmeal has a long history as a dietary staple in many cultures. Rich in carbohydrates and fiber, it provides energy while being low in fat. To choose quality cornmeal, look for a fine texture and a fresh aroma. Store it in a cool, dry place to maintain its freshness.
Honey: Honey has been revered for its natural sweetness and medicinal properties across various cultures. Nutritionally, it’s a natural source of energy and has antioxidant properties. When selecting honey, choose local, raw varieties for maximum flavor and health benefits. Store covered in a cool, dark place to preserve its quality.
Common Mistakes to Avoid
- Overmixing the batter — This can lead to dense poppers instead of fluffy ones; mix until combined.
- Not preheating the oven — Skipping this can affect the rise and texture; always ensure the oven is at the correct temperature.
- Using stale ingredients — Fresh ingredients are key; check expiry dates on cornmeal and baking powder.
- Ignoring the mixing order — Following the recipe’s order can impact the final texture; wet ingredients should be combined before adding dry.
- Underbaking — Keep an eye on the baking time; underbaked poppers can turn out gummy inside. Perform the toothpick test to check doneness.
- Neglecting to grease the muffin tin — A well-greased tin prevents sticking; consider using cooking spray or oil.
- Not letting the batter sit — Allow the batter to sit for a few minutes, which can enhance the texture. This step is often overlooked.
- Using too much honey — While it adds sweetness, excessive honey can make them overly sticky; adhere to the recipe’s measurements.
Essential Techniques
Mixing Batter: Proper mixing is crucial for achieving the right texture in your Honey Butter Cornbread Poppers. Overmixing can create a dense consistency, while undermixing can lead to an uneven texture. Aim to mix until just combined.
Testing for Doneness: Knowing when your poppers are finished baking is essential to ensure they are perfectly cooked. Insert a toothpick into the center; it should come out clean. If the batter sticks, continue to bake, checking at 2-3 minute intervals.
Pro Tips for Perfect Honey Butter Cornbread Poppers
1. Let your batter rest for a few minutes after mixing to achieve a better texture.
2. Experiment with different types of honey, such as clover or wildflower, to impart unique flavors.
3. Add mix-ins like corn kernels or jalapeños for an extra flavor boost.
4. Use high-quality butter for a richer taste.
5. Adjust the sweetness by reducing honey if you prefer a less sweet popper.
6. Serve poppers warm with additional honey butter on the side for dipping.
7. Ensure the muffin tin is well-greased to avoid sticking.
8. Store leftover poppers in an airtight container at room temperature for best flavor retention.
Variations and Adaptations
Regional variations can include adding ingredients like bacon or cheese for a savory twist. Consider seasonal adaptations such as pumpkin puree during fall for a festive nod. Dietary modifications can cater to gluten-free diets by using alternative flours like almond or gluten-free blends. For a lighter texture, you may substitute milk with buttermilk, enhancing both flavor and richness. Otherwise, try different toppings or sprays to present your poppers uniquely!
Serving and Presentation Guide
When serving your Honey Butter Cornbread Poppers, consider plating them on a rustic wooden board for a homey feel. Garnish with fresh herbs such as parsley or chives for a touch of color. Pair them with a small bowl of honey butter or maple syrup for dipping to elevate the experience. For optimal flavor, serve warm and in generous portions, allowing guests to enjoy a second helping.
Wine and Beverage Pairing
Pair your poppers with a chilled glass of Riesling or a light Sauvignon Blanc, allowing the sweetness of the wine to complement the honey’s flavor. For non-alcoholic alternatives, serve with apple cider or an herbal iced tea for a refreshing contrast. If you’re feeling adventurous, a spiced chai could accentuate the honey and butter’s richness beautifully.
Storage and Shelf Life
For optimal freshness, store your Honey Butter Cornbread Poppers in an airtight container at room temperature for up to three days. If extended storage is needed, consider wrapping each popper in plastic wrap and freezing them. When reheating, a quick dunk in the microwave or an oven at low heat will restore their delightful softness. Always check for visual and scent changes before consuming.
Make Ahead Strategies
You can prepare the batter ahead of time and refrigerate it for later use. Just ensure to store it in a well-sealed container. Assemble the poppers right before baking to ensure optimal freshness. Fresh elements such as herbs or additional toppings can be added just before serving to brighten the dish. Timing the baking just right ensures they will be wonderfully warm when guests arrive.
Scaling Instructions
To halve the recipe, simply divide all measurements by two and adjust serving sizes accordingly. When doubling or tripling, be mindful of the muffin tin capacity to prevent overcrowding. Adjust baking times slightly; larger batches may require a few extra minutes in the oven. For storage, ensure you have ample airtight containers to accommodate your scaled recipe.
Nutritional Deep Dive
These poppers provide a well-balanced nutritional profile, offering carbohydrates for energy and a small amount of protein. Each popper is relatively low in fat, particularly when made with moderation in mind regarding honey and butter. For those keeping an eye on macros, keep in mind portion control to enjoy this treat without guilt.
Dietary Adaptations
For gluten-free versions, substitute the cornmeal with certified gluten-free alternatives. A dairy-free adaptation can be made using coconut oil in place of butter and almond milk instead of regular milk. For vegan diets, replace honey with agave syrup or maple syrup while using dairy-free butter. These adaptations ensure that anyone can enjoy the deliciousness of Honey Butter Cornbread Poppers!
Troubleshooting Guide
If your poppers are not rising properly, ensure your baking powder is fresh and that you haven’t overmixed the batter. If they turn out too dry, consider reducing the cooking time slightly and check for doneness earlier. Overly dense poppers may result from too much mixing; aim for a gentle hand while combining ingredients.
Recipe Success Stories
Readers have shared how these Honey Butter Cornbread Poppers became a family favorite, with some opting to add spice variations for added flair. Feel free to experiment and make this recipe your own, as many have successfully adapted the sweetness according to their personal taste preferences. Sharing photos of your poppers on social media can inspire others to try their hands at this delectable recipe!
Frequently Asked Questions
Can I make these ahead of time? Absolutely! You can prepare the batter ahead of time and store it in the fridge. Just bake them fresh when you need them.
How do I keep the poppers moist? Ensuring not to overbake and allowing them to rest for a few minutes will maintain moisture. Additionally, serving with honey butter will add extra moisture.
What can I substitute for cornmeal? If you don’t have cornmeal, you may use a combination of flour and fine-ground cornmeal or a gluten-free corn flour blend.
Are these poppers gluten-free? You can make these poppers gluten-free by using certified gluten-free cornmeal or a suitable flour substitute.
Can I freeze leftover poppers? Yes! Allow them to cool completely and store them in an airtight container for up to 3 months.
What’s the best way to reheat them? You can reheat your frozen poppers in the microwave or place them in a 350°F oven for about 10-15 minutes until warmed through.
Can I add cheese to the recipe? Yes, you can fold in shredded cheese of your choice into the batter for a savory twist.
How should I serve them? These poppers are best served warm with honey butter or maple syrup for dipping.
How long do they last? Honey Butter Cornbread Poppers can be stored for up to 3 days at room temperature in an airtight container.
Are they suitable for kids? Yes, these poppers are kid-friendly and make a great addition to lunch boxes or after-school snacks!
Can I use a different sweetener? You can substitute honey with agave or maple syrup, but be aware that this may slightly alter the flavor.
Additional Resources
For those looking to branch out from Honey Butter Cornbread Poppers, consider exploring alternative cornbread recipes, such as savory versions or those that incorporate vegetables. Additionally, check out ingredient guides for honey and cornmeal for more insights on their benefits and uses. Techniques for baking can also help refine your overall skills in the kitchen.
Join the Conversation
We love hearing from our readers! Share your thoughts, adaptations, and results when making the Honey Butter Cornbread Poppers. Connect with us on social media and upload your recipe photos, tag us to showcase your baking adventures. Let’s build a community to share tips, tricks, and delicious inspiration!
The Recipe
Honey Butter Cornbread Poppers
Serves: 12 Poppers
Prep Time: 15 mins
Cook Time: 20 mins
Total Time: 35 mins
Kitchen Equipment Needed
- Muffin tin
- Mixing bowl
- Measuring cups and spoons
- Whisk or spatula
Ingredients
- 1 cup cornmeal
- 1 cup all-purpose flour
- 1/4 cup sugar
- 1 tablespoon baking powder
- 1/2 teaspoon salt
- 1 egg
- 1 cup milk
- 1/4 cup melted butter
- 1/3 cup honey
Directions
- Preheat the oven to 400°F (200°C) and grease the muffin tin.
- In a mixing bowl, combine cornmeal, flour, sugar, baking powder, and salt.
- In a separate bowl, whisk together the egg, milk, melted butter, and honey.
- Pour the wet ingredients into the dry ingredients and mix until just combined.
- Scoop the batter evenly into the muffin tin, filling each cup about 2/3 full.
- Bake for about 15-20 minutes until golden and a toothpick comes out clean.
- Let cool slightly before serving with extra honey butter for dipping.
Recipe Notes
- Feel free to add ingredients like cheese or jalapeños for added flavor.
- To make gluten-free, substitute with gluten-free flour options.
- Serve warm for the best experience!