Creamy Chicken Stroganoff A Delicious Dinner Idea

“`html

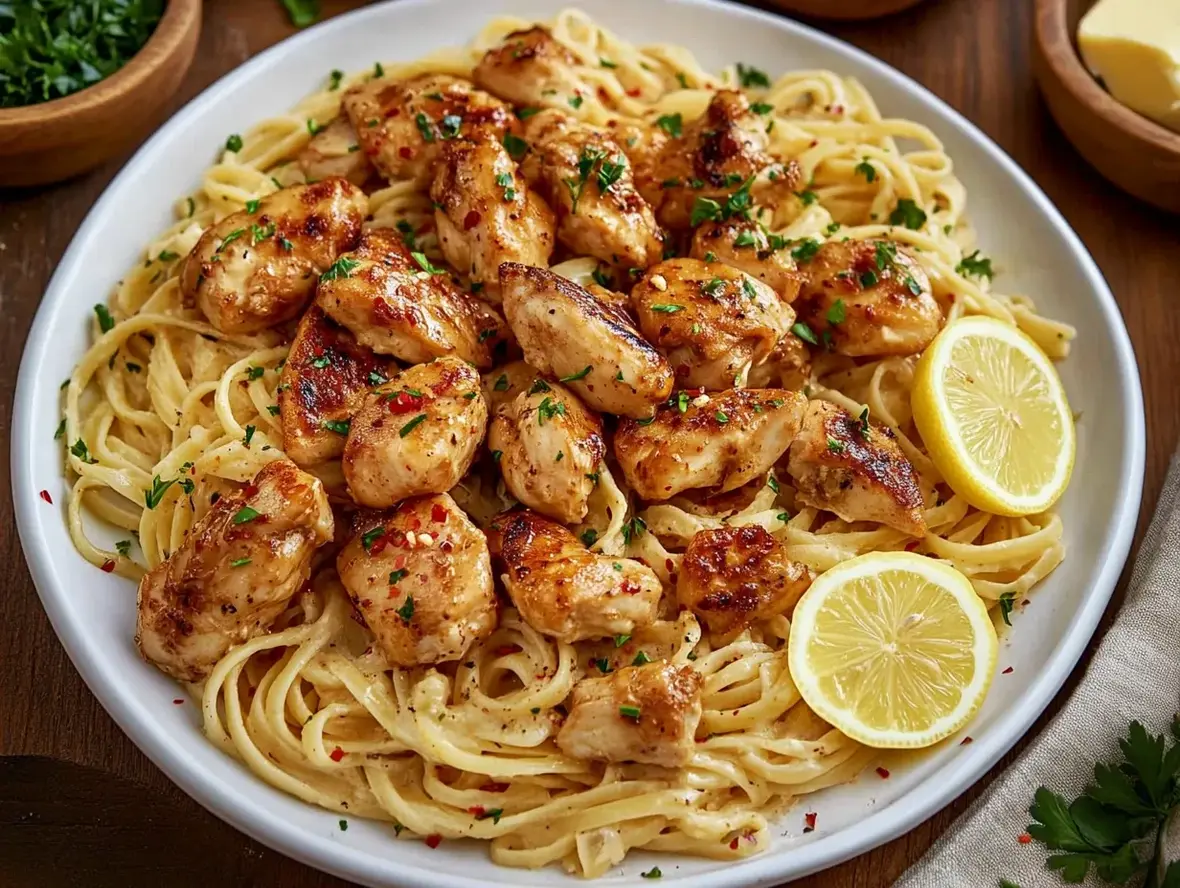
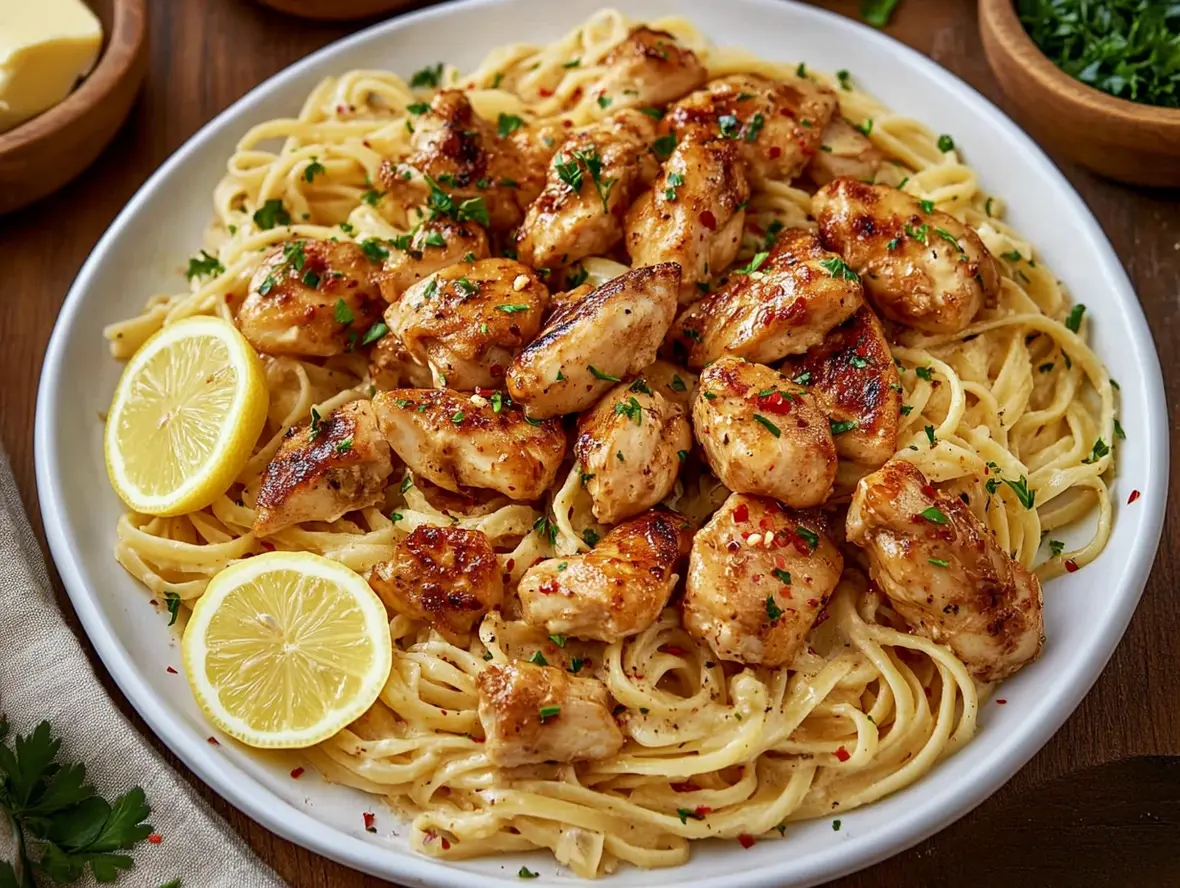
Creamy Chicken Stroganoff: A Delicious Dinner Idea

Introduction: What Makes Chicken Stroganoff So Comforting?

Are you searching for a dinner that’s both satisfying and surprisingly simple to make, perhaps something that feels like a warm hug in a bowl? If your weeknights are anything like mine, finding a recipe that hits all the right notes – comforting, flavorful, and family-friendly – can feel like striking gold. Creamy Chicken Stroganoff is exactly that dish. Imagine tender, juicy chicken pieces swimming in a rich, velvety sauce, infused with the earthy aroma of sautéed mushrooms and a hint of tang from sour cream. It’s a classic for a reason, offering a luxurious dining experience without the fuss. This dish is incredibly versatile, making it a go-to for busy evenings or when you simply want to treat yourself and your loved ones to a truly delicious meal.

Delicious bowl of creamy chicken stroganoff with mushrooms and herbs.

Ingredients for Creamy Chicken Stroganoff

The magic of Chicken Stroganoff lies in its simple yet harmonious ingredients. Each component plays a crucial role in creating that signature rich and comforting flavor profile.

For the Chicken:

  • 1.5 lbs boneless, skinless chicken breasts or thighs, cut into 1-inch cubes (thighs offer more moisture and flavor!)
  • 2 tbsp all-purpose flour (for dredging, helps thicken the sauce slightly)
  • 1 tsp salt
  • ½ tsp black pepper
  • 2 tbsp olive oil or butter (for searing those golden-brown edges)

For the Sauce:

  • 1 tbsp butter (adds a lovely richness)
  • 1 large onion, finely chopped (the sweet foundation of our flavor)
  • 8 oz cremini mushrooms, sliced (earthy, umami-packed goodness)
    • Substitution: Portobello or shiitake mushrooms can also be used for a deeper flavor.
  • 2 cloves garlic, minced (the pungent aromatic kick)
  • 1.5 cups chicken broth (the savory liquid base)
    • Substitution: Vegetable broth can be used for a vegetarian-friendly version, or water with a bouillon cube.
  • ½ cup dry white wine (optional, but adds a wonderful depth and acidity)
    • Substitution: You can omit this and add an extra ¼ cup of broth or a splash of lemon juice.
  • ½ cup heavy cream (for that irresistible creamy texture)
    • Substitution: Half-and-half can be used, but the sauce will be slightly less rich.
  • ½ cup sour cream (the signature tang and velvety finish, add off heat!)
    • Substitution: Greek yogurt can be used for a slightly lighter, tangier alternative.
  • 1 tsp Dijon mustard (adds a subtle sharpness that brightens the sauce)
  • Salt and freshly ground black pepper, to taste

Optional Garnishes:

  • Fresh parsley, chopped (for a burst of freshness and color)
  • A sprinkle of paprika

Timing is Everything for the Perfect Stroganoff

In the culinary world, timing is often the secret ingredient that transforms good dishes into great ones. For our Creamy Chicken Stroganoff, efficient timing ensures every component is perfectly cooked and integrated.

Prep time: 15 minutes
Cook time: 30 minutes
Total time: 45 minutes

Compared to many classic recipes, this Chicken Stroganoff is a breeze! Many traditional versions can take upwards of an hour, especially if they involve simmering for extended periods. Our streamlined approach delivers that same comforting flavor in under an hour, making it ideal for weekday meals without compromising on taste or quality.

Step-by-Step Instructions

Let’s get cooking! Follow these simple steps to create a truly delightful Creamy Chicken Stroganoff.

Step 1: Prepare the Chicken

Begin by patting your cubed chicken dry with paper towels. This helps achieve a better sear. In a shallow bowl or on a plate, toss the chicken pieces with flour, salt, and pepper until evenly coated. This light coating will not only season the chicken but also help thicken our sauce later on.

Step 2: Sauté the Aromatics

Heat the olive oil or butter in a large skillet or Dutch oven over medium-high heat. Add the floured chicken in a single layer (you may need to do this in batches to avoid overcrowding, which steams the chicken instead of searing it). Sear the chicken for about 2-3 minutes per side, until golden brown. Remove the chicken from the skillet and set aside on a plate. Don’t worry if it’s not cooked through; it will finish cooking in the sauce.

Step 3: Cook the Mushrooms

Add the extra tablespoon of butter to the same skillet. Add the chopped onion and sauté for about 5 minutes until softened and translucent. Then, add the sliced mushrooms and cook, stirring occasionally, until they release their moisture and start to brown, about 7-10 minutes. This browning process is key to developing their deep, earthy flavor.

Step 4: Build the Sauce

Stir in the minced garlic and cook for about 1 minute until fragrant. Pour in the white wine (if using) and scrape up any browned bits from the bottom of the skillet – this is where a lot of flavor is hiding! Let the wine simmer and reduce by about half. Next, pour in the chicken broth and bring to a simmer. Whisk in the Dijon mustard.

Step 5: Combine and Simmer

Return the seared chicken (and any juices from the plate) to the skillet. Reduce the heat to low, cover, and let it simmer gently for about 8-10 minutes, or until the chicken is cooked through and tender. Stir occasionally to prevent sticking.

Step 6: Finish and Serve

Remove the skillet from the heat. This is crucial! Stir in the heavy cream and then gently whisk in the sour cream until the sauce is smooth and creamy. Be careful not to boil the sauce after adding the sour cream, as it can curdle. Taste and adjust seasoning with salt and pepper as needed. Garnish with fresh parsley if desired. Serve immediately over your favorite pasta, rice, or mashed potatoes.

Nutritional Information: A Quick Glance

While exact figures can vary based on ingredients and portion sizes, a typical serving of Creamy Chicken Stroganoff (excluding sides) generally falls within these approximate ranges. We’ve focused on a standard serving size.

  • Calories: 450-550 kcal
  • Protein: 30-40g
  • Fat: 25-35g (Saturated Fat may be higher due to cream/butter)
  • Carbohydrates: 15-25g (especially if served with pasta/rice)
  • Sodium: Varies based on broth and added salt

Note: This is an estimated guide. For precise tracking, use a nutritional calculator with your specific ingredients.

Healthier Alternatives Without Sacrificing Flavor

Looking to lighten up this rich classic? You don’t have to sacrifice flavor! Here are a few tweaks that make a big difference:

  • Leaner Protein: Opt for chicken breast and be sure to sear it properly without overcooking to keep it tender.
  • Reduced Fat Creaminess: Substitute half-and-half for heavy cream, or use a blend of low-fat milk thickened with a bit more flour or cornstarch. For an even lighter touch, use Greek yogurt or a dairy-free cashew cream.
  • More Veggies: Bulk up the dish with extra mushrooms, or add other vegetables like spinach, peas, or bell peppers when you add the chicken back to the sauce.
  • Lighter Serve: Serve over whole wheat pasta, brown rice, quinoa, or a generous portion of steamed vegetables instead of white pasta or mashed potatoes.
  • Lower Sodium Broth: Use low-sodium chicken broth and season with salt judiciously.

Serving Suggestions: What to Pair with Your Stroganoff

The beauty of Creamy Chicken Stroganoff is its versatility. It pairs wonderfully with a variety of accompaniments:

  • Pasta: Fettuccine, egg noodles, or pappardelle are classic choices that hold the rich sauce beautifully.
  • Rice: Fluffy white rice or a healthier brown rice option are perfect for soaking up that delicious sauce.
  • Potatoes: Creamy mashed potatoes are a natural partner, or try roasted potatoes for a different texture.
  • Bread: Crusty baguette or artisan bread for dipping is essential for ensuring no sauce is left behind!
  • Simple Salad: A crisp, fresh green salad can offer a refreshing contrast to the rich stroganoff.

Common Mistakes to Avoid

Even though this recipe is straightforward, a few common pitfalls can be easily avoided:

  • Overcrowding the Pan: When searing the chicken, cook it in batches. Overcrowding leads to steaming, not browning, resulting in less flavor and tougher chicken.
  • Boiling the Sour Cream: Reheating or boiling the sauce after adding sour cream can cause it to split or curdle. Always stir it in off the heat and gently warm if absolutely necessary.
  • Not Browning the Mushrooms: Simply sweating the mushrooms will result in a watery dish. Allow them to brown properly for maximum flavor.
  • Skipping the Flour (or not browning): The light flour coating on the chicken helps thicken the sauce. If you don’t use flour, ensure you have enough liquid and time for the sauce to reduce or use a cornstarch slurry.
  • Under-seasoning: Taste and adjust salt and pepper at the end. The broth, sour cream, and other ingredients can mute flavors, so proper seasoning is key.

Storing Tips for Leftovers

Luckily, Creamy Chicken Stroganoff reheats quite well, making it an excellent candidate for meal prep or enjoying later.

  • Refrigeration: Once cooled, store leftovers in an airtight container in the refrigerator for up to 3-4 days.
  • Reheating: Gently heat the stroganoff in a saucepan over low heat, stirring frequently. You may need to add a splash of chicken broth or milk to thin the sauce. Avoid high heat or boiling. If you have sour cream, stir in a tablespoon or two at the end of reheating for extra creaminess, again, off the heat.
  • Freezing: Freezing stroganoff can sometimes affect the texture of the sour cream and dairy. If you choose to freeze, do so without the sour cream. Thaw, reheat the base, and then stir in fresh sour cream just before serving.
Close-up of creamy chicken stroganoff ready to be served.

Frequently Asked Questions About Chicken Stroganoff

***Can I make Chicken Stroganoff with beef instead of chicken?***

Absolutely! Beef Stroganoff is the original classic. You can use thinly sliced beef sirloin or tenderloin, seared quickly, or even cubed chuck roast braised until tender. The sauce method would remain largely the same.

***Why is my stroganoff sauce watery?***

This can happen if the mushrooms weren’t browned properly (releasing excess moisture) or if the sauce wasn’t reduced enough. Ensure mushrooms have ample space to brown and don’t overcrowd the pan. If it’s still watery, you can simmer it uncovered for a bit longer to let it reduce, or thicken it with a cornstarch slurry (1 tbsp cornstarch mixed with 2 tbsp cold water, then stirred into the simmering sauce until thickened).

***Can I make this dairy-free?***

Yes! For a dairy-free version, use dairy-free butter or oil for sautéing, vegetable broth, and opt for a dairy-free sour cream alternative or a cashew cream (made by blending soaked cashews with water) and a plant-based cream or full-fat coconut milk. Ensure your white wine is vegan if that’s a concern.

***How do I make the sauce richer?***

For an even richer sauce, use chicken thighs for extra flavor, add a bit more butter, use a good quality chicken stock, a splash of heavy cream, and ensure you don’t skimp on the mushrooms and onions. Serving with a richer carb like egg noodles or mashed potatoes also enhances the overall richness.

***Can I use pre-cooked chicken?***

While it’s best to cook the chicken directly in the sauce to absorb flavors, you can use rotisserie chicken or leftover cooked chicken. Add it towards the end of the sauce-making process, just long enough to heat through. Be mindful that pre-cooked chicken might be drier, so ensure your sauce is very flavorful and moist.

Conclusion: Enjoy Your Delicious Creamy Chicken Stroganoff!

Creamy Chicken Stroganoff is more than just a meal; it’s an experience. It’s the perfect blend of comfort, elegance, and simplicity, making it a dish you’ll return to time and time again. With its tender chicken, earthy mushrooms, and luscious sour cream sauce, it’s guaranteed to become a favorite in your household. Don’t hesitate to try it this week and discover why this classic is loved by so many!

Print
clock clock iconcutlery cutlery iconflag flag iconfolder folder iconinstagram instagram iconpinterest pinterest iconfacebook facebook iconprint print iconsquares squares iconheart heart iconheart solid heart solid icon

Chicken Mushroom Stroganoff


  • Author: Chef Emy

Description

A comforting and creamy dish featuring tender chicken, earthy mushrooms, and a rich sour cream sauce. Perfect for a cozy dinner, this recipe pairs wonderfully with pasta, rice, or mashed potatoes.


Ingredients

Scale
  • 2chicken breasts, cut into1-inch pieces1/2 tspgarlic powderSalt & pepper, to tasteFlour (for dredging)3 tbspolive oil, divided
  • 1/2 tspgarlic powderSalt & pepper, to tasteFlour (for dredging)3 tbspolive oil, divided
  • Salt & pepper, to tasteFlour (for dredging)3 tbspolive oil, divided
  • Flour (for dredging)3 tbspolive oil, divided
  • 3 tbspolive oil, divided
  • 1 tbspbutter8 ozcremini mushrooms, sliced1/2medium onion, chopped1 tbspDijon mustard (or more, to taste)1 tbspWorcestershire sauce (or more, to taste)3cloves garlic, minced2/3 cupchicken broth1/2 cupfull-fat sour cream
  • 8 ozcremini mushrooms, sliced1/2medium onion, chopped1 tbspDijon mustard (or more, to taste)1 tbspWorcestershire sauce (or more, to taste)3cloves garlic, minced2/3 cupchicken broth1/2 cupfull-fat sour cream
  • 1/2medium onion, chopped1 tbspDijon mustard (or more, to taste)1 tbspWorcestershire sauce (or more, to taste)3cloves garlic, minced2/3 cupchicken broth1/2 cupfull-fat sour cream
  • 1 tbspDijon mustard (or more, to taste)1 tbspWorcestershire sauce (or more, to taste)3cloves garlic, minced2/3 cupchicken broth1/2 cupfull-fat sour cream
  • 1 tbspWorcestershire sauce (or more, to taste)3cloves garlic, minced2/3 cupchicken broth1/2 cupfull-fat sour cream
  • 3cloves garlic, minced2/3 cupchicken broth1/2 cupfull-fat sour cream
  • 2/3 cupchicken broth1/2 cupfull-fat sour cream
  • 1/2 cupfull-fat sour cream

Instructions

  1. 1️⃣Prepare the Chicken:
  2. Season the chicken pieces with garlic powder, salt, and pepper.Lightly dredge each piece in flour, shaking off any excess.2️⃣Cook the Chicken:Heat 2 tablespoons of olive oil in a deep skillet over medium-high heat.Cook the chicken in two batches, about 3 minutes per side, until golden brown and cooked through (internal temperature of 165°F).If the pan becomes dry, add the remaining tablespoon of oil for the second batch.Transfer the cooked chicken to a plate and set aside.3️⃣Sauté the Vegetables:In the same skillet, melt the butter over medium heat.Add the mushrooms and onions, sautéing for 6-8 minutes until their liquid evaporates and they are nicely browned.4️⃣Add Seasoning:Stir in the Dijon mustard, Worcestershire sauce, and minced garlic.Cook for about 1 minute, letting the flavors meld.5️⃣Deglaze the Pan:Pour in the chicken broth, scraping up any browned bits stuck to the bottom of the pan.Return the cooked chicken to the skillet and simmer for 2 minutes, stirring occasionally.6️⃣Finish with Sour Cream:Reduce the heat to low and stir in the sour cream, warming the sauce gently for about 1 minute.Avoid boiling the sauce to prevent curdling.Taste and adjust seasoning with additional salt, pepper, Dijon mustard, or Worcestershire sauce, if needed.
  3. Lightly dredge each piece in flour, shaking off any excess.2️⃣Cook the Chicken:Heat 2 tablespoons of olive oil in a deep skillet over medium-high heat.Cook the chicken in two batches, about 3 minutes per side, until golden brown and cooked through (internal temperature of 165°F).If the pan becomes dry, add the remaining tablespoon of oil for the second batch.Transfer the cooked chicken to a plate and set aside.3️⃣Sauté the Vegetables:In the same skillet, melt the butter over medium heat.Add the mushrooms and onions, sautéing for 6-8 minutes until their liquid evaporates and they are nicely browned.4️⃣Add Seasoning:Stir in the Dijon mustard, Worcestershire sauce, and minced garlic.Cook for about 1 minute, letting the flavors meld.5️⃣Deglaze the Pan:Pour in the chicken broth, scraping up any browned bits stuck to the bottom of the pan.Return the cooked chicken to the skillet and simmer for 2 minutes, stirring occasionally.6️⃣Finish with Sour Cream:Reduce the heat to low and stir in the sour cream, warming the sauce gently for about 1 minute.Avoid boiling the sauce to prevent curdling.Taste and adjust seasoning with additional salt, pepper, Dijon mustard, or Worcestershire sauce, if needed.
  4. 2️⃣Cook the Chicken:
  5. Heat 2 tablespoons of olive oil in a deep skillet over medium-high heat.Cook the chicken in two batches, about 3 minutes per side, until golden brown and cooked through (internal temperature of 165°F).If the pan becomes dry, add the remaining tablespoon of oil for the second batch.Transfer the cooked chicken to a plate and set aside.3️⃣Sauté the Vegetables:In the same skillet, melt the butter over medium heat.Add the mushrooms and onions, sautéing for 6-8 minutes until their liquid evaporates and they are nicely browned.4️⃣Add Seasoning:Stir in the Dijon mustard, Worcestershire sauce, and minced garlic.Cook for about 1 minute, letting the flavors meld.5️⃣Deglaze the Pan:Pour in the chicken broth, scraping up any browned bits stuck to the bottom of the pan.Return the cooked chicken to the skillet and simmer for 2 minutes, stirring occasionally.6️⃣Finish with Sour Cream:Reduce the heat to low and stir in the sour cream, warming the sauce gently for about 1 minute.Avoid boiling the sauce to prevent curdling.Taste and adjust seasoning with additional salt, pepper, Dijon mustard, or Worcestershire sauce, if needed.
  6. Cook the chicken in two batches, about 3 minutes per side, until golden brown and cooked through (internal temperature of 165°F).If the pan becomes dry, add the remaining tablespoon of oil for the second batch.Transfer the cooked chicken to a plate and set aside.3️⃣Sauté the Vegetables:In the same skillet, melt the butter over medium heat.Add the mushrooms and onions, sautéing for 6-8 minutes until their liquid evaporates and they are nicely browned.4️⃣Add Seasoning:Stir in the Dijon mustard, Worcestershire sauce, and minced garlic.Cook for about 1 minute, letting the flavors meld.5️⃣Deglaze the Pan:Pour in the chicken broth, scraping up any browned bits stuck to the bottom of the pan.Return the cooked chicken to the skillet and simmer for 2 minutes, stirring occasionally.6️⃣Finish with Sour Cream:Reduce the heat to low and stir in the sour cream, warming the sauce gently for about 1 minute.Avoid boiling the sauce to prevent curdling.Taste and adjust seasoning with additional salt, pepper, Dijon mustard, or Worcestershire sauce, if needed.
  7. If the pan becomes dry, add the remaining tablespoon of oil for the second batch.
  8. Transfer the cooked chicken to a plate and set aside.3️⃣Sauté the Vegetables:In the same skillet, melt the butter over medium heat.Add the mushrooms and onions, sautéing for 6-8 minutes until their liquid evaporates and they are nicely browned.4️⃣Add Seasoning:Stir in the Dijon mustard, Worcestershire sauce, and minced garlic.Cook for about 1 minute, letting the flavors meld.5️⃣Deglaze the Pan:Pour in the chicken broth, scraping up any browned bits stuck to the bottom of the pan.Return the cooked chicken to the skillet and simmer for 2 minutes, stirring occasionally.6️⃣Finish with Sour Cream:Reduce the heat to low and stir in the sour cream, warming the sauce gently for about 1 minute.Avoid boiling the sauce to prevent curdling.Taste and adjust seasoning with additional salt, pepper, Dijon mustard, or Worcestershire sauce, if needed.
  9. 3️⃣Sauté the Vegetables:In the same skillet, melt the butter over medium heat.Add the mushrooms and onions, sautéing for 6-8 minutes until their liquid evaporates and they are nicely browned.4️⃣Add Seasoning:Stir in the Dijon mustard, Worcestershire sauce, and minced garlic.Cook for about 1 minute, letting the flavors meld.5️⃣Deglaze the Pan:Pour in the chicken broth, scraping up any browned bits stuck to the bottom of the pan.Return the cooked chicken to the skillet and simmer for 2 minutes, stirring occasionally.6️⃣Finish with Sour Cream:Reduce the heat to low and stir in the sour cream, warming the sauce gently for about 1 minute.Avoid boiling the sauce to prevent curdling.Taste and adjust seasoning with additional salt, pepper, Dijon mustard, or Worcestershire sauce, if needed.
  10. In the same skillet, melt the butter over medium heat.
  11. Add the mushrooms and onions, sautéing for 6-8 minutes until their liquid evaporates and they are nicely browned.4️⃣Add Seasoning:Stir in the Dijon mustard, Worcestershire sauce, and minced garlic.Cook for about 1 minute, letting the flavors meld.5️⃣Deglaze the Pan:Pour in the chicken broth, scraping up any browned bits stuck to the bottom of the pan.Return the cooked chicken to the skillet and simmer for 2 minutes, stirring occasionally.6️⃣Finish with Sour Cream:Reduce the heat to low and stir in the sour cream, warming the sauce gently for about 1 minute.Avoid boiling the sauce to prevent curdling.Taste and adjust seasoning with additional salt, pepper, Dijon mustard, or Worcestershire sauce, if needed.
  12. 4️⃣Add Seasoning:Stir in the Dijon mustard, Worcestershire sauce, and minced garlic.Cook for about 1 minute, letting the flavors meld.5️⃣Deglaze the Pan:Pour in the chicken broth, scraping up any browned bits stuck to the bottom of the pan.Return the cooked chicken to the skillet and simmer for 2 minutes, stirring occasionally.6️⃣Finish with Sour Cream:Reduce the heat to low and stir in the sour cream, warming the sauce gently for about 1 minute.Avoid boiling the sauce to prevent curdling.Taste and adjust seasoning with additional salt, pepper, Dijon mustard, or Worcestershire sauce, if needed.
  13. Stir in the Dijon mustard, Worcestershire sauce, and minced garlic.
  14. Cook for about 1 minute, letting the flavors meld.5️⃣Deglaze the Pan:Pour in the chicken broth, scraping up any browned bits stuck to the bottom of the pan.Return the cooked chicken to the skillet and simmer for 2 minutes, stirring occasionally.6️⃣Finish with Sour Cream:Reduce the heat to low and stir in the sour cream, warming the sauce gently for about 1 minute.Avoid boiling the sauce to prevent curdling.Taste and adjust seasoning with additional salt, pepper, Dijon mustard, or Worcestershire sauce, if needed.
  15. 5️⃣Deglaze the Pan:Pour in the chicken broth, scraping up any browned bits stuck to the bottom of the pan.Return the cooked chicken to the skillet and simmer for 2 minutes, stirring occasionally.6️⃣Finish with Sour Cream:Reduce the heat to low and stir in the sour cream, warming the sauce gently for about 1 minute.Avoid boiling the sauce to prevent curdling.Taste and adjust seasoning with additional salt, pepper, Dijon mustard, or Worcestershire sauce, if needed.
  16. Pour in the chicken broth, scraping up any browned bits stuck to the bottom of the pan.
  17. Return the cooked chicken to the skillet and simmer for 2 minutes, stirring occasionally.6️⃣Finish with Sour Cream:Reduce the heat to low and stir in the sour cream, warming the sauce gently for about 1 minute.Avoid boiling the sauce to prevent curdling.Taste and adjust seasoning with additional salt, pepper, Dijon mustard, or Worcestershire sauce, if needed.
  18. 6️⃣Finish with Sour Cream:Reduce the heat to low and stir in the sour cream, warming the sauce gently for about 1 minute.Avoid boiling the sauce to prevent curdling.Taste and adjust seasoning with additional salt, pepper, Dijon mustard, or Worcestershire sauce, if needed.
  19. Reduce the heat to low and stir in the sour cream, warming the sauce gently for about 1 minute.
  20. Avoid boiling the sauce to prevent curdling.Taste and adjust seasoning with additional salt, pepper, Dijon mustard, or Worcestershire sauce, if needed.
  21. Taste and adjust seasoning with additional salt, pepper, Dijon mustard, or Worcestershire sauce, if needed.

Notes

Make it Your Own:Swap chicken with beef or turkey for a variation.Storage:Store leftovers in an airtight container in the refrigerator for up to 3 days. Reheat gently over low heat to preserve the sauce’s creaminess.Optional Add-ins:Add a splash of white wine or a sprinkle of fresh parsley for extra flavor.
Storage:Store leftovers in an airtight container in the refrigerator for up to 3 days. Reheat gently over low heat to preserve the sauce’s creaminess.Optional Add-ins:Add a splash of white wine or a sprinkle of fresh parsley for extra flavor.
Optional Add-ins:Add a splash of white wine or a sprinkle of fresh parsley for extra flavor.

“`

Cheesy Potatoes Recipe for Easy Family Dinners

“`html

Cheesy Potatoes Recipe for Easy Family Dinners

Craving a Deliciously Simple Side Dish?

Are you a busy parent or a home cook looking for that perfect, comforting side dish that doesn’t require a culinary degree or hours in the kitchen? In today’s fast-paced world, finding recipes that are both incredibly delicious and genuinely easy can feel like a quest. But what if I told you that you could create a crowd-pleasing, cheesy potatoes recipe that boasts rich French onion flavor and a delightful crispy topping, all with minimal effort? This dish is a game-changer for family dinners, potlucks, and holiday gatherings, offering a guaranteed hit that will have everyone asking for seconds.

The Hearty & Flavorful Ingredients

The magic of this cheesy potato casserole lies in its straightforward yet impactful ingredient list. We aim for maximum flavor with minimal fuss, ensuring that even beginner cooks can achieve impressive results. The key is using good quality ingredients that complement each other beautifully.

For the Potato Casserole:

  • 5 lbs Russet Potatoes: Our starchy heroes, peeled and thinly sliced (about 1/8-inch thick). Russets hold their shape well and absorb creamy sauces beautifully, resulting in tender, melt-in-your-mouth goodness. If you prefer, Yukon Golds offer a slightly creamier texture.
  • 1 cup (2 sticks) Unsalted Butter: The foundation of richness. Melted butter brings a luxurious feel and helps crisp up the potatoes.
  • 1 large Yellow Onion, finely chopped: Provides a gentle, sweet onion base that melds perfectly with the creamy sauce.
  • 2 cloves Garlic, minced: For that indispensable aromatic depth.
  • 1 (10.5 oz) can Condensed Cream of Mushroom Soup (low-sodium): This soup is a secret weapon for creating a luscious, velvety sauce without a lot of extra steps. It adds creaminess and a subtle mushroom undertone.
  • 1 (10.5 oz) can Condensed Cream of Chicken Soup (low-sodium): Similar to mushroom soup, this adds another layer of creamy comfort and savory flavor.
  • 1 cup Sour Cream: Tangy and cooling, sour cream balances the richness of the butter and cheese, adding a delightful creamy texture.
  • 1 cup Milk (whole or 2%): To achieve the perfect, pourable consistency for our sauce.
  • 2 cups Shredded Sharp Cheddar Cheese: The star of the cheesy show! Sharp cheddar offers a bold flavor that shines through.
  • 1 tsp Salt: To enhance all the flavors.
  • 1/2 tsp Black Pepper: Freshly ground is best for a gentle bite.

For the Crispy French Fried Onions:

  • 1 large Yellow Onion, thinly sliced into rings: The crunchy crown jewel of our casserole.
  • 1/2 cup All-Purpose Flour: To lightly coat the onions and help them get beautifully crisp.
  • 1/2 tsp Salt
  • 1/4 tsp Black Pepper
  • Vegetable Oil, for frying: Enough to generously coat the bottom of your skillet.

Substitutions & Customizations:

  • Potatoes: While Russets are ideal, Yukon Golds or even baby potatoes (halved or quartered) can work. Adjust slicing thickness accordingly.
  • Soups: Feel free to use two cans of your preferred condensed soup (e.g., two cream of mushroom, or cream of celery).
  • Cheese: Gruyere, Monterey Jack, or a Colby-Jack blend are excellent alternatives to cheddar.
  • Onions for Frying: If you’re short on time, store-bought French fried onions are a perfectly acceptable, though less flavorful, substitute.

Timing is Everything

Prep time: 30 minutes
Cook time: 1 hour 15 minutes
Total time: 1 hour 45 minutes

This recipe requires a solid chunk of time, totaling nearly 2 hours. While the active prep is manageable at 30 minutes, the baking process is where this dish truly develops its rich flavors and creamy texture. Compared to simpler potato dishes, the extended baking time allows the sauce to thicken and the potatoes to become incredibly tender. However, the hands-on time is minimal, making it a great “set it and forget it” option for busy evenings.

Cheesy potatoes casserole with a golden brown topping in a baking dish.

Step-by-Step: Crafting Your Cheesy Potato Masterpiece

Step 1: Prep the Potatoes

First things first, let’s get those potatoes ready. Peel your russet potatoes and then slice them thinly, aiming for about 1/8-inch thickness. A mandoline slicer is your best friend here for uniform slices, but a sharp knife and a steady hand will do the trick. Uniformity is key for even cooking! Place the sliced potatoes in a large bowl.

Step 2: Make the Creamy Base

In a separate large bowl, melt your butter. Add the finely chopped yellow onion and minced garlic to the melted butter. If you have time, you can sauté these briefly in the butter on the stovetop for an even deeper flavor, but it’s not essential for this recipe. Stir in the condensed cream of mushroom and cream of chicken soups, sour cream, and milk. Mix until the sauce is smooth and well combined. Then, stir in the shredded cheddar cheese, salt, and pepper. Reserve about half a cup of cheese for topping if you like.

Step 3: Assemble the Casserole

Now it’s time to bring it all together. Pour the creamy sauce mixture over the sliced potatoes. Gently toss everything together with your hands or a large spoon until all the potato slices are evenly coated in the luscious sauce. Make sure no potato slice is left behind!

Preheat your oven to 350°F (175°C). Lightly grease a 9×13 inch baking dish. Pour the potato and sauce mixture into the prepared baking dish, spreading it out evenly.

Step 4: Bake to Perfection

Cover the baking dish tightly with aluminum foil. Bake for 1 hour. This initial covered baking time is crucial for steaming the potatoes and allowing them to become tender without drying out. After 1 hour, remove the foil. If you reserved cheese, sprinkle it over the top now. Continue to bake, uncovered, for another 10-15 minutes, or until the casserole is bubbly and the cheese is melted and golden brown (if added). If you want an extra crispy top, you can broil for the last 1-2 minutes, watching carefully to prevent burning.

Step 5: The Grand Finale – Fried Onions

While the casserole is in its final baking stage, prepare your crispy onions. In a shallow bowl, whisk together the flour, salt, and pepper. Toss the thinly sliced onion rings in the flour mixture until they are lightly coated. Heat about 1/2 inch of vegetable oil in a large skillet over medium-high heat until shimmering.

Carefully add the floured onion rings to the hot oil in a single layer (you may need to do this in batches to avoid overcrowding). Fry for 2-3 minutes per side, or until golden brown and crispy. Use a slotted spoon to transfer the fried onions to a plate lined with paper towels to drain excess oil. Sprinkle with a little extra salt immediately.

Once the potato casserole is done and bubbling, remove it from the oven. Let it rest for about 5-10 minutes. Just before serving, generously top the casserole with your homemade crispy fried onions. This makes all the difference in texture and flavor!

Nutritional Snapshot

Please note: Nutritional information is an estimate and can vary based on specific ingredients and portion sizes.

  • Calories: Approximately 450-550 per serving (this can vary significantly based on cheese and butter usage)
  • Fat: High, primarily from butter, cheese, and oil.
  • Carbohydrates: High, from potatoes.
  • Protein: Moderate, from cheese and soups.

Healthier Twists on a Classic

While this casserole is undeniably indulgent, it’s possible to make it a bit lighter without sacrificing too much flavor:

  • Reduced Fat: Use reduced-fat cream soups, light sour cream, and a lower-fat milk. You can also reduce the amount of butter used in the sauce or omit it entirely if using creamy soups.
  • Leaner Protein: Opt for chicken breast instead of thighs if making your own chicken soup base, or choose reduced-fat cheese.
  • Whole Grains: While not directly applicable to the potato base, serve with whole-grain bread or a hearty salad.
  • Vegetable Boost: Sneak in some finely chopped broccoli or cauliflower florets along with the potatoes for added nutrients and fiber.
  • Lighter Topping: Skip the fried onions altogether and top with a sprinkle of panko breadcrumbs mixed with a little melted butter and Parmesan cheese, then broiled until golden. Or, use store-bought crispy onions sparingly.

Perfect Pairings for Your Cheesy Potatoes

This rich and comforting side dish is incredibly versatile:

  • Barbecue: Excellent alongside pulled pork, ribs, or grilled chicken.
  • Roasts: A perfect accompaniment to beef roasts, prime rib, or a holiday ham.
  • Simple Proteins: Pairs well with baked salmon, grilled steak, or even a simple roasted chicken.
  • Vegetarian Mains: Serve with a hearty lentil loaf or a substantial vegetarian shepherd’s pie.
  • Salad: A crisp green salad provides a refreshing counterpoint to the richness of the potatoes.

Avoiding Common Pitfalls

To ensure your cheesy potatoes recipe turns out perfectly every time, be mindful of these common mistakes:

  • Uneven Slicing: Inconsistent potato slices lead to some being overcooked and mushy while others are undercooked and firm. Use a mandoline or a sharp knife for uniformity.
  • Over-Salting: Remember that condensed soups and cheeses already contain salt. Taste your sauce before adding too much extra salt.
  • Sauce Too Thick/Thin: Adjust the milk slightly if your sauce seems too thick or too thin before pouring it over the potatoes.
  • Skipping the Covered Bake: Covering the casserole for the first hour is essential for tender potatoes. Peeking too often can release steam and affect cooking time.
  • Burning the Onions: Fry the onions in batches and watch them closely, as they can go from golden to burnt very quickly.

Storing Leftovers Like a Pro

Leftover cheesy potatoes are a wonderful thing! Let the casserole cool completely before transferring it to an airtight container. It will keep in the refrigerator for up to 3-4 days.

To Reheat: The best way to reheat is in a moderate oven (around 325°F or 160°C) until heated through. You can also reheat individual portions in the microwave, but they may lose some of their creamy texture and the crispy topping will soften. For a crispier top, reheat uncovered on a baking sheet.

Close-up of crispy fried onions being sprinkled over a baked cheesy potato casserole.

Your Go-To Comfort Food Casserole Awaits!

There you have it – a foolproof cheesy potatoes recipe that’s set to become a staple in your home. It’s the epitome of comfort food, delivering a rich, creamy, cheesy experience with that irresistible crunch from the homemade fried onions. Whether you’re feeding a hungry family after a long day or impressing guests at a special occasion, this casserole is guaranteed to be a hit. Don’t hesitate to whip this up for your next gathering; your taste buds (and everyone else’s) will thank you!

Frequently Asked Questions (FAQs)

***What kind of potatoes are best for this recipe?***

Russet potatoes are recommended for their starchy texture, which makes them ideal for absorbing the creamy sauce and becoming tender. Yukon Gold potatoes are a good alternative if you prefer a slightly creamier result.

***Can I make this ahead of time?***

Yes! You can assemble the casserole up to the point of baking, cover it tightly, and refrigerate it for up to 24 hours. You may need to add an extra 15-20 minutes to the baking time if baking directly from the refrigerator.

***How do I make the fried onions crispy?***

Ensure your oil is hot enough (medium-high heat), don’t overcrowd the pan when frying, and drain them on paper towels immediately after frying to absorb excess grease. Frying them fresh right before serving will yield the crispiest results.

***Can I freeze this casserole?***

It’s generally not recommended to freeze this casserole after it’s been baked, as the texture of the potatoes and sauce can become watery upon thawing. If you must freeze, bake it from refrigerated, cool completely, cover very tightly, and freeze for up to 2 months. Thaw overnight in the refrigerator before reheating.

***My casserole is watery, what happened?***

This can happen if the potatoes release too much moisture, or if the sauce wasn’t thick enough to begin with. Ensure you’re using condensed soups, and if your sauce seems particularly thin, you can slightly reduce the milk or add a bit more cheese. Also, make sure you bake it uncovered for the last 10-15 minutes to allow some moisture to evaporate.

Print
clock clock iconcutlery cutlery iconflag flag iconfolder folder iconinstagram instagram iconpinterest pinterest iconfacebook facebook iconprint print iconsquares squares iconheart heart iconheart solid heart solid icon

French Onion Funeral Potatoes


  • Author: Chef Emy

Description

A comforting, cheesy casserole with a rich French onion flavor, topped with crispy homemade fried onions. Perfect for gatherings, holidays, or a hearty family dinner!


Ingredients

Scale
  • 32 ozfrozen cubed hash browns, thawed1/4 cup(1/2 stick /57 g) unsalted butter, melted2 cups(226 g) sharp cheddar cheese, shredded1 1/2 cups(345 g) sour cream
  • 1/4 cup(1/2 stick /57 g) unsalted butter, melted2 cups(226 g) sharp cheddar cheese, shredded1 1/2 cups(345 g) sour cream
  • 2 cups(226 g) sharp cheddar cheese, shredded1 1/2 cups(345 g) sour cream
  • 1 1/2 cups(345 g) sour cream
  • 1/4 cup(1/2 stick /57 g) unsalted butter1small yellow onion, diced2 tspgarlic, minced1/4 cup(31 g) all-purpose flour1 tspkosher salt1/2 tspblack pepper1/2 tspcayenne pepper1/2 tspdried mustard1/2 cup(120 g) chicken broth, room temperature1/2 cup(122.5 g) whole milk, room temperature
  • 1small yellow onion, diced2 tspgarlic, minced1/4 cup(31 g) all-purpose flour1 tspkosher salt1/2 tspblack pepper1/2 tspcayenne pepper1/2 tspdried mustard1/2 cup(120 g) chicken broth, room temperature1/2 cup(122.5 g) whole milk, room temperature
  • 2 tspgarlic, minced1/4 cup(31 g) all-purpose flour1 tspkosher salt1/2 tspblack pepper1/2 tspcayenne pepper1/2 tspdried mustard1/2 cup(120 g) chicken broth, room temperature1/2 cup(122.5 g) whole milk, room temperature
  • 1/4 cup(31 g) all-purpose flour1 tspkosher salt1/2 tspblack pepper1/2 tspcayenne pepper1/2 tspdried mustard1/2 cup(120 g) chicken broth, room temperature1/2 cup(122.5 g) whole milk, room temperature
  • 1 tspkosher salt1/2 tspblack pepper1/2 tspcayenne pepper1/2 tspdried mustard1/2 cup(120 g) chicken broth, room temperature1/2 cup(122.5 g) whole milk, room temperature
  • 1/2 tspblack pepper1/2 tspcayenne pepper1/2 tspdried mustard1/2 cup(120 g) chicken broth, room temperature1/2 cup(122.5 g) whole milk, room temperature
  • 1/2 tspcayenne pepper1/2 tspdried mustard1/2 cup(120 g) chicken broth, room temperature1/2 cup(122.5 g) whole milk, room temperature
  • 1/2 tspdried mustard1/2 cup(120 g) chicken broth, room temperature1/2 cup(122.5 g) whole milk, room temperature
  • 1/2 cup(120 g) chicken broth, room temperature1/2 cup(122.5 g) whole milk, room temperature
  • 1/2 cup(122.5 g) whole milk, room temperature
  • 2large yellow onions, thinly sliced (about4 cupsonions)4 cups(32 oz) vegetable oil1/2 tspkosher salt
  • 4 cups(32 oz) vegetable oil1/2 tspkosher salt
  • 1/2 tspkosher salt

Instructions

  1. 1️⃣Preheat the Oven:Preheat the oven to 350°F (175°C).Spray a 9×13-inch baking dish with nonstick spray.2️⃣Prepare the Potato Mixture:In a large bowl, combine the hash browns, melted butter, shredded cheese, and sour cream. Mix well and set aside.3️⃣Make the Sauce:In a medium, non-stick skillet over medium heat, melt the butter.Add the diced onion and cook until softened, about 3-5 minutes. Add the garlic and cook for 1 more minute.Stir in the flour, kosher salt, black pepper, cayenne pepper, and dried mustard. Cook for another minute.Gradually whisk in the chicken broth and milk, whisking continuously until smooth.Continue cooking, whisking often, until the sauce thickens.4️⃣Combine and Bake:Pour the prepared sauce into the potato mixture and mix until well combined.Spread the mixture evenly into the prepared baking dish.Bake for 45-50 minutes, or until the casserole is bubbly and heated through.5️⃣Prepare the Fried Onions:Line a large baking sheet with two layers of paper towels and set aside.Heat the vegetable oil in a large saucepan over high heat until it reaches 350°F (175°C).Working in batches, fry 1 cup of sliced onions at a time in the hot oil. Fry, stirring occasionally, until the onions are pale golden brown, about 2-5 minutes per batch.Using a slotted spoon or fine mesh strainer, transfer the fried onions to the prepared baking sheet.Sprinkle the fried onions with kosher salt while they are still warm, tossing to coat evenly.6️⃣Top and Serve:Once the casserole has baked for 45-50 minutes, remove it from the oven.Sprinkle the crispy fried onions evenly over the top of the hot casserole.Serve immediately and enjoy!
  2. Preheat the oven to 350°F (175°C).Spray a 9×13-inch baking dish with nonstick spray.2️⃣Prepare the Potato Mixture:In a large bowl, combine the hash browns, melted butter, shredded cheese, and sour cream. Mix well and set aside.3️⃣Make the Sauce:In a medium, non-stick skillet over medium heat, melt the butter.Add the diced onion and cook until softened, about 3-5 minutes. Add the garlic and cook for 1 more minute.Stir in the flour, kosher salt, black pepper, cayenne pepper, and dried mustard. Cook for another minute.Gradually whisk in the chicken broth and milk, whisking continuously until smooth.Continue cooking, whisking often, until the sauce thickens.4️⃣Combine and Bake:Pour the prepared sauce into the potato mixture and mix until well combined.Spread the mixture evenly into the prepared baking dish.Bake for 45-50 minutes, or until the casserole is bubbly and heated through.5️⃣Prepare the Fried Onions:Line a large baking sheet with two layers of paper towels and set aside.Heat the vegetable oil in a large saucepan over high heat until it reaches 350°F (175°C).Working in batches, fry 1 cup of sliced onions at a time in the hot oil. Fry, stirring occasionally, until the onions are pale golden brown, about 2-5 minutes per batch.Using a slotted spoon or fine mesh strainer, transfer the fried onions to the prepared baking sheet.Sprinkle the fried onions with kosher salt while they are still warm, tossing to coat evenly.6️⃣Top and Serve:Once the casserole has baked for 45-50 minutes, remove it from the oven.Sprinkle the crispy fried onions evenly over the top of the hot casserole.Serve immediately and enjoy!
  3. Spray a 9×13-inch baking dish with nonstick spray.
  4. 2️⃣Prepare the Potato Mixture:In a large bowl, combine the hash browns, melted butter, shredded cheese, and sour cream. Mix well and set aside.3️⃣Make the Sauce:In a medium, non-stick skillet over medium heat, melt the butter.Add the diced onion and cook until softened, about 3-5 minutes. Add the garlic and cook for 1 more minute.Stir in the flour, kosher salt, black pepper, cayenne pepper, and dried mustard. Cook for another minute.Gradually whisk in the chicken broth and milk, whisking continuously until smooth.Continue cooking, whisking often, until the sauce thickens.4️⃣Combine and Bake:Pour the prepared sauce into the potato mixture and mix until well combined.Spread the mixture evenly into the prepared baking dish.Bake for 45-50 minutes, or until the casserole is bubbly and heated through.5️⃣Prepare the Fried Onions:Line a large baking sheet with two layers of paper towels and set aside.Heat the vegetable oil in a large saucepan over high heat until it reaches 350°F (175°C).Working in batches, fry 1 cup of sliced onions at a time in the hot oil. Fry, stirring occasionally, until the onions are pale golden brown, about 2-5 minutes per batch.Using a slotted spoon or fine mesh strainer, transfer the fried onions to the prepared baking sheet.Sprinkle the fried onions with kosher salt while they are still warm, tossing to coat evenly.6️⃣Top and Serve:Once the casserole has baked for 45-50 minutes, remove it from the oven.Sprinkle the crispy fried onions evenly over the top of the hot casserole.Serve immediately and enjoy!
  5. In a large bowl, combine the hash browns, melted butter, shredded cheese, and sour cream. Mix well and set aside.3️⃣Make the Sauce:In a medium, non-stick skillet over medium heat, melt the butter.Add the diced onion and cook until softened, about 3-5 minutes. Add the garlic and cook for 1 more minute.Stir in the flour, kosher salt, black pepper, cayenne pepper, and dried mustard. Cook for another minute.Gradually whisk in the chicken broth and milk, whisking continuously until smooth.Continue cooking, whisking often, until the sauce thickens.4️⃣Combine and Bake:Pour the prepared sauce into the potato mixture and mix until well combined.Spread the mixture evenly into the prepared baking dish.Bake for 45-50 minutes, or until the casserole is bubbly and heated through.5️⃣Prepare the Fried Onions:Line a large baking sheet with two layers of paper towels and set aside.Heat the vegetable oil in a large saucepan over high heat until it reaches 350°F (175°C).Working in batches, fry 1 cup of sliced onions at a time in the hot oil. Fry, stirring occasionally, until the onions are pale golden brown, about 2-5 minutes per batch.Using a slotted spoon or fine mesh strainer, transfer the fried onions to the prepared baking sheet.Sprinkle the fried onions with kosher salt while they are still warm, tossing to coat evenly.6️⃣Top and Serve:Once the casserole has baked for 45-50 minutes, remove it from the oven.Sprinkle the crispy fried onions evenly over the top of the hot casserole.Serve immediately and enjoy!
  6. 3️⃣Make the Sauce:
  7. In a medium, non-stick skillet over medium heat, melt the butter.Add the diced onion and cook until softened, about 3-5 minutes. Add the garlic and cook for 1 more minute.Stir in the flour, kosher salt, black pepper, cayenne pepper, and dried mustard. Cook for another minute.Gradually whisk in the chicken broth and milk, whisking continuously until smooth.Continue cooking, whisking often, until the sauce thickens.4️⃣Combine and Bake:Pour the prepared sauce into the potato mixture and mix until well combined.Spread the mixture evenly into the prepared baking dish.Bake for 45-50 minutes, or until the casserole is bubbly and heated through.5️⃣Prepare the Fried Onions:Line a large baking sheet with two layers of paper towels and set aside.Heat the vegetable oil in a large saucepan over high heat until it reaches 350°F (175°C).Working in batches, fry 1 cup of sliced onions at a time in the hot oil. Fry, stirring occasionally, until the onions are pale golden brown, about 2-5 minutes per batch.Using a slotted spoon or fine mesh strainer, transfer the fried onions to the prepared baking sheet.Sprinkle the fried onions with kosher salt while they are still warm, tossing to coat evenly.6️⃣Top and Serve:Once the casserole has baked for 45-50 minutes, remove it from the oven.Sprinkle the crispy fried onions evenly over the top of the hot casserole.Serve immediately and enjoy!
  8. Add the diced onion and cook until softened, about 3-5 minutes. Add the garlic and cook for 1 more minute.Stir in the flour, kosher salt, black pepper, cayenne pepper, and dried mustard. Cook for another minute.Gradually whisk in the chicken broth and milk, whisking continuously until smooth.Continue cooking, whisking often, until the sauce thickens.4️⃣Combine and Bake:Pour the prepared sauce into the potato mixture and mix until well combined.Spread the mixture evenly into the prepared baking dish.Bake for 45-50 minutes, or until the casserole is bubbly and heated through.5️⃣Prepare the Fried Onions:Line a large baking sheet with two layers of paper towels and set aside.Heat the vegetable oil in a large saucepan over high heat until it reaches 350°F (175°C).Working in batches, fry 1 cup of sliced onions at a time in the hot oil. Fry, stirring occasionally, until the onions are pale golden brown, about 2-5 minutes per batch.Using a slotted spoon or fine mesh strainer, transfer the fried onions to the prepared baking sheet.Sprinkle the fried onions with kosher salt while they are still warm, tossing to coat evenly.6️⃣Top and Serve:Once the casserole has baked for 45-50 minutes, remove it from the oven.Sprinkle the crispy fried onions evenly over the top of the hot casserole.Serve immediately and enjoy!
  9. Stir in the flour, kosher salt, black pepper, cayenne pepper, and dried mustard. Cook for another minute.
  10. Gradually whisk in the chicken broth and milk, whisking continuously until smooth.Continue cooking, whisking often, until the sauce thickens.4️⃣Combine and Bake:Pour the prepared sauce into the potato mixture and mix until well combined.Spread the mixture evenly into the prepared baking dish.Bake for 45-50 minutes, or until the casserole is bubbly and heated through.5️⃣Prepare the Fried Onions:Line a large baking sheet with two layers of paper towels and set aside.Heat the vegetable oil in a large saucepan over high heat until it reaches 350°F (175°C).Working in batches, fry 1 cup of sliced onions at a time in the hot oil. Fry, stirring occasionally, until the onions are pale golden brown, about 2-5 minutes per batch.Using a slotted spoon or fine mesh strainer, transfer the fried onions to the prepared baking sheet.Sprinkle the fried onions with kosher salt while they are still warm, tossing to coat evenly.6️⃣Top and Serve:Once the casserole has baked for 45-50 minutes, remove it from the oven.Sprinkle the crispy fried onions evenly over the top of the hot casserole.Serve immediately and enjoy!
  11. Continue cooking, whisking often, until the sauce thickens.4️⃣Combine and Bake:Pour the prepared sauce into the potato mixture and mix until well combined.Spread the mixture evenly into the prepared baking dish.Bake for 45-50 minutes, or until the casserole is bubbly and heated through.5️⃣Prepare the Fried Onions:Line a large baking sheet with two layers of paper towels and set aside.Heat the vegetable oil in a large saucepan over high heat until it reaches 350°F (175°C).Working in batches, fry 1 cup of sliced onions at a time in the hot oil. Fry, stirring occasionally, until the onions are pale golden brown, about 2-5 minutes per batch.Using a slotted spoon or fine mesh strainer, transfer the fried onions to the prepared baking sheet.Sprinkle the fried onions with kosher salt while they are still warm, tossing to coat evenly.6️⃣Top and Serve:Once the casserole has baked for 45-50 minutes, remove it from the oven.Sprinkle the crispy fried onions evenly over the top of the hot casserole.Serve immediately and enjoy!
  12. 4️⃣Combine and Bake:
  13. Pour the prepared sauce into the potato mixture and mix until well combined.Spread the mixture evenly into the prepared baking dish.Bake for 45-50 minutes, or until the casserole is bubbly and heated through.5️⃣Prepare the Fried Onions:Line a large baking sheet with two layers of paper towels and set aside.Heat the vegetable oil in a large saucepan over high heat until it reaches 350°F (175°C).Working in batches, fry 1 cup of sliced onions at a time in the hot oil. Fry, stirring occasionally, until the onions are pale golden brown, about 2-5 minutes per batch.Using a slotted spoon or fine mesh strainer, transfer the fried onions to the prepared baking sheet.Sprinkle the fried onions with kosher salt while they are still warm, tossing to coat evenly.6️⃣Top and Serve:Once the casserole has baked for 45-50 minutes, remove it from the oven.Sprinkle the crispy fried onions evenly over the top of the hot casserole.Serve immediately and enjoy!
  14. Spread the mixture evenly into the prepared baking dish.Bake for 45-50 minutes, or until the casserole is bubbly and heated through.5️⃣Prepare the Fried Onions:Line a large baking sheet with two layers of paper towels and set aside.Heat the vegetable oil in a large saucepan over high heat until it reaches 350°F (175°C).Working in batches, fry 1 cup of sliced onions at a time in the hot oil. Fry, stirring occasionally, until the onions are pale golden brown, about 2-5 minutes per batch.Using a slotted spoon or fine mesh strainer, transfer the fried onions to the prepared baking sheet.Sprinkle the fried onions with kosher salt while they are still warm, tossing to coat evenly.6️⃣Top and Serve:Once the casserole has baked for 45-50 minutes, remove it from the oven.Sprinkle the crispy fried onions evenly over the top of the hot casserole.Serve immediately and enjoy!
  15. Bake for 45-50 minutes, or until the casserole is bubbly and heated through.
  16. 5️⃣Prepare the Fried Onions:Line a large baking sheet with two layers of paper towels and set aside.Heat the vegetable oil in a large saucepan over high heat until it reaches 350°F (175°C).Working in batches, fry 1 cup of sliced onions at a time in the hot oil. Fry, stirring occasionally, until the onions are pale golden brown, about 2-5 minutes per batch.Using a slotted spoon or fine mesh strainer, transfer the fried onions to the prepared baking sheet.Sprinkle the fried onions with kosher salt while they are still warm, tossing to coat evenly.6️⃣Top and Serve:Once the casserole has baked for 45-50 minutes, remove it from the oven.Sprinkle the crispy fried onions evenly over the top of the hot casserole.Serve immediately and enjoy!
  17. Line a large baking sheet with two layers of paper towels and set aside.Heat the vegetable oil in a large saucepan over high heat until it reaches 350°F (175°C).Working in batches, fry 1 cup of sliced onions at a time in the hot oil. Fry, stirring occasionally, until the onions are pale golden brown, about 2-5 minutes per batch.Using a slotted spoon or fine mesh strainer, transfer the fried onions to the prepared baking sheet.Sprinkle the fried onions with kosher salt while they are still warm, tossing to coat evenly.6️⃣Top and Serve:Once the casserole has baked for 45-50 minutes, remove it from the oven.Sprinkle the crispy fried onions evenly over the top of the hot casserole.Serve immediately and enjoy!
  18. Heat the vegetable oil in a large saucepan over high heat until it reaches 350°F (175°C).
  19. Working in batches, fry 1 cup of sliced onions at a time in the hot oil. Fry, stirring occasionally, until the onions are pale golden brown, about 2-5 minutes per batch.Using a slotted spoon or fine mesh strainer, transfer the fried onions to the prepared baking sheet.Sprinkle the fried onions with kosher salt while they are still warm, tossing to coat evenly.6️⃣Top and Serve:Once the casserole has baked for 45-50 minutes, remove it from the oven.Sprinkle the crispy fried onions evenly over the top of the hot casserole.Serve immediately and enjoy!
  20. Using a slotted spoon or fine mesh strainer, transfer the fried onions to the prepared baking sheet.Sprinkle the fried onions with kosher salt while they are still warm, tossing to coat evenly.6️⃣Top and Serve:Once the casserole has baked for 45-50 minutes, remove it from the oven.Sprinkle the crispy fried onions evenly over the top of the hot casserole.Serve immediately and enjoy!
  21. Sprinkle the fried onions with kosher salt while they are still warm, tossing to coat evenly.
  22. 6️⃣Top and Serve:Once the casserole has baked for 45-50 minutes, remove it from the oven.Sprinkle the crispy fried onions evenly over the top of the hot casserole.Serve immediately and enjoy!
  23. Once the casserole has baked for 45-50 minutes, remove it from the oven.Sprinkle the crispy fried onions evenly over the top of the hot casserole.Serve immediately and enjoy!
  24. Sprinkle the crispy fried onions evenly over the top of the hot casserole.
  25. Serve immediately and enjoy!

Notes

Make it Ahead:Prepare the casserole (without the fried onions) a day in advance, cover, and refrigerate. Bake when ready and top with freshly fried onions.Cheese Variations:Swap sharp cheddar for Gruyère, Monterey Jack, or a mix for added depth.Shortcut Option:Use store-bought French-fried onions for a quicker topping.
Cheese Variations:Swap sharp cheddar for Gruyère, Monterey Jack, or a mix for added depth.Shortcut Option:Use store-bought French-fried onions for a quicker topping.
Shortcut Option:Use store-bought French-fried onions for a quicker topping.

“`

Easy Chicken Ricotta Meatballs with Spinach Alfredo Sauce!

“`html

Easy Chicken Ricotta Meatballs with Spinach Alfredo Sauce!

Craving Creamy Chicken Perfection?

Hello, food lovers! If you’re craving a delicious and creamy dinner option, you’ve found the perfect recipe! Are you tired of dry, bland chicken dishes that leave you feeling uninspired? Does your weeknight dinner routine need a serious upgrade with a dish that’s both comforting and elegant? These Chicken Ricotta Meatballs with Spinach Alfredo Sauce are an irresistible combination of tender chicken meatballs, rich ricotta, and a luscious spinach-infused Alfredo sauce. This dish is designed to impress without requiring hours in the kitchen, making it ideal for busy weeknights or special occasions. Whether you’re making dinner for your family, impressing guests, or treating yourself to a restaurant-worthy meal at home, this dish will quickly become a favorite. Get ready to elevate your culinary game with this harmonious blend of textures and flavors!

Ingredients You’ll Need

Gather these delightful ingredients to bring this masterpiece to life. The quality of your ingredients will truly shine through in the final dish. We’ve also included notes on substitutions to make this recipe work for your pantry!

For the Chicken Ricotta Meatballs:

  • 1 lb ground chicken (lean or regular)
  • 1/2 cup fresh ricotta cheese (whole milk recommended for creaminess, but part-skim works)
  • 1/4 cup grated Parmesan cheese
  • 1 large egg, lightly beaten
  • 1/4 cup panko breadcrumbs (or regular breadcrumbs, or almond flour for gluten-free)
  • 2 cloves garlic, minced (about 1 tsp)
  • 1 tablespoon fresh parsley, finely chopped (or 1 tsp dried)
  • 1/4 teaspoon salt
  • 1/8 teaspoon black pepper
  • 1 tablespoon olive oil, for searing
For the Spinach Alfredo Sauce:

  • 2 tablespoons unsalted butter
  • 2 cloves garlic, minced (about 1 tsp)
  • 1 1/2 cups heavy cream (or half-and-half for lighter sauce)
  • 1/2 cup grated Parmesan cheese
  • 2 cups fresh spinach, roughly chopped (or 1 cup frozen spinach, thawed and squeezed dry)
  • Pinch of nutmeg (optional, but highly recommended!)
  • Salt and freshly ground black pepper, to taste
  • Optional: Cooked pasta, for serving

Timing Is Everything

Prep time: 20 minutes
Cook time: 25 minutes
Total time: 45 minutes

On average, most complex chicken dishes can take upwards of an hour to prepare and cook. This recipe for Easy Chicken Ricotta Meatballs with Spinach Alfredo Sauce is significantly faster, clocking in at just 45 minutes total! This makes it a perfect candidate for a satisfying weeknight meal without sacrificing flavor or quality. The prep is straightforward, and the cooking process is efficient, allowing you to get a gourmet-tasting meal on the table in under an hour.

A beautiful serving of chicken ricotta meatballs with spinach alfredo sauce.

Step-by-Step Mastery

Let’s get cooking! Follow these simple steps for perfectly seasoned meatballs and a decadent Alfredo sauce.

Step 1: Preheat and Prep

First things first, preheat your oven to 375°F (190°C). This ensures a consistent temperature for cooking the meatballs thoroughly. Line a baking sheet with parchment paper or lightly grease it to prevent sticking. If you’re serving this with pasta, get a large pot of salted water boiling now – timing is key!

Step 2: Craft Your Meatballs

In a medium bowl, gently combine the ground chicken, ricotta cheese, Parmesan cheese, beaten egg, panko breadcrumbs, minced garlic, chopped parsley, salt, and pepper. Use your hands to mix everything until just combined. Be careful not to overmix, as this can lead to tough meatballs. Overmixing can further develop the gluten in the breadcrumbs (or any binder you use), resulting in a denser, chewier texture rather than a tender one. Aim for a light, airy mixture.

Step 3: Sear to Perfection

Heat the olive oil in a large, oven-safe skillet (cast iron works wonderfully here!) over medium-high heat. Roll the chicken mixture into 1 to 1.5-inch meatballs. Carefully place the meatballs in the hot skillet, ensuring not to overcrowd the pan. Sear them for about 2-3 minutes per side, until they have a beautiful golden-brown crust. This searing step is crucial for developing flavor and creating a lovely texture on the outside of the meatballs. You’ll likely need to do this in batches, adding a touch more oil if needed.

Step 4: Whip Up the Alfredo

Once the meatballs are all seared, remove them from the skillet and set them aside on a plate. If you used an oven-safe skillet, you can proceed directly in it. If not, wipe out the skillet and add the butter over medium heat. Once melted, add the minced garlic and sauté for about 30 seconds until fragrant, being careful not to burn it. Pour in the heavy cream and bring it to a gentle simmer. Let it cook for 2-3 minutes, stirring occasionally, until it starts to thicken slightly. Stir in the grated Parmesan cheese until it’s melted and the sauce is smooth. Season with salt, pepper, and a pinch of nutmeg if using. The sauce should be rich and creamy.

Step 5: Combine and Simmer

Return the seared meatballs to the skillet with the Alfredo sauce. Gently nestle them into the sauce. Stir in the chopped spinach. If using an oven-safe skillet, place the skillet into your preheated oven (375°F/190°C) and bake for 10-12 minutes, or until the meatballs are cooked through and the sauce is bubbly and slightly thickened. If your skillet isn’t oven-safe, you can cover the skillet and let it simmer on the stovetop over low heat for about 10-15 minutes, or until the meatballs are cooked through and the spinach has wilted into the sauce. The goal is to ensure the meatballs are fully cooked and the flavors meld beautifully.

Step 6: Serve and Savor

Once the meatballs are cooked through and the sauce is luscious, it’s time to serve! If you cooked pasta, drain it and either toss it directly with the sauce and meatballs or serve the meatballs and sauce spooned over a bed of pasta. Garnish with extra Parmesan cheese and fresh parsley if desired. Serve immediately and enjoy the incredible flavors!

Nutritional Highlights

While exact nutritional values can vary based on specific ingredients and portion sizes, this dish offers a good balance of protein and healthy fats. A typical serving (without pasta) is estimated to contain:

  • Calories: Approximately 350-450 kcal
  • Protein: Around 25-30g
  • Fat: Approximately 20-28g (depending on cream and cheese)
  • Carbohydrates: Around 8-15g (primarily from spinach and breadcrumbs)

Note: Adding pasta will significantly increase the carbohydrate and calorie count.

Healthier Heroics

Want to lighten this up without sacrificing flavor? Here are a few smart swaps:

  • Lighter Cream Sauce: Swap heavy cream for half-and-half or even a mix of milk and a cornstarch slurry for thickening.
  • Leaner Meat: While chicken breast is lean, it can be a little dry. Ground chicken thigh offers a good balance of flavor and moisture. For an even lighter option, consider ground turkey.
  • Whole Grain Pasta: If serving with pasta, opt for whole wheat or legume-based pasta for added fiber and nutrients.
  • Reduced Cheese: While cheese is key to Alfredo, you can slightly reduce the Parmesan in the sauce or meatballs and still achieve a delicious flavor.
  • Extra Veggies: Bulk up the sauce with more spinach or add finely chopped mushrooms and zucchini to the meatball mixture.

Serving Suggestions

This dish is incredibly versatile. Here are a few ideas to serve it:

  • Classic Pasta Pairing: Serve over your favorite pasta – fettuccine, linguine, or even penne.
  • Light & Healthy: Enjoy the meatballs and sauce over a bed of sautéed zucchini noodles or spaghetti squash.
  • Crusty Bread: Perfect for soaking up that glorious Alfredo sauce!
  • Green Side: A simple side salad with a light vinaigrette complements the richness of the dish beautifully.

Common Culinary Controversies

Let’s address some common pitfalls to ensure your meatballs are perfect:

  • Tough Meatballs: As mentioned, overmixing the meatball mixture is the primary culprit. Mix gently until ingredients are just combined.
  • Dry Meatballs: Ensure you don’t overcook them, and the ricotta cheese in the mixture helps keep them moist. Searing also locks in moisture.
  • Watery Sauce: If your Alfredo sauce seems too thin, let it simmer a bit longer without the lid to allow some liquid to evaporate and thicken it naturally. A touch of cornstarch slurry can also help if it’s too watery to begin with.
  • Burned Garlic: Garlic cooks quickly. Sauté it until fragrant, but before it starts to brown, especially in the sauce base.

Storing Your Delicious Leftovers

This dish stores wonderfully, making it excellent for meal prep:

  • Refrigeration: Allow the dish to cool completely, then store it in an airtight container in the refrigerator for up to 3-4 days.
  • Reheating: Gently reheat on the stovetop over low heat or in the microwave. You may need to add a splash of milk or cream to revive the sauce’s consistency. Store meatballs and sauce separately from pasta if possible, as pasta can become mushy when stored together.
  • Freezing: While the meatballs themselves freeze well, the creamy Alfredo sauce can sometimes separate upon thawing. If you plan to freeze, it’s best to freeze the cooked meatballs separately and make the sauce fresh when reheating.
Close-up of chicken ricotta meatballs in spinach alfredo sauce.

Frequently Asked Questions

***Can I make the meatballs ahead of time?***

Absolutely! You can prepare the meatball mixture and even roll them into balls and store them in the refrigerator for up to 24 hours before cooking. You can also freeze raw meatballs on a baking sheet until firm, then transfer them to a freezer bag for up to 2 months. Cook them directly from frozen, adding a few extra minutes to the cooking time.

***What kind of chicken should I use?***

Ground chicken thigh is generally recommended for meatballs as it has more fat and is more forgiving, resulting in moister meatballs. However, ground chicken breast can be used if you prefer a leaner option, just be extra careful not to overcook them.

***Is it okay if my meatballs aren’t perfectly round?***

Of course! Homemade meatballs are meant to be rustic and charming. As long as they are roughly the same size for even cooking, don’t stress about perfect spheres.

***Can I substitute the ricotta cheese?***

While ricotta is fantastic for its creamy texture, you could experiment with a dollop of Greek yogurt or a small amount of cottage cheese (blended smooth) for a similar moisture contribution, though the flavor and texture will be slightly different.

***How can I make the Alfredo sauce thicker if it’s too thin?***

If your sauce is too thin, you can simmer it uncovered for a few extra minutes to reduce it. Alternatively, you can whisk together 1 tablespoon of cornstarch with 2 tablespoons of cold water to create a slurry, then whisk it into the simmering sauce until it thickens. Ensure the sauce is simmering when you add the slurry for it to activate.

Conclusion

Indulge in the creamy, comforting, and utterly delicious experience of these Easy Chicken Ricotta Meatballs with Spinach Alfredo Sauce. This recipe proves that you don’t need complicated techniques or hours of your time to create a truly memorable meal. The tender, flavorful meatballs combined with the velvety, spinach-infused Alfredo sauce make for a symphony of tastes and textures that will have everyone asking for seconds. Don’t hesitate to try this recipe – it’s a guaranteed crowd-pleaser and a fantastic addition to your weeknight dinner rotation!

Print

clock clock iconcutlery cutlery iconflag flag iconfolder folder iconinstagram instagram iconpinterest pinterest iconfacebook facebook iconprint print iconsquares squares iconheart heart iconheart solid heart solid icon

Chicken Ricotta Meatballs with Spinach Alfredo Sauce – Easy Dinner Recipe


  • Author: Chef Emy

Description

Hello, food lovers! If you’re craving a delicious and creamy dinner option, you’ve found the perfect recipe! TheseChicken Ricotta Meatballs with Spinach Alfredo Sauceare an irresistible combination of tender chicken meatballs, rich ricotta, and a luscious spinach-infused Alfredo sauce. Whether you’re making dinner for your family or treating yourself, this dish will quickly become a favorite.


Ingredients

Scale
  • 1lb ground chicken
  • 1 cupricotta cheese
  • 1/2 cupgrated Parmesan cheese
  • 1egg
  • 2cloves garlic, minced
  • 1/4 cupfresh parsley, chopped
  • 1 teaspoondried oregano
  • 1/2 teaspoonsalt
  • 1/4 teaspoonblack pepper
  • 1 cupfresh spinach, finely chopped
  • 2 tablespoonsbutter
  • 2cloves garlic, minced
  • 1 cupheavy cream
  • 1 cupgrated Parmesan cheese
  • 2 cupsfresh spinach
  • Salt and pepper to taste
  • Cooked pasta of your choice
  • Fresh parsley, chopped (for garnish)
  • For a dairy-free version, you can use plant-based ricotta and a non-dairy cream alternative.
  • For gluten-freeoptions, choose gluten-free pasta.

Instructions

  1. In a large mixing bowl, combineground chicken,ricotta cheese,grated Parmesan,egg,minced garlic,chopped parsley,dried oregano,salt, andblack pepper.
  2. Add thefinely chopped spinachto the mixture and stir until everything is well combined.
  3. Shape the mixture into meatballs, about1 inch in diameter.
  4. Place the meatballs on a baking sheet lined with parchment paper.
  5. Preheat your oven to375°F (190°C).
  6. Bake the meatballs for20-25 minutes, or until fully cooked and golden brown.
  7. In a large skillet, meltbutterover medium heat.
  8. Addminced garlicand sauté for1 minuteuntil fragrant.
  9. Pour inheavy creamand bring to a simmer.
  10. Stir ingrated Parmesan cheeseuntil the sauce becomes smooth and creamy.
  11. Add thefresh spinachand cook until wilted, about2-3 minutes.
  12. Season withsaltandpepperto taste.
  13. Add thebaked meatballsto the Alfredo sauce and stir gently to coat evenly.
  14. Let the meatballs simmer in the sauce for an additional5 minutesto absorb the flavors.
  15. Serve theChicken Ricotta Meatballs with Alfredo Sauceover your favorite cooked pasta.
  16. Garnish withchopped fresh parsleybefore serving.

Notes

Use fresh spinachfor the best flavor and texture. Frozen spinach can be used, but be sure to drain it well to avoid excess water in the sauce.
Do not overmixthe meatball mixture. Overworking it can lead to tough meatballs.
If you prefer aspicierdish, add a pinch of red pepper flakes to the Alfredo sauce.
Fresh herbswill give your meatballs and sauce an aromatic kick. Consider using basil or thyme.


“`

Best Bourbon Salmon Recipe: Sweet, Smoky, and Irresistibly Flavorful

“`html

Best Bourbon Salmon Recipe: Sweet, Smoky, and Irresistibly Flavorful

Are you looking for a salmon recipe that’s anything but boring? Did you know that the average home cook spends over 15 hours per month planning, preparing, and cooking meals? If you’re like many, you want weeknight-friendly meals that deliver big on flavor without taking up your entire evening. This Best Bourbon Salmon recipe is designed to do just that! It hits all the right notes: sweet, smoky, savory, and incredibly moist. The bourbon glaze caramelizes beautifully, creating a sticky, delectable crust that will have everyone asking for seconds. Perfect for a weeknight treat or a more elegant dinner party, this dish is surprisingly simple to make and consistently deliversrestaurant-quality results.

The Secret to Incredible Bourbon Salmon: A Symphony of Flavors

The beauty of this bourbon salmon lies in its balanced marinade and glaze. We’re combining classic savory elements with the distinct sweetness of bourbon and brown sugar, uplifted by a touch of acidity. Here’s what you’ll need:

  • Salmon Fillets: 1.5 – 2 lbs (about 4-6 servings). Opt for skin-on fillets if you enjoy crispy salmon skin – it adds fantastic texture and prevents the fish from drying out. Look for vibrant, firm flesh.
  • Bourbon: 1/2 cup. The flavor is paramount here. While you don’t need top-shelf, choose a bourbon you’d enjoy drinking (e.g., Maker’s Mark, Bulleit, Woodford Reserve). The alcohol will cook off, leaving behind a wonderful depth of flavor.
  • Brown Sugar: 1/4 cup, packed. This provides sweetness and helps create that irresistible sticky glaze. Light brown sugar will give a milder caramelization, while dark brown sugar offers a richer, more molasses-like sweetness.
  • Soy Sauce: 1/4 cup. Use low-sodium to control the saltiness. It adds essential umami and brininess to the glaze.

    • Substitution: Tamari for gluten-free, or coconut aminos for a soy-free option.
  • Dijon Mustard: 2 tablespoons. Adds a tangy kick and helps emulsify the glaze, contributing to a smoother consistency.
  • Garlic: 3-4 cloves, minced. Freshly minced garlic offers the most potent flavor.
  • Smoked Paprika: 1 teaspoon. This is key for that smoky depth without needing to grill. It also imparts a beautiful reddish hue.

    • Substitution: Regular paprika can be used if smoked is unavailable, though you’ll miss some of the smoky notes.
  • Black Pepper: 1/2 teaspoon, freshly ground. Enhances all the other flavors.
  • Optional: Red Pepper Flakes: 1/4 teaspoon (or to taste). For a hint of heat to balance the sweetness.
  • Olive Oil or Butter: 1 tablespoon (for searing, if pan-searing).

Effortless Elegance: Recipe Timing Breakdown

Prep time: 10 minutes
Marinade time: 30 minutes (minimum)
Cook time: 12-18 minutes
Total time: Approximately 50 minutes (including marinating)

Compared to many salmon recipes that can take an hour or more, this bourbon salmon is a lifesaver for busy weeknights. The active prep is minimal, and the marinating time can even overlap with other dinner preparations, making it incredibly efficient.

Bourbon salmon fillets coated in a rich glaze being cooked

Crafting the Perfect Bourbon Salmon: A Step-by-Step Guide

Step 1: Preheat and Prepare the Salmon

First things first, let’s get our cooking environment ready. Preheat your oven to 400°F (200°C). If you plan to sear your salmon before baking (highly recommended for extra flavor and texture!), place an oven-safe skillet (cast iron works wonderfully) over medium-high heat. Add 1 tablespoon of olive oil or butter. While the pan heats up, pat your salmon fillets completely dry with paper towels. This is crucial for achieving a good sear and allowing the glaze to adhere properly. If your fillets have skin, score the skin lightly a few times with a sharp knife to prevent curling. Season the flesh side lightly with salt and pepper.

Step 2: Combine the Bourbon Marinade

In a medium bowl, whisk together the bourbon, packed brown sugar, low-sodium soy sauce, Dijon mustard, minced garlic, smoked paprika, and black pepper. If you’re feeling a little adventurous, toss in that pinch of red pepper flakes for a subtle warmth that beautifully complements the sweetness.

Step 3: Marinate the Salmon

Place your salmon fillets in a shallow dish or a resealable plastic bag. Pour about half of the bourbon mixture over the salmon, ensuring each piece is coated. Reserve the other half for glazing later. Let the salmon marinate at room temperature for at least 30 minutes, or refrigerate for up to 2 hours. Be mindful not to marinate for too long, as the acid in the soy sauce and the bourbon can start to “cook” the fish, affecting its texture.

Step 4: Cook the Salmon

If Pan-Searing: Carefully place the salmon fillets, skin-side down (if using skin-on), into the preheated skillet. Sear for 2-3 minutes until the skin is crispy and golden brown. Flip the salmon and sear the other side for 1 minute. Transfer the skillet to the preheated oven.

If Baking Only: Arrange the marinated salmon fillets on a baking sheet lined with parchment paper or lightly greased. Place the baking sheet in the preheated oven.

Bake for 8-10 minutes.

Step 5: Glaze and Finish

Remove the salmon from the oven (or skillet). Spoon or brush the reserved bourbon mixture generously over the top of each salmon fillet. Return the salmon to the oven for another 4-8 minutes, or until the salmon is cooked through and flakes easily with a fork, and the glaze is bubbly and slightly caramelized. The internal temperature should reach 145°F (63°C). Watch carefully in the last few minutes to prevent the glaze from burning!

Nutritional Snapshot (Per Serving, approximate):

  • Calories: 350-450 (depending on fillet size and added fat)
  • Protein: 30-40g
  • Fat: 15-25g
  • Carbohydrates: 10-15g
  • Sugar: 8-12g

Note: Nutritional values are estimates and can vary based on specific ingredients and portion sizes.

Making it Healthier: Smart Swaps Without Sacrificing Flavor

While this recipe is already a good source of lean protein, you can make it even healthier:

  • Reduce Sugar: Substitute half of the brown sugar with a sugar substitute like erythritol or monk fruit sweetener, or simply reduce the amount of brown sugar by a tablespoon.
  • Lower Sodium: Ensure you’re using a “low-sodium” soy sauce. Even better, use coconut aminos, which are naturally lower in sodium and offer a slightly different, pleasant flavor profile.
  • Boost Veggies: Roast some asparagus, broccoli florets, or Brussels sprouts on the same baking sheet as the salmon during the last 15-20 minutes of cooking time. Toss them with olive oil, salt, and pepper before adding.
  • Bourbon-Free Option: While you’ll lose the distinct bourbon notes, you can substitute the bourbon with strong brewed coffee (for depth), apple cider, or even a splash of balsamic vinegar mixed with water for a comparable liquid component.

Serving Suggestions: Elevate Your Plate

This bourbon salmon is versatile! Here are some ideas to complete your meal:

  • Classic Sides: Serve with fluffy white rice, mashed potatoes, or roasted sweet potatoes.
  • Green Goodness: Pair with steamed green beans, a fresh asparagus salad, or sautéed spinach.
  • Grain Power: Quinoa or a farro salad makes for a hearty and healthy accompaniment.
  • Light and Fresh: A simple side salad with a light vinaigrette cuts through the richness of the glaze.
  • Garnishes: A sprinkle of fresh chives, parsley, or thinly sliced green onions adds a burst of color and freshness. A lemon wedge on the side is always a welcome addition.

Common Mistakes to Avoid for Bourbon Salmon Perfection

  • Overcooking: Salmon cooks quickly! Keep a close eye on it, especially during the final glazing stage, to prevent it from drying out. Err on the side of slightly undercooked, as it will continue to cook from residual heat.
  • Not Patting Dry: Skipping the step of patting the salmon dry will result in steaming rather than searing, and the glaze won’t adhere as well.
  • Marinating Too Long: As mentioned, the liquids can break down the fish’s proteins if left for extended periods, leading to a mushy texture. Stick to the recommended times.
  • Burning the Glaze: The sugars in the glaze can burn easily. Watch carefully during the final minutes of baking. If it’s browning too quickly, you can loosely tent the salmon with foil.

Storing and Reheating Leftovers

Store any leftover bourbon salmon in an airtight container in the refrigerator for up to 2-3 days. The glaze may become a bit firmer as it cools.

Reheating: The best method is gentle warming to preserve moisture. You can:

  • Oven: Reheat at a low temperature, around 275°F (135°C), for 5-10 minutes, covered with foil.
  • Skillet: Gently warm in a non-stick skillet over low heat with a splash of water or broth.
  • Microwave: Use in short bursts (30 seconds at a time), stirring in between, to avoid drying out.

Leftover salmon is delicious flaked over salads or added to grain bowls.

Close-up of bourbon salmon glaze caramelizing in the oven

Frequently Asked Questions

***What kind of bourbon should I use?***

You don’t need your most expensive bottle! A decent mid-range bourbon that you enjoy the taste of is perfect. Brands like Maker’s Mark, Bulleit, or Buffalo Trace are excellent choices. The alcohol evaporates during cooking, leaving behind a rich, complex flavor.

***Can I use a different type of fish?***

Yes! This glaze works beautifully with other firm-fleshed fish like cod, halibut, or even scallops. Adjust cooking times as needed based on the thickness of the fish.

***My glaze is too thin, what can I do?***

If your glaze seems too thin after baking, you can carefully remove the salmon from the pan and simmer the remaining glaze on the stovetop for a few extra minutes until it thickens to your liking. Be cautious as it can burn quickly.

***Can I grill this salmon?***

Absolutely! Grilling is a fantastic option for bourbon salmon. Preheat your grill to medium-high heat. Grill the salmon skin-side down for about 4-5 minutes, then flip and grill for another 3-5 minutes, basting with the reserved glaze during the last few minutes. Watch carefully to prevent flare-ups and burning.

***Is the bourbon flavor too strong?***

The bourbon flavor is present but mellowed and complemented by the sweetness of the brown sugar and the savory notes of soy sauce. While the alcohol cooks off, a depth of flavor remains. If you’re highly sensitive to any alcohol notes, you can reduce the amount of bourbon slightly or substitute a portion with water or apple cider.

A Bourbon Salmon Recipe to Remember

This Best Bourbon Salmon recipe is a testament to how simple ingredients and a well-balanced glaze can transform a humble piece of fish into a culinary masterpiece. It’s a dish that’s elegant enough for guests but easy enough for a weeknight dinner. The sweet, smoky, and savory notes are truly irresistible, and the moist, flaky texture of the perfectly cooked salmon is pure delight. Don’t be intimidated by the bourbon; it adds an unparalleled depth of flavor that elevates this salmon to new heights.

Ready to impress yourself and your loved ones? Gather your ingredients and give this sweet, smoky, and irresistibly flavorful bourbon salmon a try. We promise you won’t be disappointed!

Print

clock clock iconcutlery cutlery iconflag flag iconfolder folder iconinstagram instagram iconpinterest pinterest iconfacebook facebook iconprint print iconsquares squares iconheart heart iconheart solid heart solid icon

Best Bourbon Salmon Recipe


  • Author: Chef Emy

Description

For extra caramelization, brush the glaze on the salmon several times during cooking.Make the glaze ahead of time and store in the refrigerator for up to 1 week.


Ingredients

Scale
  • 4 salmon fillets (6 oz each)
  • 2 tbsp olive oil
  • Salt and pepper, to taste
  • For the Bourbon Glaze:
  • 1/4 cup bourbon
  • 2 tbsp brown sugar
  • 2 tbsp soy sauce
  • 1 tbsp Dijon mustard
  • 1 tbsp minced garlic
  • 1 tbsp fresh lemon juice
  • 1 tsp Worcestershire sauce
  • 1/2 tsp red pepper flakes (optional)

Instructions

    Notes

    For extra caramelization, brush the glaze on the salmon several times during cooking.Make the glaze ahead of time and store in the refrigerator for up to 1 week.


    “`

    Delicious Pizza Burger Pie Recipes You’ll Love

    “`html

    Delicious Pizza Burger Pie Recipes You’ll Love

    Are you searching for a dinner that’s as fun as it is delicious, something that brings together the best of two worlds? In today’s busy world, how much time do families spend trying to find meals that satisfy everyone? What if we told you there’s a recipe that combines the comforting flavors of pizza with the hearty appeal of a burger, all wrapped up in a golden, flaky crust? Enter the Pizza Burger Pie. This recipe isn’t just a meal; it’s an experience—a delightful fusion that’s perfect for a weeknight dinner or a weekend treat that will have everyone asking for seconds.

    Ingredients

    Get ready to gather these delightful components that will transform into your new favorite comfort food! The beauty of this recipe lies in its flexibility, so feel free to adjust any of the ingredients to suit your taste.

    • 1 lb Ground Beef: The savory foundation of our burger-pie. Use 80/20 for a good balance of flavor and juiciness. For a leaner option, 90/10 works, but you might need a little extra oil.
    • 1 packet (8 oz) Refrigerated Crescent Rolls: This provides the wonderfully flaky, buttery crust. Look for the kind that separates into triangles. If you prefer, puff pastry sheets or a homemade pizza dough can also be used, but they will alter the texture and cooking time.
    • 1/2 cup Pizza Sauce: Choose your favorite! A marinara or a robust tomato sauce works too. The richer the flavor, the better the pizza-burger fusion.
    • 1 cup Shredded Mozzarella Cheese: The classic melty cheese that ties everything together. For extra flavor, mix in some sharp cheddar or Monterey Jack.
    • 4 oz Sliced Pepperoni: The quintessential pizza topping! Any kind works, from classic thin slices to thicker, slightly spicy ones.
    • 1/4 cup Diced Onion: Adds a sweet and savory depth. Yellow or white onions are perfect. If you’re not a fan of raw onion flavor, consider sautéing them for a milder taste.
    • 1 tsp Italian Seasoning: A blend of oregano, basil, thyme, and rosemary that elevates the pizza notes. You can use just oregano and basil if that’s what you have on hand.
    • Salt and Black Pepper to taste: Essential for bringing out all the wonderful flavors.
    • Optional: Garlic Powder, Red Pepper Flakes: For an extra kick of flavor!

    Timing

    Prep time: 15 minutes
    Cook time: 25-30 minutes
    Total time: 40-45 minutes

    Compared to the average pizza recipe which can take closer to 1 hour including rise time for dough, and a burger which is quick but doesn’t involve baking, this Pizza Burger Pie is a fantastic time-saver. It offers the satisfaction of both with a much quicker total time commitment.

    Delicious Pizza Burger Pie ready to be served

    Step-by-Step Instructions

    Step 1: Preheat and Prep

    First things first, let’s get our oven ready to bake this masterpiece! Preheat your oven to 375°F (190°C). While the oven is heating up, unroll your crescent roll dough. You can either press the seams together to form one large rectangle or leave them as individual triangles to create a layered bottom crust. If you’re pressing them together, lay the triangles onto a lightly greased 9-inch pie plate or a baking sheet, gently overlapping and pressing the seams to seal. This is important to prevent any filling from leaking out during baking!

    Step 2: Brown the Beef

    Now, onto the star of our burger filling! In a medium skillet over medium-high heat, cook the ground beef until it’s nicely browned. As it cooks, break it apart with a spoon. Once it’s no longer pink, drain off any excess grease – this is key to preventing a soggy bottom! Stir in your diced onion and cook for another 2-3 minutes until the onion is softened and fragrant. Season the mixture generously with salt, pepper, and Italian seasoning. If you’re using garlic powder or red pepper flakes, add them now and give everything a good stir. The aroma at this stage is just incredible!

    Step 3: Assemble the Pie

    It’s time to bring all those delicious components together! Spread the pizza sauce evenly over the prepared crescent roll base in the pie plate. Next, sprinkle about half of the shredded mozzarella cheese over the sauce. Then, spoon the seasoned ground beef and onion mixture evenly over the cheese. Arrange the pepperoni slices on top of the beef layer. Finally, sprinkle the remaining mozzarella cheese over the pepperoni. This creates those glorious cheesy pockets that we all love in a pizza.

    Step 4: Bake to Perfection

    Pop your creation into the preheated oven. Bake for 25-30 minutes, or until the crescent roll crust is golden brown and perfectly cooked, and the cheese is melted and bubbly. Keep an eye on it, as ovens can vary. If the crust starts to brown too quickly, you can loosely tent the pie with aluminum foil for the last 10 minutes of baking. Once it’s done, carefully remove it from the oven and let it rest for about 5-10 minutes before slicing. This resting period is crucial for allowing the juices to settle and making it easier to slice without it falling apart.

    Nutritional Information

    Please note that nutritional values are approximate and can vary based on specific ingredients and portion sizes.

    • Calories: Approx. 350-450 per serving (depending on size and ingredients used)
    • Protein: Approx. 20-25g
    • Fat: Approx. 20-30g
    • Carbohydrates: Approx. 25-35g

    Healthier Alternatives

    Looking to lighten things up without sacrificing flavor? Here are a few swaps:

    • Leaner Protein: Swap ground beef for lean ground turkey or chicken.
    • Lighter Crust: Use whole wheat crescent rolls or a cauliflower crust for a lower-carb option.
    • Veggie Boost: Add finely diced bell peppers, mushrooms, or spinach to the beef mixture for extra nutrients and fiber.
    • Reduced Sodium: Opt for a low-sodium pizza sauce and be mindful of the salt added to the beef.

    Serving Suggestions

    This Pizza Burger Pie is a meal in itself, but it pairs wonderfully with a crisp side salad, fresh green beans, or some baked sweet potato fries. A dollop of sour cream or a side of ranch dressing can also be a delightful accompaniment!

    Common Mistakes to Avoid

    • Soggy Bottom: Ensure you drain the grease from the browned beef thoroughly. Using a baking sheet can also help with air circulation.
    • Leaking Filling: Make sure the crescent roll seams are sealed well, especially if you’ve pressed them together.
    • Underbaked Crust: Don’t rush the baking process. The crust needs to be golden and cooked through.
    • Skipping the Rest: Letting the pie rest before slicing is essential for structure.

    Storing Your Pizza Burger Pie

    Leftovers can be stored in an airtight container in the refrigerator for up to 3 days. Reheat in the oven or a toaster oven for best results to maintain crust crispness. Microwaving can result in a softer crust.

    Close-up of a slice of Pizza Burger Pie

    Frequently Asked Questions

    What is the best type of ground beef to use?

    An 80/20 blend (80% lean, 20% fat) provides the most flavor and juiciness. If you’re concerned about fat, 90/10 is a good alternative, but you may want to add a splash of oil when browning the meat.

    Can I make this ahead of time?

    You can prepare the beef mixture and have the crescent roll dough ready, but it’s best assembled and baked just before serving for the freshest taste and crispiest crust.

    Can I use a different type of cheese?

    Absolutely! Cheddar, Monterey Jack, Provolone, or a blend of Italian cheeses would all be delicious substitutes or additions to the mozzarella.

    How do I prevent the crescent roll crust from getting soggy?

    Ensure your ground beef is well-drained of grease. Also, consider pre-baking the crust for about 5 minutes before adding toppings, or use a baking sheet instead of a pie plate to allow for better air circulation.

    Can I add vegetables to this recipe?

    Yes! Finely chopped bell peppers, mushrooms, onions (if not already added), or spinach can be sautéed with the ground beef for an added nutritional boost and flavor.

    Conclusion

    The Pizza Burger Pie is more than just a recipe; it’s a culinary adventure that brings together two beloved classics into one harmonious dish. Its simplicity, deliciousness, and customizable nature make it a winner for any occasion. So next time you’re looking for a meal that’s sure to please, give this Pizza Burger Pie a try. We’re confident it will become a family favorite!

    Print

    clock clock iconcutlery cutlery iconflag flag iconfolder folder iconinstagram instagram iconpinterest pinterest iconfacebook facebook iconprint print iconsquares squares iconheart heart iconheart solid heart solid icon

    Pizza Burger Pie with Beef Pepperoni


    • Author: Chef Emy

    Description

    This delicious fusion of a pizza and a burger is baked to perfection in a flaky crescent roll crust. Packed with savory ground beef, melty cheese, and beef pepperoni, this dish is perfect for dinner or a fun family treat!


    Ingredients

    Scale
    • 1lb ground beef.½ cupdiced onion.1 cuppizza sauce.1 tspItalian seasoning.½ tspgarlic powder.¼ tspsalt.¼ tspblack pepper.
    • ½ cupdiced onion.1 cuppizza sauce.1 tspItalian seasoning.½ tspgarlic powder.¼ tspsalt.¼ tspblack pepper.
    • 1 cuppizza sauce.1 tspItalian seasoning.½ tspgarlic powder.¼ tspsalt.¼ tspblack pepper.
    • 1 tspItalian seasoning.½ tspgarlic powder.¼ tspsalt.¼ tspblack pepper.
    • ½ tspgarlic powder.¼ tspsalt.¼ tspblack pepper.
    • ¼ tspsalt.¼ tspblack pepper.
    • ¼ tspblack pepper.
    • 1package (8 oz) refrigerated crescent roll dough.1 ½ cupsshredded mozzarella cheese.½ cupslicedbeef pepperoni.½ cupsliced black olives.½ cupchopped bell peppers.
    • 1 ½ cupsshredded mozzarella cheese.½ cupslicedbeef pepperoni.½ cupsliced black olives.½ cupchopped bell peppers.
    • ½ cupslicedbeef pepperoni.½ cupsliced black olives.½ cupchopped bell peppers.
    • ½ cupsliced black olives.½ cupchopped bell peppers.
    • ½ cupchopped bell peppers.

    Instructions

    1. Preheat your oven to375°F (190°C).
    2. Heat a large skillet over medium heat. Cook the ground beef and diced onion until the beef is browned and the onion is translucent. Drain any excess fat.Stir in the pizza sauce, Italian seasoning, garlic powder, salt, and black pepper. Simmer for5 minutes, then remove from heat.2️⃣Prepare the Crust:Unroll the crescent roll dough and press it into the bottom and up the sides of a greased9-inch pie dishto form a crust.3️⃣Assemble the Pie:Spoon the beef mixture evenly into the prepared crust.Sprinkle with shredded mozzarella cheese.Top with slicedbeef pepperoni, black olives, and chopped bell peppers.4️⃣Bake the Pie:Bake in the preheated oven for20–25 minutes, or until the crescent roll crust is golden brown and the cheese is melted and bubbly.5️⃣Cool and Serve:Allow the pie to cool for a few minutes before slicing. Serve warm and enjoy this hearty and flavorful pizza-burger fusion!
    3. Stir in the pizza sauce, Italian seasoning, garlic powder, salt, and black pepper. Simmer for5 minutes, then remove from heat.2️⃣Prepare the Crust:Unroll the crescent roll dough and press it into the bottom and up the sides of a greased9-inch pie dishto form a crust.3️⃣Assemble the Pie:Spoon the beef mixture evenly into the prepared crust.Sprinkle with shredded mozzarella cheese.Top with slicedbeef pepperoni, black olives, and chopped bell peppers.4️⃣Bake the Pie:Bake in the preheated oven for20–25 minutes, or until the crescent roll crust is golden brown and the cheese is melted and bubbly.5️⃣Cool and Serve:Allow the pie to cool for a few minutes before slicing. Serve warm and enjoy this hearty and flavorful pizza-burger fusion!
    4. Unroll the crescent roll dough and press it into the bottom and up the sides of a greased9-inch pie dishto form a crust.3️⃣Assemble the Pie:Spoon the beef mixture evenly into the prepared crust.Sprinkle with shredded mozzarella cheese.Top with slicedbeef pepperoni, black olives, and chopped bell peppers.4️⃣Bake the Pie:Bake in the preheated oven for20–25 minutes, or until the crescent roll crust is golden brown and the cheese is melted and bubbly.5️⃣Cool and Serve:Allow the pie to cool for a few minutes before slicing. Serve warm and enjoy this hearty and flavorful pizza-burger fusion!
    5. Spoon the beef mixture evenly into the prepared crust.
    6. Sprinkle with shredded mozzarella cheese.Top with slicedbeef pepperoni, black olives, and chopped bell peppers.4️⃣Bake the Pie:Bake in the preheated oven for20–25 minutes, or until the crescent roll crust is golden brown and the cheese is melted and bubbly.5️⃣Cool and Serve:Allow the pie to cool for a few minutes before slicing. Serve warm and enjoy this hearty and flavorful pizza-burger fusion!
    7. Top with slicedbeef pepperoni, black olives, and chopped bell peppers.4️⃣Bake the Pie:Bake in the preheated oven for20–25 minutes, or until the crescent roll crust is golden brown and the cheese is melted and bubbly.5️⃣Cool and Serve:Allow the pie to cool for a few minutes before slicing. Serve warm and enjoy this hearty and flavorful pizza-burger fusion!
    8. Bake in the preheated oven for20–25 minutes, or until the crescent roll crust is golden brown and the cheese is melted and bubbly.5️⃣Cool and Serve:Allow the pie to cool for a few minutes before slicing. Serve warm and enjoy this hearty and flavorful pizza-burger fusion!
    9. Allow the pie to cool for a few minutes before slicing. Serve warm and enjoy this hearty and flavorful pizza-burger fusion!

    Notes

    Customizations: Add your favorite toppings, such as mushrooms or jalapeños, for a personalized touch.Crescent Dough Tips: Be sure to press the seams of the crescent roll dough together for a seamless crust.Storage: Leftovers can be refrigerated in an airtight container for up to 3 days and reheated in the oven.
    Crescent Dough Tips: Be sure to press the seams of the crescent roll dough together for a seamless crust.Storage: Leftovers can be refrigerated in an airtight container for up to 3 days and reheated in the oven.
    Storage: Leftovers can be refrigerated in an airtight container for up to 3 days and reheated in the oven.


    “`

    Cowboy Butter Chicken Linguine Recipe for Dinner Inspiration

    “`html

    Cowboy Butter Chicken Linguine Recipe for Dinner Inspiration

    Craving a Creamy, Flavorful Dinner? Meet Cowboy Butter Chicken Linguine!

    Are you tired of the same old weeknight dinners? Do you find yourself scrolling endlessly for a recipe that’s both incredibly delicious and surprisingly easy to make? If you’re nodding along, then you’ve landed in the right place! This Cowboy Butter Chicken Linguine is a true game-changer, blending the hearty, comforting elements of a cowboy-inspired dish with the rich, velvety decadence of butter chicken and the satisfying chew of perfectly cooked linguine. It’s a culinary fusion that promises to become a new family favorite, perfect for those nights when you want a showstopper without the fuss. Get ready to impress your taste buds and your loved ones with this unforgettable meal!

    Ingredients That Sing Together

    The magic of this Cowboy Butter Chicken Linguine lies in the quality and harmony of its components. We’re aiming for tender chicken, a sauce that’s both rich and vibrant, and pasta that’s cooked to al dente perfection.

    • Chicken Breast or Thighs: 1.5 lbs, cut into bite-sized pieces. Chicken thighs offer more moisture and flavor, while breasts are leaner.
    • Linguine: 12 oz, or your favorite long pasta.
    • Butter: 4 tablespoons (2 for searing, 2 for finishing). Unsalted is preferred so you can control the salt.
    • Olive Oil: 2 tablespoons, for searing the chicken.
    • Onion: 1 medium, finely chopped. Adds a sweet, aromatic base.
    • Garlic: 4-6 cloves, minced. The more, the merrier for that fragrant punch!
    • Ginger: 1 tablespoon, grated fresh. Adds a zesty, warm counterpoint to the richness.
    • Crushed Tomatoes: 1 (14.5 oz) can. Provides body and a hint of acidity.
    • Heavy Cream: 1 cup. The key to that luscious, creamy texture.
    • Chicken Broth: 1/2 cup. Helps to thin the sauce and add savory depth.
    • Garam Masala: 2 teaspoons. The soul of butter chicken, this spice blend adds warmth and complexity.
    • Turmeric: 1 teaspoon. For color and earthy notes.
    • Cumin: 1 teaspoon. Adds a smoky, warm dimension.
    • Red Pepper Flakes: 1/2 teaspoon, or to taste. For a gentle kick.
    • Salt and Black Pepper: To taste. Essential for bringing out all the flavors.
    • Fresh Parsley: 1/4 cup, chopped, for garnish. Adds freshness and a pop of green.
    • Lemon Slices: For serving. A bright, zesty finish.
    • Optional additions: A pinch of sugar to balance the acidity of the tomatoes, a dash of paprika for color, or a sprinkle of cayenne for extra heat.

    Timing is Everything

    Prep time: 15 minutes
    Cook time: 30 minutes
    Total time: 45 minutes

    Compared to an average pasta dish that might take around 30-40 minutes, this Cowboy Butter Chicken Linguine is right in line, making it a fantastic option for a weeknight meal without sacrificing flavor or flair. The prep is swift, and the cooking process is streamlined, allowing you to create a restaurant-quality dish in under an hour.

    Delicious Cowboy Butter Chicken Linguine in a pan

    Crafting Your Cowboy Butter Chicken Linguine Masterpiece

    Let’s get cooking! Follow these steps to create a dish that’s as beautiful as it is delicious.

    Step 1: Prep the Chicken

    Begin by patting your chicken pieces dry with paper towels. This is a crucial step for achieving a beautiful sear. Season them generously with salt and pepper. Heat 1 tablespoon of olive oil and 1 tablespoon of butter in a large skillet or Dutch oven over medium-high heat. Once the butter has melted and is shimmering, add the chicken in a single layer (work in batches if necessary to avoid overcrowding). Sear the chicken for about 3-4 minutes per side, until beautifully golden brown. Don’t worry about cooking it through at this stage; we’re just building that initial flavor and color. Remove the seared chicken from the skillet and set it aside on a plate.

    Step 2: Build the Sauce

    Reduce the heat to medium. Add the remaining 1 tablespoon of olive oil and 1 tablespoon of butter to the same skillet. Add the finely chopped onion and sauté for about 5-7 minutes, until softened and translucent. Next, stir in the minced garlic and grated ginger, and cook for another minute until fragrant, being careful not to burn the garlic. Now, it’s time for the spices! Add the garam masala, turmeric, cumin, and red pepper flakes. Stir them into the onions and garlic for about 30 seconds, allowing their aromas to bloom. Pour in the crushed tomatoes and chicken broth, scraping up any browned bits from the bottom of the skillet – that’s where all the flavor is! Bring the mixture to a gentle simmer.

    Step 3: Cook the Linguine

    While the sauce simmers, bring a large pot of generously salted water to a rolling boil. Add your linguine and cook according to package directions until al dente. This means it should still have a slight bite to it, as it will finish cooking in the sauce. Before draining, reserve about 1 cup of the starchy pasta water. Drain the linguine and set aside.

    Step 4: Combine and Finish

    Return the seared chicken (and any accumulated juices) to the skillet with the tomato mixture. Stir in the heavy cream and the remaining 2 tablespoons of butter. Bring the sauce back to a gentle simmer and cook for about 5-7 minutes, or until the chicken is cooked through and the sauce has thickened slightly. Taste and adjust seasoning with salt and pepper as needed. If the sauce is too thick, add a splash of the reserved pasta water to reach your desired consistency.

    Add the cooked linguine directly to the skillet with the sauce. Toss gently to coat every strand evenly. Let it simmer for another minute, allowing the pasta to absorb some of that glorious sauce. Garnish generously with fresh chopped parsley and serve immediately with lemon slices on the side.

    Nutritional Snapshot

    While exact nutritional values can vary based on specific ingredients and portion sizes, a serving of this Cowboy Butter Chicken Linguine typically offers:

    • Calories: Approximately 600-800 (depending on cream and portion size)
    • Protein: 30-40g
    • Fat: 30-50g (mostly from cream and butter)
    • Carbohydrates: 50-70g (from linguine and vegetables)

    This is a hearty and indulgent meal, perfect for a satisfying dinner.

    Healthier Alternatives & Swaps

    Looking to lighten this dish up without sacrificing flavor?

    • Pasta: Opt for whole wheat linguine for added fiber, or even zucchini noodles (zoodles) for a low-carb option.
    • Cream: Substitute half of the heavy cream with milk (whole or 2%) or unsweetened plant-based milk like cashew or oat milk. For a dairy-free option, use full-fat coconut milk (though this will impart a coconut flavor).
    • Butter/Oil: Use a little less butter and ensure you’re using good quality olive oil.
    • Chicken: Lean chicken breast is your best bet for reducing fat content.
    • Portion Control: Serve with a large side salad to balance the richness and increase vegetable intake.

    Serving Suggestions

    This Cowboy Butter Chicken Linguine is a complete meal in itself, but here are a few ideas to elevate your dining experience:

    • Green Salad: A crisp, simple green salad with a light vinaigrette is the perfect counterpoint to the rich pasta.
    • Garlic Bread: For ultimate indulgence, serve with warm, crusty garlic bread.
    • Steamed Broccoli or Asparagus: A side of steamed greens adds color and nutrients.
    • Garnish: Don’t forget the fresh parsley and lemon slices! A sprinkle of red pepper flakes can add extra heat if desired.

    Common Mistakes to Avoid

    To ensure your Cowboy Butter Chicken Linguine turns out perfectly, steer clear of these common pitfalls:

    • Overcrowding the Pan: When searing chicken, cook in batches. Overcrowding leads to steaming rather than searing, resulting in less flavor and color.
    • Burning Garlic or Spices: Cook garlic and ginger gently, and toast spices briefly. Burnt aromatics turn bitter.
    • Overcooking Pasta: Cook linguine to al dente. It will finish cooking in the sauce, so slightly undercooked is better than mushy.
    • Not Salting Pasta Water: Pasta water should taste like the sea! This is your primary chance to season the pasta itself.
    • Skipping the Pasta Water: The starchy pasta water is liquid gold for emulsifying and thinning sauces.

    Storing Your Cowboy Butter Chicken Linguine

    Leftovers can be stored in an airtight container in the refrigerator for up to 3-4 days. Reheat gently on the stovetop or in the microwave. You may need to add a splash of water or broth when reheating to revive the creaminess of the sauce.

    Close-up of Cowboy Butter Chicken Linguine with garnish

    Frequently Asked Questions

    What is Cowboy Butter Chicken Linguine?

    It’s a fusion dish that combines the creamy, spiced flavors of Indian Butter Chicken with the hearty, perhaps more rustic, feel of a “cowboy” style dish, served over linguine pasta. The “cowboy” aspect often implies robust flavors and satisfying ingredients.

    Can I make this spicier?

    Absolutely! Increase the red pepper flakes, add a pinch of cayenne pepper, or even a finely chopped fresh chili pepper along with the garlic and ginger for extra heat.

    What if I don’t have garam masala?

    Garam masala is a blend of spices. You can create a homemade version using ground cumin, coriander, cardamom, cinnamon, cloves, and black pepper. Or, use a combination of cumin, coriander, and a pinch of cinnamon and cloves as a substitute.

    Can I use other types of pasta?

    Yes! While linguine is classic, fettuccine, spaghetti, or even penne would work beautifully with this rich sauce.

    Is it possible to make this vegetarian?

    Yes! Substitute the chicken with firm tofu, paneer, or hearty vegetables like cauliflower florets or chickpeas. Adjust cooking times accordingly.

    Print
    clock clock iconcutlery cutlery iconflag flag iconfolder folder iconinstagram instagram iconpinterest pinterest iconfacebook facebook iconprint print iconsquares squares iconheart heart iconheart solid heart solid icon

    Cowboy Butter Chicken Linguine


    • Author: Chef Emy

    Description

    This creamy and flavorfulCowboy Butter Chicken Linguinecombines tender chicken bites, buttery rich sauce, and perfectly cooked linguine. Garnished with fresh parsley and zesty lemon slices, it’s a showstopper meal for any occasion.


    Ingredients

    Scale
    • 8 ounceslinguine.
    • 1 ½pounds boneless, skinless chicken breasts, cut into1-inch pieces.2 tablespoonsextra virgin olive oil.½ teaspoonpaprika.½ teaspoongarlic salt.½ teaspoonkosher salt.¼ teaspoonpepper.
    • 2 tablespoonsextra virgin olive oil.½ teaspoonpaprika.½ teaspoongarlic salt.½ teaspoonkosher salt.¼ teaspoonpepper.
    • ½ teaspoonpaprika.½ teaspoongarlic salt.½ teaspoonkosher salt.¼ teaspoonpepper.
    • ½ teaspoongarlic salt.½ teaspoonkosher salt.¼ teaspoonpepper.
    • ½ teaspoonkosher salt.¼ teaspoonpepper.
    • ¼ teaspoonpepper.
    • ¼ cup(4 tablespoons) cowboy butter, divided.¾ cupheavy cream.1 teaspoongarlic salt.¼ teaspooncrushed red pepper flakes.½ teaspoonlemon juice.
    • ¾ cupheavy cream.1 teaspoongarlic salt.¼ teaspooncrushed red pepper flakes.½ teaspoonlemon juice.
    • 1 teaspoongarlic salt.¼ teaspooncrushed red pepper flakes.½ teaspoonlemon juice.
    • ¼ teaspooncrushed red pepper flakes.½ teaspoonlemon juice.
    • ½ teaspoonlemon juice.
    • Lemon slices.Fresh parsley, chopped.
    • Fresh parsley, chopped.

    Instructions

    1. Bring a large pot of salted water to a boil.Add the linguine and cook until al dente, following the package instructions.Drain and set aside.2️⃣Cook the Chicken:Heat a large skillet over medium-high heat and add the olive oil.Once the oil is hot, add the chicken pieces in a single layer.Season evenly with paprika, garlic salt, kosher salt, and pepper. Cook for3–4 minuteson one side, until golden brown.Add 2 tablespoons of cowboy butter to the skillet. Flip the chicken pieces and cook for another3–4 minutes, or until browned and cooked through to an internal temperature of165°F.Remove the chicken from the skillet and place it on a plate. Tent with foil to keep warm.3️⃣Make the Sauce:Reduce the skillet heat to low. Add the remaining 2 tablespoons of cowboy butter, heavy cream, garlic salt, and crushed red pepper flakes.Scrape up the browned bits from the bottom of the skillet using a spatula and stir until the butter melts and the sauce is smooth.4️⃣Combine and Serve:Add the cooked linguine and chicken back into the skillet. Toss everything together until evenly coated in the sauce.Stir in the lemon juice for a hint of brightness.Serve the dish hot, garnished with lemon slices and fresh parsley.
    2. Add the linguine and cook until al dente, following the package instructions.Drain and set aside.2️⃣Cook the Chicken:Heat a large skillet over medium-high heat and add the olive oil.Once the oil is hot, add the chicken pieces in a single layer.Season evenly with paprika, garlic salt, kosher salt, and pepper. Cook for3–4 minuteson one side, until golden brown.Add 2 tablespoons of cowboy butter to the skillet. Flip the chicken pieces and cook for another3–4 minutes, or until browned and cooked through to an internal temperature of165°F.Remove the chicken from the skillet and place it on a plate. Tent with foil to keep warm.3️⃣Make the Sauce:Reduce the skillet heat to low. Add the remaining 2 tablespoons of cowboy butter, heavy cream, garlic salt, and crushed red pepper flakes.Scrape up the browned bits from the bottom of the skillet using a spatula and stir until the butter melts and the sauce is smooth.4️⃣Combine and Serve:Add the cooked linguine and chicken back into the skillet. Toss everything together until evenly coated in the sauce.Stir in the lemon juice for a hint of brightness.Serve the dish hot, garnished with lemon slices and fresh parsley.
    3. Drain and set aside.
    4. Heat a large skillet over medium-high heat and add the olive oil.Once the oil is hot, add the chicken pieces in a single layer.Season evenly with paprika, garlic salt, kosher salt, and pepper. Cook for3–4 minuteson one side, until golden brown.Add 2 tablespoons of cowboy butter to the skillet. Flip the chicken pieces and cook for another3–4 minutes, or until browned and cooked through to an internal temperature of165°F.Remove the chicken from the skillet and place it on a plate. Tent with foil to keep warm.3️⃣Make the Sauce:Reduce the skillet heat to low. Add the remaining 2 tablespoons of cowboy butter, heavy cream, garlic salt, and crushed red pepper flakes.Scrape up the browned bits from the bottom of the skillet using a spatula and stir until the butter melts and the sauce is smooth.4️⃣Combine and Serve:Add the cooked linguine and chicken back into the skillet. Toss everything together until evenly coated in the sauce.Stir in the lemon juice for a hint of brightness.Serve the dish hot, garnished with lemon slices and fresh parsley.
    5. Once the oil is hot, add the chicken pieces in a single layer.
    6. Season evenly with paprika, garlic salt, kosher salt, and pepper. Cook for3–4 minuteson one side, until golden brown.Add 2 tablespoons of cowboy butter to the skillet. Flip the chicken pieces and cook for another3–4 minutes, or until browned and cooked through to an internal temperature of165°F.Remove the chicken from the skillet and place it on a plate. Tent with foil to keep warm.3️⃣Make the Sauce:Reduce the skillet heat to low. Add the remaining 2 tablespoons of cowboy butter, heavy cream, garlic salt, and crushed red pepper flakes.Scrape up the browned bits from the bottom of the skillet using a spatula and stir until the butter melts and the sauce is smooth.4️⃣Combine and Serve:Add the cooked linguine and chicken back into the skillet. Toss everything together until evenly coated in the sauce.Stir in the lemon juice for a hint of brightness.Serve the dish hot, garnished with lemon slices and fresh parsley.
    7. Add 2 tablespoons of cowboy butter to the skillet. Flip the chicken pieces and cook for another3–4 minutes, or until browned and cooked through to an internal temperature of165°F.Remove the chicken from the skillet and place it on a plate. Tent with foil to keep warm.3️⃣Make the Sauce:Reduce the skillet heat to low. Add the remaining 2 tablespoons of cowboy butter, heavy cream, garlic salt, and crushed red pepper flakes.Scrape up the browned bits from the bottom of the skillet using a spatula and stir until the butter melts and the sauce is smooth.4️⃣Combine and Serve:Add the cooked linguine and chicken back into the skillet. Toss everything together until evenly coated in the sauce.Stir in the lemon juice for a hint of brightness.Serve the dish hot, garnished with lemon slices and fresh parsley.
    8. Remove the chicken from the skillet and place it on a plate. Tent with foil to keep warm.
    9. Reduce the skillet heat to low. Add the remaining 2 tablespoons of cowboy butter, heavy cream, garlic salt, and crushed red pepper flakes.Scrape up the browned bits from the bottom of the skillet using a spatula and stir until the butter melts and the sauce is smooth.4️⃣Combine and Serve:Add the cooked linguine and chicken back into the skillet. Toss everything together until evenly coated in the sauce.Stir in the lemon juice for a hint of brightness.Serve the dish hot, garnished with lemon slices and fresh parsley.
    10. Scrape up the browned bits from the bottom of the skillet using a spatula and stir until the butter melts and the sauce is smooth.
    11. Add the cooked linguine and chicken back into the skillet. Toss everything together until evenly coated in the sauce.Stir in the lemon juice for a hint of brightness.Serve the dish hot, garnished with lemon slices and fresh parsley.
    12. Stir in the lemon juice for a hint of brightness.
    13. Serve the dish hot, garnished with lemon slices and fresh parsley.

    Notes

    Cowboy Butter Substitute: If cowboy butter is unavailable, use regular butter with a pinch of cayenne pepper, garlic, parsley, and lemon juice for a similar flavor.Pasta Options: Substitute linguine with fettuccine or spaghetti for variety.Spice Level: Adjust the crushed red pepper flakes to your preferred heat level.
    Pasta Options: Substitute linguine with fettuccine or spaghetti for variety.Spice Level: Adjust the crushed red pepper flakes to your preferred heat level.
    Spice Level: Adjust the crushed red pepper flakes to your preferred heat level.

    “`

    Easy & Tasty Homemade Pickled Shrimp Recipe! 🦐

    “`html

    Easy & Tasty Homemade Pickled Shrimp Recipe! 🦐

    Unlock the Zesty Delight of Homemade Pickled Shrimp

    Are you looking for a refreshing and incredibly flavorful appetizer that’s surprisingly easy to make? In a world where countless appetizers demand hours of prep, we’re here to introduce you to a dish that offers a vibrant explosion of taste with minimal fuss: Homemade Pickled Shrimp. This delightful creation, featuring the tang of white wine vinegar, the herbaceous notes of fresh dill, and the sweet succulence of perfectly cooked shrimp, is more than just an appetizer; it’s a testament to how simple ingredients can create something truly spectacular. Did you know that seafood, particularly shrimp, is a fantastic source of lean protein and essential nutrients like selenium and vitamin B12? Our Homemade Pickled Shrimp recipe not only tantalizes your taste buds but also offers a nutritious boost, making it a guilt-free indulgence. It’s the perfect way to elevate any gathering, from casual get-togethers to more formal occasions, ensuring your guests will be raving about your culinary skills.

    Key Ingredients for Your Homemade Pickled Shrimp

    The beauty of this Homemade Pickled Shrimp recipe lies in its straightforward, high-quality ingredients that come together to create a symphony of flavors. We’ve highlighted some potential substitutions to make it even more accessible:

    • 1 pound large shrimp, peeled and deveined: Opt for fresh, high-quality shrimp. They should be plump and smell faintly of the sea, not ammonia. If using frozen, ensure they are fully thawed. This is the star, so choose wisely!
    • 1 cup white wine vinegar: This provides the essential tangy, acidic base. A good quality vinegar will make a noticeable difference.
      • Substitution: Apple cider vinegar or rice vinegar can be used for a slightly different fruity or milder profile, respectively.
    • 1/2 cup extra virgin olive oil: Adds richness and helps emulsify the brine, creating a smoother texture. Use a good quality, fruity olive oil for the best flavor.
      • Substitution: A neutral oil like avocado oil can be used if you prefer a less pronounced olive oil flavor.
    • 1/4 cup fresh dill, chopped: The quintessential herb for pickled shrimp, imparting a fresh, slightly anise-like aroma and taste. It should smell vibrant and green.
      • Substitution: Fresh parsley or a mix of dill and parsley can be used, though dill is highly recommended for the classic flavor.
    • 2 cloves garlic, minced: Adds a pungent depth. Mince it finely to distribute its flavor evenly.
      • Substitution: Garlic powder can be used in a pinch, but fresh garlic offers a superior, brighter flavor. Use about 1/2 teaspoon of garlic powder.
    • 1/2 teaspoon red pepper flakes (optional): For a subtle warmth and kick. Adjust to your spice preference.
      • Substitution: A finely chopped jalapeño or serrano pepper can be used for a fresher, more pronounced heat.
    • 1/4 cup finely chopped red onion: Adds a crisp texture and a sweet, sharp bite.
      • Substitution: Shallots or even green onions can work, though red onion offers beautiful color and a definitive flavor.
    • Salt and freshly ground black pepper to taste: Essential for balancing and enhancing all the flavors.
    • 1 tablespoon lemon juice (optional): A touch of fresh lemon juice can brighten the brine further.

    Timing is Everything: Prep, Cook, and Chill

    Prep time: 15 minutes
    Cook time: 5 minutes
    Total time: 20 minutes (plus chilling time)
    Marinating/Chill time: Minimum 1 hour, ideally 2-4 hours

    While many appetizer recipes can be time-consuming, this Homemade Pickled Shrimp recipe is exceptionally quick to assemble. The active cooking and prep time is remarkably short, clocking in at around 20 minutes. The majority of the “work” is done by the marinating process, allowing the flavors to meld and deepen. The average time for similar elaborate appetizers can easily stretch to an hour or more, making this pickled shrimp a weeknight-friendly option or a last-minute party savior.

    A vibrant bowl of homemade pickled shrimp with fresh dill and lemon slices.

    Crafting Your Perfect Homemade Pickled Shrimp

    Let’s get started on creating this delightful dish. Follow these simple steps to achieve perfectly pickled shrimp every time!

    Step 1: Prepare the Shrimp

    Begin by ensuring your shrimp are perfectly prepped. If you’ve bought them frozen, make sure they are completely thawed. Gently rinse the shrimp under cold water and pat them thoroughly dry with paper towels. This is crucial for achieving a good sear and ensuring they cook evenly without becoming waterlogged. In a medium pot, bring about 2 inches of water to a rolling boil. Add a generous pinch of salt. Carefully add the shrimp and cook for just 2-3 minutes, or until they turn opaque and pink. Do not overcook them; they should still have a slight bite. Immediately drain the shrimp and plunge them into an ice bath (a bowl filled with ice and cold water) to stop the cooking process. Once cooled, drain them well again and set aside. This blanching process ensures the shrimp are tender and ready to absorb the delicious brine.

    Step 2: Create the Pickling Brine

    Now, let’s craft the zesty brine that will transform your shrimp. In a medium bowl, whisk together the white wine vinegar and extra virgin olive oil until they are well combined. Add the fresh dill, minced garlic, red pepper flakes (if using), and finely chopped red onion. Stir everything together to ensure the ingredients are evenly distributed. Season this mixture generously with salt and freshly ground black pepper. Taste the brine at this stage; it should be distinctly tangy, aromatic, and well-seasoned. Remember, the shrimp will absorb these flavors, so don’t be shy with the seasoning. If you desire an extra layer of brightness, stir in the optional tablespoon of lemon juice.

    Step 3: Combine and Chill

    Gently add the blanched and drained shrimp to the bowl with the pickling brine. Toss everything together carefully, ensuring each shrimp is coated in the flavorful mixture. Cover the bowl tightly with plastic wrap or transfer the mixture to an airtight container. Refrigerate the Homemade Pickled Shrimp for at least 1 hour to allow the flavors to meld. For the best and most intense flavor, it’s ideal to let them marinate for 2 to 4 hours. This chilling period allows the shrimp to become tender and fully infused with the tangy, herbal, and savory notes of the brine.

    Step 4: Serve and Enjoy

    Once your Homemade Pickled Shrimp have had ample time to marinate and develop their exquisite flavor, it’s time to serve. You can serve them directly from the refrigerator. Use a slotted spoon to transfer the shrimp to a serving dish, allowing some of the brine to drain off while still keeping them moist. Garnish with a little extra fresh dill or a sprinkle of lemon zest for an added visual appeal and burst of freshness. They are best enjoyed chilled, offering a delightful contrast to warmer dishes or as a refreshing standalone appetizer.

    Nutritional Information: A Healthy Indulgence

    Homemade Pickled Shrimp is a fantastic choice for those seeking delicious yet nutritious options. Shrimp is a lean protein powerhouse, and the use of healthy fats from olive oil (in moderation) and vibrant fresh ingredients makes this recipe a well-rounded choice. While exact nutritional values can vary slightly based on ingredient brands and exact measurements, a typical serving provides:

    • Calories: Approximately 150-200 per serving.
    • Protein: High in lean protein, essential for muscle building and satiety.
    • Fats: Contains healthy monounsaturated fats from olive oil.
    • Vitamins & Minerals: Rich in Vitamin B12, selenium, and phosphorus.
    • Low in Carbohydrates: Making it a great option for low-carb diets.

    Healthier Alternatives and Flavor Tweaks

    This Homemade Pickled Shrimp recipe is already quite healthy, but we can explore even more ways to enhance its appeal and tailor it to specific dietary needs or flavor preferences:

    • Leaner Brine: For a lighter version, you can reduce the olive oil slightly and compensate with a bit more vinegar or even a splash of vegetable broth to maintain liquid volume.
    • Herb Explorations: While dill is classic, feel free to experiment with other fresh herbs like parsley, chives, or even a hint of tarragon for a different aromatic profile.
    • Spicy Kick: Instead of dried red pepper flakes, finely mince a fresh jalapeño or serrano pepper for a brighter, cleaner heat that complements the seafood beautifully.
    • Vegetable Additions: Enhance the texture and nutrients by adding thinly sliced bell peppers (any color), capers, or even some finely diced celery to the brine. Let them marinate alongside the shrimp.
    • Citrus Twist: Besides lemon juice, a little lime juice can add a refreshing twist, especially if serving with a more tropical-inspired dish.

    Serving Suggestions for Homemade Pickled Shrimp

    The versatility of Homemade Pickled Shrimp means it can be served in many delightful ways:

    • Classic Appetizer: Serve chilled in a beautiful bowl with toothpicks or small forks, garnished with extra dill.
    • Seafood Platter: A sophisticated addition to any seafood platter, alongside oysters, crab legs, or other chilled seafood.
    • Salad Topper: Toss into a green salad for a protein boost and a zesty kick. It pairs wonderfully with a light vinaigrette.
    • Sandwich or Wrap Filling: Chop the shrimp and mix with a little Greek yogurt or light mayonnaise for a flavorful sandwich spread or wrap filling.
    • Alongside Grilling: Serve as a refreshing side to grilled fish or chicken.

    Common Mistakes to Avoid When Making Pickled Shrimp

    To ensure your Homemade Pickled Shrimp is a resounding success, keep these common pitfalls in mind:

    • Overcooking the Shrimp: This is the most common mistake. Shrimp cook very quickly. Overcooked shrimp become rubbery and tough, ruining the texture. Always err on the side of undercooking during the blanching stage.
    • Not Draining Shrimp Adequately: Excess water from rinsing or the ice bath can dilute the brine, weakening the flavor and texture. Pat them very dry.
    • Insufficient Marinating Time: While you can serve sooner, allowing at least an hour (preferably longer) ensures the shrimp fully absorb the delicious pickling liquid.
    • Using Stale or Low-Quality Ingredients: The quality of your vinegar, olive oil, and especially the dill will significantly impact the final taste.
    • Salting Incorrectly: Under-seasoning will result in a bland dish. Taste the brine and adjust salt and pepper accordingly before adding the shrimp.

    Storing Your Homemade Pickled Shrimp

    Proper storage is key to maintaining the freshness and flavor of your Homemade Pickled Shrimp. Keep the shrimp in the airtight container or covered bowl in the refrigerator. Properly stored, they are typically best consumed within 2 to 3 days. The acidity of the brine acts as a preservative, but the shrimp’s texture can change over time, becoming softer. Avoid freezing pickled shrimp, as this will significantly degrade their texture.

    Close-up of pickled shrimp artfully arranged on a serving platter.

    Frequently Asked Questions About Pickled Shrimp

    What is the best type of shrimp to use for pickling?

    Large or jumbo shrimp (typically 16/20 or 21/25 count per pound) are ideal. They hold their shape well during the brief cooking process and marinating, and offer a satisfying bite.

    Can I make the pickled shrimp ahead of time?

    Yes, absolutely! In fact, they taste even better when allowed to marinate for a few hours. They can be made up to 2 days in advance and stored in the refrigerator.

    What does “shelled and deveined” mean?

    “Shelled” means the hard outer shell has been removed. “Deveined” means the dark digestive tract (which runs along the back of the shrimp) has been removed. This is usually done with a small, sharp knife or a special tool.

    Can I use dried dill instead of fresh?

    While fresh dill provides the best aroma and flavor, you can use dried dill in a pinch. Use about 1 tablespoon of dried dill for every tablespoon of fresh. However, the flavor won’t be as vibrant.

    How long do I need to pickle the shrimp?

    For optimal flavor, we recommend pickling for at least 1 hour, with 2 to 4 hours being ideal. You can pickle them for up to 24 hours, but any longer might start to affect the texture.

    A Refreshing Classic for Any Occasion

    Homemade Pickled Shrimp is more than just an appetizer; it’s a delightful experience. Its bright, zesty flavors, combined with the succulent texture of perfectly cooked shrimp, make it an irresistible addition to any menu. Whether you’re hosting a party or simply craving a sophisticated snack, this recipe delivers. The simplicity of preparation, coupled with the depth of flavor achieved through expert pickling, ensures this dish will become a go-to favorite. Don’t hesitate to dive in and create this culinary gem. It’s a testament to how minimal effort can yield maximum flavor. Give it a try, and let the vibrant taste of Homemade Pickled Shrimp impress you and your guests!

    Print
    clock clock iconcutlery cutlery iconflag flag iconfolder folder iconinstagram instagram iconpinterest pinterest iconfacebook facebook iconprint print iconsquares squares iconheart heart iconheart solid heart solid icon

    Homemade Pickled Shrimp Recipe | Easy & Tasty


    • Author: Chef Emy

    Description

    Discover the vibrant flavors ofHomemade Pickled Shrimp, an appetizer that blends the zest of white wine vinegar and fresh dill with the succulence of shrimp. ThisHomemade Pickled Shrimprecipe not only promises a delightful taste experience but also provides a nutritious boost to your diet. Follow the straightforward instructions to create this delicious dish that can elevate any meal or gathering, makingHomemade Pickled Shrimpa must-try for seafood lovers.


    Ingredients

    Scale
    • 1pound large shrimp, peeled and deveined
    • 1 cupwhite wine vinegar
    • 1/2 cupwater
    • 1/4 cupolive oil
    • 2 tablespoonssugar
    • 1lemon, thinly sliced
    • 1small red onion, thinly sliced
    • 2cloves garlic, minced
    • 1 teaspoonmustard seeds
    • 1 teaspooncoriander seeds
    • 1 teaspoonwhole black peppercorns
    • 1/2 teaspoonred pepper flakes
    • 2bay leaves
    • Fresh dill, for garnish
    • Kosher salt, to taste

    Instructions

    1. Bring a large pot of salted water to a boil. Add the shrimp and cook for 2-3 minutes until pink and opaque. Drain and transfer to a bowl of ice water to stop the cooking process.
    2. In a saucepan, combine vinegar, water, olive oil, sugar, lemon slices, onion, garlic, mustard seeds, coriander seeds, peppercorns, red pepper flakes, and bay leaves. Simmer for 10 minutes.
    3. Pour the hot brine over the cooled shrimp. Add fresh dill and a pinch of kosher salt.
    4. Allow the mixture to cool to room temperature. Cover and refrigerate for at least 4 hours, preferably overnight, before serving.

    Notes

    Serving Suggestions:Serve the pickled shrimp chilled as a refreshing starter or atop a crisp salad for a light meal.
    Storage Tips:Keep the shrimp in its brine in a sealed container in the refrigerator for up to 5 days.
    Ingredient Substitutions:If white wine vinegar is too sharp, apple cider vinegar offers a milder tang. Also, fresh parsley can be used in place of dill for a different herbal note.

    “`

    Easy Salmon Balls with Creamy Avocado Sauce! 🥑

    “`html

    Easy Salmon Balls with Creamy Avocado Sauce! 🥑

    Introduction: A Healthy Salmon Bite Revolution

    Are you looking for a dinner that’s both incredibly delicious and remarkably good for you, taking less than 30 minutes from start to finish? You’re in the right place! Hello, food lovers! Whether you’re searching for a quick, healthy dinner option or a fun twist on your favorite salmon dishes, this Easy Salmon Balls with Creamy Avocado Sauce recipe is the perfect choice. These little bites of grilled salmon, packed with fresh herbs and served with a velvety avocado-cilantro drizzle, make for a satisfying and nourishing meal. This dish is as simple to prepare as it is delicious—let’s dive into how to make this mouthwatering recipe that will have everyone asking for seconds!

    Delicious Salmon Balls Ingredients

    Crafting these flavorful salmon balls is a breeze, and the creamy avocado sauce is the perfect complement. We’ve included tips for substitutions to make it your own!

    For the Salmon Balls

    • 1 pound skinless salmon fillets, finely chopped or pulsed in a food processor (aim for a slightly coarse texture, not paste) – The star of our show, providing lean protein and those wonderful omega-3s. Fresh or thawed frozen salmon works beautifully.
    • 1/2 cup panko breadcrumbs (or gluten-free breadcrumbs for a GF option) – These give our salmon balls a delightful crispness. For a binder with fewer carbs, try almond flour.
    • 1 large egg, lightly beaten – The essential binder that holds all our delicious ingredients together.
    • 1/4 cup finely chopped fresh parsley – Bright, fresh, and herbaceous, it awakens the palate. Cilantro or dill are also fantastic choices.
    • 2 tablespoons finely chopped fresh dill (optional, but highly recommended!) – Its delicate, slightly anise-like flavor is a classic pairing with salmon.
    • 1 tablespoon Dijon mustard – Adds a subtle tang and depth of flavor that balances the richness of the salmon.
    • 1 clove garlic, minced – For that pungent kick that makes everything better.
    • 1/2 teaspoon salt, or to taste – Enhances all the flavors.
    • 1/4 teaspoon black pepper, or to taste – A classic spice pairing that adds a touch of warmth.
    • 1-2 tablespoons olive oil, for cooking (if pan-frying) – A healthy fat to ensure a beautiful golden-brown crust.

    For the Creamy Avocado Sauce

    • 1 ripe avocado, pitted and scooped – The creamy, luscious base of our sauce, loaded with healthy fats and a smooth texture.
    • 1/4 cup fresh cilantro, chopped – Offers a zesty, herbaceous punch that cuts through the richness of the avocado.
    • 2 tablespoons fresh lime juice – Its bright acidity balances the creaminess and adds a refreshing citrus note. Lemon juice can be used in a pinch.
    • 1 clove garlic, minced – A small but mighty flavor booster.
    • 2-4 tablespoons water (or milk/non-dairy milk), to reach desired consistency – To achieve that perfect, pourable sauce texture.
    • Salt and pepper to taste – To season perfectly.

    Timing is Everything

    Prep Time: 20 minutes
    Cook Time: 10-15 minutes
    Total Time: 30-35 minutes

    This recipe is designed for speed! Compared to many salmon dishes that can take an hour or more, our salmon balls are ready in about half the time, making them ideal for busy weeknights. Prep is minimal, and cooking is quick, allowing you to get a wholesome meal on the table with ease.

    Salmon balls ready to be cooked

    Step-by-Step Salmon Ball Mastery

    Step 1: Prep the Salmon

    If you’re using fillets, start by ensuring they are skinless and boneless. For the best texture, either finely chop the salmon by hand with a sharp knife until it resembles small dice, or pulse it a few times in a food processor. Be careful not to over-process it into a paste; you want some texture!

    Step 2: Mix the Balls

    In a medium bowl, combine the prepared salmon with panko breadcrumbs, the lightly beaten egg, chopped parsley, dill (if using), Dijon mustard, minced garlic, salt, and pepper. Gently mix everything together with a fork or your hands until just combined. Don’t overmix, as this can make the salmon balls tough.

    Step 3: Form the Balls

    Lightly wet your hands to prevent sticking, then roll the salmon mixture into small balls, about 1 to 1.5 inches in diameter. You should get about 12-16 balls, depending on your size preference. Place them on a plate or baking sheet as you form them.

    Step 4: Cook’s Choice – Grilling or Baking

    For Grilling: Preheat your grill to medium-high heat. Lightly oil the grill grates. Place the salmon balls on the grill and cook for about 4-6 minutes per side, or until golden brown and cooked through. They should reach an internal temperature of 145°F (63°C).

    For Baking: Preheat your oven to 400°F (200°C). Line a baking sheet with parchment paper. Arrange the salmon balls on the prepared baking sheet. Bake for 12-15 minutes, flipping halfway through, until they are golden brown and cooked through. For a crispier exterior, you can broil them for the last minute or two, watching closely to prevent burning.

    Step 5: Whip Up the Creamy Avocado Sauce

    While the salmon balls are cooking, add the pitted avocado, chopped cilantro, lime juice, minced garlic, salt, and pepper to a small food processor or blender. Blend until smooth and creamy. Add water (or milk) 1 tablespoon at a time, blending between additions, until you reach your desired sauce consistency. Taste and adjust seasoning as needed.

    Step 6: Serve and Savor!

    Once cooked, arrange your perfectly golden salmon balls on a serving platter. Drizzle generously with the luscious creamy avocado sauce, or serve the sauce on the side for dipping. Garnish with a sprinkle of extra fresh herbs if desired. Enjoy the delightful burst of flavor and healthy goodness!

    Nutritional Highlights

    These salmon balls are a nutritional powerhouse, packed with lean protein, healthy fats, and essential vitamins and minerals. A serving (approximately 3-4 balls with sauce) typically offers:

    • Protein: Excellent source, crucial for muscle repair and satiety.
    • Healthy Fats: Rich in Omega-3 fatty acids from the salmon, beneficial for heart and brain health. Avocado adds monounsaturated fats.
    • Vitamins & Minerals: Good source of Vitamin D, B vitamins, Selenium, and Potassium.
    • Fiber: Contributed by the whole grains (if using whole wheat panko) and avocado.

    *Nutritional information is an estimate and can vary based on exact ingredients and portion sizes.

    Healthier Alternatives for Every Palate

    Looking to tailor this recipe further? Here are some simple swaps:

    • Gluten-Free: Swap panko breadcrumbs for gluten-free breadcrumbs or almond flour.
    • Lower Carb: Use almond flour or crushed pork rinds instead of panko.
    • Dairy-Free Sauce: Use a dairy-free milk alternative (like almond or oat milk) for thinning the avocado sauce, or simply omit it and enjoy a thicker dip.
    • Herb Variations: Experiment with other fresh herbs like chives, basil, or even a touch of mint in the balls or sauce.
    • Spice it Up: Add a pinch of red pepper flakes to the salmon mixture or a dash of hot sauce to the avocado sauce for a little heat.

    Serving Suggestions to Elevate Your Meal

    These salmon balls are incredibly versatile! Serve them as:

    • A light and healthy main course with a side salad or steamed vegetables.
    • An appetizer for parties or gatherings.
    • Part of a larger meal, alongside quinoa, brown rice, or roasted sweet potatoes.
    • A delicious addition to grain bowls or wraps.

    Common Mistakes to Avoid

    To ensure your salmon balls are perfect every time:

    • Over-processing the Salmon: This leads to a mushy texture. Aim for finely chopped or lightly pulsed.
    • Overmixing the Batter: Mix only until just combined to keep the balls tender.
    • Not Getting Them Cooked Through: Ensure the internal temperature reaches 145°F (63°C) for food safety and optimal texture.
    • Sauce Too Thick or Thin: Adjust water/milk gradually when making the avocado sauce to achieve the perfect consistency.

    Storing Your Salmon Ball Masterpieces

    Cooked salmon balls can be stored in an airtight container in the refrigerator for up to 3 days. Reheat them gently in a skillet, oven, or air fryer to regain crispness. The avocado sauce is best made fresh, but can be stored separately in an airtight container in the fridge for up to 1 day. The avocado may brown slightly; stir well before serving.

    Serving of salmon balls with avocado sauce

    Frequently Asked Questions

    Why are my salmon balls mushy?
    This is usually due to over-processing the salmon or overmixing the ingredients. Try pulsing the salmon just a few times and mixing the ball ingredients gently until combined.

    Can I make these ahead of time?
    You can prepare the salmon mixture and form the balls ahead of time, then refrigerate them for up to 24 hours before cooking. The avocado sauce is best made just before serving.

    What kind of salmon should I use?
    Fresh or frozen (thawed) salmon fillets work well. Atlantic, sockeye, or coho salmon are all great choices. Ensure it’s skinless and boneless.

    Can I freeze the uncooked salmon balls?
    Yes, you can freeze the formed uncooked balls on a baking sheet until solid, then transfer them to a freezer-safe bag for up to 1 month. Cook them directly from frozen, adding a few extra minutes to the cooking time.

    Is the avocado sauce healthy?
    Absolutely! Avocado is packed with healthy monounsaturated fats, fiber, and vitamins. The sauce is a nutritious and delicious accompaniment.

    Conclusion: A Satisfying and Simple Salmon Solution

    There you have it – a recipe for Easy Salmon Balls with Creamy Avocado Sauce that proves healthy eating can be incredibly flavorful and remarkably simple. These vibrant bites are perfect for any occasion, from a quick weeknight dinner to a crowd-pleasing appetizer. Packed with nutrients and bursting with fresh taste, they’re sure to become a family favorite. Don’t hesitate to get creative with herbs and seasonings to make them uniquely yours. So, grab your apron and get ready to whip up a batch of these delightful salmon balls – your taste buds will thank you!

    Print
    clock clock iconcutlery cutlery iconflag flag iconfolder folder iconinstagram instagram iconpinterest pinterest iconfacebook facebook iconprint print iconsquares squares iconheart heart iconheart solid heart solid icon

    Salmon Balls with Creamy Avocado Sauce: Healthy Dinner Ideas


    • Author: Chef Emy

    Description

    Hello, food lovers! Whether you’re looking for a quick, healthy dinner option or a fun twist on your favorite salmon dishes, thisSalmon Balls with Creamy Avocado Saucerecipe is the perfect choice. These little bites of grilled salmon, packed with fresh herbs and served with a velvety avocado-cilantro drizzle, make for a satisfying and nourishing meal. This dish is as simple to prepare as it is delicious—let’s dive into how to make this mouthwatering recipe!


    Ingredients

    • Feel free to substitute breadcrumbs with almond flour for a gluten-free version, or use sour cream instead of Greek yogurt for an even creamier texture.

    Instructions

    1. Start by finely chopping the salmon fillet or pulse it in a food processor until coarsely minced. In a large mixing bowl, combine the minced salmon, chopped parsley, cilantro, breadcrumbs, egg, minced garlic, smoked paprika, lemon zest, salt, and pepper. Stir the mixture thoroughly until all ingredients are well incorporated.
    2. Once your mixture is ready, take small portions and roll them into balls, approximately 2 inches in diameter. You should have about 12-14 balls depending on size.
    3. Heat 2 tablespoons of olive oil in a large skillet or grill pan over medium heat. Place the salmon balls in the pan and cook for about 3-4 minutes on each side, or until they are golden brown and cooked through. Once cooked, remove the salmon balls from the pan and set them aside.
    4. For the creamy avocado sauce, combine the avocado, fresh cilantro, Greek yogurt, lime juice, garlic, salt, and pepper in a food processor. Blend until smooth and creamy. Taste and adjust the seasoning if needed, adding more salt or lime juice to balance the flavor.
    5. Serve your grilled salmon balls with the creamy avocado cilantro sauce either drizzled on top or as a dipping sauce on the side. These bites are best enjoyed fresh but can also be refrigerated for leftovers.

    Notes

    Use Fresh Salmon: For the best flavor and texture, always use fresh salmon fillet. If you can find wild-caught salmon, it’s even better for both taste and health benefits.
    Customize the Sauce: Feel free to play around with the avocado sauce by adding a bit of jalapeño for a spicy kick or using a touch of honey for sweetness.
    Grilling Option: While this recipe calls for grilling the salmon balls in a pan, you can also cook them on the barbecue for a smoky flavor. Simply brush the balls with a little oil and grill over medium heat.

    “`

    Delicious Street Corn Chicken Rice Bowl Recipe

    “`html

    Delicious Street Corn Chicken Rice Bowl Recipe

    Craving a Flavor-Packed Meal in Under 30 Minutes?

    Are you tired of the same old weeknight dinners? Do you find yourself Googling “quick and easy meals” more often than you’d like to admit? If you’re nodding along, you’re in for a treat! This vibrant and zesty Street Corn Chicken Rice Bowl is your answer to delicious, Mexican-inspired cuisine that’s ready in a flash. It artfully combines tender, juicy chicken with the sunshine sweetness of corn, all brought together by a luscious, creamy sauce and served over fluffy rice. It’s a dish that doesn’t just fill your stomach; it tantalizes your taste buds and brings a burst of joy to your plate. Packed with flavor and incredibly satisfying, this recipe is destined to become a go-to in your culinary rotation, perfect for busy weeknights or casual weekend gatherings.

    Ingredients: A Symphony of Flavors

    The magic of this Street Corn Chicken Rice Bowl lies in the harmonious blend of fresh ingredients. Each component plays a crucial role in creating that unforgettable street corn flavor profile, with a few delightful twists.

    For the Chicken: Juicy and Marinated

    • 1.5 lbs Boneless, Skinless Chicken Thighs or Breasts: Thighs will offer more moisture and flavor, while breasts are a leaner option. Cut into bite-sized pieces for quick cooking.
    • 2 tbsp Olive Oil: A good quality olive oil acts as the base for our marinade, helping to tenderize the chicken.
    • 1 tsp Chili Powder: Adds a mild warmth and a beautiful reddish hue.
    • 1/2 tsp Cumin: Earthy and warm, cumin is essential for that authentic Mexican flavor.
    • 1/4 tsp Smoked Paprika: For a subtle smoky depth that complements the other spices.
    • 1/4 tsp Garlic Powder: A convenient way to add garlic flavor without fresh cloves.
    • Salt and Black Pepper to Taste: Essential for enhancing all the other flavors.

    For the Rice: The Fluffy Foundation

    • 2 cups Cooked Rice: Jasmine or basmati rice works wonderfully, providing a fragrant and fluffy base. Leftover rice is perfect for this!
    • 1 tbsp Butter or Olive Oil: To keep the rice from clumping and add a touch of richness.
    • Pinch of Salt: Simple seasoning for the rice.

    For the Corn Topping: Sweet and Tangy

    • 2 cups Corn Kernels (Fresh, Frozen, or Canned): Sweet corn is key! If using frozen, thaw first. If using canned, drain well. Roasted corn takes this to another level.
    • 1 tbsp Olive Oil: To help sauté the corn and bring out its sweetness.
    • 1/2 tsp Chili Powder: For a hint of spice.
    • 1/4 tsp Cumin: Enhances the corn’s natural flavor.
    • Juice of 1/2 Lime: The bright, zesty element that defines street corn.
    • 2 tbsp Chopped Fresh Cilantro: For a burst of freshness and herbaceous notes.
    • Salt to Taste: To balance the flavors.
    • Optional: 1/4 cup Crumbled Cotija Cheese (or Feta): The traditional salty, crumbly cheese. Feta is a great substitute.

    For the Creamy Sauce: The Luscious Binder

    • 1/2 cup Mayonnaise: The creamy base. Full-fat will yield the richest flavor.
    • 2 tbsp Sour Cream or Greek Yogurt: Adds tanginess and lightens the mayo.
    • Juice of 1 Lime: More citrus for that essential zing.
    • 1 tsp Chili Powder: For color and subtle heat.
    • 1/2 tsp Cumin: To echo the spice notes.
    • Pinch of Cayenne Pepper (Optional): For an extra kick if you like it spicy.
    • Salt and Pepper to Taste.

    For Assembly: The Finishing Touches

    • Optional Garnishes: Sliced avocado, extra cilantro, lime wedges, diced red onion, pickled jalapeños.

    Timing and Prep: A Speedy Culinary Adventure

    Prep Time: 15 minutes
    Cook Time: 15 minutes
    Total Time: 30 minutes
    Servings: 4

    This recipe is designed for speed and flavor. With most ingredients prepped simultaneously, you can have a delicious, hearty meal on the table in just 30 minutes. This is significantly faster than the average one-hour meal, making it a weeknight hero. The key is efficient multitasking: while the chicken marinates briefly and cooks, prepare the rice, sauté the corn, and whip up the sauce.

    Street Corn Chicken Rice Bowl ingredients laid out

    Step-by-Step Instructions: Bringing it All Together

    Step 1: Marinate and Cook the Chicken

    In a medium bowl, toss the bite-sized chicken pieces with olive oil, chili powder, cumin, smoked paprika, garlic powder, salt, and pepper. Let it marinate for at least 10 minutes while you start on the other components. Heat a tablespoon of olive oil in a large skillet or cast-iron pan over medium-high heat. Add the marinated chicken in a single layer (cook in batches if necessary to avoid overcrowding) and cook for 5-7 minutes, stirring occasionally, until browned and cooked through. Remove chicken from the skillet and set aside.

    Step 2: Prepare the Rice

    If you don’t have pre-cooked rice, start preparing it according to package directions. If using leftover rice, gently reheat it in a saucepan with a tablespoon of butter or olive oil and a pinch of salt until warmed through.

    Step 3: Make the Corn Topping

    In the same skillet used for the chicken (no need to wash it!), add another teaspoon of olive oil if needed. Add the corn kernels, chili powder, and cumin. Sauté for 3-5 minutes until the corn is tender-crisp and slightly caramelized. Remove from heat and stir in the lime juice, chopped cilantro, and salt to taste. If using, gently fold in the crumbled cotija cheese.

    Step 4: Whip Up the Creamy Sauce

    While the corn is sautéing, whisk together the mayonnaise, sour cream (or Greek yogurt), lime juice, chili powder, cumin, and cayenne pepper (if using) in a small bowl. Season with salt and pepper to taste. This sauce should be creamy, tangy, and slightly spicy – the perfect complement to the other elements.

    Step 5: Assemble the Bowls

    Divide the warm rice among four bowls. Top generously with the cooked chicken, followed by the street corn mixture. Drizzle liberally with the creamy sauce. Add your favorite optional garnishes like sliced avocado, extra cilantro, a squeeze of fresh lime, or some thinly sliced red onion. Serve immediately and enjoy the explosion of flavors!

    Nutritional Information: A Guilt-Free Indulgence

    This recipe is designed to be satisfying and balanced. A typical serving boasts:

    • Calories: Approximately 550-650 kcal (this can vary based on portion size and specific ingredients used, e.g., chicken breast vs. thigh, full-fat vs. light mayo).
    • Protein: High, primarily from chicken and dairy. ~35-45g.
    • Carbohydrates: From rice and corn. ~40-50g.
    • Fat: From mayo, oil, and cheese. ~25-35g.

    Note: Nutritional information is an estimate and can vary.

    Healthier Alternatives: Lighten Up Without Sacrificing Flavor

    Looking to make this even healthier? Here are some simple swaps:

    • For the Chicken: Use chicken breast instead of thighs for a leaner protein source.
    • For the Rice: Opt for brown rice or quinoa for added fiber and nutrients. Cauliflower rice is a low-carb alternative.
    • For the Creamy Sauce: Replace half the mayonnaise with plain Greek yogurt (0% or 2% fat) for a lighter, tangier sauce with more protein. You can also reduce the amount of mayo and add a touch more lime juice or water to reach desired consistency.
    • For the Corn: Use fire-roasted corn for an extra layer of flavor without added fat.
    • Cheese: Use sparingly or omit the cotija/feta if you’re watching sodium or fat intake.

    Serving Suggestions: Elevate Your Bowl

    These bowls are a complete meal on their own, but here are some ideas to enhance them:

    • Add Freshness: Top with diced avocado, cherry tomatoes, or finely chopped red bell peppers for extra color and texture.
    • Spice it Up: Include sliced jalapeños (fresh or pickled) or a dash of your favorite hot sauce.
    • Crunch Factor: A sprinkle of toasted pepitas (pumpkin seeds) or a few tortilla strips can add a satisfying crunch.
    • Extra Tang: Serve with extra lime wedges on the side for an extra burst of freshness.

    Common Mistakes to Avoid

    To ensure your Street Corn Chicken Rice Bowl is a triumph:

    • Overcrowding the Pan: When cooking the chicken, don’t overcrowd the skillet. This will steam the chicken instead of searing it, resulting in less flavor and a less appealing texture. Cook in batches if necessary.
    • Under-seasoning: Taste and adjust seasoning at each stage, especially for the corn topping and the creamy sauce. Salt is essential for bringing out the full flavor of each ingredient.
    • Skipping the Lime Juice: The citrus from the lime is crucial for cutting through the richness and creating the signature street corn tang. Don’t skip it!
    • Using Bland Corn: If using canned corn, ensure it’s well-drained. If possible, opt for sweet corn varieties or even roasted corn for a deeper flavor.

    Storing Tips: Keep the Flavor Fresh

    While best enjoyed fresh, leftovers can be stored:

    • Assembly: Store the cooked chicken, rice, and corn topping in separate airtight containers in the refrigerator for up to 3 days. Store the creamy sauce separately.
    • Reheating: Reheat the chicken, rice, and corn gently on the stovetop or in the microwave. Assemble the bowl and add the sauce and fresh toppings just before serving. The sauce is best used within 3-4 days.
    Close up of a Street Corn Chicken Rice Bowl being assembled

    Frequently Asked Questions

    ***What kind of chicken is best for this recipe?***

    Boneless, skinless chicken thighs are recommended for their tenderness and flavor. However, chicken breasts work well too if you prefer a leaner option. Just be mindful not to overcook them.

    ***Can I make the components ahead of time?***

    Yes! You can marinate the chicken, cook the rice, and even prepare the corn topping and sauce a day in advance. Store them separately in the refrigerator and assemble just before serving for the best texture.

    ***What if I don’t have cotija cheese?***

    Feta cheese is an excellent substitute for cotija. If you don’t have either, you can omit the cheese, or use a sprinkle of grated Parmesan for a salty finish.

    ***Is this recipe spicy?***

    The base recipe has a mild spice level from the chili powder. You can easily adjust the heat by adding more or less chili powder, a pinch of cayenne pepper to the sauce, or by including fresh or pickled jalapeños as a garnish.

    ***Can I make this recipe vegetarian?***

    Absolutely! For a vegetarian version, omit the chicken and consider adding seasoned black beans, roasted sweet potatoes, or crispy tofu as your protein source. Ensure your spices are vegetarian-friendly.

    Your New Go-To Flavor Fiesta!

    This Delicious Street Corn Chicken Rice Bowl is more than just a meal; it’s an experience. It’s a quick, easy, and incredibly satisfying way to bring the vibrant flavors of Mexican street food right to your kitchen table. From the perfectly seasoned chicken to the sweet, tangy corn and the luscious creamy sauce, every bite is a celebration. Don’t wait for a special occasion to whip up this masterpiece. Give it a try tonight and prepare for the compliments!

    Print
    clock clock iconcutlery cutlery iconflag flag iconfolder folder iconinstagram instagram iconpinterest pinterest iconfacebook facebook iconprint print iconsquares squares iconheart heart iconheart solid heart solid icon

    Street Corn Chicken Rice Bowl


    • Author: Chef Emy

    Description

    This vibrant, zesty rice bowl combines juicy chicken, sweet corn, and creamy toppings for a Mexican-inspired meal that’s quick, satisfying, and packed with flavor.


    Ingredients

    Scale
    • 1lb chicken breast, diced.1 tablespoonolive oil.1 teaspoonchili powder.Salt and pepper, to taste.
    • 1 tablespoonolive oil.1 teaspoonchili powder.Salt and pepper, to taste.
    • 1 teaspoonchili powder.Salt and pepper, to taste.
    • Salt and pepper, to taste.
    • 2 cupscooked rice.1 cupcooked corn kernels.
    • 1 cupcooked corn kernels.
    • ¼ cupsour cream.1 tablespoonmayonnaise.1clove garlic, minced.½ teaspoonpaprika.
    • 1 tablespoonmayonnaise.1clove garlic, minced.½ teaspoonpaprika.
    • 1clove garlic, minced.½ teaspoonpaprika.
    • ½ teaspoonpaprika.
    • ¼ cupcrumbled cotija cheese.¼ cupchopped cilantro.1lime, cut into wedges.
    • ¼ cupchopped cilantro.1lime, cut into wedges.
    • 1lime, cut into wedges.

    Instructions

    1. Season the diced chicken with chili powder, salt, and pepper.
    2. Heat olive oil in a skillet over medium-high heat. Add the chicken and cook for6–8 minutes, stirring occasionally, until golden brown and fully cooked through. Remove from heat and set aside.2️⃣Prepare the Dressing:In a small bowl, whisk together the sour cream, mayonnaise, minced garlic, and paprika until smooth. Adjust the seasoning if desired.3️⃣Assemble the Bowls:Divide the cooked rice amongfour bowls.Top each bowl with an equal portion of the cooked chicken and corn.4️⃣Add Toppings:Drizzle each bowl with the creamy dressing.Sprinkle with crumbled cotija cheese and chopped cilantro.5️⃣Serve:Add a lime wedge to each bowl. Squeeze the lime over the top just before eating for a burst of freshness.
    3. In a small bowl, whisk together the sour cream, mayonnaise, minced garlic, and paprika until smooth. Adjust the seasoning if desired.
    4. Divide the cooked rice amongfour bowls.Top each bowl with an equal portion of the cooked chicken and corn.4️⃣Add Toppings:Drizzle each bowl with the creamy dressing.Sprinkle with crumbled cotija cheese and chopped cilantro.5️⃣Serve:Add a lime wedge to each bowl. Squeeze the lime over the top just before eating for a burst of freshness.
    5. Top each bowl with an equal portion of the cooked chicken and corn.
    6. Drizzle each bowl with the creamy dressing.Sprinkle with crumbled cotija cheese and chopped cilantro.5️⃣Serve:Add a lime wedge to each bowl. Squeeze the lime over the top just before eating for a burst of freshness.
    7. Sprinkle with crumbled cotija cheese and chopped cilantro.
    8. Add a lime wedge to each bowl. Squeeze the lime over the top just before eating for a burst of freshness.

    Notes

    Make It Spicy: Add a pinch of cayenne pepper to the chicken seasoning or mix hot sauce into the dressing for a fiery kick.Rice Options: Use brown rice, cauliflower rice, or quinoa for a healthy twist.Roasted Corn: For extra flavor, roast the corn kernels in a skillet with a bit of butter and paprika before adding them to the bowl.Storage: Leftovers can be stored in an airtight container in the fridge for up to 3 days. Reheat before serving, and add fresh toppings like cilantro and lime.
    Rice Options: Use brown rice, cauliflower rice, or quinoa for a healthy twist.Roasted Corn: For extra flavor, roast the corn kernels in a skillet with a bit of butter and paprika before adding them to the bowl.Storage: Leftovers can be stored in an airtight container in the fridge for up to 3 days. Reheat before serving, and add fresh toppings like cilantro and lime.
    Roasted Corn: For extra flavor, roast the corn kernels in a skillet with a bit of butter and paprika before adding them to the bowl.Storage: Leftovers can be stored in an airtight container in the fridge for up to 3 days. Reheat before serving, and add fresh toppings like cilantro and lime.
    Storage: Leftovers can be stored in an airtight container in the fridge for up to 3 days. Reheat before serving, and add fresh toppings like cilantro and lime.

    “`

    How to Make the Perfect Fried Chicken Without the Buttermilk

    “`html

    How to Make the Perfect Fried Chicken Without the Buttermilk

    Did you know that approximately 75% of people who love fried chicken also find themselves out of buttermilk at the crucial moment? It’s a culinary crisis many home cooks face! The creamy tang of buttermilk is often seen as non-negotiable for achieving that signature crispy, juicy fried chicken. But what if we told you that you could achieve those same mouthwatering results – the golden crust, the succulent meat, the irresistible crunch – without ever reaching for a carton of buttermilk? Prepare to be amazed, because today, we’re unveiling the secrets to perfect fried chicken, no buttermilk required!

    Craving Crispy Chicken Without Buttermilk?

    The aroma of perfectly fried chicken is universally appealing. That shatteringly crisp exterior and tender, juicy interior are the hallmarks of this beloved dish. While buttermilk is a popular base for marinades, contributing to both tenderness and a slightly tangy flavor that complements the richness of the chicken, its absence doesn’t mean the end of your crispy chicken dreams. With a few clever substitutions and techniques, you can achieve a fried chicken that rivals any restaurant’s, all from the comfort of your own kitchen. This recipe focuses on creating depth of flavor and achieving that coveted crispy coating using pantry staples and a touch of culinary magic. Get ready to impress yourself and your loved ones with chicken so good, they’ll never guess what’s *not* in the marinade!

    The Secret Ingredients for Your Buttermilk-Free Fried Chicken

    The magic of this recipe lies in building flavor and achieving the perfect crisp. We’ll leverage acidity and seasoning to mimic the tenderizing and flavor-enhancing effects of buttermilk.

    Chicken and Marinade

    • 3-4 lbs Chicken Pieces (a mix of bone-in, skin-on pieces like thighs, drumsticks, and breasts work best for even cooking and richer flavor. Look for pieces that are roughly the same size for uniform frying.)
    • 1 cup Kosher Salt (for brining, this draws out moisture then reabsorbs seasoned liquid, leading to juicier chicken.)
    • 6 cups Cold Water (for the brine)
    • 1/2 cup Plain Yogurt or Sour Cream (Substituion: Greek yogurt offers a similar tang and creaminess. Even mayonnaise can work in a pinch for its oil and egg content, though it alters the flavor profile slightly.) This provides the acidic component that tenderizes. Feel the creamy texture and imagine it coating the chicken.
    • 1 tablespoon White Vinegar or Lemon Juice (Substituion: Apple cider vinegar works too. This bright acidity is crucial for tenderizing the meat in place of buttermilk’s tang.)
    • 1 teaspoon Smoked Paprika (for a warm, smoky depth of flavor and beautiful color.)
    • 1/2 teaspoon Garlic Powder (essential aromatic base.)
    • 1/2 teaspoon Onion Powder (complements the garlic for a savory punch.)
    • 1/4 teaspoon Black Pepper (freshly ground for best flavor.)

    The Crispy Flour Dredge

    • 2 cups All-Purpose Flour (the foundation of our crispy coating. Sift for a lighter dredge if you prefer.)
    • 1/4 cup Cornstarch (Substituion: Potato starch will also work. This is key for an extra-crispy, shatterproof crust that stays crisp longer.) Notice how fine and light it feels.
    • 2 teaspoons Salt (enhances all the flavors.)
    • 1 teaspoon Black Pepper (a little kick.)
    • 1 teaspoon Smoked Paprika (for color and flavor.)
    • 1/2 teaspoon Garlic Powder
    • 1/2 teaspoon Onion Powder
    • Optional: 1/4 teaspoon Cayenne Pepper (for a subtle heat.)

    For Frying

    • 4-6 cups Vegetable Oil, Canola Oil, or Peanut Oil (a neutral oil with a high smoke point is best. Peanut oil adds a subtle nutty flavor.) Make sure you have enough to generously submerge the chicken pieces.

    Timing is Everything: Prep, Cook, and Enjoy

    Prep time: 20 minutes (+ 1 hour brining)
    Cook time: 15-20 minutes per batch
    Total time: 1 hour 35 minutes
    Serves: 4-6

    Compared to traditional buttermilk-marinated fried chicken, this recipe shaves off the overnight marinating time by using a quicker brine and a yogurt-based marinade. While the total active time is similar, the speed to deliciousness is enhanced.

    A pile of golden brown fried chicken pieces on a cooling rack.

    Step-by-Step to Crispy Perfection

    Step 1: Prepare the Chicken

    Begin by patting your chicken pieces thoroughly dry with paper towels. This is a crucial step for achieving a crispy, even crust. Next, prepare a quick brine: in a large bowl, dissolve the 1 cup of kosher salt in 6 cups of cold water. Submerge the chicken pieces in the brine, ensuring they are fully covered. Let them brine for 1 hour in the refrigerator. This process seasons the chicken from the inside out and helps with moisture retention, leading to juicier results.

    Step 2: Marinate for Flavor

    After brining, drain the chicken and rinse each piece under cold water to remove excess salt. Pat them completely dry again. In a medium bowl, whisk together the plain yogurt (or your chosen substitute), white vinegar (or lemon juice), smoked paprika, garlic powder, onion powder, and black pepper. Add the dried chicken pieces to this marinade. Toss well to ensure every piece is generously coated. Cover the bowl and refrigerate for at least 30 minutes, or up to 2 hours. You’ll feel how the yogurt clings to the chicken, promising a flavorful coating.

    Step 3: The Crispy Flour Dredge

    While the chicken is marinating, prepare your dredge. In a large, shallow dish or a re-sealable plastic bag, combine the all-purpose flour, cornstarch, salt, black pepper, smoked paprika, garlic powder, onion powder, and cayenne pepper (if using). Whisk or shake well to ensure all the spices are evenly distributed throughout the flour mixture. This blend is designed to create a light, airy, and exceptionally crispy coating.

    Step 4: Coat the Chicken

    Remove the chicken from the marinade, letting any excess drip off, but do not wipe it clean. Working one piece at a time, dredge the chicken in the seasoned flour mixture. Press the flour onto the chicken firmly, ensuring it’s completely and evenly coated. For an extra-crispy, craggy crust, you can dip the floured chicken back into the leftover marinade briefly (or a little extra plain yogurt/water mixture) and then dredge it in the flour again. Place the coated chicken pieces on a wire rack set over a baking sheet. Let them rest for about 10-15 minutes; this allows the coating to adhere better and will result in a crispier crust.

    Step 5: Fry to Golden Perfection

    Heat your chosen oil in a heavy-bottomed pot or Dutch oven over medium-high heat to 350°F (175°C). Use a thermometer to ensure accurate temperature; this is vital for proper cooking. Carefully lower 3-4 chicken pieces into the hot oil, making sure not to overcrowd the pot, as this will lower the oil temperature and result in greasy chicken. Fry the chicken for about 6-8 minutes per side for thighs and drumsticks, and 8-10 minutes per side for breasts, until deeply golden brown and cooked through. The internal temperature of the thickest part of the chicken should reach 165°F (74°C). Listen to that satisfying sizzle – it’s the sound of perfection!

    Step 6: Drain and Rest

    Once the chicken is perfectly golden and cooked, carefully remove it from the oil using a slotted spoon or spider strainer. Place the fried chicken pieces on a clean wire rack set over a baking sheet to drain any excess oil and to keep the crust crisp. Avoid placing them directly on paper towels, as this can make the bottom soggy. This resting period is essential for the juices to redistribute within the meat.

    Nutritional Snapshot

    Please note that nutritional information is an estimate and can vary based on portion size, exact ingredients used, and cooking methods. For this recipe, an estimated calculation for one serving (e.g., one piece of thigh or drumstick) might look like this:

    • Calories: ~350-450 kcal (depending on cut and oil absorption)
    • Protein: ~25-35g
    • Fat: ~20-30g (primarily from oil and skin)
    • Carbohydrates: ~15-20g (from the flour coating)

    Healthier Sides and Swaps

    While fried chicken is a treat, you can balance your meal with healthier accompaniments. Consider:

    • Baked or Air-Fried Sweet Potato Fries: A great source of Vitamin A and fiber.
    • Steamed or Roasted Broccoli/Green Beans: Packed with vitamins and minerals.
    • Quinoa Salad: A complete protein and good source of fiber.
    • Healthier Coating: For an even lighter version, consider using whole wheat flour or almond flour for your dredge, though this may alter the crispiness and texture. Air frying is also an excellent alternative to deep frying, using significantly less oil.
    • Marinade Swap: In a pinch, a mixture of milk and a teaspoon of vinegar can mimic buttermilk, or even just milk with a good amount of salt and spices will work.

    Serving Suggestions

    Serve your perfect buttermilk-free fried chicken hot and fresh! It’s classic with creamy mashed potatoes and gravy, coleslaw, or a simple side salad. Don’t forget a squeeze of lemon for brightness!

    Common Fried Chicken Pitfalls to Avoid

    • Overcrowding the Pot: This cools the oil, leading to soggy, greasy chicken. Fry in batches.
    • Incorrect Oil Temperature: Too low means greasy chicken; too high means burnt exterior and raw interior. Use a thermometer!
    • Not Resting the Coated Chicken: Letting the dredge sit on the chicken for 10-15 minutes helps it adhere.
    • Cutting Into It Too Soon: Allow the chicken to rest after frying to let the juices settle.
    • Under-seasoning: Salt and spices are your friends, especially in the dredge.

    Storing Your Delicious Fried Chicken

    For the best experience, fried chicken is best enjoyed fresh. However, if you have leftovers, allow them to cool completely at room temperature. Store them in an airtight container in the refrigerator for up to 3-4 days. To reheat, the oven or an air fryer at around 350°F (175°C) usually yields the crispiest results. Avoid microwaving if crispiness is a priority.

    Close-up of a crispy fried chicken piece being served.

    Your Fried Chicken Dreams, Realized

    So there you have it! Perfectly crispy, incredibly juicy fried chicken doesn’t require a special trip to the store for buttermilk. By using a simple brine, a tangy yogurt-based marinade, and a well-seasoned flour dredge with cornstarch, you can achieve restaurant-quality results right in your own kitchen. This recipe is a testament to smart ingredient swaps and essential cooking techniques that put deliciousness within reach. Don’t let a missing ingredient stop you from enjoying your favorite comfort food. Give this recipe a try and prepare to be delighted!

    Frequently Asked Questions

    ***What can I use if I don’t have plain yogurt?***

    You can substitute plain Greek yogurt, sour cream, mayonnaise (though this will impart a slight flavor), or even a mixture of milk with a teaspoon of vinegar or lemon juice to create a makeshift buttermilk substitute for the marinade.

    ***Why is my fried chicken not crispy?***

    This can happen if you overcrowd the pot (lowering oil temp), fry at too low a temperature, or don’t drain the chicken properly on a wire rack. Ensure your oil is hot enough throughout the frying process, fry in batches, and always drain on a wire rack.

    ***Can I bake this chicken instead of frying?***

    Yes, you can! For a baked version, place the coated chicken on a wire rack set over a baking sheet and bake in a preheated oven at 400°F (200°C) for 35-45 minutes, flipping halfway through, until cooked through and golden. It won’t be quite as crispy as deep-fried, but it’s a healthier alternative.

    ***How long should I brine the chicken?***

    For this recipe, a 1-hour brine is sufficient and recommended. Brining for too long (especially with salt) can result in overly salty or mushy chicken.

    ***Is cornstarch really necessary for the coating?***

    While not strictly necessary, cornstarch is highly recommended. It absorbs moisture and creates a crispier, lighter coating that stays crispier for longer than flour alone.

    Print
    clock clock iconcutlery cutlery iconflag flag iconfolder folder iconinstagram instagram iconpinterest pinterest iconfacebook facebook iconprint print iconsquares squares iconheart heart iconheart solid heart solid icon

    Fried Chicken Without Buttermilk


    • Author: Chef Emy

    Description

    Maintain oil temperature at 350°F for best resultsFor extra crispiness, let dredged chicken rest longer before fryingChicken should reach internal temperature of 165°FStore leftovers in refrigerator up to 3 days


    Ingredients

    Scale
    • 4 pounds chicken pieces (thighs, drumsticks, wings, or breasts)
    • 2 cups cold water
    • 2 tablespoons kosher salt
    • 1 tablespoon white vinegar
    • 1 teaspoon sugar
    • 3 cloves garlic, smashed
    • 1 bay leaf
    • For the Seasoned Flour Coating:
    • 2 cups all-purpose flour
    • 1 tablespoon paprika
    • 2 teaspoons garlic powder
    • 2 teaspoons onion powder
    • 1½ teaspoons black pepper
    • 1 teaspoon dried thyme
    • 1 teaspoon dried oregano
    • 1 teaspoon cayenne pepper
    • 2 teaspoons salt
    • For the Egg Wash:
    • 2 large eggs
    • ¼ cup water
    • 1 tablespoon hot sauce (optional)
    • For Frying:
    • Vegetable oil, peanut oil, or canola oil

    Instructions

    1. Combine brine ingredients and submerge the chicken. Refrigerate 4+ hours.
    2. Pat chicken dry. Prepare dredging station: seasoned flour, egg wash, more seasoned flour.
    3. Double-dredge each piece and rest for 15 minutes on a wire rack.
    4. Heat oil to 350°F in a Dutch oven or heavy pan.
    5. Fry in batches for 12-14 minutes (large pieces) or 10-12 minutes (small pieces), turning once.
    6. Drain on a wirea rack and rest 5-10 minutes before serving.

    Notes

    Maintain oil temperature at 350°F for best resultsFor extra crispiness, let dredged chicken rest longer before fryingChicken should reach internal temperature of 165°FStore leftovers in refrigerator up to 3 days

    Nutrition

    • Calories: 400

    “`