“`html
Introduction
There’s something incredibly comforting about a perfectly cooked Baked Chicken Breast Recipe—juicy, flavorful, and effortlessly versatile. Whether you’re meal prepping for the week or whipping up a quick family dinner, this dish never fails to deliver. Plus, it’s a blank canvas for your favorite spices, marinades, and sides. If you’ve ever struggled with dry or bland chicken, you’re not alone. But trust me, with the right techniques, you’ll master this staple in no time. Let’s dive into why this recipe deserves a permanent spot in your kitchen rotation.
About This Recipe
A Baked Chicken Breast Recipe is more than just a simple dish—it’s a foundation for countless meals. First, it’s lean, protein-packed, and fits seamlessly into healthy eating plans. Second, it’s incredibly adaptable. You can pair it with roasted veggies for a light dinner or slice it over a hearty salad for lunch. Moreover, baking chicken breast keeps it tender without the fuss of frying or grilling. If you’re new to cooking, this method is forgiving and easy to perfect with a few key tips.
On this blog, we celebrate recipes that balance simplicity and flavor, and this Baked Chicken Breast Recipe nails both. It aligns with our philosophy that good food doesn’t have to be complicated. For example, you can elevate it with a zesty lemon-herb marinade or keep it classic with garlic and paprika. Either way, the result is consistently delicious. If you’re looking for side dish inspiration, check out our guide to perfect roasted vegetables or our creamy mashed potatoes to complete the meal.
Beyond its versatility, this recipe matters because it solves a universal problem: how to cook chicken breast without drying it out. Many home cooks overcook chicken, fearing undercooked meat. However, with precise timing and a trusty meat thermometer, you’ll achieve juicy perfection every time. Additionally, baked chicken breast stores well, making it ideal for meal prep. Whether you’re a busy parent or a fitness enthusiast, this recipe adapts to your lifestyle without sacrificing taste or nutrition.
Why I Love This Recipe
This Baked Chicken Breast Recipe holds a special place in my kitchen because it’s the first dish I ever mastered. Years ago, I struggled with rubbery, flavorless chicken until I discovered the magic of brining and proper oven temps. Now, it’s my go-to for weeknight dinners and last-minute gatherings. I love how it welcomes creativity—sometimes I’ll toss it with buffalo sauce for a spicy kick, or keep it simple with olive oil and rosemary. Most importantly, it’s a recipe that grows with you. Whether you’re a novice or a seasoned cook, it never stops delivering delicious results.
“`
Health and Nutrition
Why it’s good for your body
Baked Chicken Breast Recipe delivers lean protein to fuel your muscles and keep you full longer. Since chicken breast is naturally low in fat, it supports heart health while providing essential nutrients. Additionally, this dish packs a punch with vitamins like B6 and B12, which boost energy and brain function.
Moreover, Baked Chicken Breast Recipe is rich in selenium, a powerful antioxidant that fights inflammation. By baking instead of frying, you avoid unnecessary oils and keep the meal light yet satisfying. Pair it with roasted veggies or a fresh salad, and you’ll create a balanced plate full of vitamins and minerals.
Furthermore, this recipe fits seamlessly into meal prep routines because it stays tender and flavorful for days. Whether you’re building muscle or simply eating cleaner, Baked Chicken Breast Recipe helps you meet your goals without sacrificing taste. Its versatility also means you can season it to match any craving while keeping nutrition front and center.
How it fits in a healthy lifestyle
Baked Chicken Breast Recipe shines in a balanced diet because it’s high in protein and low in carbs, making it perfect for fitness enthusiasts or anyone watching their intake. If you follow a gluten-free or heart-healthy plan, this dish naturally aligns with your needs. Plus, it’s simple to customize with herbs and spices for extra flavor without added calories.
For busy weeknights, this recipe saves time and keeps you on track. Pair it with nutritious sides for a complete meal, or slice it over greens for a protein-packed lunch. If you’re exploring more high-protein options, check out our meal prep guide to simplify healthy eating. With Baked Chicken Breast Recipe as a staple, you’ll enjoy delicious meals that support your wellness goals every day.
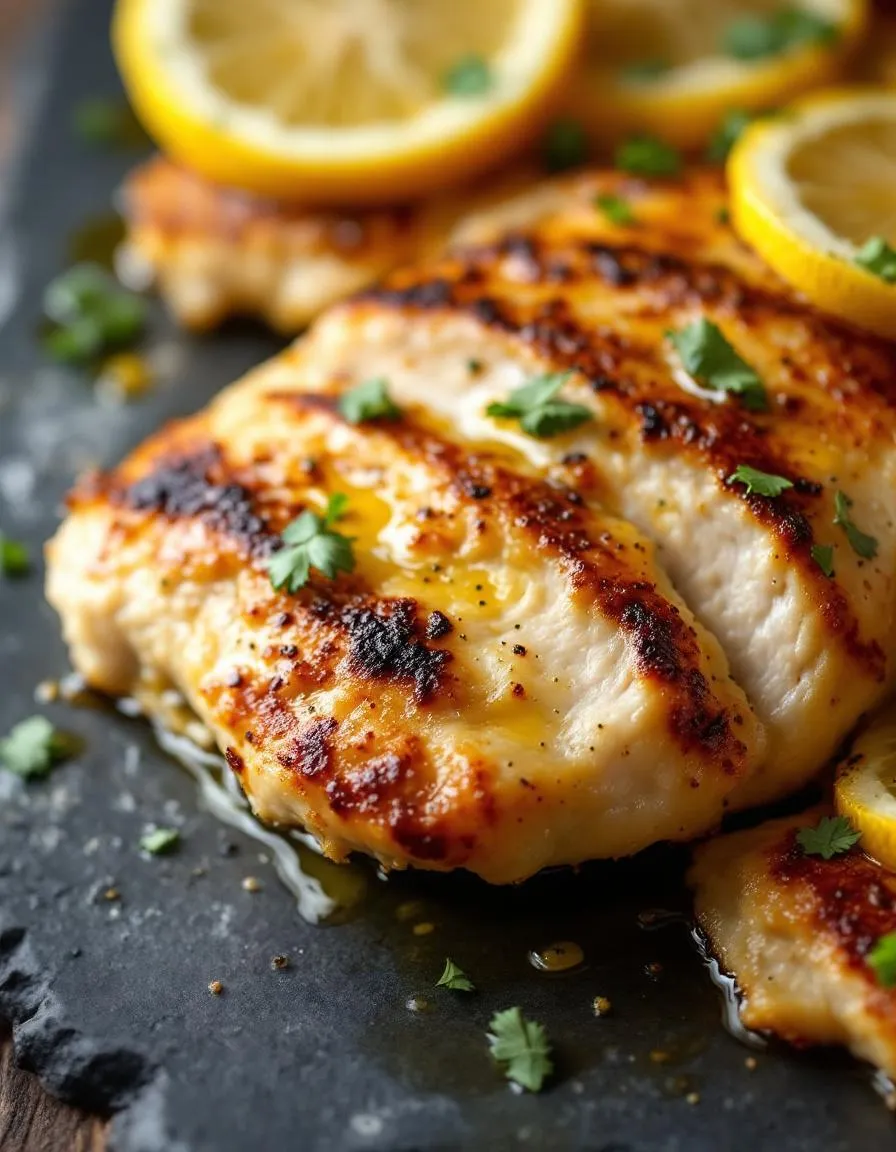
PrintBaked Chicken Breast Recipe
Description
Juicy and flavorful baked chicken breast that’s easy to prepare and perfect for a healthy meal.
Ingredients
For the Crust:
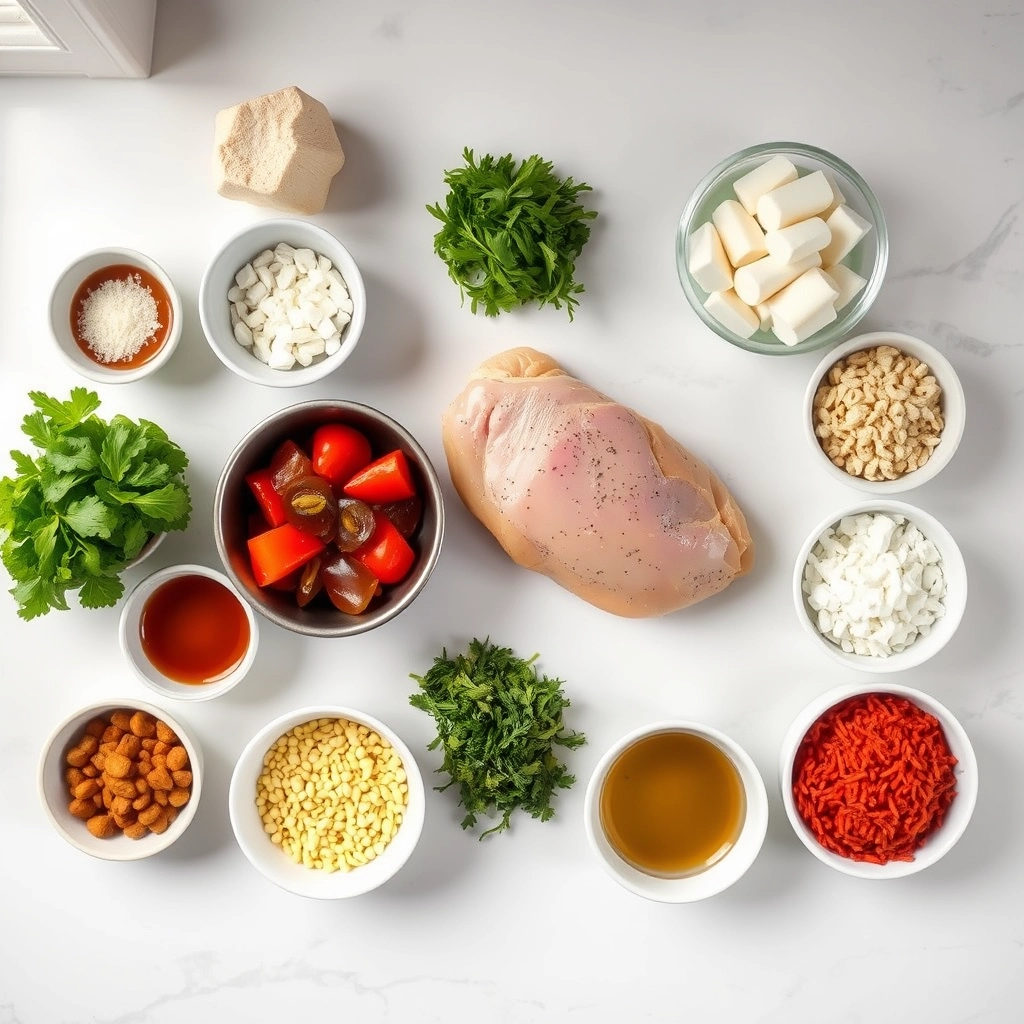
- 4 boneless, skinless chicken breasts
- 2 tablespoons olive oil
- 1 teaspoon garlic powder
- 1 teaspoon paprika
- 1 teaspoon dried oregano
- 1/2 teaspoon salt
- 1/2 teaspoon black pepper
- 1 lemon (optional, for garnish)
Instructions
1. Prepare the Crust:
- Preheat oven to 375°F (190°C).
- In a small bowl, mix garlic powder, paprika, oregano, salt, and pepper.
- Brush chicken breasts with olive oil and rub the spice mixture evenly over them.
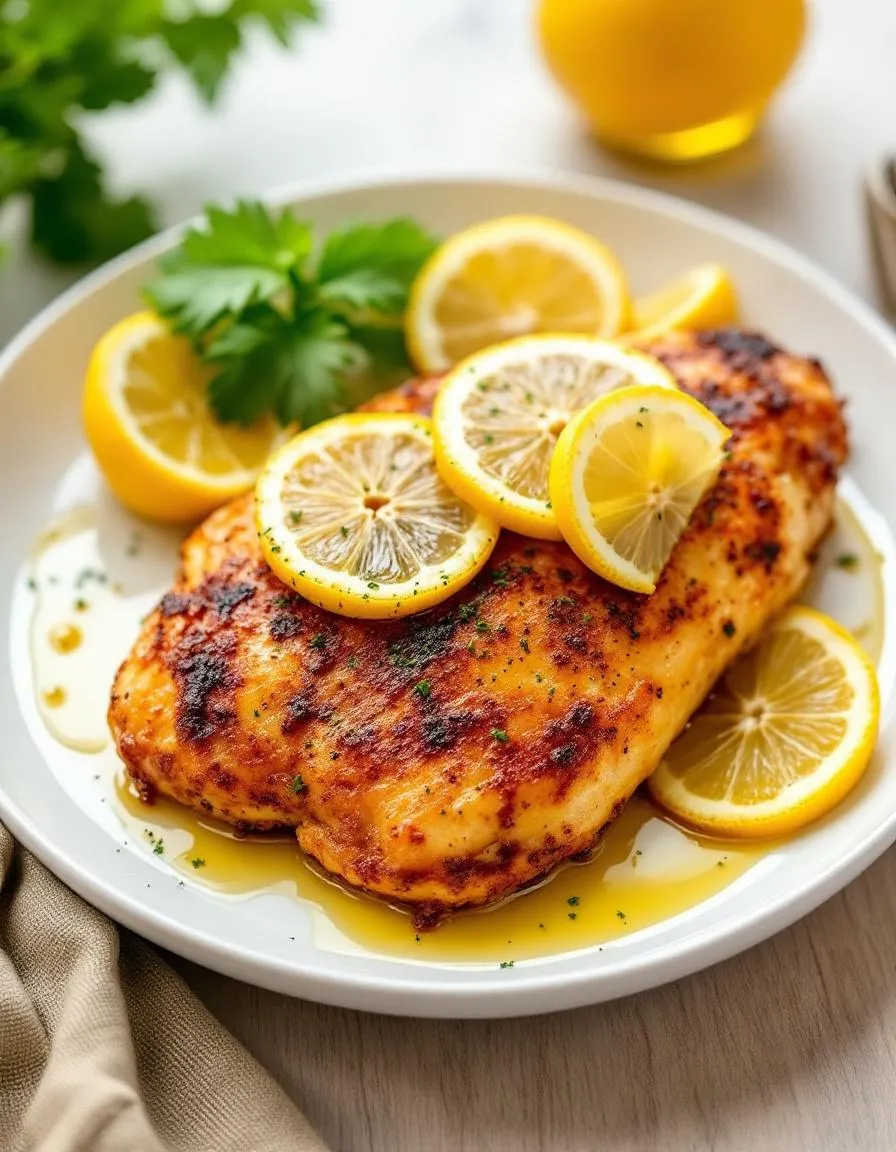
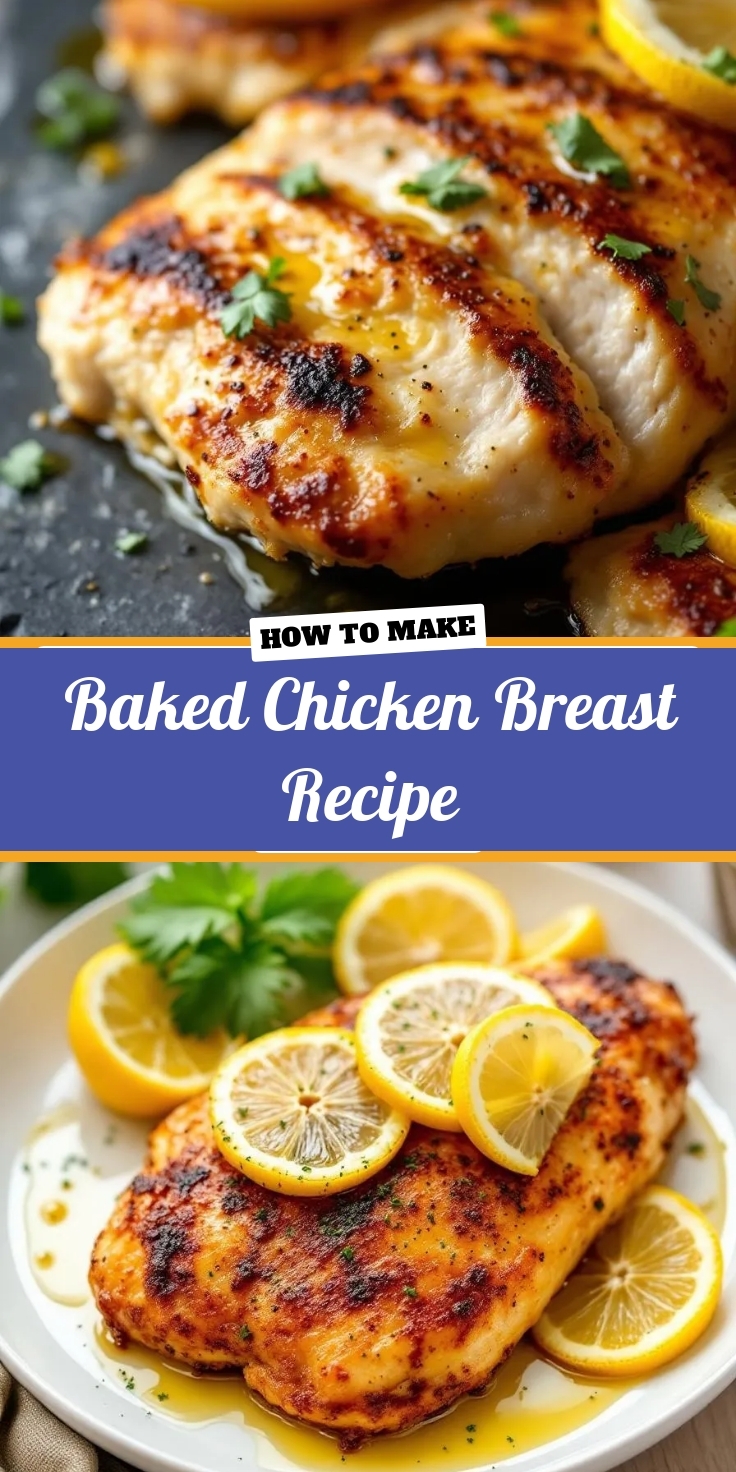
- Place chicken on a baking sheet and bake for 25-30 minutes, or until internal temperature reaches 165°F (74°C).
- Let chicken rest for 5 minutes before serving. Garnish with lemon slices if desired.
Notes
You can customize the seasonings to taste.
How to Prepare This Dish
Steps and time-saving tips
Start by preheating your oven to 375°F so it’s ready when you are. While it heats, pat the chicken breasts dry with paper towels to ensure a crispier crust. Next, drizzle olive oil over both sides of the chicken and rub it in evenly. In a small bowl, whisk together salt, pepper, garlic powder, and paprika for a simple yet flavorful seasoning. Sprinkle the mix generously over the chicken, pressing lightly so it sticks. For extra juiciness, let the seasoned chicken sit at room temperature for 10 minutes before baking. Meanwhile, line a baking sheet with parchment paper or foil for easy cleanup. Place the chicken on the sheet, leaving space between each piece for even cooking. Bake for 22-25 minutes, or until the internal temperature reaches 165°F. Let the chicken rest for 5 minutes before slicing to lock in the juices. If you’re short on time, pound thicker breasts to an even thickness so they cook faster. For a golden finish, broil the chicken for the last 2 minutes.
Mistakes I’ve made and learned from
I used to overcrowd the baking sheet, thinking it wouldn’t matter, but the chicken steamed instead of crisping up. Now I always leave space between each piece. Another blunder? Skipping the rest time—slicing too soon meant dry, tough meat. Letting it sit made all the difference. If you’re new to cooking chicken, check out my guide on perfect protein temps to avoid under or overcooking. And if you’re unsure about seasoning, my spice blends 101 post breaks down easy flavor combos. Trust me, a little patience and these tweaks turn good chicken into great chicken.
Cultural Connection and Variations
Where this recipe comes from
The Baked Chicken Breast Recipe is a timeless dish that bridges cultures and kitchens worldwide. While it might seem simple, its roots stretch back to home cooks who needed a reliable, flavorful way to prepare lean protein. In Mediterranean countries, cooks often marinate chicken breasts in olive oil, lemon, and herbs before baking, creating a bright, zesty flavor. Meanwhile, in the American South, you might find it smothered in a rich gravy or seasoned with smoky paprika for extra depth.
Families everywhere put their own spin on the Baked Chicken Breast Recipe. Some add breadcrumbs for crunch, while others layer it with cheese or wrap it in prosciutto. My grandmother used to bake hers with a splash of white wine and garlic, turning an ordinary weeknight meal into something special. No matter the variation, this dish adapts effortlessly to local tastes and traditions, making it a global favorite.
How it fits in today’s cooking
Today, the Baked Chicken Breast Recipe remains a staple for busy cooks and meal preppers. Its versatility fits perfectly into modern lifestyles, whether you’re whipping up a quick dinner or planning a weekly meal prep session. Health-conscious eaters love it for its high protein and low-fat profile, while home chefs appreciate how easily it pairs with sides like roasted veggies or nutritious grains.
Holidays and gatherings also benefit from this classic. Some families bake it with festive spices during Thanksgiving, while others keep it simple for summer BBQs. No matter how you serve it, the Baked Chicken Breast Recipe continues to evolve, proving that even the most straightforward dishes can hold a special place in our kitchens and hearts.
Taste and Texture
What makes it delicious
The Baked Chicken Breast Recipe delivers a juicy, tender bite with a golden, lightly crisp exterior that crackles with every forkful. Aromatic garlic and herbs like rosemary or thyme infuse the meat with earthy, savory notes, while a hint of lemon zest brightens each mouthful. Meanwhile, the chicken stays moist and succulent inside, thanks to a quick brine or a drizzle of olive oil before baking. Whether you pair it with roasted veggies or a fresh salad, the Baked Chicken Breast Recipe balances simplicity with bold, satisfying flavors.
Boosting the flavor
For an extra flavor punch, try marinating your chicken in yogurt and spices overnight—it tenderizes the meat while adding a subtle tang. Alternatively, top your Baked Chicken Breast Recipe with a spoonful of herb compound butter as it rests, letting the creamy richness melt into every slice. If you love heat, a sprinkle of smoked paprika or a drizzle of honey sriracha glaze adds sweet-spicy depth. Don’t shy away from experimenting with citrus marinades or crunchy breadcrumb toppings, either—each twist keeps the dish exciting.

Tips for Success
Best practices for results
Always pat the chicken dry before seasoning to help the spices stick better. For the juiciest Baked Chicken Breast Recipe, use a meat thermometer to check for an internal temperature of 165°F. Meanwhile, let the chicken rest for 5 minutes after baking so the juices redistribute evenly. Additionally, brush the chicken with olive oil or butter to keep it moist and flavorful. Finally, arrange the pieces in a single layer on the baking sheet to ensure even cooking.
Mistakes to avoid
One common mistake is overcooking the chicken, which makes it dry. Instead, follow the recommended baking time and check the temperature early. Another error is skipping the resting step, but this actually locks in moisture for the Baked Chicken Breast Recipe. Also, avoid overcrowding the pan, as this leads to uneven cooking. For more on perfecting protein dishes, check out our guide on how to cook chicken tenders. If you’re unsure about seasoning, our best spices for chicken post has great flavor combinations to try.
Serving and Pairing Suggestions
How to serve this dish
Elevate your Baked Chicken Breast Recipe by arranging it over a bed of vibrant greens or roasted vegetables for a pop of color. Meanwhile, garnish with fresh herbs like parsley or thyme to add a touch of elegance. For special occasions, slice the chicken thinly and fan it across a platter alongside seasonal sides. Whether you’re hosting a casual weeknight dinner or a holiday gathering, this versatile dish adapts beautifully to any setting.
What goes well with it
Pair your Baked Chicken Breast Recipe with a crisp white wine like Sauvignon Blanc, which highlights the dish’s savory notes. Alternatively, try a tangy lemon garlic sauce for a burst of flavor. For sides, roasted sweet potatoes or a light quinoa salad balance the meal perfectly. If you’re craving something heartier, our Creamy Garlic Mashed Potatoes add rich comfort. Finish with a refreshing side like our Cucumber Avocado Salad for a crisp contrast.
For a perfect Baked Chicken Breast Recipe, bake boneless, skinless chicken breasts at 350°F for 25–30 minutes. Use a meat thermometer to ensure the internal temperature reaches 165°F. Thicker cuts may need 5–10 extra minutes.
Brining or marinating the chicken for 30 minutes before baking locks in moisture. For a simple Baked Chicken Breast Recipe, coat the breasts with olive oil and season generously. Avoid overcooking—remove them from the oven as soon as they hit 165°F.
Yes, but add 10–15 minutes to the baking time. For a safe Baked Chicken Breast Recipe, cover the frozen chicken with foil for the first half of cooking to prevent drying. Always check that the internal temperature reaches 165°F.
Classic pairings for a Baked Chicken Breast Recipe include garlic powder, paprika, thyme, and lemon pepper. For bold flavor, try a mix of cumin, chili powder, and oregano. Always season both sides and rub the spices into the meat.