End your day with a delicious, comforting, and satisfying dinner! Whether you’re looking for quick and easy weeknight meals, cozy comfort food, or elegant dishes for special occasions, we have the perfect recipes for you.
From hearty casseroles and one-pan wonders to savory pastas, juicy meats, and flavorful vegetarian options, our collection is designed to make dinnertime effortless and enjoyable.
Busy schedule? No problem! Try our slow cooker meals, sheet pan dinners, and 30-minute recipes to save time without sacrificing flavor. Whatever your craving, these recipes will bring warmth and joy to your table every night. 🍽️✨
Did you know that the average person spends over $500 a year on takeout meals, with fried rice being a frequent favorite? But what if you could recreate that irresistible, savory, and slightly smoky flavor of your favorite takeout fried rice in your own kitchen, in a fraction of the time and at a fraction of the cost? This recipe is your answer. Forget soggy, bland rice and hello to perfectly tender grains infused with deliciousness. We’re talking about a dish that’s not just a meal, but an experience – customizable, quick, and utterly satisfying. Get ready to elevate your weeknight dinners and impress your taste buds with a homemade fried rice that truly is better than takeout!
Key Components for Flavorful Fried Rice
The magic of exceptional fried rice lies in the quality and preparation of its ingredients. Each element plays a crucial role in building layers of flavor and texture. Here’s what you’ll need to bring this dish to life:
Day-Old Cooked Rice (3 cups): This is non-negotiable for the best texture. Freshly cooked rice is too moist and will result in a mushy outcome. Leftover, refrigerated rice grains are drier and separate beautifully when stir-fried. (Substitution: Brown rice or even quinoa can work, but adjust cooking times and expect a different texture.)
Eggs (2 large): The golden ribbons woven throughout the rice, adding richness and protein. Whisked with a pinch of salt, they cook quickly and add a delightful chew.
Oil (2 tbsp neutral, like vegetable or canola): The unsung hero of stir-frying, providing heat transference and a subtle mouthfeel. (Substitution: Peanut oil or avocado oil are excellent alternatives, offering slightly different flavor profiles and higher smoke points.)
Garlic (2-3 cloves, minced): The aromatic backbone of so many savory dishes, its pungent fragrance awakens the palate.
Ginger (1 tsp, grated or minced): Adds a warm, zesty counterpoint to the richness.
Soy Sauce (2-3 tbsp, low sodium recommended): The salty, umami-rich foundation of the sauce. Adjust to your taste. (Substitution: Tamari for gluten-free, or a blend of soy sauce and a touch of fish sauce for deeper umami.)
Sesame Oil (1 tsp, toasted): A little goes a long way to impart that classic nutty, toasty aroma that screams “fried rice.” Drizzle in at the end.
Optional Protein (1 cup cooked, e.g., chicken, shrimp, tofu, pork): To make it a complete meal. Ensure it’s pre-cooked and cut into bite-sized pieces.
Mixed Vegetables (1 cup, e.g., peas, carrots, corn, bell peppers, onions): For color, crunch, and a dose of nutrients. Frozen peas and carrots are convenient and work wonderfully. If using fresh, dice them finely for quick cooking.
White Pepper (1/4 tsp, optional but recommended): Adds a subtle heat and complexity that’s different from black pepper.
Scallions (2, thinly sliced for garnish): For a fresh, sharp finish and vibrant green contrast.
Speedy Satisfaction: Your Fried Rice Timeline
Prep Time: 15 minutes
Cook Time: 15-20 minutes
Total Time: 30-35 minutes
Compared to the average takeout time ranging from 30 minutes to over an hour (including travel), this homemade version is remarkably efficient. The key is having everything prepped and ready to go before you even turn on the stove!
Crafting Your Perfect Fried Rice: Step-by-Step
Step 1: The Foundation – Rice and Veggies
First things first, make sure your day-old rice is broken up and free of clumps. Use your hands or a fork to gently separate the grains. If you’re using fresh vegetables, chop them into small, uniform pieces so they cook evenly and quickly. Mince your garlic and ginger, and have any cooked protein ready. Whisk your eggs in a small bowl with a pinch of salt and pepper, set aside. Having all your components *mise en place* (prepped and ready) is crucial for stir-frying!
Step 2: Aromatics and the Egg Dance
Heat 1 tablespoon of your neutral oil in a large skillet or wok over medium-high heat. Once shimmering, pour in the whisked eggs. Let them cook undisturbed for about 30 seconds until the edges start to set, then gently scramble them until just cooked through. Remove the scrambled eggs from the pan and set them aside with your other prepped ingredients. Add the remaining 1 tablespoon of oil to the hot pan. Toss in your minced garlic and ginger and stir-fry for about 30 seconds until fragrant – be careful not to burn them!
Step 3: Protein Power-Up
If you’re adding a cooked protein (like diced chicken, shrimp, or tofu), add it to the pan now. Stir-fry for a minute or two to heat it through and lightly brown it. If you’re using frozen vegetables like peas and carrots, add them in now too. If using fresh vegetables, add any harder ones (like diced onions or bell peppers) and stir-fry for 2-3 minutes until they start to soften. Frozen vegetables will thaw and cook quickly in the wok.
Step 4: The Grand Unification
Now it’s time for the rice! Add the day-old cooked rice to the wok. Stir and toss it well, breaking up any remaining clumps, ensuring it gets coated with the oil and infuses with the aromatics. Cook for about 3-5 minutes, stirring frequently, until the rice is heated through and starting to lightly crisp. This is where the magic happens – each grain should be separate and slightly toasted.
Step 5: Seasoning and Finishing Touches
Pour the soy sauce evenly over the rice. Add the white pepper, if using. Stir everything together vigorously, ensuring the soy sauce is distributed throughout the rice. Cook for another 1-2 minutes, allowing the sauce to caramelize slightly. Finally, return the scrambled eggs to the pan. Toss one last time to combine. Turn off the heat.
Drizzle the toasted sesame oil over the top and give it a final gentle stir. Garnish generously with fresh, thinly sliced scallions.
Fueling Your Body: Nutritional Breakdown
Calories: Approximately 400-600 per serving (will vary based on added protein and oil usage).
Protein: Good source, especially with added chicken, shrimp, or tofu.
Carbohydrates: Primarily from rice. White rice provides quick energy, while brown rice offers more fiber.
Fat: From cooking oil and egg. Controlled by the amount of oil used.
Fiber: Increases significantly with the addition of vegetables, especially if using brown rice.
Please note: Nutritional information is an estimate and can vary significantly based on ingredient choices and portion sizes.
Healthier Swaps for Guilt-Free Indulgence
Looking to make your fried rice even more aligned with your health goals without sacrificing flavor? Try these smart substitutions:
Rice: Swap white rice for brown rice, quinoa, or cauliflower rice for added fiber, nutrients, and lower carbs.
Oil: Use a non-stick spray or significantly reduce the amount of oil. A good quality non-stick wok or skillet helps immensely.
Soy Sauce: Opt for low-sodium soy sauce or coconut aminos to reduce sodium intake.
Vegetables: Load up on a wider variety of colorful vegetables like broccoli florets, snap peas, bok choy, and mushrooms for extra vitamins and minerals.
Protein: Choose lean proteins like chicken breast, turkey, shrimp, or extra-firm tofu.
Serving Your Masterpiece
This fried rice is a fantastic standalone meal, packed with protein and carbohydrates. For a more complete and balanced dinner, consider serving it alongside:
Steamed or stir-fried greens: Such as baby bok choy, gai lan, or spinach.
A light, refreshing salad: With a ginger-sesame dressing.
Spring rolls or dumplings: For an authentic takeout flavor experience.
A sprinkle of toasted sesame seeds for added crunch and visual appeal.
Avoiding Common Fried Rice Pitfalls
To ensure your fried rice is a triumph, steer clear of these common errors:
Using Freshly Cooked Rice: This is the number one culprit for mushy fried rice. Always use cold, day-old rice.
Overcrowding the Pan: Cook in batches if necessary. Overcrowding steams rather than fries, leading to soggy results.
Not Enough Heat: A hot wok or skillet is essential for achieving that characteristic “wok hei” (breath of the wok) flavor.
Burning Aromatics: Garlic and ginger cook very quickly. Stir-fry them for just 30 seconds until fragrant, then add other ingredients to prevent burning.
Adding Sauce Too Early: Add liquid sauces towards the end to prevent the rice from becoming soggy.
Leftovers? We’ve Got You Covered
Properly stored, leftover fried rice is a delicious bonus. Cooling: Allow the fried rice to cool slightly at room temperature for no more than 2 hours before storing. Storing: Transfer the cooled fried rice into an airtight container. It will keep in the refrigerator for 3-4 days. Reheating: For the best results, reheat in a skillet over medium heat with a splash of water or oil to prevent drying out. You can also microwave it, stirring halfway through. For a crisper texture, spread it on a baking sheet and reheat in a moderate oven (around 350°F/175°C) for 10-15 minutes.
Your Fried Rice Questions Answered
***Can I use fresh rice?***
While you *can* use fresh rice, it’s highly discouraged for authentic fried rice. Fresh rice is moist and sticky, leading to a mushy, clumpy dish. For best results, always use cold, day-old cooked rice.
***What kind of vegetables are best?***
Almost any finely chopped vegetable works well! Classic choices include peas, carrots, corn, and diced onions. Other great options are broccoli florets, bell peppers, mushrooms, snap peas, and bean sprouts. Frozen mixed vegetables are a convenient and excellent choice.
***How do I get that smoky flavor?***
The smoky flavor, often called “wok hei,” comes from cooking at very high heat in a wok. While it’s hard to replicate perfectly on a home stove, using a very hot pan, not overcrowding it, and achieving a slight caramelization on the rice will help mimic that delicious char.
***Can I make it vegetarian or vegan?***
Absolutely! Omit any meat or egg. For vegan, ensure your soy sauce or tamari is vegan-friendly. Tofu (firm or extra-firm, pressed and cubed) or tempeh make excellent protein additions.
Ready to ditch the delivery menu for good? This fried rice recipe is your ticket to a cheaper, faster, and more delicious meal. Give it a try and let us know how it turns out in the comments below!
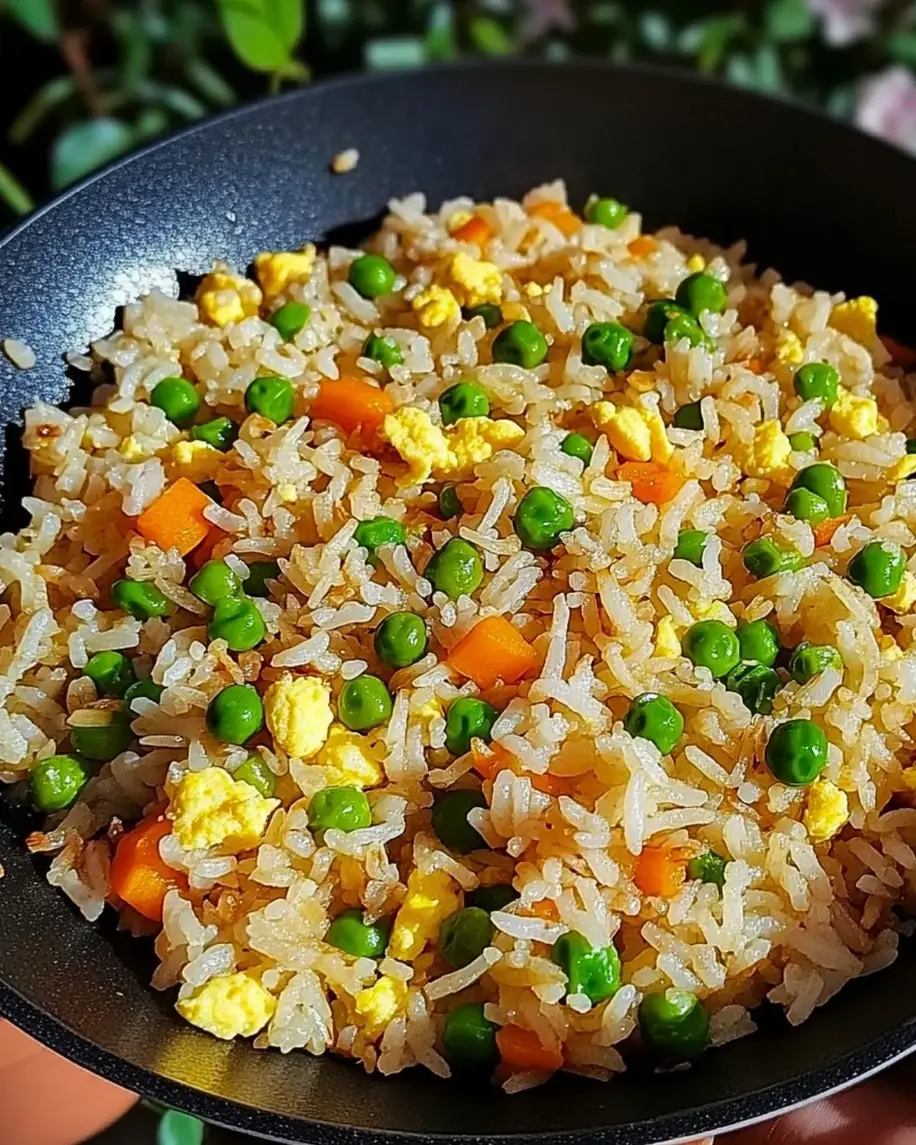
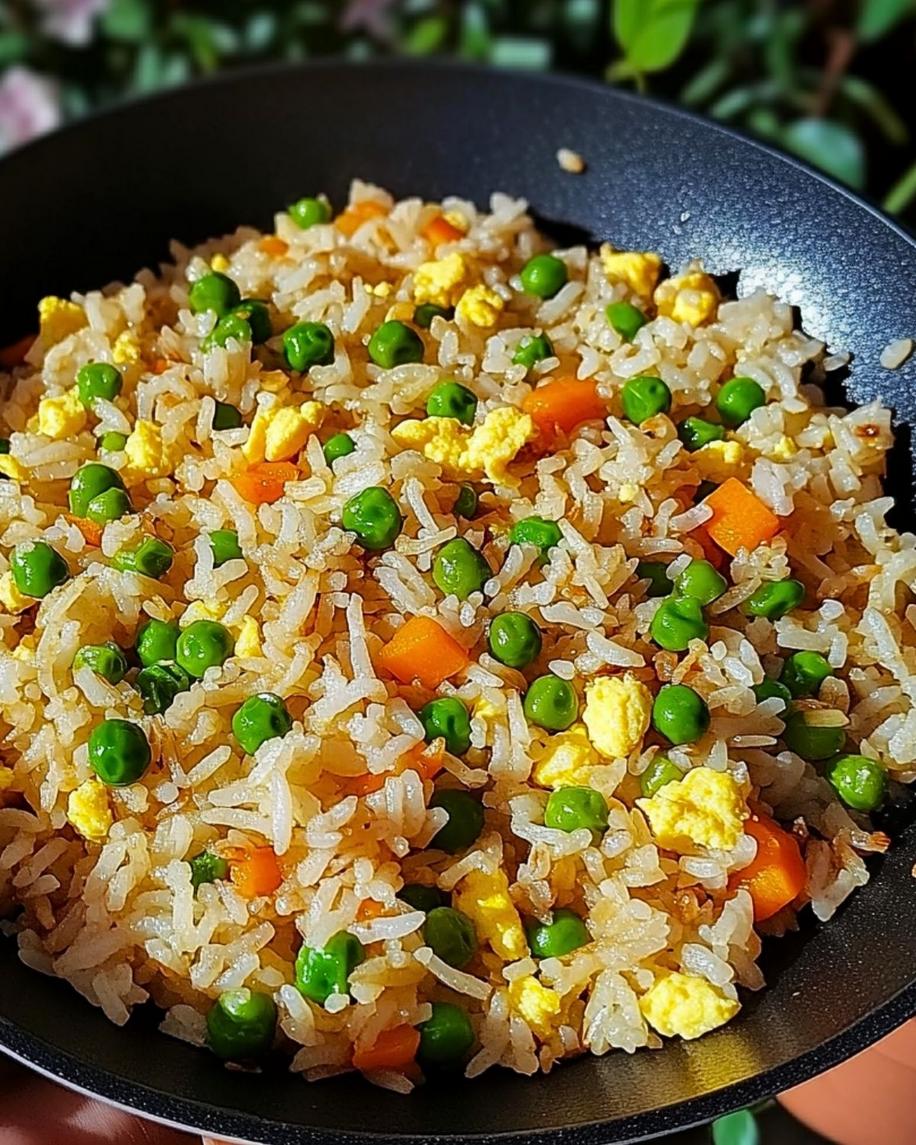
This Better Than Takeout Fried Rice is a quick and flavorful dish that’s perfect for any occasion. Made with fluffy rice, colorful vegetables, scrambled eggs, and a savory blend of soy sauce and sesame oil, it’s a simple yet satisfying recipe. Whether enjoyed as a main course or a side dish, this fried rice will become a household favorite!
Ingredients
Scale
3 cupscooked, day-old rice (Jasmine or long-grain preferred)
1 cupdiced carrots and peas (fresh or frozen)
2large eggs, whisked
2 tablespoonssoy sauce (adjust to taste)
1 tablespoonsesame oil
2garlic cloves, minced
2 tablespoonscooking oil (vegetable or canola)
2green onions, chopped (for garnish)
Salt and pepper, to taste
Instructions
Prepare all ingredients before starting to cook. Chop vegetables, whisk the eggs, and ensure the rice is clump-free.
Heat 1 tablespoon of oil in a large skillet or wok over medium-high heat. Add the whisked eggs and scramble until just set. Remove and set aside.
In the same skillet, add another tablespoon of oil and sauté the minced garlic for 30 seconds until fragrant.
Add the diced carrots and peas. Stir-fry for 2-3 minutes until slightly softened.
Add the cooked rice to the skillet, breaking up clumps with a spatula. Stir-fry for 2-3 minutes to heat through.
Drizzle soy sauce and sesame oil over the rice, stirring to coat evenly. Season with salt and pepper to taste.
Return the scrambled eggs to the skillet and mix gently with the rice. Sprinkle with chopped green onions.
Serve warm and enjoy your delicious homemade fried rice!
Notes
Use day-old rice for the best texture. Fresh rice can be used, but let it cool and dry out slightly before frying.
Customize by adding cooked chicken, shrimp, tofu, or other favorite proteins.
For an extra crunch, toss in chopped cashews or sesame seeds.
Store leftovers in the refrigerator for up to 3 days or freeze for up to 1 month.
“`
Creamy Chicken and Wild Rice Soup Recipes for Cozy Nights
Creamy Chicken and Wild Rice Soup Recipes for Cozy Nights
Embrace the Cozy: Your Ultimate Creamy Chicken and Wild Rice Soup Journey
Did you know that according to recent culinary trends, comfort food remains a top search query year-round, with creamy soups often leading the pack during cooler months? If your heart (and stomach) craves that feeling of wholesome, nourishing warmth, then you’ve landed in the perfect spot. This Creamy Chicken and Wild Rice Soup recipe is more than just a meal; it’s an experience. Imagine tender, succulent pieces of chicken nestled amongst earthy, nutty wild rice, all enveloped in a rich, velvety broth that feels like a warm hug from the inside out. This isn’t just soup; it’s the definition of cozy. Whether you’re planning a quiet evening in, a family dinner, or just need a little edible comfort, this recipe is your new go-to. Save this for those nights when you want to indulge in something truly special without venturing from your kitchen.
Hearty Ingredients for a Heavenly Bowl
The magic of this soup lies in its simple yet robust ingredients, each contributing its unique texture and flavor to create a harmonious, comforting dish. We’re aiming for a broth that’s rich and savory without being heavy, punctuated by the delightful chew of wild rice and the tenderness of chicken.
1 tablespoon olive oil: The foundation for sautéing our aromatics, providing a clean, healthy fat base. Look for a good quality extra virgin olive oil for a subtle fruity note.
1.5 lbs boneless, skinless chicken breasts or thighs: The star protein. Thighs offer more richness due to their fat content, while breasts are leaner. Choose whichever you prefer!
1 large yellow onion, chopped: Offers a sweet and pungent base for our soup’s flavor profile.
2 large carrots, peeled and diced: Adds a touch of sweetness and vibrant color. Their slight crispness before cooking adds a delightful texture.
2 celery stalks, diced: Provides a subtle herbaceous note and a refreshing crunch.
8 ounces cremini mushrooms, sliced: For a deep, earthy umami boost. Their meaty texture is a wonderful addition.
2 cloves garlic, minced: The fragrant soul of many savory dishes, bringing pungent depth.
1 cup wild rice blend, rinsed: The heart of the soup! A blend offers a more complex flavor and texture than pure wild rice. Rinsing removes excess starch.
6 cups chicken broth: The liquid gold that carries all our flavors. Low-sodium is recommended so you can control the saltiness.
1 cup milk (whole or 2%): For that luxurious creaminess. Whole milk will yield the richest result.
1/2 cup heavy cream: To elevate the creaminess to decadent levels. A little goes a long way!
1 teaspoon dried thyme: A classic herb that pairs beautifully with chicken and earthy flavors.
1/2 teaspoon dried rosemary, crushed: Adds a piney, aromatic complexity. Crush it between your fingers to release its oils.
Salt and freshly ground black pepper, to taste: Essential for balancing and enhancing all the other flavors.
2 tablespoons fresh parsley, chopped (for garnish): A bright, fresh finish that cuts through the richness.
Your Cozy Creation Timeline
Prep time: 20 minutes
Cook time: 50-60 minutes
Total time: 70-80 minutes
Compared to an average creamy chicken and wild rice soup recipe which often takes around 60-75 minutes, our timing is quite comparable. The extra few minutes are dedicated to ensuring perfectly cooked chicken and fully tender, flavorful wild rice, setting this recipe apart.
Crafting Your Comfort Masterpiece
Step 1: Cook the Chicken
First things first, let’s get our chicken ready. You have a couple of delicious options here: You can either poach your chicken breasts or thighs in lightly salted water or chicken broth until cooked through (about 15-20 minutes), then shred or dice it. Alternatively, for a deeper flavor, you can pan-sear them in a little olive oil until golden brown on both sides and cooked through, then dice. Whichever method you choose, set the cooked chicken aside. This ensures your chicken is perfectly tender and doesn’t get overcooked in the soup.
Step 2: Sauté the Aromatics
In a large pot or Dutch oven, heat the 1 tablespoon of olive oil over medium heat. Add your chopped yellow onion, diced carrots, and diced celery. Sauté these wonderfully aromatic vegetables for about 8-10 minutes, stirring occasionally, until they begin to soften and the onion becomes translucent. This process builds a crucial flavor base for the entire soup. Don’t rush this step; the gentle cooking develops their natural sweetness.
Step 3: Toast the Rice
Now, add your rinsed wild rice blend and sliced cremini mushrooms to the pot with the softened vegetables. Cook, stirring frequently, for about 2-3 minutes. You’ll notice the mushrooms start to release their moisture and then begin to brown slightly. Toasting the rice briefly enhances its nutty flavor and helps it hold its shape better during cooking. Stir in the minced garlic, dried thyme, and crushed rosemary, cooking for another minute until fragrant. Be careful not to burn the garlic!
Step 4: Simmer the Soup
Pour in the 6 cups of chicken broth, scraping up any browned bits from the bottom of the pot – that’s pure flavor! Bring the mixture to a boil, then reduce the heat to low, cover, and let it simmer for 30-40 minutes, or until the wild rice is tender. The cooking time for wild rice can vary depending on the blend, so taste a grain or two to check for doneness. You want it to be chewy but not hard.
Step 5: Add the Cream and Herbs
Once the rice is tender, gently stir in the milk and heavy cream. Add the cooked, shredded or diced chicken back into the pot. Continue to heat the soup over low heat, stirring occasionally, until it’s warmed through. Do NOT bring the soup to a rolling boil after adding the dairy, as this can cause it to curdle. We just want to heat it gently to meld the flavors and achieve that lovely creamy consistency.
Step 6: Season and Serve
Taste your magnificent creation and season generously with salt and freshly ground black pepper until it’s just right for your palate. Ladle the hot, creamy soup into bowls and garnish with the fresh chopped parsley for a burst of color and freshness. Serve immediately and savor every delicious spoonful!
A Glimpse at Your Nourishing Bowl
While exact nutritional values can vary based on specific ingredients and portion sizes, a typical serving of this Creamy Chicken and Wild Rice Soup offers a balanced mix of macronutrients:
Calories: Approximately 350-450 per serving (can fluctuate based on fat content of milk/cream and chicken cut).
Protein: Excellent source from the chicken, aiding in satiety.
Carbohydrates: Primarily from the wild rice, offering complex carbs and fiber.
Fats: Contributed by olive oil, milk, and cream, providing richness and flavor.
Vitamins & Minerals: Carrots provide Vitamin A, while other vegetables offer various B vitamins and minerals.
Wholesome Swaps for Lighter Indulgence
Love the idea of this soup but looking for a lighter version? You can still achieve a wonderfully comforting bowl with a few smart substitutions:
Dairy Density: Swap whole milk for unsweetened almond milk or oat milk, and use half-and-half or evaporated milk instead of heavy cream. You could also use a cornstarch slurry (2 tbsp cornstarch whisked with 1/4 cup cold water) to thicken the broth if you omit the cream entirely.
Leaner Protein: Opt for chicken breast and trim any visible fat. Grilling or poaching the chicken rather than pan-searing can also reduce added fats.
Broth Choice: Use low-sodium or no-sodium chicken broth. For an even lighter touch, consider using half chicken broth and half vegetable broth.
Grain Swap: While wild rice is fantastic, you could also incorporate brown rice or quinoa for a slightly different fiber and nutrient profile. Adjust cooking times accordingly.
Perfect Pairings for Your Cozy Soup
This rich and satisfying soup is a meal in itself, but it pairs beautifully with several accompaniments:
Crusty Bread: A warm baguette or sourdough is perfect for dipping into that luscious broth.
Side Salad: A simple green salad with a vinaigrette offers a refreshing contrast to the soup’s richness.
Crackers: A handful of your favorite whole-grain crackers adds a delightful crunch.
Common Mistakes to Avoid
To ensure your soup is a roaring success every time, steer clear of these common pitfalls:
Overcooking the Rice: Wild rice can become mushy if cooked for too long. Always test for tenderness and adjust simmering time as needed.
Boiling Dairy: Adding dairy and then boiling the soup can lead to a split or curdled texture. Heat gently after adding milk and cream.
Skipping the Aromatics: Not properly sautéing the onions, carrots, and celery is a missed opportunity for developing deep flavor.
Under-seasoning: Soup needs adequate salt and pepper to bring out its full potential. Taste and adjust at the end.
Storing Your Soup
Leftover creamy chicken and wild rice soup can be stored in an airtight container in the refrigerator for up to 3-4 days. Reheat gently on the stovetop over low heat, stirring frequently. You may need to add a splash more broth or milk to loosen it up as it thickens upon cooling. Freezing creamy soups can sometimes alter their texture due to the dairy content. If you plan to freeze, consider freezing the soup base without the cream and milk, then adding those in when reheating.
Frequently Asked Questions (FAQs)
***Can I use pre-cooked chicken?***
Yes, absolutely! If you have leftover rotisserie chicken or pre-cooked chicken breasts, simply shred or dice them and add them during Step 5 when you add the dairy, ensuring they are heated through.
***What kind of wild rice should I use?***
A wild rice blend is often easier to find and cooks more predictably than 100% wild rice. Look for blends that include long-grain brown rice, red rice, or other whole grains for varied texture and flavor. If using 100% wild rice, it may take longer to cook, so check your package instructions.
***Can I make this soup vegetarian?***
You can adapt this recipe to be vegetarian by omitting the chicken and using vegetable broth instead of chicken broth. You might want to consider adding more vegetables like peas, corn, or diced potatoes to make it more substantial.
***Why is my soup separating after adding the cream?***
This usually happens if the soup boils after the dairy is added. Ensure your soup is only simmering gently. Using full-fat dairy and not overheating can also help prevent separation.
***Can I freeze this soup?***
Creamy soups can be tricky to freeze. For best results, freeze the soup base (vegetables, rice, chicken, broth) without the milk and cream. When reheating, thaw the base, heat it through, and then stir in fresh milk and cream, warming gently without boiling.
Loved this recipe? Share your kitchen triumphs or ask questions below!
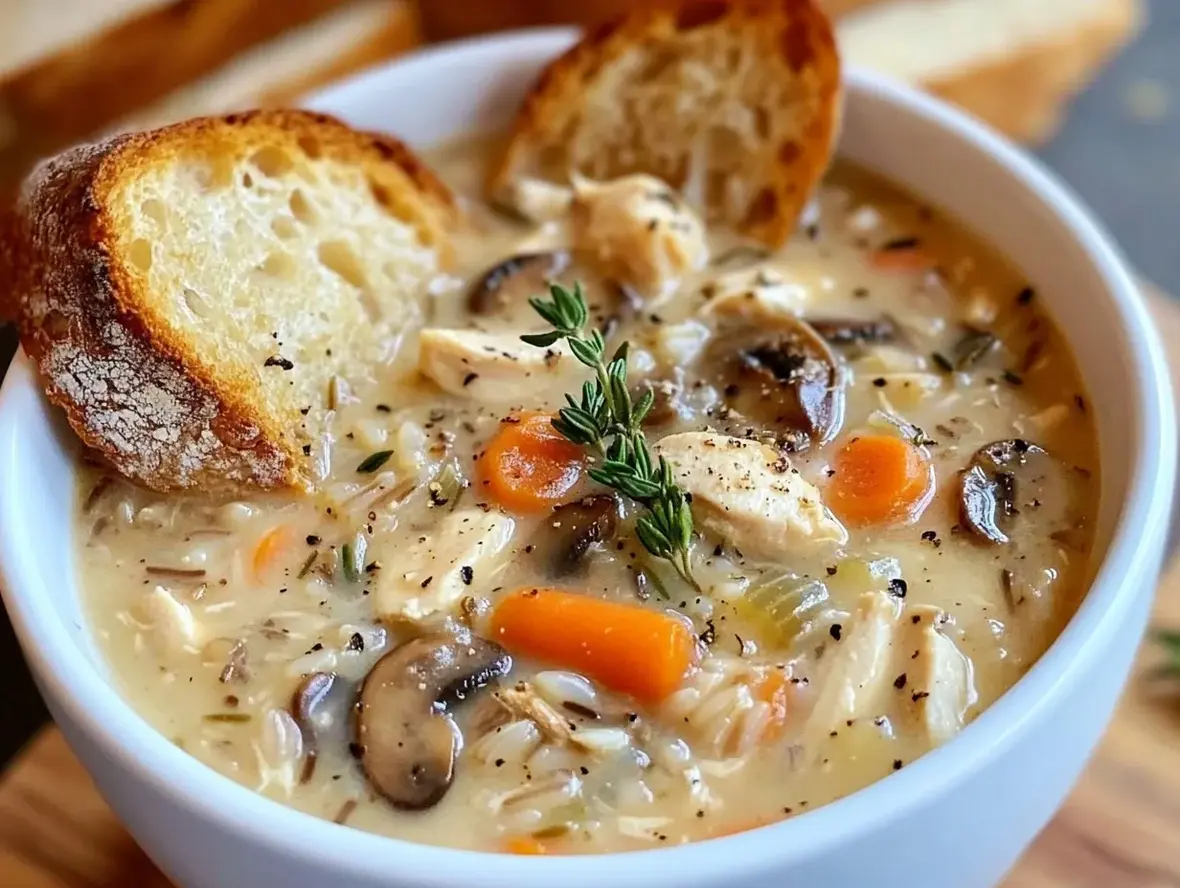
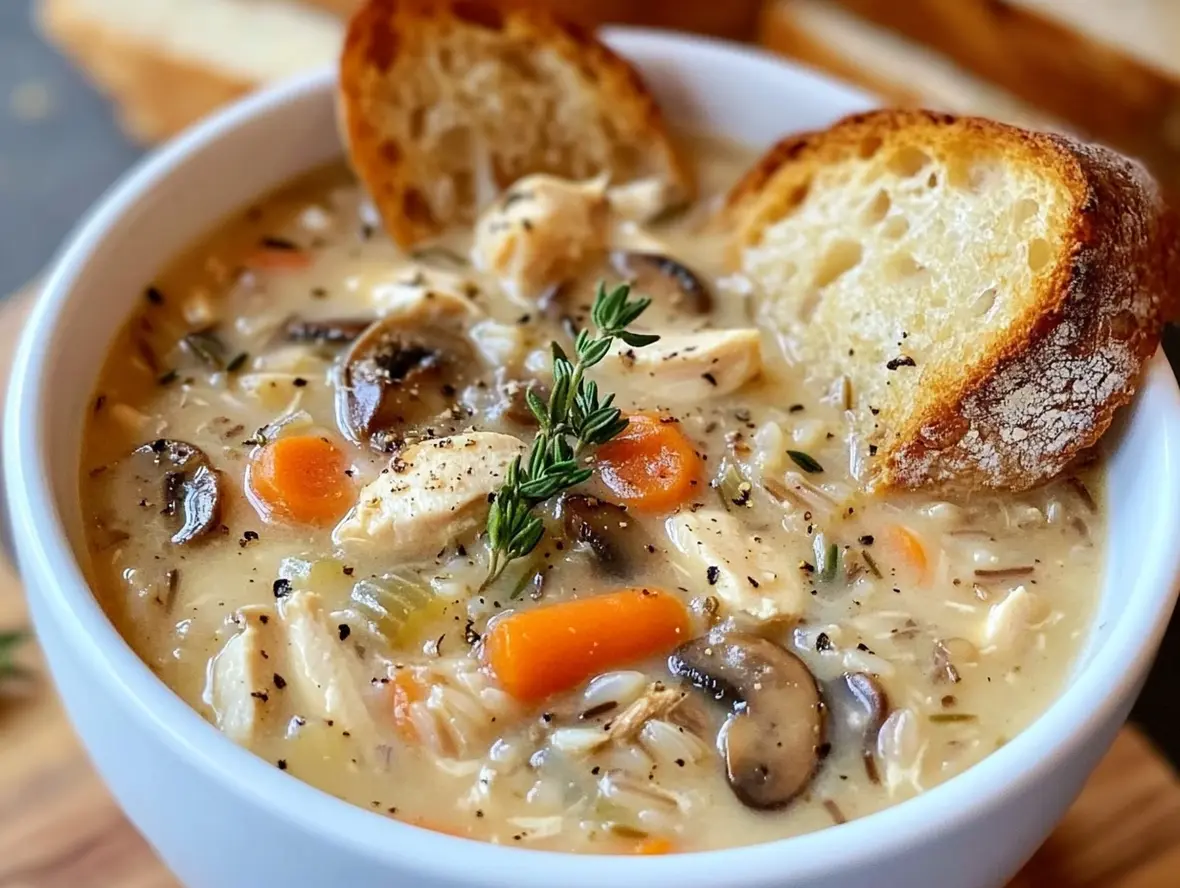
This rich and heartyChicken Mushroom Wild Rice Soupis the ultimate comfort food, perfect for chilly days. Packed with tender chicken, earthy mushrooms, and nutty wild rice in a creamy broth, it’s a delicious, filling dish the whole family will love.
1lb chicken breast, diced2 cupsmushrooms, sliced1onion, chopped3cloves garlic, minced4 cupschicken broth1 cupheavy cream2 tablespoonsolive oil1 teaspoonthymeSalt and pepper, to taste
2 cupsmushrooms, sliced1onion, chopped3cloves garlic, minced4 cupschicken broth1 cupheavy cream2 tablespoonsolive oil1 teaspoonthymeSalt and pepper, to taste
1onion, chopped3cloves garlic, minced4 cupschicken broth1 cupheavy cream2 tablespoonsolive oil1 teaspoonthymeSalt and pepper, to taste
3cloves garlic, minced4 cupschicken broth1 cupheavy cream2 tablespoonsolive oil1 teaspoonthymeSalt and pepper, to taste
4 cupschicken broth1 cupheavy cream2 tablespoonsolive oil1 teaspoonthymeSalt and pepper, to taste
1 cupheavy cream2 tablespoonsolive oil1 teaspoonthymeSalt and pepper, to taste
2 tablespoonsolive oil1 teaspoonthymeSalt and pepper, to taste
1 teaspoonthymeSalt and pepper, to taste
Salt and pepper, to taste
Instructions
1️⃣Sauté Aromatics:In a large pot, heat the olive oil over medium heat. Add the chopped onion and minced garlic, sautéing until softened and fragrant, about 3–4 minutes.2️⃣Cook the Chicken:Add the diced chicken to the pot and cook until browned on all sides, about 5–7 minutes.3️⃣Add Mushrooms:Stir in the sliced mushrooms and cook for an additional 5 minutes, allowing them to release their moisture and develop flavor.4️⃣Add Rice and Broth:Stir in the wild rice, chicken broth, thyme, salt, and pepper. Bring the mixture to a boil.5️⃣Simmer:Once boiling, reduce the heat to low and let the soup simmer, uncovered, for 40–45 minutes, or until the wild rice is tender. Stir occasionally.6️⃣Add Cream and Serve:Stir in the heavy cream and heat through for 2–3 minutes. Adjust seasoning as needed. Serve hot, garnished with fresh herbs if desired.
2️⃣Cook the Chicken:Add the diced chicken to the pot and cook until browned on all sides, about 5–7 minutes.
3️⃣Add Mushrooms:Stir in the sliced mushrooms and cook for an additional 5 minutes, allowing them to release their moisture and develop flavor.4️⃣Add Rice and Broth:Stir in the wild rice, chicken broth, thyme, salt, and pepper. Bring the mixture to a boil.5️⃣Simmer:Once boiling, reduce the heat to low and let the soup simmer, uncovered, for 40–45 minutes, or until the wild rice is tender. Stir occasionally.6️⃣Add Cream and Serve:Stir in the heavy cream and heat through for 2–3 minutes. Adjust seasoning as needed. Serve hot, garnished with fresh herbs if desired.
4️⃣Add Rice and Broth:Stir in the wild rice, chicken broth, thyme, salt, and pepper. Bring the mixture to a boil.5️⃣Simmer:Once boiling, reduce the heat to low and let the soup simmer, uncovered, for 40–45 minutes, or until the wild rice is tender. Stir occasionally.6️⃣Add Cream and Serve:Stir in the heavy cream and heat through for 2–3 minutes. Adjust seasoning as needed. Serve hot, garnished with fresh herbs if desired.
5️⃣Simmer:Once boiling, reduce the heat to low and let the soup simmer, uncovered, for 40–45 minutes, or until the wild rice is tender. Stir occasionally.
6️⃣Add Cream and Serve:Stir in the heavy cream and heat through for 2–3 minutes. Adjust seasoning as needed. Serve hot, garnished with fresh herbs if desired.
Notes
For a lighter option, substitute the heavy cream with half-and-half or coconut milk.Add fresh spinach or kale at the end for a boost of greens.
Add fresh spinach or kale at the end for a boost of greens.
“`
Slow Cooker Pinto Beans Recipe with Green Chile Flavor
Slow Cooker Pinto Beans Recipe with Green Chile Flavor
Craving a Hearty, Flavorful Meal? Discover the Magic of Slow Cooker Green Chile Pinto Beans!
Are you searching for a meal that’s both incredibly delicious and astonishingly easy to make? In a world where weeknight dinners often feel like a race against time, the humble pinto bean, infused with the vibrant kick of green chiles, offers a comforting and satisfying solution. This slow cooker pinto beans recipe with green chile flavor isn’t just a meal; it’s an experience. Imagine tender, creamy beans, boasting a depth of smoky, spicy notes that transport your taste buds. With average cooking times for dry beans easily exceeding an hour and often requiring overnight soaking and multiple stovetop checks, the slow cooker presents a revolutionary approach, minimizing active preparation and maximizing flavor extraction, all while you go about your day. This recipe is designed for busy home cooks who refuse to compromise on taste or quality, proving that healthy, home-cooked meals can be both accessible and absolutely delightful.
The Heart of the Dish: Flavorful Ingredients for Your Green Chile Pinto Beans
Crafting these exceptional slow cooker pinto beans is all about layering simple, wholesome ingredients to create a complex and comforting flavor profile. We’re not just cooking beans; we’re building a symphony of taste and texture. Here’s what you’ll need:
1 pound dried pinto beans, rinsed and picked over for any debris. These little gems are the foundation of our dish, offering a creamy texture and earthy flavor when cooked low and slow. (No soaking required for this method – a true time-saver!).
1 (4 ounce) can diced green chiles, undrained. This is where the magic happens! The mild heat and distinctive flavor of green chiles are essential. Opt for mild or hot, depending on your preference. The liquid adds crucial moisture and flavor.
1 large yellow onion, chopped. A kitchen staple, onions provide a sweet, pungent base that caramelizes beautifully in the slow cooker, adding depth.
2-3 cloves garlic, minced. No savory dish is complete without garlic! Its pungent aroma and robust flavor are key to that comforting, homemade taste.
1 teaspoon ground cumin. This warm, earthy spice is a classic pairing with beans and chiles, enhancing their natural flavors and adding a subtle smokiness.
½ teaspoon smoked paprika. For an extra layer of smoky complexity, smoked paprika is a game-changer. It adds a beautiful hue and a hint of barbecue-like depth.
¼ teaspoon cayenne pepper (optional), for an extra kick. If you love a bit more heat, a pinch of cayenne will elevate the green chile flavor without overpowering it.
4 cups low-sodium chicken or vegetable broth. Broth provides more depth of flavor than water. Using low-sodium allows you to control the saltiness. For a richer flavor, chicken broth is excellent; for a vegetarian/vegan option, vegetable broth is perfect.
1 bay leaf. This simple aromatic adds a subtle herbal note that rounds out the flavors during the long cooking process.
Salt and freshly ground black pepper, to taste. Essential for bringing all the flavors together. Add these towards the end of cooking, as beans can sometimes absorb salt and become tough if added too early.
Substitutions & Additions:
Bean Type: While pinto beans are ideal for their creamy texture, this recipe can also work with great northern beans or cannellini beans.
Chile Type: If you can’t find canned diced green chiles, you can substitute with finely chopped fresh green chiles (like Anaheim or Poblano) or even a jarred salsa verde for a different twist. Adjust the spice level accordingly.
Smoky Flavor Boost: Add a chopped chipotle pepper in adobo sauce (use sparingly!) for an intense smoky heat.
Fresh Herbs: A few sprigs of fresh cilantro stirred in at the end can add brightness.
Time Investment: Effortless Flavor, Maximum Deliciousness
One of the greatest advantages of this slow cooker recipe is its minimal active preparation time. Unlike traditional methods that can take hours of soaking and simmering, this approach uses your slow cooker to do all the hard work.
Prep time: 15 minutes
Cook time: 4-6 hours (on High) or 8-10 hours (on Low)
Total time: Approximately 4.25 – 10.25 hours (passive cooking time)
Compare this to traditional pinto bean recipes, which often require overnight soaking and 2-3 hours of stovetop simmering, plus constant attention. This slow cooker method is a true set-it-and-forget-it marvel, allowing you to prepare a delicious meal with less than 20 minutes of active work. This means you can throw everything in the slow cooker before work or in the morning and come home to a pot of perfectly cooked, flavorful beans!
Step-by-Step: Crafting Your Perfect Green Chile Pinto Beans
Follow these simple steps to unlock the delicious potential of your slow cooker:
Step 1: Rinse and Prep
Begin by thoroughly rinsing your dried pinto beans under cool running water. Spread them out on a clean surface (like a baking sheet or cutting board) and meticulously pick through them, removing any small stones, debris, or discolored beans. This simple pre-step ensures you only cook the best beans!
Step 2: Combine in the Slow Cooker
Transfer the cleaned pinto beans directly into your slow cooker insert. Add the undrained can of diced green chiles, the chopped yellow onion, and the minced garlic. Sprinkle in the ground cumin, smoked paprika, and cayenne pepper (if using). Don’t forget to add the bay leaf!
Step 3: Add the Liquid
Pour the low-sodium chicken or vegetable broth over all the ingredients in the slow cooker. Ensure the beans are mostly submerged. Give everything a good stir to distribute the spices and aromatics evenly.
Step 4: Slow Cook to Perfection
Secure the lid on your slow cooker. Set it to cook on either HIGH for 4-6 hours or LOW for 8-10 hours. The exact time will depend on your specific slow cooker model and the age of your beans. You’re looking for beans that are tender and creamy, easily mashable with a fork.
Step 5: Season and Serve
Once the beans are tender, remove and discard the bay leaf. Taste the beans and season generously with salt and freshly ground black pepper. Stir well. If the beans are too thick, you can add a little more broth or water to reach your desired consistency. If they are too thin, you can mash some of the beans against the side of the slow cooker with a spoon to thicken the liquid, or let it simmer uncovered on the stovetop for a short while.
Nutritional Snapshot: Wholesome Goodness
These slow cooker green chile pinto beans are not only a flavor powerhouse but also a nutritional champion. They are packed with plant-based protein, fiber, and essential minerals.
Calories: Approximately 150-200 per serving (depending on broth type and added salt).
Protein: A good source of plant-based protein.
Fiber: High in dietary fiber, promoting digestive health and satiety.
Vitamins & Minerals: Contains iron, folate, potassium, and magnesium.
Please note: This is an approximate nutritional value and can vary based on specific ingredients and portion sizes.
Savvy Swaps for a Healthier Plate
While this recipe is already quite healthy, you can make even more beneficial choices without sacrificing flavor:
Use Low-Sodium Broth: We’ve already recommended this, but it’s worth repeating! Controlling sodium intake is crucial for heart health.
Skim Fat from Broth: If using chicken broth made from scratch or a richer variety, skim off any excess fat before adding it to the slow cooker.
Boost Veggies: Add chopped bell peppers (any color) or a handful of spinach during the last hour of cooking for extra nutrients and fiber.
Control Sodium at the End: Always taste and adjust salt at the very end of cooking. This prevents over-salting, which can be a common pitfall.
Serve with Whole Grains: Instead of white rice, serve your beans with brown rice or quinoa for added fiber and a lower glycemic impact.
Serving Your Delicious Green Chile Pinto Beans
The versatility of these slow cooker pinto beans is truly remarkable. They’re a fantastic base for countless meals:
As a Side Dish: Serve them warm alongside grilled meats, roasted chicken, or fish for a hearty and flavorful accompaniment.
In Burritos or Tacos: Mash them slightly and use them as a creamy filling for burritos, tacos, or enchiladas. Top with your favorite salsa, avocado, and cheese.
Over Rice or Grains: Ladle generously over fluffy rice (brown or white), quinoa, or even mashed sweet potatoes for a complete and satisfying meal.
In Soups and Stews: Stir them into chili, vegetable soup, or a hearty stew for added texture and protein.
As a Dip: Mash them well and season to your liking, then serve warm with tortilla chips or fresh vegetables for a delicious and healthy dip.
Common Mistakes to Avoid
To ensure your slow cooker pinto beans turn out perfectly every time, steer clear of these common slip-ups:
Not Rinsing Beans: Skipping the rinsing step can lead to off-flavors and may not remove all the dust or debris.
Adding Salt Too Early: As mentioned, adding salt at the beginning can toughen the bean skins. Season at the end!
Overfilling the Slow Cooker: Ensure there’s enough liquid to cover the beans and that you don’t exceed the maximum fill line of your slow cooker.
Not Cooking Long Enough: Undercooked beans can be tough and difficult to digest. Ensure they are truly tender before serving.
Forgetting the Bay Leaf: While optional, the bay leaf adds a subtle depth that is often missed if omitted entirely.
Storing Your Delicious Creation
Leftover slow cooker green chile pinto beans are a treasure! Store them properly to enjoy their flavor for days to come:
Refrigeration: Allow the beans to cool to room temperature, then store them in an airtight container in the refrigerator for up to 4-5 days.
Freezing: For longer storage, portion cooled beans into freezer-safe containers or heavy-duty zip-top bags. They can be frozen for up to 3 months. Thaw overnight in the refrigerator before reheating.
Reheating: Gently reheat beans on the stovetop over low heat, adding a splash of broth or water if needed. You can also reheat them in the microwave.
Embrace the Ease and Flavor!
This Slow Cooker Pinto Beans Recipe with Green Chile Flavor is more than just a recipe; it’s your new go-to for effortless, wholesome, and incredibly tasty meals. By harnessing the power of your slow cooker, you can achieve perfectly tender beans infused with the vibrant, comforting taste of green chiles with minimal effort. Whether you’re planning a cozy family dinner, need a reliable meal prep component, or simply crave a delicious and satisfying bowl, these beans deliver every time. So, grab your slow cooker, gather your ingredients, and prepare to be amazed by the simplicity and sheer deliciousness. Don’t wait – your next favorite meal is just a few hours away!
Frequently Asked Questions
***Can I use canned pinto beans instead of dried?***
Yes, you can! If using canned beans, rinse and drain them thoroughly. Add them to the slow cooker during the last 30-60 minutes of cooking, along with the green chiles, onion, garlic, and spices, and enough broth to cover. You won’t need the full cooking time for the beans themselves, as they are already cooked.
***How do I make these beans spicier?***
To increase the heat, use hot diced green chiles, add more cayenne pepper, or include a chopped chipotle pepper in adobo sauce (use with caution, as they are very spicy!). You can also add a pinch of red pepper flakes.
***Can I make this recipe vegetarian or vegan?***
Absolutely! Simply use vegetable broth instead of chicken broth. The rest of the ingredients are naturally vegetarian/vegan, making this an easily adaptable dish.
***What if my beans are still hard after cooking?***
Bean cooking times can vary significantly. If your beans aren’t tender after the suggested cooking time, simply continue cooking on HIGH for another 30-60 minutes, checking for tenderness. Ensure they are fully submerged in liquid. Older beans may take longer to cook.
***Do I need to soak the beans for this slow cooker recipe?***
No, this recipe is designed for unsoaked dried pinto beans. The long, slow cooking process in the slow cooker fully tenderizes them without the need for presoaking. This is a major time-saver!
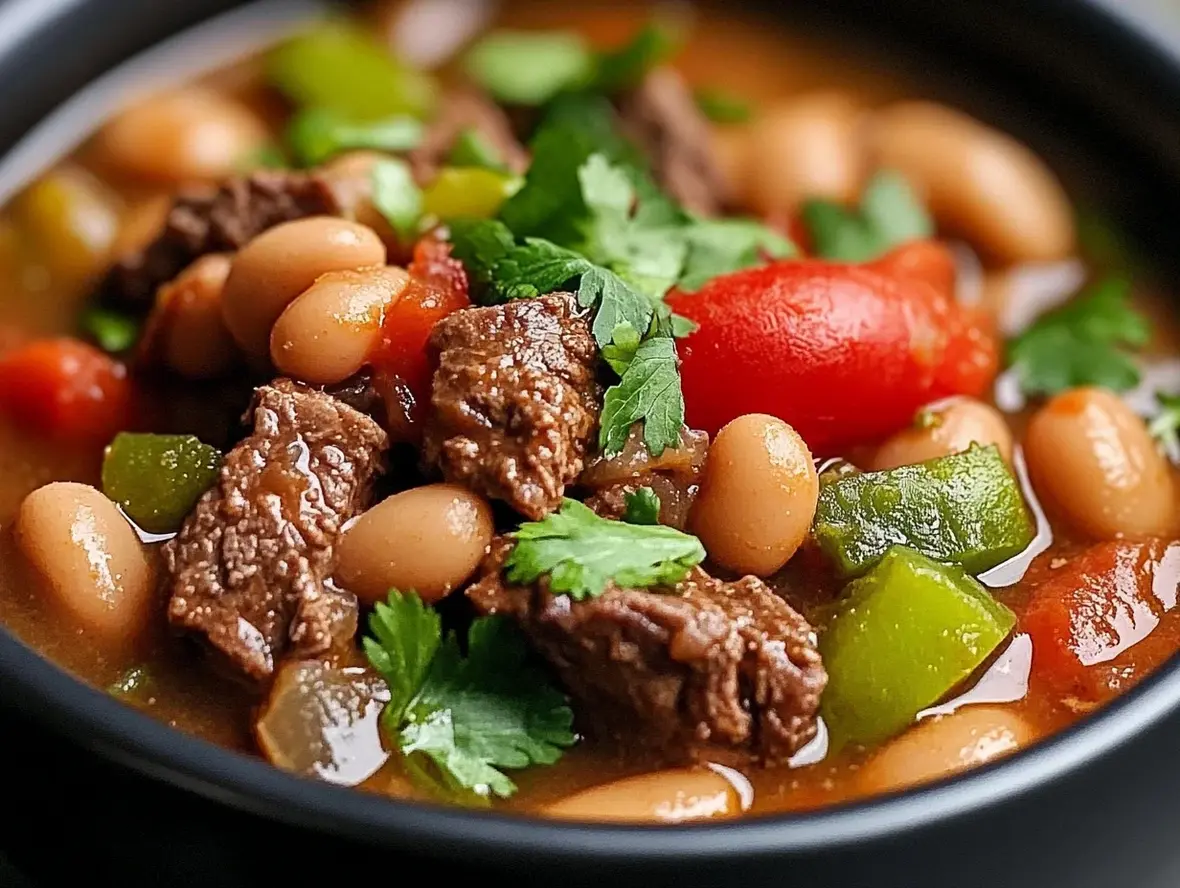
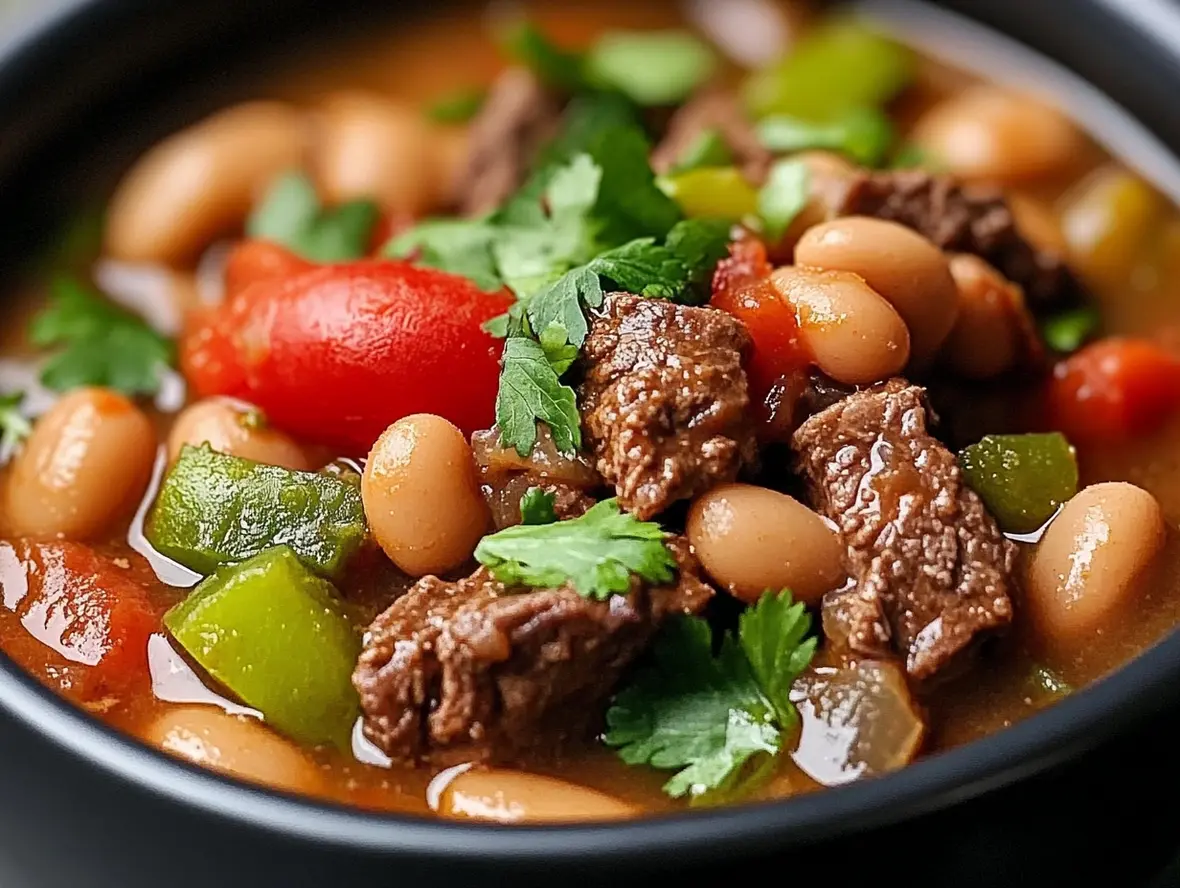
A hearty and flavorful dish perfect for busy days, thisSlow Cooker Pinto Beans, Green Chile, and Beefrecipe is packed with tender beans, seasoned ground beef, and zesty green chilies. With minimal prep and a long simmer in the slow cooker, it’s a comforting meal that pairs wonderfully with cornbread, rice, or tortilla chips.
Ingredients
Scale
Main Ingredients:1lb ground beef1medium onion, diced4 cupscooked pinto beans (or 2 cans,15 ozeach, drained and rinsed)1can (10 oz) diced tomatoes with green chilies (e.g., Rotel)1can (4 oz) diced green chilies2 cupsbeef brothSeasonings:1 teaspoonchili powder1 teaspooncumin½ teaspoonsmoked paprika½ teaspoongarlic powder¼ teaspoonblack pepperSalt, to tasteOptional Garnish:¼ cupfresh cilantro, chopped
1lb ground beef1medium onion, diced4 cupscooked pinto beans (or 2 cans,15 ozeach, drained and rinsed)1can (10 oz) diced tomatoes with green chilies (e.g., Rotel)1can (4 oz) diced green chilies2 cupsbeef broth
1medium onion, diced4 cupscooked pinto beans (or 2 cans,15 ozeach, drained and rinsed)1can (10 oz) diced tomatoes with green chilies (e.g., Rotel)1can (4 oz) diced green chilies2 cupsbeef broth
4 cupscooked pinto beans (or 2 cans,15 ozeach, drained and rinsed)1can (10 oz) diced tomatoes with green chilies (e.g., Rotel)1can (4 oz) diced green chilies2 cupsbeef broth
1can (10 oz) diced tomatoes with green chilies (e.g., Rotel)1can (4 oz) diced green chilies2 cupsbeef broth
1 teaspooncumin½ teaspoonsmoked paprika½ teaspoongarlic powder¼ teaspoonblack pepperSalt, to taste
½ teaspoonsmoked paprika½ teaspoongarlic powder¼ teaspoonblack pepperSalt, to taste
½ teaspoongarlic powder¼ teaspoonblack pepperSalt, to taste
¼ teaspoonblack pepperSalt, to taste
Salt, to taste
Optional Garnish:¼ cupfresh cilantro, chopped
¼ cupfresh cilantro, chopped
Instructions
1️⃣Prepare the Ingredients:
In a skillet over medium heat, brown the ground beef with the diced onion until the beef is fully cooked and the onion is softened. Drain any excess fat.2️⃣Combine Ingredients in the Slow Cooker:Transfer the cooked beef and onion mixture to the slow cooker. Add the pinto beans, diced tomatoes with green chilies, diced green chilies, beef broth, chili powder, cumin, smoked paprika, garlic powder, and black pepper.3️⃣Season and Stir:Stir the ingredients together thoroughly. Taste and adjust the salt as needed.4️⃣Cook the Dish:Cover the slow cooker and cook onlow for 6–8 hoursorhigh for 3–4 hours, stirring occasionally if possible.5️⃣Finish and Serve:Just before serving, stir in fresh cilantro if desired.Serve hot with cornbread, rice, or tortilla chips. Add toppings like shredded cheese, sour cream, or avocado for extra richness.
2️⃣Combine Ingredients in the Slow Cooker:Transfer the cooked beef and onion mixture to the slow cooker. Add the pinto beans, diced tomatoes with green chilies, diced green chilies, beef broth, chili powder, cumin, smoked paprika, garlic powder, and black pepper.3️⃣Season and Stir:Stir the ingredients together thoroughly. Taste and adjust the salt as needed.4️⃣Cook the Dish:Cover the slow cooker and cook onlow for 6–8 hoursorhigh for 3–4 hours, stirring occasionally if possible.5️⃣Finish and Serve:Just before serving, stir in fresh cilantro if desired.Serve hot with cornbread, rice, or tortilla chips. Add toppings like shredded cheese, sour cream, or avocado for extra richness.
Transfer the cooked beef and onion mixture to the slow cooker. Add the pinto beans, diced tomatoes with green chilies, diced green chilies, beef broth, chili powder, cumin, smoked paprika, garlic powder, and black pepper.
3️⃣Season and Stir:Stir the ingredients together thoroughly. Taste and adjust the salt as needed.4️⃣Cook the Dish:Cover the slow cooker and cook onlow for 6–8 hoursorhigh for 3–4 hours, stirring occasionally if possible.5️⃣Finish and Serve:Just before serving, stir in fresh cilantro if desired.Serve hot with cornbread, rice, or tortilla chips. Add toppings like shredded cheese, sour cream, or avocado for extra richness.
Stir the ingredients together thoroughly. Taste and adjust the salt as needed.4️⃣Cook the Dish:Cover the slow cooker and cook onlow for 6–8 hoursorhigh for 3–4 hours, stirring occasionally if possible.5️⃣Finish and Serve:Just before serving, stir in fresh cilantro if desired.Serve hot with cornbread, rice, or tortilla chips. Add toppings like shredded cheese, sour cream, or avocado for extra richness.
4️⃣Cook the Dish:
Cover the slow cooker and cook onlow for 6–8 hoursorhigh for 3–4 hours, stirring occasionally if possible.5️⃣Finish and Serve:Just before serving, stir in fresh cilantro if desired.Serve hot with cornbread, rice, or tortilla chips. Add toppings like shredded cheese, sour cream, or avocado for extra richness.
5️⃣Finish and Serve:Just before serving, stir in fresh cilantro if desired.Serve hot with cornbread, rice, or tortilla chips. Add toppings like shredded cheese, sour cream, or avocado for extra richness.
Just before serving, stir in fresh cilantro if desired.
Serve hot with cornbread, rice, or tortilla chips. Add toppings like shredded cheese, sour cream, or avocado for extra richness.
Notes
Adjust the spice level by using mild, medium, or hot green chilies and tomatoes.For a vegetarian option, omit the beef and use vegetable broth.
For a vegetarian option, omit the beef and use vegetable broth.
Are you searching for a dish that consistently garners rave reviews and disappears from the potluck table in minutes? If so, you’re likely looking for the secret to universally adored comfort food. Funeral potatoes, a dish that sounds somber but tastes heavenly, are a creamy, cheesy, and wonderfully crunchy casserole that has become a staple for good reason. It’s not just for funerals, despite its name; this versatile dish is a triumphant presence at holiday gatherings, family dinners, and any occasion where a delicious, crowd-pleasing comfort food is needed. Made with tender hash browns, a rich sour cream and cheese sauce, and crowned with a crispy, buttery topping, this casserole is the epitome of cozy indulgence. Let’s dive into why this seemingly simple dish holds such a cherished place in our culinary hearts.
Gather Your Glorious Ingredients
The magic of funeral potatoes lies in its straightforward, yet incredibly satisfying, combination of humble ingredients. Each component plays a crucial role in creating that signature creamy, cheesy, and crunchy experience. Here’s what you’ll need:
The Heart of the Casserole
Frozen Hash Brown Potatoes: 2 (30-ounce) bags, thawed. These are the foundation, providing that beloved potato texture. Look for shredded hash browns for the most authentic result.
Sour Cream: 1 (16-ounce) container. This is key for that rich, tangy creaminess. Full-fat sour cream will yield the best flavor and texture.
Cream of Chicken Soup: 1 (10.5-ounce) can. This condensed soup acts as a binder and adds a savory depth of flavor.
Milk: 1 cup, or half-and-half for extra richness. This helps to achieve the perfect sauce consistency.
For That Creamy, Cheesy Sauce
Shredded Cheddar Cheese: 2 cups, divided. Sharp cheddar offers the most flavor. Reserve about 1/2 cup for the topping.
Chopped Onion: 1/2 cup (optional). For a subtle allium kick that complements the cheese. Finely minced is best to distribute flavor evenly.
Salt: 1 teaspoon. To enhance all the flavors.
Black Pepper: 1/2 teaspoon. For a touch of warmth.
The Irresistible Crunchy Topping
Butter: 1/2 cup (1 stick), melted. The base for our golden, crunchy topping.
Crushed Corn Flakes: 2 cups. These provide the signature crispy texture. You can also use breadcrumbs or crushed Ritz crackers.
Timing is Everything: Prep, Cook, and Total Time
Prep Time: 15 minutes
Cook Time: 45-55 minutes
Total Time: 60-70 minutes
Funeral potatoes are remarkably quick to assemble, making them a weeknight savior. The prep time is minimal, mainly involving thawing the potatoes and mixing the ingredients. Baking takes just under an hour, which is fairly standard for a hearty casserole and slightly longer than the average 45-minute cook time for many simpler casseroles, but the payoff in flavor and texture is well worth it.
Let’s Get Cooking: Step-by-Step
Step 1: Preheat Oven and Prep Your Dish
First things first, let’s get your oven ready. Preheat it to 375°F (190°C). While the oven is heating, grab a 9×13 inch baking dish. Lightly grease it with butter or cooking spray to prevent any sticking – we want all that deliciousness to come out cleanly.
Step 2: Mix the Glorious Potato Base
In a large mixing bowl, combine the thawed hash browns, sour cream, cream of chicken soup, and milk (or half-and-half). If you’re using chopped onion, add it now. Sprinkle in the salt and pepper. Give everything a good stir until it’s all beautifully combined. Don’t worry if it looks a little soupy; that’s exactly what we want for a creamy casserole!
Step 3: Create the Dreamy Sour Cream Sauce
Now, let’s integrate that cheesy goodness. Add two-thirds of the shredded cheddar cheese (that’s about 1 1/3 cups) to the potato mixture. Stir it in gently until it’s evenly distributed. This cheese is going to melt into the sauce, creating those irresistible cheesy pockets throughout the casserole.
Step 4: Combine, Layer, and Prepare for Baking
Pour the glorious potato and cheese mixture into your prepared baking dish. Spread it out evenly with a spatula. Now, let’s craft that irresistible topping. In a separate small bowl, combine the melted butter and the crushed corn flakes (or your chosen crunchy element). Stir until the corn flakes are well coated in butter. Evenly sprinkle this buttery, crunchy mixture over the top of the potato casserole.
Step 5: Bake to Golden Perfection
Place the baking dish into your preheated oven. Bake for 45-55 minutes, or until the casserole is hot, bubbly around the edges, and the topping is a beautiful golden brown and delightfully crispy. You want to see those lovely signs of deliciousness bubbling up!
Step 6: Let it Rest (Patience is a Virtue!)
This is arguably the hardest step. Once it comes out of the oven, resist the urge to dive in immediately! Let the funeral potatoes rest for about 10-15 minutes. This resting period allows the casserole to set slightly, making it easier to serve and ensuring that every bite is perfectly creamy and holds its structure. While it rests, sprinkle the remaining 1/3 cup of shredded cheddar cheese over the top for an extra cheesy finish.
Nutritional Highlights
While funeral potatoes are a decadent treat, it’s helpful to have a general idea of their nutritional profile. A typical serving (approximately 1/8th of the casserole) contains:
Calories: Around 350-450 kcal, depending on specific ingredients.
Fat: High, due to cheese, sour cream, and butter.
Carbohydrates: Primarily from potatoes and corn flakes.
Protein: From cheese and soup.
Please note that these are approximate values and can vary based on the brands and exact quantities of ingredients used.
Healthier Alternatives
Want to lighten things up without sacrificing flavor? Try these swaps:
Lighter Sour Cream or Greek Yogurt: Use reduced-fat sour cream or plain Greek yogurt (which also adds protein!). The tanginess is similar.
Lower-Sodium Condensed Soup: Opt for a lower-sodium or reduced-fat variety of cream of chicken or mushroom soup.
Whole Wheat Binder: Replace some or all of the corn flakes with whole wheat breadcrumbs for added fiber.
Reduced-Fat Cheese: Use a reduced-fat cheddar, though it might slightly alter the creaminess.
Add Veggies: Mix in steamed broccoli florets or sautéed mushrooms for added nutrients and bulk.
Serving Suggestions
Funeral potatoes are incredibly versatile. They make a fantastic side dish for almost any main course, including:
Roasted meats like turkey, ham, or chicken.
Pulled pork or BBQ.
Any holiday feast spread.
As a comforting main dish with a simple side salad.
Common Mistakes to Avoid
Not Thawing Hash Browns: This can lead to a watery casserole and uneven cooking. Ensure they are thawed but not mushy.
Overmixing: Be gentle when combining ingredients to avoid breaking down the hash browns too much.
Skipping the Rest Time: While tempting, letting it sit helps it set.
Burning the Topping: Keep an eye on the casserole during the last 10-15 minutes of baking. If the topping is browning too quickly, you can loosely tent the dish with foil.
Storing Tips
Leftover funeral potatoes can be stored in an airtight container in the refrigerator for up to 3-4 days. To reheat, gently warm them in the oven at around 300°F (150°C) until heated through, or reheat individual portions in the microwave. For best results and a crisper topping, reheating in the oven is recommended.
Frequently Asked Questions
***What are funeral potatoes commonly called?***
Funeral potatoes are also known as cheesy potato casserole, Mormon potatoes, or simply party potatoes, reflecting their widespread popularity for gatherings.
***Can I use fresh potatoes instead of frozen hash browns?***
While frozen hash browns are convenient and give the best texture, you could theoretically use peeled, boiled, and then shredded or diced potatoes. However, it will add significant prep time and may alter the final consistency.
***What other cheeses can I use?***
Monterey Jack, Colby Jack, or a good quality mild cheddar are excellent substitutes for the shredded cheese. You can also add a touch of Parmesan for extra nutty flavor.
***Can I make this casserole ahead of time?***
Yes! You can assemble the casserole (without the topping) up to a day in advance. Cover and refrigerate. When ready to bake, let it sit at room temperature for about 30 minutes, then add the topping and bake, likely adding an extra 10-15 minutes to the baking time.
***Why are they called funeral potatoes?***
They earned their name because they are a comforting and easy-to-make dish that is often brought to gatherings following a funeral. It’s a way to provide sustenance and a taste of familiarity during a difficult time.
Conclusion
Funeral potatoes are more than just a casserole; they’re a hug in a dish. Their creamy, cheesy, and crispy layers offer unparalleled comfort and flavor, making them a guaranteed hit at any gathering. Whether you’re serving them at a solemn occasion or a joyous celebration, this beloved dish is sure to bring smiles and satisfied sighs all around. So, gather your ingredients, follow these simple steps, and prepare to experience the pure, unadulterated joy of funeral potatoes. Don’t forget to share your experience in the comments below!
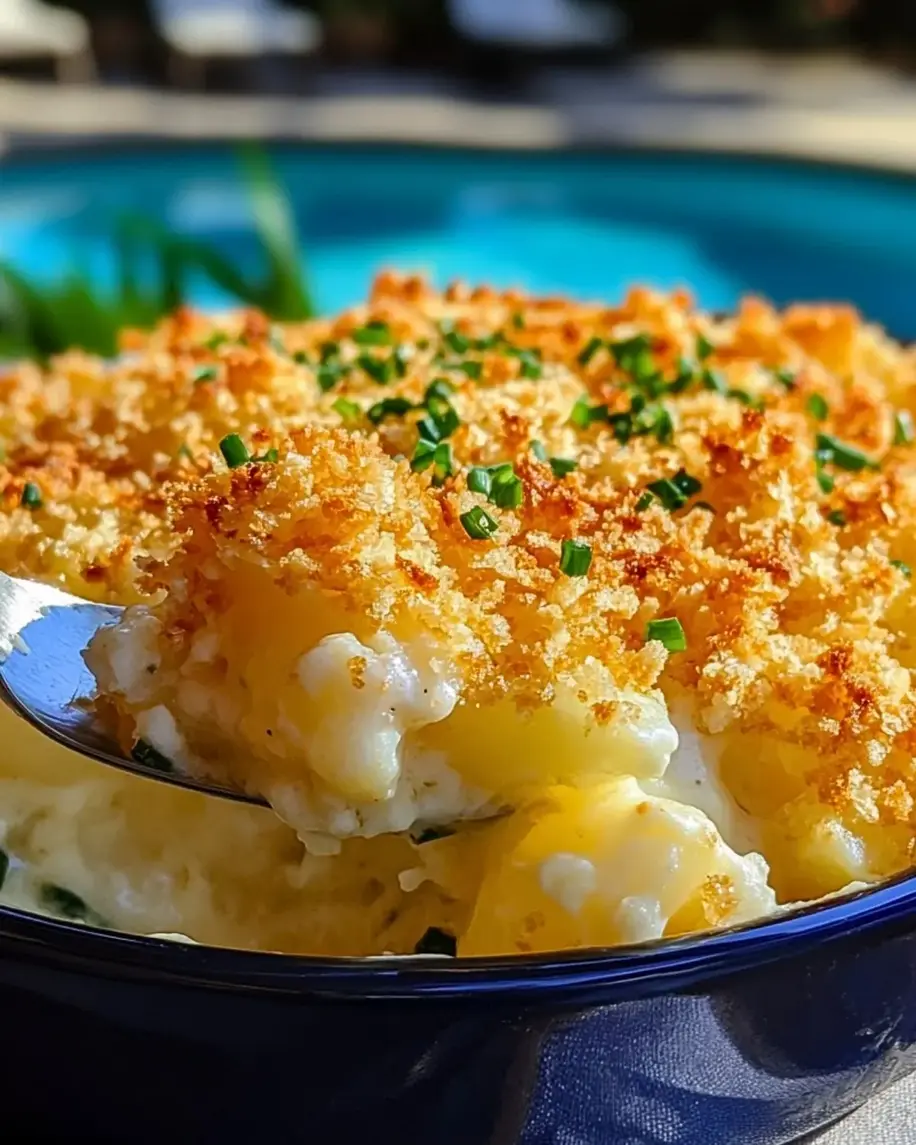
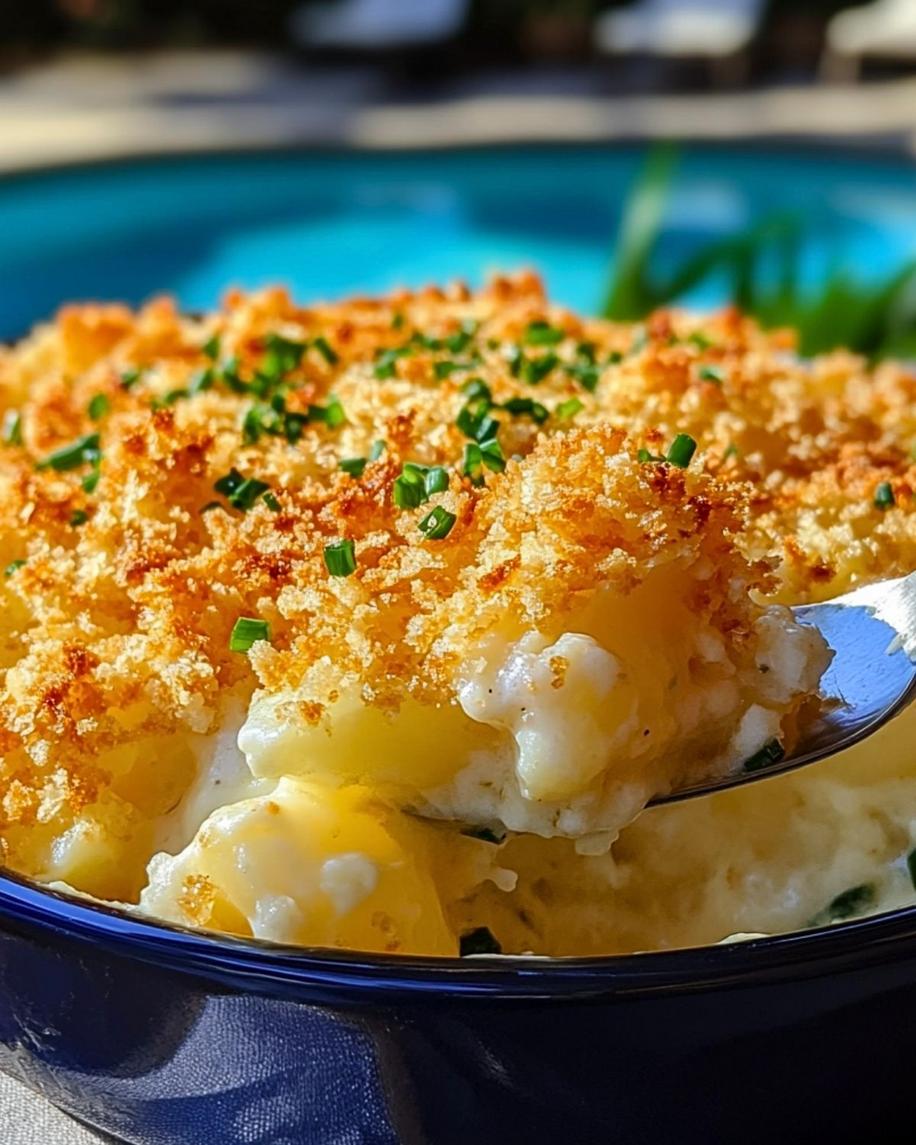
Funeral Potatoes are a creamy, cheesy, and crunchy comfort food classic perfect for any occasion. Made with tender hash browns, a rich sour cream and cheese sauce, and a crispy buttery topping, this casserole is a crowd-pleaser at potlucks, holidays, or even a simple family dinner.
Ingredients
Scale
1(32-ounce) bag frozen hash browns (shredded or diced)
1 cupsour cream
1(10.5-ounce) can cream of chicken soup (or cream of mushroom for vegetarian)
Preheat the oven to 350°F (175°C). Grease a 9×13-inch baking dish.
In a large mixing bowl, combine sour cream, cream of chicken soup, cheddar cheese, onion powder, garlic powder, salt, and pepper. Mix well.
Add the frozen hash browns to the bowl and gently stir until evenly coated.
Spread the potato mixture evenly into the prepared baking dish.
In a separate small bowl, mix the crushed cornflakes with melted butter. Sprinkle evenly over the top of the casserole.
Bake for 40-50 minutes, or until hot and bubbly, and the topping is golden brown.
Remove from the oven and let cool slightly. Garnish with chopped chives if desired. Serve warm.
Notes
For extra crunch, substitute crushed Ritz crackers or potato chips for the cornflakes.
Add cooked, diced chicken or ham for a more filling casserole.
Leftovers can be refrigerated in an airtight container for up to 3 days or frozen for up to 1 month.
If baking from frozen, cover with foil and bake for an additional 10-15 minutes, removing the foil halfway through baking.
“`
Delicious Chicken Vegetable Stew Recipe You’ll Love
Delicious Chicken Vegetable Stew Recipe You’ll Love
Introduction
Are you looking for a comforting, nutritious, and incredibly satisfying meal that the whole family will adore? In a world where weeknight dinners can often feel rushed and uninspired, discovering a recipe that offers both ease and exceptional flavor is a true win. This Chicken Vegetable Stew recipe is designed to do just that! Imagine tender pieces of chicken swimming in a rich, savory broth, surrounded by an abundance of vibrant, hearty vegetables. It’s the quintessential comfort food, perfect for those chilly evenings or whenever you need a warm hug in a bowl. We know that finding recipes that are both healthy and delicious can be a challenge, but this stew is packed with wholesome ingredients that will nourish your body and delight your taste buds. Get ready to create a dish that will become a staple in your recipe repertoire.
Ingredients for this Flavorful Stew
The magic of a great stew lies in its ingredients, and this Chicken Vegetable Stew is no exception. We’ve chosen a robust combination of vegetables and lean protein to create a balanced and deeply flavorful dish. Here’s what you’ll need:
1.5 lbs Boneless, Skinless Chicken Thighs or Breasts: Choose thighs for extra tenderness and flavor, or breasts for a leaner option. Cut into ~1-inch pieces.
Substitution: Turkey, lean beef (like sirloin), or even hearty plant-based proteins like firm tofu or chickpeas can be used.
2 tbsp Olive Oil: For sautéing and building the flavor base.
Substitution: Avocado oil, or a neutral oil like grapeseed or canola oil.
1 Large Onion: Finely chopped. Adds sweetness and depth. (Approx. 1.5 cups chopped)
Substitution: Shallots for a milder, sweeter flavor.
3 Carrots: Peeled and sliced into ½-inch rounds or half-moons. Offers a beautiful sweetness and vibrant orange hue. (Approx. 2 cups chopped)
Substitution: Parsnips for an earthier, slightly spicier note.
3 Celery Stalks: Sliced into ½-inch pieces. Provides a subtle herbal crunch and aroma. (Approx. 1.5 cups chopped)
Substitution: Fennel bulb for a hint of anise flavor, or leeks for a milder onion-like taste.
2 Cloves Garlic: Minced. The aromatic backbone of many savory dishes.
Substitution: Garlic powder (½ tsp) if fresh is unavailable, added with other dry spices.
1 lb Small Potatoes: Quartered or halved if very small. Waxy varieties like Yukon Gold or red potatoes hold their shape best. For creamy potatoes, use Russets.
Substitution: Sweet potatoes for a touch of sweetness and extra nutrients, or parsnips for an earthier flavor.
1 cup Frozen Peas: Added towards the end for a pop of green and sweetness.
Substitution: Fresh peas, or green beans (cut into 1-inch pieces), added in the last 15 minutes of cooking.
4 cups Chicken Broth: Low-sodium is recommended to control saltiness. The liquid base that melds all the flavors.
Substitution: Vegetable broth for a vegetarian version, or a mix of chicken broth and water.
Substitution: Fresh thyme (1 tbsp, chopped), added with the aromatics.
½ tsp Dried Rosemary: Pine-like, slightly peppery aroma.
Substitution: Fresh rosemary (½ tsp, chopped), added with the aromatics.
Salt and Freshly Ground Black Pepper: To taste. Essential for bringing out all the flavors.
Optional: 1 tbsp All-Purpose Flour: For thickening the stew slightly.
Substitution: Cornstarch slurry (1 tbsp cornstarch dissolved in 2 tbsp cold water) added at the end.
Garnish (optional): Fresh parsley, chopped. Adds a burst of freshness.
Timing is Everything for this Stew
This hearty stew is straightforward, but proper timing ensures perfect results. On average, most chicken vegetable stews take about 45-60 minutes from start to finish. This recipe is right in that sweet spot, offering a delicious, home-cooked meal without taking all day.
Prep time:
20 minutes
Cook time:
40 minutes
Total time:
60 minutes
Servings:
6
Step-by-Step Instructions to Perfection
Follow these simple steps to create a truly delicious chicken vegetable stew.
Step 1: Prep Your Veggies and Chicken
Begin by preparing all your ingredients. Chop your onion, carrots, and celery. Mince the garlic. Cut the chicken into bite-sized pieces (about 1-inch cubes). If you’re using potatoes, wash and cut them into bite-sized pieces as well. Having everything prepped and ready makes the cooking process smooth and enjoyable, ensuring you don’t miss a beat.
Step 2: Sear That Chicken for Flavor
Heat 1 tablespoon of olive oil in a large pot or Dutch oven over medium-high heat. Season the chicken pieces generously with salt and pepper. Add the chicken to the hot pot in a single layer (you may need to do this in batches to avoid overcrowding, which steams the chicken instead of searing it). Sear the chicken for about 2-3 minutes per side, until golden brown. This browning process, known as the Maillard reaction, is crucial for developing a deep, savory flavor that will permeate the entire stew. Remove the seared chicken from the pot and set aside.
Step 3: Sauté Your Aromatics
Add the remaining 1 tablespoon of olive oil to the same pot. Reduce the heat to medium. Add the chopped onion, carrots, and celery. Cook, stirring occasionally, for about 5-7 minutes, until the vegetables begin to soften and the onion becomes translucent. This process also helps to release their natural sweetness. Stir in the minced garlic and cook for another minute until fragrant, being careful not to burn it.
Step 4: Build the Flavor Base
If you’re using flour to thicken your stew, sprinkle it over the sautéed vegetables now. Stir well and cook for about 1-2 minutes to cook out the raw flour taste. Then, gradually pour in the chicken broth, scraping up any browned bits from the bottom of the pot – these are packed with flavor! Add the dried thyme and rosemary. Stir everything together until well combined.
Step 5: Simmer to Perfection
Return the seared chicken pieces (and any accumulated juices) to the pot. Add the prepared potatoes. Bring the stew to a gentle boil, then reduce the heat to low, cover the pot, and let it simmer for about 20-25 minutes, or until the potatoes are tender and the chicken is cooked through and easily falls apart. Stir occasionally to prevent sticking.
Step 6: Finish and Serve
Stir in the frozen peas and cook for another 5 minutes, just until they are heated through and bright green. Taste the stew and adjust seasoning with salt and freshly ground black pepper as needed. If the stew isn’t as thick as you’d like, you can thicken it with a cornstarch slurry (mix 1 tbsp cornstarch with 2 tbsp cold water, then stir into the simmering stew and cook for a minute until thickened). Ladle the hot stew into bowls. Garnish with fresh chopped parsley if desired. Serve immediately and enjoy the comforting, robust flavors!
Nutritional Information: A Wholesome Meal
This Chicken Vegetable Stew is a well-balanced meal, offering a good source of protein, fiber, vitamins, and minerals. A typical serving of this stew (approximately 1/6th of the recipe, without optional flour) is estimated to contain:
Calories: ~350-450 kcal (depending on chicken cut and exact ingredient quantities)
Protein: ~30-40g
Fat: ~15-20g
Carbohydrates: ~30-40g
Fiber: ~6-8g
Note: These are approximate values and can vary based on specific ingredients and portion sizes.
Healthier Alternatives: For a Guilt-Free Meal
Looking to make this stew even lighter without sacrificing flavor? Here are some simple swaps:
Leaner Protein: Opt for chicken breast instead of thighs for a lower fat content.
More Veggies, Less Starch: Increase the ratio of non-starchy vegetables (like broccoli, bell peppers, zucchini) and reduce the potato quantity.
Broth Choice: Use low-sodium or homemade broth to reduce sodium intake.
Thickening Agent: Skip the flour or cornstarch and reduce the liquid slightly during simmering for a naturally thicker stew. Alternatively, use a puree of cooked vegetables (like carrots or potatoes) to thicken.
Fat Reduction: Use a minimal amount of healthy fat like olive oil for sautéing, or consider using broth to sauté aromatics instead of oil.
Serving Suggestions: Elevate Your Stew
This Chicken Vegetable Stew is incredibly versatile. Here are a few ideas to serve it:
Crusty Bread: The ultimate companion for soaking up every last drop of that delicious broth.
Fluffy Rice: Serve the stew over a bed of white or brown rice for a more substantial meal.
Mashed Potatoes: For a double dose of comfort food.
Quinoa: A healthier grain option that pairs well.
Side Salad: A light, crisp salad can offer a refreshing contrast.
Common Mistakes to Avoid
Even simple recipes can have pitfalls. Here’s how to ensure your stew is perfect:
Overcrowding the Pot: When searing chicken, cook in batches to ensure proper browning, not steaming.
Burning the Garlic: Add garlic towards the end of sautéing aromatics and cook just until fragrant to avoid bitterness.
Not Enough Simmering Time: Ensure vegetables are tender and chicken is cooked through by allowing adequate simmering time.
Under-Seasoning: Taste and adjust salt and pepper at the end. Stews often need a good amount of seasoning to bring out their full flavor.
Adding Peas Too Early: Peas cook quickly. Adding them at the end keeps them vibrant and prevents them from becoming mushy.
Storing Tips for Leftovers
Leftover chicken vegetable stew stores beautifully and often tastes even better the next day as the flavors meld further.
Refrigeration: Allow the stew to cool completely, then store it in an airtight container in the refrigerator for up to 3-4 days.
Reheating: Gently reheat on the stovetop over low heat, stirring occasionally. You can also reheat individual portions in the microwave. Add a splash of broth or water if the stew has thickened too much.
Freezing: This stew is also freezer-friendly. Once cooled, portion it into freezer-safe containers or bags and freeze for up to 2-3 months. Thaw overnight in the refrigerator before reheating.
Frequently Asked Questions About Chicken Vegetable Stew
***What kind of chicken is best for stew?***
Chicken thighs are generally preferred for stews due to their higher fat content, which keeps them tender and juicy during the long cooking process. Chicken breasts can be used, but they tend to dry out more easily. If using breasts, add them towards the end of the cooking time or ensure they don’t overcook.
***Can I make this stew ahead of time?***
Yes, absolutely! Stews are excellent make-ahead meals. The flavors deepen and meld beautifully overnight. Cook the stew, let it cool, then refrigerate. Reheat gently on the stovetop.
***What vegetables can I add to this stew?***
Feel free to customize with your favorite vegetables! Good additions include: broccoli florets, bell peppers (any color), zucchini, mushrooms, corn, green beans, or leafy greens like spinach or kale (added in the last few minutes of cooking).
***How can I make this stew thicker?***
If your stew isn’t as thick as you like, you can create a slurry by mixing 1-2 tablespoons of cornstarch or all-purpose flour with an equal amount of cold water until smooth. Stir this mixture into the simmering stew and cook for a few minutes until it thickens.
***Can I make this recipe vegetarian or vegan?***
Yes! To make it vegetarian, simply replace the chicken with firm tofu, chickpeas, or hearty vegetables like mushrooms and extra potatoes. Use vegetable broth instead of chicken broth. For a vegan version, ensure you use vegetable broth and plant-based protein like tofu or beans, and omit any dairy if applicable in other versions.
Conclusion: Enjoy Your Hearty Stew
This Delicious Chicken Vegetable Stew recipe is more than just a meal; it’s an experience of warmth, comfort, and delicious home-cooked goodness. With its customizable ingredients, straightforward steps, and incredible flavor, it’s sure to become a beloved recipe for busy weeknights and cozy weekends alike. Gather your ingredients, follow these simple instructions, and savor the delightful aroma and taste of this wholesome dish. We’re confident you’ll fall in love with its nourishing qualities and hearty taste. What are you waiting for? Get in the kitchen and whip up a pot of this amazing stew today!
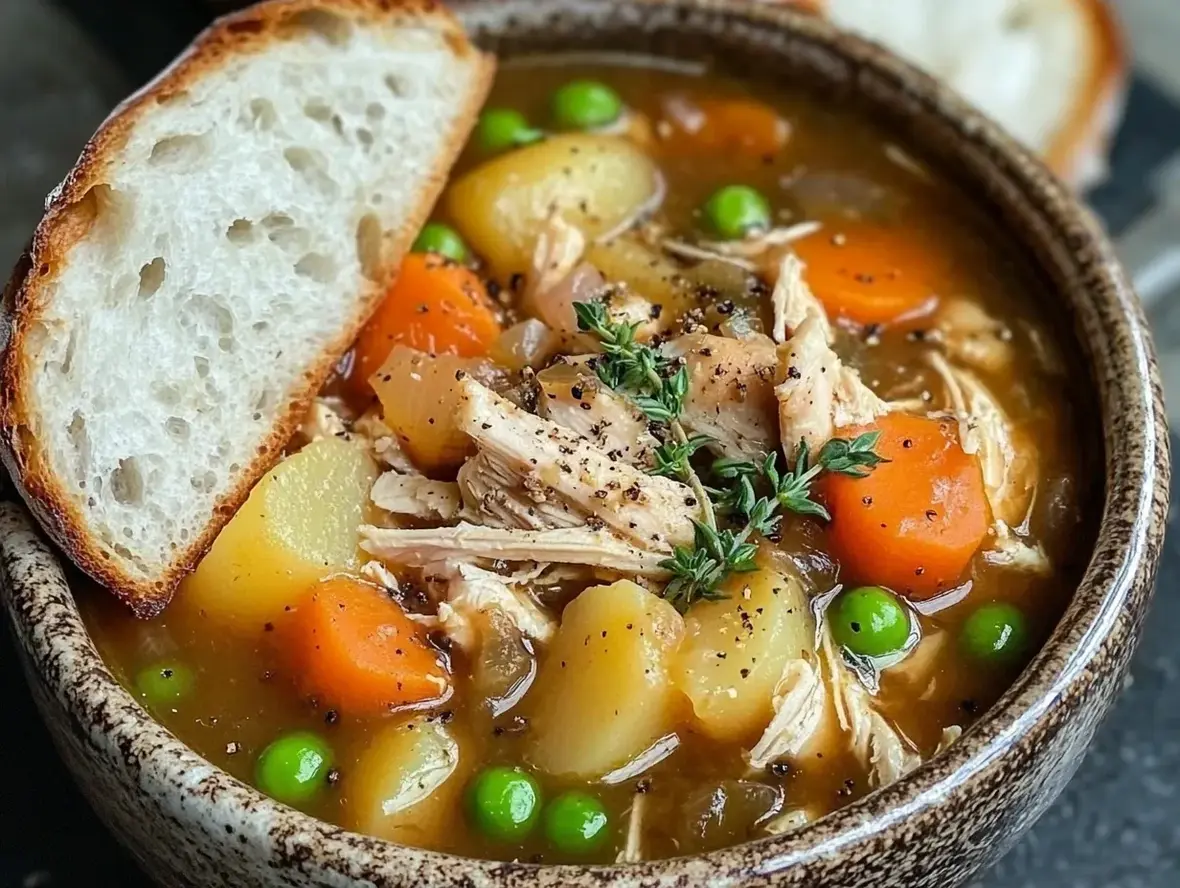
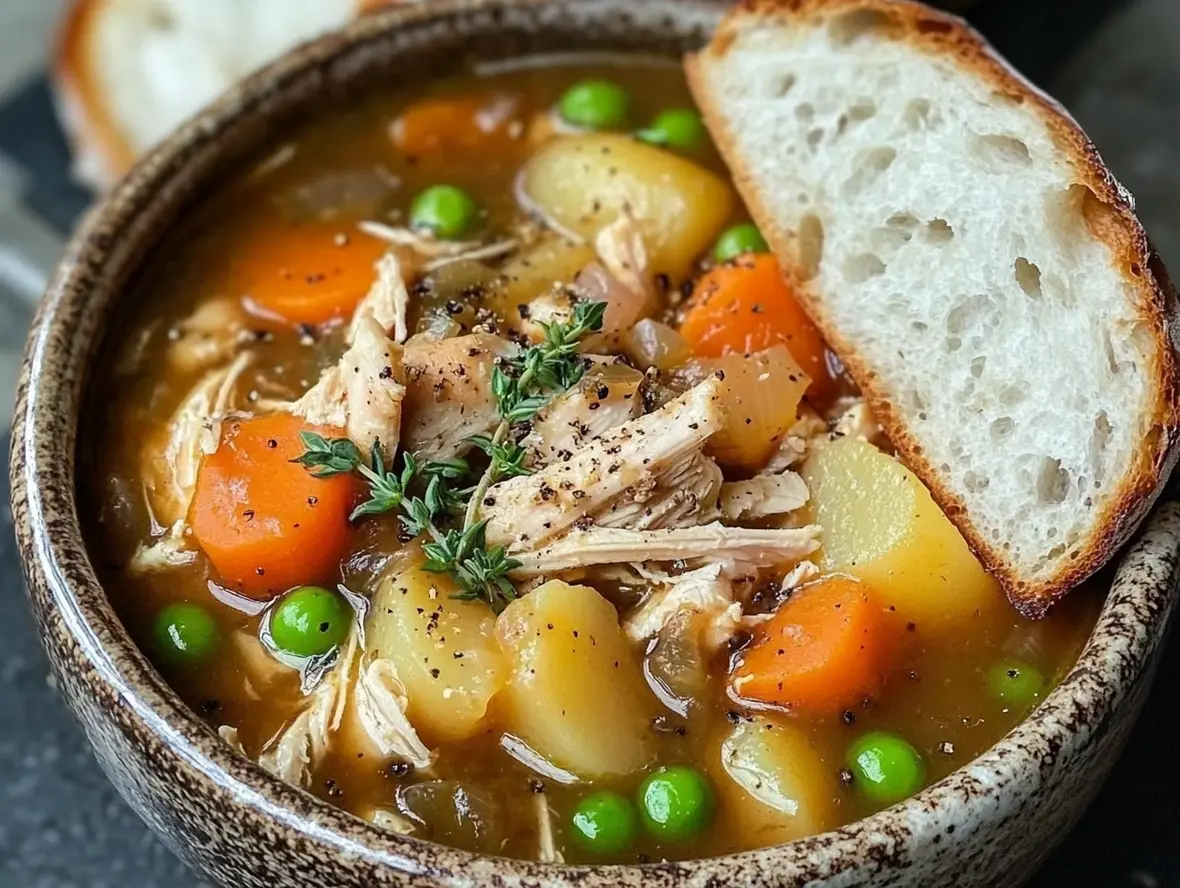
This comfortingChicken and Vegetable Stewis a perfect one-pot meal that’s hearty, nutritious, and packed with flavor. Tender chicken, wholesome vegetables, and fragrant herbs come together in a rich broth to warm you up on even the coldest days.
Ingredients
Scale
1lb chicken breast or thighs, cooked and shredded2 tablespoonsolive oil1large onion, chopped3cloves garlic, minced3carrots, sliced3medium potatoes, cubed1 cupfrozen peas4 cupschicken broth1 cupwater2 tablespoonstomato paste1 teaspoondried thyme1 teaspoondried rosemarySalt and pepper, to tasteFresh thyme or parsley (for garnish)
2 tablespoonsolive oil1large onion, chopped3cloves garlic, minced3carrots, sliced3medium potatoes, cubed1 cupfrozen peas4 cupschicken broth1 cupwater2 tablespoonstomato paste1 teaspoondried thyme1 teaspoondried rosemarySalt and pepper, to tasteFresh thyme or parsley (for garnish)
1large onion, chopped3cloves garlic, minced3carrots, sliced3medium potatoes, cubed1 cupfrozen peas4 cupschicken broth1 cupwater2 tablespoonstomato paste1 teaspoondried thyme1 teaspoondried rosemarySalt and pepper, to tasteFresh thyme or parsley (for garnish)
3cloves garlic, minced3carrots, sliced3medium potatoes, cubed1 cupfrozen peas4 cupschicken broth1 cupwater2 tablespoonstomato paste1 teaspoondried thyme1 teaspoondried rosemarySalt and pepper, to tasteFresh thyme or parsley (for garnish)
3carrots, sliced3medium potatoes, cubed1 cupfrozen peas4 cupschicken broth1 cupwater2 tablespoonstomato paste1 teaspoondried thyme1 teaspoondried rosemarySalt and pepper, to tasteFresh thyme or parsley (for garnish)
3medium potatoes, cubed1 cupfrozen peas4 cupschicken broth1 cupwater2 tablespoonstomato paste1 teaspoondried thyme1 teaspoondried rosemarySalt and pepper, to tasteFresh thyme or parsley (for garnish)
1 cupfrozen peas4 cupschicken broth1 cupwater2 tablespoonstomato paste1 teaspoondried thyme1 teaspoondried rosemarySalt and pepper, to tasteFresh thyme or parsley (for garnish)
4 cupschicken broth1 cupwater2 tablespoonstomato paste1 teaspoondried thyme1 teaspoondried rosemarySalt and pepper, to tasteFresh thyme or parsley (for garnish)
1 cupwater2 tablespoonstomato paste1 teaspoondried thyme1 teaspoondried rosemarySalt and pepper, to tasteFresh thyme or parsley (for garnish)
2 tablespoonstomato paste1 teaspoondried thyme1 teaspoondried rosemarySalt and pepper, to tasteFresh thyme or parsley (for garnish)
1 teaspoondried thyme1 teaspoondried rosemarySalt and pepper, to tasteFresh thyme or parsley (for garnish)
1 teaspoondried rosemarySalt and pepper, to tasteFresh thyme or parsley (for garnish)
Salt and pepper, to tasteFresh thyme or parsley (for garnish)
Fresh thyme or parsley (for garnish)
Instructions
1️⃣Sauté Aromatics:In a large pot, heat olive oil over medium heat. Add the chopped onion and sauté until softened, about 5 minutes. Add the minced garlic and cook for another minute, until fragrant.2️⃣Add Vegetables and Broth:Stir in the carrots, potatoes, chicken broth, and water. Mix in the tomato paste, dried thyme, rosemary, salt, and pepper. Bring the mixture to a boil, then reduce the heat to low and simmer for 20 minutes, or until the vegetables are tender.3️⃣Add Chicken and Peas:Add the shredded chicken and frozen peas to the pot. Stir to combine and let simmer for another 5–10 minutes, ensuring everything is heated through and flavors meld together.4️⃣Serve:Ladle the stew into bowls and garnish with fresh thyme or parsley. Serve hot, accompanied by crusty bread or warm rolls for a complete meal.
2️⃣Add Vegetables and Broth:Stir in the carrots, potatoes, chicken broth, and water. Mix in the tomato paste, dried thyme, rosemary, salt, and pepper. Bring the mixture to a boil, then reduce the heat to low and simmer for 20 minutes, or until the vegetables are tender.
3️⃣Add Chicken and Peas:Add the shredded chicken and frozen peas to the pot. Stir to combine and let simmer for another 5–10 minutes, ensuring everything is heated through and flavors meld together.4️⃣Serve:Ladle the stew into bowls and garnish with fresh thyme or parsley. Serve hot, accompanied by crusty bread or warm rolls for a complete meal.
4️⃣Serve:Ladle the stew into bowls and garnish with fresh thyme or parsley. Serve hot, accompanied by crusty bread or warm rolls for a complete meal.
Notes
Substitute or add your favorite vegetables, such as celery, parsnips, or green beans.For extra richness, stir in a splash of cream or a knob of butter before serving.
For extra richness, stir in a splash of cream or a knob of butter before serving.
“`
Italian Penicillin A Comforting Pastina Soup Recipe
“`html
Italian Penicillin A Comforting Pastina Soup Recipe
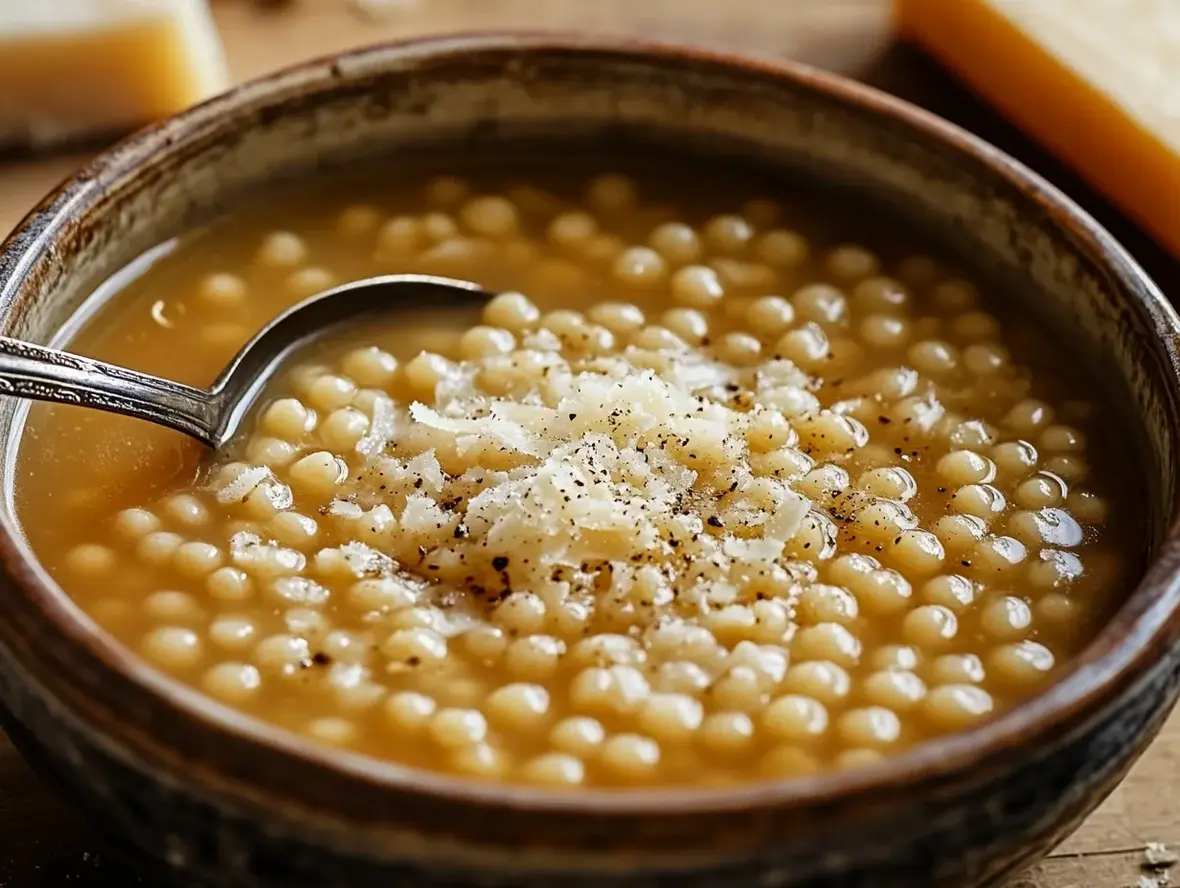
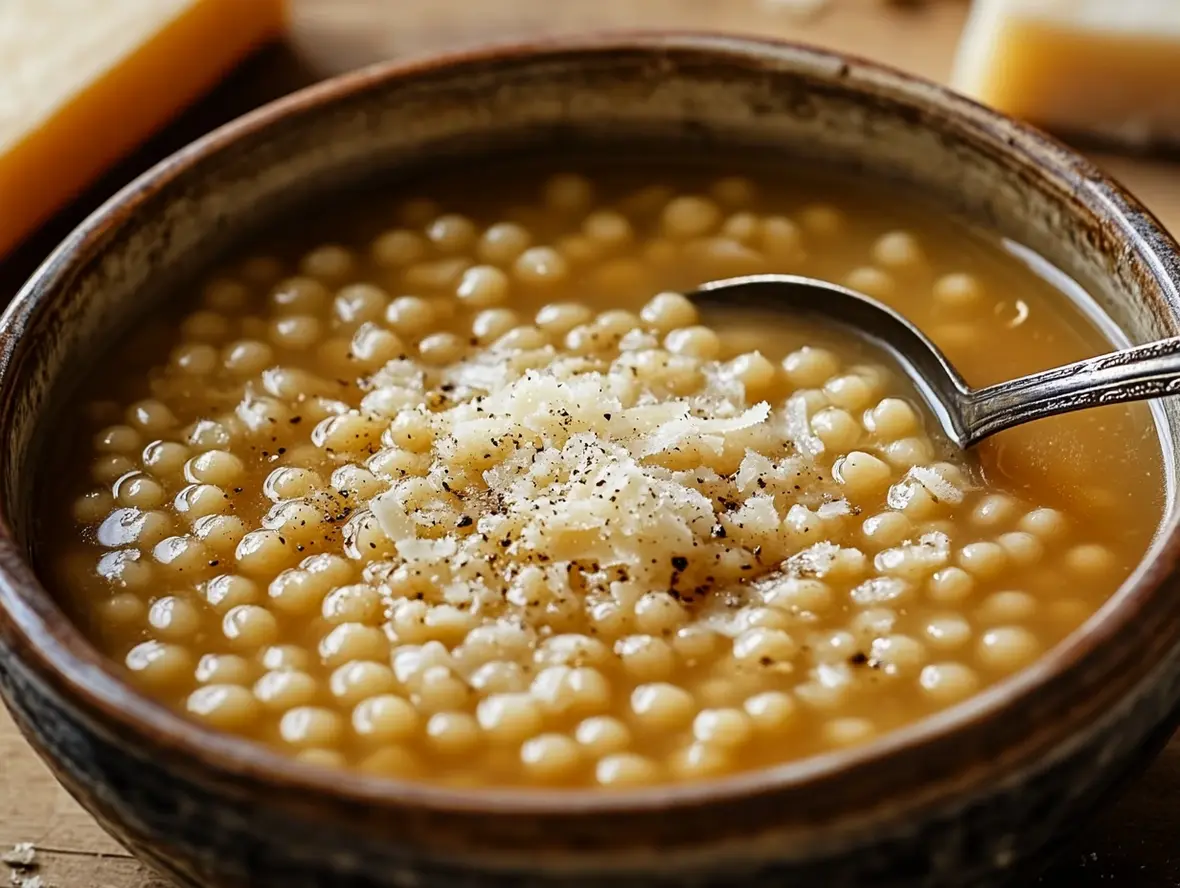
When colds strike or you’re simply yearning for a bowl of pure, unadulterated comfort, what’s the first dish that comes to mind? For many, especially those with Italian heritage, it’s a steaming bowl of Italian Penicillin. This humble yet deeply satisfying pastina soup is more than just a meal; it’s a culinary hug, a restorative balm, and a testament to the power of simple, wholesome ingredients. In a world constantly seeking the next superfood, sometimes the oldest remedies are the most profound. This recipe will guide you through creating this beloved Italian tradition in your own kitchen, a dish lauded for its ability to soothe the soul and warm the body from the inside out.
Ingredients: A Base for Comfort
The beauty of Italian Penicillin lies in its simplicity. The ingredients are readily available, and their synergy creates a comforting depth of flavor. We’ll focus on a foundational recipe, but feel free to adapt it to your pantry and preferences.
Core Ingredients
Chicken Broth: 6-8 cups. This is the soul of the soup. Opt for a high-quality, low-sodium chicken broth for the best flavor base. Homemade is always a treasured option if you have it!
Pastina: 1/2 cup. Small pasta shapes like Stelline (little stars), Acini di Pepe (peppercorns), or Orzo are traditional. They cook quickly and absorb the broth beautifully.
Egg: 1 large, lightly beaten. This is what gives Italian Penicillin its distinctive richness and creamy texture.
Parmesan Cheese: 1/4 cup, finely grated, plus more for serving. The salty, umami kick of Parmesan is essential.
Lemon Juice: 1-2 tablespoons, freshly squeezed. A bright, zesty touch that cuts through the richness and adds a refreshing lift.
Salt and Freshly Ground Black Pepper: To taste. Essential for seasoning and bringing out all the flavors.
Optional Aromatics and Enhancements
Garlic: 1-2 cloves, minced. Adds a subtle warmth and depth.
Butter: 1 tablespoon. For sautéing aromatics and adding a touch more richness.
Fresh Herbs: Such as parsley or chives, finely chopped, for garnish. Adds freshness and visual appeal.
Substitutions and Variations
Vegetarian: Use a high-quality vegetable broth instead of chicken broth.
Vegan: Use vegetable broth, omit the egg and Parmesan. You can create a creamy texture with a swirl of cashew cream or a thickening roux with vegetable oil and flour.
Gluten-Free: Use gluten-free pastina (rice or corn-based) or even small gluten-free pasta shapes.
Extra Protein: Shredded cooked chicken or tiny meatballs can be added for a heartier meal.
Timing: Quick Comfort
Prep Time: 5 Minutes
Cook Time: 15 Minutes
Total Time: 20 Minutes
Compared to many comforting soups that can take hours to simmer, Italian Penicillin is remarkably quick. Its short cooking time makes it ideal for a weeknight meal when you need something warm and nourishing fast.
Step 1: Preparing the Broth
Pour your chicken broth into a medium-sized saucepan. If you’re using any optional aromatics like minced garlic, you can gently sauté them in a tablespoon of butter or olive oil in the bottom of the pot for about a minute until fragrant before adding the broth. If not, simply bring the broth to a gentle simmer over medium heat. Season with a pinch of salt and a grind of black pepper. Remember that broths and Parmesan can be salty, so it’s best to season tentatively at first and adjust later.
Step 2: Building Flavor
Once the broth is simmering, this is your moment to enhance its depth. If you’re adding minced garlic and butter, ensure they’ve had a chance to infuse their aroma into the broth. Taste the broth and adjust the salt and pepper as needed. This foundational flavor is what the pastina will absorb, so getting it right now is key.
Step 3: Adding the Pastina
Increase the heat slightly to bring the broth to a rolling boil. Add the 1/2 cup of pastina to the pot. Stir occasionally to prevent sticking. Cook the pastina according to the package directions, which is typically around 5-8 minutes, until it’s al dente (tender but with a slight bite).
Step 4: Finishing Touches
This is where the magic happens. Once the pastina is cooked, remove the pot from the heat. In a small bowl, whisk together the lightly beaten egg and the grated Parmesan cheese. While whisking the egg and cheese mixture constantly, slowly drizzle about half a cup of the hot broth into it. This tempering process gently heats the egg, preventing it from scrambling. Now, slowly pour this tempered egg and cheese mixture back into the pot of soup, whisking continuously. The soup will instantly thicken and turn a beautiful, creamy golden hue. Stir in the fresh lemon juice. Taste one last time and adjust seasonings if necessary. The lemon juice awakens all the flavors and provides that signature bright finish.
Nutritional Information: A Light Yet Satisfying Choice
While exact nutritional values vary based on ingredients and portion sizes, a typical serving of Italian Penicillin is relatively light yet satisfying.
Calories: Approximately 150-250 kcal per serving (without added meats or excessive butter).
Protein: Moderate, primarily from the egg and Parmesan.
Carbohydrates: Primarily from the pastina.
Fat: Moderate, from the egg and cheese; can be controlled by broth choice and added fats.
Vitamins & Minerals: Provided by the broth (if homemade or enriched) and any added herbs.
This soup is a fantastic source of hydration and quickly digestible nutrients, making it ideal for those needing gentle sustenance.
Healthier Alternatives: Nourishment Without Compromise
While this classic recipe is already quite wholesome, here are some ways to make it even healthier without sacrificing its comforting essence:
Broth Choice: Use a low-sodium or homemade broth to control sodium intake. For an even lighter option, a good quality chicken consommé works beautifully.
Whole Grains: If available, opt for whole wheat pastina or small whole grain pasta shapes for added fiber.
Reduced Fat: Use reduced-fat Parmesan cheese or a smaller amount. For creaminess, a whisked tablespoon of cornstarch mixed with a little cold water can replace some of the egg and cheese richness.
Extra Veggies: Finely grated carrots or zucchini can be added with the pastina for a boost of vitamins and gentle texture.
Serving Suggestions: Elevating Your Bowl
Italian Penicillin is a complete comfort in a bowl, but here are a few ways to make it even more special:
Garnish Generously: A sprinkle of fresh parsley, chives, or even a few fresh basil leaves can add a burst of color and freshness.
Extra Cheese: Always offer extra grated Parmesan cheese at the table for those who love an extra salty, umami punch.
Drizzle of Olive Oil: A tiny drizzle of good quality extra virgin olive oil just before serving can add a luxurious finish.
Crusty Bread: Pair with warm, crusty bread for dipping into the flavorful broth.
Common Mistakes to Avoid
Overcooking the Pastina: Pastina can turn mushy quickly. Keep an eye on it and aim for al dente.
Scrambling the Egg: Always temper the egg mixture by slowly adding hot broth while whisking, and avoid adding it to a furiously boiling soup.
Under-seasoning: Broth and Parmesan add salt, but it’s crucial to taste and adjust at the end. The lemon juice also requires proper seasoning to shine.
Skipping the Lemon: While it might seem unusual, fresh lemon juice is the secret ingredient that elevates this soup from good to exceptional. Don’t skip it!
Storing Tips: Keeping the Comfort On Hand
Italian Penicillin is best enjoyed fresh, as the pastina can absorb too much liquid and become soft if stored for too long. However, if you have leftovers:
Refrigeration: Allow the soup to cool completely before transferring it to an airtight container. It will keep in the refrigerator for 1-2 days.
Reheating: When reheating, add a splash of extra broth or water, as the soup will likely have thickened considerably. Gently warm it on the stovetop over low heat, stirring frequently. Avoid microwaving if possible, as it can sometimes lead to uneven heating and potential scrambling of any residual egg.
Freezing: This soup is generally not recommended for freezing due to the pastina and egg tempering, which can alter the texture upon thawing.
Conclusion: A Bowl of Pure Comfort
Italian Penicillin is more than just a recipe; it’s an edible hug, a culinary balm that speaks to generations of comfort and care. Its simplicity belies a profound ability to soothe, nourish, and bring warmth to even the chilliest of days or the most weary of spirits. Whether you’re feeling under the weather, craving a taste of home, or simply want to whip up something quick and nourishing, this pastina soup is your answer. So, gather your simple ingredients, follow these steps, and create your own pot of Italian Penicillin. Experience the heartwarming magic for yourself!
FAQs: Your Burning Questions Answered
What is the best type of pastina to use for Italian Penicillin?
Tiny pasta shapes like Stelline (stars), Acini di Pepe (peppercorns), or Orzo are traditional and work beautifully as they cook quickly and absorb the broth without becoming overwhelming. Alphabet pasta is also a fun option!
Can I make this soup ahead of time?
It’s best enjoyed fresh. The pasta will continue to absorb liquid and can become mushy if stored for too long. If you must, store the broth separately from the cooked pastina and combine just before serving.
What if I don’t have chicken broth?
A good quality vegetable broth is a great substitute for a vegetarian version. You could also use a light beef broth for a different flavor profile, but chicken is classic for its mild, comforting nature.
Why is it called “Italian Penicillin”?
The nickname comes from its association with a remedy for colds and illnesses. Much like the antibiotic penicillin, this comforting soup was believed to have healing properties due to its warm, nourishing, and easy-to-digest nature.
Can I add vegetables to this soup?
Absolutely! While the classic version is simple, you can add finely grated carrots, zucchini, or even a handful of spinach towards the end of cooking for added nutrients and color.
A comforting and simple Italian classic,Pastina Soup(often called “Italian Penicillin”) is the ultimate remedy for cold days or when you’re feeling under the weather. With tiny star-shaped pasta, a velvety egg finish, and a touch of Parmesan, this quick and satisfying soup warms the soul.
Ingredients
Scale
4 cupschicken broth (homemade or store-bought)1 cuppastina pasta (tiny star-shaped or pearl-shaped pasta)1egg, beaten¼ cupfreshly grated Parmesan cheese1 tablespoonbutterSalt and pepper, to taste
1 cuppastina pasta (tiny star-shaped or pearl-shaped pasta)1egg, beaten¼ cupfreshly grated Parmesan cheese1 tablespoonbutterSalt and pepper, to taste
1egg, beaten¼ cupfreshly grated Parmesan cheese1 tablespoonbutterSalt and pepper, to taste
¼ cupfreshly grated Parmesan cheese1 tablespoonbutterSalt and pepper, to taste
1 tablespoonbutterSalt and pepper, to taste
Salt and pepper, to taste
Instructions
1️⃣Heat the Broth:In a medium pot, bring the chicken broth to a gentle boil over medium heat.2️⃣Cook the Pastina:Add the pastina to the boiling broth. Cook for 6–8 minutes, stirring occasionally, until the pasta is tender.3️⃣Create Creamy Richness:Reduce the heat to low. Slowly drizzle the beaten egg into the simmering soup while whisking continuously to form silky strands.4️⃣Finish with Butter & Cheese:Stir in the butter and Parmesan cheese until fully melted and combined. Taste and season with salt and pepper as needed.5️⃣Serve:Ladle the soup into bowls, top with extra Parmesan and a sprinkle of black pepper, and serve immediately.
2️⃣Cook the Pastina:Add the pastina to the boiling broth. Cook for 6–8 minutes, stirring occasionally, until the pasta is tender.3️⃣Create Creamy Richness:Reduce the heat to low. Slowly drizzle the beaten egg into the simmering soup while whisking continuously to form silky strands.4️⃣Finish with Butter & Cheese:Stir in the butter and Parmesan cheese until fully melted and combined. Taste and season with salt and pepper as needed.5️⃣Serve:Ladle the soup into bowls, top with extra Parmesan and a sprinkle of black pepper, and serve immediately.
3️⃣Create Creamy Richness:Reduce the heat to low. Slowly drizzle the beaten egg into the simmering soup while whisking continuously to form silky strands.
4️⃣Finish with Butter & Cheese:Stir in the butter and Parmesan cheese until fully melted and combined. Taste and season with salt and pepper as needed.5️⃣Serve:Ladle the soup into bowls, top with extra Parmesan and a sprinkle of black pepper, and serve immediately.
5️⃣Serve:Ladle the soup into bowls, top with extra Parmesan and a sprinkle of black pepper, and serve immediately.
Notes
For added flavor, toss in fresh herbs like parsley or a pinch of nutmeg.Customize by adding shredded chicken or diced vegetables for a heartier meal.
Customize by adding shredded chicken or diced vegetables for a heartier meal.
“`
Delicious Honey Glazed Roasted Brussels Sprouts
Absolutely! Here’s the comprehensive recipe article, formatted for WordPress Gutenberg and spicemingle.com, complete with SEO optimization and dynamic HTML conversion.
Are you looking for a side dish that will actually get rave reviews? Have you ever wondered why some roasted Brussels sprouts are perfectly tender-crisp and caramelized, while others end up soggy or burnt? You’re not alone! Many home cooks struggle to master the art of roasting this often misunderstood vegetable. But fear not! Today, we’re diving deep into a recipe that transforms Brussels sprouts from a potential dinnertime disappointment into an absolute showstopper: Delicious Honey Glazed Roasted Brussels Sprouts with Crispy Turkey Bacon. This isn’t just any recipe; it’s a carefully crafted combination of flavors and textures that will have everyone asking for seconds. It’s simple, incredibly flavorful, and perfectly balanced, making it an ideal accompaniment to almost any main course, from a hearty grilled steak to a delicate baked salmon. Get ready to elevate your side dish game and discover the magic that happens when Brussels sprouts meet honey and crispy turkey bacon!
Ingredients for Honey Glazed Perfection
The magic of this recipe lies in its simplicity and the quality of its components. We’re focusing on fresh ingredients that come together to create a symphony of sweet, savory, and slightly bitter notes, with a delightful textural contrast.
Primary Stars: The Sprouts
1.5 pounds Brussels sprouts: Look for firm, bright green sprouts. They should feel dense and show no signs of yellowing or wilting. Smaller to medium-sized sprouts tend to be sweeter and more tender.
The Crunchy Contrast: Turkey Bacon
4-6 slices turkey bacon: Choose a good quality turkey bacon. It provides a fantastic salty, smoky crunch that complements the sweetness of the sprouts without overwhelming them. The crispy bits add so much!
The Sweet & Savory Glaze
2 tablespoons olive oil: Extra virgin olive oil is our go-to for its robust flavor and healthy fats.
2 tablespoons honey: Local honey, if you can find it, for an authentic sweetness. It’s what gives our sprouts that irresistible glossy sheen.
1 tablespoon balsamic vinegar: Adds a tangy depth that cuts through the richness and balances the sweetness of the honey.
Salt and freshly ground black pepper: To taste. Don’t be shy with the pepper – it adds a lovely subtle heat.
Optional Enhancements
Pinch of red pepper flakes: For a hint of warmth if you like a little spice.
Toasted nuts (pecans or walnuts): Add another layer of crunch and earthy flavor.
Crumbled feta or goat cheese: For a creamy, tangy finish.
Timing Your Culinary Adventure
Prep Time:
15 minutes
Cook Time:
25-30 minutes
Total Time:
40-45 minutes
This recipe is wonderfully efficient, taking less prep time than many other vegetable side dishes. The average roasted vegetable recipe might take 20-25 minutes of prep, but our simple trimming and glazing speed things up. The cook time is comparable to most roasting recipes, ensuring tender sprouts with crispy edges.
Step-by-Step Roasting Ritual
Follow these simple steps to achieve Brussels sprout perfection. The key is even cooking and that glorious caramelization.
Step 1: Get Them Ready
First things first, let’s prep our Brussels sprouts. Wash them thoroughly under cold water. Then, trim off the tough stem ends. Pluck off any loose or yellow outer leaves – these can sometimes taste bitter and won’t crisp up nicely. If your sprouts are on the larger side, I like to cut them in half lengthwise. This exposes more surface area to the heat, promoting faster and more even roasting and caramelization. For smaller sprouts, you can leave them whole, but make sure they’re all roughly the same size so they cook uniformly.
Step 2: Prep the Bacon
While you’re prepping the sprouts, lay your turkey bacon slices on a separate baking sheet lined with parchment paper. We’re going to pre-cook it slightly so it gets nice and crispy. Pop it into a preheated oven at 400°F (200°C) for about 8-10 minutes, just until it starts to render its fat and firm up. We don’t want it fully cooked yet, as it will continue to crisp up later with the sprouts. Once lightly cooked, remove it from the oven, let it cool slightly, and then chop it into bite-sized pieces. Set aside.
Step 3: The Flavor Infusion
Now for the flavor party! In a large bowl, toss the prepared Brussels sprouts with the olive oil. Ensure each sprout is lightly coated. Season generously with salt and freshly ground black pepper. If you’re feeling adventurous, this is also the time to add your pinch of red pepper flakes for a subtle kick. We want to season them well before roasting, as the flavors will meld beautifully during the cooking process.
Step 4: Roasting Magic
Spread the seasoned Brussels sprouts in a single layer on a large baking sheet. Avoid overcrowding the pan, as this will steam the sprouts instead of roasting them, leading to a less desirable, soggy texture. If necessary, use two baking sheets. Place the baking sheet(s) into your preheated oven at 400°F (200°C). Roast for 15-20 minutes, or until they are starting to become tender and the edges are beginning to brown and crisp up. You might want to give them a toss halfway through for even cooking.
Step 5: The Final Touch
Once the sprouts are almost tender and beautifully browned, it’s time for the final, crucial step. In a small bowl, whisk together the honey and balsamic vinegar. Drizzle this glaze evenly over the roasting Brussels sprouts. Add the pre-cooked, chopped turkey bacon to the baking sheet with the sprouts. Toss everything gently to coat. Return the baking sheet to the oven for another 5-7 minutes, or until the glaze is sticky and caramelized, and the turkey bacon is perfectly crisp. Watch closely during this stage, as the honey can burn quickly!
Nutritional Highlights
While this dish is undeniably delicious, it also packs a nutritional punch. Brussels sprouts are a powerhouse of vitamins (especially C and K) and fiber, promoting digestive health and immune function. Turkey bacon offers a leaner alternative to traditional bacon, providing protein with less saturated fat. The olive oil contributes healthy monounsaturated fats.
Calories: Approximately 150-200 per serving (highly dependent on portion size and specific ingredients used).
Protein: Good source, primarily from turkey bacon.
Fiber: Excellent, thanks to the Brussels sprouts.
Vitamins: Rich in Vitamin C, Vitamin K, and Folate.
Healthy Fats: From olive oil and to a lesser extent, turkey bacon.
Healthier Alternatives
We love this recipe as is, but if you’re looking for even lighter options, consider these swaps:
For Turkey Bacon: Crispy prosciutto, pancetta (use sparingly for flavor), or even crispy roasted chickpeas for a vegetarian/vegan option. For a lower-fat crunch, you could also omit the bacon and add toasted sunflower or pumpkin seeds for texture.
For Honey: Maple syrup or agave nectar are excellent vegan substitutes that offer a similar sweetness and caramelization.
For Olive Oil: Avocado oil is another good choice with a high smoke point. For a lighter touch, you can use slightly less oil and focus on ensuring good caramelization in the oven.
Serving Suggestions
These Honey Glazed Roasted Brussels Sprouts are incredibly versatile. They are a perfect side for:
Holiday Dinners: A sophisticated alternative to traditional green bean casserole.
Weeknight Meals: Pairs beautifully with grilled chicken, pork chops, or baked fish.
Brunches: Adds a savory-sweet element to a brunch spread.
Vegetarian/Vegan Mains: Serve alongside hearty lentil loaves or tofu steaks.
Common Mistakes to Avoid
To ensure your sprouts turn out perfectly every time, steer clear of these pitfalls:
Overcrowding the Pan: This leads to steaming, not roasting. Use two pans if necessary.
Not Trimming Properly: Always trim the tough stem and remove any sad outer leaves.
Uneven Sizing: Cut sprouts into uniform pieces for even cooking.
Under-seasoning: Brussels sprouts need a good amount of salt and pepper to bring out their flavor.
Burning the Honey: Watch the final few minutes of cooking closely; honey caramelizes quickly!
Storing Tips
Leftovers can be stored in an airtight container in the refrigerator for up to 3 days. Reheat gently in a skillet or a low oven (around 300°F/150°C) to regain some crispness, or enjoy them cold – they are surprisingly good straight from the fridge!
Frequently Asked Questions
***Can I make this recipe vegetarian or vegan?***
Absolutely! To make it vegan, simply omit the turkey bacon and use maple syrup or agave nectar instead of honey. For a vegetarian option with added crunch, consider adding toasted pecans, walnuts, or pumpkin seeds in the last few minutes of roasting, or use crispy prosciutto if you eat pork.
***My Brussels sprouts are bitter, what did I do wrong?***
Bitterness in Brussels sprouts can come from a few things: overcooking, older sprouts, or certain outer leaves. Ensure you trim off any yellow or bruised outer leaves. Roasting at a high temperature (400°F/200°C) helps to caramelize their natural sugars, which balances out any bitterness. Also, make sure your sprouts are fresh and firm.
***Can I use regular bacon instead of turkey bacon?***
Yes, you absolutely can! Regular bacon will also become wonderfully crispy and add a rich, smoky flavor. Just adjust cooking times as needed, as bacon can vary in thickness.
***Do I have to cut the sprouts in half?***
Cutting larger sprouts in half helps them cook more evenly and get crispier edges. If you have very small, uniform sprouts, you might be able to leave them whole, but halving is generally recommended for the best texture and caramelization.
ThisSalami-Mozzarella Tortellini Pasta Saladis a delightful medley of flavors and textures, perfect for picnics, potlucks, or as a refreshing meal on a warm day. The tender tortellini pairs beautifully with the savory salami, creamy mozzarella, and crisp veggies, all tossed in a tangy Italian dressing.
Ingredients
Scale
For the salad:1(16 oz) package tortellini pasta1 cupsalami, diced1 cupmozzarella cheese, cubed or pearl-sized1 cupcherry tomatoes, halved1 cupcucumber, dicedFor the dressing:3 tbspolive oil2 tbspred wine vinegar1 tspItalian seasoningSalt, to tastePepper, to taste
1(16 oz) package tortellini pasta1 cupsalami, diced1 cupmozzarella cheese, cubed or pearl-sized1 cupcherry tomatoes, halved1 cupcucumber, dicedFor the dressing:3 tbspolive oil2 tbspred wine vinegar1 tspItalian seasoningSalt, to tastePepper, to taste
1 cupsalami, diced
1 cupmozzarella cheese, cubed or pearl-sized1 cupcherry tomatoes, halved1 cupcucumber, dicedFor the dressing:3 tbspolive oil2 tbspred wine vinegar1 tspItalian seasoningSalt, to tastePepper, to taste
1 cupcherry tomatoes, halved1 cupcucumber, dicedFor the dressing:3 tbspolive oil2 tbspred wine vinegar1 tspItalian seasoningSalt, to tastePepper, to taste
1 cupcucumber, diced
For the dressing:3 tbspolive oil2 tbspred wine vinegar1 tspItalian seasoningSalt, to tastePepper, to taste
3 tbspolive oil2 tbspred wine vinegar1 tspItalian seasoningSalt, to tastePepper, to taste
2 tbspred wine vinegar
1 tspItalian seasoningSalt, to tastePepper, to taste
Salt, to tastePepper, to taste
Pepper, to taste
Instructions
1️⃣Cook the Tortellini:Prepare the tortellini according to the package instructions. Once cooked, drain and allow it to cool completely.2️⃣Combine Salad Ingredients:In a large mixing bowl, combine the cooled tortellini, diced salami, chopped mozzarella, halved cherry tomatoes, and diced cucumber.3️⃣Make the Dressing:In a small bowl, whisk together olive oil, red wine vinegar, Italian seasoning, salt, and pepper until well blended.4️⃣Dress the Salad:Drizzle the dressing over the tortellini mixture. Toss until all the ingredients are evenly coated.5️⃣Refrigerate:Cover the salad and refrigerate for at least 30 minutes before serving to let the flavors meld.
2️⃣Combine Salad Ingredients:In a large mixing bowl, combine the cooled tortellini, diced salami, chopped mozzarella, halved cherry tomatoes, and diced cucumber.3️⃣Make the Dressing:In a small bowl, whisk together olive oil, red wine vinegar, Italian seasoning, salt, and pepper until well blended.4️⃣Dress the Salad:Drizzle the dressing over the tortellini mixture. Toss until all the ingredients are evenly coated.5️⃣Refrigerate:Cover the salad and refrigerate for at least 30 minutes before serving to let the flavors meld.
3️⃣Make the Dressing:In a small bowl, whisk together olive oil, red wine vinegar, Italian seasoning, salt, and pepper until well blended.
4️⃣Dress the Salad:Drizzle the dressing over the tortellini mixture. Toss until all the ingredients are evenly coated.5️⃣Refrigerate:Cover the salad and refrigerate for at least 30 minutes before serving to let the flavors meld.
5️⃣Refrigerate:Cover the salad and refrigerate for at least 30 minutes before serving to let the flavors meld.
Notes
Customize the veggies by adding bell peppers, red onions, or olives for added variety.This salad can be made a day ahead, making it a convenient choice for gatherings.
This salad can be made a day ahead, making it a convenient choice for gatherings.
Craving a Flavor Explosion? This Monterey Chicken Spaghetti Delivers!
Are you tired of the same old weeknight dinners? Do you find yourself searching for a meal that’s both incredibly satisfying and packed with vibrant flavors? If so, you’re not alone! Millions of home cooks are looking for recipes that can transform ordinary ingredients into extraordinary meals, and Monterey Chicken Spaghetti is the culinary hero you’ve been waiting for. This dish masterfully blends tender, seasoned chicken with a creamy, tangy sauce, all tossed with perfectly cooked spaghetti. It’s a symphony of textures and tastes that will have your family asking for seconds before they’ve even finished their first plate. Forget bland and boring; this recipe is designed to be your go-to for a show-stopping meal that’s surprisingly easy to make.
Ingredients You’ll Need
Gather these delightful components to create your mouthwatering Monterey Chicken Spaghetti:
Boneless, Skinless Chicken Breasts or Thighs: 1.5 lbs, cut into bite-sized pieces. Chicken thighs offer a richer, more forgiving flavor, while breasts are leaner.
Spaghetti: 12 oz. A classic choice that holds the sauce beautifully. Feel free to substitute with linguine or fettuccine for a slightly different texture.
Olive Oil: 2 tablespoons. For sautéing and building flavor. Extra virgin olive oil adds a lovely fruity note.
Onion: 1 medium, finely chopped. Provides a sweet aromatic base. A yellow or white onion works best.
Garlic: 3-4 cloves, minced. Essential for that pungent, savory depth. Adjust to your garlic preference!
Bell Pepper: 1 large, any color (red, green, or yellow), diced. Adds a touch of sweetness and vibrant color. Red bell peppers are typically sweeter.
Rotel Tomatoes (Diced Tomatoes with Green Chilies): 1 can (10 oz), undrained. This is the secret weapon for that signature Monterey tang and mild heat. Use mild or original based on your spice preference.
Cream Cheese: 4 oz, softened. Creates the luscious, creamy texture of the sauce. Full-fat cream cheese yields the richest result.
Heavy Cream: 1/2 cup. For extra creaminess and a smooth sauce consistency. Half-and-half is a lighter alternative but may result in a slightly less rich sauce.
Chicken Broth: 1/2 cup. Adds moisture and savory depth. Low-sodium is recommended to control saltiness.
Monterey Jack Cheese: 1 cup, shredded. Melts beautifully and adds a mild, creamy, slightly tangy flavor. Cheddar or a Mexican blend can be substituted.
Seasonings:
1 teaspoon Cumin
1 teaspoon Chili Powder
1/2 teaspoon Paprika
Salt and Black Pepper to taste
Optional Garnishes: Fresh cilantro, chopped green onions, a dollop of sour cream, or extra shredded cheese.
Prep Time: 15 minutes
Cook Time: 25 minutes
Total Time: 40 minutes
Compared to other spaghetti dishes which can often take upwards of an hour, this Monterey Chicken Spaghetti is a weeknight warrior, coming together in just 40 minutes. The prep is quick, and the cooking process is streamlined, making it an ideal choice when time is of the essence.
Step-by-Step Instructions
Step 1: Prepare the Chicken
Let’s get our star ingredient ready! If you haven’t already, cut your chicken breasts or thighs into uniform, bite-sized pieces. This ensures they cook evenly. In a medium bowl, toss the chicken pieces with our spice blend: cumin, chili powder, paprika, a generous pinch of salt, and freshly ground black pepper. Make sure each piece is nicely coated in those wonderful aromas. This initial seasoning will infuse the chicken with deep flavor from the very first bite.
Step 2: Cook the Chicken
Heat 1 tablespoon of olive oil in a large skillet or Dutch oven over medium-high heat. Once shimmering, add the seasoned chicken in a single layer. Avoid overcrowding the pan; cook in batches if necessary. Sear the chicken for about 3-4 minutes per side, until it’s golden brown and cooked through. The searing locks in the juices and creates a beautiful crust. Remove the cooked chicken from the skillet and set it aside on a plate. We’ll add it back later to soak up all that delicious sauce!
Step 3: Sauté the Vegetables
Add the remaining 1 tablespoon of olive oil to the same skillet (no need to clean it – those browned bits are pure flavor!). Reduce the heat to medium and add the finely chopped onion and diced bell pepper. Sauté for about 5-7 minutes, stirring occasionally, until the vegetables are softened and the onion is translucent. Now, add the minced garlic and cook for another minute until fragrant. Be careful not to burn the garlic; it can turn bitter quickly.
Step 4: Build the Sauce
Pour the can of undrained Rotel tomatoes with green chilies into the skillet with the sautéed vegetables. Stir to combine everything. Next, add the softened cream cheese, heavy cream, and chicken broth. Stir continuously until the cream cheese is fully melted and the sauce becomes smooth and creamy. This is where the magic happens – the base for our luscious, flavorful sauce is forming!
Step 5: Combine and Simmer
Return the cooked chicken pieces to the skillet with the sauce. Stir everything together well, ensuring the chicken is coated in the creamy mixture. Bring the sauce to a gentle simmer. Reduce the heat to low, cover the skillet, and let it simmer for about 5-10 minutes. This allows the flavors to meld beautifully and the chicken to finish cooking if it wasn’t quite done, while also becoming incredibly tender as it absorbs the sauce.
Step 6: Add the Spaghetti
While the chicken and sauce are simmering, cook your spaghetti according to package directions until al dente. Drain the spaghetti well. Now, add the drained spaghetti directly into the skillet with the Monterey chicken and sauce. Stir gently to coat every strand of pasta with the creamy, flavorful sauce. If the sauce seems a little too thick, you can add a splash more chicken broth or a little of the reserved pasta water to reach your desired consistency.
Step 7: Serve
Stir in half of the shredded Monterey Jack cheese until melted and bubbly. Serve the Monterey Chicken Spaghetti immediately, hot from the skillet. Garnish generously with the remaining shredded cheese, fresh cilantro, chopped green onions, or a dollop of sour cream if you like. The warmth of the dish will melt the cheese beautifully, creating an irresistible presentation.
Nutritional Snapshot
While exact nutritional values can vary based on specific ingredients and portion sizes, a typical serving of this Monterey Chicken Spaghetti is approximately:
**Calories:** 550-650 kcal
**Protein:** 30-40g
**Fat:** 25-35g
**Carbohydrates:** 40-50g
**Fiber:** 3-5g
**Sodium:** Varies based on broth and Rotel used.
Nutritional information is an estimate and may vary.
Healthier Swaps for a Lighter Bite
Looking to lighten up this creamy classic without sacrificing flavor? Here are some smart substitutions:
Use Leaner Protein: Opt for chicken breast over thighs, or even a plant-based protein like firm tofu or cannellini beans.
Lighten the Creaminess: Replace half of the cream cheese with Greek yogurt or a Neufchatel cheese. Use skim milk or half-and-half instead of heavy cream. A splash of milk can also help thin the sauce if needed.
Whole Wheat Spaghetti: Switch to whole wheat spaghetti for added fiber and a slightly nuttier flavor.
Load Up on Veggies: Increase the amount of bell peppers, or add other vegetables like corn, zucchini, or spinach for extra nutrients and volume.
Reduced Sodium Ingredients: Choose low-sodium chicken broth and Rotel to control your salt intake.
Serving Perfection
Monterey Chicken Spaghetti is a complete meal on its own, but here are a few ideas to elevate your dining experience:
Serve with a side of simple green salad with a light vinaigrette to balance the richness.
Crusty bread or garlic bread is perfect for sopping up any leftover sauce.
A side of steamed broccoli or sautéed green beans adds a fresh, healthy counterpoint.
Avoid These Common Pitfalls
To ensure your Monterey Chicken Spaghetti is a triumph every time, steer clear of these common errors:
Overcrowding the Pan: This steams the chicken instead of searing it, resulting in less flavor and a less pleasant texture. Cook in batches if necessary.
Burning the Garlic: Garlic burns quickly when sautéed. Add it towards the end of the vegetable sauté and cook only until fragrant.
Not Draining Pasta Properly: Ensure your spaghetti is well-drained before adding it to the sauce to prevent a watery final dish.
Using Cold Cream Cheese: Softened cream cheese melts more smoothly, preventing lumps in your sauce.
Storage Savvy
Homemade Monterey Chicken Spaghetti is best enjoyed fresh, but leftovers are fantastic too! Store any cooled leftovers in an airtight container in the refrigerator for up to 3-4 days. Reheat gently on the stovetop over low heat, adding a splash of milk or broth if the sauce has thickened too much. You can also microwave individual portions. It does not freeze particularly well due to the creamy sauce, which can separate upon thawing.
Frequently Asked Questions
***Can I make this recipe ahead of time?***
While it’s best served fresh, you can prepare certain components ahead. Cook the chicken and sauté the vegetables separately. Store them in the refrigerator. When ready to serve, warm them up, build the sauce, and combine with freshly cooked spaghetti. The sauce itself can also be made ahead and reheated gently.
***What if I don’t have Rotel?***
You can substitute with one 14.5 oz can of diced tomatoes (undrained) and add 1-2 diced mild green chilies or a pinch of cayenne pepper for a similar flavor profile.
***Is this recipe spicy?***
The spice level depends on the type of Rotel you use. “Original” Rotel has a mild heat from the green chilies. For a spicier dish, use “Hot” Rotel or add a pinch of red pepper flakes or a diced jalapeño to the sautéed vegetables.
***Can I make this in a slow cooker or Instant Pot?***
Yes, both are possible with some adjustments. For a slow cooker, sear the chicken first, then add all ingredients (except spaghetti and cheese) and cook on low for 4-6 hours. Add cooked spaghetti and cheese at the end. For an Instant Pot, pressure cook chicken and sauce ingredients, then add uncooked pasta and cook according to IP pasta directions.
***Why is my sauce lumpy?***
Lumps usually form if the cream cheese is added while still very cold or if it’s not stirred enough. Ensure the cream cheese is softened, and whisk the sauce frequently as it heats to ensure a smooth, creamy consistency.
Did you try this incredible Monterey Chicken Spaghetti recipe? We’d love to hear about your experience! Share your thoughts, tips, or variations in the comments below. Your feedback helps our community grow and inspires us all!
Monterey Chicken Spaghetti is a hearty, cheesy pasta dish that combines tender chicken, creamy Monterey Jack cheese, and perfectly cooked spaghetti in a rich, flavorful sauce. This recipe is quick to make, endlessly comforting, and perfect for weeknight dinners or casual family meals.
Ingredients
Scale
12 ouncesspaghetti, cooked al dente
2boneless, skinless chicken breasts, cut into bite-sized pieces
1 cupshredded Monterey Jack cheese
1medium yellow onion, finely chopped
3garlic cloves, minced
1 cupchicken broth
1/2 cupheavy cream
2 tablespoonsolive oil
1 tablespoonbutter
1 teaspoonpaprika
1 teaspoonItalian seasoning
Salt and black pepper, to taste
Fresh parsley for garnish
Instructions
Cook the spaghetti according to package instructions until al dente. Drain and set aside.
Heat olive oil in a large skillet over medium heat. Season the chicken pieces with paprika, Italian seasoning, salt, and pepper. Add the chicken to the skillet and cook for 5-7 minutes, or until golden brown and fully cooked. Remove the chicken and set aside.
In the same skillet, melt the butter over medium heat. Add the chopped onion and cook for 3-4 minutes, or until softened. Stir in the minced garlic and cook for another 30 seconds until fragrant.
Pour in the chicken broth and heavy cream. Stir well and bring to a gentle simmer. Reduce the heat to low and let the sauce thicken slightly, about 5 minutes.
Add the cooked spaghetti and chicken back into the skillet. Toss to combine until the pasta is fully coated in the sauce.
Sprinkle the shredded Monterey Jack cheese evenly over the top. Cover the skillet and let it sit for 2-3 minutes, or until the cheese melts.
Remove from heat, garnish with fresh parsley, and serve warm.
Notes
For extra flavor, add sautéed vegetables like mushrooms, spinach, or bell peppers to the dish.
If you enjoy a spicy kick, sprinkle in some red pepper flakes or cayenne pepper.
Store leftovers in an airtight container in the refrigerator for up to 3 days. Reheat with a splash of broth or cream to refresh the sauce.
For a crunchier texture, top the dish with toasted breadcrumbs or crushed crackers before serving.
“`
Easy Sheet Pan Taco Pizza for Quick Family Dinners
Let’s get this delicious recipe ready for your blog!
## Part 1: Article Content Generation
# Easy Sheet Pan Taco Pizza for Quick Family Dinners
## Tired of the Weeknight Dinner Rut? Meet Your New Best Friend!
Are you searching for a dinner solution that’s lightning-fast, incredibly delicious, and guaranteed to please even the pickiest eaters? If you’re like many families, the answer is a resounding yes! The daily challenge of getting a wholesome and satisfying meal on the table can feel overwhelming. That’s where our Easy Sheet Pan Taco Pizza comes in. This recipe transforms the bold, exciting flavors of your favorite tacos into a crowd-pleasing pizza, all cooked on a single sheet pan. It’s the ultimate weeknight warrior, minimizing cleanup and maximizing flavor. Get ready to revolutionize your dinner routine!
## Deconstructed Taco Flavors, Reimagined as Pizza
Imagine the vibrant spices of seasoned ground beef, the fresh zest of salsa, the creamy richness of cheese, and the satisfying crunch of taco shells – all coming together on a crispy pizza crust. This Sheet Pan Taco Pizza is designed for maximum flavor impact with minimal effort. It’s a fusion dish that’s sure to become a family favorite.
## Ingredients: A Symphony of Taco & Pizza Bliss
Gathering your ingredients is the first step towards taco pizza pandemonium! We’ve made sure to include notes for substitutions because we know that ingredients can sometimes be a pantry puzzle.
* **For the Crispy Base:**
* 1 large (13-14 inch) pre-made pizza crust or a large tortilla (like a giant flour tortilla or a couple of smaller ones overlapped). *Sensory Note: Look for a sturdy crust that can hold up to toppings. A slightly browned, crisp edge is pure joy!*
* **Substitution:** If you don’t have a pre-made crust, you can use a large rectangular piece of puff pastry, or even make your own pizza dough.
* **For the Savory Taco Filling:**
* 1 lb ground beef (80/20 or 90/10 recommended). *Sensory Note: A bit of fat in the beef ensures juicy, flavorful crumbles.*
* 1 packet (1 oz) taco seasoning.
* 2/3 cup water.
* **Substitution:** Ground turkey or chicken can be used. For a vegetarian option, use crumbled firm tofu or plant-based grounds.
* **For the Flavorful “Sauce” Layer:**
* 1/2 cup salsa (your favorite mild, medium, or hot). *Sensory Note: A chunky salsa adds interesting texture and bursts of flavor.*
* **Substitution:** Refried beans seasoned with a pinch of cumin and chili powder can also work as a fantastic base layer.
* **For the Cheesy Topping:**
* 2 cups shredded Mexican blend cheese (or a mix of cheddar and Monterey Jack). *Sensory Note: Melty, gooey cheese is non-negotiable for pizza perfection!*
* **Substitution:** Use your favorite melting cheese like mozzarella, pepper jack, or a dairy-free alternative.
* **For the Fresh, Zesty Garnishes (Choose your favorites!):**
* 1/2 cup shredded lettuce. *Sensory Note: A cool, crisp crunch that beautifully contrasts the warm toppings.*
* 1/4 cup diced tomatoes.
* 1/4 cup sliced black olives.
* 2 tablespoons chopped fresh cilantro.
* Sour cream or Greek yogurt, for drizzling.
* Sliced jalapeños (fresh or pickled), for a kick.
* Guacamole or diced avocado.
* Crushed tortilla chips, for extra crunch.
## Timing is Everything: Speed Through Dinner Prep!
This recipe is all about efficiency, making it a weeknight dream.
Compared to an average pizza recipe that might involve making dough from scratch or assembling multiple components separately, our Easy Sheet Pan Taco Pizza shaves off significant time while delivering maximum satisfaction.

## Step-by-Step Instructions: Crafting Your Taco Pizza Masterpiece
Let’s get cooking! Follow these simple steps for taco pizza success.
### Step 1: Preheat and Prep Your Pan
Preheat your oven to 400°F (200°C). Lightly grease a large baking sheet or line it with parchment paper for easiest cleanup. If using a pre-made crust, place it directly onto the prepared baking sheet. If using a large tortilla, place it on the sheet. For extra crispiness, you can pre-bake the crust or tortilla for 5 minutes before adding toppings.
### Step 2: Cook the Taco Meat
In a medium skillet over medium-high heat, crumble and brown the ground beef. Drain off any excess grease. Stir in the taco seasoning and water, then bring to a simmer. Cook for 5-7 minutes, stirring occasionally, until the sauce has thickened and the meat is well-coated.
### Step 3: Assemble Your Taco Pizza Base
Spread the salsa evenly over the pizza crust or tortilla, leaving a small border for the edges. This will be your flavorful “sauce.” Dollop and spread any refried beans here if you’re using them as an alternative.
### Step 4: Layer on the Taco Delight
Evenly distribute the seasoned taco meat over the salsa layer. Don’t be shy – make sure every bite gets a taste of that savory goodness!
### Step 5: Cheese, Please!
Sprinkle the shredded Mexican blend cheese generously over the taco meat. Go all the way to the edges to ensure a beautiful, melty crust.
### Step 6: Bake to Golden Perfection
Place the baking sheet in the preheated oven. Bake for 15-20 minutes, or until the crust is golden brown and the cheese is melted and bubbly, with a few delicious browned spots.
### Step 7: Add Your Favorite Fresh Toppings
Carefully remove the sheet pan from the oven. Now it’s time for the fun part – customizing your taco pizza! Top with shredded lettuce, diced tomatoes, olives, cilantro, a dollop of sour cream, jalapeños, avocado, or any of your other favorite garnishes.
### Step 8: Slice and Serve!
Let the pizza cool for just a minute or two before slicing it into squares or wedges using a pizza cutter or a sharp knife. Serve immediately and watch it disappear!
## Nutritional Information: A Deliciously Approximate Guide
While exact nutritional values can vary based on specific ingredients used (especially cheese and meat fat content), here’s a general estimate for a generous slice:
Looking to lighten things up without sacrificing flavor? Try these smart swaps:
* **Leaner Protein:** Opt for ground turkey, chicken, or extra-lean ground beef.
* **Whole Wheat Crust:** Use a whole wheat pizza crust or large whole wheat tortilla.
* **Veggie Boost:** Load up on extra veggies like bell peppers, corn, or onions mixed into the taco meat or as toppings.
* **Lighter “Sauce”:** Use a salsa with no added sugar or a thin layer of black bean dip.
* **Reduced-Fat Cheese:** Use a reduced-fat Mexican blend or opt for more veggies and less cheese.
* **Greek Yogurt:** Swap sour cream for plain Greek yogurt for a protein and probiotic boost with fewer calories and fat.
## Serving Suggestions: Beyond the Slice
This Sheet Pan Taco Pizza is incredibly versatile. Serve it as a fun weeknight dinner, a party appetizer, or even for a casual brunch. It pairs wonderfully with a simple side salad, some corn on the cob, or a refreshing glass of agua fresca. For a more authentic taco experience, offer small bowls of all the garnish options so everyone can customize their own slice.
## Common Mistakes to Avoid
* **Overcrowding:** Don’t overload the pan with too many wet toppings, which can make the crust soggy.
* **Soggy Bottom:** Ensure your oven is properly preheated, and consider pre-baking the crust for extra crispness.
* **Under-Seasoning:** Use a full packet of taco seasoning and taste your meat mixture before adding it to the pizza.
* **Skipping the Garnish:** Those fresh toppings are key to balancing the richness and adding that “taco” essence!
## Storing Tips: Leftovers Love Taco Pizza Too!
Leftover Sheet Pan Taco Pizza can be stored in an airtight container in the refrigerator for up to 3 days. For the best results when reheating, place slices on a baking sheet and warm them in a 350°F (175°C) oven for about 5-10 minutes, or until heated through and the crust is re-crisped. You can also reheat individual slices in a toaster oven or air fryer. Microwaving can make the crust a bit soft.

## Conclusion: Dinner Solved, Flavor Amplified!
You’ve just unlocked the secret to incredibly easy, incredibly delicious family dinners! The Easy Sheet Pan Taco Pizza is a testament to how simple ingredients and a clever concept can create a meal that’s both fun and satisfying. It’s the perfect blend of your favorite taco flavors and the beloved comfort of pizza, all without the fuss. So, ditch the takeout menus and recipe indecision, and embrace the weeknight wonder that is this sheet pan sensation. Give it a try this week and prepare for happy eaters all around!
## Frequently Asked Questions
***_What kind of pizza crust works best?_***
A sturdy, thin-to-medium crust is ideal. Pre-made pizza crusts, large tortillas, or even flatbreads work beautifully. If you’re very concerned about sogginess, you can briefly pre-bake your chosen crust before adding toppings.
***_Can I make this ahead of time?_***
You can prepare the taco meat mixture and chop your toppings ahead of time and store them separately in the refrigerator. Then, simply assemble and bake when you’re ready to eat. Baking the assembled pizza from scratch is best for optimal texture.
***_Can I use different types of meat or a meat substitute?_***
Absolutely! Ground turkey, chicken, or a plant-based ground like tofu or tempeh crumbles are excellent alternatives. Adjust cooking times as needed for your chosen protein.
***_What if I don’t have taco seasoning?_***
No problem! You can create your own taco seasoning blend with 1 tablespoon chili powder, 1 teaspoon cumin, 1 teaspoon paprika, 1/2 teaspoon garlic powder, 1/2 teaspoon onion powder, 1/4 teaspoon dried oregano, and a pinch of cayenne pepper (for heat). Adjust to your taste!
***_How can I make the crust extra crispy?_***
For an extra crispy crust, pre-bake it on the baking sheet for 5-7 minutes at 400°F (200°C) before adding toppings. Also, ensure your oven is fully preheated, and consider using a pizza stone if you have one, though a regular baking sheet works well for this recipe.
***_Is this kid-friendly?_***
Yes! This recipe is very kid-friendly. You can adjust the spice level of the salsa and garnishes to suit your children’s preferences. Most kids love the combination of pizza and taco flavors.
A fusion of pizza and tacos, thisEasy Taco Pizzais a quick, family-friendly recipe perfect for game nights or casual dinners. With a flaky crescent roll crust, hearty refried beans, seasoned ground beef, melted cheese, and fresh toppings, it’s a crowd-pleaser that’s ready in under 40 minutes.
Ingredients
For the crust:2(8 oz) cans Pillsbury crescent rolls
For the filling:1lb ground beef1envelope taco seasoning mix1(16 oz) can refried beansFor the toppings:2–3cups shredded cheddar cheese or Mexican blend½ cupchopped tomatoes¼ cupsliced black olives4chopped green onions
For the toppings:2–3cups shredded cheddar cheese or Mexican blend½ cupchopped tomatoes¼ cupsliced black olives4chopped green onions
Instructions
1️⃣Preheat Oven:Preheat your oven to 375°F (190°C).
2️⃣Cook Ground Beef:In a skillet over medium-high heat, brown the ground beef for 7-10 minutes. Drain any excess fat.3️⃣Add Taco Seasoning:Return the beef to the skillet. Stir in the taco seasoning mix with ½–⅔ cup water. Simmer until most of the liquid evaporates, stirring occasionally.4️⃣Prepare the Crust:Unroll the crescent rolls into rectangles and press them into an 11.5×16.5 inch jelly roll pan to form the crust. Make sure to press ½ inch up the edges to create a slight border.5️⃣Bake the Crust:Bake in the preheated oven for 11–13 minutes or until golden brown.6️⃣Heat Refried Beans:Microwave the refried beans for about 1 minute to soften.7️⃣Spread Refried Beans:Spread the warmed refried beans evenly over the baked crust.8️⃣Layer with Ground Beef:Spoon the seasoned ground beef evenly over the refried beans.9️⃣Add Cheese:Sprinkle 2–3 cups of shredded cheese over the beef layer.🔟Top with Fresh Ingredients:Evenly distribute the chopped tomatoes, sliced black olives, and chopped green onions over the cheese.1️⃣1️⃣Final Bake:Return the taco pizza to the oven and bake for another 3–6 minutes, just until the cheese melts and bubbles.1️⃣2️⃣Slice and Serve:Let the taco pizza sit for a few minutes before slicing into squares or rectangles. Serve hot and enjoy!
3️⃣Add Taco Seasoning:Return the beef to the skillet. Stir in the taco seasoning mix with ½–⅔ cup water. Simmer until most of the liquid evaporates, stirring occasionally.4️⃣Prepare the Crust:Unroll the crescent rolls into rectangles and press them into an 11.5×16.5 inch jelly roll pan to form the crust. Make sure to press ½ inch up the edges to create a slight border.5️⃣Bake the Crust:Bake in the preheated oven for 11–13 minutes or until golden brown.6️⃣Heat Refried Beans:Microwave the refried beans for about 1 minute to soften.7️⃣Spread Refried Beans:Spread the warmed refried beans evenly over the baked crust.8️⃣Layer with Ground Beef:Spoon the seasoned ground beef evenly over the refried beans.9️⃣Add Cheese:Sprinkle 2–3 cups of shredded cheese over the beef layer.🔟Top with Fresh Ingredients:Evenly distribute the chopped tomatoes, sliced black olives, and chopped green onions over the cheese.1️⃣1️⃣Final Bake:Return the taco pizza to the oven and bake for another 3–6 minutes, just until the cheese melts and bubbles.1️⃣2️⃣Slice and Serve:Let the taco pizza sit for a few minutes before slicing into squares or rectangles. Serve hot and enjoy!
4️⃣Prepare the Crust:Unroll the crescent rolls into rectangles and press them into an 11.5×16.5 inch jelly roll pan to form the crust. Make sure to press ½ inch up the edges to create a slight border.
5️⃣Bake the Crust:Bake in the preheated oven for 11–13 minutes or until golden brown.6️⃣Heat Refried Beans:Microwave the refried beans for about 1 minute to soften.7️⃣Spread Refried Beans:Spread the warmed refried beans evenly over the baked crust.8️⃣Layer with Ground Beef:Spoon the seasoned ground beef evenly over the refried beans.9️⃣Add Cheese:Sprinkle 2–3 cups of shredded cheese over the beef layer.🔟Top with Fresh Ingredients:Evenly distribute the chopped tomatoes, sliced black olives, and chopped green onions over the cheese.1️⃣1️⃣Final Bake:Return the taco pizza to the oven and bake for another 3–6 minutes, just until the cheese melts and bubbles.1️⃣2️⃣Slice and Serve:Let the taco pizza sit for a few minutes before slicing into squares or rectangles. Serve hot and enjoy!
6️⃣Heat Refried Beans:Microwave the refried beans for about 1 minute to soften.7️⃣Spread Refried Beans:Spread the warmed refried beans evenly over the baked crust.8️⃣Layer with Ground Beef:Spoon the seasoned ground beef evenly over the refried beans.9️⃣Add Cheese:Sprinkle 2–3 cups of shredded cheese over the beef layer.🔟Top with Fresh Ingredients:Evenly distribute the chopped tomatoes, sliced black olives, and chopped green onions over the cheese.1️⃣1️⃣Final Bake:Return the taco pizza to the oven and bake for another 3–6 minutes, just until the cheese melts and bubbles.1️⃣2️⃣Slice and Serve:Let the taco pizza sit for a few minutes before slicing into squares or rectangles. Serve hot and enjoy!
7️⃣Spread Refried Beans:Spread the warmed refried beans evenly over the baked crust.
8️⃣Layer with Ground Beef:Spoon the seasoned ground beef evenly over the refried beans.9️⃣Add Cheese:Sprinkle 2–3 cups of shredded cheese over the beef layer.🔟Top with Fresh Ingredients:Evenly distribute the chopped tomatoes, sliced black olives, and chopped green onions over the cheese.1️⃣1️⃣Final Bake:Return the taco pizza to the oven and bake for another 3–6 minutes, just until the cheese melts and bubbles.1️⃣2️⃣Slice and Serve:Let the taco pizza sit for a few minutes before slicing into squares or rectangles. Serve hot and enjoy!
9️⃣Add Cheese:Sprinkle 2–3 cups of shredded cheese over the beef layer.🔟Top with Fresh Ingredients:Evenly distribute the chopped tomatoes, sliced black olives, and chopped green onions over the cheese.1️⃣1️⃣Final Bake:Return the taco pizza to the oven and bake for another 3–6 minutes, just until the cheese melts and bubbles.1️⃣2️⃣Slice and Serve:Let the taco pizza sit for a few minutes before slicing into squares or rectangles. Serve hot and enjoy!
🔟Top with Fresh Ingredients:Evenly distribute the chopped tomatoes, sliced black olives, and chopped green onions over the cheese.
1️⃣1️⃣Final Bake:Return the taco pizza to the oven and bake for another 3–6 minutes, just until the cheese melts and bubbles.1️⃣2️⃣Slice and Serve:Let the taco pizza sit for a few minutes before slicing into squares or rectangles. Serve hot and enjoy!
1️⃣2️⃣Slice and Serve:Let the taco pizza sit for a few minutes before slicing into squares or rectangles. Serve hot and enjoy!
Notes
Customize toppings to your liking! Add jalapeños, avocado slices, or a dollop of sour cream for extra flavor.For a spicier version, use hot taco seasoning or add a pinch of cayenne pepper to the ground beef.
For a spicier version, use hot taco seasoning or add a pinch of cayenne pepper to the ground beef.
—
## Part 2: HTML Conversion for WordPress Gutenberg
Easy Sheet Pan Taco Pizza for Quick Family Dinners
Tired of the Weeknight Dinner Rut? Meet Your New Best Friend!
Are you searching for a dinner solution that’s lightning-fast, incredibly delicious, and guaranteed to please even the pickiest eaters? If you’re like many families, the answer is a resounding yes! The daily challenge of getting a wholesome and satisfying meal on the table can feel overwhelming. That’s where our Easy Sheet Pan Taco Pizza comes in. This recipe transforms the bold, exciting flavors of your favorite tacos into a crowd-pleasing pizza, all cooked on a single sheet pan. It’s the ultimate weeknight warrior, minimizing cleanup and maximizing flavor. Get ready to revolutionize your dinner routine!
Ingredients: A Symphony of Taco & Pizza Bliss
Gathering your ingredients is the first step towards taco pizza pandemonium! We’ve made sure to include notes for substitutions because we know that ingredients can sometimes be a pantry puzzle.
For the Crispy Base:
1 large (13-14 inch) pre-made pizza crust or a large tortilla (like a giant flour tortilla or a couple of smaller ones overlapped). Sensory Note: Look for a sturdy crust that can hold up to toppings. A slightly browned, crisp edge is pure joy!
Substitution: If you don’t have a pre-made crust, you can use a large rectangular piece of puff pastry, or even make your own pizza dough.
For the Savory Taco Filling:
1 lb ground beef (80/20 or 90/10 recommended). Sensory Note: A bit of fat in the beef ensures juicy, flavorful crumbles.
1 packet (1 oz) taco seasoning.
2/3 cup water.
Substitution: Ground turkey or chicken can be used. For a vegetarian option, use crumbled firm tofu or plant-based grounds.
For the Flavorful “Sauce” Layer:
1/2 cup salsa (your favorite mild, medium, or hot). Sensory Note: A chunky salsa adds interesting texture and bursts of flavor.
Substitution: Refried beans seasoned with a pinch of cumin and chili powder can also work as a fantastic base layer.
For the Cheesy Topping:
2 cups shredded Mexican blend cheese (or a mix of cheddar and Monterey Jack). Sensory Note: Melty, gooey cheese is non-negotiable for pizza perfection!
Substitution: Use your favorite melting cheese like mozzarella, pepper jack, or a dairy-free alternative.
For the Fresh, Zesty Garnishes (Choose your favorites!):
1/2 cup shredded lettuce. Sensory Note: A cool, crisp crunch that beautifully contrasts the warm toppings.
1/4 cup diced tomatoes.
1/4 cup sliced black olives.
2 tablespoons chopped fresh cilantro.
Sour cream or Greek yogurt, for drizzling.
Sliced jalapeños (fresh or pickled), for a kick.
Guacamole or diced avocado.
Crushed tortilla chips, for extra crunch.
Timing is Everything: Speed Through Dinner Prep!
This recipe is all about efficiency, making it a weeknight dream.
Prep time: 15 minutes
Cook time: 20-25 minutes
Total time: 35-40 minutes
Compared to an average pizza recipe that might involve making dough from scratch or assembling multiple components separately, our Easy Sheet Pan Taco Pizza shaves off significant time while delivering maximum satisfaction.
Step-by-Step Instructions: Crafting Your Taco Pizza Masterpiece
Let’s get cooking! Follow these simple steps for taco pizza success.
Step 1: Preheat and Prep Your Pan
Preheat your oven to 400°F (200°C). Lightly grease a large baking sheet or line it with parchment paper for easiest cleanup. If using a pre-made crust, place it directly onto the prepared baking sheet. If using a large tortilla, place it on the sheet. For extra crispiness, you can pre-bake the crust or tortilla for 5 minutes before adding toppings.
Step 2: Cook the Taco Meat
In a medium skillet over medium-high heat, crumble and brown the ground beef. Drain off any excess grease. Stir in the taco seasoning and water, then bring to a simmer. Cook for 5-7 minutes, stirring occasionally, until the sauce has thickened and the meat is well-coated.
Step 3: Assemble Your Taco Pizza Base
Spread the salsa evenly over the pizza crust or tortilla, leaving a small border for the edges. This will be your flavorful “sauce.” Dollop and spread any refried beans here if you’re using them as an alternative.
Step 4: Layer on the Taco Delight
Evenly distribute the seasoned taco meat over the salsa layer. Don’t be shy – make sure every bite gets a taste of that savory goodness!
Step 5: Cheese, Please!
Sprinkle the shredded Mexican blend cheese generously over the taco meat. Go all the way to the edges to ensure a beautiful, melty crust.
Step 6: Bake to Golden Perfection
Place the baking sheet in the preheated oven. Bake for 15-20 minutes, or until the crust is golden brown and the cheese is melted and bubbly, with a few delicious browned spots.
Step 7: Add Your Favorite Fresh Toppings
Carefully remove the sheet pan from the oven. Now it’s time for the fun part – customizing your taco pizza! Top with shredded lettuce, diced tomatoes, olives, cilantro, a dollop of sour cream, jalapeños, avocado, or any of your other favorite garnishes.
Step 8: Slice and Serve!
Let the pizza cool for just a minute or two before slicing it into squares or wedges using a pizza cutter or a sharp knife. Serve immediately and watch it disappear!
Nutritional Information: A Deliciously Approximate Guide
While exact nutritional values can vary based on specific ingredients used (especially cheese and meat fat content), here’s a general estimate for a generous slice:
Calories: 350-450 kcal
Protein: 20-25g
Fat: 18-25g
Carbohydrates: 25-35g
Fiber: 3-5g
These are estimated values and will vary based on portion size and specific ingredient choices.
Healthier Alternatives: Deliciously Smart Swaps
Looking to lighten things up without sacrificing flavor? Try these smart swaps:
Leaner Protein: Opt for ground turkey, chicken, or extra-lean ground beef.
Whole Wheat Crust: Use a whole wheat pizza crust or large whole wheat tortilla.
Veggie Boost: Load up on extra veggies like bell peppers, corn, or onions mixed into the taco meat or as toppings.
Lighter “Sauce”: Use a salsa with no added sugar or a thin layer of black bean dip.
Reduced-Fat Cheese: Use a reduced-fat Mexican blend or opt for more veggies and less cheese.
Greek Yogurt: Swap sour cream for plain Greek yogurt for a protein and probiotic boost with fewer calories and fat.
Serving Suggestions: Beyond the Slice
This Sheet Pan Taco Pizza is incredibly versatile. Serve it as a fun weeknight dinner, a party appetizer, or even for a casual brunch. It pairs wonderfully with a simple side salad, some corn on the cob, or a refreshing glass of agua fresca. For a more authentic taco experience, offer small bowls of all the garnish options so everyone can customize their own slice.
Common Mistakes to Avoid
Overcrowding: Don’t overload the pan with too many wet toppings, which can make the crust soggy.
Soggy Bottom: Ensure your oven is properly preheated, and consider pre-baking the crust for extra crispness.
Under-Seasoning: Use a full packet of taco seasoning and taste your meat mixture before adding it to the pizza.
Skipping the Garnish: Those fresh toppings are key to balancing the richness and adding that “taco” essence!
Storing Tips: Leftovers Love Taco Pizza Too!
Leftover Sheet Pan Taco Pizza can be stored in an airtight container in the refrigerator for up to 3 days. For the best results when reheating, place slices on a baking sheet and warm them in a 350°F (175°C) oven for about 5-10 minutes, or until heated through and the crust is re-crisped. You can also reheat individual slices in a toaster oven or air fryer. Microwaving can make the crust a bit soft.
Conclusion: Dinner Solved, Flavor Amplified!
You’ve just unlocked the secret to incredibly easy, incredibly delicious family dinners! The Easy Sheet Pan Taco Pizza is a testament to how simple ingredients and a clever concept can create a meal that’s both fun and satisfying. It’s the perfect blend of your favorite taco flavors and the beloved comfort of pizza, all without the fuss. So, ditch the takeout menus and recipe indecision, and embrace the weeknight wonder that is this sheet pan sensation. Give it a try this week and prepare for happy eaters all around!
Frequently Asked Questions
What kind of pizza crust works best?
A sturdy, thin-to-medium crust is ideal. Pre-made pizza crusts, large tortillas, or even flatbreads work beautifully. If you’re very concerned about sogginess, you can briefly pre-bake your chosen crust before adding toppings.
Can I make this ahead of time?
You can prepare the taco meat mixture and chop your toppings ahead of time and store them separately in the refrigerator. Then, simply assemble and bake when you’re ready to eat. Baking the assembled pizza from scratch is best for optimal texture.
Can I use different types of meat or a meat substitute?
Absolutely! Ground turkey, chicken, or a plant-based ground like tofu or tempeh crumbles are excellent alternatives. Adjust cooking times as needed for your chosen protein.
What if I don’t have taco seasoning?
No problem! You can create your own taco seasoning blend with 1 tablespoon chili powder, 1 teaspoon cumin, 1 teaspoon paprika, 1/2 teaspoon garlic powder, 1/2 teaspoon onion powder, 1/4 teaspoon dried oregano, and a pinch of cayenne pepper (for heat). Adjust to your taste!
How can I make the crust extra crispy?
For an extra crispy crust, pre-bake it on the baking sheet for 5-7 minutes at 400°F (200°C) before adding toppings. Also, ensure your oven is fully preheated, and consider using a pizza stone if you have one, though a regular baking sheet works well for this recipe.
Is this kid-friendly?
Yes! This recipe is very kid-friendly. You can adjust the spice level of the salsa and garnishes to suit your children’s preferences. Most kids love the combination of pizza and taco flavors.
A fusion of pizza and tacos, thisEasy Taco Pizzais a quick, family-friendly recipe perfect for game nights or casual dinners. With a flaky crescent roll crust, hearty refried beans, seasoned ground beef, melted cheese, and fresh toppings, it’s a crowd-pleaser that’s ready in under 40 minutes.
Ingredients
For the crust:2(8 oz) cans Pillsbury crescent rolls
For the filling:1lb ground beef1envelope taco seasoning mix1(16 oz) can refried beansFor the toppings:2–3cups shredded cheddar cheese or Mexican blend½ cupchopped tomatoes¼ cupsliced black olives4chopped green onions
For the toppings:2–3cups shredded cheddar cheese or Mexican blend½ cupchopped tomatoes¼ cupsliced black olives4chopped green onions
Instructions
1️⃣Preheat Oven:Preheat your oven to 375°F (190°C).
2️⃣Cook Ground Beef:In a skillet over medium-high heat, brown the ground beef for 7-10 minutes. Drain any excess fat.3️⃣Add Taco Seasoning:Return the beef to the skillet. Stir in the taco seasoning mix with ½–⅔ cup water. Simmer until most of the liquid evaporates, stirring occasionally.4️⃣Prepare the Crust:Unroll the crescent rolls into rectangles and press them into an 11.5×16.5 inch jelly roll pan to form the crust. Make sure to press ½ inch up the edges to create a slight border.5️⃣Bake the Crust:Bake in the preheated oven for 11–13 minutes or until golden brown.6️⃣Heat Refried Beans:Microwave the refried beans for about 1 minute to soften.7️⃣Spread Refried Beans:Spread the warmed refried beans evenly over the baked crust.8️⃣Layer with Ground Beef:Spoon the seasoned ground beef evenly over the refried beans.9️⃣Add Cheese:Sprinkle 2–3 cups of shredded cheese over the beef layer.🔟Top with Fresh Ingredients:Evenly distribute the chopped tomatoes, sliced black olives, and chopped green onions over the cheese.1️⃣1️⃣Final Bake:Return the taco pizza to the oven and bake for another 3–6 minutes, just until the cheese melts and bubbles.1️⃣2️⃣Slice and Serve:Let the taco pizza sit for a few minutes before slicing into squares or rectangles. Serve hot and enjoy!
3️⃣Add Taco Seasoning:Return the beef to the skillet. Stir in the taco seasoning mix with ½–⅔ cup water. Simmer until most of the liquid evaporates, stirring occasionally.4️⃣Prepare the Crust:Unroll the crescent rolls into rectangles and press them into an 11.5×16.5 inch jelly roll pan to form the crust. Make sure to press ½ inch up the edges to create a slight border.5️⃣Bake the Crust:Bake in the preheated oven for 11–13 minutes or until golden brown.6️⃣Heat Refried Beans:Microwave the refried beans for about 1 minute to soften.7️⃣Spread Refried Beans:Spread the warmed refried beans evenly over the baked crust.8️⃣Layer with Ground Beef:Spoon the seasoned ground beef evenly over the refried beans.9️⃣Add Cheese:Sprinkle 2–3 cups of shredded cheese over the beef layer.🔟Top with Fresh Ingredients:Evenly distribute the chopped tomatoes, sliced black olives, and chopped green onions over the cheese.1️⃣1️⃣Final Bake:Return the taco pizza to the oven and bake for another 3–6 minutes, just until the cheese melts and bubbles.1️⃣2️⃣Slice and Serve:Let the taco pizza sit for a few minutes before slicing into squares or rectangles. Serve hot and enjoy!
4️⃣Prepare the Crust:Unroll the crescent rolls into rectangles and press them into an 11.5×16.5 inch jelly roll pan to form the crust. Make sure to press ½ inch up the edges to create a slight border.
5️⃣Bake the Crust:Bake in the preheated oven for 11–13 minutes or until golden brown.6️⃣Heat Refried Beans:Microwave the refried beans for about 1 minute to soften.7️⃣Spread Refried Beans:Spread the warmed refried beans evenly over the baked crust.8️⃣Layer with Ground Beef:Spoon the seasoned ground beef evenly over the refried beans.9️⃣Add Cheese:Sprinkle 2–3 cups of shredded cheese over the beef layer.🔟Top with Fresh Ingredients:Evenly distribute the chopped tomatoes, sliced black olives, and chopped green onions over the cheese.1️⃣1️⃣Final Bake:Return the taco pizza to the oven and bake for another 3–6 minutes, just until the cheese melts and bubbles.1️⃣2️⃣Slice and Serve:Let the taco pizza sit for a few minutes before slicing into squares or rectangles. Serve hot and enjoy!
6️⃣Heat Refried Beans:Microwave the refried beans for about 1 minute to soften.7️⃣Spread Refried Beans:Spread the warmed refried beans evenly over the baked crust.8️⃣Layer with Ground Beef:Spoon the seasoned ground beef evenly over the refried beans.9️⃣Add Cheese:Sprinkle 2–3 cups of shredded cheese over the beef layer.🔟Top with Fresh Ingredients:Evenly distribute the chopped tomatoes, sliced black olives, and chopped green onions over the cheese.1️⃣1️⃣Final Bake:Return the taco pizza to the oven and bake for another 3–6 minutes, just until the cheese melts and bubbles.1️⃣2️⃣Slice and Serve:Let the taco pizza sit for a few minutes before slicing into squares or rectangles. Serve hot and enjoy!
7️⃣Spread Refried Beans:Spread the warmed refried beans evenly over the baked crust.
8️⃣Layer with Ground Beef:Spoon the seasoned ground beef evenly over the refried beans.9️⃣Add Cheese:Sprinkle 2–3 cups of shredded cheese over the beef layer.🔟Top with Fresh Ingredients:Evenly distribute the chopped tomatoes, sliced black olives, and chopped green onions over the cheese.1️⃣1️⃣Final Bake:Return the taco pizza to the oven and bake for another 3–6 minutes, just until the cheese melts and bubbles.1️⃣2️⃣Slice and Serve:Let the taco pizza sit for a few minutes before slicing into squares or rectangles. Serve hot and enjoy!
9️⃣Add Cheese:Sprinkle 2–3 cups of shredded cheese over the beef layer.🔟Top with Fresh Ingredients:Evenly distribute the chopped tomatoes, sliced black olives, and chopped green onions over the cheese.1️⃣1️⃣Final Bake:Return the taco pizza to the oven and bake for another 3–6 minutes, just until the cheese melts and bubbles.1️⃣2️⃣Slice and Serve:Let the taco pizza sit for a few minutes before slicing into squares or rectangles. Serve hot and enjoy!
🔟Top with Fresh Ingredients:Evenly distribute the chopped tomatoes, sliced black olives, and chopped green onions over the cheese.
1️⃣1️⃣Final Bake:Return the taco pizza to the oven and bake for another 3–6 minutes, just until the cheese melts and bubbles.1️⃣2️⃣Slice and Serve:Let the taco pizza sit for a few minutes before slicing into squares or rectangles. Serve hot and enjoy!
1️⃣2️⃣Slice and Serve:Let the taco pizza sit for a few minutes before slicing into squares or rectangles. Serve hot and enjoy!
Notes
Customize toppings to your liking! Add jalapeños, avocado slices, or a dollop of sour cream for extra flavor.For a spicier version, use hot taco seasoning or add a pinch of cayenne pepper to the ground beef.
For a spicier version, use hot taco seasoning or add a pinch of cayenne pepper to the ground beef.
“`
Irresistible Seafood Bisque Recipe with Shrimp and Crab
Irresistible Seafood Bisque Recipe with Shrimp and Crab
Discover the Ultimate Seafood Bisque
Are you looking for a show-stopping dish that’s both elegant and deeply comforting? In a world where weeknight dinners often lean towards the simpler side, isn’t it wonderful to find a recipe that feels luxurious yet is surprisingly approachable? This Irresistible Seafood Bisque recipe, packed with the delicate sweetness of shrimp and crab, promises to deliver a bowl of pure bliss. Imagine a velvety smooth, rich broth, infused with the essence of the sea, perfectly balanced with creamy goodness. Whether you’re hosting a dinner party and want to impress your guests, or simply craving a cozy, indulgent meal on a chilly evening, this bisque is your answer. It’s a dish that transforms humble ingredients into a culinary masterpiece, proving that delicious can also be easy to achieve. Get ready to dive into a truly unforgettable seafood experience!
Irresistible Ingredients for Your Bisque
The secret to an exceptional seafood bisque lies in the quality and harmony of its ingredients. We’ve carefully selected each component to build layers of flavor that sing with every spoonful. Don’t be intimidated by the list; substitutions are noted to make this recipe adaptable to your pantry and preferences.
Aromatics & Base
2 tablespoons unsalted butter: The foundation of our sauté, providing richness and a smooth mouthfeel. (Substitution: Olive oil for a lighter touch.)
1 large yellow onion, finely chopped: Adds a subtle sweetness and depth of flavor as it softens.
2 celery stalks, finely chopped: Contributes a fresh, slightly savory note that complements the seafood.
1 large carrot, finely chopped: Offers a hint of earthy sweetness and vibrant color. (Substitution: Parsnip for a nuttier flavor.)
2 cloves garlic, minced: The pungent magic that awakens the palate.
1/4 cup all-purpose flour: Essential for thickening our bisque into that coveted creamy texture. (Substitution: Gluten-free all-purpose blend.)
1 cup dry white wine (like Sauvignon Blanc or Pinot Grigio): Adds a layer of acidity and complexity, deglazing the pan and lifting savory notes. (Substitution: More seafood or vegetable broth.)
4 cups high-quality seafood or fish stock: The soul of the bisque, providing immense ocean flavor. (Substitution: Chicken or vegetable stock if seafood stock is unavailable, though flavor will differ.)
2 cups whole milk or half-and-half: For ultimate creaminess. (Substitution: Evaporated milk for richness without extra water, or a dairy-free milk like cashew or oat milk for a vegan option – though flavor will be altered.)
The Seafood Stars
1 pound large shrimp, peeled and deveined, tails on or off (reserve shells if possible): Sweet, succulent, and a visual delight.
8 ounces lump crab meat, picked over for shells: The luxurious jewel of our bisque, offering tender, sweet chunks. (Substitution: Flaked imitation crab for an economical option, or a mix of crab and lobster.)
Enriching Elements
1/4 cup brandy or cognac (optional): A splash of this adds a sophisticated, warming depth. (Substitution: Omit if preferred.)
1 bay leaf: Infuses a subtle herbaceous aroma during simmering.
1/4 teaspoon cayenne pepper (or to taste): A whisper of heat to balance the richness.
Salt and freshly ground black pepper, to taste: Essential for bringing out all the flavors.
Finishing Touches & Garnishes
Fresh chives or parsley, chopped: For a burst of freshness and color.
A swirl of heavy cream or a dollop of crème fraîche: For extra indulgence and visual appeal.
Perfect Timing for Your Bisque
Prep time: 20 minutes
Cook time: 40 minutes
Total time: 60 minutes
Average recipe time: 75 minutes
This recipe is designed for efficiency, coming in slightly faster than the average bisque while delivering exceptional flavor. The prep is straightforward, and the simmering time allows flavors to meld beautifully without requiring hours in the kitchen.
Crafting Your Irresistible Seafood Bisque
Let’s embark on the journey of creating this magnificent bisque. Follow these steps for a truly delightful culinary experience.
Step 1: Sauté the Aromatics
In a large pot or Dutch oven, melt the butter over medium heat. Add the chopped onion, celery, and carrot. Sauté, stirring occasionally, until the vegetables are softened and translucent, about 8-10 minutes. This gentle cooking releases their sweet essence. Add the minced garlic and cook for another minute until fragrant, being careful not to burn it.
Step 2: Build the Flavor Base
Sprinkle the flour over the softened vegetables. Stir continuously for about 1-2 minutes to cook out the raw flour taste and create a roux. This thickening agent is crucial for the bisque’s luxurious texture. Gradually whisk in the white wine, scraping up any browned bits from the bottom of the pot. Let it simmer for about 2 minutes until slightly reduced.
Step 3: Simmer and Strain for Smoothness
Pour in the seafood stock and milk (or half-and-half). Add the bay leaf and cayenne pepper. Bring the mixture to a gentle simmer. Reduce the heat to low, cover, and let it simmer for at least 20 minutes, allowing the flavors to meld beautifully. For an incredibly smooth bisque, you can carefully transfer the soup to a blender (in batches, if necessary) and blend until very smooth, or use an immersion blender. Alternatively, for a slightly chunkier texture, you can skip this blending step or only partially blend. If you blended, return the soup to the pot and strain through a fine-mesh sieve if you desire an even silkier consistency.
Step 4: Enrich the Soup with Cream and Brandy
If using, pour in the brandy or cognac and let it simmer for a minute to allow the alcohol to cook off. Stir in the milk or half-and-half until fully incorporated. Gently heat the soup through, but do not boil, as this can cause the dairy to separate.
Step 5: Add the Seafood for Perfection
Add the prepared shrimp and crab meat to the simmering bisque. Cook gently for just 3-5 minutes, or until the shrimp are pink and opaque and the crab is heated through. Be careful not to overcook the seafood, as it can become tough. The residual heat will do most of the work.
Step 6: Season and Serve with Flair
Season the bisque generously with salt and freshly ground black pepper to your taste. Remove the bay leaf. Ladle the hot bisque into bowls. Garnish with chopped fresh chives or parsley and a swirl of heavy cream or a dollop of crème fraîche for a truly decadent presentation. Enjoy immediately!
Nutritional Snapshot
While exact nutritional values can vary based on specific ingredients and portion sizes, a typical serving of this seafood bisque is approximately:
Calories: 350-450 kcal
Protein: 15-20g
Fat: 20-25g
Carbohydrates: 10-15g
Please note: These are estimates. For precise tracking, consult a nutritional calculator with your specific ingredients.
Healthier Bisque Alternatives
You can lighten up this rich bisque without sacrificing too much flavor:
Reduced Fat: Use skim milk or a combination of milk and low-sodium vegetable broth instead of half-and-half. Opt for olive oil over butter for sautéing.
Thicker Texture: Blend in a small, cooked potato or some pureed white beans to thicken the bisque instead of relying solely on flour or cream.
Leaner Proteins: While shrimp and crab are relatively lean, you can increase the proportion of shrimp to crab, as crab meat can be higher in fat and cholesterol.
Portion Control: Serve with a lighter side salad or crusty bread rather than rich accompaniments.
Elevate Your Serving Experience
This bisque is a star on its own, but it pairs beautifully with a few complementary items:
Crusty Bread: Perfect for dipping and sopping up every last drop of that glorious broth.
Simple Green Salad: A light, crisp salad with a vinaigrette dressing provides a refreshing contrast to the richness of the bisque.
Small Sandwiches: Think delicate cucumber or smoked salmon sandwiches for a touch of elegance.
Wine Pairing: A crisp, dry white wine like the one used in the recipe (Sauvignon Blanc, Pinot Grigio) or a light-bodied Chardonnay makes an excellent pairing.
Avoid Common Bisque Pitfalls
Even experienced cooks can encounter a few snags:
Overcooking Seafood: Shrimp and crab cook very quickly. Adding them too early or simmering them too long will result in tough, rubbery textures.
Not Cooking Out the Flour: If you don’t sauté the flour sufficiently, you can end up with a raw flour taste in your bisque.
Boiling Dairy: Once milk or cream is added, heat the bisque gently. Boiling can cause dairy to curdle or separate, affecting the smooth texture.
Weak Stock: The flavor of your bisque is heavily dependent on the quality of your stock. Use the best possible seafood stock you can find or make.
Skipping the Wine/Brandy Deglaze: This step is crucial for building deep flavor from the bottom of the pot.
Storing Your Culinary Masterpiece
Refrigeration: Cooled bisque can be stored in an airtight container in the refrigerator for up to 3 days. The flavors will meld even further, making it delicious the next day.
Reheating: Gently reheat on the stovetop over low heat, stirring occasionally, until warmed through. Avoid boiling. If the bisque has separated slightly, a vigorous whisk can often bring it back together.
Freezing: Bisque generally does not freeze well due to the dairy content, which can separate and change texture upon thawing. If you must freeze it, it’s best to omit the dairy before freezing and stir it in when reheating.
Frequently Asked Seafood Bisque Questions
***Can I make this bisque without wine or brandy?***
Yes, absolutely! If you prefer to omit the alcohol, simply replace the wine with an equal amount of seafood or vegetable broth. For the brandy, you can just leave it out or add a tiny splash of sherry vinegar or even a teaspoon of Worcestershire sauce for a hint of depth.
***What kind of seafood can I use?***
This recipe is wonderfully adaptable. While shrimp and crab are recommended for their classic bisque flavor, you could also add lobster, scallops, mussels, or clams. Just be mindful of cooking times for each type of seafood.
***How can I make my bisque richer?***
For an even richer bisque, use heavy cream instead of milk or half-and-half. You can also swirl in a bit of crème fraîche or a pat of butter right before serving for extra decadence.
***Can I make this ahead of time?***
Yes, you can make the base of the bisque a day in advance. Store it in the refrigerator, and then add the shrimp and crab and gently heat through just before serving.
***Why is my bisque not smooth?***
If your bisque isn’t as smooth as you’d like, it’s likely because the vegetables weren’t fully blended or strained. Using an immersion blender or a high-powered blender and passing the soup through a fine-mesh sieve are the best ways to achieve a silky smooth texture.
Savor the Taste of the Sea
This Irresistible Seafood Bisque recipe is more than just a soup; it’s an experience. It’s a celebration of the ocean’s bounty, crafted with care and designed to delight. The velvety texture, the rich aroma, and the exquisite taste of shrimp and crab come together to create a dish that is truly unforgettable. Whether you’re a seasoned chef or a home cook looking to impress, this recipe offers a pathway to culinary excellence. So, gather your ingredients, embrace the process, and get ready to serve a bowl of pure, unadulterated comfort and flavor. Enjoy!
A decadent and creamy bisque featuring the rich flavors of crab, shrimp, and lobster. This dish is perfect for special occasions or when you’re craving a restaurant-quality meal at home.
Ingredients
Scale
Seafood:½lb shrimp, peeled and deveined½lb lump crab meat½lb lobster meat, choppedBase and Aromatics:4 tbspbutter1small onion, chopped2cloves garlic, mincedThickening and Liquid:¼ cupall-purpose flour3 cupsseafood or chicken broth1 cupheavy creamSeasoning:1 tspOld Bay seasoning½ tsppaprikaSalt and pepper to tasteGarnish:Fresh parsley, chopped (optional)Crusty bread for serving (optional)
Base and Aromatics:4 tbspbutter1small onion, chopped2cloves garlic, mincedThickening and Liquid:¼ cupall-purpose flour3 cupsseafood or chicken broth1 cupheavy creamSeasoning:1 tspOld Bay seasoning½ tsppaprikaSalt and pepper to tasteGarnish:Fresh parsley, chopped (optional)Crusty bread for serving (optional)
Thickening and Liquid:¼ cupall-purpose flour3 cupsseafood or chicken broth1 cupheavy creamSeasoning:1 tspOld Bay seasoning½ tsppaprikaSalt and pepper to tasteGarnish:Fresh parsley, chopped (optional)Crusty bread for serving (optional)
¼ cupall-purpose flour3 cupsseafood or chicken broth1 cupheavy cream
3 cupsseafood or chicken broth1 cupheavy cream
1 cupheavy cream
Seasoning:1 tspOld Bay seasoning½ tsppaprikaSalt and pepper to tasteGarnish:Fresh parsley, chopped (optional)Crusty bread for serving (optional)
1 tspOld Bay seasoning½ tsppaprikaSalt and pepper to taste
½ tsppaprikaSalt and pepper to taste
Salt and pepper to taste
Garnish:Fresh parsley, chopped (optional)Crusty bread for serving (optional)
Fresh parsley, chopped (optional)Crusty bread for serving (optional)
Crusty bread for serving (optional)
Instructions
1️⃣Cook the Aromatics:In a large pot, melt the butter over medium heat.Add the chopped onion and minced garlic, and sauté for 3-4 minutes, until softened and fragrant.2️⃣Make the Roux:Stir in the flour, cooking for 1-2 minutes while stirring constantly. This helps remove the raw flour taste and creates a thickening base for the bisque.3️⃣Add Liquids:Gradually whisk in the seafood broth, ensuring a smooth mixture.Bring the liquid to a gentle simmer, then add the heavy cream, Old Bay seasoning, paprika, salt, and pepper. Stir to combine.4️⃣Add Seafood:Gently stir in the shrimp, crab, and lobster meat. Simmer for 5-7 minutes, or until the shrimp are pink and fully cooked. Be careful not to overcook the seafood.5️⃣Serve:Ladle the bisque into bowls and garnish with freshly chopped parsley, if desired.Serve warm with crusty bread or crackers for dipping
In a large pot, melt the butter over medium heat.Add the chopped onion and minced garlic, and sauté for 3-4 minutes, until softened and fragrant.2️⃣Make the Roux:Stir in the flour, cooking for 1-2 minutes while stirring constantly. This helps remove the raw flour taste and creates a thickening base for the bisque.3️⃣Add Liquids:Gradually whisk in the seafood broth, ensuring a smooth mixture.Bring the liquid to a gentle simmer, then add the heavy cream, Old Bay seasoning, paprika, salt, and pepper. Stir to combine.4️⃣Add Seafood:Gently stir in the shrimp, crab, and lobster meat. Simmer for 5-7 minutes, or until the shrimp are pink and fully cooked. Be careful not to overcook the seafood.5️⃣Serve:Ladle the bisque into bowls and garnish with freshly chopped parsley, if desired.Serve warm with crusty bread or crackers for dipping
Add the chopped onion and minced garlic, and sauté for 3-4 minutes, until softened and fragrant.
2️⃣Make the Roux:Stir in the flour, cooking for 1-2 minutes while stirring constantly. This helps remove the raw flour taste and creates a thickening base for the bisque.3️⃣Add Liquids:Gradually whisk in the seafood broth, ensuring a smooth mixture.Bring the liquid to a gentle simmer, then add the heavy cream, Old Bay seasoning, paprika, salt, and pepper. Stir to combine.4️⃣Add Seafood:Gently stir in the shrimp, crab, and lobster meat. Simmer for 5-7 minutes, or until the shrimp are pink and fully cooked. Be careful not to overcook the seafood.5️⃣Serve:Ladle the bisque into bowls and garnish with freshly chopped parsley, if desired.Serve warm with crusty bread or crackers for dipping
Stir in the flour, cooking for 1-2 minutes while stirring constantly. This helps remove the raw flour taste and creates a thickening base for the bisque.3️⃣Add Liquids:Gradually whisk in the seafood broth, ensuring a smooth mixture.Bring the liquid to a gentle simmer, then add the heavy cream, Old Bay seasoning, paprika, salt, and pepper. Stir to combine.4️⃣Add Seafood:Gently stir in the shrimp, crab, and lobster meat. Simmer for 5-7 minutes, or until the shrimp are pink and fully cooked. Be careful not to overcook the seafood.5️⃣Serve:Ladle the bisque into bowls and garnish with freshly chopped parsley, if desired.Serve warm with crusty bread or crackers for dipping
3️⃣Add Liquids:
Gradually whisk in the seafood broth, ensuring a smooth mixture.Bring the liquid to a gentle simmer, then add the heavy cream, Old Bay seasoning, paprika, salt, and pepper. Stir to combine.4️⃣Add Seafood:Gently stir in the shrimp, crab, and lobster meat. Simmer for 5-7 minutes, or until the shrimp are pink and fully cooked. Be careful not to overcook the seafood.5️⃣Serve:Ladle the bisque into bowls and garnish with freshly chopped parsley, if desired.Serve warm with crusty bread or crackers for dipping
Bring the liquid to a gentle simmer, then add the heavy cream, Old Bay seasoning, paprika, salt, and pepper. Stir to combine.4️⃣Add Seafood:Gently stir in the shrimp, crab, and lobster meat. Simmer for 5-7 minutes, or until the shrimp are pink and fully cooked. Be careful not to overcook the seafood.5️⃣Serve:Ladle the bisque into bowls and garnish with freshly chopped parsley, if desired.Serve warm with crusty bread or crackers for dipping
4️⃣Add Seafood:
Gently stir in the shrimp, crab, and lobster meat. Simmer for 5-7 minutes, or until the shrimp are pink and fully cooked. Be careful not to overcook the seafood.5️⃣Serve:Ladle the bisque into bowls and garnish with freshly chopped parsley, if desired.Serve warm with crusty bread or crackers for dipping
5️⃣Serve:Ladle the bisque into bowls and garnish with freshly chopped parsley, if desired.Serve warm with crusty bread or crackers for dipping
Ladle the bisque into bowls and garnish with freshly chopped parsley, if desired.
Serve warm with crusty bread or crackers for dipping
Notes
Seafood Broth:For an extra depth of flavor, use homemade seafood stock made from shrimp shells and lobster shells.Texture:For a smoother bisque, blend the soup base (before adding the seafood) with an immersion blender.
Texture:For a smoother bisque, blend the soup base (before adding the seafood) with an immersion blender.
“`
Hi I'm Emy
I’m passionate about sharing a diverse collection of sweet and savory recipes that I’ve meticulously tested and perfected in my own kitchen.