Table of Contents
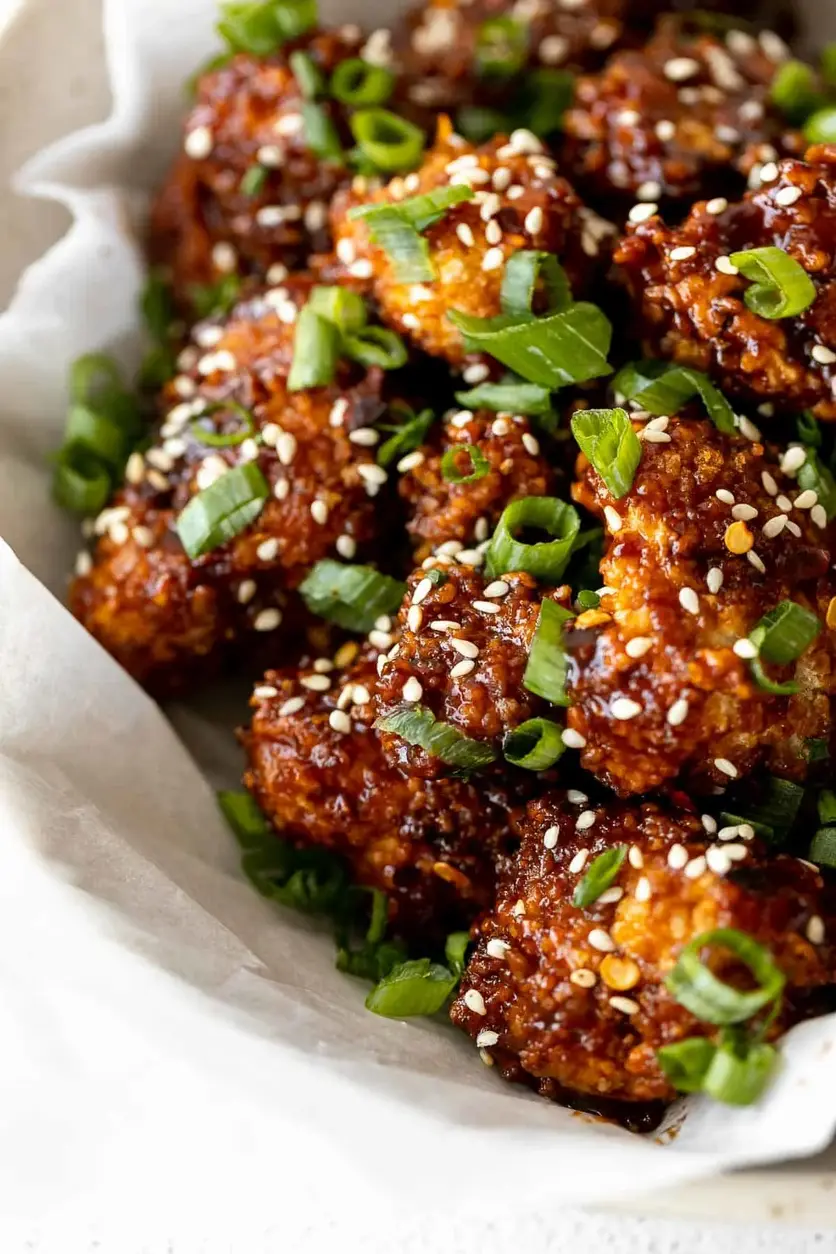
Easy 25-min. Mongolian Chicken (Shallow Fried) – Crispy, Sticky & Faster Than Takeout
I still remember the first time I tasted a dish like this Mongolian chicken — it was a snowy evening in my tiny Paris apartment, and a neighbor brought over a container of glossy, sticky chicken that smelled of ginger and soy. One bite and I was hooked. Years later, trained in a French kitchen and now living in New York City, I’ve re-created that memory with my own twist: easy Mongolian chicken that comes together in just 25 minutes, using a simple shallow-fry technique that gives you deep-golden crispiness without a deep fryer. This recipe is all about that irresistible combination — crunchy nuggets of chicken thigh coated in a sweet-savory glaze that clings to every piece. Whether you’re a busy parent or a student craving something homemade, this quick chicken stir fry will become your go-to.
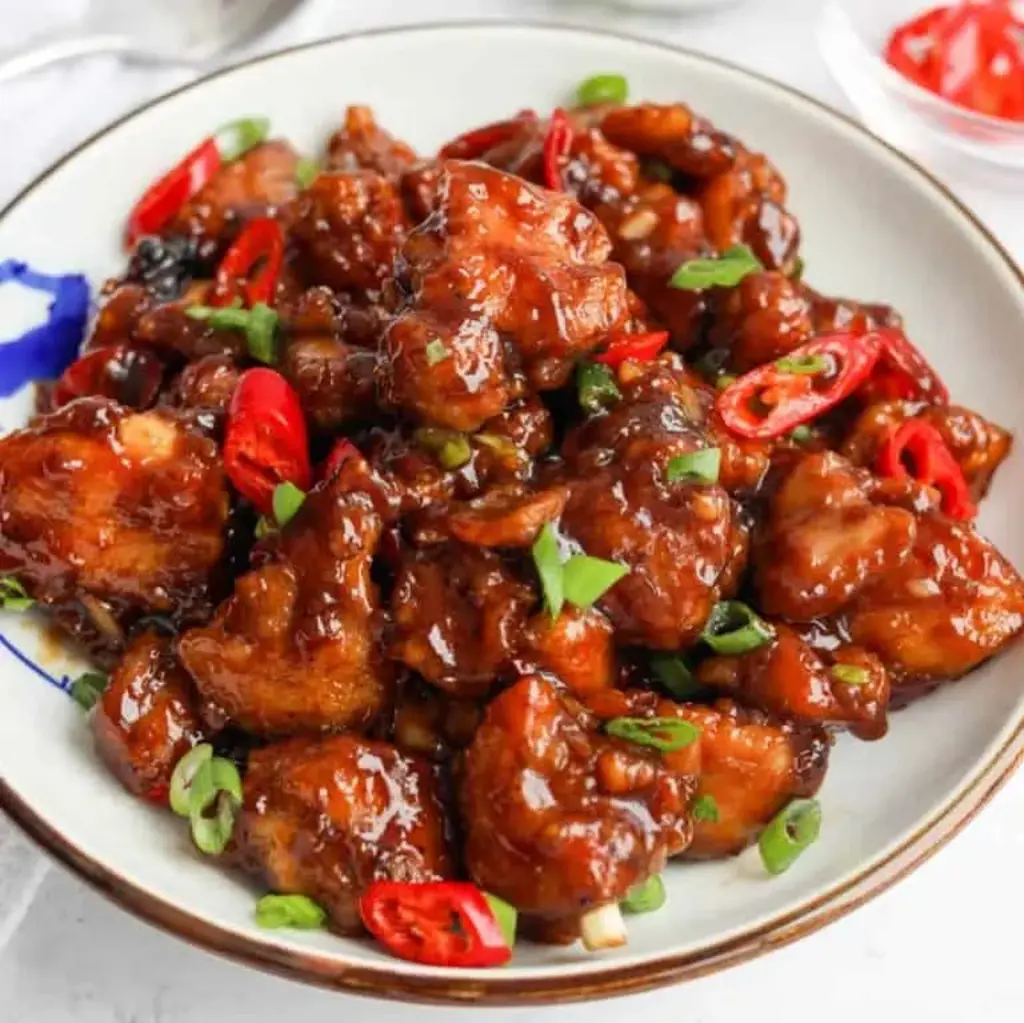
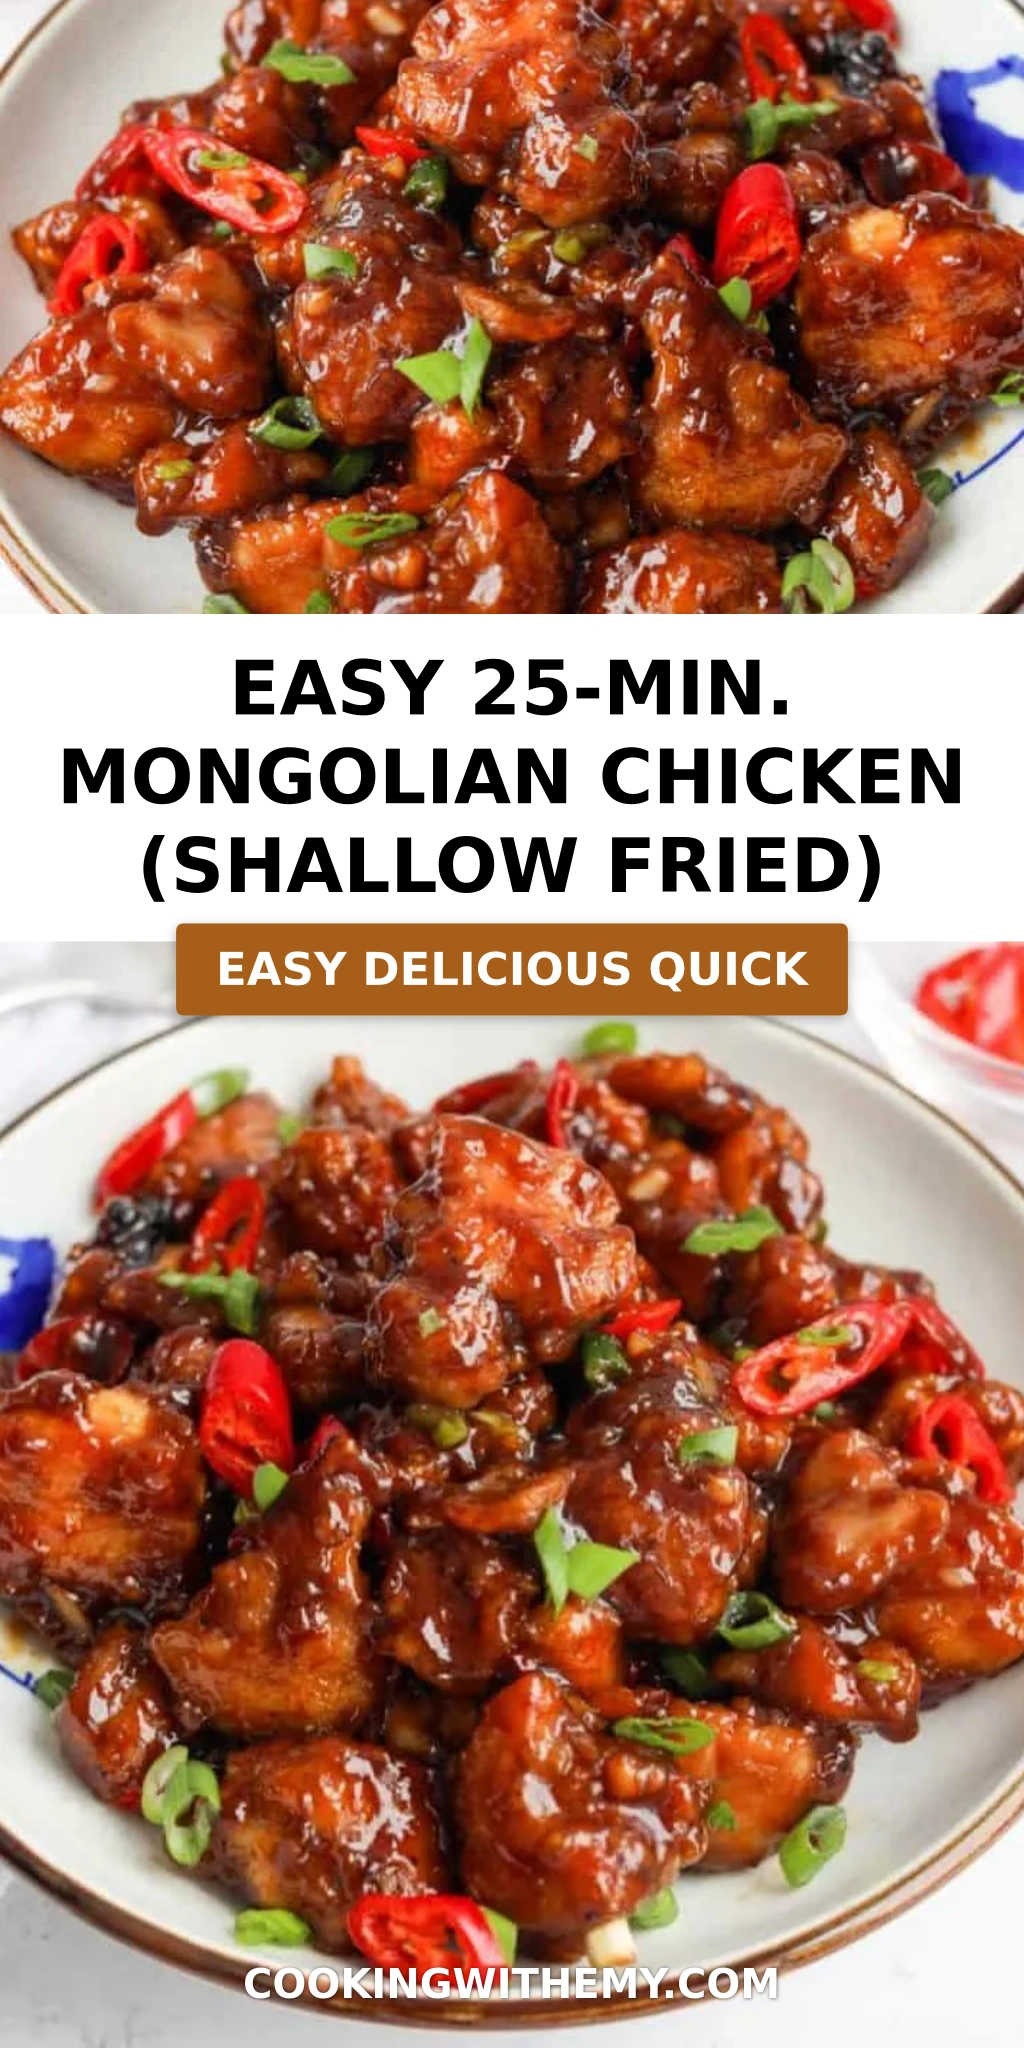
Picture this: you walk into the kitchen and within half an hour, the air is filled with the warm, toasty scent of sesame oil and garlic. The chicken sizzles as it hits the pan, turning into beautiful golden-brown morsels. Then comes the sauce — a glossy, dark mixture of hoisin, soy, and brown sugar that bubbles and thickens before you toss the crispy pieces in it. The final dish is a study in contrasts: crunchy edges, tender meat, and a sticky-sweet glaze with a subtle kick from fresh ginger and red chili. Serve it over steamed jasmine rice, and you’ve got dinner that tastes like it came from a fancy takeout spot, but costs a fraction of the price.
What sets my version apart is the technique: I use chicken thighs (not breast) for extra juiciness, and I shallow-fry them in just enough oil to get that deep crunch without needing gallons. I learned this trick during my pastry days in Paris — sometimes less oil means more control and a cleaner result. Plus, I make a cornstarch slurry that ensures the sauce clings perfectly without being gloopy. One common mistake I see is patting the chicken dry before coating — don’t! The surface moisture actually helps the starch stick, giving you a superior crust. Let me show you how easy it is.
Why This Easy Mongolian Chicken Recipe Is the Best
The flavor secret lies in the hoisin-ginger combination. Hoisin sauce — a thick, fragrant Chinese condiment — brings a fermented sweetness that balances the salty soy and warm ginger. Growing up in Morocco, my mother always had a jar of something similar (a local amalou paste) that she’d use to glaze meats. I’ve blended that memory with classic French sauce-building skills, simmering everything together until it’s thick enough to coat a spoon. This isn’t just a stir-fry sauce; it’s a caramelized glaze that makes each bite feel luxurious.
Perfected texture: shallow frying means the chicken stays crisp even after tossing in the sauce — because you’re not deep-frying, you avoid the dreaded sogginess. I tested this dozens of times in my NYC kitchen, and the key is frying at medium-high heat until the starch coating turns deep amber. A wire rack is your best friend here; it lets the excess oil drip off while keeping the crust intact. The result? Chicken that stays crunchy for a good 10-15 minutes on the table — way longer than typical takeout.
Foolproof and fast: total time from start to finish is 25 minutes, and I’ve designed the steps so even a beginner can nail it. The recipe uses only one pan and simple supermarket ingredients. No obscure Asian condiments — hoisin and soy are in every US grocery store. Plus, the cooking process is forgiving: if the sauce gets too thick, a splash of water loosens it; if it’s too thin, let it bubble a bit longer. It’s the kind of weeknight dinner that makes you look like a pro without the stress.
Easy Mongolian Chicken Ingredients
Whenever I’m at the Union Square Greenmarket, I pick up fresh ginger and garlic from the Asian produce stalls — they’re so much more pungent than the supermarket kind. For this recipe, I also grab a bottle of good-quality hoisin sauce (look for one without too much added sugar). Here’s what else you’ll need:
Ingredients List
- 1 lb skinless boneless chicken thighs
- ¼ cup cornstarch (or potato starch, add more if needed)
- 1/3 cup vegetable oil (or any neutral oil)
- 2 garlic cloves (minced)
- 2 red chili pepper (sliced, divided)
- 5 slices ginger
- 4 tbsp hoisin sauce
- 2 tbsp regular soy sauce (or light soy sauce)
- 2 tbsp brown sugar
- 2 tsp sesame oil (toasted kind)
- 1 green onion (finely chopped, optional garnish)
- 1 tbsp cornstarch (or potato starch)
- ½ cup water (cold)
Ingredient Spotlight
Chicken thighs: They’re the hero of this quick chicken stir fry because they stay moist and tender even if you cook them a minute or two extra. Skip the breast here — it dries out too easily. Look for thighs that are evenly sized so they cook at the same rate.
Hoisin sauce: This is your shortcut to complex flavor. It’s a thick, dark sauce made from soybeans, fennel, red chili peppers, and garlic. In a pinch, you can substitute with a mix of 2 tbsp black bean paste + 2 tbsp honey, but the texture will be slightly less glossy.
Fresh ginger and garlic: These provide the aromatic backbone. Always use fresh — the dried powders won’t give you that pungent, spicy warmth. Store fresh ginger in the freezer; it grates beautifully without peeling.
Cornstarch for coating: It creates that signature ethereal crunch. Potato starch works even better (it’s lighter), but cornstarch is easy to find. The key is to coat the chicken right before frying so the starch doesn’t get gummy.
| Original Ingredient | Best Substitution | Flavor / Texture Impact |
|---|---|---|
| Hoisin sauce | Black bean paste + honey (2 tbsp each) | Less sweet, more savory, slightly gritty |
| Brown sugar | Coconut sugar or honey (reduce liquid if using honey) | Caramel notes less deep, may be thinner |
| Sesame oil (toasted) | Toasted sesame seeds + neutral oil (1:2) | Lighter sesame flavor, good substitute |
| Red chili pepper | ½ tsp red pepper flakes | Similar heat, less fresh crunch |
How to Make Easy Mongolian Chicken — Step-by-Step
Trust me, you can do this — I’ve walked hundreds of beginner cooks through this in my cooking classes. Just follow each step, and you’ll have restaurant-quality shallow fried chicken on the table fast.
Step 1: Make the Cornstarch Slurry
In a small bowl, whisk together 1 tablespoon cornstarch and ½ cup cold water until fully dissolved. Set aside. This will thicken your sauce at the end.
💡 emy’s Pro Tip: Use cold water — hot water will make the cornstarch clump. Whisk vigorously for about 15 seconds to ensure no lumps.
Step 2: Cut and Coat the Chicken
Cut chicken thighs into uniform 1.5-inch cubes. Important: Do NOT pat them dry — the surface moisture helps the starch adhere. Place the cubes in a large bowl, add ¼ cup cornstarch (or up to ⅓ cup if needed), and toss until each piece is evenly coated in a thin white layer. Set aside while you heat the oil.
⚠️ Common Mistake to Avoid: Over-coating with starch. If you see thick clumps, shake off the excess — too much starch will make the coating powdery rather than crispy.
Step 3: Shallow Fry the Chicken
Heat ⅓ cup vegetable oil in a large pan (preferably a 12-inch skillet) over medium-high heat. The oil should shimmer but not smoke. Working in batches (do not crowd the pan), add the chicken in a single layer. Fry until deep golden and cooked through, about 5-7 minutes per batch, turning once halfway. Transfer to a wire rack set over a baking sheet to drain. Reserve 2 teaspoons of oil in the pan; discard the rest (or save for another use).
💡 emy’s Pro Tip: Test doneness with a meat thermometer — chicken thighs should reach 165°F (74°C). If you don’t have one, cut into the thickest piece; the juices should run clear and the meat should be opaque all the way through.
Step 4: Make the Sauce
Reduce heat to medium. In the same pan (with the reserved 2 tsp oil), add 5 slices ginger, minced garlic, and half of the sliced red chili peppers. Stir-fry for just 10 seconds until fragrant. Add 4 tbsp hoisin sauce, 2 tbsp soy sauce, 2 tbsp brown sugar, and 2 tsp toasted sesame oil. Stir the cornstarch slurry again (it settles), then pour it in. Cook, stirring constantly, until the sauce thickens and becomes glossy — about 30 seconds.
⚠️ Common Mistake to Avoid: Skipping the re-stir of the slurry. The cornstarch settles quickly; if you pour it without stirring, you’ll get a watery sauce with a clump of starch at the bottom.
Step 5: Combine and Serve
Add the fried chicken back to the pan and toss to coat every piece evenly with the sticky sauce. Remove from heat immediately. Garnish with remaining red chili slices and chopped green onion. Serve over steamed rice or noodles for a complete meal.
💡 emy’s Pro Tip: For extra crunch, serve the sauce on the side and drizzle it over the chicken right before eating. This keeps the crust from softening prematurely.
| Step | Action | Duration | Key Visual Cue |
|---|---|---|---|
| 1 | Make slurry | 30 seconds | No lumps, milky white liquid |
| 2 | Cut & coat chicken | 5 minutes | Thin, even white coating |
| 3 | Shallow fry | 5-7 min per batch | Deep golden brown, chicken floats slightly |
| 4 | Make sauce | 1 minute | Sauce bubbles and coats the back of a spoon |
| 5 | Toss & serve | 30 seconds | Every piece shiny with sauce |
Serving & Presentation
This easy Mongolian chicken is a star on its own, but I love piling it high on a bed of fluffy jasmine rice and scattering extra sliced red chilies and scallions over the top. The contrast of white rice against the dark, glossy sauce makes for a stunning plate. For a pop of freshness, I often add a handful of steamed bok choy or a simple cucumber salad dressed with rice vinegar and sesame seeds — a trick I picked up from a Vietnamese street-food stall in the East Village.
If you want to fancy it up (maybe for a dinner party), serve the chicken on individual plates with a drizzle of extra sauce and a sprinkle of toasted sesame seeds. A side of quick-pickled carrots or radishes cuts through the richness beautifully, a technique I learned from my Moroccan mother who always balanced heavy dishes with something acidic.
Pairing suggestion: A crisp, cold lager or an off-dry Riesling works wonderfully with the sweet-spicy sauce. For a non-alcoholic option, try iced jasmine tea with a slice of lime.
| Pairing Type | Suggestions | Why It Works |
|---|---|---|
| Side Dish | Steamed jasmine rice, stir-fried bok choy, cucumber salad | Absorbs sauce, adds freshness, light crunch |
| Sauce / Dip | Extra hoisin glaze, sriracha mayo, soy-vinegar dip | Enhances sweetness, adds creaminess, cuts richness |
| Beverage | Lager beer, off-dry Riesling, iced jasmine tea | Crispness balances sweetness, acidity cuts heat |
| Garnish | Scallions, red chili slices, toasted sesame seeds | Adds color, freshness, and nutty aroma |
Make-Ahead, Storage & Reheating
I know life gets busy — I often prep the sauce and cut the chicken hours ahead, then fry and assemble when my partner gets home. This recipe is perfect for meal prep because the components hold up well. Here’s my system:
| Method | Container | Duration | Reheating Tip |
|---|---|---|---|
| Refrigerator | Airtight container | Up to 4 days | Reheat in a skillet over medium heat with a splash of water to refresh the sauce |
| Freezer | Freezer-safe bag or container | Up to 3 months | Thaw in fridge overnight, then reheat in a pan; the crunch won’t be the same but flavor holds |
| Make-Ahead | Separate sauce and raw coated chicken | Sauce: 5 days; coated chicken: 1 day in fridge | Fry coated chicken fresh when ready, then toss with reheated sauce |
If you reheat leftovers, the chicken will lose its initial crunch — that’s normal. To restore some crispness, I reheat it in a toaster oven at 375°F for 5-7 minutes, then toss with extra sauce. Avoid the microwave, which makes the coating rubbery.
Variations & Easy Swaps
| Variation | Key Change | Best For | Difficulty Impact |
|---|---|---|---|
| Spicy Szechuan Twist | Add 1 tsp Szechuan peppercorns + 1 tbsp chili crisp | Those who love heat and numbing sensation | Easy (no change in technique) |
| Gluten-Free Version | Use tamari instead of soy sauce; ensure hoisin is GF (most brands are) | Gluten-sensitive diets | Easy (simple swap) |
| Harissa-Honey Fusion | Replace brown sugar with honey; add 1 tbsp harissa paste | Moroccan-inspired twist (my culture!) | Easy (adjust sweetness to taste) |
Spicy Szechuan Twist
If you love bold, numbing heat, this is for you. After stir-frying the ginger and garlic, add 1 teaspoon Szechuan peppercorns and 1 tablespoon chili crisp (like Lao Gan Ma). The peppercorns create that signature tingling sensation while the chili crisp adds deep, smoky heat. It’s a game-changer for spice lovers.
Gluten-Free Version
Swap the regular soy sauce for tamari (which is wheat-free) and double-check your hoisin label — most brands are naturally gluten-free, but some contain wheat flour. Use cornstarch or potato starch as is. The flavor is nearly identical; you won’t miss the gluten at all.
Harissa-Honey Fusion
This is my nod to my Moroccan roots. Replace the brown sugar with 2 tablespoons honey, and stir in 1 tablespoon harissa paste along with the sauce ingredients. The result is a sweet-spicy glaze with a subtle smokiness. I love serving this version with a side of couscous and roasted carrots — it tastes like home.
FAQ — Frequently Asked Questions
Can I use chicken thighs instead of chicken breast for this Mongolian chicken recipe?
Absolutely — in fact, I highly recommend it. Chicken thighs stay juicy and tender even if you cook them a minute or two longer, which makes them ideal for shallow frying. The extra fat content also adds flavor and helps the coating stay crispy. If you prefer breast, you can use it, but reduce the cooking time to about 4-5 minutes per batch and be careful not to overcook, as breast meat dries out quickly. I personally always reach for thighs for this quick chicken stir fry.
What is the best way to shallow fry the chicken so it stays crispy?
The secret is to maintain the oil temperature at a steady medium-high (about 350°F if you use a thermometer). Don’t crowd the pan — fry in a single layer and work in batches. The coating should be a thin, even layer of cornstarch; too much will become gummy. Also, let the fried chicken drain on a wire rack (not paper towels) so the steam doesn’t soften the crust. I learned this trick from a French pastry chef: air circulation is key to preserving crunch.
Can I make the Mongolian sauce without brown sugar?
Yes, you can. Brown sugar adds a deep caramel sweetness, but you can substitute it with honey, maple syrup, or coconut sugar. If using honey, reduce the total liquid slightly because honey is thinner. For a low-glycemic option, try monk fruit sweetener (a 1:1 swap), but the sauce won’t be as sticky. I’ve tested this with coconut sugar from my local NYC health food store, and it works beautifully — just make sure to dissolve it fully in the sauce.
What side dishes go well with Mongolian chicken?
Steamed jasmine rice is the classic pairing — its fragrance and slight stickiness soak up the glossy sauce perfectly. For vegetables, try stir-fried bok choy with garlic, or a quick cucumber salad with rice vinegar and sesame oil. I also love serving it with steamed edamame sprinkled with sea salt. If you want a heartier side, go for lo mein noodles tossed with a little soy sauce. These sides are all quick to make and complement the sweet-spicy flavors.
How do I keep the chicken crispy when adding the sauce?
The key is to toss the fried chicken in the sauce quickly and serve immediately. Make sure the sauce has thickened before adding the chicken, then toss for only 15-20 seconds. Over-tossing or letting it sit in the sauce will soften the crust. Another trick: you can serve the sauce on the side and let everyone drizzle it over their own portion. This way the chicken stays perfectly crunchy for longer.
Is this recipe spicy? How can I adjust the heat level?
This Mongolian chicken recipe has a mild to medium heat from the fresh red chili peppers. If you prefer a milder dish, simply remove the seeds and membranes from the chilis, or use just one chili. For extra heat, add the full amount of chili plus a pinch of red pepper flakes or a drizzle of sriracha in the sauce. I often tone it down for my kids by using sweet bell pepper strips instead of chili — they still get that fresh crunch without the heat.
Can I use potato starch instead of cornstarch for coating?
Absolutely — in fact, potato starch creates an even lighter, crispier coating than cornstarch. It’s a common ingredient in Japanese and Korean frying. Use it in the same 1:1 ratio. The only difference is that potato starch can get slightly more opaque and stay crispier longer. I often buy it at my local Asian grocery store in Chinatown. Both work well, so use what you have on hand.
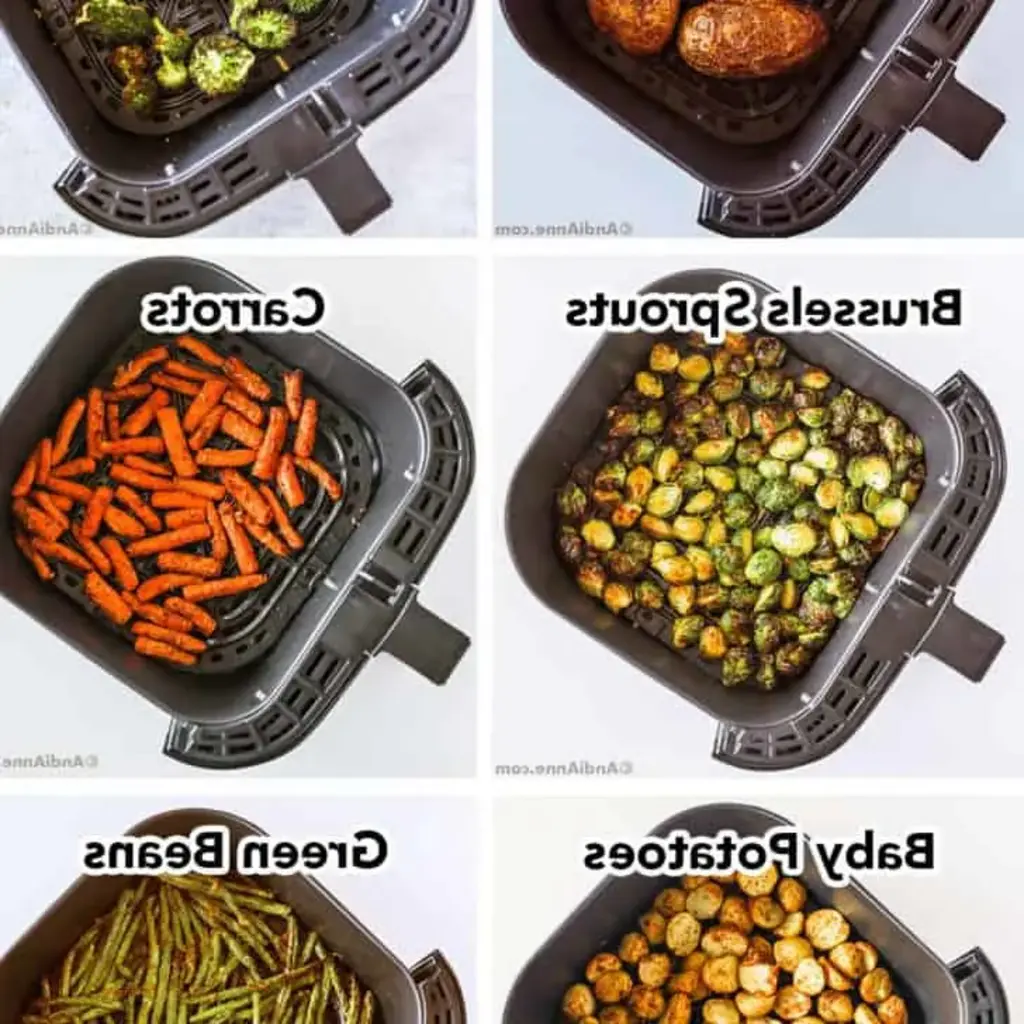
Can I make this dish in an air fryer?
Yes, you can air-fry the chicken instead of shallow frying. Preheat your air fryer to 400°F (200°C). Coat the chicken as directed, then spray the basket with oil and arrange the pieces in a single layer. Cook for 8-10 minutes, shaking halfway through, until golden and cooked through. The texture will be slightly drier than pan-fried, but it’s a great oil-free alternative. Then prepare the sauce on the stove and toss the air-fried chicken in it.
How can I thicken the sauce if it is too thin?
If your sauce is thinner than you’d like, simply let it simmer for another 30-60 seconds while stirring. The cornstarch slurry will continue to thicken as it cooks. If it still seems thin after that, mix an additional teaspoon of cornstarch with 2 teaspoons of cold water and stir it in. Be careful not to add too much, or the sauce will become jelly-like. The ideal consistency is glossy and coats the back of a spoon when you lift it.
Can I double this recipe for a crowd?
Definitely. This recipe easily doubles for a party. Just be sure to fry the chicken in multiple batches so you don’t crowd the pan — each batch should still be in a single layer. The sauce can be doubled and made in the same pan; it will thicken slightly faster because of the larger volume, so watch it carefully. Double the garnishes too. I’ve served this at family gatherings in New York, and it always disappears in minutes.
Share Your Version!
I love hearing how my readers put their own spin on recipes — it’s what makes cooking so personal and fun. If you try this easy Mongolian chicken, please leave a star rating and a comment below. Did you swap the chili for bell peppers? Add extra ginger? Tell me all about it! Take a photo of your creation and tag me on Instagram or Pinterest — my handle is @cookingwithemy. I can’t wait to see your delicious plates.
While you’re here, why not browse my other 25-minute dinners? They’re all made with the same philosophy: big flavor, minimal fuss, and a sprinkle of love from my kitchen to yours. From my NYC kitchen to yours — I hope this recipe brings as much warmth to your table as it does to mine. — emy 🧡
⭐️⭐️⭐️⭐️⭐️ Loved this recipe? Pin it now and share the crunch!
Drop a comment below — what did you serve it with?
Love This Recipe? Save It to Pinterest!
If you enjoyed this Easy 25-min. Mongolian Chicken recipe, don’t let it get lost in your browser tabs! 😄 Pin it now so you can find it again anytime — and explore hundreds more tried-and-tested recipes waiting for you on my Pinterest boards.
👉 Follow emy on Pinterest @cookingwithemy
📌 Pin this recipe · 🔁 Re-pin your favorites · 💬 Tag me when you make it — I love seeing your creations!

Easy 25-min. Mongolian Chicken (Shallow Fried)
Description
This easy Mongolian chicken recipe takes just 25 minutes and simple ingredients to make tonight. It tosses crispy, bite-sized chicken in a sticky, sweet soy glaze. Skip the takeout fees for a fast dinner that your whole family will love.
Ingredients
- 1 lb skinless boneless chicken thighs
- ¼ cup cornstarch (or potato starch, add more if needed)
- 1/3 cup vegetable oil (or any neutral oil)
- 2 garlic cloves (minced)
- 2 red chili pepper (sliced, divided)
- 5 slices ginger
- 4 tbsp hoisin sauce
- 2 tbsp regular soy sauce (or light soy sauce)
- 2 tbsp brown sugar
- 2 tsp sesame oil (toasted kind)
- 1 green onion (finely chopped (optional garnish))
- 1 tbsp cornstarch (or potato starch)
- ½ cup water (cold)
Instructions
- In a small bowl, whisk together 1 tbsp cornstarch and ½ cup (125 ml) cold water until fully dissolved to make your cornstarch slurry. Set aside.
- Cut chicken thighs into uniform 1.5-inch cubes. Do not pat dry, as the moisture is needed for the next step.
- Transfer the chicken to a large bowl and add cornstarch. Toss until evenly coated, adding more if needed. Set aside.
- Heat vegetable oil in a large pan over medium-high heat. Working in batches, fry the chicken in a single layer until crispy, cooked through, and golden, about 5-7 minutes. Transfer to a wire rack to drain. Reserve 2 tsp (10 ml) of oil in the pan and discard the rest.
- Reduce heat to medium. Stir-fry ginger, garlic, and half of the red chilies for 10 seconds. Add hoisin sauce, soy sauce, brown sugar, and sesame oil. Stir the cornstarch slurry again, then pour it in. Stir to combine and simmer until the sauce thickens.
- Add the chicken and toss to coat evenly. Remove from heat, garnish with the remaining red chilies and green onions, and serve immediately.
Nutrition
- Calories: 224 kcal
- Sugar: 16 g
- Fat: 5 g
- Carbohydrates: 35 g
- Protein: 10 g
Tried This Recipe? Leave a Comment!
Did you make this recipe? I’d love to hear how it turned out! Please leave a comment and a rating below. Your feedback helps other home cooks and supports cheerychop.com!
For more delicious inspiration, follow me on Pinterest!