Table of Contents
Italian Sausage and Spinach Stuffed Spaghetti Squash – A Low-Carb Comfort Dish
Growing up in Morocco, my mother’s kitchen was a symphony of slow-cooked tagines and fragrant couscous. But it wasn’t until I trained at Le Cordon Bleu in Paris that I fell in love with the French knack for stuffing vegetables — courgettes, tomatoes, and especially squash. Now living in New York City, I’ve taken that classic stuffed squash approach and given it a hearty, all-American spin. My Italian Sausage and Spinach Stuffed Spaghetti Squash is everything you love about a big bowl of Italian sausage pasta — but without the carbs. This low-carb stuffed squash is a whole meal in itself, and it’s become my go-to for cozy weeknights when I want something satisfying yet light.
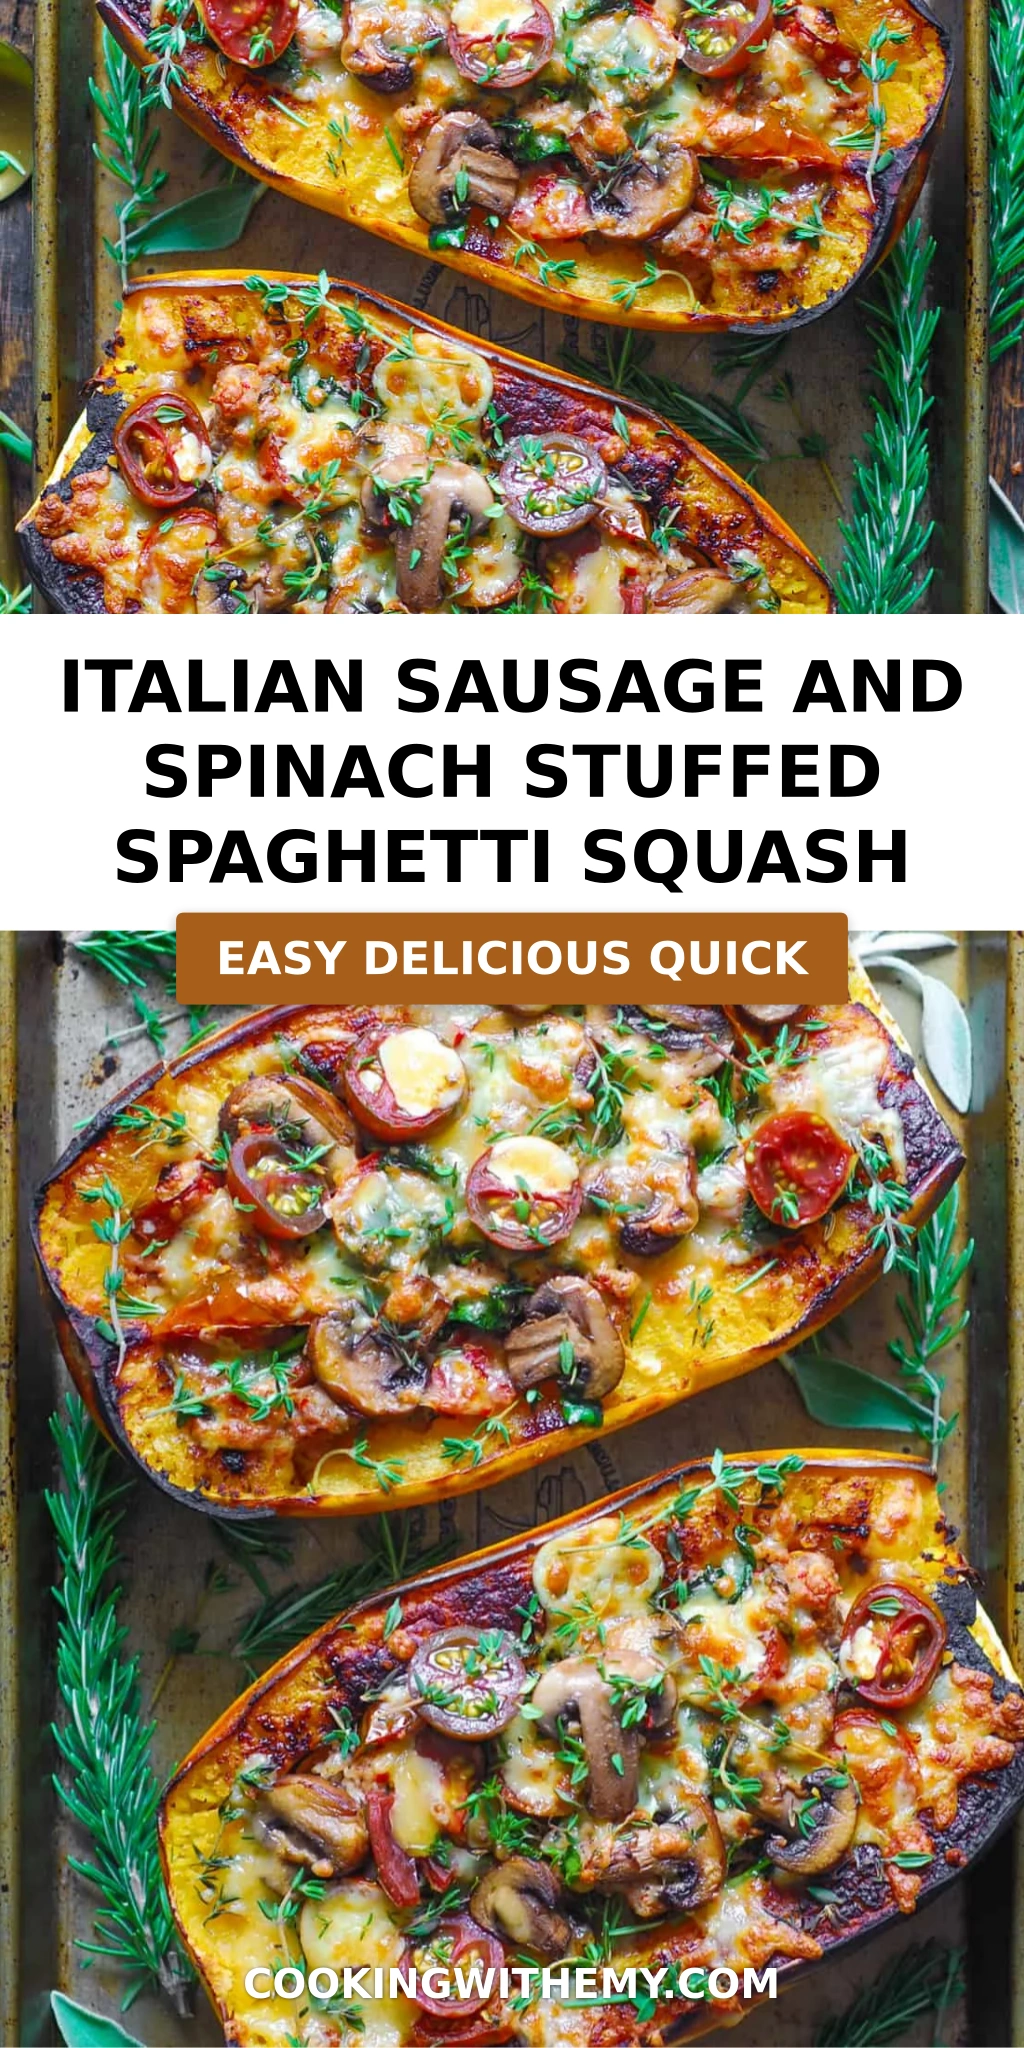
Picture this: tender strands of roasted spaghetti squash acting like a fluffy bed for spicy Italian sausage, earthy mushrooms, juicy cherry tomatoes, and fresh spinach all bound together with gooey melted Parmesan. The squash takes on a faint sweetness that perfectly balances the savory, slightly spicy filling. As you dig in, each forkful delivers a contrast of textures — the soft squash “noodles,” the tender-crisp mushrooms, and the browned bits of sausage. A sprinkle of fresh thyme on top adds an herby, almost floral note that brings the whole dish together. This isn’t just a low-carb substitute; it’s a genuinely delicious dinner that happens to be gluten-free and keto-friendly.
I’ve tested this recipe more times than I can count, and I want to save you the trouble I went through with watery squash and bland fillings. The secret? Pre-roasting the squash cut-side down so the interior dries out just enough — then loading it with a well-seasoned, slightly thickened filling. In the steps below, I’ll share my pro tip for avoiding soggy bottoms and a common mistake that can make the filling too wet. By the end, you’ll have a restaurant-worthy stuffed spaghetti squash that even pasta lovers will fight over.
Why This Italian Sausage and Spinach Stuffed Spaghetti Squash Recipe Is the Best
The Flavor Secret: My version gets its depth from the spicy Italian sausage — I always pick one that’s at least 80% pork for rich flavor — and the two-step cooking: first the squash roasts alone, then the filling browns in the same skillet, picking up all those browned bits. A pinch of red pepper flakes and a dash of Italian seasoning from my Paris days (Herbes de Provence works beautifully) elevate the whole dish. My Moroccan roots sneak in with a tiny pinch of cinnamon in the sausage mix — trust me, it rounds out the acidity of the tomatoes beautifully.
Perfected Texture: Many stuffed spaghetti squash recipes end up watery because the squash releases liquid as it bakes. I avoid this by roasting the squash cut-side down at 400°F until fork-tender — that dries out the interior. Then, after stuffing, I bake it again for just 15 minutes with the cheese on top. The result is a filling that’s moist but not soggy, with the squash strands holding their shape. My pro tip: after the first roast, fluff the squash with a fork and let it sit for a couple of minutes so any last moisture can evaporate.
Foolproof & Fast: This recipe is designed for the home cook who wants a stunning dinner without spending hours in the kitchen. The active prep is just 15 minutes, then the oven does the rest. I’ve streamlined the steps so you can roast the squash while you make the filling — everything comes together in under 75 minutes. Even if you’ve never cut a spaghetti squash before, the microwave trick (outlined in the recipe) makes it easy and safe. Whether you’re meal-prepping for the week or impressing dinner guests, this recipe delivers consistent, gorgeous results.
Stuffed Spaghetti Squash Ingredients
I pick up my spaghetti squash at the Union Square Greenmarket in NYC — they’re firm, heavy, and a deep golden yellow. The spicy Italian sausage I get from my local butcher in Brooklyn, but any good-quality store-bought brand works. For the Parmesan, I always grate it myself from a block (pre-shredded contains anti-caking agents that won’t melt as smoothly). Here’s everything you’ll need:
Ingredients List
- 2 medium spaghetti squash
- 2 tablespoons olive oil (for the squash)
- Salt and black pepper
- 1 tablespoon olive oil (for the skillet)
- 16 oz spicy Italian sausage, casings removed
- 8 oz cremini mushrooms, sliced
- ½ teaspoon Italian seasoning (or Herbes de Provence)
- 4 cloves garlic, minced
- Red pepper flakes, to taste (optional)
- 10 oz fresh spinach (about 1 large bag)
- 5 oz cherry tomatoes, sliced (some reserved for topping)
- 6 oz freshly shredded Parmesan cheese
- Fresh thyme leaves, for garnish
Ingredient Spotlight
Spaghetti Squash: Look for a squash that’s about 2–3 pounds, with a firm, matte skin and no soft spots. The oval ones with even coloring tend to have more uniform strands. If you can’t find spaghetti squash, yellow summer squash works in a pinch — though the strands are much shorter and the texture is more tender.
Spicy Italian Sausage: I prefer hot Italian sausage because the heat carries through the dish beautifully, but you can use mild or sweet if you’re sensitive to spice. For a leaner option, you can substitute ground turkey with 1 teaspoon fennel seeds and ½ teaspoon crushed red pepper — but note the filling will be drier, so add an extra drizzle of olive oil.
Spinach: Fresh spinach wilts down to almost nothing, so don’t be shy with the amount. I suggest using baby spinach for tenderness. Frozen spinach can be used — thaw it completely and squeeze out every drop of water before adding to the skillet (see FAQ below for details). This swap works well in a pinch.
Parmesan Cheese: Authentic Parmigiano-Reggiano is ideal for its nutty, salty flavor. If you need dairy-free, a good-quality vegan Parmesan (like Follow Your Heart) melts decently, though it won’t get as golden. The recipe won’t be exactly the same, but still delicious.
| Original Ingredient | Best Substitution | Flavor / Texture Impact |
|---|---|---|
| Spicy Italian sausage | Mild Italian sausage + ½ tsp red pepper flakes | Less heat, same savory profile |
| Fresh spinach (10 oz) | Frozen spinach (10 oz, thawed and squeezed) | Slightly softer texture; needs extra drying |
| Parmesan cheese | Vegan Parmesan or pecorino romano | Pecorino adds sharpness; vegan doesn’t brown as well |
| Cremini mushrooms | Button mushrooms or portobello (diced) | Similar earthy flavor; portobello is meatier |
How to Make Italian Sausage and Spinach Stuffed Spaghetti Squash — Step-by-Step
Ready to cook? I promise this process is simpler than it sounds. Just follow along, and you’ll have golden, cheesy stuffed squash boats by dinner time.
Step 1: Prep the Squash
Preheat your oven to 400°F and line a baking sheet with parchment paper. Place each squash on a damp paper towel to prevent slipping. Using a large, sharp chef’s knife, carefully cut each squash in half lengthwise. Scoop out the seeds and stringy fibers with a spoon. If cutting is tough, zap the whole squash in the microwave for 5 minutes first — it softens the skin and makes slicing a breeze. (That’s my Paris-trained trick for safe cutting.)
💡 emy’s Pro Tip: After seeding, blot the cut sides with a paper towel. This removes excess moisture before oiling, helping the squash roast instead of steam.
Step 2: Season and Roast
Drizzle the cut sides and cavity of each squash half with olive oil, then season generously with salt and pepper. Place the halves cut-side down on the prepared baking sheet. Roast on the middle rack for 30–40 minutes, until the flesh is fork-tender and easily pierced. While the squash roasts, start the filling.
⚠️ Common Mistake to Avoid: Don’t overcrowd the baking sheet. Give each squash half room for steam to escape. If they’re too close, they’ll steam and become mushy instead of roasting.
Step 3: Cook the Filling
Heat 1 tablespoon olive oil in a large, high-sided skillet over medium heat. Add the crumbled sausage and sliced mushrooms. Cook, breaking up the sausage, until the meat is browned and the mushrooms have released their liquid and started to caramelize — about 5–6 minutes. If you like a leaner filling, drain excess fat; otherwise, leave it in — the fat helps wilt the spinach.
💡 emy’s Pro Tip: Use a potato masher to break the sausage into small, uniform crumbles. This ensures every bite gets even distribution.
Step 4: Wilt the Spinach
Add the minced garlic, Italian seasoning, red pepper flakes (if using), and most of the sliced cherry tomatoes (reserve a handful for topping). Stir and cook for 1 minute until fragrant. Now add the spinach in large handfuls. Stir until the spinach fully wilts — this takes about 2–3 minutes. The mixture should look juicy but not soupy. Taste and adjust salt and pepper.
⚠️ Common Mistake to Avoid: Adding all the spinach at once will cool down the pan and make it watery. Add it in three batches, letting each one wilt before adding the next.
Step 5: Stuff the Squash
When the squash is tender, remove from the oven and flip the halves cut-side up. Let them cool slightly — about 5 minutes. Use a fork to fluff the spaghetti-like strands gently (don’t pull them out). Divide the sausage-spinach mixture evenly among the four halves, mounding it slightly. Top with the reserved cherry tomato slices and a generous sprinkle of shredded Parmesan.
💡 emy’s Pro Tip: For the cheesiest crust, mix a tablespoon of breadcrumbs or almond flour into the Parmesan before topping. It’ll add a golden, crispy layer that contrasts beautifully with the squash.
Step 6: Bake Until Melted and Serve
Return the stuffed squash to the oven and bake at 400°F for another 15 minutes, until the cheese is melted and bubbling. If you want deeper browning, switch to the broiler for the last 2 minutes — watch it carefully to prevent burning. Remove from oven, garnish with fresh thyme leaves, and serve hot.
⚠️ Common Mistake to Avoid: Skipping the final 15-minute bake. Some people think the squash is already cooked, but that second bake melds the flavors and ensures the filling is piping hot throughout.
| Step | Action | Duration | Key Visual Cue |
|---|---|---|---|
| 1 | Cut and seed squash | 10 mins | Clean cavities, no loose fibers |
| 2 | Roast squash cut-side down | 30–40 mins | Fork pierces easily, skin slightly caramelized |
| 3 | Sauté sausage and mushrooms | 6 mins | Sausage browned, mushrooms darkened |
| 4 | Add garlic, tomatoes, spinach | 5 mins | Spinach wilted, mixture thick |
| 5 | Stuff squash and top with cheese | 5 mins | Filling mounded, cheese covering top |
| 6 | Second bake + broil | 15–17 mins | Cheese golden and bubbly |
Serving & Presentation
I love serving these stuffed squash halves straight from the baking sheet — they look so inviting sitting in their own little “boats.” To plate, carefully transfer each half to a dinner plate using a wide spatula. Garnish with fresh thyme leaves and an extra sprinkle of Parmesan if you’re feeling indulgent. The bright green herb against the golden cheese makes a gorgeous table presentation.
This dish is a complete meal on its own, but if you want to round it out, pair it with a simple arugula salad dressed with lemon and olive oil — the peppery leaves cut through the richness. For a heartier dinner, serve with crusty garlic bread (if not strictly low-carb) or a side of roasted broccoli. In my NYC kitchen, I often add a Moroccan twist by offering a small bowl of harissa on the side for spicy heat.
Below is a quick pairing guide for different occasions:
| Pairing Type | Suggestions | Why It Works |
|---|---|---|
| Side Dish | Arugula salad, roasted broccoli, sautéed zucchini | Adds freshness and crunch, balances richness |
| Sauce / Dip | Harissa, marinara, garlic-yogurt sauce | Extra moisture and flavor kick |
| Beverage | Dry red (Chianti), sparkling water with lemon, light lager | Acidity cuts the fat; bubbles cleanse the palate |
| Garnish | Fresh thyme, parsley, toasted pine nuts, red pepper flakes | Adds texture, color, and brightness |
Make-Ahead, Storage & Reheating
As a busy NYC food blogger, I rely on make-ahead meals. This stuffed spaghetti squash is a dream for meal prep: you can roast the squash and cook the filling up to 2 days in advance, then stuff and bake before serving. Here’s how to store and reheat leftovers so they stay delicious:
| Method | Container | Duration | Reheating Tip |
|---|---|---|---|
| Refrigerator | Airtight container or wrap tightly | Up to 4 days | Reheat in 350°F oven for 15 mins or microwave 2 mins |
| Freezer | Freezer-safe container or bag, exclude cheese | Up to 3 months | Thaw overnight in fridge, add fresh cheese before baking at 375°F until hot |
| Make-Ahead | Store roasted squash and filling separately | Up to 2 days (refrigerated) | Assemble and bake as directed, adding 5 extra minutes if starting cold |
For the crispiest reheated squash boats, I always use the oven rather than the microwave — it brings back the roasted edge on the squash and re-melts the cheese beautifully. If you’re short on time, microwave on 70% power for 1½ minutes, then finish under the broiler for 2 minutes. Avoid high power, which makes the squash rubbery.
Variations & Easy Swaps
One of the best things about this stuffed spaghetti squash recipe is how versatile it is. I’ve played with many versions — some inspired by my Moroccan roots, others by what’s fresh at the farmers market. Here are a few tried-and-tested variations:
| Variation | Key Change | Best For | Difficulty Impact |
|---|---|---|---|
| Moroccan Spiced | Add 1 tsp cumin, ½ tsp cinnamon, ¼ tsp turmeric to filling | Lovers of North African flavors | Easy (same steps) |
| Dairy-Free / Keto | Omit Parmesan; use dairy-free mozzarella or nutritional yeast | Dairy-sensitive or strict keto | Easy (cheese swap) |
| Spring Vegetable Version | Replace mushrooms and spinach with asparagus, zucchini, peas | Springtime fresh eating | Easy (adjust chop sizes) |
Moroccan Spiced Version
Growing up in Morocco, my mother would often add a pinch of cinnamon and cumin to savory dishes — it’s a classic North African touch that adds warmth without screaming “dessert.” For this version, sauté the sausage and mushrooms as directed, then stir in 1 teaspoon ground cumin, ½ teaspoon ground cinnamon, and ¼ teaspoon turmeric along with the garlic. The spinach and tomatoes absorb the spices beautifully, and the squash’s sweetness ties it all together. Garnish with fresh cilantro instead of thyme for an authentic finish.
Dairy-Free / Keto Version
If you’re avoiding dairy, skip the Parmesan and use a good-quality dairy-free mozzarella shred (I like Miyoko’s) or sprinkle with nutritional yeast for a cheesy flavor. For a keto-friendly boost, add ¼ cup of crushed pork rinds or almond flour to the filling to absorb extra moisture. The texture remains satisfying, and you still get that golden top — just watch the last few minutes of baking because dairy-free cheese can burn faster.
Spring Vegetable Version
When spring hits the NYC farmers market, I swap the mushrooms and half the spinach for fresh asparagus (cut into 1-inch pieces), diced zucchini, and frozen peas. Cook the asparagus and zucchini first for 3 minutes, then add the garlic and tomatoes. Fold in the peas just before wilting the remaining spinach. The filling becomes lighter and brighter, perfect for a seasonal twist. Pair with a glass of Sauvignon Blanc for the ultimate spring dinner.
How do you prevent the spaghetti squash from becoming watery when stuffing it with Italian sausage and spinach?
The key is to pre-roast the squash cut-side down on a baking sheet. This allows the moisture to steam out rather than pool inside the cavity. I roast at 400°F for 30–40 minutes until fork-tender — the interior becomes fluffy and dry. After roasting, let the squash rest cut-side up for a few minutes; you can even tilt the halves to drain any last drops. Additionally, avoid overcooking the spinach in the filling: wilt it quickly over medium-high heat and don’t add extra liquid. A final 15-minute bake after stuffing helps everything set without becoming soggy.
Can I use frozen spinach instead of fresh for this stuffed spaghetti squash recipe?
Yes, you can substitute frozen spinach, but you must thaw it completely and squeeze out every bit of water. Frozen spinach holds a lot more moisture than fresh, and if you add it directly to the filling, your stuffing will become watery. Thaw the spinach in the fridge overnight or quickly in the microwave, then wrap it in a clean kitchen towel and wring it dry. After that, chop it and add it to the skillet as you would fresh. Note that the texture will be softer and less vibrant than fresh, but the flavor remains good. You may want to reduce the amount of salt slightly since frozen spinach is sometimes packed with salt.
How long do you need to bake Italian sausage and spinach stuffed spaghetti squash?
Total oven time is about 50–55 minutes: about 30–40 minutes for the empty squash halves to roast at 400°F, and then 15 minutes after stuffing (also at 400°F). The second bake ensures the filling is piping hot and the cheese melts and browns. If you’re reheating a fully assembled dish from the fridge, add 5–10 extra minutes. For frozen stuffed squash, bake at 375°F for about 30–35 minutes (the lower temperature prevents burning before the center is hot). Always test the internal temperature with an instant-read thermometer — it should be at least 165°F.
What type of Italian sausage works best for stuffing spaghetti squash — mild, sweet, or hot?
I prefer hot Italian sausage because the heat cuts through the sweetness of the squash and the richness of the cheese. However, any variety will work. Mild Italian sausage will give you a more subtle, family-friendly flavor, while sweet sausage adds a touch of fennel and sugar that can be lovely if you want a sweeter profile. If you use sweet sausage, I recommend adding extra red pepper flakes for balance. For the best flavor, buy sausage in casings and remove the casings yourself — the meat holds together better and you can control the crumble size. If you can’t find Italian sausage, you can use ground pork seasoned with fennel seeds, garlic powder, and red pepper flakes.
Can I make this stuffed spaghetti squash ahead of time?
Absolutely. This recipe is perfect for meal prep. You can roast the squash halves and prepare the filling up to 2 days in advance. Store them separately in the refrigerator. When you’re ready to serve, stuff the squash, top with cheese, and bake for the final 15 minutes (add 5 extra minutes if starting from cold). The key is to let the squash cool completely before storing and to keep the filling covered so it doesn’t dry out. If you’ve already assembled and baked the dish, it reheats beautifully in the oven — just cover loosely with foil to prevent the cheese from burning.
How do I reheat leftovers without making them soggy?
The best way to reheat leftovers is in the oven. Preheat to 350°F, place the squash halves on a baking sheet, and cover loosely with aluminum foil. Bake for 12–15 minutes, then remove the foil and bake for another 2–3 minutes to crisp the cheese. This method restores the roasted texture of the squash without steaming it. The microwave will make the squash soggy and the cheese rubbery, so use it only if you’re in a hurry — microwave on 70% power for 1½ minutes, then finish under the broiler for 1–2 minutes. I don’t recommend reheating this dish more than once for best quality.
Can I freeze Italian sausage and spinach stuffed spaghetti squash?
Yes, but with a tweak: I suggest freezing the roasted squash halves and the filling separately, without the cheese. When you’re ready to eat, thaw them overnight in the refrigerator, stuff the squash, add fresh Parmesan, and bake as directed. Freezing a fully assembled, baked dish can work, but the squash may become a bit mushy upon thawing. If you must freeze an assembled dish, let it cool completely, wrap tightly in plastic wrap and foil, and freeze for up to 3 months. Reheat from frozen in a 375°F oven for 30–35 minutes, adding fresh cheese halfway through.
What can I substitute for Parmesan cheese in this recipe?
If you don’t have Parmesan or are avoiding dairy, you have several good options. Pecorino Romano is a sharp, salty sheep’s milk cheese that melts well — use the same amount. For a dairy-free alternative, use a good-quality vegan Parmesan shred or nutritional yeast (start with 3 tablespoons and adjust to taste). For a more indulgent swap, try provolone or mozzarella for a stretchy, melty topping. Just be aware that non-aged cheeses release more moisture, so you may want to reduce the final baking time by a couple of minutes to avoid sogginess.
How do I cut a spaghetti squash easily and safely?
Spaghetti squash has a tough skin, so safety is key. First, soften the squash by microwaving it whole for 5 minutes (poke a few slits in the skin first). This step is optional but highly recommended — it makes the knife glide through. Place the squash on a damp paper towel to stop it from rolling. Use a large, sharp chef’s knife and cut lengthwise, starting from the stem end. Rock the knife gently with steady pressure. If you encounter resistance, stop and microwave a bit longer rather than forcing the knife. Once halved, scoop out the seeds with a sturdy spoon. My Paris chef instructor taught me to always cut away from my body and keep fingers curled under. Use a cut-resistant glove if you’re nervous.
Can I use ground chicken or turkey instead of Italian sausage?
Yes, you can swap the Italian sausage for ground chicken or turkey. Because poultry is leaner and less flavorful, you’ll need to add extra seasonings to replicate the sausage taste. Mix the ground meat with 1 teaspoon fennel seeds (lightly crushed), 1 teaspoon garlic powder, ½ teaspoon smoked paprika, ½ teaspoon salt, and ¼ teaspoon red pepper flakes. Cook the meat in 1 tablespoon olive oil — since it’s lean, it will produce less fat, so you may need a little extra oil to prevent sticking. The final filling will be slightly drier than the pork version, but still delicious. Consider adding a splash of chicken broth if the mixture seems too dry.
Share Your Version!
I’d love to see how your stuffed spaghetti squash turns out! Did you go with the spicy sausage, or try a vegetarian twist? Did you add that pinch of cinnamon I recommended? Drop a comment below and let me know — your ideas inspire the whole cookingwithemy community. And if you’re a visual person, snap a photo of your finished dish and tag me on Instagram or Pinterest @cookingwithemy. I personally read every comment and answer questions, so don’t be shy!
One thing I’m especially curious about: which variation are you most excited to try? The Moroccan-spiced version always surprises people, but the classic Italian is a hit every time. Let me know in the comments — I might feature your version on my stories!
From my NYC kitchen to yours — I hope this recipe brings as much warmth to your table as it does to mine. — emy 🧡
Love This Recipe? Save It to Pinterest!
If you enjoyed this Italian Sausage and Spinach Stuffed Spaghetti Squash recipe, don’t let it get lost in your browser tabs! 😄 Pin it now so you can find it again anytime — and explore hundreds more tried-and-tested recipes waiting for you on my Pinterest boards.
👉 Follow emy on Pinterest @cookingwithemy
📌 Pin this recipe · 🔁 Re-pin your favorites · 💬 Tag me when you make it — I love seeing your creations!

Italian Sausage and Spinach Stuffed Spaghetti Squash
Description
Italian Sausage and Spinach Stuffed Spaghetti Squash is just like your favorite Italian sausage pasta! Except in this recipe, everything is stuffed into the roasted spaghetti squash! This cozy dinner is packed with veggies (spinach, tomatoes, and mushrooms). It’s completely gluten-free, low-carb, and keto-friendly!
Ingredients
- 2 spaghetti squash (medium size)
- 2 tablespoons olive oil
- salt and pepper
- 1 tablespoon olive oil
- 16 oz spicy Italian sausage (crumbled)
- 8 oz mushrooms (sliced)
- ½ teaspoon Italian seasoning (or Herbs from Provence)
- 4 cloves garlic (minced)
- red pepper flakes
- 10 oz spinach
- 5 oz cherry tomatoes (sliced)
- 6 oz Parmesan cheese (shredded)
- fresh thyme (for garnish)
Instructions
- Preheat oven to 400 Fahrenheit. Line the baking sheet with parchment paper.
- Cut the squash in 2 halves, scrape out the seeds and the fiber out of each half. Repeat with a second squash.
- (Note: before cutting each squash, you can microwave it. In this case, make large slits with a knife in a spaghetti squash along the line where you will slice it in half. Then, microwave the whole squash for about 5 or 10 minutes to soften it a bit. Then cut each squash in half.)
- Drizzle olive oil over the cut sides and inside of the squash. Generously season with salt and pepper.
- Place the 4 squash halves on the prepared baking sheet cut side down.
- Bake for about 30 or 40 minutes on the middle rack. Remove it from the oven when it's cooked through and soft. You can check by pulling the baking sheet out of the oven and piercing the squash with the fork – it should be soft.
- Proceed with the rest of the recipe while the squash is in the oven.
- Make the stuffing while the spaghetti squash is roasted in the oven. Heat 1 tablespoon of olive oil on medium heat in a large, high-sided skillet.
- Add crumbled sausage and sliced mushrooms and cook on medium heat for about 5 minutes or until the sausage is cooked. Drain excess fat if you like. Or, you could leave it in since you will be adding a lot of spinach to be wilted in the same skillet.
- Add minced garlic, Italian seasoning, red pepper flakes, and chopped tomatoes (reserving some for later use).
- Add fresh spinach in batches to the sausage mixture and cook until the spinach wilts.
- By this time, you have roasted the spaghetti squash for 30 or 40 minutes. Remove it from the oven and turn cooked squash halves cut sides up.
- Let it cool slightly.
- Divide the Italian sausage mixture among the 4 halves and stuff the squash until the mixture is leveled. Top with the remaining sliced cherry tomatoes and the shredded Parmesan cheese.
- Return stuffed spaghetti squash to the preheated oven and roast at 400 F for 15 more minutes until the cheese mixture melts.
- When serving, top with fresh thyme.
Nutrition
- Calories: 561 kcal
- Sugar: 11 g
- Fat: 40 g
- Carbohydrates: 28 g
- Protein: 26 g
Tried This Recipe? Leave a Comment!
Did you make this recipe? I’d love to hear how it turned out! Please leave a comment and a rating below. Your feedback helps other home cooks and supports cheerychop.com!
For more delicious inspiration, follow me on Pinterest!