Ultimate Cheese-Stuffed Chicken Recipe for Irresistible Flavor Delight

Ultimate Cheese-Stuffed Chicken Recipe: A Cheesy Delight

⚖️
Difficulty
Moderate

⏲️
Prep Time
20 mins

🕒
Cook Time
30 mins

⏱️
Total Time
50 mins

🍽️
Servings
4

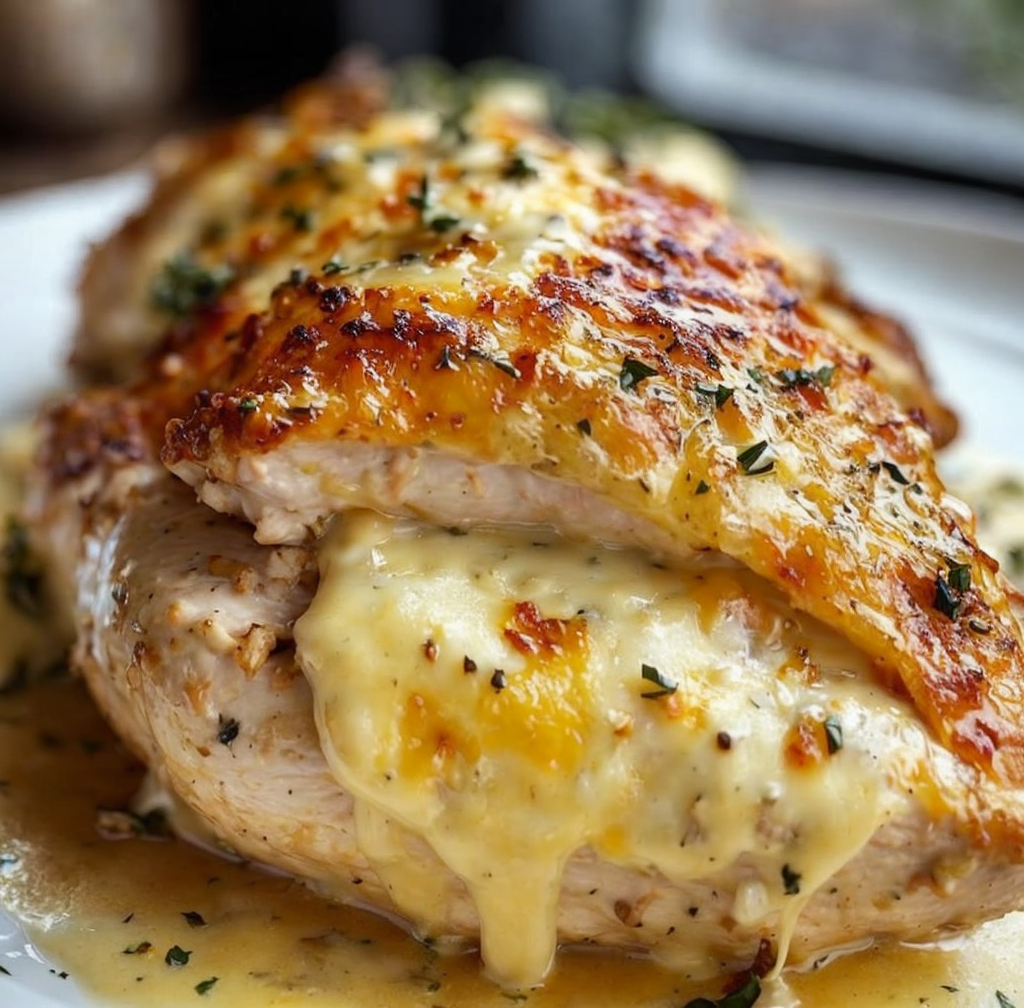
The Ultimate Cheese-Stuffed Chicken Recipe is a culinary masterpiece that promises to please cheese lovers and chicken enthusiasts alike. Imagine tender chicken breasts, expertly filled with a gooey blend of cheeses that melts beautifully as it bakes, creating an extraordinary dish that is as comforting as it is impressive. Each bite offers a delightful contrast of flavors—with the savory chicken perfectly complementing the rich, creamy cheese filling. This recipe is not just a meal; it’s an experience that brings joy to the table.

This cheese-stuffed chicken is elevated by its cohesive blend of herbs and spices, adding depth to the overall taste profile. The aroma wafting from the kitchen as it cooks is nothing short of intoxicating, enveloping your home in a warm, inviting fragrance that will have everyone flocking to the dinner table. With simple ingredients and an easy preparation method, this recipe allows you to showcase your culinary skills without overwhelming you. Perfect for a weeknight dinner or a special occasion, it strikes the ideal balance between elegance and comfort food.

Quick Recipe Highlights

  • Flavor Profile: This dish features a delightful combination of savory chicken with a rich and creamy cheese filling, enhanced by aromatic herbs and spices.
  • Texture: Expect a crispy exterior that leads to a succulent, juicy interior with a smooth, melting cheese center.
  • Aroma: The combination of garlic, herbs, and melting cheese creates a mouthwatering scent that fills the kitchen.
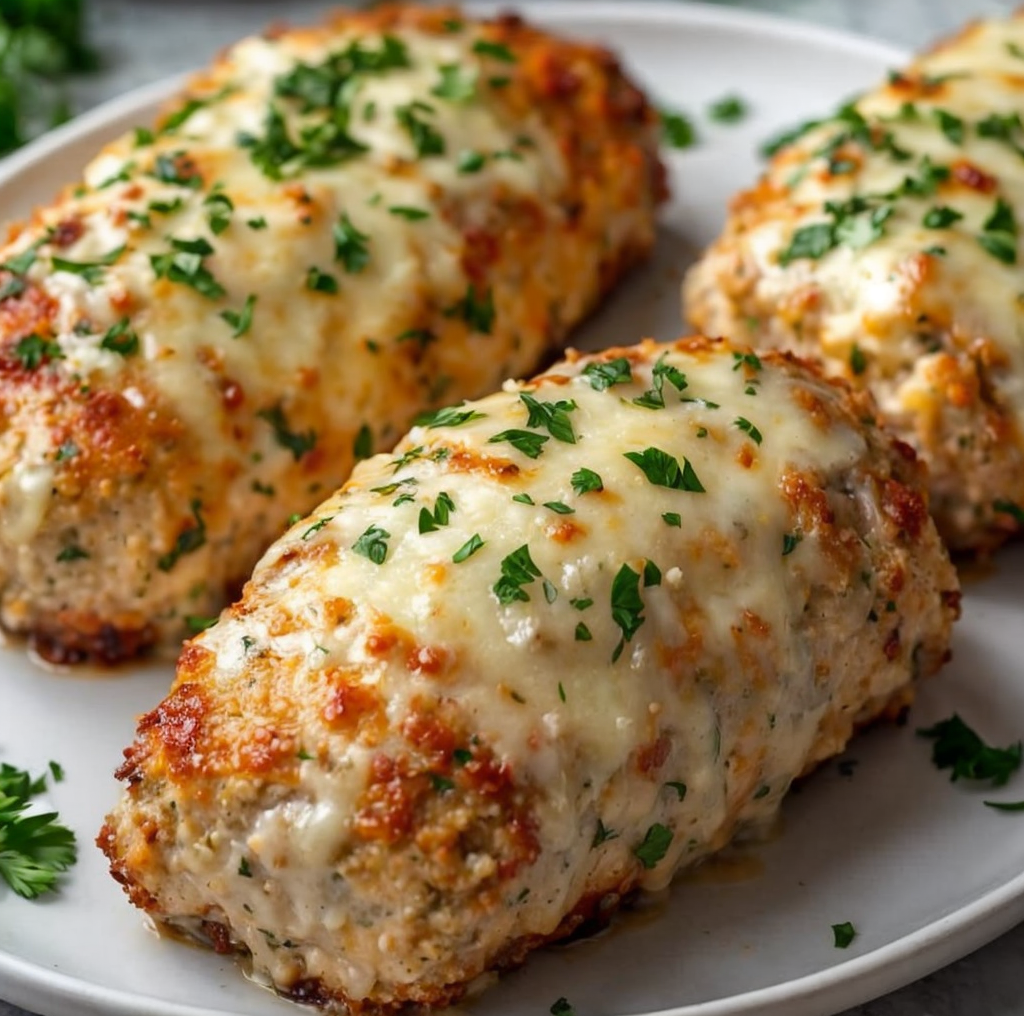
  • Visual Appeal: The golden-brown chicken breasts stuffed with colorful cheeses peek through, enticing anyone’s appetite.
  • Skill Level Needed: Though it requires a bit of technique, the recipe is approachable for both novice cooks and seasoned chefs.
  • Special Equipment: A meat mallet and toothpicks or kitchen twine are recommended for easy stuffing and securing.

Recipe Overview

  • Difficulty Level: The dish requires moderate skill, particularly in handling and stuffing the chicken, but the techniques are straightforward and easy to follow.
  • Category: This cheese-stuffed chicken fits seamlessly into dinner or main course categories, making it versatile for various meal types.
  • Cuisine: While inspired by classic comfort food, this dish draws on various culinary influences, resulting in a heartfelt blend of tastes.
  • Cost: The primary ingredients are budget-friendly, making the dish attainable without compromising quality.
  • Season: Ideal for all seasons, this recipe stands out in fall and winter when comfort food is highly sought after.
  • Occasion: Perfect for family dinners, gatherings, or even as a meal prep hero for lunch throughout the week.

Why You’ll Love This Recipe

This cheese-stuffed chicken dish not only excels in taste and texture but also delivers a satisfying experience that brings warmth to your dining table. The combination of juicy chicken and luxurious cheesy filling offers a delightful sensory experience, making it a hit with family and friends. A well-executed flavor balance of herbs and seasonings accentuates the dish, nourishing both body and soul.

The preparation process is convenient, as it can be done in less than an hour. With accessible ingredients and straightforward techniques, you can master this dish without the stress of complicated cooking. It’s an excellent choice for novice cooks or anyone looking to impress without extensive culinary experience.

Nutritionally, this recipe provides plenty of protein from the chicken, along with essential nutrients from the herbs and cheeses. Overall, you are served a well-rounded meal without sacrificing flavor or indulgence, making it an attractive choice for health-conscious eaters.

This recipe shines for social occasions; imagine presenting this stunning dish at your next gathering. The creamy filling and beautiful presentation are both inviting and impressive, creating a perfect conversation piece while allowing you to enjoy your time with loved ones.

Given its cost-effectiveness, this ultimate cheese-stuffed chicken is accessible to everyone. With common pantry ingredients and a few fresh produce items, you can whip up a meal that feels gourmet while keeping the budget intact.

Historical Background and Cultural Significance

Cheese-filled dishes have a long history dating back centuries, celebrated in various cultures for their ability to combine the richness of dairy with savory elements. This particular cheese-stuffed chicken sees influences from classic European cuisine, often featuring poultry paired with cheese and herbs.

In many cultures, stuffed dishes represent care and tradition, passed down through generations. The delight in showcasing one’s cooking abilities through an intricate filling presents itself uniquely in gatherings and family dinners, making it a significant culinary tradition.

Over time, the evolution of this dish has seen variations adapting to local tastes and ingredient availability, making it a versatile option for many households. Various regions have developed their own unique takes on stuffed meats, with cheese often being a celebrated ingredient, showing its importance across different culinary traditions.

You’ll find regional variations of stuffed chicken, some incorporating local spices or specific types of cheese indigenous to certain areas. This flexibility ensures that the dish remains both classic yet adaptable, giving it a rich source of cultural significance in global cuisine.

Ingredient Deep Dive

Chicken Breast
Historically, chicken has been a staple protein source in many cultures due to its accessibility and versatility. Low in fat and high in protein, chicken breast is an excellent choice for a healthy diet. When selecting chicken, look for breasts that are plump and have a pinkish hue; this ensures freshness. Store chicken in the refrigerator, but it can be frozen for longer shelf life.

Cheese
Cheese, a beloved ingredient in various cuisines, has been enjoyed since ancient times. It brings flavors together while adding creaminess to dishes. Nutritionally, cheese provides calcium and protein but should be consumed in moderation due to higher fat content. When choosing cheese, opt for fresh cheeses like mozzarella or creamy cheeses like cream cheese, depending on the desired final flavor. Store cheese in airtight containers to keep its freshness, and consider substitutions like vegan cheese for dietary preferences.

Common Mistakes to Avoid

  • Not pounding the chicken evenly can lead to uneven cooking.
  • Overstuffing the chicken may cause it to burst during cooking.
  • Skipping the resting period after cooking may result in dry chicken.
  • Using cold cheese can make it hard to stuff the chicken smoothly.
  • Overcooking the chicken can make it rubbery and dry.
  • Neglecting to season the filling can result in bland flavors.
  • Choosing the wrong cheese type may affect the melting quality.
  • Forgetting to secure the filling can lead to cheese spilling out.
  • Not allowing the chicken to come to room temperature before cooking might affect cooking time.
  • Skipping the sauce or drizzling glaze can make the dish less appealing visually and flavor-wise.

Essential Techniques

Pounding Chicken
Pounding the chicken creates an even thickness, promoting uniform cooking. Use a meat mallet, and start from the center, working outward. Avoid excessive force to prevent tearing. Aim for about half an inch thickness.

Stuffing Chicken
Properly stuffing the chicken requires an even scoop of filling, leaving space to secure the edges. Do not overstuff; a heaping tablespoon per breast is sufficient. Secure with toothpicks or kitchen twine to avoid leaks.

Pro Tips for Perfect Ultimate Cheese-Stuffed Chicken

Prepare your filling a day in advance for deeper flavors. Use freshly grated cheese for better melting quality. Allow chicken to sit at room temperature for 15 minutes before cooking to ensure even cooking. Season the outside of the chicken well for enhanced flavor. Invest in a good meat thermometer to check the internal temperature accurately. Let the stuffed chicken rest for at least 5 minutes before slicing, ensuring juiciness. Optionally, serve with a light salad to balance the richness.

Variations and Adaptations

Explore regional variations by incorporating local herbs or spices. Seasonal adaptations might include using squash in the filling during fall. For dietary restrictions, consider vegan cheese or poultry substitutes like tofu or tempeh. Flavor variations could include sautéed vegetables or different garlic notes. Texture modifications might involve adding cooked grains to the filling for additional bulk. Presentation alternatives could focus on enticing garnishes or cooking in a sauce instead of baking.

Serving and Presentation Guide

Present the dish beautifully by slicing through one piece to showcase the cheese oozing out. A drizzle of rich balsamic reduction adds a gourmet touch. Garnish with freshly chopped herbs, such as parsley or basil, for a pop of color and flavor. Pair with seasonal vegetables on the side and make sure to serve warm for the best flavor experience. Aim for appropriate portion sizes, allowing guests to enjoy the flavors without being overwhelmed.

Wine and Beverage Pairing

Opt for a crisp white wine, such as Chardonnay or a light Sauvignon Blanc, that complements the richness of the cheese. Non-alcoholic alternatives like sparkling water with a splash of lemon can refresh the palate. If coffee or tea is desired, a lightly roasted coffee can provide a wonderful contrast to the savory flavors. Serve beverages chilled or at room temperature, ensuring that they enhance the dish without overpowering it.

Storage and Shelf Life

Leftover cheese-stuffed chicken should be stored in an airtight container in the refrigerator, where it will last up to 3 days. To freeze, wrap it tightly in plastic wrap and store in a freezer-safe container for up to 3 months. Always check for signs of spoilage, such as off-smells or changes in texture, before reheating. To reheat, use the oven to maintain the texture and ensure it warms evenly, at about 350°F until heated through.

Make Ahead Strategies

To save time, prepare the stuffed chicken a day in advance, allowing flavors to meld. When storing, wrap it tightly to prevent drying out. Consider cooking it partially, then finishing it just before serving for optimal flavor. Avoid adding fresh elements, like herbs or sauces, until right before serving to maintain quality.

Scaling Instructions

For halving the recipe, use a single chicken breast and adjust filling ingredients accordingly. Doubling or tripling requires extra attention to cooking time, typically adding about 10-15 minutes per additional piece. Always use a thermometer to ensure even doneness throughout. Keep storage needs in mind, as larger quantities will require more space in your kitchen.

Nutritional Deep Dive

This recipe offers an appealing macro breakdown with high protein from chicken and cheese. Understand contributing micronutrients, including calcium from cheese and iron from chicken. Health benefits are prominent, catering to active lifestyles while offering wholesome ingredients. Be mindful of portions to maintain balance, particularly when making dietary choices focused on weight management or specific nutritional needs.

Dietary Adaptations

Modify the dish for gluten-free diets by using corn starch for breading. Consider a dairy-free option with plant-based cheeses for lactose intolerance. Vegan adaptations could utilize chickpea or lentil-based fillings to replace chicken. Low-carb and keto-friendly adjustments could focus on skipping breadcrumbs and increasing cheese filling. Always ensure substitutions maintain flavor and texture for the best cooking results.

Troubleshooting Guide

If the stuffed chicken is too dry, double-check cooking times and temperatures. Ensure that ingredients are fresh and not past their prime, as this can affect flavor quality. If flavors aren’t well-rounded, re-season after stuffing for better balance. Equipment struggles might arise from mismatched tools; ensure you have the right sizes for your chicken breasts and ingredients.

Recipe Success Stories

Feedback from the community has always emphasized the versatility of this recipe, with many sharing successful variations incorporating unique cheese blends. Adaptation stories feature creative spins like buffalo chicken flavors or vegetarian versions using eggplant. Photography tips often revolve around capturing the melty cheese in action, encouraging readers to document and share their successes.

Frequently Asked Questions

Can I make this recipe ahead of time? Yes! You can prepare the chicken and stuffing a day in advance and store it in the fridge until ready to cook.

What type of cheese works best? For a gooey filling, opt for mozzarella or a blend of cream cheese with your favorites like cheddar or parmesan.

Can I grill this instead of baking? Absolutely! Grilling adds a smoky flavor to the chicken, just be sure to secure the stuffing well.

How long does leftovers last? Leftover cheese-stuffed chicken can be safely stored in the refrigerator for up to 3 days.

What sides pair well with this dish? Consider serving with a fresh salad, roasted veggies, or creamy mashed potatoes for a complete meal.

How do I ensure my chicken is cooked through? Use a meat thermometer to check the internal temperature; it should read 165°F (75°C).

Can I freeze the stuffed chicken? Yes, wrap them tightly to prevent freezer burn and store for up to 3 months.

What if I don’t have a meat mallet? A heavy pan or rolling pin can work just as effectively for pounding the chicken.

Is it easy to adapt for dietary restrictions? Yes! This recipe can easily be adjusted for gluten-free, dairy-free, and vegan diets.

What herbs can I include? Fresh herbs like basil, thyme, or parsley can enhance flavor; incorporate them into the cheese filling.

Additional Resources

Explore related recipes such as stuffed pork chops or cheesy pasta bakes for variations on similar themes. Look into technique guides that offer insight into making perfect stuffed dishes. Investigate information about seasonal ingredients to better adapt the recipes to local availability and customer preferences. Equipment recommendations for kitchen tools can elevate your cooking experience significantly.

Join the Conversation

We want to hear your thoughts! Share your experience preparing the Ultimate Cheese-Stuffed Chicken on social media with your own unique twists. Post your photos, engage with other cooking enthusiasts, and leave reviews to spark discussions about the best adaptations or techniques you’ve discovered. Let’s create a fantastic community around delicious cooking!

The Recipe

Ultimate Cheese-Stuffed Chicken

Serves: 4

Prep Time: 20 mins

Cook Time: 30 mins

Total Time: 50 mins

Kitchen Equipment Needed

  • Meat mallet
  • Toothpicks or kitchen twine
  • Oven-safe dish
  • Meat thermometer
  • Mixing bowl

Ingredients

  • 4 chicken breasts
  • 1 cup shredded mozzarella cheese
  • ½ cup cream cheese, softened
  • 1 teaspoon garlic powder
  • 1 tablespoon chopped fresh parsley
  • Salt and pepper to taste
  • 1 cup breadcrumbs

Directions

  1. Preheat the oven to 375°F (190°C).
  2. Begin by pounding the chicken breasts to an even thickness for uniform cooking.
  3. In a mixing bowl, combine mozzarella, cream cheese, garlic powder, parsley, salt, and pepper to form the filling.
  4. Scoop the filling into the center of each chicken breast, folding the sides over, and securing with toothpicks or twine.
  5. Coat each stuffed chicken breast in breadcrumbs.
  6. Place the chicken in an oven-safe dish and bake for 30 minutes or until the internal temperature reaches 165°F (75°C).
  7. Remove from the oven, allow to rest for 5 minutes, then serve warm.

Recipe Notes

  • Feel free to customize the cheese blend based on your preference.
  • Use fresh herbs for a more vibrant flavor.
  • This recipe can be doubled for larger gatherings.

Irresistible Chicken Bacon Ranch Pinwheels Recipe for Your Next Party

Chicken Bacon Ranch Pinwheels: A Flavor-Packed Delight

⚖️
Difficulty
Easy

⏲️
Prep Time
15 mins

🕒
Cook Time
0 mins

⏱️
Total Time
15 mins

🍽️
Servings
8 pinwheels

If you’re searching for a delicious and easy appetizer that’s perfect for parties, gatherings, or a quick evening snack, look no further than Chicken Bacon Ranch Pinwheels. These tasty, bite-sized treats combine savory chicken, crispy bacon, and zesty ranch dressing, all wrapped in a tortilla, creating layers of flavor that are hard to resist. Whether you’re hosting a game day party or just want to indulge in a flavorful snack, these pinwheels are sure to please a crowd!

Picture this: A soft tortilla, spread with creamy ranch dressing, layered with succulent chicken, and vibrant greens, all topped off with crispy bacon bits, making each bite a delightful explosion of texture and taste. Not only are they visually appealing, with their colorful layers, but they also carry a nostalgic charm that brings back memories of family gatherings and carefree get-togethers, making them the ultimate crowd-pleaser.

Quick Recipe Highlights

  • Flavor Profile: The combination of juicy chicken, smoky bacon, and tangy ranch dressing creates a harmonious balance that excites the palate.
  • Texture: Each pinwheel features a delightful contrast between the crisp tortillas and the tender fillings, providing a satisfying bite.
  • Aroma: The enticing scent of cooked bacon mingles with the creamy ranch aroma, making it hard to resist while they’re being prepared.
  • Visual Appeal: These pinwheels exhibit an eye-catching swirl of greens, chicken, and bacon that makes them a visually inviting treat.
  • Skill Level Needed: Perfect for beginner cooks, this recipe requires minimal cooking techniques, mostly involving assembly.
  • Special Equipment: Only a cutting board and knife are needed, making this a no-fuss recipe.

Recipe Overview

  • Difficulty Level: This recipe is classified as easy, making it accessible for cooks of all skill levels. The most complex aspect is assembling the ingredients, which is straightforward and quick.
  • Category: These pinwheels fall under the appetizer category, ideal for serving at parties, casual get-togethers, or as a delicious snack.
  • Cuisine: While not tied to a specific cuisine, Chicken Bacon Ranch Pinwheels reflect American flavors, combining popular ingredients loved across the nation, like ranch dressing and bacon.
  • Cost: Overall, these pinwheels are budget-friendly, with ingredients that are both affordable and easy to find at your local grocery store.
  • Season: Best enjoyed year-round, these pinwheels are particularly popular during summer picnics and holiday parties.
  • Occasion: Perfect for any occasion, these pinwheels can be served at birthdays, holidays, or any festive gathering.

Why You’ll Love This Recipe

First, the flavor and texture appeal of Chicken Bacon Ranch Pinwheels is unbeatable. The rich taste of the ranch dressing perfectly complements the savory chicken and crunchy bacon, while the tortillas provide a soft and satisfying base. Every bite offers a delightful crunch and creamy finish that keeps you coming back for more.

Second, these pinwheels offer great convenience and ease of preparation. With minimal cooking required, you can whip up a batch in just 15 minutes, making them an ideal choice for quick meals or last-minute gatherings. They’re also perfect for meal prep, as you can make them ahead of time and store them for later enjoyment.

Nutritionally, while they are indulgent, you can easily modify the recipe to make it healthier. By using whole-wheat tortillas, grilled chicken, and light ranch dressing, you can create a snack that satisfies cravings without compromising your dietary goals.

Socially, these pinwheels are fantastic for entertaining. They’re easy to serve and always a hit at parties, making them a great choice for gatherings. Plus, because they can be cut into smaller portions, it’s easy for guests to snack while mingling.

Finally, their cost-effectiveness makes Chicken Bacon Ranch Pinwheels an accessible dish for everyone. With simple ingredients that are budget-friendly, they offer substantial flavor without breaking the bank. This makes them a practical option for any household.

Historical Background and Cultural Significance

Chicken Bacon Ranch Pinwheels may not have a deep historical lineage, but they represent a modern twist on classic American flavors. The combination of ranch dressing as a condiment started in the mid-20th century, with the popularity of ranch dips and dressings rising substantially, bringing creamy goodness to the forefront of American cuisine.

In terms of cultural importance, these pinwheels capture the essence of casual American gatherings, where finger foods reign supreme. Their popularity in celebration meals reflects a larger trend in culinary preferences, where quick, shareable bites dominate menus.

Over time, Chicken Bacon Ranch Pinwheels have evolved, with numerous variations emerging that showcase creativity in the kitchen. You’ll find different ingredients based on personal preferences, such as adding bell peppers, cheese, or other meats, allowing this dish to adapt and thrive in various contexts.

Regionally, adaptations of these pinwheels can be found across the United States. Some variations might include different types of sauces or herbs, keeping the recipe fresh and catering to local tastes.

Ingredient Deep Dive

Chicken: Chicken serves as the main protein in this dish, providing a satisfying and hearty element. Historically, it has been a staple in diets worldwide due to its accessibility and versatility. Nutritional benefits include high protein content, essential for muscle growth and repair. For selection, always choose fresh or frozen chicken breasts, ensuring even cooking. Proper storage requires refrigeration and can last about 2 days after cooking. For substitutions, consider rotisserie chicken for an even easier option.

Bacon: Bacon adds a smoky flavor and crispiness to Chicken Bacon Ranch Pinwheels, enhancing the overall taste. Its cultural significance in American breakfasts showcases its beloved status. Nutritionally, bacon is high in protein but also contains saturated fats, so moderation is key. When selecting bacon, opt for high-quality brands with minimal additives. Store it in the refrigerator, and use it within a week after opening. Alternatives can include turkey bacon or a plant-based option for a healthier choice.

Ranch Dressing: A creamy condiment that ties all the flavors together, ranch dressing has become a quintessential American dip since its inception. Nutritionally, it can offer flavor but may also be high in calories and preservatives, making dressings made from scratch a healthier option. Look for dressings with fewer ingredients for best taste. Store ranch in the fridge and follow the expiration date on the bottle. DIY options may include Greek yogurt or avocado as healthier substitutes.

Common Mistakes to Avoid

  • Using stale tortillas can result in a dry texture. Always choose fresh tortillas for optimal flavor.
  • Overfilling the pinwheels can make rolling difficult. Aim for a thin layer of filling to make rolling easier.
  • Not allowing the pinwheels to chill before slicing can lead to messy cuts. Chill for at least 30 minutes for best results.
  • Skipping the seasoning can lead to bland flavors. Ensure chicken and vegetables are properly seasoned before layering.
  • Choosing low-quality ingredients can impact flavor. Invest in fresh and flavorful components for the best results.
  • Slicing the pinwheels too thick can make them hard to eat. Aim for about 1-inch thickness for easy serving.
  • Ignoring dietary preferences can limit your guest’s enjoyment. Always ask about dietary restrictions before serving.
  • Not experimenting with flavors can make recipes dull. Don’t hesitate to alter ingredients to suit personal tastes.

Essential Techniques

Rolling: Mastering the rolling technique is crucial for successful pinwheels. Spread the filling evenly and use a firm and steady motion to roll tightly. Avoiding air pockets ensures the filling stays intact. Visual cues for success include the tortilla maintaining its shape and the filling securely held inside.

Chilling: Chilling the assembled pinwheels is essential to set the filling and make slicing easier. Aim to chill for at least 30 minutes. Shorter chilling times can make the pinwheels difficult to slice and less visually appealing. Ensure they are covered to maintain moisture.

Pro Tips for Perfect Chicken Bacon Ranch Pinwheels

1. Use fresh ingredients to elevate flavors; fresh herbs and crisp vegetables can significantly enhance overall taste.

2. Experiment with different types of tortillas; flavored or whole-wheat options can add unique twists to the classic recipe.

3. Incorporate various cheeses for additional richness; mozzarella or cheddar cheese can complement the existing flavors beautifully.

4. For added crunch, include thinly sliced veggies like bell peppers or cucumbers in the filling.

5. Adjust the ranch dressing’s creaminess by mixing it with Greek yogurt for a healthier alternative.

6. Slice pinwheels just before serving to maintain their freshness and visual appeal.

7. Make them a day in advance and store in the fridge for easy access on busy days.

8. Serve with an additional dipping sauce on the side, such as extra ranch or salsa for added flavor.

Variations and Adaptations

For a regional twist, try adding salsa or jalapeños to give your pinwheels a spicy kick. Seasonal adaptations, such as incorporating fresh herbs in the summer, can elevate the freshness of the dish. For dietary modifications, consider using gluten-free tortillas or even lettuce wraps for a low-carb option.

If you’re looking for flavor variations, swap out ranch dressing for pesto or Italian dressing to create a new taste experience. Texture modifications can include using crispy fried onions for added crunch or creamy avocado for a smooth layer. Presentation alternatives like serving on skewers can provide a fun and interactive dining experience.

Serving and Presentation Guide

To plate your Chicken Bacon Ranch Pinwheels, arrange them on a platter, sliced side up for visibility, and serve with small cups of ranch dressing or salsa beside them. Garnish with fresh herbs or a sprinkle of paprika for an appealing contrast. Think about colorful sides like carrot sticks or cucumber rounds to create a vibrant look. Temperature-wise, they should be served chilled but can also be enjoyed at room temperature. Portion control is easy, as one pinwheel makes for a perfect bite.

Wine and Beverage Pairing

For wine, a crisp Sauvignon Blanc complements the creamy ranch and salty bacon beautifully. For red wine lovers, opt for a light Pinot Noir that won’t overpower the dish. Non-alcoholic alternatives can include a refreshing sparkling lemonade or iced tea, which provide a nice balance to the tangy flavors. Coffee or tea isn’t usually paired but can be offered for a unique twist, with iced coffee being a delightful option in warmer months.

Storage and Shelf Life

For storage, keep these pinwheels wrapped tightly in plastic wrap and stored in the refrigerator to maintain freshness. Properly stored, they can last for up to three days. Signs of spoilage include an off smell or discoloration of the ingredients. To reheat, there is no need, as they are best enjoyed cold; however, for those preferring warm, briefly heat them in the microwave, carefully ensuring they do not become soggy. Freezing is not recommended, as the texture may become compromised.

Make Ahead Strategies

To prepare these Chicken Bacon Ranch Pinwheels ahead of time, assemble and chill them for up to a day before serving. This can enhance the flavors as they meld together. Store them in an airtight container between steps to maintain moisture. When you’re ready to serve, simply slice and arrange on a platter. Consider adding fresh herbs or a drizzle of dressing just before serving for a fresh touch, ensuring that quality remains high.

Scaling Instructions

For halving the recipe, simply adjust the ingredient quantities as necessary while still using the same preparation methods. Doubling or tripling is straightforward, but ensure you have enough surface area to roll the pinwheels effectively. Monitor the chilling time, as larger batches may need an extended time to firm up. Timing modifications aren’t usually necessary, but always check for freshness, especially if preparing in advance, maintaining consistent storage practices.

Nutritional Deep Dive

A single Chicken Bacon Ranch Pinwheel provides a well-rounded snack with a decent balance of protein and carbohydrates. Given its potential high fat content, be mindful of portion sizes if you’re managing weight. Incorporating fresh veggies can also add fiber and improve the on-the-go nutritional profile, making each bite more filling while enhancing dietary benefits.

Dietary Adaptations

For gluten-free options, utilize gluten-free tortillas or lettuce wraps instead of traditional tortillas. To transform these pinwheels into a dairy-free delight, opt for dairy-free ranch dressing and leave out any cheese used in the filling. Vegan adaptations could involve substituting chicken with chickpeas or using a tofu-based filling for a hearty alternative. Low-carb options can simply replace the tortilla with celery sticks or cucumber slices, maintaining the flavor while supporting dietary preferences.

Troubleshooting Guide

If your Chicken Bacon Ranch Pinwheels turn out too soggy, ensure the ingredients are adequately drained and avoid excessive dressing. For texture issues, consider adjusting the tortilla thickness, opting for larger ones for sturdier rolls. If flavors seem off, revisit your seasoning, as fresh herbs can add vibrancy. Equipment challenges may arise with improper rolling, so practice with a light hand for better results. Timing concerns should focus on chilling times to ensure easy slicing later.

Recipe Success Stories

Readers love sharing their positive experiences with these Chicken Bacon Ranch Pinwheels. Many have noted how their slight variations, such as adding jalapeños or trying different dressings, have been a hit at their gatherings. Detailed suggestions from the community have encouraged others to get creative, blending ingredients to suit their taste preferences. Aspiring photographers also appreciate how picturesque these pinwheels are, sharing stunning images on social media channels across the culinary community.

Frequently Asked Questions

Can I use store-bought chicken? Yes, using pre-cooked or rotisserie chicken can save time and is a great option for a quick meal. Make sure to shred or chop it into bite-sized pieces before using it in the pinwheels.

How long do these pinwheels last in the fridge? Chicken Bacon Ranch Pinwheels can last up to 3 days in the refrigerator when stored properly. Ensure they are wrapped tightly to maintain freshness.

Can I freeze Chicken Bacon Ranch Pinwheels? Freezing is not generally recommended as the texture may change after thawing. However, if you wish, you can freeze the ingredients separately and assemble them fresh when ready to serve.

What can I serve with these pinwheels? They pair wonderfully with a side of vegetable sticks, chips, or even a light salad for a complete appetizer spread.

Do I need to cook the bacon beforehand? Yes, it’s best to cook the bacon until crispy. This not only enhances the flavor but also ensures proper food safety.

Can I make them ahead of time? Absolutely! You can assemble them a day in advance and store them in the refrigerator to save time on the day of your event.

What kind of tortillas work best? Flour tortillas are generally preferred for their flexibility, but whole-wheat or even spinach tortillas can add a delicious twist and extra nutrition.

Is there a vegetarian option for this recipe? Yes! Substitute chicken with black beans or shredded vegetables like zucchini or carrots for a delicious vegetarian alternative.

Can I use a different dressing? Certainly! Feel free to experiment with other dressings such as buffalo sauce, blue cheese, or even a homemade vinaigrette.

What’s the best way to cut the pinwheels? Use a sharp knife for clean slices and cut gently to avoid squeezing out the filling. Cutting just before serving maintains freshness and presentation.

Additional Resources

Explore other related recipes that complement Chicken Bacon Ranch Pinwheels, like fresh salads or savory dips, to create a well-rounded menu. Learn essential kitchen techniques and ingredient information that enhance your culinary skills. For equipment recommendations, consider tools that make the assembly of these pinwheels easier, such as sharp knives or cutting boards with measurements.

Join the Conversation

We encourage readers to share their creations and variations on social media to create a community of cooking enthusiasts. Post pictures of your Chicken Bacon Ranch Pinwheels under our unique hashtag, and let us know about your experiences and any twists you added. Join our cooking community for recipe reviews, tips, and to get inspired by others’ culinary adventures.

The Recipe

Chicken Bacon Ranch Pinwheels

Serves: 8 pinwheels

Prep Time: 15 mins

Cook Time: 0 mins

Total Time: 15 mins

Kitchen Equipment Needed

Ingredients

Directions

  1. Spread ranch dressing evenly over each tortilla.
  2. Layer shredded chicken, bacon, and lettuce on top of the ranch dressing.
  3. Add cheese if desired, ensuring an even distribution.
  4. Roll the tortillas tightly from one end to the other.
  5. Wrap the rolled tortillas in plastic wrap and chill for at least 30 minutes.
  6. After chilling, slice into 1-inch pinwheels and serve immediately.

Recipe Notes

Delicious Italian Pinwheels Recipe: A Snack Everyone Will Love!

Italian Pinwheels Recipe: A Snack Worth Sharing!

⚖️
Difficulty
Easy

⏲️
Prep Time
15 mins

🕒
Cook Time
0 mins

⏱️
Total Time
15 mins

🍽️
Servings
12 pinwheels

Italian Pinwheels are the ultimate snack that brings flavor, fun, and creativity to your gatherings. This recipe includes a mix of delectable ingredients, rolled up tightly into a satisfying bite-sized treat. With the use of savory meats, creamy spreads, and fresh veggies, each slice bursts with Italian-inspired flavors that will leave your guests impressed. Perfect for lunchboxes, appetizers, or party platters, these pinwheels are not only delicious but also visually enticing.

This snack is incredibly versatile; you can customize it with your favorite ingredients or whatever you have on hand. The best part? They require minimal cooking and are quick to prepare, making them an ideal choice for busy weeknights or unexpected guests. Each bite delivers a delightful crunch paired with mouthwatering flavors of Italy, ensuring that these pinwheels become a staple in your recipe repertoire!

Quick Recipe Highlights

  • Flavor Profile: Expect a delightful combination of savory salami, creamy cheese, and zesty Italian dressing that comes together beautifully.
  • Texture: The soft tortilla provides a satisfying base while the crunchy veggies add an appealing contrast in each bite.
  • Aroma: The aroma from the fresh herbs and spices will awaken your senses and get your taste buds ready for something scrumptious.
  • Visual Appeal: The colorful layers of ingredients create a stunning visual effect, making them perfect for gatherings.
  • Skill Level Needed: Anyone can master this recipe—perfect for both novice cooks and seasoned chefs alike.
  • Special Equipment: You simply need a sharp knife for slicing and a cutting board—no complicated gadgets required!

Recipe Overview

  • Difficulty Level: This Italian Pinwheels recipe is rated easy, making it suitable for everyone, including kids who want to help cook!
  • Category: Enjoy it as a snack or appetizer, perfect for parties, picnics, or as a light meal.
  • Cuisine: Rooted in Italian culinary traditions, this recipe reflects the vibrant flavors and easy-going nature of Italian dishes.
  • Cost: Prep this delightful snack on a budget; ingredient costs are typically low, making it affordable for all.
  • Season: Ideal for any season, pinwheels can be enjoyed year-round with fresh ingredients.
  • Occasion: Serve these at birthday parties, holiday gatherings, or casual family get-togethers to impress your guests!

Why You’ll Love This Recipe

The taste and texture of Italian Pinwheels are genuinely irresistible. The combination of a soft flour tortilla and savory filling creates a delightful experience, as the flavors meld together beautifully. Each pinwheel is a festival of tastes, from the saltiness of the salami to the creaminess of the cheese, balanced perfectly by the freshness of veggies. This comforting snack is a remarkable treat for your palate, guaranteed to satisfy your cravings.

Convenience is at the forefront of this recipe. With just a short prep time, you can create a platter of these inviting pinwheels that are ready to be devoured. They are sturdy and travel well too, perfect for on-the-go lunches or party snacks. Plus, they can be made in advance and kept fresh in the refrigerator, thus saving you time on the day of the event.

Nutritionally, Italian Pinwheels provide a range of beneficial ingredients. You can incorporate lean meats, fresh vegetables, and nutritious spreads, making them a balanced option that can fit into various dietary needs. You get protein, healthy fats, and fiber—all in a delightful snack form that doesn’t sacrifice taste for health.

Socially speaking, these pinwheels are a hit at any gathering. Their bite-sized nature makes them easy to serve, share, and enjoy while mingling. Perfect for tapping into conversations and socializing without the hassle of bigger portions, they create a relaxed and cheerful dining atmosphere.

Cost-effectiveness is another appealing feature. With readily available ingredients from your local grocery store, you can whip up a generous batch of these pinwheels without breaking the bank, making it a smart choice for feeding a crowd on a budget.

Historical Background and Cultural Significance

The origin of pinwheels can be traced back to many cultures that enjoy rolled or folded bread with fillings. In Italy, similar preparations of cured meats, cheeses, and fresh vegetables wrapped in thin bread have been enjoyed for generations. The Italian culinary tradition embraces using simple yet refreshing ingredients, enhancing flavors while keeping them approachable and wholesome.

Culturally, Italian Pinwheels signify conviviality and celebration. Shared meals, like those featuring these pinwheels, bring friends and family together for good food and merriment. Particularly in Italian culture, food is a central part of enriching relationships, and recipes like these help foster a sense of community.

Over time, the use of pinwheels has evolved, accompanying various fillings and styles depending on regional ingredients and preferences. While traditional Italian pinwheels focus on meats and cheeses, fusion adaptations have also emerged, showcasing local favorites and global ingredients.

Variations of pinwheels are popular worldwide; similar recipes can be found in different cuisines, showcasing the versatility of rolled snacks. From the Vietnamese rice paper rolls to southwestern-style tortilla wraps, the concept of wrapping foods continues to thrive across cultures, proving their universal appeal.

Ingredient Deep Dive

Salami, a key ingredient in Italian Pinwheels, has its roots in ancient practices of preserving meat. This flavorful, cured sausage brings authenticity to the dish, establishing rich flavors. Nutritionally, salami provides protein and essential vitamins like B12. When choosing salami, look for high-quality options with natural ingredients to enhance taste. Store it in a cool, dry place, and vacuum-seal leftovers for increased longevity. For substitution, consider turkey or chicken variations for a leaner option.

Cream cheese acts as a delectable spread that brings the different flavors together. It adds creaminess and acts as a binding agent, preventing the fillings from falling apart. Cream cheese is a source of calcium and vitamin A, necessary for bone health and immunity. When purchasing, opt for full-fat versions for better taste and texture; however, Neufchâtel or low-fat options are available for a lighter touch. It can be stored in the refrigerator for about two weeks, and substitutions like hummus or goat cheese can also be used for a different flavor profile.

Fresh vegetables such as bell peppers and spinach add a crunchy texture while providing essential nutrients. Bell peppers are rich in vitamins A and C, which boost immunity, while spinach offers iron and fiber. When selecting vegetables, opt for firm and vibrant options to ensure freshness, and store them in the vegetable drawer of your fridge. You can substitute with any seasonal greens or other veggies you prefer.

Common Mistakes to Avoid

  • Using stale tortillas: Fresh, soft tortillas are crucial for easy rolling. Stale ones can crack and break apart.
  • Overfilling: Adding too many ingredients can make rolling challenging and cause the pinwheels to burst open.
  • Not chilling: Letting the assembled pinwheels chill in the fridge before slicing allows them to set and makes cutting easier.
  • Skipping seasoning: Proper seasoning enhances flavors, so don’t forget to season the cream cheese or vegetables before rolling.
  • Not using a sharp knife: A sharp knife is essential for clean cuts; a dull knife can squish the pinwheels and make them unappealing.
  • Choosing bland ingredients: Use flavorful meats and fresh produce to ensure the pinwheels taste vibrant.
  • Ignoring food safety: Ensure perishable ingredients like cream cheese are refrigerated before and after serving.
  • Rushing the process: Take your time while rolling to avoid messy and poorly shaped pinwheels.
  • Neglecting garnish and presentation: Add fresh herbs or a drizzle of dressing to enhance appearance and taste.
  • Not tasting: Always taste the filling mixture before rolling to adjust seasoning as needed.

Essential Techniques

Rolling is the most crucial technique for making pinwheels. Proper rolling helps enclose all fillings securely, preventing spillage when sliced. To master this, start from one end, tucking the filling, and continue to roll tightly without over-squeezing. It’s important to ensure a compact structure while maintaining some space for expansion in the tortilla.

Chilling the assembled pinwheels is vital for maintaining their shape. When combined, give them at least 30 minutes in the refrigerator before slicing. This allows the cream cheese to firm up and helps all flavors meld. Visual cues of success include a sturdy roll that doesn’t uncoil or break; once cut, the pinwheels should hold their shape and display vibrant layers.

Pro Tips for Perfect Italian Pinwheels

– Use a variety of colored vegetables for a visually stunning presentation that appeals to guests.
– For a spicy kick, consider adding jalapeños or a chipotle spread to your cream cheese mixture.
– Experiment with different spreads, such as pesto or tapenade, to change the flavor profile.
– Incorporate herbs like fresh basil or parsley to enhance the Italian flair and nutritional value.
– Cut the pinwheels into various sizes depending on the serving occasion; larger pieces can work as a light meal.
– Consider adding a layer of spinach or mixed greens inside for added nutrition and texture.
– Use whole-grain or gluten-free tortillas to cater to dietary needs and preferences.
– Prepare the pinwheels a day in advance; they taste even better as the flavors meld overnight.

Variations and Adaptations

Regional variations of pinwheels can include different meats or spices reflective of the area. For instance, a southwestern twist could incorporate smoked turkey and pepper jack cheese, giving a unique flair. Seasonal adaptations can highlight ingredients like roasted butternut squash or fresh tomatoes in summer.

Dietary modifications are simple—substituting traditional meats for leaner options, like grilled chicken, offers a delicious alternative without sacrificing flavor. Flavor variations might involve using different cheese types, such as feta for a Mediterranean feel or mozzarella for classic Italian flavors.

For texture modifications, consider grilling the pinwheels briefly for a warm, crispy exterior. Presentation alternatives could involve skewering small pinwheels onto toothpicks and serving with a dipping sauce for added appeal.

Serving and Presentation Guide

Plating techniques can elevate your Italian Pinwheels from ordinary to extraordinary. Arrange them in a spiral on a large platter, garnishing with fresh herbs or colorful vegetable slices for a pop of color. For a more sophisticated touch, consider serving them on a rustic wooden board with toothpicks for easy access.

Traditional accompaniments, such as olives or a side of marinara sauce, perfectly enhance the overall experience. Modern serving suggestions might include pairing pinwheels with sparkling water or a light Italian white wine for a more refreshing drink option. Consider temperature: these pinwheels can be enjoyed chilled or at room temperature, making them perfect for outdoor events. Portion control can be simplified by slicing them into different sizes to suit both light snacking and heartier appetites.

Wine and Beverage Pairing

Italian Pinwheels pair wonderfully with light, crisp wines. A Pinot Grigio complements the zesty flavors and brings a refreshing balance to the rich ingredients. For a red option, Chianti can add depth while enhancing the savory notes of the salami.

For non-alcoholic alternatives, consider serving sparkling water with lemon or iced tea infused with fresh mint for a refreshing touch. If coffee or tea is enjoyed during post-meal gatherings, try a smooth cappuccino or chamomile tea for a soothing effect. Be mindful of serving temperatures; chilled wines or refreshing mocktails are best to accompany these flavorful bites.

Storage and Shelf Life

Proper storage is essential to prolong the freshness of your pinwheels. Wrap them tightly in plastic wrap or place them in an airtight container to prevent them from drying out. Italian Pinwheels can be stored in the refrigerator for up to 3 days without losing quality.

When it comes to temperature, ensure they are kept chilled until serving time for optimum flavor and food safety. It’s best to consume them cold, but if you prefer, they can be brought to room temperature before serving. Signs of spoilage include a loss of color in the vegetables or a sour smell from the cream cheese.

For reheating, it’s best to consume pinwheels cold, but if desired, they can be briefly microwaved for a warm option. If planning to freeze, ensure to tightly wrap them in foil then place them in a freezer bag, where they can last for up to 2 months. Just be mindful that some fresh ingredients may lose their crunch.

Make Ahead Strategies

Planning ahead can make hosting or meal prep easy with Italian Pinwheels. Start by preparing your filling a day in advance, allowing flavors to blend beautifully. Assemble the pinwheels, refrigerate, and slice them right before serving for maximum freshness.

If you need to store between steps, wrap the tortillas in a damp paper towel and keep them in a sealed container to prevent them from drying out. This technique ensures they remain pliable for rolling later. Consider how the quality may impact your pinwheels; ingredients with higher moisture content should be added last to avoid sogginess.

Incorporating fresh elements, such as avocado slices or fresh herbs, can enhance the flavor when served. Add these just before serving to maintain freshness and texture.

Scaling Instructions

Scaling this Italian Pinwheels recipe is uncomplicated. If you need to halve the recipe, adjust ingredient portions accordingly while maintaining ratios for flavor balance. Doubling or tripling ingredients is also simple; prepare additional tortillas and distribute filling evenly to maintain quality.

Consider equipment adjustments when scaling up; larger platters or more cutting boards may be necessary for efficiency. Timing modifications also play a role; plan for extra chilling time if you double or triple the quantity to ensure all objects cool and set properly during prep.

Storage considerations are also important, as larger batches may require more refrigerator space or larger containers to keep them fresh.

Nutritional Deep Dive

The macro breakdown of Italian Pinwheels can vary based on ingredient choice, but on average, each pinwheel contains a balanced mix of proteins, carbs, and fats. With the salami and cream cheese contributing protein and healthy fats, these snacks can support energy levels and nutrient intake.

In terms of micronutrient analysis, ingredients like bell peppers enhance the dish with vitamins A and C, which are essential for skin health and immune function. This recipe effectively combines nutrient-dense elements providing a light yet fulfilling meal or snack.

The health benefits are notable: incorporating fresh vegetables boosts fiber intake, aiding digestion while whole grain tortillas offer complex carbohydrates suitable for steady energy. Portion analysis is vital for moderation; consider each pinwheel as a single serving to help manage intake.

For weight management tips, combine these pinwheels with a side salad to provide bulk without excessive calories, contributing to a balanced and satisfying meal.

Dietary Adaptations

Adaptations for Italian Pinwheels can easily accommodate dietary preferences. For gluten-free options, consider using rice wraps or gluten-free tortillas to ensure everyone can enjoy them.

Dairy-free adjustments involve swapping cream cheese with plant-based spreads like hummus or cashew cream. For those following a vegan lifestyle, replace the salami with savory roasted vegetables or plant-based deli slices.

To create a low-carb or keto-friendly version, opt for vegetable-based tortillas or simply omit the wrap and serve as a salad. Likewise, a paleo approach can utilize lettuce wraps filled with the same delicious ingredients.

Other specific diets, like low-FODMAP, can select ingredients with lower fermentable carbohydrates, ensuring everyone has an option to savor these delightful treats.

Troubleshooting Guide

Texture issues can arise from using overcooked or stale tortillas; ensure you choose fresh, soft tortillas for optimal results.

Flavor balance can be adjusted by tasting the filling mix before assembly; adding herbs or spices can enhance flavors when needed.

Temperature problems are typically due to not adequately chilling; ensure your pinwheels are cooled correctly for proper structure.

Equipment challenges are minimal but consider using a sharp serrated knife for smooth slicing; avoid using a dull knife that can crush the filling.

For ingredient substitutions, always taste adjust seasonings accordingly, especially with spices or sauces that can vary in intensity.

Timing concerns require proper assembly in advance to allow chill time—and don’t rush for quality results!

Recipe Success Stories

Community feedback has shown that Italian Pinwheels are often praised for their flavor and versatility. Many users have experimented with different ingredients, discovering combinations that bring great success.

Variation successes include using smoked salmon with dill cream cheese, which proved to be a hit at a recent gathering. Reader suggestions often highlight adding spicy mustard for an unexpected twist that enhances flavor.

Photography tips shared by success stories recommend capturing colorful layers to showcase the vibrant components that make up the pinwheels, drawing in viewers to recreate them at home.

Frequently Asked Questions

Can I make Italian Pinwheels in advance? Yes, these pinwheels can be assembled a day ahead and kept in the refrigerator. Just slice them right before serving for the best presentation.

What other fillings can I use? You can use various fillings, including vegetables, different cheeses, or spreads like pesto or tzatziki to suit your taste.

How should I store leftover pinwheels? Store any leftovers in an airtight container in the refrigerator for up to three days.

Can I freeze Italian Pinwheels? Yes, you can freeze them; however, ingredients like fresh veggies may lose some texture upon thawing. Wrap tightly in foil and store in a freezer bag.

What dips work well with pinwheels? Marinara sauce, ranch dressing, or a spicy aioli are excellent options to serve alongside your pinwheels.

How do I get the perfect roll? Start rolling with the filling placed more towards the bottom third of the tortilla for tighter rolls and a better structure.

Are Italian Pinwheels suitable for kids? Absolutely! These pinwheels are not only easy to eat but can also include kid-friendly ingredients that appeal to younger eaters.

What can I do with leftover ingredients? Leftover ingredients can be added to salads, pastas, or used in other wraps to avoid waste.

How can I ensure the pinwheels stay fresh? Wrap the pinwheels tightly in plastic wrap or store them in an airtight container to keep them fresh longer.

What is the best way to cut the pinwheels? Use a sharp knife and cut them with a gentle sawing motion to avoid squishing the filling.

Additional Resources

For those interested in more Italian-inspired recipes, consider trying Caprese salad or bruschetta for delightful appetizers. Technique guides on rolling techniques can help enhance your culinary skills, leading to beautifully crafted pinwheels.

Learn more about various ingredients in Italian cooking through dedicated guides, which often highlight fresh herbs and spices essential for flavor. For those looking to expand their kitchen tools, consider investing in high-quality knives for cleaner cuts and better results in recipes. Seasonal variations can keep your pinwheel game fresh and interesting, leading to creative fillings that celebrate the best of each season.

Join the Conversation

We would love to see your take on our Italian Pinwheels! Share your photos and variations on social media, and don’t forget to tag us. Engaging in photography tips from fellow cooks can provide new ideas and inspire creativity in the kitchen.

Your recipe reviews help us improve and create new content tailored to your interests—let us know what you think in the comments! Encourage sharing by inviting friends to explore their own Italian Pinwheels creations, prompting a community of recipe enthusiasts to unite.

The Recipe

Italian Pinwheels

Serves: 12 pinwheels

Prep Time: 15 mins

Cook Time: 0 mins

Total Time: 15 mins

Kitchen Equipment Needed

  • Cutting board
  • Sharp knife
  • Plastic wrap (for storage)

Ingredients

  • 4 large flour tortillas
  • 8 oz cream cheese, softened
  • 6 oz sliced salami
  • 1 cup fresh spinach leaves
  • 1 cup bell peppers, sliced
  • 2 tbsp Italian dressing

Directions

  1. In a mixing bowl, combine cream cheese and Italian dressing, stirring until smooth.
  2. Spread an even layer of the cream cheese mixture over each tortilla.
  3. Layer salami, spinach, and bell peppers evenly over the tortillas.
  4. Starting from one end, tightly roll the tortilla until all the filling is inside.
  5. Wrap each rolled tortilla in plastic wrap and refrigerate for at least 30 minutes.
  6. Once chilled, remove the plastic wrap and slice the rolled tortillas into 1-inch pieces.
  7. Arrange pinwheels on a serving platter and serve immediately or store for later.

Recipe Notes

  • Feel free to customize your fillings based on personal preference or dietary needs.
  • Make sure to keep the pinwheels tightly wrapped in the fridge to maintain freshness.

Iowa Party Bites: Ultimate Cheesy Meaty Appetizer Recipe

Iowa Party Bites: The Ultimate Cheesy Meaty Appetizer

⚖️
Difficulty
Easy

⏲️
Prep Time
15 mins

🕒
Cook Time
20 mins

⏱️
Total Time
35 mins

🍽️
Servings
24 bites

Iowa party bites are the quintessential cheesy meaty appetizer that will steal the spotlight at any gathering. With a delightful combination of savory meats, rich cheeses, and spices, these bites burst with flavor in every mouthful. Perfect for game days, holiday parties, or just a cozy night in, they offer a satisfying snack that pairs exceptionally well with a cold drink or two. Grab your friends and sink your teeth into these delectable morsels!

This fun and easy-to-make recipe will have you whipping up a platter in no time. From the moment you start mixing the ingredients, the aroma of seasoned meat and melted cheese fills the air, making it impossible to resist. Iowa party bites are not just about taste; they are an experience, becoming a cherished part of any gathering and leaving your guests craving more.

Quick Recipe Highlights

  • Flavor Profile: Expect a delicious medley of smoky, savory, and cheesy flavors that meld together harmoniously.
  • Texture: Each bite boasts a crispy exterior with a gooey, cheesy interior that is sure to satisfy.
  • Aroma: The irresistible aroma of browned meat and melted cheese will have everyone flocking to the snack table.
  • Visual Appeal: Golden-brown bites that are perfectly crafted will look stunning on your serving platter.
  • Skill Level Needed: This recipe is beginner-friendly, with simple steps that even novice cooks can master.
  • Special Equipment: You’ll need a mixing bowl, baking sheet, and an oven for perfectly baked bites.

Recipe Overview

  • Difficulty Level: This recipe is straightforward and designed for anyone to try, making it perfect for busy cooks.
  • Category: These bites are great for appetizers, snack platters, and party foods, appealing to a wide range of palates.
  • Cuisine: Drawing from hearty Midwestern flavors, these bites reflect the comforting essence of Iowa’s culinary traditions.
  • Cost: With affordable ingredients, this recipe remains budget-friendly while still impressing your guests.
  • Season: While perfect for cold weather gatherings, they can be enjoyed year-round for any occasion.
  • Occasion: Whether it’s a family reunion, a holiday party, or a casual get-together, Iowa party bites fit the bill.

Why You’ll Love This Recipe

The taste and texture of Iowa party bites offer an unforgettable experience that delights the palate. The combination of flavorful meats and creamy cheeses creates a burst of flavor with each bite, while the crunchy exterior adds a satisfying textural contrast. You’ll find yourself reaching for seconds (and thirds!) without hesitation.

Convenience is key, as this recipe requires minimal prep time and simple cooking steps. This makes it an ideal choice for busy cooks who still want to impress their guests with delicious homemade appetizers. You can prep the bites in advance, allowing you to spend more time enjoying the company of your friends and family.

In terms of nutrition, these appetizers provide a good balance of protein and fat, which can be enjoyed in moderation. Using quality ingredients ensures that you are feeding your guests something hearty and wholesome without compromising on flavor or enjoyment.

Socially, Iowa party bites serve as a great conversation starter, drawing friends and family together around delicious food. Whether served at a crafted charcuterie board or as finger foods, they bring everyone to the table, literally and figuratively, enhancing the communal aspect of entertaining.

Lastly, the cost-effectiveness of this recipe makes it an appealing choice for anyone looking to host a gathering without breaking the bank. With readily available ingredients that won’t put a dent in your wallet, you can create a memorable dish that will leave a lasting impression.

Historical Background and Cultural Significance

Iowa party bites originated from the hearty tradition of finger foods common in Midwestern state gatherings. This region is known for its focus on community and sharing meals that evoke warmth and nostalgia. While the exact origin story remains unclear, these cheesy meaty bites have become a staple in many households, especially during celebrations.

Culturally, the significance of such appetizers can be linked to the notion of hospitality in Iowa’s community-focused lifestyle. Food has a way of bringing people together, and these party bites exemplify the spirit of sharing and togetherness that pervades local traditions. They are often served during significant events, showcasing the importance of connection through food.

Over time, the recipe has evolved from basic meat and cheese combinations to include a variety of spices, sauces, and different cooking methods, allowing for personal adaptations that cater to regional tastes. This evolution reflects changes in culinary practices and preferences, further solidifying the bites’ place in modern gatherings.

Regional variations abound, with many Iowans enjoying their party bites with unique ingredient substitutions or local specialties, making them a true representation of Midwestern culinary diversity. The flavors found in these bites can vary greatly depending on personal taste and community preferences.

Ingredient Deep Dive

The main ingredients of Iowa party bites include ground meat, cheese, and a variety of savory spices. Ground beef or sausage often represents the hearty base of these bites, providing high protein content and richness. When selecting ground meat, opt for fresh, locally sourced products to ensure quality. Both options offer unique flavors, with beef providing a robust taste and sausage adding a hint of spice.

Cheese plays an equally vital role in the recipe, with cheddar or cream cheese commonly used for their melting properties and rich flavors. These cheeses not only contribute to the overall taste but also enhance the texture, making the bites irresistibly gooey when cooked. When selecting cheese, look for block cheese rather than pre-shredded varieties, as they melt better and offer superior flavor.

Additional ingredients often include spices like garlic powder, onion powder, and paprika. These spices contribute to the overall flavor profile, adding depth and an aromatic appeal. In selecting spices, opt for fresh or high-quality options, which can vastly improve the end product.

When it comes to storage, leftovers can be kept in airtight containers in the refrigerator for up to three days. Alternatively, uncooked bites can also be frozen before baking, offering flexibility for preparing ahead of time. Additionally, if you need to substitute any ingredients due to allergies or dietary restrictions, turkey or plant-based proteins can work well as alternatives to ground meat.

Common Mistakes to Avoid

  • Overmixing the batter can lead to tough bites. Mix until just combined for a light texture.
  • Using low-quality cheese can result in a lesser flavor and disappointing melt. Always choose good-quality cheese for better results.
  • Failing to preheat the oven properly can lead to uneven cooking. Make sure your oven is hot before placing the bites inside.
  • Not adjusting cooking times based on oven variations can lead to undercooked or burnt bites. Always keep an eye on the timer.
  • Skipping the resting time post-baking can affect flavor absorption. Allowing the bites to rest lets flavors develop.
  • Using too much filler, like breadcrumbs, can make the bites dry and less flavorful. Balance is key!
  • Overcrowding the baking sheet can prevent even crisping. Bake in batches if necessary.
  • Not seasoning adequately can leave the bites bland. Always taste and adjust seasoning before baking.
  • Failing to check for doneness can lead to food safety issues. Ensure they reach an appropriate internal temperature.
  • Not garnishing can lead to a lackluster presentation. Add fresh herbs or sauces to elevate visual appeal.

Essential Techniques

One of the key techniques to master when preparing Iowa party bites is mixing the ingedients. Properly combining your meat, cheese, and spices is crucial for flavor and texture. Avoid overmixing, as this can lead to a tough consistency. Instead, gently fold the ingredients until just mixed for the best results.

Another important technique is shaping the bites. Uniformly shaped bites ensure even cooking and consistent texture. Use a small scoop or your hands to form the bite sizes you prefer, ensuring they are compact without being too dense.

Oven management is also essential for achieving the perfect bake. Make sure to preheat your oven adequately to achieve a nice crispy exterior. Additionally, using a baking mat or parchment paper can aid in even baking and cleanup.

Lastly, garnishing techniques should not be overlooked. Simple garnishes, such as fresh parsley or a drizzle of BBQ sauce, enhance both visual appeal and flavor. Mastering the art of presentation adds an extra touch to your party spread.

Pro Tips for Perfect Iowa Party Bites

Start with high-quality ingredients for the best flavor and texture. This applies to your choice of meat, cheese, and spices.

Mix your ingredients just until combined. Overmixing can lead to dry bites; remember, less is more!

Consider incorporating different cheeses to add layers of flavor. Mixing cheddar and mozzarella creates a delightful texture and flavor combo.

Experiment with spices to personalize the flavor profile. Adding herbs like parsley or dill provides unique taste variations.

If you’re making a large batch, prepare them ahead of time and freeze before baking. This allows you to pop them in the oven fresh for your guests.

Monitor the cooking closely to avoid over-baking. Aim for a golden brown color on the outside and a gooey interior.

Always serve hot to maintain the ideal melt-in-your-mouth texture. If making in advance, reheat carefully to preserve quality.

For added flavor depth, add a mixture of BBQ sauce or sriracha to your meat before shaping your bites.

Variations and Adaptations

Regional variations of Iowa party bites can often be found across different Midwest states. For instance, adding local cheeses or favorite spices unique to the area can give these bites a distinctive flair. In Wisconsin, for example, incorporating a blend of cheddar and mozzarella is common, reflecting their cheese-producing heritage.

Seasonal adaptations are also a great way to enjoy this recipe throughout the year. In the fall, try adding pumpkin puree to the meat mixture for a hint of sweetness and seasonal flavor. Alternatively, during summer gatherings, you might opt to include fresh herbs from the garden, infusing the bites with a bright taste.

Dietary modifications can cater to those with specific food restrictions. For a gluten-free version, replace bread crumbs with crushed corn chips or almond flour. If dairy is an issue, consider using vegan cheese alternatives that melt well, ensuring everyone can enjoy the dish.

Flavor variations can also elevate these bites; consider adding jalapeños for a spicy twist or BBQ sauce for a smoky flavor. You can also modify the textures by experimenting with different breadcrumb coatings or utilizing a crispy topping made from crushed crackers or panko.

Presentation alternatives can enhance your serve. Instead of a traditional platter, consider serving the bites in mini cups or on skewers for a fun twist. Using vibrant garnishes like cilantro or a sprinkle of paprika can also make a colorful impact.

Serving and Presentation Guide

Serving your Iowa party bites with style will elevate any gathering. When plating, consider using vibrant colored platters or wooden boards to make the golden-brown bites pop against the background.

Garnishing the bites is also essential. A sprinkle of chopped fresh parsley or chives can add color and freshness, enhancing visual appeal. For a touch of luxury, consider drizzling them with a creamy ranch or spicy sriracha sauce for dipping.

Traditional accompaniments may include pickles or olives, which can provide a delightful contrast to the savory bites. Additionally, a side of tortilla chips or vegetable sticks can offer crunchy options for your guests.

Modern serving suggestions may include mini skewers or toothpicks, allowing guests to easily grab a bite without disturbing the overall presentation. Alternatively, consider individual serving cups that can make it easy for guests to enjoy while mingling.

Temperature considerations are essential; serve the bites hot right from the oven. If making ahead, keep them warm in a slow cooker to retain their delicious texture until serving.

Lastly, consider portion control tips when serving. Create small, manageable portions for individual guests, ensuring everyone gets to taste the goodness without overwhelming their plates.

Wine and Beverage Pairing

When it comes to pairing wine with Iowa party bites, opt for a lightly chardonnay or a bubbly prosecco to complement the flavors of the savory bites. These wines enhance the richer profile of the cheeses while cutting through the meat’s richness.

For those who prefer non-alcoholic alternatives, consider serving sparkling water with a twist of lemon or a light, refreshing mocktail made with cucumber and mint. These options will cleanse the palate between bites and keep the atmosphere light.

If coffee or tea is preferred, serve black coffee with a hint of cream, which can create a nice balance against the salty bites. A lighter herbal tea can also be a soothing counterpart that doesn’t compete with the flavors of the dish.

Temperature considerations for beverages are essential; slightly chilled wines serve better alongside warm bites, ensuring a refreshing experience. Serving suggestions include providing detailed tasting notes to enhance guest engagement during your gathering.

Storage and Shelf Life

For Iowa party bites that remain fresh, proper storage methods are crucial. Keep baked bites in an airtight container in the refrigerator for up to three days. Allow them to cool completely before sealing to prevent moisture build-up.

When it comes to freezing, uncooked bites can last for up to three months. Flash freeze them individually before transferring them into a freezer bag to make frying or baking easy later.

Temperature requirements for leftovers should maintain a cool environment until reheated. Signs of spoilage to look out for include off-odors or discoloration, indicating they may have gone bad.

When reheating, do so in an oven preheated to 350°F, allowing their crispy exterior to return while ensuring a gooey interior. Heat them for about 10-15 minutes until warmed thoroughly.

For optimal enjoyment, freezing bites allows you to prepare in batches ahead of time. This makes it easy to impress guests without spending hours in the kitchen last minute.

Make Ahead Strategies

To streamline the process, you can prep Iowa party bites in advance. Assemble all ingredients the day before and keep them sealed in the refrigerator. This lets flavors combine and enhances overall taste.

If you choose to freeze them, form the bites, then flash freeze before storing them in a freezer bag. This allows for quick baking directly from the freezer; simply adjust cooking time accordingly.

Quality impacts should be assessed when making ahead. Be mindful that some textures may change slightly after freezing; however, the flavor profile typically remains intact.

When it’s time to serve, simply follow the reheating guidelines to ensure they are hot and crispy. Feel free to add any fresh elements like herbs right before serving to brighten up the overall dish.

For an extra upgrade, consider preparing a dipping sauce in advance. Store it in a separate container, allowing your guests to customize their bites easily for added flavor.

Scaling Instructions

Scaling your Iowa party bites recipe is straightforward and allows you to double or triple the ingredients as needed. When halving the recipe, make sure to check cooking times as they may decrease slightly.

Doubling or tripling the recipe means you might need larger baking sheets or multiple trays. Be cautious about accounting for spacing to ensure even cooking across batches.

For equipment adjustments, a large mixing bowl and a good food processor can help you manage increased quantities efficiently. It may also be helpful to set up an assembly line to streamline the process.

Timing modifications should be followed closely, considering that larger or more significant batches may take longer to bake. Use a meat thermometer to ensure internal doneness.

Finally, proper storage considerations for doubled batches must be taken into account to ensure freshness. Be sure to label containers and date them to track their shelf life.

Nutritional Deep Dive

Understanding the nutritional aspects of Iowa party bites involves looking at macronutrient breakdowns. Each serving provides a balance of protein from the meat and fats from cheese, making them a satiating snack ideal for gatherings.

Micronutrient analysis highlights minerals found in meat, such as iron and vitamin B12, essential for energy metabolism. Vitamin content can vary based on cheese choices, so opting for fortified varieties adds extra nutritional benefits.

Health benefits include protein-dense bites great for fueling energy levels, especially during events requiring a full day of entertaining. Moderation is key, as portions should align with overall dietary goals.

Dietary considerations should focus on maintaining a balance. Pair with fresh veggies or a light salad on the side to add fiber and vitamins, creating a more wholesome experience.

For weight management tips, be mindful of portion control; set serving platters at moderate sizes, and offer plenty of lighter alternatives to complement these hearty bites alongside fresh greens or dips.

Dietary Adaptations

Adapting Iowa party bites for dietary needs is practical and can cater to most preferences. For a gluten-free version, simply substitute traditional bread crumbs with gluten-free alternatives, such as ground oats or almond meal.

Those avoiding dairy can substitute cheese with plant-based cheese options available on the market. Many melt well, ensuring that texture and flavor remain satisfactory for all guests.

For a vegan adaptation, replace meat with lentils or a vegetable-filled mix that yields a great flavor profile while staying plant-based. Further enhance with spices and a vegan cheese substitute for richness.

Low-carb variations might include using finely chopped cauliflower or zucchini instead of traditional binders, ensuring lower carbs overall while creating a tasty bite.

Keto adaptations often focus on incorporating healthy fats, so using full-fat cream cheese or adding crushed nuts into the mixture can enhance the overall experience while keeping them keto-friendly.

Low-FODMAP options can easily adjust by eliminating certain spices known for causing digestive unrest. Focus on simple herbs while ensuring a balanced flavor without lactose and high-FODMAP ingredients.

Troubleshooting Guide

Texture issues may arise if the bites are too moist. To fix this, ensure all ingredients are measured correct and try adding more binding agents. If they’re too dry, consider increasing the cheese ratio slightly.

Flavor balance problems can occur if spices aren’t adequately integrated. In that case, taste the mixture before baking and adapt spices, adding a pinch more of salt or herbs to even out flavors.

Temperature problems during baking can be remedied by ensuring the oven is preheated sufficiently before placing bites in. Keep an eye on them, as individual ovens do vary in temperature efficiency.

Equipment challenges may come up if you’re lacking a baking sheet large enough. Use two smaller trays instead while ensuring that there is enough airflow around bites for even cooking.

Ingredient substitutions can lead to unexpected results. Ensure you’re aware of how alternate ingredients will interact, especially when using alternative meats or dairy products to ensure the right textures are achieved.

Timing concerns can be tricky; if the recipe requires longer or shorter cooking, keep a close eye on visual cues, including color and texture, to determine if they are cooked throughout.

Recipe Success Stories

Many happy cooks have shared positive feedback regarding their experiences making Iowa party bites. Community members often highlight the versatility and simplicity, making it enjoyable for ingredient experimentation, catering to personal tastes, and dietary needs.

Readers often share stories about personalizing the recipe, whether through added spices, cheese variations, or unique dipping sauces, making each experience distinct and creative.

Adaptation stories regularly include successes with friends’ gatherings where these bites became the star of the show, showcasing their ability to bring everyone together over a shared love for delicious food.

Photography tips are also a beloved aspect of sharing these bites on social media. Those who made the recipe often showcase beautiful color contrasts in their presentation, demonstrating how food can be as visually appealing as it is tasty.

Frequently Asked Questions

Can I use turkey instead of beef in Iowa party bites?
Absolutely! Ground turkey is a great alternative and can create a lighter version of these bites. Season well to ensure the flavors are robust.

Can I make Iowa party bites in advance?
Yes, you can prepare the ingredients ahead of time and cook them just before serving. Alternatively, these bites freeze well before baking, making entertaining stress-free.

What dipping sauces go well with Iowa party bites?
Classic options include ranch dressing, BBQ sauce, or spicy aioli. Feel free to experiment with your favorites for additional flavor layers!

How do I know when the bites are fully cooked?
Bites are done when they turn golden brown and crispy on the outside. For added assurance, use a meat thermometer to check for an internal temperature of 160°F.

What cheeses work best for this recipe?
Cheddar and cream cheese are popular choices; however, mozzarella and pepper jack can also add different flavors and textures. Mix and match for added creativity!

How can I make these bites spicy?
Add diced jalapeños or red pepper flakes to the meat mixture for a spicy kick. Consider serving with a hot sauce for extra heat!

Are there vegan options for Iowa party bites?
Yes! Replace the meat with lentils or finely chopped vegetables, and use vegan cheese for a plant-based alternative that retains flavor and texture.

How do I store leftovers?
Keep fully cooked Iowa party bites in an airtight container in the refrigerator for up to three days. Reheat thoroughly to enjoy their flavor again!

Can I bake these bites instead of frying them?
Yes, baking is a healthy alternative! Bake at 375°F until golden brown and cooked through, about 20-25 minutes.

What are some creative serving ideas for these bites?
Try serving them on wooden skewers, in mini cups, or alongside colorful dips and garnishes to create an appealing presentation.

Can I use leftovers to create another dish?
Absolutely! Leftover Iowa party bites can be diced and added to salads, wraps, or even pasta for an exciting new meal!

Additional Resources

For those looking for further culinary inspiration related to Iowa party bites, consider exploring related recipes. Dips like creamy ranch or zesty salsa can enhance your party spread beautifully.

Technique guides on baking techniques or ingredient selections can assist in mastering your home cooking skills. Always feel free to adapt to personal tastes along the way!

In-depth ingredient information about local meat and cheese sources can provide fresh options and support local artisans. Understanding how they contribute to the flavors can elevate your cooking.

Equipment recommendations focused on baking trays, mixing bowls, or measuring tools can ensure you have the right tools for the job, allowing for successful preparation every time.

Don’t overlook seasonal variations in your ingredient sourcing—locally available veggies could provide fresh offerings that enhance your appetizer spread while reflecting the best your area has to offer!

Join the Conversation

We invite you to share your Iowa party bites journey! Engage with us on social media and showcase your creative successes through photography and personal experiences.

Leave us a comment about what variations you’ve enjoyed or substitutions you recommend—community insights can help everyone improve their cooking endeavors.

Share your recipe reviews and connect with fellow cooking enthusiasts as we celebrate the love of food and the joy of gathering. Your story could inspire another cook to try their hand at this delightful appetizer.

Explore our online community for more recipe variations, tips, and support as you navigate the world of home cooking. We can’t wait to see your delicious creations!

The Recipe

Iowa Party Bites

Serves: 24 bites

Prep Time: 15 mins

Cook Time: 20 mins

Total Time: 35 mins

Kitchen Equipment Needed

  • Mixing bowl
  • Baking sheet
  • Parchment paper (optional)
  • Cook’s fork or spatula

Ingredients

  • 1 lb ground beef or sausage
  • 1 cup shredded cheddar cheese
  • 1/2 cup cream cheese, softened
  • 1/2 cup breadcrumbs
  • 1 tsp garlic powder
  • 1 tsp onion powder
  • 1 tsp paprika
  • Salt and pepper to taste

Directions

  1. Preheat your oven to 375°F (190°C).
  2. In a mixing bowl, combine the ground meat, shredded cheese, cream cheese, breadcrumbs, and seasonings.
  3. Mix until just combined—do not overmix.
  4. Using your hands, form the mixture into bite-sized balls.
  5. Place them on a parchment-lined baking sheet, spaced apart for even cooking.
  6. Bake in the preheated oven for 20-25 minutes, or until golden brown.
  7. Remove from the oven and let cool slightly before serving.

Recipe Notes

  • Feel free to substitute with your favorite cheeses or meats for unique flavor variations.
  • For spicier bites, add diced jalapeños or red pepper flakes to the mixture.
  • These bites can be made ahead and frozen before baking for convenience.

Delicious Sausage & Hash Brown Balls: Easy Recipe Guide

Sausage & Hash Brown Balls: A Deliciously Easy Snack Idea

⚖️
Difficulty
Easy

⏲️
Prep Time
15 mins

🕒
Cook Time
25 mins

⏱️
Total Time
40 mins

🍽️
Servings
12 balls

Sausage & Hash Brown Balls are the perfect companion for your next gathering, elevating any snack table with their irresistible flavor and delightful crunch. These bite-sized morsels combine savory sausage and crispy hash browns, making every bite a mouthful of satisfaction. As you savor the warm, cheesy center, you’ll find it hard to stop at just one. They’re not only tasty but also incredibly versatile, serving as an appetizer, a party food, or even a quick snack.

The harmony of textures is what makes these sausage balls truly unique. Dip them into your favorite sauce, and you’ll amplify the flavors even further. Whether you’re hosting a casual get-together, tailgating, or simply enjoying a cozy night in, these balls of goodness will quickly become a favorite at any event. They’re simple to prepare, making them a great choice for both novice cooks and seasoned chefs alike.

Quick Recipe Highlights

  • Flavor Profile: Savory sausage combined with the subtle earthiness of hash browns results in a comforting, delicious treat.
  • Texture: The outer layer is perfectly crisp, giving way to a tender, cheesy center that melts in your mouth.
  • Aroma: The inviting smell of cooked sausage mingling with buttery potatoes fills your kitchen, making it hard to wait.
  • Visual Appeal: Golden brown color with a hint of cheese peeking through makes these balls visually appealing on any platter.
  • Skill Level Needed: Perfect for beginners; the straightforward steps make this an easy recipe to master.
  • Special Equipment: A mixing bowl, baking sheet, and an oven are all the tools you need for success.

Recipe Overview

  • Difficulty Level: This recipe is easy enough for beginners, with minimal steps and no special techniques required.
  • Category: An appetizer that suits any occasion, these Sausage & Hash Brown Balls are perfect for parties, game days, or family gatherings.
  • Cuisine: Influenced by classic comfort food, this dish blends American flavors into an enjoyable snack.
  • Cost: Approximate cost per serving is budget-friendly, making it an economical choice for mass gatherings.
  • Season: Perfect for any season, these snacks can be enjoyed year-round, though they shine during colder months.
  • Occasion: Ideal for casual get-togethers, celebrations, or even as a fun addition to a brunch spread.

Why You’ll Love This Recipe

The combination of flavors in these Sausage & Hash Brown Balls is unmatched. The savory flavors of well-seasoned sausage meld seamlessly with the texture of crispy hash browns, while the melted cheese adds richness that ties everything together. When paired with a dipping sauce, they serve as a perfect party snack that will leave your guests raving.

Preparation is a breeze with this recipe. The straightforward steps and minimal cooking time mean you can have these delicious bites ready to go in no time. Whether you need a quick appetizer for unexpected guests or are preparing for a big event, these sausage balls are here to make your life easier.

These Sausage & Hash Brown Balls aren’t just delicious; they’re also packed with energy! The sausage provides a hearty protein boost, while the potatoes add carbohydrates that will keep you fueled for hours. Plus, with the addition of cheese, you’re invited to enjoy a more balanced treat.

Social gatherings call for delicious food, and these sausage balls deliver both taste and fun. They’re easy to share, encouraging conversation and laughter around the table. Watch as your friends and family dive into these crispy bites, creating memorable moments.

On top of their fantastic taste and texture, these sausage balls are cost-effective. With simple ingredients that are often already in your pantry, you’ll enjoy remarkable flavor profiles without breaking the bank. It’s a win-win!

Historical Background and Cultural Significance

These Sausage & Hash Brown Balls have roots in American comfort food, emerging from the creative adaptations of backyard barbecues and potlucks. They recall warm gatherings where hearty bites were celebrated, reflecting a culture of togetherness and shared meals.

In the realm of American culture, finger foods have carved a place of prominence. These sausage balls showcase the inclusive nature of such recipes, appealing to various tastes while being easy to prepare and share. Their popularity has grown, emphasizing how food can bring communities together.

Over time, this recipe has evolved, incorporating different spices, meats, and cheeses tailored to personal preferences. Variations include adding diced vegetables or switching to different kinds of sausage, showcasing how adaptable and welcoming this dish can be to different tastes.

Regional variations can be spotted across the country, reflecting local culture. From spicy southern adaptations featuring jalapeño to more Italian influences with the addition of herbs, these variations make the recipe even more intriguing, inviting all to enjoy them.

Ingredient Deep Dive

Sausage:
Sausage holds a significant place in culinary traditions, especially in the United States, where it is commonly featured in breakfast dishes and snacks. It’s rich in flavor and can be tailored to suit varying spice levels, from mild to spicy, making it a versatile ingredient. Nutritionally, sausage provides a good source of protein and essential vitamins. When selecting sausage, look for high-quality options with minimal fillers, and for storage, keep it refrigerated and use it within a week of purchase. If you prefer a lighter option, turkey or chicken sausage can serve as great substitutions.

Hash Browns:
Hash browns have become a staple in households, particularly at breakfast tables. Their fluffy interior and crispy exterior make them an attractive complement to many dishes. Nutritionally, they deliver carbohydrates that can provide instant energy. When choosing hash browns, opt for fresh or frozen varieties without additives for the best flavor. They should also be stored in a cool, dry place and can last in the freezer for up to a year. Riced cauliflower can be used as a low-carb alternative to create a lighter version of the dish without sacrificing texture.

Common Mistakes to Avoid

  • Overmixing the ingredients can lead to dense sausage balls. Mix until just combined for optimal texture.
  • Not baking at the right temperature may result in uneven cooking; ensure the oven is preheated properly.
  • Using too little cheese can lead to dry balls; don’t skimp on this key ingredient.
  • Forgetting to season your mixture can leave your sausage balls bland; always taste before baking!
  • Failing to grease the baking sheet can cause sticking; ensure it’s well-coated for easy removal.
  • Not allowing them to cool slightly before serving can lead to burns; be patient before enjoying.
  • Overcrowding the baking sheet can trap steam; space them out for best crispness.
  • Preparing them too far in advance may affect freshness; serve as soon as possible.

Essential Techniques

To master mixing your sausage and hash brown ingredients, create the right texture while ensuring even distribution of flavors. Make sure to combine without overworking the mixture; this helps the balls maintain their moist interiors while achieving a crispy exterior.

Baking is a crucial part of this recipe. Preheat your oven to encourage even baking and ensure the balls cook through. Use an instant-read thermometer to check for doneness, aiming for an internal temperature of 165°F to ensure they’re safe to enjoy.

Pro Tips for Perfect Sausage & Hash Brown Balls

For extra crunch, consider pan-frying the balls for a few minutes before baking, giving them a golden edge.

Experiment with different types of cheese for varied flavor profiles, such as cheddar, pepper jack, or even mozzarella.

Herbs and spices can elevate your mix; try adding thyme, parsley, or crushed red pepper for a unique twist.

Always ensure your hash browns are thawed and excess moisture is squeezed out before mixing; this prevents soggy balls.

If you have leftovers, toss them into a salad for a delicious protein boost the next day.

Keep the baking sheet lined with parchment paper for easy cleanup and prevent sticking.

When storing leftovers, allow them to cool completely before placing in airtight containers to retain their crunch.

Variations and Adaptations

For a regional twist, consider incorporating local spices or serve with dipping sauces inspired by different cuisines. For example, mustard or hot sauce can provide a flavorful kick.

Adapt these balls seasonally by introducing seasonal ingredients. In the fall, mix in shredded zucchini or cooked pumpkin for a touch of sweetness.

For dietary modifications, consider swapping in a gluten-free bread crumb mixture for a gluten-free option. Additionally, you can create a vegan version by using plant-based sausage and dairy-free cheese.

In terms of flavor variations, add fresh herbs like basil or cilantro for a fresh twist. Feel free to adjust the spice levels by incorporating chipotle peppers for extra heat.

Presentation can also be enhanced with attractive garnishes like fresh herbs or served on skewers for easy eating.

Serving and Presentation Guide

For an appealing presentation, arrange your sausage balls in a circular pattern on a serving platter, garnished with fresh parsley.

Consider pairing these delicious bites with a dipping sauce in the center, like ranch or spicy aioli, to invite interaction from your guests.

Serving them slightly warm enhances their flavors and textures; keep them covered with a cloth until guests arrive.

Use decorative toothpicks to serve for easy pick-up, making them an ideal finger food for gatherings.

Maintain portion control by setting out a measurable serving size per guest to avoid waste and ensure everyone gets to enjoy some.

Wine and Beverage Pairing

For a delightful pairing, serve these sausage balls with a crisp white wine like Sauvignon Blanc, which complements the richness of the sausage and adds refreshing acidity.

Non-alcoholic alternatives would include sparkling water or iced tea with citrus notes to clean the palate between bites.

Menu planners may also consider pairing these bites with a light beer that balances out the flavors without overpowering them.

If opting for coffee or tea, consider serving a light roast coffee that won’t interfere with the savory notes of the dish.

Presentation can be enhanced by serving drinks in attractive glassware to elevate the overall dining experience.

Storage and Shelf Life

To keep your Sausage & Hash Brown Balls fresh, store them in an airtight container in the refrigerator for up to three days.

Ensure they’re cooled completely before storing to prevent moisture accumulation, which can lead to sogginess.

When reheating, use the oven for best results; place them on a baking sheet at 350°F for about 10 minutes for that fresh-out-of-the-oven taste.

If you want to prolong the shelf life, freeze them in a single layer on a baking sheet, then transfer them to a freezer-safe container, where they can last for up to three months.

Signs of spoilage include off smells or a change in texture; discard if unsure.

Make Ahead Strategies

You can prep the mixture and refrigerate it for up to 24 hours ahead of cooking, saving time on the day of your gathering.

Consider forming the balls in advance and placing them on a baking sheet, covering them, and putting them in the refrigerator until you’re ready to bake them.

For quality retention, bake them fresh just before serving; if baking in batches, keep the first batch warm in the oven set to low.

Reheating should be done gently; adding a sprinkle of water before reheating can help maintain moisture.

Plan to add fresh garnishes just before serving for a pop of color and to keep them looking appetizing.

Scaling Instructions

You can easily halve the recipe if you are hosting a smaller gathering; adjust the ingredient amounts accordingly.

Doubling or tripling the recipe is simple; just increase the cooking time slightly when baking multiple trays at once.

When scaling up, ensure you have enough baking sheet space to avoid overcrowding, which can lead to uneven cooking.

Timing modifications will depend on your oven’s capacity; monitor closely, testing with a toothpick for doneness.

Consider using larger mixing bowls and spatulas when scaling up to handle the increased volume comfortably.

Nutritional Deep Dive

These Sausage & Hash Brown Balls provide a healthy dose of macro-nutrients, particularly protein from the sausage and carbohydrates from the hash browns.

In terms of micronutrients, these ingredients offer essential vitamins and minerals, such as B vitamins and potassium.

The combination of sausage and cheese does add calories; be mindful of portion sizes if you’re watching your intake.

Their high protein content makes them ideal for energy-boosting snacks, suitable for an active lifestyle.

For weight management tips, consider pairing these balls with a fresh salad or vegetable platter to round out meals healthily.

Dietary Adaptations

For those on a gluten-free diet, make sure to opt for gluten-free sausage and substituting with gluten-free breadcrumbs or almond flour.

If dairy-free or vegan, using plant-based sausage and nutritional yeast can replicate flavors without compromising dietary restrictions.

Low-carb dieters might swap potatoes for cauliflower rice, retaining the form while drastically reducing carbohydrates.

Keto enthusiasts can enjoy these balls by incorporating more cheese or bacon into the mix to boost fat content.

Paleo followers can adapt this recipe with natural ingredients and eliminate processed ingredients, making it compliant with their dietary choices.

Troubleshooting Guide

If the texture is off, it might be due to over or undercooking; ensure the internal temperature reaches 165°F for optimal texture.

Flavors can become off-balance if not seasoned well; always taste your mixture before baking to adjust seasonings.

For temperature problems, an oven thermometer can help verify your oven’s actual heat levels, preventing undercooked or burnt balls.

If your ingredients don’t appear to bind, consider adding a little mayonnaise or an egg to help hold them together during baking.

Timing concerns can arise with larger batches; make sure to test a few balls before serving your guests.

Recipe Success Stories

Feedback from the community highlights how these Sausage & Hash Brown Balls were a hit at parties and family gatherings.

Many have added their unique twists, whether it be experimenting with spices or introducing different cheese options, leading to successes in flavor and variety.

Reader suggestions often emphasize the importance of serving these fresh out of the oven for maximum enjoyment, keeping their crispy outside and warm, gooey inside.

Photographic tips have encouraged others to present these delicious balls in creative ways, enhancing the visual appeal during social media sharing.

Success stories of adjusting to dietary needs continue to grow, showcasing this recipe’s flexibility to cater to various preferences.

Frequently Asked Questions

Can I prepare these balls in advance?
Yes, you can prepare the mixture the night before and refrigerate it until you’re ready to bake. This method cuts down on prep time for busy days.

What dipping sauces pair well?
Popular dipping sauces include ranch, honey mustard, buffalo sauce, and even spicy aioli for added flavor depth.

Can I freeze the sausage balls?
Absolutely! You can freeze them before baking for up to three months. Just bake them directly from the freezer, adding a few extra minutes to the cook time.

How do I know when they are done?
Use a food thermometer to ensure the internal temperature reaches 165°F. They should be golden brown on the outside.

What type of sausage should I use?
You can use any ground sausage you prefer, such as pork, turkey, or even chicken for a lighter option.

Can I make these vegetarian?
For a vegetarian version, substitute the sausage with plant-based crumbles and keep the other ingredients the same.

How do I achieve a crispy exterior?
Ensure you preheat your oven, and do not overcrowd the baking sheet, allowing air to circulate.

What alternative ingredients can I utilize?
You can add veggies like bell peppers or shredded carrots and replace cheese with a dairy-free option for dietary preferences.

Can I use fresh hash browns instead of frozen?
Yes, fresh hash browns can work, but make sure to squeeze out excess moisture for the best texture.

How long will leftovers last in the refrigerator?
Properly stored in an airtight container, leftovers will last up to three days in the refrigerator.

Additional Resources

You can find other similar recipes like Spicy Cheese Balls and Veggie Nuggets to add variety to your cooking rotation. Utilize technique guides on frying and baking for efficiency in the kitchen.

For ingredient information, explore the benefits of using different types of cheese or meats, helping you understand how they contribute to overall flavor.

Check out recommended kitchen equipment for efficiency, such as a reliable baking sheet or mixing tools essential for perfect results.

Try seasonal variations that showcase fresh ingredients for showcasing flavors during different times of the year.

Join the Conversation

We’d love to hear your feedback! Share your photography and personal adaptations of this recipe on social media; your experiences enrich our community.

Write your recipe reviews to help others discover the joys of cooking these Sausage & Hash Brown Balls!

Engagement brings us together; feel free to submit your variations or questions that may come up as you explore this delicious snack.

Stay connected and see how others are creating meaningful connections through food, bringing everyone together for delightful moments!

The Recipe

Sausage & Hash Brown Balls

Serves: 12 balls

Prep Time: 15 mins

Cook Time: 25 mins

Total Time: 40 mins

Kitchen Equipment Needed

  • Mixing bowl
  • Baking sheet
  • Cooking spray or parchment paper
  • Spatula
  • Measuring cups and spoons

Ingredients

  • 1 pound ground sausage
  • 2 cups frozen hash browns, thawed
  • 1 cup shredded cheddar cheese
  • 1/2 cup breadcrumbs
  • 1 egg, beaten
  • 1 teaspoon garlic powder
  • Salt and pepper to taste

Directions

  1. Preheat your oven to 400°F (200°C) and line a baking sheet with parchment paper.
  2. In a large mixing bowl, combine the ground sausage, hash browns, cheddar cheese, breadcrumbs, beaten egg, garlic powder, salt, and pepper.
  3. Mix until just combined; avoid overmixing to maintain texture.
  4. Form the mixture into 1-inch balls and arrange them on the prepared baking sheet.
  5. Bake for 25 minutes or until golden brown and cooked through. Use a meat thermometer to ensure they reach 165°F.
  6. Allow them to cool slightly before serving with your choice of dipping sauce.

Recipe Notes

  • Feel free to substitute different types of cheese or add chopped vegetables for varied flavors.
  • These sausage balls can be frozen unbaked for up to three months; bake them directly from the freezer when ready.
  • Consider adding herbs like parsley or cilantro for an extra boost of flavor.

Delicious Mediterranean Spaghetti with Hearty Meat Sauce Recipe

Mediterranean Spaghetti with Hearty Meat Sauce: A Flavorful Journey to the Mediterranean

⚖️
Difficulty
Medium

⏲️
Prep Time
15 mins

🕒
Cook Time
30 mins

⏱️
Total Time
45 mins

🍽️
Servings
4 servings

Introducing the Mediterranean Spaghetti with Hearty Meat Sauce, a recipe that transports your taste buds straight to the sun-soaked shores of the Mediterranean. This delightful dish marries perfectly cooked spaghetti with a rich, savory meat sauce bursting with flavors of garlic, herbs, and ripe tomatoes. Every bite of this pasta is a celebration of vibrant ingredients, making it an iconic meal for family gatherings or a cozy evening dinner. With its aromatic profile and hearty texture, this dish is guaranteed to become a favorite at your dining table.

Imagine twirling strands of spaghetti around your fork, each twirl capturing the essence of the Mediterranean. The sauce is thick, rich, and comforting, crafted from ground beef simmered with tomatoes, aromatic vegetables, and a medley of spices that promise to tantalize your palate. Garnished with fresh basil and a sprinkle of Parmesan, this meal is not only delicious but also visually stunning, inviting everyone to dig in. Whether served on a casual weeknight or a special occasion, Mediterranean Spaghetti with Hearty Meat Sauce is a dish that unites everyone over good food and great company.

Quick Recipe Highlights

  • Flavor Profile: This dish features a robust flavor profile characterized by rich meatiness, acidity from tomatoes, and herbaceous notes from fresh basil and oregano.
  • Texture: The combination of tender spaghetti and hearty meat sauce creates a delightful contrast, making every bite comforting and satisfying.
  • Aroma: The enticing aroma of sautéed garlic, onion, and herbs fills your kitchen, creating an inviting atmosphere for your meal.
  • Visual Appeal: The vibrant red of the sauce against the backdrop of golden spaghetti makes this dish visually appealing and mouthwatering.
  • Skill Level Needed: With straightforward steps, this recipe is perfect for cooks of all skill levels, providing an opportunity for beginners to enhance their pasta cooking techniques.
  • Special Equipment: A large pot for cooking spaghetti and a skillet for preparing the meat sauce are essential, making this recipe easily manageable.

Recipe Overview

  • Difficulty Level: This recipe is categorized as medium difficulty due to the need for proper sauce preparation and pasta cooking, ideal for intermediate cooks looking to refine their skills.
  • Category: Mediterranean Spaghetti fits perfectly into the pasta category, serving as a fantastic main course for any meal.
  • Cuisine: This recipe draws its influences from Mediterranean cuisine, known for its use of fresh herbs and wholesome ingredients that celebrate natural flavors.
  • Cost: The ingredients for this recipe are relatively affordable, making it a cost-effective choice for families and individuals alike.
  • Season: While delicious year-round, this dish is particularly comforting in fall and winter when heartier meals are sought after.
  • Occasion: Mediterranean Spaghetti with Hearty Meat Sauce is excellent for cozy family dinners, gatherings with friends, or even festive occasions like birthdays and anniversaries.

Why You’ll Love This Recipe

Mediterranean Spaghetti with Hearty Meat Sauce perfectly balances taste and texture, providing a meal that is both indulgent and satisfying. The rich flavors from the meat sauce complement the al dente pasta, creating a culinary experience that speaks of warmth and comfort. With every bite, you’ll appreciate the depth of flavor crafted by fresh herbs and quality ingredients, pulling you into a world of delightful tastes.

Convenience is key with this recipe. From preparation to serving, this dish can be made in less than an hour, making it a perfect choice for busy weeknights or last-minute gatherings. The straightforward steps allow beginners and experienced cooks alike to create a home-cooked meal with ease. Plus, the versatility of the hearty sauce means you can prepare it ahead of time, allowing for quick reheating when needed.

Nutritionally, this dish boasts a good balance of protein, carbohydrates, and essential vitamins, thanks to the lean meat and tomato base enriched with vegetables. With the addition of fiber-rich spaghetti and the option for whole-grain versions, you can easily adapt it to suit your health needs without sacrificing flavor.

Socially, Mediterranean Spaghetti is a dish that brings people together. Its communal nature encourages sharing and conversation, making it perfect for dinner parties or family meals. You can easily scale the recipe to accommodate larger gatherings, ensuring that everyone enjoys a hearty meal.

Finally, this recipe is cost-effective and accessible, using ingredients commonly found in your pantry or local grocery store. With minimal investment, you can serve a filling dish that satisfies both the stomach and the soul, proving that great taste doesn’t have to come at a high price.

Historical Background and Cultural Significance

The roots of Mediterranean cuisine are as diverse as the countries that surround the Mediterranean Sea. Originating from a blend of cultures, this cuisine brings together the flavors of Greece, Italy, and North Africa, all of which emphasize fresh ingredients and wholesome cooking methods. Pasta, a staple in Italian tradition, transforms into a canvas for this rich meat sauce, showcasing the importance of regional culinary practices.

The cultural significance of spaghetti and meat sauce reflects a communal approach to dining, where meals are often enjoyed together. In many Mediterranean countries, sharing food reflects hospitality and brings people closer, turning dinner into a treasured ritual. With family-style servings and communal eating, Mediterranean spaghetti promotes togetherness and connection.

As the recipe has evolved, it has embraced modifications based on regional ingredients and preferences. For instance, variations of this dish might include the use of lamb or turkey instead of beef, or incorporating seasonal vegetables to enhance flavor and nutrition. The flexibility of this recipe demonstrates how traditional dishes can adapt while still remaining true to their origins.

Regional variations of Mediterranean Spaghetti are a testament to local tastes and preferences, with each region adding their unique twist. From the addition of olives in southern Italy to the use of spicy pepper in Spain, these adaptations not only reflect local ingredients but also celebrate the culinary diversity of the Mediterranean region.

Ingredient Deep Dive

Ground Beef: A key player in this dish, ground beef provides both flavor and protein. Historically, beef has been a staple protein across many cultures. Nutritionally, it offers essential vitamins and minerals, including iron and B12. When selecting ground beef, choose grass-fed options for superior flavor and health benefits. Store it in the coldest part of your refrigerator and consume it within a couple of days, or freeze it for longer preservation. If you’re looking for substitutions, ground turkey or lentils make great alternatives for lighter or vegetarian versions.

Spaghetti: This beloved pasta is the foundation of the dish, originating from Italy. Rich in carbohydrates, spaghetti serves as a great energy source. Opt for whole grain or gluten-free alternatives for extra nutrition. Store dried spaghetti in a cool, dry place, and keep fresh pasta in the refrigerator for a few days. If you’re out of spaghetti, alternatives like penne or fusilli work well, offering different textures to the dish.

Tomatoes: Tomatoes are crucial for the sauce, bringing acidity and brightness. Originating in South America, they became integral to Mediterranean cooking in the 16th century. Rich in vitamins C and K, tomatoes are also high in antioxidants. When selecting tomatoes, look for those that are firm and vibrant in color. Canned tomatoes are a great pantry staple that ensures you can cook this dish year-round. For a twist, consider substituting cherry tomatoes for added sweetness.

Garlic and Onion: These aromatics provide depth of flavor in the sauce. Both are known for their health benefits including heart health and immune support. When selecting, choose fresh garlic that is firm and free of sprouts. Store onions in a cool, dark place, and ideally separate from potatoes to extend their shelf life. If you need substitutes, shallots can offer a similar flavor profile.

Herbs (Basil and Oregano): Fresh herbs elevate the taste of Mediterranean dishes. They add freshness and aromatic qualities that enhance the overall flavor. Basil is often associated with Italian cuisine, while oregano has historical ties to Greece. When choosing herbs, fresh is preferred, but dried herbs work as a suitable substitute. Store fresh herbs in the refrigerator and dried ones in a cool, dark pantry. Both enhance the dish with their unique profiles.

Common Mistakes to Avoid

  • Overcooking the pasta: Make sure to test the spaghetti a minute or two before the package instructions suggest. Al dente pasta holds up better against the sauce.
  • Skimping on seasoning: Seasoning the sauce at each stage of cooking is crucial. Add salt and spices throughout to develop a more complex flavor.
  • Using low-quality meat: The meat is the star of the sauce, so investing in good-quality ground beef will greatly affect the dish’s taste and texture.
  • Not allowing flavors to develop: Take your time when simmering the sauce. Allowing it to cook longer helps meld the flavors together.
  • Adding cold meat to the pan: Let your meat come to room temperature before cooking; this ensures even browning.
  • Ignoring fresh herbs: Fresh herbs can elevate your sauce and adding them at the right moment enhances their flavor. Avoid overcooking them.
  • Skipping the garlic: Garlic adds depth to your sauce. Be cautious not to burn it, as it can turn bitter.
  • Not tasting as you go: Always taste your sauce before serving. Adjusting seasonings at the end can greatly improve the final outcome.
  • Forgetting to reserve pasta water: The starchy pasta water is perfect for adjusting the sauce consistency, ensuring it clings beautifully to every strand.
  • Overloading the sauce with too many ingredients: Less is often more. Stick to the core ingredients for best results and let their natural flavors shine.

Essential Techniques

Cooking Pasta: Properly cooking pasta is essential for achieving the right texture. Start with a large pot of boiling salted water, add the spaghetti, and stir occasionally. Cook until al dente—firm to the bite—then drain and reserve some pasta water. Avoid rinsing, as this removes the starch needed for sauce adherence.

Making a Hearty Meat Sauce: Begin by browning the ground beef in a skillet, breaking it apart for even cooking. Once browned, add onions and garlic, sautéing until translucent. Slowly add tomatoes and herbs, allowing the sauce to simmer so all flavors develop. Adjust the seasoning and let it cook until thickened to your desired consistency.

Pro Tips for Perfect Mediterranean Spaghetti with Hearty Meat Sauce

1. Always use a large pot for boiling your pasta to prevent sticking and allow for even cooking.
2. Opt for high-quality canned tomatoes—San Marzano are a favorite for their sweetness and richness.
3. When simmering your sauce, a longer cook time allows the flavors to enhance, but be careful not to let it dry out.
4. Don’t be afraid to add red wine to your meat sauce for depth; just let it reduce a little before serving to eliminate the alcohol taste.
5. Fresh herbs should be added toward the end of cooking to retain their flavor; dried herbs can be added earlier in the process.
6. If you plan on leftovers, store the pasta and sauce separately to prevent the pasta from becoming mushy.
7. For a spicy kick, consider adding red pepper flakes to the sauce while it simmers for an exciting flavor twist.
8. Take your time when sautéing vegetables; properly caramelized onions enhance the sweetness and complexity of the dish.

Variations and Adaptations

Regional variations of Mediterranean Spaghetti can include different types of meat, such as lamb or chicken, which add unique flavors and profiles. You can also experiment with seasonal adaptations; incorporating fresh vegetables like zucchini or bell peppers in the spring and summer can lighten the meal.

For those with dietary restrictions, gluten-free pasta options are widely available without sacrificing taste. Vegan adaptations could replace ground beef with lentils or mushrooms, providing a hearty alternative while keeping the essence of the dish intact.

Flavor variations can be added through spices and herbs, such as substituting basil with parsley or introducing a hint of cinnamon for a Moroccan twist. If you’re looking for a texture modification, adding crushed nuts or seeds can introduce a delightful crunch.

Lastly, presentation alternatives could include serving the spaghetti in individual bowls, garnished with a drizzle of olive oil and freshly grated cheese for a restaurant-quality finish.

Serving and Presentation Guide

Plating your Mediterranean Spaghetti beautifully enhances the dining experience. Start by twirling the spaghetti into a nest shape in the center of a warm plate, allowing the sauce to cascade around it. A sprinkle of freshly shredded Parmesan and torn basil leaves on top adds both flavor and visual appeal.

Traditional accompaniments like garlic bread or a side Greek salad can complement this dish well, rounding out the meal. You might also consider modern serving suggestions such as using single-serve cast iron skillets or mason jars for a rustic presentation.

Temperature is crucial; serve immediately after cooking to savor the pasta’s texture. For portion control, consider using kitchen scales to measure servings evenly, ensuring everyone gets their fair share.

Wine and Beverage Pairing

When it comes to wine pairings, a medium-bodied red wine like Chianti or Sangiovese complements the rich flavors of Mediterranean Spaghetti beautifully. Its acidity cuts through the meat sauce, enhancing the overall tasting experience.

For non-alcoholic alternatives, a sparkling water with a slice of lemon provides a refreshing balance. Additionally, if you wish to indulge in coffee or tea after the meal, a light herbal tea can aid digestion while providing a pleasant contrast to the robust flavors of the dish.

Temperature plays a role here too; red wines should ideally be served slightly cooler than room temperature for optimal enjoyment, while sparkling beverages can be chilled.

Storage and Shelf Life

To ensure the longevity of your Mediterranean Spaghetti, proper storage methods are essential. Place any leftovers in airtight containers and refrigerate, where they can last for up to three days. If you wish to keep it longer, freezing is an option; the dish will remain good for about three months when properly sealed.

Always check for signs of spoilage before consuming—look for off-odors or unusual colors. When reheating, ensure it’s done thoroughly to an internal temperature of 165°F, and consider adding a splash of water to rehydrate the pasta.

Freezing guidelines suggest separating the meat sauce and pasta before freezing, as they can maintain their texture better this way. Simply thaw and reheat when ready to serve again.

Make Ahead Strategies

For those short on time, several make-ahead strategies can be employed to facilitate cooking. You can prepare the meat sauce a day in advance, storing it in the refrigerator to allow the flavors to meld further. Cook the spaghetti fresh just before serving for the best texture.

If preparing ingredients beforehand, chop your vegetables and store them in airtight containers, ready for use. To ensure quality, keep a close watch on the timeline for each step, as preparing elements too far in advance can occasionally alter their taste and texture.

When assembling the dish, have everything ready to go. The last-minute touch of freshly chopped herbs can be added just before serving to maintain their vibrant flavor. For reheating, do so gently in a saucepan, adding pasta cooking water to restore moisture.

Scaling Instructions

If you’re looking to scale your Mediterranean Spaghetti recipe, adjusting ingredients becomes simple. For halving the recipe, use a kitchen scale to measure out ingredients accurately and reduce cooking times accordingly.

When doubling or tripling the recipe for larger gatherings, ensure you have a sufficiently large pot for boiling and a larger skillet for the sauce. This will allow for even cooking without overcrowding the pan.

Be mindful of timing modifications: while the cooking duration may stay consistent, preparing ingredients can take longer when larger batches are involved. Additionally, consider storage considerations; you may need to use multiple containers when freezing or refrigerating leftovers.

Nutritional Deep Dive

When analyzing the nutrition of Mediterranean Spaghetti with Hearty Meat Sauce, the macro breakdown reveals a good balance of macronutrients: carbohydrates from spaghetti, protein from ground beef, and healthy fats if olive oil is used.

Micronutrient analysis shows that this dish is rich in vitamins such as A, C, and K, mainly sourced from tomatoes and fresh herbs. Additionally, ground beef provides key minerals, including iron and zinc, instrumental for maintaining energy levels.

Health benefits include high protein content aiding muscle repair and maintenance, while dietary fiber from whole grain pasta supports digestive health. Portion analysis is vital; a serving of this dish typically contains around 600-700 calories depending on portion sizing.

For those on weight management journeys, balance is critical—consider pairing the dish with a side salad to increase volume while keeping calorie intake in check.

Dietary Adaptations

For those following a gluten-free diet, there are many great alternatives to traditional spaghetti, like zucchini noodles or gluten-free pasta brands that maintain great texture and flavor.

A dairy-free adaptation can be achieved by omitting cheese or using nutritional yeast as a cheese substitute, providing a similar umami flavor without the dairy content.

Vegetarians and vegans can replace the ground beef in the recipe with lentils or crumbled textured vegetable protein, ensuring protein needs are met without any meat.

For low-carb dieters, using spiralized vegetables as a base instead of traditional pasta is an excellent option, maintaining a comforting feel with much fewer carbohydrates.

For those adhering to a keto lifestyle, consider opting for cauliflower rice in lieu of pasta, while also being mindful of the tomato content to ensure carbohydrate levels stay low.

For paleo followers, swapping out the pasta for spiralized vegetables like zucchini or sweet potatoes preserves the dish’s integrity while adhering to dietary guidelines.

Troubleshooting Guide

If you find your sauce too watery, allow it to simmer uncovered for a while to reduce excess liquid, enhancing the overall flavor. For texture issues, if the spaghetti is mushy, ensure to cook for the recommended time next time and check for al dente during cooking.

If your dish tastes bland, it could be due to insufficient seasoning. Adjust this by adding salt, and consider including umami-rich ingredients like Worcestershire sauce or more herbs for depth.

Temperature problems can arise when serving; keeping the sauce heated while cooking the pasta is essential, preventing cold servings. Always taste before serving to ensure the temperature is just right.

If you experience equipment challenges, like a pot boiling over, reduce the heat slightly and stir to keep even bubbling. Ingredient substitutions may yield varied results, so approach swaps cautiously, always considering how flavors will meld together.

Timing concerns often stem from trying to multitask; ensure you have all ingredients prepped beforehand to facilitate a smoother cooking experience.

Recipe Success Stories

Our community has embraced Mediterranean Spaghetti with Hearty Meat Sauce, sharing feedback on the delightful flavors and comforting textures. Many have highlighted the ease of preparation, praising how quickly the dish comes together without compromising on taste, making it a go-to for weekday dinners.

Readers have also reported successful variations, such as incorporating local vegetables or swapping out proteins, proving the dish’s versatility. Sharing their adaptations has fostered a sense of community, creating a platform for engagement among food lovers.

Photography tips have proven invaluable too, with community members showcasing their final creations on social media. This not only inspires others to try the recipe but also reflects the personal touches people add to the dish, making each serving unique.

Feedback regarding the meal’s aroma enhancing the dining experience has also been a recurring theme; many cooks have noted how inviting their homes feel while preparing this dish, often leading to family members getting involved in the cooking process.

Ultimately, the success stories surrounding Mediterranean Spaghetti with Hearty Meat Sauce celebrate both the recipe’s authenticity and the memories created around the dinner table.

Frequently Asked Questions

Can I make this dish vegetarian? Yes, you can easily make Mediterranean Spaghetti vegetarian by substituting ground beef with lentils, mushrooms, or even a meat substitute product for a similar texture and taste.

What herbs work well with this recipe? Fresh basil and oregano are commonly used in the traditional recipe, but feel free to add thyme, rosemary, or parsley for added flavor and freshness.

Can I use whole grain spaghetti? Absolutely! Whole grain spaghetti is a nutritious alternative that provides more fiber while still complementing the robust sauce.

How can I add more vegetables to this dish? You can incorporate diced zucchini, bell peppers, or spinach directly into the meat sauce for extra nutrition. Adding them in the last few minutes of cooking keeps them vibrant and tender.

Is it safe to reheat leftovers? Yes, ensure you reheat the pasta and sauce thoroughly to an internal temperature of 165°F before serving again for food safety.

Can I freeze this dish? Absolutely! Both the spaghetti and meat sauce freeze well. Just store them in airtight containers to prevent freezer burn, and consume within three months for best results.

How can I make this dish low-carb? Replace the spaghetti with zucchini noodles or spaghetti squash to create a lower-carb version of this dish while still enjoying the hearty meat sauce.

What can I serve with Mediterranean Spaghetti? Garlic bread, a side salad, or roasted vegetables are fantastic accompaniments that complement the dish beautifully.

Can I use store-bought sauce? While homemade sauce is delicious, you can save time by using quality store-bought marinara or spaghetti sauce if you’re in a pinch.

How do I store the leftovers properly? Place the leftovers in airtight containers, refrigerate within two hours of cooking, and consume them within three days for the best quality.

Additional Resources

For those looking to enhance their cooking skills, related recipes such as Pasta Arrabbiata and Pesto Pasta provide equally delightful options within the Mediterranean cuisine spectrum.

Explore technique guides focused on pasta cooking, such as How to Cook Pasta Perfectly or Making Homemade Pasta, to deepen your understanding of this staple ingredient.

Ingredient information can be especially useful—refer to guides on Choosing Fresh Herbs and The Benefits of Using Whole Foods for a refined cooking approach.

If you’re interested in equipment recommendations, tools like a high-quality pasta pot and a sturdy skillet will serve you well for various dishes beyond just this recipe.

Finally, consider seasonal variations by incorporating spring vegetables like asparagus or summer zucchini for freshness, adapting this classic to whatever produce is at its peak.

Join the Conversation

We encourage you to share your own variations of Mediterranean Spaghetti with Hearty Meat Sauce, as your unique touches can inspire others in the community. Social media platforms are a fantastic place to document your cooking journey, showcasing beautiful photos of your completed dishes, tips, and tricks.

Don’t forget to engage with fellow cooks who might comment on your posts. Building a community around food not only brings creativity to the table but can also enrich your culinary skills as everyone shares their experiences.

Recipe reviews are welcomed as well—your feedback on how this dish turned out for you will help others make informed decisions when trying this recipe.

Your culinary adventures help create a vibrant community, where everyone can learn and discover new cooking methods, flavors, and traditions. Let’s cook, share, and enjoy together.

The Recipe

Mediterranean Spaghetti with Hearty Meat Sauce

Serves: 4 servings

Prep Time: 15 mins

Cook Time: 30 mins

Total Time: 45 mins

Kitchen Equipment Needed

  • Large pot
  • Skillet
  • Mixing spoon
  • Measuring cups and spoons
  • Colander

Ingredients

  • 12 oz spaghetti
  • 1 lb ground beef
  • 1 can (28 oz) crushed tomatoes
  • 1 onion, diced
  • 4 cloves garlic, minced
  • 1 tsp dried oregano
  • 1 tsp dried basil
  • Salt and pepper to taste
  • 2 tbsp olive oil
  • Fresh basil and Parmesan for garnish

Directions

  1. In a large pot of boiling salted water, cook spaghetti according to package instructions until al dente. Drain and set aside.
  2. In a skillet, heat olive oil over medium heat. Add onion and sauté until translucent.
  3. Add garlic and continue cooking for 1-2 minutes until fragrant.
  4. Add ground beef to the skillet, breaking it apart as it cooks until browned and cooked through.
  5. Stir in crushed tomatoes, oregano, and basil. Season with salt and pepper to taste.
  6. Simmer the sauce for about 20 minutes, allowing flavors to blend and sauce to thicken.
  7. Toss the cooked spaghetti with the sauce or serve sauce over the spaghetti in individual bowls.
  8. Garnish with fresh basil and grated Parmesan cheese before serving.

Recipe Notes

  • Feel free to substitute ground beef with turkey or lentils for a lighter or vegetarian option.
  • For extra flavor, add a splash of red wine to the sauce while it simmers.
  • You may also incorporate seasonal vegetables into the meat sauce for added nutrition.

Delicious Crispy Chicken with Creamy Dijon Sauce Recipe

Crispy Chicken with Creamy Dijon Sauce: A Flavor Explosion

⚖️
Difficulty
Medium

⏲️
Prep Time
15 mins

🕒
Cook Time
25 mins

⏱️
Total Time
40 mins

🍽️
Servings
4

Crispy Chicken with Creamy Dijon Sauce is the perfect recipe for those who crave a delicious, straightforward dinner. This dish delivers a symphony of flavors—tender chicken coated in a crunchy, golden-brown crust, perfectly complemented by a rich and tangy Dijon sauce. The crispy texture of the chicken gives way to juicy meat that is both satisfying and comforting. Every bite is a reminder of home-cooked meals that warm both the heart and the belly.

The creamy Dijon sauce is a star in its own right—it boasts a perfect balance of flavors with hints of tanginess, creaminess, and a touch of sweetness. This sauce is poured over the chicken, enhancing both its flavor and visual appeal. Served alongside seasonal vegetables or fluffy mashed potatoes, this crispy chicken dish offers a delightful dining experience that is sure to impress family and friends alike.

Quick Recipe Highlights

  • Flavor Profile: This dish features a combination of rich creaminess and the sharp tang of Dijon mustard that elevates the taste of the chicken.
  • Texture: The contrast between the crispy chicken skin and the smooth, creamy sauce creates an enticing mouthfeel.
  • Aroma: The aroma of garlic and herbs mingles beautifully with the warm creamy sauce, making it hard to resist.
  • Visual Appeal: The vibrant golden hue of the crispy chicken paired with the creamy sauce creates a visually stunning plate.
  • Skill Level Needed: Perfect for home cooks looking to elevate their skills, this dish requires basic frying and sauce-making techniques.
  • Special Equipment: A deep frying pan or skillet is essential, along with a whisk for the sauce.

Recipe Overview

  • Difficulty Level: This recipe is labeled as medium due to the need for frying techniques and balancing flavors in the sauce.
  • Category: Ideal for dinner and special occasions, this dish is a standout at both family dinners and festive gatherings.
  • Cuisine: Rooted in classic French cooking, the use of Dijon mustard elevates it to a culinary masterpiece.
  • Cost: Ingredients are generally affordable, making this a cost-effective choice for a hearty meal.
  • Season: This dish can be enjoyed year-round, especially appealing in the fall and winter months when comfort food is desired.
  • Occasion: Perfect for a romantic dinner at home or a festive gathering, Crispy Chicken with Creamy Dijon Sauce invites conversation and joy.

Why You’ll Love This Recipe

The taste and texture of Crispy Chicken with Creamy Dijon Sauce create a delightful experience on your palate. The tender chicken, enveloped in a crunchy golden crust, delivers satisfaction in every bite. The creamy sauce adds a layer of complexity, enriching the overall flavor without overpowering the chicken’s natural juiciness.

Convenience is another appealing aspect of this recipe. With a prep time of only 15 minutes, you can have a delicious dinner ready in no time. The step-by-step directions make it easy, allowing even novice cooks to shine in the kitchen. It’s a go-to recipe for weeknight dinners when you need something quick yet impressive.

Nutritionally, this dish strikes a balance between indulgence and wholesome ingredients. The chicken provides a great source of protein, while the accompanying sauce, made with fresh ingredients, offers a boost of flavor without excess calories if portion-controlled properly.

When it comes to social gatherings, this dish is a crowd-pleaser. The combination of flavors and textures encourages sharing and brings people together around the dining table. Your guests will appreciate the effort and relish the comforting taste of home-cooked food.

Lastly, you will love how cost-effective this recipe is. It utilizes everyday ingredients that are accessible and affordable, making it suitable for any budget without sacrificing flavor or nutritional content.

Historical Background and Cultural Significance

Crispy Chicken with Creamy Dijon Sauce has its roots in French cuisine, where cooking with mustard is a beloved tradition. The essence of this recipe draws from the deep culinary heritage of Dijon, a city known for its distinctive mustard. Over centuries, Dijon mustard has evolved, elevating countless dishes with its unique flavor profile.

This dish’s cultural importance lies in its ability to bring families and friends together. In many households, preparing a meal like this one is a shared activity that fosters connections and creates cherished memories. The integration of French ingredients into American kitchens showcases the beautiful blend of cultures in today’s culinary landscape.

Throughout its evolution, the recipe has been adapted and modified, often reflecting regional flavors and available ingredients. As a result, the dish has inspired numerous adaptations across the globe while maintaining its core identity.

Regional variations exist as well, with some incorporating local herbs, spices, or even alternative cooking methods. Each adaptation contributes a new layer of flavor while preserving the essence of crispy chicken and its flavorful sauce.

Ingredient Deep Dive

Chicken is the star ingredient in this recipe, praised for its versatility and nutritional benefits. Rich in protein, chicken supports muscle growth and overall health. Opt for organic or free-range sources for the best flavor and animal welfare standards. Look for chicken that is firm and free of blemishes, and store it in the refrigerator, using it within 1-2 days for optimal freshness.

Dijon mustard brings character to the dish, known for its sharp, tangy flavor profile. It has a storied history, being first created in the town of Dijon, France, in the 18th century. This mustard is lower in sodium compared to other condiments and offers antioxidants. Choosing a reputable brand ensures a strong flavor. Keep Dijon mustard in your pantry, and it will last indefinitely but check for signs of spoilage before use.

Cream adds the necessary richness to the sauce, enhancing the flavor while ensuring the perfect texture. Look for heavy whipping cream for the richest taste. Dairy products should be kept refrigerated, and remember to use them before the expiration date for the best results.

Common Mistakes to Avoid

  • Overcooking the chicken: This leads to dry meat. Always use a meat thermometer to ensure an internal temperature of 165°F.
  • Not seasoning properly: Make sure to season both the chicken and the sauce adequately to amplify flavors.
  • Using too high a heat: Frying at high temperatures can quickly burn the crust while leaving the chicken undercooked. Aim for medium heat.
  • Skipping the resting time: Allowing the chicken to rest after cooking helps retain moisture and flavor.
  • Neglecting the sauce: Stirring the sauce continuously prevents sticking and burns, ensuring a smooth final product.
  • Using low-quality mustard: A flavorful Dijon mustard is key to achieving the desired taste. Avoid generic brands.
  • Ignoring pan space: Crowding your pan can lead to steaming instead of frying. Cook in batches if necessary.
  • Forgetting about garnishes: Fresh herbs or a sprinkle of pepper enhance both presentation and flavor.

Essential Techniques

To achieve the perfect crispy chicken, it’s essential to master frying techniques. The key is maintaining the right oil temperature to create a crispy exterior without burning. Use a thermometer for accuracy, and always let the oil heat before adding chicken.

Making the creamy Dijon sauce requires an understanding of emulsification. Gradually whisking in the cream maintains the sauce’s consistency. Watch for the sauce thickening and adjust seasoning to balance flavors effectively.

Pro Tips for Perfect Crispy Chicken with Creamy Dijon Sauce

Start with marinating the chicken for at least an hour or overnight to deepen flavor before cooking. Use a blend of breadcrumbs for extra crunchiness, mixing panko with regular breadcrumbs for texture variations.

Consider pan-searing the chicken first before finishing it in the oven for even cooking. Always use fresh herbs for the sauce; they brighten the flavor and enhance aroma. Adjust the creaminess of the sauce according to preference by reducing or adding more cream carefully.

Pair the dish with seasonal vegetables that can be sautéed quickly in the same pan for a flavorful side. Finally, don’t forget to let the chicken rest after frying for better flavor retention and juiciness.

Variations and Adaptations

This recipe can be easily adapted to suit personal tastes. For those who enjoy heat, consider adding crushed red pepper flakes into the sauce for an exciting kick. Alternatively, smoky paprika can transform this dish into a flavorful experience.

Seasonal adaptations could involve using fresh herbs like thyme or rosemary, adding a fragrant layer of flavor. During holidays, try pairing it with festive accompaniments like cranberry sauce for a unique twist.

For health-conscious individuals, consider making a lighter sauce using a blend of Greek yogurt and Dijon mustard. This modification retains the creamy texture while reducing calories. If you’re a fan of crunch, try adding sliced almonds or walnuts to the breadcrumb mixture.

Presentation alternatives include serving the chicken over a bed of sautéed greens or alongside roasted seasonal vegetables for colorful plates that appeal visually.

Serving and Presentation Guide

To present Crispy Chicken with Creamy Dijon Sauce beautifully, consider the use of white plates to make the colors pop. Slice the chicken breast diagonally for an elegant appearance and drizzle the sauce artfully over the top.

Garnish with fresh herbs like parsley or chives to bring a touch of freshness to each plate. Roasted vegetables can be added on the side, providing vibrant colors—essential for appealing presentation.

Temperature considerations are essential; serve the dish hot for the best experience. Portion control helps with balanced plating—aim for an equal amount of chicken and sauce on each plate for consistent servings.

Wine and Beverage Pairing

For wine pairings, consider a Chardonnay that has undergone malolactic fermentation; it complements the creamy notes of the sauce beautifully. Alternatively, a light Pinot Noir can provide a delightful contrast.

For non-alcoholic options, a herbal iced tea serves as a refreshing counterpart. If coffee is your preference, a dark roast enhances the meal with deep, complex flavors. Always serve beverages at appropriate temperatures to maintain their flavor integrity.

Storage and Shelf Life

To store leftovers, place the crispy chicken in an airtight container and refrigerate for up to 3 days. Ensure the sauce is cooled before sealing to prevent moisture buildup. For long-term storage, consider freezing; chicken can last up to three months in a freezer.

Signs of spoilage include off smells, discoloration, or mold growth. Always reheat leftovers to a safe temperature of 165°F before consumption to ensure safety. When reheating, add a splash of cream to the sauce to restore its original creaminess.

Make Ahead Strategies

Preparing components ahead saves time when meal prepping. You can marinate the chicken the night before and store it in the fridge. The sauce can also be made in advance; just reheat gently when ready to serve, adding fresh herbs at the last minute for flavor.

Quality may decline if left to sit. Store the sauce separately before serving to maintain freshness.

Fresh elements like herbs should be added just prior to serving for maximum potency. If you’re serving on a busy night, consider par-cooking the chicken, then finishing it when guests arrive.

Scaling Instructions

If you need to adjust the recipe for larger gatherings, scaling ingredients is straightforward. Halving the recipe requires adjusting the cooking time slightly, as smaller portions often cook faster.

For doubling or tripling, ensure you have an adequately sized skillet and maintain even heat. Adjust seasoning proportionally, but taste during preparation for perfect flavor balance.

Keep in mind that cooking in batches may be necessary for uniform cooking and browning. Always check internal temperatures to avoid undercooking or overcooking, especially when scaling.

Nutritional Deep Dive

A typical serving of Crispy Chicken with Creamy Dijon Sauce contains approximately 450 calories, depending on preparation techniques. The macronutrient breakdown features a solid protein content, essential for muscle health, and provides satisfying energy.

Micronutrient analysis shows ingredients like mustard offering antioxidants and chicken providing necessary vitamins and minerals. When considering health benefits, opt for whole ingredients to maximize nutrition.

For those managing weight, controlling portion sizes is essential. Pairing with nutrient-dense sides can ensure a balanced meal without excessive caloric intake.

Dietary Adaptations

For gluten-free variations, replace traditional breadcrumbs with gluten-free alternatives, such as crushed rice or cornflakes, to maintain texture. If dairy-free, consider a plant-based cream to achieve a similar creamy consistency without compromising flavor.

Vegan adaptations could involve substituting chicken with crispy tofu or seitan, allowing the same crunchy experience while catering to plant-based diets. Low-carb or Keto adaptations can include replacing any starch-heavy accompaniments with leafy greens or cauliflower sides.

For those on a low-FODMAP diet, use lactose-free cream and avoid garlic to tailor this dish without sacrificing flavor. Each adaptation provides a unique spin while keeping the integrity of the original recipe intact.

Troubleshooting Guide

If the chicken is dry, it’s typically overcooked—ensure the meat thermometer reads 165°F and adjust cooking times accordingly. For flavor balance, adding a pinch of salt or a splash of vinegar can help enhance the taste profile.

If the sauce is too thick or curdled, gradually whisk in additional cream or stock over low heat while stirring to bring it back together. Equipment challenges can arise with frying; ensure your oil is hot enough to prevent sticking.

In case of missing ingredients, substitutions can often make a meal come together, such as using yogurt for cream or different herbs for a fresh flavor.

Timing issues often relate to miscalculations. Use a timer and make notes when serving new dishes to manage future meals better.

Recipe Success Stories

Our community has embraced this dish with flying colors! Many readers shared how they’ve made it for special family occasions, and it has quickly become a favorite.

Adaptations have included everything from adding spice to ensuring a healthy twist, and each story shares a common love for the original recipe. Tips from others have emphasized the importance of presentation and fresh ingredients for the ultimate dining experience.

Photos shared by readers showcase beautiful versions of this dish, inspiring others to recreate and put their spin on this classic recipe. Each adaptation tells a unique story, making this recipe a versatile canvas for many culinary artists.

Frequently Asked Questions

1. Can I make this recipe gluten-free?
Yes, simply substitute regular breadcrumbs with gluten-free options. Many grocery stores offer alternatives made from rice or gluten-free oats that work perfectly in this recipe.

2. What can I use instead of Dijon mustard?
You can replace Dijon mustard with yellow mustard or a mix of mustard and honey if you’re looking for less tanginess and a hint of sweetness.

3. How do I store leftovers?
Leftover chicken can be stored in an airtight container in the fridge for about 3 days. The sauce should be stored separately; both can last longer if frozen.

4. Is it possible to prepare this in advance?
Absolutely! You can marinate the chicken and prepare the sauce, storing each separately in the fridge for up to a day before cooking.

5. Can I use chicken thighs instead of breasts?
Yes! Chicken thighs are perfect for this recipe and will yield juicy, flavorful results.

6. What sides go well with this dish?
Roasted vegetables, mashed potatoes, or a simple green salad are great accompaniments to the crispy chicken.

7. How can I make the sauce richer?
For an even richer sauce, you can add extra cream or a tablespoon of butter at the end of cooking.

8. Can this recipe be baked instead of fried?
Yes, you can bake the chicken at 400°F for about 30 minutes, flipping halfway through for even cooking.

9. How do I ensure the chicken is crispy?
Make sure your oil is hot enough before adding the chicken, and avoid overcrowding the pan.

10. What should I do if the sauce curdles?
If your sauce curdles, gently whisk in a little more cream or broth while heating it on low until smooth again.

Additional Resources

Explore more of our delicious recipes that complement this crispy chicken dish, such as seasonal salads, various mustard dips, and flavorful side dishes. Consider checking out our technique guides for frying and sauce-making for further cooking insights.

Equipment recommendations, such as reliable frying pans or food thermometers, can also enhance your cooking experience. Make sure to follow our seasonal variations to create perfect pairings as you explore the palette of flavors available year-round.

Join the Conversation

We’d love to hear your experiences with this recipe! Share your photos on social media, and let us know about your variations and tips. Engaging with our community can provide inspiration for new twists on classic dishes like this crispy chicken.

Consider leaving a review to help others find this delicious creation, and don’t forget to tag us in your culinary adventures. Share the love of cooking, and let’s create a community that celebrates wonderful homemade food together!

The Recipe

Crispy Chicken with Creamy Dijon Sauce

Serves: 4

Prep Time: 15 mins

Cook Time: 25 mins

Total Time: 40 mins

Kitchen Equipment Needed

  • Deep frying pan or skillet
  • Meat thermometer
  • Whisk
  • Spatula
  • Airtight storage containers

Ingredients

  • 4 boneless, skinless chicken breasts
  • 1 cup breadcrumbs
  • 1/2 cup Dijon mustard
  • 1 cup heavy cream
  • 2 tablespoons olive oil
  • 2 cloves garlic, minced
  • Salt and pepper to taste
  • Fresh herbs for garnish

Directions

  1. Preheat your skillet over medium heat, adding olive oil to coat the bottom.
  2. Prepare the chicken by patting it dry, then season with salt and pepper.
  3. Coat each chicken breast in Dijon mustard and then dredge in breadcrumbs, ensuring a thorough coating.
  4. Add the chicken to the hot skillet and cook on each side for 7-10 minutes until golden brown and cooked through.
  5. While the chicken is cooking, prepare the sauce by sautéing garlic in a separate saucepan.
  6. Add the cream and whisk continuously until smooth, then stir in additional Dijon mustard to taste.
  7. Once the chicken is fully cooked, remove from heat and allow to rest for a few minutes before slicing.
  8. Serve the chicken drizzled with creamy Dijon sauce and garnish with fresh herbs.

Recipe Notes

  • Customize the spice level by adding cayenne pepper to the breadcrumbs.
  • Substituting chicken with tofu or tempeh can provide a vegetarian option.
  • This dish pairs wonderfully with a side of mashed potatoes or steamed vegetables.

Delicious Garlic Parmesan Chicken Meatloaf Recipe for Dinner Success

Garlic Parmesan Chicken Meatloaf: A Flavorful Twist on a Classic Dish

⚖️
Difficulty
Easy

⏲️
Prep Time
15 mins

🕒
Cook Time
45 mins

⏱️
Total Time
60 mins

🍽️
Servings
6

The savory aroma of garlic and parmesan wafts through the kitchen as this Garlic Parmesan Chicken Meatloaf bakes to golden perfection. This recipe brings a fresh twist to the traditional meatloaf, infusing tender chicken with vibrant flavors, making it a family favorite. Ideal for weeknight dinners, it’s both satisfying and health-conscious, offering a wholesome meal that doesn’t skimp on taste.

This Garlic Parmesan Chicken Meatloaf isn’t just about comfort food; it’s about creating an inviting ambiance that encourages gathering around the table. Each bite delivers moist chicken mingled with that classic garlic punch and a rich parmesan cheese finish, ensuring a flavor explosion your taste buds will celebrate. It’s an approachable dish that provides warmth and a hint of nostalgia, making it perfect for family gatherings or simple weekday meals.

Quick Recipe Highlights

  • Flavor Profile: This meatloaf features a rich combination of garlic and parmesan, elevating the basic concept into something special.
  • Texture: You’ll find a tender, juicy interior complemented by a slight crispness on the edges, making each bite delightful.
  • Aroma: The robust garlic aroma mixed with the savory notes of parmesan fills your kitchen, inviting everyone to the dinner table.
  • Visual Appeal: The golden crust and appetizing aroma creates a dish that is visually stunning and enticing, perfect for any table setting.
  • Skill Level Needed: This easy recipe is suitable for cooks of all levels, making it a fun activity for beginners and seasoned chefs alike.
  • Special Equipment: You’ll need a mixing bowl and a loaf pan, which are essentials in preparing this meatloaf.

Recipe Overview

  • Difficulty Level: This Garlic Parmesan Chicken Meatloaf is easy to prepare, making it the perfect choice for beginner cooks or experienced chefs alike.
  • Category: This dish falls under the category of comfort food and main dishes, perfect for dinner or special occasions.
  • Cuisine: The recipe draws influences from American cooking, holding a special place in households across the country.
  • Cost: This recipe is budget-friendly, with basic ingredients that are generally affordable, making it easy to prepare for any occasion.
  • Season: Enjoy this meatloaf year-round, especially during the fall and winter months when comforting meals are most desired.
  • Occasion: The Garlic Parmesan Chicken Meatloaf is ideal for family dinners, potlucks, and festive gatherings.

Why You’ll Love This Recipe

The taste and texture of this Garlic Parmesan Chicken Meatloaf will have everyone coming back for seconds. The chicken keeps the loaf incredibly moist, while the added garlic delivers that pungent kick that awakens the palate. Parmesan contributes a creamy texture, enriching the overall mouthfeel and ensuring each slice is bursting with flavor.

Convenience is key when it comes to this recipe. The preparation time is quick, and it can be made ahead for those busy weeknights. Just mix, shape, and bake—this simplicity makes it a hassle-free meal for families with packed schedules. Plus, leftovers reheat beautifully, allowing you to enjoy this dish more than once without a second cooking session.

From a nutritional standpoint, this meatloaf is a healthier alternative to traditional beef variants. Combining lean ground chicken with a medley of herbs, you create a protein-rich dish that is lower in fat while still providing the hearty satisfaction of comfort food. It’s a fantastic way to sneak in more lean protein into your family’s diet without sacrificing flavor.

Socially, this Garlic Parmesan Chicken Meatloaf serves as a wonderful centerpiece for gatherings. The inviting aroma and beautiful presentation encourage sharing and conversation, enhancing your meal experience. Families can bond over serving and enjoying this savory delight, making memories wrapped in flavors.

Cost-effectiveness is another reason to love this meatloaf. Utilizing inexpensive ingredients like ground chicken, garlic, and parmesan, creates a hearty dish that stretches your budget. You can feed a larger group without breaking the bank, ensuring everyone walks away satisfied and happy.

Historical Background and Cultural Significance

Meatloaf has long been a staple in American cuisine, tracing its history back to the 19th century. Recently, innovative spins like this Garlic Parmesan Chicken Meatloaf have revived interest in this classic dish, appealing to modern taste preferences. The combination of chicken with robust garlic and parmesan resonates with both traditional and contemporary appetites.

Culturally, meatloaf represents comfort and home-cooked values. Families around the country have their unique ways of preparing meatloaf, sharing recipes and stories through generations. The dish serves not just as a meal, but as a vehicle for memories, comfort, and love.

Over time, the evolution of the meatloaf recipe has introduced countless variations. From classic beef to turkey and chicken, today’s versatile interpretations reflect changing dietary preferences and culinary creativity. This Garlic Parmesan Chicken Meatloaf stands out as a modern take that maintains the core essence of a beloved family dish.

Regional variations across the U.S. offer unique twists on the meatloaf tradition. This recipe adds Italian influences via parmesan and garlic, showcasing how diverse cultural elements can enhance classic American dishes, making them even more enticing.

Ingredient Deep Dive

Garlic, a key ingredient in this recipe, has been used in cooking for centuries, with its history dating back to ancient cultures. Highly regarded for its health benefits, garlic is known for its anti-inflammatory and immune-boosting properties. When selecting garlic, look for firm, dry bulbs with no signs of sprouting. Store it in a cool, dark place to keep it fresh for longer. If you’re in need of substitutes, you can consider garlic powder or shallots for a different, but complementary flavor profile.

Parmesan cheese, another hero in this dish, adds a depth of flavor that enriches the overall taste. It’s a hard cheese originating from Italy and renowned for its rich, nutty flavor. Nutritionally, parmesan is high in protein and calcium. When choosing parmesan, opt for wheel-aged varieties for the best quality. It’s best stored in the refrigerator wrapped tightly to maintain freshness. In case you need alternatives, consider Pecorino Romano or Grana Padano, which can mimic the flavor profile nicely.

Common Mistakes to Avoid

  • Not measuring ingredients accurately can lead to inconsistent taste and texture, so be sure to use precise quantities.
  • Overmixing the meat mixture can result in a tough meatloaf, so mix just until combined for a tender result.
  • Skipping the resting time after baking makes slicing difficult and can lead to a crumbly consistency.
  • Using excess fat or grease can make the meatloaf greasy; therefore, be mindful of the fat content in your ground chicken.
  • Not using a meat thermometer to check doneness can lead to undercooked meat, which is unsafe. The internal temperature should reach 165°F.
  • Forgetting to line or grease your pan can cause sticking, making it difficult to serve without breaking.
  • Inadequate seasoning will yield a bland flavor, so don’t forget to taste the mixture before baking.
  • Adding too many additional ingredients can disrupt the moisture balance, leading to dryness, so stick to the suggested ingredients for best results.
  • Not allowing for even cooking by not shaping the meatloaf properly can lead to unevenly baked results.
  • Using low-quality cheese could diminish the overall flavor; opt for freshly grated parmesan for best results.

Essential Techniques

Achieving the perfect meatloaf requires mastering the art of mixing. This technique is crucial to ensure that the flavors meld together without overworking the meat. Use a gentle folding motion and avoid excessive handling, which can lead to a dense texture. Visually, you want a homogenous mixture without noticeable clumps.

Shaping the meatloaf is another integral step. A well-shaped loaf ensures even cooking and desirable presentation. Use your hands to form a compact loaf without over-compressing the mixture, keeping it tender while maintaining flavor integrity. A uniform shape will bake evenly and produce an aesthetically pleasing final dish.

Pro Tips for Perfect Garlic Parmesan Chicken Meatloaf

1. Use day-old bread for breadcrumbs for a richer flavor and better texture.
2. Experiment with adding herbs like parsley or thyme to enhance the flavor profile further.
3. Let the meatloaf rest for 10 minutes post-cooking before slicing to retain juices.
4. Cover the meatloaf with foil during the first half of baking to avoid a burnt surface.
5. Incorporate a glaze made of ketchup and honey on top for a sweet finish.
6. Try adding finely diced vegetables like bell peppers or onions for extra moisture and nutrients.
7. Freeze individual slices for a quick, easy reheatable meal later on.
8. Use a parchment-lined pan for easy clean-up and perfect removal.

Variations and Adaptations

For regional variations, consider incorporating local spices or ingredients, such as using Cajun seasoning for a Southern twist. Seasonal adaptations can include adding fresh herbs in the spring or incorporating pumpkin puree for a fall flavor profile. For dietary modifications, lean turkey can replace chicken for a similar taste with a different texture.

Flavor variations can include substituting cheddar for parmesan or adding sun-dried tomatoes for an Italian flair. Texturally, mixing in finely chopped mushrooms can enhance moisture and provide a distinct earthy flavor. Presentation alternatives, such as serving the meatloaf in muffin tins, create delightful single-serving portions for social gatherings.

Serving and Presentation Guide

When plating, consider using a large serving platter and placing the meatloaf slices in a slightly overlapping array for visual appeal. Garnish with freshly chopped herbs like parsley or basil for a pop of color and freshness. Traditional accompaniments include mashed potatoes or steamed vegetables, making for a balanced meal.

Modern serving suggestions might entail serving the meatloaf with a side salad drizzled with balsamic vinaigrette for added freshness. Be mindful of temperature considerations; serve the meatloaf warm for the best taste experience. For portion control, aim to cut even slices to manage serving sizes effectively.

Wine and Beverage Pairing

For a delightful pairing, a medium-bodied red wine, such as Pinot Noir, complements the savory flavors in the Garlic Parmesan Chicken Meatloaf beautifully. If you prefer white wine, a Chardonnay offers enough richness to balance the meal. For non-alcoholic alternatives, consider pairing with sparkling water infused with lemon, which cleanses the palate nicely.

For coffee enthusiasts, a light roast coffee served black can highlight the savory notes in the meatloaf without clashing; serve it warm to enhance the flavors. Achieving temperature harmony in your beverages will elevate your dining experience, so be sure to serve them at ideal temperatures.

Storage and Shelf Life

Storing your Garlic Parmesan Chicken Meatloaf is straightforward. Allow it to cool completely before transferring it to an airtight container to preserve freshness. It can be kept in the refrigerator for up to 4 days. For longer storage, wrap individual portions tightly in plastic wrap and place them in the freezer, where they can last up to 3 months.

Signs of spoilage include an off smell or unusual texture, so always check before consuming. When reheating, ensure the internal temperature reaches 165°F for food safety. For best results, reheat in the oven to maintain texture, but microwave heating works for convenience.

Make Ahead Strategies

Planning to make ahead can save time during busy weeks. Mix the ingredients and shape the meatloaf the night before, then cover it tightly and refrigerate until ready to bake. This allows the flavors to meld beautifully, enhancing the overall taste.

Store leftovers separated by layers of parchment paper if stacking in one container, helping to maintain their shape and moisture. For reheating, do so in the oven with a splash of broth to keep it moist, or microwave individual servings with a damp paper towel over them to prevent drying.

Scaling Instructions

If you’re looking to halve the recipe, simply adjust the ingredients accordingly, keeping the same cooking temperature. Scaling to double or even triple the recipe for gatherings works beautifully, just ensure you use a larger loaf pan or split it across two pans for even cooking.

Make equipment adjustments where needed; a larger mixing bowl helps when scaling up. Modify cooking times slightly, checking doneness with a thermometer, as larger meatloaves may require additional time. Ensure proper storage for scaled batches, utilizing multiple containers if necessary.

Nutritional Deep Dive

A macro breakdown suggests that this Garlic Parmesan Chicken Meatloaf is high in protein due to its chicken base while remaining lower in fat than traditional recipes. Each serving offers a balanced amount of carbohydrates primarily from breadcrumbs, making it a wholesome option.

Micronutrient analysis reveals benefits from garlic, including vitamins C and B6, alongside calcium and magnesium from parmesan. Implementing this recipe into your diet can foster health benefits like improved immunity and bone health. Portion control is vital; for those managing weight, serving sizes can be adapted to individual dietary needs.

Dietary Adaptations

For gluten-free options, substitute traditional breadcrumbs with gluten-free varieties or ground oats. If you’re looking for dairy-free adaptations, try vegan cheese or omit cheese altogether, using additional herbs for flavor.

Vegetarians might adapt this recipe by using lentils or a mixture of beans as a protein source, creating a delicious meat-free loaf. For low-carb or keto diets, consider using crushed pork rinds as a breadcrumb alternative, offering a crunchy texture without the carbs. Paleo enthusiasts can simply omit breadcrumbs entirely, using grated vegetables for bulk.

Troubleshooting Guide

If you encounter texture issues, such as dryness, consider adding moisture in the form of broth or eggs next time. For flavor balance, if the loaf tastes bland, remember to season well and perhaps add a homemade glaze.

Temperature problems can arise—check your oven’s heat calibration to ensure even cooking. If ingredient substitutions land poorly, stick with similar flavors and textures. Should timing concerns arise, stick a thermometer in the center; it should read 165°F for chicken meatloaf.

Recipe Success Stories

Community feedback on this Garlic Parmesan Chicken Meatloaf has been overwhelmingly positive. Readers have noted successful adaptations, including veggie-loaded versions that sneak in extra nutrients without sacrificing taste. Suggestions have emerged about incorporating different cheeses or adding a spicy kick with jalapeños.

Photography tips shared by readers indicate that utilizing natural light enhances the appeal of the final dish. Many readers enjoy showing off their versions on social media, creating a community around this beloved recipe. Your stories and adaptations can contribute to the evolving legacy of this delicious meatloaf.

Frequently Asked Questions

Can I use ground turkey instead of chicken? Yes, ground turkey can be used in place of chicken for a slightly different taste while keeping the dish lean. Just be mindful of the slightly different cooking times.

What can I use instead of breadcrumbs? Alternatives include crushed crackers, oats, or ground flaxseed, depending on your dietary needs and texture preferences.

How do I make it gluten-free? Use gluten-free bread or oats as a substitute for traditional breadcrumbs.

What sides pair well with this meatloaf? Traditional sides include mashed potatoes or steamed veggies. A light green salad also works well to balance the meal.

Can I freeze leftovers? Yes, leftover meatloaf can be frozen for later enjoyment. Ensure it is well-wrapped to avoid freezer burn.

How do I prevent the meatloaf from drying out? Avoid overcooking and consider adding a layer of glaze or sauce on top during baking to maintain moisture.

Is there a vegetarian version of this meatloaf? Yes, you can substitute the chicken for lentils or a mixture of beans to create a wholesome vegetarian option.

How long does this meatloaf last in the fridge? Properly stored, it can last for up to four days in the refrigerator.

Can I cook this meatloaf in advance? Yes, you can prepare the meatloaf in advance and refrigerate it before baking for ease on a busy day.

What temperature should the meatloaf be when done? The internal temperature should reach 165°F to ensure the chicken is fully cooked and safe to eat.

Can I add other vegetables to the meatloaf? Absolutely! Diced bell peppers, carrots, or onions can add moisture and flavor to the meatloaf.

Additional Resources

Explore related recipes that embrace comfort food themes, such as beef meatballs or chicken burgers, to further inspire your culinary journey. Technique guides focusing on meat preparation and cooking methods can help troubleshoot any challenges encountered here.

Ingredient information on garlic and chicken, including selection tips, can enhance your cooking knowledge. Equipment recommendations can assist with choosing the best tools to streamline your kitchen workflow, ensuring you have quality at your fingertips. Seasonal variations allow you to adapt this meatloaf throughout the year, keeping it fresh and exciting.

Join the Conversation

We invite you to share your experiences with this recipe on social media! Upload your completed Garlic Parmesan Chicken Meatloaf and tag us to inspire others. Engage in the comments section to share tips, photography suggestions, and your unique adaptations to this recipe.

Community engagement can lead to new ideas and fresh variations, allowing this dish to evolve further. We love hearing about your cooking adventures and the cherished moments around the dinner table that this recipe brings.

The Recipe

Garlic Parmesan Chicken Meatloaf

Serves: 6

Prep Time: 15 mins

Cook Time: 45 mins

Total Time: 60 mins

Kitchen Equipment Needed

  • Mixing bowl
  • Loaf pan
  • Meat thermometer
  • Spatula or spoon for mixing
  • Oven

Ingredients

  • 1 lb ground chicken
  • 1 cup breadcrumbs
  • 1/2 cup grated parmesan cheese
  • 2 cloves garlic, minced
  • 1 egg
  • 1 tsp Italian seasoning
  • Salt and pepper to taste
  • Ketchup for topping (optional)

Directions

  1. Preheat the oven to 375°F (190°C).
  2. In a large mixing bowl, combine the ground chicken, breadcrumbs, parmesan cheese, minced garlic, egg, Italian seasoning, salt, and pepper.
  3. Mix until just combined, being careful not to overmix.
  4. Transfer the mixture to a loaf pan and shape it into a loaf.
  5. If using, spread a thin layer of ketchup on top of the meatloaf for added flavor.
  6. Bake for 45 minutes, or until the internal temperature reaches 165°F (75°C).
  7. Let the meatloaf rest for 10 minutes before slicing.

Recipe Notes

  • This meatloaf freezes well; wrap slices tightly to maintain freshness.
  • Feel free to add chopped vegetables to the mix for enhanced nutrition.
  • Adjust seasonings to your taste, especially the garlic!

Delicious Creamy Italian Sausage Bow Tie Pasta Recipe

Creamy Italian Sausage with Bow Tie Pasta: A Comforting Delight

⚖️
Difficulty
Easy

⏲️
Prep Time
10 mins

🕒
Cook Time
20 mins

⏱️
Total Time
30 mins

🍽️
Servings
4 servings

Creamy Italian Sausage with Bow Tie Pasta is a dish that promises comfort and satisfaction in every bite. This delightful recipe brings together flavorful Italian sausage, perfectly cooked bow tie pasta, and a rich, creamy sauce that makes it an instant favorite among families and friends. Imagine sitting down to a plate of tender pasta enveloped in a velvety sauce, with the aromatic spices of Italian sausage warming your taste buds. This meal is perfect for weeknight dinners, yet special enough to serve during gatherings.

The star of this dish is undoubtedly the sausage, with its savory, robust flavors complemented by the creamy sauce. Each bow tie pasta piece cradles the sauce perfectly, delivering a delightful texture that balances the heartiness of the sausage. The combined fragrance of garlic and herbs wafts through the kitchen, creating an inviting atmosphere that beckons everyone to the dinner table. Whether you are trying to impress guests or simply want a nourishing meal after a long day, this recipe delivers both flavor and ease.

Quick Recipe Highlights

  • Flavor Profile: The dish boasts a delightful blend of savory Italian sausage, rich cream, and aromatic spices that make every bite a flavor explosion.
  • Texture: The bow tie pasta’s unique shape provides a satisfying chew, while the creamy sauce adds a smooth finish that coats each piece perfectly.
  • Aroma: The combination of garlic, herbs, and sausage creates an irresistible aroma that fills the kitchen as it cooks.
  • Visual Appeal: This dish features vibrant colors from the pasta and a creamy white sauce that invites you to dig in.
  • Skill Level Needed: This recipe is straightforward, making it perfect for novice cooks and busy families alike.
  • Special Equipment: A large pot for cooking pasta and a skillet for the sauce are the only required tools.

Recipe Overview

  • Difficulty Level: Preparing Creamy Italian Sausage with Bow Tie Pasta is relatively easy, making it accessible for cooks at all experience levels.
  • Category: This dish falls under comfort food and pasta meals, perfect for lunches or cozy dinners.
  • Cuisine: Inspired by traditional Italian cooking, this recipe captures the essence of Italian flavors through simple yet rich ingredients.
  • Cost: The recipe is budget-friendly, with ingredients that can usually be found at any grocery store at reasonable prices.
  • Season: Ideal for any season, this recipe warms you up during colder months while remaining satisfying year-round.
  • Occasion: Great for family dinners, casual gatherings, or special occasions when you want to impress without much fuss.

Why You’ll Love This Recipe

Creamy Italian Sausage with Bow Tie Pasta is a feast for the senses. The uniqueness of the bow tie pasta adds an element of fun to the dish, making it visually appealing and enjoyable to eat. Each bite combines the rich, savory flavors of Italian sausage with a smooth, creamy sauce that clings perfectly to the pasta. This comforting dish is an instant crowd-pleaser, offering familiar flavors that evoke warmth and happiness, ideal for sharing with family and friends.

What makes this recipe even more appealing is its convenience. With minimal prep time and easy cooking steps, you can prepare this meal in just 30 minutes. This means you can quickly whip it up on busy weeknights when you may not have time for elaborate meals, yet still want something hearty. The leftovers are just as delicious, allowing you to enjoy this dish multiple times throughout the week, saving both time and effort.

Nutritionally, the dish provides a satisfying balance of carbohydrates and protein. The pasta gives you the necessary energy, while the sausage adds a good source of protein, and the creamy sauce ensures a filling meal that can keep you and your family satisfied. This dish can also be adapted with fresh vegetables, making it easy to incorporate some greens for an extra nutrient boost.

Socially, Creamy Italian Sausage with Bow Tie Pasta holds great value as a dish for gatherings. Its shareable nature makes it perfect for potlucks, and its deliciousness often leads to compliments from guests. You can serve it with a simple salad and bread, turning this recipe into a delightful meal that everyone will remember long after the plates are cleared.

Furthermore, this recipe is incredibly cost-effective. The ingredients are easily accessible and inexpensive, providing an affordable way to prepare a delicious meal. This makes it a great choice for families looking to enjoy a heartwarming dish without breaking the bank, establishing it as a staple in your weekly meal planning.

Historical Background and Cultural Significance

Creamy Italian Sausage with Bow Tie Pasta has roots in Italian culinary traditions, where pasta and hearty dishes have been central to family meals for centuries. While the exact origin of this particular preparation is hard to pinpoint, it draws inspiration from classic Italian pasta recipes that use local ingredients. The use of sausage in this dish highlights the historic significance of regional meats in Italian cooking, where every family might have their variation.

The dish showcases Italian comfort food principles, focusing on simplicity, flavor, and nourishment. In Italy, pasta is more than just a meal; it represents a cultural pillar where families gather at the dinner table, sharing love and conversation. Creamy sauces often accompany pasta dishes, enhancing the overall eating experience and evoking the satiety associated with authentic Italian home cooking.

As recipes evolved, adaptations emerged based on the availability of ingredients and regional preferences. This dish combines traditional Italian sausage with creamy sauces that became popular in various adaptations of Italian cuisine outside of Italy. Over the years, it has transformed into a beloved favorite in home kitchens across the globe, demonstrating why Italian cuisine resonates so well with diverse cultures.

Some regional variations might incorporate local vegetables, cheeses, or spices, emphasizing the adaptability of this dish. In many homes, especially in the U.S., variations of Italian sausage recipes are popular and often adjusted with items on hand, reflecting not only individual tastes but also the community’s culinary landscape, showing the blend of tradition and innovation still at play today.

Ingredient Deep Dive

Italian Sausage: Italian sausage is a flavorful addition to many pasta dishes. This versatile meat is seasoned with a medley of spices, including fennel, which adds a distinctive taste. The use of pork sausage reflects Italy’s agricultural history, where pig farming is a predominant practice. Nutritionally, it’s a great source of protein; however, one should opt for leaner varieties to keep fat content in check. When selecting sausage, look for high-quality brands with natural ingredients, and store them in the refrigerator. For those looking for alternatives, turkey or chicken sausage works as a lighter option.

Bow Tie Pasta: Bow tie pasta, or farfalle, is not only adorable in shape but also holds sauce remarkably well. This pasta type has roots in Northern Italy and is often used in salads and creamy dishes alike. Its unique shape allows it to trap the creamy sauce, ensuring each mouthful is packed with flavor. When choosing pasta, look for durum wheat varieties for better texture. They can be stored in a cool, dry place, and cooked al dente for the best results. For gluten-free options, there are excellent alternatives made from rice or chickpea flour available.

Cream: Cream is the key ingredient that provides a luxurious, velvety texture to the sauce. While heavy cream is traditionally used, it can be substituted with half-and-half or even Greek yogurt for a healthier twist. Its history in Italian cooking dates back centuries when dairy products were readily available. Cream is a good source of fat-soluble vitamins, though it’s best to consume it in moderation. Always keep cream refrigerated and use it before the expiration date. Non-dairy alternatives, such as coconut cream or cashew cream, can also be used for a lighter dish.

Common Mistakes to Avoid

  • Overcooking Pasta: It’s important to cook the pasta al dente. Overcooking will lead to mushy pasta that won’t hold the creamy sauce well.
  • Skimping on Seasoning: Proper seasoning is crucial. Don’t shy away from adding salt and pepper to both the sausage and the sauce for full flavor.
  • Using Cold Ingredients: For best results, let cream and other refrigerated ingredients come to room temperature before adding them to the pan to achieve a smooth sauce.
  • Not Draining Pasta Well: It’s essential to reserve some pasta water when draining, just in case you need to thin out the sauce later.
  • Skipping the Sauté: Always sauté garlic and onions before adding it to the sauce for depth of flavor; this step shouldn’t be rushed.
  • Adding Cream Too Early: Wait until just before serving to add the cream to prevent curdling and maintain a nice consistency.
  • Neglecting to Taste: Always taste your sauce before serving. Adjust seasonings as needed to enhance the dish’s flavors.
  • Not Incorporating Pasta Water: Use reserved pasta water to adjust the sauce’s consistency if it becomes too thick, ensuring it adheres well to the pasta.
  • Overcrowding the Pan: Give the sausage room to brown properly. Crowding it can lead to steaming instead of browning.
  • Focusing Solely on Recipe: Feel free to adjust the recipe based on personal preferences; cooking should be enjoyable and open to interpretation!

Essential Techniques

Cooking Pasta: Cooking pasta correctly is essential for achieving the desired texture. Always use ample water, allowing it to come to a rolling boil before adding the pasta. Stirring occasionally and tasting for doneness are crucial steps that prevent overcooking. A visual cue for perfectly cooked pasta is a slight bite to the texture when chewed, known as al dente.

Sautéing Aromatics: Sautéing garlic and onion is key to building flavor in your sauce. Start with a hot pan to ensure the aromatics don’t get soggy. Monitor the cooking process, as garlic can quickly burn; you want it fragrant and slightly golden, leading to a beautifully layered flavor profile.

Making a Cream Sauce: Crafting a creamy sauce can elevate your dish. Begin by melting butter and adding heavy cream while stirring continuously. A gentle heat prevents curdling and allows the sauce to emulsify. To master this technique, look for a smooth, consistency as the sauce thickens to coat the back of a spoon.

Pro Tips for Perfect Creamy Italian Sausage with Bow Tie Pasta

1. For an extra depth of flavor, consider adding a splash of white wine to deglaze the pan after browning the sausage before mixing in the cream.

2. If you enjoy a touch of heat, add crushed red pepper flakes to the sausage as it cooks, infusing a spicy kick to the dish.

3. Fresh herbs, such as basil or parsley, can enhance the freshness of the creamy sauce. Add them just before serving for a vibrant finish.

4. Incorporate spinach or other leafy greens into your dish to boost its nutritional value while adding a pop of color.

5. For a nuttier flavor, consider grating some Parmigiano-Reggiano cheese into your sauce, enriching its creamy texture.

6. Experiment with different shapes of pasta; while bow tie is delightful, other varieties enhance the dish’s presentation and texture.

7. Always reserve a little bit of pasta water to help adjust the sauce’s thickness and achieve the perfect consistency.

8. Allow the dish to rest for a few minutes after plating. This allows the flavors to meld together beautifully.

Variations and Adaptations

This dish can be personalized in numerous ways, making it versatile for any palate. For those who prefer a lighter option, substituting light cream or Greek yogurt can cut down on calories while maintaining a deliciously creamy sauce. When preparing for a hearty meal, consider adding vegetables like bell peppers, zucchini, or mushrooms, melding beautifully with the existing flavors and boosting nutritional content.

If you want to explore different regional variations, try using chorizo in place of Italian sausage for a robust flavor blend reminiscent of Spanish flair. Incorporating seasonal vegetables allows the recipe to adapt throughout the year; for example, use asparagus in the spring or pumpkin in the fall for a unique twist.

For those with dietary restrictions, modifying the ingredients to fit gluten-free or dairy-free diets becomes straightforward. Zucchini noodles can serve as a great alternative to pasta, while coconut cream can replace heavy cream for a satisfying vegan-friendly version that doesn’t compromise on taste.

When it comes to presentation, consider serving the dish in a family-style presentation in an attractive baking dish, or plating individual servings with a sprinkle of fresh herbs for a restaurant-style touch.

Serving and Presentation Guide

Plating is an essential part of the dining experience. For Creamy Italian Sausage with Bow Tie Pasta, consider using a wide, shallow bowl that allows the dish to shine. Twirl the pasta into a mound, placing the sausage and sauce generously atop without overwhelming the presentation.

Garnishing suggestions include a sprinkle of freshly grated Parmesan cheese or cracked black pepper to enhance the visual appeal. You can also add a sprig of fresh basil or parsley to bring a fresh color contrast.

Traditional accompaniments involve a simple side salad or garlic bread, inviting a balance to the meal without overshadowing the flavors of the main dish. For modern serving, consider pairing the pasta with a light, crisp white wine or a refreshing sparkling water with a wedge of lemon for a delightful contrast.

Serving temperature is also critical; this dish is best enjoyed hot, so consider warming plates before serving. Furthermore, portion control can be managed by using smaller bowls to ensure guests can enjoy multiple courses without feeling overwhelmed.

Wine and Beverage Pairing

Pairing wine with Creamy Italian Sausage with Bow Tie Pasta adds a delightful dimension to your meal. A crisp Chardonnay complements the richness of the creamy sauce without overpowering it. Alternatively, a light Pinot Grigio works beautifully, enhancing the dish’s flavors while cleansing the palate.

For non-alcoholic alternatives, consider serving sparkling water infused with lemon or cucumber that offers a refreshing contrast to the savory flavors. This not only quenches thirst but adds a sophisticated touch to your dinner table.

If you prefer coffee or tea, a light herbal tea like chamomile might pair well for those who enjoy a caffeine-free option after dinner, providing a soothing finish to the meal.

Temperature considerations are vital in wine pairing; serve white wines chilled to accentuate their crisp notes, while warming slightly in the glass enhances their aromatic qualities.

Storage and Shelf Life

Proper storage of Creamy Italian Sausage with Bow Tie Pasta can significantly extend its shelf life. Store leftovers in airtight containers in the refrigerator for up to 3 days, ensuring they retain their flavor and freshness. Always allow the dish to cool before sealing to prevent condensation, which could lead to spoilage.

When freezing, ensure the dish is cooled, then transfer it to freezer-safe containers or bags. It can be safely frozen for up to 3 months. For thawing, place the container in the refrigerator overnight before reheating.

Signs of spoilage include an off smell, visible discoloration, or an unusual texture. To reheat, warm gently on the stove over low heat, adding a splash of cream or reserved pasta water to revive its creamy consistency. For a quick option, microwave the dish in short intervals, stirring frequently to avoid overheating.

Make Ahead Strategies

To streamline dinner preparation, consider making Creamy Italian Sausage with Bow Tie Pasta ahead of time. Start by preparing the sausage and cream sauce; once cool, store them separately in airtight containers in the refrigerator. This allows you to whip up the pasta just before serving, ensuring it’s freshly cooked and warm.

A good prep timeline involves cooking the sausage mixture the night before, allowing the flavors to meld even better. During mealtime, simply cook the bow tie pasta and combine everything for a delightful dish ready in minutes.

Storage between steps is key; sauce can last up to 3 days in the fridge, while the pasta can be made fresh just before serving. Quality impact is minimal when reheating the sausage mixture, as it retains much of its original flavor profile.

To maintain freshness, allow it to come to room temperature before reheating gently. For the final touch, consider throwing in fresh herbs just before serving to brighten up the flavors and add a touch of vibrancy.

Scaling Instructions

If you’re looking to adjust the recipe for larger gatherings, scaling up is straightforward. Halve or double the quantities of ingredients to suit your needs; each ingredient will generally scale proportionally.

When doubling or tripling, ensure you have appropriate-sized pots and pans to accommodate the increased quantity without overcrowding, which can lead to uneven cooking.

Timing modifications become important; as quantities increase, you may need to extend cooking times slightly, allowing each component ample time to reach the desired temperature and flavor profile.

When storing leftovers, consider separating them out into smaller containers to make reheating easier. Adjustments in sauce ingredient proportions might also be necessary to maintain the intended flavor balance.

Nutritional Deep Dive

Though Creamy Italian Sausage with Bow Tie Pasta is undeniably delicious, understanding its nutritional content ensures you enjoy it responsibly. A typical serving may provide substantial carbohydrates from pasta, a good protein dose from sausage, and fats from the cream.

Analyzing macronutrients reveals that a serving might contain around 25-30 grams of carbs, 15-20 grams of protein, and roughly 20-25 grams of fat, depending on your specific ingredient choices.

Micronutrient analysis is equally vital; the dish contains vitamins A, B6, and C, alongside important minerals like iron and calcium. Awareness of dietary considerations should help in making better choices; for instance, opting for whole grain pasta increases fiber intake.

It’s important to practice moderation, especially with creamy sauces which can be rich in calories. For those looking to manage their weight, controlling portion sizes while enjoying this dish can align with healthy eating habits, allowing for indulgence without guilt.

Dietary Adaptations

For those following a gluten-free diet, consider swapping out traditional pasta for gluten-free options such as chickpea or quinoa pasta. These keep the integrity of the dish while catering to dietary needs.

Dairy-free adaptations can be achieved by substituting heavy cream with coconut cream or cashew cream. These alternatives maintain the creamy texture while accommodating those with lactose intolerance or dairy allergies.

Vegan versions are also achievable by utilizing plant-based sausage alternatives and dairy-free creams. This allows everyone to enjoy the delicious flavors without compromising dietary choices.

Low-carb variations can involve spiralizing zucchini or using cauliflower rice; both provide a substantial base without the carbs of traditional pasta.

Keto and paleo enthusiasts can transform this recipe further by enhancing it with additional non-starchy vegetables and maintaining a focus on whole, unprocessed ingredients.

Troubleshooting Guide

In cooking, issues may arise; you may encounter texture problems, such as sauce being too thick or thin. To resolve thick sauces, add reserved pasta water to adjust consistency. For a thin sauce, gently simmer to reduce excess liquid.

Flavor balance can also be tricky; if the dish is too salty or bland, adjusting seasoning just before serving can revitalize the flavor profile. Adding a touch of acidity, like lemon juice or vinegar, can cut through richness and enhance overall taste.

Temperature problems, whether undercooked or overly hot, can arise; ensure you monitor the cooking process, adjusting heat as needed and using a thermometer for precision.

Equipment challenges may occur, especially when using unfamiliar tools; always read manufacturer instructions first, and ensure proper practices are followed.

Ingredient substitutions may lead to unpredictable outcomes. For best results, stick to suggested replacements and understand how they impact dish dynamics.

Timing concerns often arise when preparing meals for large groups; be sure to prep ingredients well in advance and allow for more cooking time as needed.

Recipe Success Stories

Our readers have shared their enthusiasm for Creamy Italian Sausage with Bow Tie Pasta, highlighting its ability to impress dinner guests effortlessly. Many have noted how simple adjustments transform the dish into unique family favorites with personal twists.

Several cooking enthusiasts have shared their success in adapting the recipe for vegetarian diets, using lentils and mushrooms to mimic the heartiness of sausage without sacrificing flavor. Community feedback emphasizes the importance of balance between tradition and modern adaptations in today’s kitchens.

Photography tips from readers showcase this pasta dish’s visual appeal. They recommend plating it in a rustic bowl, garnished with bright herbs and colorful vegetables to elevate the aesthetic appeal for social media sharing.

Amidst the love for full cream versions, several readers have successfully reduced fat content while maintaining taste, revealing the dish’s flexibility and how it can cater to diverse nutritional goals.

Frequently Asked Questions

Can I make this dish ahead of time?
Yes, the sausage and cream sauce can be prepared in advance and stored separately in airtight containers. Cook the pasta just before serving to ensure the best texture.

What can I use instead of Italian sausage?
If you prefer a milder flavor, ground turkey or chicken sausage can be great substitutes. For a vegetarian version, sautéed mushrooms and lentils can work well.

Can I freeze leftovers?
Yes, Creamy Italian Sausage with Bow Tie Pasta can be frozen for up to three months. Ensure to cool it down before storing it in airtight containers.

How can I adjust the spice level?
You can control the spice by adding crushed red pepper flakes while cooking the sausage or serve some hot sauce on the side for those who prefer a kick.

Is there a gluten-free option?
Absolutely! You can substitute bow tie pasta with gluten-free pasta alternatives such as chickpea or quinoa pasta.

How do I store leftovers?
Leftovers should be stored in airtight containers in the refrigerator for up to three days. Reheat gently on the stove or in the microwave, adding a splash of cream or pasta water.

Can I add vegetables?
Yes! Consider adding zuchinni, bell peppers, or spinach in your creamy sauce for added nutrition and flavor.

Is this dish suitable for meal prep?
Yes, this dish is great for meal prep. Prepare the sauce and sausage in advance and simply cook the pasta when needed.

What wine pairs well with this dish?
A light, crisp Chardonnay or a Pinot Grigio pairs exceptionally well, complementing the creamy flavors without being overpowering.

How do I reheat the dish without losing quality?
Reheat gently over low heat, adding reserved pasta water or additional cream to restore the creamy consistency. Stir occasionally to prevent burning.

Additional Resources

If you’re looking to expand your pasta repertoire, explore other related recipes for ly pasta dishes, sauces, and creative ingredient uses. Technique guides on sautéing, boiling pasta, and making cream sauces can bolster your confidence in the kitchen.

For ingredient information, delve into the world of Italian sausages and discover different types and their unique flavor profiles. Keeping suggestions on equipment recommendations handy can save you time and enhance your cooking experience.

Feel free to experiment with seasonal variations, highlighting fresh ingredients that pair well with creamy sauces, bringing delightful changes to this classic recipe.

Join the Conversation

We’d love to hear from you! Share your Creamy Italian Sausage with Bow Tie Pasta experiences on social media using our hashtag. Include your photos, tips, and variations, inspiring others to try this delightful dish.

Feedback from recipe reviews helps us improve! What did you enjoy most? Were there any adaptations you made? Community engagement builds a vibrant cooking culture, and we encourage sharing your stories as we all strive to create delicious meals together.

The Recipe

Creamy Italian Sausage with Bow Tie Pasta

Serves: 4 servings

Prep Time: 10 mins

Cook Time: 20 mins

Total Time: 30 mins

Kitchen Equipment Needed

  • Large pot for boiling pasta
  • Skillet for cooking sausage and sauce
  • Measuring cups and spoons
  • Wooden spoon for stirring
  • Airtight containers for storage

Ingredients

  • 12 oz bow tie pasta
  • 1 lb Italian sausage
  • 1 cup heavy cream
  • 1 onion, chopped
  • 3 cloves garlic, minced
  • 2 tbsp olive oil
  • Salt and pepper to taste
  • Fresh basil for garnish

Directions

  1. Cook the bow tie pasta according to package directions in a large pot of salted boiling water. Drain and set aside.
  2. In a skillet, heat olive oil over medium heat. Add chopped onion and sauté until translucent, about 5 minutes.
  3. Add minced garlic and cook for an additional minute until fragrant, being careful not to burn.
  4. Add Italian sausage to the skillet, breaking it apart as it cooks. Brown until fully cooked.
  5. Reduce heat and stir in the heavy cream; let simmer for 5-7 minutes until slightly thickened.
  6. Combine the cooked pasta with the sauce and mix to coat evenly. Season with salt and pepper to taste.
  7. Serve immediately, garnished with fresh basil.

Recipe Notes

  • Feel free to add vegetables like spinach or bell peppers for added nutrition.
  • This dish can be made ahead and stored in the refrigerator for up to 3 days.
  • Leftovers can be frozen for up to 3 months; simply reheat before serving.

Savory Slow Cooker Beef and Mushroom Stew Recipe to Try

Slow Cooker Beef and Mushroom Stew: A Comforting Delight

⚖️
Difficulty
Easy

⏲️
Prep Time
15 mins

🕒
Cook Time
6 hours

⏱️
Total Time
6 hours 15 mins

🍽️
Servings
4

Slow Cooker Beef and Mushroom Stew is a hearty dish that you’ll come to crave as the weather turns cooler. This recipe is a perfect blend of tender beef, earthy mushrooms, and rich gravy, creating a symphony of flavors in your mouth. The beauty of this stew lies in its simplicity, requiring minimal effort while making a meal that warms your heart and fills your belly. Each bite is imbued with a deep umami flavor, thanks to the combined taste of beef and mushrooms simmered for hours. It’s the ultimate comfort food that can be enjoyed on a cold winter day or shared with family and friends at any occasion.

The slow cooking process ensures that every ingredient melds perfectly, resulting in succulent meat and mouthwatering vegetables enriched by an aromatic broth. You’ll love the appearance of this dish as much as its flavor; the vibrant colors of the vegetables contrast beautifully with the dark, savory gravy. Perfectly paired with crusty bread or steamed rice, this stew is not only comforting but elegant enough for dinner guests.

Quick Recipe Highlights

  • Flavor Profile: A robust blend of tender beef, earthy mushrooms, and aromatic herbs creates a rich and savory experience.
  • Texture: The stew features melt-in-your-mouth beef combined with soft vegetables, making every bite a comforting delight.
  • Aroma: The enticing scent of simmering beef mixed with fresh herbs and spices fills your kitchen, drawing everyone to the dinner table.
  • Visual Appeal: Rich brown gravy envelops the colorful carrots and mushrooms, ensuring that this dish is a feast for the eyes.
  • Skill Level Needed: This recipe is easy to master, making it perfect for novice cooks and seasoned chefs alike.
  • Special Equipment: A reliable slow cooker or crockpot is essential for ensuring optimal flavor and tenderness.

Recipe Overview

  • Difficulty Level: This recipe is classified as easy, accommodating cooks of all skill levels as it doesn’t require precise techniques and allows for plenty of flexibility.
  • Category: It falls under the stew category, making it an ideal choice for hearty main dishes.
  • Cuisine: With influences from classic comfort food traditions, this stew hails from various cultural backgrounds, including Irish and American cuisines.
  • Cost: The recipe is budget-friendly, with common, accessible ingredients that won’t break the bank.
  • Season: Perfect for fall and winter, when the heartiness of the stew offers significant warmth and sustenance.
  • Occasion: Ideal for cozy family dinners or gatherings with friends, making it a versatile choice for numerous occasions.

Why You’ll Love This Recipe

Slow Cooker Beef and Mushroom Stew captures the essence of comfort food. The combination of tender beef and flavorful mushrooms creates an irresistible dish that comforts the soul. Each spoonful transports you to a cozy moment, whether on a chilly evening or bustling family gathering.

The simplicity of preparation is another reason to love this recipe. Just toss all ingredients into your slow cooker, set it, and forget it while you go about your day. When you return, you’ll be greeted by a delightful aroma and a meal that’s practically ready to serve.

Not only is this dish mouthwatering, but it’s also packed with nutritional value. Beef is a great source of protein and essential nutrients, while mushrooms provide additional benefits like antioxidants and vitamins. This dish offers a blend of flavors and nutrition that caters to almost any dietary preference.

For social gatherings, Slow Cooker Beef and Mushroom Stew shines. It encourages communal dining, where everyone ladles their portion from the slow cooker, fostering connections and conversation. It’s perfect for potlucks, holidays, or just a cozy dinner with loved ones.

Finally, the effort-to-reward ratio of this recipe is hard to beat. You can feed a family for a fraction of what you’d pay for takeout, and the ingredient list is both simple and adaptable, ensuring accessibility and affordability for everyone.

Historical Background and Cultural Significance

The origins of beef stew can be traced back centuries, with roots in various global cuisines. Traditionally, stews have served as an efficient way to prepare and preserve meat while extracting flavors from various ingredients and spices. This Slow Cooker Beef and Mushroom Stew draws inspiration from hearty recipes that prioritize comfort and nourishment.

Culturally, stews symbolize togetherness and family. They often represent a communal meal, bringing people together around the table to share conversation and warmth. In many cultures, beef stew is often reserved for colder months or special occasions, reflecting its role as a dish that provides sustenance and comfort.

As times have evolved, so have recipes. While the original beef stew recipes might have featured simpler ingredients, contemporary variations often embrace a mix of exotic spices, vegetables, and cooking techniques. Our Slow Cooker Beef and Mushroom Stew blends these evolving influences, creating a comforting classic.

Regional variations abound as well, with every region adapting the traditional beef stew to reflect local ingredients and flavors. For example, in some European countries, root vegetables feature prominently, while in others, herbs and spices unique to the area lend their character to the dish.

Ingredient Deep Dive

Beef: Beef has been a staple protein in human diets for centuries, rich in protein, iron, and essential B vitamins. When selecting beef for stew, look for braising cuts such as chuck or brisket for their flavor and tenderness when slow-cooked. It’s best stored in the refrigerator and used within a few days to ensure freshness.

Mushrooms: Mushrooms are as versatile as they are nutritious, that can provide various flavors from earthy to meaty. Nutritionally, mushrooms are low in calories, high in fiber, and an excellent source of antioxidants. When purchasing, select firm, unblemished mushrooms, and store them in a paper bag in the fridge to maintain freshness.

Carrots: Carrots contribute sweetness and texture to the stew while adding significant vitamins A and K, which are essential for a balanced diet. Choose firm, bright orange carrots, ensuring they are free of blemishes. Store them in a cool, dark place to extend their shelf life, and consider cutting them into uniform pieces for even cooking.

Onions: Onions play a vital role in enhancing the stew’s flavor profile, imparting sweetness and depth. Nutritionally, onions contain antioxidants and vitamins that may contribute to better heart health. Always opt for firm onions without sprouting, and store them in a cool, dark space to preserve their quality.

Common Mistakes to Avoid

  • Using lean cuts: Opt for tougher cuts like chuck, which become tender when slow-cooked; lean cuts dry out and can be tough.
  • Not browning meat: Skipping browning can lead to a less flavorful stew, as it caramelizes sugars and enhances taste.
  • Overfilling the slow cooker: Max out at about two-thirds full to avoid uneven cooking.
  • Inadequate seasoning: Season layers throughout the cooking process to build complexity in flavor.
  • Adding too much liquid: Reduce initial liquids to allow for evaporation during cooking; adjust as necessary toward the end.
  • Ignoring cook times: Ensure you adhere to recommended cooking times for optimal tenderness and flavor development.
  • Not letting it rest: Allow the stew to rest briefly before serving; flavors meld and improve upon standing.
  • Insufficient vegetable chopping: Cut vegetables uniformly for even cooking and texture.

Essential Techniques

Browning meat is crucial because it enhances flavor through the Maillard reaction, resulting in a richer taste. Ensure your pan is hot and do not overcrowd, allowing for proper browning; this creates a complex flavor base. Watch for a deep brown color, which indicates you’re on the right track.

Layering flavors means adding ingredients at different stages to build complexity; start with aromatics before adding vegetables and broth. This technique allows flavors to develop and infuse throughout the stew, creating depth. Be aware of overcooking any single component that could lose its texture or flavor.

Make sure to taste periodically throughout the process. Adjust seasoning as needed, incorporating salt and spices to suit your preference. A well-seasoned stew is a balanced stew that will please all palates.

Pro Tips for Perfect Slow Cooker Beef and Mushroom Stew

Use high-quality ingredients; the better the quality, the richer the flavor. Select fresh vegetables and well-marbled beef for optimal results.

Consider adding wine or broth instead of water to elevate the flavor base. A splash of red wine introduces acidity and complexity, rounding out the flavor profile.

If you prefer a thicker stew, remove some liquid near the end of cooking and mix it with cornstarch before returning it to the pot. This helps you achieve your desired consistency swiftly.

Experiment with herbs like thyme or bay leaves during cooking; they infuse your broth with distinct flavors as they simmer.

For added richness, finish your stew with a pat of butter or a dollop of cream; both can enhance the mouthfeel and overall taste.

Allowing the stew to cool before refrigerating enhances the flavors. The longer it sits, the better it gets as flavors meld and develop.

Experiment with serving options, adding sides like crusty bread or mashed potatoes to round out the meal and enhance satisfaction.

Variations and Adaptations

This recipe is incredibly versatile, inviting you to explore regional variations. For instance, adding parsnips or potatoes can create a heartier dish with different textures.

Seasonal adaptations can include adding squash in the fall or spinach in spring for a fresh twist, adapting to what’s in season and available locally.

For dietary modifications, try substituting beef with plant-based proteins like mushrooms or hearty lentils for a vegetarian-friendly version.

You can also explore flavor variations by adding spices such as smoked paprika or a splash of balsamic vinegar for an unexpected zing or experimenting with different herbs.

Texture modifications could involve adding barley or quinoa for a more wholesome texture, creating a unique experience while keeping the dish nourishing.

For presentation alternatives, serve the stew in charming individual ramekins or rustic bowls, enhancing the dining experience with a personal touch.

Serving and Presentation Guide

Plating is essential when serving your Slow Cooker Beef and Mushroom Stew. Use shallow bowls to showcase the stew’s vibrant ingredients. A drizzle of the rich gravy over the top enhances visual appeal.

Garnish with fresh herbs, such as parsley or thyme, to add color and freshness, elevating the dish’s presentation. Pair with fresh crusty bread or garlic bread to balance the meal and provide an excellent contrast to the stew.

Serving temperature is integral; ensure your stew is piping hot. A warmed plate also enhances the meal experience, allowing the flavors to resonate fully.

Portion control is essential when serving. Consider using a ladle to ensure even servings, allowing guests to return for more if desired, promoting a community spirit at the table.

Wine and Beverage Pairing

When selecting wine to enjoy with your Slow Cooker Beef and Mushroom Stew, opt for a hearty red wine like Cabernet Sauvignon or Merlot. These wines complement the richness of the beef and enhance the stew’s deep flavors.

Non-alcoholic alternatives can include a robust herbal tea or sparkling water with fresh lemon, offering a refreshing contrast to the meal.

If you prefer coffee or tea, consider serving a rich black coffee or a mild herbal tea that won’t overpower the flavors present in the stew, enhancing the dining experience.

Serving suggestions should include temperatures; keep wine at a cool room temperature for optimal taste enhancement.

Storage and Shelf Life

Store any leftover Slow Cooker Beef and Mushroom Stew in an airtight container in the refrigerator. It typically lasts 3-4 days, allowing you to enjoy the leftovers for a quick meal.

For longer preservation, consider freezing the stew in portion-sized containers. It can retain quality for up to 3 months in the freezer.

When reheating, ensure you gradually warm the stew either on a stovetop or in a microwave, adding a splash of water or broth to adjust consistency while maintaining moisture.

Be on the lookout for signs of spoilage; if the stew develops an off smell, color changes, or unusual texture, it’s best to discard it.

Make Ahead Strategies

To save time, you can make this stew in advance. Prepare your ingredients the day before and store everything in the fridge, ready to toss into the slow cooker after your busy day begins.

After cooking, let the stew cool completely before storing it; this helps keep it fresh and reduces the risk of bacterial growth during refrigeration.

Consider the quality of ingredients; if possible, purchase fresher items the day prior to make the dish that much more appealing.

For quick assembly, store prepared vegetables and meats separately so they are easy to combine in the slow cooker when you’re ready to cook.

Reheating the stew’s flavors can improve with the addition of fresh herbs just before serving. You’ll be astonished at how simple adjustments can elevate a meal!

Scaling Instructions

If you need to halve the recipe, simply reduce the ingredients accordingly while maintaining the same cooking times in your slow cooker for best results.

Doubling or tripling the recipe is incredibly simple; ensure to batch-cook in larger slow cookers, keeping in mind the increased cooking time due to volume.

Adjust your equipment as needed; when increasing the recipe, consider using two slow cookers to avoid overcrowding and achieve even cooking.

You may want to increase the overall cook time slightly when scaling up; monitor the doneness of the beef and vegetables for best results.

In terms of storage, be mindful that larger batches will take longer to cool down; ensure that leftovers are stored in smaller, manageable portions.

Nutritional Deep Dive

Slow Cooker Beef and Mushroom Stew is not only satisfying but also a nutritious choice. The dish’s primary macros include protein from beef, fiber from vegetables, and healthy fats if beef is well-marbled.

Carrots and mushrooms contribute vitamins A, D, and B12, essential for maintaining good health. This dish is a great way to ensure a well-rounded intake of these nutrients.

For those mindful of dietary considerations, the portion sizes can help with weight management while still providing a filling meal that doesn’t skimp on flavor.

By focusing on ingredient quality, this dish can maintain a balanced macro and micronutrient profile, suitable for a nourishing lifestyle choice.

Bang for your buck ratio is high here; this dish is rich in nutrients, flavor, and comfort, giving you a better meal for your efforts.

Dietary Adaptations

For gluten-free eaters, ensure to use gluten-free broth and check packaged ingredients for hidden gluten sources.

Dairy-free adaptations can be achieved by avoiding cream toppings; enjoy the richness from cooking alone as all ingredients blend well during the simmering process.

Vegans can substitute beef with hearty mushrooms and legumes, using vegetable broth to enhance flavors while keeping the dish entirely plant-based.

Low-carb options can come from using cauliflower in place of potatoes, adjusting cooking times slightly to allow for optimal tenderness without becoming too soft.

For a keto approach, the heavy use of mushrooms and vegetables creates a filling meal that fits within low-carb guidelines while providing richness from the fats.

Paleo enthusiasts can enjoy this stew by focusing on wholesome, unprocessed ingredients and omitting grains or dairy from the dish entirely.

Troubleshooting Guide

Texture issues may arise if beef isn’t cooked long enough; always monitor tenderness for perfect results. Adding more broth mid-way can salvage a dish that appears too thick or dry.

Flavor balance becomes crucial, especially with seasoning; increments of salt, pepper, or acid must be made throughout the cooking process, checking against desired taste preferences.

Temperature problems arise when the slow cooker isn’t properly regulated; ensure the settings are as intended and keep monitoring with a reliable thermometer.

Ingredient challenges can include substitutions not working out; always consider how each ingredient interacts and integrate based on cooking times and flavors.

Timing concerns are typical; if your stew is undercooked, increase the time needed, but check towards the end to avoid meat becoming dry and tougher than intended.

Recipe Success Stories

This recipe has garnered community feedback praising its hearty nature and comforting flavors, proving an instant favorite for family gatherings. Many readers share their personal spins, from adding different vegetables to incorporating a hint of heat with spices.

Variation successes often include personal twists based on community input; layers of flavor become even richer with reader recommendations incorporated into the cooking process.

Adaptation stories from readers tell inspiring usage of leftovers, transforming them into creative new dishes, showcasing the flexibility of this stew.

Readers often share photography tips when presenting their versions, celebrating not only the meal but also the aesthetic experience on social media, further sharing the love.

Engagement in the comments encourages others to try variations, fostering a community of sharing ideas and successes around this comforting classic.

Frequently Asked Questions

Can I use frozen beef for this recipe? Yes, you can use frozen beef. Just ensure it’s fully thawed before cooking to achieve even seasoning and cooking times.

What can I substitute for mushrooms? If you’re not a fan of mushrooms, consider using other vegetables such as zucchini or bell peppers for a different flavor profile.

Can I cook this stew on high for a shorter time? While it’s recommended to cook on low for max tenderness, you can cook on high for 3-4 hours instead.

Is it possible to add beans to this stew? Definitely! Adding beans can provide extra protein and fiber; be sure to use canned beans for easier cooking.

What should I serve with this stew? This dish pairs perfectly with crusty bread, over rice, or mashed potatoes to soak up the delightful gravy.

Can I add cream to this stew? Yes, for a richer stew, a touch of cream can elevate the dish right before serving, giving it a velvety finish.

How do I store leftovers? Store leftovers in an airtight container in the refrigerator for up to 4 days or freeze for longer use.

Can I make this stew in advance? Yes, the flavors deepen with time, making it ideal for making ahead; just refrigerate or freeze and reheat before serving.

Are there any recommended substitutions for the spices? Absolutely. Feel free to use dried herbs or spices that you enjoy, such as rosemary or oregano, based on your taste preferences.

How can I make this dish spicier? If you prefer a kick, add crushed red pepper or a diced jalapeño during cooking for welcomed heat that complements the flavors well.

Additional Resources

Explore the world of comfort food by diving into related recipes that celebrate slow cooking and hearty flavors. Other comforting classics, like chicken and dumplings or beef stroganoff, would make excellent addition to your repertoire.

For those looking to improve their technique, consider ingredient guides focusing on seasonal vegetables or proper meat handling techniques to boost your kitchen skills further.

Engage with equipment recommendations that help optimize your slow cooking experience, guiding you toward the best slow cooker options and maintenance tips.

For seasonal variations, explore inspiration for warm dishes as autumn and winter set in, reflecting on warm meals that satisfy the soul during colder months.

Join the Conversation

Your culinary adventures with Slow Cooker Beef and Mushroom Stew don’t have to end here! Share your experiences on social media to spark engagement with fellow cooking enthusiasts.

Capture mouthwatering photography of your stew, showcasing its goodness, and encourage your friends to join in and test the recipe for themselves.

We love reading recipe reviews, so consider sharing your adaptations and successes in the comments section to build community engagement.

Encourage your variations to spread amongst friends and family; communal cooking inspires creativity and connection surrounding the love for food.

The Recipe

Slow Cooker Beef and Mushroom Stew

Serves: 4

Prep Time: 15 mins

Cook Time: 6 hours

Total Time: 6 hours 15 mins

Kitchen Equipment Needed

  • Slow cooker
  • Large skillet (for browning)
  • Cutting board
  • Sharp knife

Ingredients

  • 2 lbs beef chuck, cut into 1-inch cubes
  • 8 oz mushrooms, sliced
  • 4 carrots, sliced
  • 1 onion, chopped
  • 4 cloves garlic, minced
  • 2 cups beef broth
  • 1 cup red wine (optional)
  • 2 tbsp tomato paste
  • 1 tsp dried thyme
  • 2 bay leaves
  • Salt and pepper to taste
  • 3 tablespoons olive oil (for browning)

Directions

  1. In a large skillet, heat olive oil over medium-high heat.
  2. Brown the beef cubes on all sides; do this in batches if necessary to avoid overcrowding.
  3. Transfer the browned beef to the slow cooker, followed by mushrooms, carrots, onion, and garlic.
  4. Add beef broth, wine, tomato paste, thyme, bay leaves, salt, and pepper to the slow cooker and stir gently.
  5. Set the slow cooker to low and cook for 6-8 hours or until beef is tender.
  6. Remove bay leaves before serving and adjust seasoning if necessary.

Recipe Notes

  • For thicker stew, add cornstarch mixed with water during the last hour of cooking.
  • Leftovers can be refrigerated for up to 4 days or frozen for 3 months.
  • Experiment with other vegetables such as potatoes or parsnips for added variety.