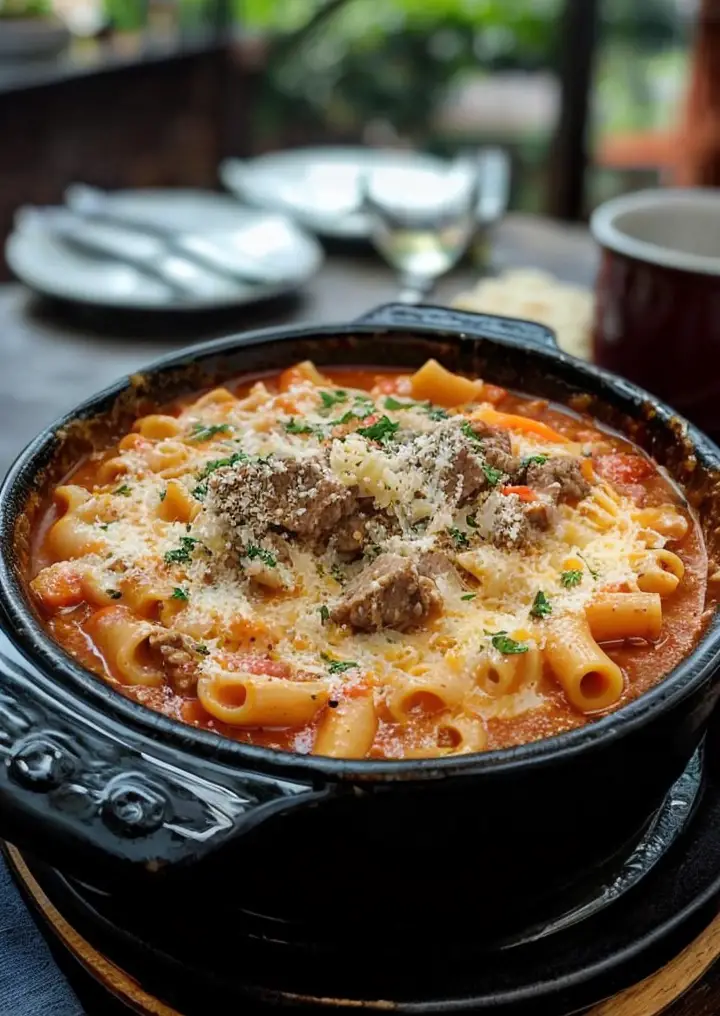
Hearty Beef & Tomato Macaroni Soup for Comforting Meals

Beef & Tomato Macaroni Soup: A Hearty Comfort Food Delight

⚖️
Difficulty
Easy

⏲️
Prep Time
15 mins

🕒
Cook Time
30 mins

⏱️
Total Time
45 mins

🍽️
Servings
4

Beef & Tomato Macaroni Soup is the ultimate comfort food that warms not just the body but also the soul. This hearty soup combines tender beef, rich tomatoes, and comforting macaroni to create a dish that’s both filling and flavorful. The savory combination of spices, aromatics, and fresh ingredients creates a tantalizing aroma that beckons you to the kitchen.

Imagine a cold evening where a bowl of Beef & Tomato Macaroni Soup awaits. The vibrant colors of fresh tomatoes, the comforting texture of macaroni, and the distinct flavor of seasoned beef make this dish irresistible. It’s a perfect blend of heartiness and nostalgia, reminiscent of family dinners and comforting gatherings.

Quick Recipe Highlights

  • Flavor Profile: This soup features a robust combination of beef and tangy tomatoes, balanced by Italian herbs and spices that create a delightful taste experience.
  • Texture: The tender beef and soft macaroni in a rich tomato broth offer a soothing mouthfeel that’s both satisfying and comforting.
  • Aroma: The savory scent of simmering beef coupled with the sweet notes of fresh tomatoes fills the kitchen, inviting everyone to enjoy a warm bowl.
  • Visual Appeal: The dish boasts vibrant reds from tomatoes, golden pasta, and garnishes of fresh herbs that make it visually enticing.
  • Skill Level Needed: This recipe is beginner-friendly, requiring only basic culinary techniques that anyone can master.
  • Special Equipment: A large pot or Dutch oven is recommended for proper cooking and flavor development.

Recipe Overview

  • Difficulty Level: This recipe is rated easy, making it ideal for cooks of all skill levels. Combining a few simple steps ensures a delicious outcome.
  • Category: Perfect for a cozy dinner, this dish fits into both soups and pasta categories.
  • Cuisine: This dish draws inspiration from classic Italian-American cuisine, where flavors of beef and tomatoes shine.
  • Cost: The affordability of ingredients makes this recipe budget-friendly while delivering comfort and satisfaction.
  • Season: Enjoy this soup year-round, especially in the chilly months when hearty meals are most comforting.
  • Occasion: This is a great dish for family dinners, casual get-togethers, or meal prep for a busy week ahead.

Why You’ll Love This Recipe

This Beef & Tomato Macaroni Soup delivers on taste and texture. The satisfying bite of tender beef pairs perfectly with soft macaroni, creating a delightful contrast that keeps each spoonful interesting. The robust flavor from simmering tomatoes and seasonings rounds out the taste, ensuring every bowl is full of comforting goodness. This soup has a way of warming the heart and soul.

Convenience is a hallmark of this recipe. With an easy prep time, you can whip up a pot of Beef & Tomato Macaroni Soup in no time. Whether you’re looking for a quick weeknight meal or a delightful weekend treat, this recipe makes cooking straightforward and stress-free.

Nutritionally, this soup is a great choice as it’s packed with protein from beef, healthy carbohydrates from macaroni, and essential vitamins from tomatoes. It’s a delicious way to incorporate wholesome ingredients into your meals, ensuring you’re not only satisfied but also nourished.

Socially, this recipe holds immense value. There’s something about sharing a warm soup with family or friends that fosters connection. It’s a dish that invites conversation and brings people together around the dinner table, making it a staple for gatherings and celebrations.

Finally, the cost-effectiveness of this recipe makes it accessible for everyone. With affordable ingredients and a substantial yield, you can prepare a satisfying meal without breaking the bank, making it a go-to option for budget-conscious cooks.

Historical Background and Cultural Significance

The origins of Beef & Tomato Macaroni Soup can be traced back to the Italian-American immigrant experience, where simple ingredients were transformed into hearty meals. As families settled in urban areas, they blended their culinary traditions with local flavors, resulting in the comforting soup many enjoy today.

Culturally, this soup represents the heart of home cooking. It symbolizes warmth, comfort, and the joy of sharing meals with loved ones. In many Italian households, such dishes were often made as a way to use leftovers creatively, reflecting resourcefulness in family cooking.

Over time, the recipe has evolved, incorporating various regional ingredients and styles. Some families might add beans, while others prefer additional vegetables, showcasing the versatility of the dish.

Regional variations abound, with each community adding its unique touch. From spicy versions in the South to vegetarian takes in urban centers, Beef & Tomato Macaroni Soup continues to be a beloved dish in many kitchens across America.

Ingredient Deep Dive

Beef serves as the star ingredient in this soup, adding protein and depth to the flavor. Ground beef is most common, but cuts like chuck or stew meat can enhance the richness. Be sure to select lean cuts to reduce excess fat, and store your beef properly in the refrigerator or freezer for optimal freshness.

Tomatoes are essential for creating that deep, comforting broth. Using canned tomatoes can yield great results, but fresh tomatoes in season can elevate the flavor profile. Recognize the importance of selecting ripe tomatoes, as they bring freshness and natural sweetness to the soup. Store tomatoes at room temperature, and remember to use them promptly for the best taste.

Macaroni holds everything together, providing a soft texture that complements the other ingredients. Choosing high-quality pasta ensures it maintains its shape in the broth. Store dry macaroni in an airtight container, and be mindful of its expiration date for the best possible results.

Herbs and spices are crucial in enhancing the overall flavor. Fresh herbs, such as basil or parsley, add brightness, while dried spices like oregano and thyme bring warmth. Selecting and storing fresh herbs properly can extend their lifespan and flavor impact.

Broth or stock is often used as the base for the soup. Whether homemade or store-bought, it introduces additional flavor. If using store-bought options, opt for low-sodium varieties for better control over salt levels. Ensure proper storage to extend shelf life and always check for expiration dates.

Common Mistakes to Avoid

  • Overcooking the pasta: This can lead to mushy texture. Cook the pasta until it is just al dente, as it will continue cooking in the soup.
  • Using cold ingredients: Starting with room temperature ingredients helps achieve consistent cooking and better flavor development.
  • Not seasoning properly: Always taste your soup while cooking and adjust seasoning as needed to create a well-balanced flavor.
  • Skipping the browning step: Failing to brown the beef can lead to a less flavorful broth. Take the time to brown your meat for added depth.
  • Adding tomatoes too early: Introducing tomatoes prematurely without proper cooking can result in a raw taste. Add them later in the cooking process to build flavor.
  • Ignoring the simmer: A good simmer melds flavors—avoid boiling to keep the meat tender and the soup cohesive.
  • Not letting it rest: Allow the soup to sit for a few minutes before serving to enable the flavors to marry effectively.
  • Inadequate storage methods: Improper storage can affect freshness and flavor; ensure your soup is cooled properly before refrigerating.

Essential Techniques

Browning beef is a critical technique for developing flavor in your Beef & Tomato Macaroni Soup. Ensuring the meat is browned on all sides creates rich, caramelized bits that enhance the taste of the broth. Use medium-high heat and avoid overcrowding the pot to achieve the best results.

Simmering the soup gently is essential for melding the flavors together. A rolling boil can break down the ingredients too quickly, so keeping the heat slightly lowered allows a slower extraction of flavors, resulting in a smoother, rich broth. Aim for a gentle bubble, which indicates the soup is simmering correctly.

Stirring regularly helps to prevent the pasta from sticking to the bottom of the pot. Also, it ensures even cooking and helps the ingredients meld beautifully. Remember to scrape the bottom of the pot to release any delicious fond that may form as the soup cooks.

Pro Tips for Perfect Beef & Tomato Macaroni Soup

1. Start with cold beef and let it come to room temperature for better searing results, which enhances flavor.
2. Choose high-quality canned tomatoes for the best taste; San Marzano tomatoes are a great option.
3. Experiment with fresh herbs for garnish; they brighten up the dish and enhance the overall flavor.
4. If you enjoy spice, add a pinch of red pepper flakes for some heat without overwhelming the dish.
5. For added creaminess, stir in some grated Parmesan cheese just before serving.
6. Make it a one-pot meal by adding chopped vegetables like carrots or celery for extra nutrients and flavor.
7. Save leftover soup to enjoy for lunch the next day—soups often taste even better the second time around.
8. Adjust the thickness of the soup by adding more or less broth based on your personal preference.

Variations and Adaptations

Beef & Tomato Macaroni Soup is highly adaptable based on regional tastes and seasonal availability. In some regions, beans such as kidney or black beans can enhance the heartiness of the soup while adding fiber. These legumes can easily replace some of the beef for a meatless option.

For seasonal adaptations, consider adding fresh vegetables, such as zucchini or bell peppers, during the summer months, making the soup lighter and more vibrant. In the colder months, root vegetables like parsnips or carrots can be added to provide warmth and additional sweetness.

Dietary modifications can also be made by using whole grain or gluten-free pasta. Both options keep the heartiness while meeting dietary restrictions. Additionally, lean ground turkey or chicken can replace beef for a lighter version without sacrificing flavor.

Flavor variations can be introduced by adding smoked paprika for a smokier profile or experimenting with different herbs, such as thyme or rosemary, to create a distinctive taste.

For those wanting to elevate presentation, consider serving the soup in bread bowls for a rustic touch. It not only makes for an appealing presentation but also enhances the overall experience.

Serving and Presentation Guide

When plating your Beef & Tomato Macaroni Soup, use deep bowls that emphasize the abundance of ingredients. Garnish with a sprinkle of freshly chopped parsley or basil for a pop of color and freshness.

Consider serving alongside crusty bread or a light salad for a balanced meal. This not only adds texture but also rounds out the dining experience. For a modern twist, swirl some pesto into each bowl just before serving, adding both flavor and a striking appearance.

Serve the soup warm but ensure it’s not boiling hot, allowing your guests to enjoy it comfortably. Offer grated cheese on the side, letting individuals choose how much to add while enhancing their experience.

For portion control, consider smaller servings if accompanying the soup with larger main dishes or multiple courses. This keeps it light while still satisfying.

Wine and Beverage Pairing

Wine pairings can elevate the experience of enjoying your Beef & Tomato Macaroni Soup. A medium-bodied red wine, such as Chianti or Merlot, complements the richness of the beef and acidity of the tomatoes beautifully.

For those opting for non-alcoholic alternatives, a sparkling water with a slice of lemon or lime can provide a refreshing contrast to the warm soup. Alternatively, consider tea options such as a mild herbal tea to cleanse the palate.

If you enjoy coffee or tea with your meals, aim for light roast coffees or chamomile tea, which won’t overpower the flavors of the soup.

Temperature considerations are crucial; serve wine at optimal temperatures, around 60-65°F, to best appreciate the flavors and aromas of the chosen bottle.

When serving, place your wine and water options next to the soup for convenience, ensuring guests can easily refresh their drinks as they enjoy their meal.

Storage and Shelf Life

To store Beef & Tomato Macaroni Soup, place it in an airtight container in the refrigerator. It can generally be safely stored for 3-4 days. Ensure it cools completely before sealing to avoid condensation, which can alter texture and flavor.

For longer storage, consider freezing the soup. After cooling, transfer it into freezer-safe bags, making sure to remove excess air, allowing it to last up to three months. For best results, reheat frozen soup slowly to preserve the texture.

Signs of spoilage include an off smell or unusual color changes. If any freezer burn appears, it’s best to discard the soup to ensure quality upon reheating.

Reheating can be done in a saucepan over medium-low heat, stirring occasionally until heated through. For frozen soup, allow it to thaw overnight in the refrigerator for easier reheating.

Freezing guidelines suggest dividing the soup into smaller portions, making it easier to thaw only what you need, minimizing waste and enhancing convenience.

Make Ahead Strategies

To enjoy Beef & Tomato Macaroni Soup with minimal last-minute effort, consider preparing it a day in advance. Flavors develop beautifully overnight, resulting in a richer taste. Store it properly in the refrigerator after cooling it down.

While prepping, chop vegetables and measure spices in advance, allowing for a smoother cooking process. Store prepped ingredients in separate containers labeled with the date for easy access when ready to cook.

Quality does not significantly decrease when made ahead, especially when properly stored. As flavors meld, the soup often tastes even better the next day, making it a perfect option for meal planning.

For assembly, simply reheat the soup before adding fresh herbs or a dollop of cream to maintain freshness. Think about how to incorporate any fresh elements just before serving, like a sprinkle of cheese or a drizzle of olive oil.

Lastly, consider prepping extra pasta separately to prevent overcooking or mushiness when stored. Add the pasta just before serving to maintain its ideal texture.

Scaling Instructions

Scaling the Beef & Tomato Macaroni Soup recipe is easy. To halve the recipe, simply reduce all ingredient quantities by 50%, ensuring flavor remains balanced.

For larger gatherings, multiplying the recipe by two or three works well. Consider the size of your pot and adjust cooking times as necessary, allowing more time for simmering to ensure flavors are equally rich in larger batches.

Timing modifications may help; larger quantities may need extra simmering time to meld flavors thoroughly. Keep an eye on the consistency and adjust the broth as necessary to prevent it from becoming too thick.

When scaling, think about maximizing storage. Use larger containers for fractions of the batch you plan to store, ensuring the soup cools properly before refrigeration or freezing for future meals.

Lastly, for larger portions, ensuring adequate seasoning might require a taste test before finalizing quantities, as more may result in the flavors needing a tweak to maintain balance.

Nutritional Deep Dive

Nutritionally, each serving of Beef & Tomato Macaroni Soup offers a well-rounded profile. Breaking down the macros, expect a healthy serving of protein from the beef, complemented by carbohydrates from the pasta, essential for energy.

Micronutrient content is abundant due to the incorporation of tomatoes and any added vegetables. The Vitamin C from tomatoes supports immune function, while B vitamins from beef help energy metabolism, making it a beneficial addition to your diet.

Health benefits extend beyond macronutrients; a warm bowl of soup can be nurturing for the soul, aiding in hydration and comfort, especially during colder seasons. The balance of ingredients can contribute positively to overall diet quality.

For portion analysis, consider controlling servings to prevent excess calorie intake, especially if served as part of a multi-course meal. Keeping a watchful eye on portion sizes can also help with weight management strategies.

Dietary considerations are important; those managing dietary restrictions can easily alter ingredients, swapping macaroni for whole-wheat or gluten-free options without sacrificing taste or nutrition.

Dietary Adaptations

Making Beef & Tomato Macaroni Soup gluten-free is simple. Substitute traditional macaroni with gluten-free pasta options that maintain the soup’s hearty essence while accommodating gluten sensitivities.

For dairy-free variations, skip any added cheese, and consider enhancing the soup with coconut milk for creaminess or nutritional yeast for added flavor without dairy.

Vegetan adaptations allow for a meatless version by replacing beef with hearty mushrooms or lentils, creating a fulfilling meal that aligns with plant-based diets while retaining flavor and richness.

Low-carb adaptations can be achieved by substituting pasta with spiralized vegetables like zucchini or cauliflower rice, offering a lighter dish that’s still full of flavor without excess carbohydrates.

Keto modifications might include using grass-fed beef and full-fat broth, focusing on high-quality ingredients while keeping carbs low.

Other specific diets, like paleo or low-FODMAP, can be achieved through ingredient adjustments. Just ensure that all components align with dietary guidelines to guarantee compatibility.

Troubleshooting Guide

Texture issues can arise if pasta is overcooked; ensure it remains al dente by following cooking time precisely. If the pasta becomes mushy, consider reducing the amount next time or adding it closer to serving.

Flavor balance concerns can be addressed by tasting during the simmering process. If it’s too salty or bland, adjust by incorporating fresh herbs or additional broth to create harmony.

Temperature problems may result from cooking too quickly on high heat; always opt for a gentle simmer to ensure meat stays tender while thickening the soup gradually.

Equipment challenges may involve stuck-on bits; deglazing the pot with broth after browning beef can prevent this inconvenience while adding more flavor.

Ingredient substitutions can lead to unexpected results—if you’re swapping proteins or herbs, be prepared for variations in taste and texture.

Timing concerns can be mitigated by prep planning; if you find yourself pressed for time, consider simmering the soup longer on lower temperatures to achieve adequate flavor without rushing.

Recipe Success Stories

Many readers have embraced the comforting tradition of Beef & Tomato Macaroni Soup, sharing their variations and successes across social platforms. Community feedback often revolves around the heartwarming experience of family gatherings centered on this dish.

Several variations have emerged, with users incorporating different proteins and vibrant vegetables, showcasing personal touches that resonate with individual family traditions.

Adaptation stories reveal the recipe’s versatility—transformed to be gluten-free or vegan, still managing to retain its soul-warming essence.

Photography tips from readers help enhance the visual appeal of the dish. Beautifully styled bowls with garnishes catch the eye, leading to increased interest in sharing these comforting recipes.

Engagement grows as members share their unique modifications, contributing to an enriching experience that celebrates home cooking, friendship, and community.

Frequently Asked Questions

1. Can I use canned tomatoes instead of fresh?
Yes, using canned tomatoes is recommended as they’re often more concentrated in flavor and provide consistent results in overall taste.

2. How can I reduce salt in the recipe?
Opt for low-sodium broth and avoid adding extra salt until the end of the cooking process to control flavor levels better.

3. Can I freeze the leftovers?
Absolutely! Store leftover soup in airtight containers or freezer bags, ensuring it cools completely before freezing for optimal freshness.

4. What herbs can I use to enhance flavor?
Fresh or dried herbs like basil, oregano, and thyme work well and can be easily adjusted depending on your taste preferences.

5. Is this soup suitable for meal prep?
Yes! It stores well in the fridge and can be made ahead of time, improving in flavor as it sits.

6. Can I add vegetables to the soup?
Certainly! Carrots, celery, or bell peppers can be incorporated for added nutrition and color.

7. How do I store leftover macaroni from the soup?
It’s best to store the macaroni separately from the soup to maintain its texture. Combine them just before enjoying leftovers.

8. Is this soup kid-friendly?
Yes, the comforting flavors and hearty nature make it appealing to children, especially when served with their favorite bread.

9. Can I make this soup in a slow cooker?
Yes, you can adapt this recipe for a slow cooker by browning the beef first and then adding the remaining ingredients for slow simmering.

10. How long does it take to cook on the stovetop?
The overall cooking time is about 30 minutes once all ingredients are in the pot, offering a quick meal option.

Additional Resources

For those looking for related recipes, consider trying variations like Italian Wedding Soup or a classic Tomato Basil Soup to complement your meal rotation.

Explore technique guides on making homemade broth or mastering pasta cooking for a richer culinary experience, elevating your cooking skills alongside this recipe.

Ingredient information about beef types, pasta varieties, and seasonings can help you choose the best options for your personal taste and dietary needs.

Equipment recommendations, such as investing in a durable Dutch oven or quality knives, will aid in achieving optimal results as you prepare this and other dishes.

Additionally, seasonal variations can inspire fresh ingredient choices, allowing you to adapt this recipe to align with local, available produce across the year.

Join the Conversation

Engagement in social media sharing is encouraged—when you create your Beef & Tomato Macaroni Soup, snap a photo and share your stories! Provide tips and tricks from your cooking experience to inspire other home chefs.

Photography tips come in handy while capturing your dishes. Experiment with natural light and different angles for the most visually appealing representation of your savory soup.

Take the time to leave reviews, offering feedback on the recipe and sharing your experiences with family or restaurant-style touches to this beloved dish.

Community engagement around this recipe gives birth to new ideas, and we encourage you to share your favorite variations, inspiring others to step into their kitchens and create.

As you explore this recipe, remember there’s always something new to learn and share within the culinary community.

The Recipe

Beef & Tomato Macaroni Soup

Serves: 4

Prep Time: 15 mins

Cook Time: 30 mins

Total Time: 45 mins

Kitchen Equipment Needed

  • Large pot or Dutch oven
  • Wooden spoon
  • Measuring cups and spoons
  • Sharp knife and cutting board

Ingredients

  • 1 lb ground beef
  • 1 can (14.5 oz) diced tomatoes
  • 4 cups beef broth
  • 1 cup macaroni pasta
  • 1 medium onion, chopped
  • 2 cloves garlic, minced
  • 1 tsp oregano
  • 1 tsp basil
  • Salt & pepper to taste
  • Fresh parsley for garnish (optional)

Directions

  1. In a large pot or Dutch oven, brown the ground beef over medium-high heat until fully cooked. Drain excess fat.
  2. Add chopped onion and minced garlic, cooking until softened, about 3–4 minutes.
  3. Stir in the diced tomatoes, beef broth, oregano, basil, salt, and pepper. Bring to a simmer.
  4. Add macaroni and cook according to package instructions until al dente, about 8–10 minutes.
  5. Adjust seasoning if necessary, then remove from heat and let it sit for a few minutes to thicken.
  6. Serve hot, garnished with fresh parsley if desired.

Recipe Notes

  • Leftovers can be refrigerated for up to 4 days or frozen for longer storage.
  • For added richness, consider adding a splash of cream just before serving.
  • Experiment with different vegetables or proteins to personalize the recipe.

Decadent Creamy Mustard Chicken with Bacon for Dinner Delight

Creamy Mustard Chicken with Bacon: A Decadent Delight for Your Dinner Table

⚖️
Difficulty
Medium

⏲️
Prep Time
15 mins

🕒
Cook Time
30 mins

⏱️
Total Time
45 mins

🍽️
Servings
4

Creamy Mustard Chicken with Bacon is not just a meal; it’s an experience that tantalizes your taste buds and warms your heart. As the chicken simmers in a luscious mustard cream sauce, infused with the savory crunch of crispy bacon, the dish transforms into a comforting feast ideal for family gatherings or intimate dinners. The blend of Dijon mustard with cream creates a velvety sauce that clings to the chicken, providing layers of flavor with every bite.

This recipe is sure to impress whether you pair it with a side of fluffy mashed potatoes or a fresh garden salad. The uplifting aroma of sautéed garlic and freshly chopped herbs fills your kitchen, making it impossible to resist digging in. When you serve up Creamy Mustard Chicken with Bacon, you’re not just serving a dish, but a memorable moment for your loved ones.

Quick Recipe Highlights

  • Flavor Profile: This dish brings together the rich creaminess of the sauce with the tangy kick of mustard and the irresistible smokiness of bacon.
  • Texture: The chicken is tender and juicy, perfectly complemented by the crunch of crispy bacon and the silkiness of the sauce.
  • Aroma: Delightful notes of garlic, mustard, and herbs create an enticing scent that beckons from the kitchen.
  • Visual Appeal: The golden-brown chicken is beautifully showcased in a creamy sauce, making it as pleasing to the eye as it is to the palate.
  • Skill Level Needed: This recipe requires basic cooking skills and simple techniques, making it accessible for home cooks of all levels.
  • Special Equipment: Just a skillet is needed, which makes clean-up a breeze.

Recipe Overview

  • Difficulty Level: This recipe is classified as medium difficulty due to the need to master the sautéing technique and manage cooking times effectively.
  • Category: Creamy Mustard Chicken with Bacon falls into the main course category, perfect for dinner or special occasions.
  • Cuisine: This recipe is influenced by classic French cooking, where cream sauces and mustard are frequently used together for delightful results.
  • Cost: With approximate costs under $20 for four servings, this dish offers an affordable gourmet experience at home.
  • Season: Ideal for year-round enjoyment, this dish shines in the cooler months when comfort food is most appreciated.
  • Occasion: Perfect for family dinners, date nights, or even holiday feasts, it’s a recipe that brings people together.

Why You’ll Love This Recipe

The exquisite balance of flavors and textures in Creamy Mustard Chicken with Bacon will have everyone raving at the dinner table. The creamy, tangy sauce combined with the smokiness of the bacon creates a delightful symphony of taste. Each bite reveals juicy chicken bathed in a warm, inviting sauce.

One of the winning aspects of this recipe is its straightforward preparation. With just a handful of ingredients and minimal equipment, you can easily whip this dish together, leaving you more time to relax and enjoy with your guests. It’s a great choice for busy weeknights when you want something delicious without the fuss.

Nutritionally, this dish can fit into a balanced diet while offering protein from the chicken and healthy fats from the cream. You can easily incorporate fresh vegetables or a side salad to enhance the meal’s nutritional profile.

Beyond its flavors and ease of preparation, Creamy Mustard Chicken with Bacon is a dish that fosters connections. It’s the kind of meal that brings family and friends around the table, sparking conversations and sharing laughter, making it perfect for social gatherings.

This recipe is also wallet-friendly, allowing you to serve a gourmet-style dinner at home without breaking the bank. With pantry staples and affordable ingredients, it’s an accessible choice that doesn’t compromise on taste.

Historical Background and Cultural Significance

The roots of mustard-based sauces date back to ancient times when mustard seeds were first cultivated. Traditionally connected to French cuisine, mustard was often paired with cream to create rich sauces that enhanced the flavor of meats. Creamy mustard sauces have become culinary staples, showcasing the perfect blend of heat and tang with richness from cream.

As we reflect on the cultural significance, it’s important to note how bacon has often been viewed as a comfort food across various cultures. It adds depth and umami to many dishes, elevating dishes that might otherwise be plain. Then this recipe embraces these culinary traditions, offering a modern yet respectful nod to gastronomic history.

Over the years, the evolution of this dish has seen many adaptations, from variations in creaminess to enhancements with different herbs and spices. The integration of ingredients like herbs de Provence or even a touch of white wine has emerged, demonstrating its versatility.

Regional variations may include different types of mustard, from spicy to smoky, reflecting local tastes while retaining the essence of the original creamy mustard sauce. This shows the beauty of a recipe that collects influences while remaining a comforting classic.

Ingredient Deep Dive

Chicken: Chicken is a widely appreciated source of protein with a rich history in global cuisine. When selecting chicken for your dish, look for fresh, high-quality cuts, preferably organic or free-range to ensure flavor and ethical sourcing. Store raw chicken in the refrigerator and use it within two days or freeze it for longer storage. For substitutions, turkey can be used as a leaner option.

Bacon: Bacon not only introduces a smoky flavor to the dish but also provides a satisfying crunch. Historically, bacon has roots in ancient preservation methods, where curing meat was essential for longevity. When choosing bacon, opt for butcher quality or nitrate-free varieties. Proper storage includes keeping bacon in an airtight container in the refrigerator. To ensure optimal freshness, it can also be frozen. For those seeking alternatives, turkey bacon could work, but note the flavor differences.

Mustard: Mustard has been used for centuries, celebrated for its tangy flavor and culinary versatility. Dijon mustard, commonly used in the recipe, packs a punch that elevates dishes. Look for reputable brands that use high-quality mustard seeds. Store mustard in a cool, dark place and check for expiration dates. If you’re out of Dijon, yellow mustard or whole grain are good alternatives but may alter the flavor profile slightly.

Heavy Cream: Heavy cream is essential for creating the comforting sauce in this recipe. It adds richness and body. Historically, cream has been a staple in many cuisines, desired for its luxurious texture. Always purchase fresh cream and keep it refrigerated. For a lighter option, half-and-half can be substituted, or non-dairy alternatives like coconut cream for a twist on the flavors.

Common Mistakes to Avoid

  • Overcooking Chicken: Overcooked chicken turns dry and tough. Monitor doneness and remove it from heat once it reaches 165°F.
  • Using Low-Quality Bacon: Not all bacon is created equal. Choose higher-quality bacon, which will provide better flavor and texture in the dish.
  • Neglecting Seasoning: While mustard and bacon offer flavor, salt and pepper are essential. Taste as you go to achieve balance.
  • Not Sautéing Garlic: Garlic should be sautéed until fragrant to bring out its sweet notes. Don’t let it burn, which can introduce bitterness.
  • Rushing the Sauce: Allow the cream to simmer slowly, letting flavors meld. A rushed sauce can end up thin instead of rich and creamy.
  • Skipping Fresh Herbs: Fresh herbs add essential brightness to the sauce. Dried herbs do not possess the same aroma or depth of flavor.
  • Ignoring Rest Time: Letting the chicken rest after cooking ensures the juices are locked in. This will improve overall texture and flavor.
  • Using Cold Ingredients: Room temperature ingredients meld better during cooking. Let cream and mustard sit out for a bit before use.

Essential Techniques

To properly cook the chicken, pat the pieces dry. This allows for better browning and enhances flavor. Start by searing the chicken in a hot pan to create a golden crust. Avoid overcrowding the skillet, as this can lead to steaming. Mastering this technique ensures flavorful, juicy chicken.

Creating the creamy mustard sauce is essential. After removing the chicken, deglaze the pan with a splash of broth or wine, scrapping the bits off the bottom. This builds flavor. Gradually whisk in the cream and mustard, allowing it to simmer to thickened perfection. Visual cues for success include a bubbling sauce that has reduced in volume.

Pro Tips for Perfect Creamy Mustard Chicken with Bacon

Begin with room temperature chicken for even cooking. This helps creating a lovely sear on the outside.
Consider marinating the chicken beforehand in a mixture of mustard and olive oil to enhance the flavors.
For extra crunch, sprinkle crispy fried onions on top before serving. This adds texture and visual appeal.
Serve with crusty bread to soak up the delicious sauce, enhancing the overall dining experience.
If you prefer a stronger mustard flavor, add an extra teaspoon towards the end of cooking.
Experiment with different mustards, like honey mustard for sweetness or spicy brown for a kick.
Present the dish elegantly by placing a sprig of fresh parsley on top for a pop of color.
Serve with sides like roasted vegetables or rice to round out the plate and add nutrition.

Variations and Adaptations

Consider regional adaptations of this creamy dish using local herbs or sauces to personalize it. For instance, adding fresh tarragon can introduce an herbal note that can elevate the dish.
Seasonal adaptations could include adding butternut squash or Brussels sprouts in the cooler months for a comforting touch.
Make dietary modifications by substituting chicken for tofu or seitan to create a vegetarian version that still satisfies.
If you’re looking for flavor variations, incorporate ingredients like mushrooms for earthiness or lemon for brightness.
Texture modifications can include adding toasted nuts or seeds as a topping for a delightful crunch.
For presentation alternatives, consider plating it on a bed of greens for a fresh and vibrant look.

Serving and Presentation Guide

When plating your Creamy Mustard Chicken with Bacon, create height by stacking the chicken atop a mound of mashed potatoes. This presentation is visually appealing and invites guests to dig in.
Enhance garnishing by adding fresh herbs or chives sprinkled on top of the sauce. This not only adds color but a fresh flavor burst.
Traditional accompaniments like crusty baguette or rustic bread perfect for sopping up the sauce should be included on the side.
Modern serving suggestions involve portioning the chicken onto individual plates, drizzling sauce, and elegantly placing the bacon on top for an upscale dining feel.
Temperature considerations should be taken seriously; servings should be warm but never hot to the point of steaming. This helps in enjoying the flavors fully without burns.
Portion control tips include serving with side salads or veggies to ensure a balanced meal plate.

Wine and Beverage Pairing

For an excellent wine pairing, consider a buttery Chardonnay, as its creaminess complements the sauce beautifully. Alternatively, a light red wine like Pinot Noir balances the acidity from the mustard, making it an enjoyable contrast.
If you prefer non-alcoholic alternatives, try a sparkling apple cider, as the effervescence contrasts nicely with the rich dish.
Tea pairings, particularly herbal teas like chamomile, work wonderfully to cleanse the palate between bites. This enhances the overall dining experience, creating a holistic meal.
Always serve your chosen beverage chilled or at the recommended temperature for optimal flavor experience, which can elevate the meal.

Storage and Shelf Life

To store leftover Creamy Mustard Chicken with Bacon, transfer it to an airtight container and refrigerate for up to 3 days. It’s essential to let it cool first before sealing to avoid moisture buildup.
For longer storage, consider freezing portions in freezer-safe containers; it can last 2-3 months. Just ensure to label them with the date for freshness.
When reheating, do so gently on the stovetop, adding a splash of cream if the sauce appears too thick. Avoid microwaving as it can alter texture and taste, leading to uneven warming.
Signs of spoilage include any off smells or changes in texture or color, so always be cautious and inspect before consumption.

Make Ahead Strategies

To streamline the cooking process, consider preparing the creamy mustard sauce a day in advance. Store it separately in the refrigerator and reheat gently before serving.
If planning on making this dish for a gathering, chop and pre-cook the bacon, storing it in an airtight container until ready to combine.
Quality impacts can be assessed based on how sauces tend to develop flavors over time; letting it rest allows for more concentration. Remember to balance seasoning when reheating as flavors can diminish.
Assembling your meal can be made simple by pre-measuring ingredients so you can cook through the process without interruption.
Fresh elements, like parsley or herbs, can be added just before serving to keep them vibrant and fresh. This attention to detail elevates the overall experience.

Scaling Instructions

Scaling this recipe is simple; if you want to halve the recipe, adjust ingredient quantities accordingly while keeping the cooking method the same.
For doubling or tripling, ensure you have a larger skillet or consider cooking in batches to maintain temperature control during cooking.
Be mindful of timing modifications, as larger batches may require longer cooking even with small increases in chicken pieces.
Store any leftovers according to the same storage guidelines mentioned before so that you can enjoy the delicious dish later without sacrifice.

Nutritional Deep Dive

From a macro standpoint, Creamy Mustard Chicken with Bacon provides a suitable balance of proteins and fats that support a nourishing diet.
Micronutrient analysis will reveal that ingredients like garlic and mustard offer health benefits, particularly in supporting immunity and digestion.
Assessing health benefits is also crucial; chicken provides essential amino acids and proteins that are vital for bodily functions.
Dietary considerations should involve portion control, as the dish can be rich. Pair it with sides rich in fiber to create a balanced meal.
Weight management tips can include monitoring portion sizes and balancing indulgent meals with lighter fare in your weekly planning.

Dietary Adaptations

For gluten-free options, simply ensure the mustard used is gluten-free and you’re good to go.
This dish can be adapted to a dairy-free diet by using coconut cream or cashew cream, giving it a unique flavor twist while remaining creamy.
For those who eat a vegan diet, consider using plant-based substitutes for both chicken and cream, ensuring to add appropriate seasonings.
Low-carb and keto dieters can relish this dish as it is naturally low in carbs; just avoid serving it with high-carb sides.
A Paleo lifestyle can accommodate this recipe well, eliminating processed ingredients while enjoying the healthy fats found in the dish.
Low-FODMAP diets can easily modify here by adjusting garlic levels and using lactose-free dairy options.

Troubleshooting Guide

If you’re encountering texture issues with your sauce, check the heat level, as a too-high flame can cause it to separate or curdle. Gradually whisk as you cook, watching for a smooth finish.
Flavor balance can be adjusted while the sauce simmers. If it feels too tart, adding a touch of sweetness via honey can help counteract that.
Temperature problems may arise if the chicken sticks to the pan; ensure you grease the skillet adequately and check temperatures regularly to prevent burning.
Equipment challenges can often be remedied by using the correct size of pans and stovetops, ensuring even heat distribution.
Ingredient substitutions may affect taste; always taste as you go and adjust seasonings to ensure the final dish meets expectations.
Timing concerns can be addressed by prepping ingredients ahead of time, ensuring you maintain an efficient workflow during cooking.

Recipe Success Stories

Readers rave about their delightful experiences with this creamy chicken dish, often sharing tips on their favorite mustard varieties used.
Adaptations shared by readers include utilizing leftover sauces in pasta dishes or baked potato toppings, showcasing versatility.
Community feedback often emphasizes the ease of preparation and impressive results that cater to both busy weeknights or special occasions.
Photography tips shared include using natural light when capturing the dish, highlighting the creamy texture against vibrant herbs and garnishes.

Frequently Asked Questions

Can I use boneless chicken thighs instead of breasts? Absolutely! Chicken thighs will result in a juicier dish. Just ensure they are cooked to a safe internal temperature.

What can I substitute for heavy cream? If you prefer a lighter option, half-and-half can work, or try coconut cream for a dairy-free alternative.

Can I make this recipe in advance? You can prepare the sauce in advance. Reheat gently over low heat before serving.

Is this dish kid-friendly? Yes! The mild flavors of the creamy sauce and crispy bacon are typically very appealing to children.

What herbs work best in this recipe? Fresh thyme or parsley pairs beautifully with the sauce and enhances flavor without overpowering it.

How do I ensure my sauce doesn’t curdle? Cook over low heat and add the cream gradually, stirring constantly.

What sides should I serve with this dish? Mashed potatoes, rice, or steamed vegetables would make great accompaniments.

How should I store leftovers? Keep leftovers in an airtight container in the refrigerator for up to three days, or freeze for longer storage.

Can this dish be made dairy-free? Yes! Substitute heavy cream with coconut cream or a plant-based cream alternative.

What wine pairs best with this meal? A creamy Chardonnay complements the flavors beautifully, but a light Pinot Noir works well also!

Additional Resources

For those wanting to expand their culinary repertoire, consider checking out related recipes such as Herb Grilled Chicken or Bacon-Wrapped Asparagus to complement your main dish.
Technique guides on how to properly sear chicken and make creamy sauces are valuable for building confidence in the kitchen.
Understanding specific ingredients like mustard and its varieties will enhance your cooking skills and elevate future dishes.
Equipment recommendations involve selecting the right size of non-stick skillet for even cooking, ensuring efficiency and ease during preparation.
Lastly, explore seasonal variations that may inspire creativity, like incorporating fall vegetables or fresh spring herbs that brighten any dish.

Join the Conversation

Engage with us on social media by sharing your cooking experiences and the variety of your own adaptations to this recipe! Show off your beautifully plated Creamy Mustard Chicken with Bacon and inspire others with your variations.
Don’t forget to leave your reviews, suggestions, and tips below for the community to enjoy. Your feedback fosters growth and innovation among home cooks alike.
Let’s create an engaging and supportive cooking community where everyone can share and celebrate success in the kitchen together!

The Recipe

Creamy Mustard Chicken with Bacon

Serves: 4

Prep Time: 15 mins

Cook Time: 30 mins

Total Time: 45 mins

Kitchen Equipment Needed

  • Large skillet
  • Wooden spoon or spatula
  • Meat thermometer
  • Cutting board
  • Knife

Ingredients

  • 4 boneless, skinless chicken breasts
  • 6 slices of bacon, chopped
  • 1 cup heavy cream
  • 3 tablespoons Dijon mustard
  • 2 cloves garlic, minced
  • Salt and pepper to taste
  • Fresh parsley, chopped for garnish

Directions

  1. In a large skillet over medium heat, cook the chopped bacon until crispy. Remove and set aside, leaving grease in the pan.
  2. Season chicken breasts with salt and pepper. Add them to the skillet and cook for 6-7 minutes on each side until golden brown and cooked through. Remove from skillet.
  3. In the same skillet, add minced garlic and cook for 1 minute until fragrant.
  4. Stir in heavy cream and Dijon mustard, bringing to a simmer and stirring to combine.
  5. Return the chicken to the skillet, spooning sauce over the top and letting it simmer for 3-5 minutes.
  6. Sprinkle crispy bacon on top and garnish with fresh parsley before serving.

Recipe Notes

  • For extra flavor, marinate the chicken in mustard prior to cooking.
  • Feel free to customize with vegetables like spinach or mushrooms added to the sauce.
  • This dish pairs well with a side of rice or crusty bread for dipping into the sauce.

Delicious Crunchy Ritz Butter Chicken Delight Recipe You’ll Love

Crunchy Ritz Butter Chicken Delight: A Flavor Explosion on Your Plate

⚖️
Difficulty
Easy

⏲️
Prep Time
15 mins

🕒
Cook Time
30 mins

⏱️
Total Time
45 mins

🍽️
Servings
4

If you’re looking for a delightful recipe to elevate your dinner table, Crunchy Ritz Butter Chicken Delight is the answer. This delicious dish combines succulent chicken pieces with a buttery, creamy sauce and a savory Ritz cracker topping that provides an irresistible crunch. Imagine biting into tender chicken enveloped in a rich sauce, followed by a satisfying crunch from the crackers; it’s an experience that tantalizes the taste buds and warms the heart, making it perfect for family gatherings or a cozy date night.

The appeal of Crunchy Ritz Butter Chicken Delight lies not only in its flavor but also in its simplicity. The unique blend of spices creates a symphony of aromas, while the contrasting textures of tender chicken meat and crispy toppings bring a new element to traditional chicken dishes. This recipe promises not just a meal but a culinary adventure that will impress even the most discerning palates.

Quick Recipe Highlights

  • Flavor Profile: Each bite brings together zesty spices melded with the buttery richness of the sauce, balanced by the salty crunch of Ritz crackers.
  • Texture: The dish harmonizes the soft texture of the chicken with the delightful crunch of the topping, creating a rewarding mouthfeel.
  • Aroma: The dish is fragrant with notes of garlic, herbs, and butter, inviting you to dig in before you even take a bite.
  • Visual Appeal: Its stunning presentation with a golden crust contrasting against the creamy chicken sauce is sure to impress.
  • Skill Level Needed: This easy recipe is suitable for beginner cooks, requiring minimal culinary skills while delivering maximum flavor.
  • Special Equipment: A baking dish is essential for an even cook and a crispy finish.

Recipe Overview

  • Difficulty Level: With straightforward steps and minimal technical skills required, this recipe is approachable for cooks of all levels.
  • Category: The Crunchy Ritz Butter Chicken Delight fits perfectly into the main dish category, ideal for dinner parties or family meals.
  • Cuisine: It draws inspiration from American comfort food, blending traditional methods with unique flair.
  • Cost: This dish is budget-friendly, making use of affordable ingredients that can be found in your pantry or local grocery store.
  • Season: This dish is perfect for any season, particularly during the cooler months when comfort food is especially inviting.
  • Occasion: Whether it’s a casual family dinner or a special occasion, this dish makes any meal feel festive.

Why You’ll Love This Recipe

From the first bite, the explosion of flavors in the Crunchy Ritz Butter Chicken Delight will captivate your taste buds. The combination of savory spices with the creamy sauce provides a warm, comforting sensation that elevates this dish beyond standard chicken recipes. The buttery embrace of the cracker topping adds a delightful crunch that creates a unique dual texture enjoyable with every mouthful.

One of the greatest conveniences of this recipe is its quick cooking time without compromising on flavor. With just 15 minutes of prep and 30 minutes of cooking, you can serve a stunning dish without spending all day in the kitchen. This simplicity makes it an ideal choice for busy weeknights or unexpected guests.

Additionally, the nutritional benefits of this dish should not be overlooked. With a good source of protein from the chicken and the added flavors from herbs and spices, it’s both satisfying and healthy in moderation. Make sure to serve it with fresh vegetables or a salad to balance the meal.

Gathering around the dinner table has never felt more wholesome. This recipe not only satisfies appetites but brings family and friends together, making it an excellent choice for any social gathering. From kids to adults, everyone will be reaching for another scoop, sharing stories and laughs at the table.

Lastly, when it comes to affordability, this recipe stands out. Using budget-friendly ingredients without sacrificing taste, it allows anyone to whip up a delectable meal that feels special yet accessible. Enjoying a restaurant-quality dish at home without breaking the bank can be one of the most rewarding aspects of cooking.

Historical Background and Cultural Significance

The origins of butter chicken date back to India, where it was created in the 1950s by the chefs at the Moti Mahal restaurant in Delhi. This dish was born from a need to reduce food waste, as leftover chicken was simmered in a rich and creamy sauce, perfectly complementing the tender meat. This culinary innovation laid the foundation for numerous adaptations worldwide.

Butter chicken has since become emblematic of Indian cuisine, celebrated for its decadent flavor and luxurious texture. It’s more than just a meal; it represents the warmth and hospitality of Indian culture, often served at family gatherings and festive occasions. Each region might have its own twist, showcasing local spices and ingredients.

In recent years, butter chicken has evolved further, finding its way onto menus across various continents, blending seamlessly with different culinary traditions. The Crunchy Ritz Butter Chicken Delight is a perfect example of this evolution that marries traditional flavors with modern cooking techniques and ingredients.

Regional variations abound; for instance, some may add roasted nuts for extra texture or different spices reflecting local tastes. This adaptability demonstrates the dish’s importance in global cuisine, bridging cultural gaps and encouraging a shared gastronomic experience.

Ingredient Deep Dive

Chicken: A staple in kitchens worldwide, chicken is not only versatile but also rich in protein. Selecting fresh, organic chicken ensures the best flavor and quality. When storing, keep chicken refrigerated and consume within 1-2 days for optimal freshness. Frozen chicken can be stored for several months, but if substitution is needed, turkey or tofu can be excellent alternatives.

Butter: Known for its rich flavor, butter serves as a key ingredient in the sauce, enhancing the overall creaminess. When selecting butter, choose unsalted varieties to control the salt level in your dish. Store it in a cool place, and it can last several months in the fridge or longer in the freezer. For a healthier option, consider using olive oil or coconut oil.

Ritz Crackers: An iconic American snack, Ritz crackers are not just for munching. They add an unbeatable crunch to the chicken. When purchasing, opt for original flavors to maintain the classic taste. Store them in an airtight container to keep them fresh. If allergies are a concern, substitute with gluten-free crackers or crushed nuts for a similar effect.

Spices and Herbs: Essential for flavor enhancement, spices like garam masala and cumin add warmth and depth to the dish. When buying spices, fresh ground versions provide a more robust taste, and proper storage in a cool, dark place can maintain their potency. Herbal alternatives like cilantro can also be used for freshness.

Common Mistakes to Avoid

  • Overcooking the chicken: Ensure chicken is cooked just right to prevent dryness. Use a meat thermometer to check for doneness.
  • Skipping marinating: Marination enhances flavor. Do not skip this step, even if short on time, try to marinate for at least 30 minutes.
  • Incorrect temperature: Cooking at too high a temperature can result in uneven cooking. Opt for a medium heat setting.
  • Not enough seasoning: Taste as you cook to adjust flavors. A pinch of salt or more spices can make a world of difference.
  • Using stale crackers: Ensure that your Ritz crackers are fresh for the best crunch; stale ones lead to a soggy topping.
  • Selecting incorrect pan size: Using an inappropriate size can lead to uneven cooking or burning. Ensure your baking dish is a good fit for the ingredients.
  • Ignoring resting time: Allow the chicken to rest after cooking to retain juices and enhance flavor.
  • Forgetting to preheat the oven: Always preheat for even cooking; this is crucial for the top to get crispy.

Essential Techniques

Marinating Chicken: Marinating is crucial for enhancing flavor. Combine spices and buttermilk or yogurt, ensuring the chicken absorbs these flavors well. Aim for at least 30 minutes, but overnight is ideal. Avoid shortcuts, as a proper marinade can drastically improve taste.

Creating the Sauce: Start by sautéing ingredients like garlic and onion, which build a flavor base. Next, add butter and heavy cream, stirring continuously to combine. Monitoring temperature is key; high heat can cause the cream to separate. Aim for a slightly bubbling mixture before combining with chicken.

Baking for Crispiness: To achieve the perfect crunch, bake the dish uncovered. Use a broiler for the last couple of minutes if extra crispiness is desired. Keep an eye on it to prevent burning; you’ll want it a beautiful golden brown.

Layering Ingredients: When assembling the dish, layer the chicken, sauce, and crackers thoughtfully to ensure even distribution of flavors. The bottom layer of sauce also helps keep crackers crunchy without becoming too soggy.

Pro Tips for Perfect Crunchy Ritz Butter Chicken Delight

1. Use fresh ingredients! Fresh chicken and spices make a significant difference in taste.

2. Add a squeeze of lemon juice before serving for a zesty kick that balances the richness of the dish.

3. Consider adding fresh herbs like cilantro or parsley on top before serving for added color and freshness.

4. Adjust spice levels according to your preference; try adding a pinch of cayenne for a bit of heat.

5. If you’re short on time, opt for precooked chicken to speed up preparation without sacrificing flavor.

6. Keep an eye on the cracker topping as it bakes, ensuring it reaches the desired crispiness without burning.

7. Pair with steamed vegetables or a fresh salad to round out the meal and add nutrition.

8. Finally, enjoy the leftovers! This dish reheats wonderfully without sacrificing taste.

Variations and Adaptations

Regional variations of this classic recipe might include local spices, like smoked paprika or garlic powder, to enhance flavor profiles. Seasonal adaptations could involve adding vegetables from your garden, like zucchini or bell peppers, for added nutrition and color during summer months.

Dietary modifications can also be made by substituting chicken with firm tofu or vegetables for a vegetarian option. For a gluten-free version, try crushed gluten-free crackers. Similarly, a low-carb adaptation can be achieved by utilizing almond flour in place of Ritz crackers for crunch.

For those who enjoy extra flavor, consider experimenting with different cheeses sprinkled on top, such as mozzarella or cheddar. You can also change the texture by using panko breadcrumbs combined with spices for a different topping altogether.

Finally, in terms of presentation, consider serving the dish in individual ramekins for a charming touch, or garnish with edible flowers or microgreens for an upscale appearance.

Serving and Presentation Guide

Plating the Crunchy Ritz Butter Chicken Delight can enhance its visual appeal—consider dividing it into individual portions and serving in small bowls for family-style dining. Garnishing with fresh herbs or a sprinkle of paprika can add to its inviting look.

Accompany this dish with traditional sides like basmati rice or naan bread, which not only complement the flavors but also enhance the overall dining experience. Modern serving suggestions include pairing it with a crisp salad or roasted vegetables for a balanced meal.

Temperature is vital; serve the dish warm to enjoy the creamy sauce and crunchy topping at their best. Portion control can be managed by serving in smaller bowls, ensuring everyone gets a taste without overwhelming their plate.

Wine and Beverage Pairing

For wine pairings, opt for a Riesling or a buttery Chardonnay to complement the richness of the butter chicken. These wines will balance the flavors without overpowering them. If you’re looking for a non-alcoholic alternative, pair with sparkling water infused with lime or a refreshing mint lemonade that enhances the meal without added sweetness.

If you’re a coffee drinker, a smooth blend like an American or a light roast pairs well after dinner, complementing the dish’s richness and helping to cleanse the palate.

Storage and Shelf Life

Store any leftovers in airtight containers in the refrigerator for up to three days. Ensure that the dish is cooled down to room temperature before sealing to avoid condensation, which can lead to spoilage. Reheating in an oven rather than a microwave can help restore the original texture of the topping and prevent sogginess.

If you wish to freeze the dish, do so in suitable containers, and it can last up to three months. For best results, reheat thoroughly in the oven while keeping an eye on the topping to ensure it stays crispy. Signs of spoilage include off smells or discoloration, so always check before consuming.

Make Ahead Strategies

To save time, consider preparing the marinade the night before and allowing the chicken to soak in all those flavors overnight. You can also chop your spices and vegetables ahead of time, storing them in the fridge until you’re ready to cook.

Create a prep timeline by organizing your steps; start with marinating the chicken, then move on to making the sauce while the chicken sits. After assembling, you can refrigerate the dish until ready to bake. When you’re ready, simply adjust cooking times if starting from cold, which could add 5-10 minutes depending on your oven.

Finally, keep freshness in mind. If you plan to enjoy this dish days later, consider adding fresh herbs just before serving to maintain their vibrant color and flavor.

Scaling Instructions

Scaling this recipe is simple; when halving, use half of each ingredient while keeping the cook time similar. For larger gatherings, doubling or tripling the recipe requires careful attention to pan size and cooking times. Ensure that your baking dishes can accommodate the size increase and adjust the cooking time as needed, keeping in mind that larger quantities may require more longer baking time to ensure everything is heated thoroughly.

Equipment like larger baking dishes or multiple smaller ones can help achieve an even cook if you’re making bigger batches. Consider rotating the dishes halfway through cooking to ensure even browning. Lastly, take care of storage considerations for any leftovers, as larger batches may yield more food than a standard-sized family meal.

Nutritional Deep Dive

On the macro level, Crunchy Ritz Butter Chicken Delight offers a solid balance of protein, fats, and carbohydrates. With about 30 grams of protein per serving from the chicken, it’s a great choice for muscle maintenance and repair. The fats primarily sourced from butter add richness and energy to the dish, while the carbohydrates from the crackers provide quick energy.

When looking at micronutrients, the dish also contributes vitamins and minerals, particularly B vitamins from chicken and calcium from butter. If you aim for a balanced diet, consider pairing this dish with nutrient-dense sides like steamed broccoli or a colorful salad for added fiber and vitamins.

Portion size is important; while this dish is delicious, managing your servings can support weight management efforts. Enjoying it with veggies or fiber-rich foods can create a fulfilling meal without overeating.

Dietary Adaptations

For those following gluten-free diets, substitute Ritz crackers with gluten-free alternatives, such as almond meal or gluten-free breadcrumbs, to maintain the crunch without exposure to gluten.

If you’re looking for dairy-free options, replace butter with coconut oil or a vegan butter alternative. To create a vegan version, swap out chicken for marinated tofu or tempeh to still capture that fulfilling texture and flavor.

Low-carb dieters can follow similar principles by using almond flour or ground pork rinds instead of crackers for a crunch that satisfies without excess carbs. Keto enthusiasts can enjoy this recipe without guilt by adapting the ingredient list to focus on high fat, low carb replacements.

Troubleshooting Guide

If you encounter texture issues, consider reviewing your cooking times. Overcooked chicken becomes tough, while undercooked leads to rubberiness; a meat thermometer should be your best friend. Next, achieving a healthy flavor balance may need adjustments; under-seasoned dishes can benefit immensely from a sprinkle of salt or fresh herbs just before serving.

Temperature problems can arise when baking; make sure your oven temperature is accurate before putting your dish in. Sometimes, using an internal thermometer can ensure it reaches the perfect doneness without guessing.

When using substitutions, recognize that not all replacements react the same way. For instance, if using dairy-free cream, ensure it has similar fat content to maintain the intended creaminess. Times may also alter when scaling the recipe; always check for doneness properly if increasing serving sizes.

Recipe Success Stories

Community feedback highlights the adaptability and flavor of Crunchy Ritz Butter Chicken Delight. Many readers have shared their creative twists on the recipe, adding personal touches like different spices or toppings. Variations with different flavored crackers or even crushed chips have become popular as well, showcasing the dish’s versatility.

Numerous readers have expressed their delight in how easily the dish pleases varied palates, making it a go-to for family meals. Testimonials describe how even picky eaters enjoy the child-friendly flavor profile while still appearing sophisticated enough for adult gatherings.

Adaptation stories show how this recipe can be simplified for busy weeknights yet retains its scrumptious essence, proving that great taste can come from minimal effort. Photographers in the community have also shared tips for capturing the dish’s stunning presentation, inspiring others to showcase their creations on social media.

Frequently Asked Questions

Can I prepare the marinade the night before?

Absolutely! Marinating overnight enhances the flavors significantly. It allows the spices to penetrate the chicken thoroughly, making it even more delicious.

What can I use instead of chicken?

For a vegetarian version, consider using firm tofu or seitan. Both options absorb flavors well and can provide a satisfying texture.

How do I ensure my topping stays crispy?

To keep the topping crunchy, avoid covering the dish while baking. You can also broil it for a few minutes at the end of cooking for an extra crunch.

Is this dish suitable for freezing?

Yes, it freezes well! Store in airtight containers, and thaw before reheating to maintain texture and flavor.

What should I serve with this dish?

It pairs wonderfully with rice, naan, or a fresh green salad; these sides add balance and color to your meal.

Can I use other crackers?

Definitely! Feel free to experiment with flavored or gluten-free crackers; just ensure they provide a similar crunch.

How long can leftovers be stored?

Leftovers can last in the fridge for up to three days. Make sure to keep them in airtight containers for freshness.

What spices can I add for extra flavor?

Adding spices like paprika, cayenne, or Italian herbs can introduce new flavor dimensions. Adjust according to your taste!

Is this recipe kid-friendly?

Absolutely! Its comforting flavors and crunchy topping tend to be a hit with kids. Adjust spice levels for a milder version if needed.

Can I scale this recipe up or down?

Yes, you can easily adjust the ingredients! When doubling, ensure to use larger pans to accommodate increased volume.

Additional Resources

For those looking for related recipes, consider exploring other butter chicken adaptations or fusion dishes combining elements from various cuisines. Technique guides on marinating or creating sauces can enhance your cooking skills, while ingredient information ensures the best selections for your pantry.

Equipment recommendations for this dish include good-quality baking dishes, which can endure high temperatures. Look for ones that facilitate even cooking and achieving the best results. For seasonal variations, explore ways to incorporate fresh, seasonal vegetables into the recipe, adjusting cooking times as necessary for the best outcomes.

Join the Conversation

We would love to hear your thoughts on Crunchy Ritz Butter Chicken Delight! Share your feedback on social media and be sure to tag us in your culinary creations. Whether it’s your unique variations of the dish or particular photography tips, sharing these experiences fosters a sense of community around food.

Don’t hesitate to leave a review on this recipe and share how it worked for you! Engage with others who have tried this recipe and exchange tips and adaptations that have worked. The beauty of cooking lies in its shared experiences, and we look forward to hearing your stories.

The Recipe

Crunchy Ritz Butter Chicken Delight

Serves: 4

Prep Time: 15 mins

Cook Time: 30 mins

Total Time: 45 mins

Kitchen Equipment Needed

  • Baking dish
  • Mixing bowls
  • Measuring cups and spoons
  • Whisk or fork
  • Knife and cutting board

Ingredients

  • 4 boneless chicken breasts, cubed
  • 1 cup heavy cream
  • 1/2 cup unsalted butter
  • 1 cup Ritz crackers, crushed
  • 1 tablespoon garlic powder
  • 1 tablespoon garam masala
  • Salt and pepper to taste

Directions

  1. Preheat your oven to 350°F (175°C).
  2. In a mixing bowl, combine the diced chicken with garlic powder, garam masala, salt, and pepper.
  3. In a skillet over medium heat, melt butter and add the chicken, sautéing until lightly browned.
  4. Once cooked, remove from heat and stir in heavy cream until well combined.
  5. Transfer the chicken mixture into a greased baking dish.
  6. Sprinkle crushed Ritz crackers evenly over the top.
  7. Bake in the preheated oven for 25-30 minutes or until the top is golden brown.
  8. Let rest for 5 minutes before serving. Enjoy!

Recipe Notes

  • Feel free to add vegetables like peas or bell pepper for added nutrients.
  • The dish can be made a day in advance, just bake when ready to serve.
  • Adjust the amount of spices according to your taste preferences.

Delicious Burrata Bruschetta Recipe for Perfect Summer Appetizers

Burrata Bruschetta: A Flavorful Italian Delight

⚖️
Difficulty
Easy

⏲️
Prep Time
15 mins

🕒
Cook Time
10 mins

⏱️
Total Time
25 mins

🍽️
Servings
4

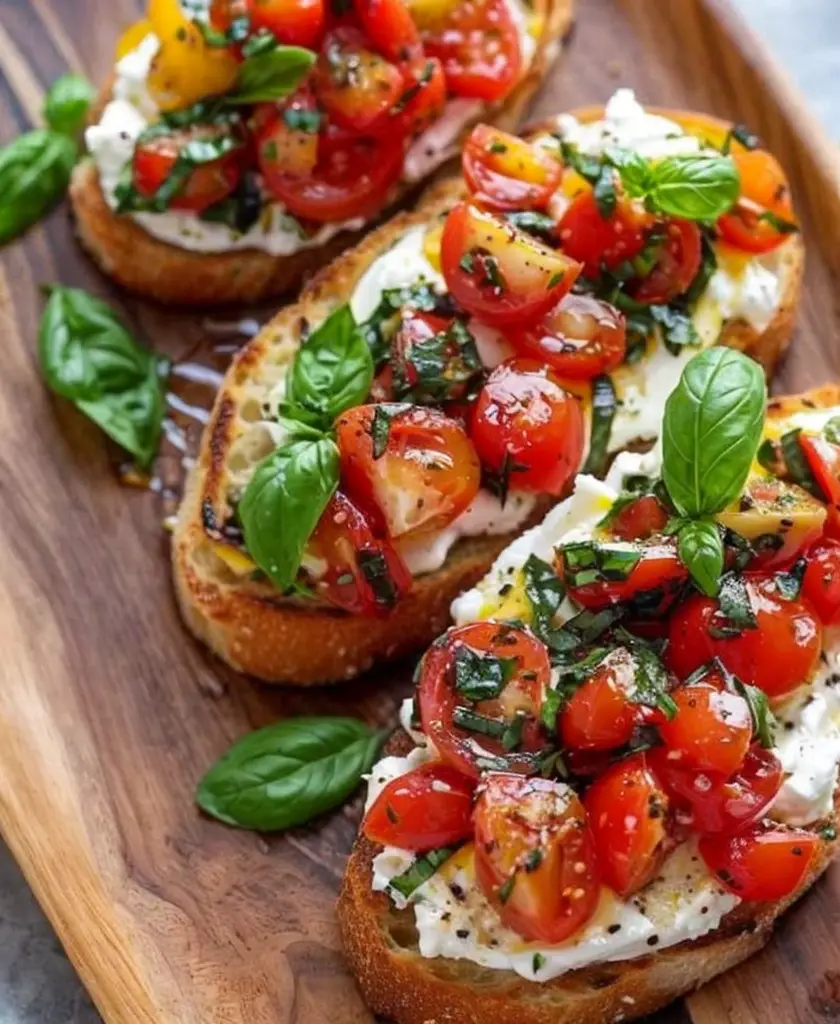
Bringing together the creaminess of burrata with the crunch of toasted bread, Burrata Bruschetta is an exquisite Italian appetizer that tantalizes taste buds with every bite. The luscious burrata, paired with vibrant tomatoes seasoned with basil and olive oil, creates a delightful juxtaposition of textures and flavors. Imagine biting into a crunchy piece of bread, only to be greeted by the soft, rich cheese melting into your mouth—it’s a culinary experience you don’t want to miss.

This dish not only looks stunning on the table, thanks to its vibrant colors, but it’s also incredibly quick and easy to prepare. Ideal for entertaining or a cozy family dinner, Burrata Bruschetta boasts a flavor profile that excites the palate with freshness and a hint of indulgence. Whether you’re hosting a gathering or treating yourself, this recipe offers a delightful taste of Italy right in your home.

Quick Recipe Highlights

  • Flavor Profile: The sweet, juicy tomatoes contrast beautifully with the creamy burrata, enhanced by aromatic basil and a drizzle of olive oil.
  • Texture: Crispy toasted bread pairs with the soft, gooey burrata, creating a mesmerizing mouthfeel.
  • Aroma: The vibrant aromas of fresh basil and ripe tomatoes evoke the essence of Mediterranean cooking.
  • Visual Appeal: The vibrant red of the tomatoes against the creamy white burrata and the golden-brown bruschetta makes for a stunning presentation.
  • Skill Level Needed: This recipe is suitable for all cooking skill levels, making it accessible for novice cooks and easy for seasoned chefs.
  • Special Equipment: No special equipment is needed—just a baking sheet and a knife will do!

Recipe Overview

  • Difficulty Level: This recipe is labeled easy, perfect for those new to cooking or looking for a quick appetizer. The steps are straightforward, ensuring a stress-free experience.
  • Category: As an appetizer, Burrata Bruschetta is perfect for gatherings, parties, or simply as a snack before the main course.
  • Cuisine: Rooted in Italian culinary traditions, this bruschetta showcases the flavors of fresh, high-quality ingredients typical of Mediterranean dishes.
  • Cost: This dish can be made at a reasonable cost, especially when using seasonal ingredients, making it an excellent option for budget-friendly entertaining.
  • Season: Best served in warmer months when tomatoes are at their peak ripeness, offering the freshest flavor possible.
  • Occasion: Ideal for summer parties, picnics, or as a starter for Italian-themed dinners, this dish is versatile enough for numerous occasions.

Why You’ll Love This Recipe

This Burrata Bruschetta will charm your senses with its delightful taste and creamy texture. The burrata cheese adds a luxurious touch that makes you savor every bite. The fresh tomatoes and fragrant basil are not just delicious; they bring an exciting burst of flavor that elevates the entire dish. This bruschetta is a perfect balance between creaminess and crunch, making it a staple at any gathering or casual dinner.

Convenience plays a huge role in the appeal of this recipe. With a prep time of just 15 minutes, Burrata Bruschetta can be ready for your guests in no time. Simply chop the tomatoes, toast your bread, and assemble the dish. This ease allows you to enjoy time with your friends and family rather than spending hours in the kitchen.

Nutritionally, you’re getting a healthy dose of vitamins and antioxidants from the tomatoes, as well as healthy fats from the olive oil. This appetizing dish not only delights the stomach but also nourishes the body, making it a wholesome choice for any meal.

The entertaining value of Burrata Bruschetta is through the roof. This appetizer is visually stunning, making it a fantastic centerpiece for any table. Additionally, it encourages sharing and conversation, bringing people together around delicious food—a true essence of dining.

Finally, it’s an economical dish that showcases how simple, quality ingredients can create remarkable flavors without breaking the bank. You can prepare this bruschetta with seasonal garden tomatoes and fresh herbs, promoting both sustainability and cost-effectiveness.

Historical Background and Cultural Significance

Burrata is a relatively recent addition to Italian cuisine, originating in the Apulia region of Southern Italy in the early 20th century. Traditionally made from buffalo milk, burrata was created to make use of leftover mozzarella scraps, offering a unique way to enjoy a rich and creamy cheese. Over the decades, this exquisite cheese has become a revered delicacy not just in Italy, but around the world.

Culturally, bruschetta has deep roots in Italian history dating back to the 15th century. The name “bruschetta” is derived from the Roman dialect verb “bruscare,” meaning “to roast over coals.” This traditional preparation method highlighted the simplicity of toasted bread topped with ripe tomatoes and olive oil, representing the essential flavors of the Mediterranean.

Today, Burrata Bruschetta is a beloved addition to Italian cuisine, often featured on tapas-style menus in restaurants around the world. With its creamy texture and vibrant flavors, it’s no wonder that this dish has become a favorite for both home cooks and professional chefs alike, embodying the principles of Italian cooking that celebrate freshness and simplicity.

As culinary trends have evolved, chefs have experimented with burrata, elevating bruschetta to new heights by incorporating various toppings and flavors. From seasonal vegetables to different pesto variations, the classic combo has continued to inspire creativity in kitchens globally.

Finally, regional variations exist throughout Italy, with each area offering unique toppings, such as grilled vegetables or cured meats, highlighting the adaptability and universality of this dish while maintaining its elegant roots.

Ingredient Deep Dive

Burrata Cheese:
Burrata cheese is celebrated not only for its rich, creamy flavor but also for its historical significance in Southern Italy. Traditionally made from buffalo milk, burrata contains a rich center of stracciatella, which is a mix of cream and shredded mozzarella. For those looking to incorporate burrata into their diet, it’s a source of high-quality protein and essential vitamins. When selecting burrata, it’s paramount to check for freshness; opt for those with a firm outer shell and a soft, creamy center. Store it in the fridge and consume it within a few days for optimal flavor.

Tomatoes:
Tomatoes are fundamental in Italian cooking, honored for their vibrant flavor, color, and nutritional benefits. Ripe tomatoes are an excellent source of vitamin C and antioxidants, particularly lycopene, known for its heart health benefits. When buying tomatoes, look for ones that are firm but slightly soft to the touch and have a deep color. Store them at room temperature to enhance their flavor, but refrigerate if they’re overripe. For variations, try heirloom tomatoes for added sweetness or plum tomatoes for a dense flavor.

Basil:
Basil is a quintessential herb in Italian cuisine, loved for its aromatic profile that complements many dishes. Historically significant, it symbolizes prosperity and love in Italian folklore. Nutritionally, basil offers anti-inflammatory properties and is rich in vitamins A and K, making it a great addition to any dish. When choosing basil, opt for fresh leaves that are vibrant in color. It’s best used fresh, but if dried, ensure it has been properly stored in a cool, dark environment away from moisture to maintain its flavor.

Olive Oil:
Olive oil is known as the cornerstone of Mediterranean diets, revered for its rich flavor and numerous health benefits. It holds historical significance, as it has been cultivated in the Mediterranean for thousands of years. Extra virgin olive oil is packed with polyphenols, which contribute to heart health and offer anti-inflammatory effects. When selecting olive oil, choose options labeled “extra virgin,” and opt for dark glass containers to shield it from light. Store in a cool, dark place to maintain its quality and longevity.

Crusty Bread:
The choice of bread can dramatically impact the overall taste of bruschetta. Traditional Italian bread, like ciabatta or baguette, offers a hearty texture that captures the essence of Italian life. When choosing bread, look for crusty varieties that are neither too hard nor too soft. It is best enjoyed fresh but can be stored in a paper bag at room temperature. For those with dietary restrictions, gluten-free options are available that can still provide that delicious crunch.

Common Mistakes to Avoid

  • Using stale bread: Always use fresh, crusty bread to ensure the best texture and flavor. Stale bread can ruin the bruschetta experience.
  • Over-toasting: Be careful not to over-toast the bread; it should be crispy on the outside but still tender inside to balance the burrata’s creaminess.
  • Insufficient seasoning: Be generous with olive oil, salt, and pepper; these elements enhance the natural flavors of the ingredients.
  • Using subpar tomatoes: The quality of tomatoes is crucial; always opt for the freshest, ripest tomatoes for maximum flavor.
  • Not letting the burrata come to room temperature: Allow the burrata to sit out for about 30 minutes before serving to ensure its creamy interior is perfect for spreading.
  • Assembling too early: For the best texture, assemble your bruschetta just before serving to prevent the bread from becoming soggy.
  • Skipping fresh herbs: Fresh basil elevates the dish significantly; dried herbs will not provide the same aromatic quality.
  • Overcomplicating toppings: Stick to simple, quality ingredients instead of overloading on toppings or sauces that mask the burrata’s flavor.
  • Using too much balsamic vinegar: While balsamic can be delicious, too much can overpower the delicate flavors of burrata and tomatoes.
  • Ignoring presentation: Serve the bruschetta artfully arranged, taking care to highlight the fresh ingredients and colors.

Essential Techniques

Toasting Bread: Toasting the bread correctly is crucial. It should be crisp on the outside while remaining chewy on the inside. Aim for a golden brown. The best way is to brush slices with olive oil and place them directly on a hot grill or under a broiler, watching carefully to avoid burning.

Chopping Tomatoes: Dice tomatoes uniformly for even distribution on the bruschetta. Remove seeds for a less watery topping. A sharp knife is essential here—fresh tomatoes are delicate, and you want to avoid bruising them. The final cut should aim for a bite-sized piece that bursts in your mouth.

Making Fresh Tomato Mixture: Using a bowl, combine the diced tomatoes, olive oil, salt, and chopped basil. Allow the mixture to sit for about 10 minutes to let the flavors meld together. Taste and adjust the seasoning as needed; this mixture should be bright and fresh.

Handling Burrata: To prepare burrata, gently open the cheese to reveal its creamy interior without tearing it apart. Use a spoon to scoop it onto your bruschetta, ensuring each piece gets a generous portion. This cheese deserves to be the star of the dish, so treat it delicately.

Plating: Presentation is key, especially with such visually appealing ingredients. Layer the bruschetta with dollops of burrata, scoop the tomato mixture on top, and finish with a drizzle of olive oil and a sprinkle of salt. Garnishing with whole basil leaves can add color and height to your dish.

Pro Tips for Perfect Burrata Bruschetta

1. Choose high-quality ingredients. The flavors of your bruschetta will only be as good as the ingredients you use, so always opt for fresh, high-quality tomatoes, burrata, and olive oil.
2. Prepare your tomatoes ahead. Allowing the diced tomatoes to sit with olive oil and salt helps them release their juices and enhances their natural sweetness.
3. Toast the bread right before serving. For optimal crispiness, toast your bread right before assembling to maintain the perfect crunch.
4. Don’t skimp on olive oil. A good drizzle of high-quality extra virgin olive oil not only enhances flavor but also adds a beautiful sheen to your dish.
5. Let burrata reach room temperature. Allow the burrata to soften to room temperature before serving to enjoy its full, creamy texture.
6. Experiment with toppings. Don’t be afraid to add your twist with extra toppings like prosciutto, roasted peppers, or even a layer of pesto.
7. Serve on a platter for sharing. Presenting the bruschetta on a beautiful platter invites guests to help themselves, making it a communal experience.
8. Use seasonal ingredients. Adapting the recipe according to what’s in season can elevate the taste of your bruschetta, giving it a fresh, unique flavor.

Variations and Adaptations

Burrata Bruschetta can be easily customized to fit different flavor profiles. For instance, adding roasted vegetables in the summer can provide a smoky flavor that complements the creaminess of the cheese. Another popular variation is to use heirloom tomatoes, which add a burst of flavor and color, making the dish even more visually appealing.

In autumn, consider incorporating roasted squash or pumpkin seeds for an earthy touch. You can also play with different herbs—substituting basil with arugula can provide a peppery contrast that still tallies up with burrata’s creaminess.

Additionally, dietary adaptations can include using gluten-free bread for those with gluten sensitivities or vegan burrata as a dairy-free alternative. These options ensure everyone can enjoy this delicious recipe!

For a bolder flavor, try incorporating toppings like spicy arugula or a drizzle of chili oil. On the other hand, a simple fresh pesto layer can transform the traditional approach into a delightful alternative.

Presentation alternatives may involve serving on individual plates as appetizers at a formal dinner, or stuffed as part of a wrap, appealing to a casual summer picnic style.

Serving and Presentation Guide

Presentation enhances the dining experience, especially for a dish like Burrata Bruschetta. For optimal plating, use a large, shallow platter to display the bruschetta slices, allowing for easy access and a communal feel.

Garnishing with whole basil leaves or edible flowers adds a pop of color. For added flair, consider a drizzle of high-quality balsamic reduction over the top to introduce a sweet and tangy element.

Placement matters as well; consider using a cutting board for a rustic vibe that invites guests to dive in. Cut the bruschetta into bite-sized pieces to make it easier to enjoy.

Temperature considerations are pivotal; serve the bruschetta immediately after assembly to avoid sogginess and maintain that delightful crunch. For gatherings, you can prepare the components ahead of time, letting guests assemble their own for added interaction.

Finally, be mindful of portion control. Aim for 2-3 pieces per person as an appetizer, allowing your guests to enjoy other courses without feeling overwhelmed.

Wine and Beverage Pairing

When it comes to pairing wine with Burrata Bruschetta, consider a light, crisp white wine, such as Pinot Grigio or Sauvignon Blanc. These wines enhance the fresh flavors of the tomatoes and basil without overwhelming the delicate richness of the burrata.

For a red option, a light-bodied Chianti is another excellent choice, mirroring the Italian roots of the dish. Its acidity complements the bruschetta’s components while adding depth.

If you’re looking for non-alcoholic beverages, try a sparkling water with a twist of lemon or fresh basil leaves. A refreshing herbal iced tea can also complement the dish beautifully.

Always serve wines chilled, particularly whites and rosés, to maintain their refreshing qualities during warm summer gatherings. Consider having a selection to cater to various preferences, ensuring all guests find a suitable pairing.

Storage and Shelf Life

Storing Burrata Bruschetta requires care to maintain flavor and texture. Once assembled, it’s best to consume the bruschetta immediately, as the bread can become soggy when topped with watery ingredients like tomatoes.

If you’re planning to prepare ahead, store the components separately. Keep the diced tomatoes mixed with olive oil in an airtight container in the refrigerator for up to 2 days. The burrata should also be kept in its original packaging until you’re ready to use it for optimal freshness.

Unassembled bruschetta can be stored at room temperature, but toasted bread should not be refrigerated, as it can lose its crispness. To store leftover bruschetta mix, place it in a container and consume within a couple of days.

If you happen to have leftover burrata, wrap it carefully in plastic wrap and keep it refrigerated for 2-3 days. Always check for any off smells or changes in texture before using leftovers.

Make Ahead Strategies

To save time when hosting, consider making components of Burrata Bruschetta ahead. You can prepare the tomato mixture the day before, keeping it chilled, which allows the flavors to meld beautifully. Just be sure to taste and adjust the seasoning before serving.

Another strategy is to toast the bread in advance. Let it cool completely before storing it in a sealed container to keep it fresh. You can quickly re-crisp it in an oven before assembling.

For burrata, ensure you keep it sealed until you’re ready to serve. Serve it at room temperature to allow its creamy center to shine, so leave it out for about 30 minutes before assembling the bruschetta.

Lastly, consider how you can enhance assembly by prepping a station with all ingredients laid out for guests. This interactive touch allows everything to stay fresh while providing guests with the fun of making their own bruschetta.

Scaling Instructions

Scaling Burrata Bruschetta is straightforward, whether you want to halve or triple the recipe. For smaller gatherings, simply adjust the ingredients while maintaining the same ratios—this dish scales well without losing its essence.

If you are doubling or tripling the recipe, ensure your work space is large enough to accommodate the increased quantity, especially for the tomato mixture. Use larger mixing bowls and spread across multiple baking sheets if necessary.

With larger servings, timing is crucial; prepare your bread in batches to ensure even toasting. Avoid overcrowding the baking sheet to maintain optimal toast quality.

In terms of storage, simply use larger containers to hold your tomato mixture and cheese. When applying proportions to larger parties, consider offering a variety of toppings to keep the buffet exciting and flavorful.

Nutritional Deep Dive

From a nutritional perspective, Burrata Bruschetta offers a delightful balance. Each serving is rich in healthy fats from burrata and olive oil, while the tomatoes contribute a healthy dosage of vitamin C, fiber, and antioxidants.

In terms of macronutrients, the combination yields a fairly balanced profile of carbohydrates from the bread, proteins from the cheese, and fats from the olive oil. Depending on the portion size, it can fit into light meals or be paired with other dishes for heartier options.

Micronutrient analysis shows that tomatoes are particularly high in potassium, essential for heart health, while basil provides vitamin K, which is vital for bone health.

For those managing their diets, the key is moderation; a couple of pieces of bruschetta can fit well into many dietary plans. Paired with fresh vegetables or salads enhances the meal’s fiber content, making it more satisfying.

All in all, Burrata Bruschetta is a deliciously satisfying option that can easily complement a variety of dietary preferences while remaining indulgent yet healthy.

Dietary Adaptations

– Gluten-Free: Use gluten-free bread options which can still hold the toppings well without sacrificing flavor. Many varieties available in stores today mimic traditional textures.
– Dairy-Free: Look for vegan burrata options made from cashews or almond milk to provide a similar creamy experience without dairy.
– Vegan: By substituting the cheese with vegan burrata, this dish can be entirely plant-based without compromising taste.
– Low-Carb: Use cauliflower bread or other low-carb options to replace traditional bruschetta bread while maintaining texture.
– Keto: For a keto-friendly version, focus on low-carb toppings like avocados or meat options instead of the bread, enhancing nutrition value.
– Paleo: Opt for fresh vegetables and nuts as a topping base to ensure it fits within Paleo guidelines, offering fresh flavors and satisfying crunch.
– Low-FODMAP: Avoid using garlic or onions in your toppings, utilizing fresh herbs and simpler flavor combinations for a low FODMAP approach.

Troubleshooting Guide

When making Burrata Bruschetta, ensuring the right texture is key. If your tomatoes result in a watery mixture, remove seeds before chopping and lightly salt them to draw out excess liquid.

Flavor balance can be a challenge; if too bland, consider a pinch of sea salt or freshly cracked black pepper to enhance flavors. Conversely, if it’s too salty, add more tomatoes or burrata to neutralize the flavor.

Temperature issues can arise; if your bread cools too quickly and loses crispness, place it in a low-temperature oven to refresh the texture without browning it further.

If you encounter equipment challenges, ensure your knife is sharp when cutting the tomatoes, as a dull knife can crush them, leading to an uneven mixture.

For ingredient substitutions, keep in mind that flavor will change based on what’s used, so tasting and adjusting is critical when throwing in variations at the last moment.

Finally, timing is essential; work quickly when assembling to serve this dish warm and fresh so that all components harmonize deliciously.

Recipe Success Stories

Readers have shared numerous successful adaptations of Burrata Bruschetta, showcasing their unique twists. One community member noted their success substituting goat cheese for burrata, adding a tangy layer of flavor that emerged delightful feedback from guests.

Many swore by the heirloom tomato variant, claiming it provided a burst of sweetness that complemented the rich creaminess beautifully, often capturing stunning photographs that highlighted the dish’s visual appeal.

Adaptation stories highlight using grilled peaches in place of tomatoes during summer for an unexpected twist that delighted family and friends, providing a perfect balance of sweetness against the cheese’s texture.

Readers have also shared their techniques for perfecting the toasted bread, often emphasizing the importance of oiling the bread beforehand to achieve a consistent golden-brown crunch worthy of any gathering.

Photography tips and sharing visuals of their successfully plated bruschettas on social media have sparked engaging conversations, inviting others to join in while sharing their versions of this classic Italian dish.

Frequently Asked Questions

1. Can I make Burrata Bruschetta ahead of time?

While the components can be prepared ahead, it’s best to assemble just before serving to maintain the freshness and texture of the bread. Preparing tomato mixtures a few hours in advance is fine, but avoid topping the bread too early.

2. What type of bread works best for bruschetta?

Crusty Italian bread, ciabatta, or baguette make ideal choices for bruschetta due to their sturdy texture, allowing them to hold the toppings well without becoming soggy.

3. Can I use other cheeses besides burrata?

Certainly! While burrata is the star, you can substitute with fresh mozzarella or even ricotta for a different but still delicious flavor and texture profile.

4. How can I add a kick to my bruschetta?

Incorporating sliced jalapeños or a drizzle of chili oil can elevate the spice level, making it an exciting variation. Experimenting with pepper oils can also provide a flavorful punch.

5. Can I use canned tomatoes?

For best results, use fresh tomatoes when possible, but in a pinch, quality canned tomatoes can work. Just drain excess liquid before using them in the topping mix.

6. What can I substitute for basil?

If basil is unavailable, fresh parsley or arugula can provide alternative herbal notes. Consider rosemary for a more robust flavor, keeping in mind it’s stronger than basil.

7. How do I prevent the bread from getting soggy?

To prevent sogginess, toast the bread until golden brown and assemble the bruschetta right before serving. Leaving the topping separate until just before consumption allows for the best texture.

8. Can I prepare a vegan version?

Absolutely! Substitute burrata with a vegan cheese option that suits your dietary needs, and keep the other ingredients fresh and vibrant to complement it.

9. How can I enhance the presentation?

Drizzling high-quality olive oil and balsamic reduction artfully over the assembled bruschetta can enhance both the flavor and visual appeal. Consider garnishing with fresh herbs for color.

10. Is Burrata Bruschetta gluten-free?

It is not inherently gluten-free, but you can opt for gluten-free bread options available in stores, ensuring that everyone can enjoy this delicious appetizer.

Additional Resources

To expand your culinary skills and explore variations, check out related recipes like Caprese Salad or Tomato Basil Pasta. Each offers a unique twist on the classic Italian flavors found in Burrata Bruschetta.

Additionally, consider diving into technique guides for perfecting homemade pesto, which pairs excellently with many Italian dishes, or explore ingredient information that further enhances your understanding of quality ingredients.

Equipment recommendations for kitchen tools that elevate your cooking experience can also be beneficial. Invest in a good set of knives and cutting boards, which are essential for slicing tomatoes and preparing fresh herbs.

Lastly, seasonal variations can enhance your cooking repertoire, encouraging you to adapt recipes based on local produce availability, optimizing taste and freshness.

Join the Conversation

We invite you to share your experiences with Burrata Bruschetta, whether it’s feedback on the recipe, your own variations, or beautiful photos of your creations on social media. Your insights foster community engagement, inspiring others to explore Italian cuisine.

Engage with fellow food lovers and share your culinary journey. Connect with us on social platforms where you can discover new tips, techniques, and delightful recipes.

Let’s celebrate the joy of cooking together, exploring how we can interpret classic dishes to express our unique flavors and styles in the kitchen. Your creativity and passion for food create a vibrant community, and we welcome you to be a part of it!

The Recipe

Burrata Bruschetta

Serves: 4

Prep Time: 15 mins

Cook Time: 10 mins

Total Time: 25 mins

Kitchen Equipment Needed

  • Baking sheet
  • Sharp knife
  • Mixing bowl
  • Spatula

Ingredients

  • 1 loaf of crusty Italian bread
  • 8 oz burrata cheese
  • 2 cups ripe cherry tomatoes, diced
  • 1/4 cup fresh basil, chopped
  • 2 tablespoons extra virgin olive oil
  • Salt and pepper to taste

Directions

  1. Preheat the oven to 400°F (200°C) and slice the bread into 1-inch thick pieces.
  2. Place the slices on a baking sheet and brush them lightly with olive oil.
  3. Toast the bread in the oven for about 5-7 minutes, or until golden brown and crispy.
  4. In a mixing bowl, combine the diced tomatoes, chopped basil, olive oil, salt, and pepper. Allow to sit for about 10 minutes.
  5. Once the bread is toasted, remove it from the oven and let it cool slightly.
  6. Assemble the bruschetta by placing a slice of burrata on each piece of toasted bread, followed by a spoonful of the tomato mixture on top.
  7. Drizzle with additional olive oil and sprinkle with more fresh basil if desired.
  8. Serve immediately and enjoy!

Recipe Notes

  • Feel free to experiment with different toppings for personalized bruschetta.
  • Make sure to use the freshest tomatoes you can find for the best flavor.
  • Any leftovers can be stored separately in the fridge and assembled just before serving.

Seared Tuna Salad with Radish and Citrus Vinaigrette Delight

Seared Tuna Salad with Radish, Finger Lime, and Citrus Vinaigrette: A Flavorful Delight

⚖️
Difficulty
Medium

⏲️
Prep Time
15 mins

🕒
Cook Time
10 mins

⏱️
Total Time
25 mins

🍽️
Servings
2-4

The Seared Tuna Salad with Radish, Finger Lime, and Citrus Vinaigrette is a culinary masterpiece that brings fresh, vibrant flavors to your plate. Imagine sinking your teeth into perfectly seared, pink tuna accompanied by the crisp crunch of radish and the zesty brightness of finger lime. Each bite is a tantalizing experience, with the unique sharpness of the radish harmonizing beautifully with the rich, buttery texture of the tuna. This salad is not just a meal; it’s an exploration of taste, texture, and artistry on a plate.

The addition of the citrus vinaigrette elevates this dish even further, offering a zingy contrast that enhances the tuna’s natural flavors. The salad is a fantastic option for a light lunch or a stunning dinner entrée that will impress guests at any gathering. With its striking visual appeal and complex flavor profile, it’s sure to be a show-stopper at your next dinner party.

Quick Recipe Highlights

  • Flavor Profile: This salad balances the umami notes of seared tuna with the bright acidity of citrus and the peppery bite of radish.
  • Texture: The tender tuna pairs perfectly with the crunchiness of fresh radish, while the vinaigrette adds a silky finish.
  • Aroma: Fresh herbs and citrus create a delightful aroma that entices your senses before you even take a bite.
  • Visual Appeal: With vibrant colors from the radish and finger lime, the salad is as eye-catching as it is delicious.
  • Skill Level Needed: While the techniques are simple, precise cooking is vital to achieve perfectly seared tuna.
  • Special Equipment: A sharp knife for slicing, a skillet for searing, and a citrus juicer for making the vinaigrette are essential.

Recipe Overview

  • Difficulty Level: Intermediate, ideal for those with some experience in cooking seafood and preparing salads.
  • Category: This dish falls under salads, seafood, and light meals, making it versatile for various occasions.
  • Cuisine: It blends elements of modern and fusion cuisines, highlighting fresh, quality ingredients.
  • Cost: The dish is budget-friendly, particularly if you source tuna from local markets or during sales.
  • Season: Best enjoyed in warmer months when fresh seafood and vibrant produce are at their peak.
  • Occasion: Perfect for casual get-togethers, picnics, or even formal dinners. It’s a showstopper that suits many events.

Why You’ll Love This Recipe

The Seared Tuna Salad with Radish, Finger Lime, and Citrus Vinaigrette is a delightful journey for your taste buds. The savory tuna, cooked to perfection, joins forces with peppery radish, creating a unique taste experience that is both refreshing and fulfilling. The zing from the finger lime adds an exciting twist, making every bite truly memorable. Additionally, the crunch of fresh vegetables enhances the dish’s textural appeal.

Convenience is another reason this salad shines. With a prep time of only 15 minutes and a quick 10-minute cook time, it’s easy to whip up without much fuss. The straightforward steps make this recipe perfect for busy weeknights or impromptu gatherings, allowing you to serve gourmet flavors with minimal effort.

Nutritionally, this salad packs a punch. Tuna is a fantastic source of lean protein and omega-3 fatty acids, which are beneficial for heart health. The fresh vegetables and vibrant citrus not only provide essential vitamins but also contribute to a healthy diet. With this dish, you enjoy great taste and nutritional benefits in one delightful bowl.

Socially, this salad is excellent for entertaining. Its striking presentation and exceptional flavors are sure to impress your guests, sparking conversation and admiration. Serve it at your next gathering to showcase your culinary skills while enjoying a delicious dish that everyone will love.

Cost-effectiveness makes this recipe even more appealing. While fresh tuna can be pricey, it’s possible to enjoy this dish without breaking the bank by purchasing from local seafood markets or opting for smaller portions. The ingredients are easy to find and can elevate any seafood dinner.

Historical Background and Cultural Significance

The origins of seared tuna can be traced back to the coastal regions of Japan, where it forms the basis of many traditional dishes. The Japanese method of searing and serving fish has influenced culinary practices across the globe, making it popular in various cuisines. Over time, seared tuna transitioned from a local delicacy to an international favorite, celebrated for its unique flavor and versatility.

Culturally, seared tuna is significant in regions where fishing is a central part of life, from the Mediterranean to Asia. The dish not only reflects the local culinary styles but also emphasizes the importance of fresh, seasonal ingredients. It celebrates the connection between food and community, highlighting the shared experience of cooking and eating together.

As the recipe evolved, chefs began to experiment with flavors and presentation, leading to varied adaptations, including salads, sushi, and gourmet entrées that blend modern ingredients with traditional techniques. The use of finger lime and radish in this salad exemplifies this evolution, combining the ocean’s bounty with garden-fresh veggies.

Regional variations have emerged, with different cultures incorporating local produce and herbs into their versions of seared tuna salads. This showcases the flexibility of the dish while honoring its historical roots, creating a fusion of flavors that speaks to the diverse culinary landscape.

Ingredient Deep Dive

Tuna is a star ingredient in this recipe, revered for its versatility and rich flavor. Often considered a delicacy, it has a long history in global cooking. Rich in omega-3 fatty acids, tuna promotes heart health and provides essential nutrients. When selecting tuna, opt for high-quality, fresh cuts, preferably from sustainable sources. Store it in the coldest part of your refrigerator and consume it within one to two days for optimal freshness.

Radishes add a delightful crunch and peppery flavor to the salad. They carry historical significance as staple vegetables across various cuisines, from Asian to European. Radishes are low in calories and rich in vitamin C, enhancing the nutritional profile of the dish. Look for firm, unblemished radishes and store them in a cool, dark place. They can last up to two weeks in the refrigerator.

Finger limes, native to Australia, contribute a burst of flavor and visual appeal. Known as “citrus caviar,” these unique limes contain tiny, juicy pearls that offer a tangy citrus flavor. They are rich in antioxidants and vitamins. Choose firm finger limes with vibrant skin, and store them at room temperature for short periods or refrigerated for longer shelf life. If unavailable, consider substituting with other citrus fruits.

Citrus vinaigrette brings the salad together, combining the sweet and tangy notes of various citrus fruits. Citrus fruits are integral to many cuisines, providing zest and brightness to dishes. They are rich in vitamin C and can boost immunity. Freshly squeezed juice makes the best vinaigrette, but bottled options work in a pinch. Store homemade vinaigrettes in the refrigerator and use them within a week.

Common Mistakes to Avoid

  • Overcooking the tuna: Removing the tuna from heat while still pink in the center ensures a tender, flavorful result.
  • Using low-quality fish: Fresh, high-quality tuna is essential for flavor and safety; opt for sushi-grade fish to guarantee freshness.
  • Neglecting to chill ingredients: Using chilled ingredients, especially the vinaigrette, elevates the overall experience of the salad.
  • Inadequate seasoning: Properly seasoning each layer of ingredients enhances flavors and prevents a bland salad.
  • Skipping marinade: Allowing the tuna to sit in the marinade infuses it with flavors, adding depth to each bite.
  • Thickly slicing the radishes: Thinly slicing radish ensures a pleasant crunch that doesn’t overpower the delicate flavors of the tuna.
  • Using stale ingredients: Ensure all components, particularly vegetables, are fresh to maximize flavor and texture.
  • Forgetting to balance flavors: Taste as you go, adjusting the vinaigrette for acidity and sweetness to suit your palate.
  • Not allowing the vinaigrette to sit: Allowing the vinaigrette to marinate for a few minutes helps the flavors meld together.
  • Overcrowding the pan: Cooking tuna in a single layer allows for proper searing and prevents steaming.

Essential Techniques

Searing is a vital technique for achieving the perfect crispy exterior while preserving the tender interior of the tuna. Master this by ensuring your pan is adequately preheated; a hot surface creates a beautiful crust. Avoid moving the tuna around too much, allowing it to form a golden crust. Look for visual cues, such as browning around the edges, indicating the fish is ready to turn.

Creating a vinaigrette requires proper emulsification, which combines oil and acid to create a smooth dressing. Start by whisking together the acidic component (citrus juice) with any seasonings, then slowly drizzle in oil while whisking vigorously. If done correctly, the mixture should thicken and maintain its consistency. A common pitfall is not using fresh ingredients, which can impact the overall flavor of the dressing.

Pro Tips for Perfect Seared Tuna Salad

1. Always use sushi-grade tuna for the best flavor and safety. It’s worth the extra cost for a superior dining experience.
2. Chill your serving platter in advance; this keeps the salad cool and enhances presentation.
3. When searing, avoid overcrowding the pan. Cook in batches if necessary to maintain the right cooking temperature.
4. Use a good quality oil for the vinaigrette; extra virgin olive oil adds richness and flavor.
5. Adjust the acidity of your vinaigrette based on your personal taste. Some prefer a tangier dressing—experiment to find your favorite balance.
6. Never skip marinating the tuna—this step infuses flavor and enhances the overall dish.
7. For added texture, consider topping the salad with nuts or seeds for a delightful crunch.
8. Serve the salad promptly after assembly to maintain the freshness of the ingredients.

Variations and Adaptations

Regional variations of this salad can incorporate local ingredients to enhance flavor. For instance, substituting avocado for radish adds creaminess, while the incorporation of local herbs can add unique tastes. Seasonal adaptations might include elements like grilled peaches for sweetness during summer months or roasted root vegetables in winter.

Dietary modifications can accommodate various preferences, such as substituting the tuna for grilled tofu or tempeh for a vegan option. For low-carb adherents, skip the carbohydrates by opting for non-starchy vegetables. Texture modifications, like using shaved vegetables instead of diced, can also create a different eating experience.

New flavor profiles can also be achieved by adding ingredients like sesame oil or wasabi to the vinaigrette, giving the salad a bold twist. Play with presentation by arranging the ingredients in layers or using different colors of radish for striking visual interest.

Serving and Presentation Guide

Plating the Seared Tuna Salad can elevate its appeal. Use a large, shallow bowl to arrange the salad artistically, allowing each ingredient to shine. Drizzling the vinaigrette artistically on top livens up the presentation. Garnish with fresh herbs like cilantro or microgreens for a pop of color.

Consider traditional accompaniments like wasabi or pickled ginger to accompany the dish. Alternatively, serve it alongside quinoa or brown rice for a satisfying meal. Temperature plays a crucial role; ensure the salad is served chilled to enhance freshness. Lastly, portion control is key; allow servings that highlight the quality of the ingredients rather than overwhelming the guest’s palate.

Wine and Beverage Pairing

For wine pairings, consider a crisp white wine like Sauvignon Blanc, which complements the freshness of the tuna and vinaigrette. A light-bodied Pinot Grigio serves as another excellent choice, echoing citrus notes. For a more adventurous palate, try a dry rosé, which adds subtle fruitiness.

For non-alcoholic alternatives, a sparkling water infused with lemon or lime mirrors the citrus elements in the salad beautifully. Additionally, matcha tea can serve as a refreshing accompaniment, balancing the dish’s richness and acidity. Ensure beverages are chilled before serving, maintaining harmony with the salad’s temperature.

Storage and Shelf Life

Proper storage of Seared Tuna Salad is vital for maintaining its freshness. Store leftovers in an airtight container in the refrigerator and consume within one to two days. Tuna is best enjoyed fresh, but if necessary, salads can be reheated gently on low heat to retain moisture and flavor.

Ensure the salad remains at a safe temperature; ideally, it should be kept below 40 degrees Fahrenheit. Check for signs of spoilage, like off smells or discoloration, before consuming leftovers. If freezing leftover tuna, ensure it’s wrapped tightly to prevent freezer burn, and consume within three months for optimal taste.

Make Ahead Strategies

Preparing Seared Tuna Salad in advance can save time while ensuring flavor. Marinate the tuna the night before to infuse flavors. You can also make the vinaigrette a day in advance, allowing the ingredients to meld together. Store separately to maintain texture until serving.

Chopping the vegetables ahead and keeping them in the refrigerator allows for a quick assembly when ready to serve. Ensure any prepped ingredients are stored in airtight containers to retain their freshness. Adding fresh elements, like herbs, right before serving enhances the salad’s vibrant profile.

Scaling Instructions

When halving the recipe, adjust the cooking time accordingly, particularly for the tuna to prevent overcooking. If doubling or tripling the recipe, ensure you have sufficient cooking equipment; larger batches may require you to sear in multiple rounds to achieve the right crust.

Consider the cooking method when scaling; a larger skillet or two smaller ones may be necessary to maintain adequate heat. Lastly, adjust storage considerations based on larger quantities, ensuring containers are appropriately sized to keep ingredients fresh.

Nutritional Deep Dive

Seared Tuna Salad is not only delicious but also packed with nutrition. A typical serving provides ample protein, contributing to muscle health and energy maintenance. With low carbohydrates, this dish is a great option for those managing their carbohydrate intake.

Micronutrient analysis reveals beneficial vitamins and minerals from the fresh vegetables—radishes contribute vitamin C while finger limes provide antioxidants. This dish supports a balanced diet and promotes overall well-being. Portion control can help manage caloric intake, making it a suitable option for those watching their diet.

Dietary Adaptations

For gluten-free eaters, this recipe is naturally gluten-free, ensuring everyone can enjoy it without worries. Dairy-free options are also a staple here, as the salad doesn’t rely on dairy-based dressings or components. For vegans, replace the seared tuna with marinated tofu or tempeh to create a satisfying alternative.

Low-carb adaptations can include swapping added carbs for more vegetables, thus maintaing the salad’s integrity while aligning it with dietary preferences. Those following keto or paleo diets will also find this dish compatible, focusing on fresh proteins and healthy fats.

Troubleshooting Guide

Addressing texture issues can often involve overcooking the tuna. If this happens, consider cutting the tuna into smaller pieces to mix into salads or serve it alongside rice to create a wholesome entrée.

Flavor balance is vital, so if the salad tastes bland, adding more seasoning or adjusting the vinaigrette could enhance the dish considerably. For cooking temperature problems, ensure the skillet is adequately preheated before adding the fish; this allows for a natural sear.

If using equipment challenges arise, have a backup plan—if the skillet isn’t large enough, sear the tuna in batches to maintain cooking quality. For ingredient substitutions, maintain the essence of the dish while switching due to availability or dietary restrictions, like using sesame oil for flavor enhancement.

Recipe Success Stories

Home cooks have shared their joy in making the Seared Tuna Salad with Radish, Finger Lime, and Citrus Vinaigrette. Many highlight the ease of preparation, which allows them to impress guests without spending hours in the kitchen. Others have adapted the recipe using available local ingredients, showcasing their creativity and personal taste.

Community feedback often mentions the freshness and vibrancy of flavors, drawing enthusiastic compliments during gatherings. Readers also share tips for perfecting the dish, such as unique plating techniques and garnishing ideas, helping others improve their culinary achievements.

Photography tips for capturing this dish include shooting it in natural light and from different angles to highlight its vibrant ingredients. Such storytelling through imagery has encouraged many to recreate the recipe and share their culinary successes.

Frequently Asked Questions

Can I use frozen tuna for this salad? While it’s best to use fresh tuna for optimal flavor, sushi-grade frozen tuna can be used if thawed properly. Ensure it’s completely defrosted and has been stored correctly before cooking.

What if I can’t find finger limes? If finger limes are unavailable, substitute with regular limes or lemon zest. While the flavors differ slightly, they will still provide a fresh and zesty component to the salad.

How do I know when the tuna is perfectly seared? Look for a golden-brown crust on the outside, while the center should remain pink. Use a meat thermometer to ensure it’s cooked to your preferred doneness.

Can this salad be made ahead of time? Yes! You can prepare the vinaigrette and chop vegetables ahead of time; however, it’s best to sear the tuna right before serving to maintain its texture.

Is this recipe suitable for meal prep? Yes, the Seared Tuna Salad is great for meal prep. Store ingredients separately to maintain freshness and assemble just before eating.

What is the best way to slice the tuna for the salad? Use a sharp knife and slice the tuna against the grain into thin, evenly sized pieces for the best texture and presentation.

Can I substitute the salad for other greens? Absolutely! Feel free to use spinach, arugula, or mixed greens for a different flavor profile while maintaining the essence of the dish.

How should I serve the salad for a dinner party? For dinner parties, consider serving in elegant bowls with the vinaigrette drizzled on top, garnished with fresh herbs for a sophisticated look.

Can I add other proteins to the salad? Definitely! Adding shrimp or grilled chicken can enhance the salad’s protein content and provide variety with little effort.

What side dishes pair well with this salad? This salad pairs very well with light sides like grilled asparagus, citrus quinoa, or a fresh vegetable platter for a refreshing meal.

Additional Resources

Explore related recipes that celebrate fresh flavors and showcase seafood, such as grilled salmon with seasonal veggies or a summer citrus shrimp salad. Technique guides can help you master the art of searing and preparing fresh cuts of fish, ensuring delicious meals every time.

For ingredient information, delve deeper into the benefits and uses of seafood in various dishes. Equipment recommendations can assist you in finding tools that enhance your cooking experience, such as high-quality knives or pans perfect for searing.

Lastly, seasonal variations inspire you to adapt this salad to feature fresh, local produce available at different times of the year, creating a dish that evolves with the seasons.

Join the Conversation

We invite you to share your experiences making the Seared Tuna Salad with Radish, Finger Lime, and Citrus Vinaigrette. Connect with us on social media to share pictures of your culinary creations and variations of this beloved recipe.

Engage with our community to exchange photography tips or offer thoughts on your improvisations. Your feedback is valuable, and we love hearing about how you’ve made this recipe your own while creating delicious memories around the table.

The Recipe

Seared Tuna Salad with Radish, Finger Lime, and Citrus Vinaigrette

Serves: 2-4

Prep Time: 15 mins

Cook Time: 10 mins

Total Time: 25 mins

Kitchen Equipment Needed

  • Skillet or frying pan
  • Sharp knife
  • Cutting board
  • Whisk or jar for vinaigrette
  • Airtight containers for storing ingredients

Ingredients

  • 2 sushi-grade tuna steaks (about 6 oz each)
  • 2 tablespoons olive oil
  • 1 bunch radishes, sliced thin
  • 1 finger lime, zest and juice
  • 2 cups mixed greens or arugula
  • Salt and pepper to taste
  • For the vinaigrette:
  • 3 tablespoons olive oil
  • 2 tablespoons fresh citrus juice (lemon or lime)
  • 1 teaspoon honey or agave syrup (optional)
  • Salt and pepper to taste

Directions

  1. In a bowl, whisk together the vinaigrette ingredients. Set aside.
  2. Heat olive oil in a skillet over high heat until shimmering.
  3. Season the tuna steaks with salt and pepper on both sides. Carefully place them in the skillet.
  4. Sear for 2-3 minutes on each side for medium-rare, adjusting time for desired doneness.
  5. Remove tuna from heat and let rest for a minute before slicing.
  6. On a serving platter, arrange the mixed greens, sliced radishes, and seared tuna.
  7. Drizzle the vinaigrette over the salad and garnish with finger lime zest.

Recipe Notes

  • For an extra crunch, consider adding toasted nuts or seeds as a topping.
  • If you prefer a spicier kick, add a sprinkle of red pepper flakes to the vinaigrette.
  • This salad can be served chilled or at room temperature, making it a perfect option for gatherings.
  • Leftover ingredients can be mixed into a wrap for a delicious lunch the next day.

Easy and Delicious Zesty Baked Lemon Garlic Cod Recipe

Zesty Baked Lemon Garlic Cod: Bursting With Flavor and Freshness

⚖️
Difficulty
Easy

⏲️
Prep Time
15 mins

🕒
Cook Time
20 mins

⏱️
Total Time
35 mins

🍽️
Servings
4

The Zesty Baked Lemon Garlic Cod is a show-stopper of a dish that perfectly encapsulates the fresh, simple flavors of Mediterranean cuisine. It’s light, flaky, and infused with the bold flavors of garlic and lemon. Each bite is a burst of vibrant zestiness, ideal for spring and summer meals. This dish is a surefire way to bring people together over its inviting aroma and irresistible taste. Perfect for both weeknight dinners and special occasions, this recipe makes cod a star ingredient in every way.

There’s something profoundly comforting about the simple, yet flavorful combination of tangy lemon and aromatic garlic coupled with succulent cod. The Zesty Baked Lemon Garlic Cod is not only delicious, but it also speaks to those who appreciate the art of home-cooking. Crafted with minimal ingredients yet packed with flavor, this dish is designed for cooks at all levels who wish to deliver gourmet results.

Quick Recipe Highlights

  • Flavor Profile: The citrusy tang of lemon paired with the sweet, pungent notes of freshly minced garlic makes for a delightful combination.
  • Texture: The cod is tender and flaky, providing a juicy, light experience that melts in your mouth.
  • Aroma: The baked dish releases a fragrant melody of lemon and garlic, perfect for igniting the senses.
  • Visual Appeal: Golden-brown edges surround the pristine white flesh of the cod, accented with bright lemon slices and herbs.
  • Skill Level Needed: This recipe is beginner-friendly, requiring basic skills to master the oven-baked method successfully.
  • Special Equipment: An oven and a baking dish are all you need, making this a fuss-free endeavor.

Recipe Overview

  • Difficulty Level: Perfect for beginners, this recipe involves straightforward techniques such as chopping, zesting, and baking.
  • Category: This dish can be served as a main course, fitting seamlessly into any meal rotation.
  • Cuisine: Inspired by Mediterranean flavors, it blends fresh ingredients known for their health benefits and delightful taste.
  • Cost: Moderate, as it involves simple ingredients like cod, lemon, and garlic, which are easily sourced and affordable.
  • Season: Ideal for warmer months when light, refreshing flavors are in demand, though enjoyable year-round.
  • Occasion: Suitable for casual family dinners, entertaining, or even as part of a festive spread.

Why You’ll Love This Recipe

The Zesty Baked Lemon Garlic Cod captures the essence of simple yet sophisticated dining. Its taste and texture are unparalleled, offering a delightful contrast between the flaky cod and the acidity of lemon. The entrancing aroma of garlic and herbs envelops your kitchen, enticing everyone around. This recipe provides convenience as its preparation is minimal, letting your oven do the heavy lifting.

Nutritionally, this dish ticks many boxes. Cod is a lean protein rich in essential nutrients and low in calories, making it an excellent choice for health-conscious eaters. Combined with lemons, garlic, and herbs, you gain a robust dish packed with antioxidants and vitamins without added sugars and fats.

Socially, this dish is a conversation starter, whether you’re hosting an intimate dinner or a larger gathering. Its vibrant presentation and bold flavors elicit compliments and spark discussion. Economically, it’s a smart choice—lean and nutritious without breaking the bank, accessible to home cooks wanting to explore new tastes without the need for exotic ingredients.

Historical Background and Cultural Significance

Cod has been a staple in various cuisines, revered for its versatility and nutrition. This dish pulls from centuries of Mediterranean cookery, where seafood thrives within local staples. Lemon and garlic, foundational in these traditions, add layers of timeless notes remembered through generations. Historically, these ingredients represent health and prosperity, commonly used in recipes passed down from family kitchens to modern culinary stages.

Over time, the recipe evolved from being cooked over an open flame to refined oven-baked techniques, which preserve nutrients and enhance aroma. Variants have emerged, reflecting regional twists on a classic pairing, but all capture the base pleasures of simplicity.

Ingredient Deep Dive

Cod, renowned for its mild flavor and firm flesh, provides the canvas upon which the other ingredients shine. Historically, cod has been globally revered, with rich cultural ties to both Northern European diets and broader maritime cuisines. Nutritionally, it’s high in protein, selenium, and vitamins B6 and B12, promoting heart health and metabolic boosts.

Lemons are nearly synonymous with Mediterranean culinary practices. Their tartness is essential to cutting through rich flavors, balancing dishes. Nutritionally, lemons are vital sources of vitamin C and flavonoids, which improve digestive health and clear skin. Storage involves keeping them cool and dry, and when selecting, choose vibrant, firm lemons.

Common Mistakes to Avoid

  • Using poor-quality fish can compromise flavor—ensure your cod fillets are fresh.
  • Overcooking can lead to dry results; keep an eye on suggested baking times.
  • Under-seasoning renders the dish bland; be generous with salt and pepper to taste.
  • Avoid skipping lemon zest; it significantly lifts the aromatic profile.
  • Neglecting pre-heating leads to uneven cooking; proper oven temperature is key.
  • Using too much oil can leave the dish greasy, overshadowing delicate cod nuances.
  • Improper baking dish size may result in uneven cooking by crowding fillets.
  • Failing to rest after baking: allow dish moments to settle for enhanced flavor development.

Essential Techniques

Ensuring each fillet is coated with a lemon-garlic mix is pivotal, allowing flavors to seep into the crevices of the fish. Master this by using a spoon or brush to cover every inch of your cod before baking. Baking at the right temperature gives the cod its signature flaky texture and golden finish. Watch for visual cues—opaque white coloring indicates completion, and resist over-baking to maintain moisture.

Pro Tips for Perfect Zesty Baked Lemon Garlic Cod

Enhance flavors by marinating your fish briefly before baking, drawing out deep citrus and herb essence. For crispy edges, consider broiling the fish in the final minutes. To balance the boldness of garlic and lemon, pair with a subtly seasoned side like steamed vegetables or a simple salad. Experiment with fresh herbs, such as dill or basil, as an optional topping for added aromatic depth. Always pat your fillets dry to ensure optimal seasoning adherence. Embrace variations by incorporating capers for an added briny kick.

Variations and Adaptations

Regional variations might see additions like olives or tomatoes to evoke the sun-soaked fields of Southern Europe. As seasons change, swap lemon for oranges for a milder twist. Dietary shifts, such as gluten-free, require no adaptations, but keto diners may decrease lemon juice, focusing on fats such as olive oil and nuts as toppings. Modulate flavor by increasing spice levels using paprika or cayenne to depart from traditional tones. Adjust textures through cooking time, offering a less flaky, moist result with a reduced bake. When presenting, elevate its appearance with microgreens or a drizzle of herb-infused oil for a modern twist.

Serving and Presentation Guide

For the perfect plating, use a bright, contrasting plate to make the white cod and lemon slices pop. Drizzle with olive oil and garnish with parsley or dill. Serve with traditional sides like roasted vegetables or couscous. For a modern take, consider pairing with a vibrant quinoa salad or an herbaceous sauce like chimichurri. Temperature should be warm but not hot for optimal flavor retention. Ensure portions are generous, highlighting the cod’s tender flake and citrus aroma in every bite.

Wine and Beverage Pairing

Pair this lemony cod with a crisp, dry white wine such as Sauvignon Blanc, which complements the dish without overwhelming it. Alternatively, a non-alcoholic citrus-infused sparkling water or a homemade lemon-herb iced tea can refresh the palate. If coffee or tea is preferred, opt for a light-bodied flavor, such as green tea, which will cleanse and invigorate. Maintain served temperature aligned with dish warmth for harmony, and offer chilled serving glasses to elevate the occasion.

Storage and Shelf Life

After cooking, store leftovers in an airtight container, refrigerating for up to two days. Keep it on the top shelf where temperatures are most consistent. Adjust any containers to allow moisture escape during reheat to protect integrity. Signs of spoilage include off aromas or slimy textures, indicators that the dish has surpassed its prime. When reheating, do so gently in the oven to avoid rubbery texture. Although suitable for freezing, defrost fully before reheating to prevent mushiness.

Make Ahead Strategies

To prepare ahead, zest lemons and mince garlic up to a day in advance, storing separately in airtight containers. Cod fillets can be marinated for up to four hours. Store in a single layer to avoid compression. Upon assembly, bring all ingredients to room temperature prior to baking for a uniform result. Reheat at moderate temperatures to preserve moisture, and garnish fresh to maintain vivid color and minty citrus notes.

Scaling Instructions

When halving the recipe, adjust the lemon and garlic proportionally to maintain flavor balance. For doubling or tripling, ensure a larger oven space or multiple baking dishes to handle the increased cod volume. Timing may vary slightly; maintain even spacing. Storage between batches is crucial; maintain cooked sections in a warm oven until all are complete. Reserve extra garnish for a final touch before serving.

Nutritional Deep Dive

Each serving contributes a balanced array of macronutrients; protein from cod, healthy fats from extra virgin olive oil, and flavor without excess calories. Key micronutrients include immunity-boosting vitamin C from lemons. The dish complements dietary pursuits focused on omega-3 intake, lean muscle maintenance, and low-sodium diets. Proper portions of cod allow for weight management, aligning with weekly dietary frameworks. Enjoy with moderation and as part of a balanced eating plan.

Dietary Adaptations

The dish naturally suits gluten-free diners, with lemon and garlic offering bold alternative flavors without breading. For dairy-free, vegan recipes, adjust toppings rather than the main components, maintaining integrity via plant-based proteins like tofu. Implement low-carb ideas by reducing lemon juice and integrating oil-rich substitutes like avocado. Keto variants favor herbs like rosemary for additional aromatic appeal. Low-FODMAP adjustments could omit garlic, introducing scapes or greens as flavor retainers.

Troubleshooting Guide

For an under-flavored cod, ensure garlic is generously applied over fillets. If consistency isn’t flaky, it may be undercooked; delicate timing around visual cues aids crisp results. Baking temperatures should be verified for uneven cooking, while alternate ingredient substitutions such as lemon-for-lime demand consideration of zesty nuances. Should preparation timing overwhelm, pre-organizing steps into manageable, sequential tasks maintains flow. For ingredient unavailability, simplicity in substitution—herbs for herbs—offers flexibility.

Recipe Success Stories

Readers around the globe have shared their successes with our Zesty Baked Lemon Garlic Cod. Anecdotes range from family praises at festive dinners to casual weekend cookouts where the dish stole the spotlight. Photography tips from our community reveal that natural lighting beyond flash captures the dish’s alluring colors best. Community feedback reiterates the adaptability of the recipe; from additional herbs to spice-infused adventures, culinary creativity is celebrated.

Frequently Asked Questions

Can I use frozen cod for this recipe?

Yes, frozen cod works well. Ensure it’s fully thawed and patted dry before seasoning to achieve the desired texture and flavor.

What if I don’t like garlic?

Garlic can be reduced or omitted, though it contributes significantly to the dish’s flavor. Consider substituting with shallots or scallions for milder notes.

How do I prevent the cod from sticking to the baking dish?

Using parchment paper or a light coating of olive oil prevents sticking while maintaining the fish’s integrity.

Can I cook this dish on the grill?

Absolutely! Use a grill-friendly dish and monitor cooking closely, as it may require less time than baking depending on grill settings.

What should I serve alongside?

Pair with a fresh salad, quinoa, or steamed vegetables to complement the flavors. A starch like rice or potatoes works well too.

How do I store leftovers?

Leftovers should be refrigerated in an airtight container, consumed within two days for best results. Reheat gently to retain texture.

Can I use a different type of fish?

Fish types like halibut or haddock are excellent alternatives. Cooking times may vary slightly based on thickness and density.

What wine pairs well?

Select a citrus-forward white, such as Sauvignon Blanc or Pinot Grigio, to sync with the lemony notes of the dish.

How do I know when the cod is fully cooked?

A fully cooked cod will be opaque and easily flake under gentle pressure with a fork.

Is it necessary to use fresh lemon juice?

While fresh lemon juice is preferred for its vibrant taste, bottled lemon juice can be a substitute if necessary.

Can this dish fit into a low-sodium diet?

Certainly; control salt quantities and use herbs like dill or parsley to elevate flavors without additional sodium.

Additional Resources

Explore our collection for complementary dishes like classic Mediterranean sides, fresh salad recipes, and seafood cuisines that elevate the culinary experience. Technique guides on perfecting lemon zest and achieving optimal cooking temperatures may enhance your kitchen prowess. For seasonal ingredient recommendations, turn to our database connecting fresh market picks with creative kitchen solutions. Equipment like specialized fish spatulas ensures the cooking and serving of delicate fillets with ease and precision.

Join the Conversation

Join us in celebrating culinary excellence by sharing your Zesty Baked Lemon Garlic Cod adventures on social media, with hashtag #LemonGarlicCodMagic. Exchange great photography insights and recipe reviews among a community of fellow enthusiasts. Inspire others by introducing your unique variations and record findings for collective learning. Let’s savor the joys of kitchen creativity together through shared insights and delicious discoveries.

The Recipe

Zesty Baked Lemon Garlic Cod

Serves: 4

Prep Time: 15 mins

Cook Time: 20 mins

Total Time: 35 mins

Kitchen Equipment Needed

  • Baking dish
  • Oven
  • Cutting board
  • Knife
  • Zester or grater

Ingredients

  • 4 cod fillets (about 6 ounces each)
  • 1 lemon, zested and juiced
  • 4 cloves garlic, minced
  • 2 tablespoons olive oil
  • Salt and pepper to taste
  • Fresh parsley, for garnish
  • Lemon slices, for garnish

Directions

  1. Preheat your oven to 400°F (200°C).
  2. In a small bowl, mix lemon juice, lemon zest, minced garlic, olive oil, salt, and pepper.
  3. Place cod fillets in a baking dish and pour the lemon garlic mixture over them.
  4. Bake in the preheated oven for 15-20 minutes or until the fish flakes easily with a fork.
  5. Garnish with fresh parsley and lemon slices before serving.

Recipe Notes

  • If desired, substitute cod with haddock or halibut.
  • Add a pinch of red pepper flakes for a hint of heat.
  • Pair with a light salad or steamed vegetables for a complete meal.

Irresistible Crunchy Ritz Butter Chicken Delight: A Must-Try Recipe

Crunchy Ritz Butter Chicken Delight: A Crispy, Flavorful Twist on Classic Favorites

⚖️
Difficulty
Easy

⏲️
Prep Time
15 mins

🕒
Cook Time
30 mins

⏱️
Total Time
45 mins

🍽️
Servings
4

Crunchy Ritz Butter Chicken Delight brings together the succulent tenderness of chicken with a crispy Ritz cracker coating that’s baked to perfection. This easy recipe promises a mouthwatering experience with its buttery notes and golden crunch, making it a great choice for family dinners or casual get-togethers. The rich buttery aroma fills the kitchen, promising a delightful dining experience full of texture and flavor.

Using Ritz crackers for the breading provides an innovative twist to traditional fried chicken recipes, catering to those who love a good crunch without the usual frying mess. It’s not just the crunch that wins here, but the harmonious blend of buttery richness and subtle seasoning that makes every bite irresistible, which is why Crunchy Ritz Butter Chicken Delight is increasingly popular in home kitchens.

Quick Recipe Highlights

  • Flavor Profile: A delightful mix of buttery, savory, and slightly tangy flavors that blend perfectly in each bite.
  • Texture: Expect a crispy outer layer with a juicy and tender chicken inside, offering a perfect contrast.
  • Aroma: The buttery fragrance combined with the seasoning’s subtle spice creates an inviting aroma.
  • Visual Appeal: Golden-brown crust gives a visually appealing presentation that ignites the appetite.
  • Skill Level Needed: Simple enough for beginners, with straightforward steps ensuring success for all cooks.
  • Special Equipment: A baking sheet and a food processor (or a plastic bag and rolling pin) for crushing crackers.

Recipe Overview

  • Difficulty Level: This is rated as an easy recipe, making it accessible to new cooks while being efficient for seasoned chefs due to its straightforward steps and minimal preparation.
  • Category: Ideal for a dinner main course but adaptable enough for casual lunch settings or as part of a larger buffet spread.
  • Cuisine: While echoing the essence of Southern comfort food, it introduces a modern twist with its unique coating choice.
  • Cost: Relatively cost-effective, utilizing common pantry ingredients and affordable chicken breast, making it suitable for budget-conscious families.
  • Season: Perfect for all seasons due to its basic ingredients, but particularly comforting during colder months when warm, hearty meals are cherished.
  • Occasion: Great for everyday meals yet special enough for gatherings, offering comfort and enjoyment to all tables.

Why You’ll Love This Recipe


Crunchy Ritz Butter Chicken Delight offers an exquisite balance of taste and texture that will captivate your taste buds. The Ritz cracker coating provides an unparalleled crunch that compliments the juicy chicken perfectly. Its subtle buttery notes blend seamlessly with hints of garlic, onion, and a mix of herbs that ensure a delightful dining experience.

Convenience is another key highlight. This recipe’s simplicity requires minimal preparation time and uses ingredients typically found in a standard pantry. With just 15 minutes of prep and a short oven cook time, it’s an ideal choice for nights when you’re craving a delectable meal in a flash without excessive effort.

Healthier than traditional fried chicken, Crunchy Ritz Butter Chicken Delight is baked instead of fried, reducing the oil content significantly. Additionally, using lower-fat alternatives for butter can make it an even lighter option, ensuring a tasty indulgence without any guilt.

Serving this dish at gatherings can elevate any dinner party, making it a conversation starter due to its unique twist on the classic chicken entrée. It not only leaves guests satisfied but pleasantly surprised by its distinctive taste and presentation, forging a memorable meal shared with loved ones.

Considering the cost-effectiveness of this dish, it brilliantly combines affordability with gourmet appeal. With accessible ingredients, you don’t have to compromise on quality or taste, providing a luxurious homemade meal that won’t break the bank.

Historical Background and Cultural Significance


Originating from the need to create a quick yet succulent chicken meal, the Crunchy Ritz Butter Chicken Delight has a storied place in culinary experimentation. Its creation is a testament to the innovation within home cooking, as chefs sought ways to infuse classic comfort with new textures.

Culturally, this dish subtly bows to Southern roots where Ritz crackers have often been used in casseroles or as pie crusts, adding a novelty that brought the familiar Ritz crunch to a center stage role in a hearty chicken dish. This coupling of crunchy exterior with the comfort of baked chicken speaks volumes to the adaptability observed in American home kitchens.

The recipe has evolved over time with regional adaptations including optional seasonings and modifications that reflect local flavors and ingredients available, making this dish a versatile staple across homes. From spicy Southern versions to more mellow Midwest takes, each variation pays homage to its original format while highlighting local preferences.

Its popularity has led to several regional variations, including spicy versions with cayenne or paprika and healthier adaptations using whole wheat crackers or gluten-free alternatives, each iteration blending tradition with contemporary tastes. This flexible dish maintains its backbone while inviting personalized creativity.

Ingredient Deep Dive


Chicken is the star ingredient, chosen for its versatile taste and health benefits. Rich in protein and low in fat, chicken is essential for muscle growth and repair. When selecting, fresh, organic chicken breasts are recommended for the best flavor and nutritional profile, storing them in the refrigerator and using within a couple of days for peak freshness.

Ritz crackers are renowned for their iconic buttery flavor, which imparts a rich taste that’s both comforting and welcoming. Originally used as a snack, their role in this recipe transforms them into an affordable gourmet breading option. Always store Ritz crackers in a cool, dry place to maintain their crispness until ready for use.

Use real butter for its authentic flavor, providing essential fat and a smell that enhances the sensory experience of cooking. For a healthier take, consider using a blend of real butter and its low-fat counterpart to maintain flavor while reducing calorie intake. Store butter in the refrigerator, ensuring it’s wrapped well to prevent absorption of other odors.

To round off the flavors, a dash of garlic powder, onion powder, and an assortment of dried herbs such as thyme or parsley is recommended. These seasonings offer depth without overwhelming the natural flavors. Ensure all spices are stored in a cool, dark place to retain their potency and use within a year of purchase for optimal freshness.

Common Mistakes to Avoid

  • Skipping the cracker crushing process might lead to an uneven coating. Ensure they’re finely crushed for a uniform crust.
  • Using skin-on chicken can disrupt texture; always choose skinless for a better coating adherence.
  • Over-cooking will dry out the chicken. Keep an eye on the oven timer to maintain juiciness.
  • Not preheating the oven can result in uneven cooking, so make sure it reaches the right temperature before baking.
  • Skipping the butter drizzle could lead to a lack of flavor depth; don’t skimp on the buttery glaze.
  • Using flavored crackers might overpower the dish. Stick to original Ritz for the intended flavor profile.
  • Overcrowding the baking sheet can lead to inconsistent baking; maintain space between pieces.
  • Not using a non-stick spray or parchment paper can lead to sticking; always prep your baking dish properly.

Essential Techniques


Crushing the crackers is a crucial step that requires a fine consistency for an even coating. Use a food processor or crush them manually using a rolling pin while the crackers are inside a sealed bag. This ensures that the coating adheres well and cooks evenly, avoiding large chunks that could create imbalances in texture.

Drizzling butter over the coated chicken before baking is essential for achieving that golden-brown finish and adding moisture. Melt butter until just liquid and use a spoon to evenly drizzle over each piece, ensuring the cracker coating absorbs this buttery richness. This technique distributes the buttery flavor perfectly, enhancing the overall taste profile.

While baking, ensure the chicken is arranged in a single layer on the baking sheet. Crowding the pieces can lead to steaming rather than baking, which affects the final crunch. Keep a small space between each piece for optimal airflow and even cooking. Watch for visual cues such as a golden-brown color to indicate doneness alongside internal temperature checks.

Pro Tips for Perfect Crunchy Ritz Butter Chicken Delight


For a gluten-free version, substitute Ritz crackers with gluten-free crackers or almond meal for a similar crunchy effect that accommodates dietary restrictions. This adaptation ensures flavor integrity while being inclusive for those with gluten sensitivities.

Enhance the seasoning with herb-infused butter, adding fresh or dried herbs like rosemary or sage to the melted butter before drizzling. This infuses the chicken with aromatic notes that pair beautifully with its buttery core. Experimenting with herbs can personalize the dish to suit your palate.

For an extra crispy finish, double-coat the chicken by dipping it in a milk or egg wash between two layers of cracker crumb coating. This additional step amplifies the crunch factor, particularly beneficial for those seeking an ultra-textured experience.

Let the chicken rest for a few minutes after baking before slicing. This resting period allows the juices to redistribute, retaining moisture and flavor when cutting into the chicken. It also ensures the crust remains intact during serving.

If you prefer a lighter version, replace some of the butter with olive oil. This provides a different health profile while maintaining moisture and aiding the crisping process. Olive oil subtly shifts the flavor profile, offering a Mediterranean touch.

Pair this dish with a simple green salad dressed with lemon vinaigrette. The acidity from the vinaigrette complements the richness of the chicken, creating a balanced meal that’s both satisfying and fresh.

Variations and Adaptations


Regional variations can include spices native to your area, such as Cajun spice mix for those who love some heat, or Italian herbs for a Mediterranean spin. These adaptations respect local palates while maintaining the dish’s core essence.

During summer, lighten the dish by adding lemon zest to the cracker crumbs before baking; its citrus brightness lifts the flavors and adds a warm-weather suitability more suitable for al fresco dining experiences.

Opt for dietary modifications by utilizing low-fat Ritz crackers or a low-calorie butter substitute. These tweaks lower the overall fat content, making the dish more aligned with low-fat diets without compromising taste.

Enhance flavor with a marinade of yogurt and spices like cumin and coriander before applying the cracker coating. This Indian-inspired twist adds depth and complexity, suitable for adventurous eaters seeking new taste horizons.

To modify texture, finely crush half the crackers and coarsely crush the rest, offering a varied crumb structure that enhances tastebuds’ attention with every bite. Textural play elevates the dining experience, adding intrigue and enjoyment.

For the presentation, use a circular mold to stack the chicken sliced into rounds, creating a tiered effect that impresses visually. Garnish with fresh parsley or fried shallots to add layers of visual and taste appeal.

Serving and Presentation Guide


Plating this dish with a side of roasted vegetables not only supplements the nutritional value but offers a vibrant color palette that enhances visual appeal. Choose brightly colored veggies like bell peppers or carrots for contrast.

Garnishing ideas include sprinkling chopped fresh herbs such as parsley or chives over the plated chicken just before serving, adding a pop of color and a hint of freshness that complements the buttery richness of the chicken.

Traditional accompaniments like mashed potatoes or rice pilaf offer a comforting base that absorbs the chicken’s juices and complements its flavors, enhancing the dining experience by intertwining textures and tastes.

For a modern twist, serve the chicken atop a bed of leafy greens drizzled with a light citrus vinaigrette, balancing the richness of the chicken with refreshing, crisp greens. This pairing capitalizes on contrasts in flavor and mouthfeel.

Temperature considerations favor serving the chicken warm but not hot, allowing the flavors to shine without overwhelming the palate. Resting the chicken for a few minutes post-baking aids in reaching the ideal serving temperature.

Control portion sizes by serving smaller, evenly-sized pieces of chicken, especially in a buffet setting, ensuring guests can comfortably enjoy the dish alongside other offerings without overcommitting on one entree alone.

Wine and Beverage Pairing


A crisp Chardonnay pairs beautifully with Crunchy Ritz Butter Chicken Delight, its light oak notes melding sweetly with the buttery chicken flavor, while the wine’s acidity cuts through the richness for a palate-cleansing effect.

Non-alcoholic alternatives include a sparkling apple cider or a bright, fruity lemonade which echoes the dish’s citrus undertones, providing a refreshing counterpoint to the savory richness that adults and children alike can enjoy.

For coffee or tea pairings, a light herbal tea with floral notes such as chamomile or a mild green tea complements the chicken without competing, offering a soothing conclusion to a hearty meal.

Serve beverages at a slightly chilled temperature to reset the palate after each bite, enhancing the meal’s flavor dynamics by bridging the balance between savory richness and refreshing beverage clarity.

Ensure serving glasses are clean and free from any lingering aftertastes that could detract from the delicate interplay between flavors, providing an optimal sensory experience across taste, smell, and visual engagement.

Storage and Shelf Life


Store any leftover Crunchy Ritz Butter Chicken Delight in an airtight container in the refrigerator to maintain freshness, ideally consuming it within 3 to 4 days for the best quality. This short storage window ensures optimal taste and safety.

Consider temperature requirements, ensuring storage consistent at a temperature below 40°F (4°C) to preserve food safety and prevent spoilage that could affect flavor and texture negatively.

Use containers with a tight seal to avoid contamination and retain moisture, enabling the chicken to stay tender without drying out. Plastic or glass containers are both suitable for maintaining the recipe’s quality over short storage times.

Signs of spoilage to watch for include an off-odor, change in color, or unusual texture, indicating the chicken should not be consumed. These markers ensure food safety, protecting consumers from potential health risks.

Reheat leftovers in a 350°F (175°C) oven for optimal results, covering loosely with foil to maintain moisture while re-crisping the crust, avoiding the microwave which can compromise the texture and make the coating soggy.

While freezing is not recommended due to potential texture changes, if necessary, flash-freeze pieces individually before sealing in bags to protect the crust structure, reheating directly from frozen to minimize texture compromise.

Make Ahead Strategies


Develop a prep timeline by preparing the cracker coating a day in advance, storing it in an airtight container to save time on the day of cooking. This advance preparation ensures efficiency without sacrificing quality.

Store the coated, unbaked chicken on a baking sheet covered in the refrigerator if preparing a few hours early, taking care to bring it briefly to room temperature before baking for even cooking results.

Assess the quality impact of preparing in advance, noting that refrigerating for too long can compromise the crispness, hence keep the time between preparation and baking as short as practically possible to maintain texture.

Assembly tips include coating the chicken immediately before baking if possible to preserve the maximum crispness, ensuring the cracker crumbs adhere well and maintain their texture upon baking.

Reheat previously cooked chicken gently in an oven to regain crispness while protecting the interior’s moisture, taking care not to overheat which can dry out the chicken.

Add fresh elements like a squeeze of lemon or sprinkle of fresh herbs just before serving to revitalize and enhance flavors that might have mellowed during the storage phase.

Scaling Instructions


When halving the recipe, ensure to divide ingredients evenly, paying particular attention to seasonings that might require slight adjustments for balance despite reduced quantities.

Doubling or tripling requires careful consideration of cooking equipment capacity, ensuring the oven can fit larger quantities for batch baking if needed to prevent overcrowding that could impede cooking performance.

Adjust equipment settings by considering using multiple baking sheets and rotating them during cooking to ensure even results when scaling up, maintaining the same high-quality end product.

Timing modifications might include monitoring the baking process closely when increasing quantities, as larger batches may require longer cooking times or multiple sessions based on your oven’s capacity.

Consider storage needs when scaling, preparing additional containers if necessary to store leftovers properly while maintaining the chicken’s original taste and texture without degradation.

Nutritional Deep Dive


Crunchy Ritz Butter Chicken Delight offers a balanced macro breakdown, primarily composed of proteins and fats with a moderate carbohydrate content from the Ritz crackers. Understanding this balance helps in dietary planning around this dish.

Micronutrient analysis reveals modest contributions of vitamins and minerals like niacin and phosphorus from the chicken, with additional calcium and iron provided by whole grain variations of crackers if used.

Health benefits include high-quality protein essential for growth and maintenance, with possible adaptations to reduce saturated fat content for heart health when opting for lower-fat butter or oil alternatives.

Dietary considerations might account for sodium content, particularly if seasoning further, encouraging mindful consumption for those needing to moderate salt levels, reflecting recommended daily intakes.

Manage portions effectively by pairing the chicken with sides rich in fiber and low-calorie vegetables, creating a nutritionally complete meal that’s satisfying without being overly calorie-dense.

Weight management tips suggest balancing the indulgence of this rich dish with lighter side offerings and ensuring portion control remains at the forefront to prevent exceeding daily intake needs.

Dietary Adaptations


For a gluten-free adaptation, switch to gluten-free crackers and ensure any other ingredients like spices aren’t at risk of cross-contamination, catering to those with gluten intolerance or celiac disease.

Adopt a dairy-free route by omitting butter and using a plant-based oil such as avocado oil for its buttery flavor, maintaining the recipe’s integrity while accommodating lactose intolerance or other dairy restrictions.

Vegan versions will require substituting chicken with firm tofu or a chicken substitute like seitan, alongside a vegan cracker alternative. Flavorings can remain similar, ensuring a delicious meal for plant-based eaters.

Low-carb options include replacing crackers with crushed nuts or Parmesan cheese for a similar adaptively crunchy exterior, reducing overall carbohydrate quantities without sacrificing the core crunch element.

Keto-friendly variations maintain low carbohydrate content, closely aligning with low-carb adaptations through nut-based coatings and mindful seasoning adjustments, ensuring compatibility with ketogenic dietary plans.

Paleo transformations involve grain-free crumb coatings using almond flour or coconut flakes, with ingredient adjustments such as ghee instead of butter to uphold ancestral diet principles.

Low-FODMAP adaptations can include substituting onion and garlic powders with alternatives like garlic-infused oils for flavor without triggering symptoms, meeting specific dietary requirements without losing zest.

Troubleshooting Guide


If facing texture issues like soggy crusts, ensure the oven is preheated properly and consider using a wire rack for baking to allow air circulation under the chicken, helping the crust crisp evenly.

For flavor balance challenges, adjust seasonings incrementally, focusing on adding subtle spice layers rather than overwhelming flavors which can overpower the delicate Ritz-induced butteriness.

Temperature problems, particularly undercooking, can be resolved by conducting multiple internal temperature checks with a meat thermometer, aiming for an internal temperature of 165°F (74°C).

Circumvent equipment challenges such as overcrowding on baking sheets by utilizing additional trays to maintain proper space between chicken pieces, ensuring hot air can circulate effectively during baking.

For ingredient substitutions like using different crackers, test the flavor impact first, as different brands and types may contribute varying levels of salt and buttery tones that alter your final dish subtly.

Timing concerns can be preemptively managed by using timers and adhering to preparation steps, preventing overbaking which may dry out chicken or underbaking that can leave coatings less crisp.

Recipe Success Stories


Community feedback highlights the recipe’s success as a staple in family meal planning, praised for its easy preparation and satisfying flavors. Many readers choose it for weeknight dinners that feel special without the stress.

Variation successes have emerged, with some incorporating spices like paprika and cajun seasoning to suit hotter palates. These successful adaptations maintain the recipe’s core nature while offering personal twists.

Adaptation stories often feature dietary changes for macros or personal preferences, showcasing how versatile this recipe can be while maintaining delightful taste and its signature crispy texture despite various modifications.

Reader suggestions often include pairing ideas, with roasted seasonal vegetables or light salads enhancing the meal’s appeal. These pairings round out meals by adding variety and interest to traditional serving styles.

Photography tips shared by the community emphasize natural lighting and rustic plating to highlight the golden crust and tender chicken beautifully. These visual complements make recipe sharing on socials a vibrant extension of success.

Frequently Asked Questions

Can I use chicken thighs instead of chicken breast?
Absolutely! Chicken thighs can be substituted for a juicier and more flavorful option, keeping an eye on cooking time as thighs may take slightly longer to bake to perfection.

What can I use instead of Ritz crackers?
If Ritz crackers aren’t available, try using any buttery cracker, plain breadcrumbs, or even crushed cornflakes for varied textures and taste, each altering the flavor profile subtly.

How do I ensure the chicken remains juicy?
Ensuring not to overcook the chicken is key, as well as allowing it to rest post-baking. Using a meat thermometer ensures that the chicken reaches but does not exceed the required internal temperature.

Is there a vegan version of this recipe?
A vegan version can involve substituting chicken with tofu or seitan, and using plant-based crackers and oils, ensuring equivalent flavor enjoyment for non-meat eaters.

What side dishes complement this recipe?
Consider serving with mashed potatoes, roasted vegetables, or a fresh leafy salad to complement and offset the richness of the chicken, creating a balanced meal experience.

Can this recipe be made ahead?
Yes, prepare the chicken up to the baking step, storing in the fridge, and ensure it’s fully cooked prior to serving for the best crunch and texture.

Can I freeze leftovers?
Freezing is possible, though not recommended, as the texture may change. Flash-freezing before sealing helps retain better texture when reheated.

What spices can I add for more flavor?
Additional spices like smoked paprika or cayenne can enhance flavor profiles, adjusting to personal taste preferences and maintaining the dish’s essence.

Can I substitute margarine for butter?
Margarine can replace butter for a lower fat alternative, though the flavor may differ slightly. Consider margarine with a buttery flavor if available for best results.

What is the best wine pairing?
A crisp, unoaked Chardonnay pairs excellently, complementing the buttery notes of the chicken while the acidity provides a refreshing counterbalance.

Are there other crackers that work as well?
Yes, buttery crackers or panko breadcrumbs are alternatives, each providing a distinct flavor or texture variation while adhering to the core principles of the recipe.

What’s the best way to store leftovers?
Use airtight containers to store leftovers in the refrigerator for up to 4 days, ensuring the best flavor preservation. Always reheat thoroughly before serving again.

Additional Resources


Dive deeper into the art of coating and frying with guides on achieving the perfect crumb consistency for various recipes, enhancing the knowledge base for budding cooks looking to expand their technique arsenal.

Explore related recipes such as classic Southern fried chicken or Parmesan-crusted chicken breast for further culinary adventures, drawing parallels and contrasts in preparation, taste, and technique.

Ingredient information on modern uses for Ritz crackers reveals their adaptability across recipes, bringing insight into how pantry staples can innovate everyday meals beyond snacking.

Consider equipment recommendations, focusing on must-have baking sheets or food processors that streamline preparation and ensure success across multiple recipes with shared methodology.

Given the seasonal flexibility of Crunchy Ritz Butter Chicken Delight, articles on how to incorporate seasonal produce and flavors can support adaptation, ensuring this is a year-round valued recipe.

Join the Conversation


Connect with us on social media as you share your culinary creations, tagging your renditions of Crunchy Ritz Butter Chicken Delight and comparing notes with a worldwide network of enthusiasts.

Utilize photography tips shared by the community to capture your dish, focusing on natural lighting and emphasis on the golden crust to create impactful, shareworthy cuisine visuals.

Write recipe reviews on the blog to share your experiences and adjustments, providing insightful feedback to help others create their perfect version of this satisfying meal.

Engage with our community by offering suggestions, asking questions, or offering new ideas that might inspire another delicious variation or adaptation of this classic dish.

Explore personalized recipe variations shared by community members, inspiring your future culinary adventures and embracing the creative potential of altering established recipes to delight taste buds.

The Recipe

Crunchy Ritz Butter Chicken Delight

Serves: 4

Prep Time: 15 mins

Cook Time: 30 mins

Total Time: 45 mins

Kitchen Equipment Needed

  • Baking sheet
  • Food processor (or zip-lock bag and rolling pin)
  • Mixing bowl
  • Meat thermometer

Ingredients

  • 4 boneless, skinless chicken breasts
  • 2 cups crushed Ritz crackers
  • 1/2 cup melted butter
  • 1 teaspoon garlic powder
  • 1 teaspoon onion powder
  • 1/2 teaspoon salt
  • 1/4 teaspoon black pepper
  • 1/2 teaspoon dried thyme or parsley

Directions

  1. Preheat your oven to 350°F (175°C). Line a baking sheet with parchment paper or spray with non-stick spray.
  2. Place Ritz crackers in a food processor and pulse until finely crushed, or crush them in a zip-lock bag using a rolling pin.
  3. In a shallow bowl, mix the crushed Ritz crackers with garlic powder, onion powder, salt, pepper, and thyme.
  4. Dip each chicken breast in the melted butter, then coat thoroughly in the cracker mixture, pressing down to ensure the crumbs stick well.
  5. Arrange the coated chicken breasts on the prepared baking sheet, leaving space between each piece.
  6. Drizzle remaining butter over the coated chicken breasts for extra flavor and brownness.
  7. Bake for 30 minutes, or until the chicken reaches an internal temperature of 165°F (74°C) and is golden brown and crispy.
  8. Remove from the oven and let rest for 5 minutes before serving.

Recipe Notes

  • For more flavor, add a pinch of cayenne pepper to the cracker mixture.
  • To make ahead, prepare until coating and store in the fridge, baking when ready.
  • Leftovers can be reheated in a 350°F oven to preserve crispness.

Deliciously Unique Savory Dill Pickle Cupcakes for Adventurous Tastebuds

Savory Dill Pickle Cupcakes: A Unique Gourmet Treat

⚖️
Difficulty
Intermediate

⏲️
Prep Time
20 mins

🕒
Cook Time
25 mins

⏱️
Total Time
45 mins

🍽️
Servings
12

Welcome to a world where classic dill pickles meet the delightful world of cupcakes. Introducing our Savory Dill Pickle Cupcakes, a surprising flavor-packed delight that’s sure to intrigue your taste buds. If you love combining unexpected taste elements, these cupcakes offer the ideal balance between sweet cake batter and the zesty, tangy hint of dill pickles. Perfect for adventurous palates, this recipe promises a culinary journey you won’t forget.

Dill pickle fans rejoice! These cupcakes reimagine the beloved savory snack into a soft, moist cake. Infused with aromatic dill and underlined by the distinctive zing of pickle juice, these cupcakes are not only a conversation starter but also a unique take on a traditional dessert. The playful melody of flavors dances on the palate, offering an unforgettable eating experience.

Crafted for those who crave culinary adventure, Savory Dill Pickle Cupcakes surprise and delight with every bite. Whip them up for an unconventional treat at your next gathering—your guests will be talking about them long after the last crumb is gone.

Quick Recipe Highlights

  • Flavor Profile: These cupcakes artfully meld sweet and savory notes, with the tanginess of dill pickles complementing the sugariness of a cupcake base.
  • Texture: Expect a soft and light crumb, enhanced by small bursts of pickles adding a delightful crunch.
  • Aroma: The scent of fresh dill and subtle vinegar hints tantalize your senses, inviting you to take a bite.
  • Visual Appeal: Beautifully golden cupcakes topped with a luscious cream cheese frosting, punctuated by a sprinkling of dill.
  • Skill Level Needed: Intermediate—Perfect for home bakers with some experience eager to push their creative boundaries.
  • Special Equipment: A muffin tin, hand mixer, and piping bag for frosting detailing.

Recipe Overview

  • Difficulty Level: Considered intermediate, this recipe requires basic baking skills and a dash of creativity for ingredient styling.
  • Category: Dessert, Savory Treat
  • Cuisine: This innovation draws from American comfort food, blending classic flavors with a modern twist.
  • Cost: With basic pantry staples and affordable pickles, this recipe is budget-friendly while still feeling gourmet.
  • Season: Ideal in the summer for a refreshing, cool cake option or year-round when you want a taste of sunshine.
  • Occasion: Serve at picnics, barbecues, or as an intriguing choice at any holiday table.

Why You’ll Love This Recipe


The Savory Dill Pickle Cupcakes masterfully intertwine flavor with texture, offering a moist cake layered with bursts of pickle brilliance. With their soft crumb and tangy finish, these cupcakes are a true conversation starter. They provide a touch of sophistication to any dessert lineup while catering to those who chase new taste adventures.

Convenience is on your side with this recipe. Despite their unconventional ingredient list, the cupcakes are straightforward to prepare. The dough comes together swiftly in a single bowl, minimizing mess and maximizing efficiency. Plus, the relatively brief bake time means you won’t have to wait long to enjoy your unique creation.

Not only are these cupcakes a delight for the palate, but they also pack a bit of nutritional punch—a touch of salt and vinegar from the pickles, and the freshness of real dill contribute flavor and a slight nutritional boost. For those who are adventurous eaters, introducing a vegetable into a cupcake has never been this deliciously fun.

Sharing these cupcakes at social gatherings is a surefire way to captivate and entertain guests. Their unique combination of flavors is guaranteed to spark conversations, making your hosting look effortless and imaginative. And if you have friends who think they’ve seen it all, these cupcakes are sure to surprise them.

Creating these cupcakes is both cost-effective and rewarding. Using readily available ingredients from your local grocery store ensures that the final output won’t break the bank. Perfectly aligned with the growing trend of experimental culinary experiences, they stand out as an accessible gourmet treat.

Historical Background and Cultural Significance


The inspiration for dill pickle cupcakes may draw unique roots, combining classic baking techniques with a love for pickled foods that dates back centuries. Pickling itself is an ancient method of food preservation, originating thousands of years ago, and savored across cultures as a flavorful enhancement to various dishes.

Culturally, pickles are cherished for their tart bite and their role as a complement to rich, fatty foods. In America, pickles have cemented their place in comfort food, adding a crispy satisfaction to burgers and sandwiches alike. Savory Dill Pickle Cupcakes embrace this love for pickles, crafting a novel dessert that combines this cultural heritage with innovation.

Initially perceived as a whimsical edition, such creative recipes have found a place in modern kitchens, offering versatility and unique twists to classic formats. Across regions, variations of these cupcakes may differ, highlighting the surrounding area’s preference in spice blend, sweet base, or pickle type, thereby showcasing how tradition and creativity can harmoniously exist.

Regional iterations might focus more on local herbs or distinct pickle varieties, signifying how the recipe evolves based on cultural influences. This adaptability isn’t just a flavor consideration but equally a testament to cultural identities, presenting the global shift towards cross-cultural culinary explorations.

Ingredient Deep Dive


Flour: The foundation of every delicious cupcake, flour offers structure when baking, interacting with water and heat to create the soft and tender texture we all crave. In cultural contexts, flour has been a humble yet essential ingredient in various baked goods worldwide, from ancient bread to modern pastries.

When selecting flour, opt for all-purpose varieties for consistency in texture. Store flour in a cool, dry place to ensure freshness, and if desired, substitute with whole grain or gluten-free alternatives for different texture and nutritional profiles.

Dill Pickles: Celebrated for their distinctive tanginess, dill pickles provide the unique edge required for this recipe. Joining cupcakes, they offer a surprising yet enjoyable contrast to the sweetness of the cake. Pickles historically serve as a simple preservation method across many cultures, providing an essential food source with a delightful flavor.

Choose crisp, quality pickles to ensure a robust flavor in your cupcakes. Store opened jars in the fridge, paying attention to expiration dates. For variety, consider sweet pickles or jalapeño pickles for a different take.

Common Mistakes to Avoid

  • Over-mixing the batter can produce a tough cupcake, as it would activate too much gluten.
  • Not draining the pickles well can introduce too much liquid, altering the cupcake consistency adversely.
  • Using cold ingredients straight from the fridge can affect mixing and the eventual batter consistency.
  • Incorrect oven temperature can lead to uneven baking, affecting texture significantly.
  • Skimping on dill seasoning may result in a flavorless cupcake lacking its intended zest.
  • Ignoring measurements due to personal taste may yield inconsistent results.
  • Over-baking can lead to dry cupcakes with unsatisfactory texture.
  • Skipping the cooling time before frosting: warm cupcakes will melt the frosting, making it less aesthetic.

Essential Techniques


Creaming Butter and Sugar: This step is pivotal in creating the cupcake’s desirable light and airy texture. It allows air to incorporate into the batter, ensuring a smooth and fluffy cake. Master this technique by ensuring your butter is just below room temperature, not too soft, and using a mixer to thoroughly combine until light and fluffy. Watch for a pale yellow color as your visual cue.

Incorporating Dry Ingredients: Proper blending of dry ingredients ensures even distribution of flavors and leavening agents. To avoid over-mixing, gently fold the dry ingredients into the wet using a spatula, underlining the need for gentleness to maintain the airiness of the batter.

Pro Tips for Perfect Savory Dill Pickle Cupcakes


Opt for quality dill pickles, as they are the flavor heroes. Fresno varieties or homemade versions often hold richer flavors. Drain them well to avoid extra moisture. Balance sweetness and savoriness to have an unmatched flavor medley. Use a gentle hand when incorporating ingredients to maintain fluffy consistency.

Consider adding a tad more dill seasoning if your pickles lack pungency. This can enhance the overall zing of your cupcakes. Use a toothpick test to confirm cupcake readiness, which involves inserting a toothpick in the center and ensuring it comes out clean. For an aesthetic appeal, top the cupcakes with a slice of dill pickle or sprinkle dill weed before serving.

Variations and Adaptations


Regional variations might emphasize different herbs beyond dill, adding thyme or rosemary for an aromatic twist. Embrace what’s seasonal, swapping standard pickles for any pickled vegetables available at local farmers’ markets during peak harvesting adventures.

Dietary needs, such as gluten-free, can be accommodated using almond or coconut flours, shifting the cupcakes from conventional to extraordinary for those with gluten sensitivities. Additionally, for those avoiding sugar, consider utilizing sugar substitutes to maintain the flavor profile without added sugar.

Serving and Presentation Guide


Transform these dill pickle cupcakes into a delightful treat by following key plating techniques—arrange them on a contrasting color platter for added drama. A delicate dill sprig elegantly garnishing each top captivates visual interest while aligning with the flavor narrative.

Traditional accompaniments, including small sandwiches or briny olives, seamlessly blend the savory with sweet, taking palates on a playful taste adventure. For a modern flair, serve with a light cucumber salad, balancing refreshing undertones.

Wine and Beverage Pairing


Pair these cupcakes with a light, crisp white wine like Sauvignon Blanc—the citrus notes harmonizing with the tanginess of the dill pickles. If alcohol isn’t ideal, opt for unsweetened iced tea or a basil-infused lemonade to enhance the herbal aspects.

Aligning with coffee pairings, a medium roast coffee highlights the sweetness while contrasting the savory essence. Consider serving lightly chilled, complementing the cupcakes’ cool nature.

Storage and Shelf Life


Once baked, these cupcakes stay fresh in an airtight container at room temperature for up to two days. To extend shelf life, refrigerate for up to five days, ensuring to bring them to room temperature before serving for optimal flavor expression. Each cupcake should be individually wrapped for freezing to prevent freeze-burn or dryness.

Make Ahead Strategies


Bake these cupcakes a day prior to serving for convenience, storing them in the fridge until time for frosting. Assemble all dry ingredients in advance to expedite mixing when ready to bake. Prepare frosting ahead of time and store it in the refrigerator, piping it fresh before serving to maintain the frosting’s creamy texture.

Scaling Instructions


Halving this recipe is simple, dress down each measurement appropriately and bake in small muffin trays to maintain individual serving sizes. For larger groups, double or triple by scaling each ingredient, ensuring to adjust bake time, checking frequently for necessary variations.

Nutritional Deep Dive


These cupcakes offer an unusual twist by incorporating vegetable elements with delightful pastry. Analyze macronutrients for a balance of carbohydrates and moderate protein. Dill lends itself to being a natural digestive aid, enhancing the nutritional profile subtly.

If aware of dietary constraints, consider halving sugar content or using alternative sweeteners without sacrificing taste, maintaining balance while appealing to health-oriented diners.

Dietary Adaptations


Alterations for specific dietary needs are possible. Gluten-free baking offers substitution with almond or coconut flours. Dairy-free seekers can employ plant-based alternatives like coconut or almond milk alongside vegan butter replacements for a thorough revamp.

Adopt a vegan strategy by opting for egg replacers, easily enhancing dimensions for plant-based diets. Low-carb enthusiasts can swap sugar for erythritol or similar substitutes to maintain low carb-intake levels.

Troubleshooting Guide


Address texture concerns by avoiding over-mixing, ensuring pickles are accurately drained, and activating baking soda with the appropriate acid in the batter. Combat flavor imbalance through seasoning adjustment according to pickle strength; more dill and spices like garlic or onion powders may be incorporated.

For temperature challenges, make certain your oven is calibrated and refrain from frequent opening to avoid heat escape, ensuring an evenly baked cupcake. Ingredient substitutions should be made considering physical properties and baking interactions to avoid unsatisfactory results.

Recipe Success Stories


Across our community, feedback highlights these cupcakes as experimental success, with users remarking upon their delight at unique flavor profiles and newfound enthusiasm for savory-sweet creations. Captured photographs show inviting creations with lush frosting and appealing pickle garnishes, ready to captivate at any gathering.

Reader suggestions have introduced alternative herbs and spices, expanding the recipe’s potential and equipping bakers with further creative capabilities, crafting personalized versions welcomed by eclectic tastes.

Frequently Asked Questions

1. Can I use bread and butter pickles for a sweeter variation?
Certainly! Bread and butter pickles introduce a contrasting sweetness that harmonizes with the savory dough, perfect for those preferring a sweeter touch without drastically shifting away from the theme.

2. What’s the best way to store these cupcakes?
Keep them in an airtight container at room temperature for up to two days or refrigerate if longer storage is needed. Before serving, allow refrigerated cupcakes to achieve room temperature for optimal flavor.

3. Can coconut flour be used as a substitution?
Yes, however, it alters consistency due to its absorptive nature. Reduce quantities and adjust liquids accordingly to sustain moisture levels within the batter.

4. Is frosting necessary?
Not strictly; however, it beautifully complements the savory cupcake, enhancing the overall dining experience with a creamy contrast. For minimalist approaches, consider dusting with a powdered sugar-dill blend.

5. How can I incorporate more flavor without making them too salty?
Use herbs like dill, thyme, or rosemary, and experiment with adding citrus zest such as lemon to impart freshness without increasing sodium levels.

6. Are there other pickled vegetables that work with this recipe?
Indeed! Try using pickled jalapeños for an adventurous spice kick or pickled beets for a vibrant color and distinct flavor backdrop.

7. What can replace eggs for a vegan version?
Utilize commercial egg replacers, flaxseeds, or chia seeds with water proportions for plant-based adaptations that won’t compromise structure or texture.

8. Do halved measurements affect baking time?
Slightly reduced sizing means watching closely as muffins will likely bake quicker. Monitor time to ensure proper doneness without overdrying the product.

9. Is there a preferred sugar substitute for low-carb versions?
Erythritol is effective, closely mimicking sugar’s properties in taste and baking interactions, allowing you to maintain sweetness while addressing sugar concerns.

10. How do I ensure frosting consistency?
Maintain butter at a slightly cool room temperature underscored by gradual incorporation of powdered sugar. Adjust with milk or cream to acquire desired smooth and pipeable consistency without unwanted runniness.

Additional Resources


Embark on a culinary journey beyond these pastries by exploring related recipes focusing on other savory-sweet delights, including pickle-infused breads, loaves, and savory cookies, supplying imaginative bakers with keystone recipes to expand repertoires.

Technique guides detail methods for successful pickling if homemade creations inspire you. Expand culinary courage with an array of exciting baked goods integrating dill’s vibrant harmony paired with thoughtful ingredient highlights.

Join the Conversation

These cupcakes open the gateway to exploring unconventional flavors, challenging baking norms, and embracing culinary creativity. We encourage you to share your experiences, photo experiments, varying tastes, and mindful adaptations within our open community, enhancing collective knowledge and enjoyment.

Engage on social media through specialized hashtags, allowing bakers to connect worldwide, showcasing distinct creations, exchanging sincere reviews, and supporting fellow adventurers in the unpredictable, beautiful journey of baking.

The Recipe

Savory Dill Pickle Cupcakes

Serves: 12

Prep Time: 20 mins

Cook Time: 25 mins

Total Time: 45 mins

Kitchen Equipment Needed

  • Muffin tin
  • Hand mixer
  • Piping bag for frosting

Ingredients

  • 1 1/2 cups all-purpose flour
  • 1 tsp baking soda
  • 1/4 tsp salt
  • 1/2 cup butter, softened
  • 1 cup sugar
  • 2 large eggs
  • 1/4 cup dill pickle juice
  • 1/2 cup chopped dill pickles
  • 1/4 cup sour cream
  • 1 tsp minced dill
  • Cream cheese frosting

Directions

  1. Preheat oven to 350°F (175°C). Line a muffin tin with cupcake liners.
  2. In a bowl, mix flour, baking soda, and salt. Set aside.
  3. Cream butter and sugar with a mixer until light and fluffy.
  4. Add eggs one at a time, beating well after each addition.
  5. Stir in dill pickle juice and sour cream until combined.
  6. Gradually add dry ingredients to the wet mixture. Stir until just combined.
  7. Fold in chopped dill pickles and minced dill.
  8. Spoon batter into prepared muffin tin, filling each cup 3/4 full.
  9. Bake in the preheated oven for 20-25 minutes or until a toothpick inserted comes out clean.
  10. Allow to cool completely before frosting with cream cheese frosting.

Recipe Notes

  • Substitute dill pickles with sweet pickles for a sweeter cupcake variation.
  • Piping frosting creates a beautiful, professional look—use a round or star nozzle for decorative flair.

Spice Up Your BBQ with Mexican-Style Corn Coleslaw Recipe

Mexican-Style Corn Coleslaw: A Fusion of Fresh Flavors

⚖️
Difficulty
Easy

⏲️
Prep Time
20 mins

🕒
Cook Time
10 mins

⏱️
Total Time
30 mins

🍽️
Servings
6

Get ready to transform your summer gatherings with a vibrant, zesty Mexican-Style Corn Coleslaw that will steal the spotlight at any meal. This dish combines the savory sweetness of fresh corn with the tangy crunch of coleslaw, creating an irresistible blend of flavors and textures. A sprinkle of cilantro and a kick from jalapeños take this dish to a new level, ensuring your taste buds are in for a treat.

Picture this: sun-soaked backyard barbecues or lazy Sunday brunches. That’s the perfect setting for this refreshing Mexican-Style Corn Coleslaw. The colors alone will make your eyes dance, while the aroma will draw everyone to the table before you even have a chance to call them. Whether you’re serving it beside juicy grilled chicken or piling it high in a taco, this coleslaw is the perfect companion.

Quick Recipe Highlights

  • Flavor Profile: The coleslaw combines sweetness from the corn, tanginess from lime, and a hint of heat from jalapeños.
  • Texture: A crisp bite from the cabbage pairs beautifully with the tender crunch of fresh corn.
  • Aroma: The fresh scent of cilantro mingles with the earthy, roasted corn notes.
  • Visual Appeal: Bright yellow corn, purple cabbage, and green jalapeños create a fiesta of colors.
  • Skill Level Needed: Simple chopping skills and basic mixing are all you need.
  • Special Equipment: A sharp knife, cutting board, and a large mixing bowl are essential.

Recipe Overview

  • Difficulty Level: This easy-to-follow recipe is suitable for beginners and seasoned cooks alike, requiring only basic culinary skills.
  • Category: Versatile as both a side dish and a standalone meal component.
  • Cuisine: Mexican-inspired, bringing traditional flavors in a contemporary form.
  • Cost: Budget-friendly as it utilizes cost-effective, readily available ingredients.
  • Season: Ideal for summer when corn is freshest, but enjoyable year-round with canned versions.
  • Occasion: Perfect for casual get-togethers or picnics, offering a refreshing complement to various dishes.

Why You’ll Love This Recipe


Indulge in the taste and texture of Mexican-Style Corn Coleslaw, where each bite brings a delightful mix of sweet, savory, and spicy elements. The corn provides a natural sweetness that contrasts beautifully with the tangy cabbage and lime, creating a symphony of flavors. The crispness of the cabbage provides a satisfying crunch, and the silkiness of the mayo-based dressing coats your palate in the most pleasant way.

Convenience is another reason to love this recipe. With just a few ingredients and minimal prep time, this coleslaw is quick to prepare, making it an ideal choice for those busy weeknight dinners or spontaneous summer parties. It’s easy to scale the recipe up or down based on your serving needs, allowing it to adapt to any occasion effortlessly.

Nutritionally, this dish offers fiber and vitamins from the fresh vegetables, while being low in carbohydrates and saturated fats. It’s an excellent way to incorporate more plant-based ingredients into your diet while treating your taste buds. The colors and textures alone make it appealing, even to those who typically shy away from vegetables.

From a social standpoint, serving this coleslaw will elevate any gathering. Whether you are a host or a guest, its universal appeal and crowd-pleasing qualities ensure it will be a hit. Pair it with grilled fish, use it as a topping for tacos, or enjoy it as a standalone dish. It brings people together with its bold flavors and vibrant presentation.

Finally, this recipe is incredibly cost-effective, using seasonal ingredients that won’t break the bank. It makes healthful, homemade dishes accessible to all, without sacrificing taste or satisfaction. The simplicity and versatility of the dish mean you’re sure to get many requests for the recipe from delighted diners.

Historical Background and Cultural Significance


The root of this flavorful coleslaw can be traced back to Mexico’s rich culinary traditions, where corn holds a pivotal role. Traditionally, corn, or “maíz,” has been a staple in Mexican cuisine for centuries, revered as a vital ingredient in daily meals. This version marries the popular Mexican street food, “elote,” with the classic coleslaw, integrating cultural culinary elements into one dish.

Throughout history, corn was seen as a divine gift by ancient Mesoamericans, and it continues to be hailed as a symbol of sustenance and prosperity. This cultural importance extends to today, where elote can be found in many Mexican street markets and is celebrated for its simplicity and flavor. It’s this cultural authenticity that enriches the Mexican-Style Corn Coleslaw with a sense of heritage and tradition.

Over time, as culinary traditions expanded beyond borders, corn-based dishes evolved to incorporate diverse ingredients. This coleslaw is one such example of cultural fusion, integrating traditional flavors with modern appeal. The addition of mayonnaise and lime juice represents a global touch, enhancing the dish’s universal palate.

Different variations of coleslaw are enjoyed in every corner of the world, from tangy and sweet in the southern United States to spicy and piquant iterations in Asia. Each variation reflects the regional palate and ingredient availability, showcasing how this dish has woven itself into global culinary frameworks while maintaining its cultural roots.

Ingredient Deep Dive


One of the stars of this coleslaw is fresh corn, a staple of Mexican cuisine known for its sweetness and versatility. Nutritionally, corn is packed with fiber and essential vitamins such as B vitamins and minerals like phosphate and magnesium. When selecting corn, opt for bright green husks and slightly sticky silks to ensure peak freshness. Fresh, cooked corn should be refrigerated if pre-cooked or used immediately after cooking to preserve flavor and texture. Canned corn can be a handy substitute when fresh isn’t available, though the flavor profile will differ slightly.

Another key ingredient, the cabbage, adds texture and nutrition to the coleslaw. Known for its low-calorie content yet high vitamin K, C, and B6, cabbage enhances the health benefits of this dish. You can keep cabbage crisp in the refrigerator by wrapping it tightly in plastic. Should you wish, you might swap for kale or savoy cabbage for a different texture and flavor balance. Remember to finely shred or chop the cabbage to allow for even distribution of flavors in the mix.

Common Mistakes to Avoid

  • Overcooking the corn can lead to a mushy texture. Aim for a slight crunch for the best results.
  • Using too much dressing might overpower the ingredients. Start with less, adding more to taste.
  • Not allowing the coleslaw to sit before serving can result in flavors not melding as intended. Let it rest.
  • Failing to season the mixture properly can cause a bland taste; don’t skip the salt and lime.
  • Ignoring ingredient freshness will profoundly impact flavor, particularly the corn and cabbage.
  • Improper slicing of vegetables can affect texture. Ensure veggies are cut uniformly.
  • Over mixing may bruise the vegetables, leading to a less desirable texture.
  • Skipping the lime juice will leave the dish tasting flat and missing its characteristic tanginess.

Essential Techniques


Roasting corn brings out a natural sweetness and imparts a subtle smokiness, an essential step in developing deep flavors. To master this, grill corn over high heat until golden brown but retain some bite. Avoid over-charring to prevent bitterness and keep the kernels tender yet crispy.

For shredding cabbage, ensure a consistent slice for even texture throughout the dish. Use a mandoline or very sharp knife to create thin slices. This ensures the cabbage absorbs dressing properly and creates the desired crunch.

Pro Tips for Perfect Mexican-Style Corn Coleslaw


For the most vibrant flavors, use freshly squeezed lime juice rather than bottled; its zest and aroma are unmatched. Include a pinch of lime zest for an extra citrus kick.

Experiment with different types of corn, such as white or multicolored. While each variety will add a unique taste, all enhance the visual appeal of the salad.

Consider roasting or grilling corn on the cob, then slicing kernels off instead of using pre-cooked kernels for added depth in flavor.

Don’t skimp on cilantro. It brings a fresh, herby note that balances the creaminess of the dressing.

To add a touch of sweetness, a dash of honey in the dressing can counterbalance the tartness of the lime juice and spiciness of jalapeños.

Prior to serving, allow the coleslaw to chill. This resting period enhances the melding of flavors and achieves the best texture.

Variations and Adaptations


Regional variations can include adding black beans for a more robust and protein-rich salad, reminiscent of certain Mexican salads. For a seasonal adaptation, substitute canned or frozen corn during off-season months for freshness year-round.

For those with dietary restrictions, swap standard mayo for vegan or egg-free versions to satisfy dietary needs without compromising on creaminess. Increase the lime and jalapeños for a spicier flavor profile or dial back pepper for a milder taste.

Opt for purple or red cabbage to add a slight sweetness and richer pigmentation to the coleslaw, enhancing both flavor and visual appeal. For a unique presentation, serve the coleslaw inside roasted pepper halves or alongside grilled vegetables to highlight its adaptability.

Serving and Presentation Guide


For an appealing presentation, serve the coleslaw in a vibrant ceramic or wooden bowl, highlighting its colorful payoff. Garnish with sprigs of cilantro and slices of lime to enhance visual aesthetics.

Pair with traditional Mexican dishes like tacos or enchiladas for a complementary blend of textures or alongside barbecued meats for a complete meal.

Ensure it is served chilled, crucial for maintaining its refreshing appeal and crisp texture. A light garnish of queso fresco can add a pleasing finishing touch, adding creaminess without overpowering the dish.

Wine and Beverage Pairing


For wine pairings, a Sauvignon Blanc or light Pinot Gris with their citrus notes will complement the zest in the salad. Non-alcoholic options like sparkling water with lime or a lightly sweetened iced tea enhance the flavors without clouding them.

If considering coffee or tea pairings, go for a floral or citrus-driven white tea or chilled green tea that correlates with the salad’s freshness. Always serve chilled beverages alongside the coleslaw to enhance the dish’s refreshing qualities.

Storage and Shelf Life


Store any leftover coleslaw in an airtight container to prevent unwanted odors and tastes mingling. Refrigerate promptly to maintain fresh, crisp flavors.

To identify spoilage, look for soggy or discolored vegetables, unusual odors, or an overly tangy dressing. For reheating, which is not typically recommended, refresh with additional lime and a sprinkle of fresh cabbage for revived crunch if necessary.

While not ideal, freezing the dish can be done; however, expect a change in texture upon thawing, making it less crisp.

Make Ahead Strategies


Prepare the dressing up to two days ahead, storing it separately. This method allows you to throw the coleslaw together at a moment’s notice while ensuring peak freshness of the vegetables.

Mix the salad ingredients in advance and add the dressing only just before serving to prevent sogginess. During assembly, maintain ingredient room temperature with pre-chopped ingredients chilled separately for best results.

Scaling Instructions


To halve this recipe, reduce each ingredient proportionally while maintaining flavor integrity.

If doubling or tripling, use a larger mixing bowl to allow even mixing. Consider adjusting seasoning to taste and verify that cooking times for corn remain consistent.

For storage, use multiple containers to avoid compressing the coleslaw, ensuring its crispness and freshness.

Nutritional Deep Dive


This coleslaw’s macro breakdowns are as follows: low in fats due to the minimal mayo proportion, with ample dietary fiber and vitamins from vegetables. Enjoy multiple health benefits without the guilt, as it enhances any meal nutritionally.

Explore micronutrients like calcium in cabbage and corn, delivering a healthy dose of antioxidants and vitamin C. Keep portions in check to allow its health-enhancing qualities to shine through.

Dietary Adaptations


For a gluten-free adaptation, verify that any mayo additions have no gluten contamination.

Dairy-free enthusiasts can enjoy the recipe as-is, omitting any queso toppings. Opt for vegan mayonnaise for those following plant-based diets, maintaining the creamy texture with ethical considerations in mind.

Those on a low-carb regimen, including keto fans, can adjust the dressing by using olive oil and lime juice instead of mayo. Experiment with various dietary tweaks to align with personal health goals seamlessly.

Troubleshooting Guide


If the texture is mushy, check the overcooking steps or avoid excess moisture from wet salad ingredients.

Should flavor fall flat, re-evaluate the amount of lime juice or seasoning ratio for balance.

For temperature-related issues, ensure ingredients aren’t kept too long before serving or away from cooling ingredients. Not enough time to chill? Consider speeding tactics like ice baths to achieve optimal freshness.

Recipe Success Stories


From tastes shared online to family gatherings, positive feedback continues to flourish. With variations allowing personal touches, this recipe receives adaptations to suit every palate, bearing witness to the shared love for Mexican-inspired dishes.

Readers boast about unique add-ins like roasted pepitas or avocado, personalizing each version. Even amateur cooks find success, thanks to step-by-step guides shared in culinary communities.

Frequently Asked Questions

Can I prepare the coleslaw ahead of time?

Yes, you can prepare the dressing and chop vegetables in advance but combine them just before serving to preserve the salad’s crispness.

Is there a substitute for cilantro?

Parsley can be used for those who are not fond of cilantro. It provides a fresh taste without overpowering the dish.

How do I tame the heat from jalapeños?

To reduce heat, remove the seeds and membranes from the jalapeños before chopping or use a milder chili pepper variety.

Can I use canned corn instead?

Yes, while fresh corn is preferred for flavor and texture, canned corn is a good substitute when fresh is not available.

How long will the coleslaw stay fresh?

This coleslaw will remain fresh for up to 3 days when stored properly in an airtight container in the refrigerator.

What can I add for extra protein?

Add black beans or grilled chicken for a protein boost, turning it into a complete meal.

Is there a way to make it vegan?

Absolutely. Use a vegan mayo or a blend of olive oil and lime juice for the dressing without sacrificing flavor.

What kind of cabbage works best?

Green and red cabbage both work well, offering a crisp texture and mild flavor that complements the other ingredients.

Can I freeze the coleslaw?

Freezing is not recommended as it can affect texture; fresh ingredients are best consumed without freezing.

How can I make it more tangy?

Increasing lime juice or adding a splash of vinegar will heighten the tanginess effectively.

Additional Resources


For more adventurous flavors, check out our related recipes like Grilled Street Corn Salad and Lime-Cilantro Dressing. These complement the Mexican-Style Corn Coleslaw perfectly, adding variety to your dishes.

Explore technique guides on perfecting grilling corn or the art of dressing vegetables for insight beyond basic preparation. For aficionados, ingredient maps provide detailed understanding on corn and cabbage varieties.

Join the Conversation


We invite you to recreate this recipe and share your takes using #MexicanCornColeslaw on social media. Try snapping photos and tag us for a chance to be featured in our gallery.

Share your variations, offer feedback, and explore new possibilities in flavor. Read community reviews and engage in dialogues about creativity in the kitchen. Embrace sharing as an integral aspect of our culinary family.

The Recipe

Mexican-Style Corn Coleslaw

Serves: 6

Prep Time: 20 mins

Cook Time: 10 mins

Total Time: 30 mins

Kitchen Equipment Needed

  • Sharp knife
  • Cutting board
  • Mixing bowl
  • Grill or skillet (optional for roasting corn)

Ingredients

  • 3 cups shredded cabbage
  • 2 cups fresh corn kernels (or canned)
  • 1/2 cup finely chopped cilantro
  • 1/2 cup mayonnaise
  • 2 tablespoons lime juice
  • 1 medium jalapeño, diced
  • Salt and pepper to taste

Directions

  1. If roasting corn, grill over high heat until slightly charred, then cut kernels from the cob.
  2. In a large mixing bowl, combine the cabbage, corn, cilantro, and jalapeño.
  3. In a separate small bowl, whisk together the mayonnaise and lime juice; season with salt and pepper.
  4. Pour dressing over the cabbage mixture, tossing to coat evenly.
  5. Chill in the refrigerator for at least 20 minutes before serving.
  6. Taste and adjust seasoning if necessary. Serve cold.

Recipe Notes

  • For added flavor, try adding diced avocado or roasted red peppers.
  • Use dairy-free mayo for a vegan-friendly version.

Delicious Chicken Broccoli Rice Casserole Recipe for Cozy Family Dinners

Chicken Broccoli Rice Casserole: A Comforting Delight

⚖️
Difficulty
Easy

⏲️
Prep Time
15 mins

🕒
Cook Time
35 mins

⏱️
Total Time
50 mins

🍽️
Servings
6

There’s nothing quite like the warmth of a homemade Chicken Broccoli Rice Casserole. With its creamy texture and comforting flavors, this dish is sure to become a family favorite. Perfect for busy weeknights or satisfying a craving for something hearty, this casserole combines tender chicken, fresh broccoli, and fluffy rice, all enveloped in a rich, cheesy sauce. Its delightful blend of flavors and ease of preparation make it an appealing choice any time of the year.

Rich in nutrients and flavor, this Chicken Broccoli Rice Casserole presents a medley of textures and tastes. The savory sauce brings together the freshness of broccoli and the fulfilling nature of chicken and rice. Its golden-brown topping adds a crunchy contrast that balances its creamy base. This dish does more than just satiate hunger; it evokes nostalgia and warmth in every bite.

Quick Recipe Highlights

  • Flavor Profile: A harmonious blend of creamy cheese, savory chicken, and fresh broccoli with a hint of garlic and onion.
  • Texture: Creamy sauce envelops tender chicken, with slightly crunchy broccoli and soft, fluffy rice completing the mouthfeel.
  • Aroma: A comforting aroma of cheese and baked chicken wafts beautifully from the oven.
  • Visual Appeal: The cheesy top offers a golden hue, contrasting with the vibrant green of broccoli peeking through.
  • Skill Level Needed: Simple techniques suitable for beginners; minimal chopping and one-bowl mixing are the main tasks.
  • Special Equipment: A 9×13 inch baking dish and a medium saucepan for an efficient, one-pan meal preparation.

Recipe Overview

  • Difficulty Level: Rated easy, as this recipe requires no special skills, making it accessible to cooks of all levels.
  • Category: A hearty main dish that serves as an entire meal, suited for both lunch and dinner.
  • Cuisine: An American classic, drawing inspiration from comforting casseroles that trace back to 20th-century home cooking traditions.
  • Cost: Budget-friendly, utilizing simple, easily-sourced ingredients that are staples in most kitchens.
  • Season: Suitable for all seasons, this dish offers warmth in winter and uses fresh ingredients available year-round.
  • Occasion: Perfect for family dinners, potlucks, or casual gatherings. Its straightforward preparation makes it ideal for entertaining.

Why You’ll Love This Recipe


The Chicken Broccoli Rice Casserole is a symphony of tastes and textures, combining creamy, cheesy goodness with tender chicken and bright broccoli. It’s the ultimate comfort food, offering a satisfying, warm hug in every bite. Made with simple ingredients, it can transform ordinary pantry staples into a delightful meal, making it an invaluable addition to your recipe repertoire.

Aside from its flavor, this dish shines for its convenience. It’s a one-dish wonder that saves you time both in preparation and cleanup. The ingredients are straightforward, and the majority of the cooking happens unattended in the oven, freeing you to unwind post-prep.

Nutritionally, the Chicken Broccoli Rice Casserole finds success with its balanced elements. Chicken provides a good source of protein, broccoli offers fiber and vitamins, and rice delivers necessary carbohydrates, making it hearty and nourishing.

When entertaining, this casserole serves as a crowd-pleaser without the necessity of complex preparation. Its straightforward method means you can focus on enjoying time with guests rather than worrying about tricky techniques or extended kitchen time.

Cost-effective and accessible, the components of this recipe are affordable and available. With minimal investment yielding maximum satisfaction, this casserole is an excellent choice for feeding a group with ease.

Historical Background and Cultural Significance


The origins of casseroles like this one are rooted in traditional American home cooking, where hearty and comforting dishes became the cornerstone of family meals. During the mid-20th century, the humble casserole received widespread attention for its ability to feed a crowd economically, making it a staple in suburban homes.

This dish follows the tradition of combining meat, vegetables, and a starchy binder into a single, harmonious meal. Casseroles reflect the adaptability and resourcefulness of home cooks who sought to create variety in meals while adhering to budget constraints.

The Chicken Broccoli Rice Casserole, specifically, found its place in American culture as an extension of this tradition, incorporating popular modern ingredients like broccoli and chicken to suit contemporary palates.

Throughout its evolution, this casserole has seen regional adaptations, incorporating local ingredients or spices to give it a bespoke flavor for each home. Its adaptability showcases the essence of communal dining and familial sharing in American culinary customs.

Ingredient Deep Dive


Chicken, the star of this dish, brings versatility and nutrition to the table. Used historically across cultures for its rich protein content and mild flavor, chicken continues to be a preferred protein for many.

Paired with broccoli, this superfood adds a nutritious punch. Celebrated for its dietary fiber, vitamin C, and potential health benefits, broccoli not only complements the dish but also elevates its nutritional profile.

Rice, the backbone of many global cuisines, offers structure and fullness to the casserole. Its ability to absorb flavors makes it a versatile ingredient, harmonizing with the recipe’s other components.

For the sauce, cheese unifies the ingredients, creating a creamy, luscious texture. Incorporating it brings a comforting, rich quality to the dish, enhancing its appeal without overwhelming the natural flavors of the core ingredients.

Common Mistakes to Avoid

  • Not cooking the rice fully before assembling can result in a undercooked texture. Ensure rice is just tender before baking.
  • Overcooking chicken beforehand might lead to dryness. Opt for precooked but still moist chicken pieces.
  • Failing to blanch broccoli can cause it to remain too firm. A quick blanch will tenderize the vegetable without losing its bright color.
  • Adding too much cheese can overpower the dish. Stick to the recommended amount to balance flavors correctly.
  • Forgetting to season the mixture leaves it bland. Proper seasoning ensures the flavor is consistent throughout the casserole.
  • Using a dish that’s too small can lead to spillage. Ensure your casserole dish has enough room for expansion while baking.
  • Skipping a resting period post-bake results in a runny casserole. Allowing it to sit for a few minutes helps the components set.
  • Serving immediately after removal from the oven might burn the mouth. Allow the casserole to cool slightly for better enjoyment.

Essential Techniques


Mastering the art of making a Chicken Broccoli Rice Casserole ensures a perfectly cooked dish every time. Start by knowing how to correctly prepare each component. Precooking the rice to just tender, blanching the broccoli to maintain its bright hue, and ensuring the chicken remains moist are crucial steps.

Balancing the sauce is another important technique. Achieving the right thickness means letting the sauce simmer until it coats the back of a spoon without being too heavy. This prevents a watery or overly thick casserole.

Layering is key to successful assembly. Ensure even distribution of ingredients to provide a balanced bite every time. Lastly, watch for visual cues, such as a golden crust, to signal completion.

A successful Chicken Broccoli Rice Casserole depends on understanding and applying these techniques, ensuring a delicious dish every time.

Pro Tips for Perfect Chicken Broccoli Rice Casserole


For added depth, consider incorporating a sprinkle of toasted breadcrumbs over the top before baking. This creates a delightful crunch, contrasting the creamy filling. A touch of nutmeg or smoked paprika adds an unexpected layer of warmth and flavor.

Use a flavorful cheese blend to elevate the dish. Cheddar combined with Gruyere or smoked mozzarella can result in a sophisticated taste profile. For a healthier twist, substitute half of the rice with quinoa for added protein and texture variation.

Always let the casserole rest once it’s out of the oven, allowing flavors to meld and firm up for neat service. If creaminess is desired, add a dollop of sour cream to the mix before baking for a richer texture.

Variations and Adaptations


This casserole’s adaptability is one of its greatest features. For regional variations, consider adding a southwest twist with cumin and chili powder and topping with cilantro and lime. For a seasonal adaptation, incorporate roasted squash or sweet potatoes.

Dietary modifications are easy; swap regular rice for cauliflower rice for a low-carb option, or use dairy-free cheese and milk substitutes for a lactose-free version. Vegetarians can replace chicken with chickpeas or cubed tofu.

Explore flavor variations by experimenting with different cheese blends, and for texture modifications, try adding nuts or seeds. Alter presentation by using individual ramekins for a more formal or upscale dining experience.

Serving and Presentation Guide


When serving Chicken Broccoli Rice Casserole, consider garnishing with freshly chopped parsley or chives for added color and a refreshing twist. Plating in a deep, wide-brimmed dish can help keep the ingredients neatly contained, while allowing the golden crust to shine.

Traditionally served with a side salad or crusty bread, modern accompaniments might include a zesty coleslaw or grilled asparagus for balance. Ensure the dish is served warm, allowing flavors to meld and offer comfort. Control portions by using a sharp, flat spatula to neatly lift servings without breaking.

Wine and Beverage Pairing


Pair this rich casserole with a crisp, refreshing white wine, such as Sauvignon Blanc, which complements the creamy sauce and chicken without overpowering its subtleties. Non-alcoholic alternatives include a sparkling elderflower or apple drink for a fresh contrast.

For colder days, consider serving with hot herbal teas like chamomile or mint to enhance the casserole’s comforting quality. When serving, suggest keeping wines chilled and teas warm to maintain the best complement to the dish’s temperature.

Storage and Shelf Life


To store leftovers, transfer the casserole to an airtight container and refrigerate for up to three days. Ensure the casserole is completely cooled before sealing to maintain moisture and flavor.

For freezing, slice the casserole into portions and wrap in foil or airtight bags, then freeze for up to a month. Thaw in the fridge before reheating to maintain texture. Reheat in the oven at a low temperature to gradually warm through, or microwave on medium setting to prevent drying.

Make Ahead Strategies


Prepare components like rice, chicken, and broccoli ahead of time, storing them in the fridge until assembly. The sauce can be prepared in advance and stored separately to maintain freshness.

Assemble the casserole without baking up to a day in advance, ensuring it is wrapped tightly before refrigerating. Simply bake fresh on the day of serving, slightly increasing cooking time to account for its chilly start. Add a fresh garnish post-baking for renewed vibrancy.

Scaling Instructions


Halving the recipe is straightforward and requires minimal adjustments in cooking times, while doubling or tripling is equally feasible. Ensure enough oven space and adjust the baking time slightly for larger batches, checking readiness visually and with a fork.

Consider equipment adjustments, such as using larger baking dishes or multiple smaller ones, to accommodate the increased volume. Be mindful of the increased quantity when storing leftovers, using multiple containers if necessary.

Nutritional Deep Dive


This casserole presents a balanced macro profile, offering protein from chicken, carbohydrates from rice, and fats from cheese. Micronutrients from broccoli include vitamins C and K, which support immune health and bone strength.

The casserole offers a combination that supports dietary needs and health goals. Portion control supports weight management while maintaining satiety. Consider pairing with a light side salad for added fiber and nutrient variety.

Dietary Adaptations


For gluten-free needs, ensure all sauce components are free from gluten, checking labels carefully or using alternatives like cornstarch for thickening. Dairy-free cheese and milk alternatives provide easy adaptation options for lactose-intolerant individuals.

A completely vegan version can be achieved by substituting chicken with plant-based proteins and ensuring cheese and milk used are non-dairy. Low-carb enthusiasts can use cauliflower rice instead of traditional rice to significantly reduce carbohydrate content.

Troubleshooting Guide


Texture issues such as runny sauce can be resolved by ensuring proper thickening of the sauce before baking. If rice becomes mushy, reduce pre-cooking time to prevent over-softening after baking.

Prevent flavor imbalances by adjusting seasoning through taste tests during preparation. Address temperature problems by allowing full cooking time and checking internal heat with a thermometer.

Equipment challenges can be tackled by maintaining proper sizing of baking dishes to accommodate the full mixture without overcrowding. If substitutions alter the taste, gradually introduce and adjust alternatives to maintain flavor integrity.

Recipe Success Stories


Join our community, where readers share their successes and variations of this beloved casserole. Some have added exotic spices or swapped protein sources, showcasing endless creativity. They’ve shared images of richly colored servings that evoke appetite and delight.

Experimentation has brought unexpected praises, with many appreciating the nutritional balance and affordability of the recipe. Your stories and critiques continue to inspire adaptations and improvements, proving cooking is a shared journey.

Frequently Asked Questions

Q: Can I use frozen broccoli instead of fresh?

A: Yes, you can use frozen broccoli. Just make sure to thaw and drain it well before adding it to the casserole to prevent excess moisture which can make the dish runny.

Q: How can I make the sauce thicker?

A: If you like a thicker sauce, you can whisk in a little more flour or use cornstarch as a thickening agent when preparing the sauce. Ensure it’s well incorporated to prevent clumps.

Q: Can I prepare this dish in advance?

A: Absolutely! You can assemble the casserole and store it in the fridge for up to a day before baking. Add a few extra minutes to the cooking time if you bake it straight from the fridge.

Q: Is it possible to make this casserole spicy?

A: For a spicy kick, add diced jalapeños or a pinch of red chili flakes to the sauce. Adjust according to your spice preference for desired heat.

Additional Resources


Explore our related recipes, where you’ll find dishes complementing the Chicken Broccoli Rice Casserole. Our guides offer tips for ingredient selection, and discover equipment recommendations to optimize preparation. Seasonal variation ideas ensure your meals remain as fresh and delightful as possible across changing climates.

Join the Conversation


Engage with us on social media by sharing your renditions of this classic casserole. Utilize our photography tips to capture the deliciousness of your creations. We value your recipe reviews and encourage your interaction with our community to inspire all levels of cooks to share their passion. Share your unique twists on this recipe and help inspire new favorites!

The Recipe

Chicken Broccoli Rice Casserole

Serves: 6

Prep Time: 15 mins

Cook Time: 35 mins

Total Time: 50 mins

Kitchen Equipment Needed

  • 9×13 inch baking dish
  • Medium saucepan
  • Mixing bowls
  • Slotted spoon
  • Whisk
  • Measuring cups and spoons

Ingredients

  • 3 cups cooked chicken, cubed
  • 2 cups broccoli florets
  • 2 cups cooked rice
  • 1 cup shredded cheddar cheese
  • 1 can (10.5 oz) cream of chicken soup
  • 1 cup milk
  • 1/2 cup onion, finely chopped
  • 2 cloves garlic, minced
  • 1 tablespoon olive oil
  • Salt and pepper to taste

Directions

  1. Preheat your oven to 350°F (175°C) and lightly grease the baking dish.
  2. In a large bowl, combine cooked chicken, rice, and broccoli.
  3. In a medium saucepan over medium heat, sauté onion and garlic in olive oil until soft and fragrant.
  4. Add cream of chicken soup and milk to the pan, whisking until smooth and heated through.
  5. Stir in cheese, allowing it to melt completely. Season the sauce with salt and pepper.
  6. Pour the creamy sauce over the chicken, rice, and broccoli mixture, stirring until evenly coated.
  7. Transfer the mixture to the prepared baking dish, spreading it evenly. Top with additional cheese if desired.
  8. Bake for 35 minutes or until the top is golden and bubbling. Let it rest for a few minutes before serving.

Recipe Notes

  • Feel free to use other vegetables such as peas or bell peppers for a different flavor.
  • For a spicier version, add a dash of hot sauce or cayenne pepper to the sauce.
  • Ensure the casserole cools slightly before cutting to retain shape when serving.