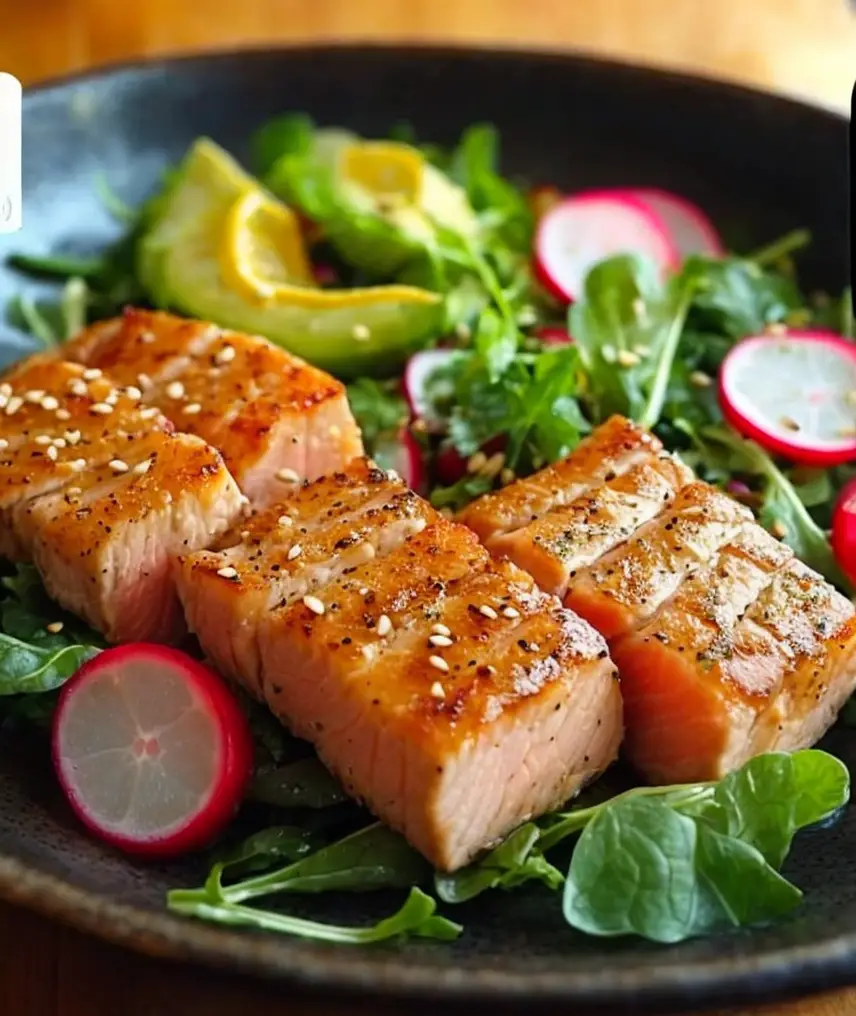
Delicious Seared Tuna Salad with Radish and Zesty Citrus Vinaigrette

Seared Tuna Salad with Radish, Finger Lime, and Citrus Vinaigrette: A Refreshing Meal

⚖️
Difficulty
Medium

⏲️
Prep Time
20 mins

🕒
Cook Time
10 mins

⏱️
Total Time
30 mins

🍽️
Servings
2

Embrace a burst of flavors with our Seared Tuna Salad, featuring crisp radishes, tangy finger limes, and a zesty citrus vinaigrette. This balanced, healthy meal combines succulent seared tuna with refreshing salad greens, creating a perfect partnership of texture and taste. Whether you’re planning a weeknight dinner or a weekend lunch, this recipe brings a touch of gourmet to your table without demanding rare culinary skills.

The Seared Tuna Salad is not only a feast for the senses but also a fantastic way to incorporate a protein-rich dish into your dining repertoire. The radishes add a satisfying crunch, while the finger lime pearls provide bursts of citrusy delight, elevating the seared tuna to a whole new level. Every bite is an explosion of fresh and vibrant flavors, reminding you just how simple yet rewarding cooking at home can be.

Quick Recipe Highlights

  • Flavor Profile: A harmonious blend of umami-rich tuna with a vibrant mix of citrus and peppery greens. Each mouthful offers a perfect balance between savory, tart, and refreshing notes.
  • Texture: A delightful contrast between the tender, melt-in-your-mouth tuna, the crispness of radishes, and the unique caviar-like texture of finger lime.
  • Aroma: Inviting scents of fresh lime and aromatic greens with a hint of the ocean from perfectly seared tuna.
  • Visual Appeal: A colorful presentation that delights the eyes with its vibrant green, red, and delicate pink hues.
  • Skill Level Needed: Moderate expertise in searing and preparing a homemade vinaigrette is needed, making it an enjoyable challenge for burgeoning home chefs.
  • Special Equipment: A well-seasoned cast iron skillet, and a sharp knife for precise vegetable slicing and a perfect sear on the tuna.

Recipe Overview

  • Difficulty Level: This dish strikes a balance between simplicity and complexity, making it accessible for intermediate cooks who are comfortable with quick, high-heat cooking methods.
  • Category: Perfect as a light entrée or a wholesome lunch option, balancing luxury with familiarity.
  • Cuisine: Rooted in modern fusion, this dish draws inspiration from both Asian and Mediterranean influences, offering a unique, globally inspired taste.
  • Cost: Moderate, with tuna being the main investment. Fresh produce and a few pantry staples complete the ingredient list without breaking the bank.
  • Season: Best enjoyed in spring and summer when fresh produce like radishes and limes are at their peak, providing the freshest flavors.
  • Occasion: Ideal for dinner parties or date nights with its sophisticated appearance and flavors, yet simple enough for an elevated weeknight meal.

Why You’ll Love This Recipe

Dive into the delightful taste and texture appeal of our Seared Tuna Salad with Radish, Finger Lime, and Citrus Vinaigrette. The expertly seared tuna brings a rich umami flavor that’s beautifully complemented by the refreshing zing of the citrus vinaigrette. The salad is more than just a meal; it’s a tapestry of flavors and textures that dance on the palate, from the tender fish to the crunchy radishes and the delightful pop of finger lime pearls. The combination ensures that each bite is a unique experience, full of life and zest.

Convenience and preparation benefits are a hallmark of this recipe. With a prep and cook time of just 30 minutes, it exemplifies efficiency without sacrificing quality. The simplicity of the ingredients speaks volumes, allowing their native flavors to shine without the need for complex preparation methods. The recipe encourages taking pride in fresh produce and high-quality seafood, making it a staple for busy individuals who prioritize healthful, delicious meals.

Nutritional advantages are abundant in this dish. Tuna is an excellent source of lean protein and omega-3 fatty acids, supporting heart health and muscle maintenance. Meanwhile, radishes add a dose of fiber and essential vitamins, and the citrus elements contribute antioxidants essential for maintaining a robust immune system. This meal is not only about treating your taste buds but also nurturing your body with nutritious ingredients.

The social and entertaining value of the Seared Tuna Salad makes it a hit at gatherings. Its impressive presentation and fresh, inviting flavors create an ideal setting for conversation and enjoyment. Whether hosting a dinner party or having a quiet meal with loved ones, the dish’s elegance and taste leave a lasting impression, making dining experiences memorable and joy-filled.

Cost-effectiveness and accessibility add another layer of appeal to this recipe. While quality tuna may be an investment, the remaining ingredients are budget-friendly and readily available at local markets. This combination ensures that you’re investing wisely in a healthful and luxurious meal, perfect for treating yourself without extravagant expense.

Historical Background and Cultural Significance

The origin story of seared tuna dishes can be traced back to Japanese cuisine, where sashimi and sushi have celebrated raw fish’s purity for centuries. This culturally significant dish represents a fusion of traditional Japanese cooking methods with Western culinary innovations, where the art of searing tuna meets a refreshing salad.

Cultural importance lies in the way the dish bridges two culinary worlds, valuing the purity of the fish while introducing a burst of global flavors. The incorporation of radish and citrus nods to Western influences, while the reverence for high-quality tuna echoes the meticulous standards of Japanese cuisine, symbolizing a harmonious blend of cultures.

The evolution of the recipe reflects the changing tastes of modern diners, favoring light, health-conscious meals. The traditional searing techniques used for the tuna denote a respect for Japanese cooking methods, while adaptations in salad ingredients and vinaigrettes show flexibility and creativity, making the dish versatile and timeless.

Regional variations exist across different cuisines, with the Mediterranean version incorporating olives and sun-dried tomatoes. Each adaptation pays homage to the original concept while showcasing regional flavors and ingredients, offering a fresh perspective on a classic idea and underscoring its adaptable nature.

Ingredient Deep Dive

Tuna, the star of this dish, holds both cultural significance and a rich history. Revered in Japanese cuisine for its delicate flavor and texture, tuna is essential in sushi and sashimi dishes and prized for its uniqueness. Nutritionally, tuna is a powerhouse of lean protein and omega-3 fatty acids, promoting heart health and muscle maintenance.

Selecting the right cut of tuna is crucial for achieving perfect sear and flavor. Opt for sashimi-grade tuna, ensuring a fresh, vibrant color and minimal odor. Storing tuna correctly involves keeping it chilled and consuming it shortly after purchase to maintain its freshness. If substituting, consider salmon or mahi-mahi for different flavors while adhering to recommended cooking times.

Radishes, often seen as humble root vegetables, bring brightness and crunch to our salad. Historically, they have been enjoyed for their peppery flavor and have roots in both European and Asian cuisines. Nutritionally, radishes provide dietary fiber and vitamin C, contributing to overall health and digestion.

When selecting radishes, look for firm, vibrant bulbs with fresh green leaves, indicating freshness. Store them in the refrigerator in a sealed container to retain moisture and crispness. If a substitute is needed, consider using jicama or sliced cucumbers to maintain the refreshing crunch in the salad.

Common Mistakes to Avoid

  • Overcooking the tuna leads to dryness and a loss of flavor. Aim for a quick sear to retain moisture and achieve a pleasing texture.
  • Using low-quality ingredients compromises the dish’s potential. Select fresh, sashimi-grade tuna and vibrant produce for the best results.
  • Neglecting to let the tuna rest before slicing leads to uneven texture and flavor distribution. Allow a brief resting period post-searing.
  • Improper slicing of tuna or radishes affects presentation and texture. Use a sharp knife and practice careful, even slices for optimal aesthetics and mouthfeel.
  • Failing to balance vinaigrette flavors results in overpowering or weak tastes. Taste and adjust the seasoning before dressing to achieve the perfect balance.
  • Ignoring presentation diminishes the dish’s visual appeal. Carefully plate with an eye for color arrangement and garnish thoughtfully.
  • Overdressing the salad can lead to sogginess. Dress lightly and serve vinaigrette on the side if needed for additional flavor.
  • Not prepping ingredients ahead of time can disrupt the cooking flow. Have all elements ready before starting to ensure a smooth cooking process.

Essential Techniques

Mastering the art of searing tuna is critical for this dish. Seared tuna achieves a perfect balance of cooked outer layer and rare center, offering richness in every bite. Ensure your pan is sufficiently hot to create a flavorful crust while maintaining a tender interior. Avoid overcooking by timing the sear accurately and observing visual cues like color and texture change.

Creating the perfect vinaigrette requires an understanding of balance between acid, oil, and seasoning. Start with fresh citrus juice for brightness and carefully emulsify the oil for smoothness. Taste frequently to ensure an ideal harmony between tartness and sweetness, adjusting ingredients through trial and error to enhance the salad’s overall flavor profile.

Pro Tips for Perfect Seared Tuna Salad

– Ensure tuna steaks are dry before searing to achieve a crisp outer layer. Pat with paper towels to remove excess moisture for the best texture.
– Season the tuna generously with salt and pepper before cooking. This enhances flavor and contributes to a savory crust when seared.
– Choose a high smoke point oil, like canola or grapeseed, for searing, to prevent burning and maintain flavor integrity.
– If finger limes are unavailable, use a blend of lime zest and juice to replicate the acidic burst.
– Directly plate just before serving so the greens stay crisp and vibrant, preserving the salad’s appealing freshness.
– For added umami, consider incorporating a touch of soy sauce or miso in the vinaigrette for depth and complexity.

Variations and Adaptations

Regional variations can introduce exciting flavor profiles to this dish. Consider a Mediterranean twist with olives, oregano, and feta cheese for a savory alternative. Each element adds cultural richness while maintaining the core principles of the original salad.

Seasonal adaptations are straightforward, allowing for ingredient swaps to suit the weather. In colder months, roasted winter vegetables make a hearty base for the seared tuna, while summer calls for fresher, crisp textures from garden-fresh produce.

Dietary modifications such as a low-carb version keep the salad vibrant. Replace certain carbohydrate-heavy components with nutrient-rich greens, and explore keto or paleo variations by adjusting the type of oil and seeds used in the dressing.

Flavor variations introduce exciting new dimensions. Experiment with Asian-inspired elements like sesame oil or ginger in the vinaigrette, enhancing the global flair.

Texture modifications can involve chopping nuts for added crunch or integrating avocado for creaminess, transforming the dish’s mouthfeel while keeping the core flavors intact.

Presentation alternatives can include serving the tuna sliced over the salad for a visual spectacle or creating bite-sized appetizers by rolling salad components in thin tuna slices, ideal for entertaining guests.

Serving and Presentation Guide

Plating techniques can elevate the dish’s appearance and experience. Arrange the tuna slices on a generous bed of greens, letting their vibrant hues capture attention. Consider a minimalist approach for an elegant look, highlighting the simplicity of each ingredient.

Garnishing ideas include sprinkling toasted sesame seeds or edible flowers for pops of color and texture. These additions can enliven the plate and offer subtle flavor enhancements.

Traditional accompaniments such as steamed rice or crusty bread can make the meal more substantial, fitting the dining occasion and personal preferences. Pairing simple sides with this flavorful salad provides balance without overshadowing the salad’s central role.

Modern serving suggestions focus on single-serving bowls or plates, allowing each diner a personalized portion. This approach encourages self-paced enjoyment and ensures that presentation remains consistent throughout the dining experience.

Temperature considerations are essential, particularly when serving fish. Ensure the salad is immediately served post-preparation to maintain ideal temperature and taste.

Portion control tips involve dividing the tuna into equal servings before slicing, ensuring each plate receives a consistent portion of protein and greens. This thoughtful approach contributes to balanced nutrition and presentation.

Wine and Beverage Pairing

For an exquisite dining experience, pair with a crisp Sauvignon Blanc or Pinot Gris, offering citrus notes that marry seamlessly with the salad’s flavors. These wines complement the vinaigrette’s tang while highlighting the tuna’s richness, offering balance to the meal.

Non-alcoholic alternatives are diverse, with sparkling water infused with fresh lime or a light herbal iced tea providing refreshing contrast and flavor mirroring the citrus elements of the dish.

If applicable, coffee or tea pairings consider the tuna’s savory nature. A mild green tea can complement, offering subtle earthiness without overpowering the dish’s primary flavors. Temperature considerations involve serving these beverages chilled or warm, according to season and personal preference.

Serve suggestions include using fine glassware to elevate the setting and create an atmosphere of culinary sophistication, aligning with the dish’s gourmet appeal.

Storage and Shelf Life

Store leftovers promptly to ensure freshness. Use airtight containers to keep flavors intact, refrigerating within two hours of preparation. The salad can last up to two days in the fridge, though it’s best consumed fresh for optimal taste and texture.

Temperature requirements stress maintaining a cold environment to prevent spoilage, especially for seafood components. Ensure refrigerators are set at proper cooling levels to sustain food safety and quality.

Container recommendations involve using glass or BPA-free plastic for secure sealing and minimal odor transfer. These containers safeguard the integrity of each component, retaining their distinct flavors and textures.

Signs of spoilage include unpleasant odors and discoloration, indicating that the food should not be consumed. Always check for freshness before enjoying leftovers, erring on the side of caution.

Reheating instructions advise against microwaving this salad to preserve its integrity. Instead, allow it to reach room temperature naturally for best results, particularly the seared tuna.

Freezing guidelines suggest against freezing for optimal flavor retention, as the radishes and greens lose their texture post-thaw. Enjoying the salad fresh ensures every bite remains vibrant and enjoyable.

Make Ahead Strategies

Adopt make-ahead strategies by preparing certain components in advance. The vinaigrette can be made up to two days prior, stored in the fridge for quick access. This allows for infusing flavors while reducing day-of preparation time.

Storage between steps helps maintain ingredient quality. Keep sliced radishes submersed in cold water to preserve crunch, and wrap greens in damp paper towels to prolong freshness in the refrigerator.

Quality impact assessment suggests assembling the salad just before serving to ensure optimal texture and taste. Maintaining separate elements until the last moment keeps each component as fresh as possible.

Assembly tips involve arranging greens first, followed by artful positioning of tuna slices for visual appeal. Serving dressing on the side allows guests to season to taste, providing control over flavor intensity.

Reheating guidelines recommend avoiding heat, preserving the salad’s intended chilled nature. Instead, focus on other assembly components that might involve slight cooking, like toasting nuts or seeds.

Fresh element additions involve incorporating ingredients such as fresh herbs or edible flowers last minute, ensuring their vibrancy and enhancing the dish’s overall presentation.

Scaling Instructions

Scaling the recipe for larger gatherings is simple with mindful adjustments. Doubling or tripling ingredients while checking seasoning maintains consistency across multiple servings, ensuring each dish receives the same flavor balance.

Equipment adjustments include using larger pans or multiple cooking devices for simultaneous searing if needed, maintaining efficiency even in scaled settings.

Timing modifications suggest cooking tuna in batches to prevent overloading pans, ensuring quality sear and texture. Allow time between batches to keep cooking processes precise and focused.

Storage considerations remind anticipating storage space for extra prepared ingredients, using labeled containers to organize multiple components effectively.

Nutritional Deep Dive

The macro breakdown of this tuna salad highlights its balanced nutrition. With high protein from tuna, healthy fats from the vinaigrette, and low carbohydrates from fresh produce, it supports a variety of dietary goals, ensuring a fulfilling meal without excessive calorie intake.

Micronutrient analysis focuses on the vitamin-rich profile, with radishes and citrus aiding immune function, while healthy fats support brain and joint health. This blend of nutrients makes it an excellent option for health-conscious individuals.

Health benefits are abundant, with ingredients promoting cardiovascular support, improved digestion, and overall nutritional well-being. The meal’s clean ingredient list allows customization while retaining health advantages.

Dietary considerations account for gluten and dairy-free lifestyles—using simple, whole ingredients which naturally align with these dietary requirements without need for significant alteration.

Portion analysis helps maintain balanced intake. Serving recommendations echo the balance, ensuring meals are fulfilling and enjoyable without culinary excess.

Weight management tips highlight the meal’s low-carb nature, offering support for weight-conscious diners aiming to maintain or reduce caloric intake while still enjoying a flavorful satisfying meal.

Dietary Adaptations

For a gluten-free version, ensure preparations adhere to celiac-friendly standards. Use gluten-free oils and avoid cross-contamination with other grain-based dishes, maintaining purity and safety for all diners.

Dairy-free adaptations are inherently included in the recipe, alleviating concerns for those with lactose intolerance or dairy sensitivities, as no animal milk products are required.

Vegan transformations are possible with substitutions like marinated tofu replacing tuna, recreating a similar texture with plant-based ingredients. This version respects ethical choices while delivering delightful flavors.

Low-carb variations naturally occur within the core recipe, focusing on high protein and fiber without carbohydrate-heavy elements. This makes it an ideal dish for those observing a low-carb lifestyle.

Keto modifications complement the original recipe by adhering to low carbohydrate limits. Tailoring serving sizes and component selections encourages healthy adherence to ketogenic guidelines.

Paleo choices align comfortably with this salad’s focus on fresh produce and quality protein. Using unprocessed ingredients respects these dietary philosophies, offering a satisfying meal.

Low-FODMAP adaptations consider ingredient sensitivity, emphasizing radishes for their minimal FODMAP content and assessing the vinaigrette for compliant ingredients, maintaining digestive comfort.

Troubleshooting Guide

Tackling texture issues involves proper tuna searing techniques. Keep heat control consistent and select the right pan to achieve a tender interior and flavorful crust.

Flavor balance problems can be resolved by adjusting vinaigrette acidity, sweetness, and seasoning, ensuring the tuna remains the focal point by balancing salty, acidic, and aromatic elements in your dressing.

Temperature problems often stem from uneven ingredient temperatures. Allow ingredients to reach room temp before serving, especially the tuna, for an integrated experience of flavors.

Equipment challenges require preheating cast iron skillets thoroughly before searing and having appropriate utensils ready for each step. Ensure knives are sharp for clean slices and vibrant presentation.

Ingredient substitutions facilitate adjusting the menu to personal taste while respecting flavor balance. Carefully choose similar flavor profile alternatives ensuring dish integrity remains intact.

Timing concerns frequently revolve around prep interruptions. Prepare all components in advance, dividing tasks into manageable stages, keeping each step measured and efficiently executed.

Recipe Success Stories

Explore community feedback revealing heartfelt connections with the Seared Tuna Salad recipe. Readers have praised its refreshing taste and elegant presentation, highlighting their satisfaction and sharing stories of family meals elevated by its flavors.

Variation successes include creative additions such as avocado or basil, offering unique interpretations that surprise and delight the palette, maintaining central tenets while exploring new dimensions.

Adaptation stories inspire with innovative dietary changes like vegan or keto versions, demonstrating flexibility and highlighting the recipe’s capacity for personal tailoring to align with diverse lifestyle needs.

Reader suggestions provide an ongoing dialogue of shared culinary exploration. Suggestions have encompassed small adjustments, like enhancing citrus profiles or introducing spices, enriching future versions of the dish.

Photography tips encourage capturing each dish’s aesthetic appeal, leveraging natural lighting, and thoughtful composition to portray ingredients fresh vibrancy. These snapshots invite others to experience the dish’s artistry.

Frequently Asked Questions

Q: Can I use a different protein besides tuna?
A: Certainly! While tuna is recommended for its texture and flavor, salmon or mahi-mahi are great alternatives. They provide similar benefits and can be seared similarly for a delightful result.

Q: How can I store leftover salad?
A: Store any leftover salad in an airtight container in the refrigerator to maintain freshness and flavor. Consume within two days to ensure optimal quality.

Q: Are finger limes essential to the salad?
A: Finger limes add unique citrus bursts, though they aren’t essential. Replacing them with lime zest and juice achieves similar acidity, retaining balance in the dish.

Q: What’s a good wine pairing for seared tuna salad?
A: A crisp Sauvignon Blanc pairs excellently with seared tuna salad, complementing the citrus vinaigrette and enhancing the dish’s overall freshness and flavor.

Q: Can this salad be made vegan?
A: Yes! Replace tuna with marinated tofu or a similar plant-based protein to make the salad entirely vegan while retaining the intended flavors and freshness.

Q: Is this dish suitable for meal prep?
A: Absolutely. Prepare certain elements like the vinaigrette and radishes in advance. Assemble just before serving for the best texture and flavor, ensuring quick meal prep.

Q: What makes tuna the focal ingredient?
A: Tuna’s rich protein content, delicate flavor, and texture make it the ideal base for our salad. Its subtle taste encourages vibrant salad and vinaigrette elements to shine without overpowering its inherent quality.

Q: Can I serve this salad warm?
A: While typically served at room temperature, the salad elements can be slightly warmed to maintain balance. Avoid heating components too much to preserve their integral freshness and crunch.

Q: What cutting techniques optimize presentation?
A: Using a sharp knife, uniformly slice the tuna and radishes to maintain visual consistency. Practice focusing on even, symmetrical cuts, ensuring aesthetic appeal.

Q: How can allergies be accommodated?
A: Customize elements to align with allergy needs. Substitute ingredients appropriately, using allergy-safe oils and alternatives that adhere to dietary restrictions, remaining attentive to cross-contamination risks.

Additional Resources

Discover related recipes utilizing similar ingredients for diverse culinary exploration. Exchange flavors and techniques with other main courses, focusing on fresh produce and lean proteins.

Technique guides provide clarity in mastering essential skills like searing fish and emulsion vinaigrettes, empowering home cooks with knowledge to attain professional-grade results.

Delve into ingredient information detailing unique components like finger limes and their applications in broader culinary contexts. This foundation inspires curiosity and innovation.

Equipment recommendations highlight essential tools for efficient cooking experiences, suggesting reliable brands and products enhancing everyday kitchen practices and culinary exploration.

Seasonal variations encourage embracing local produce offerings, adapting recipes to reflect regional accessibility, and sustaining environmentally conscious dining choices.

Join the Conversation

Engage in recipe sharing by posting your Seared Tuna Salad experiences on social media. Tag our page to inspire others and showcase your culinary creativity, building an engaging food-loving community.

Photography tips offer guidance on achieving stunning visuals, leveraging natural lighting and composition techniques to capture each dish’s inherent beauty. Share your images to inspire fellow food enthusiasts.

Recipe reviews offer constructive insights and suggestions to improve timing, technique, and modifications, offering collaborative exchanges among passionate home cooks.

Community engagement thrives on sharing variations tried and tested by diverse perspectives, allowing for a living, evolving recipe experience that embraces all users.

Recipe variations shared globally reflect the beauty of diverse cultural engagement, encouraging exploration and adaptation in the spirit of culinary unity.

The Recipe

Seared Tuna Salad with Radish, Finger Lime, and Citrus Vinaigrette

Serves: 2

Prep Time: 20 mins

Cook Time: 10 mins

Total Time: 30 mins

Kitchen Equipment Needed

  • Cast iron skillet
  • Sharp chef’s knife
  • Citrus juicer
  • Mixing bowls
  • Salad spinner

Ingredients

  • 2 tuna steaks (approximately 6 oz each)
  • 2 tablespoons olive oil
  • Salt and pepper to taste
  • 4 radishes, thinly sliced
  • 1 finger lime (or substitute with lime zest and juice)
  • Mix of salad greens (1 cup)
  • 1 tablespoon lemon juice
  • 1 tablespoon orange juice
  • 1 tablespoon honey
  • 1/3 cup olive oil (for vinaigrette)
  • Salt and black pepper to taste (for vinaigrette)

Directions

  1. Pat the tuna steaks dry with paper towels. Season generously with salt and pepper on both sides.
  2. Heat a cast iron skillet over medium-high heat. Add olive oil, ensuring coating across the surface.
  3. Place tuna in the skillet. Sear each side for approximately 1-2 minutes until a crust forms, maintaining a rare center. Remove and let rest.
  4. In a small bowl, mix lemon juice, orange juice, honey, olive oil, salt, and pepper to create the vinaigrette. Adjust seasoning as desired.
  5. Toss salad greens with thinly sliced radishes. Add vinaigrette, reserving a portion for finishing.
  6. Slice seared tuna into thin strips. Lay over dressed greens and radishes.
  7. Garnish with finger lime pulp or zest across the top. Serve immediately.

Recipe Notes

  • Ensure tuna is of high quality, preferably sashimi-grade for the best texture and flavor.
  • For a bolder vinaigrette, experiment by adding Dijon mustard or minced garlic.
  • Additional garnishes could include sesame seeds or thinly sliced scallions for an Asian twist.
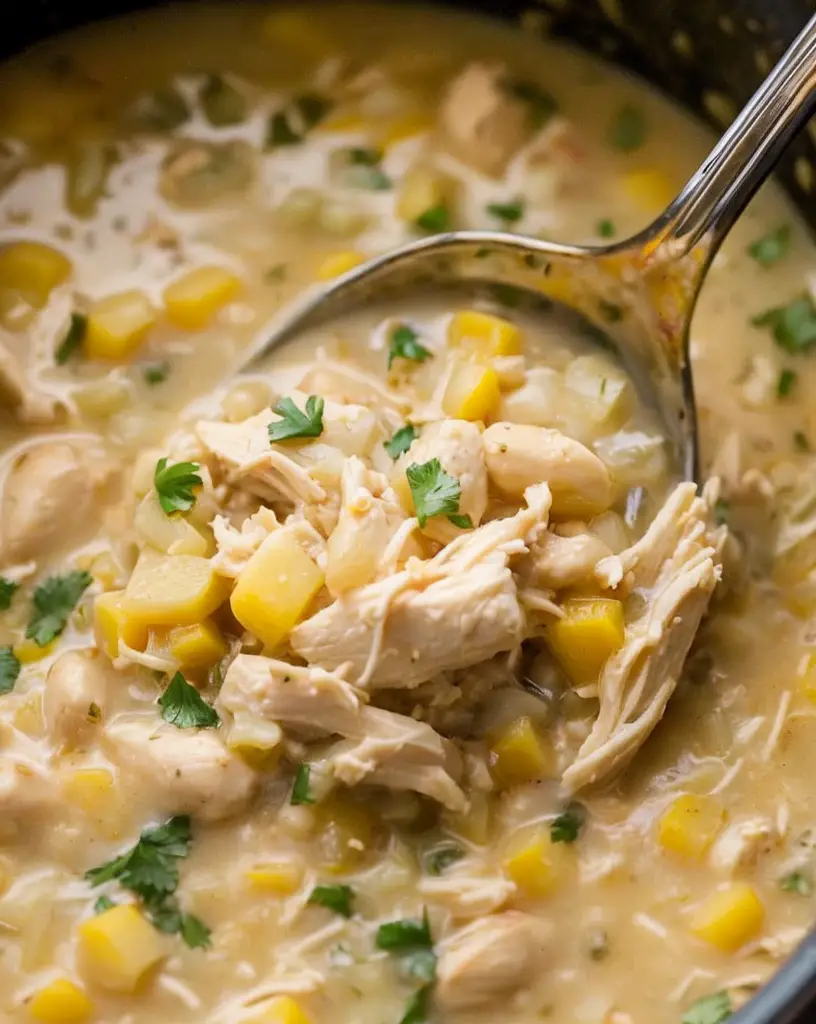
Deliciously Simple White Chicken Chili Recipe for Busy Cooks

Easy White Chicken Chili Recipe: A Comforting Bowl of Flavor

⚖️
Difficulty
Easy

⏲️
Prep Time
15 mins

🕒
Cook Time
30 mins

⏱️
Total Time
45 mins

🍽️
Servings
6

Transform your everyday dinner into a delightful affair with this Easy White Chicken Chili Recipe. Incorporating tender chicken, creamy beans, and a blend of robust spices, this chili brings comfort food to a whole new level. Its rich and creamy texture paired with a mild heat makes it a perfect family favorite. Whether you’re looking for a quick weeknight dinner or an impressively flavorful dish to please a crowd, this white chicken chili is a winner. So warm up with a bowl of heartiness and drift into a food paradise.

Quick Recipe Highlights

  • Flavor Profile: Featuring a mix of savory spices, this chili provides a mild heat balanced with creamy textures from the beans.
  • Texture: The combination of tender chicken and smooth, creamy beans gives it a satisfying mouthfeel.
  • Aroma: A delightful aroma of spices and the earthiness of beans fills your kitchen as it simmers.
  • Visual Appeal: The creamy white color combined with colorful garnishes makes it visually appealing.
  • Skill Level Needed: This recipe is simple enough for even beginner cooks to master, thanks to its straightforward steps.
  • Special Equipment: A large pot or Dutch oven is needed to bring all the flavors together seamlessly.

Recipe Overview

  • Difficulty Level: Labeled as easy, the recipe calls for basic cooking techniques and familiar ingredients, ensuring a stress-free cooking experience.
  • Category: This dish fits comfortably in the category of soups and stews, offering a cozy meal option.
  • Cuisine: While it’s rooted in American cuisine, the spices give it a hint of Southwestern flair.
  • Cost: With most ingredients being pantry staples, this chili is budget-friendly, making it accessible for all.
  • Season: It shines especially in cooler months when you’re in need of a hearty and warming dish.
  • Occasion: Perfect for casual dinners, potlucks, or game-day gatherings, this versatile recipe never disappoints.

Why You’ll Love This Recipe


Indulge your taste buds with the delightful texture and robust flavors of this Easy White Chicken Chili Recipe. The tender shreds of chicken absorb the aromatic spices impeccably, creating a symphony of flavors in every spoonful. This dish is not only a sensory delight but also a convenience-driven meal that comes together swiftly, making it ideal for busy schedules. Nutritionally, it’s a powerhouse, rich in proteins and essential nutrients from the beans and chicken. Moreover, its sociable nature makes it a charming addition to any gathering, allowing your guests to bask in its comforting warmth.

The cost-effectiveness of this recipe is another reason to cherish it. Utilizing pantry staples such as canned beans and basic spices means whipping up a satisfying meal without stretching your budget. Its universal appeal allows it to cater to various palates, ensuring everyone relishes their dining experience. Whether you savor it alone on a cozy evening or share it with loved ones, this white chicken chili promises an enjoyable, flavor-packed feast each time.

Historical Background and Cultural Significance


Originating as a popular alternative to traditional tomato-based chili, the white chicken variety has carved a niche for itself in modern American cuisine. Its roots can be traced back to Tex-Mex cooking traditions, where cooks sought to create a dish that combined creamy textures with the piquancy of chili peppers. Surprisingly, its rise to fame in culinary circles is relatively recent, prompted by the quest for inventive comfort food alternatives.

Culturally, white chicken chili has become an embodiment of culinary fusion, blending regional flavors and techniques. It represents the adaptability and creativity inherent in American cuisine, embracing diversity while catering to evolving tastes. Over time, this dish has undergone numerous adaptations, with variations popping up in different regions, each with its own twist. These continue to showcase its versatility and ability to bring comfort across cultural boundaries.

Ingredient Deep Dive


Chicken: As the star of this chili, chicken adds a rich protein source to the dish. Whole pieces or shredded, it absorbs the spices impeccably. Selecting bone-in, skin-on chicken can add depth of flavor, though boneless varieties streamline preparation.

Beans: Providing creaminess and texture, white beans are a nutritional boon. Packed with fiber and vitamins, they enhance both the taste and health benefits of the chili. Canned beans offer convenience, but dried beans can be used if time permits for even greater flavor depth. Always store beans in a cool, dry place to retain their freshness and substitute with other varieties, such as cannellini or navy beans, if desired.

Common Mistakes to Avoid

  • Overcooking the chicken: This can lead to dry, tough pieces. Monitor closely, removing the chicken once it reaches internal doneness.
  • Skipping the bean rinse: Rinsing canned beans removes excess sodium and starchy liquid, leading to a cleaner flavor profile.
  • Not adjusting seasoning: Taste test during cooking and adjust spices to suit your preference, ensuring an optimal flavor balance.
  • Forgetting to simmer: Allow the chili to simmer, meld flavors, and develop richness.
  • Using old spices: Fresh spices ensure robust flavors. If in doubt, replace them.
  • Neglecting aromatics: Starting with sautéed aromatics like onions and garlic enhances depth of flavor.
  • Using low-quality broth: A good quality chicken broth forms the backbone of this chili’s flavor.
  • Over-thickening: Add thickeners slowly and only if necessary to avoid a gluey texture.
  • Improperly storing leftovers: Cool chili completely before refrigerating to maintain its quality.
  • Not adding citrus: A squeeze of lime can enliven the flavors beautifully, balancing out richness.

Essential Techniques


Simmering: This technique allows the flavors to merge beautifully while keeping the chicken tender and juicy. Maintain a gentle simmer, avoiding vigorous boiling, to ensure even cooking without drying.

Layering aromatics: Begin with onions and garlic to create a flavorful base. This initial step enhances overall taste, providing an aromatic foundation ideal for the chili.

Using a slurry: If you prefer a thicker consistency, create a slurry with cornstarch and water, adding gradually. Stay vigilant to avoid over-thickening, aiming for a pleasantly creamy texture.

Pro Tips for Perfect Easy White Chicken Chili


Marinate chicken before cooking to impart additional layers of flavor. Aim for at least 30 minutes of marination for best results.

Use a mix of beans for varied texture and flavor depth. This can bring additional nutritional benefits as well.

Incorporate fresh herbs like cilantro or parsley as garnishes for a refreshing finish to the dish.

Introduce a bit of heat by adding diced jalapeños or a dash of hot sauce for those who prefer a spicier kick.

For a richer consistency, blend a portion of the beans before adding, creating a creamy base without additional thickeners.

Allow the chili to rest for a few minutes before serving; this enables the flavors to settle and harmonize.

Variations and Adaptations


Regional variations: Depending on local preferences, you can incorporate regional chiles or spice blends to give the dish a unique twist.

Seasonal Adaptations: In summer, add fresh corn kernels for a sweet, vibrant touch. In winter, root vegetables like sweet potatoes can add heartiness.

Dietary Modifications: Make it dairy-free by skipping any optional cheese toppings, or transform it into a vegan meal by replacing chicken with tofu or tempeh.

Flavor Variations: Smoke it up by adding roasted poblano peppers or experimenting with spices like smoked paprika for depth.

Texture modifications: Boost creaminess by stirring in a dollop of sour cream or Greek yogurt, enhancing smoothness without overpowering flavor.

Presentation alternatives: Serve in bread bowls for a rustic approach or garnish with colorful vegetables and herbs for an elevated presentation.

Serving and Presentation Guide


Plating techniques: Ladle the chili into wide, shallow bowls for better visibility of its colorful elements. For a more vibrant presentation, arrange toppings neatly on the surface.

Garnishing ideas: Fresh herbs, sliced avocados, shredded cheese, or even a handful of tortilla chips can make beautiful, contrasting garnishes.

Traditional accompaniments: Serve alongside cornbread or crusty bread to sop up every drop of goodness.

Modern serving suggestions: Try pairing it with a fresh, tangy salad or a side of roasted vegetables for a balanced meal.

Temperature considerations: Serve hot for maximum enjoyment, but offer chilled garnishes such as sour cream for contrast.

Portion control tips: One generous ladleful per person is often sufficient, but allow for easy seconds on particularly chilly days or for hungrier guests.

Wine and Beverage Pairing


Wine pairings: A crisp white wine like Sauvignon Blanc or a lightly oaked Chardonnay complements the chili’s creamy base beautifully.

Non-alcoholic alternatives: Lemon water or citrus-infused iced tea cleanse the palate while enhancing the meal.

Coffee/tea pairings: An earthy mint tea or a bold black tea can pair nicely, providing warmth and a refreshing counterpoint.

Temperature considerations: Opt for chilled drinks to contrast the chili’s warmth or enjoy a hot beverage for uniform comfort.

Serving suggestions: Accompany beverages with lime wedges or fresh mint for added aromatic delight.

Storage and Shelf Life


Storage methods: Store leftover chili in an airtight container to maintain freshness. Allow it to cool completely before refrigerating.

Temperature requirements: Keep it chilled in the refrigerator and consume within 3-4 days for optimal flavor and safety.

Container recommendations: Glass containers are ideal as they don’t absorb flavors or odors and allow easy reheating.

Signs of spoilage: Discard if there’s any unusual odor, discoloration, or mold development.

Reheating instructions: Heat gently on the stovetop, stirring occasionally until uniformly warmed. Add a splash of broth or water if needed to adjust consistency.

Freezing guidelines: Freeze in portioned containers for up to 3 months. Thaw overnight in the fridge before reheating.

Make Ahead Strategies


Prep timeline: Prepare the chicken and chop the vegetables in advance to save time on the day of cooking.

Storage between steps: If pausing partway, refrigerate cooked chicken and other prepared components separately.

Quality impact assessment: Assembled components can lose freshness over extended periods, so complete the cooking process within a day or two of prep stages.

Assembly tips: Ensure beans are added at the end to maintain their integrity and texture.

Reheating guidelines: Avoid high heat during reheating to prevent textural changes in the beans and chicken.

Fresh element additions: Stir in fresh ingredients like cilantro or lime juice just before serving to brighten and rejuvenate flavors.

Scaling Instructions


Halving the recipe: Maintain ingredient ratios, slightly reducing liquid additions to retain consistency. Adjust seasoning to taste.

Doubling or tripling: Larger batches may require more significant adjustments in seasoning. Taste frequently to ensure flavor harmony.

Equipment adjustments: Opt for a larger pot or switch to a slow cooker for convenience when scaling up.

Timing modifications: Larger volumes may extend cooking times slightly, especially in achieving desirable textures.

Storage considerations: Divide oversized batches into emergency-friendly portions before storing, for easy, later access.

Nutritional Deep Dive


Macro breakdown: Rich in protein from the chicken and beans, the dish balances carbohydrates with dietary fiber for fullness and energy.

Micronutrient analysis: White beans provide essential minerals like magnesium and potassium, while chicken contributes necessary B vitamins.

Health benefits: The high protein content supports muscle maintenance, and fiber aids digestion, making it an overall health-conscious choice.

Dietary considerations: Naturally gluten-free, this dish can easily be adapted to meet various dietary needs while providing hearty sustenance.

Portion analysis: A single serving delivers a balanced nutritional profile, but mindful portioning helps in managing caloric intake.

Weight management tips: Pair the chili with ample vegetables or salads to add volume without excess calories, complementing weight control efforts.

Dietary Adaptations


Gluten-free: Naturally compliant, but confirm all packaged ingredients like broth are certified gluten-free.

Dairy-free: Simply skip cheese garnishing to keep the meal compliant. Nutritional yeast can offer a cheesy taste sans dairy.

Vegan: Replace chicken with plant-based alternatives such as jackfruit or chickpeas and use vegetable broth.

Low-carb: Use less beans or replace them with extra vegetables, enhancing the low-carb aspect while retaining satisfaction.

Keto: Opt for fatty chicken cuts and reduce carb-heavy ingredients like beans, focusing on nutritious fats.

Paleo: Adapt by using whole, unprocessed ingredients, focusing on high-quality protein and ample vegetables.

Low-FODMAP: Adjust components to suit FODMAP guidelines, ensuring the inclusion of suitable stock and bean alternatives.

Troubleshooting Guide


Texture issues: If the chili feels too thin, mash a portion of beans to add natural creaminess or cautiously incorporate a thickener.

Flavor balance: Adjust acidity with lime or lemon juice if it tastes flat, experimenting slightly and gradually adjusting seasoning.

Temperature problems: Overheating during cooking can toughen chicken. Be vigilant and lower heat back to a gentle simmer.

Equipment challenges: Use stable pots with good heat distribution and ensure proper coverage to prevent moisture loss and even cooking.

Ingredient substitutions: Ensure taste parity when swapping ingredients, understanding flavor dynamics, and seasoning needs.

Timing concerns: Adequately prepare ingredients to streamline cooking efficiency and prevent rushed preparation chaos in the kitchen.

Recipe Success Stories


Community feedback: Enthusiastic home cooks often rave about the simplicity and irresistible taste of this recipe, finding it a staple in weekly meal plans.

Variation successes: Artisanal adaptations using local spices have delighted audiences, adding unique touches to the already dependable flavor base.

Adaptation stories: Readers embrace opportunities to tailor this dish to varied family preferences, resulting in shared creations and engaging recipe conversations.

Reader suggestions: Creative additions like caramelized onions and diverse pepper types frequently surface, encouraging culinary exploration.

Photography tips: Capture enticing photos by garnishing well and choosing vibrant, natural lighting to accentuate the chili’s inviting warmth.

Frequently Asked Questions

What beans are best for white chicken chili?
Cannellini beans are a popular choice due to their creaminess and mild flavor, but other white beans like navy or great northern beans work well.

Can this be cooked in a slow cooker?
Yes, after sautéing aromatics, add all ingredients to a slow cooker and cook on low for 6-8 hours, or until the chicken is tender.

Is there a vegetarian version of this recipe?
Absolutely! Replace chicken with hearty vegetables or plant-based proteins and substitute chicken broth with vegetable stock.

How do I avoid making the chili too spicy?
Adjust the amount of chili powder and omit spice-heavy ingredients like jalapeños if a milder result is preferred.

What garnishes pair well with this dish?
Try topping with fresh cilantro, diced avocado, shredded cheese, or a dollop of sour cream for an enhanced experience.

Can leftovers be frozen?
Certainly, ensure the chili cools fully before transferring to airtight containers for freezing and plan to consume within 3 months.

Is fresh chicken better than canned?
Fresh is recommended for texture and flavor, though canned chicken can offer a quicker, comparable alternative when time is limited.

Can corn be added to white chicken chili?
Indeed, corn adds a subtle sweetness and extra layer of texture that complements the chili well.

What can I use instead of a Dutch oven?
A large saucepan or stockpot serves as a suitable substitute, maintaining adequate heat distribution for successful chili preparation.

How can I thicken the chili without flour?
Consider pureeing some beans or using a cornstarch slurry for gentle thickening without altering the chili’s flavor.

Additional Resources


Explore related recipes like Classic Beef Chili or Vegetarian Bean Stew for further comfort food inspiration. Investigate technique guides on spice blending for enhancement mastery and learn more about the nutritional virtues of beans through detailed ingredient information. For a seamless cooking experience, consider recommended cookware that can handle everything from slow simmering to spectacular serving.

Join the Conversation


Join fellow home cooks in celebrating this Easy White Chicken Chili Recipe’s versatility by sharing your versions on social media. Picking up photography tips can elevate your presentation skills, while reviewing the recipe allows participation in the broader cooking community. Engaging with enthusiastic culinary peers and discovering diverse recipe variations adds a sociable dimension to the cooking adventure.

The Recipe

Easy White Chicken Chili

Serves: 6

Prep Time: 15 mins

Cook Time: 30 mins

Total Time: 45 mins

Kitchen Equipment Needed

  • Large pot or Dutch oven
  • Cutting board
  • Chef’s knife
  • Wooden spoon
  • Measuring cups and spoons

Ingredients

  • 2 boneless, skinless chicken breasts
  • 1 tablespoon olive oil
  • 1 onion, chopped
  • 2 cloves garlic, minced
  • 2 cans (15 oz each) white beans, drained and rinsed
  • 2 cups chicken broth
  • 1 can (4 oz) green chilies
  • 1 teaspoon cumin
  • 1 teaspoon chili powder
  • Salt and pepper to taste
  • Optional garnishes: shredded cheese, cilantro, lime wedges

Directions

  1. Heat olive oil in a large pot over medium heat. Add the chopped onion and garlic, sautéing until the onion is translucent.
  2. Add the chicken breasts, cooking them until browned on both sides. Remove and set aside.
  3. Pour in the chicken broth, beans, green chilies, cumin, and chili powder. Stir to combine.
  4. Return the chicken to the pot, cover, and simmer for about 20 minutes, until the chicken is cooked through.
  5. Take out the chicken and shred it with two forks.
  6. Return the shredded chicken to the pot, stirring into the chili. Adjust seasoning with salt and pepper.
  7. Serve hot, garnishing with cheese, cilantro, or lime as desired.

Recipe Notes

  • For added spice, include diced jalapeños in step 2.
  • Substitute vegetable broth and replace chicken with tofu for a vegetarian version.
  • Store leftovers in a sealed container, preserving flavor for up to 4 days.

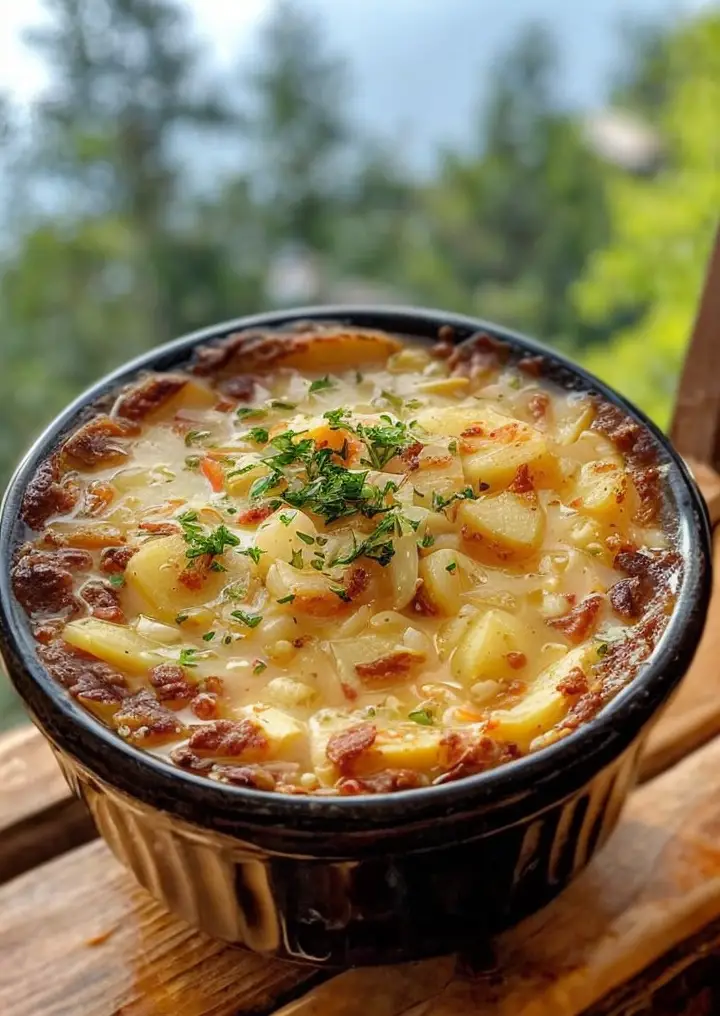
Cozy Comfort in a Bowl: Ultimate Potato Soup Recipe

Classic Potato Soup: A Comforting Family Favorite

⚖️
Difficulty
Easy

⏲️
Prep Time
20 mins

🕒
Cook Time
40 mins

⏱️
Total Time
60 mins

🍽️
Servings
4

On a chilly day, there’s nothing like a warm bowl of classic potato soup to soothe the soul. With its creamy texture and hearty flavors, this thick potato soup is the ultimate comfort food. Perfect for both family meals and quiet meals alone, this potato-based delight brings a taste of nostalgia with every spoonful. Savor the blend of tender potatoes, savory broth, and aromatic spices that make this soup a beloved dish in homes around the world.

Quick Recipe Highlights

  • Flavor Profile: This soup offers a rich and comforting flavor with earthy undertones of potatoes mingled with hints of onion and garlic for a delightful, savory depth.
  • Texture: Achieve a silky smooth texture that coats the palate, enhanced with occasional chunks of tender potatoes for added heartiness.
  • Aroma: The aroma of sautéed onions and garlic combined with a hint of thyme and freshly cracked pepper creates an inviting kitchen fragrance.
  • Visual Appeal: A bowl of creamy, pale soup dotted with green chives offers a simple yet elegant presentation.
  • Skill Level Needed: This easy recipe is beginner-friendly, requiring basic cooking skills and minimal kitchen equipment.
  • Special Equipment: A large pot and an immersion blender or regular blender are needed to achieve the desired consistency.

Recipe Overview

  • Difficulty Level: This easy potato soup recipe requires only basic culinary skills, making it perfect for novice cooks looking to build their confidence in the kitchen.
  • Category: Best served as a main course, this hearty soup can easily serve as a satisfying lunch, dinner, or even a filling starter for larger meals.
  • Cuisine: With roots in Western cuisine, potato soup has found its way into numerous cultural adaptations, each adding a unique twist to the original recipe.
  • Cost: This budget-friendly recipe relies on simple, common ingredients, making it an economical choice for families or anyone on a tight budget.
  • Season: Ideal for fall and winter, this warm dish makes use of in-season ingredients, providing comfort against the cold weather.
  • Occasion: Versatile and crowd-pleasing, it fits casual family gatherings, cozy weekday dinners, or as a comforting addition to a holiday meal spread.

Why You’ll Love This Recipe

Classic potato soup offers a delightful blend of taste and texture that warms the heart. This rich and creamy soup, full of tender potatoes and subtle herbs, delivers a satisfying balance of flavors in every bite. The smoothness of the broth combined with the soft potato chunks creates a mouthfeel that is both soothing and indulgent. This dish’s convenience extends to its straightforward preparation, with easy-to-follow steps that require minimal active time in the kitchen. For those concerned about nutrition, this soup provides a comforting meal with wholesome ingredients that offer essential vitamins and minerals, contributing to a balanced diet without sacrificing flavor. Potato soup invites social gatherings, perfect for sharing with friends and family during the colder months and creating memories over a steaming bowl of goodness. Cost-effective and accessible, this recipe uses pantry staples and is adaptable for various dietary needs, ensuring it becomes a staple in your kitchen rotation.

Historical Background and Cultural Significance

The origins of potato soup date back to European culinary traditions, where simple rural dishes relied heavily on locally available produce like potatoes. Over time, these rustic recipes evolved to meet the tastes of various regions, integrating local herbs and, ultimately, dairy or cream to elevate the dish’s richness. Throughout Europe, especially in Ireland and Germany, potato soup has become a cultural staple, often associated with warmth and home-cooked comfort, symbolizing sustenance through harsh winters. As the recipe traversed borders, it adapted to new ingredients and cooking methods, resulting in an array of variations worldwide. In America, potato soup flourished as both a homely comfort food and a sophisticated starter at elegant dinners, showcasing its incredible versatility. Regional adaptations include the inclusion of bacon or cheese in the U.S., or additional spices in other parts of the world, reflecting the local palate and ingredients available.

Ingredient Deep Dive

Potatoes, the heart of this soup, boast a rich history as a versatile food staple globally. Native to the Andes, they became a European staple following their introduction in the 16th century. Nutritionally dense, potatoes are packed with vitamin C, potassium, and fiber, making them a healthy choice for any diet. When selecting potatoes, seek firm, smooth-skinned options for the best soup results, avoiding those with green spots or sprouts. Store them in a cool, dark place, away from moisture to maximize their shelf life. Substitutions for potatoes include sweet potatoes for a sweeter touch or cauliflower for a low-carb alternative. Onion, another key ingredient, adds depth and sweetness when sautéed. High in antioxidants and vitamin C, onions also contain anti-inflammatory properties that enhance the soup’s health benefits. For the richest flavor, opt for fresh, unblemished onions, storing them in a dry, airy place to avoid spoilage. As a substitute, leeks offer a milder sweetness, providing a slightly different but equally delicious soup experience.

Common Mistakes to Avoid

  • Not properly cooking the potatoes can result in a lumpy texture, so ensure they are fully tender before blending.
  • Incorrect blending techniques can cause the soup to become gummy; opt for an immersion blender to control consistency better.
  • Adding cold cream directly can cause curdling; instead, temper the cream by warming it slightly or mixing with hot soup gradually.
  • Under-seasoning is a common pitfall with potato soup; taste and adjust salt and pepper to bring out the flavors fully.
  • Skipping the soup’s rest time can leave flavors underdeveloped; let it sit briefly before serving for optimal taste.
  • Forgetting to sauté onions can create a harsh flavor; sauté them until soft for a more balanced aromatic base.
  • Over-thickening with too much potato or flour can overshadow other flavors; gradually incorporate thickeners.
  • Using low-quality broth can detract from the overall flavor; choose a high-quality stock or make your own for best results.
  • Failing to skim excess fat may lead to a greasy soup; always skim during cooking for a clean finish.
  • Not garnishing can make the soup visually unappealing; fresh herbs like chives enhance both appearance and flavor.

Essential Techniques

Sautéing onions is crucial for a well-rounded flavor base. This simple process involves cooking chopped onions in a bit of oil or butter over medium heat until they become translucent and fragrant. Accurate temperature control helps avoid burning, ensuring the onions sweeten evenly, which contributes significant depth to the final dish. Mastering the blending of the soup to achieve the perfect consistency is another vital technique. Using an immersion blender allows for various consistencies—whether creamy smooth or slightly chunky—to appeal to different textural preferences. While blending, keep an eye on the texture to avoid over-blending, which can alter the soup’s desired mouthfeel. Proper seasoning is essential for capturing the potato’s subtle flavors. This involves layering seasonings throughout cooking while tasting as you go, adjusting as needed. Seasoning correctly at every step ensures the dish remains flavorful and well-balanced, enhancing the natural ingredients’ goodness.

Pro Tips for Perfect Potato Soup

1. Opt for Yukon Gold or Russet potatoes for the creamiest consistency, as these varieties break down well.
2. Consider adding a splash of white wine after sautéing onions for added depth and complexity.
3. Keep the skins on the potatoes for added texture and nutritional value, ensuring they are thoroughly scrubbed clean.
4. Include a pinch of nutmeg to subtly enhance the soup’s creaminess without overpowering other flavors.
5. If using a regular blender, blend in batches and leave room for steam to escape, preventing potential messes.
6. For a vegetarian-friendly version, swap chicken broth for vegetable stock without compromising taste.
7. Amp up the soup by garnishing with crisp bacon bits and shredded cheddar cheese for a loaded potato vibe.
8. Allow the soup to simmer longer after blending, enabling flavors to meld and develop more complexity.

Variations and Adaptations

Explore regional variations by incorporating culturally distinct ingredients, like bacon for a German touch or clam broth for a New England chowder flair. Adjust the potato soup recipe for seasonal changes by adding spring peas for freshness or roasted squash for fall warmth. Modify for dietary preferences by replacing cream with coconut milk for a vegan-friendly version or using low-fat dairy products for a lighter meal. Elevate flavor by introducing roasted garlic or chili flakes for heat, crafting a distinct taste profile that suits your palate. Tweak texture by adding diced vegetables like carrots for a chunkier soup or pureeing all ingredients for an ultra-smooth finish. Consider sophisticated presentation alternatives like serving in a hollowed bread bowl or garnishing with edible flowers, enhancing both aesthetic and culinary appeal.

Serving and Presentation Guide

Enhance your potato soup’s dining experience by using shallow bowls to showcase its creamy texture. Garnish liberally with chives or parsley for a pop of color and added fresh flavor. Pair with crusty warm bread or a simple salad as a traditional accompaniment, offering a balanced meal. For a modern touch, drizzle a swirl of herb-infused oil or balsamic reduction over the surface just before serving. Maintain the ideal serving temperature by warming bowls before ladling the soup, ensuring it stays piping hot. Take portion control into account by serving smaller bowls for appetizers and larger portions for main courses, aligning with the meal’s role.

Wine and Beverage Pairing

For wine pairings, consider a crisp Chardonnay or a light-bodied Pinot Noir, both complementing the soup’s creaminess without overwhelming its delicate flavors. Non-alcoholic alternatives such as sparkling water with a slice of lemon or herbal iced teas offer a refreshing counterpart. If serving with coffee or tea, an earthy chamomile or light green tea pairs gently with the soup’s flavors. Temperature-wise, ensure drink options are pleasantly cool to contrast the soup’s warmth or enjoy a warm beverage matched to the meal’s soothing nature. Serve in appropriately sized glasses or mugs to enhance the overall presentation and enjoyment.

Storage and Shelf Life

Proper storage of potato soup maximizes both taste and safety. Once cooled to room temperature, transfer it to airtight containers and refrigerate, consuming within 3-4 days. For freezing, divide soup into smaller portions, leaving space for expansion, and adjust seasoning before serving as freezing can dull flavors. Be attentive to signs of spoilage, such as off-odors or color changes, signaling the need to discard the soup. Reheat gently over medium-low heat, stirring occasionally to maintain smoothness and prevent scorching, bringing it just to steaming without boiling to preserve texture.

Make Ahead Strategies

Align preparation with busy schedules by completing initial steps like chopping vegetables a day ahead, storing prepped ingredients in airtight containers to retain freshness. After cooking, allow soup to cool and rest as flavors deepen overnight, enhancing overall taste when reheated. When storing between steps, transfer to shallow containers to cool quickly, reducing bacterial growth risk. Aim for reheating in small batches, ensuring even temperature distribution throughout. For fresh element additions, reserve garnishes like chives or sour cream for just before serving, maintaining their visual and textural impact.

Scaling Instructions

To halve the recipe, divide all ingredient quantities by two, ensuring consistent flavor by adjusting seasoning afterward as needed. When doubling or tripling, maintain original cooking techniques while adjusting timing to accommodate larger volumes, such as extending simmering time to tenderize added potatoes fully. Use larger pots and divide batches if necessary to manage safety and quality, enabling even cooking without overflow risks. Be mindful of storage limitations, with potential need for multiple containers or utilizing freezing options to preserve any surplus soup for future enjoyment.

Nutritional Deep Dive

This comforting potato soup offers a balanced nutritional profile, predominantly composed of complex carbohydrates from potatoes, moderating energy levels. Potatoes contribute to a substantial serving of vitamin C and potassium, supporting immune function and cardiovascular health. Customize nutrient intake by incorporating extra vegetables like spinach, enhancing fiber and micronutrient content. Consider dietary portions, attaining a perspective that balances caloric content relative to meal intentions, be it a standalone main course or part of a larger meal. Opt for reduced-sodium broth or a lower-fat dairy to align the dish with specific dietary goals without compromising on flavor.

Dietary Adaptations

For a gluten-free version, ensure broth and any thickeners used are certified gluten-free, as some stocks or additives may contain gluten. A dairy-free alternative can be achieved by substituting cream with coconut or almond milk, retaining creaminess with a subtle flavor difference. The vegan adaptation bypasses animal products entirely, combining broth, plant-based milk, and olive oil to maintain texture. For low-carb needs, substitute potatoes for cauliflower, significantly reducing carbohydrate content while retaining a similar texture. Adapt to a ketogenic diet by incorporating more high-fat elements like cream cheese, emphasizing satiety alongside flavor. Paleo adherents can modify the soup using paleo-compliant stocks and oils, maintaining purity in ingredients. Low-FODMAP adjustments focus on substituting garlic/onion with lower FODMAP alternatives, ensuring sensitive digestive systems remain untroubled.

Troubleshooting Guide

Addressing texture issues involves reassessing cooking time for potatoes, ensuring they are adequately tender. Balance flavors by assessing salt levels, incrementally adding more as needed without overdoing it. Temperature concerns may arise if the soup isn’t reaching the desired warmth; resolve by reheating patiently, stirring to distribute heat evenly. Equipment challenges like an unreliable blender can be mitigated by straining soup through a sieve for uniformity if necessary. For ingredient substitutions, consult alternatives, aiming for equivalents in texture and function while recognizing subtle flavor shifts. Timing problems such as rushing may require planning reconfirmation, scheduling adequate prep and cooking time.

Recipe Success Stories

Feedback from enthusiastic home cooks highlights this potato soup’s ability to recall vivid memories of childhood meals, fortified with love and care. Adaptations shared by readers include creative vegetable additions like carrots and peas, inspired by their own familial traditions. Success flourishes in cultural diversity, witnessing international influences through varied spice incorporations that elevate the base recipe. Photography enthusiasts share tips for capturing this soup’s essence, focusing on colorful contrasts provided by garnishes in vibrant lighting. The community actively celebrates versatility and the opportunity to inspire culinary exploration across households.

Frequently Asked Questions

Can I use a different type of potato? Certainly! Adjust based on your preference, with Russets offering a creamier consistency and Red potatoes holding shape more for chunkiness.

Is it possible to make this soup ahead of time? Yes, prepare in advance and refrigerate or freeze, reheating gently before serving to maintain low bubble levels.

How can I make my soup thicker? To thicken, introduce a slurry of cornstarch and water, incorporating gradually whilst boiling gently until reaching desired thickness.

What if I don’t have an immersion blender? Use a regular blender for small batches, ensuring heat dissipation via vented lids when processing hot liquids.

Can I freeze leftovers? Absolutely! Freeze in single-serve portions for easy reheating, ideally consuming within three months to sustain flavor quality.

Do I need to peel the potatoes first? While peeling offers a smoother texture, leaving skins on contributes nutritional benefits and rustic appeal.

How can I make the soup more flavorful? Experiment with additional herbs like rosemary or a splash of dry white wine, giving layers of taste to the broth.

Is it possible to use milk instead of cream? Yes, milk provides a lighter option, though it may require slight thickening adjustments for a creamy consistency.

What garnishes work best? Fresh chives, grated cheese, crumbled bacon, or a dash of paprika can complement the soup beautifully!

How can I reduce the sodium content? Opt for low-sodium broth, seasoning modestly with salt and relying on herbs and fresh ingredients for flavor depth.

Can I add protein to the soup? Incorporate cooked, diced chicken or turkey for additional protein, balancing textures with the soft potato base.

What should I use if I want a vegan alternative? Employ vegetable-based cream or broth, with olive oil providing a luxurious texture and ample flavor.

Additional Resources

Explore related recipes featuring root vegetables for further culinary enrichment, such as sweet potato bisque or carrot and ginger soup, each offering a twist on classic comfort. Technique guides, including knife skills for efficient vegetable preparation, support improvements in kitchen proficiency. Frequent ingredient spotlights reveal the science behind potatoes and onions, elucidating their versatility across numerous dishes. Equipment recommendations assess value and utility, enabling investment in gadgets that streamline soup-making processes. Seasonal variations inspire through spring pea and mint soup or roasted butternut squash bisque, promoting adaptability to available produce.

Join the Conversation

Engage with our vibrant community by sharing personal potato soup creations, utilizing hashtags and social media platforms. Upload mouthwatering photos alongside dialogue, exchanging tips and celebrating diversity within interpretations. Write thoughtful recipe reviews, contributing insights that refine and enrich future culinary endeavors for all readers. Encourage creative expression by discussing alternative ideas like toppings and mix-ins, fostering a robust network of shared experiences. Celebrate culinary achievements through diverse recipe variations, thematic storytelling, and feedback that fuels continued passion and collaboration in our expanding food culture.

The Recipe

Classic Potato Soup

Serves: 4

Prep Time: 20 mins

Cook Time: 40 mins

Total Time: 60 mins

Kitchen Equipment Needed

  • Large Pot
  • Wooden Spoon
  • Immersion Blender or Regular Blender
  • Knife
  • Chopping Board

Ingredients

  • 2 lbs potatoes, peeled and diced
  • 1 onion, chopped
  • 3 garlic cloves, minced
  • 4 cups chicken or vegetable broth
  • 1 cup heavy cream
  • Salt and pepper to taste
  • 2 tbsp butter
  • Fresh chives, chopped, for garnish

Directions

  1. Melt butter in a large pot over medium heat. Add the chopped onion and garlic, sautéing until soft and fragrant.
  2. Add the diced potatoes to the pot, stirring to coat them in the butter mixture.
  3. Pour in the broth, bringing to a boil. Reduce heat and simmer until potatoes are very tender, about 20 minutes.
  4. Using an immersion blender, puree the soup until smooth. Alternatively, blend in batches in a regular blender, removing the centerpiece of the lid to allow steam to escape.
  5. Stir in the heavy cream, season with salt and pepper to taste.
  6. Garnish with fresh chives before serving.

Recipe Notes

  • For a vegan version, replace cream with coconut milk and use vegetable broth.
  • Add a pinch of cayenne pepper for a slight kick of heat.
  • Top with crispy bacon bits for added crunch and flavor.

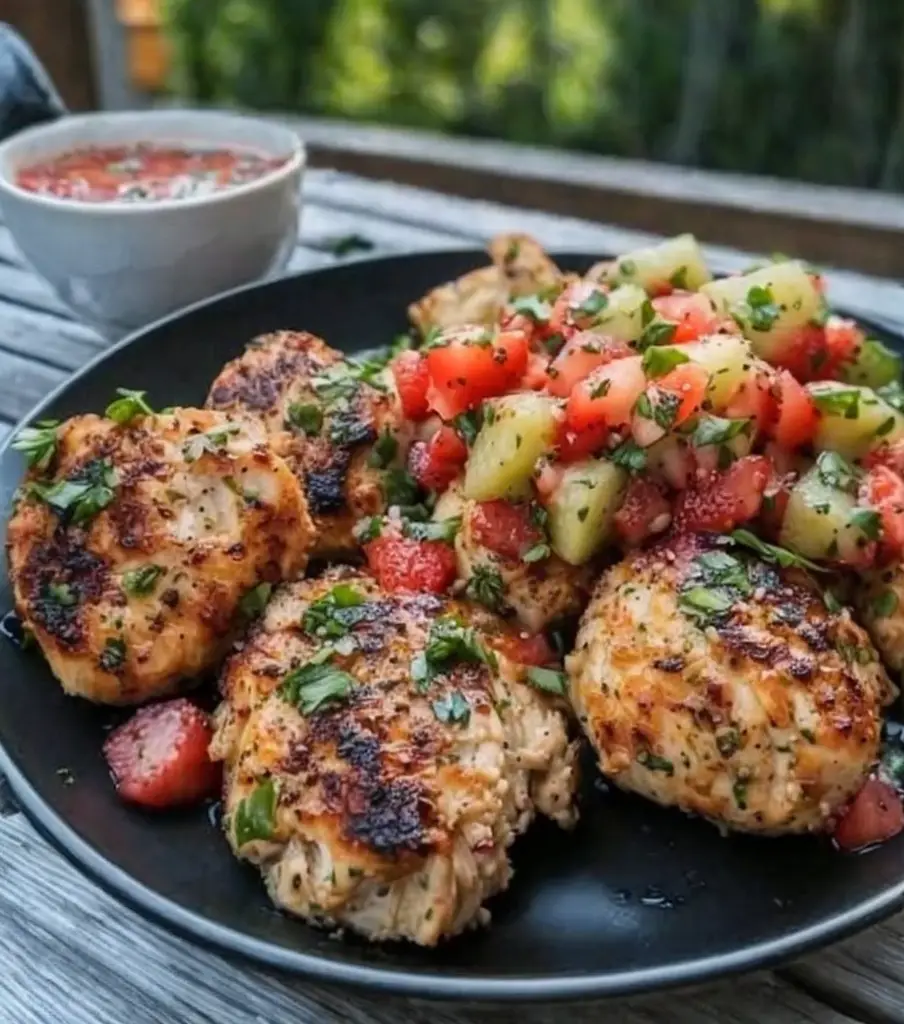
Delicious Garlic Cilantro Chicken Bites with Refreshing Kiwi Strawberry Salsa

Garlic Cilantro Chicken Bites with Kiwi Strawberry Salsa: A Fresh and Flavorful Delight

⚖️
Difficulty
Medium

⏲️
Prep Time
20 mins

🕒
Cook Time
15 mins

⏱️
Total Time
35 mins

🍽️
Servings
4

Experience a burst of vibrant flavors with our Garlic Cilantro Chicken Bites paired with a refreshing Kiwi Strawberry Salsa. This dish marries tender, succulent chicken pieces marinated in a rich garlic and cilantro blend with a tangy, sweet salsa that’s perfect for those sunny afternoons. Not only is this recipe a feast for the tastebuds, but it’s also a visual delight. Prepare this easy yet impressive dish for your next dinner party and watch your guests be wowed by its fresh and zesty taste.

The star of the dish, the Garlic Cilantro Chicken Bites, are incredibly aromatic thanks to the infusion of fresh herbs and spices. The Kiwi Strawberry Salsa perfectly complements the savory notes of the chicken with its sweet and tart punch. With every bite, you’ll get a delicious concoction of flavors that promise to take you on a culinary journey. This recipe is simple enough to whip up on a weeknight but impressive enough to be the centerpiece of your weekend gathering.

Quick Recipe Highlights

  • Flavor Profile: Combines savory and herby chicken with tangy and sweet tropical salsa.
  • Texture: Tender chicken bites with juicy, refreshing fruit salsa.
  • Aroma: Pungent cilantro and garlic notes with fruity fragrance.
  • Visual Appeal: A colorful array of green, red, and golden hues.
  • Skill Level Needed: Intermediate—requires handling poultry and basic fruit preparation.
  • Special Equipment: Skewers and a grill or grill pan.

Recipe Overview

  • Difficulty Level: Medium difficulty, requiring some familiarity with grilling techniques and ingredient prep.
  • Category: Perfect as a main dish or appetizer.
  • Cuisine: A fusion of Latin American and modern casual dining influences.
  • Cost: Moderate, with fresh produce and quality chicken being the main expenses.
  • Season: Best enjoyed in spring and summer, when fruits are in season.
  • Occasion: Ideal for barbecues, casual dinners, and festive gatherings.

Why You’ll Love This Recipe


The Garlic Cilantro Chicken Bites with Kiwi Strawberry Salsa offer a symphony of flavors and textures that are truly irresistible. The savory and aromatic chicken pairs beautifully with the tangy sweetness of the salsa, making each bite a delightful experience. Whether you’re hosting a party or looking for a satisfying meal at home, this dish caters to both indulgent cravings and nutritious desires. The recipe is straightforward yet sophisticated, ensuring you can enjoy gourmet dining without stepping out of your kitchen.

Convenience is key with this recipe—the chicken can be prepped ahead, and the salsa can be made in advance, allowing you to focus on other aspects of your meal preparation. The ingredients are accessible and can easily be found at your local supermarket, which is another reason why this dish is a winner. Its adaptability makes it suitable for various dietary preferences with just a few tweaks.

Not only does this recipe excel in taste, but it also promises a wholesome meal experience. Packed with lean protein from the chicken and rich in vitamins from the kiwi and strawberries, it supports a balanced diet. The dish is not just a treat for your senses, it’s also a nourishing addition to your weekly meal plan.

In a social and entertaining context, this dish shines as a communal yet personalized experience. The vibrant colors and enticing aroma will draw your guests in, and the unique combination of flavors will spark conversation. A perfect recipe to accompany joyous occasions and make lasting culinary memories.

From a cost perspective, this dish is relatively budget-friendly. The primary investment is in fresh herbs and quality poultry, which are well worth it for the end result. Enjoy a restaurant-quality meal at a fraction of the price, and customize per your gathering’s needs without stretching the budget.

Historical Background and Cultural Significance


The idea of combining meat with a fruit-based condiment is rooted in ancient culinary traditions, where the balance of savory and sweet was used to create harmony in dishes. While chicken marinated with herbs like cilantro is common in many cuisines, the pairing with a tropical fruit salsa adds a fresh twist that could be traced back to Latin American inspirations.

Culturally, the use of kiwi and strawberries in the salsa is a nod to the blending of international influences in modern cuisine. Originally from Southern China, the kiwi fruit has been adopted into Western cuisine as a staple ingredient that adds a vibrant color and tropical taste to many dishes.

The evolution of this recipe could be seen as part of the broader “fusion” food trend, where chefs combine elements from different culinary traditions to create innovative dishes. Here, the garlic cilantro marinade offers a familiar savory base, while the kiwi strawberry salsa introduces a playful and nouveau flair.

Regionally, variations of this dish appear where fruits and chicken are abundant. In tropical regions, similar recipes might include mango, pineapple, or papaya to capitalize on local produce. Each variation offers a unique twist, reflecting locally available ingredients and cultural preferences.

Ingredient Deep Dive


Chicken is a versatile, lean protein source that is used in countless global cuisines. It has long been a staple in diets for its affordability and adaptability. Preferring skinless thighs or breasts for this recipe ensures tenderness and easy flavor absorption. Choose fresh chicken to ensure quality and store it properly by refrigerating it immediately and using it within two days of purchase for best results.

Garlic is a powerhouse ingredient that packs a punch in terms of both flavor and health benefits. Known for its use throughout history for cooking and medicinal purposes, garlic adds a distinct depth of taste to any dish. When selecting garlic, look for firm, plump bulbs that are free from sprouting. Store garlic in a cool, dry place to maintain its potency.

Cilantro, also known as coriander, is a fragrant herb that lends a fresh, citrusy aroma to dishes. It is widely used in Asian, Middle Eastern, and Latin cuisines. Freshness is key with cilantro; choose bunches with vibrant green leaves and a strong fragrance. Cilantro should be used soon after purchase and can be stored in the fridge with its stems in water to prolong its freshness.

Kiwi provides not only a tropical twist to the salsa but also a healthy dose of vitamin C and dietary fiber. Selecting ripe kiwis involves pressing them gently to ensure a little give without being too soft. Store kiwis at room temperature until ripe, then move to the fridge to maintain their freshness.

Strawberries are a delightful addition to the salsa, offering both sweetness and tang. Look for bright red berries with a shiny exterior and fresh green leaves. Strawberries are best used shortly after purchase and can be stored in their original container unwashed in the refrigerator to preserve their shelf life.

Common Mistakes to Avoid

  • Over-marinating the chicken can lead to a mushy texture. Aim for a 30-minute marination.
  • Neglecting to preheat the grill can cause uneven cooking. Ensure the grill is hot before adding chicken.
  • Using unripe or overly ripe fruits in the salsa can affect overall taste. Choose perfectly ripe fruits.
  • Chopping the salsa ingredients too far in advance can lead to sogginess. Prepare salsa close to serving time.
  • Skewering chicken unevenly can cause inconsistent cooking times. Cut chicken into uniform pieces.
  • Skipping resting time after grilling can lead to dry chicken. Let it rest for a few minutes before serving.
  • Storing fruits at room temperature after cutting can lead to rapid spoilage. Refrigerate immediately after preparation.
  • Ignoring balance in seasoning can either result in blandness or overpowering flavors. Taste as you go for a balanced profile.

Essential Techniques


Marinating the chicken is crucial to imparting flavor and keeping it juicy. This technique involves soaking the cut pieces in a mixture of herbs, spices, and oil that tenderize the chicken and enhance its taste profile. Patience is key—allow the chicken to marinate for at least 30 minutes, but not more than an hour, to achieve optimal flavor without compromising texture.

Grilling chicken on a medium-high heat ensures a perfect char while keeping the inside moist. Timing and temperature are vital; turn the skewers halfway through cooking for even heat distribution and to prevent burning. The grill marks should be a rich golden-brown, signaling the crust has achieved maximum flavor without overcooking.

Constructing the kiwi strawberry salsa involves precise dicing and balancing flavors. Keep a 1:1 ratio of sweet to tart fruits, adding a squeeze of lime juice to tie flavors together. It is essential to chop the produce just before mixing to maintain their fresh, crisp texture. Sodium should be moderate, just enough to elevate the natural sweetness and tang of the fruits.

Pro Tips for Perfect Garlic Cilantro Chicken Bites


Marinate your chicken with a pinch of baking soda—this acts as a tenderizer and helps preserve the juiciness during grilling.

Use wooden skewers for grilling but make sure to soak them in water for at least 30 minutes prior to avoid burning.

Adding a touch of honey to the marinade will not only balance the savory notes but also promote a beautiful caramelization on the grill.

For an extra boost of aroma, sprinkle fresh lime zest over the cooked chicken bites before serving for a citrusy lift.

To keep the salsa vibrant, gently fold the fruits together rather than stirring aggressively to avoid mashing them.

Prepare all ingredients in advance and store them separately, then assemble just before serving to ensure maximum freshness and presentation.

Variations and Adaptations


Regional variations could incorporate local spices or substitute fruits available in your area. A tropical rendition might swap the strawberries for mango or pineapple, lending a warmer, more exotic flavor to the salsa. To embrace the spirit of Latin cuisine, jalapeños or diced red onions could add a mild heat.

Dietary adaptations include using tofu or tempeh instead of chicken to create a vegetarian-friendly option. The same marinade can be used for tofu bites, and a good sear on the grill will ensure a pleasing texture.

For a seasonal adaptation, consider substituting berries with other fresh seasonal fruits like peaches or nectarines in the summer to adapt to the produce available during different times of the year.

Flavor variations are endless—introduce herbs like mint or basil to the salsa for additional complexity, or substitute cilantro with parsley or dill to accommodate personal herb preferences.

To change up the texture, try adding chopped nuts such as walnuts or almonds to the salsa for crunch, or add halloumi cheese skewers alongside the chicken for a grilled alternative.

For modern presentation, plate the chicken bites atop a bed of arugula or mixed greens, draping the salsa artistically over the top for a refined yet approachable meal fit for entertaining.

Serving and Presentation Guide


Plating begins with selecting a wide, flat dish to lay out the chicken bites symmetrically. This highlights their rich golden-brown texture, accentuated by the grill’s char marks.

Elevate the visual effect with a vibrant drizzle of extra virgin olive oil or a balsamic reduction around the perimeter of the plate to add contrast.

Garnish ideas include fresh cilantro sprigs, lime wedges, or a sprinkle of chili flakes to add a dash of color and hint at the flavors within the dish.

Traditional accompaniments, such as rice or flatbreads, offer a wholesome balance to the dish, or opt for modern pairings like quinoa salad for a lighter twist.

Maintain room temperature or slightly warm finishes for the chicken bites, as heat tends to elevate the release of aromatic oils in herbs and garlic.

For portion control tips that help curb overeating, serve smaller portions initially with encouraging comments for seconds, allowing guests to request servings based on their satisfaction levels.

Wine and Beverage Pairing


A crisp Sauvignon Blanc pairs wonderfully with the fruitiness of the salsa, offering refreshing acidity that complements the herbs’ aromatic profile.

If select wine isn’t an option, a high-quality sparkling water infused with a squeeze of lime or a chilled herbal iced tea can deliver a refreshing non-alcoholic alternative.

Plain green tea or a floral white tea may serve as complementary options due to their subtle flavors that harmonize with the dish without overshadowing it.

When serving cold beverages, ensure they are sufficiently chilled to contrast with the room temperature chicken bites, which highlights the interplay of hot and cold.

Presentation impacts enjoyment, so serve beverages in stemmed glasses or ornate cups to enhance the feeling of sophistication and elevate the dining experience.

Storage and Shelf Life


Store leftovers in an airtight container to prevent moisture loss and contamination, keeping chicken and salsa in separate containers for optimal freshness.

Refrigeration is essential—place chicken and salsa promptly in the fridge to inhibit spoilage, and maintain a temperature of 40°F or lower for best results.

Plastic or glass containers with airtight seals are recommended, ensuring they are fit with removable dividers if possible to separate components until ready to consume.

Be mindful of spoilage signs such as an off smell or discoloration in the salsa or chicken, indicating it’s no longer suitable for consumption.

For reheating chicken, employ gentle heat application, such as a quick sauté, to maintain juiciness. Avoid the microwave if possible, as it can dry out the meat.

If freezing is intended, only freeze the chicken bites, as fruits in the salsa don’t freeze well. Thaw overnight for best results and consume within 3 months.

Make Ahead Strategies


Leverage time efficiencies by marinating the chicken a day ahead while storing it in a refrigerator. The salsa, however, should be prepared an hour prior to serving to retain crispness.

Store assembled salsa in the refrigerator for up to a day, but avoid adding wetter ingredients such as lime juice until serving time to prevent dilution of flavors.

When staggering preparation, grill chicken bites to completion, then flash chill to halt cooking. Warm up gently in an oven to maintain grilled textures.

Monitor the quality impact through taste-testing and visual assessment, ensuring any advanced-prepped ingredients meet your standards before serving.

Reheat the chicken on an indirect heat source to prevent overcooking, using either an oven or skillet, and maintain a gentle temperature to preserve moisture.

Inject freshness by adding newly chopped herbs and lime zest to the salsa just before serving, which will enhance aromas and provide a burst of fresh flavor.

Scaling Instructions


Halving the recipe for fewer servings involves proportionately reducing ingredient amounts, ensuring the marination and seasonings remain balanced. Maintain attention to smaller batch mixing and cooking adjustments.

Conversely, doubling or tripling batch size calls for larger cooking pans or grill space and account for added prep time without diluting the flavors.

Adjust equipment such as using a larger or secondary bowl for salsa prep and ensure skewers are adequately volume-matched with chicken pieces for consistency.

Timing becomes essential; cook chicken in batches to avoid crowding on the grill, requiring slightly longer total cooking time to complete all batches freshly.

Storage considerations include possessing enough containers to hold increased quantity securely and ensuring fridge capacity can accommodate prepared dishes.

Nutritional Deep Dive


This dish strikes a balance in macronutrients: high in protein due to chicken content, while kiwi and strawberries contribute essential carbohydrates and fibers, keeping macronutrient ratios well-rounded.

Micronutrient analysis reveals a bounty of vitamins, especially vitamin C from fruits, and minerals like iron and calcium from complementary ingredients.

Health benefits also include high antioxidant levels from cilantro and garlic, known to protect against various oxidative stress-related conditions.

For dietary considerations, this meal allows for monitoring sodium intake through marinade adjustment and encourages low-fat cooking methods like grilling.

Portion analysis indicates adherence to a calorie-conscious plan complements weight management goals without compromising flavor or variety.

Tips for maintaining a balanced diet involve integrating additional vegetables from the side or employing portion control strategies with this recipe, yielding full satisfaction.

Dietary Adaptations


For gluten-free requirements, ensure all marinade ingredients are certified gluten-free, with no cross-contamination risks within any added saucy elements or sides.

Dairy-free adaptations naturally apply, as the recipe itself is devoid of dairy components. Care should be taken when selecting accompaniments, ensuring their exclusion of milk-based items.

Transitioning to a vegan format means substituting chicken with marinated tofu or tempeh—an equally enjoyable medium for ensuring the marinade and grilling intricacies remain intact.

A low-carb rendition focuses more heavily on protein and fiber found within chicken and salsa, keeping additional starches minimized or omitted altogether.

Keto or Paleo adherents can acquire success with this dish by ensuring high-fat condiments are added, blending olive oil with avocado or coconut oil, and eliminating central sugars.

Look towards low-FODMAP ingredients such as replacing higher fructose fruits with blueberries or kiwi slices, limiting garlic while using dried herbs to amplify flavor.

Troubleshooting Guide


If encountering texture issues, balance marination time to ensure meat remains juicy, and avoid overcooking by closely monitoring grill times.

Flavor imbalances may arise from incorrect marination ingredient proportions; taste along the way and adjust herbs, salsa sweeteners, and acidity levels for correction.

Temperature problems like undercooked chicken necessitate checking internal temperatures to reach 165°F for safe consumption, paired with visual inspection.

Equipment challenges can disrupt cooking; ensure grills are sterilized, at optimal heat levels, and skewers are well-spaced to eliminate inconsistencies.

Ingredient substitutions for personal preferences enable creativity; try alternative fruits and herbs matching dietary plans for consistency with original intent.

Timing concerns like premature topping addition result in sogginess; layer ingredients at the recommended time, just before serving, for sustained texture and freshness.

Recipe Success Stories


Community enthusiasts have hailed the Garlic Cilantro Chicken Bites with Kiwi Strawberry Salsa as a culinary triumph in home cooking, citing the recipe as endlessly customizable and lively.

Exploring variation successes, readers have shared their preferences for basmati rice accompaniment, rotating fruit choices seasonally, and adding spice to raise intensity levels in the salsa.

Adaptation stories offer tales of substitutions that maintain authenticity, blending cultural influences in new, exciting ways. This encourages community creativity and challenges standard norms.

Reader suggestions often include adding toasted coconut flakes over salsa for tropical flair or drizzling honey lime sauce to accentuate citrus facets, offering fresh insights perfect for implementation.

Photography tips revolve around capturing the vibrant colors of fruits against the warm grill-marked chicken background, using daylight or directional lighting to elevate the visual presentation of textures and layers.

Frequently Asked Questions

Can I make the salsa a day before serving?

It’s best to make the salsa just before serving to maintain freshness and texture. However, you can prepare the ingredients and store them separately, then mix close to serving time.

What can I substitute for cilantro if I don’t like it?

If cilantro isn’t to your taste, consider using flat-leaf parsley or fresh dill, which offers a bright flavor without overpowering the other ingredients.

Is it possible to cook chicken without skewers?

Yes, you can cook the chicken pieces directly on the grill or grill pan. Just ensure they are evenly spaced and flip halfway through cooking for uniform doneness.

How long can I store the leftovers?

Leftovers are best consumed within 2 to 3 days when stored properly in the refrigerator. Keep the chicken and salsa in separate airtight containers to maintain their quality.

Can I freeze the chicken bites?

Yes, the chicken bites can be frozen separately. Thaw in the fridge overnight and reheat gently to avoid drying out. Freezing salsa is not recommended due to fruit texture changes.

What’s the best way to keep wooden skewers from burning?

Soak wooden skewers in water for at least 30 minutes before using them. This prevents them from burning and splitting during grilling.

What are some good side dishes to serve alongside?

Consider serving with a side of rice pilaf, quinoa salad, or a mixed greens salad with a citrus vinaigrette to complement the dish without overwhelming its flavors.

How can I adjust spiciness in this recipe?

To adjust spiciness, add or reduce chili in the marinade and salsa. You can also include jalapeño if desired or omit any heat altogether for a milder flavor profile.

What’s the ideal grilling time for skewers?

Cook chicken skewers over medium-high heat for around 12-15 minutes, turning occasionally to ensure even grilling and prevent burning.

What can I do if my salsa turns out too watery?

If the salsa is watery, try draining excess liquid before serving. You can also mix in additional diced fruits and herbs to balance out moisture levels.

Additional Resources


Look into related recipes that use similar flavor profiles, such as lime-marinated tacos or other grilled chicken variations that enrich your culinary repertoire.

Expand technique guides and enhance your kitchen skills by practicing flaming grilling tips or mastering perfect fruit chopping efficiency for precision in presentation.

Delve deeper into ingredient information that expands your knowledge about garlic’s health benefits, kiwi’s role in desserts, and cilantro’s fusion into various cultural traditions.

Seek equipment recommendations from grill masters advocating best practices for smokeless indoor cooking, thermal thermometers for accuracy, and superior knives for clean cuts.

Embrace seasonal variations with access to yearly produce charts, enabling fun exploration of fresh possibilities throughout the year that always inspire fresh new tastes and aesthetic adjustments.

Join the Conversation


Engage with fellow readers on social media, sharing photos and experiences you’ve garnered from recreating the Garlic Cilantro Chicken Bites recipe, adding unique personal twists.

Capture your creations with photography tips on composition, lighting, and backdrop selection that showcase your efforts beautifully and inspire others to experiment in their kitchens.

Share recipe reviews to enrich community knowledge, acclaiming successes and advising slight replications, forming a supportive network based on interaction and positivity.

Cultivate community engagement through exchanges, discussions, and idea sharing, fostering friendships, and collaborations that stem beyond the kitchen realm, forming lasting bonds.

Exploit recipe variations by trialing local adaptations and reporting feedback on forums, proclaiming discoveries, and gaining collective input that guides future successful cooking endeavors.

The Recipe

Garlic Cilantro Chicken Bites with Kiwi Strawberry Salsa

Serves: 4

Prep Time: 20 mins

Cook Time: 15 mins

Total Time: 35 mins

Kitchen Equipment Needed

  • Grill or grill pan
  • Wooden skewers
  • Mixing bowls
  • Cutting board
  • Sharp knife

Ingredients

  • 1 lb (450g) chicken breast or thighs, cubed
  • 2 tbsp olive oil
  • 4 cloves garlic, minced
  • ¼ cup fresh cilantro, chopped
  • 1 tbsp lime juice
  • Salt and pepper to taste
  • 2 kiwis, peeled and diced
  • 1 cup strawberries, hulled and diced
  • 1 tbsp honey
  • 1 tbsp lime juice
  • Salt to taste

Directions

  1. In a bowl, mix olive oil, garlic, cilantro, lime juice, salt, and pepper. Add cubed chicken, toss to coat, and marinate for 30 minutes.
  2. Preheat grill to medium-high heat.
  3. Thread chicken onto skewers and grill for 12-15 minutes, turning occasionally, until cooked through.
  4. In a separate bowl, combine diced kiwi, strawberries, honey, lime juice, and salt for the salsa. Mix gently.
  5. Serve grilled chicken skewers with a generous helping of kiwi strawberry salsa on the side.

Recipe Notes

  • Marinate chicken no longer than 1 hour to prevent mushiness.
  • Salsa should be prepared close to serving time for freshness.
  • Try substituting mango or pineapple in place of strawberries for a tropical twist.
  • If using tofu, press and marinate similarly, adjusting grilling times as needed.

Filet Mignon Delight with Creamy Parmesan Mustard Sauce Recipe

Filet Mignon with Creamy Parmesan Mustard Sauce: A Decadent Dinner Delight

⚖️
Difficulty
Medium

⏲️
Prep Time
15 mins

🕒
Cook Time
20 mins

⏱️
Total Time
35 mins

🍽️
Servings
4

Filet Mignon with Creamy Parmesan Mustard Sauce is a gourmet treat that redefines luxury dining at home. The succulent filet mignon, renowned for its tenderness and rich flavor, is complemented beautifully by the creamy, tangy mustard sauce enhanced with nutty parmesan cheese. This dish elevates any mealtime into a memorable occasion, blending simple ingredients with sophisticated flavors. The aroma of perfectly seared steak, mingled with the fragrant notes of the creamy sauce, makes for an irresistible combination tempting enough to impress any dinner guest.

Quick Recipe Highlights

  • Flavor Profile: Indulge in the rich umami taste of filet mignon paired with the creamy, tangy zip of Parmesan mustard sauce that creates a delightful harmony on the palate.
  • Texture: Experience the unparalleled tenderness of filet mignon, seared to perfection, alongside a velvety sauce that adds a luscious layer to each bite.
  • Aroma: The filet’s savory aroma meets the herbaceous and slightly spicy scent of mustard, infused with the warm nuttiness of parmesan.
  • Visual Appeal: Impress with a beautifully seared filet, glistening with a golden crust, topped with a smooth, creamy sauce speckled with parmesan.
  • Skill Level Needed: Medium cooking expertise is required to achieve the ideal sear and craft the sauce without curdling.
  • Special Equipment: A heavy-bottomed skillet and a whisk are essential for perfect searing and sauce consistency.

Recipe Overview

  • Difficulty Level: Chosen as medium due to the precision required in cooking the steak to the desired doneness and achieving a perfect sauce consistency without breaking.
  • Category: Ideal for main courses during special events or romantic dinners, offering a touch of elegance to the meal.
  • Cuisine: The dish has roots in classic European steakhouse traditions, capturing the timeless appeal of high-quality beef and fine French sauces.
  • Cost: Approximately $30, considering the premium cut of meat and cheese, yet provides an exquisite dining experience reminiscent of fine dining establishments.
  • Season: Best enjoyed during colder months for its comforting richness, yet equally delightful during early spring dinners.
  • Occasion: Perfect for anniversaries, intimate gatherings, or when impressing guests with culinary finesse.

Why You’ll Love This Recipe


The taste and texture appeal of this Filet Mignon is unmatched. Tender, juicy steak effortlessly melts in your mouth, while the creamy mustard sauce adds complexity and balance; its tang cutting through the richness of the beef. The recipe’s convenience is a standout feature. Requiring only minimal prep and a short cooking time, it’s perfect for creating a high-end dining experience without hours of labor. Nutritionally, filet mignon delivers high protein with lower fat compared to other cuts, while the sauce, though indulgent, can be adjusted for those monitoring intake. Socially, it’s a showstopper, embodying sophistication and style, ideal for communal dining or sharing culinary excellence with loved ones. Despite its premium ingredients, the recipe is cost-effective when compared to restaurant pricing, making it accessible luxury.

Historical Background and Cultural Significance


Filet Mignon has roots in French cuisine, drawing its name from the French word “mignon,” meaning delicate or tender. It gained popularity in Europe for its unparalleled tenderness and flavor, eventually making its way into American steakhouses. Culturally, it symbolizes celebration and high-end dining, often served in prestigious establishments or during significant life events. The traditional sauce accompaniment, like a mustard cream sauce, has European origins as well, showcasing culinary fusions over the centuries. Variations of this recipe appear globally, adapting to local tastes while maintaining its luxury appeal.

Ingredient Deep Dive


The star of this dish, filet mignon, is prized for its tenderness and rich, beefy flavor, owing to its location on the tenderloin. Nutritionally, it offers high-quality protein without excessive fat, making it a healthier red meat option. Selecting a filet with good marbling ensures risk-level flavor, while storage in a refrigerator for a short period before cooking maintains its quality. If needed, substitute beef tenderloin medallions. For the sauce, Dijon mustard offers a kick that contrasts the rich meat; parmesan enhances with umami depth, though Grana Padano could serve as an alternative.

Common Mistakes to Avoid

  • Overcooking the filet mignon is a common mistake; aim for medium-rare to maintain its tenderness.
  • Not allowing the steak to rest after cooking can lead to dryness as the juices run out.
  • Using cold steak; let it reach room temperature for even cooking.
  • Skipping the pre-heating of the skillet can prevent the steak from developing a good sear.
  • Allowing the sauce to boil can lead to curdling, so maintain a low heat.
  • Using low-quality parmesan may result in a bland sauce.
  • Seasoning sparingly can diminish the overall flavor, so don’t shy from salt and pepper.
  • Not whisking the sauce thoroughly can cause grainy texture, so be diligent in mixing.

Essential Techniques


Achieving a perfect sear on filet mignon is crucial, done by pre-heating a skillet to a high temperature, allowing the exterior to caramelize while keeping the interior juicy. The technique of deglazing with stock or wine extracts flavorful fond, essential for the sauce’s depth. Mastering sauce consistency involves careful whisking with gentle heat to prevent curdling, aiming for a silky, cohesive result.

Pro Tips for Perfect Filet Mignon with Creamy Parmesan Mustard Sauce


Let your steak rest after cooking; a minimum of 5 minutes ensures juices redistribute. Use freshly grated parmesan for the sauce for maximum flavor impact; pre-grated lacks the same punch. If possible, use grass-fed beef for a richer, more robust flavor profile. For the sauce, incorporate a touch of honey to balance out bitterness from mustard. Always pat steak dry before seasoning for a better sear. Consider finishing the steak with a pat of butter for an extra layer of richness.

Variations and Adaptations


For a Mediterranean twist, add olives or sun-dried tomatoes to the sauce. In spring, add fresh herbs like tarragon or dill for a lighter, fragrant profile. For a lower-carb version, replace traditional cream with coconut cream, modifying the flavor palette towards a tropical theme. Achieve a smokier flavor by using smoked paprika or chipotle powder in the seasoning rub. Presenting the dish on a rustic wooden board gives a contemporary twist, enhancing visual appeal.

Serving and Presentation Guide


Plating the filet on a warmed plate keeps the meat hot and tender for consumption. Consider a bold garnish like freshly cracked pepper or a sprig of rosemary to enhance visual appeal. Traditional accompaniments include roasted vegetables or a salad of bitter greens to contrast the rich meat. For a more modern touch, serve with a cauliflower puree or truffle-infused sides. Temperature is essential; both steak and sauce should be hot but not scalding for optimal flavor enjoyment.

Wine and Beverage Pairing


Pair this filet with a bold red wine such as Cabernet Sauvignon or Malbec; their depth and complexity complement the robust flavors of the steak. For non-alcoholic options, a black cherry soda or spiced tea provides a unique contrast. If coffee is preferred post-dinner, a strong espresso highlights the meal’s boldness while cleansing the palate. Temperature matters; ensure beverages are appropriately chilled or warmed to harmonize with the meal.

Storage and Shelf Life


Store cooked filet mignon in an airtight container in the refrigerator, best consumed within three days for optimum freshness. The sauce, once prepared, should be cooled before storing to avoid condensation, lasting similar timeframes. Look for signs of spoilage such as off-smells or changes in color. Reheating should be gentle to maintain tenderness, warming through in a low oven. Freezing is possible for the steak but not recommended for the sauce.

Make Ahead Strategies


Pre-cut and season steaks hours before cooking, allowing flavors to absorb while refrigerated. The sauce can be made a day in advance and gently reheated before serving. If preparing ahead, store each component separately to maintain individual qualities. When assembling, ensure steaks are warm before topping with sauce. Fresh garnishes should be added only when serving to preserve vibrancy and texture.

Scaling Instructions


For smaller gatherings, halve the recipe while maintaining cooking times, as these are crucial for desired doneness. Doubling or tripling requires using multiple pans to ensure even searing, adjusting total cooking periods when managing larger batch sizes. Storage options may change with scale; provide additional containers if needed to ensure airtight conditions for freshness.

Nutritional Deep Dive


Filet mignon offers a solid protein boost while maintaining lower overall fat compared to other cuts. Pairing with the parmesan-mustard sauce increases fat content but adds unique flavors. Dijon mustard provides low-calorie tang, enriched with micronutrients like magnesium. Dietary consideration includes balance; a lean protein meal is rounded out by the creamy sauce for a satisfying yet luxurious treat.

Dietary Adaptations


For gluten-free versions, ensure the beef stock and all condiments are gluten-free safe. To adapt to a dairy-free diet, replace the cheese and cream with coconut cream or a dairy-free alternative. Vegan substitutions involve using plant-based beef alternatives and vegan cheese to retain taste integrity. Low-carb adherents can maintain the sauce richness, focusing modifications on the sides carbohydrate content.

Troubleshooting Guide


If the steak’s texture feels tough, evaluate cooking time; undercooked is preferred to rectify. Adjust seasoning to achieve perfect flavor balance; sometimes a touch more salt amplifies everything. In cases of sauce separation, reducing heat and whisking vigorously often salvages consistency. Avoid high fire for delicate sauce work; slow and steady maintains structure. Desired equipment should be adequately heated for best results.

Recipe Success Stories


Many enthusiasts online rave about the impeccable balance of the creamy sauce with the filet’s natural richness, declaring the recipe a staple for special occasions. Readers have successfully adapted it for outdoor grilling, introducing smoke-infused nuances with consistent results. Photography captures its aesthetic; tips include using natural lighting and incorporating vibrant vegetables as side elements.

Frequently Asked Questions

Can I use other cuts of beef?

Yes, tenderloin medallions are a good substitute, although they might not offer the same tenderness. Adjust cooking times accordingly.

What if I don’t have Parmesan cheese?

Grana Padano or another sharp, hard cheese can be used to provide a similar umami experience.

How can I tell when the steak is done?

Use a meat thermometer; a medium-rare steak is typically around 130°F, ensuring perfect tenderness without guesswork.

Can the sauce be made ahead of time?

Yes, it can be made and stored for up to a day before gently reheating to serve. Ensure it’s at a moderate temperature before adding to avoid separation.

What sides pair well with this dish?

Consider roasted asparagus, garlic mashed potatoes, or a fresh mix of greens to complement and not overshadow the dish’s flavors.

Can I make this recipe with a non-dairy cream?

Absolutely, coconut cream or a soy-based alternative can work, though it might slightly alter the sauce flavor profile.

Additional Resources


Explore related recipes such as Beef Wellington or Mustard Crusted Pork Chops. Further technique guides cover searing and sauce mastery to enhance culinary skills. Ingredient sources discuss parmesan varieties or the nuances of different beef cuts to maximize recipe potential. Equipment recommendations ensure top results, while seasonal variations highlight optimal timing for peak ingredient freshness.

Join the Conversation


We love seeing your creations! Follow us on social media, share your filet mignon photographs, and write reviews to let us know how the recipe worked for you. Our engaging community often shares unique variations and handy tips, continually refining and enhancing each culinary experience.

The Recipe

Filet Mignon with Creamy Parmesan Mustard Sauce

Serves: 4

Prep Time: 15 mins

Cook Time: 20 mins

Total Time: 35 mins

Kitchen Equipment Needed

  • Heavy-bottomed skillet
  • Whisk
  • Meat thermometer
  • Tongs

Ingredients

  • 4 filet mignon steaks (6 oz each)
  • Salt and pepper to taste
  • 1 tablespoon olive oil
  • 1/4 cup Dijon mustard
  • 1/2 cup heavy cream
  • 1/3 cup grated Parmesan cheese
  • 2 tablespoons butter

Directions

  1. Preheat your skillet over high heat.
  2. Season steaks generously with salt and pepper on both sides.
  3. Add olive oil to skillet, then sear steaks 3-4 minutes per side for medium-rare.
  4. Remove steaks from skillet and rest on a warm plate.
  5. Reduce heat to low, add butter. Once melted, whisk in mustard until combined.
  6. Slowly add cream, whisking continuously until the sauce thickens slightly.
  7. Stir in Parmesan until melted and fully incorporated into the sauce.
  8. Return steaks to the skillet briefly to reheat if necessary, then serve topped with sauce.

Recipe Notes

  • For best results, use room temperature steaks before cooking.
  • Avoid boiling the sauce to prevent separation.
  • Feel free to add a splash of white wine to the sauce for enhanced complexity.

Mouthwatering Parmesan Garlic Bacon Cheeseburger Lasagna Recipe for Dinner

Parmesan Garlic Bacon Cheeseburger Lasagna: A Fusion Feast

⚖️
Difficulty
Medium

⏲️
Prep Time
30 mins

🕒
Cook Time
60 mins

⏱️
Total Time
90 mins

🍽️
Servings
8

Introducing the Parmesan Garlic Bacon Cheeseburger Lasagna: a symphony of bold flavors that brings together the hearty robustness of lasagna with the savory charm of a cheeseburger. This dish combines layers of pasta, succulent ground beef, crispy bacon, and a creamy garlic parmesan sauce, creating an enticing meal that satisfies both pasta enthusiasts and cheeseburger lovers alike. Relish every bite of this harmonious blend that promises a delicious adventure for your taste buds, perfect for family dinners or entertaining friends.

Strong notes of garlic and parmesan enhance the savory beef, while the bacon adds a smoky crunch, punctuating the richness of this multi-layered masterpiece. With visual appeal that’s just as captivating as its taste, the golden hues of melted cheese and browned bacon against the vibrant red of marinara create an irresistible feast for the eyes.

Quick Recipe Highlights

  • Flavor Profile: Rich and savory with bold garlic and parmesan notes, complemented by smoky bacon and juicy beef.
  • Texture: Creamy layers with tender pasta, crispy bacon, and a delightful cheese crust.
  • Aroma: Inviting scents of garlic, melted cheese, and smoked bacon fill the kitchen.
  • Visual Appeal: Beautifully layered with golden cheese, making for an Instagram-worthy presentation.
  • Skill Level Needed: Moderate cooking skills required for layering and sauce preparation.
  • Special Equipment: A large baking dish and a skillet are essential.

Recipe Overview

  • Difficulty Level: This Parmesan Garlic Bacon Cheeseburger Lasagna requires a medium level of skill, involving careful ingredient layering and sauce preparation, yet remains approachable for the enthusiastic home cook.
  • Category: This hearty dish falls under both main courses and comfort food, bridging the gap between traditional lasagna and a unique culinary innovation.
  • Cuisine: A fusion of Italian and American cuisines, reflecting the adaptability and creativity within modern culinary practices.
  • Cost: Utilizes common, accessible ingredients; overall cost remains reasonable, especially when cooking for a group.
  • Season: Ideal year-round, with comforting warmth perfect for cooler seasons and a satisfying richness during warmer months.
  • Occasion: Perfect for casual family dinners, friendly gatherings, and celebrations where comfort food is a must.

Why You’ll Love This Recipe

The taste of this Parmesan Garlic Bacon Cheeseburger Lasagna is as captivating as it is memorable, offering a perfect combination of rich, meaty flavors punctuated by the sharpness of parmesan and the tang of garlic. The texture contrasts delightfully with chewy pasta, creamy sauce, and crispy bacon. It’s a dish that promises to become a household favorite thanks to its irresistible flavor profile.

Beyond its taste, this lasagna recipe is notably convenient. The preparation is straightforward, with familiar ingredients and achievable steps, making it possible to enjoy gourmet flavor without the hassle. The ability to prepare components ahead of time makes it particularly appealing for busy nights or stress-free entertaining. The versatility of the recipe allows it to meet various dietary needs, offering nutritional benefits when adapted with whole-grain pasta and low-fat cheese alternatives. It’s a comforting option that doesn’t compromise on health.

Socially, this recipe shines as a conversation starter at dinner parties or gatherings, highlighting your culinary creativity. The combination of traditional and modern elements captures attention and appreciation from guests, making it a memorable centerpiece for your table. It offers excellent value, utilizing widely available ingredients and yielding generous servings, ensuring both satisfaction and financial prudence.

Historical Background and Cultural Significance

Lasagna, traditionally an Italian dish, has seen numerous adaptations worldwide, becoming a staple in various cuisines due to its comforting assembly of pasta, sauce, and cheese. Originally tracing back to Ancient Greece, where layers of pasta and sauce were served, its evolution saw the incorporation of tomatoes and cheese, hallmarks of the Italian edition.

The cheeseburger, American in origin, brought together a need for practicality and flavor, combining ground beef and cheese into a convenient sandwich format. By merging these two culinary giants, the Parmesan Garlic Bacon Cheeseburger Lasagna takes on a unique cultural importance, symbolizing the inventive spirit of contemporary cooking. It embraces international influences while maintaining a distinctly modern, fusion cuisine identity.

Regionally, this dish might vary with additional spices or alternative meats, showcasing a community’s local flavor and preferences. From coast to coast, these adaptations illustrate the dynamic nature of culinary traditions and their ability to bridge cultures and tastes.

Ingredient Deep Dive

Ground beef serves as the hearty base, rich in protein and iron, providing crucial nutritional value. Historically significant in many cultures for its versatility and affordability, it’s best chosen for quality and fat content, ideally at 80/20. Store it refrigerated and consume within a few days of purchase, or freeze for longer shelf life.

Garlic, prized for its pungent aroma and health benefits, enhances savory dishes immensely. Known for its immune-boosting properties, it has been a staple in world cuisine for centuries. When selecting, choose firm bulbs with tight, intact skins. Stored in a cool, dry place, garlic retains its potency and flavor over weeks.

Parmesan cheese adds umami richness, elevating dishes with its aged, nutty profile. Nutritionally adding calcium and protein, it is best bought whole and grated as needed to preserve flavor. Keep it wrapped in parchment in the fridge, and consider pecorino as a substitution for different flavor dynamics.

Bacon introduces a smoky, salty dimension while adding texture. Opt for thick-cut varieties for more substantial bites. With long refrigeration shelf life, it can be pre-cooked and frozen for efficiency. Turkey bacon offers a lighter alternative for reduced fat content.

Common Mistakes to Avoid

  • Overcooking the pasta: Ensure pasta is al dente before assembling to avoid a mushy final texture.
  • Over-layering ingredients: Balance is key—for easy cooking and serving, avoid excessive layers.
  • Insufficient seasoning: Season each component separately for a depth of flavor throughout the dish.
  • Uneven sauce distribution: Spread sauce evenly to prevent dry sections and ensure cohesive baking.
  • Skipping rest time: Allow the lasagna to settle post-baking for easy slicing and serving.
  • Neglecting to drain beef: Properly drain fat from beef to avoid oily layers.
  • Inadequate cheese browning: Broil briefly for that perfect golden crust.
  • Incorrect baking dish size: Use the right size to avoid overflow and ensure proper layering.

Essential Techniques

Pasta Cooking is crucial for a successful lasagna. Cooking until slightly firm ensures it holds up during baking. Watch for al dente—cooked yet firm—and avoid overcooking, which results in a soggy dish. Use salted water to enhance pasta flavor.

Beef Browning imparts deep, caramelized flavors and is essential for texture. Ensure your pan is hot and beef is dry for optimal browning and reduced steaming. Break up beef into crumbly pieces for even cooking and drain excess fat.

Layering, vital for the lasagna structure, needs balance and evenness. Spread each layer fully to avoid dry spots. Be patient in equal distribution to achieve uniform cooking and seamless flavor blending.

Cheese Melting tops the culinary experience, needing gentle heating to avoid separation and graininess. Choose quality cheese for creaminess, and increase oven heat briefly for a browned top.

Pro Tips for Perfect Parmesan Garlic Bacon Cheeseburger Lasagna

Pre-boil your pasta with a splash of olive oil and plenty of salt for non-stick layers and enhanced pasta flavor.

Prepare garlic parmesan sauce beforehand to allow flavors to meld fully, enriching the final dish.

Crisp the bacon to your preferred level before inclusion for optimized texture that doesn’t become soggy during baking.

Layer ingredients consistently to avoid overwhelming any singular flavor—achieve balance for enjoyable bites every time.

Rest the lasagna post-baking; this ensures easier slicing and preserves its layered structure.

For a golden cheese top, broil for a brief few minutes—watch closely to prevent burning.

Variations and Adaptations

For regional variation, incorporate local cheeses or spice mixes to reflect regional palates and add a twist to the traditional recipe.

During summer, consider substituting marinara with fresh tomatoes and basil for a lighter, seasonal adaptation.

To accommodate dietary restrictions, use gluten-free pasta or explore plant-based ground beef for alternative meat solutions without sacrificing flavor.

Indulge in flavor experimentation by adding jalapeños for a spicy kick or roasted vegetables for earthy undertones.

Alter textures by varying cheese types—whisking mascarpone for creaminess or cheddar for sharpness changes dynamics.

Presentation can shift from traditional baking to individual portions in ramekins for a more modern, portion-controlled display.

Serving and Presentation Guide

For an elegant presentation, cut the lasagna into clean square portions using a sharp knife, cooled slightly for precision.

Garnish with fresh basil leaves or parsley for a pop of color and herbal aroma, enhancing visual appeal while adding a burst of freshness.

Serve with a simple mixed green salad to balance the richness of the lasagna, offering a crisp texture contrast.

Consider pairing with garlic bread, a traditional accompaniment that complements the robust flavors.

Ensure lasagna is served hot, the cheese bubbling slightly, maximizing aroma and taste sensation.

Utilize portion-control by serving moderate squares, paired with sides, to ensure a satisfying yet balanced meal.

Wine and Beverage Pairing

Pair this lasagna with a medium-bodied red wine, such as a Chianti or Merlot, which complement the meatiness without overpowering the garlic and cheese.

For non-alcoholic options, a robust pomegranate or cranberry juice diluted with soda water offers tartness to cut through richness.

A cold lager also provides a satisfying malt base that aligns with the smoky bacon elements.

In cooler months, consider a warm mug of herbal tea like peppermint, refreshing the palate after rich bites.

Serve drinks slightly chilled to soothe the taste buds, contrasting against the lasagna’s warmth, heightening dining pleasure.

Storage and Shelf Life

Store lasagna in an airtight container in the refrigerator, where it keeps well for 3 to 4 days, maintaining flavor integrity.

Use glass or ceramic containers to avoid flavor absorption, and ensure layers remain visually appealing for future slices.

Watch for off scents or discoloration as spoilage signs, disposing of if these occur before anticipated shelf life ends.

When reheating, cover and preheat oven to 350°F, warming until heated through while keeping moisture intact.

For freezing, wrap individual portions tightly in freezer wrap and store up to 2 months for meal planning flexibility.

Make Ahead Strategies

To advance prep, cook pasta and bacon in advance, storing separately to retain distinct textures.

Assemble the lasagna up to a day ahead and refrigerate, allowing flavors to meld for enriched tasting experience.

Upon determining readiness for baking, allow the dish to reach room temperature for even cooking.

Consider reheating leftovers in an oven for freshness, introducing fresh sauce or cheese for vibrancy.

Fresh herbs added at serving ensure bright notes contrast beautifully with cooked counterparts, reviving every bite.

Scaling Instructions

For fewer servings, halve ingredient quantities, maintaining preparation timing and attention to layer balance.

Doubling requires a larger dish and attention to oven time—aim for the same oven temperature, noting potential 10-15 minute increases.

Adjust equipment size proportionately, using larger pots for increased sauce quantities without overcrowding.

Store additional portions effectively to maintain freshness or explore freezing larger batches for planned meals.

Nutritional Deep Dive

Macronutrient rich, this dish provides ample protein through beef and cheese, making it ideal for muscle and energy support.

The pasta adds balanced carbohydrates, crucial for immediate energy, complemented by cheese fats for sustained satiety.

Micronutrients, notably calcium in cheese and iron in beef, contribute to essential bodily functions, enhancing bone and blood health.

Portion responsibly to keep calorie intake balanced—such servings ensure nutritional benefits without excess.

Whole-grain pasta or low-fat dairy alternatives can adapt the dish for healthier options, supporting diverse dietary aims.

Dietary Adaptations

To make it gluten-free, opt for gluten-free pasta and ensure other ingredients conform to gluten-free standards.

For dairy-free diets, use plant-based cheese alternatives, with almond or coconut milk subbing gracefully into the bechamel sauce.

Vegan adaptations require plant-based proteins and cream sauces, replicating textures while adhering to plant-based lifestyles.

A low-carb rendition can be achieved with zucchini noodles, reducing carb counts while retaining signature flavors and textures.

Troubleshooting Guide

If the lasagna turns out overly dry, consider a looser sauce or addition of extra cheese—aiding moisture retention through baking.

A tasteless blend may require revisiting seasoning steps; do not hesitate to add herbs or spices for accentuated flavor.

Temperature imbalances often fix with adjusted oven settings or alteration of baking time; always verify ovens perform at accuracy.

Equipment challenges are mitigated through ensuring adequately sized dishes for manageable preparation and coverage.

Incorrect ingredient substitutions lead to mismatched flavors, so align alternatives respectfully within recipe boundaries for taste harmony.

Recipe Success Stories

Enthusiast cooks rave about the family’s response to this fusion dish, noting how kids enjoy familiar flavors with gourmet flair.

Some successful interpretations bring regional cheese into the dish, crediting local nuance and deeper appreciation from those around.

Readers often share their inventive adaptations on social forums, exploring robust spices like paprika or cumin for personalized heat.

Community photographs underscore vibrant presentations, showing critical acclaim of golden cheese lids and sky-high layers.

Shared creative insights further connect cooks across regions, illustrating versatile adaptability with applause-worthy results every time.

Frequently Asked Questions

Can this lasagna be made without bacon?

Absolutely, the recipe remains satisfying without bacon. For similar smokiness, consider adding smoked paprika or liquid smoke to maintain signature smokiness.

How do I prevent the lasagna from becoming too watery?

Avoid overcooking pasta and thoroughly drain beef after browning to reduce excess moisture. Employ effective sauce thickening techniques if necessary.

What can I use instead of traditional beef?

Ground turkey or chicken works excellently, offering lighter options. For a meatless version, explore lentils or a blend of plant-based beef.

How do I achieve the perfect cheese crust?

A broiler does the trick beautifully, baking until the standard time’s end before browning cheese further under high heat. Monitor closely to prevent burning.

Is it possible to substitute fresh garlic for garlic powder?

Yes, although the result may be slightly different. 1/8 teaspoon of garlic powder can replace each clove, adjusting to taste as garlic depth builds.

Can I make this lasagna with different cheese?

Certainly. Mozzarella or Gruyere complements wonderfully, lending creaminess and depth. Experiment with blends for personalized cheesy character.

What steps can I take to simplify this recipe for weeknights?

Preparing components like pasta and sauce ahead makes for straightforward assembly on busier nights. Utilize pre-cooked bacon or cheese blends to save time.

How long should I rest the lasagna before serving?

Resting 10-15 minutes allows layers to settle and cool slightly—facilitating neater slicing and a balanced temperature for mature servings.

What size baking dish works best for this quantity?

A 9×13-inch dish is perfect for the specified quantities, ensuring proper layering heights and evenly distributed cooking for flavorful success.

Are there complementary dishes to enhance my serving?

A fresh side salad with a vinaigrette or balsamic dressing contrasts wonderfully with the lasagna’s rich flavors, creating a balanced dining experience.

Additional Resources

With related recipes like classic lasagna or chicken alfredo lasagna within reach, you can explore further culinary fusion potential easily.

Technique guides—focusing on bechamel sauce creation or bacon crisping—offer the depth of skill needed in realizing this dish’s full potential.

Ingredient information, highlighting cheese nuances or beef selection techniques, empowers informed, quality decisions for elevated flavor dynamics.

Equipment recommendations lend helping hands with dish selection, while seasonal variations for flavor adjustments keep your cooking consistently intriguing.

Join the Conversation

Engage with the recipe community by sharing your adaptations and successes on social networks, illustrating personal spins alongside stunning photos.

Showcase your unique plating techniques and spark discussion with fellow enthusiasts keen to explore innovative fusion twists.

Contribute to recipe reviews, sharing insights on adjustments or equipment hacks, bridging experiences among curious creative minds.

Welcome feedback in comments, fostering community collaboration and enhanced understanding—creating a dynamic network of supportive culinary aficionados.

As kitchen adventures unfold, this Parmesan Garlic Bacon Cheeseburger Lasagna forms a centerpiece of culinary exploration and shared discovery.

The Recipe

Parmesan Garlic Bacon Cheeseburger Lasagna

Serves: 8

Prep Time: 30 mins

Cook Time: 60 mins

Total Time: 90 mins

Kitchen Equipment Needed

  • 9×13-inch baking dish
  • Large skillet
  • Saucepan
  • Cheese grater
  • Oven-safe lid or aluminum foil

Ingredients

  • 1 pound ground beef
  • 1 pound bacon, chopped
  • 3 cloves garlic, minced
  • 1 cup parmesan cheese, grated
  • 2 cups mozzarella cheese, shredded
  • 12 lasagna noodles
  • 2 cups marinara sauce
  • Salt and pepper to taste
  • 2 tablespoons olive oil

Directions

  1. Preheat oven to 375°F (190°C). Boil lasagna noodles according to package instructions, ensuring they’re slightly firm. Drain and set aside.
  2. In a skillet, cook chopped bacon until crispy. Remove and drain excess fat on paper towels.
  3. Add ground beef to the same skillet, seasoning with salt and pepper. Cook until browned, then drain fat.
  4. In a saucepan, heat olive oil over medium heat. Add minced garlic, sautéing until fragrant.
  5. Add marinara sauce to garlic and simmer for 5 minutes. Stir in parmesan cheese, allowing sauce to thicken slightly.
  6. In a baking dish, begin layering with marinara sauce, noodles, ground beef, bacon, and mozzarella cheese. Repeat until ingredients are used, topping with mozzarella.
  7. Cover with foil and bake for 45 minutes. Remove foil, increase heat to broil, and cook additional 5-10 minutes for cheese browning.
  8. Let cool for 10 minutes before slicing. Serve warm, garnished with additional parmesan and herbs if desired.

Recipe Notes

  • For added flavor, consider mixing herbs like oregano or basil within the sauce layer.
  • Leftover portions can be refrigerated for up to 4 days or frozen for up to 2 months.
  • Substitute pasta with gluten-free alternatives as needed without cooking time adjustment.

Flavorful Mediterranean Stuffed Salmon Recipe for a Healthy Gourmet Meal

Delicious Mediterranean Stuffed Salmon: A Flavorful Feast

⚖️
Difficulty
Medium

⏲️
Prep Time
15 mins

🕒
Cook Time
25 mins

⏱️
Total Time
40 mins

🍽️
Servings
4

Savor the essence of the Mediterranean with our exquisite Mediterranean Stuffed Salmon recipe. This dish bursts with rich, vibrant flavors from sun-ripened tomatoes, salty feta cheese, and fresh herbs woven into tender salmon fillets. Perfectly balanced, each bite takes your palate on a journey to the sun-drenched coasts of Greece, enveloping you in a symphony of tastes and textures.

The Mediterranean Stuffed Salmon not only delights the senses but also nourishes the body. The succulent salmon, rich in esteemed omega-3 fatty acids, when combined with a medley of vegetables, creates a wholesome meal. Ideal for gatherings and special dinners, it’s both impressive and approachable—allowing you to bring a touch of Mediterranean elegance to your table.

Quick Recipe Highlights

  • Flavor Profile: The exquisite blend of Mediterranean ingredients provides a burst of sunshine on your plate. With an infusion of tangy feta, earthy spinach, and hints of lemon, the salmon becomes a delightful canvas for these vibrant flavors.
  • Texture: The contrast between the tender flakiness of the salmon and the creamy, rich filling offers an indulgent mouthfeel reminiscent of dining in a coastal Greek taverna.
  • Aroma: This dish emits an enticing aroma blending the freshness of herbs with the savory depth of baked salmon, inviting you into the kitchen before it’s even ready.
  • Visual Appeal: The vivid colors of the stuffing against the soft, pink salmon make for an inviting dish that promises as much aesthetic delight as gastronomic pleasure.
  • Skill Level Needed: This recipe requires intermediate culinary skills. The ability to butterfly a salmon fillet and prepare a cohesive stuffing are helpful as you craft this masterpiece.
  • Special Equipment: A sharp fillet knife for precision cuts and a baking dish that ensures even cooking are essential for achieving the best results.

Recipe Overview

  • Difficulty Level: Considered medium in complexity, this recipe includes fileting and stuffing, which may pose a challenge for novices but is certainly manageable with a little preparation.
  • Category: This dish serves as a main course, ideal for family dinners or a striking centerpiece at your next dinner party.
  • Cuisine: Rooted in Mediterranean culinary traditions, this recipe draws from Greek influences, elevating simple ingredients to gourmet status.
  • Cost: Salmon and quality Mediterranean ingredients can be on the pricier side, though their nutritional benefits and flavors justify the investment.
  • Season: Best enjoyed year-round, this dish shines particularly in the summer and fall when fresh herbs and vegetables are in abundance.
  • Occasion: Its elegance makes it perfect for festive occasions, yet it remains simple enough for a weeknight indulgence.

Why You’ll Love This Recipe


The Mediterranean Stuffed Salmon is a testament to vibrant, wholesome cooking. It’s the culmination of fresh ingredients and time-honored techniques that come together to create something truly special. The taste marries the succulent flavors of ocean-fresh salmon with the rich Greek stuffing, creating a harmonious balance of earthy and fresh notes. The convenience is in its preparation; with components that can readily be assembled in advance, enabling you to focus on enjoying the meal rather than laboring over it.

Nutritional benefits abound as well, given the omega-3 rich salmon, antioxidants from the spinach, and the balanced fat profile from olive oil as the prime cooking medium. This dish serves as a perfect addition to any celebration or gathering, with its striking visual presentation and unbeatable taste earning unanimous accolades. Furthermore, the often-costly perception of Mediterranean cuisine is dispelled as the ingredients here can be sourced affordably, making this meal an accessible delight for everyone, from novices to seasoned chefs alike.

Historical Background and Cultural Significance


The Mediterranean Stuffed Salmon takes inspiration from an ancient culinary practice of combining locally sourced fish with abundant garden herbs. This approach has its roots in early Greek and Roman cuisine, where fish was often paired with readily available vegetables and legumes, reflecting a farm-to-table ethos centuries before it became a trend.

Originally, stuffing seafood was a method to preserve the moisture in the fish while imbuing it with rich flavors. This simple yet effective technique was passed down through generations, transforming under the influence of region-specific herbs and spices. As a result, the stuffed salmon became a celebrated dish throughout Mediterranean regions, served at festivals and gatherings as a representation of prosperity and abundance.

Ingredient Deep Dive


Salmon, often hailed as the king of fish, is at the core of this recipe due to its rich history and cultural significance in Mediterranean diets. Known for its distinctive flavor, it has served as a crucial source of protein and healthy fats, making it a cherished staple in many diets. When selecting, look for wild-caught varieties which offer superior flavor, while storing salmon in cold, airtight containers is essential to maintain freshness.

Feta cheese, a crown jewel of Greek cuisine, adds a creamy, tangy element to the dish. Its production is rooted in ancient Greece, considered a cultural symbol of hospitality and community. Notably rich in calcium and protein, feta complements the salmon with its savory, salty profile. Always seek authentic Greek feta, stored in brine to prolong its shelf life and preserve its bold flavor.

Common Mistakes to Avoid

  • Using frozen salmon can greatly diminish the dish’s flavor and texture, which are best highlighted with fresh, high-quality fillets.
  • Overcooking the salmon is a common pitfall leading to dryness; careful monitoring while baking ensures tender, moist results.
  • Neglecting to season the dish adequately can lead to a lackluster taste; be liberal with herbs and spices for maximum impact.
  • Not allowing the salmon to rest post-cooking can cause juices to escape, resulting in a less flavorful filling.
  • Skipping the step of blotting the salmon dry before stuffing can cause excess moisture, affecting the texture of the stuffing.
  • Overstuffing can lead to leakage while cooking, so careful filling placement is key.
  • Failing to preheat the oven can result in uneven cooking, so ensure it is fully heated before baking the fish.
  • Using the wrong baking vessel, such as one that’s too small, can hinder even heat distribution, leading to inconsistent results.

Essential Techniques


Butterflying salmon is a key skill here, ensuring the fillet can be adequately stuffed. Precision is vital—cutting the fish without severing through creates a perfect pocket for the filling, resulting in a uniform and aesthetically pleasing dish. Practicing patience is crucial, as is using a sharp knife to avoid jagged cuts.

The proper filling technique involves evenly spreading the stuffing to prevent overloading and ensures balanced flavors throughout. Visual cues like shimmering olive oil and succulent, fully cooked interior signals indicate the dish’s readiness.

Pro Tips for Perfect Mediterranean Stuffed Salmon


Allow the salmon to sit at room temperature for about 10 minutes before cooking, which aids even cooking and prevents the exterior from cooking faster than the interior. Opt for lemon zest rather than juice directly in the stuffing—this avoids unnecessary moisture and enhances flavor.

Wrapping your stuffed salmon in parchment during the initial cooking retains moisture, helping achieve that tender, flaking finish. Consider using sun-dried tomatoes for added depth, especially if fresh tomatoes are out of season. Pre-season the baking dish to create a base layer of flavor, infusing the salmon with subtle undertones.

For a restaurant-quality finish, broil the fillet briefly at the end of baking for a golden, crispy outer layer. Experiment with different herb combinations for the stuffing to tailor the dish to your taste preferences, such as adding dill for a more robust herbal note.

Variations and Adaptations


The Mediterranean Stuffed Salmon can effortlessly adapt to suit varied regional tastes. For an Italian twist, incorporate pine nuts and basil into the filling, providing an earthy, nutty dimension that pairs beautifully with the salmon’s subtle flavor. Seasonal adaptations, such as infusing summer’s basil and mint, add brightness, yet in winter consider rosemary for warmth.

For those adhering to dietary restrictions, substitute dairy-free cheese to suit lactose intolerances or opt for whole wheat breadcrumbs to boost fiber content while maintaining classic textures. Adjust seasonings between subtle and spicy by varying the pepper choices used, enhancing the dish’s versatility to cater to a variety of palates.

Serving and Presentation Guide


Maximizing the visual appeal of your Mediterranean Stuffed Salmon begins with its plating. Consider using long, white serving platters to highlight the vibrant colors of the dish. Garnishes of lemon wedges and sprigs of parsley add a refreshing touch, while the addition of pink Himalayan salt over the top just before serving enhances both flavor and aesthetics.

Include accompanying vegetable medleys, such as roasted asparagus or blistered cherry tomatoes, to create color contrast and textural variety on the plate. Ensure each serving is equally portioned for an even and appealing presentation. Serving at room temperature allows flavors to meld beautifully, ensuring each bite delivers maximum taste and enjoyment.

Wine and Beverage Pairing


Pairing salmon with the right wine enhances the dish’s flavors—options such as a crisp Sauvignon Blanc or a balanced Chardonnay complement its savory profile while cutting through the richness of the stuffing. For non-alcoholic options, consider herbal teas like mint or chamomile, which replicate subtle aromatic notes found in the dish.

When presenting alongside coffee, opt for a light roast which echoes the toasted elements in the stuffing and harmonizes with the salmon’s delicate nature. Serving all beverages chilled ensures a refreshing counterpoint to the buttery texture of the stuffed fish.

Storage and Shelf Life


The Mediterranean Stuffed Salmon maintains its quality when stored correctly. After cooling, place in an airtight container, maintaining optimal freshness in the refrigerator for up to three days. For longer storage, freeze fillets individually, which allows you to thaw only what you need, aiding in meal planning flexibility.

Reheat gently in a low oven to prevent drying, adding a splash of olive oil beforehand to restore moisture. Be vigilant of any signs of spoilage, such as an off-putting odor, and discard any suspect portions to ensure safe consumption.

Make Ahead Strategies


Prepping elements of the Mediterranean Stuffed Salmon in advance can significantly simplify assembly on the day of serving. Prepare the filling and butterfly the salmon a day prior, storing them separately to maintain texture integrity. The day of serving, simply fill and bake, minimizing stress and reducing cooking time.

Consider arranging everything on a baking sheet for easy transfer to the oven, ensuring a streamlined cooking process. Refresh the herbs before serving to add a burst of fresh aroma, ensuring your dish is as appealing to the nose as it is to the taste buds, keeping everything prepared for an easy mealtime experience.

Scaling Instructions


Scaling the Mediterranean Stuffed Salmon for larger gatherings requires some adjustments in technique and equipment. When doubling the recipe, prepare batches of filling separately to maintain even mixing and ensure balanced flavors. Consider additional baking dishes and assign separate cooking racks to guarantee even heat circulation.

Halving the recipe requires careful reduction in the amount of filling, ensuring the salmon is still evenly stuffed without excess leakage. Store any leftover filling in the refrigerator for use in other dishes, preventing waste and maximizing ingredients.

Nutritional Deep Dive


The Mediterranean Stuffed Salmon exemplifies a nutritious powerhouse. That’s not just omega-3 fatty acids boosting heart health—but also antioxidants from the spinach and heart-friendly natural fats from extra virgin olive oil. Dive deeper into its rich micronutrient profile of Vitamins B and D, which contribute vitally to overall wellness.

Tailoring portion sizes ensures appropriate nutrient distribution while aligning with dietary recommendations. By understanding the precise impact of each serving, the Mediterranean Stuffed Salmon can become a staple in health-forward meal rotations without compromising taste or variety.

Dietary Adaptations


Adapting the Mediterranean Stuffed Salmon to meet specific dietary needs can be seamlessly done while maintaining its delicious essence. For a gluten-free variation, replace breadcrumbs with gluten-free alternatives or finely ground nuts, which uphold the texture while accommodating restrictions. Vegan adaptations involve substituting feta cheese with almond-based cheese alternatives and using flax eggs to bind the stuffing.

For those reducing carb intake, removing breadcrumbs entirely suffices while using additional vegetables to create a different texture while refreshing taste. These modifications ensure every diner, regardless of their dietary preferences, can enjoy the Mediterranean Stuffed Salmon experience.

Troubleshooting Guide


Should your Mediterranean Stuffed Salmon encounter issues, simple solutions are readily available. For texture problems, consider adjusting the cooking time—overcooked salmon results from excessive heat or duration, while undercooking indicates a need for additional monitoring. Balance flavor by tasting the filling beforehand to confirm proper seasoning.

Temperature issues often stem from uneven cooking surfaces or overcrowded ovens—adjustments such as using convection settings help alleviate these concerns. Substitute ingredients thoughtfully, replacing like-for-like in freshness and profile to maintain integrity. Timing adaptations, involving scheduling precise intervals, enable seamless preparation and service.

Recipe Success Stories


Community feedback elevates the Mediterranean Stuffed Salmon from a recipe to a shared culinary celebration. Readers recount fond memories of intimate dinners transformed by the dish, celebrated for its sophisticated flavors and approachable nature. Families cherish times when children assist in preparing the meal, fostering lifelong skills and enjoyment.

Adaptive successes extend across regions, where diverse ingredients honor the spirit of the original recipe. Photography enthusiasts capture stunning images of their culinary creation, sharing success across platforms and inspiring others to embark on their own culinary journeys and share their own successes.

Frequently Asked Questions

What’s the best way to butterfly a salmon for stuffing? Using a sharp knife, make an incision along the thicker side of the salmon to form a pocket, ensuring not to cut all the way through. Practice patience and precision for the best results.

Can I prepare components in advance? Yes, you can prepare the filling a day ahead and store it separately, making the day-of assembly quick and easy.

What wine pairs best with the Mediterranean Stuffed Salmon? Opt for a crisp white wine like Sauvignon Blanc or Pinot Grigio, whose acidity complements the dish’s richness.

Are there non-dairy substitutes for feta cheese? Yes, coconut or almond-based cheese alternatives work well as substitutes, providing a creamy texture while adhering to dietary preferences.

Can I freeze leftovers? Absolutely, portion the leftovers and place them in a freezer-safe container for up to three months. Reheat gently in a low oven for the best result.

How can I avoid overcooking the salmon? Monitor the internal temperature; salmon is considered done at 145°F, or when it flakes easily with a fork.

What side dishes complement this meal? Roasted asparagus, couscous, or lemon garlic potatoes pair beautifully with the Mediterranean Stuffed Salmon for a complete meal.

Is there a vegetarian option? Yes, replace salmon with large portobello mushrooms to create a delicious plant-based alternative with the same flavors.

Is it necessary to use fresh herbs? While fresh herbs offer the best flavor, dried herbs can be an adequate substitute, using one-third of the fresh amount specified.

How do I know if the salmon is fresh? Fresh salmon should have a mild scent, firm flesh, and a bright, vibrant color without any dull patches.

Additional Resources


Explore further culinary delights by delving into our collection of recipes inspired by the Mediterranean. These dishes, from traditional Greek salads to zesty Middle Eastern sides, provide a comprehensive guide to mastering regional flavors. Enhance your cooking techniques with our step-by-step guides on knife skills, stuffing methods, and optimal salmon selection tips.

Our ingredient resource pages offer insights into sourcing the finest produce and maximizing their qualities in home cooking. For those passionate about seasonal variety, discover our detailed guides on incorporating fresh, farm-to-table elements into your favorite dishes year-round.

Join the Conversation


Join our community of culinary enthusiasts and share your Mediterranean Stuffed Salmon experiences. Engage on social media with tagging and hashtags, bringing together food lovers with photographic exploration and recipe exchanges. We encourage you to leave reviews, sharing what worked and inspiring others to try the dish.

Experience recipes customized by community feedback, learning adaptations and tweaks that align with personal styles and tastes. By connecting with others, discover diverse perspectives, embrace inventive culinary expressions, and contribute to a vibrant, flavorful dialogue that celebrates Mediterranean cooking.

The Recipe

Mediterranean Stuffed Salmon

Serves: 4

Prep Time: 15 mins

Cook Time: 25 mins

Total Time: 40 mins

Kitchen Equipment Needed

  • Sharp fillet knife
  • Medium baking dish
  • Mixing bowls
  • Cutting board

Ingredients

  • 4 salmon fillets
  • 1 cup fresh spinach, chopped
  • 1/2 cup feta cheese, crumbled
  • 1/4 cup sun-dried tomatoes, chopped
  • 2 cloves garlic, minced
  • 1 tablespoon fresh oregano, chopped
  • 1 lemon, zested
  • Salt and pepper to taste
  • 2 tablespoons olive oil

Directions

  1. Preheat the oven to 375°F (190°C).
  2. Butterfly each salmon fillet to create a pocket for stuffing.
  3. In a bowl, mix spinach, feta, sun-dried tomatoes, garlic, oregano, lemon zest, salt, and pepper.
  4. Stuff the salmon pockets with the mixture, compressing to ensure even distribution.
  5. Place salmon in the baking dish, drizzle with olive oil, and season once more with salt and pepper.
  6. Bake for 25 minutes or until salmon flakes easily with a fork. Broil on high for an additional two minutes for a golden top.
  7. Remove from the oven and let rest for five minutes before serving.

Recipe Notes

  • Substitute goat cheese for feta for a milder flavor.
  • Feel free to adjust filling quantities based on taste preferences.
  • Add a sprinkling of chopped walnuts for extra texture.

Savor Nutritious Flavors with This Mediterranean Salmon Bake Recipe

Mediterranean Salmon Bake: A Flavorful Feast

⚖️
Difficulty
Easy

⏲️
Prep Time
15 mins

🕒
Cook Time
30 mins

⏱️
Total Time
45 mins

🍽️
Servings
4

Transform your dinner table with this Mediterranean Salmon Bake, a dish that brings together the vibrant flavors of the Mediterranean Sea. Succulent salmon fillets are nestled with ripe tomatoes, briny olives, and aromatic herbs for an unforgettable meal. As the salmon bakes in the oven, it melds with the fragrant ingredients, resulting in a symphony of taste and a heart-healthy feast.

This Mediterranean Salmon Bake is not just about flavor; it’s a testament to simple cooking with rich outcomes. Ideal for both weeknight dinners and festive gatherings, this dish requires minimal preparation, letting fresh ingredients take the spotlight. Dive into layers of zesty citrus notes and the warmth of Mediterranean spices that will transport your taste buds to sunny coastlines.

Quick Recipe Highlights

  • Flavor Profile: An explosion of zesty lemon, aromatic herbs, and savory salmon complemented by earthy olives.
  • Texture: A delectable contrast of tender salmon and juicy tomatoes with a slight crunch from oven-baked vegetables.
  • Aroma: Captivating scents of roasted tomatoes mingling with fresh lemon and herbs.
  • Visual Appeal: Bright reds and greens contrasted against the pinkish hues of salmon fillets for a stunning presentation.
  • Skill Level Needed: Straightforward techniques with a focus on assembling and baking.
  • Special Equipment: A baking dish and a zester for lemon zest.

Recipe Overview

  • Difficulty Level: This easy recipe requires basic assembly skills, making it perfect for cooks new to baking fish dishes.
  • Category: Ideal as a main course, this dish pairs well with rice, couscous, or a fresh salad.
  • Cuisine: Rooted in Mediterranean culinary traditions, emphasizing fresh, wholesome ingredients.
  • Cost: Moderate, with fresh fish being the primary expense component.
  • Season: Best enjoyed in spring and summer when herbs and tomatoes are in peak season.
  • Occasion: Suitable for everyday meals and special occasions alike thanks to its elegant presentation.

Why You’ll Love This Recipe


With its tantalizing combination of Mediterranean flavors, this salmon bake appeals to the senses with each bite. The juicy, well-seasoned salmon pairs beautifully with the savory olives and vibrant vegetables. Easy preparation and simple cleanup make it an ideal dish for busy households. You don’t need to be a master chef to enjoy a meal that’s both nutritious and delightful.

Health-conscious eaters will appreciate the omega-3 fatty acids in salmon, combined with antioxidants from fresh vegetables and olive oil. This Mediterranean dish supports a balanced diet, aligning with heart-healthy eating patterns focused on unsaturated fats and fresh produce. Whether entertaining guests or pursuing weeknight variety, the Mediterranean Salmon Bake excels with its gentle elegance and robust flavors.

The accessibility of ingredients ensures that this dish can be made with ease and frequency. With the robust textures and flavors of salmon augmented by a tapestry of vegetables, every serving provides a satisfying mix of protein and fiber-rich ingredients, delivering energy and satisfaction. The Mediterranean Salmon Bake offers a luxurious dining experience without the hefty price tag associated with many gourmet dishes.

Historical Background and Cultural Significance


Born from the sun-drenched shores of the Mediterranean, this salmon bake reflects the region’s rich fishing history and love of fresh, seasonal produce. While the original recipes often called for locally caught fish like sea bass, salmon has become a frequent substitute due to its widespread availability. This adaptation illustrates the recipe’s flexibility and global appeal.

The Mediterranean diet is renowned for promoting health and longevity, with the Mediterranean Salmon Bake exemplifying the cornerstone ingredients of this cultural dietary approach. Olives, tomatoes, and fish are staples in numerous regional recipes, celebrated for their flavor as much as their contribution to wellness. Through centuries, these ingredients have remained central to convivial meals that gather families around the table.

From fishing villages to bustling city kitchens, the recipe evolves with personal touches while retaining its core simplicity and flavor. As a modern classic, this salmon bake enjoys a devotion from home cooks who appreciate its straightforward preparation and memorable taste. Regional variations abound, from additional herbs to nuanced spice blends, showcasing the diverse choices available to cooks worldwide.

Ingredient Deep Dive

Salmon is the star of this dish, a fish revered across cultures for its flavor and nutritional profile. Rich in omega-3 fatty acids, salmon supports heart health and reduces inflammation. When selecting salmon, look for fillets that are vibrant in color, firm to the touch, and free of off odors. Store salmon in the coldest part of the fridge, using it within two days for optimum freshness. Substitute with trout or sea bass for a different taste twist.

Olives introduce an intriguing depth to the Mediterranean Salmon Bake. Known for their briny, full-bodied flavor, olives are a hallmark of Mediterranean cooking. Packed with healthy fats, they complement the salmon beautifully. Choose olives that are firm yet yielding, with rich dark or green hues. Store them in their brine in the fridge, ensuring they’re submerged to maintain their quality. Capers or artichokes can provide an alternative with similarly vibrant results.

Common Mistakes to Avoid

  • Overbaking the salmon, which can cause it to dry out. Always check for doneness early.
  • Undersalting the dish; use an adequate amount of seasoning to enhance the natural flavors.
  • Using olives without draining. Excess brine can overpower the dish’s balance.
  • Ignoring the freshness of lemons. Use fresh lemon juice and zest for maximum zest.
  • Overcrowding the baking dish. Ensure spacing for even cooking.
  • Not preheating the oven can lead to uneven cooking times.
  • Skipping the resting period. Allow the dish to rest post-baking for the flavors to meld.
  • Using the wrong type of olive oil. Opt for a high-quality extra virgin variant for flavor.

Essential Techniques


Master proper seasoning by generously seasoning the fish and vegetables, ensuring the flavors are balanced throughout. Fresh herbs and lemon enhance the salmon, preventing blandness. Balancing moisture is key; baste the salmon with its juices for added flavor. Look for the telltale flaky texture to gauge doneness, avoiding overcooked salmon. Ensure all ingredients are evenly distributed within the baking dish for consistent heat exposure and a harmonious final product.

Pro Tips for Perfect Mediterranean Salmon Bake


Make sure to use the freshest salmon available, as this will greatly enhance the dish’s overall flavor. Adding a tablespoon of honey to the lemon juice can provide a subtle sweetness that elevates the salmon’s natural taste. For a deeper flavor, marinate the salmon fillets briefly in olive oil, lemon juice, and herbs before baking. Arrange vegetables around and beneath the salmon so they absorb the juices during cooking. Experiment with fresh basil or thyme for an aromatic variation that retains the dish’s essence.

Variations and Adaptations


For a regional twist, incorporate feta cheese crumbles on top before baking. Adapt to seasonal ingredients by adding summer squash or fall sweet potatoes for texture diversity. Tailor the dish for a low-carb diet by substituting starchy sides with cauliflower rice. Adjust the spice with a touch of paprika or red pepper flakes to enhance the dish’s warmth. Fine-tune textures by adding almonds or pine nuts for a nutty crunch.

Serving and Presentation Guide


Position each salmon fillet atop a bed of mixed greens or grain salad for additional visual appeal. Garnish with a sprig of fresh herbs or lemon slices for brightness. Accompany the Mediterranean Salmon Bake with a chilled white wine or sparkling water to enhance the meal’s Mediterranean essence. Serve warm for the best texture; room temperature offers a more daring approach. Portion the salmon evenly to ensure each guest enjoys balanced flavors.

Wine and Beverage Pairing


Pair the Mediterranean Salmon Bake with a crisp Sauvignon Blanc, which complements the salmon’s richness and the herbs’ zest. For non-alcoholic options, a lemon-infused iced tea aligns perfectly with the dish’s citrus notes. A light sparkling water can also cleanse the palate and enhance the meal’s refreshing qualities. Serve beverages chilled to balance the dish’s warm, luscious flavors for optimal gustatory enjoyment.

Storage and Shelf Life


Store leftovers in an airtight container in the refrigerator for up to 2 days. The salmon bake is best enjoyed fresh, but can be reheated in a low oven to preserve moistness. Avoid microwave reheating to prevent dryness. Ensure all ingredients are sealed properly to minimize exposure to air. Check for signs of spoilage like off-smells or discoloration to ensure food safety.

Make Ahead Strategies


Assemble the Mediterranean Salmon Bake up to a day in advance, storing it covered in the refrigerator. Bake directly from the fridge, adding an extra few minutes to cooking time. Reheating should be done gently in the oven to maintain moisture. Fresh elements like herbs can be added just before serving to ensure vibrancy and flavor. Prepare accompanying sides while the salmon bakes to streamline the overall cooking process.

Scaling Instructions


Halve the recipe by cutting each ingredient proportionally; consider using smaller baking dishes to maintain even cooking. Double or triple quantities for a larger crowd, adjusting oven space accordingly. Additional batches may require staggering to ensure optimal cooking. Adjust baking times slightly to accommodate increased volume. Consider storage logistics for leftovers, ensuring adequate container space for all servings.

Nutritional Deep Dive


This Mediterranean Salmon Bake aligns with heart-healthy dietary principles, boasting high protein with low saturated fat content. Featuring a macro breakdown that emphasizes healthy fats, it supports cardiovascular health through its omega-3-rich salmon. Packed with micronutrients like vitamin D and potassium, it contributes significantly to overall nutritional wellness. For diet-sensitive individuals, consider portion control to align with personal dietary goals. The dish’s balance makes it an excellent option for maintaining weight while enjoying indulgent flavors.

Dietary Adaptations


To accommodate gluten-free diets, ensure all chosen side dishes and seasonings are verified gluten-free. For dairy-free adaptations, avoid cheese toppings and verify that all processed ingredients are dairy-free. Vegan adjustments can be explored by substituting salmon with marinated tofu or eggplant steaks. Ketogenic adherents can reduce tomato content and emphasize olive oil for profile compatibility. Paleo variations may incorporate root vegetables, remaining true to dietary restrictions without compromising flavor.

Troubleshooting Guide


Address dry textures by brushing additional olive oil onto salmon pre-bake. Correct imbalanced flavors by adjusting the seasoning, ensuring adequate herbs and lemon juice. Balance internal temperatures by evenly spacing out fillets in the dish. For ingredient substitutions, maintain ingredient ratios to prevent altered texture or taste. Timing concerns can be alleviated by ensuring a preheated oven and checking internal temperature early with a cooking thermometer.

Recipe Success Stories


Our community loves this Mediterranean Salmon Bake for its speedy prep and comforting flavors. Many have successfully integrated capers for an intriguing depth, while others appreciate the dish as part of their dinner rotation. Photographers admire its vibrant color palette, capturing images that celebrate the dish’s artistry. Readers have shared success by adjusting side dishes to cater to the flavors inherent in the bake. Join our readers in exploring the numerous adaptations possible with this foundational recipe.

Frequently Asked Questions

What side dishes complement this Mediterranean Salmon Bake?

This dish pairs well with rice, quinoa, or a green salad to balance the rich flavors without overwhelming the palate.

How can I make the dish spicier?

Add a pinch of red pepper flakes or black pepper to the vegetable seasoning for an extra kick.

Can I freeze leftovers?

It’s recommended to freeze only if necessary. Wrap in foil and store in a freezer-safe container; thaw in the fridge overnight before reheating.

What’s the best way to tell if my salmon is cooked?

Salmon is done cooking when it flakes easily with a fork and the interior is opaque. A meat thermometer should read 145°F.

Can I use frozen salmon?

Yes, just thaw it completely in the refrigerator overnight and pat dry with paper towels before cooking.

How do I prevent the dish from becoming too dry?

A well-maintained oven temperature and regular basting with juices ensure the salmon remains moist and flavorful.

What herbs work best?

Fresh dill, parsley, basil, and thyme are traditional choices. Mix and match according to your taste preference.

Is marinating necessary?

While not required, a brief marination can infuse additional flavors into the salmon and elevate the dish’s complexity.

Can I cook this on a grill?

Yes, opt for a grill-safe dish and cover loosely with foil to mimic the baking process. Monitor closely to avoid overcooking.

What’s a good non-alcoholic pairing?

Herbal iced teas or sparkling water with a splash of citrus can enhance the Mediterranean flavors without alcohol.

Additional Resources


Explore ingredient guides that delve into the origins and benefits of key Mediterranean diet components. Discover tools and gadgets that simplify the preparation of fish and vegetable-based dishes with ease. Review seasonal charts that explore the optimal produce selections throughout the year to perfect your Mediterranean Salmon Bake. Engage with technique guides detailing the art of Mediterranean seasoning, cooking methods, and ingredient balancing.

Join the Conversation


Share your success stories and recipe adaptations on social media using our dedicated hashtag. Snap photos that celebrate the Mediterranean Salmon Bake’s vibrant appeal and submit them for feature consideration. Review recipes with your feedback to help the community; your variations can inspire others. Dive into our comment section for additional tips, community interactions, and potential recipe collaborations.

Deliciously Simple French Onion Soup Recipe for Cozy Evenings

Easy French Onion Soup: Comfort in a Bowl

⚖️
Difficulty
Easy

⏲️
Prep Time
15 mins

🕒
Cook Time
60 mins

⏱️
Total Time
75 mins

🍽️
Servings
4

Soothe your soul with a steaming bowl of Easy French Onion Soup, the quintessential comfort food that embodies warmth and coziness. Imagine the rich aroma of caramelized onions mingling with a savory beef broth, topped with a golden crust of melted cheese. This classic dish combines deep, complex flavors with a simplicity that allows the quality of its ingredients to shine. Whether you’re curling up on a cold day or entertaining guests, this French Onion Soup promises satisfaction and delight.

The texture of this soup is a harmonious blend of silky onions and a hearty broth that fills the mouth with every spoonful. The crowning glory of melted gruyère cheese adds a creamy richness that perfectly complements the soup’s savory depth. As you take your first bite, you’ll experience an unrivaled blend of textures, from the velvety broth to the crispy-edged cheese toast.

Quick Recipe Highlights

  • Flavor Profile: A delightful blend of sweet caramelized onions and savory beef broth, topped with aged, nutty gruyère cheese.
  • Texture: The soup combines tender onions with hearty broth and a crispy, cheesy toast topping.
  • Aroma: Wafts of rich, sweet onions and savory stock perfume the kitchen, inviting you in.
  • Visual Appeal: A rustic presentation with a contrasting golden cheese crust atop a deep, amber broth.
  • Skill Level Needed: Ideal for beginner cooks looking to perfect their technique with simple steps.
  • Special Equipment: Oven-safe soup bowls and a sharp knife are essential for achieving the ideal texture and presentation.

Recipe Overview

  • Difficulty Level: This Easy French Onion Soup is straightforward enough for novice chefs, requiring only basic chopping and stirring skills.
  • Category: This dish is perfect as an appetizer, a hearty side, or even the main course in a casual French-themed dinner.
  • Cuisine: Rooted in French culinary tradition, this soup showcases classic techniques like caramelization and gratinée.
  • Cost: Cost-effective, using onions, broth, and bread as primary ingredients, making it luxury comfort food on a budget.
  • Season: While enjoyable year-round, this soup is particularly satisfying during fall and winter months when warming comfort is desired.
  • Occasion: Ideal for cozy family dinners, intimate gatherings, or an elegant starter for a dinner party.

Why You’ll Love This Recipe


Easy French Onion Soup offers an unparalleled taste experience, with caramelized onions delivering a deep sweetness that marries beautifully with the savory broth. The texture, with layers of soft onions and melted cheese, provides a comforting mouthfeel and a heartwarming experience. This combination will satisfy any palate, providing a burst of warmth and rich flavor in every bite.

Convenience is at the heart of this recipe. With minimal preparation time and straightforward instruction, you can achieve professional-level results with less effort. The ingredients are easy to source and commonly found in any kitchen, making this dish both accessible and achievable on short notice.

Nutritionally, this soup offers a great balance of macronutrients. Onions are rich in antioxidants, while the broth provides a source of protein. The cheese, though indulgent, adds calcium and depth to the nutritional profile, making it a wholesome choice when enjoyed in moderation.

This soup shines as a social centerpiece, perfect for entertaining friends or family. Its rich flavor profile makes it a conversation starter, while its classic roots cater to the nostalgia and comfort sought in gathering occasions. Paired with a fresh salad and a glass of wine, it transforms into a lavish affair.

Budget-conscious cooks will find French Onion Soup to be a financially savvy choice. The basic components—onions, stock, and bread—are economical and versatile. With luxurious elements like gruyère cheese, you can impress without overspending, proving that gourmet doesn’t have to mean expensive.

Historical Background and Cultural Significance


French Onion Soup dates back to ancient Rome, but it gained fame as a French classic in the 18th century. It began as a simple dish in French taverns, celebrated for its restorative properties. The soup’s transformation from humble beginnings to a refined favorite mirrors the evolution of French cuisine, where rustic ingredients were elevated by technique and presentation.

Culturally, this soup holds a place in French culinary lore, often linked to late-night Parisian dinners and the desire for something comforting and satisfying after a long day. It embodies the French philosophy of maximizing flavor from a few quality ingredients, teaching chefs worldwide about economical yet impactful cooking.

The recipe has seen numerous adaptations over the centuries. Regional variations might include the use of different cheeses, such as Comté or Emmental, or the infusion of regional wines to tweak the flavor profile slightly. Despite these changes, the core ingredients and underlying technique have remained consistent.

Globally, French Onion Soup represents a bridge between haute cuisine and home cooking, resonating with chefs and food lovers alike. The integral techniques, such as caramelization and gratinée, highlight its importance as a teaching tool in culinary schools, promising depth of flavor with accessible methods.

Ingredient Deep Dive


Onions, the star of this dish, have been celebrated for their medicinal properties and culinary versatility since ancient times. They provide vitamins C and B6, potassium, and manganese. When selecting onions for your soup, choose those that are firm and free from sprouting. Store them in a cool, dark place to prolong freshness.

Beef broth serves as the flavorful base, infusing the soup with richness. Traditionally, it delivers protein and amino acids essential for health. When selecting broth, opt for low-sodium to control seasonings. Should you choose, substitute with chicken or vegetable broth for a lighter option with different nuances.

Gruyère cheese melts beautifully and complements the onions’ sweetness with its nutty undertones. For best results, select a piece with a balanced mix of creamy and piquant notes. If unavailable, Emmental or Comté can be excellent stand-ins. Store cheese wrapped in wax paper, placed inside a container within the fridge.

Sturdy, crusty bread acts as the soup’s crowning touch. Seek out baguettes or sourdough with a firm structure to withstand broth soaking without disintegration. To maintain freshness, store bread at room temperature in a paper bag, and should you wish, toast before serving for an added crisp layer.

Common Mistakes to Avoid

  • Avoiding proper caramelization of onions, which can deprive the soup of its sweet depth. Take your time to develop the sugars through slow cooking.
  • Using bland or generic cheese may lead to a lackluster topping. Always opt for a robust cheese like gruyère for authentic flavor.
  • Skipping the deglazing step can result in lost fond, or caramelized bits, crucial for depth of taste. A little wine or broth can be used effectively here.
  • Over-salting before cheese addition. Gruyère is naturally salty, so taste as you cook to ensure balanced seasoning.
  • Not using oven-safe bowls for broiling can lead to cracked dishes and unwelcome accidents.
  • Serving immediately after broiling may result in a soup that’s too hot to enjoy. Allow a few minutes to cool slightly for a better experience.
  • Using pre-made or low-quality stock can diminish the soup’s quality. Homemade or high-quality store-bought stock is advisable.
  • Neglecting the bread’s structural integrity can lead to a soggy texture. Ensure it has a crispy edge to withstand the broth.

Essential Techniques


Mastering caramelization is crucial. Patience is key as onions soften and their natural sugars develop, transforming simple ingredients into something extraordinary. The golden, caramelized result serves as the soup’s flavor foundation, offering both sweetness and depth.

Deglazing your pot after caramelizing onions allows you to lift flavorful browned bits for a more complex taste. A splash of white wine or additional broth works well. Scraping the pot ensures not only added flavor but also a smoother, more cohesive broth.

Proper broiling technique ensures the cheese becomes golden and bubbling. Keep a close eye; too long under heat can cause burning. Ideal cues include bubbling edges with a golden brown hue atop. This step adds both flavor and aesthetic to your dish.

Pro Tips for Perfect Easy French Onion Soup


Slice onions thinly and uniformly to ensure even cooking during caramelization, providing a consistent sweetness throughout the soup.

Use high-quality bread with a thick crust, maximizing contrast between chewy interior and crispy shell once broiled.

Allow the soup to rest post-broiling, akin to letting a steak settle—flavors meld, and temperature becomes perfect for savoring each mouthful.

For added depth, incorporate two different types of onions, such as yellow and sweet, creating a complex base for the broth.

Deglaze the pot with a splash of cognac or dry sherry for nuanced flavor without overpowering the rich taste of the soup.

Your choice of broth can significantly influence flavor—experiment to match your preference, from beef richness to vegetarian undertones.

To achieve a restaurant-quality finish, consider adding a small pinch of fresh thyme or bay leaves to enhance the aromatic profile.

If prefer a heartier soup, increase the amount of onions used, thickening the base for a more substantial meal.

Variations and Adaptations


Regional variations of French Onion Soup might employ local cheeses, like Comté in the Jura or Beaufort in the Alps, tweaking the flavor profile subtly but significantly.

Seasonal adaptations are simple—add mushrooms or leeks during autumn months for earthier tones, or consider fresh green herbs during spring for bright contrasts.

For dietary modifications, gluten-free bread can easily replace traditional for those with gluten sensitivities, ensuring enjoyment without compromise.

If you’re looking for a flavor variation, a splash of balsamic vinegar during caramelizing can introduce a sweet tanginess, enhancing complexity.

Adjusting texture is feasible by altering broth qualities—thicker broth for a creamier soup or additional broth for lighter slurping. Also, pureeing a portion can add body.

For a modern twist, individual servings in small ramekins can make for elegant presentations in a tapas-style spread or amuse-bouche format.

Serving and Presentation Guide


Traditional French Onion Soup is best served in individual, oven-safe bowls, ensuring easy transfer from broiling to table while showcasing its bubbling cheese topping.

Garnish with sprigs of fresh thyme or a sprinkle of chives to add green contrast against the golden crust and heighten visual appeal.

Consider pairing with a crisp green salad, perhaps with a mustard vinaigrette, to balance the soup’s rich warmth with fresh, acidic notes.

In a modern setting, individual portions can be served in small cups as an appetizer or starter, providing a taste of sophistication before the main meal.

Ensure the soup is served hot but not overly so—allow it to cool slightly for optimal texture and flavor enjoyment, ensuring it pleases rather than overwhelms.

Portion control is key; nestled on the brink of too little or too much, 200ml per serving is often ideal, providing satisfaction without overindulgence.

Wine and Beverage Pairing


A glass of light, aromatic white wine like a Sauvignon Blanc complements the onion’s sweetness and cheese’s nuttiness, cutting through richness with bright acidity.

For red wine lovers, a Beaujolais or Merlot pairs beautifully, its fruit-forward nature marrying harmoniously with the onion broth.

Non-alcoholic alternatives include a tart apple cider or a crisp green tea, offering refreshing options that cleanse the palate between spoonfuls.

Given the soup’s richness, coffee or tea may follow the meal rather than accompany it—opt for a clean, herbal infusion post-consumption for digestion.

Ensure beverages are served slightly chilled if white wine or cider to contrast the warm soup, offering a welcome temperature variation through the meal.

Present wine or cider in clean, clear glasses to enhance visual appeal, reflecting any ambient light and showcasing their beautiful hues.

Storage and Shelf Life


To store leftovers, allow the soup to cool to room temperature before transferring to airtight containers, preventing condensation and bacterial growth.

Place in the fridge, maintaining a chill environment for up to three days, ensuring flavors remain bold and the soup stays safe to consume.

If freezing, portion soup into freezer-safe containers, leaving space for expansion during freezing. Always defrost overnight in the refrigerator before reheating.

Signs of spoilage include off-odors, sour taste, or unusual texture changes—if present, discard immediately to avoid health risks.

For reheating, gently bring the soup to a simmer on the stove, ensuring even heating without burning. Stir occasionally to distribute heat uniformly.

Avoid freezing cheese-topped soup, as texture may alter. Instead, freeze the broth and plan a fresh cheese topping upon serving leftovers.

Make Ahead Strategies


Consider prepping the onions a day ahead, allowing flavors to deepen as they rest, bringing a heightened complexity once cooked into the soup.

Assemble cheese-topped toasts separately, storing at room temperature to avoid sogginess, then broil fresh atop reheated soup for optimal texture.

Assess quality post-preparation—if broth or onions taste stale before use, refresh by reheating with fresh thyme or a splash of white wine.

Refrigerate or freeze cooked soup sans bread, preserving flavor integrity over time. Reheat before serving, finishing with fresh toast to maintain texture.

If refrigerating between steps, ensure soup is cooled quickly and thoroughly to inhibit bacterial growth, retaining flavor and nutrition.

Add any fresh herbs or garnishes at the final step, maintaining visual appeal and aromatic freshness upon serving.

Scaling Instructions


Halving this recipe is straightforward, simply halve all ingredients proportionally, maintaining flavors and consistency throughout the steps.

When doubling or tripling, be mindful of pot size to prevent overflow, as larger quantity requires suitable equipment. Consider initiating cooking in batches if necessary.

Adjust equipment, using larger baking sheets or multiple oven racks to accommodate increased amounts and maintain uniform cooking and broiling.

Increment timing slightly when increasing portions, as larger volumes may require extended cooking for flavors to meld seamlessly.

Storage considerations must include ample container space if planning leftovers, accommodating doubled or tripled recipes efficiently.

When scaling, occasionally taste test, ensuring flavors remain balanced, seasoning and adjusting as required throughout the cooking process.

Nutritional Deep Dive


French Onion Soup provides a compelling macronutrient profile, balancing carbohydrates from bread with protein from broth and cheese, alongside essential fats.

Micronutrient analysis reveals substantial vitamin C from onions and calcium from cheese, vital for immunity and bone health respectively.

Health benefits encompass antioxidants from onions, promoting heart health, and vitamin content, supporting skin and eye health through regular consumption.

Dietary considerations should account for sodium levels—those on low-salt diets may require alterations by selecting low-sodium broth alternatives.

Portion analysis suggests moderation is key; alongside high-nutrient foods, larger portions can increase caloric intake—ideal for indulgence over time.

Integrate weight management tips, suggesting balance through mindfulness—pairing smaller servings with fresh greens or whole grains enhances meal value.

Dietary Adaptations


For a gluten-free French Onion Soup, substitute traditional wheat bread with gluten-free alternatives, ensuring the same crunchy texture and flavorful result.

Dairy-free versions can replace traditional cheese with non-dairy alternatives like cashew cheese or nutritional yeast for a similar topping effect.

Vegans can adapt using vegetable broth, plant-based butter alternatives, and vegan cheeses, conscious of maintaining the rich broth flavor without animal products.

Low-carb keto dieters can enjoy modifications by substituting bread with low-carb alternatives or omitting it altogether, focusing on hearty broth and cheese.

Paleo enthusiasts may replace cheese with nutritional yeast and opt for paleo-friendly bread options, retaining the bowl’s satisfying taste and texture.

Low-FODMAP motorists should select chives or scallions instead of onions, while using lactose-free cheese varieties for a gut-friendly version.

Additional diets like Whole 30 might require ingredient substitutions, employing compliant broth and bread, often available at specialty food stores.

Troubleshooting Guide


Texture issues with onions often arise from insufficient caramelization time. Ensure slow cooking and constant stirring to achieve the desired golden hue.

If flavor balance skews too sweet or salty, adjust with additional broth or a splash of acidity, such as balsamic or white wine vinegar, to counterbalance sweetness.

Temperature concerns, such as burning cheese during broiling, can be managed by keeping a close eye on timing and positioning soups lower in the oven.

Challenges with equipment, like oven-safe bowls, should prioritize heats resistant to prevent cracking; consult manufacturer guidelines if uncertain.

Ingredient substitutions shouldn’t compromise flavor. Choose alternatives similar in profile, ensuring the essence of French Onion Soup shines through.

Timing concerns during service can affect enjoyment; allow for cooling to just-right temperatures after broiling, balancing taste with safety.

Recipe Success Stories


A reader shared their experience recreating this Easy French Onion Soup for an anniversary dinner, noting how its sumptuous flavors significantly impressed their partner.

One adaptation success involved adding shiitake mushrooms, enhancing the broth’s umami element and deepening the overall experience.

A food enthusiast described photographing their beautifully crafted soup, capturing its bubbling cheese and aromatic steam, which garnered appreciation online.

A community member recommended a tweak, using smoked gruyère for a distinctive depth, turning traditional into elevated variation pleasing friends and family.

An ambitious cook shared their experiment, serving the soup in sourdough bread bowls, listening to children’s excitement over this creative presentation.

Each story showcases diverse uses and appreciation, highlighting French Onion Soup’s adaptable yet signature character celebrated internationally.

Frequently Asked Questions

Can I make French Onion Soup ahead of time?

Yes, prepare the soup base in advance, cooling and refrigerating it. Add the cheese and bread topping before heating and serving.

What’s the best way to caramelize onions?

Use low heat, patience, and stirring. Over an hour, the slow process transforms the sugars into rich brown goodness, perfect for this soup.

What cheese can I substitute for gruyère?

Emmental or Comté work well. For non-diary needs, nutritional yeast or quality vegan cheese provides comparable nutty, creamy flavors.

Can I freeze French Onion Soup?

Freeze without toppings. Thaw in the fridge overnight, reheat, then finish with fresh toast and cheese for optimal presentation and taste.

How do I prevent soggy bread in French Onion Soup?

Use toasted, thick-crust bread that can withstand sitting in broth, adding structure that won’t disintegrate quickly.

Which wine pairs best with this dish?

A crisp Sauvignon Blanc or fruit-forward Beaujolais complements well, offering contrast and balancing rich flavors with refreshing acidity.

Is there a vegetarian version available?

Yes, substitute the beef broth with a robust vegetable broth and use plant-based cheese alternatives, achieving similar satisfying results.

What’s the secret to a smooth broth?

Ensure a simmer rather than boil, incorporating all flavors gently, and strain if necessary for a pure, refined texture.

Can this soup work as a main course?

Definitely, bolster with a substantial salad or charcuterie board, elevating simple soup to a hearty, fulfilling entree experience.

Why add alcohol when caramelizing onions?

It’s optional, adding a complex layer by lifting flavors from the pot’s base. Non-alcohol use or broth retains delightful, balanced results.

Additional Resources


Explore related dishes such as Bouillabaisse and Coq au Vin for more French classic inspirations, each offering distinct yet easily achievable flavors.

Dive into our collected technique guides, covering caramelization and broiling in detail, ensuring Each effort leads to culinary perfection.

Delve into ingredient-specific information via dedicated posts, discovering onion varieties and cheese aging processes enhancing current and future creations.

Examine equipment recommendations for optimal kitchen setups, selecting gear that enhances ease and safety in crafting complex flavors.

Consider the plethora of seasonal variations offered across our site, inspiring endless creativity beyond the basic French Onion Soup, driving your culinary exploration.

Join the Conversation


Engage with your culinary community online, sharing photos and stories of your soup masterpieces via social platforms using our dedicated hashtags.

Discover photography tips for capturing the essence of your meals in stunning light, showcasing textures, colors, and bubbling cheese online.

Offer your thoughts via recipe reviews, helping us refine content and continue providing valuable insights tailored to your evolving kitchen pursuits.

Explore ways to innovate this recipe, from personal flavor twists to complete transformations, contributing suggestions that spark creativity and inspire others.

Embrace community interaction and support—whether through constructive feedback or celebratory praise, enhancing the culinary journey for all enthusiasts involved.

The Recipe

Easy French Onion Soup

Serves: 4

Prep Time: 15 mins

Cook Time: 60 mins

Total Time: 75 mins

Kitchen Equipment Needed

  • Large heavy-bottomed pot
  • Oven-safe soup bowls
  • Sharp knife
  • Cheese grater
  • Broiler

Ingredients

  • 4 large yellow onions, thinly sliced
  • 2 tablespoons unsalted butter
  • 1 tablespoon olive oil
  • 8 cups beef broth
  • 1 cup dry white wine
  • 4 sprigs fresh thyme
  • Salt and black pepper to taste
  • 8 slices of baguette, toasted
  • 2 cups grated gruyère cheese

Directions

  1. In a large pot over low heat, melt butter with olive oil. Add onions and cook slowly, stirring occasionally, until deeply caramelized, about 45 minutes.
  2. Add wine to deglaze the pot, scraping up any browned bits from the bottom. Simmer until the liquid reduces by half.
  3. Stir in beef broth and thyme. Simmer for 20 minutes and season with salt and pepper.
  4. Preheat broiler. Ladle soup into oven-safe bowls, place a toast slice on top, and cover with grated cheese.
  5. Place bowls under the broiler until the cheese is melted and bubbling, about 3-5 minutes. Serve immediately, garnished with fresh thyme if desired.

Recipe Notes

  • Substitute vegetable broth for a vegetarian option.
  • Use Emmental or Comté cheese if gruyère is unavailable.
  • Deglazing can be done with additional broth if you prefer no wine.

Delicious Spaghetti and Spinach With Sun-Dried Tomato Cream Sauce

Spaghetti & Spinach with Sun-Dried Tomato Cream Sauce: A Delicious Italian Fusion

⚖️
Difficulty
Easy

⏲️
Prep Time
15 mins

🕒
Cook Time
20 mins

⏱️
Total Time
35 mins

🍽️
Servings
4

In the world of Italian cuisine, simplicity and flavor are key, and this Spaghetti & Spinach with Sun-Dried Tomato Cream Sauce exemplifies those principles perfectly. The blend of tender spaghetti tossed with fresh spinach and enveloped in a luscious sun-dried tomato cream sauce creates a delightful harmony of flavors. Whether you’re looking to impress a crowd or simply enjoy a comforting homemade meal, this dish delivers a gourmet experience with ease.

Imagine the rich aroma wafting from your kitchen as the tomatoes rehydrate, releasing their concentrated flavors into the creamy sauce. The joyous contrast of the vibrant green spinach against the creamy red sauce is not just a feast for the eyes but also for the taste buds. Every bite resonates with the sun-kissed sweetness of tomatoes, balanced by the creamy texture and subtle hints of garlic and basil.

This recipe doesn’t demand culinary expertise but rather thrives on a love for food and an appreciation for quality ingredients. It’s perfect for weekday dinners yet elegant enough for hosting friends. With this Italian fusion dish, you can savor the sunny flavors of the Mediterranean without leaving your home.

Quick Recipe Highlights

  • Flavor Profile: Experience a delightful blend of tangy sun-dried tomato with a creamy garlic-infused base, evolving into a savory and slightly sweet medley.
  • Texture: Expect a silky, smooth sauce that perfectly coats the al dente pasta and fresh spinach, providing a luxurious mouthfeel.
  • Aroma: Enjoy the inviting aromatic notes of garlic and sweet sun-dried tomatoes, hinting at the Mediterranean coast.
  • Visual Appeal: The dish presents a lovely contrast of dark green spinach against a creamy, red-hued sauce, creating an appetizing visual treat.
  • Skill Level Needed: An easy recipe suitable for beginners, focusing on simple techniques like sautéing and simmering.
  • Special Equipment: A high-quality sauté pan ensures even cooking and enhances the flavors.

Recipe Overview

  • Difficulty Level: Chosen to be easy due to minimal steps and common kitchen techniques, making it accessible for novice cooks.
  • Category: This versatile pasta dish fits into both main course dinners and as a comforting lunch option.
  • Cuisine: Inspired by Italian culinary traditions, this dish merges classic pasta elements with modern gourmet flair.
  • Cost: Budget-friendly, utilizing pantry staples and readily available fresh produce, making it economical yet elegant.
  • Season: Best prepared in spring or summer when fresh spinach is in season, but dried tomatoes allow for all-year enjoyment.
  • Occasion: Ideal for casual dinners, romantic meals, or light family gatherings, offering a little bit of gourmet to any table.

Why You’ll Love This Recipe


The fusion of taste and texture in this Spaghetti & Spinach with Sun-Dried Tomato Cream Sauce makes it a standout pasta dish. The tanginess of sun-dried tomatoes beautifully counters the creaminess of the sauce, while the spinach offers a slight bitterness that rounds out the overall flavor. This dish strikes a perfect balance—each bite brings a new layer of flavor, transporting you to an Italian countryside with its authentic yet innovative combination.

Moreover, the convenience of this recipe cannot be overstated. With a prep time of just 15 minutes and a straightforward cooking process, it’s perfect for busy schedules. Ideal for midweek meals or cooking novices, it ensures you can have a splendid meal on the table without much fuss. Plus, the leftovers are just as delightful, should any remain.

On the nutritional front, this dish offers plenty of iron and vitamins from the spinach, healthy fats from the olive oil, and lycopene from the tomatoes. This combination is not only satisfying but also packed with nutrients, ensuring you enjoy your meal both in taste and health benefits. For added protein, consider serving it with grilled chicken or shrimp.

As for social value, this recipe holds its ground firmly in any setting. Whether it’s a family dinner or a casual gathering of friends, it brings some classy Italian vibes to your dining experience. It’s simple enough not to overshadow the company but delicious enough to earn collective praises, setting the stage for memorable gatherings.

Lastly, this Spaghetti & Spinach with Sun-Dried Tomato Cream Sauce is a testament to how cost-effective recipes can still be gourmet. It uses simple ingredients efficiently, ensuring that you can enjoy high-quality meals without breaking the bank. Its accessibility is further heightened by the lack of need for specialty ingredients, allowing for ease of preparation in many kitchens worldwide.

Historical Background and Cultural Significance


The origin of this Spaghetti & Spinach with Sun-Dried Tomato Cream Sauce draws inspiration from traditional Italian pasta dishes that emphasize simple yet bold flavors. Traditionally, sun-dried tomatoes have been a key part of Southern Italian cuisine, where the tomatoes are sun-dried to preserve their rich flavor and shelf life during the colder months.

In the cultural landscape, pasta holds an esteemed position in Italian cuisine, symbolizing the diversity and ingenuity of Italian cooking. The addition of spinach not only enhances the dish’s nutritional profile but also adds a touch of modern interpretation to the classic recipes, conveying the evolving nature of culinary arts.

Over the years, the concept of incorporating cream sauces with pasta has gained popularity, especially in Western variations of Italian cooking. The creamy element introduces an indulgent texture, creating dishes that are both comforting and sophisticated—qualities most cherished in contemporary dining.

Regionally, while this specific combination is more a product of modern culinary experimentation, it pays homage to its roots in regions famous for sun-dried tomato and spinach production. Across Italy, variations can include different types of pasta, added proteins like meats or cheeses, and herbs that flourish in local gardens, adapting it to regional tastes and ingredients available.

Ingredient Deep Dive


The sun-dried tomatoes are undoubtedly the stars of this dish, contributing a concentrated flavor that accentuates every bite. Traditionally, these tomatoes are dried under the Mediterranean sun—a process dating back centuries. This method not only preserves their robust taste but also intensifies their natural sweetness. Nutritionally, they are rich in antioxidants, particularly lycopene, known for cardiovascular benefits.

When selecting sun-dried tomatoes, opt for those packed in olive oil, as they are softer and more flavorful due to the preserved infusion. Store them in a cool, dry place; refrigeration helps extend their shelf life, preventing spoilage. If needed, dry-packed versions can be rehydrated in warm water or wine for added depth of flavor. Substitute options include roasted red peppers for a milder taste profile.

As for spinach, this leafy green is a powerhouse of nutrients, being high in vitamins A, C, K, and iron. In culinary history, spinach has been celebrated for its adaptability in sauces, pastas, or as a standalone dish. To choose the best spinach, look for vibrant green, unblemished leaves, ensuring a fresh and crisp texture. Proper storage involves wrapping in paper towels and placing in a perforated plastic bag in the refrigerator to maintain freshness.

Spinach can easily be substituted with other greens such as kale or Swiss chard, though they may impart a different texture. For those focused on budget, frozen spinach offers a cost-effective and convenient option, maintaining nutritional integrity while reducing prep time.

Common Mistakes to Avoid

  • Overcooking the pasta can lead to a mushy texture. Always aim for al dente, checking the pasta a minute before the package directs.
  • Using too much cream can overpower the dish’s flavor nuances, so measure carefully and adjust as needed.
  • Neglecting to sauté the garlic properly can lead to a harsh taste; make sure it is golden for maximum flavor.
  • Adding fresh spinach too early can result in wilted, slimy greens. Introduce it at the end to preserve color and crunch.
  • Not adjusting seasoning can lead to a bland dish. Taste continuously, adding salt, pepper, or extra herbs as needed.
  • Using inferior quality sun-dried tomatoes may lack the robust flavor needed. Investing in good-quality ones is key.
  • Forgetting to save pasta water for the sauce may result in a less cohesive dish. The starch helps to bind sauces.
  • Overcrowding the pan when sautéing can lead to steamed vegetables rather than sautéed, diminishing the flavor.

Essential Techniques


The perfect penne pasta is an art best mastered by understanding al dente. Translating to ‘to the tooth,’ this technique is crucial for achieving the desired firmness when biting the pasta, ensuring it holds its shape and absorbs sauce well. Boil plenty of salted water to allow the pasta freedom to move and cook evenly. Taste it a minute before the time suggested on the package, and if it offers a slight resistance yet yields to your teeth, it’s ready.

Sautéing garlic for aromatic base layers requires patience. Avoid rushing this step; slow cooking of garlic releases its full bouquet without burning, which can cause bitterness. Golden, not brown, is the perfect stage—a gentle warm hue and a sweet, nutty aroma develop, hinting readiness to infuse into the sauce seamlessly.

Incorporating pasta water into the sauce achieves silkiness without heavy creams. The pasta water, rich in starch from the cooking pasta, acts as a thickener and binder, allowing the sauce to coat the pasta rather than just sitting atop it. Add sparingly, enhancing the sauce’s texture gradually while melding flavors harmoniously.

Pro Tips for Perfect Spaghetti & Spinach with Sun-Dried Tomato Cream Sauce


Understand the timing of adding different ingredients. Introduce spinach at the last moment to preserve its vibrant color and nutritional value. Its gentle wilting should occur from residual heat rather than direct flame.

Create depth in your sauce by gently simmering sun-dried tomatoes before pureeing them into the cream. The slow release of flavors when cooked elevates the tangy notes and complements the creamy background beautifully.

When selecting sun-dried tomatoes, choose those packed in olive oil when possible. They often have a richer taste from their preserved state, drastically improving the overall flavor profile.

Taste your sauce as it simmers and remembers the magic of seasoning. Salt enhances natural flavors, but its overuse can overshadow them. Consider white pepper to maintain the sauce’s color purity while gently infusing warmth.

While preparing the pasta, add salt generously to the boiling water. It should be as salty as the sea; this is your only opportunity to directly season the pasta itself.

Conserve leftover pasta water for potential sauce adjustments. If you find the pasta or sauce too dry when combined, a splash of pasta water will rehydrate and invigorate the dish.

When reheating, use a gentle method to retain texture and flavor. Stir on low heat, slowly allowing it to regain warmth without separating, often a risk with cream-based sauces.

Variations and Adaptations


Mediterranean influences can diversify this dish by switching basil for thyme or oregano—spices that amplify the sun-dried tomato’s flavors advancing into more herbaceous notes. For a protein boost, add cooked pancetta or grilled chicken, satisfying meat lovers while enhancing the dish’s depth.

Seasonal adaptations are simple; incorporate winter greens like kale that survive colder environments without losing nutrient quality. Alternatively, Summer’s bounty of fresh basil or cherry tomatoes can heighten the flavor and inject more freshness into every mouthful.

Dietary modifications can easily be achieved by substituting with gluten-free pasta or a vegan cream cheese or coconut milk in place of dairy, ensuring the dish remains inclusive without losing its essential character.

To heighten flavor, consider using roasted garlic for a mellowed, caramelized twist rather than fresh minced garlic. This variation introduces a new sweet earthiness that pairs beautifully with sun-dried tomato vibrancy.

Textural adjustments could include toasting pine nuts for a nutty crunch topping the dish just before serving.

Presentation alternatives suggest serving this pasta in a broad, shallow bowl, permitting ample sauce per bite, highlighting multi-colored layers, and inviting diners visually before they’ve even tasted it.

Serving and Presentation Guide


Consider using wide, shallow dinner bowls when plating this dish. They allow the sauce to pool around the pasta attractively, visually celebrating the creamy red hue that compliments the vibrant green spinach. Arrange the pasta in nested twirls to encourage clean, stunning visuals that invite an enjoyable dining experience.

Enhance the appearance of this dish with freshly grated parmesan or pecorino cheese, plus a light drizzle of quality olive oil before serving. Add a sprig of basil to each bowl for color contrast and aromatic appeal, amplifying the freshness.

For traditional accompaniments, a simple Italian green salad on the side bolsters this meal, offering a crispness that contrasts the creamy pasta effectively.

Modern serving suggestions include offering this dish with artisanal bread to dip into leftover sauce—a tactile, interactive element your guests will adore.

Temperature considerations strongly suggest serving this dish warm but not scaldingly hot; this subtly alerts diners to the array of flavors while maintaining the hoped-for creamy pasta texture.

Portion control is easily managed with recommended serving sizes that maintain sufficient pasta per person, ensuring satisfaction without excess.

Wine and Beverage Pairing


For wine pairings, consider a chilled glass of Pinot Grigio or Sauvignon Blanc. These bright, crisp whites perfectly counter the creaminess while complementing the sun-dried tomatoes’ acidity. If you prefer reds, a light Chianti or a Grenache would also pair nicely, their fruity notes dancing rhythmically with the dish’s flavors.

Non-alcoholic alternatives like Italian sodas or sparkling water, infused with basil or citrus, provide refreshing accompaniment while ensuring the diner’s palate remains invigorated.

Pairing this dish with coffee or tea may seem unexpected but can be delightful. Opt for a mild black tea or a simple roast espresso for post-meal enjoyment, aligning flavor profiles without overwhelming the palate.

Mindful of temperature considerations, hot drinks post-dinner can conclude the meal warmly, matching the dish’s home-cooked tones with ease.

Ensure each beverage remains served cool to highlight their refreshing, balancing properties, enhancing the experience through juxtaposed temperatures alongside the warm pasta.

Storage and Shelf Life


Storing leftover Spaghetti & Spinach with Sun-Dried Tomato Cream Sauce requires careful consideration. Transfer any uneaten pasta to an airtight container, ensuring minimal air exposure. Store it in the refrigerator for up to three days, retaining flavor and texture when eaten at a later time.

Temperature requirements suggest keeping it below 4°C (40°F) to prevent bacterial growth while maintaining edibility when reheated. If freezing, do so only with assurance that it won’t detract from the sauce’s integrity, avoiding potential separation.

Check for spoilage if unpleasant odors or changes in texture and color arise. Cream-based sauces may be susceptible to deterioration—discard immediately if suspect.

Reheat by placing it in a pan over medium heat, adding a splash of milk or reserved pasta water to restore its creamy nature. Stir continuously to ensure evenly reheated portions.

Freezing should only be considered with caution—it might affect the sauce’s smoothness post-thawing, potentially deflating the dish’s overall appeal.

Make Ahead Strategies


Consider a prep timeline where spinach is washed and sun-dried tomatoes are measured beforehand, neatly placing in containers ensures time-efficient assembly.

Storage between steps may include keeping the sauce prepared up to two days in refrigerator, allowing an effortless finish with freshly cooked pasta when needed.

Assessing quality impact shows minimal degradation when preparing certain elements ahead—the cream sauce tends to thicken, requiring loosening during final cooking steps.

During assembly, remember to maintain pasta texture by cooking al dente just before mixing. This approach allows reheating while preserving integrity.

If reheating, restore creaminess gradually over low heat, gently stirring and adjusting seasonings to match freshness expectations.

Introduce fresh elements like basil at the last moment could seal flavors anew, ensuring vibrancy and aroma prevail till serving time.

Scaling Instructions


When halving the recipe, adjust ingredient proportions accordingly, keeping flavor balance paramount. This controlled reduction remains beneficial when cooking just for yourself or a smaller gathering.

Should you want to double or triple this delightful dish, ensure ample pot space to prevent overcrowding, accommodating uniform cooking. Maintain equal ingredient ratios for optimal taste.

Adjusting equipment may require utilizing a larger pot or pan, enabling proper sautéing and sauce mixing without spilling or uneven heat distribution.

Increasing quantities might necessitate timing modifications; cook larger batches marginally longer for consistent results, while monitoring both pasta and sauce.

Don’t overlook storage considerations. Larger batches post-cooking require multiple containers, keeping servings conveniently separated and easily reheatable without quality compromise.

Nutritional Deep Dive


Exploring this dish’s macro breakdown highlights a commendable balance of carbohydrates, primarily from pasta, essential for energy replenishment. Fats from olive oil and cream contribute to satiety, while proteins serve as complements—the addition of toasted pine nuts or grated cheese fulfills this role adeptly.

Micronutrient analysis uncovers spinach’s contribution of iron, Vitamin C and K, pivotal for immunity and bone health, bolstering the dish’s nutritiousness.

Health benefits shine through the antioxidants within sun-dried tomatoes, advocating for cellular protection and cardiovascular well-being—a justified benefit to every serving.

Dietary considerations emphasize moderation; employing pasta that’s wholegrain or a gluten-free alternative continues to cater to diverse preferences without sacrificing satisfaction.

Portion analysis underscores sensible serving sizes to meet dietary goals, providing calories that support balanced living while minimizing potential overindulgence.

Given its comprehensive macronutrient lineup, this dish naturally fosters responsible weight management while delivering a delightful Mediterranean pasta experience.

Dietary Adaptations


A gluten-free version of the dish is attainable by subbing regular spaghetti with a certified gluten-free option, ensuring no compromise in flavor but meeting dietary restrictions head-on.

For dairy-free needs, replace cream with a coconut or cashew-based variety, maintaining the sauce’s creamy texture while avoiding lactose, expanding its inclusivity further.

Transforming this into a vegan delight simply requires substituting non-dairy cream and omitting cheese—each step seamlessly integrated without overshadowing flavors.

Moving to a low-carb approach involves choosing vegetable noodles, such as zucchini strands in lieu of traditional pasta, embodying healthier, innovative alternatives.

Keto diners find the almond flour pasta alternative enticing, offering a ketogenic compatible meal while retaining intended taste and presentation outcomes.

For paleo enthusiasts, focus on traditional cream replacements and grain-free pasta options, delivering culinary satisfaction while abstaining from dietary conflicts.

Those following low-FODMAP diets can achieve success with ingredient swaps, including garlic-infused olive oil to bypass intolerances without losing taste.

Troubleshooting Guide


Should texture issues arise, potentially separating cream causing graininess, simply blend some sauce to recapture smoothness—a straightforward fix.

To counterbalance flavor discrepancies, if ever too salty or bland, adjust by adding more cream or salt accordingly, developing a harmonious taste.

Temperature problems when reheating require gradual warming, ensuring stability—is crucial when maintaining creamy consistency post-fridge storage.

Equipment challenges may surface with pan size; a larger skillet or nonstick when sautéing spinach ensures not crowding and maximizes surface contact.

Ingredient substitutions occasionally lead to diverse results; adhering closely to suggested swaps guarantees similarity in flavor and impact.

Timing concerns impacting pasta overcooking counteracted by draining a minute early, reserving pasta water for further sauce integration.

Recipe Success Stories


One community member shared this recipe’s debut at her intimate dinner party, each guest raving about the creamy sauce’s intricacy and her effortless presentation. Her secret incorporated the slow introduction of lemon zest, adding a citrusy edge appreciated widely.

Another reader triumphed with variation success, introducing Italian sausage crumbles into the mix, delivering depth and hearty complexity. The suggestion garnered admiration, elevating a simple weeknight dinner to a memorable event.

Adaptation stories pour in aplenty with vegan renditions, using cashew cream while coaxing those sensitive to dairy into supportive feedback, appreciating the dish’s magnified inclusivity.

Reader suggestions often include additional veggies like sautéed mushrooms, embracing the recipe’s foundational flexibility, their inclusion validated by many who’ve explored them.

Photography tips breathe life into the dish’s vibrancy, captured stunningly from overhead angles accentuated by clean, natural lighting, sharing visual inspiration that motivates aspiring cooks.

Frequently Asked Questions

Can I use fresh tomatoes instead of sun-dried tomatoes?

Fresh tomatoes can deliver a different texture and flavor profile due to higher water content. Consider oven-roasting to mimic sun-dried intensity, or use them as a fresh garnish.

What’s the best alternative to cream for a lighter sauce?

For a lighter sauce, coconut milk or evaporated milk offer lower calorie alternatives while preserving creaminess; these may introduce other flavor notes to complement the overall taste.

Can this recipe be made ahead?

Yes, prepare components like the sauce in advance, refrigerate up to two days then combine with freshly cooked pasta when ready. This saves time and enhances flavors blended over refrigeration.

What type of pasta works best with this sauce?

While spaghetti pairs delightfully, penne, fettuccine, or spirals also soak up the sauce well, creating a uniform balance—choose based on preference, consistency retained throughout.

Can I add protein to this dish?

Yes, grilled chicken, shrimp, or sausage make excellent additions. Cook separately ensuring complete doneness, then mix during final assembly, enhancing both nutrition and flavor complexity.

How do I prevent the cream sauce from curdling?

Maintain low to moderate heat while cooking; high temperatures may lead to curdling. Stir continuously to keep sauce cohesive, and avoid direct boiling after cream addition.

Is this dish freezer-friendly?

While possible, note that texture might alter due to cream thawing. If freezing, consider separating components, reheating gently to restore sauce back to its creamy texture when ready to serve.

How can I adjust the spice level?

Introducing crushed red peppers or a hint of cayenne pepper enhances warmth, inviting a layer of spiciness. Gradual integration allows control, catering to desired heat levels.

What can I use as a garnish if fresh basil isn’t available?

Substitute with flat-leaf parsley or chives providing mild flavor contrasts, or sprinkle lightly with toasted seeds and nuts capturing texture abundance creatively beyond herbs alone.

Can I serve this dish cold as a pasta salad?

While traditionally served warm, adaptations exist as a chilled dish seasoned with additional dressing for moisture, noting sun-dried tomato’s flavor exponentially enriches cold preparations.

Additional Resources


Explore related recipes such as “Sun-Dried Tomato and Basil Risotto,” adding another dimension to your culinary journey. Each dish builds on sun-dried tomato brilliance, amplifying your repertoire of Mediterranean inspired cuisine.

Technique guides offer step-by-step insight into sauté and simmer mastery, refining skills critical for creating cascade layers of flavor found within this pasta dish.

Dive into ingredient information, revealing the nuances of spinach’s dietary wonders and sun-dried tomatoes’ vibrant legacy woven into Italian heritage—educational outreach welcoming you deeper into culinary traditions.

Equipment recommendations ensure desired results consistently. Choices ranging from quality nonstick pans to sturdy components amplify efficiency and outcome, rendering your cooking endeavors less daunting.

Discover seasonal variations celebrating nature’s offerings through year-round appeal, tailoring dishes to showcase fresh ingredients sustaining taste and nutrition cycle throughout changing months.

Join the Conversation


Join fellow food enthusiasts on social media platforms sharing your own creations and iterating upon this Spaghetti & Spinach with Sun-Dried Tomato Cream Sauce. Photograph each step, from sourcing fresh ingredients to the finished masterpiece, lighting it beautifully, and applying filters that capture your culinary journey.

Write insightful recipe reviews, expanding community knowledge through personal experiences and suggestions. Contributions include tweak triumphs, ingredient availability, and schedule-friendly shortcuts.

Engage community members welcoming recipe variations, unveiling endless adaptability accommodating preferences and dietary prerequisites diversely.

Share photography tips encouraging participation, detailing camera settings, plating angles, and lighting conditions underscoring food styling—an art uniting culinarians worldwide.

Active engagement fosters inspiring connections and the shared goal of celebrating exceptional home-cooked meals, broadening horizons, and embracing new, delicious adventures.

The Recipe

Spaghetti & Spinach with Sun-Dried Tomato Cream Sauce

Serves: 4

Prep Time: 15 mins

Cook Time: 20 mins

Total Time: 35 mins

Kitchen Equipment Needed

  • Large pot for boiling pasta
  • Sauté pan
  • Wooden spoon
  • Strainer
  • Blender or food processor

Ingredients

  • 12 oz spaghetti
  • 2 tbsp olive oil
  • 3 cloves garlic, minced
  • 1 cup sun-dried tomatoes in oil, drained and chopped
  • 1 cup heavy cream
  • 6 cups fresh spinach
  • 1/4 cup grated parmesan cheese
  • Salt and pepper, to taste
  • Fresh basil, for garnish

Directions

  1. Cook spaghetti according to package instructions in salted water until al dente. Reserve 1 cup of pasta water, then drain and set aside.
  2. In a large sauté pan, heat olive oil over medium heat. Add garlic and sauté until fragrant, about 1 minute.
  3. Stir in sun-dried tomatoes, cooking for an additional 2 minutes.
  4. Pour in heavy cream and allow the mixture to simmer, reducing slightly, approximately 5 minutes.
  5. Blend the sauce using a blender or food processor until smooth, then return to the pan.
  6. Add spinach to the sauce, letting it wilt gently. Incorporate drained spaghetti, using reserved pasta water to adjust sauce consistency as needed.
  7. Stir in parmesan cheese, seasoning with salt and pepper to taste.
  8. Garnish with freshly torn basil and additional parmesan before serving.

Recipe Notes

  • For a vegan version, substitute heavy cream with cashew cream and parmesan with nutritional yeast.
  • Add crushed red pepper for a spicier kick.
  • Can be stored in an airtight container and refrigerated for up to 3 days.