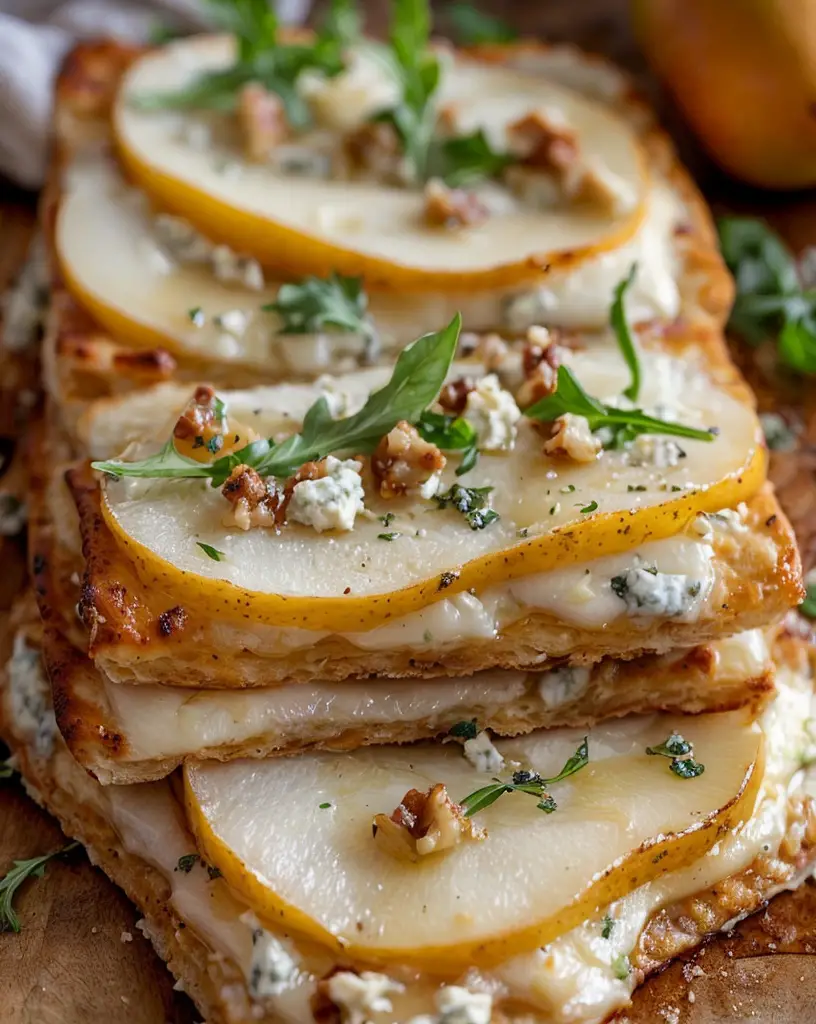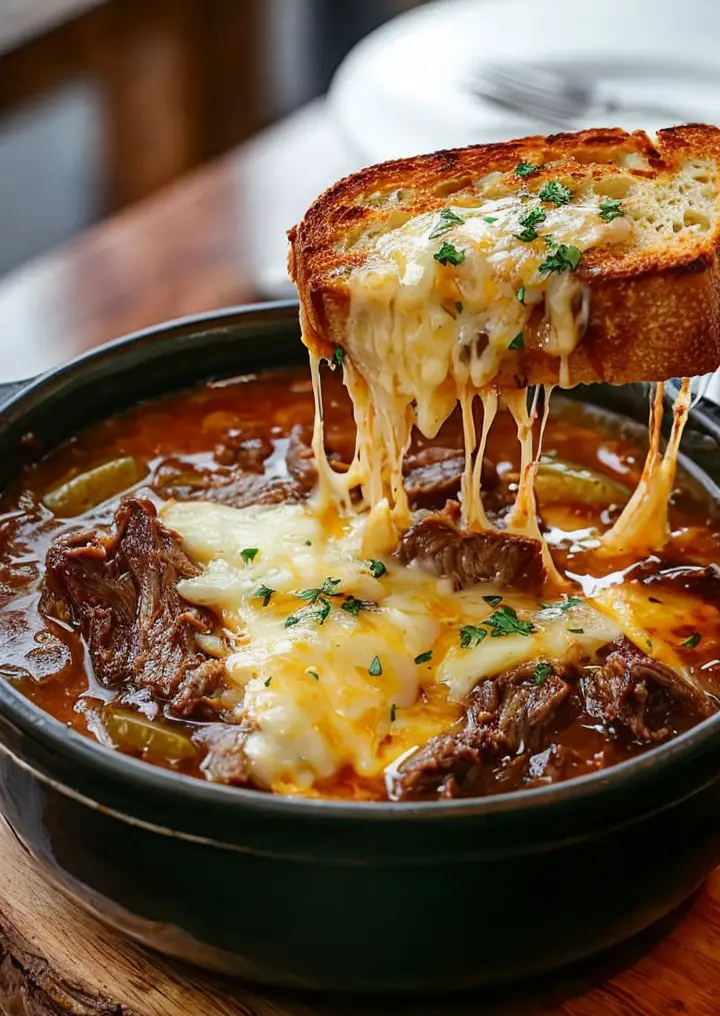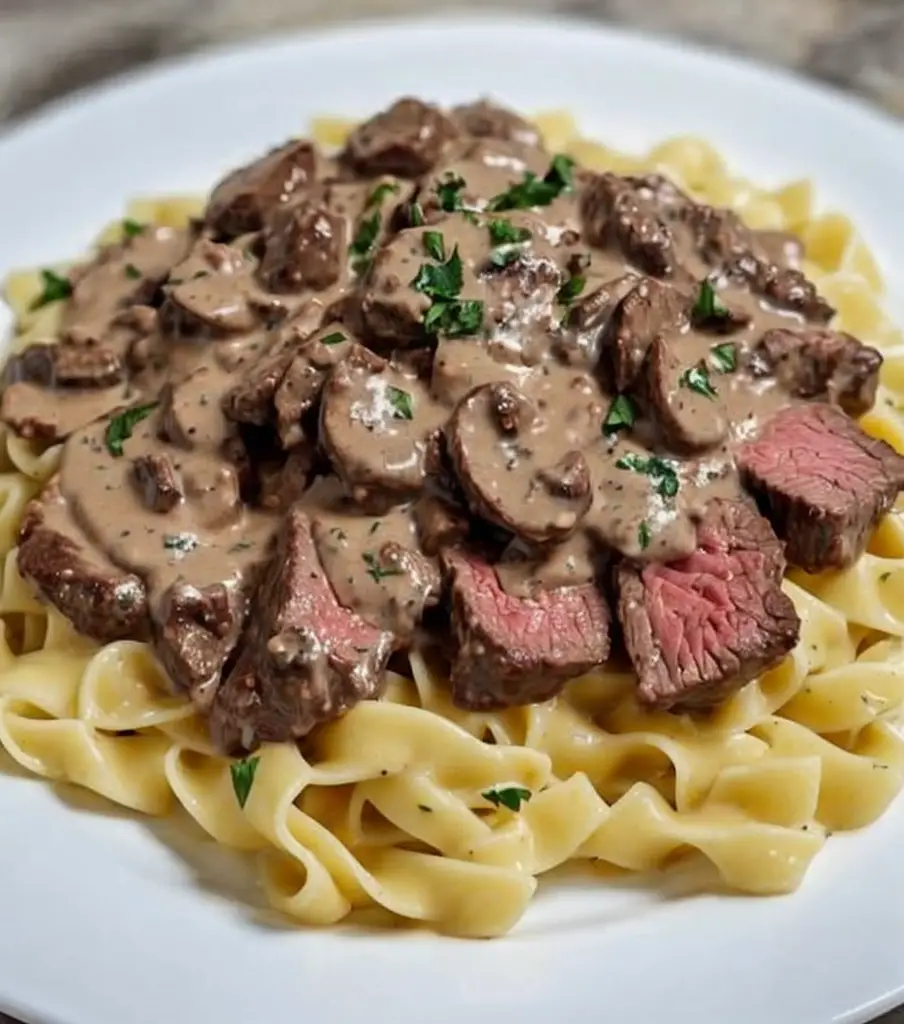
Indulge in the Ultimate Shrimp Grilled Cheese Garlic Bread Delight

Ultimate Shrimp Grilled Cheese with Garlic Bread: A Melty Delight

⚖️
Difficulty
Medium

⏲️
Prep Time
15 mins

🕒
Cook Time
10 mins

⏱️
Total Time
25 mins

🍽️
Servings
4

Dive into the luxurious world of melted cheese and succulent shrimp with our Ultimate Shrimp Grilled Cheese with Garlic Bread. This comforting recipe takes the classic grilled cheese to a whole new level by adding tender shrimp and the irresistible flavor of garlic bread. Whether you’re looking for a quick lunch or a delightful dinner, this dish is a perfect choice to satisfy your taste buds.

The combination of freshly baked garlic bread and savory shrimp enveloped in gooey cheese is nothing short of culinary magic. Each bite offers a harmonious blend of flavors and textures that will leave you craving more. This recipe is not only a treat for your senses but also a testament to the versatility of grilled cheese sandwiches.

Quick Recipe Highlights

  • Flavor Profile: Expect a delightful medley of savory shrimp mingling with melty cheese, enhanced by the aromatic freshness of garlic.
  • Texture: Enjoy the perfect balance of crispy garlic bread and the creamy, soft interior filled with cheese and shrimp.
  • Aroma: The enticing aroma of garlic coupled with melting cheese and grilled bread will fill your kitchen with warmth and coziness.
  • Visual Appeal: This sandwich is a feast for the eyes with its golden crust, vibrant pink shrimp, and molten cheese oozing out.
  • Skill Level Needed: Intermediate cooking skills are required to properly manage the shrimp and achieve the desired grilled bread texture.
  • Special Equipment: Griddle or frying pan, spatula, and a good non-stick surface are essential to perfect this recipe.

Recipe Overview

  • Difficulty Level: Best suited for those comfortable with basic cooking techniques. The challenge lies in perfectly grilling the bread without overcooking the shrimp.
  • Category: This dish is versatile, fitting comfortably under sandwiches or casual dining, making it perfect for any meal of the day.
  • Cuisine: Inspired by Italian and American culinary traditions, this recipe brings a delicious cross-cultural experience to your table.
  • Cost: Economical and budget-friendly, especially if shrimp is already in your pantry staples or if you’re using leftover cheese and bread.
  • Season: While perfect all year round, this dish is particularly comforting during the cooler months when hearty meals are most appreciated.
  • Occasion: Ideal for lunch gatherings, quick weeknight dinners, or game night munchies.

Why You’ll Love This Recipe


The Ultimate Shrimp Grilled Cheese with Garlic Bread combines traditional flavors with a modern twist. The inclusion of shrimp adds a luxurious texture and a pop of flavor that perfectly complements the creamy cheese. You’re not just making a sandwich; you’re crafting a flavor experience. Quick to prepare, this recipe offers simplicity without sacrificing taste. Perfect for those days when you need a comforting meal without putting in significant effort.

This dish can easily become a go-to meal in your household due to its simplicity and family-friendly flavor profile. The nutritional benefits of shrimp, high in protein and omega-3 fatty acids, make this a relatively healthy indulgence, especially when paired with the right whole-grain or artisan bread.

Hosting a casual gathering? Impress your guests with these gourmet-style sandwiches that require minimal preparation. Pair them with a variety of sides to cater to different palates. The cost-effectiveness of this dish allows for entertaining on a budget without compromising on flavor or presentation.

Historical Background and Cultural Significance


Grilled cheese sandwiches have a storied history, beloved in many cultures for their simplicity and comfort. Originating from the United States, the classic grilled cheese has seen various adaptations over the decades. Shrimp, on the other hand, has been a culinary staple in coastal cuisines around the world, valued for its versatility and delicate flavor.

This recipe reflects the evolution of traditional dishes by marrying the no-frills comfort of grilled cheese with the rich, umami taste of shrimp, presenting a unique take on a classic favorite. The inclusion of garlic bread elevates this combination, creating a flavor fusion that pays homage to Mediterranean influences and American innovation.

Variations on grilled cheese have appeared throughout history, but the addition of shrimp is a relatively modern twist, offering a nod to the gourmet trend of incorporating seafood into everyday recipes. This blend of flavors showcases regional variations and the adaptability of comfort foods in a global culinary landscape.

Ingredient Deep Dive


Shrimp, the star ingredient of this recipe, is cherished worldwide for its sweet flavor and nutritional value. Rich in protein, shrimp contribute to heart health when included in a balanced diet. When selecting shrimp, fresh or frozen options work equally well; just ensure they are deveined and cleaned thoroughly.

Cheese, an indispensable component of this recipe, provides richness and depth to the grilled cheese. Opt for varieties like cheddar or mozzarella, known for their melting quality. Choosing the right cheese is crucial—an aged cheddar adds sharpness, while mozzarella gives a gooey texture without overwhelming the shrimp.

Garlic bread serves as the flavorful base for this sandwich. Quality artisan bread enhances the overall experience, delivering a crispy exterior and a soft center. Infusing the bread with garlic butter or oil intensifies the savory notes, creating a perfect vehicle for the shrimp and cheese.

Common Mistakes to Avoid

  • Overcooking the shrimp is a common pitfall. Ensure shrimp are just cooked until pink for optimal texture and flavor.
  • Using overly thick bread can lead to an unbalanced sandwich. Opt for bread slices that are thick enough to provide structure but thin enough to allow the filling flavors to shine.
  • Skipping the preheat step for your pan can result in uneven cooking. Always ensure your cooking surface is properly heated before grilling.
  • Lack of seasoning can make or break the dish. Make sure each component has enough seasoning to elevate the distinct flavors.
  • Overstuffing the sandwich can lead to messy cooking. Avoid adding too much of the filling, which can result in spilling during grilling.
  • Failing to use butter or oil when grilling can lead to a dry and unevenly toasted sandwich. A thin layer of butter on the outside of the bread ensures a golden, crispy finish.
  • Navigating the cheese-shrimp balance is crucial. Achieving a harmonious balance ensures no one ingredient overpowers the others.
  • Avoiding pre-cooked shrimp could lead to mishaps. If using pre-cooked shrimp, mind your grilling time to prevent chewing overcooked results.

Essential Techniques


Mastering the art of grilling bread is crucial. Ensure your pan is at the right temperature; a medium heat allows the cheese to melt without the bread burning. Keep an eye on color change—when the bread reaches a deep golden brown, it’s ready.

Shrimp cooking requires finesse, ensuring they turn a beautiful pink without becoming rubbery. Watch for a slight curl to the shrimp, indicating they are perfectly cooked. Practice flipping with a gentle, even motion to prevent ingredients from spilling out of the sandwich.

Consider cheese melting as a crucial step. To achieve the ideal melt, cover the pan briefly, trapping heat inside to assist the cheese in achieving a luxuriously gooey texture. Avoid high heat, which could scorch the bread while leaving cheese unmelted.

Pro Tips for Perfect Ultimate Shrimp Grilled Cheese


Sauté shrimp in garlic-infused oil before adding them to the sandwich to enhance the flavor profile. This technique infuses the shrimp with a delightful aromatic that complements the garlic bread.

Use a combination of cheeses—consider mixing sharp cheddar with creamy mozzarella for a balanced flavor and superior melt quality.

Season every layer. Lightly season the shrimp with pepper and a pinch of salt to highlight their natural taste and balance the creaminess of the cheese.

Butter the outside of the bread slices for the ultimate crispiness. This step ensures a perfect golden crust that complements the soft and rich interior.

Avoid skimping on cheese. Use shredded cheese instead of sliced to achieve even melting that envelops the shrimp.

Utilize a cast iron skillet for the best results; it retains heat effectively for even cooking, providing perfect color and texture to the grilled cheese.

Variations and Adaptations


Explore regional variations by incorporating local ingredients. In a coastal setting, consider adding crab or lobster for a seafood extravaganza. Alternatively, substitute the shrimp with sautéed mushrooms for a vegetarian delight.

Seasonal adaptations make this dish a year-round favorite. In summer, add fresh basil or arugula post-cooking for a vibrant touch. During colder months, incorporate sun-dried tomatoes or roasted peppers for warmth.

Dietary modifications are possible by using gluten-free bread or dairy-free cheese for specific dietary needs while retaining flavor integrity.

Experiment with flavor variations by adding spices or herbs, such as dill or smoked paprika, to the shrimp before assembling the sandwich. A splash of lemon juice post-cooking enhances freshness and adds brightness.

For texture modifications, a layer of thin, fresh cucumber slices adds crunch, while avocado introduces a creamy component that elevates the dish.

Presentation is key: cut sandwiches diagonally and serve on a wooden board with sprinkled fresh herbs for rustic charm. Use colorful serving dishes to enhance the visual appeal and highlight the vibrant sandwich elements.

Serving and Presentation Guide


Perfect plating can transform a simple sandwich meal into a gourmet experience. Serve on a contrasting plate to bring out the golden hues of the grilled cheese.

Garnishing with a sprinkle of freshly chopped parsley or basil adds a touch of color and flavor. Pair the sandwich with a light side salad or fries for a complete meal feel. Consider serving with a small bowl of marinara sauce for dipping – enhancing both presentation and taste.

Temperature is an important consideration; serve immediately after cooking for the best taste and texture, ensuring the cheese remains melted and the bread retains its crispness.

For portion control tips, consider serving half-sized sandwiches for appetizers. This option allows guests to enjoy other dishes while savoring the delightful flavors of this ultimate grilled cheese.

Wine and Beverage Pairing


A crisp white wine, such as a Sauvignon Blanc or a Chardonnay, pairs beautifully with the rich flavors of this shrimp grilled cheese, highlighting the seafood element and cutting through the cheese’s creaminess.

Non-alcoholic alternatives like a chilled lemon-infused sparkling water provide a refreshing balance to the dish’s richness. If you prefer tea, a light green tea pairs well without overpowering the sandwich flavors.

Temperature considerations are crucial for beverage serving; chilled options work best to complement the hot, gooey texture of the grilled cheese, providing a harmonious culinary experience.

Storage and Shelf Life


Proper storage is key to enjoying leftovers without sacrificing quality. Allow sandwiches to cool, and place them in airtight containers. Refrigeration is suitable for up to three days.

Reheat using an oven or toaster oven to retain texture, avoiding microwaves that can lead to soggy bread. Freezing is possible, but wrap sandwiches tightly in aluminum foil and store in freezer-safe bags to prevent freezer burn.

Make Ahead Strategies


For busy schedules, consider preparing the garlic bread and shrimp portions ahead of time. Store these components separately and assemble just before grilling for maximum freshness.

Assessing quality, the bread may lose some texture if left with butter for too long. Fresh assembly ensures the best eating experience.

Reheating sandwiches should prioritize a crisp crust and gooey interior. Avoid microwaves, opting for stovetop reheating instead.

Scaling Instructions


To halve the recipe, simply adjust the ingredients proportionally without affecting the overall flavor. Scaling up requires minimal adjustment, though a larger griddle may speed up the cooking process when preparing multiple servings simultaneously.

Consider cooking time modifications when scaling; smaller batches cook faster, whereas large quantities may require more even distribution on the griddle to maintain quality and consistency.

Nutritional Deep Dive


This sandwich provides a balanced macronutrient approach, combining protein-rich shrimp with carbohydrates from the bread. The dish offers crucial vitamins and minerals, such as calcium from the cheese and vitamin D from shrimp.

Dietary considerations should include monitoring portion size to manage caloric intake while ensuring essential nutrients are consumed.

Examining weight management benefits, this flavorful dish satisfies hunger while providing energy, supporting a balanced diet when paired with a side of fresh vegetables.

Dietary Adaptations


For gluten-free options, select gluten-free bread varieties and ensure all other ingredients are verified as gluten-free to avoid cross-contamination.

Dairy-free options can be achieved by substituting cheese with plant-based alternatives that offer similar melting characteristics.

Create a vegan version by replacing shrimp with tofu or tempeh, and use vegan cheese products alongside garlic-infused oil.

Those following a low-carb or keto diet can opt for bread alternatives such as cauliflower bread without sacrificing the classic grilled cheese experience.

Troubleshooting Guide


To remedy texture issues, ensure appropriate butter or oil usage on the bread ensures a crunchy finish while optimizing heat level for even cooking.

Balancing flavors involves assessing seasoning levels, particularly for shrimp. Consider a squeeze of lemon post-cooking for an added zest.

Preventing temperature problems means managing grill time and ensuring the cheese is allowed to melt fully in a covered pan to avoid cheese that remains chunked or unmelted.

Recipe Success Stories


Readers have shared successful attempts at customizing this recipe, illustrating adaptability. One popular suggestion includes adding Mediterranean spices for an exciting twist on the original.

Community feedback emphasizes the sandwich’s nostalgic comfort and modern taste, making it a household favorite for adults and children alike.

Photography enthusiasts appreciate the vibrant colors and desires to capture each gloriously melted cheese stretch for social media sharing.

Frequently Asked Questions

Can I use pre-cooked shrimp? Yes, using pre-cooked shrimp can save time. Just ensure they are thawed and add them during the last steps to avoid overcooking.

What types of cheese work best? Cheddar, mozzarella, or a blend of the two works well for this recipe, providing a balance of flavor and melt quality.

Can I make this recipe dairy-free? Certainly, by substituting with dairy-free cheeses which offer good meltability, and managing your oil-butter spread accordingly.

How can I make this gluten-free? Select gluten-free bread options, ensuring packaging states it’s certified gluten-free to avoid any gluten remnants.

Can I use frozen shrimp? Absolutely, frozen shrimp work in this recipe as long as they are thawed and properly drained before cooking.

What’s the best way to reheat leftovers? Use an oven or toaster to achieve crispy bread and warm filling without making the sandwich soggy.

Can I substitute tofu for shrimp? You can opt for tofu to create a vegetarian version, slicing it thinly and seasoning before use.

How do I prevent melty cheese from spilling? Maintain moderate filling amounts to avoid overfilling and spilling during grilling, and use a spatula for gentle sandwich flips.

Should garlic bread be homemade? It enhances the experience, although store-bought options suffice; consider adding extra garlic butter for a personal touch.

What’s an ideal side dish? A fresh salad or crunchy coleslaw pairs well, adding texture contrast and complementing the rich flavors of the main dish.

Additional Resources


Related recipes could include a range of seafood dishes or complementary comfort foods that align with the flavor profile of this grilled cheese.

Technique guides to improve grilling bread and cooking shrimp efficiently can further supplement this recipe’s success.

Ingredient information analyzing shrimp and cheese variations expands readers’ understanding of ideal selections for optimal results.

Join the Conversation


Share your creation on social media to engage with a community of fellow food lovers, using hashtags to find variations and inspiration.

Review your experience, highlighting any personal twists or additional recipes that successfully pair with the Ultimate Shrimp Grilled Cheese with Garlic Bread.

Exchange photography tips with a community of food photography enthusiasts, discussing techniques to capture the melting cheese and vibrant ingredients.

The Recipe

Ultimate Shrimp Grilled Cheese with Garlic Bread

Serves: 4

Prep Time: 15 mins

Cook Time: 10 mins

Total Time: 25 mins

Kitchen Equipment Needed

  • Griddle or frying pan
  • Spatula
  • Cheese grater (for shredding)

Ingredients

  • 8 slices of garlic bread
  • 1 pound of shrimp, peeled and deveined
  • 1 cup shredded cheddar cheese
  • 1 cup shredded mozzarella cheese
  • 2 tablespoons of butter
  • Salt and pepper to taste

Directions

  1. Melt 1 tablespoon of butter in a skillet over medium heat. Add shrimp, season with salt and pepper, and cook until pink, about 2 minutes per side. Remove from skillet.
  2. Preheat a griddle over medium heat and butter one side of each bread slice.
  3. Place 4 slices, buttered side down, on the griddle. Top each with a mix of cheeses and cooked shrimp. Cover with remaining bread slices, buttered side up.
  4. Cook until bread is golden brown and cheese is melted, about 3-4 minutes per side. Use a spatula to press down gently and ensure even cooking.
  5. Remove from heat and let cool slightly before cutting and serving.

Recipe Notes

  • Feel free to add a dash of lemon juice to the shrimp post-cooking for added freshness.
  • Adjust cheese ratios based on personal preference for either sharper or creamier flavors.
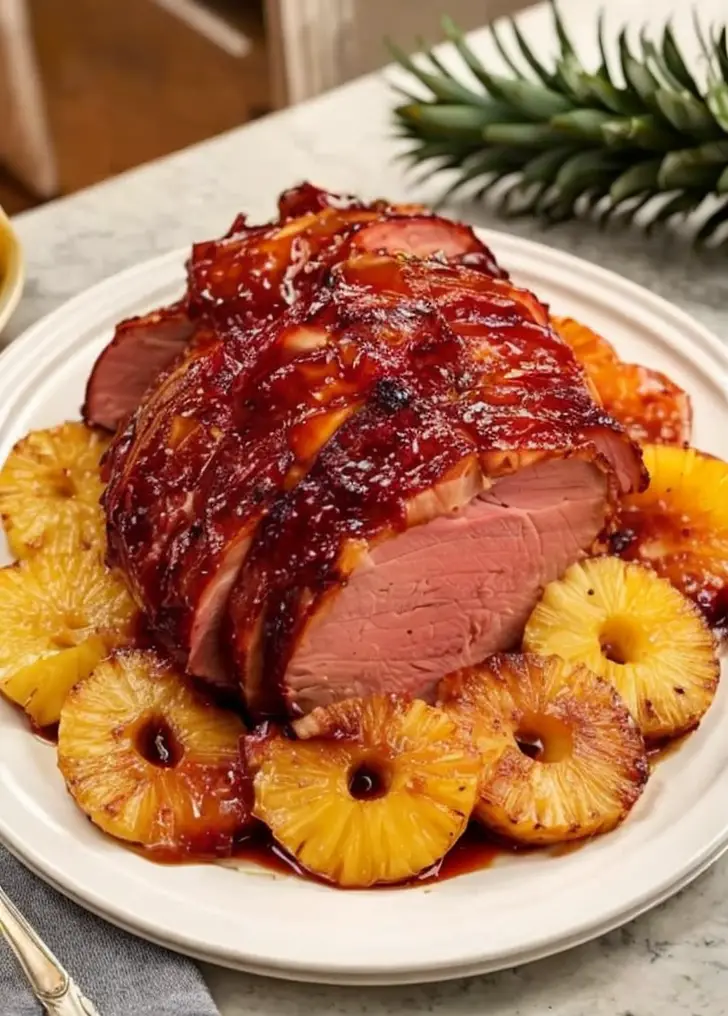
Delicious Pineapple Glazed Ham: A Perfect Holiday Feast Recipe

Pineapple Glazed Ham: A Festive Delight for Every Occasion

⚖️
Difficulty
Medium

⏲️
Prep Time
30 mins

🕒
Cook Time
2 hours

⏱️
Total Time
2 hours 30 mins

🍽️
Servings
8-10

Pineapple glazed ham is a timeless classic, known for its mouthwatering sweet and savory flavors that always satisfy. This delightful treat is a must-have for festive gatherings or any special occasion. The caramelized pineapple glaze enhances the juicy and tender ham, providing a delectable experience with each bite. Aromas of spiced pineapple and honey will fill your kitchen, inviting friends and family to share in this culinary delight.

Though it may seem daunting, preparing a pineapple glazed ham can be an enjoyable endeavor, as it merges traditional cooking methods with delicious modern flavors. With a few key ingredients and a bit of patience, you will craft a centerpiece worthy of any holiday table. Indulge in the harmonious blend of sweet fruitiness and savory goodness, creating a dish that dances on the palate while pleasing the eye.

Quick Recipe Highlights

  • Flavor Profile: Sweet and savory with notes of pineapple, honey, and cloves that balance the saltiness of the ham.
  • Texture: Juicy, tender ham encased in a sticky, caramelized glaze that adds a satisfying chew.
  • Aroma: A delightful fusion of fruity pineapple and aromatic spices like cloves and ginger, creating a fragrant ambiance.
  • Visual Appeal: A shiny, golden-brown ham garnished with star-like pineapple rings and cherries, offering a feast for the eyes.
  • Skill Level Needed: Some experience with glazing techniques and a patient eye for timing and temperature.
  • Special Equipment: Roasting pan, basting brush, and carving knife for optimal results.

Recipe Overview

  • Difficulty Level: This recipe is considered medium difficulty, ideal for those with some basic cooking experience, as it involves proper glazing techniques and monitoring cook times.
  • Category: A main course dish, perfect for dinner gatherings and festive meals where a hearty entree is required.
  • Cuisine: While rooted in American culinary traditions, pineapple glazed ham draws influence from Polynesian and Southern cuisines through its use of tropical fruit and sticky glazes.
  • Cost: Moderate, as quality ham can be a bit pricey, but the remaining ingredients are generally economical.
  • Season: Best suited for colder months like autumn and winter, when rich, warming meals are in demand.
  • Occasion: Ideal for holiday feasts such as Christmas, Easter, and Thanksgiving, but also perfect for celebratory family dinners and potlucks.

Why You’ll Love This Recipe


Pineapple glazed ham strikes the perfect balance between sweet and savory, making it a favorite for taste enthusiasts. The succulent ham absorbs the rich, fruity glaze, resulting in flavors that are both complex and comforting. You’ll appreciate not only the delicious outcome but also the satisfying process of layering flavors carefully.

This recipe offers convenience too, as much of the preparation is hands-off, allowing you to manage other tasks while the ham roasts. With simple preparation and easily accessible ingredients, creating this classic dish is achievable for cooks of varying skill levels. Its forgiving nature means minor adjustments won’t compromise the end result.

In terms of nutrition, ham provides a good source of protein, while pineapple contributes essential vitamins like vitamin C. This combination ensures a balanced meal when served with appropriate sides. Furthermore, the glaze’s sweetness is countered by savory flavors, helping to maintain moderate sugar levels.

The social aspect of pineapple glazed ham cannot be overstated—it is a dish meant for sharing. Whether at a holiday table or a weekend gathering, its appeal is universal, fostering communal dining experiences. The presentation alone invites conversation and admiration.

Cost-wise, this dish can be quite accessible. While quality hams are an investment, serving them with inexpensive sides like mashed potatoes or salads balances out the meal’s cost, making it suitable for hosts on a budget.

Historical Background and Cultural Significance


The origin of pineapple glazed ham is deeply intertwined with holiday traditions. Traditionally served during festive occasions, its roots can be traced back to early American holiday feasts where preservation of ham was punctual. The practice of adding pineapple likely emerged in the mid-20th century, when canned fruits became a popular addition to meats.

Culturally, this dish has earned a spot on many family tables as a symbol of celebration and abundance. Particularly in the United States, pineapple glazed ham is synonymous with Easter and Christmas dinners. It brings together family traditions, merging diverse culinary histories into shared experiences.

Over the years, the recipe has evolved, integrating more modern flavors and glaze techniques, reflecting personal taste and regional availability. Cooks have added their twists, with variations including mustard or bourbon glazes.

Regionally, there are adaptations of the pineapple glazed ham, particularly in areas where pineapple is indigenous or easily cultivated. In parts of the Pacific Islands, for instance, freshly grilled pineapple may replace canned products, enhancing the tropical flavor profile while maintaining the core tradition of the recipe.

Ingredient Deep Dive


The star ingredient, ham, is a staple known for its savory, satisfying qualities. Historically used as a method for preserving meat, ham’s role in cuisine has expanded significantly, becoming an essential protein choice in many cultural traditions. When selecting ham, choose one with a consistent marbling of fat, as this ensures moisture and flavor during cooking.

Pineapple, the tropical fruit that lends its name to this dish, adds a distinct sweetness that complements the ham’s richness. Rich in vitamin C and bromelain, pineapple is not only a nutritional powerhouse but also aids in digestion. Fresh or canned pineapple both work in this recipe, but the key is to ensure ripeness to maximize its aromatic compounds.

Coarse brown sugar or honey is used in the glaze for its caramelizing properties, creating a sticky sheen on the ham’s exterior. They add depth and complexity to the sweetness, marrying beautifully with the pineapple’s tartness. Store these ingredients in airtight containers in a cool, dry place to avoid crystallization or hardening.

Spices like cloves and ginger impart warmth and aromatic complexity to the glaze. These spices have cultural significance and have been used for centuries for their potential health benefits. When fresh spice options aren’t available, ground versions can be substituted, though they should be fresh to retain potency.

Common Mistakes to Avoid

  • Not properly scoring the ham before glazing can lead to uneven caramelization and glaze distribution.
  • Using a ham that is too lean can result in dryness; always select a ham with good marbling.
  • Overcooking the glaze may cause it to become bitter; ensure you’re continuously stirring and monitoring the temperature.
  • Neglecting to wrap the ham in foil can lead to excessive drying; always cover it during the initial baking phase.
  • Skipping resting time before carving leads to loss of juices; allow the ham to rest post cooking.
  • Forgetting to baste periodically will hinder the infused flavors—set a timer for intervals.
  • If using a fresh pineapple, using an unripe one will impart less sweetness and balance.
  • Using low-quality cloves will not achieve the desired aromatic profile, always source fresh spices.

Essential Techniques


Scoring the ham deeply but not too aggressively is crucial, as it allows the glaze to penetrate and form a flavorful crust. This technique enhances texture and visual appeal. The key is to cut in a diamond pattern, no more than half an inch deep, without cutting into the flesh too far.

Glazing periodically keeps the ham moist and evenly coated, preventing the glaze from burning or becoming overly sticky. Start glazing in the last hour of cooking, reheating as necessary to maintain a fluid consistency. Proper timing ensures a glossy finish without overwhelming the ham.

Monitoring internal temperature with a meat thermometer ensures safety and perfect doneness. Ideally, the ham should reach an internal temperature of 145°F. Regular checks prevent overcooking, which can lead to dryness.

Pro Tips for Perfect Pineapple Glazed Ham


Ensuring even cooking begins with bringing the ham to room temperature before baking. This allows it to cook evenly, preventing the outer layer from drying out while the inside remains undercooked.

To enhance the pineapple flavor, consider basting with freshly juiced pineapple for the final glaze layer. This adds a nuanced depth and vibrant citrusy note to the finished dish.

For a deeper, more complex glaze, consider incorporating a dash of dark rum or bourbon, but be sure to cook off the alcohol content.

When serving, carve the ham thinly to allow guests to fully enjoy the glaze-to-meat ratio. Thin slices also make for easier portion control in larger gatherings.

Using a roasting pan with a rack ensures that the ham cooks evenly and avoids contact with any juices, which can cause sogginess at the base.

If you desire a more intense smoky flavor, smoking the ham moderately before glazing will infuse it with additional complexity and savory depth.

Variations and Adaptations


Pineapple glazed ham can be adapted to different regions by incorporating local spices or ingredients. For instance, the addition of coconut milk or tamarind paste can enrich the glaze, tailoring it to certain tropical palates.

Seasonality plays a role in favor adaptations as well. During the fall, you might incorporate cinnamon and nutmeg for a more autumnally spiced approach, or choose to add chili flakes for a hint of heat in warmer months.

Dietary modifications are simple with this dish. For a lower-sodium version, opt for an unsalted ham and use a low-sodium fruit juice in the glaze.

For those avoiding sugar, utilize unsweetened pineapple juice and reduce the quantity of sugar or honey in the glaze, supplementing with stevia or another sugar substitute if needed.

Presentation-wise, using whole fresh pineapples as a serving tray, hollowing them out and placing diced servings inside, creates a vibrant and inviting presentation.

Serving and Presentation Guide


Plating the ham by arranging slices in a fan around the central carving board creates a stunning visual effect, allowing the glaze’s shine to captivate. For garnishing, consider scattering pomegranate seeds or fresh herbs like mint or parsley for contrasting color.

Traditional accompaniments such as buttery mashed potatoes or roasted vegetables complement the ham’s richness, while a fresh salad provides a light, refreshing counterpart.

For a modern twist, pair the ham with a spicy mango salsa or a tangy cranberry sauce, as their acidity will cut through the sweetness of the glaze, enhancing every bite.

Serve the dish warm but not hot. Ideal serving temperature will bring out the glaze’s full flavor without overpowering the palate with heat.

Portion control can be maintained by pre-scoring slices, ensuring guests can easily help themselves without pre-carving. This also minimises waste if leftovers are undesired.

Wine and Beverage Pairing


Pairing the pineapple glazed ham with a light to medium-bodied white wine like a Riesling or Gewürztraminer will accentuate the dish’s sweet and savory notes. These wines’ slight sweetness and acidity balance the glaze’s flavors.

For non-alcoholic options, try a sparkling water with hints of citrus or a ginger-infused iced tea, which provides a refreshing counterbalance.

In cooler months, consider serving with warm, spiced apple cider, thus mirroring the dish’s warm, fruity notes.

For coffee, a medium roast with bright, citrusy or fruity flavors pairs well, while a green tea with a hint of lemon or ginger enhances the overall dining experience.

Temperature considerations for beverages should lean towards chilled or room temperature to complement the warm ham without cooling it too rapidly.

Storage and Shelf Life


Store leftover ham by wrapping it tightly in aluminum foil or placing it in an airtight container to prevent drying out. Refrigerate promptly, keeping the ham at a consistent, cold temperature.

For longer storage, freezing is effective. Ensure slices are separated with parchment paper to avoid clumping, and use freezer-safe bags or containers for up to two months.

Signs of spoilage include an off odor, discoloration, or a slimy texture—discard immediately if these are present.

Reheating should be approached gently to maintain moisture, using a low oven temperature, covered, with a splash of water or pineapple juice to reintroduce moisture.

Avoid microwaving large pieces, as uneven heating can lead to dryness; opt instead for the oven method or stovetop for smaller portions.

Make Ahead Strategies


Consider preparing components ahead of time by making the glaze a day in advance. Store it covered in the refrigerator, then bring it to room temperature before applying.

The ham can be scored and prepped for cooking a few hours before baking. Assemble trays and utensils prior to cooking to streamline the process.

Although the major steps can be prearranged, avoid assembling the final dish too early. The freshest glaze should be applied as close to service as possible to maintain its sheen.

Reheating should be done gently and entirely, to preserve quality and prevent drying out. When reheating, always add a fresh layer of glaze to restore its glossy appearance.

Scaling Instructions


Halving the recipe involves using a smaller ham, reducing cooking time proportionately, but keeping glaze quantities relatively the same for adequate coverage.

Doubling or tripling necessitates monitoring batch sizes and oven space. Ensure hams are equally basted when scaled, adjusting time accordingly for larger quantities.

Investing in additional roasting racks may be necessary for even cooking when scaling larger recipes, and consider staggering cook times to manage kitchen space effectively.

Storage considerations should involve planning for increased leftovers, which can be shared or preserved through proper freezing techniques.

Nutritional Deep Dive


The macro breakdown for pineapple glazed ham typically favors protein, with the ham itself being rich in essential amino acids necessary for body maintenance and repair.

Micronutrient analysis pinpoints the pineapple as a source of vitamin C, aiding immune system function, while the ham supplies B vitamins, crucial for energy metabolism.

Health benefits exist through the potential for this dish to be low-carb, especially when paired with vegetable-based sides, though moderation is advisable due to sodium content in the ham.

Dietary considerations are essential for those managing salt intake or preferring lower sugar, and portion analysis helps keep servings balanced within dietary guidelines to avoid excess.

Weight management tips include accompanying the ham with high-fiber sides such as salads, ensuring a fuller feeling while controlling caloric intake.

Dietary Adaptations


For those needing gluten-free options, ensure any store-bought glaze ingredients or sauces used are gluten-free certified, focusing on naturally gluten-free whole ingredients.

Dairy-free preparation is standard, as there are no dairy elements in the traditional recipe, but ensure any accompaniments adhere to this guideline.

Vegan adaptations are possible with meat substitutes such as seitan or jackfruit, which can mimic the ham’s texture when cooked correctly and glazed.

Low-carb choices include focusing on pure meats without sugars added to the glaze, or utilizing sugar substitutes that do not alter taste dramatically.

Keto or Paleo adherents can modify the recipe using acceptable sweeteners and healthy fats without grains or refined sugars to align with their diet plans.

Low-FODMAP variations could exclude high fructose alternatives or replace them with suitable FODMAP-friendly options.

Troubleshooting Guide


Texture issues often arise from overcooking, leading to dryness. Maintain constant temperature checks and adjust cooks times if necessary, to minimize this risk.

Flavor balance can sometimes be skewed towards sweetness. Gradually introduce savory elements like mustard or pepper to the glaze, exercising caution to prevent over addition.

Temperature problems stem from improper oven calibration. Always confirm oven temperature with a thermometer before cooking to ensure consistent results.

Equipment challenges frequently arise from inadequate roasting pans. Select larger pans to accommodate proper glazing and roasting without overcrowding.

Ingredient substitutions must retain proportions. When altering sugar or spices, measure equivalent quantities to maintain balance, experimenting in small increments when uncertain.

Timing concerns relate to preemptive carving. Wait the prescribed rest period after cooking to lock in juices, ensuring moistness within the ham.

Recipe Success Stories


The community’s response to making pineapple glazed ham has been overwhelmingly positive, with many mentioning the ease of preparation and impressive flavor profile achievable.

Variation successes include the addition of diverse spices or local ingredients, from star anise in Asia to maple syrup in Canada, each bringing unique notes to the broth.

Some readers have adapted the basic glaze with creative substitutions like thawed frozen raspberries for added color and burst of tartness, receiving rave reviews.

Reader suggestions often feature the inclusion of fresh pineapple in the final presentation. This visual touch not only enhances the dish but keeps flavors traditional and enticing.

Photography tips from this community emphasize bright, natural lighting for showcasing the ham’s glistening glaze, ensuring rich colors come through vibrantly.

Frequently Asked Questions

What is the best way to glaze ham?

Glazing should be done in layers. Start applying the glaze during the last hour of baking, reheating it as necessary. Periodically baste every 15-20 minutes to achieve a glossy finish that caramelizes without burning.

Can I use fresh pineapple instead of canned?

Absolutely, fresh pineapple adds a vibrantly fresh and mildly tart flavor to the glaze. Be sure it’s ripe to ensure sweetness and consider juicing some as a base for enhancing the glaze.

What type of ham should I use?

A bone-in or boneless, half or whole ham works well, with bone-in generally offering more flavor. Opt for a moderately sweet or plain cured ham to allow the glaze to shine.

Is it necessary to score the ham?

Yes, scoring allows the glaze to penetrate deeply into the meat, creating a flavorful crust while preventing the fat from shrinking unevenly during cooking.

What’s the ideal internal temperature for cooked ham?

Aim for an internal temperature of 145°F for properly cooked ham, measured by a food thermometer inserted into the thickest part of the meat, ensuring it’s both safe and juicy.

How should I store leftovers?

Leftover ham should be wrapped tightly in aluminum foil or stored in an airtight container. Refrigerate and consume within five days or freeze for longer storage, ensuring slices are separated for easy defrosting.

Can I prepare the glaze in advance?

Yes, preparing the glaze in advance allows flavors to meld, saving time during final preparation. Store it in the refrigerator and bring it to room temperature before use on cooking day.

How do you reheat glazed ham without drying it out?

Reheat the ham in a covered dish at a low oven temperature, adding a splash of water or juice for moisture. Apply fresh glaze sparingly to restore its sheen and enhance flavors.

Should I cover ham with foil while baking?

Covering the ham with foil during the initial phase of baking helps retain moisture. Remove the foil later to promote browning and allow the glaze to set without burning.

Can I use a different sweetener in the glaze?

Substituting brown sugar with honey, maple syrup, or agave is possible but adjust quantities to taste. Sugar substitutes can also be used for lower-calorie versions, as long as they withstand high temperatures.

Additional Resources


Explore additional resources to deepen your understanding and improve your technique. Our guide on how to select and slice ham ensures precise portioning, while articles on regional spices offer unique ways to adapt traditional recipes.

For enthusiasts, related recipes such as honey baked ham, or herb-glazed turkey, showcase similar glazing techniques with distinctive flavor profiles.

Seasonal variations, such as our Autumnal Spice Glazed Ham, reveal the richness of cinnamon and nutmeg mixed with the classic pineapple base, perfect for fall fiestas.

Equipment recommendations streamline the process, with reviews on the most reliable roasting pans and carving knives, providing guidance in achieving professional results.

Join the Conversation


We encourage you to share your pineapple glazed ham creations on social media with our community, exchanging tips and presentation ideas to elevate this classic dish together.

Photography tips are provided to highlight your ham’s best angles, using natural daylight and minimal props for an optically enticing image.

Your feedback through recipe reviews helps us refine techniques and address common concerns, fostering an open dialogue about various cooking methods and ingredient experiments.

Spotlight reader contributions by sharing variations or adaptations brings fresh perspectives, enriching others’ culinary repertoires and showcasing international flavors.

Get involved in our community forums where conversations about family traditions, cooking hacks, and modern adaptations bring pineapple glazed ham into an era of shared culinary innovation.

The Recipe

Pineapple Glazed Ham

Serves: 8-10

Prep Time: 30 mins

Cook Time: 2 hours

Total Time: 2 hours 30 mins

Kitchen Equipment Needed

  • Roasting pan
  • Basting brush
  • Carving knife
  • Meat thermometer

Ingredients

  • 1 fully cooked boneless ham (4-5 pounds)
  • 1 cup crushed pineapple, unsweetened
  • 1 cup brown sugar
  • 1/4 cup honey
  • 1/4 cup pineapple juice
  • 1/2 tsp ground cloves
  • 1/2 tsp ground ginger
  • Maraschino cherries for garnish (optional)
  • Pineapple slices for garnish (optional)

Directions

  1. Preheat your oven to 325°F (163°C). Place the ham in a roasting pan.
  2. In a saucepan, combine crushed pineapple, brown sugar, honey, pineapple juice, cloves, and ginger. Bring to a gentle simmer over medium heat.
  3. Continue to stir, simmering until the mixture is slightly thickened, about 10 minutes. Remove from heat and let it cool slightly.
  4. Score the surface of the ham in a diamond pattern, about 1/4 inch deep, before pouring half of the glaze over it.
  5. Cover the ham with aluminum foil and bake for 1 1/2 hours, basting every 20 minutes with remaining glaze.
  6. For the last 30 minutes, remove foil and continue basting every 10 minutes, ensuring the glaze caramelizes to a golden brown.
  7. Once done, let the ham rest for 15 minutes before garnishing with pineapple slices and cherries.
  8. Slice and serve the ham warm, allowing guests to enjoy the full range of flavors from the succulent meat to the caramelized glaze.

Recipe Notes

  • For a less sweet glaze, reduce the sugar to half a cup and add a splash of apple cider vinegar for a tangy note.
  • Leftover ham can be diced and used in sandwiches, omelets, or as a pizza topping.
  • For a festive touch, replace maraschino cherries with fresh cranberries for garnish.

Delicious Mediterranean Feta Cheese Bake Recipe for Easy Dinners

Mediterranean Feta Cheese Bake: A Savory Delight

⚖️
Difficulty
Easy

⏲️
Prep Time
10 mins

🕒
Cook Time
20 mins

⏱️
Total Time
30 mins

🍽️
Servings
4

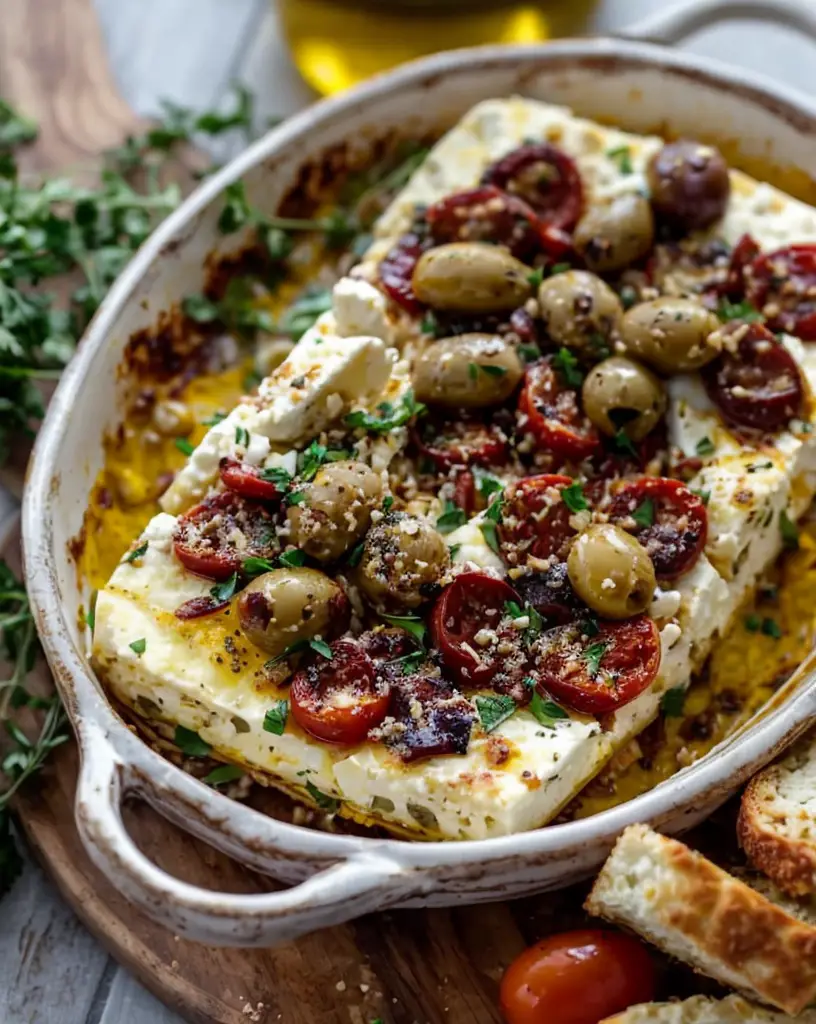
Imagine sinking your teeth into a savory, Mediterranean Feta Cheese Bake. This dish combines the tanginess of feta cheese with fresh tomatoes, olives, and aromatic herbs to create an irresistible feast for the senses. Picture golden, bubbly cheese draped over a medley of vibrant vegetables, filling the kitchen with a scent that embodies sun-drenched shores and breezy days. Whether served with crusty bread or as a main, this bake is a reminder of the Mediterranean’s radiant charm and hospitality.

This Mediterranean Feta Cheese Bake is perfect for those evenings when simplicity and flavor need to go hand in hand. It’s a testament to the Mediterranean philosophy of leveraging quality ingredients to create delightful culinary experiences. The harmonious blend of textures and flavors promises to delight anyone who loves Mediterranean cuisine.

Quick Recipe Highlights

  • Flavor Profile: Tangy feta complements sweet tomatoes and briny olives, all elevated by aromatic herbs.
  • Texture: Creamy cheese and juicy vegetables contrast with a crunchy bread topping.
  • Aroma: The bake offers a rich scent of melted cheese and rosemary, reminiscent of a herb garden.
  • Visual Appeal: Vibrant reds and greens beneath a golden, bubbling cheese surface create an inviting dish.
  • Skill Level Needed: Simple assembly with basic baking steps; suitable for beginners.
  • Special Equipment: A baking dish and oven are essential for this recipe.

Recipe Overview

  • Difficulty Level: Easy — it’s more about assembling and baking than intricate cooking techniques
  • Category: This is a delightful vegetarian main dish perfect for quick lunches or cozy dinners.
  • Cuisine: The dish draws from Mediterranean traditions, known for their reliance on fresh, wholesome ingredients.
  • Cost: Budget-friendly due to its reliance on common pantry staples and fresh produce.
  • Season: Best enjoyed year-round but ideal in summer when tomatoes are at their peak.
  • Occasion: Perfect for casual family meals, weeknight dinners, or as a standout appetizer at gatherings.

Why You’ll Love This Recipe

This Mediterranean Feta Cheese Bake will win you over with its bold, tangy flavors and delightful textures. The fusion of creamy feta cheese with juicy tomatoes and olives creates a symphony of taste that captures the essence of Mediterranean cuisine. Each bite is a joy to the senses.

Convenience is key with this recipe. In just under 30 minutes, you can transform simple ingredients into a warm, bubbly bake that feels gourmet. It’s an easy option for anyone looking to impress without spending hours in the kitchen.

Nutritionally, this bake packs a punch. It’s rich in protein from the feta and loaded with vitamins and antioxidants from fresh tomatoes and olives. Plus, it’s vegetarian, making it suitable for a wide range of diets.

The Mediterranean Feta Cheese Bake is a definite crowd-pleaser. Its rich, vibrant flavors make it perfect for sharing with friends and family. Whether you’re hosting a casual lunch or a larger gathering, this dish is your ticket to culinary acclaim.

With its accessible ingredients and straightforward preparation, this bake offers excellent value for money. Quality produce and a few pantry staples are all you need to create a dish that’s both delicious and budget-friendly.

Historical Background and Cultural Significance

The Mediterranean Feta Cheese Bake traces its roots to the sun-kissed shores of the Mediterranean, where feta cheese reigns supreme. This beloved cheese, known for its crumbly texture and tangy flavor, is a staple in Greek cuisine and beyond.

Culinary traditions in Greece and neighboring countries celebrate fresh ingredients and simple preparation methods, evident in this dish’s straightforward assembly. The Mediterranean emphasis on fresh produce, healthy fats, and whole grains comes through beautifully in the bake.

This dish has evolved over time, adapting to the ingredients available in different regions. In places where fresh tomatoes or olives might be scarce, other local vegetables often take their place without losing the dish’s character.

From Greek tavernas to modern home kitchens worldwide, variations of this recipe showcase the adaptability of Mediterranean flavors. Some add a pinch of chili for heat, while others might incorporate local herbs to add an exciting twist.

Ingredient Deep Dive

Feta cheese, a star ingredient, has a rich cultural heritage. Originating from Greece, it’s a PDO (Protected Designation of Origin) product, meaning true feta is only made in specific parts of Greece. Nutritionally, it’s a great source of protein and calcium, with lower fat content than many other cheeses.

Ripe, juicy tomatoes bring incredible nutrition and vibrant flavor to the bake. They’re a fantastic source of vitamins C and K, and the antioxidants help contribute to the dish’s nutritional profile. Opt for locally grown tomatoes in season for the best flavor.

Selecting high-quality, pit-free olives enhances both the taste and texture of the dish. Olives, rich in heart-healthy monounsaturated fats, add a briny depth. Store olives submerged in their brine in the fridge to maintain freshness.

Rosemary, a key herb in this bake, infuses the dish with an aromatic flair. Store fresh rosemary in the fridge wrapped in a damp paper towel to extend its shelf life. If substituting, thyme is a flavorful alternative but consider lowering the quantity to maintain balance.

Common Mistakes to Avoid

  • Overbaking can dry out the cheese, so keep an eye on the oven.
  • Using too much salt can overwhelm the already salty feta and olives.
  • Skimping on the olive oil might result in a lackluster flavor.
  • Inadequate seasoning with herbs could leave the dish tasting flat.
  • Using tomatoes that are not ripe may add unwanted acidity.
  • Forgetting to taste-test vegetables before baking may lead to improper seasoning.
  • Refrigerating leftovers without covering can lead to drying out of the dish.
  • Add crusty bread or breadcrumbs for a crunchy contrast, but avoid overusing so as not to outshine the vegetables.

Essential Techniques

Ensuring the feta cheese remains moist involves baking until just golden and bubbly. This technique prevents over-drying and maintains a creamy texture, capturing the essence of Mediterranean dishes.

Cutting tomatoes evenly ensures consistent texture and even cooking. Irregular sizes can lead to uneven cooking, with some parts overcooked while others remain raw. Aim for uniformity for the perfect bake.

Using good quality olive oil elevates this bake, offering depth and richness. Drizzle generously over vegetables before baking for maximum flavor absorption.

Pro Tips for Perfect Mediterranean Feta Cheese Bake

Choose a mix of green and black olives to add even more depth of flavor. Each type of olive brings unique notes, enhancing the overall taste.

For the fullest flavor, use fresh herbs where possible. Dry herbs work in a pinch, but fresh herbs provide a lively aroma.

Pre-mix vegetables and feta on the baking tray to distribute flavors evenly, ensuring each bite is perfectly seasoned.

Use a glass or ceramic baking dish as these materials ensure even heat distribution and aesthetic presentation from oven to table.

Serve immediately out of the oven for the best taste and texture experience. The cheese sets as it cools, and immediate serving ensures creamy deliciousness.

Experiment with roasted red peppers for an additional layer of flavor. They blend beautifully with the other ingredients and add a hint of sweetness.

Variations and Adaptations

Regional variations include adding sun-dried tomatoes for an extra tang or roasted peppers for sweetness. For seasonal adaptations, incorporate zucchini or eggplant, taking advantage of summer’s bounty.

For dietary modifications, use lactose-free feta for those sensitive to dairy. This maintains the integrity of the dish without compromising taste or texture.

Introduce fresh jalapeños for a kick, or blend different herbs like thyme and oregano for varied flavor nuances.

To change up textures, try adding toasted pine nuts for crunch or a sprinkle of sesame seeds for an extra layer.

For a more elegant presentation, serve individual ramekins of the bake. This approach elevates the dish and makes portion control easy.

Serving and Presentation Guide

For a rustic look, serve directly from the baking dish; its warmth and natural tones add to the charm. Garnish with fresh rosemary sprigs or a light sprinkle of lemon zest for visual and aromatic appeal.

Traditionally accompanied by crusty bread, this bake also pairs beautifully with a simple green salad. The contrast in textures will delight the palate.

For modern serving suggestions, consider topping with a poached egg for brunch or drizzling with balsamic glaze for an upscale twist.

Maintain a warm temperature to experience the full flavor profile of the dish. If serving later, gently reheat to ensure the cheese re-melts properly.

Attention to portion control can be pivotal in displaying the bake’s best side. Serve generous slices while keeping an eye on neat presentation to uphold the Mediterranean aesthetic.

Wine and Beverage Pairing

Select a crisp, dry white wine such as Sauvignon Blanc or Pinot Grigio. Their vibrant notes accentuate the feta’s tanginess and cut through the richness.

Non-alcoholic options could include a robust lemon and mint iced tea or sparkling water with a hint of lime. Both refresh the palate and complement the herbaceous elements.

For tea pairings, consider fresh peppermint tea. Its clean character harmonizes and refreshes, allowing the bake’s flavors to shine.

Chilled serving is optimal for beverages, enhancing their refreshing qualities against the warm, savory bake.

Pour wine in smaller, frequent amounts to keep it at an optimal temperature; this ensures the last sip is just as delightful as the first.

Storage and Shelf Life

Store leftovers in an airtight container in the refrigerator to maintain freshness for up to three days. Before sealing, ensure the bake has cooled to room temperature to prevent condensation inside the container.

Reheat gently in a preheated oven at 350°F (175°C) until heated through for best results, avoiding microwaving to preserve texture.

If freezing is necessary, do so before baking. Assemble the dish in a freezer-safe container and cover tightly. To serve, thaw in the refrigerator overnight before baking as usual.

Be mindful of signs of spoilage, such as an off-putting smell or mold. These indicate the bake is past its prime and should be discarded.

Avoid repeated reheating to maintain quality. If planning on reheating portions, only rewarm the amount intended for immediate consumption.

Make Ahead Strategies

Prepare the vegetables and feta in advance, storing them separately. Combine and bake close to the mealtime to enjoy freshness and maximum flavor.

Assemble up to a day ahead and store in the refrigerator. This breaks up prep time and ensures an easy, breezy meal on busy days.

Consider assembling and baking in separate stages. Bake the vegetables lightly first, then add feta before returning to the oven.

Be conscious of the quality impact of advance preparation. If planning to make ahead, aim for freshness when assembling components.

Mix fresh herbs only when ready to bake to maintain their aromatic properties. Ensuring peak freshness will enliven your dish.

Gently reheat assembled dishes in the oven to avoid altering textures. After baking, the dish should be served without delay for best results.

Scaling Instructions

Halve or double the recipe according to your needs. Adjust all ingredient amounts proportionately to maintain the harmonious balance of flavors.

Adjust the baking dish size when changing the recipe yield. The same thickness should be maintained to ensure even cooking and optimal bake results.

Timing may need adaptation; larger batches might require extended baking. Keep a close watch near the end of the cooking time to prevent overbaking.

Store leftovers appropriately, given the adjusted recipe scale. Consider separate storage containers if doubling to allow for flexibility later.

Always taste-test the seasoning in large batches. Making more of the bake may require tweaking to maintain flavor integrity.

Nutritional Deep Dive

Each serving is packed with essential nutrients including proteins from feta and vitamins from fresh vegetables, contributing a well-rounded, wholesome meal.

The bake provides a well-balanced breakdown of macronutrients, with healthy fats from olives and feta contributing to satiety and flavor depth.

The abundance of micronutrients, minerals, and antioxidants from the ingredients offer various health benefits, supporting overall wellness.

Portion control and mindful eating with this dish can complement weight management efforts. With nutrient-dense ingredients, a little goes a long way.

The dish fits into several diet plans, with its reliance on Mediterranean principles known for promoting heart health and longevity.

Dietary Adaptations

For gluten-free adherence, use gluten-free breadcrumb topping. This simple substitution ensures a crunchy finish without compromising dietary needs.

To make the dish dairy-free, substitute feta with a plant-based cheese alternative. Be sure to choose one that melts well to maintain texture.

Transform the bake to vegan by using plant-based cheese and adding more varieties of vegetables and protein-rich lentils or chickpeas.

For low-carb meals, lessen the breadcrumbs and add more non-starchy veggies. This ensures the bake remains satisfying while accommodating carb restrictions.

Explore the keto diet by incorporating keto-friendly cheese and minimizing carb-rich components like crusty bread.

For low-FODMAP alternatives, choose suitable veggies and omit garlic, opting for garlic-infused oil to preserve flavor without affecting digestion.

Troubleshooting Guide

If the texture is not creamy, ensure feta isn’t overcooked. Keep an eye on the dish during the final baking phase for optimal texture.

If flavor balance is off, verify ingredient ratios. Reducing or adding specific components like olives or herbs may correct this issue.

For cold spots, ensure even veggie distribution before baking to promote uniform cooking and heating throughout.

Equipment issues? Consider switching to a different material baking dish; glass or ceramic often provide more even cooking results.

Should temperature be off, always preheat the oven prior to baking. This step is essential for ensuring even cooking through all elements.

Ingredient substitution concerns can be addressed by testing small batches first, ensuring harmony in both flavor and texture before serving a larger quantity.

Recipe Success Stories

Our community of culinary enthusiasts have raved about the Mediterranean Feta Cheese Bake, often sharing their personal tweaks and interpretations across social media platforms. From adding a pinch of chili to incorporating locally sourced herbs, the creativity sparked by this dish is inspiring.

Blog followers frequently share photos of their bakes, showcasing various presentations and charming table settings that contribute to an engaging culinary experience.

Adaptations, like serving the bake with poached eggs for brunch or crisping the top layer under a broiler for added texture, highlight the dish’s versatility.

Photography tips shared by readers often emphasize natural light and vibrant setups, hinting at thoughtful composition that captures the bake’s essence.

Recipe reviews often mention the ease and convenience, with busy parents highlighting their success in incorporating this dish into weeknight dinner rotations without sacrificing flavor or quality.

Frequently Asked Questions

What can I substitute for feta cheese? Use a cheese with similar tang like goat cheese for the closest match in taste and texture.

Can I make it without an oven? While baking is optimal, a toaster oven could work in small batches or for reheating.

Is this dish freezer-friendly? Freezing is best before baking. Thaw in the fridge before ready to bake for best results.

How many calories does a serving have? Approximately 250 calories, slightly varying with ingredient brands and proportions.

Can I add meat? Yes, adding cooked chicken or lamb can provide a hearty twist without altering the bake’s flavor profile.

What complements it as a side? Serve with a simple green salad or a warm rice pilaf for a complete meal experience.

Is it child-friendly? Its simple yet bold flavors are often enjoyed by children, especially when served alongside their favorite sides.

Any wine pairing suggestions? A crisp, dry white wine like Sauvignon Blanc complements the feta’s tang and overall savoriness beautifully.

How do I make it spicier? Consider adding sliced jalapeños or a sprinkle of chili flakes to amp up the heat.

Is it suitable for a dinner party? Absolutely! Its vibrant presentation and ease of preparation make it a great option for entertaining.

Can it be made a day in advance? Yes, but for freshest results, consider assembling then baking prior to serving to maintain optimal texture and flavor.

Any tips for even cooking? Ensure an even spread of ingredients and use a preheated oven to ensure each component cooks uniformly.

Additional Resources

Delve deeper with related Mediterranean recipes like hummus or tzatziki to complement this bake, crafting a full meal spread. Our blog has comprehensive technique guides for selecting and using feta cheese, essential for mastery in Mediterranean cooking.

Explore ingredient information for olives and tomatoes; our guides provide details on seasonal variations and source recommendations to maximize flavor. Our posts on essential kitchen equipment emphasize the value of quality baking dishes, enhancing your overall cooking experience.

Join the Conversation

Engage with us and fellow foodies on social media by sharing your creations. We welcome photos and insights from your Mediterranean Feta Cheese Baking journey.

Use #MedFetaBake to connect with others, exchange tips, and exhibit your culinary creativity. Your feedback drives our community and inspires us to explore ever more flavorful ventures.

Consider leaving a recipe review with your personal twist, as community engagement and shared experiences welcome new iterations and inspiring recipe evolution.

Discover more about photography techniques and how presenting baked dishes impressively can elevate not only the plate but also the pleasure of shared meals.

Don’t hesitate to share unique recipe variations with us, as our community thrives on innovation and collective inspiration in every bite.

The Recipe

Mediterranean Feta Cheese Bake

Serves: 4

Prep Time: 10 mins

Cook Time: 20 mins

Total Time: 30 mins

Kitchen Equipment Needed

  • Baking dish
  • Cutting board
  • Knife
  • Oven
  • Mixing bowl (optional)

Ingredients

  • 200g feta cheese, crumbled
  • 2 large tomatoes, chopped
  • ½ cup black olives, pitted and sliced
  • 2 tablespoons olive oil
  • 1 sprig fresh rosemary, chopped
  • Salt and pepper to taste
  • Crusty bread or breadcrumbs for topping

Directions

  1. Preheat your oven to 375°F (190°C).
  2. In a baking dish, combine chopped tomatoes, olives, and crumbled feta cheese.
  3. Drizzle with olive oil and season with rosemary, salt, and pepper.
  4. Toss lightly if desired, ensuring even distribution, then bake for 20 minutes or until the cheese is golden and bubbly.
  5. If using crusty bread, add alongside the bake or top with breadcrumbs for a crunchy finish.

Recipe Notes

  • For added flavor, consider mixing thyme alongside rosemary.
  • This bake pairs well with a variety of bread and salads, adjust serving sides per preference.

Discover the Ultimate Fusion: Irresistible Taco Spaghetti Recipe

Taco Spaghetti: A Flavorful Fusion

⚖️
Difficulty
Easy

⏲️
Prep Time
10 mins

🕒
Cook Time
20 mins

⏱️
Total Time
30 mins

🍽️
Servings
4

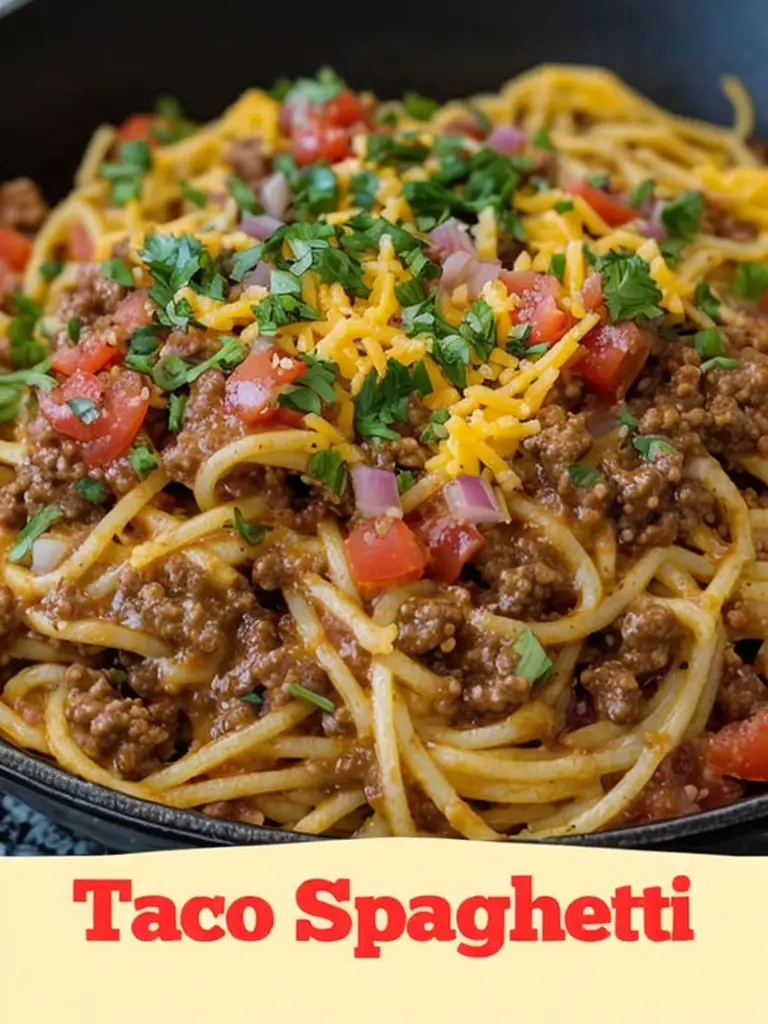
Taco Spaghetti is an exciting blend of comforting spaghetti and the spirited flavors of a classic taco. Perfect for a midweek dinner or a casual gathering, this dish combines the delightful spices of tacos with the texture of pasta, creating an unforgettable culinary experience. Prepare to offer your family or guests a burst of flavor with this unique yet easy recipe.

Quick Recipe Highlights

  • Flavor Profile: Savory ground beef, robust tomato sauce, and a touch of zesty taco seasoning merge seamlessly.
  • Texture: The combination of al dente spaghetti with hearty beef is topped with melted cheese for a pleasing textural contrast.
  • Aroma: The spice blend fills your kitchen with rich, enticing aromas that will have everyone asking what’s cooking.
  • Visual Appeal: Vibrant red sauce contrasted with bright garnishes makes this dish as pleasing to the eye as it is to the palate.
  • Skill Level Needed: Suitable for beginners, this recipe involves basic cooking techniques with straightforward steps.
  • Special Equipment: A single large skillet and a pot for cooking spaghetti—no special tools are necessary.

Recipe Overview

  • Difficulty Level: Easy – Simply browning meat and mixing ingredients make this recipe accessible to all.
  • Category: Main Course – A hearty dish that can stand alone or be paired with sides.
  • Cuisine: Fusion – Combines elements of Italian and Mexican cuisines for a delightful twist.
  • Cost: Moderate – Most ingredients are common pantry staples, keeping this dish budget-friendly.
  • Season: All Year – Enjoy this comforting dish in any season, thanks to its warming richness.
  • Occasion: Casual Dining – Perfect for family dinners, casual gatherings, or a cozy meal night.

Why You’ll Love This Recipe


Taco Spaghetti’s taste combines the rich, tomatoey essence of a traditional spaghetti sauce with the spicy, vibrant notes of taco spices. The recipe’s preparation is as convenient as it is delicious, with a minimal prep time of just 10 minutes. Embrace the nutritional benefits of including a substantial portion of ground beef without overpowering the dish, allowing for a balance of protein and carbohydrates. This blend of textures and layered flavors makes it fantastic for social gatherings, effortlessly feeding a group. Moreover, the widespread accessibility of ingredients makes this not only a cost-effective choice but readily adaptable to any unplanned dinner night.

Historical Background and Cultural Significance


Originating as a modern culinary innovation, Taco Spaghetti exemplifies a blend of Italian and Mexican-American culinary cultures. Although traditional in their own right, these cuisines adapt well to fusion, celebrating a new era of home cooking. Over time, the recipe has gained popularity through family dinners and shared gatherings, establishing itself in American households. Each household naturally interprets the recipe slightly differently, contributing to regional variations; it delights in adaptability and creativity.

Ingredient Deep Dive


Ground beef serves as the foundation of Taco Spaghetti, carrying historical importance across several cuisines as a versatile protein. Rich in nutrients like iron and vitamin B12, it supplies necessary dietary requirements that support muscle function and energy production. When selecting, opt for lean ground beef to maintain a healthier profile and store it in the fridge for up to two days or freeze for longer durations. Ideal substitutions include turkey or plant-based crumbles for those needing dietary adaptations.

Common Mistakes to Avoid

  • Overcooking spaghetti can result in a mushy texture, detracting from the dish’s intended mouthfeel. Always aim for al dente.
  • Neglecting to properly drain the beef may leave an oily residue that conflicts with the sauce’s flavors.
  • Using low-quality taco seasoning alters the overall taste profile. Invest in a well-regarded brand or create a homemade blend.
  • Adding cheese too early can invite burning rather than melting. Sprinkle it after the dish is removed from heat.
  • Under-seasoning can leave the dish bland. Taste as you cook and adjust spices accordingly.
  • Skipping the simmering step can lead to a watery sauce. Allow sauces to simmer properly for the best consistency.
  • Over-salting water can result in an overpoweringly salty pasta; balance is crucial in achieving the desired taste.
  • Forgetting to garnish can result in a lackluster presentation. Fresh herbs such as cilantro elevate the dish visually and flavor-wise.

Essential Techniques


Mastering the art of browning beef is crucial for deep, rich flavors in Taco Spaghetti. Begin by ensuring your skillet is hot before adding meat to sear rather than stew. This step ensures a caramelized crust, enhancing the texture and taste. Maintaining consistent stirring helps achieve an even browning without scorching the surface, delivering a perfectly cooked beef that’s both juicy and flavor-packed.

Pro Tips for Perfect Taco Spaghetti


To achieve the best Taco Spaghetti, always use fresh ingredients; fresh tomatoes or homemade sauce can elevate the taste significantly. Adding a squeeze of lime right before serving provides a refreshing, tangy lift. Incorporate a mix of cheeses for a richer cheese experience—blend cheddar with pepper jack or mozzarella. A dash of cumin can enhance the taco seasoning, offering a more profound depth. For added heat, consider mixing in diced jalapeños or a splash of hot sauce. Lastly, simmer the sauce for longer if time permits to deepen flavors and meld ingredients beautifully.

Variations and Adaptations


Regional variations like Southwestern Taco Spaghetti might include charred corn for extra sweetness or smoky chipotle for heat. Adjusting the recipe for seasons, consider a summer version with zucchini or bell peppers, adding a light freshness. For dietary needs, swap traditional pasta with gluten-free versions without loss of taste. Modify flavors by infusing smoked paprika to introduce a deeper smokiness, or experiment with textures by incorporating crushed tortilla chips for crunch.

Serving and Presentation Guide


Present your Taco Spaghetti with a flourish by using colorful dinnerware that showcases the vibrant red sauce. Traditional accompaniments like avocado or a dollop of sour cream enhance both the presentation and taste. For a modern touch, serve alongside a fresh salad using a zesty lime dressing. Temperature-wise, it’s best enjoyed hot but can stand at room temperature if necessary during gatherings. Ensure portions are generous, serving with optional sauces on the side for personalized seasoning.

Wine and Beverage Pairing


Pair this flavorful dish with a medium-bodied red wine like a Syrah or Zinfandel, offering both robustness and fruity notes that complement the spicy elements. Non-alcoholic options like lime-infused sparkling water or a mild, citrusy iced tea can refresh the palate. For a caffeine lift, pair with slightly sweetened black tea to bring out the rich flavors. Keep beverage temperatures chilled for contrast, accentuating the warmth of the meal.

Storage and Shelf Life


To store leftover Taco Spaghetti, place it in an airtight container and refrigerate promptly, consuming within four days for optimal taste. Ensure portions are cooled before covering to avoid steam-induced condensation. Watch for signs of spoilage, including off-odors and discoloration, to maintain safety. Reheating on a stovetop over low heat with a splash of water maintains moisture and avoids drying out. This recipe also freezes well for up to three months without compromising flavor.

Make Ahead Strategies


Allocate time to chop and measure all ingredients the day before for quick assembly. Store prepped ingredients in separate containers labeled according to usage steps to streamline cooking. Cooking and storing the sauce in advance may enhance the flavor as it mellows overnight. Just before serving, cook the spaghetti fresh to ensure the optimal texture when reheated.

Scaling Instructions


To efficiently scale this recipe, adjust ingredient ratios while acknowledging that cooking times may vary based on volume. Halving the recipe requires careful seasoning adjustments to preserve intensity. When doubling, utilize a larger skillet to ensure even cooking. Keep extra portions stored separately to maintain long-term freshness, and remember that pasta may require gradual reheating for larger batches.

Nutritional Deep Dive


This Taco Spaghetti recipe offers a well-rounded nutritional profile by balancing macronutrients: carbohydrates from pasta, proteins from beef, and fats primarily from cheese. Including tomatoes and spices provides antioxidants and anti-inflammatory benefits, these compounds are beneficial for heart health and digestion. Keep portion sizes controlled for weight management, and consider variations for dietary preferences without compromising nutrition.

Dietary Adaptations


For gluten-free needs, substitute with chickpea pasta, maintaining texture while increasing nutritional value. Dairy-free versions can swap out cheese for plant-based alternatives without sacrificing creamy satisfaction. For vegans, replace beef with black beans or tofu, providing a complete protein source without animal products. Low-carb adherents can enjoy this dish with spiralized zucchini, offering similar satisfaction with fewer carbohydrates.

Troubleshooting Guide


If your dish lacks the right texture, revisit pasta cooking time—aiming for al dente ensures a firm bite. For flavor balance, incrementally adjust seasonings after initial tasting rather than making sweeping changes. Addressing temperature issues, monitor heat levels to prevent uneven cooking or scorching. When substituting equipment, ensure pans are appropriately sized to manage heat distribution effectively. Resolve ingredient substitution challenges by researching alternatives that mimic the original taste profile and texture.

Recipe Success Stories


Our community has celebrated Taco Spaghetti for its versatility and appeal, with feedback highlighting adaptations like the addition of crispy bacon for extra indulgence. Readers have successfully incorporated vegetarian versions that won over skeptics and noted excellent results when sharing the dish at potlucks. Photography enthusiasts enjoy capturing this dish’s rich colors against rustic backgrounds, and many suggest a sprinkle of plant-based ranch for extra flair.

Frequently Asked Questions

Can I make Taco Spaghetti ahead of time? Yes, preparation and storage are straightforward. Simply reheat before serving.

What can I use instead of beef? Ground turkey or plant-based crumbles provide good alternative proteins, maintaining the dish’s core essence.

How can I make this dish less spicy? Use mild taco seasoning and exclude jalapeños, offering spice control while retaining flavor.

Is it possible to freeze leftovers? Absolutely! Freeze in tightly sealed containers and thaw fully before reheating for best results.

Can I use other types of pasta? Certainly! Penne or rotini can substitute, each offering different textures that enhance the dish.

How do I prevent pasta from sticking? Ensure it is stirred initially after cooking and use olive oil to keep strands from clumping.

Is there a way to make it healthier? Choose whole wheat pasta and lean ground beef to maximize fiber and protein while reducing fats.

How do I avoid overcooking the beef? Cook only until beef is browned and no pink remains, monitored carefully for best results.

What toppings work best? Avocado, cilantro, and green onions offer additional layers of taste and texture.

What’s the best way to serve it? Plate with a contrasting side like a crisp cabbage slaw or fresh corn salad to complement and refresh palates.

Can I make this spicy? Absolutely, add diced jalapeños or hot sauce to increase the spice level to taste.

Why is my sauce watery? Ensure ample simmering time to reduce excess liquid, offering a thick, rich consistency.

Additional Resources


Explore our further resources focusing on related pasta dishes, taco seasoning blends, and tomato sauce preparation techniques. We offer detailed guides for selecting quality kitchen equipment, enhancing both cooking efficiency and enjoyment. Seasonal adaptations and ingredient substitution recommendations help balance or introduce new flavors and textures. Embrace creativity with our collection of companion dish suggestions to round out your meal experience.

Join the Conversation


We invite you to share your Taco Spaghetti experiences on social media, adding a personal twist to showcase in our community gallery. Use #TacoSpaghettiAdventure to inspire others, celebrate successes, and explore your creativity with variations. Leave a review and discuss adaptations with fellow enthusiasts, sharing insights that refine and perfect this flavorful fusion. Engage with our diverse community, fostering a collective culinary joy that transforms dining into memorable gatherings.

The Recipe

Taco Spaghetti

Serves: 4

Prep Time: 10 mins

Cook Time: 20 mins

Total Time: 30 mins

Kitchen Equipment Needed

  • Large skillet
  • Pot for boiling spaghetti
  • Colander for draining pasta

Ingredients

  • 8 oz spaghetti
  • 1 lb ground beef
  • 1 packet taco seasoning
  • 1 cup salsa
  • 1 cup beef broth
  • 1 cup shredded cheddar cheese
  • Optional garnish: fresh cilantro, avocado slices, lime wedges

Directions

  1. Cook spaghetti according to package instructions until al dente. Drain and set aside.
  2. In a large skillet, brown the ground beef over medium heat until fully cooked. Drain excess fat.
  3. Add taco seasoning, salsa, and beef broth. Stir to combine and bring to a simmer.
  4. Reduce heat and allow to simmer for 10 minutes to thicken the sauce.
  5. Toss the cooked spaghetti in the sauce until fully coated.
  6. Stir in the shredded cheese until melted and distributed evenly.
  7. Remove from heat and let it cool slightly for flavors to meld.
  8. Serve hot, garnished with cilantro, avocado, and lime if desired.

Recipe Notes

  • For a spicier kick, add chopped jalapeños or a splash of hot sauce to the sauce mixture.
  • For a vegetarian version, substitute ground beef with black beans or a plant-based ground meat alternative.

Irresistible Creamy Cajun Pasta with Shrimp and Spicy Sausage

Creamy Cajun Pasta with Shrimp and Spicy Sausage: A Flavorful Delight

⚖️
Difficulty
Medium

⏲️
Prep Time
20 mins

🕒
Cook Time
25 mins

⏱️
Total Time
45 mins

🍽️
Servings
4

A delightful fusion of flavors awaits with this Creamy Cajun Pasta with Shrimp and Spicy Sausage. This dish combines succulent shrimp with hearty sausage, all enveloped in a creamy Cajun sauce. Perfect for those who enjoy a bit of spice, this pasta will tantalize your taste buds with its rich palette of flavors. Whether you’re looking for a delightful dinner recipe for the family or impressing guests with a gourmet meal, this recipe is your go-to option.

The Creamy Cajun Pasta not only offers a tantalizing taste but also boasts vibrant and inviting colors that elevate its visual appeal. The perfectly cooked shrimp and sausage provide a delightful texture contrast, making each bite incredibly satisfying. This dish also fills your kitchen with a rich aroma that unfurls as it simmers, adding another layer of sensory experience that will leave you eager to dig in.

Quick Recipe Highlights

  • Flavor Profile: A luscious blend of creamy and spicy flavors, with hints of garlic and paprika harmonizing beautifully with each bite.
  • Texture: The creamy pasta sauce, tender shrimp, and crisp sausage create an exquisite mouthfeel that delights with diverse textures.
  • Aroma: Enticing aromas of garlic, onion, and spices make this dish as aromatic as it is delicious.
  • Visual Appeal: A colorful medley of shrimp and sausage against creamy pasta with splashes of green from parsley adds to its allure.
  • Skill Level Needed: Moderate cooking skills; suitable for those familiar with making cream sauces and pasta.
  • Special Equipment: A quality saucepan for sauce preparation, a large pot for pasta, and a skillet for sautéing ingredients.

Recipe Overview

  • Difficulty Level: Intermediate due to the need for timing precision in cooking the pasta and preparing the sauce simultaneously while ensuring shrimp and sausage are not overcooked.
  • Category: Main Course, particularly fitting for those who enjoy pasta and rich Cajun flavors.
  • Cuisine: A delightful blend of Cajun and Italian culinary traditions, featuring creamy pasta with bold, spicy flavors reminiscent of Southern cooking.
  • Cost: Moderate; shrimp and sausage are the primary high-cost ingredients, but other components are affordable pantry staples.
  • Season: Ideal year-round but particularly comforting in cooler months when hearty, warming dishes are desired.
  • Occasion: Perfect for family dinners, casual gatherings, or when hosting friends for an informal, flavorful meal.

Why You’ll Love This Recipe


The Creamy Cajun Pasta with Shrimp and Spicy Sausage is a delightful blend of tastes that is both delicious and comforting. The combination of spices offers a mellow heat that is balanced by the creamy sauce. The variety of textures—from firm pasta to tender shrimp and perfectly sautéed sausage—makes every bite an exploration of flavor and feel. This recipe is ideal for those who appreciate a satisfying meal that is as rich in taste as it is in texture.

Apart from its taste and texture, the recipe’s straightforward preparation is an added advantage. The use of readily available ingredients and simple cooking techniques make it a convenient choice for any home cook. The meal can be prepared in under an hour, making it a suitable choice for weeknight dinners when time is of the essence. Pair this with a fresh green salad and you’ve got yourself a complete, wholesome meal.

Nutritionally, this dish is robust, providing a good balance of proteins from shrimp and sausage along with fats from the creamy sauce. There is room for vegetable inclusion through potential additions like bell peppers or spinach, enhancing its vitamin and mineral content. This combination ensures that the dish is not only indulgent but also satisfying in terms of nutritional requirements.

Moreover, this dish holds social and entertaining value, making it a great conversation starter at gatherings. Its vibrant presentation is a head-turner, and its unique fusion of flavors will surely leave a lasting impression on guests. Whether you’re serving it at a dinner party or as part of a cozy family meal, the Creamy Cajun Pasta is a centerpiece that shines on any occasion.

Cost-effectiveness is another reason to love this recipe. While shrimp can be a pricier ingredient, buying them frozen can save money, and they still cook up beautifully. Using smoked sausage, which is generally affordable, and other staple pantry ingredients makes this dish budget-friendly without compromising on taste. Plus, the ability to serve four means it stretches to feed a standard family or small group effectively.

Historical Background and Cultural Significance


The origin of this Creamy Cajun Pasta with Shrimp and Spicy Sausage can be traced back to the rich culinary traditions of Cajun cooking, which itself is a fascinating blend of influences. Cajun cuisine emerged from the French-speaking Acadian immigrants who settled in Louisiana. They brought with them culinary traditions rich with spices, meats, and a deep appreciation for slow-cooked meals that intertwine flavors beautifully.

Cajun food is celebrated for its bold flavors and complicated seasonings, often featuring meats like sausage and seafood, especially shrimp. This particular recipe captures the essence of Cajun cooking by combining these elements into a creamy, pasta-based dish. The dish builds on the traditional Cajun roots by incorporating Italian influences through pasta and cream, demonstrating the adaptability and evolution of Cajun cuisine.

Over time, the dish has evolved to suit different palates, allowing for variations such as the inclusion of different types of sausage or the addition of other seafood varieties such as crayfish. Its adaptability makes it a staple in many homes across the United States, beloved for its bold flavor and comforting qualities. The versatility of this pasta dish also makes it a canvas for creativity in contemporary kitchens.

Regional variations can be found, where local ingredients are added to this foundational recipe. Some areas might include a splash of wine for added depth, while others might increase the heat level with additional spices. Such variations highlight the dynamic nature of Cajun cooking and its seamless fusion with diverse culinary techniques.

Ingredient Deep Dive


Shrimp, a central ingredient in this Creamy Cajun Pasta, not only adds flavor but is also rich in protein and low in calories. Historically revered in Southern cuisine, particularly in Gulf Coast regions, shrimp are a sustainable choice that brings the taste of the sea into delicious everyday meals. When selecting shrimp, look for firmness in texture and a fresh sea scent. It’s best to purchase them frozen unless you source them fresh from a reliable fishmonger. If fresh, aim to cook them within a day or two; if frozen, they can last for months.

For storing, always keep shrimp refrigerated in a sealed container. Defrost in the refrigerator overnight for best results and avoid defrosting at room temperature to prevent bacterial growth. If shrimp is unavailable, crayfish or scallops can serve as an excellent substitution without drastically changing the dish’s flavor profile.

Spicy sausage plays a critical role in enhancing the dish’s smoky, spicy notes. Sausages are deeply rooted in many culinary traditions worldwide, providing a hearty and flavorful addition to the pasta. Choose quality sausages from reputable producers to ensure a consistent taste. When storing, keep them in their original packaging until ready to use, then refrigerate once opened. If sausages are inaccessible, consider using chorizo or a vegetarian sausage alternative for a similar spice level.

Common Mistakes to Avoid

  • Overcooking the shrimp is a common mistake that results in rubbery texture. Aim to cook them just until pink and opaque.
  • Using low-fat cream substitutes can result in a sauce that doesn’t thicken properly. Stick to full-fat cream for the best results.
  • Not salting the pasta water sufficiently can lead to bland pasta. Make sure the water is as salty as the sea.
  • Failing to reserve pasta water for the sauce can cause the final dish to lack cohesion. The starchy water is critical for melding the sauce ingredients.
  • Avoid overcrowding the pan when cooking sausage; this can prevent caramelization. Cook in batches if necessary.
  • Neglecting the spice balance can make the dish overly hot or bland. Taste as you go to manage heat levels to your preference.
  • Skipping the deglazing step can result in lost flavors stuck to the pan. Make sure to scrape up those caramelized bits for deeper flavor.
  • Inadequate garnishing can reduce visual appeal. A sprinkle of fresh parsley or Parmesan adds both color and flavor.

Essential Techniques


Creating the perfect Creamy Cajun Pasta with Shrimp and Spicy Sausage relies on mastering a few essential techniques. Sautéing is crucial, as it builds a flavor base through the browning of sausage, enriching the final dish with a smoky note. To master sautéing, ensure your pan is hot before adding ingredients and allow each ingredient to crisp without overcrowding the pan.

Deglazing is another key step for this dish, releasing flavorful brown bits from the pan into the sauce. When the sausage and shrimp are cooked, add a splash of broth or wine and gently scrape the pan. This integrates deep, savory flavors into your sauce.

Balance is critical in seasoning, especially given the spicy elements. To achieve the perfect balance, add spices gradually, tasting as you go to ensure you’re not overwhelming the palate. This gives you control over the heat and overall flavor.

Pro Tips for Perfect Creamy Cajun Pasta


To enhance the Creamy Cajun Pasta experience, make sure to use fresh spices if possible. This ensures that the flavors are vibrant and bold. Additionally, whenever you cook pasta, particularly for a dish with sauce, undercook by a minute less than the package instructions. This way, the pasta finishes cooking in the sauce, absorbing the full flavor.

Do not underestimate the power of pasta water; reserve a cup to help bind and thicken the sauce as needed. If you find your sauce too thick, the water helps achieve the perfect consistency without diluting the flavors. Test kitchen tip: use heavy cream instead of half-and-half for a richer taste and creamier sauce texture.

For added depth, a splash of white wine during deglazing can complement the sausage’s smokiness. Remember to let it evaporate sufficiently, allowing its flavor without harshness. Reserve some chopped fresh parsley for the end, adding both color and a fresh, bright taste that lifts the dish.

Variations and Adaptations


Regional variations of this recipe can be as diverse as the places where it’s cooked. In coastal areas, replacing shrimp with fish like salmon or adding crab can offer a new seafood dimension. In drier climates, using poultry instead of sausage can create a lighter dish yet retain the essence of Cajun flavor.

Seasonal adaptations involve incorporating vegetables like zucchini in the summer or adding squash in the fall. These can provide a nutritional boost and align the dish more closely with the season’s produce. Additionally, considering dietary needs, swapping out regular pasta for gluten-free options ensures this dish can be enjoyed by those with specific health requirements.

For flavor variations, consider adding bell peppers for sweetness or extra red pepper flakes for heat. An excellent texture modification is throwing in a handful of roasted nuts like pecans or almonds for crunch. Presentation alternatives include serving the dish on a large platter family-style, allowing everyone to serve themselves straight from the kitchen to the table.

Serving and Presentation Guide


Consider using large, wide bowls for serving, which help the sauce pool neatly while displaying the vibrant colors of the dish. Garnish with finely chopped parsley or chives to introduce a fresh burst of green, pairing visually with the golden hue of the pasta.

Traditional accompaniments include garlic bread or a simple green salad, both of which offer a perfect contrast to the creamy, spicy flavors. For a modern serving suggestion, try topping the pasta with a soft-poached egg—the yolk mingles wonderfully with the sauce, enhancing richness.

Temperature considerations include serving this pasta fresh from the pan to ensure the sauce remains silky and warm. Dish it out immediately while it’s in peak condition. Portion control can be maintained by measuring roughly one cup of pasta per person, leaving room for other courses.

Wine and Beverage Pairing


For wine pairings, a chilled Riesling or a dry, acidic Sauvignon Blanc pairs beautifully with the spicy undertones of the Creamy Cajun Pasta. Their slight sweetness and acidity refresh the palate between bites, balancing the richness of the sauce. Alternatively, a medium-bodied rosé can harmonize with the savory sausage and creamy texture.

Non-alcoholic alternatives such as sparkling water with a lemon slice or an iced tea with a splash of lime both offer a refreshing contrast to the dish’s spicy elements. If you enjoy coffee or tea post-meal, consider a bold espresso or a spiced chai to complement the vibrant Cajun flavors.

Temperature considerations for these beverages involve keeping wines chilled and non-alcoholic options cool to cleanse the palate effectively. Serving suggestions include presenting wine in stemmed glasses to maintain their chill or offering non-alcoholic drinks in highball glasses with ample ice.

Storage and Shelf Life


Proper storage ensures that leftovers remain as tasty as the initial serving. Store pasta in an airtight container, separating the shrimp and sausage if possible to prevent over-saturation of the pasta in sauce. Refrigerate within two hours of cooking to maintain freshness.

Ideal temperature requirements for storage keep the dish safe and tasty between 34°F and 40°F. Watch for signs of spoilage, such as an off-smell or discoloration in the sauce; these indicate that reheating is no longer an option. Always reheat leftovers gently over low heat in a pan with a splash of water or broth to preserve the dish’s texture.

For freezing guidelines, ensure the pasta is cooled before sealing in a freezer-safe container. This dish freezes well for up to three months. Allow to thaw in the fridge overnight and reheat as suggested for optimal results.

Make Ahead Strategies


To simplify dinner, consider making the sauce ahead of time. Store it in the refrigerator for up to two days, allowing the flavors to deepen. This will shorten the final cooking time on the say of serving. Prepare your ingredients, such as chopping the sausage and peeling the shrimp, the evening before.

Step storage is crucial for retaining quality. Keep cooked pasta separate from the sauce to prevent soaking for meal prep ahead of time. When assembling, ensure that freshly cooked elements like shrimp are added to the heated sauce for the best flavor.

For reheating, gently warm the sauce on the stove, adding the reserved pasta water to adjust consistency without losing its charm. To freshen up the flavor profile, toss in freshly chopped herbs just before serving to rejuvenate the dish’s aromatic appeal.

Scaling Instructions


Scaling this recipe is straightforward; however, attention must be paid to maintain taste integrity. When halving the recipe, divide each ingredient by two, but ensure that seasoning adjustments are made gradually. Doubling or tripling the recipe requires larger pots and pans to maintain even heat distribution, ensuring that the increased quantity cooks evenly.

Adjust cooking times slightly, especially if scaling the pasta. Test for doneness in larger batches to avoid overcooking. Keep storage considerations in mind when scaling up; calculate the need for additional containers to keep leftovers fresh.

Nutritional Deep Dive


This pasta dish is hearty, with a balance of macronutrients. Each serving delivers a robust amount of protein from the shrimp and sausage, carbohydrates from the pasta, and healthy fats from the creamy sauce. Key micronutrients include iodine and selenium from shrimp, supporting thyroid health, and vitamin B12 from sausage for energy metabolism.

Specific dietary considerations might involve opting for whole wheat pasta, increasing the fiber content for those seeking additional nutritional benefit. It’s crucial to analyze portion sizes, balancing the energy intake with guidelines that suit personal dietary needs.

Dietary Adaptations


For those with gluten sensitivities, gluten-free pasta substitutions maintain the recipe’s integrity. Ensure all other ingredients, particularly sausages, are certified gluten-free.

Dairy-free alternatives can include coconut cream or lactose-free cream systems, though slight flavor changes might occur. Vegan options may involve tofu sausage and a blend of nutritional yeast and cashew cream to mimic traditional cream sauce flavors.

Troubleshooting Guide


Texture issues commonly arise from overcooking the pasta or shrimp. Undercooking your pasta slightly helps, as does cooking shrimp just until pink. If the sauce is too thin, simmer it longer to reduce excess moisture.

To balance spice, if overly hot, add more cream to mellow the heat. Conversely, increasing cayenne or paprika will enhance spice levels. Timing concerns often involve pasta readiness; prioritize cooking it last to ensure peak freshness.

Recipe Success Stories


Readers across various platforms have praised this Creamy Cajun Pasta for its vibrant flavors. From modified versions using turkey sausage to experimenting with additional vegetables, feedback highlights its adaptability and consensus among children and adults alike.

Variations have been shared, incorporating more vegetarian ingredients or alternative proteins, allowing the foundation of this recipe to be applied universally. Community feedback attests to its well-received nature at potlucks and other gatherings.

Frequently Asked Questions

Q1: Can I use pre-cooked shrimp?
A1: Yes, pre-cooked shrimp can be used, but add them at the very end of the cooking process to prevent them from becoming rubbery.

Q2: Can this dish be made spicy or mild?
A2: Absolutely. Adjust the seasoning levels by adding more or less Cajun spice, adapting the intensity of heat to personal preferences.

Q3: What type of pasta is best for this recipe?
A3: While penne is recommended, other shapes like fettucine or linguine also work well, holding the sauce effectively.

Q4: Is there a low-fat alternative for the cream?
A4: You can substitute with Greek yogurt or a lower-fat cream, but the sauce may be slightly less rich and creamy.

Additional Resources


Explore other exciting recipes such as Shrimp Scampi Pasta or Smoked Sausage Jambalaya, offering complementary flavors to this Cajun-inspired dish. For those new to pasta preparation, consider consulting guides on cream sauce techniques or shrimp preparation to further hone culinary skills.

Join the Conversation


Share your versions of the Creamy Cajun Pasta with Shrimp and Sausage on social media utilizing #CajunPastaLove; we love seeing your adaptations. Feedback and reviews on this recipe’s page can provide valuable insights to fellow cooks embarking on creating this flavorful delight. Join our community in celebrating bold, innovative flavors in cooking.

The Recipe

Creamy Cajun Pasta with Shrimp and Spicy Sausage

Serves: 4

Prep Time: 20 mins

Cook Time: 25 mins

Total Time: 45 mins

Kitchen Equipment Needed

  • Large pot for pasta
  • Medium-sized skillet
  • Sharp knife
  • Chopping board
  • Measuring cups and spoons

Ingredients

  • 12 ounces penne pasta
  • 1 tablespoon olive oil
  • 8 ounces spicy smoked sausage, sliced
  • 1 pound medium shrimp, peeled and deveined
  • 3 garlic cloves, minced
  • 1 onion, diced
  • 1 red bell pepper, sliced
  • 1 cup heavy cream
  • 1 1/2 cups chicken broth
  • 2 teaspoons Cajun seasoning
  • 1/2 cup freshly grated Parmesan cheese
  • Parsley, for garnish
  • Salt and pepper, to taste

Directions

  1. Cook the pasta according to package instructions until al dente. Drain and set aside.
  2. In a large skillet, heat olive oil over medium heat. Add sausage and sauté until browned. Remove from skillet and set aside.
  3. Add the shrimp to the skillet and cook until pink and opaque. Set aside with the sausage.
  4. Add onion and red bell pepper to the same skillet. Sauté until softened, about 5 minutes. Stir in garlic and cook for an additional minute.
  5. Add chicken broth and bring to a simmer, then reduce heat and add cream and Cajun seasoning.
  6. Allow the sauce to simmer and thicken, stirring occasionally. Stir in Parmesan cheese until melted.
  7. Add cooked pasta, shrimp, and sausage back to the skillet, tossing to coat in the sauce. Season with salt and pepper to taste.
  8. Garnish with parsley before serving, and enjoy immediately.

Recipe Notes

  • For extra heat, add cayenne pepper to the sauce.
  • If the sauce becomes too thick, thin it with reserved pasta water.
  • For a seafood variety, add crab or scallops.

Irresistible Southern Cornbread Poppers for Perfect Party Appetizers

Southern Cornbread Poppers 🌽🍯 – Irresistible Appetizers for Any Occasion!

⚖️
Difficulty
Easy

⏲️
Prep Time
15 mins

🕒
Cook Time
20 mins

⏱️
Total Time
35 mins

🍽️
Servings
24 poppers

Welcome to the delectable world of Southern Cornbread Poppers, your new go-to appetizer for any gathering. These irresistible golden bites are crafted from classic southern cornbread flavors, delightfully melded with a hint of honey. Whether you’re planning a cozy family dinner or an extravagant party, their warm, comforting taste will enchant every guest. With a crispy exterior and a soft, crumbly interior, these poppers promise a taste of true Southern hospitality in every bite. Their tantalizing fragrance fills the kitchen, instantly setting the stage for memorable meals and joyful moments.

Quick Recipe Highlights

  • Flavor Profile: A perfect balance of sweet and savory, these poppers infuse traditional cornbread with a drizzle of honey, creating a mouthwatering treat.
  • Texture: Enjoy the contrast of a crisp, golden crust surrounding a soft, moist center that crumbles delightfully as you bite in.
  • Aroma: The scent of fresh cornbread infused with honey fills the air, offering a comforting and inviting aroma.
  • Visual Appeal: Bright yellow cornmeal provides a cheerful pop of color, accented by a golden-brown finish that’s sure to impress.
  • Skill Level Needed: Ideal for beginners, this recipe requires simple mixing and baking techniques.
  • Special Equipment: A piping bag or small scoop simplifies shaping the poppers before baking.

Recipe Overview

  • Difficulty Level: Rated easy for its straightforward preparation and minimal ingredients, this recipe is perfect for cooks of all skill levels.
  • Category: Belonging to the appetizer category, these poppers make excellent starters or party snacks.
  • Cuisine: Rooted in Southern culinary traditions, these poppers offer a taste of nostalgic comfort and hospitality.
  • Cost: Budget-friendly, with most ingredients commonly found in a well-stocked kitchen.
  • Season: Enjoy these poppers year-round, with peak popularity in fall and winter thanks to their warm, comforting taste.
  • Occasion: Perfect for gatherings, these poppers shine at dinners, parties, and game-day feasts.

Why You’ll Love This Recipe


Discover a delightful combination of rich, comforting flavors and an easy preparation method with our Southern Cornbread Poppers. Their sweet and savory taste profile ensures they are universally loved, quickly becoming a favorite in any setting. With a recipe designed for convenience, you can craft these melt-in-your-mouth treats in a matter of minutes, ensuring maximum enjoyment with minimal effort.

Nutritionally, these poppers cater to those seeking a hearty yet balanced snack, with wholesome cornmeal providing essential fibers and minerals. They’re also versatile enough to complement various dietary needs with simple adjustments. Socially, their shareability makes them a hit at gatherings, effortlessly enhancing the atmosphere and creating conversation starters.

From a budget perspective, Southern Cornbread Poppers are cost-effective, relying on accessible ingredients that promise a significant flavor payoff. Whether a small family gathering or a large event, they adapt to any occasion, delivering both economy and luxury. Their accessibility and ease of preparation mean anyone can enjoy crafting this beloved appetizer, making it a joyful experience from creation to consumption.

Historical Background and Cultural Significance


The legacy of Southern Cornbread Poppers hails from the rich traditions of Southern American cuisine, where cornbread has long been a staple. Originally a means to harness the simple ingredients available to early settlers, cornbread evolved into a significant culinary icon, celebrated across generations for its adaptability and comforting nature.

Culturally, cornbread holds a cherished place in Southern hospitality, representing warmth, welcome, and comfort, foundational to family gatherings and festive occasions. The transition to poppers reflects an innovative twist on the classic, capturing the adventurous spirit of modern Southern cooks while honoring their heritage.

Throughout its evolution, cornbread has seen diverse adaptations, from skillet-fried variations to sweet honeyed versions. Regional differences further highlight its versatility, with each rendition showcasing local tastes and preferences. These poppers, however, embody a universal appeal, marrying nostalgia with novelty.

Reflective of various regional nuances, Southern Cornbread Poppers encapsulate culinary innovation while maintaining a timeless tradition, uniting history with contemporary delight. As they continue to evolve, they affirm the enduring significance of cornbread in Southern culture and beyond.

Ingredient Deep Dive


Cornmeal is the heart of these poppers, tracing back to Native American traditions and remaining a staple in Southern kitchens. Providing the cornbread’s hallmark flavor and texture, cornmeal offers nutritional benefits through rich fibers and essential minerals like magnesium and selenium.

Honey, a natural sweetener, enhances the cornbread’s flavor profile, offering antioxidants and antibacterial properties. Opt for raw or locally sourced honey to maximize its health benefits. When selecting cornmeal, prioritize freshness and opt for stone-ground varieties for authentic texture and flavor.

Store cornmeal in an airtight container in a cool, dry place to preserve its quality. Honey, meanwhile, should remain tightly sealed and away from heat to prevent crystallization. Substitute sugar or syrup if needed, adjusting sweetness to suit your palate.

Common Mistakes to Avoid

  • Overmixing: Avoid tough poppers by gently folding ingredients until just combined. Too much mixing develops gluten, affecting texture.
  • Undercooking: Ensure even cooking and full flavor by baking until the poppers are golden brown and set, checking doneness with a toothpick.
  • Improper Measurements: Precision is key. Use measuring cups and spoons to ensure ingredient balance for the perfect popper foundation.
  • Skipping Cooling: Allow poppers to cool slightly before serving. This step helps them firm up while enhancing flavor.
  • Neglecting Freshness: Use fresh ingredients, particularly baking powder, to achieve optimal rise and fluffiness.
  • Wrong Temperature: Preheat your oven fully. A fluctuating oven temperature can lead to uneven cooking and disappointing results.
  • Poor Storage: Prevent sogginess by storing poppers in a sealed container at room temperature or freezing for longer preservation.
  • Incorrect Substitutions: While substitutions are possible, ensure they complement the dish’s flavor and texture, such as using applesauce instead of eggs if needed.

Essential Techniques


Mastering the proper mix ratio is vital. Overmixing can lead to dense poppers, so combine ingredients until they’re just blended. This preserves the light, crumbly texture characteristic of great cornbread. Keep an eye on baking time and coloration—poppers should be visually golden with a firm outer crust, signaling readiness. Ensure your oven is fully preheated to attain even brownness.

Pro Tips for Perfect Southern Cornbread Poppers


Choose quality cornmeal for flavor depth, and brush the poppers with honey butter fresh from the oven for a glossy, savory glaze. For added creaminess, incorporate a dollop of sour cream into the batter. Remember, your bake time may vary based on popper size; adjust accordingly. Always use fresh baking powder to guarantee a desirable rise. Consider adding jalapenos for a spicy kick or sharp cheddar for rich, gooey pockets of cheese. Finally, enjoy immediately to best savor their signature mouthfeel.

Variations and Adaptations


Regional adaptations often include ingredients like jalapenos or bell peppers for an added kick, while sweeter versions might embrace vanilla or cinnamon. During different seasons, fresh corn or herb infusions introduce exciting layers of flavor. For dietary needs, opt for almond milk instead of cow’s milk, or incorporate almond or coconut flour for gluten-free versions. Enhance flavor profiles by including diced cheese or bacon for savory indulgence.

Serving and Presentation Guide


Plate these poppers on a rustic wooden board adorned with small bowls of honey butter or jam for dipping. A sprinkle of chopped chives atop each popper adds a vibrant green contrast. Serve them with tangy coleslaw, enhancing their traditional essence, or a modern crisp salad for refreshing balance. Maintain ideal temperature by warming just before serving. Manage portion control by offering 4-6 poppers per guest, ensuring satisfaction without overwhelming the palate.

Wine and Beverage Pairing


Complement the poppers’ rich flavors with a crisp Chardonnay or a light Pinot Noir, enhancing their savory and sweet notes. Opt for sweet tea or lemonade for a non-alcoholic alternative, capturing traditional Southern refreshment. If enjoying with coffee, choose a mild roast to match without overpowering. Ensure beverages are served at their peak temp, around 45-55°F for whites, comfortably room temp for reds. Present in classic glassware to elevate the dining experience.

Storage and Shelf Life


Store poppers in an airtight container for a shelf life of up to 3 days at room temp. Refrigeration isn’t recommended as it may alter texture. Check for signs of spoilage like a sour odor or discolored spots. Reheat in a 350°F oven for 5-7 mins to restore crispness. Freeze by arranging poppers in a single layer on a tray before transferring to a zip-top bag for longer storage, reheating before serving.

Make Ahead Strategies


Prepare batter in advance, storing it in the fridge up to 24 hours prior to baking. When ready to serve, scoop and bake poppers fresh for optimal texture. For longer lead times, bake and freeze poppers, allowing thawing at room temperature before a brief oven reheat. Assemble accompanying dishes ahead too, such as dipping sauces, to streamline serving.

Scaling Instructions


For smaller gatherings, halve ingredient quantities without adjusting bake time for easy balancing. When doubling or tripling, ensure uniform cooking by not overcrowding baking trays; adjust ovens or bake in multiple batches if necessary. Account for freezer space when storing leftovers from larger batches. Maintain quality and timing adjustments for seamless servings.

Nutritional Deep Dive


Each popper offers balanced macros with a combination of carbs from cornmeal, protein from eggs, and fats from butter. They’re enriched with vitamins, including B6 and E, and minerals like magnesium. Perfect for energy boosts, they fit into balanced diets but should be portioned to match energy needs. Consider pairing with fiber-rich vegetables or protein slices for a balanced plate.

Dietary Adaptations


For gluten-free needs, substitute the flour with an appropriate blend. Create a dairy-free version by using plant-based milk and butter. To craft a vegan adaptation, replace eggs with flaxseed meal. Modify for low-carb diets by incorporating almond flour, and ensure keto compliance by eliminating honey. Paleo enthusiasts may wish to enhance with nuts or coconut for texture.

Troubleshooting Guide


For texture issues like dryness, adjust liquid proportions slightly or reduce bake time. If flavors seem off-balance, experiment with seasoning levels or add zest for brightness. Temperature inconsistencies can result in uneven cooking, requiring an oven thermometer for calibration. Ensure essential tools are functional; piped batter consistency relies on proper mechanics. Basic ingredient swaps should complement, rather than compromise, original intent, adjusting for flavor congruence.

Recipe Success Stories


Share your Southern Cornbread Poppers triumphs with a community eager to embrace culinary creativity. Enthusiasts have succeeded in crafting Cajun-spiced renditions or integrating homestyle jalapeno bites, tweaking seasonings for distinct blends. Swapping oils for a lighter texture or crowd-sourcing unique presentation ideas, users continuously innovate while preserving warmth and tradition. Harness the potential of visual storytelling with inspired photography, enhancing recipes with vibrant, inviting imagery.

Frequently Asked Questions

Can I use pre-packaged cornbread mix?
Yes, but be mindful of additional salt and baking powder present, adjusting the recipe accordingly for balance.

What’s the best way to measure cornmeal?
Use a spoon to fill your measuring cup, then level it off with a knife for precise measurement ensuring consistent recipe results.

How do I maintain popper softness?
Avoid overbaking and ensure a proper moisture balance in the batter. Cover with foil if storing long-term to avoid drying.

Can I substitute honey in the recipe?
Agave or maple syrup can replace honey for a similar sweetness; monitor sugar levels if using sweetened variants.

What’s the optimal way to reheat poppers?
Reheat in a preheated oven to maintain crispness. Avoid microwaving, which can lead to soggy texture.

How can I adjust for high altitude?
Increase baking temperature by 25°F and reduce baking powder slightly to compensate for faster leavening at altitude.

Are there vegetarian adaptations?
These poppers are inherently vegetarian, offering flexibility in add-ins. Avoid bacon or sausage for stricter vegetarian renditions.

Could I substitute granulated sugar for honey?
While possible, the flavor profile will change; adjust sweetness levels and consider using a syrup for a closer substitution.

Is it possible to make these poppers extra crispy?
Brush with melted butter before baking for enhanced crispness or increase oven temp briefly for a final crunch.

What’s the best dipping sauce?
Pair with a chili-infused honey, spicy aioli, or classic Southern gravy for complementary flavors.

How do I avoid overly dense poppers?
Ensure baking powder freshness and avoid overworking the batter to promote aeration and rise.

How can I add more flavor?
Additional spices like cayenne or smoked paprika, as well as inclusions like cheese or herbs, can intensify flavor.

Additional Resources


Explore a world of Southern culinary delights with related recipes such as classic buttermilk cornbread or indulgent cheddar chive biscuits. Technique guides offer insight into perfecting bakes and mastering cast-iron cooking. Delve into ingredient wisdom with cornmeal storage tips or learn about honey’s health benefits. Boost your kitchen shelf with recommended seasonal tools and explore fun, adaptable variations to broaden your cornbread repertoire in any season.

Join the Conversation


Get involved by sharing your Southern Cornbread Poppers experiences across social media channels, tagging #CornbreadPoppers for featured highlights. Perfect your food photography with tips on lighting and composition, capturing the crisp hues and textures. Leave reviews and engage with our community for feedback, or introduce your twists and creative adaptations to this cherished recipe. Your insights contribute to a living, evolving culinary tradition, cementing cornbread poppers as a modern culinary darling.

The Recipe

Southern Cornbread Poppers

Serves: 24 poppers

Prep Time: 15 mins

Cook Time: 20 mins

Total Time: 35 mins

Kitchen Equipment Needed

  • Mixing bowls
  • Piping bag or small cookie scoop
  • Baking sheet
  • Oven

Ingredients

  • 1 cup cornmeal
  • 1/2 cup all-purpose flour
  • 1 tbsp sugar
  • 1 tsp baking powder
  • 1/2 tsp salt
  • 1/4 tsp baking soda
  • 1 cup buttermilk
  • 1 large egg
  • 2 tbsp melted butter
  • 2 tbsp honey

Directions

  1. Preheat the oven to 375°F (190°C) and line a baking sheet with parchment paper.
  2. In a large mixing bowl, combine cornmeal, flour, sugar, baking powder, salt, and baking soda.
  3. In a separate bowl, whisk together buttermilk, egg, melted butter, and honey.
  4. Gradually add the liquid mixture to the dry ingredients, mixing until just combined.
  5. Transfer batter to a piping bag or use a small cookie scoop, piping or scooping small mounds onto the baking sheet.
  6. Bake for 20 minutes or until golden brown and set.
  7. Remove from oven and let cool slightly before serving.

Recipe Notes

  • Substitute honey with maple syrup for a unique flavor twist.
  • Add diced jalapenos to the batter for a spicy variation.
  • Enjoy poppers with a side of sweet chili sauce or honey butter for added flavor.

Delicious Salmon with Creamy Spinach Sauce for a Healthy Dinner

Salmon with Creamy Spinach Sauce: A Gourmet Delight

⚖️
Difficulty
Intermediate

⏲️
Prep Time
15 mins

🕒
Cook Time
25 mins

⏱️
Total Time
40 mins

🍽️
Servings
4

Embark on a culinary journey with our exquisite Salmon with Creamy Spinach Sauce. This recipe combines fresh, succulent salmon with a rich and velvety spinach sauce, creating a symphony of flavors on your palate. Perfect for a sophisticated dinner party or a cozy family meal, this dish is both indulgent and nutritious. The vibrant green of the spinach beautifully complements the salmon’s pink hue, making for an eye-catching presentation.

Salmon with Creamy Spinach Sauce is an elegant yet approachable dish, delivering bold flavors without compromising on nutrition. The creamy sauce enriched with fresh spinach accentuates the fatty richness of the salmon, creating a harmonious balance in every bite. As it cooks, your kitchen will be filled with a warm and inviting aroma, promising a delightful dining experience.

Strong visual appeal is another highlight of this dish. The colorful contrast between the salmon and spinach sauce creates an enticing presentation, guaranteeing it to be the centerpiece of your table. Whether you’re new to cooking or a seasoned gourmet, this recipe offers a wonderful opportunity to enhance your culinary skills.

Quick Recipe Highlights

  • Flavor Profile: The dish marries the rich indulgence of a creamy sauce with the fresh, slightly oceanic taste of salmon.
  • Texture: Crispy-skinned salmon pairs with a luxuriously smooth sauce, offering a delightful textural contrast.
  • Aroma: An inviting blend of buttery notes mixed with the earthy smell of fresh spinach and a hint of ocean breeze from the salmon.
  • Visual Appeal: A captivating dish with the vibrant pink of salmon highlighted by the lush green sauce.
  • Skill Level Needed: Requires basic cooking skills, including pan-searing and sauce preparation.
  • Special Equipment: A non-stick skillet and a blender for the creamiest sauce texture.

Recipe Overview

  • Difficulty Level: Intermediate – This dish involves several cooking stages, including sautéing and blending, that provide a moderate challenge, especially in timing.
  • Category: Main Course – Ideal for dinner menus looking for a balanced and sophisticated protein-centered recipe.
  • Cuisine: Fusion – Merging European-style creamy sauces with Pacific salmon, it brings together diverse culinary traditions.
  • Cost: Moderate – Fresh salmon and quality ingredients lend a gourmet feel without excessive cost.
  • Season: Spring and Summer – Best when fresh spinach is abundant and salmon is at its peak freshness.
  • Occasion: Dinner parties or special family gatherings, where presentation and flavor can shine.

Why You’ll Love This Recipe


The taste and texture of Salmon with Creamy Spinach Sauce are a treat for any seafood enthusiast. The crispy, flaky salmon yields a delectable bite, harmonized with the lush, buttery spinach sauce that envelops your palate with each mouthful. Cooking salmon to perfection ensures a pleasant crust while retaining the fish’s natural juiciness.

Convenience is another reason to love this recipe. With minimal preparation time, it’s ready on your table within 40 minutes — suitable for weeknight dinners. The steps are straightforward yet rewarding, making you look like a culinary pro.

Nutritionally advantageous, this dish is packed with omega-3 fatty acids from the salmon, and the spinach provides valuable vitamins and minerals. Together, they form a nourishing meal that supports heart health, brain function, and more.

As a social dish, it sparks admiration and conversation around any dinner table — its gourmet look and taste make it Instagram-worthy, adding a touch of class to gatherings. It’s a delightful centerpiece for entertaining guests or celebrating special occasions at home.

Cost-effectiveness balances luxury with affordability. Opting for local, seasonal ingredients helps cut costs, allowing you to offer an upscale menu without breaking the bank, and its elegance makes any meal feel special.

Historical Background and Cultural Significance


The origin of salmon dishes dates back to ancient times when coastal communities heavily relied on fish for sustenance. Salmon, with its natural abundance in Northern waters, played a pivotal role in the diet of cultures from the Native Americans to Northern Europeans.

Culturally, salmon is celebrated in many traditions, from Scandinavian gravlax to Japanese sushi. This particular recipe draws on the European style of pairing fish with creamy, dairy-rich sauces, emphasizing balance and indulgence in culinary practice.

The evolution of salmon recipes reflects a shift towards fusion and adaptability in modern cuisine. This has led to incorporating global influences, resulting in innovative dishes that balance classic European techniques with new, diverse culinary elements.

Regional variations abound in salmon preparations, often influenced by local ingredients and traditions. The addition of creamy spinach sauce offers a nod to the delicate and refined sauces prized in French cuisine, presenting a dish that world travelers and food enthusiasts can enjoy.

Ingredient Deep Dive


Salmon is a widely loved fish known for its rich taste and nutritional value. Historically, it has featured prominently in the diets of coastal and riverine communities, appreciated for its heart-healthy fats, protein, and vitamin D content.

To ensure freshness, select salmon with vibrant flesh, firm to the touch, and a mild scent. Store it in the coldest part of your refrigerator and consume it within a day or two for best flavor and quality. When necessary, substitute salmon with Arctic char or trout for a change in flavor profile.

Spinach lends earthy, subtle flavors to the dish, complementing the salmon. Its nutritional bounty includes vitamins K, A, and C, alongside iron and antioxidants, making it a powerhouse ingredient often used in various cuisines.

When shopping for spinach, look for crisp, bright green leaves free from yellowing or wilting. Store unwashed in a sealed container or plastic bag in the crisper drawer to maintain freshness. Should you need to substitute, baby kale or Swiss chard can provide a similar texture and flavor.

Common Mistakes to Avoid

  • Overcooking the Salmon: Always monitor the cooking time closely. Overcooking leads to dryness, losing the fish’s natural juiciness.
  • Undercooked Spinach Sauce: Ensure sufficient time for the spinach to wilt properly while retaining its bright green color.
  • Improper Seasoning: Both the fish and sauce require seasoning at every stage to build depth. Taste and adjust as necessary.
  • Skillet Choice: Avoid non-stick pans for the salmon to achieve a perfect crisp skin; stainless steel works best.
  • Thickening the Sauce: Be cautious with cream; it should be reduced slowly to prevent separation or curdling.
  • Sauce Consistency: Blend the sauce adequately to ensure a smooth, creamy texture without lumps.
  • Cooling the Fish: If prepping in advance, cover the salmon to prevent cooling and drying out before serving.
  • Pairing Wine Incorrectly: Choose wines or beverages that complement, not overshadow, the delicate flavors of the dish.
  • Inadequate Resting: Allow the salmon to rest briefly after cooking to retain juiciness and even out internal temperatures.
  • Ignoring Presentation: Consider visual elements when plating for an appealing, restaurant-quality finish.

Essential Techniques


Perfect Pan-Seared Salmon: achieving a crisp, golden exterior requires high heat and a dry salmon skin. Ensure your pan is hot before adding oil and salmon. Avoid moving the salmon prematurely; allow the skin to naturally release from the pan when ready.

Wilted Spinach: Add fresh spinach to the sauce at the right moment, and keep it moving by stirring gently to ensure even wilting. Overcooking diminishes both color and nutritional content.

Blending the Sauce: Use a quality blender for smoothness. Blend until light, ensuring an even texture without retained stringiness or lumps. Return blended sauce to a gentle heat while monitoring thickness.

Pro Tips for Perfect Salmon with Creamy Spinach Sauce


For a vibrant sauce, blend fresh spinach in brief pulses to prevent heat damage and preserve color. Use whole milk or half-and-half instead of cream for a lighter yet creamy sauce option. When seasoning, remember to build flavor step-by-step, adjusting salt and pepper in both the sauce and the salmon before serving.

Make use of fresh herbs such as parsley or dill as a garnish, elevating both flavor and color contrast on the plate. Consider plating each fillet with precision, pouring the sauce artfully around and beneath the salmon for elegance.

To elevate texture contrast, reserve some creaminess by adding a dash of cold butter just before serving, enriching the sauce’s mouthfeel. Pair with complementary sides like roasted asparagus or a light citrus salad to accentuate the dish.

Variations and Adaptations


Regional Variations: Incorporate local herbs and spices reflecting the culinary identity of your area. Examples include dill in Northern Europe or basil for a Mediterranean twist.

Seasonal Adaptations: Substitute spinach with kale during fall or winter, or arugula in spring for varied flavors. Each offers a distinct profile while maintaining harmony with the creamy base.

Dietary Modifications: For lactose-intolerant diners, use almond milk and thicken with a cornstarch slurry. The sauce remains indulgent yet suitable for dietary needs.

Flavor Variations: Infuse the sauce with differing cheeses like Parmesan or Pecorino for a more robust, savory undertone while keeping the core ingredients consistent.

Texture Modifications: Incorporate toasted pine nuts or walnuts for crunch. Their nutty flavor enhances the sauce’s complexity, complementing the fish’s soft texture.

Presentation Alternatives: Serve over a bed of risotto or alongside wild rice to heighten the overall presentation, balancing the dish with hearty accompaniments.

Serving and Presentation Guide


Embrace subtle elegance in plating by using broad, flat plates with a light color to highlight contrasts. Center the salmon fillet, and spoon the sauce lazily around the perimeter, garnishing with a lemon slice or zest for vibrancy.

Garnishing Ideas: Lightly roasted, slivered almonds offer texture. Sprinkle fresh herbs that complement the dish’s flavors for an added aromatic layer.

Traditional Accompaniments: Al dente asparagus spears or a simple side salad make for classic pairings, adding lightness without overshadowing the main dish.

Modern Serving Suggestions: Present in individual portions for a sophisticated dining atmosphere, taking care to maintain temperature and texture integrity.

Wine and Beverage Pairing


Pairing wine with salmon is both art and science. A chilled Chardonnay or Pinot Gris enhances its natural fat, complemented by the creaminess of the sauce. For red wine lovers, opt for a light-bodied Pinot Noir, whose delicate berry notes will amplify the dish’s profile.

Non-Alcoholic Alternatives: A zesty lemonade or iced tea infused with mint would offer refreshing, palate-cleansing counterpoints.

Coffee/Tea Pairings: If serving tea, choose a light jasmine or green tea with subtle floral fragrance to complement yet not overpower the flavors.

Temperature Considerations: Serve drinks slightly chilled for whites or reds, appreciating the harmony between wine’s temperature and salmon’s warmth.

Storage and Shelf Life


Preserve leftover salmon by wrapping it gently in foil and refrigerating for up to two days. Ensure different components like the sauce are stored separately in airtight containers to maintain quality.

Signs of Spoilage: Watch for an undesirable fishy odor or discoloration, indicating potential spoilage. When reheating, use low heat, preserving moisture with a lid or foil tent.

To freeze, ensure salmon is tightly sealed to prevent freezer burn. Thaw overnight in the refrigerator, and use gentle reheating methods to recapture the original texture and flavor profile.

Make Ahead Strategies


Plan ahead by prepping the spinach sauce a day prior, storing it separately. It’s easily reheatable, simplifying assembly on serving day while maintaining freshness and taste.

Storage Between Steps: Refrigerate components individually, particularly if prepping in strides. Salmon can be marinated briefly before cooking, adding depth to its inherent tang.

After assembling, use freshening elements like a citrus splash or fresh herbs to rekindle flavors upon serving, making each bite vibrant and delightful.

Scaling Instructions


Adjust the recipe to meet your needs comfortably with easy scaling methods. When halving, reduce each ingredient proportionally, keeping cooking times similar given smaller batch dynamics.

Double or triple the recipe for a party, taking care with equipment size, using larger pans or multiple kits as necessary to accommodate procedure adjustments without impacting outcome.

Storage Considerations: Consider the spatial impact of bulkier ingredients when refrigerating, ensuring proper sealing to prevent cross-flavor contamination.

Nutritional Deep Dive


With a macro breakdown focusing on an ideal nutrient profile, the dish offers ample protein from salmon, important omega-3s, and vitamins like B6. The spinach acts as a vitamin K and antioxidant store, adding valuable dietary benefits alongside the creamy sauce.

Satisfied by essential micronutrients, this dish taxes neither calories nor fats excessively for its flavor, allowing it to integrate easily into a balanced meal plan.

Dietary Considerations: Consider moderation for calorie watching, balancing with lighter side dishes if necessary, leveraging the dish’s natural richness to complement broader dietary patterns appropriately.

Dietary Adaptations


Gluten-Free: Verify all ingredients, particularly stocks or pre-packaged items, meet gluten-free standards to keep the dish accessible for those with gluten intolerance.

Dairy-Free: Use alternative cream bases, such as coconut cream, while maintaining the sauce’s essential silkiness and flavor consistency.

Vegan: Swap salmon for marinated tofu or mushrooms, crafting a distinct spin for plant-based palates without sacrificing satisfaction or depth.

Low-Carb: Enjoy the dish as is, naturally low in carbohydrates, suitable for various low-carb eating strategies where balance matters.

Keto: Suited to ketogenic dietary patterns, highlight the omega-rich salmon and cream profile as focal points that align with keto requirements.

Paleo: Substitute cream with almond cream or similar paleo-friendly options, allowing flavor continuity alongside dietary compliance need.

Other Specific Diets: Utilize beige spaghetti squash for a non-traditional but friendship-approved accompaniment that watches starch.

Troubleshooting Guide


Texture Issues: If your sauce feels gritty, ensure precise blending; update your blender for smooth results if necessary.

Flavor Balance: Avoid overpower or underwhelming by continually tasting and seasoning judiciously throughout all preparation stages.

Temperature Problems: Monitoring sauce manipulation helps avoid scorching or separating cream elements, allowing for quality and taste retention.

Equipment Challenges: Skilled pan preparation ensures fish safety; insufficient non-stick cleaning or scorching placeups misses opportunities otherwise enhanced by suitable cookware availability.

Ingredient Substitutions: Counter substitute constraints with flexibility, choosing alternatives that retain essential composition and characteristics when pursuing adaptations.

Timing Concerns: Record detailed logs during cooking execution, adjusting future attempts for varied circumstances or conditions, preserving quality.

Recipe Success Stories


Our readers shared memorable family occasions when Salmon with Creamy Spinach Sauce was credited for sparking delightful meal moments. One posted image captured the elegance perfectly, depicting a dish that drew praises from young and old.

Community feedback highlights the recipe’s success in gatherings and intimate dinners alike, with suggestions to pair with seasonally available side items becoming common.

Adaptations prompted creativity, showcasing the dish’s strong back and vibrant color when attempting less common ingredient variations that stumble on immunity alone.

Photography tips, especially emphasizing lighting and plate angle choices, have empowered others to share their culinary creations confidently with shared social networks.

Frequently Asked Questions

Can I substitute salmon with another fish? For similar flavor and texture, trout or Arctic char serves as an excellent option, retaining similar richness and cooking style.

How can I make the dish less calorie-dense? Consider using almond milk and slight variable oil substitution in sauce preparation, while selecting leaner salmon cuts when available.

What wine pairs best with the dish? A lightly oak-aged Chardonnay or delicate Pinot Noir enhances the dish’s flavors harmoniously without overshadowing.

Can I prepare the sauce beforehand? Definitely, the sauce can be stored overnight by cooling promptly, ensuring flavors remain vibrant and significantly beneficial for assembly ease.

Are there vegan alternatives to this recipe? Marinated tofu or mushrooms establish excellent vegan substitutes, creating flavor coherence while observing dietary requirements comprehensively.

How do I ensure the fish doesn’t overcook? Observe the cooking time strictly, taking it off one minute earlier than needed to account for residual heat in skillet transitions.

Is the dish suitable for meal prepping? Yes, it prepares in manageable components with separable storage, keeping its quality intact when needing partial reheating or assembly.

What garnishes work well with this recipe? Lightly toasted almonds, lemon zest, or fresh parsley accentuate the presentation, adding both texture and complexity without masking the bold.

Can I freeze this dish? When adequately sealed, freezing proves successful with prompt meal satisfaction, ensuring salmon’s moisture seamanship remains unchallenged housewise later.

What should I do if my sauce separates? Reblend on short, consistent pulse tasks at low speed briefingly, reinitialize stirring and gently reheating for sauce unification.

Additional Resources


Explore related salmon recipes that capture maritime vitality through diverse culinary lenses. Discover secrets behind perfect sauce textures with detailed technique guides.

Stay inspired with ingredient information profiling vivid alternatives and equivalencies challenging satisfied by diverse pantry offerings, complementing particular commander’s daily clerk foodlogs.

Consider equipment recommendations aligning value; steel frying options ensure illustrative searing outcomes through persistent updated features. Observe seasonal adaptations, splicing seasons with sauce celebration and best riemy selections.

Access a library of culinary knowledge with these resources, expanding your repertoire around innovative dishes that transcend typical–tracing charm discovery from your kitchen table to spirited table shanahan company.

Join the Conversation


Enrich our community workshops by reviewing this recipe, sharing variations and adaption stories inspiring culinary adventure enthusiasm. Embrace feedback and insights catalyzing gourmet expressions.

Engagement powerfully complements skilled processes utilizing photography tips enhancing social media compositions wooing attention graciously. Reveal visual storytelling inherent within ingredient interplay while encouraging collective participation.

Your input shapes vibrant conversation dynamics across platforms, fostering appreciation for creativity-distinctive forms amid broadened perspective awareness. Generate movement, inviting inclusive contemplation directing communed purpose flourishes glowing conversation.

The Recipe

Salmon with Creamy Spinach Sauce

Serves: 4

Prep Time: 15 mins

Cook Time: 25 mins

Total Time: 40 mins

Kitchen Equipment Needed

  • Non-stick skillet
  • Blender
  • Mixing bowls
  • Measuring spoons and cups

Ingredients

  • 4 salmon fillets (about 6 oz each)
  • 2 tablespoons olive oil
  • Salt and pepper to taste
  • 1 cup fresh spinach, packed
  • 1 clove garlic, minced
  • 1 cup heavy cream
  • 1 tablespoon lemon juice

Directions

  1. Season salmon fillets with salt and pepper.
  2. Heat olive oil in a non-stick skillet over medium-high heat. Add salmon, skin-side down, and cook for 3-4 minutes. Flip and cook for another 2-3 minutes, until cooked through. Remove and set aside.
  3. In the same skillet, add garlic and sauté until fragrant. Add spinach and cook until wilted.
  4. Add heavy cream and lemon juice to the skillet, stirring continuously until the sauce thickens slightly.
  5. Transfer the sauce to a blender and blend until smooth. Return sauce to the skillet and heat gently.
  6. Serve salmon over rice or pasta and spoon the creamy spinach sauce over each fillet.

Recipe Notes

  • Substitute heavy cream with half-and-half for a lighter version.
  • For added flavor, sprinkle fresh dill over the finished dish.

Delightful Pear and Gorgonzola Flatbread Recipe Perfect for Any Occasion

Elegant Pear and Gorgonzola Flatbread: A Gourmet Delight

⚖️
Difficulty
Intermediate

⏲️
Prep Time
20 mins

🕒
Cook Time
15 mins

⏱️
Total Time
35 mins

🍽️
Servings
4

Experience a delightful blend of sweet and savory with this Elegant Pear and Gorgonzola Flatbread. Perfect for impressing guests or treating yourself to a gourmet meal, this flatbread features the succulent sweetness of ripe pears against the sharp tang of creamy gorgonzola. Golden, crispy edges give way to a tender crust, all topped with a touch of earthy arugula. Easy yet sophisticated, this recipe promises layers of flavor and texture, making it a standout dish for any gathering.

Serving up flavors that are rich, vibrant, and harmonized, this flatbread is a testament to culinary perfection, blending a delicate balance of sweet pears and salty cheese. The base is warm and crisp, providing a perfect canvas for the toppings, while the garnish adds a vibrant freshness that elevates each bite. The simplicity in preparation allows for maximum enjoyment with minimal fuss—ideal for both beginner chefs and seasoned cooks alike.

Prepare to dazzle your taste buds with its aromatic allure. As it bakes, the flatbread fills your kitchen with irresistible smells of sweet baked fruit mixed with melting cheese—a sure way to bring friends and family rushing to the table. Visually, it is a feast for the senses, with creamy whites and earth tones contrasting green arugula. Its straightforward assembly and modest equipment requirements make this dish a delight for both spontaneous dining and planned occasions.

Quick Recipe Highlights

  • Flavor Profile: Delight in the sweet, juicy pears perfectly complemented by tangy gorgonzola cheese. Each bite is a balanced symphony of flavors, enhanced by subtle undertones of olive oil.
  • Texture: Enjoy the satisfying crunch of the golden-baked flatbread contrasted with the creamy, soft gorgonzola and juicy, tender pears, creating a harmonious mouthfeel.
  • Aroma: The intoxicating scent of lightly toasted bread, combined with the warming perfume of pears and rich notes of melting cheese, fills the room.
  • Visual Appeal: A picturesque dish with vibrant greens, golden crust edges, and delicate slices of pear, creating an elegant presentation that is sure to captivate and entice.
  • Skill Level Needed: Suitable for intermediate cooks; requires basic skills such as slicing and baking, along with a sense for balancing flavors.
  • Special Equipment: A baking sheet and a quality knife are essential. A pizza stone can enhance the texture but is not required.

Recipe Overview

  • Difficulty Level: This flatbread requires some skill in balancing flavors and timing to prevent overcooking the delicate toppings, which makes it a rewarding project for avid home cooks.
  • Category: Perfect as an appetizer or light main dish, this flatbread can also be served as part of a brunch spread.
  • Cuisine: A fusion of Italian and modern American cuisines, this dish marries rustic European elements with a contemporary twist.
  • Cost: With gorgonzola and fresh produce, this recipe strays into the mid-range cost, offering a gourmet experience without breaking the bank.
  • Season: Best enjoyed in the fall when pears are at their peak, but its ingredients make it suitable for any season.
  • Occasion: Ideal for casual gatherings, holiday dinners, or as an elegant addition to a sophisticated wine night.

Why You’ll Love This Recipe

Indulge in the exquisite taste and texture of this elegant flatbread, where the sweetness of the juicy pears perfectly marries with the creamy tanginess of gorgonzola cheese. The crispy, golden flatbread serves as the ideal base, creating a delightful contrast that is as pleasurable to taste as it is to see. Topped with fresh arugula, each bite delivers a refreshing, peppery punch that adds another dimension to the dish.

The convenience of this recipe lies in its uncomplicated preparation. Requiring minimal kitchen equipment, it allows you to craft a restaurant-worthy dish in the comfort of your home. With a short cooking time, you can enjoy this masterpiece without the fuss or stress of lengthy cooking processes and instead focus on its rewarding flavors.

Nutritionally, this flatbread offers a balanced meal with a good mix of healthy fats and nutrients. The pears supply antioxidants and fiber, while the cheese adds a source of protein and calcium. The fresh arugula further enhances the nutrient profile with vitamins and minerals.

As a dish that is sophisticated yet achievable, this flatbread is an outstanding choice for social gatherings. It not only impresses guests handily but also facilitates enjoyable preparation with minimal stress, allowing you to engage and entertain while serving a delectable centerpiece.

This pear and gorgonzola flatbread is not only about luxury flavors but also practicality and affordability. With common ingredients easily found in most grocery stores, you can elevate your dining experience without stretching your budget, making it a perfect choice for those who appreciate good value and exceptional taste.

Historical Background and Cultural Significance

The origin of combining fruit and cheese traces back to ancient times when preserving techniques were limited, and natural pairings were commonplace for both flavor and preservation. In Italian cuisine, particularly, the juxtaposition of sweet and savory has been celebrated, creating harmonious dishes like this flatbread.

This flatbread highlights the cultural importance of pairing different tastes to create balanced dishes, a practice rooted deeply in historic culinary traditions. The harmonious blend of fruit and cheese is emblematic of European cuisine, particularly Italian, where such combinations have been honed over centuries.

Over time, recipes like this flatbread have evolved, merging traditional conceptual frameworks with modern dietary preferences and availability of global ingredients. The incorporation of diverse culinary influences highlights the adaptability and enduring appeal of such combinations.

In regions across the world, variations of this recipe have emerged, each bringing its unique twist. While some may swap pears for figs or apples, others might experiment with different cheeses, showcasing the versatility and regional adaptability of the flatbread concept.

Ingredient Deep Dive

Pears, often dubbed the “gift of the gods” in Greek mythology, play a crucial role in this recipe. With a naturally sweet flavor profile and juicy texture, pears introduce a welcome freshness and lightness. They are a great source of dietary fiber and vitamin C, making them both nutritious and delicious. Selecting ripe, firm pears with a subtle fragrance ensures optimum flavor and texture, while proper storage in a cool, dry place preserves their quality.

Gorgonzola cheese, hailing from Italy, marries beautifully with the pears, offering a creamy texture and sharp flavor. Its rich history dates back hundreds of years, cherished for its unique taste and versatility. Loaded with calcium and phosphorous, it’s beneficial for bone health. Always opt for high-quality gorgonzola with a tangy, but not overpowering aroma, and store it in the refrigerator wrapped in waxed paper.

Common Mistakes to Avoid

  • Overloading toppings: Excess can lead to soggy flatbread and uneven cooking. Balance is key for even heating and crispiness.
  • Underestimating cook time: A too-short bake time prevents the flatbread from developing a crispy base. Follow suggested timing for best results.
  • Using unripe pears: Ensure pears are ripe to get optimal sweetness and flavor.
  • Skimping on gorgonzola: A sufficient amount ensures balanced flavor; too little will make the dish feel one-dimensional.
  • Not pre-baking the flatbread: Do not skip pre-baking to achieve a firm base before layering with toppings.
  • Improper storage: Fresh ingredients require appropriate storage; use fresh pears and keep the gorgonzola refrigerated until use.
  • Ignoring seasoning: Simple salt and pepper elevate the flavors, enhancing each element distinctly.
  • Cooking at low temperature: Bake at recommended heat to ensure a crispy, well-cooked base and melted cheese.
  • Using cold ingredients: Let pears and cheese sit at room temperature before use for even cooking.
  • Nonspecific pear-to-cheese ratio: Maintain a balanced ratio to ensure harmony between sweet and savory flavors.

Essential Techniques

Pre-baking the flatbread is crucial to achieving a crispy crust. This foundational step sets a solid base and prevents sogginess from the juicy toppings. Ensure an even thickness to allow uniform cooking—your key to a perfect base texture.

Balancing flavors is an art in this dish; you want the sweetness of pears to complement but not overshadow the tang of gorgonzola. Taste as you go, adjusting quantities to maintain harmony. Visual cues, like the slight melting and bubbling of cheese, indicate readiness for removal from the oven.

Mastering ingredient placement will affect cooking consistency. Distribute pears and cheese evenly to ensure each bite delivers the intended complex flavors, avoiding overcrowding which can lead to undercooked toppings.

Pro Tips for Perfect Elegant Pear and Gorgonzola Flatbread

Select ripe, fragrant pears for the best sweetness and flavor profile. If unavailable, allow underripe pears to ripen at room temperature before use.

Use room temperature gorgonzola for easier spreading and even melting. This enhances flavor distribution across the flatbread.

Take advantage of a pizza stone if available for a crispier crust with consistent baking across the base.

Experiment with adding a light drizzle of balsamic glaze post-bake for an extra layer of flavor complexity.

Garnish with fresh herbs like thyme or rosemary to elevate aroma and presentation.

A sprinkle of nuts like walnuts or pecans adds crunch and complements the flavors.

Try cutting the flatbread into smaller pieces for appetizer servings, perfect for parties and gatherings.

Pair each slice with arugula for added freshness and presentation appeal, enhancing both flavor and texture.

Variations and Adaptations

For a regional twist, consider incorporating figs instead of pears for an Italian variation, lending a deeper, more robust sweetness to the dish. Seasonal adaptations can be made by using apples during the colder months, preserving the balance of fruit and cheese while introducing unique flavor nuances.

Dietary modifications are also possible—swap the traditional crust for a gluten-free option to accommodate dietary needs, or use plant-based cheese to make this dish vegan without compromising on texture or flavor.

Experimenting with flavor changes can yield delightful results. Try adding a thin layer of caramelized onions beneath the cheese for earthy sweetness, or drizzle with honey post-bake for an indulgent finish.

For texture modifications, introduce a scattering of crushed nuts for added crunch and contrast against the creamy cheese and tender fruit.

Elevate presentation with edible flowers or a dusting of finely chopped herbs, adding a splash of brightness that enhances the overall visual intrigue.

Serving and Presentation Guide

Master the art of plating this dish by arranging flatbread slices in a slight fan shape on a rustic wooden board, inviting guests to help themselves. Garnish with fresh arugula or herbs before serving for added color and freshness, elevating the flatbread’s aesthetic and appeal.

Traditional accompaniments, like a side salad or a light soup, intensify the dining experience, enhancing the meal’s sophistication. For modern serving suggestions, consider offering alongside a cheese and charcuterie board for an interactive and enticing appetizer.

Serve warm, but ensure the flatbread cools slightly to avoid topping sliding and to preserve its presentation integrity. Consider portion control tips for serving, like cutting into squares or strips, allowing for manageable, elegant bites.

Wine and Beverage Pairing

This flatbread pairs beautifully with a chilled glass of Chardonnay, whose fruity undertones accentuate the pears while balancing the cheese’s creaminess. Opt for a medium-bodied wine to complement rather than overpower the dish’s delicate flavors.

Alternatively, a non-alcoholic apple or pear cider enhances the flatbread’s fruity elements, providing a refreshing beverage choice without alcohol.

For a warm pair, freshly brewed white tea offers a clean finish, complementing the cheese’s tang and fruit sweetness while allowing the dish’s natural flavors to shine.

Maintain ideal beverage temperature to enhance your dining experience—keep wines chilled and teas appropriately warmed for maximum enjoyment.

Serve drinks in appropriate glassware, elevating the experience by matching presentation elegance with this delightful dish.

Storage and Shelf Life

Proper storage is key to maintaining the flatbread’s quality. Allow to cool before placing in an airtight container or wrapping in foil. Store in the refrigerator for up to three days for optimal freshness.

When storing, separate layers with parchment to prevent sticking. Reheat at a low temperature to crisp the base without overcooking the toppings, restoring texture and flavor.

Signs of spoilage, such as off-smells or visible mold, indicate that the flatbread should no longer be consumed. If freezing, ensure the flatbread is tightly wrapped in plastic and then in foil to prevent freezer burn, good for up to a month.

Make Ahead Strategies

Prepare the flatbread portions ahead by pre-baking the base and storing it separately from the toppings. Pear slices can be pre-cut and stored in a sealed container with a dash of lemon juice to retain color and prevent browning.

Assemble shortly before serving to maintain fresh and vibrant flavors; this prevents the fruit from sogging or the cheese from hardening. Reheat pre-baked bases in a warm oven to restore crispiness.

Prepare arugula and optional garnishes just prior to serving to ensure freshness and vibrant presentation. If needed, extra cheese can be added fresh from the oven to enhance melty texture.

Scaling Instructions

To halve the recipe, simply reduce each ingredient by half and maintain balance across flavors. Consider using smaller kitchen tools and adjusting equipment accordingly.

For larger groups, doubling or tripling the recipe is straightforward, but be mindful of oven space—utilize multiple baking sheets to ensure even cooking.

Adjust timing by watching visual cues, as increased quantities may require slightly longer baking, while ensuring crispness and thorough melting.

Confirm availability of ingredients across scales and plan storage for leftovers by pre-portioning before refrigeration or freezing.

Nutritional Deep Dive

Explore the nutritional benefits more deeply knowing that this flatbread offers a balanced meal profile. Comprising a moderate serving of complex carbohydrates, healthy fats, and protein, it aligns well with various dietary needs.

Pears contribute fiber, vitamin C, and antioxidants, promoting digestion and immune health, while gorgonzola delivers calcium and essential nutrients supporting bone and dental health.

With a moderation-focused portion approach, this flatbread can fit into weight management plans by providing satisfaction without excess calories, allowing for indulgence while maintaining health goals.

Dietary Adaptations

For a gluten-free version, choose a gluten-free flatbread base, easily available in specialty and many mainstream grocery outlets nowadays.

Adapting to a dairy-free diet is achievable with plant-based cheese options that melt well, offering creamy textures akin to traditional cheese.

Opt for a vegan adaptation by employing plant-based cheese and crust, aligning with plant-based diets without compromising taste or texture.

Low-carb followers can focus on alternative flatbread bases made from almond flour or other low-carb substitutes, while maintaining the toppings’ integrity.

For keto enthusiasts, this dish can be adapted by balancing macronutrient requirements with a low-carb crust, providing a nutrient-dense meal option.

Paleo and Low-FODMAP followers may also find suitable modifications by selecting compliant cheeses and bases, ensuring dietary compatibility.

Troubleshooting Guide

For texture issues such as sogginess, consider pre-baking the crust longer than usual, ensuring it forms a firm enough base for moist toppings.

If flavors feel unbalanced, adjust by adding a bit more gorgonzola or seasoning to elevate the savory profile against the sweet pear backdrop.

Temperature problems can be remedied by adjusting your oven’s calibration—ensure it’s precise to prevent uneven baking and achieve desired results.

Equipment challenges, such as lack of a pizza stone, can be alleviated by closely monitoring bake time, achieving a crispy crust on a standard sheet.

Ingredient substitutions, like swapping other fruits for pears, should be tested on small scales first to ensure they meld well with existing flavors.

Timing concerns, such as completion of other dishes concurrently, can be managed by preparing ingredients in advance and aligning bake times.

Recipe Success Stories

This Elegant Pear and Gorgonzola Flatbread has been met with resounding enthusiasm across community forums and social media platforms. Readers have shared vibrant photographs capturing the dish’s innate beauty, with expectant hosts crafting it for family gatherings and intimate dinner parties alike.

Creative adaptions, like swapping in seasonal fruits, have been celebrated, evidencing the recipe’s adaptability and appeal across diverse tastes. Feedback highlights successful modifications and contributions from users, showcasing a collective passion for culinary exploration.

Readers’ anecdotes about positive reactions from guests who enjoyed nuanced flavors and sophisticated presentation affirm the recipe’s success, encouraging others to try it. The recipe has inspired novices and seasoned cooks, inciting further culinary innovations and connections across diverse communities.

Frequently Asked Questions

Can I use a different type of cheese instead of gorgonzola?
Absolutely! While gorgonzola offers a distinctive taste, you can try other blue cheeses or a soft goat cheese for a milder flavor profile.

How can I prevent the pears from browning before baking?
A light coating of lemon juice on the sliced pears will help retain their vibrant color until you’re ready to assemble the flatbread.

What should I serve alongside this flatbread?
Pair it with a crisp green salad or a light soup—these options complement the flatbread without overwhelming its flavors.

Is it okay to prepare the flatbread in advance?
Yes, you can pre-bake the flatbread and store it separately. Assemble with fresh toppings just before serving for optimal freshness.

Can this recipe be made on a stovetop instead of an oven?
Baking offers the best results; however, a stovetop method with a lid can partly mimic this by cooking the toppings while maintaining some base crispiness.

What type of pears should I use?
Use firm, ripe pears like Bartlett or Anjou for their balance of sweetness and texture when baked, enhancing both flavor and stability on the flatbread.

How can I make this flatbread spicier?
Add a pinch of crushed red pepper flakes over the cheese before baking or a drizzle of hot honey post-bake for a sweet-heat combination.

What should I do if my flatbread comes out soggy?
Ensure adequate pre-baking of the crust and maintain balance in topping quantities, adjusting oven temperature settings if needed for a crisper outcome.

How do I know if the flatbread is done baking?
Look for visual cues such as bubbling cheese, golden edges, and a firm base—these indicate readiness for serving after cooling slightly.

Are there any substitutions if I don’t have arugula?
Baby spinach or watercress can work as alternatives, maintaining the peppery punch while offering their unique textures and flavors.

How long will leftovers keep in the fridge?
Properly stored in an airtight container, leftovers can last up to three days. Reheat in the oven for best texture retention.

Additional Resources

Delve deeper into culinary mastery with related recipes like Fig and Prosciutto Flatbread, expanding your repertoire of sweet-salty combinations. Explore technique guides on artisanal cheese pairings to maximize flavor impact in future culinary adventures.

Ingredient information on seasonal fruits can inspire variations, while equipment recommendations, like choosing the best pizza stone, help hone your kitchen setup for optimal results.

Embrace seasonal variations, adapting recipes to local produce availability and freshness, ensuring year-round enjoyment of delightful, gourmet flatbreads.

Join the Conversation

Follow along on social media for additional tips and fan-shared adaptations of the Elegant Pear and Gorgonzola Flatbread. Engage with others by sharing your cooking experiences and variations for community feedback and inspiration.

Contribute to recipe reviews online, offering insights into personal modifications and outcomes, encouraging fellow food enthusiasts to try the recipe.

Capture stunning photos of your finished flatbread creations, partaking in photography challenges within culinary communities, and sharing your results to inspire others.

Join forums and discussions related to creative cooking, helping forge connections and exchange innovative ideas in the culinary arts, fostering a shared passion for great taste and presentation.

The Recipe

Elegant Pear and Gorgonzola Flatbread

Serves: 4

Prep Time: 20 mins

Cook Time: 15 mins

Total Time: 35 mins

Kitchen Equipment Needed

  • Baking sheet
  • Knife
  • Cutting board
  • Oven
  • Rolling pin (optional)

Ingredients

  • 1 prepared flatbread crust
  • 2 ripe pears, thinly sliced
  • 1 cup crumbled gorgonzola cheese
  • 1 tablespoon olive oil
  • 1 cup fresh arugula
  • Salt and freshly ground black pepper to taste

Directions

  1. Preheat the oven to 400°F (200°C).
  2. Place the flatbread crust on a baking sheet.
  3. Brush lightly with olive oil.
  4. Arrange pear slices evenly over the crust, followed by crumbled gorgonzola cheese.
  5. Season with salt and pepper.
  6. Bake for 12-15 minutes, until the cheese is melted and the crust is golden brown.
  7. Remove from oven and allow to cool slightly.
  8. Top with fresh arugula just before serving.

Recipe Notes

  • For additional flavor, drizzle balsamic glaze over the flatbread before serving.
  • For added crunch, top with crushed walnuts or pecans.
  • Feel free to experiment with different types of cheese such as blue cheese or Brie.

Savor Hearty French Onion Short Rib Soup with Gruyère Toast

French Onion Short Rib Soup with Gruyère Toast: A Gourmet Delight

⚖️
Difficulty
Medium

⏲️
Prep Time
30 mins

🕒
Cook Time
4 hrs

⏱️
Total Time
4 hrs 30 mins

🍽️
Servings
6

Immerse yourself in the hearty and rich flavors of French Onion Short Rib Soup with Gruyère Toast. This exquisite French delicacy combines tender short ribs with caramelized onions, layered in a broth that captures the essence of comfort food. The soup is topped with perfectly toasted slices of bread crusted with melted Gruyère cheese, adding a delightful crunch to every spoonful. Ideal for a winter evening, this dish will transport you to the cozy bistros of France.

Indulge your senses with the comforting aromas of rich beef broth and sweet onions combined with the nutty, caramelized tang of Gruyère cheese. This recipe brings together the succulent texture of braised short ribs and the crisp bite of Gruyère toast. Whether you’re preparing a meal for a special occasion or simply elevating a family dinner, this French Onion Short Rib Soup promises a gourmet experience.

Quick Recipe Highlights

  • Flavor Profile: Deep and savory, with the robust beef stock and well-caramelized onions creating a harmonious base, complemented by the nutty notes of Gruyère cheese.
  • Texture: A delightful contrast of tender short ribs, silky broth, and crunchy toasted bread on top, making each bite a pleasure.
  • Aroma: Infused with the aromatic essence of freshly caramelized onions and herbs that fill the kitchen with a pleasant warmth.
  • Visual Appeal: The golden brown crust of Gruyère-sprinkled toast against the rich soup creates an inviting and rustic presentation.
  • Skill Level Needed: This recipe requires patience and basic cooking skills to master caramelization and slow cooking techniques.
  • Special Equipment: A heavy-bottomed pot for even heat distribution and a broiler for perfectly crisped toast.

Recipe Overview

  • Difficulty Level: This recipe is considered medium due to the need for slow cooking and the handling of multiple components like braising ribs and making toasts.
  • Category: Perfect as a main course, especially during colder months when a hearty meal is appreciated.
  • Cuisine: Rooted in classic French culinary tradition, offering a rustic yet sophisticated dining experience.
  • Cost: With short ribs and Gruyère, it’s a mid-range dish cost-wise, yet worthwhile for its flavor depth and appeal.
  • Season: Best enjoyed in fall and winter, as the warm and inviting dish pairs perfectly with cooler weather.
  • Occasion: Suitable for family dinners, dinner parties, or holiday feasts where elegance in comfort food is desired.

Why You’ll Love This Recipe


Enjoy the sumptuous taste and texture appeal of this French Onion Short Rib Soup with Gruyère Toast. Each spoonful delivers a medley of deeply savory flavors, where the broth’s richness mingles beautifully with the luscious strands of slow-cooked short rib. The Gruyère toast adds a unique crunch, making every bite a delightful experience for your palate.

Convenience and ease take center stage as the slow-cooking process allows flavors to meld effortlessly, giving you ample time to attend to other aspects of dinner preparation. You’ll find that this recipe, while seemingly elaborate, relies on straightforward steps that yield gourmet results without demanding constant attention in the kitchen.

This dish provides nutritional advantages, featuring protein-rich short ribs and the beneficial compounds present in onions, which are known for their immune-supporting properties. The cheese provides a good source of calcium, making this soup not only flavorful but also nutritionally sound for the whole family.

Socially and for entertaining, this soup is a conversation starter, inspiring admiration with its complex flavors and sophisticated presentation. It’s an excellent choice for impressing guests, offering both visual and culinary appeal that sticks long after the meal is finished.

In terms of cost-effectiveness and accessibility, while the ingredients might seem upscale, they are widely available and offer the luxury of French cuisine at a fraction of the dining out cost. Preparing this recipe at home is both fulfilling and economical, making gourmet dining accessible.

Historical Background and Cultural Significance


Tracing its origin back to the humble beginnings of French provincial cooking, this soup embodies the transformation of simple kitchen staples into a delightful fare. Historically, onion soups were peasant dishes due to the inexpensive and perennial availability of onions. The fusion with decadent short ribs elevates this soup beyond its modest roots, creating a dish worthy of any gourmet menu.

Within French culinary tradition, this recipe holds cultural importance as it bridges rustic culinary practices with the grandeur of French dining. It combines hearty meats with simple broths, demonstrating how French cuisine integrates complexity in simplicity, appealing to both common sensibilities and refined tastes.

Over time, the recipe evolved from simple onion broths served in French taverns to become a staple of upscale dining, especially in bistros across France. Each region might slightly alter the meat or cheeses, but the core remains a testament to robust flavors and culinary finesse.

Regional variations often incorporate local ingredients into the dish, such as diverse wine selections for deglazing or native cheese types on the toast. This adds a personal touch to the timeless classic, allowing every locale to claim its rendition as part of its culinary heritage.

Ingredient Deep Dive


Starting with the short ribs, they are an essential component, transforming the soup into a hearty meal. In French cuisine, beef is a staple protein, symbolizing strength and substance. Nutritionally, short ribs offer a rich source of iron and proteins essential for energy production and muscle maintenance, while contributing unparalleled depth of flavor when slow-cooked.

When selecting short ribs, look for those with a good marbling of fat, as this ensures tenderness and flavor. Store them refrigerated until use, ensuring they are well-wrapped to avoid exposure to air, which can dry them out. If short ribs aren’t accessible, brisket can be a substitute for a similar taste profile.

Onions are another standout ingredient, steeped in culinary tradition and nutrition-rich with vitamin C and dietary fiber. Historical folklore often links onions with strength and endurance, empowering even the simplest meals. Their caramelization is a cornerstone technique that brings sweetness and complexity to the soup, drawing out both taste and aroma.

Choose onions that are firm and heavy for their size, storing them in a cool, dry place to prolong their shelf life. In case of substitutions, consider using shallots or leeks for a milder flavor, adding an aromatic depth without overpowering other components of the dish.

Common Mistakes to Avoid

  • Undercaramelizing the onions can impair the depth of the soup, as this step creates the soup’s foundational sweetness and color. Allow ample time for the process to ensure proper caramelization.
  • Failing to deglaze the pan might lead to missed flavor opportunities. Use a splash of wine or broth to lift the browned bits from the pan, enriching the dish with developed flavors.
  • Overcrowding the pot with ribs can prevent adequate browning. Work in batches if needed to ensure each piece is well-browned, contributing to a richer-tasting broth.
  • Skipping the cheese toast or using a different cheese might alter the expected taste and texture. Gruyère is chosen for its melting properties and flavor; substitutions should aim to match these characteristics.
  • Not allowing the soup to simmer long enough can mean missing out on depth and richness. Patience is essential for flavors to mature and meld together.
  • Using low-quality broth can result in a flat-tasting soup. Opt for homemade or high-quality store-bought options to underpin the entire dish with robust flavors.
  • Rushing the toasting process could leave the bread soggy. Ensure a hot broiler for a crispy and golden toast that complements the soup’s texture.
  • Using the wrong salt can overwhelm the flavors. Stick to fine sea salt for seasoning, allowing gradual flavor development without overpowering subtle notes.
  • Not tasting as you cook risks imbalances in flavor. Adjust seasonings gradually to suit personal preferences and ingredients.
  • Neglecting proper storage can spoil leftover soup. Allow it to fully cool before refrigerating in airtight containers to retain freshness and flavor.

Essential Techniques


Mastering the caramelization of onions is crucial for developing the soup’s foundational flavor. This technique requires patience as you slowly cook out the moisture, allowing the natural sugars to deepen in color and taste. Avoid high heat, which can burn the onions prematurely, and watch for a uniform golden-brown hue as a cue for success.

Braising the short ribs is another key technique, transforming tough cuts into tender morsels. This process requires searing the meat to develop flavors followed by slow cooking in liquid. The goal is a melt-in-your-mouth texture, achieved by maintaining a gentle simmer and checking for doneness.

Perfecting the cheese toast involves accurately broiling bread slices topped with Gruyère. The goal is achieving a crisp exterior while allowing the cheese to melt and bubble – a visual cue for readiness. Ensure the toast doesn’t sit too close to the broiler, avoiding charring before the cheese fully melts.

Pro Tips for Perfect French Onion Short Rib Soup


For exceptional caramelized onions, add a pinch of sugar midway through cooking to enhance the natural sweetness and ensure even browning without quicker charring.

Emphasis on using a well-marbled cut for short ribs ensures tenderness and flavor. Searing initially locks in the juices, creating a richer broth outcome.

Homemade broth takes this dish from great to fantastic, infusing additional depths of flavor absent in store-bought varieties.

Ensure that Gruyère is freshly grated to enjoy optimum meltability and stretch on your cheese toasts, contributing both flavor and visual delight.

Use high-quality bread, such as a baguette or sourdough, for toasting. Its firmness holds up to the broth while offering a satisfying bite and preventing sogginess too quickly.

Integrate herbs like thyme or bay leaves when slow-cooking to infuse the broth with additional aromatic notes, enhancing complexity.

When serving, ladle a balanced mix of ingredients into bowls to distribute short ribs and onions evenly, ensuring uniform taste in every serving.

For freezing sections, consider leaving the bread aside until serving time, ensuring the toast remains fresh and crisp upon reheating.

Variations and Adaptations


Regional variations can invoke local ingredients or cheeses to add unique touches. For instance, a Swiss influence might prefer Emmental cheese, offering a nutty flavor variant.

Seasonal adaptations allow for warmer spices or vegetables during harsher winters; experiment by adding a touch of nutmeg or root vegetables for an autumnal twist.

Dietary modifications to reduce calorie intake might involve leaner cuts or substituting cheese with a lower-fat version without drastic taste changes for health-conscious cooks.

Flavor variations are achievable by altering the choice of wine or broth, such as using a rich red wine for a deeper base or vegetable broth for a lighter version.

Adjust texture by including finely diced vegetables like celery or carrots for additional body and fiber within the broth, catering to those preferring a more substantial soup.

Presentation alternatives invite creativity with grilled cheese croutons or a drizzle of truffle oil upon serving, adding flair and modern appeal to the classic dish.

Serving and Presentation Guide


Employ elegant soup bowls for serving, with a side plate specifically for the toast if preferred separately, enhancing the dining experience visually and practically.

Garnishing ideas could include a sprinkle of chopped fresh parsley or thyme on top of the cheese toast, enlivening the colors and adding a fresh aroma to each serving.

Traditional accompaniments like a rustic salad or a simple vinaigrette serve as harmonious side options, balancing the richness of the soup.

Modern serving suggestions may incorporate serving the soup in individual bread bowls, transforming the container into a flavorful part of the meal.

Temperature considerations focus on serving the soup immediately upon preparation to maintain the optimal array of textures, from hot broth to crisp toast.

Portion control tips ensure each guest receives adequate servings, focusing on even distribution of short ribs and onions, ensuring balance across presentation.

Wine and Beverage Pairing


For wine pairings, a robust red such as Bordeaux or Côtes du Rhône complements the rich, savory flavors of the soup, enhancing the meal’s depth.

Non-alcoholic alternatives like hearty apple cider resonate well, highlighting the sweetness and warming nature of the dish without overpowering the primary flavors.

Consider light coffee or herbal teas for after-dinner pairings, aligning the meal’s comforting theme to finish on a warm, soothing note.

Temperature considerations emphasize room temperature servings for wines, ensuring the full highlight of accompanying notes with the soup’s savory elements.

Opt for decanters for wine serving, bringing both practical aeration benefits and a touch of elegance to the dining experience, enriching conversation and taste.

Storage and Shelf Life


Store the soup in the refrigerator within airtight containers, where it keeps well for 3-4 days, allowing flavors to deepen while retaining freshness.

Temperature requirements for storage align at a stable 4°C to prevent spoilage, ensuring quality preservation for leftover enjoyment even days later.

Container recommendations include glass or BPA-free plastic to avoid any flavor leaching, while ensuring secure seals to maintain aroma and taste.

Be vigilant for signs of spoilage, such as discoloration, off-odors, or the presence of mold, signaling potential issues if detected after the recommended timeframe.

Reheating instructions involve slow warming on the stove, aiming to preserve textures without quick overheating that could break down components adversely.

Freezing guidelines suggest doing so without bread, preventing texture loss, and ensuring proper separation for ease of individual portion reheating when desired.

Make Ahead Strategies


Plan a prep timeline in advance to coincide with leisurely periods, managing your time over multiple days to prep components leisurely and reduce stress.

Storing ingredients between prep moments alleviates pressure, allowing elements like the broth or onions to rest until final assembly before serving.

Quality impacts can be assessed by considering how reheating or extended storage influence flavors, focusing on ensuring consistency remains in later servings.

Ensure assembly tips are followed for final touches, like freshly broiling the cheese toast just before serving, maintaining freshness across the presentation.

Reheating guidelines offer brief mentions of stove or oven reheating methods, preserving the soup’s integrity from fridge or freezer to final service.

For fresh elements, like herbs or cheese garnish, add immediate to serving time, accentuating visuals and flavors when plates reach the table.

Scaling Instructions


Halving the recipe ensures the adaptation handles with equal flavor emphasis, adjusting cooking times to reflect smaller amounts efficiently.

Doubling or tripling needs focus on equipment adjustments, ensuring larger pots or additional serving dishes accommodate increased volumes comfortably.

Modify timings to reflect adjusted quantities, keeping an eye on potential increased simmer time if scaling up, especially for the ribs to achieve desired tenderness.

Storage considerations offer thoughts on distribution within various-sized containers for leftovers, allowing easier handling and portioning when accessed later.

Nutritional Deep Dive


Macro breakdown highlights the balance between protein and healthy fats from short ribs, with carbs naturally integrated through onions and optional bread.

Micronutrient analysis reveals insights about essential vitamins present in alliums like onions, alongside calcium-rich elements in cheese, supporting holistic dietary goals.

Recognize health benefits from lean proteins and herbal elements, holding emphasis in robust bone and immune support through comprehensive nutrient presence.

Dietary considerations focus on ensuring balanced portions promote satisfaction without excess, aligning with health-focused lifestyle commitments individuals choose.

Portion analysis ensures servings remain within reasonable calorie limits, leveraging healthful alignments around balanced meals, keeping diet-conscious diners appeased.

Use weight management tips to encourage sensible serving sizes, offering guidance that allows full enjoyment without overeating beyond hunger gratification.

Dietary Adaptations


To make the recipe gluten-free, ensure the use of gluten-free bread for the toast, maintaining firm textures conducive to toasting without compromising dietary needs.

Dairy-free adaptations can involve subbing Gruyère with vegan cheese alternatives, focusing on those that mimic meltability while retaining creamy, nutty taste.

Vegan options require plant-based substitutes entirely, using seitan or mushrooms for rib replacement and nutritional yeast for similar cheesy seasoning profiles.

For low-carb needs, opt to skip or minimize bread inclusion, offering a toppings-free option focused on protein-rich elements and hearty vegetable components.

Keto focus invites utilizing higher-fat cuts or cheeses for enhanced satiety and richness, mindful of ratios amongst fat, carbs, and proteins in diets.

Following Paleo principles, consider natural vegetable broth bases over store-bought and utilize simple bread alternatives, keeping aligned within guidelines.

Low-FODMAP simplifies incorporating allowable alliums like green onions or chives with selective vegetable substitutes to maintain taste and compatibility equally.

Other specific diet approaches see the adaptation of ingredients to suitable replacements, mindful of individual choices surrounding food sensitivities or preferences.

Troubleshooting Guide


Address texture issues by ensuring longer cooking times and proper braising liquids, achieving desired tenderness and comfort without risk of dryness or toughness.

For flavor balance, always taste and adjust uniformly as it cooks, preventing excessive saltiness or pronounced bitterness by adding elements like sugar or vinegar.

Temperature problems require consistent heat management, particularly during caramelization or simmering, to maintain ideal environmental factors throughout prep.

Resolve equipment challenges by utilizing appropriately sized cookware. Heavy pots ensure even heating, while broilers emphasize controlled toasting, alleviating issues.

Ingredient substitutions benefit from thoughtful selections that preserve balance. Veggie swaps should match cooking times, while cheese alternatives seek similar consistency.

Timing concerns should reflect realistic timeframes that allow critical reductions, preventing rush-induced errors or missteps, yielding subpar results.

Recipe Success Stories


A story of community feedback highlights praises where the hearty yet sophisticated blend delighted family gatherings, becoming a go-to comfort meal.

Exploration of variations sees reader adaptation stories where local twist ingredients brought new, personalized tastes to regional interpretations, sharing stunning outcomes.

Adaptation efforts shared by readers underscore innovations, like homemade stock inclusions or elevated spices, bringing diversity across bowls that celebrate creativity.

Reader suggestions encourage experimentation with herbs or wine choices, unveiling layers of varying flavors while introducing playful spins on classics fans adore.

Photography tips from community engagement suggest focusing on presentation angles or accentuations of texture, ensuring visually compelling representations that captivate.

Frequently Asked Questions

Q: Can the short ribs be substituted with another cut of meat?

A: Yes, brisket or oxtail can be excellent alternatives while still providing that rich, extensive beef flavor. Ensure thorough cooking for the best tenderness.

Q: Is it possible to prepare this dish vegetarian?

A: Absolutely, using vegetable broth and replacing short ribs with hearty mushrooms like portobellos can capture the essence in a vegetarian form.

Q: How long can leftovers be stored?

A: Properly refrigerated, the soup stays fresh for up to four days. Just ensure full reheat above serving temperatures to maintain safety and flavor.

Q: What is the best kind of bread for toasting?

A: Opt for robust bread varieties like sourdough, or a well-structured French baguette for their ability to handle heat without collapsing under toppings.

Q: How can I ensure my onions caramelize properly?

A: Take time and consistently stir over medium heat, allowing full moisture evaporation over gradual browning. Patience yields the best caramelization.

Q: Can this dish be made without wine?

A: Absolutely, substitute with additional broth mixed with a splash of vinegar for acidity, or leave it out entirely for a milder broth flavor.

Q: Is it necessary to use Gruyère, or can I use another cheese?

A: While Gruyère is traditional for its melt and flavor, Swiss or a sharp aged cheddar also works in retaining similar texture and taste dynamics.

Q: What’s the best wine to pair with this soup?

A: A full-bodied red like Merlot complements the beefiness of the short ribs beautifully, enhancing the experience with its smooth tannins.

Q: Can I freeze the soup with bread?

A: It’s not recommended as bread tends to lose texture upon thawing. Store separately and add the toast fresh when serving for best results.

Q: What are signs of spoilage in leftover soup?

A: Unusual smells, discoloration, or any visible molds indicate spoilage. When in doubt, discard and enjoy these comforting flavors with a fresh batch.

Additional Resources


Explore related recipes such as traditional French Onion Soup or slow-cooked braises, combining histories or variations in culinary understanding.

Technique guides offer detailed insights into caramelization or slow cooking principles, ensuring mastery across fundamental aspects impacting kitchen results.

Ingredient information highlights nutritional content, origins, and synergy between main elements, guiding culinary choices towards informed applications.

Recommendations for equipment ensure success, from choice pots promoting even heat to sharpening methods for tools ensuring prompt and precise work.

Seasonal variations suggest embracing local flavors through various interpretations, yielding flavors uniquely influenced by climate or produce availability across regions.

Join the Conversation


Share your creations on social media, engaging with an active cooking community that celebrates unique takes, encouraging collaborative and expansive culinary journeys.

Tips for capturing culinary creations involve lighting or plating, enhancing visual storytelling through thoughtful composition approaching food photography.

Embrace recipe reviews that delve into step-by-step explorations, presenting the French Onion Short Rib Soup’s evolving charm through dedicated practice.

Welcome community engagement through diverse feedback or story shares, celebrating kitchen successes while enhancing the richness through varied insights.

Nurture recipe variations by sharing custom compositions, fostering imagination amongst culinary enthusiasts eager to celebrate diversity of flavor and texture.

The Recipe

French Onion Short Rib Soup with Gruyère Toast

Serves: 6

Prep Time: 30 mins

Cook Time: 4 hrs

Total Time: 4 hrs 30 mins

Kitchen Equipment Needed

  • Heavy-bottomed pot
  • Knife and chopping board
  • Broiler or oven
  • Wooden spoon
  • Ladle

Ingredients

  • 2 tablespoons olive oil
  • 2 pounds beef short ribs
  • 4 large onions, thinly sliced
  • 4 cloves garlic, minced
  • 2 quarts beef broth
  • 1 cup dry white wine
  • 2 tablespoons flour
  • Fresh thyme sprigs
  • Salt and pepper, to taste
  • 6 slices of crusty bread
  • 1 cup grated Gruyère cheese

Directions

  1. Heat olive oil in a heavy-bottomed pot over medium-high heat. Sear the short ribs on all sides until browned, then remove and set aside.
  2. In the same pot, reduce heat to medium and add onions, cooking until deeply caramelized, about 30-40 minutes.
  3. Add garlic, cooking until fragrant. Stir in flour, mixing until the onions are well-coated.
  4. Deglaze with white wine, scraping any brown bits from the bottom of the pot. Allow to reduce slightly.
  5. Return short ribs to the pot. Add beef broth and thyme sprigs. Season with salt and pepper.
  6. Bring to a boil, then reduce heat to low, cover, and let simmer for approximately 3-4 hours, or until ribs are tender.
  7. Preheat the broiler. Place bread slices on a baking sheet, top with Gruyère cheese, and broil until cheese is melted and bubbly.
  8. Serve soup hot, topped with a slice of Gruyère toast.

Recipe Notes

  • For a deeper flavor, add a splash of balsamic vinegar before serving.
  • Extra broth can be stored and used for future soups or stews.

Delicious Beef Stroganoff with Egg Noodles for Hearty Dinners

Beef Stroganoff with Egg Noodles: A Classic Comfort Dish

⚖️
Difficulty
Medium

⏲️
Prep Time
15 mins

🕒
Cook Time
30 mins

⏱️
Total Time
45 mins

🍽️
Servings
4

Few dishes bring about the warmth of home like a serving of Beef Stroganoff with Egg Noodles. This recipe combines tender strips of beef, enveloped in a rich and creamy sauce, with hearty egg noodles to create the ultimate comfort food experience. As the tantalizing aroma wafts through your kitchen, you’ll find yourself anticipating each savory bite of this delectable dish. Whether you are preparing it for a weeknight dinner or a special gathering, beef stroganoff never fails to impress with its harmonious blend of flavors and textures.

The crowning glory of this recipe is its luscious sauce, masterfully balanced between the earthiness of mushrooms and the tangy depth of sour cream. A sprinkle of fresh parsley enhances its appeal both visually and on the palate. Not to be outdone, the perfectly cooked egg noodles serve as the ideal bed to soak up every drop of that delicious sauce. Even the most discerning culinary aficionado will declare this beef stroganoff a masterpiece after just one bite. Experience classic comfort with this time-honored recipe and let its savory taste wrap you in nostalgia.

Quick Recipe Highlights

  • Flavor Profile: This Beef Stroganoff delivers a rich and savory taste, accented with hints of saltiness and subtle sweetness from caramelized onions.
  • Texture: Tender strips of beef complement the creamy sauce, while the egg noodles provide a perfect al dente bite.
  • Aroma: Earthy notes from mushrooms and beef meld with the tang of sour cream for an inviting aroma.
  • Visual Appeal: The creamy gravy glistens over beef and noodles, with a garnish of fresh parsley adding a bright pop of color.
  • Skill Level Needed: Intermediate cooking skills are beneficial to master the perfect sear on the beef and balance the sauce’s flavors.
  • Special Equipment: A large skillet or a Dutch oven is essential for evenly cooking the beef and building flavors in the sauce.

Recipe Overview

  • Difficulty Level: This recipe is rated medium due to the need for proper timing when browning beef and deglazing the pan effectively.
  • Category: Typically categorized as a main dish, perfect for lunch or dinner.
  • Cuisine: A classic example of Russian cuisine that incorporates French culinary techniques.
  • Cost: Reasonably priced, with majority of ingredients being pantry staples or moderately priced meats like sirloin or chuck.
  • Season: Best enjoyed in cooler months when its rich flavors provide warming comfort.
  • Occasion: Ideal for family dinners, gatherings, and special occasions where comfort food is appreciated.

Why You’ll Love This Recipe


The taste and texture of Beef Stroganoff with Egg Noodles is a delightful symphony of flavors that present a rich, creamy profile with savory beef, earthy mushrooms, and perfectly cooked noodles. Each bite provides a comforting mouthfeel, elevating the dining experience from ordinary to extraordinary. The convenience of this recipe is undeniable; with straightforward preparation steps, it can be whipped up with ease even on busy weeknights. The simple yet indulgent ingredients make this dish a family favorite without sacrificing precious time in the kitchen.

Nutritionally, Beef Stroganoff offers a balance of protein from beef, carbohydrates from noodles, and essential vitamins sourced from fresh components like mushrooms and onions. The social aspect of sharing such a beloved dish enhances its value, bringing loved ones together around the table. Cost-effectiveness further seals its appeal, as the use of everyday ingredients keeps expenses in check while still offering an elevated dining experience. Embracing this recipe not only shows culinary prowess but also brings timeless tradition to your very own dinner table.

Historical Background and Cultural Significance


The story of Beef Stroganoff dates back to the 19th century in Russia, where it is said to have been created by a chef for the affluent Stroganoff family. This dish combines Russian and French techniques, representing a culinary blend that was trendy among Russian nobility at the time. Cultural importance lies not only in its aristocratic roots but also in its enduring presence in global cuisine—adopted and adapted by cultures worldwide.

As the Beef Stroganoff recipe evolved, it underwent variations reflective of regional flavors and available ingredients. In America, for instance, noodles were commonly incorporated during wartime, offering a cost-efficient way to stretch meals. In turn, these adaptations have made beef stroganoff a versatile dish boasting a variety of forms—each adding a unique twist to the traditional Russian recipe. Across generations, the dish has been kept alive, proving not only its adaptability but also its timeless allure among home cooks and professional chefs alike.

Ingredient Deep Dive


Beef: Historically, beef has been a prestigious ingredient in Russian cuisine, seen in dishes meant for aristocratic tables. Its versatility allows for browning and caramelization, providing deep flavors to the stroganoff sauce. From a nutritional standpoint, beef offers high-quality protein, iron, and several B vitamins. When selecting beef for stroganoff, opt for tender cuts like sirloin or ribeye. Store beef in the refrigerator and use within a couple of days, while keeping it in an airtight container ensures freshness.

Mushrooms: Mushrooms add an earthy depth to this sauce, and they have long held cultural significance in culinary traditions as a prized ingredient. Nutritionally, they are low in calories but packed with antioxidants and vitamin D. Choose firm mushrooms without blemishes or spots. Store them in a paper bag in the refrigerator to extend their life, ensuring moisture doesn’t spoil them. For a twist, substitute with portobello or shiitake mushrooms to enhance flavors.

Common Mistakes to Avoid

  • Overcooking the beef: This leads to tough, chewy meat. Sear quickly over high heat instead.
  • Skipping the deglazing step: Omitting this robs the sauce of depth. Scrape those flavorful bits from the pan!
  • Using low-fat sour cream: This can cause the sauce to separate. Opt for full-fat for a smoother consistency.
  • Missing mushroom caramelization: Ensure mushrooms are brown before adding liquids for maximum flavor.
  • Incorrect noodle cooking: Overboiled noodles become mushy. Cook until just al dente for best results.
  • Adding cold ingredients: Allow them to come to room temperature for even cooking.
  • Neglecting season adjustments: Taste often and anchor flavors with salt and pepper as needed.
  • Rushing the sauce: Give time to simmer and thicken, letting flavors meld beautifully.

Essential Techniques


Searing Beef: Proper searing locks in juices, creating a flavorful and tender base. Ensure a hot pan, dry meat, and avoid crowding to achieve perfect caramelization. Watch for a well-browned crust before removing—the hallmark of adeptly seared beef.

Deglazing: A technique involving adding liquid to a hot pan to collect browned bits, enriching the sauce. Use wine, broth, or water, scraping to incorporate. Success is seen in a reduced, flavorful liquid free of stuck-on residues.

Sauce Thickening: For a creamy texture, combine ingredients at a gentle simmer, allowing natural thickening. Stir regularly, avoiding high heat to prevent curdling. The sauce is ready when it coats the back of a spoon smoothly.

Pro Tips for Perfect Beef Stroganoff with Egg Noodles


Use marbled beef: The fat content ensures tender, flavorful results. Opt for cuts like ribeye or sirloin.
Pat beef dry: Moisture inhibits browning, so make sure the surface is free of excess water before cooking.
Balance sauce: A quick squeeze of lemon juice at the end can brighten and balance flavors, elevating the dish.
Rest cooked beef: Allow beef to rest before slicing to retain juices and maximize tenderness.
Layer flavors: Build complexity by cooking onions until translucent and mushrooms until golden.
Garnish wisely: Fresh parsley or dill provides a herby freshness and a vibrant color contrast.

Serving and Presentation Guide


Serve Beef Stroganoff with Egg Noodles by arranging the noodles generously on a plate, then ladle the sauce-laden beef and mushroom mixture over the top. For a sophisticated presentation, sprinkle fresh parsley or dill over the plate, adding color contrast. Traditional side accompaniments include roasted potatoes or a crisp green salad, putting emphasis on contrasting textures and flavors.

For a modern twist, consider serving in individual ramekins, allowing guests to appreciate the artfully plated dish. Focus on portion control to ensure balanced servings and avoid overwhelming the palate. Room temperature service allows the sauce to maintain its luscious quality, whereas reheated leftovers may slightly alter the velvety texture.

The Recipe

Beef Stroganoff with Egg Noodles

Serves: 4

Prep Time: 15 mins

Cook Time: 30 mins

Total Time: 45 mins

Kitchen Equipment Needed

  • Large skillet or Dutch oven
  • Sharp knife
  • Wooden spoon
  • Measuring cups and spoons
  • Colander

Ingredients

  • 1 lb beef sirloin, thinly sliced
  • 2 tbsp olive oil
  • 1 large onion, diced
  • 2 cups mushrooms, sliced
  • 2 cloves garlic, minced
  • 1 cup beef broth
  • 1 cup sour cream
  • 2 tbsp flour
  • Salt and pepper to taste
  • 8 oz egg noodles
  • Fresh parsley, chopped for garnish

Directions

  1. Heat the olive oil in a large skillet over medium-high heat. Add beef in batches, browning on all sides. Remove and set aside.
  2. In the same skillet, add onions and cook until translucent. Stir in mushrooms and garlic, cooking until mushrooms are browned.
  3. Sprinkle flour over vegetables, stirring to form a roux. Gradually whisk in beef broth, deglazing the pan and incorporating all browned bits.
  4. Reduce heat and mix in sour cream, ensuring no lumps. Let the sauce simmer, thickening to coat the back of a spoon.
  5. Return beef to the pan, seasoning with salt and pepper to taste. Simmer gently for 5-10 minutes, allowing flavors to meld.
  6. Meanwhile, cook egg noodles according to package instructions. Drain and toss with a bit of olive oil to prevent sticking.
  7. Serve beef stroganoff over egg noodles and garnish with fresh parsley.

Recipe Notes

  • Substitute sour cream with Greek yogurt for a tangier flavor.
  • For a touch of freshness, add a splash of lemon juice before serving.
  • This dish pairs well with a glass of red wine for a complete meal experience.